

Page 1

802.11g PC Card Wireless Adapter
Installation Guide
Page 2

Notice to Users
©2005 2Wire, Inc. All rights reserved. This manual in whole or in part, may not be reproduced,
translated, or reduced to any machine-readable form without prior written approval.
2WIRE PROVIDES NO WARRANTY WITH REGARD TO THIS MANUAL, THE SOFTWARE, OR OTHER
INFORMATION CONTAINED HEREIN AND HEREBY EXPRESSLY DISCLAIMS ANY IMPLIED WARRANTIES OF
MERCHANTABILITY OR FITNESS FOR ANY PARTICULAR PURPOSE WITH REGARD TO THIS MANUAL, THE
SOFTWARE, OR SUCH OTHER INFORMATION, IN NO EVENT SHALL 2WIRE, INC. BE LIABLE FOR ANY
INCIDENTAL, CONSEQUENTIAL, OR SPECIAL DAMAGES, WHETHER BASED ON TORT, CONTRACT, OR
OTHERWISE, ARISING OUT OF OR IN CONNECTION WITH THIS MANUAL, THE SOFTWARE, OR OTHER
INFORMATION CONTAINED HEREIN OR THE USE THEREOF.
2Wire, Inc. reserves the right to make any modification to this manual or the information contained
herein at any time without notice. The software described herein is governed by the terms of a separate
user license agreement.
2Wire, and the 2Wire logo are registered trademarks of 2Wire, Inc. All other trademarks are trademarks
of their respective owners.
5100-000244-001 Rev B
Page 3

2Wire 802.11g Wireless PC Card
2Wire’s 802.11g Wireless PC Card is a wireless network card that fits into any
standard PC Card Type II slot. Using this adapter gives you the same connectivity
as Ethernet without the wires. Expanding or redesigning your network is easy, and
unlike cabled Ethernet, the 2Wire 802.11g Wireless PC Card allows you to roam
throughout the home or office while remaining connected to the local area network
(LAN).
Follow these steps to complete the adapter installation:
Step 1 - Install the 2Wire 802.11g Wireless PC Card.
Step 2 - Install the adapter driver from your 2Wire Wireless Installation CD.
The following sections give you detailed instructions for completing each step.
1
Page 4
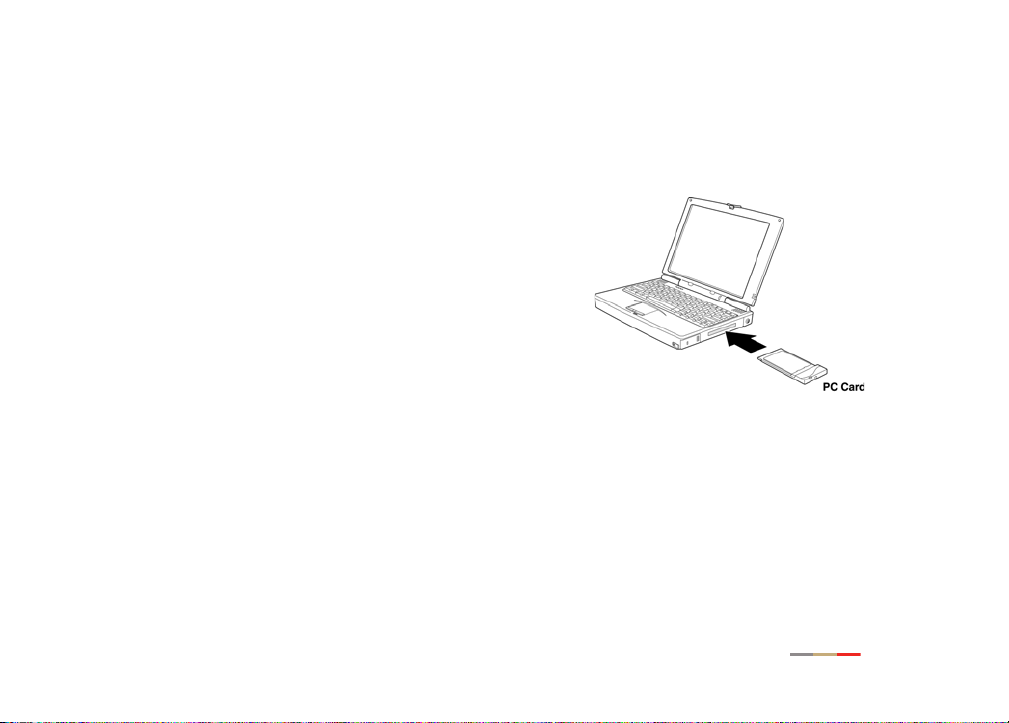
Step 1: Install the 2Wire 802.11g Wireless PC Card
To install the 2Wire 802.11g Wireless PC Card
in your laptop, turn off your computer and
simply insert the card into the PC Card slot.
2
Page 5
Step 2: Install the 2Wire 802.11g Wireless PC Card Driver
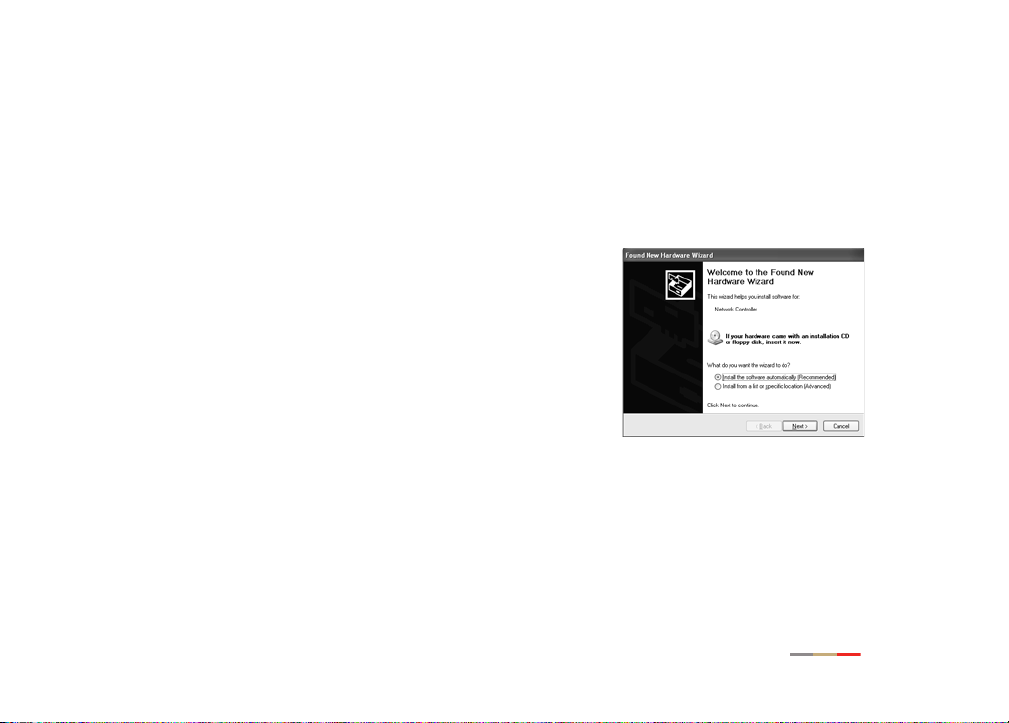
Installing Drivers For Windows XP
1. Power on your computer. Insert your 2Wire
Wireless Installation CD into your CD-ROM
drive.
2. When the Found New Hardware Wizard
window opens, select
automatically (Recommended)
continue.
Install the software
and click Next to
3
Page 6

3. The drivers are installed.
4. When the Completing the Found New
Hardware Wizard opens, click
Finish. Your
installation is complete.
5. Continue to “Appendix A: Wireless Adapter
Configuration” on page 12 to configure the
adapter to work with your 2Wire gateway.
4
Page 7

Installing Drivers for Windows 2000
1. Power on your computer. Insert your 2Wire
Wireless Installation CD into your CD-ROM
drive.
2. When the Found New Hardware Wizard window
opens, click
3. The next window prompts you to install device
drivers. Select
device (recommended)
Next to continue.
Search for a suitable driver for my
, and click Next.
5
Page 8

4. When the Locate Driver Files window opens,
deselect the
the
CD-ROM drives checkbox, and click Next.
5. When the Driver Files Search Results window
opens, click
Floppy disk drives checkbox, select
Next.
6
Page 9

6. When the Completing Found New Hardware
Wizard opens, click
Finish. Your installation is
complete.
7. Continue to “Appendix A: Wireless Adapter
Configuration” on page 12 to configure the
adapter to work with your 2Wire gateway.
Installing Drivers for Windows ME
1. Power on your computer. Insert your 2Wire
Wireless Installation CD into your CD-ROM
drive.
2. When the Add New Hardware Wizard window
opens, select
(Recommended)
Automatic search for a better driver
, and click Next.
7
Page 10

3. After the driver files are copied, click
Finish.
4. If the System Settings Change window
opens, click
Yes to restart your computer.
Your installation is complete.
5. Continue to “Appendix A: Wireless Adapter
Configuration” on page 12 to configure
the adapter to work with your 2Wire
gateway.
8
Page 11

Installing Drivers for Windows 98 SE
1. Power on your computer. Insert your 2Wire
Wireless Installation CD into the CD-ROM drive.
2. When the Add New Hardware Wizard opens,
click
Next to continue.
3. When the next window opens, select Search for
the best driver for your device (Recommended)
and click
Next.
,
9
Page 12

4. Deselect the Floppy disk drives checkbox,
select the
Next.
5. Windows locates the best driver for your
device. Click
CD-ROM drive checkbox, and click
Next to continue.
10
Page 13

6. After the drivers are copied, click Finish.
7. If the System Settings Change window
opens, click
Yes to restart your computer.
Your installation is complete.
8. Continue to “Appendix A: Wireless Adapter
Configuration” on page 12 to configure the
adapter to work with your 2Wire gateway.
11
Page 14

Appendix A: Wireless Adapter Configuration
Now that you have installed the drivers for your wireless adapter, you must
configure it to work with the 2Wire gateway. A wireless network requires a network
name (SSID) and an encryption key to operate. Every 2Wire wireless gateway
comes with a unique network name and encryption key printed on the bottom of
the unit.
1. With the 2Wire Wireless Installation CD in your CD-ROM drive, click Run from
the Windows Start button. In the Open field, enter D:\setup.exe and click
If your CD-ROM drive is not located on D:, substitute the appropriate letter (for
example, E:\setup.exe).
2. When the Driver and Utilities program page displays, click the Configure 2Wire
Wireless Adapter
button.
OK.
12
Page 15

3. Enter the serial number and encryption
key from your 2Wire wireless gateway,
then click the
Begin Wireless Configuration
button to configure your adapter.
13
Page 16

Regulatory Information
FCC Statement
This device has been tested and complies with the specifications for a Class B digital device, pursuant
to Part 15 of the FCC rules. These rules are designed to provide reasonable protection against harmful
interference in a residential installation. This equipment generates, uses, and can radiate radio
frequency energy and, if not installed and used according to the instructions, may cause harmful
interference to radio communications. However, there is no guarantee that interference will not occur in
a particular installation. If this equipment does cause harmful interference to radio or television
reception, which is found by turning the equipment off and on, the user is encouraged to try to correct
the interference by one or more of the following measures:
• Reorient or relocate the receiving antenna.
• Increase the separation between the equipment and the receiver.
• Connect the equipment into an outlet on a circuit different from that to which the receiver is
connected.
• Consult the dealer or an experienced radio/TV technician for help.
 Loading...