

Page 1
•
Travel, journey, explore, zoom-zoom. You’ll always know
where you’re headed, wherever you go.
•
Never read an old-fashioned paper map again. With a
DVD map database of the entire country and GPS satellites
displaying your exact location at any given moment, you can
go anywhere. And, with a 7-inch touch screen plus voice
command recognition, this hi-tech navigation system is both
safe and easy to use.
•
Need to know where to exit for local attractions? No
problem. The Mazda Navigation System can pinpoint millions
of points of interest in over 40 different categories and get
you there, providing both audible and visual guidance. When
you’re looking for entertainment, find restaurants, golf
courses and other local attractions. Even in a strange city,
you’ll feel more secure with directions to everything from
police stations to gas stations. As an added convenience,
get instant directions to ATM’s, airports, or even hotels and
shopping.
Automatic Rerouting
Your route will automatically recalculate if you miss a turn or
depart from the original guidance
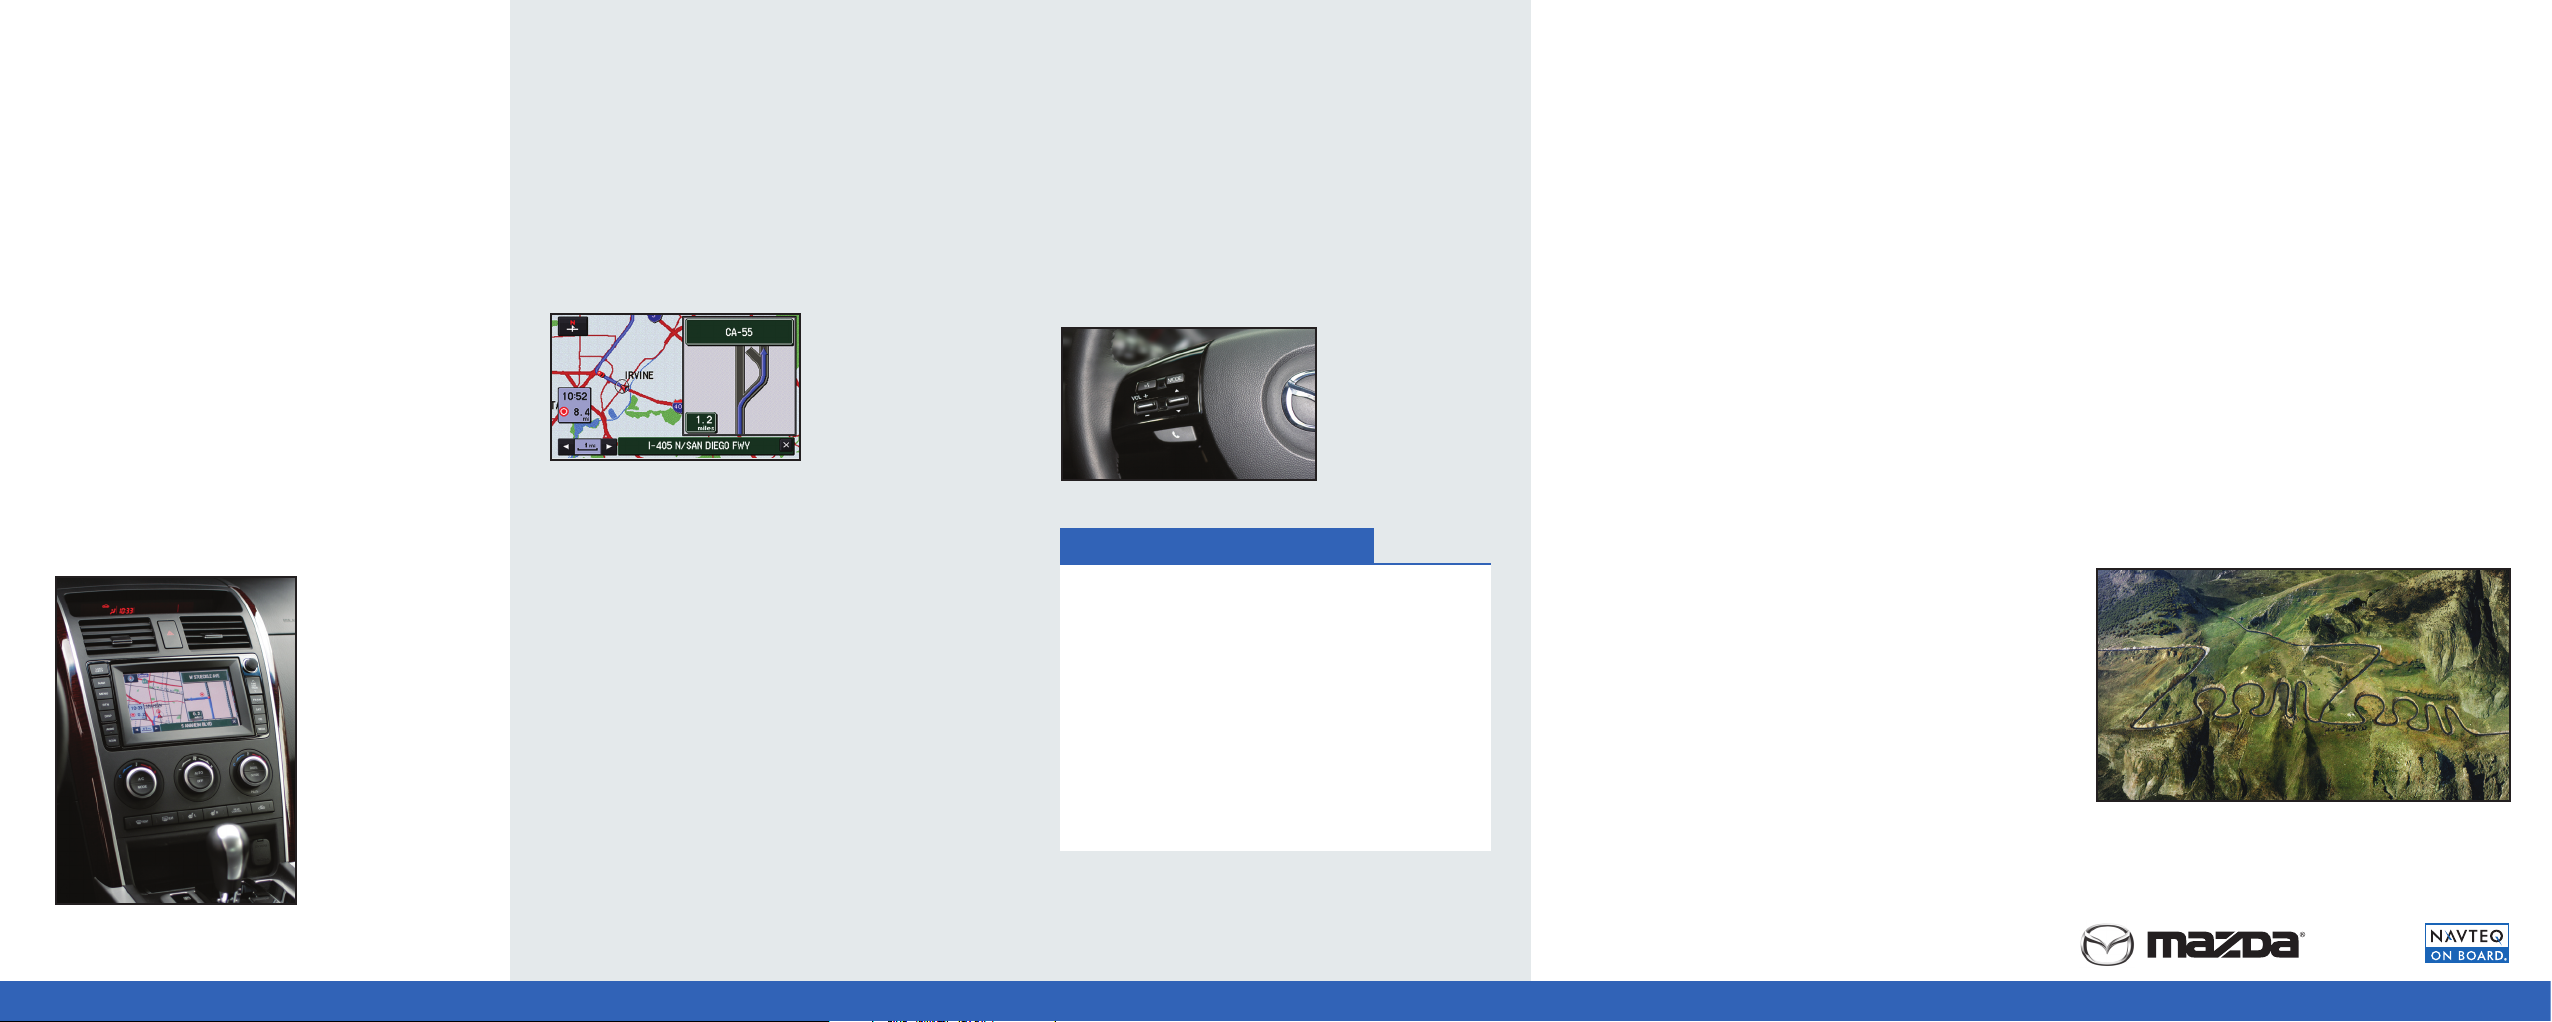
Turn List Mode
When selected, the navigation system displays turn-by-turn
information on one half of the screen, and the map on the other
Voice Guidance
Audible directions given through the stereo speakers alert
you of your next maneuver; press the Voice button and say
“Repeat” to hear the last command given
Zoom
Choose from 13 scales/levels of magnification; a zoom
magnification level of less than one mile is required to show
icons on the map
Touch Screen
Control most aspects of the navigation system with your
fingertips, using the 7-inch high-definition touch screen
Your vehicle’s navigation system is equipped with a Voice
Recognition function for added safety and convenience. This
feature allows you to control many aspects of the system
using only your voice. To initiate voice recognition the VOICE
button on the steering wheel must be pressed. Once engaged,
the system will beep and wait for your response if additional
information is necessary.
•
The Map Data DVD contains navigable road data for all of
the continental United States and parts of Canada. This road
data includes information such as city names, street names,
and over 150 attributes associated with each road segment.
One-way streets, turn restrictions, and medians are all
included attributes in your Map Data DVD.
•
The Map Database is continually updated by NAVTEQ to
provide additional coverage, and account for changes in
both the road network and points of interest. Purchasing
map updates when available is recommended to ensure your
system operates using the most current information.
•
Map and software version numbers can be found by entering
the Navigation Set Up menu, then selecting Calibration and
Map Version. To get more information about the Map Data
and/or updates, contact the Mazda Customer Assistance
Center at 800.222.5500.
Know where you are, and where you’re going.
Key
Features
Voice Commands
Map
Database
Facts
Navigation Related Commands
“Repeat” “ATM”
“Zoom In / Out” “I’m Hungry”
“Voice Guidance Off / On” “Airport”
“Detour” “Shopping Mall”
“Rest Area” “POI Off”
“Gas Station” “Cancel”
“Hotel” “Enter Destination”
“Hospital” “Go to Preset Destination [#]”
“Police Station” “Go Home”
*“Display Day” *“Display Night”
“Show Map” “Turn List”
See owner’s manual for a complete list of commands.
*These will change the “backlighting” of the system screen.
ZOOM-ZOOM
I can’t find my destination address?
Check that you have selected the correct search area for your
destination address. Also ensure that you have selected the
correct region to search on the “Destination Entry” screen.
(see Search Area of this guide). Due to changes in the road
network, i.e. expansion of home sub-divisions, it is possible the
address is not contained on your map.
Why doesn’t my system route me the way I
expect to go?
Delete any old route points still stored as destinations or
waypoints by selecting stored locations. Check that you do
not have any avoid areas saved along your chosen route. Also
check your Route Option settings.
Why can’t I see the navigation display with my
sunglasses on?
The display uses polarization technology, and may not be
viewed with some polarized sunglasses. Try wearing nonpolarized sunglasses while in your vehicle.
How many languages are available?
You can select from 3 languages - English, Spanish or French.
Manage your language selection through the Navigation
Set-Up menu.
How do I synchronize my information clock
to the navigation clock?
Ensure the vehicle is in an open area where GPS signal can
be received. To verify GPS signal, turn the ignition on and
look for the blue “GPS” icon in the top left corner of the
navigation screen. If no “GPS” icon appears, the vehicle
may need to be driven. Once a GPS signal has been
established, verify that the information display clock
time matches the navigation system clock.
Frequently
Asked
Questions
9999-95-CX9NAV-08 ©2007 Mazda Motor of America, Inc.
Page 2
Mazda CX-9
Navigation System
INFORMATION AND QUICK START GUIDE
Navigation Menu
A (Destination Entry) – Set a destination using various
entry methods
B (Address Book) – Store up to 106 addresses (100 Memory
Points, 5 Pre-Set Destinations, 1 Home)
C
(Cancel Guidance) – Cancel the calculated route guidance
to a destination
D
(Route Options) – During guidance you can specify
preferences, add a way point, or view the turn list
E
(Volume) – Adjust the volume of the system’s voice guidance
F
(Set Clock) – Adjust the vehicle and navigation clock
G
(Navigation Set Up) – Customize the system to your liking
Route Options
A
(Route Preference) – Edit your route calculation
preferences. Choose to avoid toll and/or major roads,
restricted roads, and ferries
B
(Destination & Way Point) – Delete or edit your
destination and up to 5 Way Points
C
(Display Route) – Preview a simulation of your route on the
map screen
D
(Detour) – Recalculate your route by detouring 1, 3, 5 miles
or even the entire route
E
(Turn List) – Displays all turns required to reach your final
destination
A
B
C
D
E
A
B
C
D
E
F
G
Panel button
Panel button
1 NAVI – Displays the navigation screen and the vehicle’s
present location
2 MENU – Brings up the Navigation Menu
3 RTN – Returns to the previous screen
4 DISP – Adjust the screen display
On-Screen Buttons – Operable buttons are illuminated
When the system powers on, the Caution screen is displayed.
Please read and press Agree to continue using the Mazda
Navigation System.
NOTE: If using a Bluetooth phone, the Caution Screen will be
unresponsive until the Bluetooth connection has been completed.
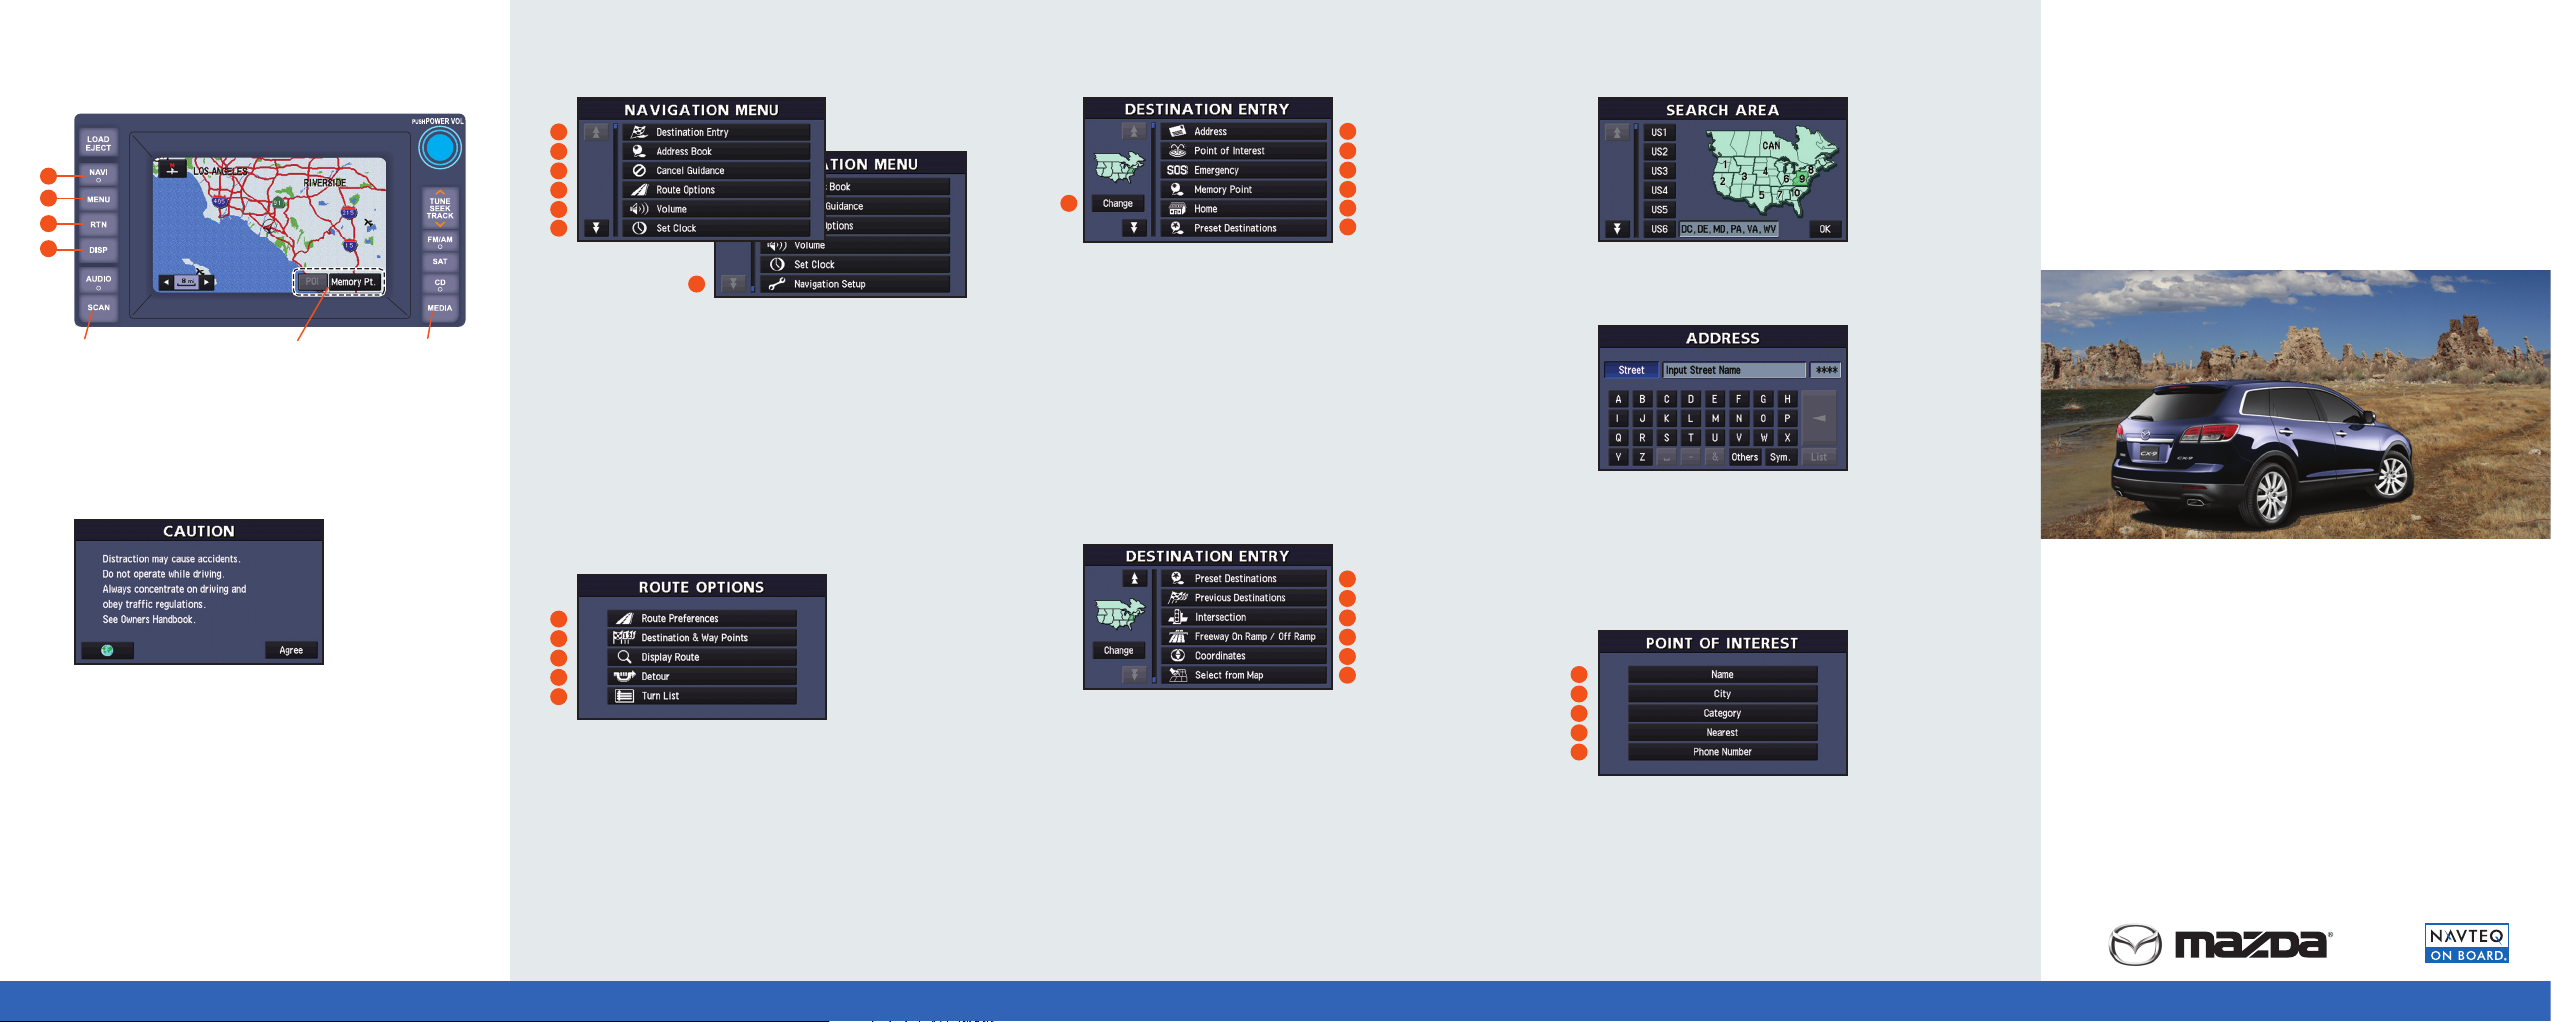
Destination Entry (Part 1)
A
(Change) – Set your region (Search Area) for quicker searches
B
(Address) – Select destination by address
C
(Point of Interest) – Search and route to POIs several
different ways
D
(Emergency) – Provides quick access to police stations and
hospitals nearest to your location
E
(Memory Point) – Save and customize up to 100
destinations
F
(Home) – Once set, you can navigate home from anywhere at
the touch of a button
G
(Preset Destinations) – Save up to 5 frequently used
destinations
Destination Entry (Part 2)
A
(Preset Destinations)
B
(Previous Destinations) – Select from the last 100
destinations entered
C
(Intersection) – Locate a specific intersection
D
(Freeway On Ramp / Off Ramp) – Route to freeway
entrances or exits
E
(Coordinates) – Select a destination using specific
coordinates
F
(Select from Map) – Choose a destination using crosshairs
on the map screen
Search Area
1
Under Destination Entry, select Change
2
Select the desired search area and press OK
Address Entry
1
From the Destination Entry menu, select Address
2
Select City – this will narrow your search and enable
predictive text
3
Select Street and enter the street name. Do not include prefix,
suffix, or street types (for S. Main Ave, enter Main)
4
Enter the house number and press OK
Point of Interest
From the Destination Entry Menu, select Point of Interest
A
(Name) – Enter the name of the place your searching for
B
(City) – Search for a POI in a specific city.
C
(Category) – Select from millions of POIs in approximately 40
different categories
D
(Nearest) – Find the POIs closest to you
E
(Phone Number) – Find a business using their phone number
Names and Functions
Quick Start Guide
(For complete operating instructions, see your owner’s manual)
A
A
B
C
D
E
F
A
B
C
D
E
FPO
B
C
D
E
F
G
1
2
3
4
On-screen button
 Loading...