

Page 1
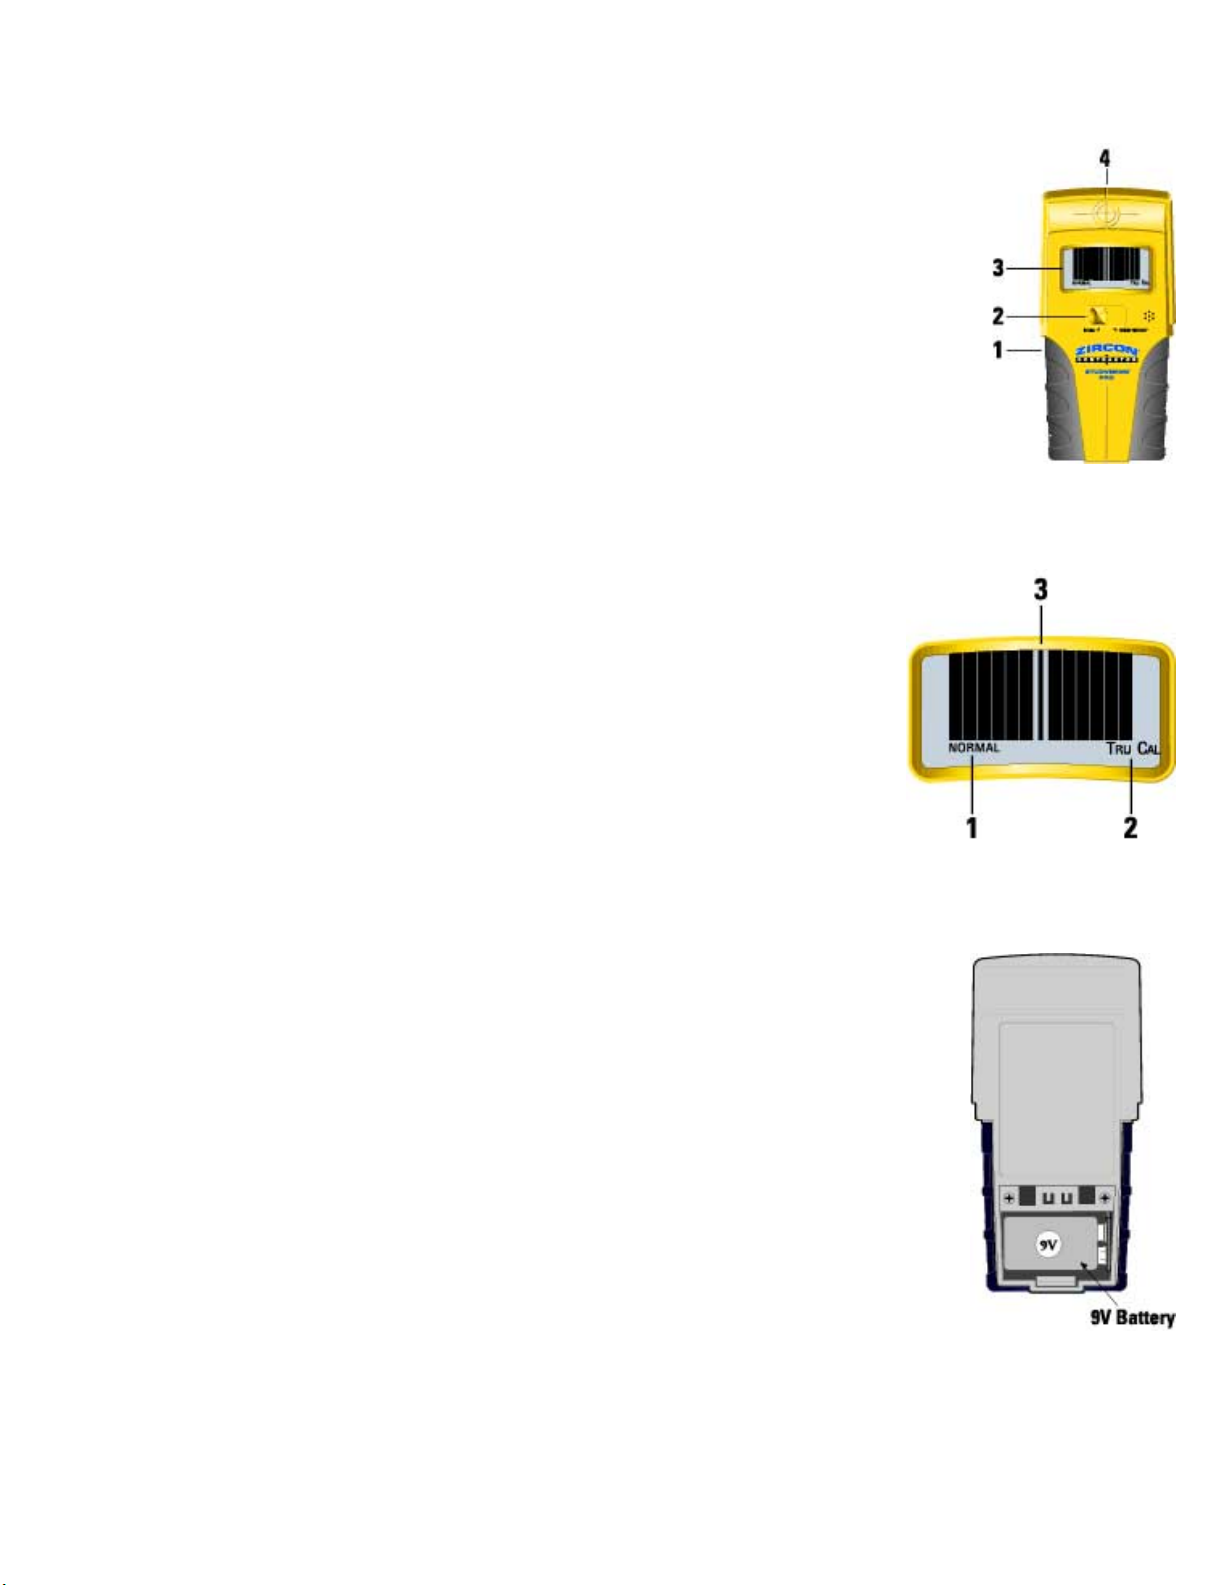
StudVision® Pro Stud Finder Components
1. On/Off Switch
2. Mode Selector
3. Window-In-The-Wall LCD Display
4. Stud Edge Indicator
LCD Display Components
1. Mode Indicator
2. Calibration Indicator
3. Center Indicator
Installing the battery
Open battery door on back of case. Connect a 9-volt battery to battery clip. Insert
battery into case and replace battery door.
Battery will last approximately two years under normal conditions.
Operating Instructions - Scanning in Normal Mode
Select NORMAL and place StudVision® Pro stud finder against the wall (Figure 4).
Page 2
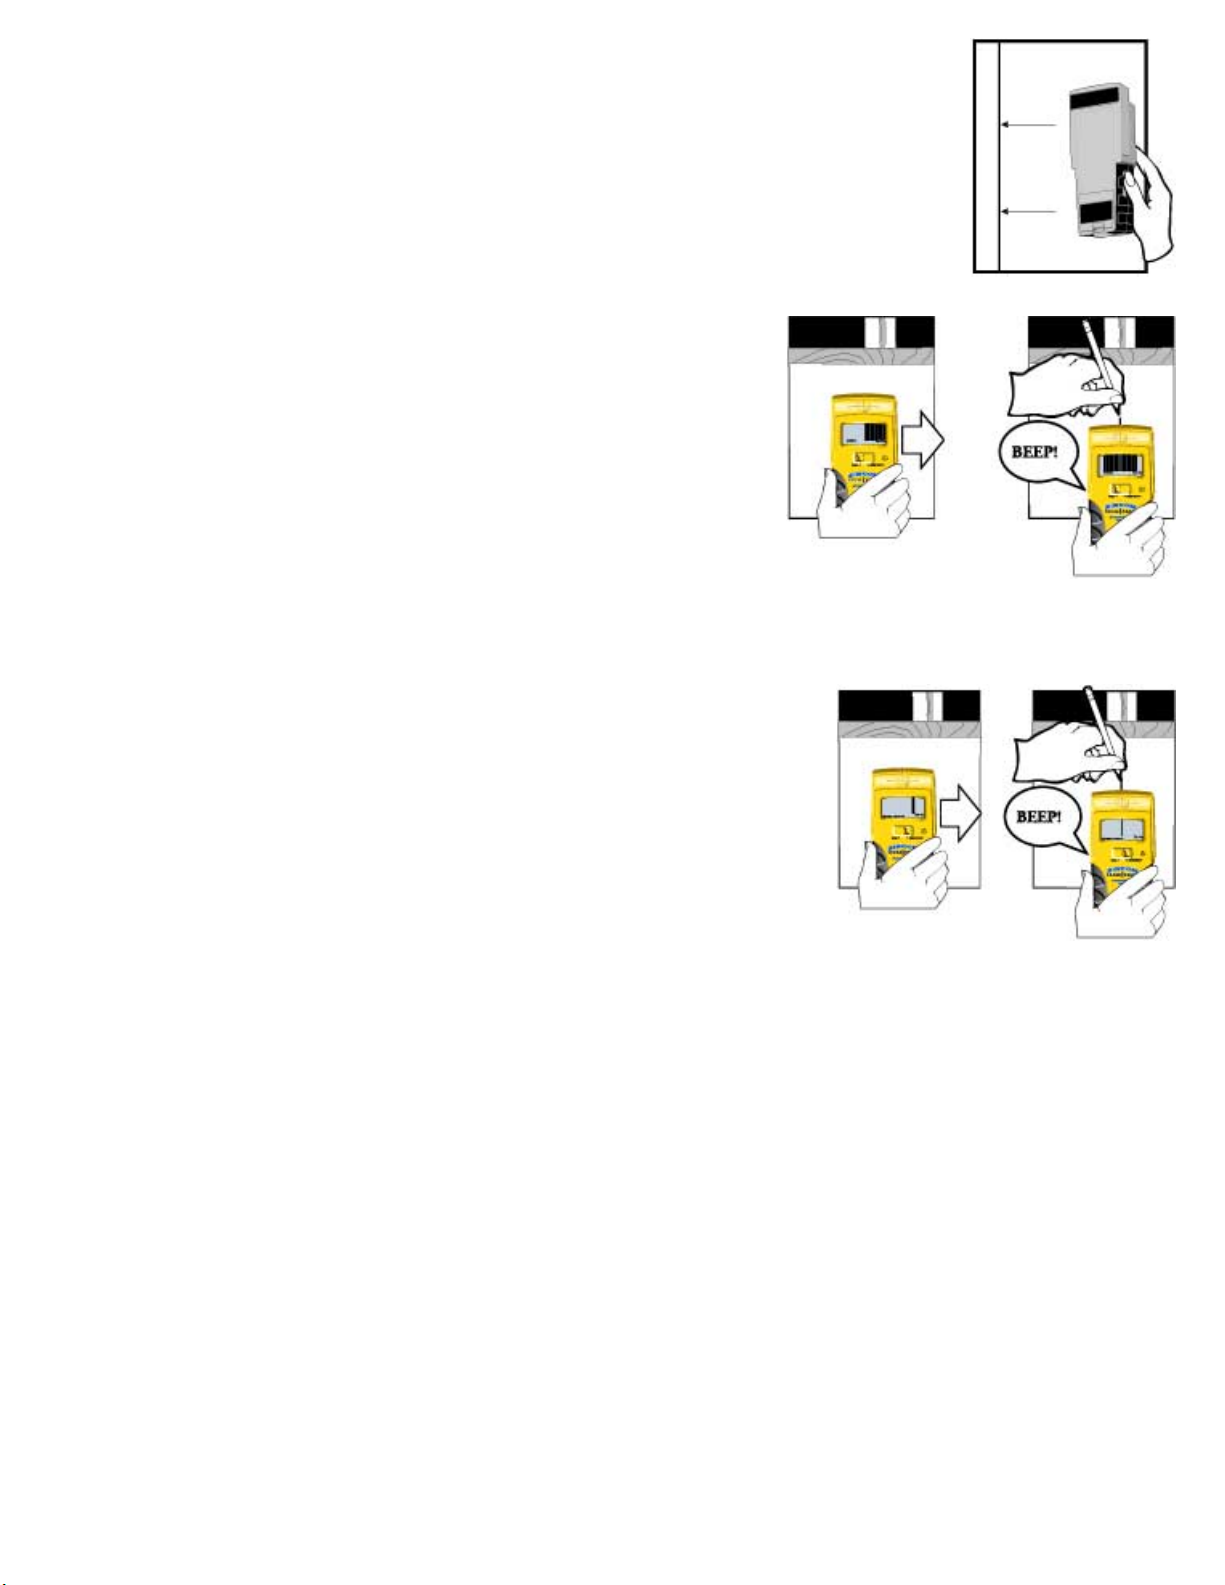
Press and hold the ON/OFF switch. Slide tool slowly across the wall.
As the tool starts to approach a stud, it will begin to display bars representing the
stud behind the wall.
Continue moving across the stud. When StudVision® Pro stud finder is over the
center of a stud or stud grouping, the center bar on the LCD will become
highlighted, the SpotLite® Pointing System light will appear on the wall, and a
tone will sound.
At this point if the tool determines that this is more than a single
stud, the display will switch to show a wider stud.
Mark this center point (Figure 5).
Operating Instructions - Scanning in Extreme Precision
Select EXTREME PRECISION and place against wall. Press and
hold ON/OFF switch in.
Slide SLOWLY horizontally without lifting or rocking the StudVision®
Pro unit. The word SCAN will be at the bottom of the LCD to indicate
that StudVision® Pro stud finder must first scan over a stud before it
will accurately locate the center. Because of the extreme sensitivity,
this must be done more slowly than regular stud scanning.
A single bar will appear on the LCD to show where the stud is in
relation to the unit (see Figure 6). Move the unit to get this single bar to the center of the display so
that the SpotLite® appears, indicating that the tool is centered over the stud and mark that center
point.
Flashing Display! Error indicator
StudVision® Pro device finds dense objects beneath the wall surface. The position where you start
is important. To work properly, the tool must start (by holding the button in) over a part of the wall
that is not dense. Otherwise, an error is indicated. If LCD starts blinking and unit beeping, move
over a few inches and start again.
Low Battery:
Page 3

When the Low Battery Indicator appears, replace the battery as soon as possible to maintain
sensitivity.
Helpful Hints:
If the error condition occurs, start again keeping the unit flat and sliding smoothly across the wall. If
the surface is too rough, you can slide more smoothly by putting a piece of paper on the wall and
scanning through that.
To avoid interference, keep your free hand at least six inches (15 cm) away from the StudVision®
Pro stud finder while calibrating and scanning.
The tool should always be held parallel to the stud/joist and moved across it (see Figures 5, 6).
Working with Different Materials:
The StudVision® Pro stud finder is designed for use on interior walls only. Three main factors affect
sensing depth while scanning for studs. They are thickness, density, and moisture content. The
StudVision® Pro stud finder is capable of scanning through approximately 2" (5 cm) of common
construction materials in Extreme Precision mode. It can scan through most sheet materials
including:
Bare wood flooring and sub flooring
Linoleum on a wood base
Gypsum drywall over plywood sheathing
Wallpapered walls (if dry)
Textured ceilings if uniform thickness (use a thin cardboard in Extreme Precision mode and
scan through the cardboard to avoid damage to texturing)
Because of inconsistent density of the material, it is not effective on:
Ceramic floor tile
Carpeting and pad
Wallpaper with metallic fibers
Lath and plaster walls (in most cases)
Freshly painted walls that are still damp (must dry at least a week)
CAUTION
If electrical wiring or metal and plastic pipes are close to or touching the back surface of the wall,
the StudVision® Pro stud finder may detect them in the same manner as studs. Caution should
always be used when nailing, cutting, or drilling in walls, floors, and ceilings that may contain these
items.
Page 4

Note: Always turn off the power if working near electrical wires.
 Loading...