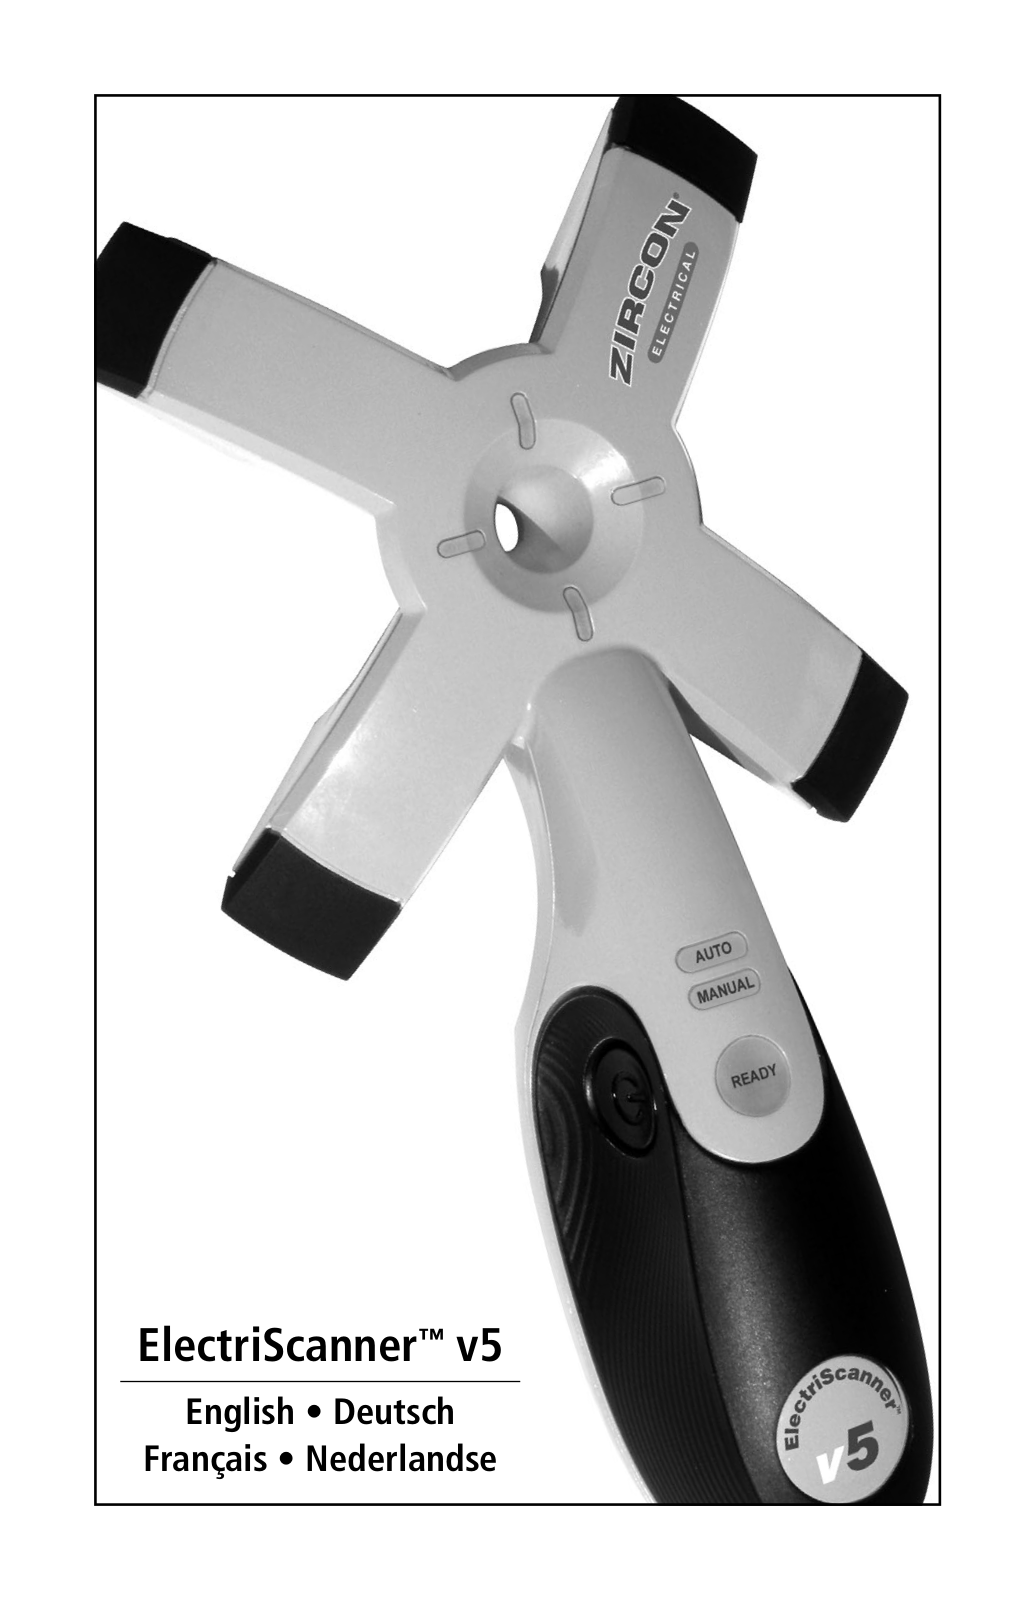
Zircon ElectriScanner v5 User guide [ml]

ElectriScannerv5

English • Deutsch

Français • Nederlandse

Table of Contents

/ Inhaltsverzeichnis


Contenu /

Inhoudstafel


EN


ENGLISH


Overview . . . . . . . . . . . . . . . . . . . . . .

. . . . .

.

.

.

.


3. . . . . . . . . . . . . .


Installing the Battery . . . . . . . . . . . . . . . .

. . . .

.

.

.

.


. 3. . . . . . . . . . . .


Turning on the Tool . . . . . . . . . . . . . . . .

. . . . .

.

.

.

.


3. . . . . . . . . . . . .


The Two Modes . . . . . . . . . . . . . . . . . .

. . . . .

. . . . 4. . . . . . . . . . . . . .


Toggling Between Modes . . . . . . . . . . . . . . . . . . . . . . . 4. . . . . . . . . . .


Scanning in Auto

Mode . . . . . . . . . . . . . .

. . . . .

.

.

.

.


5. . . . . . . . . . . .


Scanning in Manual Mode . . . . . . . . . . . . .

. . . . .

.

.

.


.

6. . . . . . . . . . .


Tips for Scanning . . . . . . . . . . . . . . . . . .

. . . .

.

.

.

.


. 6. . . . . . . . . . . . .


Troubleshooting . . . . . . . . . . . . . . . . . .

. . . . .

.

.

.

.


7. . . . . . . . . . . . . .


DE


Deutsch


Übersicht . . . . . . . . . . . . . . . . . . . . . .

. . . . .

.

.

.

.


8. . . . . . . . . . . . . .


Installation Der Batterie . . . . . . . . . . . . . .

. . . . .

.

.

.

.


8. . . . . . . . . . . .


Das Gerät Einschalten . . . . . . . . . . . . . . . . . . . . . . . . . 8. . . . . . . . . . . .


Auswahl Der Betriebsarten Auto Bzw.. Manual . . .

. . . . . . . . .

9. . . . . .


Umschalten Zwischen Den Betriebsarten Auto Bzw..

Manual Modus .

9


Scannen Mit Der Betriebsart Auto Modus . . . . .

. . . . .

.

.

.


10. . . . . . .


Scannen Mit Der Betriebsart Manual Modus . . . .

. . . . . . . . 11. . . . . .


Hinweise Zum Scannen . . . . . . . . . . . . . . . . . . . . . . . 12. . . . . . . . . . . .


Hinweise Bei Fehlern . . . . . . . . . . . . . . . .

. . . .

.

.

.

.

13. . . . . . . . . . . .


Français


FR


Generalites . . . . . . . . . . . . . . . . . . . . .

. . . . .

.

.

.


14. . . . . . . . . . . . . . .


Mise

en Place

de

la Pile . . . . . . . . . . . . . .

. . . . .

.

.

.

. 14. . . . . . . . . . .


Mise

en Route

de

L’outil . . . . . . . . . . . . . .

. . . . .

.

.

.

. 14. . . . . . . . . . .


Les Deux Modes . . . . . . . . . . . . . . . . . .

. . . . .

.

.

.

. 15. . . . . . . . . . . . .


Basculer Entre les Modes . . . . . . . . . . . . . .

. . . .

.

.

.

.

15. . . . . . . . . . .


Analyser en Mode AUTO . . . . . . . . . . . . . .

. . . .

.

.

.

.

16. . . . . . . . . . .


Analyser en Mode MANUEL . . . . . . . . . . . .

. . . . .

.

.

.

. 17. . . . . . . . . .


Conseils D’analyse . . . . . . . . . . . . . . . . .

. . . . .

.

.

.


17. . . . . . . . . . . . .


Defauts de Fonctionnement . . . . . . . . . . . .

. . . . .

.

.

.

. 18. . . . . . . . . .


Nederlandse


NL


Overzicht . . . . . . . . . . . . . . . . . . . . . .

. . . . .

.

.

.

. 19. . . . . . . . . . . . . .


Plaatsen Van De Batterij . . . . . . . . . . . . . .

. . . . .

.

.

.

. 19. . . . . . . . . . .


Het Toestel In Werking Stellen . . . . . . . . . . .

. . . . .

.

.

. 19. . . . . . . . . .


De Twee Modi . . . . . . . . . . . . . . . . . . . . . . . . . . . . 20. . . . . . . . . . . . . .


Veranderen Van Modus . . . . . . . . . . . . . .

. . . . .

.

.

.

. 20. . . . . . . . . . .


Scannen In Auto Modus . . . . . . . . . . . . . .

. . . .

.

.

.

.

21. . . . . . . . . . .


Scannen In Manuele Modus . . . . . . . . . . . .

. . . . .

.

.

.

. 22. . . . . . . . . .


Tips Voor Het Scannen . . . . . . . . . . . . . . .

. . . . .

.

.

.


22. . . . . . . . . . . .


Problemen Oplossen . . . . . . . . . . . . . . . .

. . . . .

.

.

.

. 23. . . . . . . . . . . .

2

OVERVIEW

The ElectriScannerv5 live wire locator can find AC wires with voltages up to 440 V, between 50 and 60 Hz.. It is made for finding wires in standard residential, commercial, and industrial construction.. It finds wires by using patented technology, five sensors, and intelligent software to locate electrical fields emitted by live AC wires.. It also features Zircon’s new patented pinch grip for a comfortable hold and rubberized bumpers for impact protection..

On a standard construction 15 mm drywall with a 220/240 V AC signal, the tool can scan up to 10 cm deep.. Actual scanning depth may be greater or lesser in certain situations, depending upon placement of wires, wire voltage, humidity, and the composition of the material you are scanning through.. The tool cannot scan through metal objects and metallic surfaces..

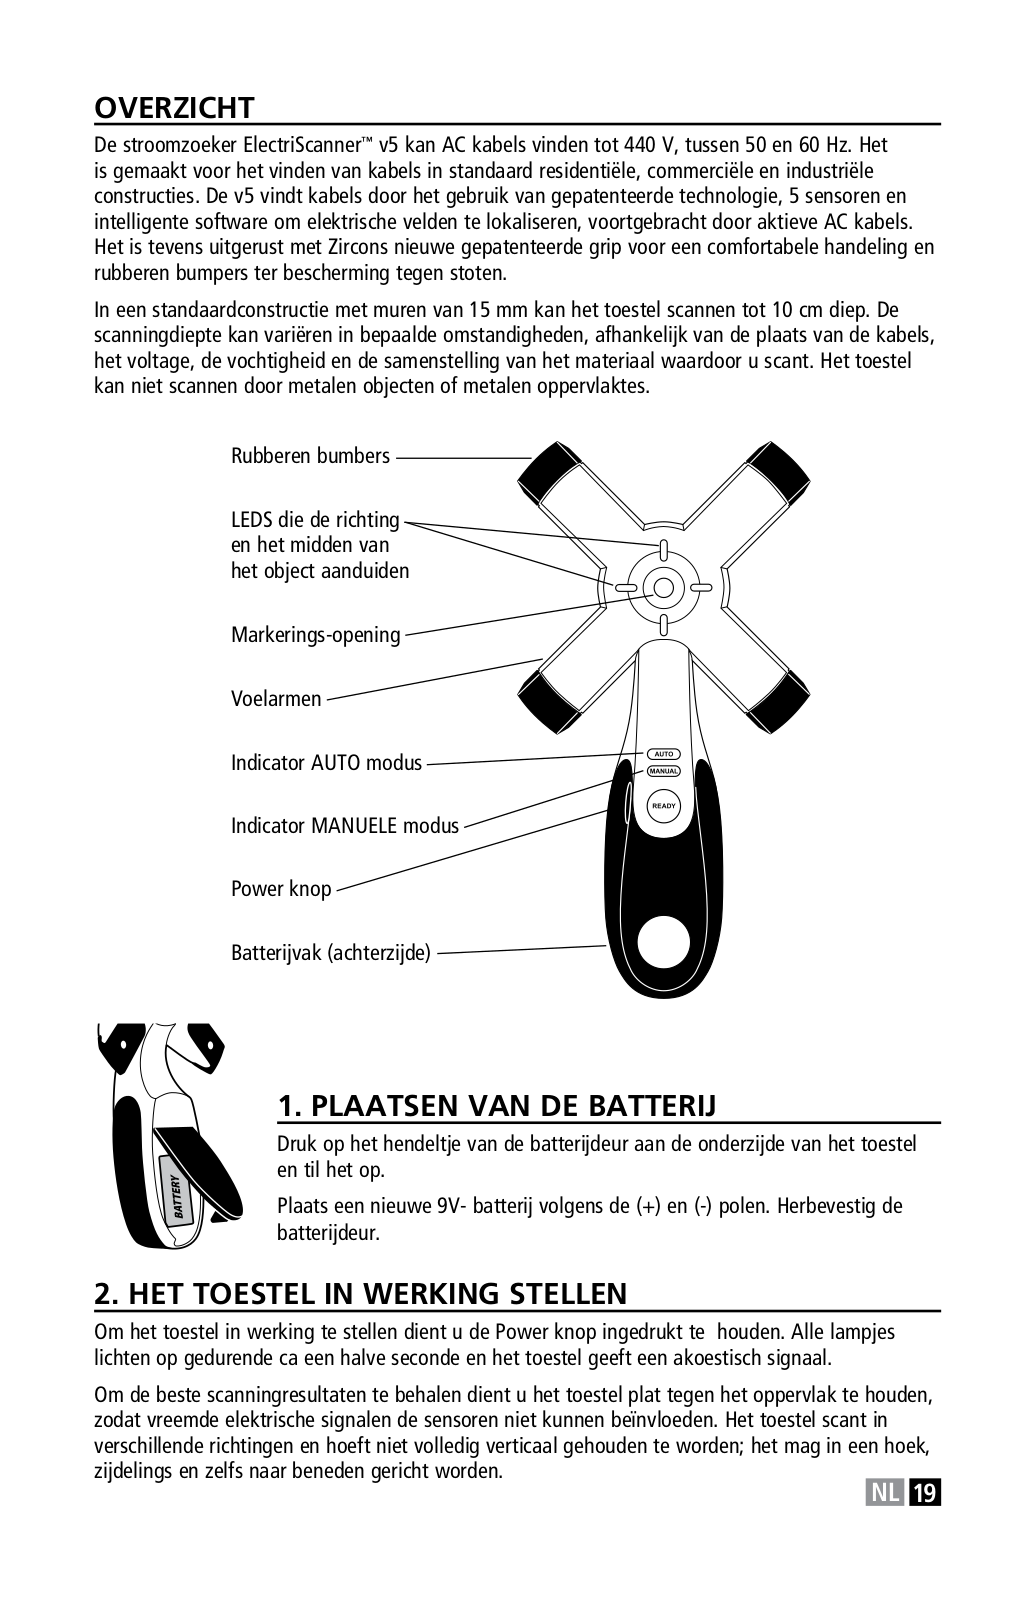
Rubber bumpers

Directional and Centre target indicator LEDs

Marking hole

Sensing arms

AUTO Mode indicator

MANUAL Mode indicator

Power button

Battery compartment (on back)

1. INSTALLING THE BATTERY

Push in the battery door tab at the bottom of the tool and lift the door up..

Attach a new 9-Volt battery to the connector, matching the positive (+) and negative (-) terminals.. Adjust the battery into place and replace the door..

2. TURNING ON THE TOOL

To turn the tool on, press and hold the Power button.. All lights will turn on for about half a second and the tool will beep..

For the best scanning results, hold the unit flat against the wall, as holding the tool off the wall allows ambient electrical signal to interfere with the sensors.. The tool is multi-directional and does not need to be held completely vertical (up and down); it can be held at an

angle, sideways, or even pointing downward..


EN

3

When turned on, the tool runs a battery test..

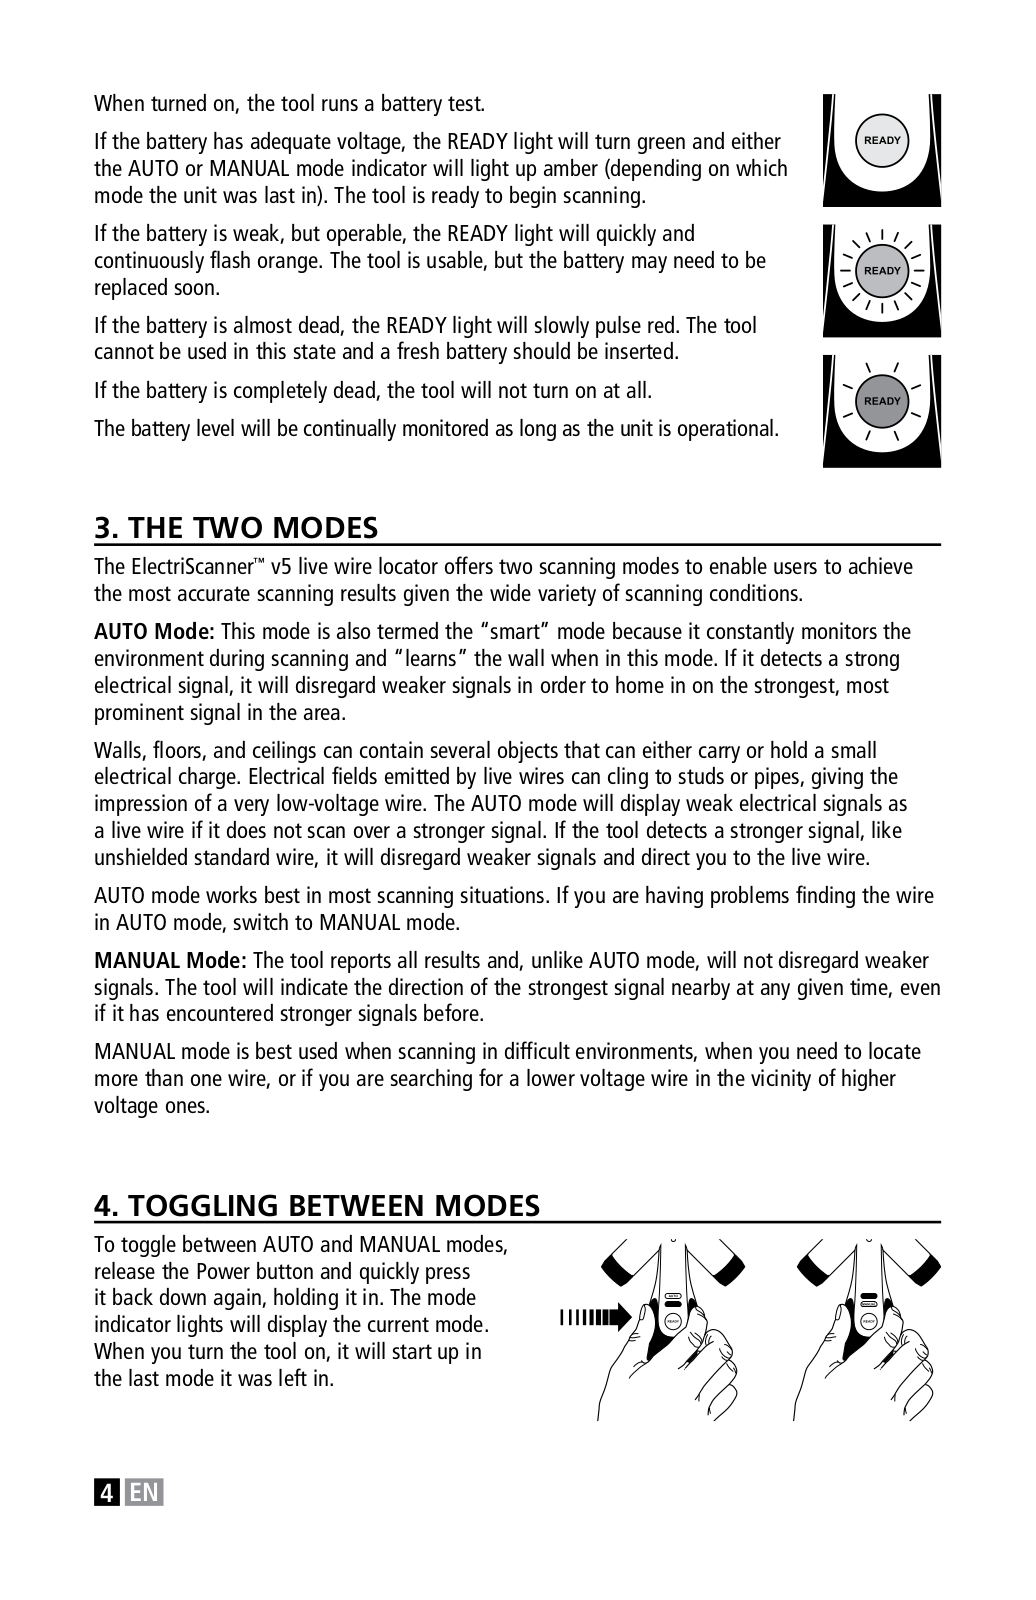
If the battery has adequate voltage, the READY light will turn green and either the AUTO or MANUAL mode indicator will light up amber (depending on which mode the unit was last in).. The tool is ready to begin scanning..

If the battery is weak, but operable, the READY light will quickly and continuously flash orange.. The tool is usable, but the battery may need to be replaced soon..

If the battery is almost dead, the READY light will slowly pulse red.. The tool cannot be used in this state and a fresh battery should be inserted..

If the battery is completely dead, the tool will not turn on at all..

The battery level will be continually monitored as long as the unit is operational..

3. the Two Modes

The ElectriScannerv5 live wire locator offers two scanning modes to enable users to achieve the most accurate scanning results given the wide variety of scanning conditions..

AUTO Mode: This mode is also termed the “smart” mode because it constantly monitors the environment during scanning and “learns” the wall when in this mode.. If it detects a strong electrical signal, it will disregard weaker signals in order to home in on the strongest, most prominent signal in the area..

Walls, floors, and ceilings can contain several objects that can either carry or hold a small electrical charge.. Electrical fields emitted by live wires can cling to studs or pipes, giving the impression of a very low-voltage wire.. The AUTO mode will display weak electrical signals as a live wire if it does not scan over a stronger signal.. If the tool detects a stronger signal, like unshielded standard wire, it will disregard weaker signals and direct you to the live wire..

AUTO mode works best in most scanning situations.. If you are having problems finding the wire in AUTO mode, switch to MANUAL mode..

MANUAL Mode: The tool reports all results and, unlike AUTO mode, will not disregard weaker signals.. The tool will indicate the direction of the strongest signal nearby at any given time, even if it has encountered stronger signals before..

MANUAL mode is best used when scanning in difficult environments, when you need to locate more than one wire, or if you are searching for a lower voltage wire in the vicinity of higher voltage ones..

4. TOGGLING BETWEEN Modes

To toggle between AUTO and MANUAL modes, release the Power button and quickly press

it back down again, holding it in.. The mode indicator lights will display the current mode.. When you turn the tool on, it will start up in the last mode it was left in..

4 EN

Zircon ElectriScanner v5 User guide

5. SCANNING IN AUTO MODE

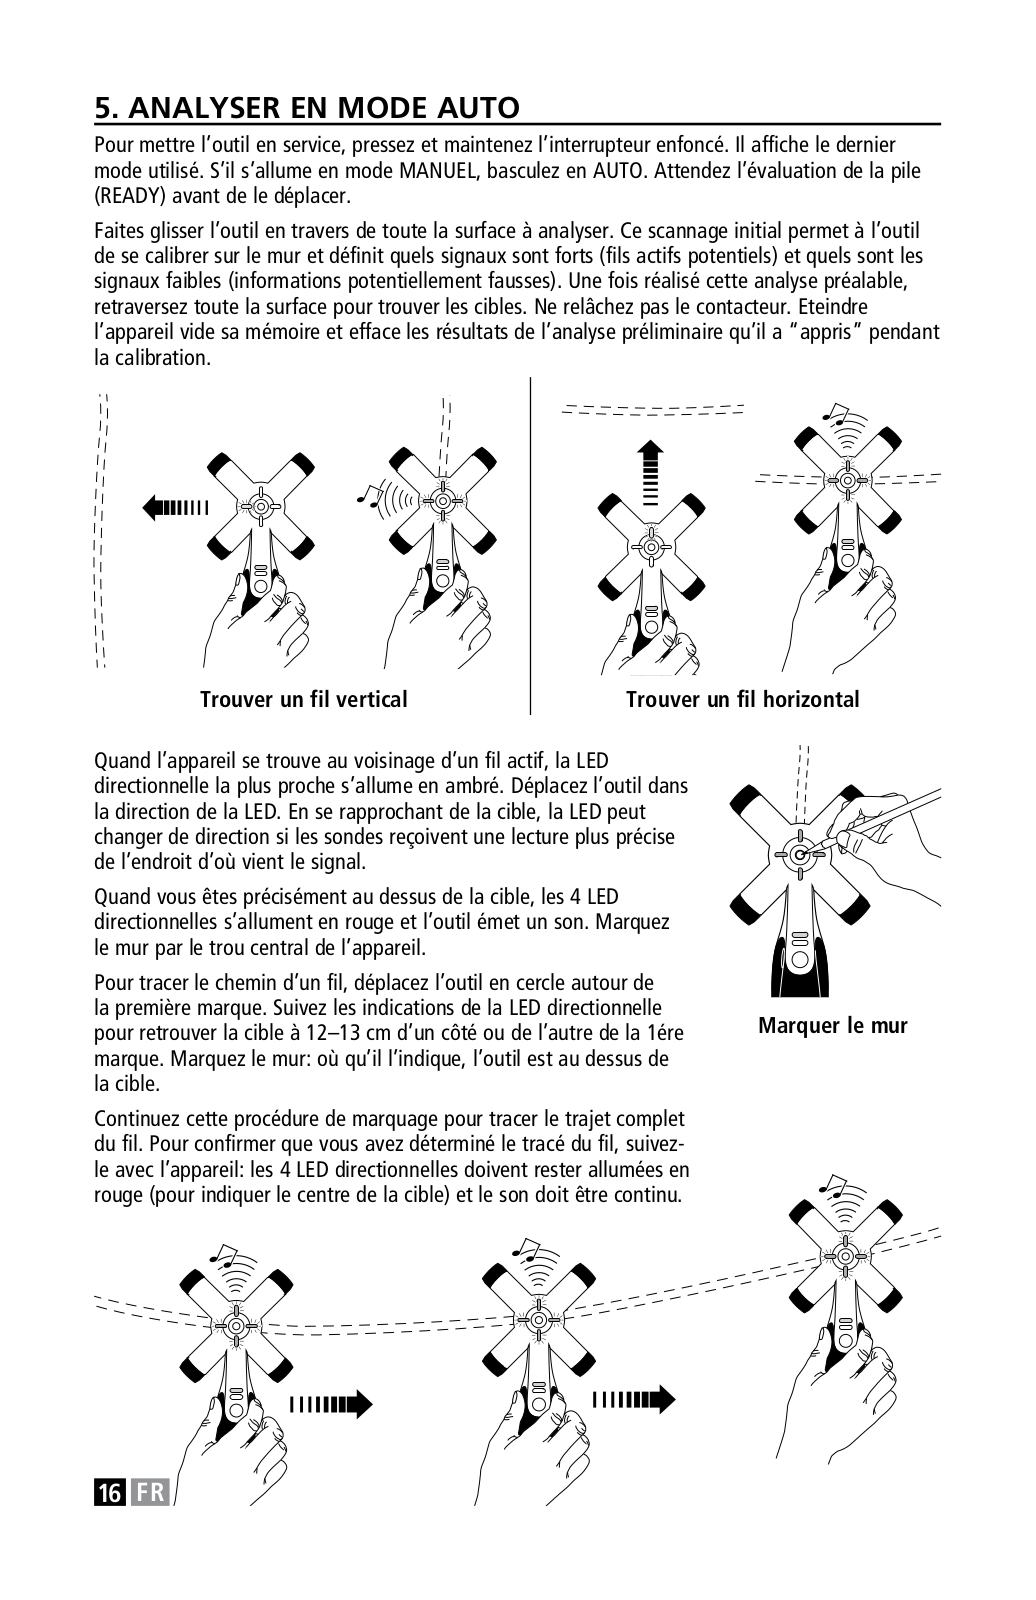
To turn the tool on, press and hold the Power button.. It will start up in the last mode used.. If the tool starts up in MANUAL mode, toggle it to AUTO mode.. Wait for the battery indication (READY light) before moving the tool..

Slide the tool across the entire area you are scanning.. This initial scan allows the tool to calibrate to the wall and determine which signals are strong (potential live wires) and which signals are weak (potential false positives).. Once you have performed a preliminary scan, go back across the surface to find the targets.. Do not release the Power button; turning the tool off resets the memory and erases the preliminary scan results the unit has “learned” during calibration..

Finding a vertical wire

Finding a horizontal wire

When the unit is in the vicinity of a live wire, the closest directional LED will light up amber.. Move the tool in the direction of the LED..

As you get closer to the target, the LED may change direction as the sensors get a more accurate reading of where the signal is coming from..

When you are directly over the target, all four directional LEDs will light up red and the tool will beep.. Mark the wall through the hole

in the centre of the sensing arms..

To trace the path of the wire, move the tool in a circle around the

first mark.. Follow the directional LED indications to again pinpoint Marking the wall the target 12–13 cm on either side of your first mark.. Mark the wall

wherever the tool indicates it is over the target..

Continue this marking procedure to trace the entire length of the wire.. To confirm you have found the path of the wire, run the tool along the marks; all four directional LEDs should stay illuminated red (to indicate the target centre) and the beep should remain constant..

EN 5

If there are multiple wires behind a wall, the ElectriScannerv5 live wire locator may only find one of them in AUTO mode after an initial scan of the surface has been done.. Once the tool scans over a strong signal, it will disregard lower-voltage wires or wires deep in the wall.. For instance, if a residential wall contains two 220 V unshielded standard wires, one close to the surface and the other far against the back, the tool will sense a weaker electrical field coming from the deeper wire and will ignore it in favor of the stronger signal coming from the closer wire..

If you do not find all your target wires in AUTO mode, switch the tool to MANUAL mode (see Section 4: Toggling Between Modes) and follow the instructions below..

6. SCANNING IN MANUAL MODE

To turn the tool on, press and hold the Power button.. If the tool starts up in AUTO mode, toggle it to MANUAL mode.. Wait for the battery indication (READY light) before moving the tool..

Slide the tool across the wall.. When an outer sensor arm detects an AC signal, the nearest directional LED will light up amber.. Move the tool in the direction of the LED.. As you get closer to the target, the LED may change direction as the sensors get a more accurate reading of where the signal is coming from..

Finding a vertical wire

Finding a horizontal wire

When you are directly over the target, all four directional LEDs will light up red and the tool will beep.. Mark the wall through the hole in the centre of the unit..

Move the tool in a circle around the first mark to locate the target on either side of the first mark.. Mark the wall wherever the tool indicates you’re over the target.. Scan the rest of the wall, marking anything the tool finds as a wire.. Some of these results may be false positives.. See Avoiding False Positives in the following section..

7. TIPS FOR SCANNING

The ElectriScannerv5 live wire locator scans for electrical fields, so wires do not need to be going to or from an active device to be detected.. The wire must simply be energized (live).. Make sure the circuit is switched on at the breaker box and that the wire is not turned off at a light switch..

Detecting Different Voltages:

Higher-voltage wires emit a stronger electrical field than lower-voltage wires.. The tool will detect a 220 V wire much further away than a lower voltage wire.. If you are looking for a low-voltage wire, like a doorbell wire or landscape lighting wires, you may have to use MANUAL mode and/or conduct a more thorough search than if you are searching for an unshielded standard household wire..

The unit will indicate the wire centre regardless of the voltage..

6 EN

Scanning Behind Or Around Metal Objects:

Metallic objects and surfaces mask electrical fields.. The tool can have problems finding wires behind metallic wallpapers, multiple layers of lead-based paint, foil lined insulation, or in walls with embedded metal mesh (like plaster or stucco).. It will not be able to find live wires in or near metal conduit.. If you know you are looking for wires in metal conduit, we recommend a metal scanning device..

Large metal objects, such as pipes and ductwork, can also interfere with the scanning results if the wire is within 5–6 cm of them..

Metal Junction Boxes and Switch Boxes:

When tracing a wire to an outlet, junction box, or other metal switch box, the wire reading might “disappear” 5–6 cm away from the box.. This is because a properly installed metal junction or switch box is grounded, which cancels out the electrical field.. The wire reading will not disappear when going into plastic outlets or switch boxes..

Avoiding False Positives:

Electrical fields emitted by live wires can collect on non-metallic surfaces nearby; while these electrical fields are small and weak, the tool is sensitive enough to detect them.. In MANUAL mode, this can mean several false positives, whereas in AUTO mode, as it “learns” the wall, the tool will ignore a weak signal if it finds a stronger one, such as the live wire nearby..

Finding a Wire Attached to a Stud:

When an unshielded standard wire is stapled to the side of a stud, the tool may read the centre of a stud as the centre of the wire for the same reason that causes the false positives: the electrical field emitted by the wire collects in and around the stud.. You can determine if a stud is behind the wall where you have marked the target by using a stud finding tool..

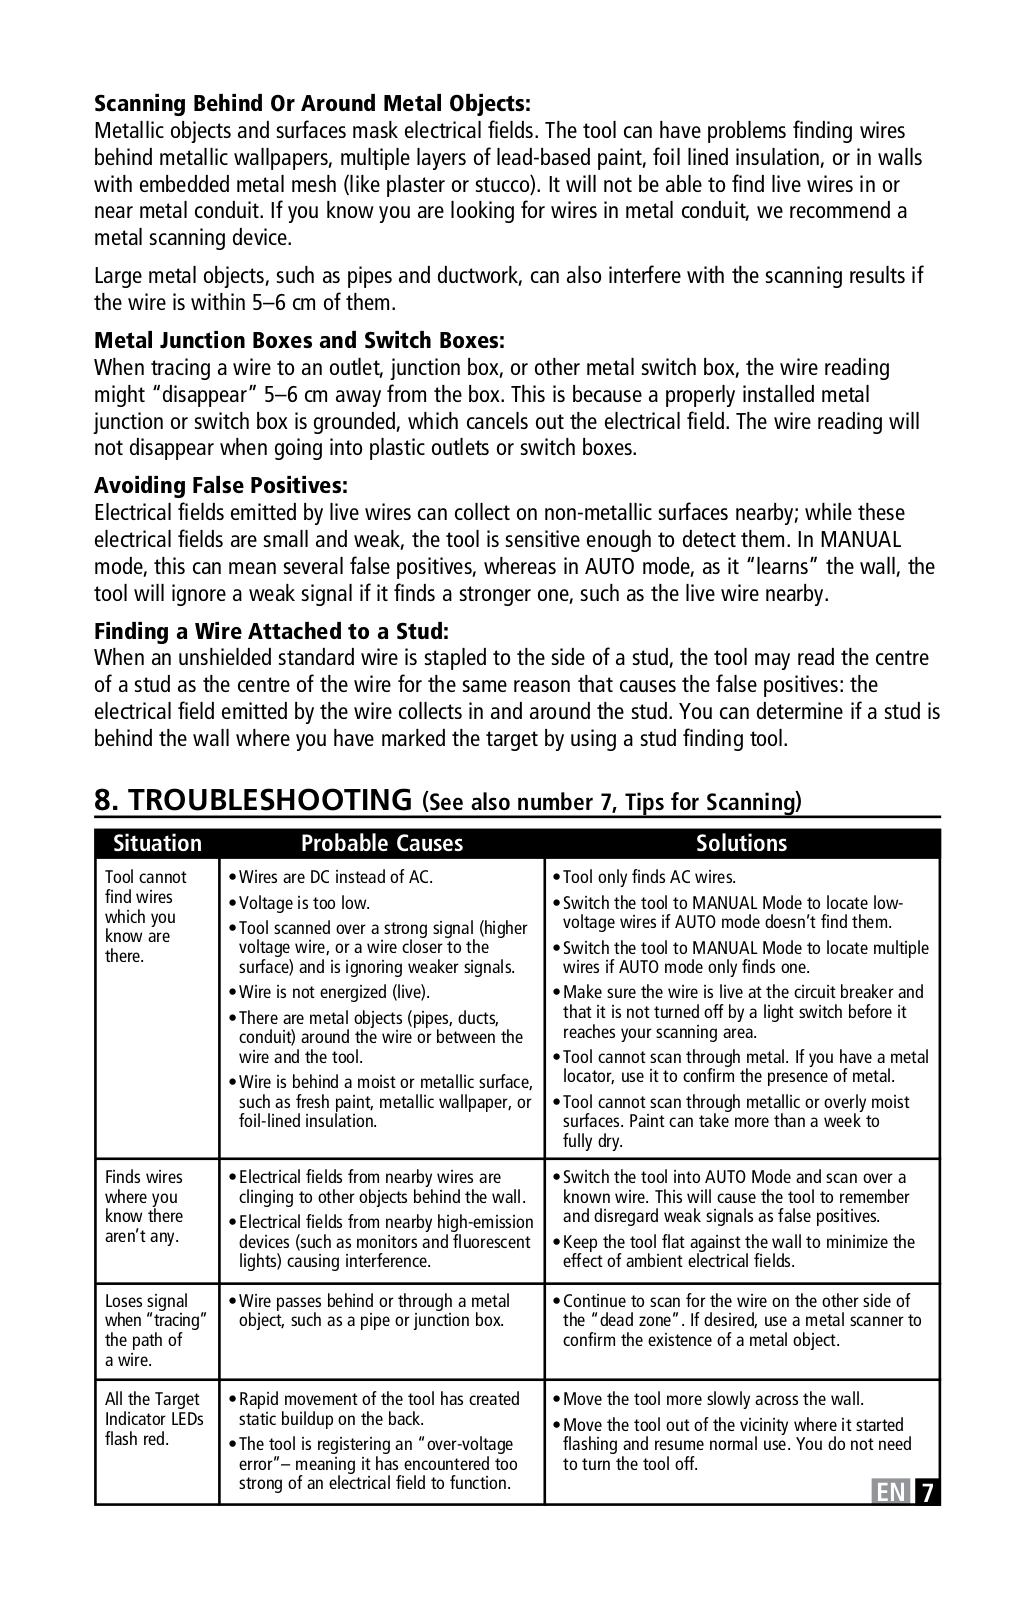
8. TROUBLESHOOTING (See also number 7, Tips for Scanning)

Situation

Probable Causes

Solutions

Tool cannot

•Wires are DC instead of AC.

•Tool only finds AC wires.

find wires

•Voltage is too low.

•Switch the tool to MANUAL Mode to locate low-

which you

•Tool scanned over a strong signal (higher

voltage wires if AUTO mode doesn’t find them..

know are


voltage wire, or a wire closer to the

•Switch the tool to MANUAL Mode to locate multiple

there..

surface) and is ignoring weaker signals..

wires if AUTO mode only finds one..


•Wire is not energized (live).

•Make sure the wire is live at the circuit breaker and


•There are metal objects (pipes, ducts,

that it is not turned off by a light switch before it


reaches your scanning area..


conduit) around the wire or between the


wire and the tool..

•Tool cannot scan through metal. If you have a metal


•Wire is behind a moist or metallic surface,

locator, use it to confirm the presence of metal..


such as fresh paint, metallic wallpaper, or

•Tool cannot scan through metallic or overly moist


foil-lined insulation..

surfaces.. Paint can take more than a week to


fully dry..


Finds wires

•Electrical fields from nearby wires are

•Switch the tool into AUTO Mode and scan over a

where you

clinging to other objects behind the wall..

known wire.. This will cause the tool to remember

know there

•Electrical fields from nearby high-emission

and disregard weak signals as false positives..

aren’t any..

devices (such as monitors and fluorescent

•Keep the tool flat against the wall to minimize the


lights) causing interference..

effect of ambient electrical fields..


Loses signal

•Wire passes behind or through a metal

•Continue to scan for the wire on the other side of

when “tracing”

object, such as a pipe or junction box..

the “dead zone”.. If desired, use a metal scanner to

the path of


confirm the existence of a metal object..

a wire..


All the Target

•Rapid movement of the tool has created

•Move the tool more slowly across the wall.

Indicator LEDs

static buildup on the back..

•Move the tool out of the vicinity where it started

flash red..

•The tool is registering an “over-voltage

flashing and resume normal use.. You do not need


error”– meaning it has encountered too

to turn the tool off..


strong of an electrical field to function..


EN


7


ÜBERSICHT

Das Ortungsgerät ElectriScannerv5 ortet spannungsführende Leitungen bis zu 440 V zwischen 50 und 60 Hz.. Dieses spezialisierte Gerät ortet Leitungen in Wohnhäusern, sowie in Gewerbeund Industriegebäuden.. Der ElectriScannerv5 verfügt über eine patentierte Technologie, fünf integrierte Sensoren, und eine intelligente Software.. Damit können spannungsführende Leitungen geortet werden, indem ihr spannungsgeladenes Umfeld abgescannt wird.. Desweiteren verfügt der ElectriScannerv5 über das patentiertes Zircon Design

für den gummierten Griff, der einen sicheren Halt in der Hand ermöglicht, sowie weiteren gummierten Schutzelementen..

Der Scanner kann das spannungsgeladene Umfeld einer 15 mm dicken Trockenbauwand mit einem Spannungssignal von 220/240 V, bis zu einer Tiefe von 10 cm abscannen.. Die tatsächliche Ortungstiefe kann höher oder niedriger sein, je nach Ortungsumfeld, Lage der Leitungen, Spannungssignal, Feuchtigkeit und Materialdichte der Oberfläche, die abgescannt wird.. Dieser Scanner ist nicht geeignet, um Objekte aus Metall zu orten oder metallische Oberflächen zu scannen..

Gummierte Schutzelemente

LED Anzeige für die Richtung bzw.. den Mittelpunkt eines Zielobjekts

Markierungsloch

Sensorenelement

Anzeige für AUTO Modus (Betriebsart AUTO)

Anzeige für MANUAL Modus (Betriebsart MANUELL)

Ein-/Austaste

Batteriefach (auf der

Rückseite des Geräts)

1. INSTALLATION DER BATTERIE

Drücken Sie auf den unteren Teil der Batterieabdeckung und öffnen Sie das Batteriefach..

Legen Sie eine neue 9-Volt Batterie in das Batteriefach ein, so dass die Pole der Batterie, Positiv (+) und Negativ (-) genau den im Fach abgebildeten Symbolen (+) (-) entsprechen.. Achten Sie darauf, dass die Batterie einwandfrei angebracht ist und schließen Sie das Fach wieder mit dem Batteriefachdeckel..

2. DAS GERÄT EINSCHALTEN

Halten Sie das Gerät flach gegen die Wand.. Schalten Sie es ein, indem Sie auf die Ein-/Austaste drücken und diese gedrückt halten.. Alle Anzeigelichter schalten sich ein, etwa eine halbe Sekunde, und ein akustisches Signal ist zu hören..

Für optimale Ortungsergebnisse halten Sie bitte den Scanner flach gegen die Wand gedrückt.. Wenn Sie das


Gerät während des Einschaltens nicht an der Wand gedrückt halten, können andere nahe

8


DE

Spannungssignale die Sensoren beinträchtigen.. Wenn das Gerät flach gegen die Wand gedrückt

Loading...
+ 16 hidden pages