

Page 1
R 26 T
2
14
26
38
50
62
74
MANUEL D’UTILISATION
GEBRAUCHSANWEISUNG
INSTRUCCIONES DE USO
OPERATING MANUAL
ISTRUZIONI D’USO
GEBRUIKSAANWIJZING
NAVODILA ZA UPORABO
3
2
5
4
>
1
y
Page 2

Dear Sir, Madam,
Congratulations on your purchase of this heater. You have purchased a quality
product, which will serve you for many years to come. This, of course, provided
you use the heater correctly. Please read these Directions for Use first, to ensure
the maximum lifetime for your heater.
This appliance comes with a 48-month manufacturer’s warranty on all defects
in material or workmanship.
We wish you much warmth and comfort from your heater.
Yours sincerely,
PVG Holding b.v.
Customer Service Department
1 READ THE DIRECTIONS FOR USE FIRST.
2 IN CASE OF ANY DOUBT, CONTACT YOUR DEALER.
3 BEFORE YOU START READING, FOLD OUT THE LAST PAGE. ! ! ! ! ! ! ! ! ! !
4
38
Page 3

GENERAL DIRECTIONS FOR USE
Below you will find the main steps to be taken for
using your heater. For more details, please refer to
the MANUAL (pages 41 ff.).
s As a fire precaution, the tank must be filled either
when the heater has been switched off or in
another room than the room where the heater is
installed.
s Always ensure that the tank is closed properly after
filling it at a safe distance from all sources of heat
and open flames (see chapter B).
s Store all fuel containers with their original caps
and seals in a cool and dark place.
s Fuel ages. Use new fuel at the start of every hea-
ting season.
s The use of Zibro Extra, Zibro Kristal or Zibro Bio as
a heating fuel assures you that you have a good
quality fuel.
s Before changing brands and/or types of fuel make
sure that the mobile heater first completely empties all of the remaining fuel inside the heater.
MAIN COMPONENTS
Safety button
Knurled wick
adjustment knob
Ignition button
Combustion
chamber
Combustion
chamber handle
Fuel indicator
Grill
Lid for removable
tank
Removable tank
Removable tank
fuel gauge
Ignition coil
Battery holder
!
"
#
$
%
&
'
(
)
*
+
,
! ! ! ! ! ! ! ! ! ! ! ! ! ! ! ! ! ! ! ! ! ! ! ! ! !
Remove all packaging materials (refer to Section A, Fig. A).
Fill the removable tank ) and wait 30 minutes before you
ignite the heater (refer to Section B, Fig. H).
Insert the batteries into the battery holder ,
(refer to Section A, Fig. F).
Check whether the combustion chamber - is fully upright
(refer to Section A, Fig. E).
Ignite the heater by turning the knurled wick adjustment
knob " as far to the right as possible and then gently push the
ignition button # (refer to Section C, Fig. K and L).
After igniting the heater it will take 10 to 15 minutes before
you can check if the heater burns well (refer to Section D).
Switch off the heater (refer to Section E).
1
2
3
4
5
6
7
4
39
Page 4
WHAT YOU NEED TO KNOW IN ADVANCE
ALWAYS MAKE SURE THAT THERE IS SUFFICIENT VENTILATION
Read this user manual carefully before using the appliance and keep it for future
reference. Install this device only when it complies with local/national legislation,
ordinances and standards. This product is intended to be used as a heater in residential houses and is only suitable for use in dry locations, in normal household
conditions, indoors in living room, kitchen and garage.
Regardless of the model, you must always make sure that the heater is used in a
room large enough to enable the heater to be used safely without extra ventilation. If the room is smaller than required, you must always open a door or window
slightly (ensuring an opening of approx. 2.5 cm). It is important that every room
where the heater is used has sufficient air intake and efficient air outflow (both
openings must have a minimum cross section of 50 cm2). No modifications to the
safety system are allowed, as that will invalidate the guarantee that the air probe
will work properly. Consult your dealer in case of doubt.
Be aware that the grid and the top plate become hot. If the appliance is covered
there is a risk of fire. Due to high surface temperature, keep away from children.
SAFETY SYSTEM
When you have turned on the heater, if the room temperature is relatively low (19
to 20°C) it may automatically switch off. The cause of this is build-up of heat in the
heater. This is a logical consequence of the safety mechanism. This will not occur
when using the heater at lower ambient temperatures.
Especially for France: Your heater was designed to operate exclusively on fuel for
liquid fuel-operated mobile heaters in accordance with the Decrees of 08-01-1998
and 18-07-2002. The use of other fuels is forbidden. Ask your dealer or check our
website for the addresses of our retailers. The liquid fuel-operated mobile heater
is intended as an extra heater, and not as a continuous source of heat.
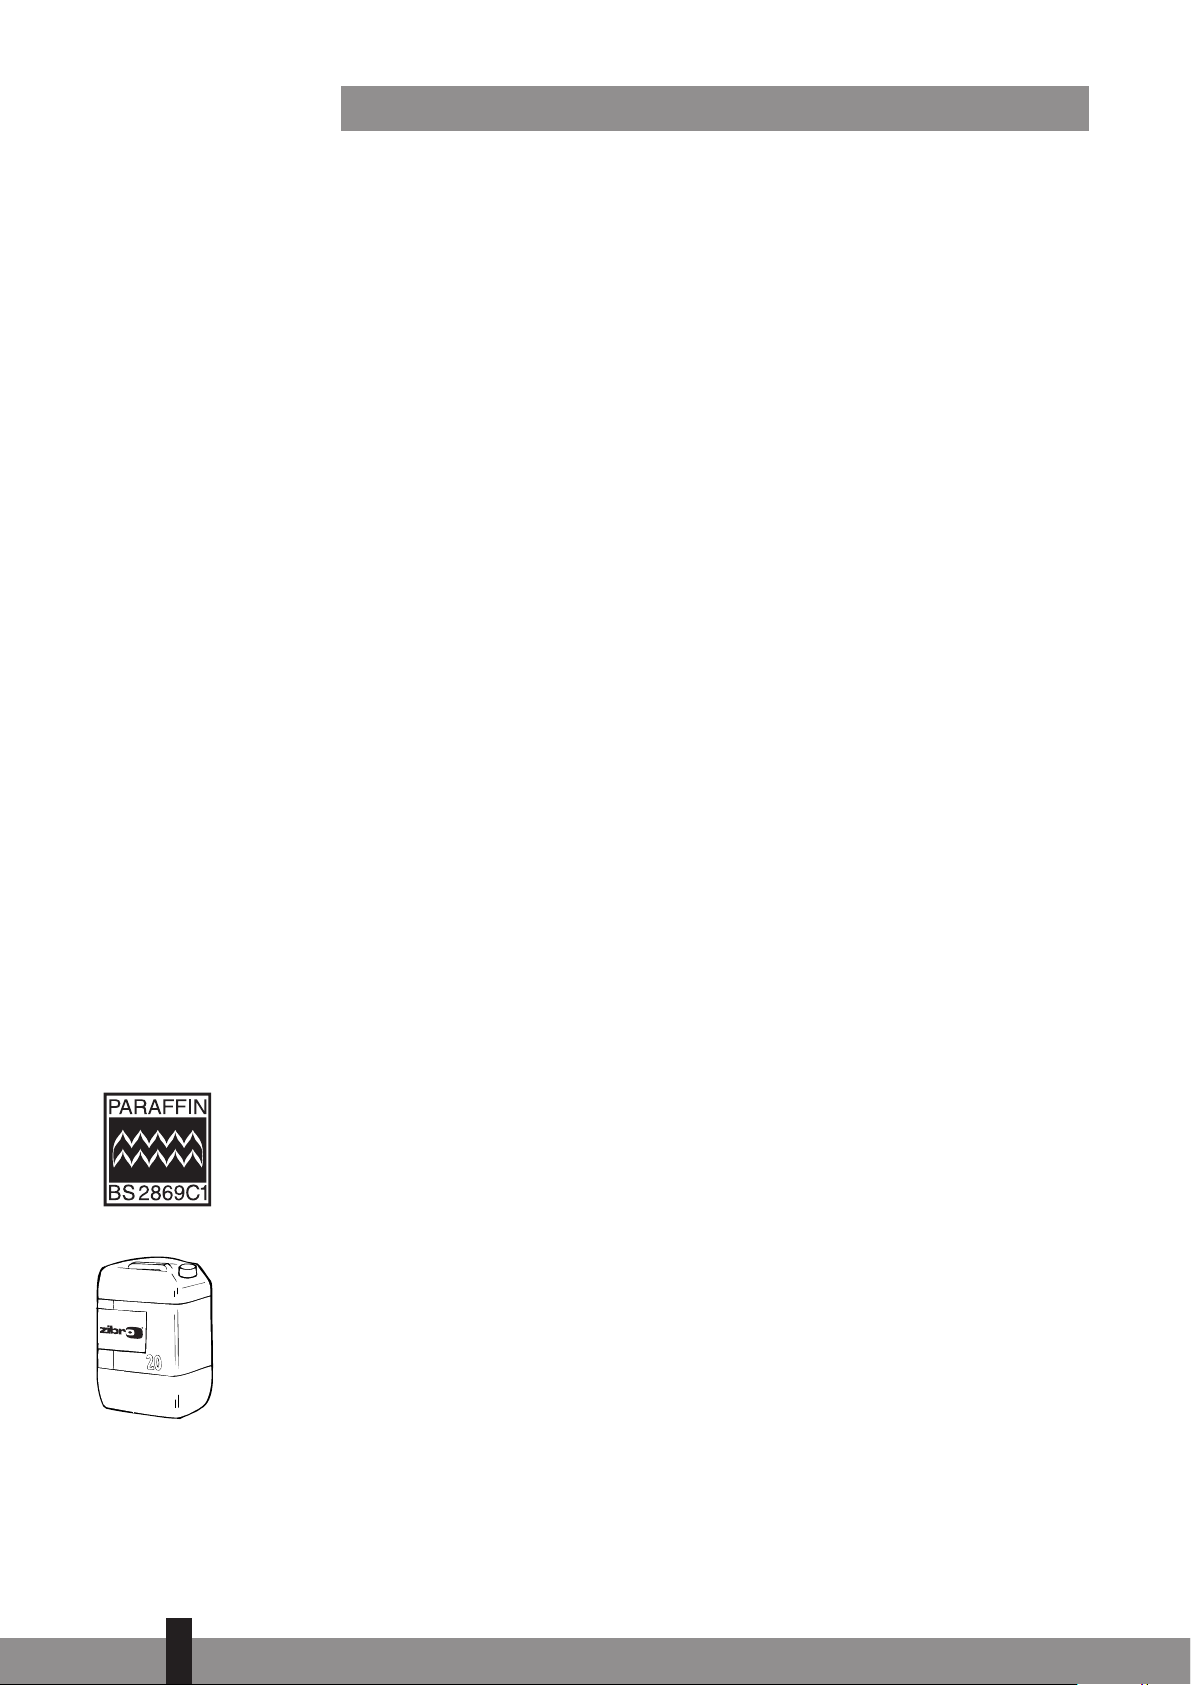
Especially for United Kingdom: Only use Class C1 paraffin fuel in accordance with
BS2869; Part 2, or equivalent.
The user must comply with the following instructions for proper use:
DO NOT
- use the liquid fuel-operated mobile heater in caravans, boats, and vehicle
cabins;
- use the liquid fuel-operated mobile heater in insufficiently ventilated rooms
(consult the table of properties for the minimum dimensions of the room to
be heated), underground rooms and / or at a height of over 1500 metres;
- modify the heater safety features.
The use of this type of heating in public rooms is subject to prior regulatory permission. Obtain proper information on this in advance.
THE RIGHT FUEL
Your heater has been designed for use with high-quality water-free pure paraffin
oil, such as Zibro Extra or Zibro Kristal. Only fuels of this kind will ensure clean and
proper burning. Lower quality fuel may result in:
! excessive tar deposits on the glass fibre wick
! incomplete burning
! reduced heater lifetime
! smoke and/or smells
! deposits on the grid or mantle
Only the use of the
correct fuel will ensure
safe, efficient, and
comfortable use of your
heater.
4
40
Page 5
! ! ! ! ! !
Using the right fuel is therefore essential for safe, efficient, and comfortable use
of your heater.
Damage and/or malfunctions of the heater due to the use of other than high quality water-free pure paraffin oil is not covered by the warranty.
Always refer to your local dealer for the right fuel for your heater.
A
MANUAL
A INSTALLING THE HEATER
1
Caref ully rem ove y our h eater from the box and che ck th e con tents .
In addition to the heater you also need to have:
! a transportation cap
! these directions for use
! a manual fuel syphon pump
Keep the box and the packaging materials (Fig. A) for storage and/or
transportation.
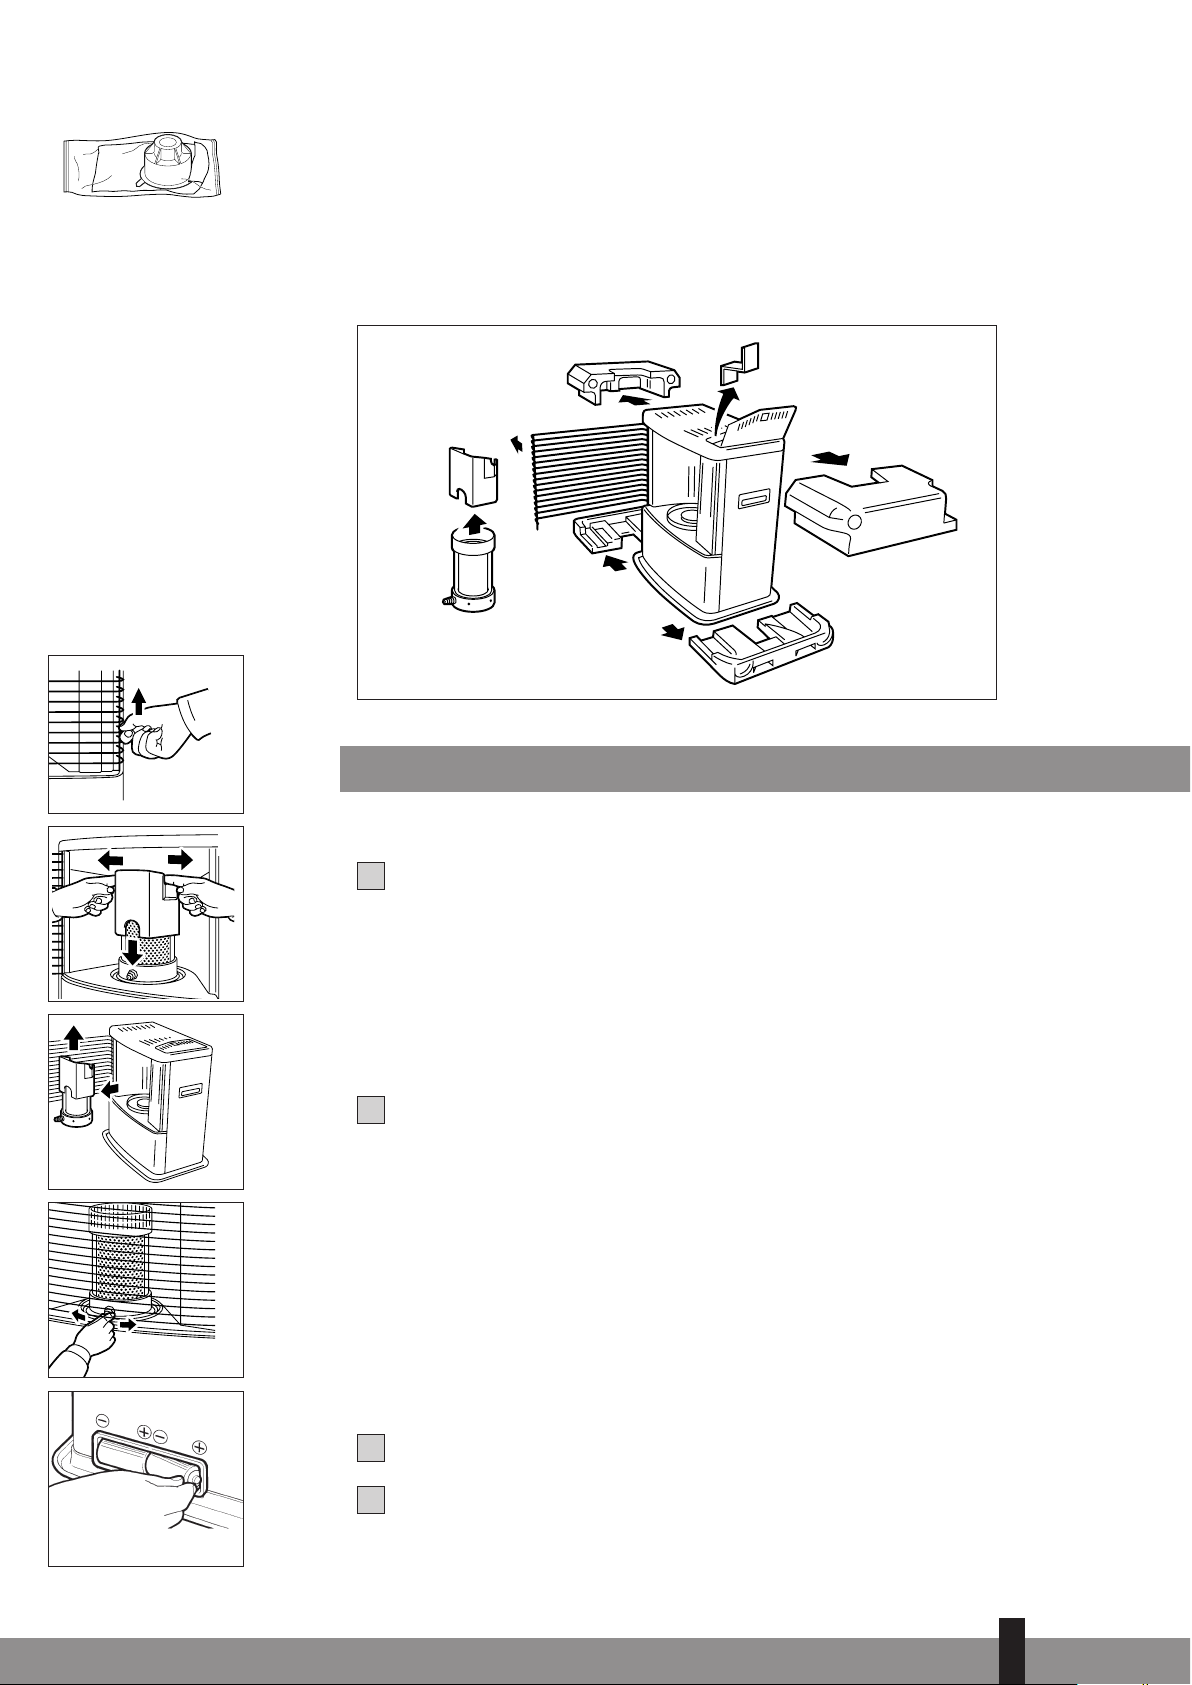
2
Remove the other packaging materials:
! emove the packaging material from the grill !. Lift the grill from the slot
(Fig. B) and pull it forward.
! Pull both ends of the packaging to the rear and at the same time slightly
downwards (see Fig. C).
! Remove the combustion chamber from the heater and remove the pac-
kaging underneath (see Fig. D).
! Put the combustion chamber back into its place. The combustion chamber
is positioned correctly when it can be smoothly moved a little to the left
and to the right by its handle " (Fig. E). Close the grill: Slightly lift it to
reposition it in its slot.
! Open the lid of the removable tank # and remove the piece of cardboard.
3
Fill the removable tank as indicated in Section B.
4
Insert the batteries into their holder $ at the back of the heater (Fig. F).
Ensure that the positive and negative poles match the + and - marks indica-
ted on the battery housing.
This transportation cap
is packed separately in
the box. Only this cap
ensures trouble-free
transportation of the
heater after use.
Store it well!
4
41
B
D
C
E
F
Page 6
5
The floor should be firm and completely level.
Reposition the heater, when it is
not level. Do not correct the situation by placing books or other goods under the
heater.
Please refer to the separate instructions in the carton box for fixing of
the heater.
6
Your heater is now ready for use.
B FILLING FUEL
Fill the removable tank in a suitable place since there can always be some spillage.
Follow the procedure below:
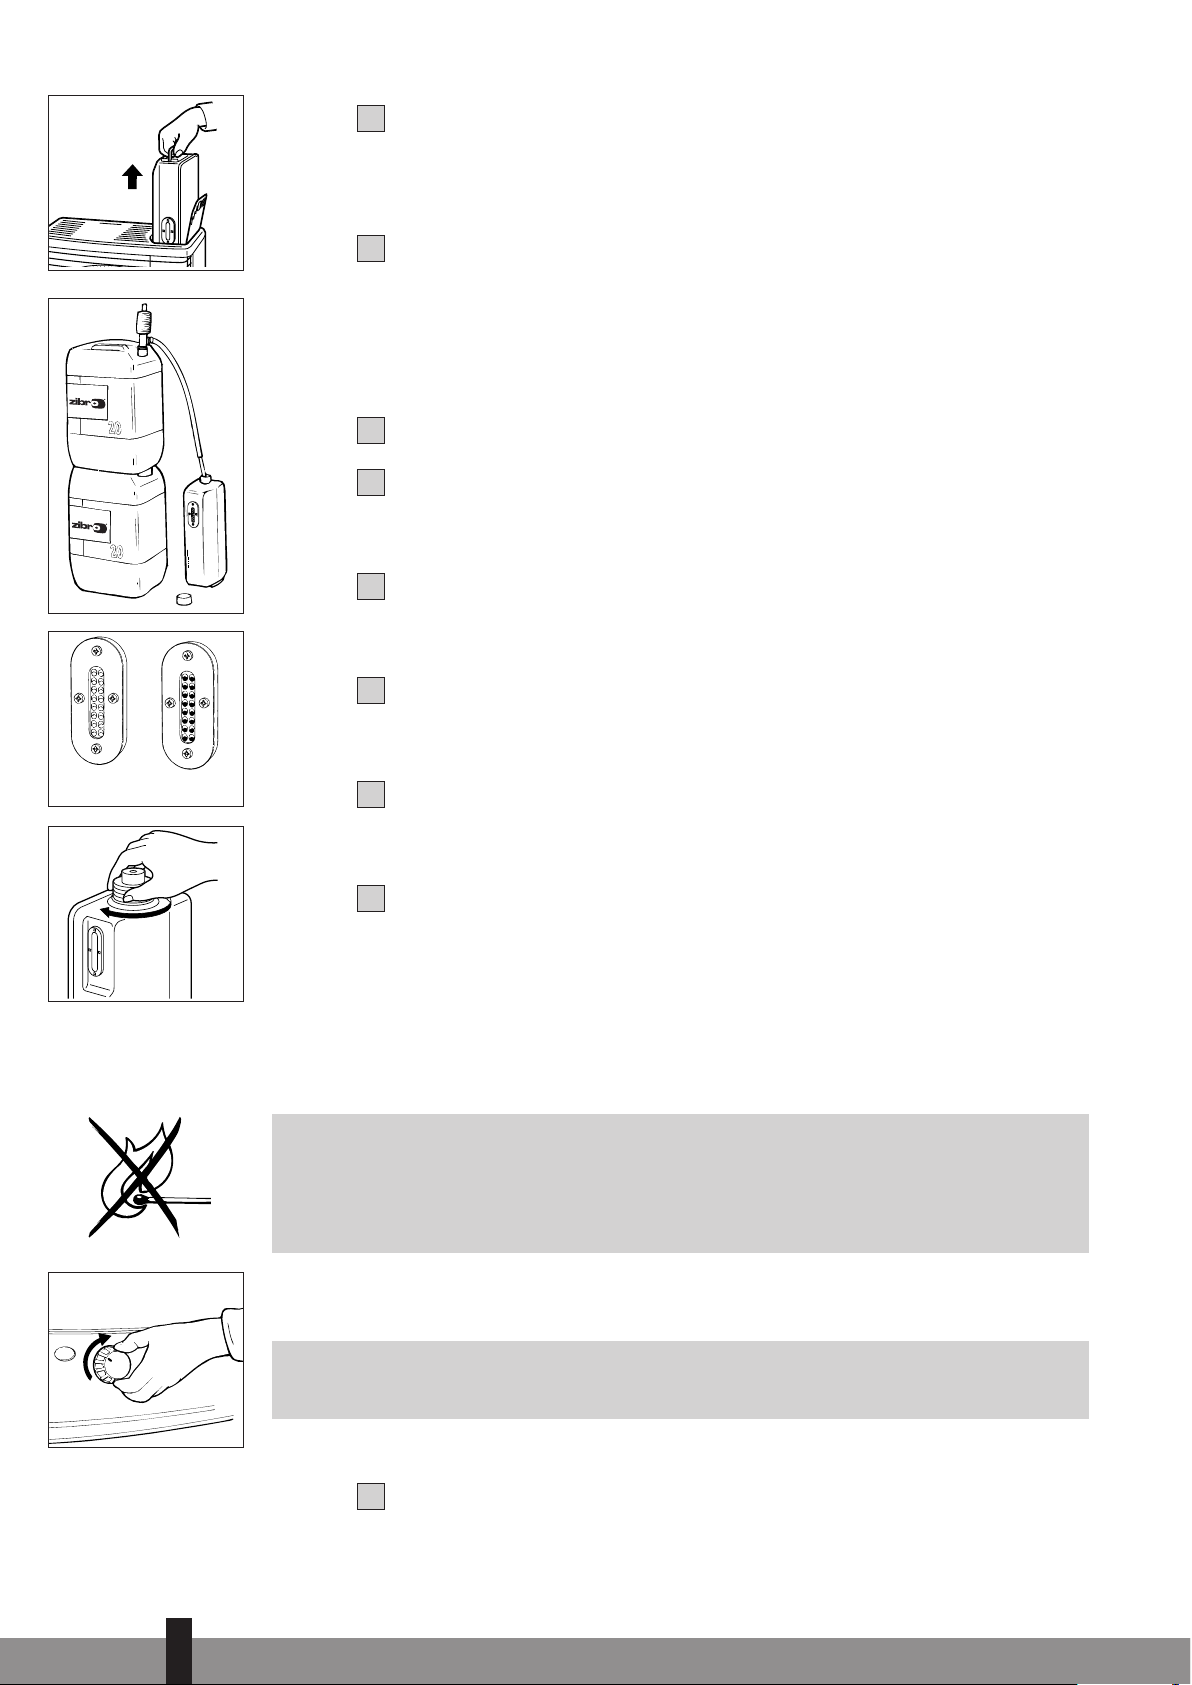
1
Make sure that the heater is switched off.
2
Open the upper lid and lift the removable tank out of the heater (Fig. G).
Note: Some drops may leak from the tank. Put down the removable tank (cap
pointing upwards, handle on floor and screw off the fuel cap.
3
Fill the removable tank using a fuel pump (refer to fuel pump operation
instructions.) Make sure that it is in a higher position than the removable tank
(Fig. H). Insert the ribbed hose into the opening of the removable tank.
4
Check the removable tank fuel gauge while filling the tank (Fig. I). Stop filling
once the gauge indicates that the tank is full. Never overfill the tank, especially not when the fuel is very cold (fuel expands when it heats up).
5
Let the remaining fuel in the pump flow back into the jerry can and carefully
remove the pump. Carefully screw the fuel cap back on the tank. Clean off
any spilled fuel.
6
Check whether the fuel cap is straight and tightened properly. Reinstall the
removable tank in the heater (cap down). Close the lid.
C IGNITING THE HEATER
A new heater may give off some smells for a short while, when it is used for the
first time. You should therefore provide extra ventilation or ignite the heater
outside the living room.
When you use the heater for the first time, first put the filled removable tank into
place, and then wait approximately 30 minutes before you ignite the heater. This
allows the glass fibre wick to soak up the fuel. Follow the same procedure when you
have completely burnt up all fuel from the tank, and after the glass fibre wick has
been replaced.
Before igniting the heater, always check the fuel indicator ! to see whether the
removable tank needs filling up.
Always ignite the heater with the ignition coil ". Never use matches or a cigarette
lighter.
Follow the procedure below:
1
Turn the knurled wick adjustment knob # clockwise to its stop (Fig. K). If you
apply more pressure you may turn it slightly further; however, it will automati-
cally return to the startposition.
4
42
H
I
empty full
K
J
G
Page 7
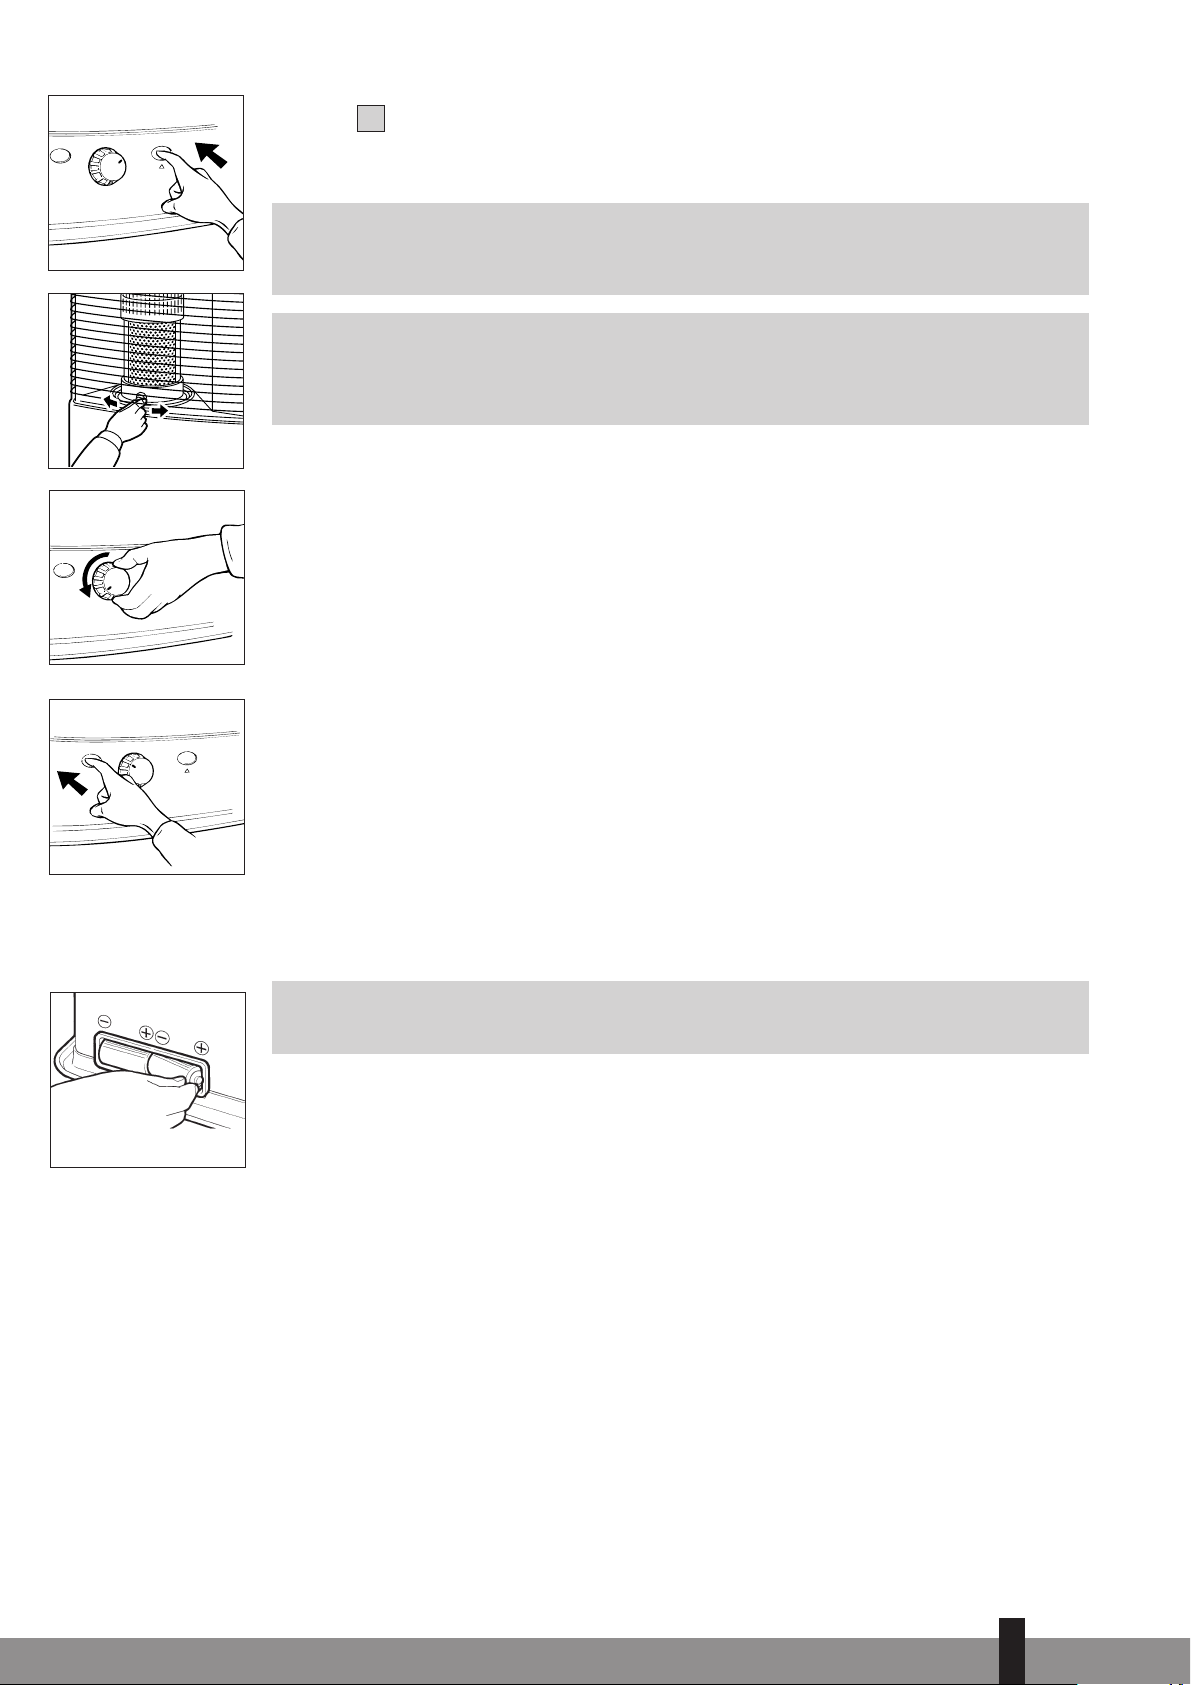
2
Push in the ignition button ! (Fig. L), but do not apply too much force.
Release the ignition button as soon as a flame is visible in the combustion
chamber ".
If the heater has been used only a few times and the wick adjustment knob is not
locked, first turn the wick adjustment knob (Fig. M) completely left, before putting
the wick in the highest position for ignition (Section C).
After having ignited the heater, always check whether the combustion
chamber " is level, by sliding it slightly to the left and the right by its handle #
(Fig. E). This should be a smooth movement. If the combustion chamber is not
level, this will cause smoke and soot to develop.
D BURNING OF THE HEATER
After you have ignited the heater, it will take 10 to 15 minutes before you can check
whether the heater is burning well. Too high a flame may cause smoke and soot,
whereas too low a flame causes smells. The page opposite the folding page shows
the minimum and maximum permissible burning heights of the flame (Fig. Q). The
flame can be slightly adjusted with the knurled wick adjustment knob $ (Fig. M).
Burning that is too low may be caused by:
! insufficient fuel (fill the tank)
! poor fuel quality (contact your dealer)
! insufficient ventilation (put window or door ajar)
! wastage of the wick (contact your dealer or replace the wick,
refer to section L)
E SWITCHING OFF THE HEATER
Let the heater burn at its lowest setting (Fig. M) for approximately one minute.
Then slowly turn the knurled wick adjustment knob $ anti-clockwise to its stop.
The flame will extinguish after a little while.
In case of an emergency, switch off the heater by pushing in the safety button
% (Fig. N).
F MALFUNCTION, CAUSES AND SOLUTIONS
If any malfunctioning cannot be solved from the directions below, please contact
your dealer.
THE HEATER DOES NOT IGNITE
! The batteries are not positioned correctly in the holder.
Check (Fig. F).
! There is not enough power left in the batteries for the ignition.
Replace (Fig. F).
! You have run out of fuel from the tank or the wick has been replaced.
After having refilled and replaced the removable tank, wait for 30 minutes
before igniting the heater.
! You are pushing the ignition button ! with too much force.
Push it in less forcefully (Section C).
! The ignition coil & is defective.
Contact your dealer.
4
43
L
M
N
F
E
Page 8
IRREGULAR FLAME AND/OR SOOT AND/OR SMELLS
! The combustion chamber ! has not been positioned correctly.
Use the handle " to put it level, until you can easily slide it slightly to the left
and to the right and the chamber is level.
! You are using fuel which is past its ‘use by’ date.
Start every heating season with fresh fuel.
! You are using the incorrect type of fuel.
Refer to THE RIGHT FUEL (See Section ’What you need to know in advance’).
! Dust has gathered in the lower part of the heater.
Contact your dealer.
! The wick height is not correct.
Contact your dealer.
THE HEATER SLOWLY EXTINGUISHES
! The removable tank is empty.
See Section B.
! The lower reservoir is contaminated by moist.
Contact your dealer.
! The wick has hardened on the upper side.
Burn the heater until all fuel is used (Section G). Use the right fuel.
! You are using fuel which is past its ‘use by’ date.
Start every heating season with fresh fuel.
THE HEATER REMAINS BURNING LOW
! Wick position too low.
Contact your dealer.
! Before you refilled the tank, the heater had burnt up almost all the fuel.
After having refilled and replaced the removable tank, wait for 30 minutes
before igniting the heater.
! You are using the incorrect type of fuel.
Refer to THE RIGHT FUEL (See Section ’What you need to know in advance’).
! The room is insufficiently ventilated.
Leave a window or a door wide open for a while.
THE HEATER IS BURNING TOO HIGH
! You are using an incorrect, too volatile type of fuel.
Refer to THE RIGHT FUEL (See Section ’What you need to know in advance’).
! Wick position too high.
Contact your dealer.
G MAINTENANCE
Your heater needs hardly any maintenance. It is, however, important that you
remove dust and stains in time with a damp cloth, because otherwise these
may cause stains that are hard to remove. Under normal conditions, only three
components are subject to wear:
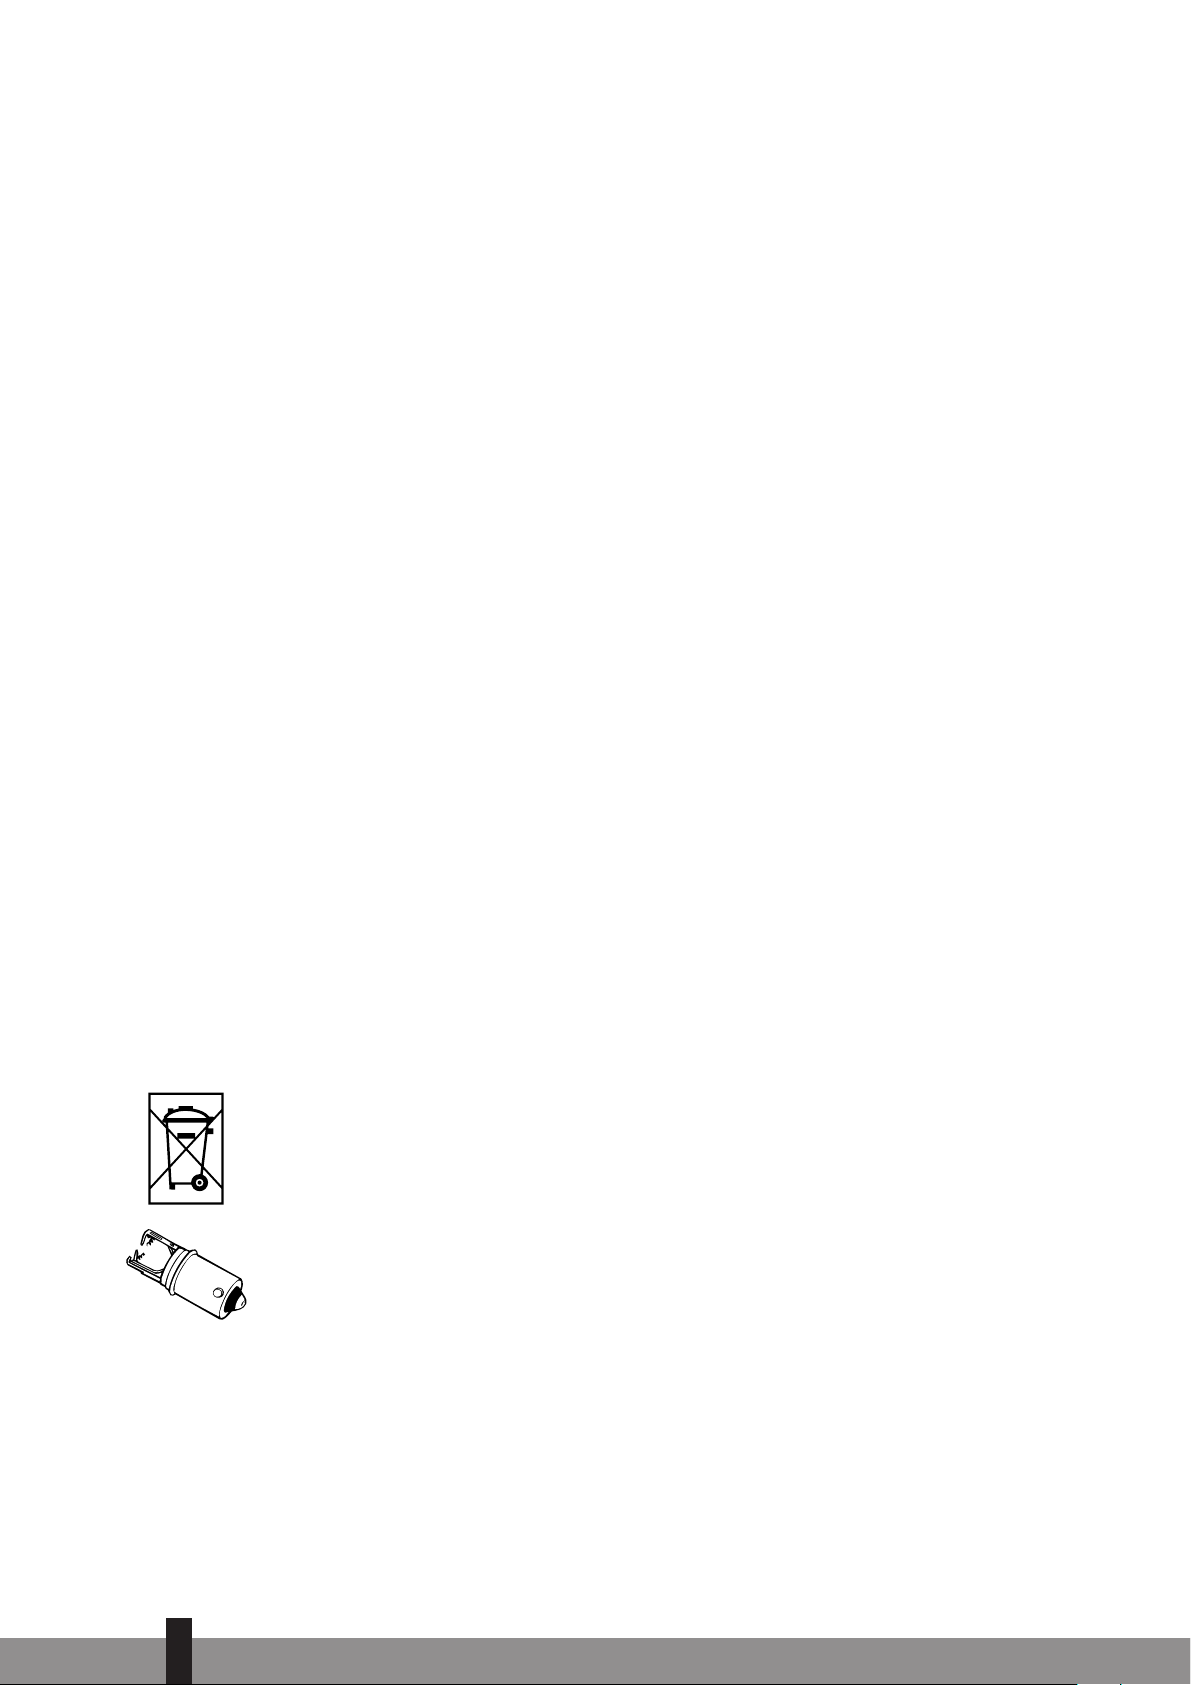
1. THE BATTERIES
You may replace the batteries yourself. Do not dispose of old batteries along with
the other domestic waste. Follow the locally applicable regulations regarding the
disposal of domestic chemical waste.
2. THE IGNITION COIL
The ignition coil will have a longer life, if you ignite the heater in the correct manner. Replace the batteries in time and take care not to push in the ignition button
4
44
broken ignition coil
Page 9
with too much force. If the filament is broken, the ignition coil must be replaced.
3. THE WICK
To extend the glass fibre wick life, you must occasionally let the heater burn until
the tank is completely emptied and the heater extinguishes by itself. Do this when
you notice that the flame is weakening. The burn-out will cause some smells, so it
is recommended that you take the heater outside of the living room.
Do not remove any heater components yourself. Always contact your dealer for
repairs.
Let the heater cool down first, before you start any maintenance or service work.
H STORAGE (END OF THE HEATING SEASON)
We recommend that you burn up all the fuel in the fuel tank at the end of the heating season and store the heater properly. Follow the procedure on the next page:
1
Ignite the heater outside the living room and let it burn until all fuel is used.
2
Let the heater cool down.
3
Clean the heater with a damp cloth and then dry it with a dry cloth.
4
Remove the batteries from the holder ! and store them in a dry place.
5
Store the heater in a dust-free place, if possible in its original packaging.
Unused fuel cannot be used for the next heating season. If there is still some
fuel left, do not throw it away, but dispose of it in accordance with the local
regulations for the disposal of domestic chemical waste. Always start the new
heating season with fresh fuel. When you start re-using the heater, follow the
instructions again (starting from Section A and as specified).
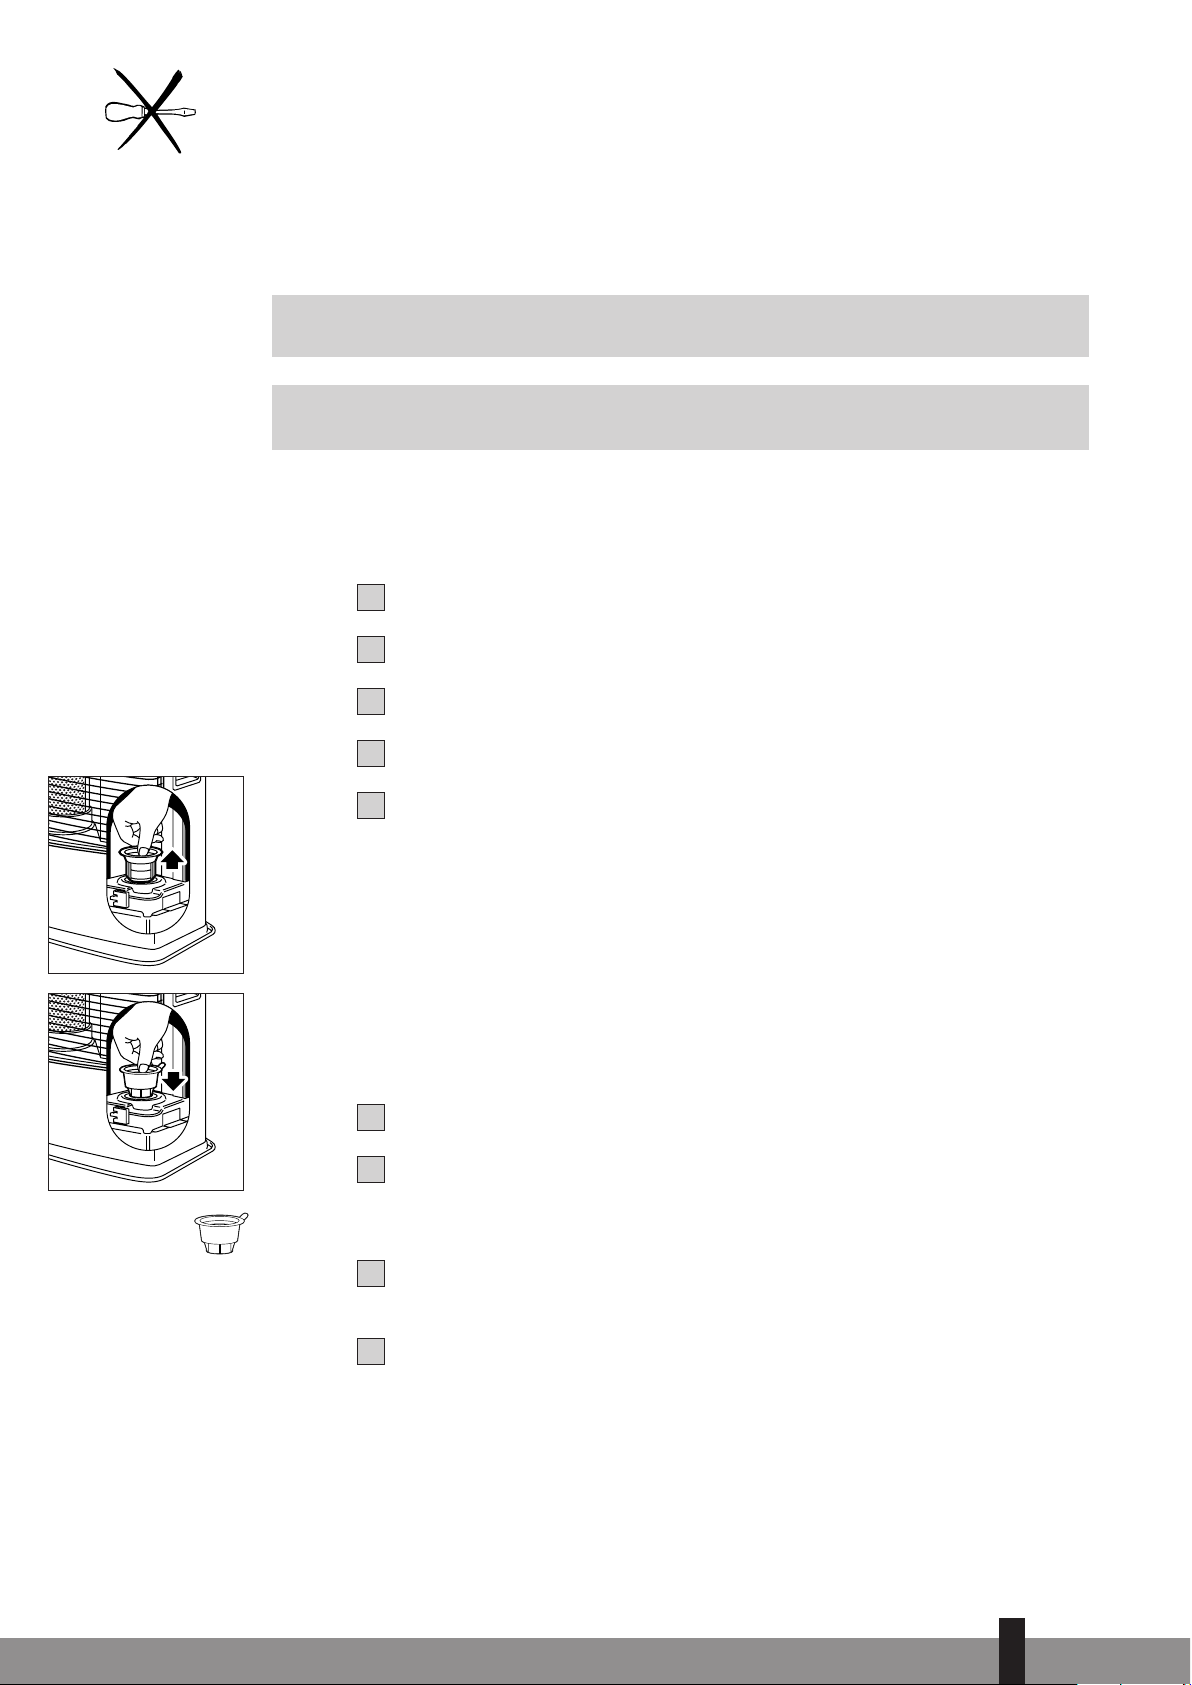
I TRANSPORTATION
Take the following measures to avoid fuel leakage during the transportation of
the heater:
1
Let the heater cool down.
2
Remove the removable tank " from the heater and remove the fuel filter
(Fig. O). Some drops may leak from the filter; keep a cloth at hand. Store the
fuel filter and the removable tank outside the heater.
3
Place the transportation cap into the position of the fuel filter (Fig. P).
Press it tight.
4
Always move the heater in an upright position.
4
45
O
P
Transportation cap
Page 10

J S PEC IFI CAT IO NS
Ignition electrical Dimensions (mm) width 428
Fuel paraffin
(including base plate)
depth 295
Capacity (kW)* 3.0 height 453
Suitable space (m3)** 60-110 Accessories: manual fuel syphon pump,
transportation cap
Fuel consumption (l/hr)* 0.313 Required batteries
2x R20kG, MN 1300
Fuel consumption (g/hr)* 250 1.5V, size D
Burning time per tank (hr)* 12.8 Wick type F
Capacity removable tank (litres) 4.0
Weight (kg) 8.0
* At maximum setting
** Specified values are indicative
K WARRANTY PROVISIONS
Your heater comes with a 48-month warranty starting on the date of purchase.
Within this period all defects in material or workmanship will be repaired without
any charge. The following provisions shall apply regarding this warranty:
1
We expressly dismiss all other claims for damages, including consequential
damages.
2
Any repairs or replacements of components within the term of warranty will
not result in an extension of the term of warranty.
3
The warranty will no longer apply, when the heater has been modified,
non-original parts have been used, or when it is repaired by third parties.
4
The warranty will not apply to parts that are subject to normal wear, such as
the batteries, the ignition coil, the wick and the manual fuel pump.
5
The warranty will only apply, when you present the original, dated proof of
purchase, provided no changes have been made to it.
6
The warranty will not apply to damages caused by actions not in compliance
with the Directions for Use, neglect, and the use of an incorrect type of fuel,
or fuel past its use-by date. The use of incorrect fuel can even be dangerous*.
7
Transportation costs and the risks involved during the transportation of the
heat er or heater compon ents will always be the resp onsibility of the
purchaser.
In order to avoid unnecessary costs, we recommend that you always read the
’Directions for Use’ carefully first. In case they offer no solution, please take the
heater to your dealer for repair.
* Highly inflammable substances may induce uncontrollable burning, causing flames to break out. Should this
happen, never try to move the heater, but always switch off the heater immediately (refer to Section E). In
cases of emergency you may use a fire extinguisher, but only a type B extinguisher: a carbon dioxide or powder
extinguisher.
4
46
Page 11

11 TIPS FOR SAFE USE
1 Children should be supervised to ensure that they do not play with the
appliance.
2 Do not move the heater when it is burning or still hot. Do not refill nor
service the heater when it is burning or still hot.
3 Position the front of the heater at a distance of minimum 1.5 metres
from walls, curtains, and furniture.
4 Do not use the heater in dusty rooms. You will not have optimum
burning in such r ooms. Do not use the heate r i n the immediate
surrounding of a bath, a shower or a swimmingpool.
5 Switch off the heater, before you leave or go sleeping.
6 Store and move fuel only in suitable tanks and jerrycans.
7 Make sure that the fuel is not exposed to heat or extreme temperature
changes. Always store the fuel in a cool, dry and dark place (sunlight
will affect the quality).
8 Never use the heater in places where harmful gasses or fumes may be
present (e.g. exhaust gasses or paint fumes).
9 Beware that the grid of the heater becomes hot. If the appliance is
covered there is a risk of fire.
10 Always make sure that there is sufficient ventilation.
11 This appliance is not intended for use by persons (including children)
with reduced physical, sensory or mental capabilities, or lack of experience and knowledge, unless they have been given supervision or
instruction concerning use of the appliance by a person responsible for
their safety.
4
47
20cm
100cm
50cm
150cm
50cm
Page 12

4
48
REPLACEMENT OF THE WICK
L E NSU RE THA T THE H EAT ER IS OF F AND CO MPL ET ELY
COOL BEFORE STARTING TO REPLACE THE WICK.
1
Open the lid and remove the removable tank.
2
Remove the batteries from the battery holder.
3
Open the front grill. Remove the combustion chamber
from the heater. Close the grill.
4
Pull the knurled wick adjustment knob off the heater.
5
Unscrew the three cabinet screws on the back and sides
of the heater. Pull the cabinet forward slightly, and
then remove it from the base plate.
6
Unscrew the four wing nuts from the wick holder.
7
Lift up the wick holder and the wick mechanism.
8
Remove the screw on the stem holding the bracket and
remove the bracket.
9
Turn right the stem to the end and remove the wick
sleeve (with wick).
10
Turn the wick sleeve counterclockwise and lift the wick
sleeve up. Remove it from the primary air tube.
11
Squeeze the wick to loosen the three wick pins and
remove the wick from the wick sleeve. Ensure that you
are wearing gloves and that you have a container in
which to put the old wick.
Page 13

4
49
12
Install the wick to the wick sleeve according to the allo-
wed direction engraved on the wick sleeve.
13
Install the wick sleeve (with wick) to the primary air
tube. And then turn the wick sleeve clockwise to set in
the handle arm.
14
Install the bracket. Then tighten the screw which is hol-
ding the stem.
15
Put the wick holder chassis back into position.
16
Screw the four wing nuts hand tight.
17
Place the knurled wick adjustment knob on the wick
mechanism. Turn the knob as far to the right as possi-
ble. Press the tip-over switch. Check that the wick can
be lowered completely. Repeat this check a number of
times. If the wick cannot be lowered completely it has
not been placed correctly. If this is the case, repeat the
procedure from No. 12. Pull the knurled wick adjust-
ment knob off the heater.
18
Put the cabinet back into position and tighten the three
screws. Put the knurled wick adjustment knob back into
position. Now put the combustion chamber back into
position. Check that it is level by sliding it slightly to the
left and the right by its handle. Close the grill.
19
Put the filled removable tank into position. Put the bat-
teries into the battery holder (ensure that the positive
and negative poles match the + and – marks indicated
on the battery housing). Wait 30 minutes after repla-
cing the tank and batteries before using the heater.
Page 14

! ! ! ! ! ! ! ! ! ! ! ! ! ! ! ! ! ! ! ! ! ! ! ! ! ! ! ! ! ! ! ! ! ! ! ! ! ! ! ! ! ! ! ! ! !
" Q
1-3 cm.
Page 15

! " #
$
%
&
'
(
)
*
+
,
Page 16

D
Benötigen Sie weitere Informationen oder treten Probleme auf, besuchen Sie bitte unsere Website www.zibro.com, oder setzen Sie sich mit
unserem Kundendienst in Verbindung (Telefonnummer auf www.zibro.com).
For alle yderligere oplysninger eller ved eventuelle problemer med apparatet henvises til www.zibro.com eller det lokale Kundecenter (telefon-
numre findes i www.zibro.com).
Si necesita información o si tiene algún problema, visite nuestra página Web www.zibro.com, o póngase en contacto con el servicio cliente
(hallará el número de teléfono en www.zibro.com).
F
Si vous souhaitez obtenir des informations supplémentaires ou si vous rencontrez un problème, rendez-vous sur notre site Web (www.zibro.
com) ou contactez le notre service client (vous trouverez l’adresse et numéro de téléphone sur www.zibro.com).
Jos haluat huoltoapua, lisätietoja tai laitteen kanssa tulee ongelmia, tutustu verkkosivustoon osoitteessa www.zibro.com tai kysy neuvoa PVG
kuluttajapalvelukeskuksesta (www.zibro.com).
If you need information or if you have a problem, please visit the our website (www.zibro.com) or contact our sales support (you find its phone
number on www.zibro.com)
I
Per informazioni e in caso di problemi, visitate il sito Web www.zibro.com oppure contattate il Centro Assistenza Clienti (per conoscere il numero
di telefono, consultate www.zibro.com).
N
Hvis du trenger informasjon, eller hvis du har et problem med produktet, kan du gå til nettsidene www.zibro.com. Alternativt kan du kontakte
med PVG’ forbrukertjeneste (telefonnummeret i www.zibro.com).
Als u informatie nodig hebt of als u een probleem hebt, bezoek dan de onze website (www.zibro.com) of neem contact op met de afdeling
sales support (adres en telefoon op www.zibro.com).
P
Se necessitar de informações ou se tiver problemas, visite o Web site www.zibro.com ou contacte o Centro de Assistência (número de telefone
o www.zibro.com)
W przypadku problemów i w celu uzyskania szczegółowych informacji odwiedź stronę internetową Zibro dostępną pod adresem www.zibro.
com lub skontaktuj się z Centrum kontaktów Zibro (www.zibro.com)
S
Om du behöver service eller information eller har problem med apparaten kan du besöka www.zibro.com eller kontakta Zibro kundtjänst (du
hittar telefonnumret på www.zibro.com).
Če želite dodatne informacije, obiščite spletno mesto podjetja na naslovu www.zibro.com ali pokličite na telefonsko (www.zibro.com).
Daha fazla bilgiye ihtiyaç duyarsanız veya bir sorunla karşılaşırsanız, www.zibro.com adresindeki Zibro Internet sitesini ziyaret edin veya ülkenizde
bulunan Zibro müşteri merkeziyle iletişim kurun (telefon numarasını: www.zibro.com).
--- --- -- ----
-- -- --- -----
-- -- --- -----
-- ---- -- ----
-- -- --- -----
-- -- --- -----
--- --- -- ----
-- ---- -- ----
www.zibro.com
Distributed in Europe by PVG Holding B.V.
PVG Traffic avg©110518 man_R26T
New 06/11
Zibro® is registered trademark of TOYOTOMI Co., Ltd. for paraffin heaters.
ZIBRO brand paraffin heaters are made in Japan and imported by PVG Holding B.V.
Printed in Japan
7997000903
Page 17

R 26 T
2
14
26
38
50
62
74
MANUEL D’UTILISATION
GEBRAUCHSANWEISUNG
INSTRUCCIONES DE USO
OPERATING MANUAL
ISTRUZIONI D’USO
GEBRUIKSAANWIJZING
NAVODILA ZA UPORABO
3
2
5
4
>
1
y
Page 18

Sehr geehrte Kundin, sehr geehrter Kunde,
herzlichen Glückwunsch! Sie sind jetzt der stolze Besitzer eines transportablen
Kaminofens. Sie haben sich für ein Qualitätsprodukt entschieden, an dem Sie
noch viele Jahre Ihre Freude haben werden, vorausgesetzt, Sie benutzen den
Kaminofen verantwortungsvoll. Lesen Sie deswegen zuerst diese Gebrauchs-
anweisung aufmerksam durch, um so eine optimale Lebensdauer Ihres
Kaminofens zu garantieren.
Im Namen des Herstellers bieten wir Ihnen 48 Monate Garantie auf alle
eventuell auftretenden Material- und Herstellungsfehler.
Wir wünschen Ihnen viel Wärme und Komfort mit Ihrem Kaminofen.
Mit freundlichen Grüßen
PVG Holding b.v.
Abteilung Kundendienst
1 LESEN SIE ZUERST DIE GEBRAUCHSANWEISUNG.
2 WENDEN SIE SICH IM ZWEIFELSFALL AN IHREN HÄNDLER.
3 VOR DEM LESEN DER GEBRAUCHSANWEISUNG BITTE DAS LETZTE BLATT AUFFALTEN. ! ! !
2
14
Page 19

BENUTZUNG
KURZ ZUSAMMENGEFASST
Nachfolgend sind in groben Zügen die Schritte angegeben, die zur Inbetriebnahme Ihres Kamin ofens ausgeführt werden müssen. Detaillierte Beschreibung der
Handlungen entnehmen Sie bitte der GEBRAUCHSANWEISUNG (Seite 17 ff).
s :UR 6ORBEUGUNG VON &EUER MUSS ENTWEDER DER (EIZOFEN VOR DEM
Füllen des Brennstoffbehälters ausgeschaltet werden oder der
Behälter muss in einem anderen Raum als dem, in dem sich der
Heizofen befindet, gefüllt werden.
s 3ORGEN 3IE IMMER DAFàR DASS DER "RENNSTOFFBEHÊLTER NACH DEM
Füllen gut verschlossen ist. Achten Sie beim Füllen darauf, dass
sich der Behälter in einer sicheren Entfernung von Wärmequellen
und offenen Flammen befindet (siehe Kapitel B).
s $AS ERSTE -AL WIRD )HR +AMINOFEN WÊHREND DES "RENNENS NOCH
kurz ‘neu’ riechen.
s ,AGERN 3IE ALLE "RENNSTOFFBEHÊLTER MIT /RIGINALDECKEL UND 6ERSIE-
gelung kühl und dunkel.
s "RENNSTOFF ALTERT "EGINNEN 3IE JEDE (EIZSAISON MIT NEUEM "RENN-
stoff.
s 7ENN 3IE :IBRO %XTRA :IBRO +RISTAL ODER :IBRO "IO BENUTZEN KÚN-
nen Sie sich auf die Qualität des Brennstoffs verlassen.
s 7ENN 3IE ZWISCHEN DEN EINZELNEN 3ORTEN -ARKEN WECHSELN MàS-
sen Sie den Kaminofen erst vollständig leer brennen lassen.
WICHTIGE
EINZELTEILE
Sicherheitstaste
Drehregler
Zünd-Taste
Brennkammer
Handgriff
Brennkammer
Brennstoffanzeige
Gitter
Deckel
Brennstofftank
Brennstofftank
Brennstoffanzeige
Brennstofftank
Elektrische Zündung
Batteriefach
!
"
#
$
%
&
'
(
)
*
+
,
! ! ! ! ! ! ! ! ! ! ! ! ! ! ! ! ! ! ! ! ! ! ! ! ! !
Entfernen Sie das gesamte Verpackungsmaterial
(siehe Kapitel A, Abb. A).
Befüllen Sie den Brennstofftank ) und warten Sie 30 Minuten
bevor Sie den Kaminofen starten (siehe Kapitel B, Abb. H).
Geben Sie die Batterien in das Batteriefach ,
(siehe Kapitel A, Abb.F).
Überprüfen Sie, ob die Brennkammer - gerade steht
(siehe Kapitel A, Abb. E).
3TARTEN 3IE DEN +AMINOFEN INDEM 3IE DEN $REHREGLER "
langsam nach
rechts drehen, bis er sich nicht weiter drehen
LÊT ANSCHLIEEND DIE :àND4ASTE # vorsichtig betätigen (siehe
Kapitel C, Abb. K und L).
.ACH DEM 3TARTEN DES /FENS DAUERT ES BIS -INUTEN BEVOR
3IE SEHEN OB DER /FEN RICHTIG BRENNT (siehe Kapitel D).
Schalten Sie den Kaminofen aus (siehe Kapitel E).
1
2
3
4
5
6
7
2
15
Page 20

WICHTIG ZU WISSEN
JEDERZEIT AUSREICHEND VENTILIEREN
Lesen Sie bitte vor der Anwendung des Geräts sorgfältig die Bedienungsanleitung
UND BEWAHREN 3IE SIE FàR EINE ZUKàNFTIGE %INSICHTNAHME AUF $AS 'ERÊT NUR DANN
INSTALLIEREN WENN DIE ÚRTLICH GELTENDEN BZW NATIONALEN 6ORSCHRIFTEN 6ERORDNUNGEN
UND .ORMEN ERFàLLT SIND $IESES 0RODUKT IST FàR DEN 'EBRAUCH ALS (EIZOFEN IN
Wohngebäuden bestimmt, und darf nur in trockener Umgebung, unter normalen
Haushaltsverhältnissen, in Wohnräumen, Küchen und in Garagen verwendet werden.
*EDES -ODELL BENÚTIGT EINE BESTIMMTE MINIMALE 2AUMGRÚE UM DEN +AMINOFEN
SICHER OHNE ZUSÊTZLICHE 6ENTILATION BETREIBEN ZU KÚNNEN 7ENN DER BETREFFENDE
Raum kleiner als der angegebene Minimumwert ist, dann muß dafür gesorgt wer-
DEN DA IMMER EIN &ENSTER ODER EINE 4àR EINEN 3PALT BREIT OFFEN BLEIBT CA CM
Es ist wichtig, dass jeder Raum, in dem der Heizofen benutzt wird, ausreichend belüftet und gut entlüftet wird (beide Öffnungen müssen einen Querschnitt von mindes-
TENS CM haben). Änderungen am Sicherheitssystem sind unzulässig und würden
die Garantie einer einwandfreien Funktion des Luftfühlers nichtig machen. Wenden
3IE SICH IM :WEIFELSFALL AN )HREN (ÊNDLER
Beachten Sie, dass das Gitter und die obere Platte heiß werden. Wenn das Gerät
ABGEDECKT WIRD BESTEHT DAS 2ISIKO EINES "RANDES 7EGEN DER HOHEN 4EMPERATUR DER
/BERFLÊCHE VERWENDEN 3IE DAS 'ERÊT AUERHALB DER 2EICHWEITE VON +INDERN
SICHERHEITSSYSTEM
Wenn Sie das Heizgerät eingeschaltet haben, kann es sein, dass es sich bei einer rela-
TIV NIEDRIGEN :IMMERTEMPERATUR BIS # AUTOMATISCH AUSSCHALTET $ER 'RUND
HIERFàR IST 7ÊRMEANSAMMLUNG IM (EIZGERÊT $IESES 0HÊNOMEN IST EINE LOGISCHE &OLGE
des vorhandenen Sicherheitsmechanismus. Wenn das Heizgerät bei niedrigeren
Umgebungstemperaturen eingesetzt wird, tritt dieses Phänomen nicht auf.
Speziell für Frankreich: Ihr Heizofen wurde ausschließlich für den Betrieb mit
"RENNSTOFF FàR MIT FLàSSIGEM "RENNSTOFF BETRIEBENE MOBILE (EIZÚFEN GEMÊ DEN
2ICHTLINIEN VOM UND AUSGELEGT $IE 6ERWENDUNG ANDERER
"RENNSTOFFE IST VERBOTEN &RAGEN 3IE )HREN (ÊNDLER $IE !DRESSEN UNSERER (ÊNDLER
finden Sie auf unserer Website.
$ER MIT FLàSSIGEM "RENNSTOFF BETRIEBENE MOBILE (EIZOFEN WURDE ALS ZUSÊTZLICHES
Heizgerät ausgelegt und nicht als ständige Wärmequelle.
Speziell für Großbritannien: Verwenden Sie ausschließlich Petroleum-Brennstoff
DER +LASSE # GEMÊ "3 4EIL ODER EINEN GLEICHWERTIGEN "RENNSTOFF
Im Hinblick auf die richtige Verwendung muss der Benutzer folgende
Anweisungen befolgen:
ES IST VERBOTEN
- den mit flüssigem Brennstoff betriebenen mobilen Heizofen in Wohnwagen,
auf Booten und in Fahrerhäusern zu benutzen.
- den mit flüssigem Brennstoff betriebenen mobilen Heizofen in unzureichend
belüfteten Räumen (die Mindestmaße für zu beheizende Räume entnehmen
3IE BITTE DER 4ABELLE MIT DEN TECHNISCHEN $ATEN +ELLERRÊUMEN BZW IN EINER
(ÚHE VON àBER M ZU BENUTZEN
- Änderungen an den Sicherheitsvorrichtungen des Heizofens vorzunehmen.
7ENN DIESE !RT VON (EIZUNG IN ÚFFENTLICH ZUGÊNGLICHEN 2ÊUMEN EINGESETZT WERDEN
soll, muss eine entsprechende Genehmigung vorliegen. Erkundigen Sie sich rechtzeitig nach den entsprechenden Vorschriften.
2
16
Page 21

! ! ! ! ! !
DER RICHTIGE BRENNSTOFF
Ihr Kaminofen wurde für die Benutzung von wasserfreiem, sauberem Petroleum
HOHER 1UALITÊT WIE :IBRO %XTRA ODER :IBRO +RISTAL ENTWICKELT .UR DIESER
Brennstoff sorgt für eine saubere und optimale Verbrennung. Brennstoff geringerer Qualität kann zu folgenden Problemen führen:
! àBERMÊIGE !BLAGERUNG AUF DEM $OCHT
! unvollständige Verbrennung
! VERKàRZTE ,EBENSDAUER VON $OCHT UND +AMINOFEN
! 2AUCH UNDODER 'ERUCH
! Niederschlag auf dem Gitter oder Gehäuse
$ER RICHTIGE "RENNSTOFF IST ALSO WICHTIG FàR EINEN SICHEREN EFFIZIENTEN UND KOMFORtablen Gebrauch Ihres Kaminofens.
%INE "ESCHÊDIGUNG BZW EINE 3TÚRUNG DES (EIZOFENS AUFGRUND DER 6ERWENDUNG
von anderem als hochwertigem wasserfreiem Petroleum fällt nicht unter die Garantie.
Informieren Sie sich bei Ihrem Händler in Ihrer direkten Umgebung über den richtigen Brennstoff für Ihren Kaminofen.
A
GEBRAUCHSANWEISUNG
A DIE INSTALLATION DES KAMINOFENS
1
Nehmen Sie den Kaminofen vorsichtig aus dem Karton und kontrollieren Sie
den Inhalt auf Vollständigkeit.
Außer dem Kaminofen muß folgendes vorhanden sein:
! EIN 4RANSPORTVERSCHLU
! diese Gebrauchsanweisung
! eine Syphonpumpe
Bewahren Sie den Karton und das Verpackungsmaterial (Abb. A) zwecks
,AGERUNG UNDODER 4RANSPORT AUF
2
Entfernen Sie das übrige Verpackungsmaterial:
! Entfernen Sie das Stückchen Verpackungsmaterial vom Gitter '.
Heben Sie das Gitter aus der Kerbung (Abb. B) und ziehen Sie es nach vorn.
2
17
Nur mit dem richtigen
Brennstoff ist eine
sichere, effiziente und
komfortable Benutzung
Ihres Kaminofens gewä-
hrleistet.
Diesen Transport-
verschluß finden Sie im
Verpackungs karton. Nur
hiermit kann der Kami-
nofen nach Benutzung
problemlos transportiert
werden. Bewahren Sie
den Verschluß also gut
auf!
B
C
Page 22

! :IEHEN 3IE BEIDE %NDEN DES 6ERPACKUNGSMATERIALS NACH HINTEN UND GLEICH-
ZEITIG LEICHT NACH UNTEN !BB #
! .EHMEN 3IE DIE 6ERBRENNUNGSKAMMER AUS DEM /FEN UND ENTFERNEN 3IE DAS
DARUNTER BEFINDLICHE 6ERPACKUNGSMATERIAL !BB $
! 3ETZEN 3IE DIE "RENNKAMMER WIEDER EIN $IE "RENNKAMMER STEHT RICHTIG
wenn sie sich ohne Schwierigkeiten mit dem Handgriff % etwas nach links
und rechts verschieben lässt (Abb.E).
! Schließen Sie das Gitter: leicht anheben, um es wieder in die Kerbung
einrasten zu lassen.
! ½FFNEN 3IE DEN $ECKEL DES "RENNSTOFFTANKS ( und entfernen Sie das
Stückchen Karton.
3
Befüllen Sie den Brennstofftank wie in Kapitel B beschrieben.
4
Legen Sie die Batterien in das dafür bestimmte Fach , an der Rückseite des
Kaminofens (Abb. F). Achten Sie dabei auf die + und - Pole.
5
$ER "ODEN MU STABIL UND WAAGERECHT SEIN 3TELLEN 3IE DEN +AMIN AN EINE
andere Stelle, falls er nicht waagerecht steht. Versuchen Sie nicht durch
Unterlage von Büchern oder ähnlichem den Stand zu korrigieren.
6
Ihr Kaminofen ist jetzt betriebsbereit.
B DAS BEFÜLLEN MIT BRENNSTOFF
Füllen Sie den Brennstofftank an einer dazu geeigneten Stelle (falls etwas verschüttet wird). Gehen Sie wie folgt vor:
1
$ER +AMINOFEN SOLLTE AUSGESCHALTET SEIN
2
½FFNEN 3IE DEN $ECKEL UND ZIEHEN 3IE DEN "RENNSTOFFTANK AUS DEM +AMINOFEN
!BB ' !CHTUNG DER 4ANK KANN KURZ NACHTROPFEN 3TELLEN 3IE DEN "RENNSTOFFTANK AB 4ANKVERSCHLU NACH OBEN 'RIFF AUF DEM "ODEN UND DREHEN 3IE
DEN 4ANKVERSCHLU AUF
3
Füllen Sie den Brennstofftank mit einer Brennstoffpumpe (siehe Gebrauchsan-
WEISUNG "RENNSTOFFPUMPE $ABEI IST DARAUF ZU ACHTEN DASS DER +ANISTER HÚHER
STEHT ALS DER "RENNSTOFFTANK !BB ( $EN GERIFFELTEN 3CHLAUCH STECKEN 3IE
dann in die Öffnung des Brennstofftanks.
4
Achten Sie während des Füllvorgangs auf die Brennstoffanzeige des Brenn-
STOFFTANKS !BB ) 7ENN 3IE SEHEN DA DER 4ANK FAST VOLL IST STELLEN 3IE DEN
&àLLVORGANG EIN $EN 4ANK NIEMALS ZU VOLL FàLLEN 6OR ALLEM NICHT WENN DER
Brennstoff sehr kalt ist (Brennstoff dehnt sich aus, wenn er wärmer wird).
5
Lassen Sie den Brennstoff, der sich noch in der Pumpe befindet, in den
+ANISTER ZURàCKSTRÚMEN UND ENTFERNEN 3IE DIE 0UMPE VORSICHTIG 3CHRAUBEN
3IE DEN 4ANKVERSCHLU WIEDER SORGFÊLTIG AUF DEN 4ANK 7ISCHEN 3IE EVENTUELL
verschütteten Brennstoff weg.
6
+ONTROLLIEREN 3IE OB DER 4ANKVERSCHLU GERADE SITZT UND FEST ANGEZOGEN IST
3ETZEN 3IE DEN "RENNSTOFFTANK WIEDER IN DEN +AMINOFEN EIN 4ANKVERSCHLU
NACH UNTEN 3CHLIEEN 3IE DEN $ECKEL
2
18
H
I
leer voll
J
G
F
D
E
Page 23

2
19
K
L
C DAS STARTEN DES KAMINOFENS
%IN NEUER /FEN VERURSACHT ZU "EGINN ETWAS 'ERUCH 3ORGEN 3IE DESWEGEN FàR ZUSÊTZ
LICHE 6ENTILATION ODER STARTEN 3IE DEN /FEN DAS ERSTE -AL AUERHALB DES 7OHNRAUMES
Wenn Sie den Kaminofen zum ersten Mal benutzen, müssen Sie nach
dem Einsetzen des Brennstofftanks ca. 30 Minuten warten, bevor Sie den
/FEN STARTEN DAMIT SICH DER $OCHT MIT "RENNSTOFF VOLLSAUGEN KANN $IES
trifft auch zu, wenn Sie den Kaminofen vollständig leer gebrannt haben,
BEZIEHUNGSWEISE NACH !USTAUSCH DES $OCHTES
Achten Sie vor dem Starten des Kaminofens darauf, daß sich noch genügend Brenn-
STOFF IM 4ANK BEFINDET MIT (ILFE DER "RENNSTOFFANZEIGE &).
3TARTEN 3IE DEN +AMINOFEN IMMER àBER DIE ELEKTRISCHE :àNDUNG +.
.IEMALS 3TREICHHÚLZER ODER EIN &EUERZEUG BENUTZEN
Hierbei gehen Sie wie folgt vor:
1
$REHEN 3IE DEN $REHREGLER . nach rechts bis zum Anschlag (Abb. K). Mit
EINEM GEWISSEN $RUCK KÚNNTEN 3IE DEN $REHREGLER DANN NOCH ETWAS WEITER
drehen, er federt dann jedoch von selbst wieder zurück.
2
$RàCKEN 3IE DIE :àND4ASTE # VORSICHTIG CA 3EKUNDEN !BB , ABER
nicht zu stark. Spätestens wenn in der Brennkammer eine kleine Flamme
SICHTBAR WIRD LASSEN 3IE DIE :àND4ASTE LOS &ALLS NOTWENDIG 6ORGANG WIEDERHOLEN
3OLLTE BEI ERSTER "ENUTZUNG DES /FENS DER &LAMMENREGLER NICHT VERRIEGELT SEIN
drehen Sie dann den Flammenregler (Abb. M) erst ganz nach links, bevor Sie
DEN $OCHT FàR DIE :àNDUNG IN DIE HÚCHSTE 0OSITION EINSTELLEN +APITEL #
Vor dem Starten des Kaminofens immer kontrollieren, ob die Brennkammer
- gerade steht, indem Sie den Handgriff % kurz nach links und rechts
SCHIEBEN !BB % $IES MU OHNE 3CHWIERIGKEITEN MÚGLICH SEIN 7ENN DIE
Brennkammer schräg steht, führt dies zu Rauch- und Rußentwicklung.
D DAS BRENNEN DES OFENS
.ACHDEM DER +AMINOFEN GESTARTET WURDE DAUERT ES BIS -INUTEN BEVOR 3IE
KONTROLLIEREN KÚNNEN OB DER /FEN GUT BRENNT %INE ZU HOHE &LAMME KANN 2AUCH
und Rußentwicklung verursachen, während eine zu niedrige Flamme zu Geruchs-
BILDUNG FàHRT !UF DER 3EITE NEBEN DEM &ALTBLATT KÚNNEN 3IE SEHEN WIE HOCH DIE
&LAMME MINIMAL UND MAXIMAL BRENNEN !BB 1 SOLLTE 3IE KÚNNEN DIE &LAMME MIT
DEM $REHREGLER " etwas regulieren (Abb. M).
Eine zu niedrige Flamme kann entstehen durch:
! zu wenig Brennstoff (befüllen Sie den Brennstofftank)
! schlechten Brennstoff (wenden Sie sich an Ihren Händler)
! ZU WENIG 6ENTILATION EIN &ENSTER ODER EINE 4àR EINEN 3PALT BREIT ÚFFNEN
! 6ERSCHLEI DES $OCHTES $OCHTWECHSEL ERFORDERLICH SIEHE +APITEL ,
E DAS AUSSCHALTEN DES KAMINOFENS
Lassen Sie den Kaminofen ungefähr eine Minute auf einem niedrigen Stand bren-
NEN !BB - $ANN DREHEN 3IE DEN $REHREGLER " NACH LINKS BIS ZUM !NSCHLAG $IE
&LAMME ERLÚSCHT DANN VON SELBST
M
N
E
Page 24

In Notfällen schalten Sie den Kaminofen durch Eindrücken der Sicherheitstaste
! aus (Abb. N).
F STÖRUNGEN, URSACHEN UND LÖSUNGEN
7ENN SICH EINE 3TÚRUNG NICHT MIT (ILFE DER UNTENSTEHENDEN (INWEISE BEHEBEN LÊT
dann wenden Sie sich bitte an Ihren Händler.
DER OFEN LÄSST SICH NICHT STARTEN.
! $IE "ATTERIEN SITZEN NICHT RICHTIG IM "ATTERIEFACH
Überprüfen (Abb. F).
! $IE "ATTERIESPANNUNG IST ZU NIEDRIG
Austauschen (Abb. F)
! 3IE HABEN DEN +AMINOFEN VOLLSTÊNDIG LEERBRENNEN LASSEN ODER DEN $OCHT
ausgetauscht.
Nach Einsetzen des gefüllten Brennstofftanks 30 Minuten mit dem Starten
warten.
! 3IE HABEN DIE :àND4ASTE # zu stark betätigt.
Behutsam drücken (ca. 2-3 Sekunden) (Kapitel C).
! $IE ELEKTRISCHE :àNDUNG + ist defekt. Wenden Sie sich an Ihren Händler.
UNGLEICHE FLAMME UND/ODER RUSS UND/ODER GERUCH
! $IE "RENNKAMMER - ist nicht richtig eingesetzt.
Mit dem Handgriff % die Brennkammer richtig einsetzen, bis sie sich mühelos
etwas nach links und rechts verschieben läßt.
! Sie benutzen veralteten Brennstoff.
Fangen Sie jede neue Heizsaison mit neuem und richtigem Brennstoff an.
! Sie benutzen einen falschen Brennstoff.
Siehe +/22%+4%2 "2%..34/&& (Kapitel „Wichtig zu wissen”).
! Staubanhäufung im unteren Bereich des Kaminofens.
Wenden Sie sich an Ihren Händler.
! $IE $OCHTHÚHE IST NICHT RICHTIG EINGESTELLT
Wenden Sie sich an Ihren Händler.
DER KAMINOFEN GEHT LANGSAM AUS.
! $ER "RENNSTOFFTANK IST LEER
Siehe Kapitel B.
! Es befindet sich Feuchtigkeit im unteren Reservoir.
Wenden Sie sich an Ihren Händler.
! $ER $OCHT IST AN DER /BERSEITE VERHÊRTET
Kaminofen außerhalb des Wohnraumes vollständig leer brennen lassen
(Kapitel G). Verwenden Sie richtigen Brennstoff.
! Sie benutzen veralteten Brennstoff.
Fangen Sie jede neue Heizsaison mit neuem und richtigem Brennstoff an.
DIE FLAMME DES OFENS BRENNT ZU NIEDRIG.
! $ER $OCHT IST ZU NIEDRIG EINGESTELLT
Wenden Sie sich an Ihren Händler.
! $ER +AMINOFEN HAT VOR DEM .ACHFàLLEN FAST DEN GESAMTEN "RENNSTOFF
verbraucht.
Nach dem Einsetzen des vollen Brennstofftanks 30 Minuten warten, bevor der
Kaminofen erneut gestartet wird.
! Sie benutzen veralteten oder einen falschen Brennstoff.
Siehe KORREKTER BRENNSTOFF (Kapitel „Wichtig zu wissen”).
! $ER 2AUM WIRD NICHT AUSREICHEND VENTILIERT
Ein Fenster oder eine Tür kurz weit öffnen und danach einen Spalt breit offen
lassen.
2
20
F
Page 25

DIE FLAMME DES KAMINOFENS BRENNT ZU HOCH.
! Sie benutzen einen falschen, zu flüchtigen Brennstoff.
Siehe KORREKTER BRENNSTOFF (Kapitel „Wichtig zu wissen”).
! $ER $OCHT IST ZU HOCH EINGESTELLT
Wenden Sie sich an Ihren Händler.
G DIE WARTUNG
)HR +AMINOFEN BENÚTIGT KAUM 7ARTUNG 3TAUB UND &LECKEN SOLLTEN JEDOCH RECHTZEITIG MIT EINEM FEUCHTEN 4UCH ENTFERNT WERDEN DA ANSONSTEN HARTNÊCKIGE &LECKEN
ENTSTEHEN KÚNNEN .ORMALERWEISE SIND NUR DIE FOLGENDEN DREI 4EILE DEM 6ERSCHLEI
ausgesetzt:
1. DIE BATTERIEN
$IESE KÚNNEN 3IE SELBST AUSTAUSCHEN 7ERFEN 3IE DIE ALTEN "ATTERIEN NICHT IN DEN
!BFALLEIMER SONDERN ENTSORGEN 3IE DIESE LAUT DEN ÚRTLICHEN 6ORSCHRIFTEN FàR
chemischen Kleinabfall.
2. DIE ELEKTRISCHE ZÜNDUNG
$IE :àNDSPIRALE HAT EINE LÊNGERE ,EBENSDAUER WENN 3IE DEN +AMINOFEN IMMER
vorsichtig starten. Wechseln Sie die Batterien rechtzeitig aus und achten Sie darauf,
DA 3IE DIE :àND4ASTE NICHT ZU STARK BETÊTIGEN 7ENN DER 'LàHFADEN GERISSEN IST
MU DIE :àNDSPIRALE AUSGETAUSCHT WERDEN
3. DER DOCHT
5M DIE ,EBENSDAUER DES $OCHTES ZU VERLÊNGERN SOLLTEN 3IE DEN +AMINOFEN VON
:EIT ZU :EIT VOLLSTÊNDIG LEER BRENNEN LASSEN BIS ER VON SELBST AUSGEHT 4UN 3IE DIES
SOBALD 3IE MERKEN DA DIE &LAMME ETWAS SCHWÊCHER WIRD $A DIESER 6ORGANG ET-
was Geruch verursacht, empfehlen wir Ihnen, dies außerhalb des Wohnbereiches
zu tun.
%NTFERNEN 3IE SELBST KEINE 4EILE AUS DEM +AMINOFEN 7ENDEN 3IE SICH BEZàGLICH
einer eventuellen Reparatur immer an Ihren Händler.
Bevor Sie Wartungsarbeiten ausführen, muß der Kaminofen ausgeschaltet und
abgekühlt sein.
H LAGERUNG (ENDE DER HEIZSAISON)
Wir empfehlen Ihnen, den Kaminofen am Ende jeder Heizsaison vollständig
leer brennen zu lassen und ihn danach gut aufzubewahren. Beachten Sie dazu
folgende Hinweise:
1
3TARTEN 3IE DEN /FEN AUERHALB DES 7OHNRAUMES UND LASSEN 3IE IHN
voll ständig leer brennen.
2
Lassen Sie den Kaminofen anschließend abkühlen.
3
$EN +AMINOFEN MIT EINEM FEUCHTEN 4UCH REINIGEN UND DANACH MIT EINEM
TROCKENEN 4UCH TROCKEN REIBEN
4
$IE "ATTERIEN AUS DEM "ATTERIEFACH NEHMEN , und an einer trockenen
Stelle aufbewahren.
2
21
Elektrische Zündung mit
gerissenem Glühfaden
Page 26

5
,AGERN 3IE DEN +AMINOFEN STAUBFREI NACH -ÚGLICHKEIT IN DER
/RIGINALVERPACKUNG $EN àBRIGGEBLIEBENEN "RENNSTOFF SOLLTEN 3IE IN DER
nächsten Heizsaison nicht mehr verwenden. Entsorgen Sie übriggebliebenen
Brennstoff gemäß den Vorschriften, die in Ihrer Gemeinde für chemische
Kleinabfälle gelten. Beginnen Sie jede neue Heizsaison immer mit neuem
Brennstoff Beachten Sie wieder die Gebrauchsanweisung (wie beschrieben ab
Kapitel A), wenn Sie den Kaminofen erneut in Betrieb nehmen.
I TRANSPORT
5M ZU VERHINDERN DA DER +AMINOFEN WÊHREND DES 4RANSPORTES "RENNSTOFF VERliert, müssen folgende Maßnahmen getroffen werden:
1
Lassen Sie den Kaminofen abkühlen.
2
Nehmen Sie den Brennstofftank ) aus dem Kaminofen und entfernen Sie den
Brennstofffilter (Abb. O) $IESER KANN EVENTUELL ETWAS NACHTROPFEN HALTEN 3IE
EIN 4UCH BEREIT $EN "RENNSTOFFFILTER UND DEN "RENNSTOFFTANK AUERHALB DES
Kaminofens aufbewahren.
3
3ETZEN 3IE DEN 4RANSPORTVERSCHLU ANSTELLE DES "RENNSTOFFFILTERS EIN !BB 0
und drücken Sie ihn fest, so daß kein Brennstoff austritt.
4
$EN +AMINOFEN IMMER AUFRECHT TRANSPORTIEREN
J T EC HNI SC HE DA TE N
:àNDUNG ELEKTRISCH !BMESSUNGEN MM "REITE
Brennstoff Petroleum (einschließlich Bodenplatte) 4IEFE
Kapazität (kW)
*
(ÚHE
Geeigneter Raum (m3)
**
:UBEHÚR 4RANSPORTVERSCHLU
Brennstoffpumpe
"RENNSTOFFVERBRAUCH ,TR3TD* "ENÚTIGTE "ATTERIEN
X 2K' -.
"RENNSTOFFVERBRAUCH G3TD* 6
"RENNDAUER PRO 4ANK 3TD
*
$OCHTTYP &
Inhalt Brennstofftank (Liter) 4,0
Gewicht (kg) 8,0
"EI %INSTELLUNG AUF MAXIMALEM 3TAND
** Angegebene Werte sind Richtwerte
K GARANTIEBEDINGUNGEN
Sie erhalten auf Ihren Kaminofen 48 Monate Garantie ab Kaufdatum. Innerhalb
DIESER :EIT WERDEN ALLE -ATERIAL UND (ERSTELLUNGSFEHLER KOSTENLOS BEHOBEN (IERbei gelten folgende Regeln:
1
Alle weiteren Ansprüche auf Schadenersatz, inklusive Folgeschäden, werden
nicht anerkannt.
2
2EPARATUR ODER !USTAUSCH VON 4EILEN INNERHALB DER 'ARANTIEZEIT FàHRT NICHT
zur Verlängerung der Garantie.
3
$IE 'ARANTIE VERFÊLLT WENN 6ERÊNDERUNGEN ANGEBRACHT WURDEN .ICHT
/RIGINAL 4EILE MONTIERT ODER 2EPARATUREN DURCH $RITTE AM +AMINOFEN
ausgeführt wurden.
2
22
Transportverschluß
O
P
Page 27

4
4EILE DIE NORMALEM 6ERSCHLEI AUSGESETZT SIND WIE DIE :àNDSPIRALE DIE
"ATTERIEN DER $OCHT UND DIE 3YPHONPUMPE FALLEN NICHT UNTER DIE 'ARANTIE
5
$IE 'ARANTIE GILT AUSSCHLIELICH UNTER 6ORLAGE DER DATIERTEN /RIGINALRECHNUNG
auf der keine Veränderungen vorgenommen wurden.
6
$IE 'ARANTIE GILT NICHT BEI 3CHÊDEN DIE DURCH ZWECKWIDRIGE (ANDLUNGEN
entstanden sind, beziehungsweise durch Verwahrlosung und durch die
Benutzung von falschem oder veraltetem Brennstoff. Falscher Brennstoff
kann sogar gefährlich sein.*
7
$IE 6ERSANDKOSTEN UND DAS 6ERSANDRISIKO DES +AMINOFENS ODER DESSEN 4EILE
GEHEN ZU ALLEN :EITEN ZU ,ASTEN DES +ÊUFERS
5M UNNÚTIGE +OSTEN ZU VERMEIDEN EMPFEHLEN WIR )HNEN IMMER ZUERST SORGFÊLTIG
DIE 'EBRAUCHSANWEISUNG ZU LESEN &INDEN 3IE DARIN KEINE ,ÚSUNG WENDEN 3IE SICH
an Ihren Händler.
,EICHT ENTZàNDLICHE 3TOFFE KÚNNEN ZUM "EISPIEL ZU UNKONTROLLIERBARER 6ERBRENNUNG FàHREN DIE AUSSCHLAGENDE
Flammen zur Folge haben. Versuchen Sie in diesem Fall nie, den Kaminofen zu transportieren, sondern schalten
Sie den Kaminofen unverzüglich aus (siehe Kapitel E). )N .OTFÊLLEN KÚNNEN 3IE EINEN &EUERLÚSCHER BENUTZEN
JEDOCH AUSSCHLIELICH EINEN +OHLENDIOXID ODER 0ULVER&EUERLÚSCHER
11 TIPS ZUR SICHERHEIT
1 Kinder sind zu beaufsichtigen, um sicherzugehen, dass sie nicht mit dem
Gerät spielen.
2 4RANSPORTIEREN 3IE DEN /FEN NICHT WENN ER BRENNT ODER NOCH HEI IST )N
diesem Fall auch keine Wartungsarbeiten durchführen.
3 Stellen Sie den Kaminofen so auf, daß er sich mit der Vorderseite
MINIMAL -ETER VON -AUERN 'ARDINEN UND -ÚBELN BEFINDET !CHTEN
Sie ebenfalls darauf, daß der Raum über dem Kaminofen frei ist.
4 Benutzen Sie den Kaminofen nicht in staubigen Räumen und nicht an
Stellen, an denen es stark zieht. In beiden Fällen erhalten Sie keine
optimale Verbrennung. Benutzen Sie den Kaminofen nicht in unmittel-
BARER 5MGEBUNG EINER "ADEWANNE $USCHE ODER EINES 3WIMMINGPOOLS
5 Schalten Sie den Kaminofen aus, bevor Sie das Haus verlassen oder zu
Bett gehen.
6 Bewahren und transportieren Sie den Brennstoff ausschließlich in den
DAZU BESTIMMTEN 4ANKS UND +ANISTERN
7 !CHTEN 3IE DARAUF DA DER "RENNSTOFF NICHT (ITZE ODER EXTREMEN
4EMPERATURUNTERSCHIEDEN AUSGESETZT WIRD ,AGERN 3IE DEN "RENNSTOFF
IMMER AN EINEM KàHLEN TROCKENEN UND DUNKLEN /RT 3ONNENLICHT
schadet der Qualität).
8 Benutzen Sie den Kaminofen niemals an Stellen, an denen schädliche
'ASE ODER $ÊMPFE AUFTRETEN KÚNNTEN ZUM "EISPIEL !USPUFFGASE ODER
Farbdämpfe).
9 $AS 'ITTER DES +AMINOFENS WIRD HEI $ER +AMINOFEN DARF NICHT
abgedeckt werden (Brandgefahr).
10 Achten Sie immer auf ausreichende Ventilation.
11 $IESES 'ERÊT DARF NICHT VON KÚRPERLICH GEISTIG ODER SENSORISCH EINGE
schränkten Personen (oder Kindern) benutzt werden oder von Personen,
die unzureichende Erfahrung und Kenntnisse haben, es sei denn dies
erfolgt unter Aufsicht und Anleitung zur Verwendung des Geräts durch
jemanden, der für die Sicherheit dieser Personen zuständig ist.
2
23
20cm
100cm
50cm
150cm
50cm
Page 28

2
24
WECHSELN DES DOCHTES
L D ER OFEN M USS GANZ A BGEKÜ H LT SEIN , B EVOR
SIE MIT DEM DOCHTWECHSEL BEGINNEN.
1
½FFNEN 3IE DEN $ECKEL UND NEHMEN 3IE DEN "RENNSTOF
tank heraus.
2
Nehmen Sie die Batterien aus dem Batteriefach.
3
$AS 'ITTER AUS DER +ERBUNG HEBEN UND NACH VORN
ZIEHEN $IE "RENNKAMMER AUS DEM /FEN NEHMEN $AS
Gitter schließen.
4
$EN $REHREGLER VOM /FEN ABZIEHEN
5
$IE DREI 'EHÊUSESCHRAUBEN AN DER 5NTERSEITE LÚSEN $AS
Gehäuse ein wenig nach vorn ziehen und von der
Bodenplatte abnehmen.
6
$IE &LàGELMUTTERN UNTER DEM "RENNERSITZ LÚSEN
7
(EBEN 3IE $EN "RENNERSITZ UND DEN $OCHTMECHANISMUS
hoch.
8
$IE 3CHRAUBE DIE DEN (ALTER FESTHÊLT AUS DER !CHSE DREhen. Halter entfernen.
9
Halter bis zum Ende nach rechts drehen und den
$OCHTHALTER ENTFERNEN INKL $OCHT
10
$REHEN 3IE DEN $OCHTHALTER GEGEN DEN 5HRZEIGERSINN
UND HEBEN DEN $OCHTHALTER AN %NTFERNEN 3IE DEN
$OCHTHALTER VON DER ERSTEN ,àFTÚFFNUNG
11
$OCHT DRàCKEN UM DIE DREI $OCHTSTIFTE ZU LÚSEN UND UM
DEN $OCHT VOM $OCHTHALTER ZU ENTFERNEN $AFàR SOR-
gen, dass Sie Handschuhe tragen und ein Behälter für
DEN GEBRAUCHTEN $OCHT BEREITSTEHT
Page 29

2
25
12
$EN $OCHT IN DEN $OCHTHALTER IN DIE 2ICHTUNG DIE AUF
DEM $OCHTHALTER EINGRAVIERT IST EINSETZEN
13
$REHEN 3IE DEN $OCHTHALTER GEGEN DEN 5HRZEIGERSINN
UND HEBEN DEN $OCHTHALTER AN %NTFERNEN 3IE DEN
$OCHTHALTER VON DER ERSTEN ,àFTÚFFNUNG
14
$EN (ALTER EINBAUEN $ANACH DIE 3CHRAUBE ANZIEHEN
die den Halter festhält.
15
$EN "RENNERSITZ WIEDER MONTIEREN
16
$IE &LàGELMUTTERN GLEICHMÊIG HANDFEST ANZIEHEN
17
$EN 2ÊNDELDREHKNOPF FàR DEN $OCHT AUF DEN $OCHTME
CHANISMUS SETZEN $EN +NOPF SO WEIT WIE MÚGLICH NACH
rechts drehen. Auf die Kippsicherung drücken, um zu
KONTROLLIEREN OB DER $OCHT VOLLSTÊNDIG HINABGELASSEN
werden kann. Mehrere Male wiederholen. Wenn der
$OCHT NICHT GANZ NACH UNTEN GESCHOBEN WERDEN KANN
wurde er nicht ordnungsgemäß eingesetzt. Ist das der
&ALL !RBEITSWEISE AB 0UNKT WIEDERHOLEN $EN
$REHREGLER VOM /FEN ABZIEHEN
18
$AS 'EHÊUSE WIEDER AUFSETZEN UND DIE DREI 3CHRAUBEN
FESTDREHEN $EN 2ÊNDELDREHKNOPF DES $OCHTES EINSTELLEN $ANN DIE "RENNKAMMER WIEDER EINSETZEN +ONTROL
lieren Sie, ob diese gerade steht, indem Sie mit dem
(ANDGRIFF KURZ NACH LINKS UND RECHTS SCHIEBEN $AS
Gitter schliessen.
19
$EN GEFàLLTEN "RENNSTOFFTANK WIEDER AUFSETZEN $IE
Batterien in das Batteriefach einlegen (achten Sie dabei
auf die + und – Pole). Nach dem Einsetz e n des
Brennstofftanks und der Batterien müssen Sie 30
-INUTEN WARTEN BEVOR 3IE DEN /FEN STARTEN
Page 30

! ! ! ! ! ! ! ! ! ! ! ! ! ! ! ! ! ! ! ! ! ! ! ! ! ! ! ! ! ! ! ! ! ! ! ! ! ! ! ! ! ! ! ! ! !
" Q
1-3 cm.
Page 31

! " #
$
%
&
'
(
)
*
+
,
Page 32

D
Benötigen Sie weitere Informationen oder treten Probleme auf, besuchen Sie bitte unsere Website www.zibro.com, oder setzen Sie sich mit
unserem Kundendienst in Verbindung (Telefonnummer auf www.zibro.com).
For alle yderligere oplysninger eller ved eventuelle problemer med apparatet henvises til www.zibro.com eller det lokale Kundecenter (telefon-
numre findes i www.zibro.com).
Si necesita información o si tiene algún problema, visite nuestra página Web www.zibro.com, o póngase en contacto con el servicio cliente
(hallará el número de teléfono en www.zibro.com).
F
Si vous souhaitez obtenir des informations supplémentaires ou si vous rencontrez un problème, rendez-vous sur notre site Web (www.zibro.
com) ou contactez le notre service client (vous trouverez l’adresse et numéro de téléphone sur www.zibro.com).
Jos haluat huoltoapua, lisätietoja tai laitteen kanssa tulee ongelmia, tutustu verkkosivustoon osoitteessa www.zibro.com tai kysy neuvoa PVG
kuluttajapalvelukeskuksesta (www.zibro.com).
If you need information or if you have a problem, please visit the our website (www.zibro.com) or contact our sales support (you find its phone
number on www.zibro.com)
I
Per informazioni e in caso di problemi, visitate il sito Web www.zibro.com oppure contattate il Centro Assistenza Clienti (per conoscere il numero
di telefono, consultate www.zibro.com).
N
Hvis du trenger informasjon, eller hvis du har et problem med produktet, kan du gå til nettsidene www.zibro.com. Alternativt kan du kontakte
med PVG’ forbrukertjeneste (telefonnummeret i www.zibro.com).
Als u informatie nodig hebt of als u een probleem hebt, bezoek dan de onze website (www.zibro.com) of neem contact op met de afdeling
sales support (adres en telefoon op www.zibro.com).
P
Se necessitar de informações ou se tiver problemas, visite o Web site www.zibro.com ou contacte o Centro de Assistência (número de telefone
o www.zibro.com)
W przypadku problemów i w celu uzyskania szczegółowych informacji odwiedź stronę internetową Zibro dostępną pod adresem www.zibro.
com lub skontaktuj się z Centrum kontaktów Zibro (www.zibro.com)
S
Om du behöver service eller information eller har problem med apparaten kan du besöka www.zibro.com eller kontakta Zibro kundtjänst (du
hittar telefonnumret på www.zibro.com).
Če želite dodatne informacije, obiščite spletno mesto podjetja na naslovu www.zibro.com ali pokličite na telefonsko (www.zibro.com).
Daha fazla bilgiye ihtiyaç duyarsanız veya bir sorunla karşılaşırsanız, www.zibro.com adresindeki Zibro Internet sitesini ziyaret edin veya ülkenizde
bulunan Zibro müşteri merkeziyle iletişim kurun (telefon numarasını: www.zibro.com).
--- --- -- ----
-- -- --- -----
-- -- --- -----
-- ---- -- ----
-- -- --- -----
-- -- --- -----
--- --- -- ----
-- ---- -- ----
www.zibro.com
Distributed in Europe by PVG Holding B.V.
PVG Traffic avg©110518 man_R26T
New 06/11
Zibro® is registered trademark of TOYOTOMI Co., Ltd. for paraffin heaters.
ZIBRO brand paraffin heaters are made in Japan and imported by PVG Holding B.V.
Printed in Japan
7997000903
 Loading...