

Page 1
®
LASER
LIMITED EDITION
6
3
4
>
1
BRUGSANVISNING
MANUEL D'UTILISATION
OPERATING INSTRUCTIONS
ISTRUZIONI D’USO
GEBRUIKSAANWIJZING
2
12
22
32
42
Page 2

Kære kunde
Hjertelig tillykke med anskaffelsen af Deres Zibro Kamin, det førende mærke
blandt flytbare kaminer. De har anskaffet Dem et absolut kvalitetsprodukt,
som De vil få glæde af mange år frem i tiden.
Naturligvis forudsat at kaminen anvendes på forsvarlig vis. Læs derfor først
denne brugsanvisning, så Deres Zibro Kamin kan holde længe.
På fabrikantens vegne yder vi 2 års garanti på alle opståede materiale- og
fremstillingsfejl.
Vi ønsker Dem meget varme og komfort med Deres Zibro Kamin.
Med venlig hilsen
PVG Scandinavia A/S
Kundeservice
1 LÆS FØRST BRUGSANVISNINGEN.
2 KONTAKT DERES ZIBRO KAMIN FORHANDLER, HVIS DE HAR YDERLIGERE SPØRGSMÅL.
3 FOLD DEN SIDSTE SIDE UD FØR DE LÆSER BRUGSANVISNINGEN. E E E E E E E E
6
2
Page 3

GENERELT OM BRUGEN
Dette er i store træk, hvordan Deres Zibro Kamin skal
anvendes. For yderligere information henvises der til
VEJLEDNINGEN.
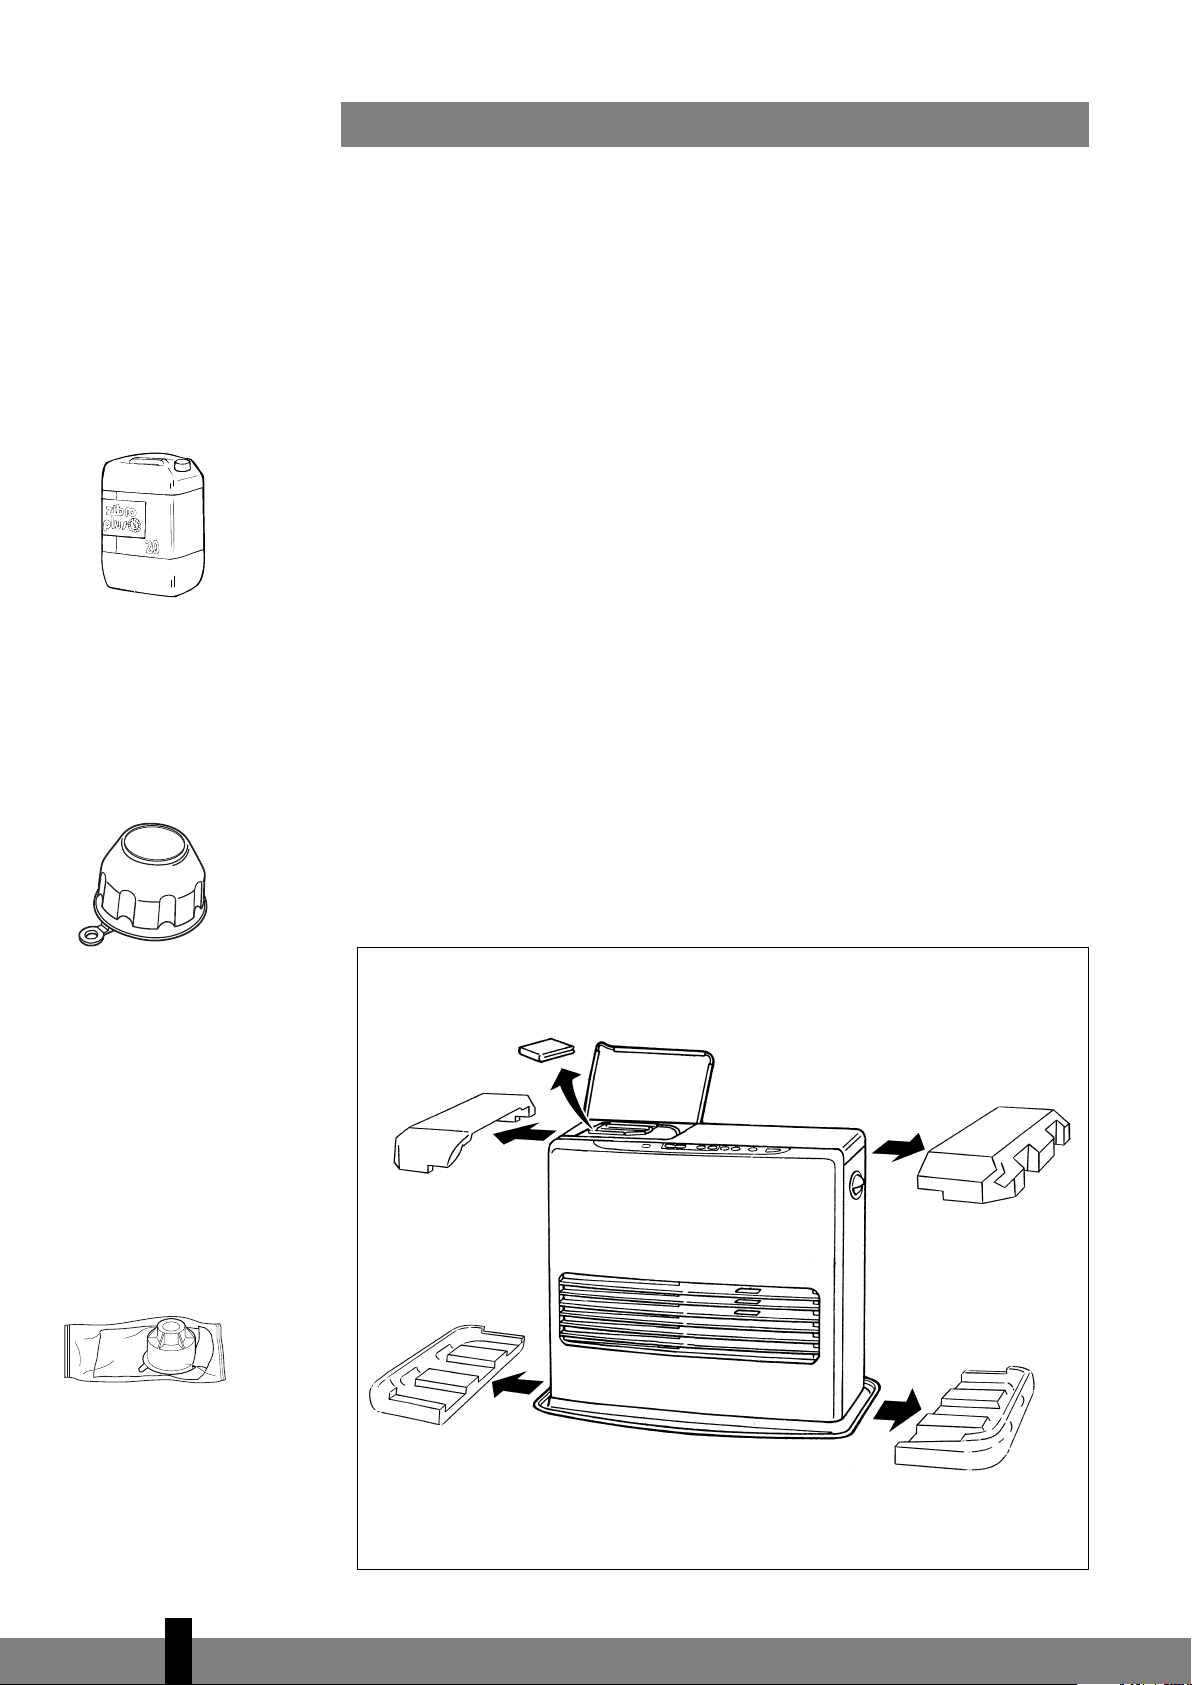
Fjern alt emballagemateriale (se kap. A, fig. A)
1
Fyld brændstoftanken 7 (se kap. B, fig. D).
2
Sæt stikket i stikkontakten.
3
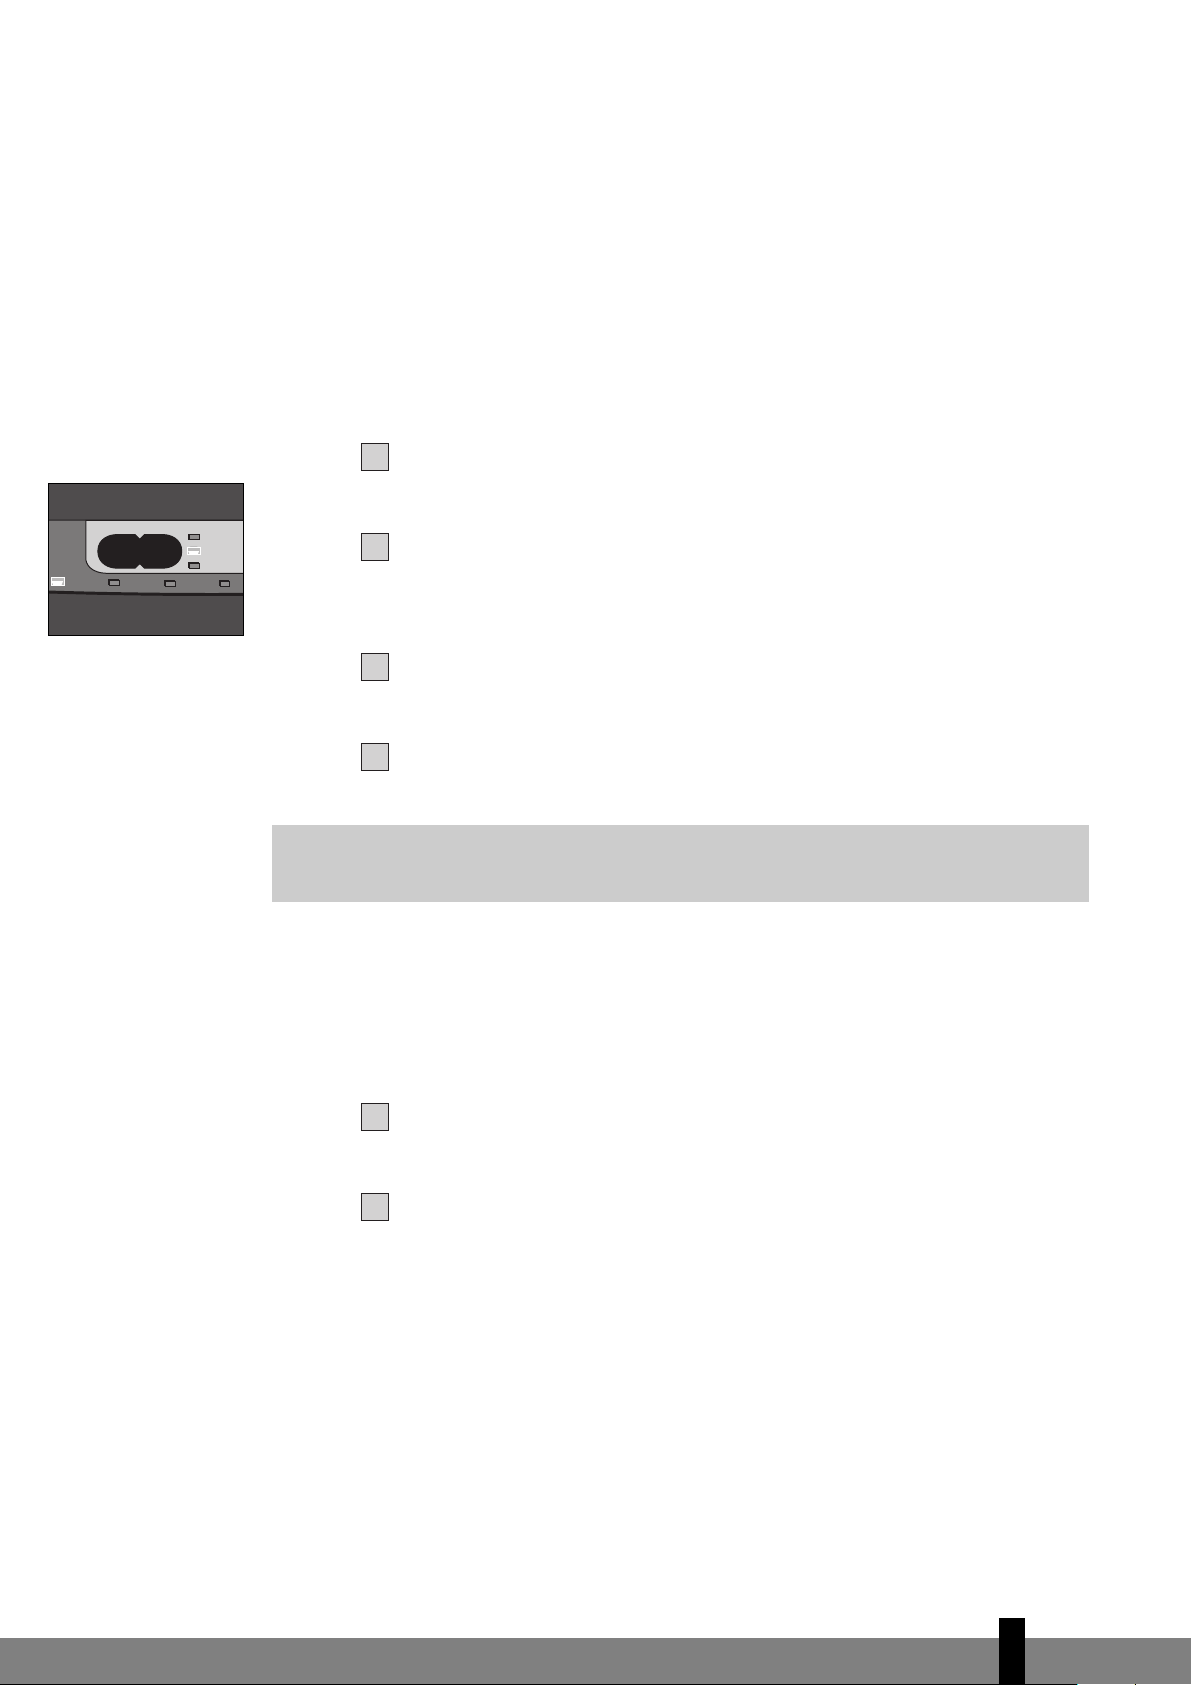
VIGTIGE DELE
A
Frontpanel
B
Frontgitter
C
Bundplade
4
Tankrumslåg
E
Betjeningspanel
F
Håndtag
G
Brændstoftank
Tænd for kaminen på ON/OFF knappen
4
Hvis De ønsker at ændre temperaturen, brug
5
da indstillingsknapperne
Sluk for kaminen på ON/OFF knappen N.
6
(se kap. E).
• Den første gang kaminen tændes, lugter den
"ny", når den brænder.
• Opbevar brændstoffet på et køligt og mørkt sted.
• Brændstof ældes. Start altid fyringssæsonen med
nyt brændstof.
• Når De fyrer med Zibro Plus, er De garanteret
brændstof af den rigtige kvalitet.
• Hvis De skifter til en andet mærke petroleum, skal
De lade kaminen brænde helt tom først.
N (se kap. D).
H
Luftfilterskærm
I
Ventilatorfilter
J
Termostat
K
Vaterpasset
Stik og ledning
L
Informationsdisplay
M
ON/OFF knap
N
Børnesikring
O
Indstillingsknapper
P
(tid og temperatur)
Timer
Q
SAVE-knap
R
Kontrollys
S
E E E E E E E E E E E E E E E E E E E E E E E
6
3
Page 4
Kun med det rigtige
brændstof er De
garanteret en ufarlig,
effektiv og optimal brug
af Deres Zibro Kamin.
INDEN DE TÆNDER FOR KAMINEN
SØRG ALTID FOR TILSTRÆKKELIG VENTILATION
For alle Zibro Kamin modeller gælder et bestemt minimumsrum, hvor kaminen
kan bruges uden ventilation og uden fare (se kap. P). Hvis det pågældende rum er
mindre end angivet, skal der altid åbnes et vindue eller en dør på klem (± 2,5 cm).
Dette tilrådes også i rum, der er velisolerede eller uden gennemtræk og/eller som
ligger over 1500 m. Hvis der ikke er tilstrækkelig ventilation (læs: ilt), slukkes
kaminen automatisk. Brug ikke deres Zibro Kamin i kældre eller andre rum under
jordhøjde som er uden ventilation.
DET RIGTIGE BRÆNDSTOF
Deres Zibro Kamin er fremstillet til at anvende vandfri, ren petroleum af høj
kvalitet som f.eks. Zibro Plus. Kun ved at anvende et sådant brændstof opnår man
en ren og optimal forbrænding. Anvendelse af brændstof af ringere kvalitet kan
medføre:
E større risiko for funktionsfejl
E ufuldstændig forbrænding
E at kaminen ikke holder så længe, som den ellers ville
E røg og/eller stank
E anslag på frontgitter eller kappe
Dækselåbneren befinder
sig på bagsiden af
kaminen. Med dæksel-
åbneren undgås snavsede
hænder, når
brændstoftanken åbnes.
Forklaring: "dæksel-
åbneren" er en
plastikhætte, der an-
bringes over dækslet (for
at åbne eller lukke det),
så man ikke får brænd-
stof på hænderne!
Det rigtige brændstof er derfor af stor betydning for en ufarlig, effektiv og
optimal brug af kaminen.
Spørg altid den nærmeste Zibro Kamin forhandler om den rigtige type brændstof
til Deres kamin.
A
Denne transportprop
findes løst i kassen. Kun
med denne kan
kaminen transporteres
uden problemer. Gem
den derfor omhyggeligt!
6
4
Page 5
VEJLEDNING
54321654321
A INSTALLATION AF KAMINEN
Tag forsigtigt Deres Zibro Kamin ud af kassen og kontrollér indholdet.
Udover kaminen skal der være følgende:
E en manuel hævepumpe
E en transportprop
E en dækselåbner
E denne brugsanvisning
Gem kassen og emballagematerialet (fig. A) til opbevaring og transport
af kaminen.
E E E E E E
rigtigt forkert
C1
Åbn tankrumslåget
fast på indersiden af tankrumslåget.
Fyld brændstoftanken som det beskrives i
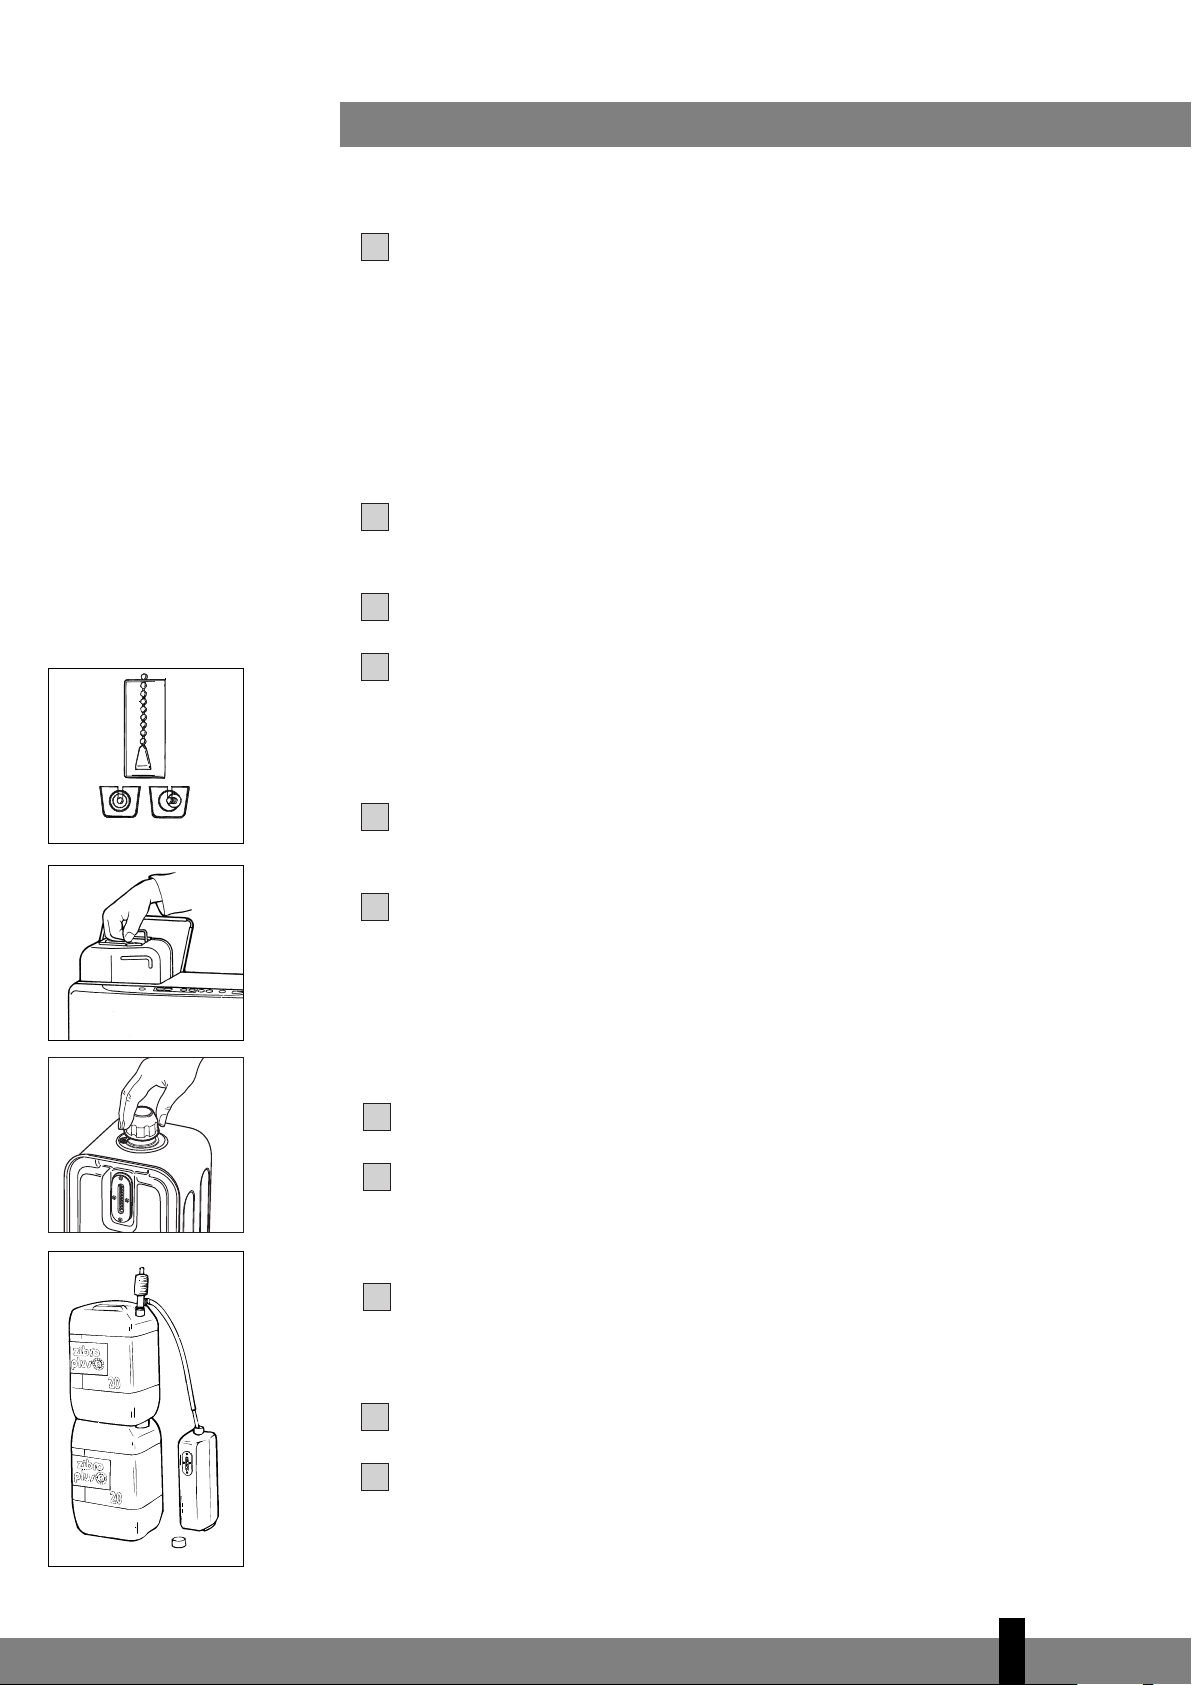
Gulvet skal være stabilt og i vater. Kontroller dette med vaterpasset K.
B
C
Se lige på vaterpasset. Hvis loddet falder indenfor cirklen, står kaminen rigtigt
(fig. B). Flyt kaminen hvis den ikke står i vater. Forsøg ikke at korrigere ved at
ligge bøger eller andet under kaminen.
Sæt stikket
den korrekte tid med indstillingsknapperne
Deres Zibro Kamin er nu klar til brug.
L i stikkontakten (220/230 Volt - vekselstrøm 50 Hz), og indstil
7, og fjern det lille stykke karton. Sæt klistermærket
kap. B.
P (se kap. C).
B PÅFYLDNING AF BRÆNDSTOF
Fyld ikke brændstoftanken i beboelsesrum, men anvend et mere velegnet sted
(man kan altid komme til at spilde lidt). Påfyldning foretages således:
Kontrollér at kaminen er slukket.
Åbn tankrumslåget
opmærksom på at det kan dryppe lidt fra tanken. Sæt brændstoftanken ned
(med proppen opad), og skru tankproppen af på med dækselåbneren (fig. C1).
D
Stik det glatte og hårdeste rør på hævepumpen ned i dunken. Sørg for at
denne står højere end brændstoftanken (fig. D). Den ribbede slange stikkes
ind i åbningen på brændstoftanken.
Drej knappen øverst på pumpen fast (til højre).
Tryk på pumpens håndtag et par gange, til brændstoffet begynder at løbe
ned i brændstoftanken. Når dette sker, behøver man ikke trykke mere på
pumpen.
4, og tag brændstoftanken 7 op af kaminen (fig. C). Vær
6
5
Page 6
E
F
U
E
L
V
E
N
T
S
A
TEMP
CLOCK
TIMER
19:14
SET ROOM
F
U
E
L
V
E
N
T
S
A
TEMP
CLOCK
TIMER
20:15
SET ROOM
8
7
6
Hold øje med brændstofmeteret på brændstoftanken G under påfyldning
(fig. E). Når den er fuld, standses påfyldningen ved at dreje knappen øverst på
pumpen løs (til venstre). Fyld ikke tanken for meget, især ikke hvis brændstoffet er meget koldt (brændstoffet udvider sig, når det bliver varmere).
Tom Fuld
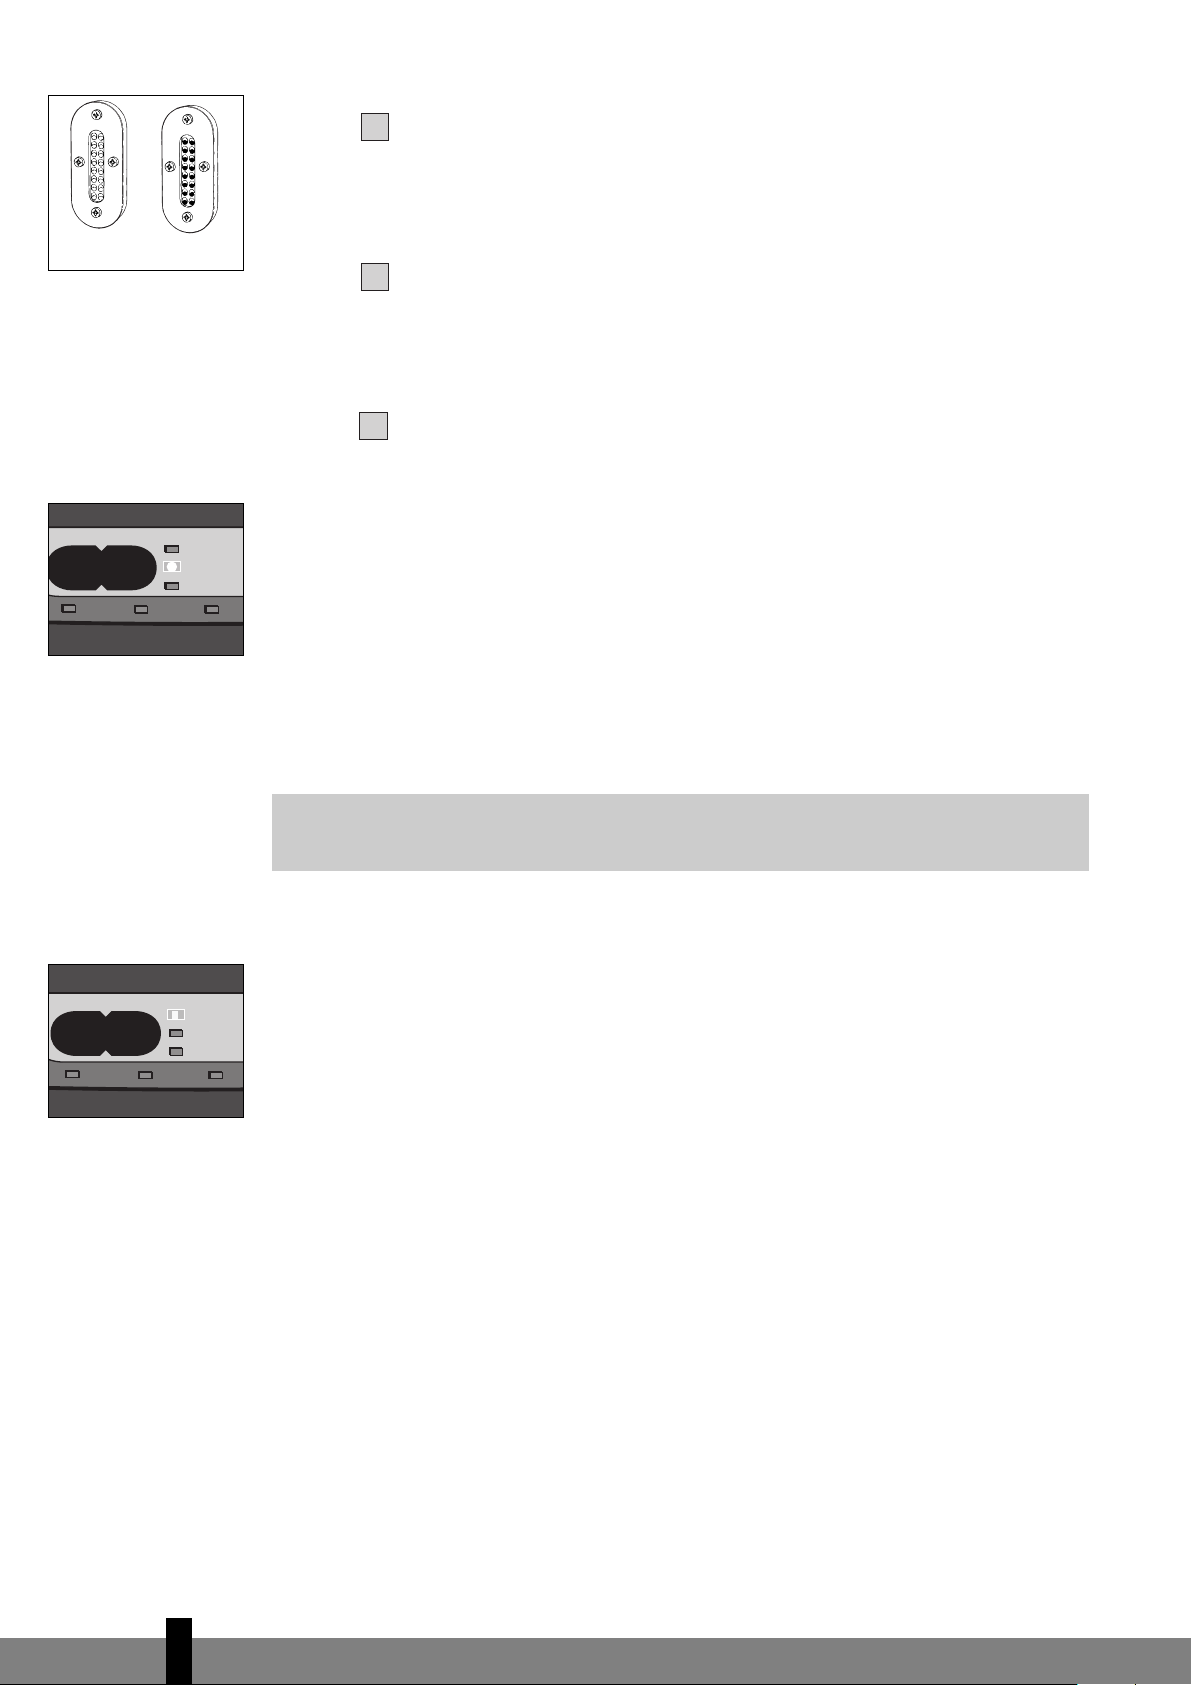
F: Når lampen CLOCK
holder op med at blinke,
er indstillingen fastlagt
Lad brændstoffet, som er blevet til overs i pumpen løbe tilbage i dunken og
fjern forsigtigt pumpen. Skru tankens dæksel godt på med dækselåbneren.
Åbneren opbevares efter brug på bagsiden af kaminen. Fjern eventuelt spildt
brændstof.
Kontrollér at tankproppen sidder rigtigt og er skruet fast. Sæt brændstoftanken tilbage i kaminen (med proppen nedad). Luk tankrumslåget.
C INDSTILLING AF URET
Uret kan kun indstilles, når stikket er i stikkontakten, og kaminen ikke er tændt.
Brug indstillingsknapperne
at aktivere denne funktion (lampen CLOCK ved siden af displayet begynder at
blinke). Derefter kan timerne indstilles med den venstre knap (
minutterne med knappen til højre (
med én. Hvis knappen holdes inde, forøges værdien indtil knappen slippes. Efter ca.
10 sekunder holder lampen op med at blinke, og indstillingen er fastlagt.
Hvis stikket har været ude af stikkontakten (eller hvis strømmen på anden måde
☞
har været afbrudt), skal indstillingerne foretages igen.
P til at indstille uret. Tryk først på en af knapperne for
NHOUR) og
MMIN). Ved at trykke én gang forøges værdien
G: Den ønskede
temperatur angives til
venstre og den aktuelle
til højre.
6
D SÅDAN TÆNDES KAMINEN
En ny kamin kan i starten forårsage en svag lugt. Sørg derfor for ekstra
ventilation.
For at tænde for kaminen trykkes blot på ON/OFF knappen
blinke, hvilket betyder, at tændingsprocessen er aktiveret. Dette varer et øjeblik.
Når kaminen brænder, vil ON/OFF knappen lyse rødt. Informationsdisplayet
viser 2 tal. På lampen ved siden af dem fremgår det, at disse tal vedrører
temperaturen (fig. G). Under ROOM er den aktuelle rumtemperatur angivet, og
under SET er den indstillede temperatur angivet. Den sidstnævnte funktion kan
ændres med indstillingsknapperne
(se kap. E).
N. Denne begynder at
M
E INDSTILLING AF DEN ØNSKEDE TEMPERATUR
Den indstillede temperatur kan kun ændres, hvis kaminen er tændt. Temperaturen
ændres med indstillingsknapperne
aktivere funktionerne (lampen TEMP ved siden af informationsdisplayet
begynder at blinke). Derefter kan De forhøje den ønskede temperatur ved at
trykke på den venstre knap (HOUR) eller sænke den med den højre knap (MIN).
Ved at trykke én gang forøges værdien med én. Efter ca. 10 sekunder holder
lampen op med at blinke, og indstillingen er fastlagt (fig. G).
Temperaturen kan indstilles til min. 6° og max. 28° C.
6
P. Tryk først på en af knapperne for at
M
Page 7
Hvis stikket har været ude af stikkontakten (eller strømmen har været afbrudt),
21432
1
T
I
M
E
R
F
U
E
L
V
E
N
T
S
TEMP
CLOCK
TIMER
20:15
SET ROOM
genindstilles temperaturen til 20° C.
F BRUG AF TIMEREN
Med timeren kan kaminen tændes automatisk på et forud indstillet tidspunkt.
For at kunne indstille timeren skal uret være rigtigt indstillet
kaminen skal være slukket.
Sådan indstilles timeren:
(se kap. C), og
H: Kontrollampen TIMER
angiver, at TIMER
funktionen er aktiveret.
Tryk på ON/OFF knappen
Lampen TIMER ved siden af displayet
Indstil tidspunktet som kaminen skal tændes på ved hjælp af indstillingsknapperne
knappen til højre (
P. Anvend knappen til venstre (NHOUR) til at indstille timer og
MMIN) til at indstille minutter (se kap. C).
Efter ca. 10 sekunder skifter informationsdisplayet tilbage til CLOCK og
lampen TIMER tændes, hvilket angiver, at timerfunktionen er aktiveret (fig. H).
Timeren sørger for, at rummet så vidt muligt har den ønskede temperatur på
det indstillede tidspunkt.
Hvis De ønsker at slukke kaminen og lade den tænde igen med timeren,
☞
behøver De kun at trykke på knappen TIMER
For at annullere timerindstillingen trykkes én gang på ON/OFF knappen N.
G SÅDAN SLUKKES KAMINEN
Kaminen kan slukkes på to måder.
N og umiddelbart derefter på TIMER knappen Q.
M begynder nu at blinke.
(se kap. G).
Tryk på ON/OFF knappen
N. Informationsdisplayet skifter til CLOCK, og
flammen slukkes i løbet af ca. et minut.
Hvis De vil slukke kaminen og næste gang lade timeren tænde den, trykkes på
knappen TIMER
Sålænge at lampen TIMER ved siden af displayet
indstillede tid ved at trykke på knappen
Q. Foruden at slukke kaminen aktiveres også timeren.
M blinker, kan De ændre den
P (se kapitel F).
H INFORMATIONSDISPLAYET
Informationsdisplayet M er ikke kun beregnet til at vise den indstillede tid og
temperatur
Koden i informationsdisplayet fortæller Dem, hvad der er galt:
(kap. C, E og F), men også til at give meddelelse om funktionsfejl.
6
7
Page 8
R
F
U
E
L
V
E
e-: 0
SET ROOM
Hvis der opstår nogen
N
T
S
A
V
E
TEMP
CLOCK
TIMER
HOUR MIN
funktionsfejl, fortæller
informationsdisplayet,
hvad der er i vejen.
KODE INFORMATION HANDLING
e - 0
Temperaturen i kaminen er for høj /
Strømafbrydelse. Tænd kaminen igen
Lad kaminen afkøle og genstart.
e - 1 Defekt termostat /
Defekt brændertermistor. Kontakt forhandleren.
e - 2 Startproblemer. Kontakt forhandleren.
e - 5 Væltesikring. Tænd kaminen igen.
e - 6 Dårlig forbrænding. Kontakt forhandleren.
e - 7 Rumtemperatur højere end 28°C. Hvis nødvendigt tændes kaminen igen.
e - 8 Defekt ventilatormotor. Kontakt forhandleren.
e - 9 Snavset luftfilter; eller. Rens filter
snavset brændstofpumpe Kontakt din forhandler.
-- : -- Ikke mere brændstof Påfyld brændstoftanken.
(& blinke
FUEL-lampe)
-- : -- For lidt ventilation. Ventiler bedre.
(& blinke
VENT-lampe)
Optræder der funktionsfejl, som ikke er omtalt i oversigten ovenfor, kontakt da
Deres Zibro Kamin forhandler.
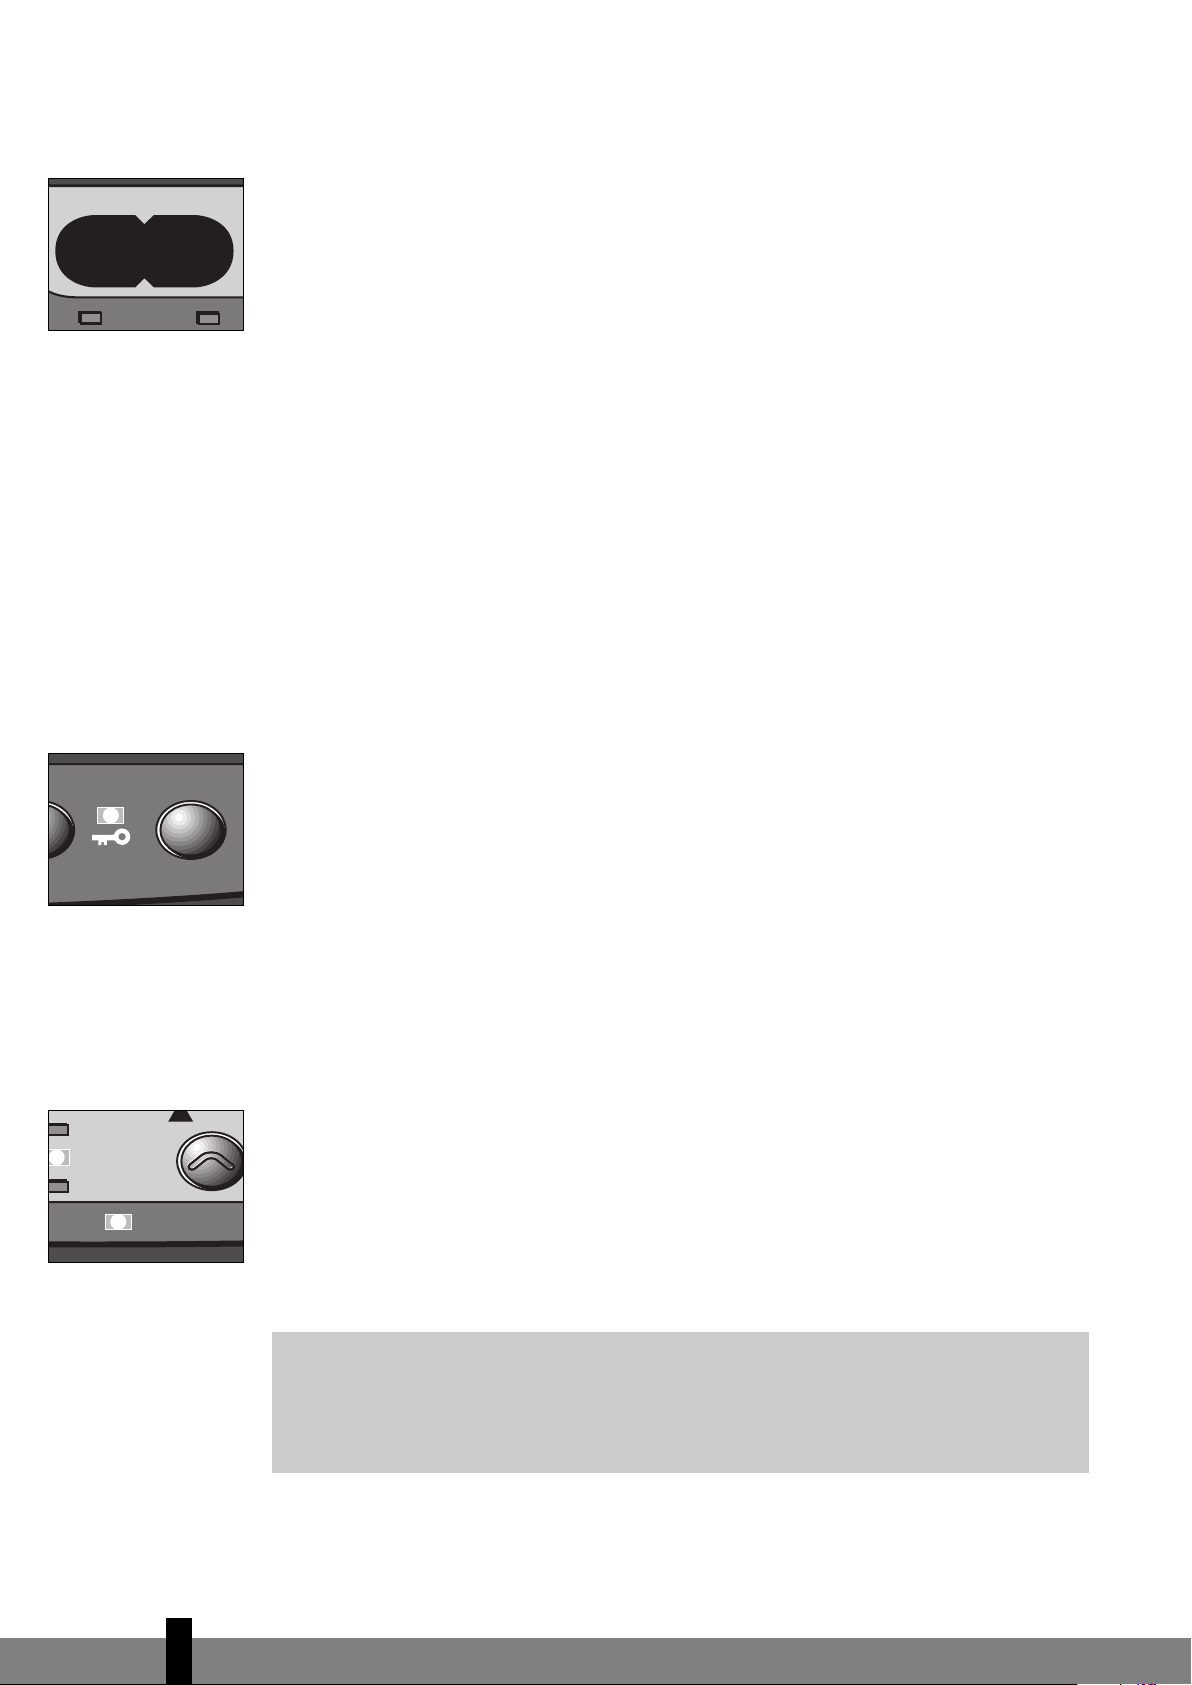
I: Når lampen KEY-LOCK
begynder at lyse, er
børnesikringen aktiveret.
J: Når lampen SAVE lyser,
slukkes eller tændes
kaminen automatisk,
sådan at temperaturen
holder sig inden for et
bestemt
temperaturområde.
I BØRNESIKRING
Børnesikringen kan bruges til at forhindre, at børn ændrer kaminens indstillinger
ved et uheld. Når kaminen er tændt, og børnesikringen slået til , kan kaminen kun
slukkes. Andre funktioner er spærret. Hvis kaminen allerede er slukket, forhindrer
børnesikringen også, at kaminen tændes ved et uheld.
Børnesikringen aktiveres ved at holde den pågældende knap
sekunder. Lampen KEY-LOCK tændes (fig. I), hvilket angiver, at børnesikringen er
aktiveret. Børnesikringen slås fra ved at trykke på knappen
mere end 3 sekunder.
J DEN KORREKTE BRUG AF "SAVE"
Med "SAVE" funktionen kan temperaturen holdes inden for et bestemt område.
Når denne funktion er aktiveret, slukkes kaminen automatisk, hvis rumtemperaturen ligger mere end 4°C over den indstillede temperatur. Når temperaturen
igen når den indstillede temperatur, tændes kaminen automatisk igen.
"SAVE" aktiveres ved at trykke den pågældende knap
lyser (fig. J). Ved at trykke på SAVE igen slås funktionen fra.
Også uden indstillingen "SAVE" sørger kaminen for, at den indstillede
temperatur så vidt muligt holdes, ved at dens opvarmningskapacitet tilpasses.
☞
"SAVE" er en energisparefunktion, der kan slukke kaminen hvis temperaturen
kommer 3 °C over det indstillede.
O nede i mere end 3
O og holde den nede i
R ned. Lampen "SAVE"
6
8
Page 9
321
E
L
V
E
N
T
TEMP
CLOCK
TIMER
R
F
U
E
L
V
E
20:10
SET ROOM
K: Hvis lampen FUEL er
tændt,, viser
informationsdisplayet,
hvor mange minutter
brændstoffet rækker.
K KONTROLLAMPEN "FUEL"
Hvis kontrollampen FUEL begynder at lyse, betyder det, at der kun er brændstof
til 10 min. mere. Den resterende brændetid kan følges i informationsdisplayet
(fig. K). For hvert andet minut høres et alarmsignal, for at gøre opmærksom på, at
kaminen bør efterfyldes.
Hvis der ikke reageres, slukkes kaminen af sig selv. I dette tilfælde høres også et
advarselssignal. Kontrollampen FUEL blinker, og i informationsdisplayet kommer
der fire streger til syne. Dette kan bringes til ophør ved at trykke på ON/OFF knappen én gang.
Når kaminen har brugt alt brændstof og er slukket, varer det et stykke tid inden
kaminen igen kan tændes efter påfyldning.
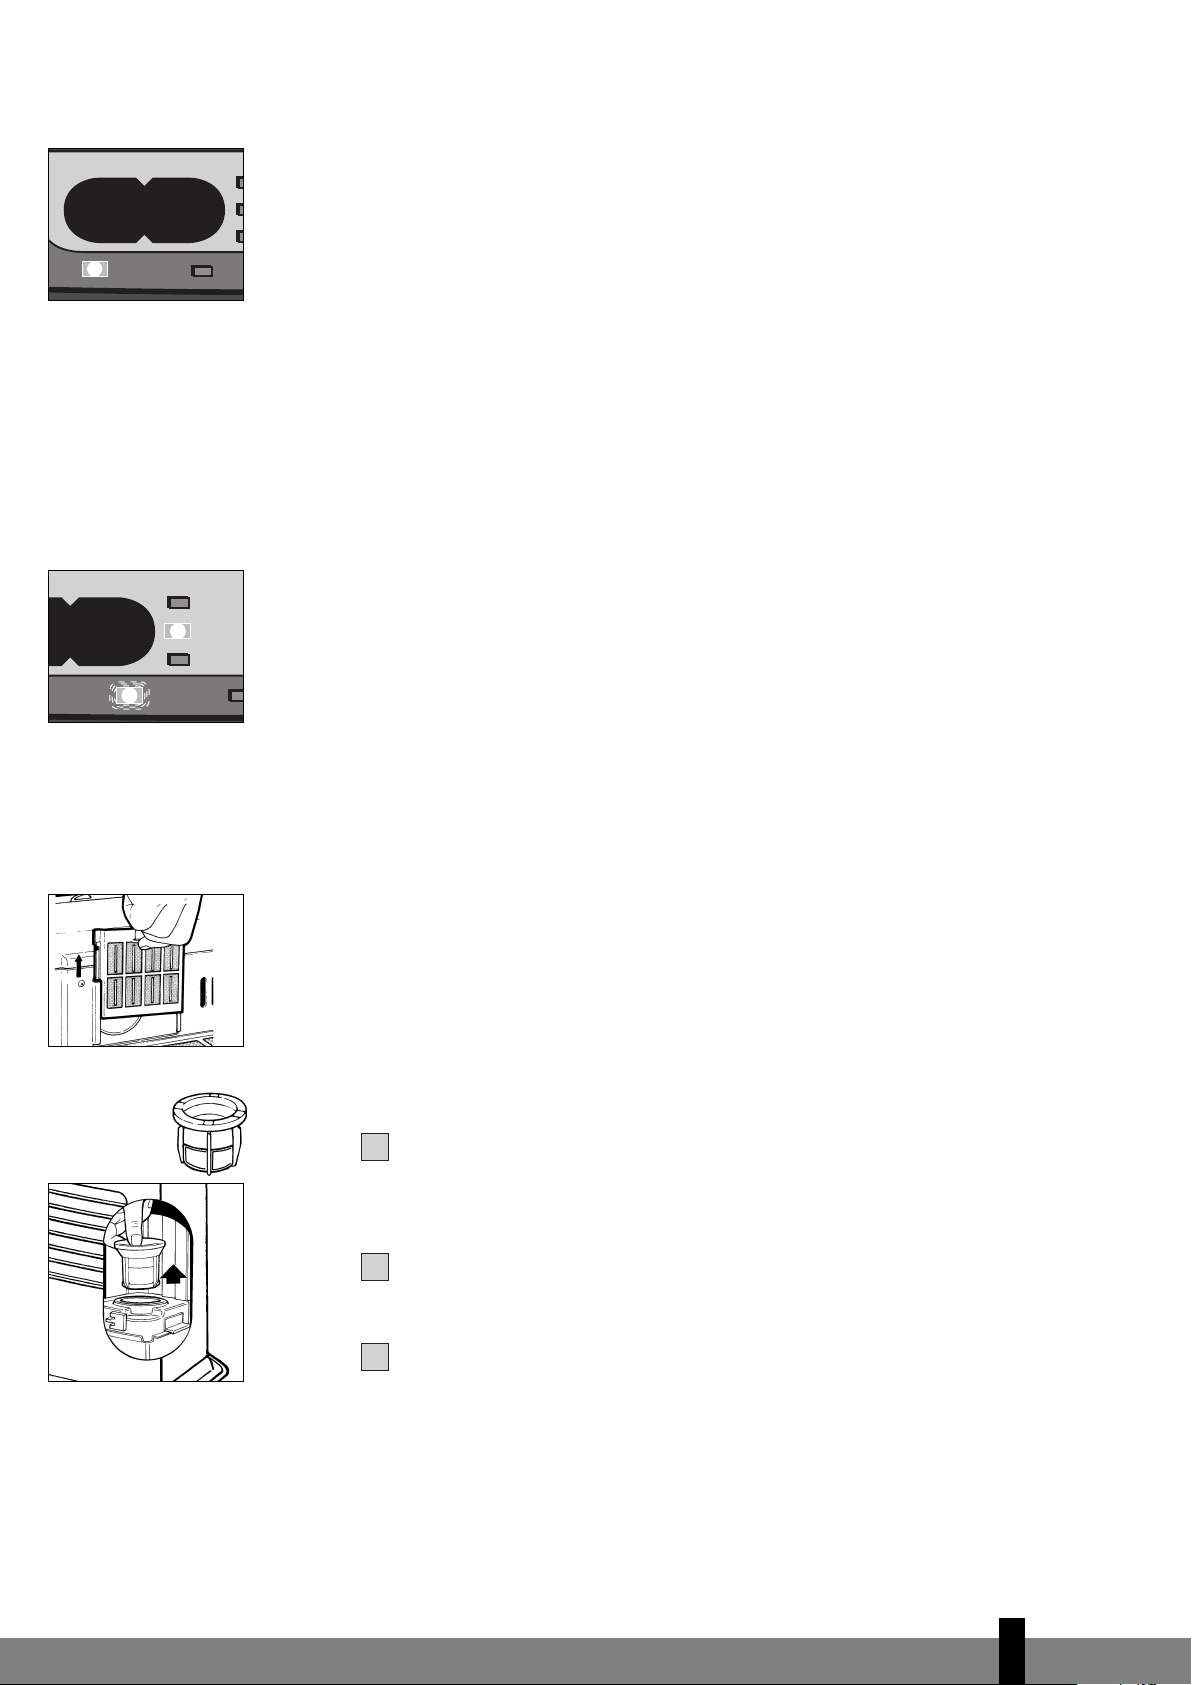
L KONTROLLAMPEN "VENT"
Hvis kontrollampen VENT begynder at blinke, er det tegn på, at rummet ikke
udluftes tilstrækkeligt (fig. L). Hvis De ikke sørger for ekstra ventilation, slukkes
kaminen automatisk efter et stykke tid.
Hvis kontrollampen fortsat blinker, efter at der er blevet ventileret, skal De
kontakte Deres Zibro Kamin forhandler.
M
L: Hvis kontrollampen
VENT lyser, betyder det,
at der skal udluftes i
rummet.
Brændstoffilter
M
M VEDLIGEHOLDELSE
Sluk for kaminen, og lad den køle af, inden De påbegynder nogen form for
vedligeholdelse. Træk også stikket ud af stikkontakten.
Deres Zibro Kamin kræver næsten ingen vedligeholdelse. Dog skal
8
luftfilterskærmen
frontgitteret
luftfilterskærmen (fig. M), og rengør den med sæbevand. Sørg for at
luftfilterskærmen er helt tørt, før den sættes på plads.
Kontrollér også regelmæssigt brændstoffiltret:
Fjern brændstoftanken 7 fra kaminen, og fjern brændstoffiltret (fig. N).
Dette kan
N
dryppe, så hav en klud parat.
Bank brændstoffiltret tomt mod et fast underlag og med bunden i vejret, så
urenheder fjernes.
2
og ventilatorfilteret 9rengøres med en støvsuger og
med en fugtig klud. Dette gøres ugentligt. Fjern af og til
(Rens aldrig brændstoffiltret med vand!).
Sæt brændstoffiltret tilbage i kaminen.
Det anbefales, at støv og pletter fjernes med jævne mellemrum med en fugtig
klud, da der ellers let kan opstå pletter, der er svære at fjerne.
6
9
Page 10
Fjern aldrig selv nogen dele fra kaminen. Ved en eventuel reparation, skal De
432
1
altid kontakte Deres Zibro Kamin forhandler. Hvis el-ledningen er beskadiget,
☞
må den kun udskiftes af en autoriseret installatør, og den skal udskiftes med en
ledning af typen HO5 VV-F.
N OPBEVARING (SLUT PÅ FYRINGSSÆSONEN)
Efter fyringssæsonen skal kaminen opbevares et sted, hvor den ikke bliver støvet,
så vidt muligt i den originale emballage.
Resterende brændstof kan ikke bruges i den næste fyringssæson. Brug derfor altid
det hele. Hvis De alligevel har lidt til overs, må det ikke smides væk, men skal
bortskaffes i henhold til reglerne om kemisk affald, som gælder i Deres kommune.
Begynd altid den nye fyringssæsson med nyt brændstof. Når kaminen på ny tages i
brug følges vejledningen
(fra kapitel A).
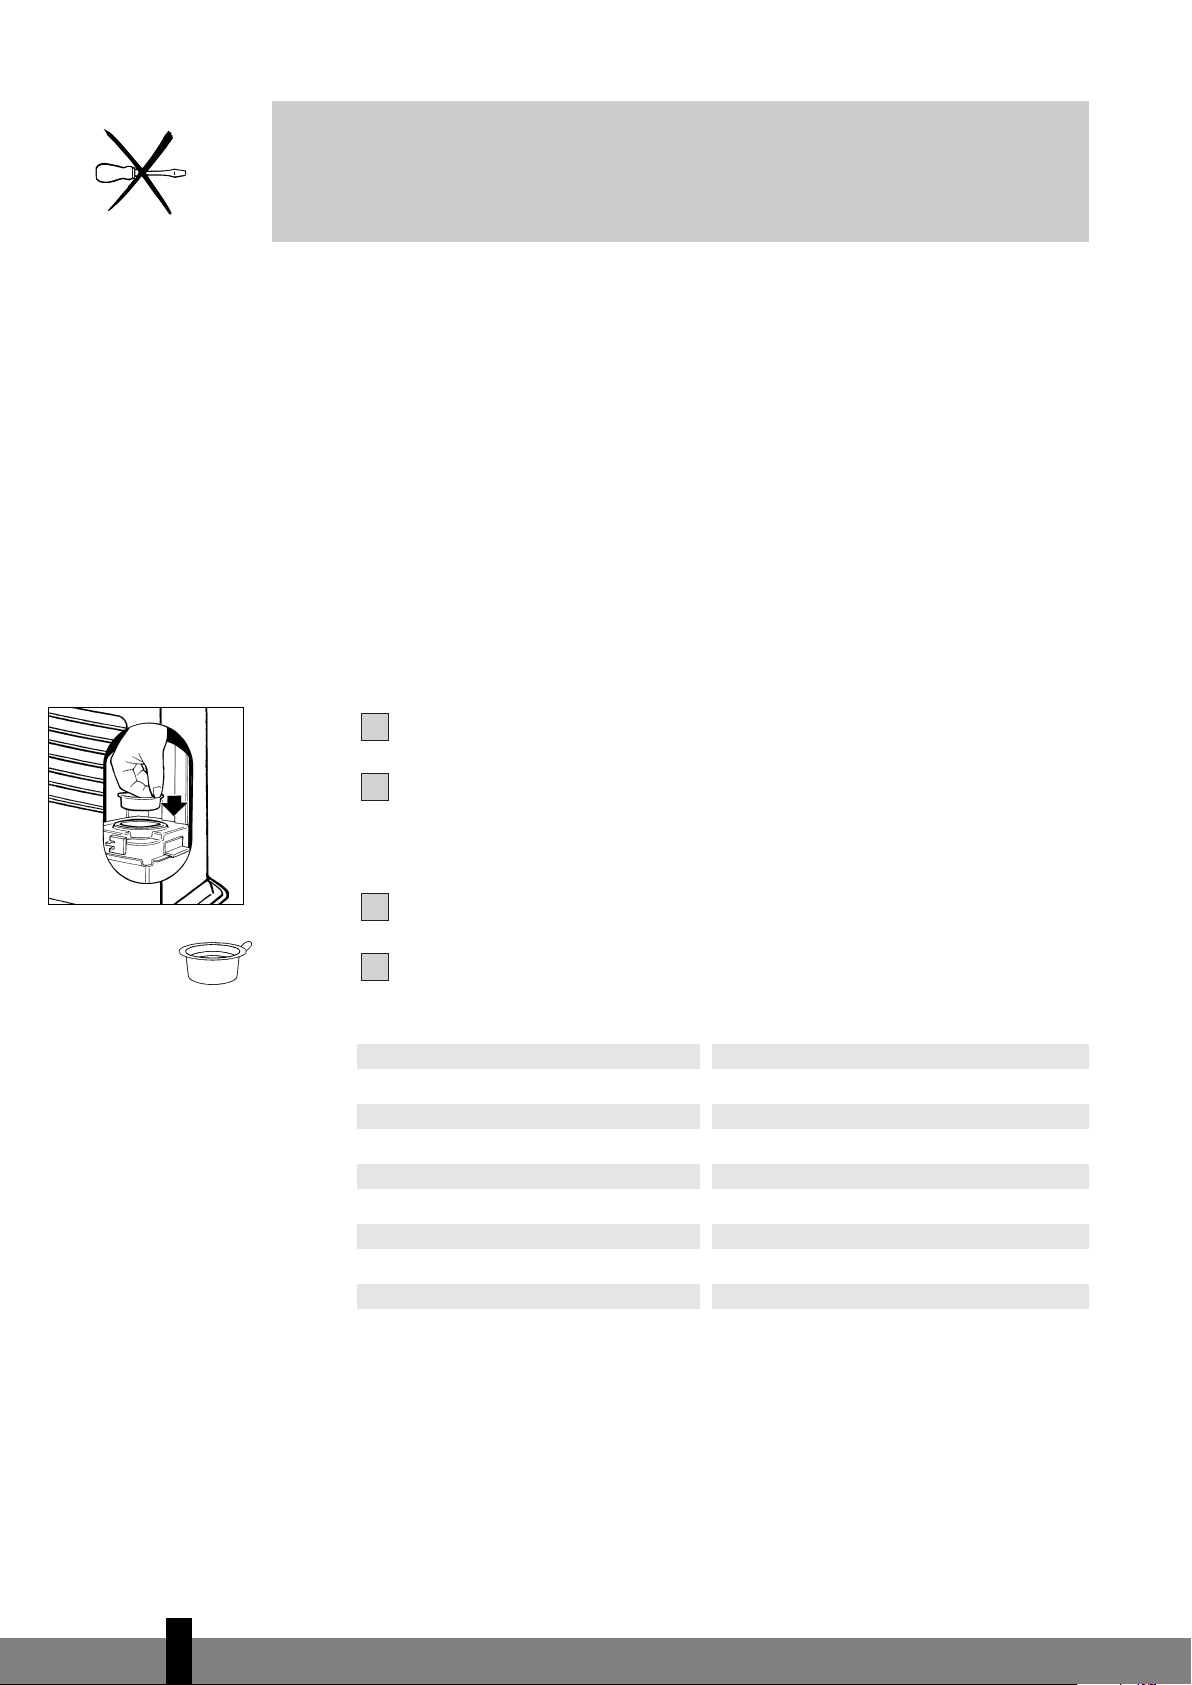
O TRANSPORT
For at forhindre at kaminen lækker under transport, skal der tages følgende
forholdsregler:
Transportprop
O
Lad kaminen køle af.
Fjern brændstoftanken
fig. N)
. Det kan dryppe lidt fra dette, hav derfor en klud parat. Opbevar ikke
brændstoffiltret og brændstoftanken i kaminen.
Tryk transportproppen godt gast på brændstoffiltrets plads (fig. O).
Transporter altid kaminen i lodret stilling.
G fra kaminen og tag brændstoffilteret ud (se kap. M,
P TEKNISKE DATA
Tænding elektrisk Mål (mm) bredde 516
Brændstof petroleum (incl. bundplade) dybde 315
Kapacitet (kW) max. 3,7 højde 450
Kapacitet (kW) min. 1,05 Tilbehør manuel hævepumpe
Velegnet rum (m
Brændstofforbrug (l/t)
Brændstofforbrug (g/t)
Brændetid pr. tank (t)
Indhold brændstoftank (l) 5,4 under drift 28 W
Vægt (kg) 11
3)**
35-140 dækselåbneren, transportprop
*
*
*
0,365 Netspænding 220V/230V
292 vekselstrøm/50Hz
15 El-forbrug ved opstart 368 W
* Ved indstilling på højeste stand
** De oplyste værdier er vejledende
Q GARANTIBETINGELSER
Der ydes 2 års garanti på Deres Zibro Kamin, hvor garantien løber fra købsdagen.
Inden for denne periode repareres alle materiale- og fremstillingsfejl gratis.
Følgende regler gælder for denne garanti:
6
10
Page 11
Alle yderligere krav på skadesgodtgørelse, inklusiv efterfølgende skade
7654321
afvises udtrykkeligt.
Alle reparationer eller udskiftning af dele i garantiperioden medfører ikke
forlængelse af garantien.
Garantien bortfalder, hvis der er foretaget ændringer, hvis der er monteret
uoriginale reservedele, eller hvis kaminen har været repareret af tredjemand.
Garantien gælder ikke for dele, der er udsat for normal slitage, som f.eks.
brændermåtten og den manuelle hævepumpe.
Garantien gælder kun, hvis De kan forevise det originale daterede købsbevis,
og hvis der ikke er foretaget ændringer på dette.
Garantien gælder ikke for skade, der er opstået ved handlinger, der afviger
fra brugsanvisningen, ved forsømmelse eller ved brug af forkert eller
forældet brændstof. Forkert brændstof kan endog være farligt**. Derfor
anbefales brugen af Zibro Plus Extra i kaminen. Zibro Plus Extra er et kvalitetsprodukt, som er specielt velegnet til brug i kaminen.
Fragtomkostninger og risiko ved forsendelse af kaminen eller dele af denne
er altid for købers regning.
For at undgå unødvendige omkostninger anbefales det altid at læse
brugsanvisningen omhyggeligt igennem. Hvis der ikke kan findes en løsning i
denne, indleveres kaminen til reparation hos Deres forhandler.
* Ved brug af forkert brændstof soder vægen til (bliver hård).
** Letantændelige stoffer kan f.eks. medføre en ukontrollabel forbrænding med stikflammer. Prøv i så tilfælde
ikke at flytte kaminen, men sluk omgående for den. I nødstilfælde kan der anvendes en ildslukker, men i så fald
udelukkende af type B: kulsyre- eller pulverslukker.
10 TIPS FOR SIKKER BRUG
1 Forklar altid børnene, at der er en meget varm kamin i nærheden.
2 Flyt aldrig kaminen, når den brænder eller stadig er varm. I dette tilfælde
må den heller ikke påfyldes eller vedligeholdes.
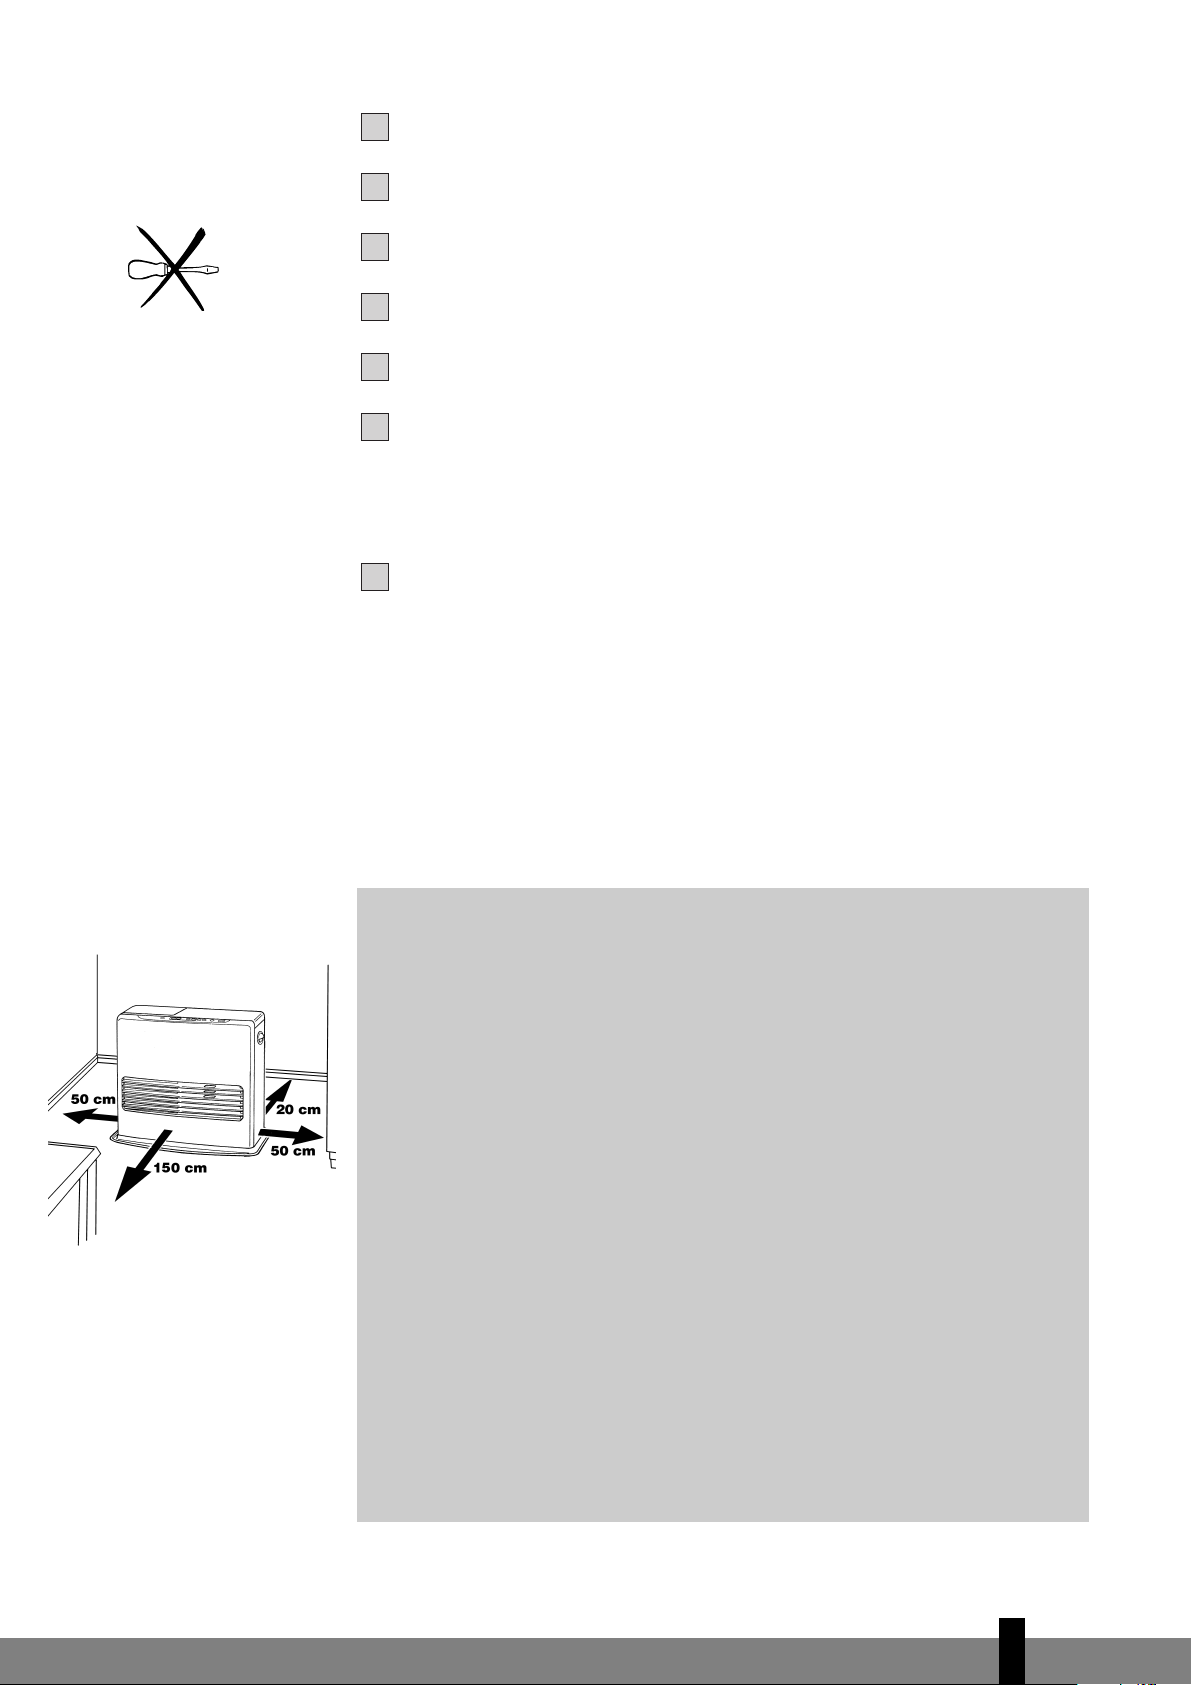
3 Anbring kaminen så dens forkant er mindst 1,5 meter fra mure, gardiner
og møbler.
4 Brug ikke kaminen i støvede rum, da der så ikke opnås en optimal
forbrænding. Brug ikke kaminen i umiddelbar nærhed af badekar,
brusekabiner eller svømmebassiner.
5 Sluk kaminen før De forlader huset eller går i seng. Hvis De er fraværende
i længere tid (f.eks. ferie), skal stikket også tages ud af stikkontakten.
6 Opbevar og transporter altid brændstoffet i de dertil beregnede tanke
og dunke.
7 Sørg for, at brændstoffet ikke udsættes for varme eller ekstreme
temperaturforskelle. Opbevar altid brændstoffet et køligt, tørt og
mørkt sted (sollys forringer kvaliteten af brændstoffet).
8 Brug aldrig kaminen på steder, hvor der kan være skadelige gasser eller
dampe (f.eks. udstødningsgasser eller malingsdampe).
9 Vær opmærksom på, at kaminens gitter bliver meget varmt. Hvis der
anbringes ting oven på kaminen, udgør det en brandfare.
10 Sørg altid for tilstrækkelig ventilation.
6
11
Page 12

Chère Madame, Cher Monsieur,
Nous vous remercions de la confiance que vous avez bien voulu témoigner à
notre marque en choisissant un convecteur à pétrole Zibro Kamin. Vous venez
d'acquérir un produit de qualité, qui vous donnera entière satisfaction durant
de très nombreuses années. A condition, bien sûr, de respecter les consignes
d'utilisation. C'est pourquoi nous vous invitons vivement à consulter ce manuel
afin d'assurer à votre convecteur Zibro Kamin Laser une durée de vie optimale.
Les produits Zibro Kamin sont garantis contre tout vice de fabrication ou de
conception (hors consommables) pendant une durée de 2 ans à compter de leur
date d'achat.
Nous vous souhaitons beaucoup de chaleur et de confort avec votre Zibro
Kamin.
Bien cordialement,
PVG International b.v.
Service-Consommateurs
1 LISEZ PRÉALABLEMENT LE MANUEL D'UTILISATION.
2 EN CAS DE DOUTE, CONTACTEZ VOTRE REVENDEUR ZIBRO KAMIN.
3 POUR LIRE, DÉPLIEZ LA DERNIÈRE PAGE. E E E E E E E E E E E E E
3
12
Page 13

L'UTILISATION
DANS LES GRANDES LIGNES
Voici, dans les grandes lignes, la marche à suivre pour
utiliser votre Zibro Kamin. Le MANUEL D'UTILISATION
(page 5 et suivantes) reprend chaque étape en détail.
1
Retirez les différents emballages (voir le chapitre A, fig. A).
2
Remplissez le réservoir amovible 7 (voir le chapitre B, fig. D).
3
Branchez la fiche dans la prise de courant.
4
Allumez le convecteur à l'aide de la touche ON/OFF
chapitre D).
5
Modifiez si nécessaire la température à votre convenance à
l'aide des touches de réglage
(voir le chapitre E).
N (voir le
ÉLÉMENTS
IMPORTANTS
A
Façade
B
Grille
C
Plateau inférieur
4
Couvercle du
réservoir amovible
E
Panneau
de réglage
F
Poignée
G
Réservoir amovible
H
Filtre à air
I
Cache du ventilateur
6
Pour éteindre le convecteur, appuyez sur la touche ON/OFF N.
• Le remplissage du réservoir doit se faire
(sécurité contre l’incendie):
- soit appareil à l’arrêt,
- soit dans un autre local que celui où est
installé le chauffage,
- dans tous les cas, l’utilisateur doit vérifier la
bonne fermeture de son réservoir rechargé
en dehors de toute source de chaleur ou de
feux nus (voir le chapitre
B).
• Votre convecteur dégagera une odeur de
'neuf' en chauffant pour la première fois.
• Conservez votre combustible dans un endroit
frais, à l'abri de la lumière après avoir fermé le
ou les bidons avec le bouchon d'origine.
• Le combustible vieillit. Utilisez à chaque début
de saison de chauffage du nouveau
combustible.
• Si vous chauffez au Zibro Plus vous êtes assurés
d'avoir un combustible de bonne qualité et
conforme à l'arrêté du 8/1/1998 relatif aux
caractéristiques du combustible liquide pour
appareils mobiles de chauffage.
• Si vous changez de marque et/ou de type de
pétrole, vous devez d'abord vous assurer que le
convecteur à pétrole consomme entièrement le
combustible présent.
J
Sonde de
température
K
Fil à plomb (pour
l'horizontalité)
L
Cordon d'alimentation électrique
M
Afficheur
numérique
N
Touche ON/OFF
O
Verrouillage sécurité
enfants
P
Touche de réglage
(heure et
température)
Q
Réglage de l'heure
d'allumage désirée
"Timer"
R
Touche
ECONOMIQUE
S
Lampes témoins
E E E E E E E E E E E E E E E E E E E E E E E
3
13
Page 14

Seul un combustible
approprié vous garantit
un usage sûr et durable
de votre convecteur
Zibro Kamin.
CE QUE VOUS DEVEZ SAVOIR AU PRÉALABLE:
AÉREZ TOUJOURS SUFFISAMMENT
Quel que soit le modèle, vous devez toujours prévoir une pièce de volume minimal
afin d'utiliser le convecteur Zibro Kamin en toute sécurité, sans aération supplémentaire. Si le volume de la pièce est plus petit que celui préconisé, vous devez
toujours entrebâiller une fenêtre ou une porte (± 2,5 cm). Il est important que chaque pièce où l'appareil est utilisé soit munie d'une entrée d'air suffisante et d'une
sortie d'air efficace (section minimale de 50 cm2 pour chaque orifice). N'utilisez
pas votre Zibro Kamin dans les pièces insuffisamment aérées ou situées en dessous
du niveau du sol, et/ou-dessus de niveau plus haut que 1500 mètres, ni dans les
caravanes, les bateaux et les cabines de véhicules. Toute modification du système
de sécurité est interdite, car dans ce cas, nous ne pourrons plus garantir le bon
fonctionnement du contrôleur d'atmosphère. En cas de doute, consultez votre distributeur Zibro Kamin.
LE COMBUSTIBLE APPROPRIÉ
Votre convecteur Zibro Kamin a été conçu pour fonctionner avec du pétrole pur,
de haute qualité et dénué d'eau, comme Zibro Plus Extra et Zibro Plus Kristal. Seuls
ces combustibles vous assureront une combustion propre et optimale. Un
combustible de moins bonne qualité peut se traduire par:
E un risque accru de pannes
E une combustion imparfaite
E une réduction de la durée de vie du convecteur
E un dégagement de fumée et/ou de mauvaise odeur
E un dépôt sur la grille ou le manteau
Un combustible approprié est donc essentiel pour un usage sûr et durable de votre
convecteur.
Vous pouvez trouver le
bouchon main propre à
l’arrière du convecteur.
Celui-ci sert à ouvrir le
bouchon du réservoir en
évitant d’avoir les mains
sales.
Vous trouverez ce
bouchon de transport
séparément dans le
carton. Pour transporter
le convecteur dans votre
véhicule, utilisez
obligatoirement le
bouchon de transport. Il
faut donc bien le
conserver!
Consultez toujours votre revendeur Zibro Kamin le plus proche sur le combustible
approprié pour votre convecteur à pétrole ou consultez le 3615 ZIBRO sur minitel.
A
3
14
Page 15

MANUEL D'UTILISATION
65432165432
1
A INSTALLATION DU CONVECTEUR
Retirez avec précaution votre convecteur Zibro Kamin Laser du carton et
vérifiez-en le contenu. En plus du convecteur, vous devez disposer:
E d'une pompe à main
E d'un bouchon de transport
E d’un bouchon ”ouverture main propre”
E du présent manuel d'utilisation
Conservez le carton et l'emballage (fig. A) à des fins d'entreposage
et/ou de transport.
E E E E E E
correct incorrect
C1
B
C
Ouvrez le couvercle du réservoir amovible
Remplissez le réservoir amovible comme indiqué au
La surface du sol doit être plane. Vérifiez-le en vous servant du fil à plomb K.
Si le poids se retrouve à l'intérieur du cercle, c'est que le convecteur est en
bonne position (fig. B). Déplacez le convecteur s'il n'est pas parfaitement
horizontal. N'essayez pas de corriger sa position en mettant en dessous des
livres ou un objet quelconque.
Branchez la fiche
réglez l'heure à l'aide des touches de réglage
Votre Zibro Kamin est maintenant prêt à l'emploi.
L dans la prise de courant (220/230 volts CA - 50 Hz) et
7 puis retirez la cale de carton.
chapitre B.
P (voir le chapitre C).
B REMPLISSAGE DU COMBUSTIBLE
Remplissez votre réservoir amovible dans un lieu approprié (au cas où vous
renverseriez du combustible). Procédez comme suit:
Assurez-vous que le convecteur est éteint.
Soulevez le couvercle
D
convecteur (fig. C). Attention! quelques gouttes de combustible peuvent
encore s'écouler du réservoir. Posez le réservoir amovible (bouchon en haut)
puis dévissez le bouchon du réservoir, à l’aide du bouchon ”ouverture main
propre”.
4, dégagez le réservoir amovible 7 et retirez-le du
Prenez la pompe à main et introduisez le tuyau rigide dans le bidon.
Veillez à ce que ce dernier soit plus haut que le réservoir amovible (fig. D).
Introduisez le tuyau flexible dans l'orifice du réservoir amovible.
Serrez le bouton situé au dessus de la pompe (en le tournant à droite).
Pressez la pompe plusieurs fois jusqu'à ce que le combustible commence à
couler dans le réservoir amovible. Une fois que c'est le cas, vous n'avez plus
E
vide plein
besoin de presser la pompe.
Lors du remplissage, observez attentivement la jauge du niveau de
combustible
desserrant le bouton situé sur la pompe (en le tournant à gauche).
Ne remplissez jamais trop le réservoir, surtout si le combustible est très froid
(en chauffant, le combustible se dilate).
G (fig. E). Si celle-ci est pleine, désamorcez la pompe en
3
15
Page 16

8
7
F
U
E
L
V
E
N
T
S
A
TEMP
CLOCK
TIMER
19:14
SET ROOM
F
U
E
L
V
E
N
T
S
A
TEMP
CLOCK
TIMER
20:15
SET ROOM
F: Si la lampe témoin
CLOCK ne clignote plus,
c'est que l'heure désirée
est programmée.
Ne laissez pas le combustible encore présent dans la pompe, remettez-le dans
le bidon et retirez la pompe avec soin. Vissez le bouchon du réservoir
minutieusement sur le réservoir, å l’aide du bouchon ”ouverture main
propre”. Essuyez le combustible éventuellement renversé.
Vérifiez que le bouchon du réservoir est bien vissé. Remettez le réservoir
amovible dans le convecteur (bouchon en bas). Refermez le couvercle. Pensez
à fermer votre bidon pour éviter des dépôts d'eau.
C REGLAGE DE L'HEURE
Introduisez la fiche dans la prise de courant (220/230 Volts AC/50HZ). La touche de
mise en route ON/OFF
appuyez d'abord sur la touche HOUR. La lampe témoin CLOCK et l’afficheur
mettent à clignoter. Appuyez ensuite sur le bouton (
l'heure actuelle. Pour les minutes, appuyez sur la touche (
seule fois, vous augmentez la valeur petit à petit. Si vous maintenez la touche
enfoncée, la valeur continue à augmenter jusqu'à ce que vous relâchiez la touche.
Au bout de 10 secondes environ, la lampe témoin s'arrête de clignoter et le
réglage sera enregistré.
l’afficheur disparaîtra et le convecteur sera en position réserve (stand-by). Par appuyer sur
un bouton quelconque, l’heure sera visible.
En cas de coupure de courant ou si la prise est débranchée, vous devez procéder
☞
de nouveau au réglage.
N doit être en position OFF. Pour effectuer le réglage,
M se
MHOUR) jusqu'à obtenir
NMIN).En appuyant une
5 Minutes après l’extinction du convecteur, l’information sur
G: A gauche la
température désirée, à
droite la température
mesurée.
D MISE EN ROUTE DU CONVECTEUR
Au début, un convecteur à pétrole neuf dégage une certaine odeur. Prévoyez donc
une aération supplémentaire.
Une fois le réglage de l'heure effectuée, allumez le convecteur en appuyant
tout simplement sur la touche ON/OFF
indiquer que l'opération d'allumage est en cours. Cette opération dure
quelques instants. Lorsque le convecteur s'allume, la touche ON/OFF
rouge. L'afficheur numérique
s'allume. La température actuelle s'affiche sous l'inscription ROOM. La
température désirée s'affiche sous l'inscription SET. Vous pouvez modifier cette
dernière en vous servant des touches de réglage
M affiche deux nombres. Le voyant température
N.Cette dernière se met à clignoter pour
(voir le chapitre E).
E REGLAGE DE LA TEMPERATURE DE VOTRE CHOIX
Vous pouvez modifier la température désirée lorsque le convecteur est allumé en
vous servant des touches de réglage
sur la touche (
diminuer la température, appuyez sur la touche (
environ, la lampe témoin s'arrête de clignoter et la valeur sera enregistrée (fig G).
Vous pouvez régler la température sur 6°C minimum et 28°C maximum. En cas de
coupure de courant ou si la prise est débranchée :
- rebranchez l'appareil. Un message E-0 nous indique qu'il y a eu coupure de
courant; appuyez sur le bouton marche/arrêt ON/OFF, reprogrammez l'heure
chapitre C)
désirée passe à la valeur standard soit 20°C.
MHOUR), la lampe témoin TEMP S se met à clignoter. Pour
, rallumez de nouveau l'appareil (voir chapitre D). La température
P. Pour augmenter la température, appuyez
NMIN). Au bout de 10 secondes
N reste
(voir
3
16
F PROGRAMMATION DE L'HEURE DESIREE (TIMER)
Le TIMER permet d'allumer automatiquement l'appareil à une heure désirée. Au
préalable, vous devez avoir programmé l'heure actuelle
votre température
Procédez comme suit:
(voir chapitre E). Le convecteur doit être éteint.
(voir chapitre C) ainsi que
Page 17

21432
1
T
I
M
E
R
F
U
E
L
V
E
N
T
S
TEMP
CLOCK
TIMER
20:15
SET ROOM
H: La lampe témoin
R
F
U
E
L
V
E
e-: 0
SET ROOM
TIMER indique que la
fonction timer est active.
Appuyez sur la touche ON/OFF N puis juste après sur la touche
TIMER
Enregistez l'heure à laquelle le convecteur doit s'allumer en vous servant des
touches de réglage
enregistrer l'heure et la touche (
minutes s’effectue de 5 en 5 minutes).
Au bout de 10 secondes environ, l'afficheur numérique se met en mode
CLOCK (horloge) et la lampe témoin TIMER s'allume, indiquant que la
fonction timer est active (fig. H).
Le timer permet d'obtenir la température désirée à l'heure programmée.
L'appareil calcule lui-même à quel moment il doit se mettre en route pour
obtenir la température voulue (Fuzzy logics).
Si vous désirez éteindre le convecteur ou changer l'heure de démarrage, il vous
suffit simplement d'appuyer sur la touche TIMER
Q. La lampe témoin TIMER et l’afficheur se mettent à clignoter.
P. Appuyez ensuite sur la touche (MHOUR) pour
☞
Afin de désactiver la fonction du timer, appuyez une seule fois sur la touche
ON/OFF
G EXTINCTION DU CONVECTEUR
Il y a deux manières d'éteindre le convecteur:
N.
NMIN) pour les minutes (le réglage des
(voir le chapitre G).
En cas de panne,
l'afficheur numérique
vous indique ce qui se
passe.
Appuyez sur la touche ON/OFF
mode CLOCK et la flamme s'éteint.
Si vous désirez éteindre le convecteur et faire en sorte qu'il s'allume la
prochaine fois automatiquement sous l'effet du timer, appuyez sur la touche
TIMER
pouvez modifier l'heure d'allumage à votre convenance en vous servant des
touches de réglage
Q. Tant que la lampe témoin TIMER et l’afficheur clignotent, vous
P (voir chapitre F).
N. L'afficheur numérique se met en
H LE ROLE DE L'AFFICHEUR NUMERIQUE
L'afficheur numérique M sert non seulement à afficher l'heure et la température
(consignées)
apparaît sur l'afficheur vous indique ce qui se passe:
CODE INFORMATION ACTION
e - 0
f - 0 Panne de courant secteur. Rallumez le convecteur.
e - 1 Thermostat défectueux. Contactez votre revendeur.
f - 1 Thermistance du brûleur défectueuse. Contactez votre revendeur.
e - 2 Problèmes de mise en marche. Contactez votre revendeur.
e - 5 Protection anti-renversement . Rallumez le convecteur.
e - 6 Mauvaise combustion. Contactez votre revendeur.
e - 7 Température ambiante Rallumez le convecteur
e - 8 Moteur soufflant défectueux. Contactez votre revendeur.
e - 9 Filtre à air encrassé ou Nettoyez le filtre.
-- : -- Combustible épuisé. Remplissez le réservoir amovible.
(+ lampe témoin
"FUEL"-clignotante)
-- : -- Manque d'aération. Aérer.
(+ lampe témoin
"VENT" clignotante)
(chapitres C,E et F) mais encore à signaler des pannes. Le code qui
Surchauffe du convecteur. Laissez refroidir, puis rallumez.
supérieure à 28˚C. si nécessaire.
Pompe à combustible encrassée. Contactez votre revendeur.
3
17
Page 18

Si la panne persiste ou en cas de doute, vous devez toujours contacter votre
N
T
S
A
V
E
TEMP
CLOCK
TIMER
HOUR MIN
R
F
U
E
L
V
E
20:10
SET ROOM
E
L
V
E
N
T
TEMP
CLOCK
TIMER
revendeur Zibro Kamin.
I VERROUILLAGE DE SECURITE ENFANTS
Vous pouvez utiliser le verrouillage de sécurité enfants pour éviter toute
modification accidentelle des réglages du convecteur. La seule touche qui n'est pas
verrouillée par le bouton sécurité enfants est le bouton de mise en marche ON/OFF
(14). Si le convecteur est éteint et que le bouton verrouillage est activé, l'appareil
ne peut pas s'allumer.
I: Si la lampe témoin
KEY-LOCK est allumée,
c'est que le verrouillage
de sécurité enfants est
activé.
J: Si la lampe témoin
SAVE s'allume, le
convecteur s'allume et
s'éteint automatiquement afin de rester dans
les limites d'une certaine
plage de températures.
Activez le verrouillage de sécurité en appuyant la touche KEY LOCK
plus de 3 secondes. La lampe témoin KEY-LOCK s'allume (fig. I) pour indiquer que
le verrouillage de sécurité enfants est actif. Pour désactiver le verrouillage de
sécurité enfants, appuyez encore une fois pendant plus de 3 secondes sur la
touche KEY-LOCK.
J L'UTILISATION DE LA TOUCHE ÉCONOMIQUE 'SAVE'
La fonction 'SAVE' vous permet de limiter la température. Si cette fonction est
active, le convecteur s'éteindra automatiquement si la température ambiante
(ROOM) dépasse de 4˚C la température désirée (SET). Si la température ambiante
est en dessous ou égale à la température désirée, le convecteur se rallumera
automatiquement.
Pour activer la fonction 'SAVE', appuyez sur la touche correspondante
témoin SAVE s'allume (fig. J). Pour désactiver cette fonction, appuyez de nouveau
sur la touche SAVE.
Même sans la fonction 'SAVE', votre convecteur veille à ce que la température
désirée soit approximativement maintenue en adaptant sa capacité de
chauffage. 'SAVE' est une position économique que vous employez lorsque, par
☞
exemple, vous n'êtes pas présent dans la pièce ou pour maintenir la
température de la pièce en position "Hors gel".
O pendant
R
. La lampe
K: Si la lampe témoin FUEL
s'allume, vous verrez sur l'af-
ficheur numérique combien il
vous reste de temps avant
que l'appareil ne s'éteigne
par manque de combustible.
L: Si la lampe témoin
'VENT' clignote, vous
devez aérer davantage
3
18
K LA LAMPE TÉMOIN 'FUEL'
Si la lampe témoin FUEL commence à s'allumer, vous disposez encore de 10
minutes de combustible. Un compte à rebours s'effectue sur l'afficheur numérique
M (fig. K). Vous entendrez un signal d'alarme toutes les deux minutes, vous
indiquant que vous devez faire le plein de combustible. Si vous n'intervenez pas, le
convecteur s'éteint de lui-même. La lampe témoin FUEL se met alors à clignoter et
l'afficheur numérique affiche quatre tirets (----).
Si le convecteur a entièrement épuisé son combustible, une fois le plein effectué,
vous devez attendre que le voyant FUEL s'éteigne avant de rallumer le convecteur.
L LA LAMPE TÉMOIN 'VENT'
Si la lampe témoin VENT commence à clignoter, elle indique que la pièce n'est pas
suffisamment aérée (fig. L). Si vous n'aérez pas davantage, le convecteur
s'éteindra de lui-même au bout de quelque minutes.
Si la lampe témoin 'VENT' reste allumée après que vous ayez aéré, contactez votre
revendeur Zibro Kamin.
M ENTRETIEN
Avant d'effectuer l'entretien de votre convecteur, vous devez éteindre celui-ci et le
laisser refroidir.
Page 19

4321321
M
Votre Zibro Kamin exige peu d'entretien. Mais vous devez nettoyer chaque
semaine le filtre à air
grille
2 à l'aide d'un chiffon. Retirez de temps à autre le filtre à air pour le
nettoyer à l'eau savonneuse (fig. M). Veillez à ce que le filtre à air soit bien sec
avant de le remettre en place.
Vérifiez aussi régulièrement le filtre à combustible:
8 et le cache du ventilateur 9 à l'aide d'un aspirateur, et la
Filtre à combustible
Enlevez le réservoir amovible
combustible (fig. N). Ayez un chiffon à portée de main pour essuyer le
combustible restant.
N
☞
Retirez le filtre à combustible et nettoyez-le avec du pétrole ou à l'aide d'une
soufflette (ne nettoyez jamais à l'eau!)
Remettez le filtre à combustible en place dans le convecteur.
Nous vous conseillons de nettoyer de temps en temps la poussière et les taches au
moyen d'un chiffon sec. A défaut de quoi, des taches tenaces peuvent se former.
Ne démontez pas les composants du convecteur. Pour toute réparation
éventuelle, contactez toujours votre revendeur Zibro Kamin.
Si le cordon d'alimentation électrique est endommagé, seul un installateur
agréé peut le remplacer par un cordon de type H05 VV-F.
7 hors du convecteur puis retirez le filtre à
N ENTREPOSAGE (FIN DE LA SAISON)
En fin de saison, rangez le convecteur dans un lieu sans poussière, si possible en
utilisant l'emballage d'origine.
Vous ne pourrez pas conserver le combustible restant pour la saison suivante.
Allumez le convecteur et laissez-le consommer entièrement son combustible. Ne
jetez pas le combustible n'importe où. Observez les règles en vigueur dans votre
commune concernant les déchets chimiques.
Dans tous les cas, vous devez commencer la nouvelle saison avec du combustible
neuf. Lorsque vous reutiliserez votre convecteur suivez les instructions de mise en
marche
(dès chapitre A).
O TRANSPORT
Afin d'éviter les fuites de combustible durant le transport du convecteur, vous
devez prendre les précautions suivantes:
Laissez le convecteur refroidir.
Retirez le réservoir amovible
(voir le chapitre M, fig. N). Ce dernier peu goutter un peu; gardez un chiffon à
portée de main. Conservez le filtre et le réservoir amovible indépendamment
du convecteur.
Mettez le bouchon de transport à la place du filtre à combustible (fig. O) et
enfoncez-le bien.
Transportez le convecteur toujours en position verticale.
G du convecteur et retirez le filtre à combustible
3
19
Page 20

65432
1
Bouchon de transport
P SPÉCIFICATIONS TECHNIQUES
Allumage électrique
Combustible Combustible liquide pour appareils
mobiles de chauffage (Arrêté du 8/1/1998)
Puissance nominale moyenne 190 g/h 2350 Watt
Puissance calorifique max. 292 g/h 3500 Watt
Puissance calorifique min. 87 g/h 1050 Watt
3
Volume conseillé de la pièce (m
Consommation de combustible (l/heure)*
Consommation de combustible (g/heure)*
Autonomie du réservoir (heures)
Contenance du réservoir amovible (litres) 5,4
O
Poids (kg) 11
Dimensions (mm) largeur 516
(plateau inférieur compris) profondeur 315
Accessoires pompe à main
Tension secteur 220 V / 230 V - AC / 50 Hz
Consommation électrique allumage 368 W
Niveau sonore minimum 21 dB
* En cas de réglage en position maximale
** Ces valeurs sont données à titre indictif
)** minimum 35 maximum 140
0.365
292
minimum 15 maximum 50
hauteur 450
bouchon de transport
continu 28 W
maximum 36 dB
Le marquage CE correspond à la conformité aux normes EN 60-335 partie 1 (1995)
et EN 50-165 (08/97)
Q CONDITIONS DE GARANTIE
Votre convecteur Zibro Kamin Laser est couvert par une garantie de 2 ans à compter
de la date d'achat. Durant cette période, tous les vices de fabrication ou de
conception seront réparés gratuitement. De plus, les règles suivantes s'appliquent :
Nous rejetons expressément toute autre demande d'indemnisation, y compris
en cas de préjudice indirect.
La réparation ou le changement de pièces effectués dans la période de
garantie n'entraîne pas la reconduction de la garantie.
La garantie ne s'applique pas dans les cas suivants: modifications apportées au
convecteur, usage de pièces non d'origine, réparations du convecteur
effectuées par des tiers.
Les pièces sujettes à l'usure normale, comme le tamis et la pompe à main ne
sont pas couvertes par la garantie.
La garantie s'applique uniquement si vous présentez le bon d'achat d'origine,
daté et ne portant pas de modifications.
La garantie ne s'applique pas en cas de dommage occasionné par des
manipulations non conformes au manuel d'utilisation, par une négligence ou
par l'usage de combustible non approprié ou usagé. Un combustible non
approprié peut même être dangereux*.
3
20
Page 21

Les frais d'expédition et les risques liés à l'envoi du convecteur ou de ses
7
pièces sont toujours à la charge de l'acheteur.
En cas de problème, consultez le manuel d'utilisation. Si le problème persiste,
consultez votre revendeur.
* Les matières hautement inflammables, par exemple, peuvent produire une combustion incontrôlable avec,
pour conséquence, un jaillissement des flammes. Dans ce cas, ne déplacez pas le convecteur mais éteignez-le
immédiatement. En cas d'urgence, vous pouvez utiliser un extincteur mais uniquement du type B: extincteur à
acide carbonique ou à poudre.
10 CONSEILS POUR UN USAGE EN TOUTE SÉCURITÉ
1 Attirez l'attention des enfants sur la présence d'un convecteur en
combustion.
2 Ne déplacez pas le convecteur lorsqu'il chauffe ou s'il est encore brûlant.
Dans ces conditions, il ne faut pas ajouter du combustible ni
entreprendre l'entretien du convecteur.
3 Placez l'avant du convecteur à au moins 1,5 mètre du mur, des rideaux
et des meubles.
4 N'utilisez pas le convecteur dans des pièces poussiéreuses. Dans ce cas, la
combustion ne sera pas optimale. Ne pas utiliser le convecteur près d’un
point d’eau (bain, douche, piscine, etc.).
5 Eteignez le convecteur avant de sortir ou d'aller vous coucher. Si vous
devez vous absenter longtemps (vacances par exemple), retirez la fiche
de la prise de courant.
6 Conservez le combustible exclusivement dans des réservoirs et bidons
adaptés.
7 Veillez à ce que le combustible ne soit pas exposé à la chaleur ou à des
écarts de température extrêmes. Conservez le combustible toujours dans
un endroit frais, sec et sombre (la lumière solaire dégrade la qualité du
combustible).
8 N'utilisez jamais le convecteur dans des endroits où des gaz, solvants ou
vapeurs nocifs (par exemple: gaz d'échappement ou vapeurs de
peinture) peuvent être présents.
9 La grille du convecteur devient brûlante. Il est interdit de couvrir le
convecteur (risque incendie).
10 Aérez toujours suffisamment.
3
21
Page 22

Dear Sir, Madam,
Congratulations on your purchase of this Zibro Kamin heater, the number one
brand amongst portable domestic heaters. You have purchased a first-class
quality product, which will serve you for many years to come. This, of course,
provided you use the heater correctly. Please read these Directions for Use first,
to ensure a maximum lifetime for your Zibro Kamin heater.
Your heater comes with a 24-month manufacturer’s warranty on all defects in
material or workmanship.
We wish you much warmth and comfort with your Zibro Kamin.
Yours sincerely,
PVG International b.v.
Customer Service Department
1 READ THE DIRECTIONS FOR USE FIRST.
2 IN CASE OF ANY DOUBT, CONTACT YOUR ZIBRO KAMIN DEALER.
3 BEFORE YOU START READING, FOLD OUT THE LAST PAGE. E E E E E E E E E E
4
22
Page 23

GENERAL DIRECTIONS FOR USE
Below you will find the main steps to be taken for
using your Zibro Kamin. For more details, please refer
to the MANUAL (pages 35 ff.).
Remove all packaging materials (refer to Section A, Fig. A).
1
Fill the removable tank 7 (refer to Section B, Fig. D).
2
MAIN COMPONENTS
A
Front plate
B
Grid
C
Base plate
4
Lid for removable
tank
E
Operation panel
Insert the plug into the wall-socket.
3
Ignite the heater using the ON/OFF key
4
If required, change the temperature using the adjustment keys
5
(refer to Section E).
Switch off the heater by pressing the ON/OFF N key.
6
N (refer to Section D).
F
Handle
G
Removable tank
H
Air filter
I
Vent filter
J
Thermostat
K
Plummet (level)
L
Plug + cord
M
Information display
N
ON/OFF key
O
Childproof lock
P
Adjustment keys
• The first time you ignite your heater it will smell
like ’new’ for a short time.
(time and
temperature)
• Store your fuel in a cool and dark place.
Q
• Fuel has a limited shelf life. Start every heating
season with new fuel.
• The right quality of fuel will be assured, when
you use Zibro Plus for your heater.
• If you change to another brand and/or type of
parrafin oil, you must first finish up all the
remaining fuel in the heater.
E E E E E E E E E E E E E E E E E E E E E E E
Timer
R
SAVE key
S
Indicator lights
4
23
Page 24

Only the use of the
correct fuel will ensure
safe, efficient, and
comfortable use of your
Zibro Kamin.
WHAT YOU NEED TO KNOW IN ADVANCE
ALWAYS MAKE SURE THAT THERE IS SUFFICIENT VENTILATION
For each Zibro Kamin model the minimum size of space is specified in which you
can use the heater safely, without additional ventilation
particular room is smaller than the specified space, always leave a window or door
slightly ajar (± 2.5 cm). We also recommend doing this in highly insulated or
draught-free rooms and/or at altitudes above 1,500 metres. However, if there is
insufficient ventilation (i.e. oxygen), the heater will automatically switch off. Do
not use your Zibro Kamin in cellars or other underground areas.
THE RIGHT FUEL
Only use Class C1 paraffin fuel in accordance with BS2869: Part 2, or equivalent.
Your Zibro Kamin heater has been designed for use with high-quality water-free
pure paraffin oil, such as Zibro Plus. Only fuels of this kind will ensure clean and
proper burning. Lower quality fuel may result in:
E increased possibility of malfunctioning
E incomplete burning
E reduced heater lifetime
E smoke and/or smells
E deposits on the grid or mantle
Using the right fuel is therefore essential for safe, efficient, and comfortable use
of your heater.
(refer to Section P). If a
The fuel cap cover can
be found at the rear of
the heater. This cover
allows you to keep your
hands clean when
opening the fuel tank.
This transportation cap
is packed separately in
the box. Only this cap
ensures trouble-free
transportation of the
heater after use.
Store it well!
Always refer to your local Zibro Kamin dealer for the right fuel for your heater.
A
4
24
Page 25

MANUAL
54321654321
A INSTALLING THE HEATER
Carefully remove your Zibro Kamin from the box and check the contents.
In addition to the heater you will also have:
E a manual fuel pump
E a transportation cap
E a fuel cap cover
E these directions for use
Keep the box and the packaging materials (Fig. A) for storage
and/or transportation.
E E E E E E
OK wrong
C1
Open the lid of the removable tank
Attach the sticker to the inside of the lid.
B
C
Fill the removable tank as indicated in
The floor should be firm and completely level. Check the latter with the
plum chain
circle, the heater is positioned correctly (Fig. B). Reposition the heater, when it
is not level. Do not try to correct the situation by placing books or other
goods under the heater.
box for fixing of the heater.
Insert the plug L into the wall-socket (220/230 Volts - AC / 50 Hz) and set the
correct time using the adjustment keys
Your Zibro Kamin is now ready for use.
K. Look straight down on it. If the weight drops within the
Please refer to the separate instruction in the carton
7 and remove the piece of cardboard.
Section B.
P (refer to Section C).
B FILLING FUEL
Do not fill the removable tank in the living room, but in a more suitable place
(there can always be some spillage). Follow the procedure below:
Make sure that the heater is switched off.
Open the lid
Note: Some drops may leak from the tank. Put down the removable tank
D
(cap pointing upwards) and screw off the fuel cap using the fuel cap cover
(Fig. C1).
Take the manual fuel pump and insert the smooth, most rigid tube into the
jerrycan. Make sure that it is in a higher position than the removable tank
(Fig. D). Insert the ribbed hose into the opening of the removable tank.
Lock the valve on top of the pump (turn clockwise).
Squeeze the pump a few times, until fuel starts flowing into the removable
tank. As soon as this happens, there is no need to press any longer.
4 and lift the removable tank 7 out of the heater (Fig. C).
4
25
Page 26

8
7
6
E
F
U
E
L
V
E
N
T
S
A
TEMP
CLOCK
TIMER
19:14
SET ROOM
F
U
E
L
V
E
N
T
S
A
TEMP
CLOCK
TIMER
20:15
SET ROOM
Check the removable tank fuel gauge G while filling the tank (Fig. E). Stop
filling by loosening the valve on top of the pump (turn anti-clockwise), once the gauge indicates that the tank is full. Never overfill the tank,
especially not when the fuel is very cold (fuel expands when it heats up).
empty full
F: When the CLOCK
indicator light stops
blinking, the setting has
been locked to the
indicated value.
Let the remaining fuel in the pump flow back into the jerrycan and carefully
remove the pump. Carefully screw the fuel cap back on the tank using the
fuel cap cover. After use, re-store the cover at the rear of the heater. Clean
off any spilled fuel.
Check whether the fuel cap is straight and tightened properly. Reinstall the
removable tank in the heater (cap down). Close the lid.
C SETTING THE CLOCK
It is only possible to set the correct time, when the heater is connected to the
mains and not burning. Use the adjustment keys
either of the two keys to switch on the function (the CLOCK light and the
information display
left (
MHOUR) and the minutes using the key on the right (NMIN). Press once to
increase the value by one step. When you hold down the key, the value will
continue going up, until you release the key again. After approximately 10
seconds the light will stop blinking and the setting will be locked. 5 Minutes after
switching off the heater, the information on the display will disappear and the
heater will automatically switch into the stand-by position.
M will start blinking). Next, set the hours using the key on the
P to set the time. First press
G: The required
temperature on the left,
the measured
temperature on the
right.
4
26
When the heater has been unplugged (or after a power failure), the time needs
☞
to be set again.
D IGNITING THE HEATER
When used for the first time, a new heater may give out a smell for a short while.
You should therefore provide extra ventilation.
Just press the ON/OFF button N to ignite the heater. The button will start blinking,
indicating that the ignition procedure has started. This will take a short while. Once
the heater is burning, the ON/OFF button will remain lit (red). The information
display
numbers refer to the temperatures (Fig. F). The actual room temperature is
indicated below ROOM, while the temperature setting is indicated below SET. The
latter can be changed with the adjustment keys
Prior to igniting the heater, always check for sufficient fuel in the removable tank.
M will show two numbers. The light next to them indicates that these
(refer to Section E).
E SETTING THE REQUIRED TEMPERATURE
The temperature setting can only be adjusted, when the heater is burning. Use the
adjustment keys
switch on the function (the TEMP light next to the information display
blinking). Next, adjust the temperature using the key on the left (
the temperature to a higher setting and the key on the right (
temperature. Press once to increase the value one step. After approximately 10
seconds the light will stop blinking and the setting will be locked (Fig. G).
P to adjust the temperature. First press either of the two keys to
M will start
MHOUR) to set
NMIN) to lower the
Page 27

The available temperature settings range from 6°C minimum to 28°C maximum.
21432
1
T
I
M
E
R
F
U
E
L
V
E
N
T
S
TEMP
CLOCK
TIMER
20:15
SET ROOM
When the heater has been unplugged (or after a power failure), the temperature
will reset to the factory setting of 20°C.
F USING THE TIMER
The timer allows you to switch on the heater automatically at a preset time.
H: The TIMER indicator
light indicates that the
timer function has been
switched on.
☞
In order to switch on the timer, the correct time must have been set
Section C)
and the heater should be off.
(refer to
Follow the procedure below:
Press the ON/OFF button
The TIMER light and the information display
Use the adjustment keys
Use the key on the left (
(
NMIN) to set the minutes (interval of 5 minutes).
N and then the TIMER key Q immediately after that.
M will start blinking.
P to set the time at which the heater must ignite.
MHOUR) to set the hours and the key on the right
After approximately 10 seconds the information display will show CLOCK
again and the TIMER indicator light will light up, indicating that the timer
function has been activated (Fig. H).
The timer will ensure that the room will have been heated to approximately
the required temperature at the set time.
When you want to switch off the heater and ignite it again with the timer, all
you have to do is press the TIMER key
(refer to Section G).
Press the ON/OFF button N once to clear the timer setting.
G SWITCHING OFF THE HEATER
There are two ways to switch off the heater.
Press the ON/OFF button
N. The information display will show the CLOCK
signal. Within approximately one minute the flame will have extinguished.
Press the TIMER key
Q, when you want to switch off the heater and ignite it
again with the timer the next time. This not only switches off the heater, but
it also activates the timer function. As long as the TIMER light and the
information display
the adjustment keys
M are blinking, you can change the required time with
P (refer to Section F).
H THE INFORMATION DISPLAY
The information display M not only serves as an indicator of the (set) time and
temperature (Sections C, E, and F), it also indicates any malfunctioning of the
heater. The code on the information display tells you what is the matter:
4
27
Page 28

R
F
U
E
L
V
E
e-: 0
SET ROOM
In case of any
N
T
S
A
V
E
TEMP
CLOCK
TIMER
HOUR MIN
malfunctioning the
information display will
tell you what is the
matter.
I: When the KEY-LOCK
light lights up, the
childproof lock has been
activated.
CODE INFORMATION WHAT TO DO
e - 0 Temperature within the heater too high. Cool-down and re-ignite.
f - 0 Power interrupted. Re-ignite the heater.
e - 1 Faulty thermostat. Contact your dealer.
f - 1 Faulty burner thermistor. Contact your dealer.
e - 2 Starting problems. Contact your dealer.
e - 5 Tipping-over protection. Re-ignite the heater.
e - 6 Poor burning. Contact your dealer.
e - 7 Room temperature If necessary,
above 28°C. re-ignite the heater.
e - 8 Defective booster. Contact your dealer.
e - 9 Air filter dirty; or Clean filter
Fuel pump dirty. Contact your dealer.
-- : -- Out of fuel. Refill removable tank.
(& blinking
FUEL-light)
-- : -- Too little ventilation. Ventilate better.
(& blinking
VENT-light)
Always contact your Zibro Kamin dealer for any malfunctioning not listed above.
I CHILDPROOF LOCK
The childproof lock can be used to prevent children accidentally changing the
heater settings. When the heater is burning and the childproof lock is on, the
heater can only be switched off. Other functions are blocked then. If the heater
has already been switched off, the childproof lock also prevents accidental
ignition of the heater.
Activate the childproof lock by pressing the appropriate key O and holding it down
for more than 3 seconds. The KEY-LOCK indicator light will light up (Fig. I),
indicating that the childproof lock has been activated. Switch off the childproof lock
by pressing the key
O and holding it down for more than 3 seconds once again.
J: When the SAVE light
lights up, the heater will
automatically switch on
or off in order to remain
within a specified
temperature range.
4
28
J THE CORRECT USE OF 'SAVE'
The 'SAVE' function allows you to limit the temperature. When this function is
activated, the heater will automatically switch off, when the room temperature
exceeds the set temperature by 4°C. Subsequently, when the room temperature has
dropped again to the set temperature, the heater will automatically switch on again.
Activate the 'SAVE' setting by pressing the appropriate R key. The SAVE indicator
light will light up (Fig. J). Switch off the function by pressing the SAVE key once
again.
Without the 'SAVE' setting your heater will maintain the set temperature by
approximation as well, by adjusting its heating capacity. 'SAVE' is an economy
☞
setting, which you can use when, for instance, you are not present in the room
or to keep it frost-free.
Page 29

321
E
L
V
E
N
T
TEMP
CLOCK
TIMER
R
F
U
E
L
V
E
20:10
SET ROOM
K: When the FUEL
indicator light is lit, the
information display will
show the number of
minutes of fuel left in
the tank.
K THE 'FUEL' INDICATOR LIGHT
When the FUEL indicator light lights up, there is enough fuel left for another 10
minutes of heater use. The count-down of the remaining heating time can be seen
in the information display
sounded, warning you to refill the removable tank. If you do not react, the heater
will extinguish by itself. The heater will also sound a warning signal, when it
switches off. The FUEL indicator light will blink, while four lines are blinking in the
information display. You can stop this by pressing the ON/OFF button
Once the heater has used up all its fuel and extinguished, it will take some time,
after the refill, before the heater is completely ready for use again.
M (Fig. K). Every two minutes an alarm signal is
L THE 'VENT' INDICATOR LIGHT
When the VENT indicator light starts blinking, this is a sign that the room is not
vented sufficiently (Fig. L). If you do not provide additional ventilation, the heater
will switch off automatically after some time.
N once.
L: A blinking VENT
indicator light is a sign
that you need extra
ventilation.
fuel filter
M
If the indicator light continues blinking after extra ventilation, please contact your
Zibro Kamin dealer.
M MAINTENANCE
Switch off the heater and let it cool down, before you start any maintenance
work. Also disconnect the plug from the mains.
Your Zibro Kamin needs hardly any maintenance. It is, however, important that
you clean the air filter
2 with a damp cloth, both on a weekly basis. Remove the air filter occasionally
(Fig. M) and clean it with soapy water. Prior to reinstallation, make sure that the
air filter has fully dried.
Regularly inspect the fuel filter as well:
Remove the removable tank
(Fig. N). Some drops may leak from the filter; keep a cloth at hand.
N
Remove the dirt by tapping the fuel filter upside-down against a hard surface.
(Never clean it with water!)
8 and the vent filter 9 with a vacuum cleaner and the grid
7 from the heater and remove the fuel filter
☞
Reinstall the fuel filter into the heater.
We recommend that you remove dust and stains in time with a damp cloth,
because otherwise these may cause stains that are hard to remove.
Do not remove any heater components yourself. Always contact your Zibro
Kamin dealer for repairs. When the power cord is damaged, it may only be
replaced by an authorised fitter. Use a new cord of the type H05 VV-F.
4
29
Page 30

N STORAGE (END OF THE HEATING SEASON)
21432
1
At the end of the heating season, you must store the heater in a dust-free place, if
possible in its original packaging.
Unused fuel cannot be used in the next heating season. We therefore recommend
that you burn up all fuel. If there is still some fuel left, do not throw it away, but
dispose of it in accordance with the local regulations for the disposal of domestic
chemical waste.
Always start the new heating season with fresh fuel. When you start re-using the
heater follow the instructions again
(starting from section A and as specified).
O TRANSPORTATION
Take the following measures to avoid fuel leakage during the transportation of
the heater:
O
Let the heater cool down.
transportation cap
Remove the removable tank
(refer to Section M, Fig. N). Some drops may leak from the filter; keep a cloth
at hand. Store the fuel filter and the removable tank outside the heater.
Place the transportation cap into the position of the fuel filter (Fig. O).
Press it tight.
Always move the heater in an upright position.
G from the heater and remove the fuel filter
P SPECIFICATIONS
Ignition electrical Dimensions (mm) width 516
Fuel paraffin (including base plate) depth 315
Capacity (kW) max. 3,5 height 450
Capacity (kW) min. 1,05 Accessories manual fuel pump
Suitable space (m
Fuel consumption (l/hr)
Fuel consumption (g/hr)
Burning time per tank (hr)
Capacity removable tank (litres) 5,4
Weight (kg) 11 continuous 28 W
* At maximum setting ** Specified values are indicative
3)**
35-140 fuel cap cover
*
*
0,365 transportation cap
292 Mains 220V/230V
*
15 -- AC/50 Hz
Electrical consumption
igniter 368 W
Q WARRANTY PROVISIONS
Your heater comes with a 24-month warranty starting on the date of purchase.
Within this period all defects in material or workmanship will be repaired without
any charge. The following provisions shall apply regarding this warranty:
We expressly dismiss all other claims for damages, including consequential
damages.
Any repairs or replacements of components within the term of warranty will
not result in an extension of the term of warranty.
4
30
Page 31

The warranty shall no longer apply, when the heater has been modified,
76543
non-original parts have been used, or when it is repaired by third parties.
The warranty shall not apply to parts that are subject to normal wear, such as
the burner mat and the manual fuel pump.
The warranty shall only apply, when you present the original, dated proof of
purchase, provided no changes have been made to it.
The warranty shall not apply to damages caused by actions not in compliance
with the Directions for Use, neglect, and the use of an incorrect type of fuel,
or fuel past its use-by date. The use of incorrect fuel can even be dangerous*.
Transportation costs and the risks involved during the transportation of the
heater or heater components shall always be for the account of the purchaser.
In order to avoid unnecessary costs, we recommend that you always read the
’Directions for Use’ carefully first. In case this does not help, please take the heater
to your dealer for repair.
* Highly inflammable substances may induce uncontrollable burning, causing flames to break out. Should this
happen, never try to move the heater, but always switch off the heater immediately. In case of emergency you
may use a fire extinguisher, but only a type B extinguisher: a carbon dioxide or powder extinguisher.
10 TIPS FOR SAFE USE
1 Make sure that children are always aware of the presence of a burning
heater.
2 Do not move the heater when it is burning or still hot. Do not refill nor
service the heater when it is burning or still hot.
3 Position the front of the heater at a minimum distance of 1.5 metres
from walls, curtains, and furniture.
4 Do not use the heater in dusty rooms, or you will not have optimum
burning. Do not use the heater close to a bath, a shower or a
swimmingpool.
5 Switch off the heater, before you go to sleep. Unplug the
heater as well, when you go away for a longer period of time
(e.g. holidays).
6 Store and move fuel only in suitable tanks and jerrycans.
7 Make sure that the fuel is not exposed to heat or extreme temperature
changes. Always store the fuel in a cool, dry and dark place (sunlight
will affect the quality).
8 Never use the heater in places where harmful gasses or fumes may be
present (e.g. exhaust gasses or paint fumes).
9 Be aware that the grill of the heater becomes hot. If the appliance is
covered there is a risk of fire.
10 Always make sure that there is sufficient ventilation.
4
31
Page 32

E E E E E E E E E E E E E E E E E E E E E E E E E E E E E
Page 33

T
I
M
E
R
F
U
E
L
V
E
N
T
S
A
V
E
ON
OFF
TEMP
CLOCK
TIMER
20:15
SET ROOM
HOUR MIN TIMER SAVE KEY-LOCK POWER
D
H
I
K
F
J
L
G
E
A
B
C
SE M RQP NO
Page 34

DISTRIBUTED IN EUROPE BY PVG INTERNATIONAL BV
i ÖSTERREICH
PVG Austria VertriebsgmbH
Salaberg 49
3350 HAAG
tel: +43 7434/44867
fax: +43 7434/44868
email: pvgaustria@zibro.com
e BELGIË
PVG Belgium NV/SA
Industrielaan 55
2900 SCHOTEN
tel: +32 3 326 39 39
fax: +32 3 326 26 39
email: pvgbelgium@zibro.com
q SCHWEIZ
PVG Schweiz AG
Genuastrasse 15
4142 MÜNCHENSTEIN
tel: +41 61 337 26 51
fax: +41 61 337 26 78
email: pvgint@zibro.com
2 DEUTSCHLAND
PVG Deutschland GmbH
Beiersdorfstraße 4
46446 EMMERICH
tel: +49 2821 76713
fax: +31 412 648385
email: pvgint@zibro.com
6 DANMARK
PVG Scandinavia A/S
Niels Bohrsvej 10
6100 HADERSLEV
tel: +45 73 53 02 02
fax: +45 73 53 02 04
email: pvgdenmark@zibro.com
5 ESPAÑA
PVG España S.A.
Pol. Ind. San José de Valderas II
Comunidad ”La Alameda”
C / Aurora Boreal, 19
28918 LEGANÉS (Madrid)
tel: +34 91 611 31 13
fax: +34 91 612 73 04
email: pvgspain@zibro.com
4 UNITED KINGDOM
Lister Gases
Bridge Street
Holloway Bank, Wednesbury
West Midlands WS10 OAW
Tel.: +44 121 506 1818
Fax: +44 121 505 1744
email: gases@lister.co.uk
> ITALIA
PVG Italy SRL
Via Niccolò Copernico 5
50051 CASTELFIORENTINO (FI)
tel: +39 571 628500
fax: +39 571 628504
email: pvgitaly@zibro.com
u NORGE
Sunwind - Gylling A/S
Rudsletta 71-75 / P.O. Box 64
N-1309 RUD
tel: +47 67 17 13 70
fax: +47 67 17 13 80
email: pvgint@zibro.com
1 NEDERLAND
PVG International b.v.
P.O.Box 96
5340 AB OSS
tel: +31 412 694694
fax: +31 412 622893
email: pvgnl@zibro.com
9 PORTUGAL
Gardena, Lda
Recta da Granja do Marquês
ALGUEIRÃO
2725-596 MEM MARTINS
tel: + 35 21 92 28 530
fax: + 35 21 92 28 536
email: pvgint@zibro.com
: POLSKA
PVG Polska Sp. z. o. o.
Kolonia Promna 58
26-803 PROMNA
tel: +48 48 615 16 33
fax: +48 48 615 16 33
email: pvgpoland@zibro.com
3 FRANCE
PVG France SARL
4, Rue Jean Sibélius
B.P. 185 - 76410
SOTTEVILLE SOUS LE VAL
tel: +33 2 32 96 07 47
fax: +33 2 32 96 07 77
email: pvgfrance@zibro.com
 Loading...