

Page 1
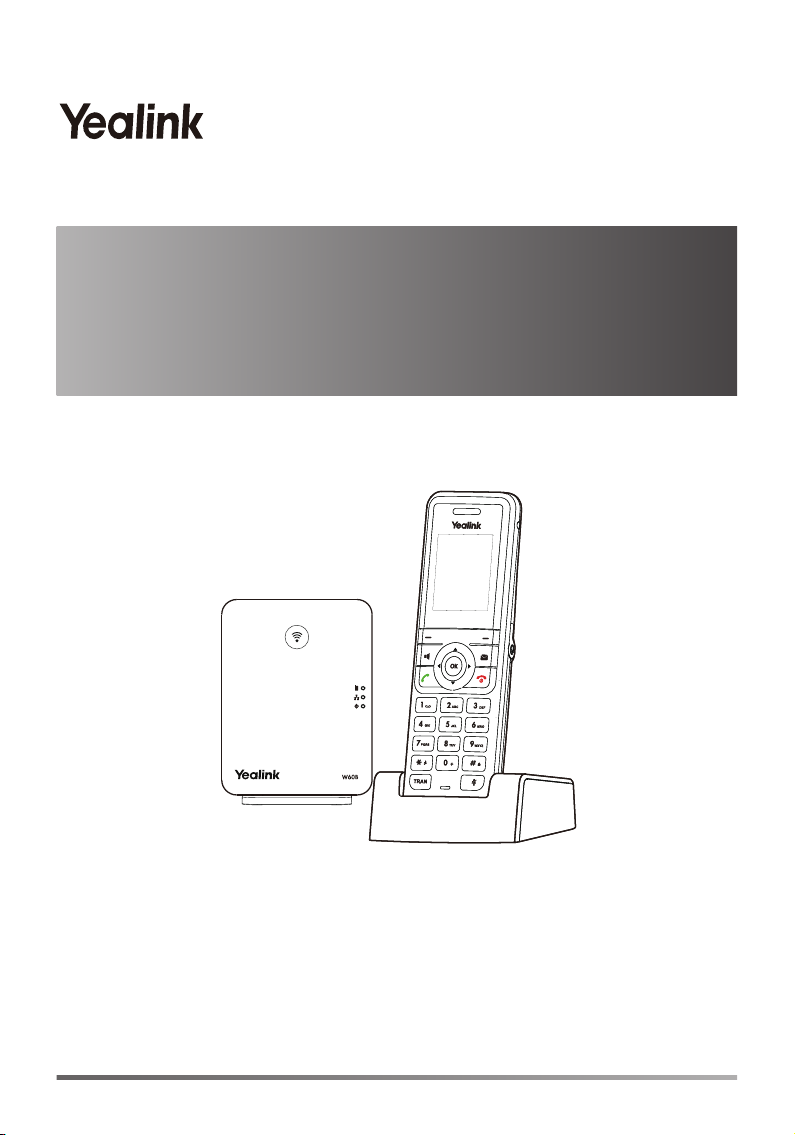
DECT IP Phone
W53P & W53H
Quick Start Guide(V83.X)
For W60B firmware: 77.83.0.X or later
For W53H firmware: 88.83.0.X or later
Page 2
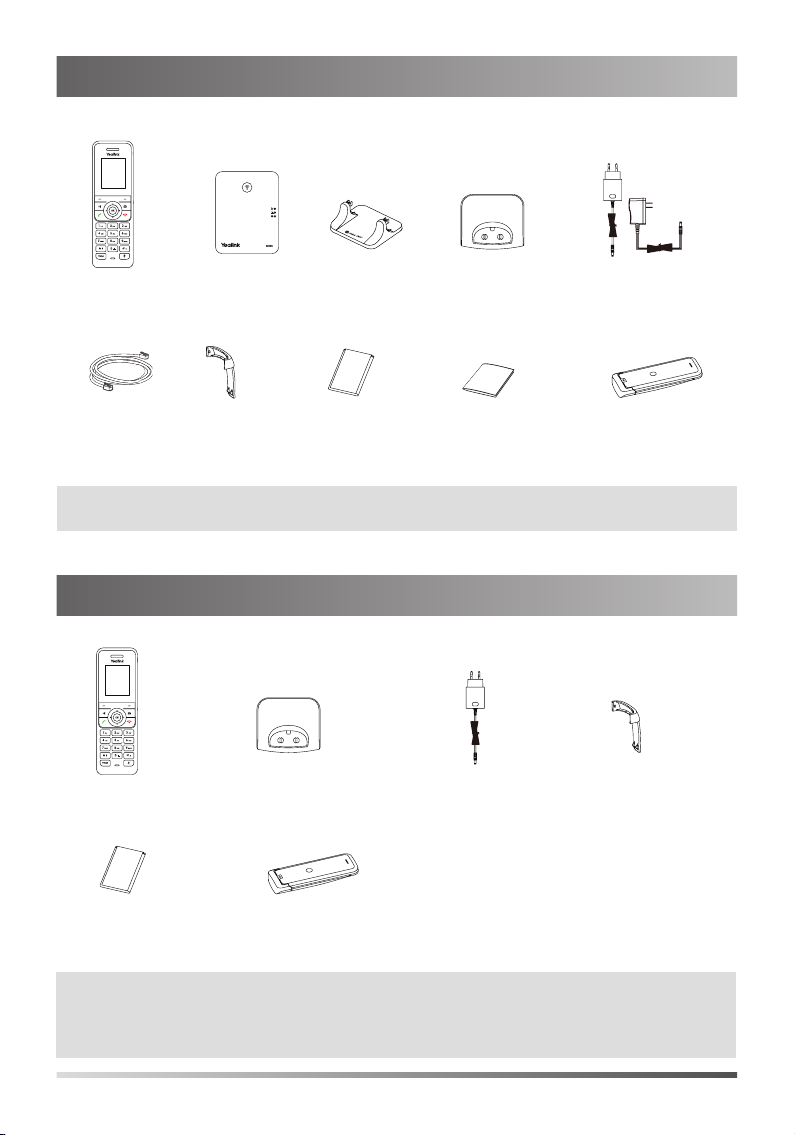
W53P Package Contents
W53H Headset
Ethernet Cable
W60B Base Station Base Stand
Belt Clip
Rechargeable Battery
USB Charger Cradle
Quick Start Guide
2 Power Adapters
Handset Protective Case
(Optional)
Note: Yealink W53P DECT IP phone consists of one W60B base station and one
W53H handset.
W53H Package Contents
W53H Headset
USB Charger Cradle
2 Power Adapters
Belt Clip
Rechargeable Battery
Handset Protective Case
(Optional)
Note: We recommend that you use the accessories provided or approved by
Yealink.
The use of unapproved third-party accessories may result in reduced
performance.
1
Page 3

W60B Package Contents
W60B Base Station Base Stand
Power Adapter Ethernet Cable
Quick Start Guide
Assembling the DECT Phone
1. Connect the base station power and the network using
Method a or Method b.
a. AC Power Option b. PoE (Power Over Ethernet) Option
Note
• If you choose Method a, use Yealink-supplied power adapter (5V/600mA).
A third-party power adapter may damage the base station.
• If you choose Method b, you do not need to connect the power adapter.
Make sure the hub/switch is PoE-compliant.
2a. (Desktop Installation) Attach and remove the base stand.
Attach the Base Stand Remove the Base Stand
M
A
C
S
N
M
A
C
S
N
Align the snap-fits with the corresponding holes
and push forward, snapping them into the holes.
2
M
A
C
S
N
Remove the snap-fits from the
holes horizontally.
Page 4
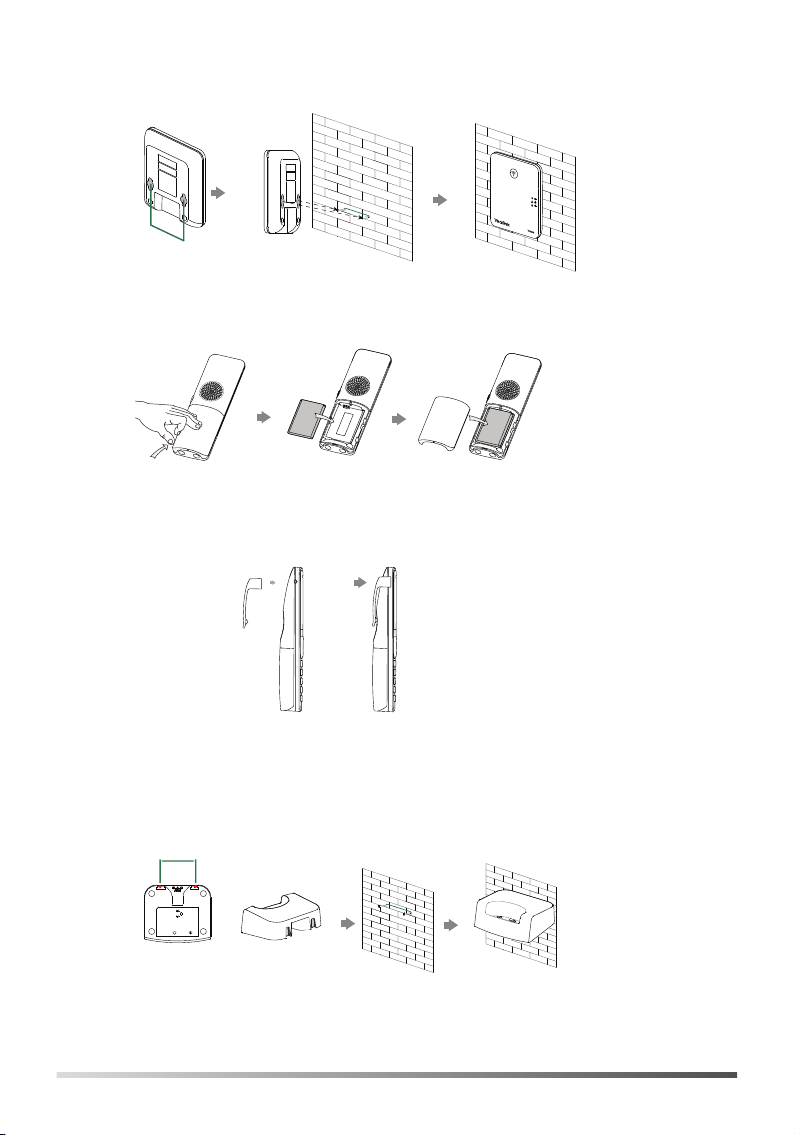
2b. (Wall-Mount Installation) Attach the base station.
59mm
40mm
MAC
SN
M
A
C
SN
59mm
3. Insert the battery into the handset.
sn
4. Attach the Belt Clip.
5. (Optional) Mount the charger cradle to the wall.
40mm
3
Page 5

6. Connect the charger cradle and charge the handset.
Note
• Use Yealink-supplied power adapter (5V/600mA). A third-party power adapter
may damage the handset.
• Check the charging status on the top right corner of the LCD screen.
Getting Started
Shortcut Keys
Shortcut keys help you quickly access to frequently used phone features. Describe the default shortcut-keys behaviors:
1 Access the call history record.
2 Check the line status.
3 Access the intercom list, select one to place an
1
3
4
2
internal call.
5
4 Decrease the ringer volume.
6
5 Increase the ringer volume.
6 Access the directory list.
Entering and Editing Data
• Press one or more times to switch among different input modes or type
“#”.
• Press to provide the special characters to choose or to type “*”.
• Press a digit key one or more times to type the desired character or digit.
• Press the Del soft key to delete entered characters.
• Press the Save soft key to accept the change or Back to cancel.
4
Page 6

Handset Registration
You can register up to 8 handsets to one W60B base station. Each handset can
be registered to 4 different base stations.
When the handset LCD screen prompts “Unregistered!”, long press
base station till the registration LED flashes.
There are two methods to register a new handset:
Easy Registration:
1. Press the Reg soft key on the handset to register quickly.
Normal Registration:
1. Press the OK soft key on the handset, and then select Register Handset.
2. Select the desired base station and then press the OK soft key. The handset
begins searching the base station.
3. Press the OK soft key after searching a base station successfully.
4. Enter the base station PIN (default: 0000), and then press the Done soft key to
complete registration.
To register to multiple base stations, press OK to enter the main menu, and select Settings->Registration->Register Handset, then repeat steps 2-4.
Note:
• If the handset is registered to the base station successfully, the handset LCD
scree prompts “Handset Subscribed” and “Base NO.”( the last 4 characters
indicate the base station’s MAC address).
• If the handset LCD screen prompts “Searching for Base”, check that your base
station is powered on.
on the
Network Settings
You can configure the base station to obtain network settings in one of the following ways:
DHCP
By default, the base station attempts to contact a DHCP server in your network to
obtain the valid network settings, such as IP address, subnet mask, gateway address and DNS address.
Static
If the base station cannot contact a DHCP server for any reason, you need to
configure the IP address, subnet mask, gateway address, primary DNS address
and secondary DNS address for the base station manually.
5
Page 7

To configure the network parameters for the base station manually:
1. Press the OK key to enter the main menu, and then select Settings->System
Settings ->Network (default PIN: 0000)->Basic.
2. Select the desired IP addressing mode from the IP Mode field.
3. Press to select the desired IP addressing mode.
4. Make the desired changes.
5. Press the Save soft key to accept the change.
Note:
• The IP DECT phone supports either or both IPv4 and IPv6 addressing modes,
but IPv6 is disabled by default.
• Wrong network settings may result in inaccessibility of your DECT phone and
may affect the network performance. Contact your system administrator for
the network parameters.
Basic Operations
Turning Handset On/Off
To turn the handset on, do one of the following:
• Press , then the LCD screen lights up.
• Place the handset in the charger cradle. The handset will be turned on
automatically.
To turn the handset off:
Long press to turn the handset off.
Locking/Unlocking Keypad
• Long press when the handset is idle to lock the keypad.
• Long press again to unlock the keypad.
Silent Mode
• Long press when the handset is idle to switch the silent mode to on.
• Long press again to switch the silent mode to off.
6
Page 8

Handset Settings
Handset Name
To rename the handset:
1. Press the OK key to enter the main menu, and then select Settings->Handset
Name.
2. Edit the value in the Rename field.
3. Press the Save soft key to accept the change.
Volume Adjustment
• Press or when the handset is idle or ringing to adjust the ringer volume.
• Press or during a call to adjust the receiver volume of speakerphone/
earpiece/earphone.
Ring Tones
1. Press the OK key to enter the main menu, and then select Settings->
Audio->Ring Tones->Melodies.
2. Press or to highlight the Intercom Call or the desired line.
3. Press or to select the desired ring tone.
4. Press the Save soft key to accept the change.
Local Directory
To add a contact:
1. Press the OK key to enter the main menu, and then select Directory->Local
Directory.
2. Press the Options soft key, and then select New Contact.
3. Enter the desired value in the Name, Office, Mobile and Other field
respectively.
4. Press the Save soft key to accept the change.
To edit a contact:
1. Press the OK key to enter the main menu, and then select Directory->Local
Directory.
2. Press or to highlight the desired entry.
3. Press the Options soft key, and then select Edit.
4. Edit the desired value in the Name, Office, Mobile and Other field
respectively.
5. Press the Save soft key to accept the change.
7
Page 9

To delete a contact:
1. Press the OK key to enter the main menu, and then select Directory->Local
Directory.
2. Press or to highlight the desired entry.
3. Press the Options soft key, and then select Delete to delete the selected entry.
Speed Dial
1. Press the OK key to enter the main menu, and then select Settings->
Telephony->Speed Dial.
2. Press or to highlight the desired digit key, and then press the Assign soft
key.
3. Press or to select the desired directory type.
4. Press or to highlight the desired entry, and then press the OK soft key.
If both the office number and mobile number are stored, press
highlight the desired number, and then press the OK soft key again.
or to
Basic Call Features
Placing Calls
To place a call directly:
1. Do one of the following:
• Enter the desired number when the handset is idle.
• Press to enter the pre-dialing screen. Enter the desired number using the
keypad.
If there are multiple lines assigned to your handset as outgoing lines, press
the Line soft key to select the desired line. If you do not select a line, the hand
set uses the default outgoing line to dial out.
2. Press , or to dial out.
To place a call from the local directory:
1. Press when the handset is idle.
2. Press or to select the desired directory type.
3. Highlight the desired entry, and then press or to dial out using the default
line.
If multiple numbers for the contact are stored, press or to highlight the
desired number, and then press or again to dial out using the default line.
To place a call from the call history:
1. Press the History soft key when the handset is idle, and then select the
desired call history list.
8
Page 10

2. Press or to highlight the desired entry, and then press or to dial out
using the default line.
To place a call from the redial list:
1. Press when the handset is idle.
2. Press or to highlight the desired entry, and then press or .
To place a call using the speed dial key:
Long press the speed dial key to call the preset number directly.
Answering Calls
To answer a call, do one of the following:
• Press the Accept soft key.
• Press .
• Press .
• Press .
Note: You can ignore an incoming call by pressing the Silence soft key or reject
an incoming call by pressing
.
Ending Calls
Press .
Call Mute
• Press during a call to mute the call.
• Press again to un-mute the call.
Call Hold and Resume
To place a call on hold:
Press the Options soft key during a call, and then select Hold.
To resume a call, do one of the following:
• If there is only a call on hold, press the Resume soft key.
• If there are two calls on hold, press the Resume soft key to resume the current
call.
Press the Swap soft key to swap between calls.
9
Page 11

Call Transfer
You can transfer a call in the following ways:
Blind Transfer
1. Press the Options soft key during a call, and then select Transfer.
2. Enter the number you want to transfer the call to.
3. Press the Transfer soft key.
Semi-Attended Transfer
1. Press the Options soft key during a call, and then select Transfer.
2. Enter the number you want to transfer the call to.
3. Press , or to dial out.
4. Press the Transfer soft key when you hear the ring-back tone.
Attended Transfer
1. Press the Options soft key during a call, and then select Transfer.
2. Enter the number you want to transfer the call to.
3. Press , or to dial out.
4. Press the Transfer soft key after the call is answered.
Call Forward
To enable the call forward feature on a specific line:
1. Press the OK key to enter the main menu, and then select Call Features->Call
Forward.
2. If there are multiple lines assigned to your handset, press or to highlight
the desired line, and then press the OK soft key.
3. Press or to highlight the desired forwarding type, and then press the OK
soft key.
• Always----Incoming calls are forwarded immediately.
• Busy----Incoming calls are forwarded when the line is busy.
• No Answer----Incoming calls are forwarded if not answered after a period of
time.
4. Select Enabled from the Status field.
5. Enter the number you want to forward the incoming calls to in the Target field.
For No Answer Forward, press
before forwarding in the After Ring Time field.
6. Press the Save soft key to accept the change.
or to select the desired ring time to wait
10
Page 12

About Yealink
Yealink (Stock Code: 300628) is a global leading unified communication (UC)
terminal solution provider that primarily offers video conferencing systems and
voice communication solutions. Founded in 2001, Yealink leverages its independent research and development and innovation to pursue its core mission: “Easy
collaboration, high productivity.” The company’s high-quality
UC terminal solutions enhance the work efficiency and competitive advantages
of its customers in over 100 countries. Yealink is the world’s second-largest SIP
phone provider and is number one in the China market.
Technical Support
Visit Yealink WIKI (http://support.yealink.com/) for the latest firmware, guides,
FAQ, Product documents, and more. For better service, we sincerely recommend
you to use Yealink Ticketing system (https://ticket.yealink.com) to submit all your
technical issues.
YEALINK(XIAMEN) NETWORK TECHNOLOGY CO.,LTD.
Web: www.yealink.com
Addr: 309, 3rd Floor, No.16, Yun Ding North Road, Huli
District, Xiamen City, Fujian, P.R. China
Copyright©2017 YEALINK(XIAMEN) NETWORK
TECHNOLOGY CO.,LTD.All rights reserved.
11
Page 13

FCC CAUTION:
This device complies with part 15 of the FCC Rules. Operation is subject to the following two conditions:
(1) This device may not cause harmful interference, and (2) this device must accept any interference
received, including interference that may cause undesired operation.
Any changes or modifications not expressly approved by the party responsible for compliance could void
the user's authority to operate the equipment.
NOTE: This equipment has been tested and found to comply with the limits for a Class B digital device,
pursuant to part 15 of the FCC Rules. These limits are designed to provide reasonable protection against
harmful interference in a residential installation. This equipment generates, uses and can radiate radio
frequency energy and, if not installed and used in accordance with the instructions, may cause harmful
interference to radio communications. However, there is no guarantee that interference will not occur in a
particular installation. If this equipment does cause harmful interference to radio or television reception,
which can be determined by turning the equipment off and on, the user is encouraged to try to correct the
interference by one or more of the following measures:
—Reorient or relocate the receiving antenna.
—Increase the separation between the equipment and receiver.
—Connect the equipment into an outlet on a circuit different from that to which the receiver is connected.
—Consult the dealer or an experienced radio/TV technician for help.
The equipment complies with FCC radiation exposure limits set forth for an uncontrolled environment,
This transmitter must not be co-located or operating in conjunction with any other antenna or transmitter.
IC WARNING:
Privacy of communications may not be ensured when using this telephone.
Les communications effectuées au moyen de cet appareil ne sont pas nécessairement protégées des
indiscrétions.
This device complies with Industry Canada licence-exempt RSS standard(s). Operation is subject to the
following two conditions: (1) this device may not cause interference, and (2) this device must accept any
interference, including interference that may cause undesired operation of the device.
Le présent appareil est conforme aux CNR d'Industrie Canada applicables aux appareils radio exempts
de licence. L'exploitation est autorisée aux deux conditions suivantes : (1) l'appareil ne doit pas produire
de brouillage, et (2) l'utilisateur de l'appareil doit accepter tout brouillage radioélectrique subi, même si le
brouillage est susceptible d'en compromettre le fonctionnement.
This Class B digital apparatus complies with Canadian ICES-003.
Cet appareil numérique de la classe B est conforme à la norme NMB-003 du Canada.
The device is compliance with RF exposure guidelines, user can obtain Canadian information on RF
exposure and compliance.
Le présent appareil est conforme
Après examen de ce materiel aux conformité ou aux limites d'intensitè de champ RF,
Les utilisateurs peuvent sur l'exposition aux radiofréquences et la conformité and compliance d'acquérir.
 Loading...