

Page 1

Getting Started
Network Settings
You can configure the base station to obtain network settings in one of the following ways:
DHCP: By default, the base station attempts to contact a DHCP server in your network to
obtain the valid network settings, e.g., IP address, subnet mask, gateway address
and DNS address.
Static: If the base station cannot contact a DHCP server for any reason, you need to
configure the IP address, subnet mask, gateway address, primary DNS address
and secondary DNS address for the base station manually.
To configure the network parameters for the base station manually:
1. Press the OK key to enter the main menu, and select Settings->System Settings->
Network.
2. Enter the system PIN (default: 0000), and press the Done soft key.
3. Select Static from the IP Address Type field.
4. Enter the valid values in the IP Address, Subnet Mask, Default Gateway, Primary DNS and
Secondary DNS fields.
5. Press the Save soft key to accept the change.
Note: The wrong network settings may result in inaccessibility of your phone and may have an
impact on the network performance. For more information about these parameters, contact
your system administrator.
Handset Registration
The handset in the W52P package is pre-registered to the base station. The handset
number and name display on the idle screen after turning the handset on. If your handset
is not pre-registered to the base station, do one of the followings to register it manually:
If the handset LCD screen prompts “Searching for Base”, long press on the base
station till the first LED flashes. Then press the OK key to enter the main menu, and
Settings->Registration->Register Handset
select
If the handset LCD screen prompts “Press base page 2s then press OK”, long press
on the base station till the first LED flashes. Then press the OK soft key on the handset.
to register the handset.
Configuring your Phone
IP DECT Phone
W52P & W52H
Shortcuts
This helps you get quick access to features by pressing the shortcut keys directly without
having to scroll through the menu.You can press the following predefined shortcuts to
access some frequently used features of your handset when the handset is idle:
Press to access the call history.
Press to check the line status.
Press to place an internal call.
Press to access the directory.
Press to decrease the ringer volume.
Press to increase the ringer volume.
For more information, refer to the User Guide available online at:
http://www.yealink.com/DocumentDownload.aspx?CateId=142&flag=142.
Copyright 2013 YEALINK NETWORK TECHNOLOGY CO.,LTD.
c
Quick Installation Guide
www.yealink.com
Applies to firmware version 30 or later.
Page 2
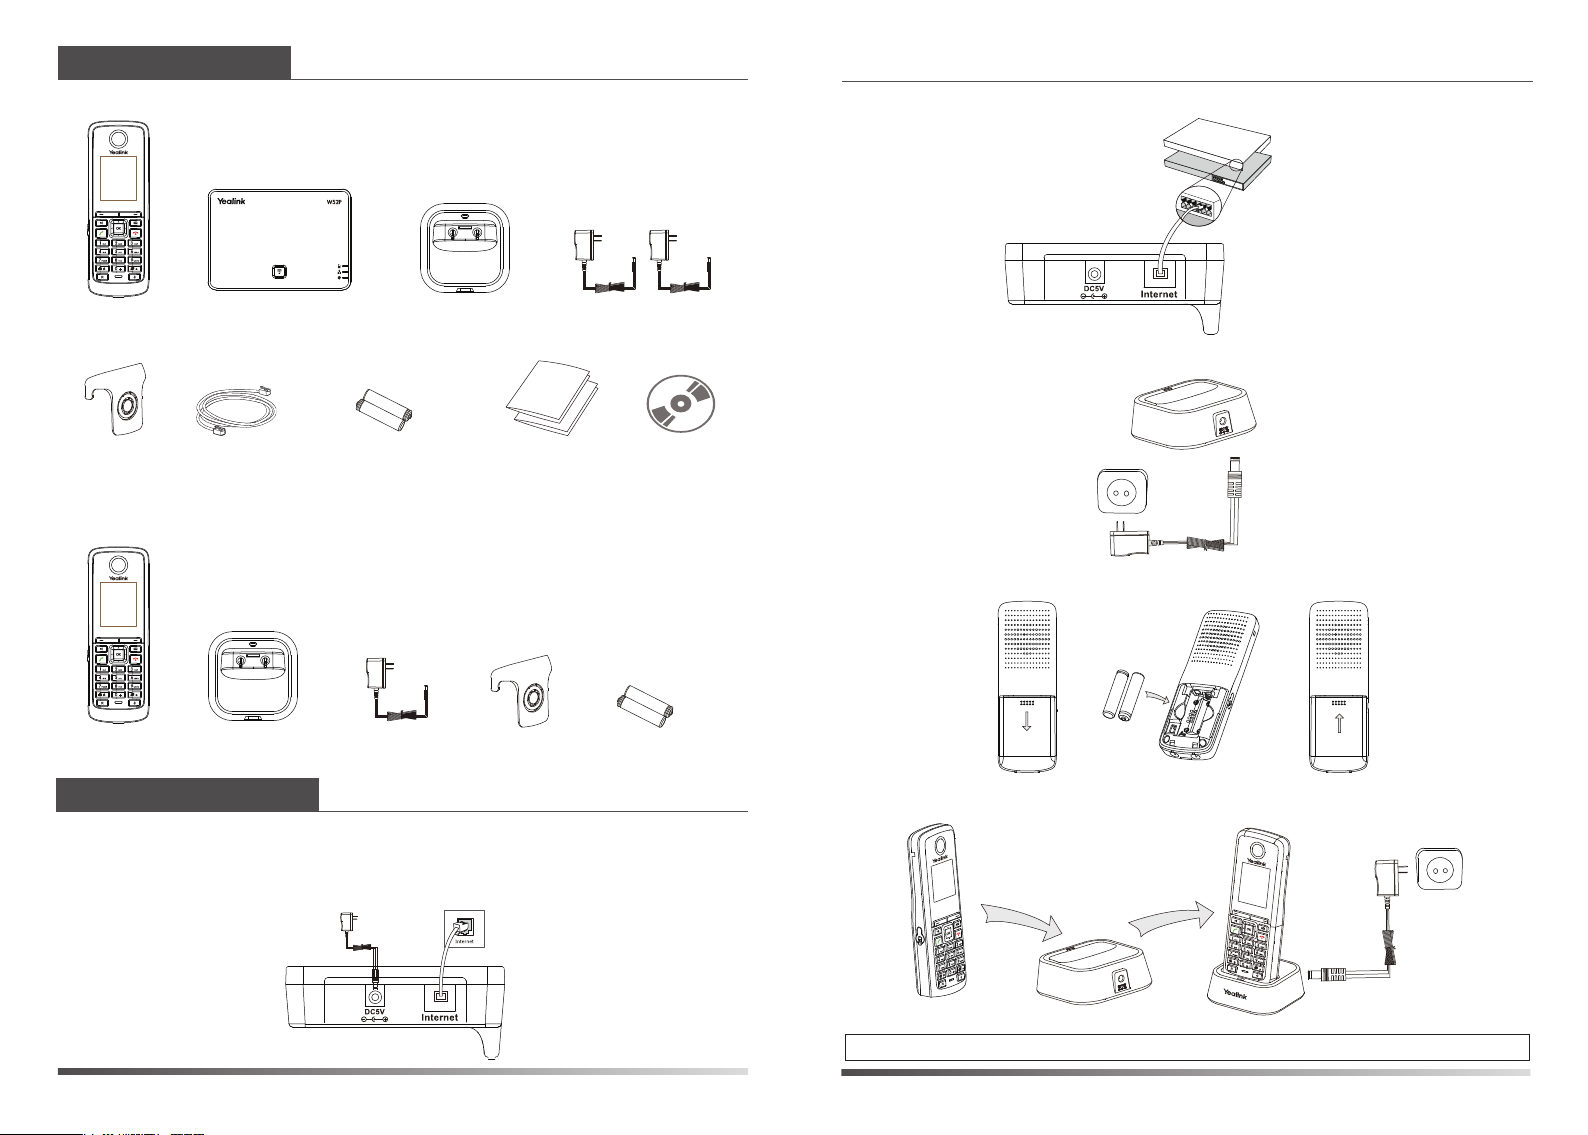
Packaging Contents
The following items are included in your W52P package:
b. PoE (Power over Ethernet) Option
IEEE 802.3af compliant
PoE Hub/Switch
Handset
Belt Clip
Base Station
Ethernet Cable
Charger Cradle
Two Rechargeable
Batteries
Quick Installation
Guide & Quick
Reference Guide
Two Power Adapters
CD-ROM
The following items are included in your W52H package:
Handset
Charger Cradle
Power Adapter
Belt Clip
Two Rechargeable
Batteries
Assembling the Phone
1. Connect the network and power for the base station in one of the
following ways, as shown below:
a. AC Power Option
2. Connect the charger cradle, as shown below:
3. Insert the batteries into the handset, as shown below:
4. Charge the handset, as shown below:
W52P & W52H Quick Installation Guide
Note: The charging status of the handset is indicated in the top right-hand corner of the LCD screen.
www.yealink.com
 Loading...