

Page 1
Owner's Manual
Bedienungsanleitung
Mode d'emploi
mi
^^ÊÊʧ
Wm
m
«
■
Page 2

Congratulations on your
purchase of the Yamaha
PortaSound PSS-380!
You now own a great portable keyboard
with a compact form that is packed full
of musical enjoyment. Its outstanding
features, developed through the culmina
tion of the latest technology, will surely
provide your performance with greater
versatility and expression.
Read this User's Guide carefully while
playing your new PortaSound, and you
will be able to make full use of its many
fantastic features in no time.
Herzlichen Glückwunsch
zum Kauf des Yamaha
PortaSound PSS-380!
Sie besitzen Jetzt ein hervorragendes,
transportables und kompaktes Keyboard,
vollgepackt mit phantastischen Funktionen
für höchsten Musikgenuß. Die außerge
wöhnlichen Merkmale, entwickelt auf
dem letzten Stand der Technologie, dienen
dazu, Ihrem Spiel erhöhte Vielseitigkeit
und Ausdruckskraft zu verleihen.
Beziehen Sie sich beim Spielen ihres
neuen PortaSound auf diese Anleitung,
und Sie werden bereits nach kurzer Zeit
in der Lage sein, die Vielzahl an sensa
tionellen Funktionen voll einzusetzen.
Félicitations d'avoir porté
votre choix sur le Yamaha
PortaSound PSS-380.
Vous voici en possession d'un fantastique
clavier portatif compact qui regorge des
trésors musicaux. Ses caractéristiques
exceptionnelles, fruits des dernières tech
nologies de pointe, sont prêtes à vous
donner des performances de plus grande
polyvalence et de possibilités d'expression.
Lisez attentivement ce mode d'emploi tout
en jouant sur votre nouveau PortaSound
et vous serez très vite apte à tirer le
meilleur parti de ses atouts.
¡Enhorabuena por la adquisición
de! PortaSound PSS-380
Yamaha!
Ahora usted posee un excelente teclado
portátil de forma compacta que está com
pletamente equipado para poder disfrutar
de música. Sus notables características,
desarrolladas a través de la culminación
de la más reciente tecnología, propor
cionarán sin duda a sus actuaciones
mayor versatilidad y expresión.
Lea cuidadosamente este manual de
instrucciones mientras toque con su
PortaSound y, en poco tiempo, podrá
sacar el máximo partido de sus muchas
y fantásticas funciones.
CONTENTS
PRECAUTIONS..................................................... 2
GETTING STARTED
POWER............................................................. 3
ACCESSORY JACKS
OPTIONS.......................................................... 5
QUICK GUIDE
DESCRIPTION OF PARTS................................... 8
SELECTING THE VOICE....................................10
SELECTING THE STYLE AND AUTO
ACCOMPANIMENT
DIGITAL SYNTHESIZER...................................31
USING SONG MEMORY
LET’S TRY PLAYING!
TROUBLESHOOTING
SPECIFICATIONS................................................44
............................................
......................................
......................................................
.........................................
....................................
.......................................
........................................
16
38
41
42
INHALT
VORSICHTSMASSREGELN
VORBEREITUNG ZUM SPIEL
3
4
6
NETZVERSORGUNG..................................... 3
HILFSANSCHLÜSSE...................................... 4
SONDERZUBEHÖR........................................ 5
SCHNELLÜBERSICHT
BESCHREIBUNG DER FUNKTIONSTASTEN
UND-REGLER.................................................... 8
WAHL EINER STIMME
WAHL DES MUSIKSTILS UND DER
AUTOMATISCHEN BEGLEITUNG
DIGITAL SYNTHESIZER...................................31
VERWENDUNG DER SONG MEMORY
SPIELBEGINN
FEHLERSUCHE...................................................42
TECHNISCHE DATEN........................................44
.....................................................
...............................
...........................
........................................
......................................
...............
............
TABLE DES MATIERES
2
PRECAUTIONS..................................................... 2
PREPARATIFS
3
6
10
16
38
41
ALIMENTATION
PRISES AUXILIAIRES
OPTIONS.......................................................... 5
GUIDE RAPIDE
DESCRIPTION DES COMMANDES
SELECTION DE VOIX
SELECTION DU STYLE ET DE
L’ACCOMPAGNEMENT AUTOMATIQUE
SYNTHETISEUR NUMERIQUE
UTILISATION DE LA MEMOIRE DE
MELODIE...........................................................38
ESSAYONS DE JOUER
GUIDE DE DEPANNAGE
SPECIFICATIONS................................................44
......................................................
............................................
...................................
....................................................
........................................
........................
......................................
...................................
..................
INDICE
PRECAUCIONES.................................................. 2
ANTES DE COMENZAR...................................... 3
....
3
3
4
6
9
10
16
31
41
43
ALIMENTACIÓN
TOMAS AUXILIARES.................................... 4
OPCIONES
GUÍA RÁPIDA....................................................... 6
DESCRIPCIÓN DE LAS PARTES
SELECCIÓN DE LA VOZ
SELECCIÓN DEL ESTILO Y DEL
ACOMPAÑAMIENTO AUTOMÁTICO
SINTETIZADOR DIGITAL
EMPLEO DE LA MEMORIA DE
CANCIONES......................................................38
¡PROBEMOS A TOCAR!
GUÍA PARA LA SOLUCIÓN DE
PROBLEMAS
ESPECIFICACIONES
............................................
.......................................................
...................................
................................
....................................
....................................................
..........................................
.......................
...........
3
5
9
10
16
31
41
43
44
Page 3

PRECAUTIONS-taking care
OF YOUR PORTASOUND
Your new PortaSound is a fine musical instrument—
and should be treated as such.
Handle it with care and common sense, and it will
give you years of enjoyment.
Location
• Avoid exposure to direct sunlight or other sources
of heat. Never leave it inside a car where it can get
very hot. Also avoid highly humid or dusty places.
VORSICHTSMASSREGELN-
PFLEGE IHRES PORTASOUND
Ihr neues PortaSound ist ein hochwertiges Musikinstru
ment und sollte auch als solches behandelt werden.
Sofern Sie beim Umgang auf die nötige Vorsicht
achten, wird Ihnen das Instrument auf Jahre hinaus
Freude bereiten.
Aufstellung
•Vermeiden Sie das Instrument direktem Sonnen
licht oder anderen Wärmequellen auszusetzen.
Lassen Sie es niemals in einem Fahrzeug liegen,
wo sich mitunter Hitze staut. Vermeiden Sie trüber
hinaus auch feuchte und staubige Umgebungen.
PRECAUTIONS-SOINS A
APPORTER AU PORTASOUND
Le nouveau PortaSound est un instrument de musique
de précision et doit être traité en tant que tel.
Si Гоп le manipule avec soin en tenant compte de sa
fragilité relative, il donnera entière satisfaction à
l’utilisateur pendant des années.
Emplacement
•Eviter d’exposer l’appareil au rayonnement solaire
direct ou à d'autres sources de chaleur. Ne jamais
le laisser dans un véhicule, car la température peut
s’y élever fortement. Eviter également les endroits
humides et poussiéreux.
PRECAUCIONES - cu idado
DE su PORTASOUND
Su nuevo PortaSound es un instrumento musical
delicado - y tiene que tratarse como tal.
Manéjelo con cuidado y sentido común, y le ofrecerá
años de entretenimiento.
Ubicación
• Evite la exposición a la luz solar directa y a otras
fuentes térmicas. No lo deje nunca en el interior
de un automóvil, ya que podría calentarse mucho.
Evite también lugares muy húmedos y polvorientos.
Interference Through
Electromagnetic Fields
• Do not use your PortaSound close to television sets,
radios or other equipment receiving electromagnetic
signals as this may cause interference noise in the
other appliance.
Handling
• Protect your PortaSound from strong impact. Be
careful not to drop it or place heavy objects on it.
• Do not apply unreasonable force the buttons and
levers.
When You are Not Using the
PortaSound
•After use, always turn off the POWER switch.
•When not using your PortaSound for long periods,
be sure to remove the batteries to avoid damage
through battery leakage.
Cleaning
• Clean the exterior with a soft, dry cloth.
•To remove stubborn stains, use a slightly
moistened cloth to wipe off the soiled areas.
• Never use alcohol, thinner, or other chemical
solvents; their use will damage the finish.
• Do not leave vinyl chloride material on the
PortaSound for a long time; it may adhere
to the exterior.
Störungen durch elektroma
gnetische Felder
• Spielen Sie Ihr PortaSound nicht in der Nähe eines
Fernsehgeräts, eines Radios oder eines sonstigen,
elektromagnetische Sendesignale empfangenden
Geräts, da diese Rauschstörungen in anderen
Geräten verursachen können.
Umgang mit dem Instrument
• Bewahren Sie Ihr PortaSound vor starken Stößen.
Lassen Sie es nicht fallen, und stellen Sie keine
schweren Objekte darauf ab.
•Betätigen Sie die Tasten und Regler nicht stärker
als notwendig.
Bei Nichtbenutzung des
PortaSound
•Schalten Sie das Instrument nach dem Spielen stets
über den Netzschalter (POWER) aus.
•Nehmen Sie die Batterien heraus, wenn Sie das
Instrument für längere Zeit nicht benutzen, um ein
eventuelles Auslaufen der Batterien zu vermeiden.
Reinigung
•Wischen Sie das Außengehäuse mit einem
weichen, trockenen Tuch sauber.
•Verwenden Sie, um hartnäckigem Schmutz zu
entfernen, ein leicht angefeuchtetes Tuch.
• Verwenden Sie niemals Alkohol, Verdünner oder
chemische Lösungen, da diese die Oberfläche des
Instruments beschädigen können.
• Bringen Sie niemals Vinylchlorid für längere Zeit in
Kontakt mit Ihrem PortaSound, um ein Festkleben
zu vermeiden.
Interférence électromagnétique
• Ne pas utiliser le PortaSound à proximité d’un
téléviseur, d’une radio, ou d’autres appareils qui
reçoivent des signaux électromagnétiques car
l’instrument risque de parasiter les autres appareils.
Manipulation
• Protéger le PortaSound contre tout choc violent.
Veiller à ne pas le laisser tomber et à ne pas y
poser d’objet lourd.
• Ne pas appuyer de force sur les touches et les
leviers.
Lorsque le PortaSound n'est pas
utilisé
•Après usage, toujours commuter l’interrupteur
POWER sur arrêt.
•Lorsque le PortaSound ne doit pas être utilisé
pendant une période prolongée, veiller à enlever
les piles pour éviter tout dommage éventuel dû à
une fuite de celles-ci.
Entretien
• Essuyer l’extérieur avec un chiffon doux et sec.
• Enlever les taches rebelles à l’aide d’un chiffon
doux et humide.
• Ne jamais utiliser d’alcool, de dissolvant ou d’autre
solvant chimique, car ces produits risquent
d’abîmer la finition.
•Ne pas laisser longtemps d’objet en chlorure de
vinyle sur le PortaSound, car ce plastique risque
d’adhérer au coffret extérieur de l’instrument.
Interferencias debidas a campos
electromagnéticos
• No emplee el PortaSound cerca de aparatos de
televisión, de radio, ni de otros equipos receptores
de señales electromagnéticas, ya que se podría
producir ruido de interferencias en ellos.
Manejo
• Proteja su PortaSound contra impactos fuertes.
Tenga cuidado para no dejarlo caer, y no coloque
objetos pesados sobre él.
• No aplique presión irrazonable sobre los botones
y planeas.
Cuando no vaya a emplear su
PortaSound
• Después de emplear el PortaSound, ponga siempre
el interruptor POWER en OFF.
•Cuando no vaya a emplear el PortaSound durante
mucho tiempo, extraiga las pilas para evitar el daño
que podría causar el electrólito de las mismas.
Limpieza
•Limpie el exterior con un paño suave y seco.
• Para quitar manchas difíciles, emplee un paño
ligeramente humedecido.
• No emplee nunca alcohol, bencina, ni otros
disolventes químicos, ya que podría dañar ei
acabado.
• No deje materiales de cloruro de vinilo sobre el
PortaSound durante mucho tiempo, ya que podrían
adherirse ai mismo.
Page 4

GETTING STARTED
POWER
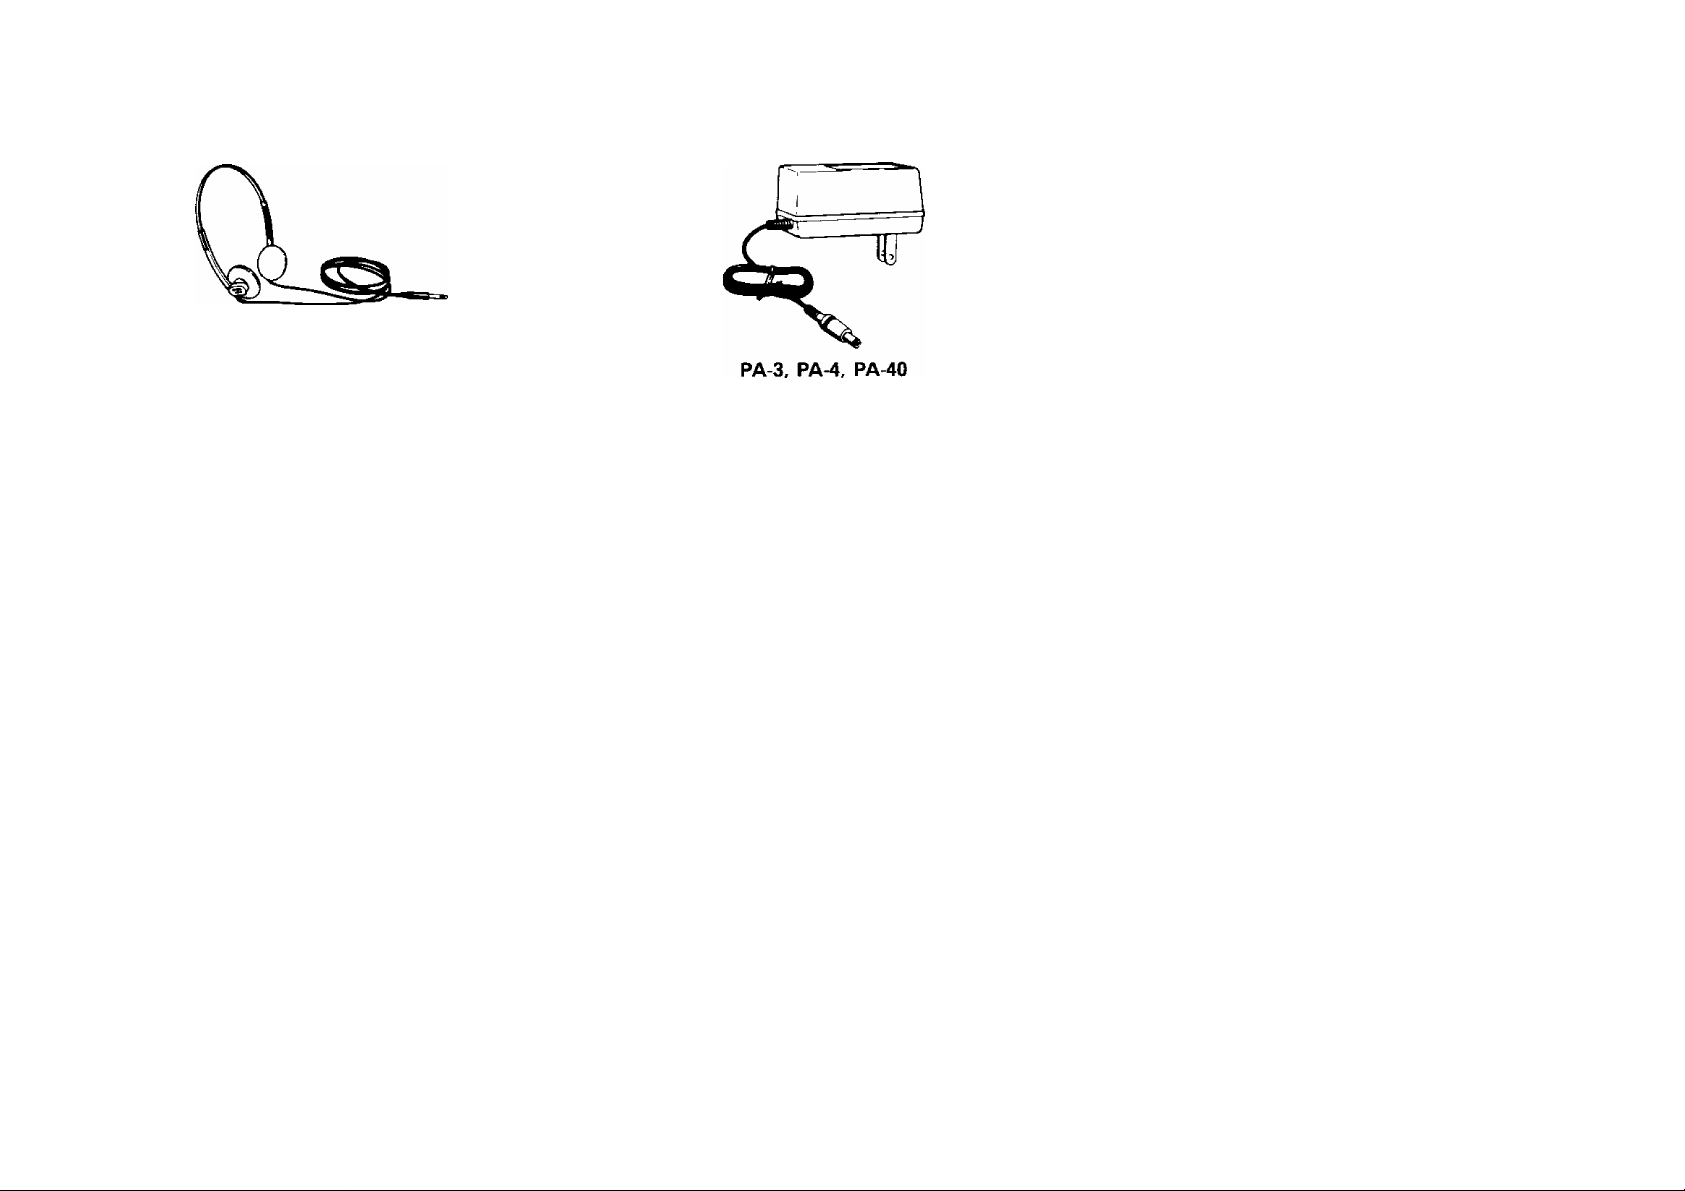
Your PortaSound can run on batteries or can
run on a household current by connection to
the optional Yamaha PA-3, PA-4, or PA-40
Power Adaptor.
VORBEREITUNG ZUM SPIEL
METZVERSORGUNG
Das PortaSound kann mit Batteriestrom oder
durch Anschluß eines der als Sonderzubehör
lieferbaren Yamaha-Netzteile PA-3, PA-4 oder
PA-40 über Netzstrom betrieben werden.
PREPRATIFS
ALIMENTATION
Le PortaSound peut fonctionner sur piles ou
sur le courant secteur grâce au branchement
de l’adaptateur d’alimentation secteur Yamaha
PA-3, PA-4, ou PA40, disponible en option.
ANTES DE COMENZAR
AUMENTACIÓN
Su PortaSound puede funcionar con pilas,
o con la corriente de la red conectándole
un adaptador de alimentación de CA PA-3,
PA-4, o PA-40 Yamaha opcional.
Inserting Batteries
Turn the instrument upside-down and remove
the battery compartment lid Insert the six
1.5V size “C” batteries provided, making sure
that their poles are aligned. Replace the lid.
*When the Batteries Run Down
When the batteries run low and the battery
voltage drops below a certain level, the
PortaSound may produce either a distorted
sound or no sound at all at high volume levels.
As soon as this happens, replace all six
batteries with new ones. If you allow the
batteries to become spent completely, any
data you have stored in the internal
memories will be lost.
Using an AC Power Adaptor
To connect your PortaSound to a wall socket,
you will need the separately sold Yamaha
PA-3, PA-4, or PA-40 Power Adaptor. No other
adaptor can be used, so be sure to ask for the
right kind.
Einlegen der Batterien
Drehen Sie das Instrument um, und nehmen
Sie den Batteriefachdeckel am Unterboden ab.
Legen Sie die sechs mitgelieferten 1,5-VBatterien des Typs R14 ein, und achten Sie auf
die korrekte Ausrichtung der Batteriepole.
Setzen Sie den Batteriefachdeckel wieder an.
Battery size: [EC “R-14”
ANSI "C”
JIS"SUM-2"
Verwendbare Batterietyjren: lEC "R-14"
ANSI "C”
JIS "SUM-2”
*Bei schwachen Batterien
Bei schwachen Batterien und Abfallen der
Batteriespannung unter einen bestimmten
Grad erzeugt das PortaSound entweder nur
verzerrten Klang bzw. (bei höher Lautstärke
einstellung) überhaupt keinen Klang. Tauschen
Sie alle sechs Batterien gegen neue aus,
sobald dieser Zustand eintritt. Warten Sie
nicht, bis die Batterien völlig leer sind,
da in diesem Fall sämtliche in den internen
Speicher eingegebenen Daten verlorengehen.
Verwendung eines Netzteils
Für den Anschluß Ihres PortaSound an eine
Netzsteckdose benötigen Sie eines der als
Sonderzubehör erhältlichen Yamaha-Netzteile
PA-3, PA-4 oder PA-40. Die Verwendung
anderer Netzteile als die hier genannten ist
nicht möglich. Achten Sie deshalb beim Kauf
des Netzteils darauf, daß es sich um das
richtige Modell handelt.
Misen place des piles
Renverser l’instrument et enlever le couvercle
du logement des piles. Insérer les six piles de
1,5 V de format C, fournies, en s’assurant de
respecter l’agencement des polarités. Ensuite,
remettre le couvercle en place.
Format des piles: IEC "R-14”
ANSI “C"
JIS "SUM-2"
Tamaño de las pilas: lEC “R-14”
ANSI “C"
JIS “SUM-2"
* Lorsque les piles s’épuisent
Lorsque les piles s’épuisent et que la tension
tombe en-dessous d’un certain niveau, le
PortaSound risque de produire des sons
déformés ou pas de son du tout lorsque
l’intensité sonore est trop forte. Dès que ce
phénomène apparaît, remplacer les six piles par
des neuves. Si l’on laisse les piles s’épuiser
complètement, les données mémorisées dans
le PortaSound seront effacées.
Emploi d’im adaptateur d’alimentation secteur
Pour raccorder le PortaSound à une prise murale,
un adaptateur d’alimentation Yamaha PA-3,
PA-4 ou PA-40, disponible en option, est
indispensable. Comme aucun autre type
d’adaptateur ne peut être utilisé, s’assurer
de se procurer l’adaptateur requis.
Inserción de las pilas
Dé la vuelta al instrumento y extraiga la tapa
del compartimiento de las pilas. Inserte las seis
pilas de 1,5V, tamaño “C”, suministradas,
cerciorándose de que los polos queden
alineados. Vuelva a colocar la tapa.
"Cuando se gasten las pilas
Cuando las pilas se gasten y la tensión
disminuya por debajo de cierto nivel, el
PortaSound puede producir sonido distor
sionado o no producir ninguno a altos niveles
de volumen. Tan pronto como suceda esto,
reemplace las seis pilas por otras nuevas.
Si deja que las pilas se agoten completamente,
se perderán todos los datos almacenados en
las memorias internas.
Empleo de un adaptador de alimentación deCA
Para conectar su PortaSound a una toma de
la red, necesitará un adaptador de alimentación
PA-3, PA-4, o PA-40 Yamaha vendido por
separado. Como no podrá emplearse ningún
otro adaptador, cerciórese de solicitar el tipo
correcto.
Page 5

Tlug the adaptor into a convenient wall
socket and its connector into the DC 9-12V
IN jack on the back of your PortaSound.
"Schließen Sie das Netzteil an eine Netzsteckdose
und dessen Stecker an die Betriebsstrom
buchse DC 9-12V IN an der Rückwand des
PortaSound an.
* Brancher l’adaptateur dans une prise murale
adéquate et enficher son connecteur dans la
prise DC 9-12V IN, située au dos du PortaSound.
* Enchufe el adaptador en una toma de la red
y su conector en la toma DC 9-12V IN de la
parte posterior de su PortaSound.
ACCESSORY JACKS
•Using Headphones
For private practicing and playing without
disturbing others, connect headphones to the
rear panel HEADPHONES/AUX. OUT jack.
The built-in speakers are automatically cut
off when you insert a headphone plug into
this jack.
•Connecting a Keyboard Amplifier or Stereo Amplifier
After making sure the PortaSound is turned
off, use an audio cable to connect the LINE
IN or AUX. IN jack of the keyboard amplifier
or stereo system to the HEADPHONES/AUX.
OUT jack of the PortaSound.
HILFSANSCHLÜSSE
•Verwendung von Kopfhörern
Schließen Sie Kopfhörer an die Buchse
HEADPHONES/AUX. OUT an der Rückwand
an, wenn Sie in aller Ruhe üben möchten,
ohne andere dabei zu stören. Die eingebauten
Lautsprecher werden bei Anschluß der
Kopfhörer an diese Buchse automatisch
abgeschaltet.
•Anschluß eines Keyboardverstarkers oder einer Stereoanlage
Vergewissern Sie sich, daß das Instrument
ausgeschaltet ist. Schließen Sie dann die Buchse
LINE IN bzw. AUX. IN des Keyboardverstärkers
bzw. der Stereoanlage mit einem Audioanschlußkabel an die Buchse HEADPHONES/
AUX. OUT des PortaSound an.
PRISES AUXILIAIRES
•Emploi d'un casque d’écoute
Pour s’exercer et jouer sans déranger
personne, brancher un casque d’écoute à la
prise HEADPHONES/AUX. OUT du panneau
arrière. Les haut-parleurs incorporés sont
automatiquement coupés lorsqu’on insère
la fiche du casque d’écoute dans cette prise.
t Raccordement d’un amplificateur de
clavier ou d’un amplificateur stéréo
Après s’être assuré que le PortaSound est
hors tension, utiliser un cordon audio pour
relier la prise LINE IN ou AUX. IN de
l’amplificateur de clavier ou du système
stéréo à la prise HEADPHONES/AUX. OUT
du PortaSound.
TOMAS PARA ACCESORIOS
•Empleo de auriculares
Para practicar en privado y tocar sin
molestar a los demás, conecte los auriculares
a la toma HEADPHONES/AUX. OUT del
panel posterior. Cuando inserte la clavija de
los auriculares en esta toma, los altavoces
incorporados se cortarán automáticamente.
•Conexión a un amplificador de teclado o a un amplifícador estéreo
Después de cerciorarse de que la alimentación
del PortaSound esté desconectada, emplee un
cable de audio para conectar la toma LINE
IN o AUX. IN del amplificador o el sistema
estéreo a la toma HEADPHONES/AUX.OUT
del PortaSound.
■®í
Page 6
OPTIONS
SONDERZUBEHÖR
OPTIONS
OPCIONES
HPE-5, HPE-3
•Headphones
• Kopfhörer
•Casque d’écoute
•Auriculares
• AC Power Adaptor
•Netzteil
•Adaptateur d’alimentation secteur
• Adaptador de alimentación de CA
SCC-23
•Soft Carrying Case
•Weichschalenkoffer
•Etui souple de transport
•Funda para transporté
Page 7
QUICK GUIDE
This section provides a simple introduction to your
PortaSound. For further details on its operation,
refer to the respective pages listed in parentheses.
SCHNELLÜBERSICHT
Dieser Abschnitt liefert eine einfache Beschreibung
des PortaSound. Genauere Einzelheiten zur Bedienung
finden Sie auf den jeweils in Klammern angege
benen Seiten.
GUIDE RAPIDE
Ce chapitre a pour but de donner une introduction
simple du PortaSound, Pour plus de détails sur le
fonctionnement, se reporter aux pages repsectives
indiquées entre parenthèses.
GUIA RAPIDA
En esta sección se ofrece una introducción sencilla
al PortaSound. Para más detalles sobre su operación,
consulte las páginas respectivas indicadas entre
paréntesis.
POWER/MODE lever f^page20)
NORMAL; In this mode, you can perform using only the
rhythm without Automatic Accompaniment.
SINGLE FINGER: You can produce entire chords automati
cally by pressing just one, two. or three keys.
FINGERED: In this mode, you can produce an Automatic
Accompaniment by pressing chords with your left hand.
AUTO BASS: When you press chords with your left hand,
this mode automatically produces an accompaniment
consisting of bass notes.
OFF: Turns off your PortaSound.
DEMONSTRATION
Turn on this START/STOP button to start the demonstration
performance of the preset song. To stop the demonstration
performance, press the START/STOP button again.
Démonstration (DEMONSTRATION)
Enclencher la touche START/STOP pour lancer la
démonstration de la mélodie préréglée. Pour arrêter cette
performance de démonstration, appuyer de nouveau sur
la touche START/STOP.
POWER/MODE-Wahlschalter (^Seite20)
NORMAL: in diesem Betriebsmodus können Sie mit dem
Rhythmus allein, d.h. ohne Verwendung der automatischen
Begleitung, spielen.
SINGLE FINGER: Hierdurch können Sie durch einfaches
Anschlägen von einer, zwei oder drei Tasten automatisch
ganze Akkorde erzeugen.
FINGERED: Dieser Betriebsmodus ermöglicht die Erzeugung
eines automatischen Begleitspiels durch Anschlägen von
Akkorden mit der linken Hand,
AUTO BASS: Während Sie mit der linken Hand Akkorde
anschlagen, erzeugt dieser Betriebsmodus automatisch eine
Baßbegleitung.
OFF: Dient zum Ausschalten des Instruments.
DEMONSTRATION
Drücken Sie die Taste START/STOP zum Starten des
Demonstrationsspiels des Preset-Titels. Drücken Sie die
START/STOP-Taste einfach noch einmal, wenn Sie das
Demonstrationsspiel wieder abschalten möchten.
Demostración (DEMOSTRATION)
Ponga en ON este interruptor START/STOP para iniciar
la ejecución de demostración de la canción preajustada.
Para cesar ia demostración, vuelva a presionar el botón
START/STOP.
Levier POWER/MODE (voir page
NORMAL: Dans ce mode, il est possible de jouer en utilisant
uniquement le rythme, sans accompagnement automatique.
SINGLE FINGER: On peut produire des accords entièrement
automatiques en appuyant sur une, deux, ou trois louches.
FINGERED: Dans ce mode, il est possible de produire un
accompagnement automatique en plaquant des accords de
la main gauche.
AUTO BASS; Lorsqu’on plaque des accords de la main gauche,
ce mode produit automatiquement un accompagnement
consistant en notes basses.
OFF: Met le PortaSound hors tension.
20
)
Palanca de alimentación/selección
de modo (POWER/MODE) (■♦página 20)
NORMAL: En este modo, usted podrá locar empleando
solamente el ritmo sin acompañamiento automático.
SINGLE FINGER: Usted podrá producir automáticamente
acordes enteros con sólo pulsar una, dos, o tres teclas.
FINGERED: En este modo, usted podrá producir un
acompañamiento automático pulsando los acordes con la
mano izquierda.
AUTO BASS: Cuando pulse los acordes con la mano izquierda,
este modo pruducirá automáticamente un acompañamiento
compuesto por notas de contrabajo.
OFF; En esta posición se desconectará la alimentación del
PortaSound.
DIGITAL SYNTHESIZER section
(■♦page 31)
This features provides you with 100 preset voices which
can be edited to create your own exclusive voice.
By changing the voice waveform and the way in which the
voice amplitude changes over time, you enjoy a virtually
unlimited variety of voices.
DIGITAL SYNTHESIZER-Sektion
(■♦Seite 31)
Diese Funktion stellt Ihnen 100 Preset-Stimmen zur
Verfügung, die Sie beliebig bearbeiten und somit Ihren
eigenen Klangvorstellungen anpassen können. Durch
Ändern der Signatschwingungstorm und der sich ändernden
Stimmenamplitude, ergibt sich eine nahezu unbegrenzte
Vielzahl an Stimmenmöglichkeiten.
Section du synthétiseur numérique
(DIGITAL SYNTHETISER) (voir page 3i)
Cette section offre à l’utilisateur 100 voix préréglées qui
peuvent être montées pour créer des voix exclusives.
En changeant la forme d’onde de la voix et la manière
dont l'amplitude de la voix change sur la durée, on peut
obtenir un nombre quasiment illimité de voix.
Sección del sintetizador digital
(DIGITAL SINTHESIZER) (^página 31)
Esta sección le ofrece 100 voces preajustadas que podrá
editar para crear sus propias y exclusivas voces.
Cambiando la forma de onda de una voz en la forma
en la que la amplitud cambia con el tiempo, podrá disfrutar
prácticamente de una variedad ilimitada de voces.
Page 8
VOICE selection (100 voices) (^page lo)
©Turn on the VOICE button in the VOICE/STYLE SELECT
section.
{©Choose a voice (an instrument sound) from the VOICE
LIST on the left of the MULTI DISPLAY.
@ Use the numeric buttons 0-9 to input the corresponding
two-digit Voice No. by beginning with the left digit.
Wahl einer Stimme (VOICE) (100 Stimmen)
(“►Seite 10)
©Drücken Sie die Taste VOICE in der VOICE/STYLE
SELECT-Sektion.
(©Wählen Sie eine Stimme (einen Instrumen ten klang) aus
der VOICE LIST links am MULTI DISPLAY.
(© Geben Sie über die Zifferntasten 0 bis 9 die zweistellige
Nummer der gewünschten Stimme, angefangen mit der
linken Ziffer, ein.
Section des voix (VOICE) (voir page 10)
©Enclencher la touche VOICE de la section VOICE/STYLE
SELECT.
©Choisir une voix (un son instrumental) dans la liste des
voix, située à la gauche de l’affichage.
@ Utiliser les touches numériques de 0 à 9 pour composer
le numéro à deux chiffres de la voix, en commençant
par le chiffre de gauche.
Selección de voces (VOICE) (KX) voces)
{■♦página 10)
® Ponga en ON el botón VOICE de la sección
VOICE/STYLE SELECT.
@ Elija una voz (un sonido instrumental) de la sección
VOICE LIST de la parte izquierda de MULTI DISPLAY,
© Emplee los botones numéricos 0-9 para introducir el
número de dos dígitos correspondiente a la voz.
comenzando por el de las decenas.
STYLE selection (100 styles) (^page i6)
© Turn on the STYLE button in the VOICE/STYLE SELECT
section.
© Choose a style (a rhythm pattern) from the STYLE LIST.
d) Use the numeric buttons 0-9 to input the corresponding
two-digit Style No. by beginning with the left digit.
©To start the rhythm, turn on the START/STOP button in
the RHYTHM CONTROL section. To stop the rhythm,
press the same button again.
STYLE-Wahl (100 Stilrichtungen) (■♦Seite 16)
©Drücken Sie die Taste STYLE in der VOICE/STYLE
SELECT-Sektion.
©Wählen Sie einen Musikstil (ein Rhythmuspattern) aus
der STYLE LIST.
@ Verwenden Sie die Zifferntasten 0 bis 9 zum Eingehen
der entsprechenden zweistelligen Stilnummer, angefangen
mit der linken Zifler.
©' Drücken Sie zum Starten des Rhythmus die Taste
START/STOP in der RHYTHM CONTROL-Sektion,
Drücken Sie diese Taste einfach noch einmal, wenn Sie
den Rhythmus wieder abschalten möchten.
MULTI DISPLAY
Your PortaSound is provided with a digital LED display,
so you can check the currently selected voice, style, tempo,
and Transpose value, or the current beat.
AFFICHAGE MULTIPLE
Le PortaSound est muni d'un affichage à diodes électro
luminescentes (DEL) numériques, de sorte qu’il est possible
de vérifier la voix couramment choisie, le style, le tempo
et la valeur de la transposition, ou la mesure.
SONG MEMORY (-►page 38)
The Song Memory feature lets you record and play back
your performance of three different songs.
Mémoire de mélodie (SONG MEMORY)
(voir page 38)
La mémoire de mélodie permet d’enregistrer et de
reproduire trois mélodies différentes.
Sélection du style (STYLE) (100 styles)
(voir page 16)
© Enclencher la touche STYLE de la section VOICE/STYLE
SELECT.
© Choisir un style (un motif rythmique) dans la liste des
styles.
@ Utiliser les touches numériques de 0 à 9 pour composer
le numéro à deux chiffres du style, en commençant par
le chiffre de gauche.
© Pour lancer le rythme, enclencher la touche START/STOP
de la section RHYTHM CONTROL. Pour arrêter le
rythme, appuyer de nouveau sur la même touche.
MULTI DISPLAY
Das Instrument ist mit einer LED-Anzeige ausgerüstet,
so daß Sie die jeweils eingestellte Stimme, den Musikstil,
das Tempo, den Transpositions wert oder die verwendete
Takt länge überprüfen können.
Multivisualizador (MULTI DISPLAY)
Su PortaSound dispone de un visuaiizador digital de LED,
con el que podrá comprobar la voz, el estilo, el tempo,
y el valor de transposición seleccionados, o el tiempo actual.
SONG MEMORY (-►Seite 38)
Die Musiktitel-Speicherfunktion ermöglicht die Aufnahme
und Wiedergabe drei verschiedener Titel Ihres Spiels.
Memoria de canciones (SONG MEMORY)
(■♦página 38)
La memoria de canciones le permitirá grabar y reproducir
su actuación de tres canciones diferentes.
Selección de estilo (STYLE) (100 estilos)
(■♦página 16)
© Ponga en ON el botón STYLE de la sección VOICE/
STYLE SELECT.
©Elija un estilo (o un patrón rítmico) de STYLE LIST.
@ Emplee los botones numéricos 0-9 para introducir
el número de dos dígitos correspondiente al estilo,
comenzando por el de las decenas.
© Para iniciar el ritmo, ponga en ON el botón START /STOP
de la .sección RHYTHM CONTROL. Para cesar el ritmo,
vuelva a presionar el mismo botón.
Page 9
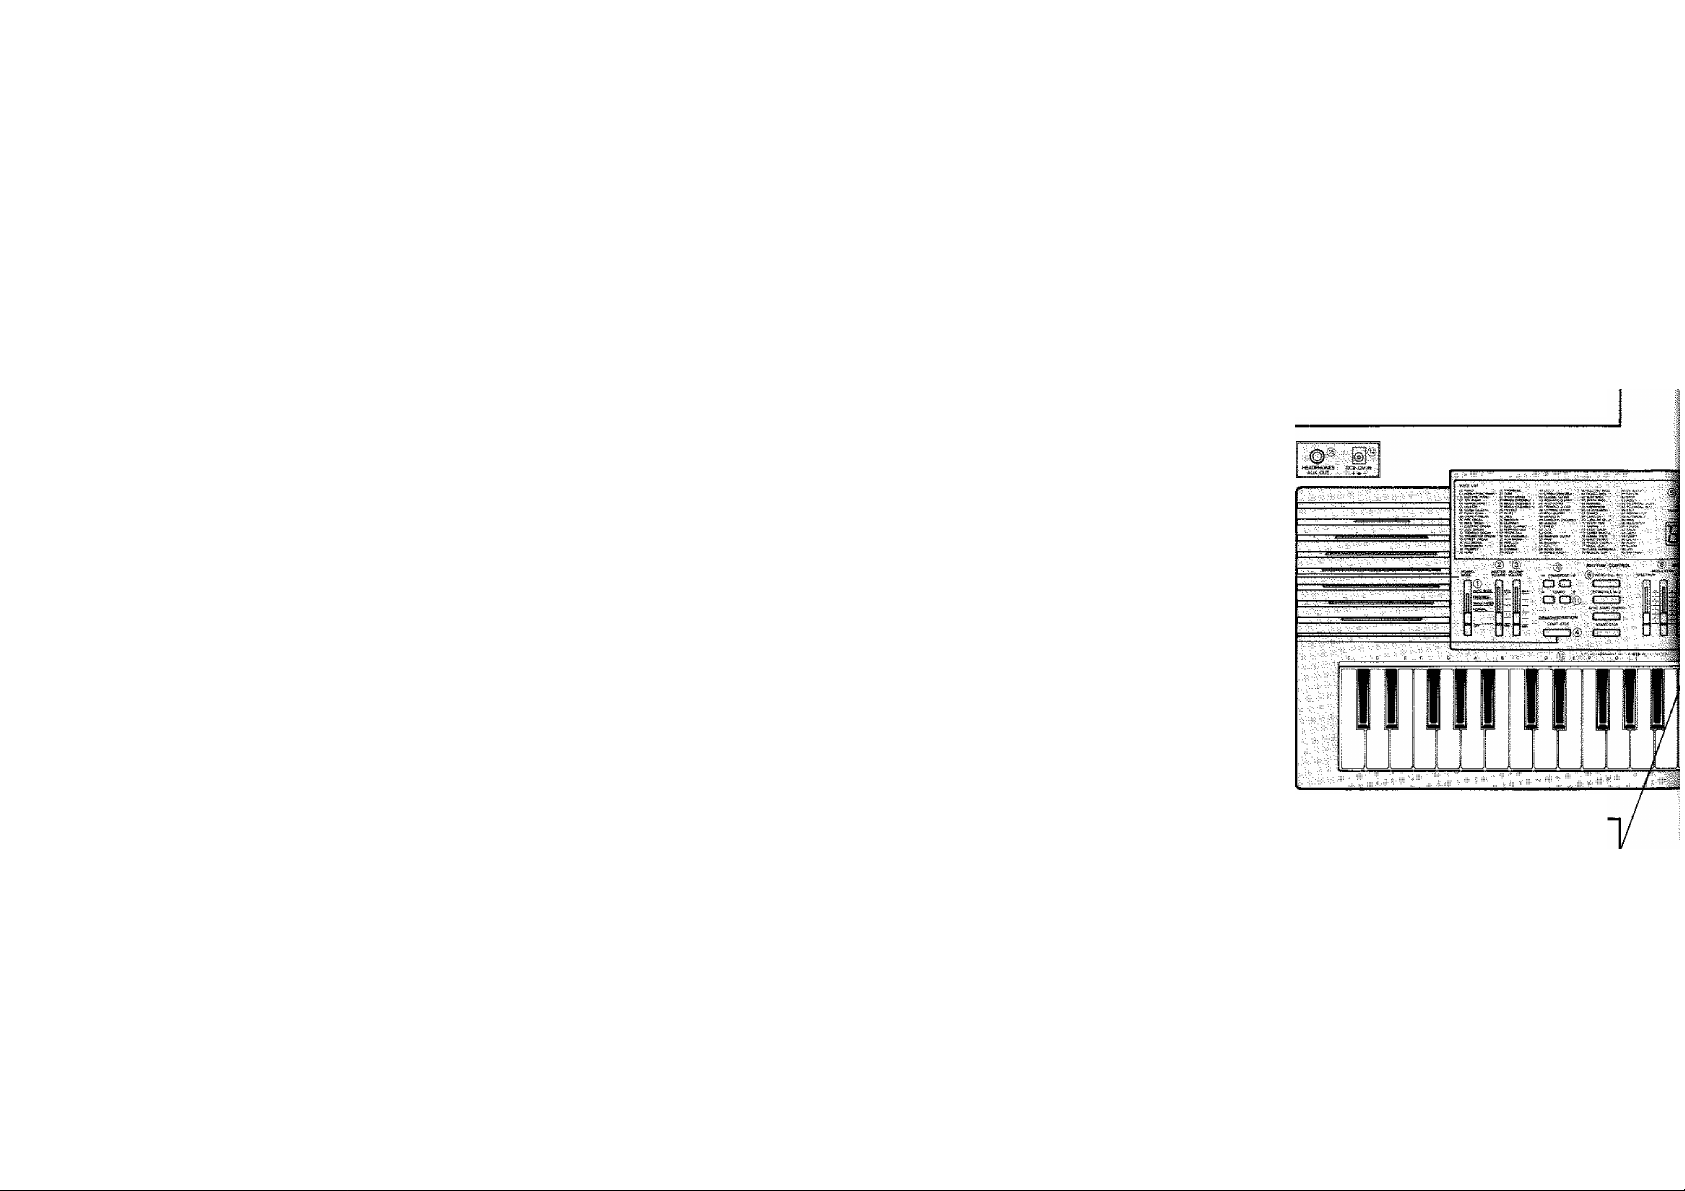
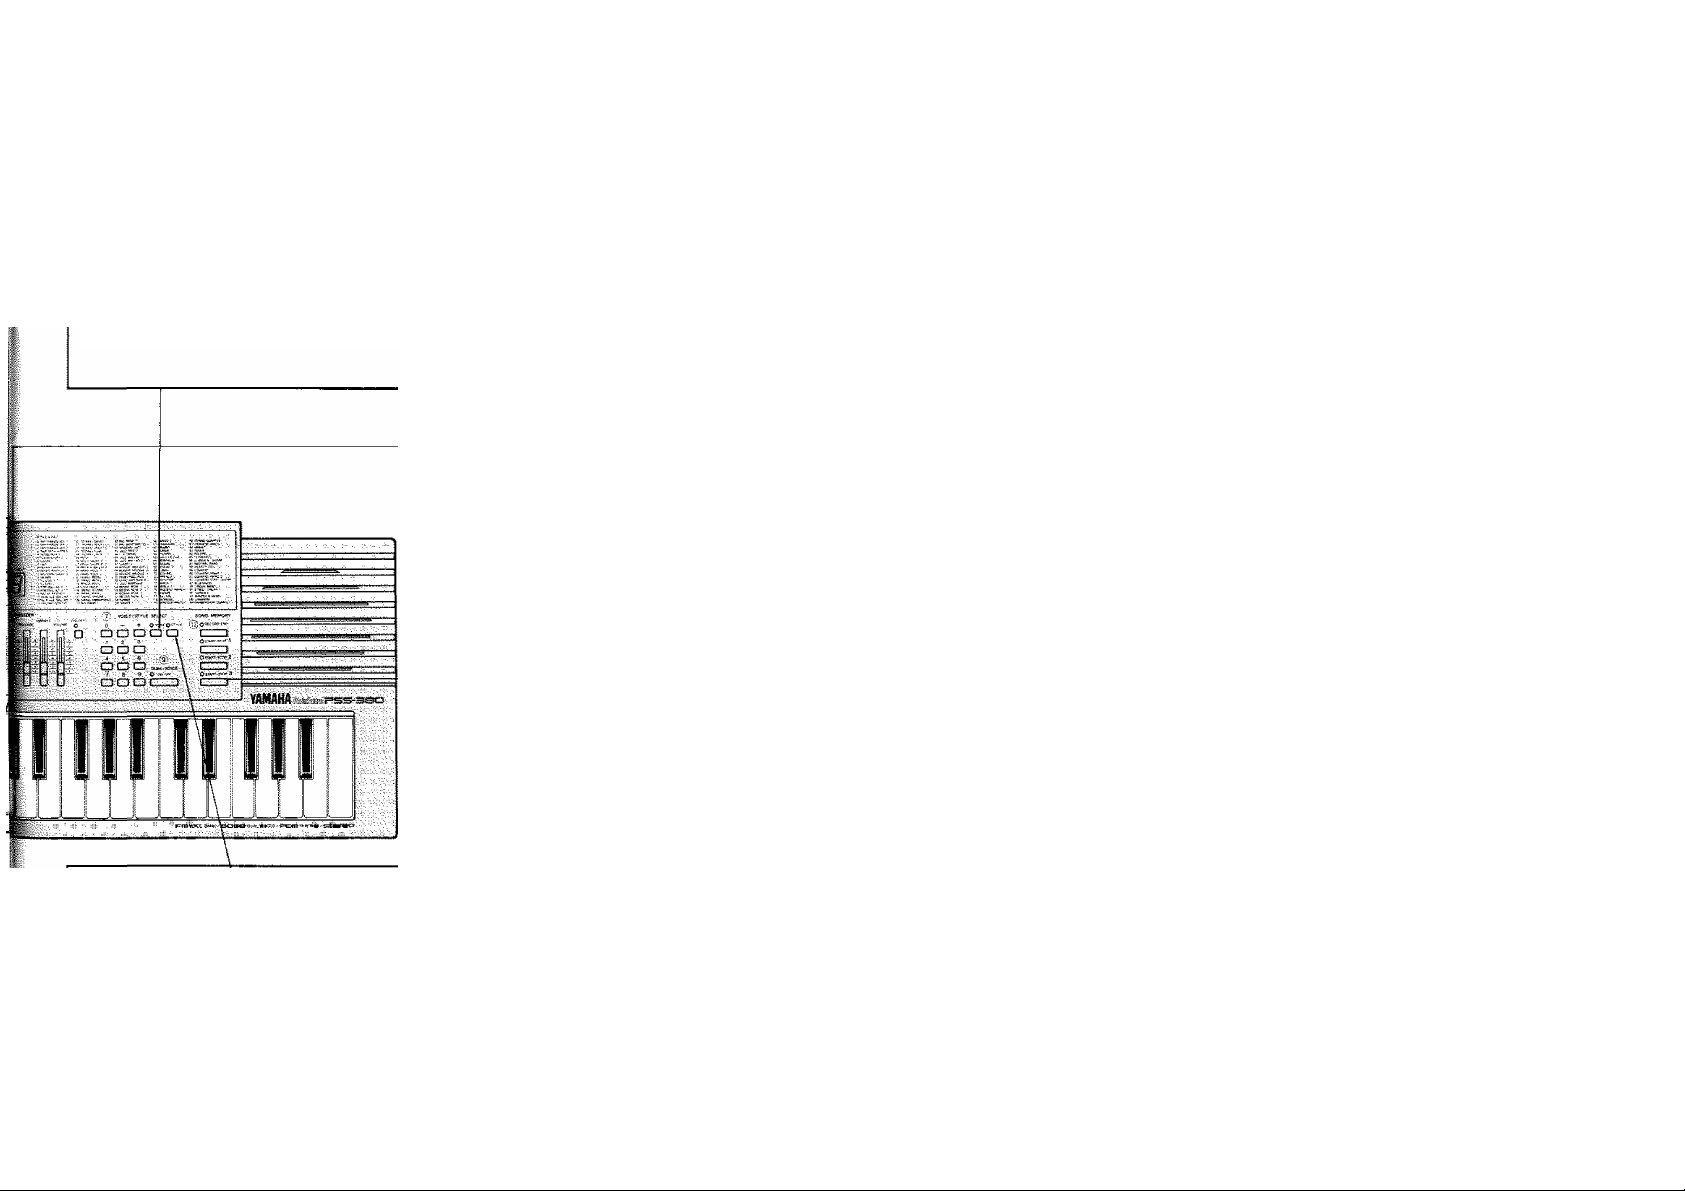
DESCRIPTION OF PARTS
0POWER/MODE lever
Selects an accompaniment mode or turns off the PortaSound.
©MASTER VOLUME lever
Adjusts the overall volume.
©ACCOMP. VOLUME lever
Adjusts the volume of the Automatic Accompaniment.
©DEMONSTRATION section
Press this START/STOP button to start or stop playback of the
preset demo song.
©MULTI DISPLAY
A digital display that shows the currently selected voice, style,
tempo. Transpose value or the current beat.
©RHYTHM CONTROL section
Use these buttons to start, stop or add variation to the rhythm
or Automatic Accompaniment.
©VOICE/STYLE SELECT section
Use these buttons to select the desired voice or style.
©DIGITAL SYNTHESIZER section
These levers let you alter the parameters of a voice to create
your own original sound.
@ DUAL VOICE section
Turn on the ON/OFF button when you want to create a richer,
layered sound consisting of two voices.
©TRANSPOSE buttons
Use these buttons to transpose the overall key of the PortaSound.
©TEMPO buttons
Use these buttons to adjust the tempo of the rhythm.
©SONG MEMORY section
These buttons are used to record and play back your
performance.
©Auto Accompaniment section of the keyboard
During automatic accompaniment, this section of the keyboard
is used for playing chords with your left hand. In NORMAL
mode, it functions as an ordinary keyboard,
©DC 9-12V IN jack
Connect the AC power adaptor to this jack,
©HEADPHONES/AUX. OUT jack
The sound of the PortaSound is output from this jack, which can
be connected to headphones, a keyboard amplifier, or a stereo
system.
BESCHREIBUNG DER FUNKTIONSTASTEN UND REGLER
® POWER/MODE-Wahlschalter
Dient zum Wählen eines Begleitmodus bzw. zum Ausschalten
des Instruments.
©MASTER VOLUME-Schalter
Dient zum Einstellen der Gesamtlautstärke.
©ACCOMP. VOLUME-Schalter
Dient zum Einstellen des automatischen Begleitspiels.
@ DEMONSTRATION-Sektion
Drücken Sie die START/STOP-Taste zum Ein- bzw. Ausschalten
der Wiedergabe des Preset-Demonstrationstitels.
©MULTI DISPLAY
Eine Digitalanzeige, die die jeweils gewählte Stimme, den
Musikstil, das Tempo, den Transpositionswert und die eingestellte
Taktlänge anzeigt.
©RHYTHM CONTROL-Sektion
Verwenden Sie diese Tasten zum Ein- bzw. Ausschalten, oder
um dem Rhythmus bzw, der automatischen Begleitung eine
Spielfolge hinzuzufügen.
©VOICE/STYLE SELECT-Sektion
Verwenden Sie diese Tasten zur Wahl der gewünschten Stimme
oder des gewünschten Stils.
©DIGITAL SYNTHESIZER-Sektion
Diese Schalter dienen zum Ändern der Parametereinstellung
einer Stimme, um deren Klang wie gewünscht zu ändern.
©DUAL VOICE-Sektion
Die Taste ON/OFF dient zum Ein-/Ausschalten der Doppel
stimmenfunktion zur Erzeugung eines reicheren, überlagerten
Klangs, bestehend aus zwei Stimmen.
©TRANSPOSE-Taste
Verwenden Sie diese Tasten, um die Gesamttonart des
Instruments zu transponieren,
©TEMPO-Tasten
Verwenden Sie diese Tasten zum Einstellen des Rhythmustempos,
©SONG MEMORY-Sektion
Diese Tasten dienen zur Aufnahme und Wiedergabe Ihres Spiels.
® Automatikbegleitsektion der Tastatur
Beim Spiel mit automatischer Begleitung dient dieser Abschnitt
der Tastatur zum Spielen von Akkorden mit der linken Hand.
Im NORMAL-Modus funktioniert dieser Tastaturabschnitt mit
normaler Tastenfunktion.
@DC 9-12 V IN-Buchse
Schließen Sie das Netzteil an diese Buchse an,
©HEADPHONES/AUX. OUT-Buchse
Der Klangausgang des Instruments liegt an dieser
Ausgangsbuchse an. Die Buchse dient für den Anschluß von
Kopfhörern, Keyboardverstärker oder Stereoanlage,
SffiS +
i) QQ
slrf- oa©
Page 10
DESCRIPTION DES COMMANDES
® Levier d'alimentation/mode (POWER/MODE)
Choisit un mode d’accompagnement ou met le PortaSound hors
tension.
©Levier d'intensité sonore principale (MASTER VOLUME)
Ajuste l’instensité sonore principale.
©Levier d'intensité sonore de l'accompagnement (ACCOMP.
VOLUME)
Ajuste l’instensité sonore de l’accompagnement automatique,
©Section de démonstration (DEMONSTRATION)
Appuyer sur la touche START/STOP pour lancer ou arrêter la
lecture de la mélodie de démonstration préréglée.
©Affichage multiple (MULTI DISPLAY)
Affichage numérique qui indique la voix couramment choisie, le
style, le tempo, la valeur de transposition ou la mesure courante.
©Section du réglage du rythme (RHYTHM CONTROL)
Utiliser ces touches pour lancer, arrêter, ou ajouter une variation
au rythme ou à l’accompagnement automatique.
©Section de sélection des voix/du style (VOICE/STYLE SELECT)
Utiliser ces touches pour choisir la voix ou le style souhaité.
©Section du synthétiseur numérique (DIGITAL SYNTHETISER)
Ces leviers permettent d’altérer les paramètres d’une voix, afin
de créer un son original.
0:0:00 0:
ÓOO
àoôj*®™
ôôoBfb
©Section des voix doubles (DUAL VOICE)
Enclencher la touche ON/OFF lorsqu’on veut créer un son plus
riche, plus dense, en utilisant deux voix.
©Touches de transposition (TRANSPOSE)
Utiliser ces touches pour transposer la clé générale du
PortaSound.
©Touches du tempo (TEMPO)
Utiliser ces touches pour régler le tempo du rythme.
©Section de la mémoire de mélodie (SONG MEMORY)
Ces touches sont utilisées pour mémoriser et reproduire ses
performances.
©Section de l'accompagnement automatique du clavier
Pendant l’exécution de l’accompagnement automatique, cette
section du clavier est utilisée pour produire des accords à (a
main gauche. En mode NORMAL, il fonctionne comme un
clavier ordinaire.
©Prise d'entrée d'alimentation en courant continu de 9 à 12 V
(DC 9-12V IN)
Brancher l’adaptateur d'alimentation secteur à cette prise,
©Prise de casque d'écoute/de sortie auxiliaire
(HEADPHONES/AUX. OUT)
Le son du PortaSound sort de cette prise qui accepte le
branchement d’un casque d’écoute, d’un amplificateur de clavier,
ou d’un système stéréo.
DESCRIPCIDN DE LAS PARTES
©Palanca de alimentación/selección de modo (POWER/MODE)
Empléela para seleccionar un modo de acompañamiento o para
desconectar la alimentación del PortaSound.
©Palanca de volumen principal (MASTER VOLUME)
Empléela para ajustar el volumen global.
©Palanca de volumen de acompañamiento (ACCOMP, VOLUME)
Empléela para ajustar el volumen del acompañamiento
automático,
©Sección de demostración (DEMOSTRATION)
Presione este botón START/STOP para iniciar o cesar la
reproducción de la canción de demostración preajustada.
©Multivisualizador (MULTI DISPLAY)
Visualizador digital que muestra la voz, el estilo, el tempo, y el
valor de transposición seleccionados, o el tiempo actual.
©Sección de control del ritmo (RHYTHM CONTROL)
Emplee estos botones para iniciar, cesar, o añadir variación a!
ritmo o al acompañamiento automático.
©Sección de selección de voces/estilos (VOICE/STYLE)
Emplee estos botones para seleccionar la voz o el estilo que desee.
©Sección del sintetizador digital (DIGITAL SINTHESIZER)
Estas palancas le permitirán alterar los parámetros de una voz
para crear su sonido original propio.
©Sección de voces dobles (DUAL VOICE)
Ponga en ON el botón ON/OFF cuando desee crear un sonido
estratificado más rico compuesto por dos voces.
©Botones de transposición (TRANSPOSE)
Empléelos para transponer el tono general del PortaSound,
©Botones de tempo (TEMPO)
Empléelos para ajustar el tempo del ritmo.
©Sección de memoria de canciones (SONG MEMORY)
Emplee estos botones para grabar y reproducir su actuación,
©Sección de acompañamiento automático del teclado
Durante el acompañamiento automático, esta sección del teclado
se emplea para reproducir acordes con la mano izquierda. En el
modo NORMAL, funciona como teclado ordinario.
©Toma de entrada de CC (DC 9-12V INI
Conéctele el adaptador de alimentación de CA,
©Toma para auriculares/salida auxiliar ÍHEAPHONES/AUX. OUT)
El sonido del PortaSound sale a través de esta toma, a la que
podrá conectar unos auriculares, un amplificador de teclado, o
un sistema estéreo.
Page 11

SELECTING THE VOICE
You can choose from 100 voices. First of all, let's
select different voices and listen to their sound.
WAHL EINER STIMME
100 verschiedene Stimmen stehen zur Auswahl.
Wählen Sie zunächst eine Reihe von Stimmen aus,
und hören Sie sich deren Klang an.
SELECTION DE VOIX
Il est possible de choisir parmi 100 voix. Avant tout,
sélectionner les voix tour à tour et écouter leur son.
SELECCION DE LA VOZ
Usted podrá seleccionar entre 100 voces. En primer
lugar, seleccione diferentes voces y escuche
su sonido.
®Set the POWER/MODE lever to
NORMAL.
The PortaSound is turned off when this
lever is in OFF position. To turn it on,
choose a mode by setting the lever to
another position.
@Tum on the VOICE button.
Turn on the VOICE button in the VOICE/
STYLE SELECT section.
The currently selected Voice No. will
appear at the three-digital MULTI DISPLAY.
erstellen Sie den POWER/MODE-
Wahlschalter auf NORMAL.
Bei Umschalten auf OFF wird das Instrument
ausgeschaltet. Wählen Sie zum Einschalten
des Instruments eine Stimme, indem Sie
den Schalter einfach in eine andere Stellung
umschalten.
©Drücken Sie die VOICE-Taste in der
VOICE/STYLE SELECT-Sektion.
Die derzeit eingestellte Stimmennummer
erscheint daraufhin in der dreistelligen
Digitalanzeige MULTI DISPLAY.
TñANSPOSE 12-12
® Placer le levier POWER/MODE sur
la position NORMAL.
Le PortaSound est hors tension lorsque ce
levier est sur la position OFF. Pour mettre
celui-ci sous tension, choisir un mode en
plaçant ce levier sur une autre position.
n
Al/TOBAS»
ü
mai FiNQEF
NOMML
OFF
©Enclencher la touche VOICE.
Enclencher la touche VOICE de la section
VOICE/STYLE SELECT.
Le numéro de la voix couramment choisie
apparaît sur l’affichage multiple à trois chiffres.
0 voice
a a
MULTI CHSPLAY
voice 00-99
STYLE 00-99
TEMPO 40-540
(T)Ponga la palanca POWER/MODE en
NORMAL.
Si pone esta palanca en OFF, la alimentación
del PortaSound se cortará. Para conectarla,
elija un modo poniendo la palanca en
otra posición.
©Ponga en ON el botón VOICE.
Ponga en ON el botón VOICE de la sección
VOICE/STYLE SELECT.
El número de la voz actualmente seleccio
nada aparecerá en el multivisualizador digital
de tres dígitos.
‘Ö'O'O
U U U
10
Page 12

©Turn off the DUAL VOICE ON/OFF
button.
When the POWER/MODE lever is initially
set to a mode, the DUAL VOICE feature
will automatically be turned on so that
two PIANO voices (No. 00) will be sounded
when you play the keyboard.
If you wish to select and sound only a
single voice, turn off the DUAL VOICE
ON/OFF button.
© Schalten Sie die Doppelstimmen
funktion durch Drücken der Taste
DUAL VOICE ON/OFF aus.
Beim ersten Einstellen des POWER/MODEWahlschalters auf einen Betriebsmodus wird die
DUAL VOICE-Funktion automatisch eingeschaltet,
so daß beim Spielen auf der Tastatur zwei
PIANO'Stimmen (Nr. 00) erzeugt werden.
Schalten Sie deshalb die Doppelstimmenfunktion
durch Drücken der Taste DUAL VOICE ON/OFF
aus, wenn Sie nur eine Stimme wählen und
erzeugen möchten.
©Libérer la touche DUAL VOICE
ON/OFF.
Lorsque le levier POWER/MODE est placé
sur un mode pour la première fois, la
fonction DUAL VOICE s’active automatique
ment, de sorte que deux voix PIANO (n®00)
retentissent lorsqu’on joue sur le clavier.
Si l'on souhaite choisir et écouter le son
d’une seule voix, libérer la touche DUAL
VOICE ON/OFF.
DUAL VOICE
O OfrJ/OFF
©Ponga en OFF el botón DUAL
VOICE ON/OFF.
Cuando ponga inicialmente la palanca
POWER/MODE en un modo, la función
de voz doble se activará automáticamente,
por lo que cuando toque con el teclado oirá
dos voces de piano (número 00).
Si desea selecciona una sola voz, ponga
en OFF el botón DUAL VOICE ON/OFF.
©Choose a voice from the VOICE LIST.
Using the numeric keys 0—9 or the -i- and
- keys at the VOICE/STYLE SELECT
section, input the desired Voice No.
To select the TOY PIANO voice (No. 03),
for example, sequentially press the 0 button
then the 3 button. The selected Voice No.
will appear at the MULTI DISPLAY.
©Wählen Sie eine Stimme aus der
VOICE UST.
Geben Sie durch Drücken der Zifferntasten
0 bis 9 oder der Tasten -t- und — in der
VOICE/STYLE SELECT-Sektion die ge
wünschte Stimmennummer ein. Zum Beispiel:
Drücken Sie zum Wählen der TOY PIANOStimme (Nr, 3) nacheinander die Taste 0 und
dann die Taste 3. Die gewählte Stimmen
nummer erscheint daraufhin in der MULTI
DISPLAY-Anzeige.
oo a O a
aoc^
a a
□ OD
©Choisir une voix dans la liste
VOICE UST,
A l’aide des touches numériques de 0 à 9,
ou des touches H- et - de la section
VOICE/STYLE SELECT, entrer le n° de
voix souhaité.
Par exemple, pour choisir la voix TOY
PIANO (piano d’enfant) (n°3), appuyer sur la
touche 0 puis sur la touche 3. Le n“ de la
voix choisie apparaît sur l’affichage mutiple.
VOICE/STYLE SELECT
0 — + 0 VOICE O STYLÉ
1 2 3
4 5
© Elija una voz de VOICE LIST.
Empleando las teclas numéricas 0-9, y las
teclas + y - de la sección VOICE/STYLE
SELECT, introduzca el número de la voz
que desee.
Para seleccionar la voz TOY PIANO
(número 03), por ejemplo, presione secuencialmente el botón 0 y después el 3. El
número de la voz seleccionada aparecerá
en el multivisualizador.
11
Page 13
* Press the + button to increase the Voice No.
by one, or press the - button to decrease
it by one.
3) Listen to the voice by playing some
notes on the keyboard. Also choose
other voices and listen to their
sound.
When you play the keyboard, the notes
will be sounded using the voice selected
in Step (4). To choose another voice, repeat
Step @.
Drücken Sie die Taste + , um die nächsthöhere
bzw. die Taste um die nächstniedrigere
Stimme einzustellen.
(5) Hören Sie sich den Klang der
Stimme an, indem Sie einige Noten
auf der Tastatur anschlagen.
Wählen Sie auf diese Weise auch andere
Stimmen aus, und prüfen Sie deren Klang.
Beim Spielen auf der Tastatur werden die
Noten mit der unter Schritt @ gewählten
Stimme erzeugt. Wiederholen Sie deshalb
Bedienungsschritt wenn Sie eine andere
Stimme wählen möchten.
★ Appuyer sur la touche + pour faire défiler les n“
de voix un à un, dans l'ordre croissant et appuyer
sur la touche - pour les faire défiler dans l'ordre
décroissant.
Î5) Ecouter la voix en jouant quelques
notes sur le clavier. Choisir également
d’autres voix et écouter leur son.
Lorsqu’on joue sur le clavier, les notes
retentissent par la voix choisie à l’étape ®.
Pour choisir une autre voix, répéter l’étape ®.
★ Presione el botón + para aumentar de uno en
uno el nùmero de voz, o - para disminuirlo.
® Escuche la voz tocando algunas
notas del teclado. Además, elija
otras voces y escuche su sonido.
Cuando toque con el teclado, las notas
sonarán utilizando la voz seleccionada
en el paso Para elegir otra voz, repita
el paso (4).
__
Points to Remember,
>For each voice, up to eight notes (or four notes
tor certain voices) can be sounded at the same
time. During Automatic Accompaniment play
back, however, only half that number of nmes
Ccin be concurrently sounded. And if DUAL
VOICES is on, the maximum number of notes
which can be concmrentiy sounded for each
voice will further halved.
Merkpunkt
►Für jede Stimme können bte zu acht Noten (bzw.
vier Noten bei be^mmten St!mmen)'0eichzeiiig
erzeugt werden. B«m ^iel mit automatischer
Begleitung können jedoch jeweils nur halb so
viele Stimmen ^dchzeitig erzeugt werden. Bei
eingeschalteter DUAL VOICES^unktion wird die
maximale Anzahl der für jede Stimme gleichzeitig
erzeugbaren Noten noch eänraal halbiert.
.A ne pas oublier.
►Pour chaque voix, un maximum de huit notes
(ou quajxe notes pour certaines voix) peut être
joué «muîtanément. Cependant, prendant
i’accompi^nement automatique, seule la moitié
de ces notes peut retentir en même temps.
En oim'e, si la fonctiim DUAL VOICES est
en service, le nombre maximal des notes
qui peuvent retentir ensemble est de nouveau
diminiié de moitié.
__
Puntos a recordar .
♦Para cada voz, podrán sonar al mtemo tiempo
;ocbo notes (cuatro notas para ciertas voces). Sin
embargo, durante el acompañamiento automático,
solamente podrán sonar a la vez la mitad de
este número de notas. Y si DUAL VOICES está
en ON, el numero máximo de notas que pcxirán
sonar a la vez para cada voz se dividirá otra
vez por la mitad.
12
Page 14
DUAL VOICES
Turn on the ON/OFF button when you want
to create a richer, layered sound consisting of
two voices.
One of the two voices will be the currently
selected voice. To select a different voice for
the second voice, perform the operation below.
DUAL VOICES
Schalten Sie die Doppelstimmenfunktion über
die Taste ON/OFF zur Erzeugung eines
reicheren, überlagerten Klangs, bestehend aus
zwei Stimmen, ein. Eine der beiden Stimmen
ist dabei die derzeit gewählte Stimme. Wenn
Sie als zweite Stimme eine andere Stimme
wählen möchten, gehen Sie wie folgt vor.
VOIX DOUBLES
Enclencher la touche ON/OFF lorsqu'on
souhaite obtenir un son plus riche, plus dense
composé de deux voix. Une de celles-ci
consiste en la voix couramment choisie. Afin
de choisir une voix différente pour la seconde
voix, procéder aux démarches d-dessous.
Voces dobles (DUAL VOICES)
Ponga en ON el botón ON/OFF cuando desee
crear un sonido estratificado más rico compuesto
por dos voces.
Una de las dos voces será la actualmente
seleccionada. Para seleccionar una voz diferente
para la segunda, realice la operación siguiente.
(D Hold down the DUAL VOICE button (its
lamp will light) while you press the numeric
keys to input the Voice No. of the desired
second voice.
While this button is held down, the Voice
No. of the second voice will be shown at
the MULTI DISPLAY.
©When you play notes on the keyboard, they
will be sounded using two different voices.
^Points to Remember:
•When thé PortaSourid U initially turned on,
: Dual VOICE wilt autorhatically be turned on
" with the PIANO voice (No. 00) fleeted for both
voices of the Dual Voice.
♦When DUAL VOICE is bn; the maximum
number of notes which can be concurrently
sounded for each voice will be half that of
a single voice when DUAL VOICE is off.
©Halten Sie die Taste DUAL VOICE gedrückt
(das Lämpchen der Taste leuchtet auf), und
wählen Sie gleichzeitig die zweite Stimme,
indem Sie deren Nummer über die Ziffern
tasten eingeben. Während des Drückens
dieser Taste erscheint die Stimmennummer
der zweiten Stimme in der MULTI DISPLAYAnzeige.
voice/style select
0 — + O yoice O STVU
□ □ a a □
1 2 3
□ DO
4 5 6
a a OUML VOICE
"89 ON/OFF
yS
a CD t:
© Beim Spielen auf der Tastatur werden diese
beiden Stimmen zusammen als zwei
verschiedene Stimmen erzeugt.
Merkpunkte ___________
___________
* Bei Einschaiteh des Ihstrument^ wird die DUAL
VÖICE-Funktion äutornät^h einge^chaitet; wobei
die PtANO-Sdmme (Nr. 00) für beide Stimmen der
EAtppeisdmmehhmktiOh erze^^^ wird,
ißei eihgeschälteter DUAL VOiGE-FunktiOn
können für jede Stimme nur maximal halb so
viele Noten gleichzeitig erzeugt wefdbn wie bei
ausgeSchaiteteir DUAL VÖICE-Fünktiori.
©Maintenir la touche DUAL VOICE enfoncée
(son témoin s’allume) tandis que l’on appuie
sur les touches numériques pour entrer le
n° de la seconde voix souhaitée.
Pendant que cette touche est enfoncée,
le n° de la seconde voix apparaît sur
l’affichage multiple.
©Lorsqu’on joue des notes sur le davier, elles
vont retentir avec deux sortes de voix.
. A ne pas oublier
►Lorsque le PortaSound est mis pour la première
fois sous tension, la fonction DUAL VOICE
s^active automatiquement et la voix PIANO
(n°fM) est chmsie pour les deux voix de cette
fonction.
►Lorsque la fonction DUAL VOICE est en service,
le nombre maximal des notes qui peuvent retentir
ensemble pour chaque voix est la moitié du
nombre possible pour une voix lorsque la fonc‘
don DUAL VOICE est libérée.
© Mantenga pulsado el botón DUAL VOlCE
(su lámpara se encenderá) mientras pulse las
teclas numéricas para introducir el número
de la segunda voz.
Mientras mantenga pulsado este botón,
el número de la segunda voz aparecerá
en el multivisualizador.
©Cuando toque notas en el teclado, éstas
sonarán utilizando dos voces diferentes.
Puntos a recordar,
►Cuando conecte inietataeníe la alimentación del
PortaSoand, la voz doble se activará automáti
camente con PIANO (número 00) seleccionada
para ambas voces de las wces dobles.
►Cuando DUAL VOICE esté en ON. eí número
máximo de notas que podrán sonar a la vez
para cada voz será la mitad de ia de una sola
voz cuando DUAL VOICE esté en OFF.
13
Page 15

TRANSPOSE
The Transpose feature allows you to transpose
the overall key of the notes you are actually
playing on the keyboard.
TRANSPOSE
Die Transpositionsfunktion ermöglicht das
Transponieren der Gesamttonart der Noten,
die sie tatsächlich auf der Tastatur spielen.
TRANSPOSITION
La fonction de transposition permet de
transposer la clé générale des notes que l’on
joue sur le clavier.
— inAKSPOSE +
□ a
Transposición (TRANSPOSE)
La función de transposición le permitirá
transponer el tono global de las notas que esté
tocando actualmente en el teclado.
This feature is handy when;
■ You wish to sound notes which are lower or
higher than the actual range of the keyboard.
■ You wish to change the key in order to play
along with other instruments or to provide
accompaniment to a singer.
(T)When either the + or - TRANSPOSE
button is pressed once, the currently set
Transpose value will appear at the MULTI
DISPLAY. (It is initially set to zero.) After
a brief interval, the display of the voice or
style will be restored.
Diese Funktion ist nützlich wenn:
■ Sie Noten erzeugen möchten, die unter oder
über dem tatsächlichen Notenbereich des
Keyboards liegen.
■ Sie das Keyboard auf eine andere Tonart
transponieren möchten, um mit anderen
Instrumenten mitzuspielen oder als Begleitung
mit einem Sänger zu spielen.
(T) Durch Drücken der TRANSPOSE-Taste +
oder - erscheint der derzeit eingestellte
Transpositionswert in der MULTI DISPLAYAnzeige (anfangs auf Null eingestellt). Kurz
darauf erscheint wieder die Stimmennummer
oder der Musikstil in der Anzeige.
Cette fonction est pratique.
■ Lorsqu’on veut faire retentir des notes qui
■ Lorsqu’on veut changer de clé afin de jouer
©Lorsque la touche TRANSPOSE + ou - est
VOICE O0'99
CTYLE 00-19
TEMPO 40-240
TF%ANSP0SE -12-12
sont plus basses ou plus aiguës que la plage
des notes disposibles sur le clavier.
avec d’autres instruments, ou pour fournir
un accompagnement à un chanteur.
enfoncée, la valeur de transposition couram
ment posée apparaît sur l’affichage multiple
(elle est initialement réglée sur “0”). Après
un bref instant, l’affichage de la voix ou du
style réapparaît.
U
Esta función será muy útil cuando:
■ Desee que el sonido de las notas sea inferior
o superior a la gama actual del teclado.
■ Desee cambiar el tono a fin de tocar junto
con otros instrumentos, o para proporcionar
acompañamiento a un cantante.
© Cuando presione el botón TRANSPOSE -i- o -
una vez, el valor de transposición actualmente
establecido aparecerá en multivisualizador.
(Inicialmente está ajustado a cero.) Después
de un breve intervalo, se restablecerá la
visualización de la voz o del estilo.
14
Page 16

(2)To change the Transpose value, press the
+ or - button while the Transpose value
is being displayed. With 0 representing the
original key, the Transpose value can be
changed in a two-octave range of — 12 (one
octave below) to 12 (one octave above). For
example, if you set the Transpose value to 3
and then play a song in the key of C, your
performance will be in the key of Et because
the key has been shifted by three half-steps.
©Drücken Sie zum Transponieren der Tonart
die Taste -t- oder - , während die Anzeige
den Transpositionswert angibt. Mit 0 als
Originaltonart eingestellt, kann der Transpositionswert in einem Zwei-OktavenBereich von - 12 (eine Oktave darunter) bis
12 (eine Oktave darüber) geändert werden.
Wenn Sie zum Beispiel den Transpositions
wert auf 3 einstellen und dann in der Tonart
C spielen, klingen die gespielten Noten
aufgrund der Tonartverschiebung um drei
Halbschritte in der Tonart Ek
©Pour changer la valeur de transposition,
appuyer sur la touche -i- ou — pendant que
la valeur de transposition est affichée. Avec
0 représentant la clé originale, la valeur de
transposition peut être modifiée dans une
plage de deux octaves, de —12 (une octave
en-dessous) jusqu’à 12 (une octave au-dessus).
Par exemple, si l’on règle la valeur de
transposition sur 3, puis que l’on joue une
mélodie sur la clé d’ut, cette mélodie retentira
en mi bémol, parce que la clé a été déplacée
de trois demi-intervalles.
©Para cambiar el valor de transposición,
presione el botón -i- o - mientras esté
visualizándose el valor de transposición.
Con 0 representando el tono original, el
valor de transposición podrá cambiarse
en un margen de dos octavas de — 12 (una
octava inferior) a 12 (una octava superior).
Por ejemplo, si ajusta el valor de transposi
ción a 3 y después toca una canción con
tono de C (Do), su actuación estará en el
tono de Et> (Mi bemol), porque el tono se
habrá desplazado tres medios pasos.
©To restore the original pitch (0), press the -t-
and - buttons at the same time. In addition,
if you continuously hold down the -t- or button, the Transpose value will automatically
continue changing until that button is
released. When 12 or -12 is selected.
Automatic Accompaniment will be returned
to its original key.
_ ID
( L
©Drücken Sie, um die Originaltonlage (0)
wiederherzustellen, die Tasten + und gleichzeitig. Wenn Sie die Taste + oder gedrückt halten, ändert sich der Transposi
tionswert automatisch fortlaufend weiter, bis
die Taste wieder freigegeben wird. Durch
Einsteilen von 12 oder —12 wird die
automatische Begleitung wieder auf die
Originaltonart zurückgestellt.
— THANSPOSE +
a □
© Pour rétablir la hauteur originale (0), appuyer
simultanément sur les touches -t- et —.
En outre, le fait de maintenir ces touches
enclenchées fait changer continuellement
la valeur de transposition, jusqu’à ce que
ces touches soient libérées. Lorsque la valeur
12 ou - 12 est choisie, l’accompagnement
automatique revient à sa clé d’origine.
/?
©Para restablecer el diapasón original (0),
presione los botones -t- y — al mismo
tiempo. Además, si mantiene continuamente
presionado el botón -i- o - , el valor de
transposición continuará cambiando con
tinuamente hasta que suelte el botón.
Cuando selecione 12 o — 12, el acompaña
miento automático volverá al tono normal.
15
Page 17

SELECTING THE STYLE AND
AUTO ACCOMPANIMENT
Selecting the Style
You can choose from 100 styles of rhythm.
First of all, let's select different styles and listen
to their sound.
WAHL DES MUSIKSTILS
UND DER AUTOMATISCHEN
BEGLEITUNG
Wahl des Musikstils
Es stehen 100 verschiedene Rhythmusarten zur
Auswahl, Wählen Sie verschiedene Musikstile aus,
und hören Sie sich deren Klang an.
SELECTION DU STYLE ET
DE L'ACCOMPAGNEMENT
AUTOMATIQUE
Sélection du style
Il est possible de choisir parmi 100 styles différents.
Avant tout, choisir les différents styles tour à tour et
les écouter.
SELECCIÓN DEL ESTILO
Y DEL ACOMPAÑAMIENTO
AUTOMÁTICO
Selección del estilo
Usted podrá elegir entre 100 estilos de ritmo.
En primer lugar, seleccione estilos diferentes
y escuche el sonido.
0Set the POWER/MODE lever to
NORMAL.
©Turn on the STYLE button.
Turn on the STYLE button in the VOICE/
STYLE SELECT section.
©Choose a style from the STYLE
UST.
Using the numeric keys 0—9 or the + and
- keys at the VOICE/STYLE SELECT
section, input the desired Style No.
To select the POP BALLAD 2 style (No. 15),
for example, sequentially press the 1 button
and the 5 button.
©Stellen Sie den POWER/MODE-
Wahlschalter auf NORMAL.
@ Drücken Sie die Taste STYLE.
Drücken Sie die STYLE-Taste in der
VOICE/STYLE SELECr-Sektion.
VOICE/STYLE SELECT
O — + Ovoice#STYLE
o a a a
□ □a
4 5 6
□ □ a
7 8 9
aacD
©Wählen Sie aus der STYLE LIST
einen Musikstil.
Geben Sie durch Drücken der Zifferntasten
0 bis 9 oder der Tasten + und - in der
VOICE/STYLE SELECT-Sektion die
Nummer des gewünschten Musikstils ein.
Zum Beispiel; Drücken Sie zum Wählen des
Stils POP BALLAD 2 (Nr. 15) nacheinander
die Taste 1 und dann die Taste 5.
©Placer le levier POWER/MODE sur
la position NORMAL.
@ Enclencher la touche STYLE.
Enclencher la touche STYLE de la section
VOICE/STYLE SELECT.
©Choisir un style dans la liste STYLE
LIST.
A l’aide des touches numériques de 0 à "9,
ou des touches + et - de la section VOICE/
STYLE SELECT, entrer le n® de style souhaité.
Par exemple, pour choisir le style POP
BALLAD 2 (n°15), appuyer sur la touche 1
puis sur la touche 5.
©Ponga en NORMAL la palanca
POWER/MODE.
©Ponga en ON el botón STYLE.
Ponga en ON el botón STYLE de la sección
VOICE/STYLE SELECT.
© Elija un estilo de STYLE LIST.
Empleando las teclas numéricas 0-9 o las
teclas -F y - de la sección VOICE/STYLE
SELECT, introduzca el número del estilo
deseado.
Para seleccionar el estilo POP BALLAD 2
(número 15), por ejemplo, presione secuencialmente el botón 1 y el botón 5.
★ Press the + button to increase the Style No. by
one, or press the - button to decrease it by one.
* Drücken Sie die Taste + , um die nächsthöhere
bzw. die Taste -, um die nächstniedhgere
Stilnummer einzustellen.
* Appuyer sur la touche + pour faire défiler les n"
de style un à un, dans l'ordre croissant et appuyer
sur la touche - pour les faire défiler dans l'ordre
décroissant.
16
★ Presione el botón + para aumentar el húmero
de estilo de uno en uno, o - para disminuirlo.
Page 18

(4)Start the rhythm.
Turn on the START/STOP button at the
RHYTHM CONTROL section. A drum sound
will be produced in the style selected in
Step (3). Try playing along with the beat.
(4) Starten Sie den Rhythmus.
Drücken Sie die Taste START/STOP in der
RHYTHM CONTROL-Sektion. In dem unter
Schritt @ gewählten Stil wird jetzt ein
Trommelklang erzeugt. Versuchen Sie
mit dem Schlagrhythmus mitzuspielen.
@ Lancer le rythme.
RHYTHM CONTROL
WTRO/FILL W 1
(
------
3
INTRO/FkLL IN 2
í
--------
SVNC STAHT/£ND1NG
1
Enclencher la touche START/STOP de
la section RHYTHM CONTROL. Un son de
batterie est alors produit sans le style choisi
à letape (3). Jouer en suivant la mesure.
0
Inicie el ritmo.
Ponga en ON el botón START/STOP de la
sección RHYTHM CONTROL. En el estilo
seleccionado en el paso (3), se producirá un
sonido de batería. Pruebe a tocar al compás
de este sonido.
©To change to another style:
Repeat Step @. The rhythm will change to
the new style from the beginning of the
next measure.
©To stop the rhythm:
Press the START/STOP button again.
©Umstellen auf einen anderen Stil:
Wiederholen Sie Bedienungsschritt @. Der
Rhythmus wechselt mit Beginn des nächsten
Taktabschnitts auf den neuen Stil.
©Abschalten des Rhythmus:
Drücken Sie die Taste START/STOP noch
einmal.
© Pour changer de style:
Répéter rétape @. Le rythme fait place
au nouveau à partir du début de la mesure
suivante.
© Pour arrêter le rythme:
Appuyer de nouveau sur la touche
START/STOP.
© Píura cambiar a otro estilo:
Repita el paso @. El ritmo cambiará al
nuevo estilo desde el comienzo del compás
siguiente.
® Para cesar el ritmo:
Vuelva a presionar el botón START/STOP.
17
Page 19

TEMPO
Try changing the tempo of the rhythm to suit
each of the songs you play. The tempo can be
changed after the rhythm has been started or
while the rhythm is stopped.
TEMPO
Versuchen Sie das Tempo des Rhythmus jedem
Titel, den Sie spielen anzupassen. Das Tempo
kann nach dem Starten des Rhythmus oder
nach Stoppen des Rhythmus geändert werden.
TEMPO
Essayer de changer le tempo du rythme pour
l’adapter à chaque mélodie que l’on joue. Le
tempo peut être modifié après que le rythme a
été lancé, ou pendant que le rythme est arrêté.
Tempo (TEMPO)
Pruebe a cambiar el tempo del ritmo para
acoplarlo a las canciones que toque. El tempo
podrá cambiarse después de haber iniciado ei
ritmo o mientras éste esté parado.
©Press either the + or — TEMPO
button once.
The currently set tempo (J^D) will appear
at the MULTI DISPLAY. After a brief interval,
the display of the voice or style will be
restored.
© Press the + or - button to adjust
the tempo.
The tempo can be adjusted as long as the
tempo value is being displayed.
★ Illumination status of the RHYTHM indicators
In accordance with the rhythm, the three dots
within the display will light up or go off as
shown below.
® Drücken Sie entweder die Taste +
oder - einmal.
Das derzeit eingestellte Tempo (J = D)
erscheint in der MULTI DISPLAY-Anzeige.
Kurz danach wechselt der Anzeigeninhalt
wieder auf die Angabe der Stimmennummer
oder des Stils.
© Drücken Sie zur Einstellung des
Tempos die Taste + oder -.
Das Tempo kann geändert werden solange
der Tempowert angezeigt bleibt.
* Beleuchtungsstatus der RHYTHM-Anzeigen
Dem gewählten Rhythmus entsprechend, leuchten
die drei Punkte, wie unten dargestellt, im
Anzeigefeld auf oder erlöschen.
— ТГМРО H
a a
VCNCE 00-99
STYLE 00-99
TEMPO 40-240
TRAttóPOSe -12-12
rjn
t í_ и
© Appuyer sur la touche TEMPO +
ou —.
Le tempo couramment choisi (J^O)
apparat sur l’affichage multiple. Après un
bref instant, l’affichage de la voix ou du
style réapparaît.
©Appuyer sur la touche + ou —
pour ajuster le tempo.
Ce tempo peut être réglé pendant que la
valeur du tempo est affichée.
★ Etat de témoins RHYTHM
Les trois points de l'affichage s'allument ou
s'éteignent en fonction du rythme, comme
illustré ci-dessous.
© Presione dos veces el botón TEMPO
+ o
El tempo actualmente ajustado (J = ü)
aparecerá en el multivisualizador. Después
de un breve intervalo, se restablecerá la
visualización de la voz o del estilo.
©Para ajustar el tempo, presione el
botón + o -.
El tempo podrá ajustarse mientras esté
visualizándose el valor del mismo.
Estado de iluminación de los indicadores RHYTHM
De acuerdo con el ritmo, los tres puntos del
visualizador se encenderán y apagarán de la
forma siguiente.
IFour-beat rhythm] / [Viertakt-Rhythmus] / [Mesure à quatre temps] / [Ritmo de cuatro tiemposl
Measure / Taktabschnitt / Mesure / Compás
Beat / Taktschlag / Battement / Tiempo
Dot status / Punktstatus / Etat du point / Estado de los puntos
18
I
I 2
N*/
3 4 12 3 4
^0 ч1/ \1а1/ 'I/ sU \1/
0*0 00«--яГ«0 -900 0*0 OOfH
'l ■'I ' '1/1' 'l' /| ' /| '
Page 20

Points to Remember.
♦The tempo can be a(^u$ted within a range of
J=40to240.
♦When you completely stop the rhythm then
switch to a different style and start the rhythm
again, a preset tempo which is suitable for the
selected style will be automaticaliy set.
♦When the + and — buttons are pressed at the
same time, the tempo value will reset to the
preset tempo for the currently selected style.
„ Merkpunkte
_______________________________________
♦Das Tempo kann innerhalb dnes Bereichs von
J=40 bis 240 eingestellt werden.
♦Wenn Sie den Rhythmus ganz ausschalten,
anschließend auf einen anderen ^ übergehen
und Rhythmik danach ammit starten, wird
automatisch ein zu dem gewählten Stil passen
des Preset-Tanpo eingesteRt.
♦Durch gleichzeitiges lihrudien der Tasten + und
- wird das Tempo für den derzeit gewählten
Stil wieder auf das Preset-Tempo zurückgestelit.
__
A ne pas oublier.
»Le tempo peut être ajusté dans une plage allant
deJ=4Gà240,
»Lorsqu’on arrête complètement le rythme, que
Гоп passe à un йу1е différent, puis qu’on
relance le rythme, un tempo prér^Ié, adapté
au style chotsL est automatiquement activé.
»Lmsque les touches + et ~ sont ^foncées
simultanément, la valeur du tempo revient sm
la valeur du tempo préréglé pour le style
couramment sélectionné.
__
Puntos a recordar__________________________________
♦El tempo podrá ajustarse dentro de un margen
de a 240.
♦Si para completamente eí ritmo, cambia a un
estOo diferente, y vuelve a iniciarlo, se est^lecerá
automáticamente un tempo preajustado
, adecuado al e^ío seleccionado.
♦S presiíHia amultáneamente los botona + y -,
el víüor dei t^po se repondrá ai preajustado
para eí estilo actualmente seiaicionado.
19
Page 21

Selecting the Auto Accompaniment Mode
The SINGLE FINGER, FINGERED, and AUTO
BASS positions of the POWER/MODE lever
represent the three Auto Accompaniment
modes. After an Auto Accompaniment mode
is selected, an accompaniment pattern can be
automatically produced by simply using the
Auto Accompaniment section of the keyboard
to indicate the desired chord progression for
the accompaniment. The rest of the keyboard
can be used to play the melody.
Einstellen der automatischen Begleitung
Die Einstellungen SINGLE FINGER, FINGERED
und AUTO BASS des POWER/MODEWahlschalters sind die drei automatischen
Begleitmodi. Nach Wahl eines automatischen
Begleitmodus kann ein Begleitmuster einfach
durch Anschlägen der gewünschten Akkord
begleitfolge in dem für die automatische
Begleitung bestimmten Tastaturbereich erzeugt
werden. Der übrige Tastaturabschnitt kann
zum Spielen der Melodie verwendet werden.
Sélection du mode d'accom
pagnement automatique
Les positions SINGLE FINGER, FINGERED et
AUTO BASS du levier POWER/MODE repré
sentent les trois modes d’accompagnement
automatique. Après qu’un de ces modes a été
choisi, un motif d’accompagnement peut être
automatiquement produit en utilisant la section
de l’accompagnement automatique du clavier
pour indiquer la progression des accords
souhaitée pour l’accompagnement. Le reste du
clavier peut être utilisé pour jouer la mélodie.
Selección del modo de acompañamiento automático
Las posiciones de SINGLE FINGER, FINGERED,
y AUTO BASS de la palanca POWER/MODE
representan los tres modos de acompañamiento
automático. Después de haber seleccionado un
modo de acompañamiento automático, podrá
producirse automáticamente un patrón de
acompañamiento simplemente empleando la
sección de acompañamiento automático del
teclado para indicar la progresión de acordes
deseada para el acompañamiento. El resto del
teclado podrá emplearse para tocar la melodía.
When the POWER/MODE lever is set to the
NORMAL position, Auto Accompaniment will
not be produced. Be sure to choose a suitable
mode before beginning your performance.
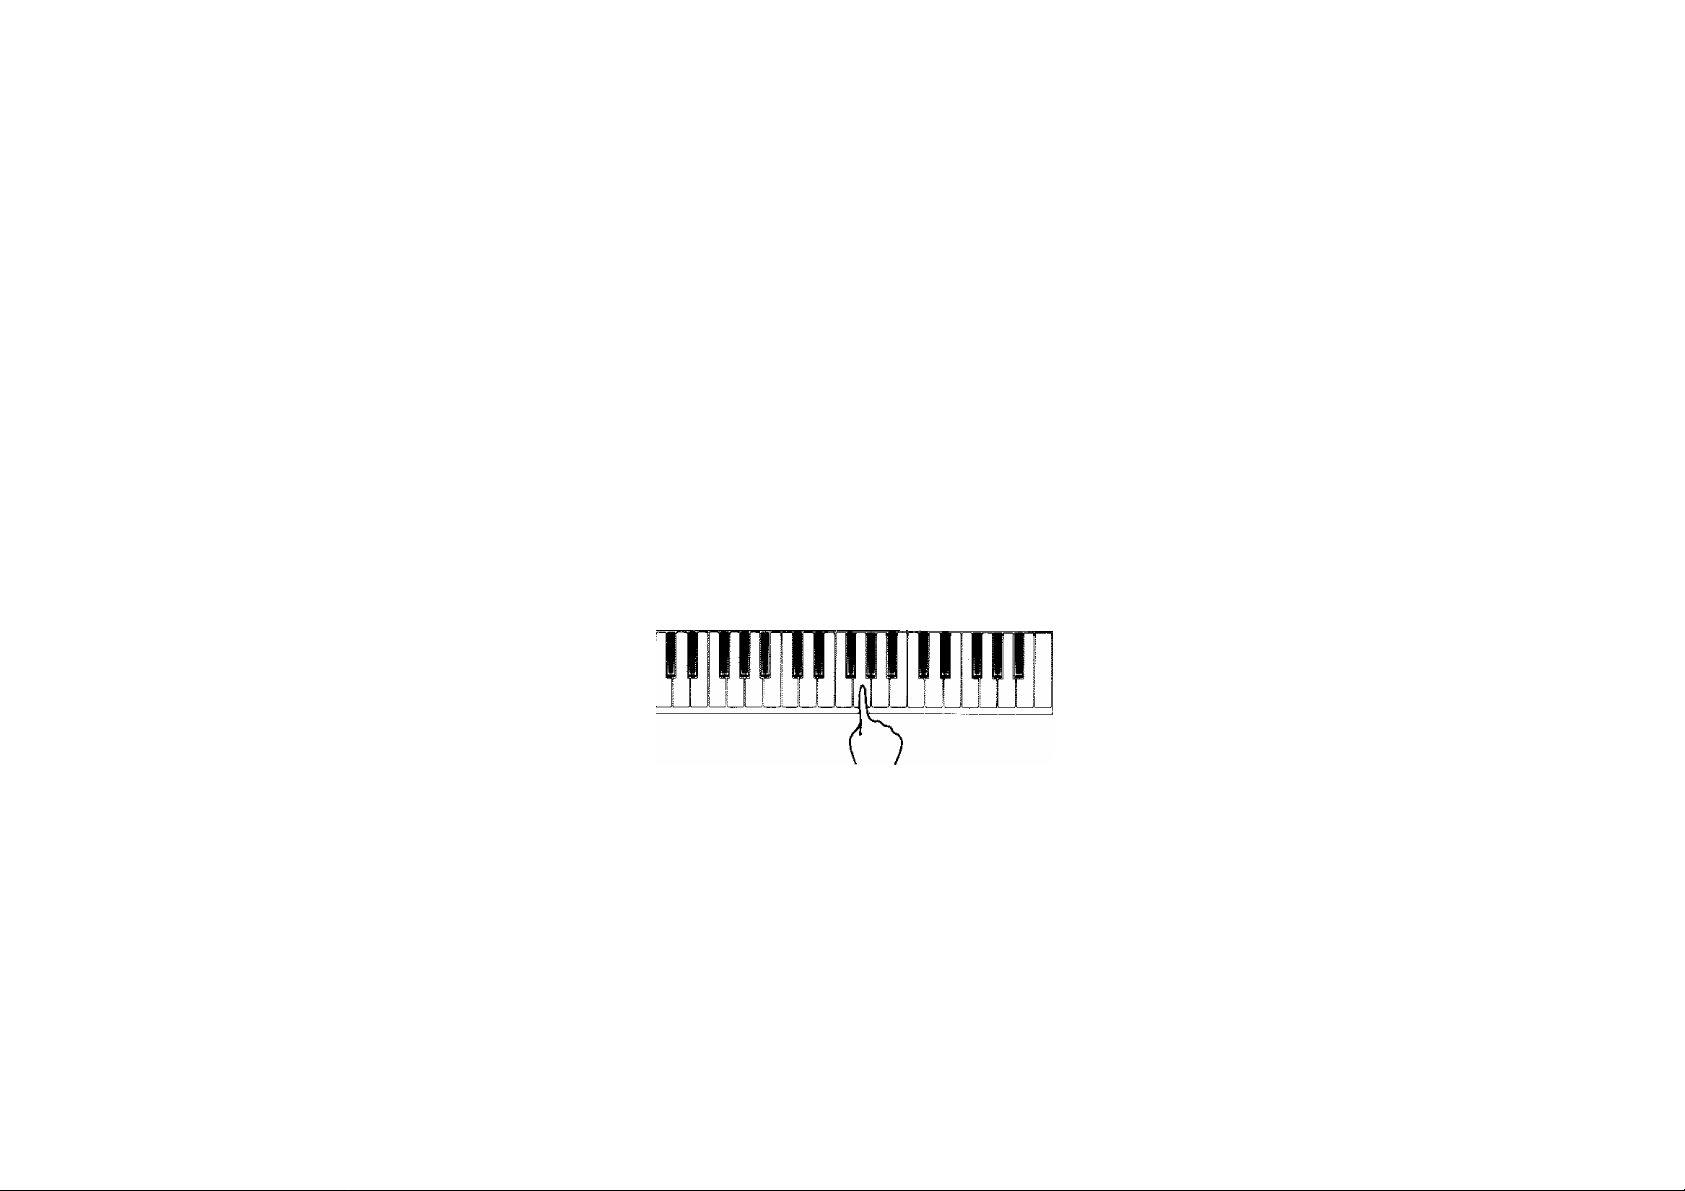
I SINGLE FINGER mode
Even if you can’t play chords, you can
produce a chord and bass accompaniment
by pressing just one, two, or three keys.
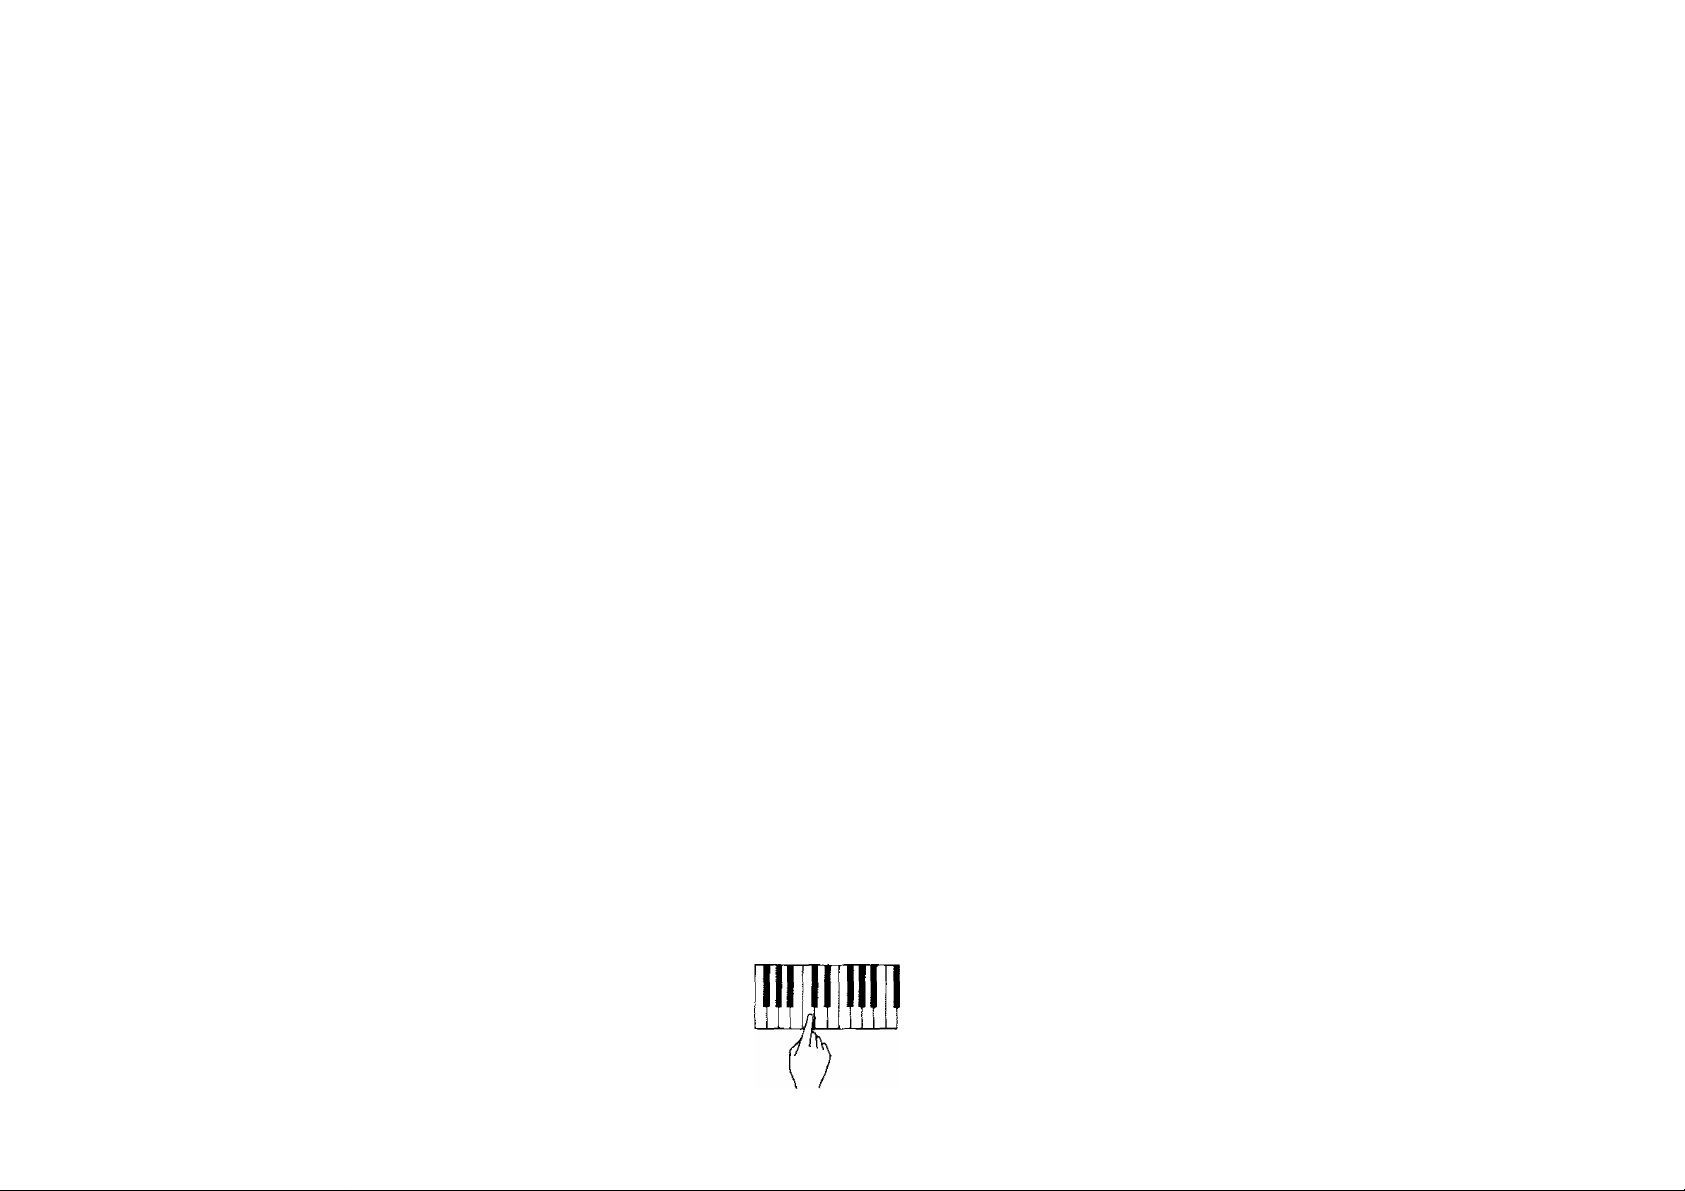
I FINGERED mode
You can also produce a chord and bass
accompaniment by playing chords in a
manner close to the actual chord structure.
I AUTO BASS mode
This mode lets you automatically produce an
accompaniment consisting of only bass notes.
Bei Einstellung des POWER/MODE-Wahlschalters
auf NORMAL wird keine automatische
Begleitung erzeugt. Achten Sie deshalb darauf,
vor Spielbeginn den gewünschten Betriebs
modus einzustellen.
I SINGLE FINGER-Modus
Selbst wenn Sie das Akkordspiel noch nicht
beherrschen, können Sie in diesem Betriebs
modus eine Akkord- und Baßbegleitung
einfach durch Anschlägen von einer, zwei
oder drei Tasten erzeugen.
IFINGERED-Modus
Hierdurch können Sie Akkord- und
Baßbegleitung auf eine Weise spielen, die
der tatsächlichen Akkordstruktur sehr
ähnlich ist.
lAUTO BASS-Modus
Dieser Modus ermöglicht das Spielen einer nur
aus Baßnoten bestehenden, automatischen
Begleitung.
Lorsque le levier POWER/MODE est placé sur
la position NORMAL, l’accompagnement auto
matique n’est pas produit. Veiller à
sélectionner un mode d’accompagnement
adéquat avant de jouer.
■ Mode SINGLE FINGER
Même si l’on est incapable de plaquer des
accords, on peut néanmoins produire un
accompagnement d’accord et de basse en
appuyant sur une, deux ou trois touches
seulement.
■ Mode FINGERED
Il est aussi possible de produire un accord
d’accompagnement et de basse en jouant
des accords proches de la structure réelle
des accords.
■ Mode AUTO BASS
Ce mode permet d’obtenir automatiquement
un accompagnement constitué exclusivement
de notes basses.
Cuando ponga la palanca POWER/MODE
en la posición NORMAL, no se producirá el
acompañamiento automático. Cerciórese de
elegir el modo adecuado antes de iniciar su
actuación.
I Modo de un solo dedo (SINGLE FINGER)
Aunque usted no pueda tocar acordes, podrá
producir acompañamientos de acordes y bajos
pulsando simplemente una, dos, o tres teclas.
I Modo de todos los dedos (FINGERED)
Usted también podrá producir acompaña
mientos de acordes y bajos tocando acordes
en una forma muy parecida a la de la
estructura de los acordes reales.
I Modo de abajos automáticos (AUTO BASS)
Este modo le permitirá producir automática
mente un acompañamiento compuesto por
notas de bajos solamente.
20
Page 22

SINGLE FINGER Mode
This mode enables you to easily produce an
Automatic Accompaniment, even if you cannot
play entire chords. For example, use one finger
to produce a major chord or press two or three
keys to produce the other types of chords.
SINGLE FINGER-Modus
Mit Hilfe dieses Modus können Sie mühelos
ein automatisches Begleitspiel erzeugen, selbst
wenn Sie das Spielen ganzer Akkorde nicht
beherrschen. Dur-Akkorde können zum
Beispiel mit nur einem Finger gespielt werden,
während das Anschlägen von zwei oder drei
Tasten andere Akkordtypen erzeugt.
Mode SINGLE FINGER
Ce mode permet de produire facilement un
accompagnement automatique, même si l’on
ne peut jouer des accords complets. Par
exemple, utiliser un seul doigt pour produire
un accord majeur ou enfoncer deux ou trois
touches pour produire d’autres types d’accords.
Modo de un solo dedo (SINGLE FINGER)
Este modo le permitirá producir fácilmente un
acompañamiento automático, incluso aunque
no pueda tocar acordes enteros. Por ejemplo,
utilice un dedo para producir un acorde mayor
o pulse dos o tres teclas para producir los
otros tipos de acordes.
©Set the TOWER/MODE lever to
SINGLE FINGER.
©Choose a style, (■♦^page 16)
©Stellen Sie den POWER/MODE-
Wablschalter auf SINGLE HNGER.
© Wählen Sie einen Musikstil.
(■^Seite 16)
©Turn on the SYNCHRO START/
©Eirücken Sie die Taste SYNCHRO
ENDING button. START/ENDING.
©When you press a key on the Auto
Accompaniment section of the key
board, the auto accompaniment will
begin.
© Bei Anschlägen einer Taste im
Tastaturabschnitt fär die automatische
Begleitung beginnt die automatische
Begleitung zu spielen.
©Placer le levier POWER/MODE sur
AUTO BA5S
FINGËfîCD
SMÛLE Fir«jER
NORMAL
_
OFF
©Choisir un style (voir page 16).
©Enclencher la touche S’VNCHRO
SYNC 5ТАЯТ/ЕГда»Ю
С—
©Lorsqu’on enfonce une touche
SINGLE HNGER.
START/ENDING.
de la section de l’accompagnement
automatique du clavier, cet accom
pagnement automatique s’enclenche.
©Ponga la palanca POWER/MODE en
SINGLE HNGER.
©Elija un estilo, ("^página 16)
©Ponga en ON el botón S'VNCHRO
START/ENDING.
© Cuando pulse un acorde, de la sección
de acompañamiento automático del
teclado, se iniciará el acompaña
miento automático.
©To stop the Auto Accompaniment,
press the START/STOP button.
©Drücken Sie zum Stoppen des
automatischen Begleitspiels die
Taste START/STOP.
© Pour arrêter l’accompagnement
automatique, appuyer sur la touche
START/STOP.
21
© Para cesar el acompañamiento
automático, presione el botón
START/STOP.
Page 23

SINGLE FINGER Chords
Major Chords
As shown in the figure below, a major chord can be
produced by pressing the key corresponding to the
basic note ^tnown as the “root note") of the chord.
SINGLE FTNGER-Akkorde
Dur-Akkorde
Wie in der Abbildung unten dargestellt, kann ein
Dur-Akkord einfach durch Anschlägen der Basisnote
(“Grundton” genannt) des Akkords gespielt werden.
Accords SINGLE FINGER
Accords majeurs
Tout comme illustré ci-dessous, un accord majeur peut
être produit en enfonçant la touche correspondant à
la note de base (appelée “radical") de l’accord.
Acordes con un solo dedo
(SINGLE FINGER)
Acordes mayores
Como se muestra en la figura siguiente, un acorde
mayor podrá producirse pulsando la tecla correspon
diente a la nota básica (conocida como “nota raíz”)
del acorde.
C D E F G A B C D E F G (Do Re Mi Fa Sol La Si Do Re Mi Fa Sol)
Producing a I) or Major Chord
To obtain a sharped () chord, press the black key
to the right of the root note.
For a flatted {[>) chord, press the black key to the
left of the root note.
Producing a Seventh or Minor Chord
An accompaniment will not always consist only of
major chords. For example, seventh chords such as
Gj or minor chords such as Am are also frequently
used. These minor or seventh chords can be produced
by pressing two keys at the same time as shown in
the figure below.
CDEFGABCDEFG
CDÊFGAHCDEFG
Do Ré Mi Fa Sol La Si Do Ré Mi Fa Sol
Spielen von Akkorden mit Halbtoner
höhung oder Halbtonerniedrigung
Schlagen Sie zur Erzeugung eines um einen halben
Ton erhöhten Akkords die schwarze Taste rechts
neben dem Grundton an und zur Erzeugung eines
um einen Flalbton erniedrigten Akkords die schwarze
Taste links neben dem Grundton.
G' G’
T.TT
Spielen von Septim- oder MollAkkkorden
Ein Begleitspiel besteht natürlich nicht immer nur
aus Dur-Akkorden. Septimakkorde wie zum Beispiel
G7 oder Moll-Akkorde wie z.B. Am kommen
ebenfalls häufig vor. Diese Moll- und Septimakkorde
werden, wie in der Abbildung dargestellt, durch
Anschlägen von zwei Tasten gleichzeitig erzeugt.
Key position / Tastenposition / Position de la touche / Posición de la tecla
Chord name
Akkordbezeichnung
Nom de l'accord
Nombre del acorde
Obtention d’un accord majeur dièse
ou bémol
Pour obtenir un accord dièse ( ^ ), appuyer sur la
noire située sur la droite de la note du radical. Pour
obtenir un accord bémol ( (j ), appuyer sur la noire
située sur la gauche de la note du radical.
■ ■
TT
Obtention d’un accord de septième ou
mineur
Un accompagnement ne consiste pas toujours
uniquement d'accords majeurs. Par exemple, des
accords de septième comme D07 ou les accords
mineurs comme La*m sont fréquemment utilisés.
Ces accords mineurs ou accords de septième peuvent
être obtenus en appuyant simutanément sur deux
touches, comme illustré ci-dessous.
Producción de un acorde mayor tt
(sostenido) o (bemol)
Para obtener un acorde sostenido (), pulse la tecla
negra situada a la derecha de la nota raíz. Para un
acorde bemol ([>), pulse la tecla negra situada a la
izquierda de la nota raíz.
Producción de un acorde de séptima o
un acorde menor
Un acompañamiento no siempre se compondrá
solamente de acordes mayores. Por ejemplo, los
acordes de séptima tг^les como G7 o ios acordes
menores como Am se emplean con bastante frecuencia.
Estos acordes menores o de séptima pueden pro
ducirse pulsando simultáneamente dos teclas, como
se muestra en la figura siguiente.
22
Page 24

©C (Major chord)
©C (Dur-Akkord)
©Do (accord majeur)
OC (Acorde mayor)
©C7 (Seventh chord)
Press the root note together with any white key to the left
of it.
©Cm (Minor chord)
Press the root note together with any black key to the left
of it.
©Cm?
Press the root note together with any white key and black
key to the left of it (three keys total).
©C7 (Septimakkord) ©D07 (accord de septième)
Schlagen Sie den Grundton zusammen mit einer der weißen
Tasten links daneben an. de celle-ci.
©Cm (Moll-Akkord)
Schlagen Sie den Grundton zusammen mit einer der
schwarzen Tasten links daneben an. de celle ci.
©Cmy
Schlagen Sie den Grundton zusammen mit einer der weißen
und schwarzen Tasten links daneben an (drei Tasten insgesamt).
Enfoncer la touche du radical avec toute blanche à la gauche
©Dom (accord mineur)
Enfoncer la touche du radical avec toute noire à la gauche
©Dom?
Enfoncer la touche du radical avec toute blanche et toute
noire à la gauche de celle-ci (trois touches au total).
OC7 (Acorde de 7.^)
Pulse la nota de la raíz juntamente con cualquier tecla blanca
situada a su izquierda.
©Cm (Acorde menor)
Pulse la nota de la raíz juntamente con cualquier tecla negra
situada a su izquierda.
©Cm? (Acorde menor de 7.®)
Pulse la nota de la raíz juntamente con cualquier tecla blanca
y negra situadas a su izquierda (tres teclas en total).
23
Page 25

FINGERED Mode
In this mode, Auto Accompaniment is produced
by playing chords in a manner closer to the
actual chord structure. This mode is suitable
for persons who are used to playing chord
accompaniment or for songs which cannot be
performed properly using SINGLE FINGER mode.
FINGERED-Modus
Hierbei wird die automatische Begleitung auf
eine Art ähnlich dem Spielen der tatsächlichen
Akkordstruktur erzeugt. Dieser Modus ist
nützlich für Personen, die an das Spielen von
Akkordbegleitungen gewöhnt sind oder für
Titel, die im SINGLE FINGER-Modus nicht auf
befriedigende Weise gespielt werden können.
Mode FINGERED
Dans ce mode, l’accompagnement automatique
est obtenu en jouant les accords d’une manière
proche de la structure réelle des accords. Ce
mode est idéal pour les utilisateurs qui sont
habitués à jouer des accompagnements en
accords, ou pour des mélodies qui s’adaptent
mal au mode SINGLE FINGER.
Modo de acordes con todos los dedos (FINGERED)
En este modo, el acompañamiento automático
se produce tocando los acordes en una forma
más cercana a la estructura real de los acordes.
Este modo es muy adecuado para personas
que acostumbren a tocar acompañamiento de
acordes, o para canciones que no pueden
tocarse adecuadamente empleando el modo
de un solo dedo {SINGLE FINGER).
(T)Set the POWER/MODE lever to
HNGERED.
©Choose a style.
©Turn on the SYNCHRO START/
ENDING button.
©When you press a chord on the
Auto Accompaniment section of
the keyboard, Auto Accompaniment
will begin.
©Stellen Sie den POWER/MODE-
Wahlschalter auf HNGERED.
© Wählen Sie einen Musikstil.
©Drücken Sie die Taste SYNCHRO
START/ENDING.
SYhJC. START/
Cl_
0
Bei Anschlägen einer Taste im
Tastaturabschnitt für die automatische
Begleitung beginnt die automatische
Begleitung zu spielen.
©Placer le levier POWER/MODE sur
HNGERED.
^TO 6ASS
FWGgflED
s>NGi¿ nwoefl
©Choisir un style.
©Enclencher la touche SYNCHRO
START/ENDING.
NCN№
0
Lorsqu’on plaque un accord dans
la section de l’accompagnement
automatique du clavier, cet accom
pagnement automatique s’enclenche.
©Ponga POWER/MODE en
FINGERED.
© Elija un estilo.
©Ponga en ON el botón SYNCHRO
START/ENDING.
0 Cuando pulse un acorde de la
sección de acompañamiento
automático del teclado, se iniciará
el acopañamiento automático.
©To stop Auto Accompaniment, press
the START/STOP button.
© Drücken Sie zum Stoppen des
automatischen Begleitspiels die
Taste START/STOP.
© Pour arrêter Taccompagnement
automatique, appuyer sur la touche
START/STOP.
24
® Para cesar el acompañamiento
automático, presione el botón
START/STOP.
Page 26

Example; C chords
A note enclosed by in parentheses indicates that the
chord will be detected even if that note is not played.
Beispiel: C-Akkorde
Eine in Klammern angegebene Note zeigt, daß dieser
Akkord erfaßt wird, selbst wenn Sie diese Note nicht
spielen.
Exemple: Accords en do
Une note indiquée entre parenthèses signifie que
l’accord sera détecté même si cette note n’est pas jouée.
Ejemplo: Acordes de C
La nota indicada entre paréntesis indica que el acorde
se detectará incluso aunque no se toque la nota.
Majoi Mirror 7th Minor 7th Major 7th
chúrd
C Cm
C Crr
Dur Akkord
Do
Accord
majeur
:
Acorde Acorde Acorde de
mayor
chord
Moll Akkord
Dorr □Oj
Accord
mineur
Cm
menor 7.'
chord
c,
Cr
Septinrskkard
Accord de
septiéme
C,
chord
Cm;
СГГ;
Moll.
Septimakkord
OOtT;
Accord de
septième roineur
Cnij
Acorde menor
de i: de 7.*
Acorde mayor Acorde roenor
FINGERED Chords
Using the key of C as an example, the figure above
shows the types of pressed chords which can be
recognized for producing Auto Accompaniment in
FINGERED mode. As long as you are playing keys
within the scale of the Auto Accompaniment section
of the keyboard, you can produce any pitch even
after raising or lowering the octave.
■ For the chord types not indicated by an asterisk in
the figure above, as long as a chord consists of the
same notes, the root note of that chord can be
determined even if the chord is inverted. In case
of the chords indicated by an asterisk, determina
tion of the root note of the chord will vary when
the intervals are inverted so be sure to heed the
following precautions.
•For diminished and augmented chords, the
lowest pitch of the pressed keys is recognized
as the root note.
•6th and minor 7th chords consist of notes of the
same pilch. Therefore, if the lowest note pressed
is a 6th interval from the root note, the chord is
recognized as a 6th chord; if it is not, the chord
is recognized as a minor 7th chord.
W
Minor 7th
chord
CMj
CM;
Dur S^timakkord mit
Septkrakkord omiodrrgter Quiote
DoMj DO;
Accord de Accord de
septième majeur
CM;
tt 5 chord
CriT;*^
Cm,-^ Moll-
septieme
oiineur 5dme 4ème stisperrdue
Cm,-^
de 7.’ 5
7th suspended
Septirrrakkord mit
verhalterrer Duarte
Acorde de 7,*
de 4.‘ suspeotida
4th chord
C;SUS
COt;SUS
D0;StrSj
Accord de
septième
C7SUS
Augmented Diminished
chord chord
4
1
Caug Cdim
Caug Cdim
4
ÜberrrtaBiger Vermlnderter
Akkord Akkord
Do aug Co dim
Accord Accord
augmenté dimittué
Caug Cdim
Acorde Acorde
aumentado disminuida de 7.* mayor de 6.' de 6 *
FINGERED CHORD
Die Abbildung unten zeigt am Beispiel der Tonart
C die angeschlagenen Akkordtypen, mit denen im
FINGERED-Modus eine automatische Begleitung
gespielt werden kann. Solange Sie Tasten innerhalb
des Tastaturbereichs der automatischen Begleitung
spielen, können Sie selbst nach einer Oktavenerhöhung
oder -erniedrigung jede beliebige Tonhöhe erzeugen.
■ Für die in obiger Auflistung nicht mit einem
Sternchen versehenen Akkordtypen, wird selbst
bei einer Umkehrung des Akkords, der Grundton
des jeweiligen Akkords erkannt, solange sich
dieser aus den gleichen Noten zusammensetzt.
Die Festlegung des Grundtons der mit einem
Sternchen versehenen Akkorde ändert sich bei
einer Umkehrung der Intervalle; beachten Sie
deshalb folgende Hinweise.
•Bei übermäßigen und verminderten Akkorden
wird der tiefste Ton der angeschlagenen Tasten
als Grundton erkannt.
•Sext- und Moll-Septimakkorde setzen sich aus
Noten der gleichen Tonlage zusammen. Ist die
tiefste angeschlagene Note ein Sextintervall vom
Grundton, wird der Akkord deshalb als Sextakkord
erkannt, bzw. andernfalls als ein Moll-Septimakkord.
toe:
Minor major
7th chord
CtrtM,
CmM;
MokDur-
Septinrakkord
DonrM;
Accord de
septidme
ntajeur mmeur
CmM;
Acorde mayor
6th Minor 6th
chord chord
Сб Cnie
Co
Sextakkord
Doe
Accord de Accord de
sirtième sixième minour
Ce
Acorde Acorde menor Acorde
Coig
Moll-
Sextakkord
Dorns
Сгтге
Accords FINGERED
En utilisant la clé d ut à titre d’exemple, le schéma
ci-dessus présente les types d’accords qui peuvent
être reconnus pour l’obtention de l’accompagnement
automatique en mode FINGERED. Aussi longtemps
que l’on joue les notes dans la gamme de la section
de l’accompagnement automatique du clavier, il est
possible d’obtenir toute hauteur après avoir
augmenté ou diminué d’une octave.
■ Pour les types d’accords qui ne sont pas flanqués
d’un astérisque dans le schéma ci-dessus, aussi
longtemps qu’un accord se compose des mêmes
notes, la note du radical de cet accord peut être
déterminée même si l’accord est inversé. Dans le
cas où les accords sont indiqués par un astérisque,
la définition de la note du radical de l’accord varie
lorsque les intervalles sont inversés. Par conséquent,
veiller à observer les précautions suivantes,
•Pour les accords diminués et augmentés, la
hauteur la plus basse des touches enfoncées
est reconnue en tant que note du radical,
•Les accords de sixième et de septième mineur
se composent de notes de la même hauteur.
Par conséquent, si la note la plus basse enfoncée
est un intervalle de 6ème à partir de la note
du radical, l’accord est reconnu comme un accord
de 6ème; dans le cas contraire, l’accord est
reconnu comme un accord de 7ème mineur.
Ж
1.0®^
7th
t 5 chord
СГ'
c, ^
Septimakkord mit
ernledhgter Quinte.
Dor®
Accord do
septièrrre 5èmo
C,-®
de 7 7 C en D
C on D
C/D
CID CIH b
C aut D C auf H t>
DoIRé DofSi b
Do sur ré Do sur si b
CIO C/B b
♦
C orr B t>
СШ 1>
Do sur ml
c en B X C en E
Acordes con todos los dedos
(FINGERED)
Empleando la tecla de C como ejemplo, en la figura
de arriba se muestran los tipos de acordes pulsados
que pueden reconocerse para producir acompaña
miento automático en el modo de acordes con todos
tos dedos. Mientras esté pulsando las teclas dentro de
la escala de la sección de acompañamiento automático
del teclado, podrá producir cualquier tono incluso
después de haber aumentado o disminuido la octava.
■ Con respecto a los acordes no indicados mediante
un asterisco en la figura anterior, mientras un
acorde se componga de las mismas notas, la nota
raíz de tal acorde podrá determinarse incluso
aunque el acorde se invierta. En el caso de los
acordes indicados mediante un asterisco, la
determinación de la nota raíz del acorde variará
cuando se inviertan los intervalos, por lo que usted
tendrá que tomar las precauciones siguientes.
•Para los acordes disminuidos y aumentados, el
tono inferior de las teclas pulsadas se reconoce
como la nota raíz.
•Los acordes de 6.^ y 7.“ menor se componen de
notas del mismo tono. Por lo tanto, si la nota
más baja tocada es un intervalo de 6.“ de la nota
raíz, el acorde se reconocerá como un acorde de
6.^; si no lo es, el acorde se reconocerá como
acorde menor de 7.®.
*
C Ofi E
CJE
CIE
C auf E
DoIMi
C/E
25
Page 27

•Minor 7th 5 t>chords and minor 6th chords
consist of notes of the same pitch. Therefore,
if the lowest note pressed is a minor 6th interval
from the root note, the chord is recognized as a
minor 6th chord; if it is not, the chord is recog
nized as a minor 7th [» 5 chord,
•For a 7th 1>5 chord, the lowest note pressed
will be recognized as the root note or the minor
7th note.
•7th chords and C/B t>chords consist of notes of
the same pitch. Therefore, only if the lowest note
pressed is a flatted 7th interval from the root note,
the chord is recognized as a C/B 1) chord; if it is
not, the chord is recognized as a 7th chord.
•The C/E chord is recognized when four or more
keys are pressed. If less than four keys are pressed,
the chord is recognized as a major chord.
I
When you press keys which are not recognizable
as a chord, Auto Accompaniment will continue
unchanged. If you press keys which are not recog
nizable as a chord immediately after pressing the
SYNCHRO START button, however, only the rhythm
will be started without Auto Accompaniment,
•Moll-Septimakkorde mit erniedrigter Quinte und
Moll-Sextakkorde setzen sich aus Noten der gleichen
Tonlage zusammen. Ist die tiefste angeschlagene
Note ein Moll-Sextintervall vom Grundton, wird
der Akkord deshalb als Sextakkord erkannt, bzw.
andernfalls als ein Moll-Septimakkord mit
erniedrigter Quinte.
•Im Falle eines Septimakkords mit erniedrigter
Quinte, wird die tiefste angeschlagene Note als
Grundton bzw, als die Moll-Septimnote erkannt.
•Die Septim- und C/H-Akkorde bestehen aus
Noten der gleichen Tonlage. Deshalb wird der
Akkord nur dann als C/H-Akkord erkannt, wenn
die tiefste angeschlagene Note ein erniedrigter
Septimintervall vom Grundton ist; andernfalls
wird der Akkord als ein Septimakkord erkannt.
•Der C/E-Akkord wird erkannt, wenn vier oder
mehr Noten angeschlagen werden. Bei Anschlä
gen von weniger als vier Noten wird der Akkord
als Dur-Akkord erkannt.
I
Bei Anschlag von Tasten, die nicht als ein Akkord
erkannt werden, spielt die automatische Begleitung
unverändert weiter. Werden jedoch Tasten ange
schlagen, die nicht unmittelbar nach Drücken der
SYNCHRO START-Taste als Akkord erkennbar
sind, startet nur der Rhythmus - ohne auto
matische Begleitung.
•Les accords de 7ème mineurs 5ème et les
accords de 6ème mineurs se composent des notes
de la même hauteur. Par conséquent, si la note
la plus basse enfoncée est un intervalle de 6ème
mineur à partir de la note du radical, l’accord est
reconnu comme un accord de 6ème mineur;
dans le cas contraire, l’accord est reconnu
comme un accord de 7ème mineur Sème \>,
•Dans les cas des accords de 7ème Sème la note
la plus basse enfoncée est reconnue comme la note
du radical ou comme la note de 7ème mineure.
•Les accords de 7ème et les accords Do/Si tse
composent des notes de la même hauteur. Par
conséquent, si seule la touche la plus basse
enfoncée est une intervalle de 7ème bémolisé,
à partir de la note du radical, l’accord est reconnu
comme un accord Do/Si b- Dans le cas contraire,
il est reconnu comme un accord de 7ème.
•L’accord Do/mi est reconnu lorsque quatre
touches ou plus sont enfoncées. Si moins de
quatre touches sont enfoncées, l’accord est
reconnu comme accord majeur.
I
Lorsqu’on enfonce des touches qui ne peuvent pas
être considérées comme des accords, l’accom
pagnement automatique se poursuit inchangé.
Cependant, si l’enfonce des touches qui ne
peuvent pas être considérées comme des accords
juste après avoir enclenché la touche SYNCHRO
START, seul le rythme s’active et l'accompagnement
automatique reste muet.
•Los acordes de 7.® 5 b menor y de 6,^ menor se
componen de notas del mismo tono. Por lo tanto,
si la nota inferior tocada es un intervalo de 6.®
menor desde la nota raíz, el acorde se reconocerá
como acorde de 6,“ menor; si no lo es, el acorde
se reconocerá como acorde de 7.“ 5[>.
•Para un acorde de 7.“ 5b, la nota más baja
tocada se reconocerá como la nota raíz o la nota
de 7.^ menor.
•Los acordes de 7.“ y los acordes de C/B b se
componen de notas del mismo tono. Por lo tanto,
solamente si la nota más baja pulsada es un
intervalo de 7.“ sostenida desde la nota raíz,
el acorde se reconocerá como acorde de 7,®,
•El acorde de C/E se reconocerá cuando se
pulsen cuatro o más teclas. Si se pulsan menos
de cuatro teclas, el acorde se reconocerá como
acorde mayor.
I
Cuando usted pulse teclas que no sean reconocibles
como un acorde, el acompañamiento automático
permanecerá invariable. Sin embargo, si pulsa
teclas que no son reconocibles como un acorde
inmediatamente después de haber presionado el
botón SYNCHRO START, solamente se iniciará
el ritmo sin acompañamiento automático.
26
Page 28

AUTO BASS Mode
This mode lets you play any chords you desire
to produce an Auto Accompaniment that
consists only of bass notes.
AUTO BASS-Modus
In diesem Modus können Sie beliebige Akkorde
zu einer automatischen Baßbegleitung spielen.
Mode AUTO BASS
Ce mode permet de jouer les accords souhaités
afin de produire un accompagnement automati
que constitué exclusivement de notes basses.
Modo de bajos automáticos (AUTO BASS)
Este modo le permitirá tocar los acordes que
desee para producir un acompañamiento auto
mático compuesto por notas de bajos solamente.
©Set the POWER/MODE lever to
AUTO BASS.
© Choose a style.
©Turn on the SYNCHRO START/
ENDING button.
©When you press a chord on the
Auto Accompaniment section of the
keyboard, Auto Accompaniment
will begin.
©Stellen Sie den POWER/MODE-
Wahlschalter auf AUTO BASS.
POWEFV
MOOE
©Wählen Sie einen Musikstil.
©Drücken Sie die Taste SYNCHRO
START/ENDING.
@ Bei Anschlägen einer Taste im
Tastaturabschnitt für die automatische
Begleitung beginnt die automatische
Begleitung zu spielen.
©Placer le levier POWER/MODE sur
AUTO BASS.
aiGlí fHG£fl
© Choisir un style.
©Enclencher la touche SYNCHRO
START/ENDING.
© Lorsqu’on plaque un accord dans
la section de l’accompagnement
automatique du davier, cet accom
pagnement automatique s’enclenche.
0Ponga la palanca POWER/MODE en
AUTO BASS.
(2) Elija un estilo.
©Ponga en ON el botón SYNCHRO
START/ENDING.
@ Cuando pulse un acorde de la
sección de acompañamiento auto
mático del teclado, se iniciará el
acompañamiento automático.
★ The method of playing chords is identical to that
in FINGERED mode.
★ Up to three notes can be sounded per chord on
the basis of last-note priority (if more than three
keys are pressed, only the notes of the last three
keys pressed will be sounded.)
★ Each time you press a chord, the bass
accompaniment pattern will change according to
that chord. Since the bass pattern will not
change when you press keys that do not form a
chord (for example, if you play a melody line
consisting of two notes or less), you can also
play freely with your left hand.
★ Akkorde werden hierbei auf die gleiche Weise
wie im FINGERED-Modus gespielt.
★ Für jeden Akkord können auf der Basis der
Endnoten Priorität bis zu drei Noten gespielt
werden (bei Anschlägen von mehr als drei
Noten, klingen nur die drei zuletzt angeschlage
nen Noten),
★ Bei jedem Anschlägen eines Akkords wechselt
die automatische Baßbegleitung entsprechend
im Gleichklang mit diesem Akkord. Da sich die
Baßbegleitung nicht ändert, wenn Sie Noten
anschlagen, die zusammen keinen Akkord formen
(zum Beispiel bei Spielen einer Melodielinie
bestehend aus zwei Noten oder weniger),
können Sie mit der linken Hand frei mitspielen.
★ La méthode pour jouer les accords est identique
à celle utilisée en mode FINGERED.
★ Trois notes maximum peuvent retentir par
accord, en se basant sur la priorité à la dernière
note (si plus de trois touches sont enfoncées,
seules les notes des trois dernières touches
enfoncées retentiront).
★ Chaque fois que l'on plaque un accord, le motif
d'accompagnement à la basse change en fonc
tion de cet accord. Comme le motif de basse ne
change guère lorsqu'on enfonce des touches qui
ne forment pas d'accord (par exemple, si l'on
joue une ligne mélodique de deux notes ou
moins), il est possible de jouer librement de la
main gauche.
27
* El método de tocar los acordes es idéntico al del
modo FINGERED.
* Por cada acorde podrán sonar hasta tres notas
en base a la prioridad de la última nota (si toca
más de tres notas, solamente sonarán las de las
tres últimas teclas pulsadas.)
* Cada vez que pulse un acorde, el patrón de
acompañamiento de bajos cambiará de acuerdo
con tal acorde. Como el patrón de graves no
cambiará cuando pulse las teclas que no formen
parte de un acorde (por ejemplo, si toca una
línea de melodia compuesta por dos notas o
menos), usted también podrá tocar libremente
con la mano izquierda.
Page 29

®То stop Auto Accompaniment, press
the START/STOP button.
i5) Drücken Sie zum Stoppen des
automatischen Begleitspiels die
Taste START/STOP.
® Pour arrêter l’accompagnement
automatique, appuyer sur la touche
START/STOP.
(D Para cesar el acompañamiento
automático, presione el botón
START/STOP.
lIMTRO/FILL IN
[INTRO]
When you press the INTRO/FILL IN 1 or 2
button while the rhythm is stopped, the
rhythm will start following by a one-measure
drum introduction.
During an Auto Accompaniment mode, when
you press a chord after pressing an INTRO/
FILL IN button, the bass and chord accompani
ment will start following a one-measure drum
introduction.
[FILL IN]
After starting the rhythm or Auto Accompani
ment, try pressing the INTRO/FILL IN 1 or 2
button. One of two variations of the current
rhythm or accompaniment pattern will be
inserted and played until the end of that measure.
A Fill In pattern is particularly effective at the
end of a phrase or during a musical climax.
INTRO/FILL IN
[INTRO]
Durch Drücken der Taste INTRO/FILL IN 1
oder 2 bei gestopptem Rhythmus, startet der
Rhythmus mit einer Trommeleinleitung von
einer Taktlänge.
Wird beim Spielen mit automatischer Begleitung
ein Akkord nach Drücken der Taste INTRO/
FILL IN angeschlagen, startet die Baß- und
Akkordbegleitung nach einer Trommeleinleitung
von einer Taktlänge.
[FILL IN]
Drücken Sie nach Einschalten des Rhythmus
oder der automatischen Begleitung die INTRO/
FILL IN-Taste 1 oder 2. Eine der beiden
Rhythmusvariationen des derzeitigen Rhythmus
oder automatischen Begleit-Patterns wird jetzt
eingeschoben und spielt bis zum Ende des
jeweiligen Taktabschnitts mit. Ein Fill In-Pattern
ist am Ende einer Phrase oder eines musikali
schen Höhepunktes besonders effektvoll.
INTRODUCTION/REMPLISSAGE I Preludio/relleno (INTRO/FILL IN)
RHYTHM CONTROL
WTRO/FM-L (N 1
INTHO/FILL IN 2
[INTRODUCTION]
Lorsqu’on appuie sur la touche INTRO/FILL IN
1 ou 2 lorsque le rythme est arrêté, celui-ci
commence automatiquement après une demi-
mesure d’introduction à la batterie.
Pendant le mode d’accompagnement auto
matique, si l’on plaque un accord après avoir
enfoncé une des touches INTRO/FILL IN,
l’accompagnement des basses et des accords
entre en service après une demi-mesure
d’introduction à la batterie.
[REMPUSSAGE]
Après avoir lancé le rythme ou l’accompagne
ment automatique, enclencher la touche
INTRO/FILL IN 1 ou 2. Une variation, parmi
deux, du rythme ou du motif d’accompagnement
courant est insérée et jouée jusqu’à la fin de
cette mesure. Un motif de remplissage s’avère
particulièrement efficace à la fin d’une phrase
ou pendant une culimination de la musique.
[INTRO]
Cuando presione el botón INTRO/FILL IN 1 o
2 mientras el ritmo esté parado, éste se iniciará
seguido por un preludio de batería de un compás.
Durante el modo de acompañamiento auto
mático, cuando pulse un acorde después de
presionar el botón INTRO/FILL IN, el acom
pañamiento de bajos y acordes se iniciará
seguido por un preludio de batería de un compás.
[FILL IN]
Después de iniciar el ritmo o el
acompañamiento automático, pruebe a
presionar el botón INTRO/FILL IN 1 o 3. Una
de dos variaciones del ritmo o el patrón de
acompañamiento actual se insertarán y
reproducirán hasta el final de dicho compás.
El patrón de relleno será particularmente
efectivo al final de una frase o durante un
punto culminante musical.
Points to Remember,
►Holding down the same iNTRO/FlLL IM buiimi
for longer than one measure causes that
pattern to be repeated until the button is;
released.
Merkpunkt
♦ Wenn Sie die gieiebe lNTRO/FlLL IN-Taste
länger als die Dau^ mner Taktlänge gedrückt
; halten, wird das jewdlige Pattem bis zur
Freigabe der Taste wiederholt
_____________________________—r—
.A ne pas oublier.
►Le fait de mednienir la même touche
INTRO/FILL ÎN pendant plus d’une mesure
provoque la répétition de ce même motif,
]UM|u’à ce que la touche soit relâchée.
28
Puntos a recprciar
►Si mantienen pulsado el mismo botón
INTRO/FILL IN durante más de un compás,
hará que e! patrón se; repita hasta que suelte
el Imtón.
_________________________
_
Page 30
SYNCHRO START/ENDING
[SYNCHRO START]
This feature synchronizes the rhythm so that
it will start with you when you begin playing
the keyboard.
SYNCHRO START/ENDING
[SYNCHRO START]
Diese Funktion synchronisiert den Rhythmus,
so daß dieser zugleich mit dem Spielbeginn auf
der Tastatur einsetzt.
DEPART SYNCHRONISE/FINAL
[DEPART SYNCHRONISE]
Cette fonction a pour but de synchroniser le
rythme, de sorte qu’il démarre lorsqu’on
commence à jouer sur le clavier.
Inicio sincronizado/coda (SYNCHRO START/ENDINGl
[SYNCHRO STARTI
Esta función sincronizará el ritmo de forma
que se inicie cuando comience a tocar con
el teclado.
©Choose a style.
©Enter Synchro Standby status.
Turn on the SYNCHRO START/ENDING
button.
Three dots at the BEAT display will flash
simultaneously, indicating that Synchro
Standby status has been entered.
©Start the rhythm.
In NORMAL mode, the rhythm is started
when you press any key of the keyboard.
In an Auto Accompaniment mode, the rhythm
is started when you press any key from
G#2 or lower.
©Wählen Sie einen Musikstil.
©Stellen Sie den Synchro*
Bereitschaftsstatus ein.
Drücken Sie die Taste SYNCHRO START /
ENDING.
Drei Punkte in der BEAT-Anzeige beginnen
gleichzeitig zu blinken und bestätigen
damit, daß der Synchro-Bereitschaftszustand
eingestellt ist.
©Starten Sie den Rhythmus.
Im NORMAL-Modus startet der Rhythmus
bei Anschlag einer beliebigen Taste auf der
Tastatur. Bei eingeschalteter automatischer
Begleitfunktion startet der Rhythmus,
wenn Sie eine Note ab Gis2 oder niedriger
anschlagen.
üiiiiiiifniimnifiiiiiif
fTT--^
A- -K
©Choisir un style.
©Entrer en état d’attente de
synchronisation.
Enclencher la touche SYNCHRO
START/ENDING.
Trois points sur l’affichage BEIAT vont clignoter
simultanément, indiquant que l’instrument
est en état d’attente de synchronisation.
-9-
©Lancer le rythme.
En mode NORMAL, le rythme démarre
lorsqu’on enfonce n’importe quelle touche
du clavier. En mode d’accompagnement
automatique, le rythme démarre lorsqu’on
enfonce n’importe quelle touche à partir de
do # 2 ou plus basse.
(T) Elija un estilo.
©Entre en el estado de espera de
sincronización.
Ponga en ON el botón SYNCHRO START/
ENDING.
En el visualizador BEAT parpadearán
simultáneamente tres puntos para indicar que
se ha entrado en el estado de sincronización.
©Inicie el ritmo.
En el modo NORMAL, el ritmo se iniciará
cuando presione cualquier tecla del teclado.
En el modo de acompañamiento automático,
el ritmo se iniciará cuando presione cual
quier tecla desde G#2 o inferior.
★ To cancel the Synchro Standby status, press the * Drücken Sie die Taste SYNCHRO START/
SYNCHRO START/ENDING again before the ENDING zum Ausschalten des Synchro- appuyer de nouveau sur la touche SYNCHRO
rhythm has started. Bereitschaftsstatus noch einmal bevor der
(ENDING]
Use this feature when you want the rhythm to Bedienen Sie sich dieser Funktion, wenn Sie Utiliser cette fonction lorsqu’on souhaite que
end naturally on a special “ending” pattern. möchten, daß der Rhythmus mit einem speziellen
Rhythmus startet.
[ENDING]
“Ending”-Pattern auf natürliche Weise endet.
★ Pour annuler l'état d'attente de synchronisation.
START/ENDING avant que le rythme n'ait démarré.
[FINAL]
le rythme finisse de manière naturelle, sur un
motif de final spécial.
29
★ Para cancelar el estado de espera de sincronización,
vuelva a pulsar SYNCHRO START/ENDING
antes de que se inicie el ritmo.
[ENDING]
Emplee esta función cuando desee que
el ritmo finalice naturalmente con un patrón
de “coda” especial.
Page 31

(T) While the rhythm or Auto Accom
paniment is playing, press the
SYNCHRO START/ENDING button.
(T) Drücken Sie, wahrend Rhythmus oder
automatische Begleitung spielen, die
Taste SYNCHRO START/ENDING.
©Pendant que le rythme ou l’accom
pagnement automatique s’exécute,
appuyer sur la touche SYNCHRO
START/ENDING.
© Mientras se esté reproduciendo el
ritmo o el acompañamiento auto
mático, presione el botón SYNCHRO
START/ENDING.
)At the start of the next measure,
the ending pattern will begin and
the rhythm will stop.
If an INTRO/FILL IN button is pressed while an
ending pattern is playing, the ending rhythm
pattern is replaced by a Fill In percussion pattern,
and the Auto Accompaniment will begin with the
basic pattern from the beginning of the next
measure. That is, the ending no longer ends the
accompaniment. This can be very effective as a
"break" within a song for added tension.
ACCOMP. VOLUME
This lever adjusts the volume of the Auto
Accompaniment (including the rhythm) within
a six-step range from maximum volume (MAX)
to minimum volume (MIN).
©Das Ending-Pattern startet bei
Beginn des nächsten Taktabschnitts,
und der Rhythmus stoppt.
★ Durch Drücken der Taste INTRO/FILL IN während
des Spiels eines Ending-Patterns wird das Ending-
Pattern durch ein Fill In-Percussionspattern
ersetzt, und die automatische Begleitfunktion
startet das Grund-Pattern mit Beginn des nächsten
Taktabschnitts. Das heißt, daß die Begleitung
nicht mehr mit dem Ending-Pattern endet. Dies
kann innerhalb eines Titels als "Break" für erhöhte
Spannung besonders effektvoll eingesetzt werden.
ACCOMP. VOLUME
Dieser Schalter regelt die Lautstärke des
automatischen Begleitspiels (einschließlich
Rhythmus) innerhalb eines sechsstufigen
Bereichs von der maximalen (MAX) bis zur
minimalen (MIN) Lautstärke.
©Au début de la mesure suivante,
le motif de Bnal s’exécute et le
rythme s’arrête.
★ Si une touche INTRO/FILL IN est enclenchée
pendant que le motif de final se joue, ce motif
rythmique de final est remplacé par un motif de
remplissage en percussion et l'accompagnement
automatique démarre avec ce motif de base, au
début de la mesure suivante. En d'autres termes,
le final ne termine plus l'accompagnement.
Cet effet est pratique pour créer une espèce
de "coupure" dans une mélodie pour ajouter
de la tension.
INTENSITE SONORE DE L'ACCOMPAGNEMENT
Ce levier règle l’intensité sonore de l’accom
pagnement automatique (y compris le rythme)
dans une plage de six paliers, de l’intensité
maximale (MAX) à l’intensité minimale (MIN).
©A1 comienzo del compás siguiente,
se iniciará el patrón de coda, y el
ritmo se parará.
* Si presiona un botón INTRO/FILL IN mientras
esté reproduciéndose un patrón de coda, éste
se reemplazará por otro de percusión de relleno,
y el acompañamiento automático se iniciará con
el patrón básico desde el comienzo del compás
siguiente. Es decir, el patrón de coda no
finalizará el acompañamiento. Esto puede resultar
muy efectivo como "interrupción" dentro de una
canción para añadir tensión.
Volumen del acompañamiento (ACCOMP. VOLUME)
Esta palanca ajusta el volumen del acompaña
miento automático (incluyendo el ritmo) dentro
de un margen de seis pasos desde el volumen
máximo (MAX) al mínimo (MIN).
30
Page 32

DIGITAL SYNTHESIZER
The Digital Synthesizer feature allows you to create
your own custom voices. Let's try creating a unique
sound by adjusting the values of the seven Digital
Synthesizer parameters.
DIGITAL SYNTHESIZER
Die Digital-Synthesizer-Funktion ermöglicht die
Erzeugung einer selbstkreierten Stimme, Erzeugen
Sie einmal versuchsweise eine solche Stimme durch
Einstellen der Werte der sieben Digital Synthesizer-
Parameter.
SYNTHETISEUR NUMERIQUE
La fonction de synthétiseur numérique permet de
créer ses propres voix. On peut ainsi créer un son
en ajustant les valeurs des sept paramètres du
synthétiseur numérique.
SINTETIZADOR DIGITAL
La función de sintetizador digital le permitirá crear
sus propias voces. Pruebe a crear un sonido único
ajustando los valores de los siete parámetros del
sintetizador digital.
Change the STRING
ENSEMBLE voice (No. 41)
to a sparkling, crystal sound!
The No. 41 STRING ENSEMBLE voice is an
expansive and gentle sound. Let’s use the
Digital Synthesizer feature to completely
transform this voice into a sparkling sound
that resembles an electfic piano.
(T) First of all, select String Ensemble
by inputting Voice No. 41.
(2)Tum off the DUAL VOICE ON/OFF
button.
Verleihen Sie der STRING
ENSEMBLE-Stimme (Nr. 41)
einen sprühenden, kristallklaren
Klang!
Die STRING ENSEMBLE-Stimme Nr. 41 ist ein
erweiterbarer, sanfter Klang. Lassen Sie uns
diese Stimme mit Hilfe der Digital SynthesizerFunktion einmal versuchsweise völlig verändern,
so daß diese den reinen Klang eines elektrischen
Pianos erhält.
OlGlTAL SYNTHESIZER
П г
Л_
♦
ü
_a_ i
i Э
U L
J
0 Wählen Sie zuerst die String
Ensemble-Stimme, indem Sie Nr. 41
eingeben.
@ Schalten Sie die Doppelstimmen
funktion DUAL VOICE ON/OFF aus.
Changer la voix STRING
ENSEMBLE (n°41) pour obtenir
un son cristallin
La voix STRING ENSEMBLE (ensemble de
cordes) n°41 fournit un son ample et doux.
Utiliser la fonction du synthétiseur numérique
pour transformer cette voix en un son qui
ressemble à celui du piano électrique.
г
1
J
32
*
L
г
1 П
± ±
L _a_ Д
‘ 32 -
f '
J L
□
©Avant tout, choisir la voix STRING
ENSEMBLE en entrant le n*’41.
(2)Libérer la touche DUAL VOICE
ON/OFF.
¡Cambie la voz STRING
ENSEMBLE (N.° 41) por un
sonido chispeante y cristalino!
La voz número 41, STRING ENSEMBLE, es un
sonido expansivo y suave. Emplee la función
de sintetizador digital para transformar com
pletamente esta voz en un sonido chispeante
que se asemeje al de un piano eléctrico.
©En primer lugar, seleccione el
conjunto de cuerdas introduciendo
la voz número 41.
©Ponga en OFF el botón DUAL
VOICE ON/OFF.
CD To begin creating a new voice, turn
on the ON/OFF button at the
DIGITAL SYNTHESIZER section.
* If you set all of the DIGITAL SYNTHESIZER
levers to position "5", you will be able to clearly
distinguish the difference in the tonal quality of
each parameter.
(D Schalten Sie die Digital Synthesizer-
Funktion über den Ein/AusSchalter ON/OFF in der DIGITAL
SYNTHESIZER-Sektion ein.
★ Die Einstellung aller DIGITAL SYNTHESIZER-
Schalter auf "5" ermöglicht eine deutliche Unter
scheidung der Tonqualität jedes Parameters.
(D Pour commencer à façonner la
nouvelle voix, enclencher la touche
ON/OFF de la section DIGITAL
SYNTHETIZER.
* Si l'on place tous les leviers de la section DIGITAL
SYNTHETIZER sur la position "5", on sera à
même de distinguer la différence de la qualité
tonale de chaque paramètre.
31
© Para comenzar a crear una nueva voz,
ponga en ON el botón ON/OFF de
la sección DIGITAL SYNTHESIZER.
★ Si pone todas las palancas DIGITAL
SYNTHESIZER en la posición "5", podrá
distinguir claramente la diferencia en la cualidad
tonal de cada parámetro.
Page 33

1. SPECTRUM:
Set the basic quality of the voice.
The Spectrum parameter determines the
brilliance or darkness of the voice’s tonal
quality.
1. SPECTRUM:
Stellen Sie die Klangfarbe
der Stimme ein.
Der Spektrumparameter bestimmt, wie hell
oder dunkel eine Stimme klingt.
1. SPECTRUM:
Poser la qualité
fondamentale de la voix.
Le paramètre du spectre détermine l’éclat ou
l’obscurité de la qualité tonale de la voix.
1.Espectro (SPECTRUM):
Ajuste la cualidad básica de ta voz.
El parámetro de espectro determina el brillo o
la obscuridad de la cualidad tonal de la voz.
i The “spectrum” of a voice refers to
i its harmonic structure, and die value i
of the Sf«£trum parameter determines j
I which harmonics will be present in
I the voice. i
Lever Position
Resulting Change in the Voice
A sparkling, brilliant sound.
An indistinct, dark sound.
Set the SPECTRUM lever to "7"
Das „Spektrum” einer Stimme bezieht
sidi auf deren haimonlsche Struktur,
und der Wert des Spektrumisö’ameteire bestimmt, weiche Harmonien
in der Jeweiligen Stimme Idingen.
Schalterstellung
Änderung der Stimme
Ein sprühender, brillanter Klang
fi
Ein undeutiger, dunkler Klang
Steifen Sie den SPECTRUM-
Schafter auf "7"
Le "spectre” d’une voix se rapporte
à sa structure harmonique et le
paramètre du spectre détermine
quelles harmoniques sont présentes
dans la voix.
Position du levier
Résultat du changement de la voix
Un son éclatant.
Un son indistinct.
Placer té levier SPECTRUM sur "7"
El “espectro” de una voz se refiere
a su estructura armónica, y e! valor
de parámetro determina qué
componentes armónicas estarán
presentes en !a voz.
Posición de la palanca iPCambio resultante en la voz
Sonido chispeante y brillante
Sonido indefinido v obscuro
Ponga la palanca SPECTRUM
en '“7",
32
Page 34

2. MODULATION: Set the timbre.
The Modulation parameter determines the
timbre of the voice so that a clear sound
or thick sound will be produced.
2. MODULATION: Stellen Sie das Timbre ein.
Der Modulationsparameier bestimmt das
Timbre der Stimme, so daß ein klarer oder
dichter Klang erzeugt wird
2. MODULATION:
Poser le timbre.
Le paramètre du timbre détermine le timbre
de la voix, de sorte qu’un son clair ou épais
soit produit.
2. Modulación (MODULATION);
Ajuste el timbre.
El parámetro de modulación determina
di timbre de la voz, por lo que se podrá
conseguir un sonido cléU'o o grueso.
This piarameter adjusts the extent
to which the harmonic component
selected by the Spechrum parameter
in Step 1 will be emphasized.
Lever Position
Resulting Change in the Voice
A dear sound.
II
A thick sound.
Set the WiOE3|jL4riONlever to "5 "
Dieser Parameter regelt den Beto
nungsgrad der über den Spektrum
parameter unter Schritt 1 gewählten
harmonischen Komponente.
Schaltersteüung
Änderung der Stimme
Ein klarer Klang
Ein dichter Klang
i Ce paramètre fquste i’éiendue à
laquelle le composant harmonique,
choisi par le paramètre du ^ectre à
rétape 1, va être accentué.
Position du levier Résultat du changement de la voix
MÜOOI.WON
Un son clair.
n
-±
Un son épais.
Placer le levier MODULATION
sur "5"
Este parámetro ajusta hasta qué
punto № seleccionará la componente
I armónica mechante el parámetro de
■ espectro del paso 1.
Posición de la palanca
MODULATION
Cambio resultante en la voz
Sonido claro
Sonido grueso
Ponga la palanca MODULATION
"5".
33
Page 35

3. ATTACK: Set the Attack Rate.
The Attack parameter determines the speed
with which the notes will reach peak volume
after the keys are pressed.
3. ATTACK:
Stellen Sie den Attack-Grad
ein.
Der Attack-Parameter bestimmt die Geschwindig
keit, mit der die Noten nach dem Tastenanschlag
ihre Höchstlautstärke erreichen.
3. ATTACK:
Poser le taux d'attaque.
Le paramètre d’attaque détermine la vitesse à
laquelle les notes vont atteindre leur intensité
sonore de crête après que les touches ont
été enfoncées.
3. Ataque (АТАСK):
Ajuste la velocidad de ataque.
El parámetro de ataque determina la velocidad
con la que las notas alcanzarán el volumen de
pico después de haber pulsado las teclas.
Lever Position Resulting Change in the Voice
The notes are sounded immediately.
(Example: No, 00 PIANO, No, 45 TREMOLO
GUITAR) ^
а
The sounding of the notes is somewhat delayed.
(Example: No. 41 STRING ENSEMBLE. No, 75
MALE CHORUS)
Set the ATTACK lever to "8"
4. DECAY: Set the Decay Rate.
The Decay parameter determines whether the
volume of the notes is sustained as long as the
keys are being pressed or whether their volume
will decrease (decay) gradually.
Lever Position
Resulting Change in the Voice
The volume gradually decreases=Decay voice.
(Example: No. 00 PIANO, No, 42 CLASSIC
GUITAR)
1+
The volume is sustained=Sustained voice.
(Example: No. 20 TROMBONE, No. 40 CELLO)
Schalterstellung
—
Änderung der Stimme
Die Noten klingen sofort. Les notes retentissent immédiatement
(Beispiel; Nr, 00 PIANO. Nr, 45 TREMOLO ;
GUITAR) ^
Die Noten klingen mit leichter Verzögerung. Le son des notes est quelque peu retardé
(Beispiel: Nr. 41 STRING ENSEMBLE, Nr, 75 ^
MALE CHORUS)
Stellen Sie den ATTACK-Schalter
auf"8*'
4. DECAY:
Stellen Sie den Decay-Grad ein.
Der Decay-Parameter bestimmt, ob die
Lautstärke der Noten, solange die Tasten
gedrückt bleiben, beibehalten wird oder
allmählich abnimmt (Decay).
Schalterstellung
Stimme
(Beispiel: Nr. 00 PIANO, Nr. 42 CLASSIC
GUITAR) ^
Änderung der Stimme
Die Lautstärke nimmt allmählich ab-Decay-
lì
Die Lautstärke wird beibehallen=SustainedSümme
(Beispiel: Nr. 20 TROMBONE, Nr. 40 CELLO)
Position du levier
:
_
Résultat du changement de la voix
(exemple: n“00 PIANO, n“45 TREMOLO
GUITAR), ^
ff
(exemple: n“41 STRING ENSEMBLE. n->75
MALE CHORUS).
Placer te levier ATTACK sur "8'
4. DECAY: Poser le taux de chute.
Le paramètre de chute détermine si l’intensité
sonore des notes doit être soutenue ou non,
aussi longtemps que les touches restent enfon
cées, ou si leur intensité sonore doit diminuer
(chuter) graduellement.
Position du levier Résultat du changement de la voix
L'intensité sonore diminue graduellement=
Voix de chute
(exemple: n«00 PIANO, n“45 CLASSIC GUITAR).
lì
L’intenàté sonore est maintenue=Voix soutenue
(exemple: n°20 TROMBONE, n“40 CELLO)
Posición de la palanca
Cambio resultante en la voz
Las notas sonarán inmediatamente.
(Ejemplo: N.“ 00 PIANO, N.® 45 TREMOLO
CUITAR) ^
El sonido de las notas se retrasará algo.
(Ejemplo: N.“ 41 STRING ENSEMBLE, N." 75
MALE CHORUS)
Ponga (a palanca ATTACK en ''8'
4. Extinción (DECAY):
Ajuste la velocidad de extinción.
El parámetro de extinción determina si el
volumen de tas nota se sostiene mientras se
mantengan pulsadas las teclas o si su volumen
disminuye (se extingue) gradualmente.
■ Posición de la palanca Cambio resultante en la voz
PECA
i
E1 volumen disminuye gradualmente=Voz
extinguida
(Ejemplo: N,° 00 PIANO, N,° 42 CLASSIC
CUITAR) ^
==
-J
El volumen se sostiene=Voz sostenida
(Ejemplo: N,“ 20 TROMBONE, N.“ 40 CELO)
Set the DECAY lever to "3"
Stellen Sie den DECAY-Schalter
äuf^r -
Placer le levier DECAY sur "3'
34
Ponga la palanca DECAY en "3'
Page 36

5. RELEASE: Set the Release Rate.
The Release parameter determines the rate
at which the notes fade out after the keys are
released.
5. RELEASE:
Stellen Sie den RELEASEGrad ein.
Der Release-Parameter bestimmt den Grad,
mit dem die Noten nach Freigeben der Tasten
ausklingen.
5. RELEASE:
Roser le taux de libération.
Le paramètre de libération détermine la
vitesse à laquelle les notes s’évanouissent après
que les touches ont été libérées.
5. Liberación (RELEASE): Ajuste la velocidad de liberación.
El parámetro de liberación determina la
velocidad con la que las notas se desvanecen
después de haber soltado las teclas.
Lever Position Resulting Change in the Voice
The notes fade out immediately=Short
aftersound.
(Example: No, 64 MARIMBA, No, 57 KOTO)
1
The notes linger=Long aftersound.
{Example: No, 65 VIBRAPHONE. No. 77
MUSIC BOX)
Set the RELEASE (ever to ”3'
6. VIBRATO: Add a Vibrato effect.
When the Vibrato effect is added, the pitch of
the voice will be cyclically raised and lowered.
The Vibrato parameter determines the depth
of the Vibrato effect. Raising the lever will
deepen the Vibrato effect.
Lever Position
Resulting Change in the Voice
Maximum Vibrato effect
Schalterstellung Änderung der Stimme
Die Noten klingen sofort aus=Kurzer Nachklang
(Beispiel: Nr. 64 MARIMBA, Nr, 57 KOTO)
I
Die Noten klingen anhaltend^ Langer
Nachklang
(Beispiel: Nr. 65 VIBRAPHONE, Nr, 77 MUSIC
BOX)
den RELE
auf ''3"
6. VIBRATO:
Fügen Sie den Noten einen
Vibrato-Effekt hinzu.
Durch Hinzufügen des Vibrato-Effekts wird die
Tonlage der Stimme zyklisch angehoben und
gesenkt. Der Vibrato-Parameter bestimmt die
Tiefe des Vibrato-Effekts. Durch Hochstellen
des Schalters verstärkt sich die Vibratotiefe.
Schalterstellung
Änderung der Stimme
Maximaler Vibrato-Effekt
Position du levierlÎRésullat du changement de la voix
Les notes s’évanouissent immédiatement=
Après-son court
(exemple: n“64 MARIMBA, n“57 KOTO),
Les notes se main tiennent=Après-son long
(exemple: n*’65 VIBRAPHONE, n“77 MUSIC
BOX)
Placer le levier RELEASE s*tr "3'
6. VIBRATO: Ajouter un effet de vibrato.
Lorsque l’effet de vibrato est ajouté, la hauteur
de la voix est relevée et abaissée de manière
cyclique. Le paramètre de vibrato détermine
la profondeur de l’effet de vibrato. Le fait
de relever le niveau a pour effet d’approfondir
l’effet vibratoire.
Position du levier Résultat du changement de la voix
Effet de vibrato maximal
Posición de la palanca ;
Cambio resultante en la voz
Las notas se desvanecen inmediatamente
Sonido residual corlo
(Ejemplo: N.“ 64 MARIMBA, N.» 57 KOTO)
1
Las notas se ligan = Sonido residual largo
(Ejemplo: N.« 65 VIBRAPHONE. N.“ 77 MUSIC
BOX)
Poriga lÉ palafito RÉÍdBÁSÉ ""3'
6. Vibrato (VIBRATO): Añada un efecto de vibrato.
Cuando añada el efecto de vibrato, el tono
de la voz aumentará y disminuirá cíclicamente.
El parámetro de vibrato determina la pro
fundidad del efecto de vibrato. Ai elevar la
palanca, el efecto de vibrato se acentuará.
Posición de la palanco
Cambio resultante en la voz
Efecto máximo de vibrato
No Vibrato effect
Set the|ViBRATO lever to "5'
Kein Vibrato-Effekt
û±'
Pas d’effet de vibrato
Placer l^levier VIBRATO sur "5"
35
PoHg^ ia ViBBATO en
Sin efecto de vibrato
Page 37

7. VOLUME:
Set the overall volume of the voice.
The Volume parameter determines the volume
of the voice created at the DIGITAL SYN
THESIZER section.
7. VOLUME: Stellen Sie die Gesamtlaut stärke der Stimme ein.
Der Volume-Parameter bestimmt die
Lautstärke der an der DIGITAL SYNTH ESIZERSektion kreierten Stimme.
7. VOLUME:
Régler Tintensité sonore générale de la voix.
Le paramètre de l’intensité sonore détermine
l’intensité de la voix créée dans la section
DIGITAL SYNTHETIZER.
7. Volumen (VOLUME):
Ajuste el volumen global de la voz.
El parámetro de volumen determina el volumen
de la voz creada en la sección DIGITAL
SYNTHESIZER.
Lever Position
VOLUME
Resulting Change in the Voice
Maximum volume level
n
Minimum volume level
Set the VOLUME lever to "5"
SchaJterstellung
Änderung der Stimme
Maximale Lautstärke
Minimale Lautstärke
Stèlien Sie den VOtÜME-Schalter
auf "S"
Position du levier
Jl±
Changement effectué de la voix
Niveau d'intensité sonore maximal
Niveau d’intensité snore minimal
Placer le levier VOLUME suif "5'
Posición de la palanca
n
Jl±
Cambio resultante en la voz
Nivel máximo de volumen
Nivel mínimo de volumen
Ponga la palanca VOLUME en "5'
36
Page 38

The creation of a sparkling sound is
now complete!
■ Using the Voice you just created, try playing
“Twinkle Twinkle Little Star”.
Twinkle Twinkle Little Star" / "Funkle, funkle kleiner Stern" / "Ah, vous dirai-je Maman?" / "Twinkle Twinkle Little Star'
Damit ist die Kreation eines brillanten
Klangs beendet!
■ Spielen Sie mit der soeben gewählten
Stimme einmal versuchsweise “Funkle,
funkle kleiner Stern”.
La création d*un son cristallin est
parachevée.
■ En utilisant la voix que l’on vient de créer,
jouer “Ah, vous dirai-je Maman?”
;La creación de un sonido chispeante
ha finalizado!
■ Empleando la voz que acaba de crear,
pruebe a tocar “Twinkle Twinkle Little Star".
By simply performing the preceding steps,
the Digital Synthesizer feature lets you enjoy
creating your own custom sounds.
Select different voices and experiment with
creating new sounds by yourself.
Points to Remember
•A voice created by DIGITAL SYNTHESIZER
feature can be combined with one of the 100
preset voices to form a Dual Voice. All you have
to do is turn on the DUAL VOICE ON/OFF
button while the Digital Synthesizer ON/OFF
button is turned on, then select the second voice.
For details on setting the second voice of a
Dual Voice, see page 13.
$
4
^ -
Auf diese Weise können Sie einfach durch Aus
fuhren der obigen Bedienungsschritte mit Hilfe
der Digital Synthesizer-Funktion ihre eigenen,
maßgeschneiderten Klänge zusammenstelien.
Wählen Sie verschiedene Stimmen und experi
mentieren etwas, indem Sie der jeweiligen
Stimme einen gewünschten Klang verleihen.
Merkpunkt
►Zur Erzeugung einer Doppelstimme kann die
mit Hilfe der DIGITAL SYNTHESIZER-Funktion
kreierte Stimme mit einer der 100 FYeset-Stimmen
kombiniert werden. Schalten Sie dazu einfach
bei eingeschalteter Digital Synthesizer-Funktion
(ON/OFF-Schalter auf ON) die DUAL VOICEFunktion ein (ON/OFF-Schalter auf ON), und
wählen Sie dann die zweite Stimme, Einzelheiten
zum Einsteilen der zweiten Stimme finden Sie
auf Seite 13.
___________________________________
^#
0—#
En effectuant les démarches précédentes, la
fonction du synthétiseur numérique permet
d’apprécier les joies de créer ses propres
sonorités.
Choisir différentes voix et procéder à des
essais pour créer des sons divers.
__
A ne pas oublier
•Une voix créée par la fonctitm du synthétiseur
numérique peut être combinée à une des KM)
voix préréglées pour former une double voix.
Tout ce qu'il conriste à faire est d’enclencher la
touche DUAL VOICE ON/OFF pendant que ia
touche DIGITAL SYNTHETIZER est enclenchée,
puis choisir la seconde voix. Pour les détails sur
le réglage de la seconde voix d’une voix,
double, se reporter à la page 13i
Fine
D.C.
Realizando simplemente los pasos
anteriormente indicados, la función de
sintetizador digital le permitirá disfrutar
creando sus propios sonidos.
Seleccione diferentes voces y experimente
creando usted mismo nuevos sonidos.
Puntos a recordar.
•Una voz creada con la ftmción DIGITAL
SYNTHESIZER podrá comtsnarse con una de
las 100 voces preajusíaítos para fonnar una voz
doble. Todo lo que usted tendrá que hacer es
poner en ON el botón VOÍCE ON/OTT
mientras el botón ON/OFF del sintetizador
digital esté en ON, y seleccionar ía segunda
voz. Con respecto al ajuste de la segunda voz
para una voz doble, consulte la página 13.
37
Page 39

USING SONG MEMORY
The SONG MEMORY feature can be used to record
and play back your performances exactly as you
play them. (The SONG MEMORY consists of three
Song Memory banks, each of which can memorize
the performance of one song.) You can also play
along with the playback of SONG MEMORY.
VERWENDUNG DES SONG MEMORY
Der SONG MEMORY-Spieldatenspeicher dient zum
Aufnehmen und Abspielen eines Musikstitels - genauso
wie dieser gespielt wurde. (Die SONG MEMORY
besteht aus drei Titelspeicherbänken, von denen jede
einen Musiktitel speichern kann.) Darüber hinaus
können Sie während der Wiedergabe über die
SONG MEMORY-Funktion auch mitspielen.
UTILISATION DE LA MEMOIRE DE MELODIE
La fonction de mémoire de mélodie peut être utilisée
pour enregistrer et reproduire les performances
exactement comme on les joue (la mémoire de
mélodie se compose de trois mémoires de mélodie,
dont chacune d'entre elles peut contenir une mélodie).
Il est aussi possible de jouer en s'accompagnant de
la lecture de la mémoire de mélodie.
EMPLEO DE LA MEMORIA DE CANCIONES
La función de memoria de canciones (SONG
MEMORY) podrá emplearla para grabar y reproducir
sus canciones exactamente como las toque, (La
memoria de canciones se compone de tres bancos
de memoria de canciones, cada uno de los cuales
puede memorizar la ejecución de una canción.)
Usted también podrá tocar junto con ia reproducción
de la memoria de canciones.
Recording or Playing Back
a Performance
©Hold down the RECORD/END
button while you press the
START/STOP 1, 2, or 3 button.
{The RECORD/END lamp flashes, a metro
nome count is sounded, and Record Standby
status is entered.)
* To cancel Record Standby status, press the
RECORD/END button again.
Aufnahme und Wiedergabe
Ihres Spiels
©Halten Sie die Taste RECORD/END
gedrückt, und drücken Sie dabei
gleichzeitig die Taste START/STOP
1, 2 oder 3.
(Das RECORD/END-Lämpchen blinkt, ein
Metronom-Signalton klingt und der Auf
nahmebereitschaftszustand ist eingestellt.)
01
* Drücken Sie zum Abschalten der Aufnahme
bereitschaft einfach die Taste RECORD/END
noch einmal.
Enregistrement ou lecture d'une
performance
©Maintenir la touche RECORD/END
enfoncée tout appuyant sur la touche
START/STOP 1, 2, ou 3
(Le témoin RECORD/END clignote, un son
de métronome se fait entendre et l’appareil
entre en état d’attente d’enregistrement.)
SONÛ MEMORY
QRECORD/END
C
O START/STOP
O START/STOP 2
D
o START/STOP 3
[
---------
1
★ Pour annuler l'état d'attente d'enregistrement,
appuyer de nouveau sur la touche START/STOP.
SONG MEMORY
-¿'record/END
er—I
-^'sTART/STOP 1
f
---------
1
Grabación o reproducción de
una actuación
© Mantenga pulsado el botón
RECORD/END y pulse el botón
START/STOP 1, 2, o 3.
(La lámpara RECORD/END parpadeará, sonará
una cuenta de metrónomo, y se entrará en el
estado de espera de grabación.)
★ Para cancelar el estado de espera de grabación,
presione de nuevo el botón RECORD/END.
©Start recording your performance.
Recording will automatically start as soon
as your performance begins.
©Beginnen Sie mit der Aufnahme
Ihres Spiels.
Der Aufnahmebetrieb startet automatisch
sobald Sie zu spielen beginnen.
©Lancer Tenregistrement de la
performance.
L’enregistrement commence automatique
ment, dès que l’on se met à jouer.
38
©Inicie la grabación de su actuación.
La grabación se iniciará automáticamente
tan pronto como comience su actuación.
Page 40

* If you are performing without a rhythm part,
recording will start as soon as you press a key
at the keyboard.
* if you want recording to start at the same time
the rhythm is started by SYNCHRO START,
press the SYNCHRO START/ENDING button in
Record Standby status to enter Synchro Standby
status, then start your performance by pressing
keys at the keyboard.
* When recording is started, any previously
memorized data in the selected Song Memory
bank will be erased. If you wish to save that
data, record your performance to another Song
Memory bank by pressing a different START /
STOP button.
★ Falls Sie ohne Rhythmuspart spielen, startet der
Aufnahmebetrieb, sobald Sie eine Taste auf der
Tastatur anschlagen.
★ Wenn Sie den Aufnahmestart zugleich mit
Einsetzen des Rhythmus über die SYNCHRO
START-Funktion wünschen: Drücken Sie im
Aufnahmebereitschaftszustand die Taste SYNCHRO
START/ENDING zum Einstellen des Synchro-
Bereitschaftsstatus, und beginnen Sie dann zu
spielen durch Anschlägen einer Taste auf der
Tastatur.
★ Bei Aufnahmestart werden alle zuvor in der
gewählten Musiktitel-Speicherbank programmierten
Musiktitel gelöscht. Nehmen Sie Ihre Spieldaten
durch Drücken einer anderen START/STOP-Taste
in einer anderen Speicherbank auf, wenn Sie
diese Daten sichern möchten.
* Si Гоп joue sans la partie du rythme,
l'enregistrement commence aussitôt que l'on
enfonce une touche du clavier.
* Si l'on souhaite que l'enregistrement commence
au moment où le rythme est lancé par la touche
SYNCHRO START, appuyer sur la touche
SYNCHRO START/ENDING en état d'attente
d'enregistrement, pour entrer dans cet état, puis
exécuter la performance en appuyant sur les
touches du clavier.
* Lorsque l'enregistrement a commencé, toutes les
données précédemment enregistrées dans la ban
que de mémoire seront effacées. Si l'on souhaite
conserver ces données, enregistrer la performance
dans une autre banque de mémoire, en enclen
chant simplement une autre touche START/STOP.
★ Si está tocando sin una parte de ritmo, la
grabación se iniciará tan pronto como pulse una
teda del teclado,
•k Si desea que la grabación comience en el
momento de iniciarse el ritmo con SYNCHRO
START, presione el botón SYNCHRO START/
ENDING en el modo de espera de grabación
para entrar en el estado de estado de espera
de inicio sincronizado, y después comience
su actuación pulsando las teclas del teclado.
* Cuando inicie la grabación, los datos previamente
memorizados en el banco de memoria de
canciones seleccionado se borrarán. Si desea
conservar los datos, grabe su actuación en otro
banco de memoria de canciones presionando un
botón START/STOP diferente.
d)Stop recording.
Press the RECORD/END button.
0
Play back the recorded performance.
When you press the START/STOP button
(1, 2, or 3) of a Song Memory bank that
contains recorded data, the song memo
rized in that Song Memory bank will be
played back.
©Schalten Sie den Aufnahmebetrieb
aus.
Drücken Sie die Taste RECORD/END.
©Spielen Sie die Aufnahme ab.
Durch Drücken der START/STOP-Taste (1, 2
oder 3) einer Spieldaten enthaltenden Titel
speicherbank wird der in dieser Speicherbank
aufgenommene Titel abgespielt.
OSTAHT/$TOP 1
©Arrêter Tenregistrement.
Appuyer sur la touche RECORD/END.
0
Reproduire la performance.
Lorsqu'on appuie sur la touche START/STOP
(1, 2, ou 3) de la banque de mémoire qui
contient les données enregistrées, la mélodie
mémorisée dans cette banque de mémoire
est reproduite.
) Pare la grabación.
Presione el botón RECORD/END.
©Reproduzca su actuación grabada.
Cuando presione el botón START/STOP (1,
2, o 3} del banco de memoria de canciones
que contenga los datos grabados, la canción
memorizada en tal banco de memoria de
canciones se reproducirán.
39
Page 41

★ You can play the keyboard as usual during
SONG MEMORY playback, but the NORMAL
mode will be selected regardless of the actual
setting of the POWER/MODE lever. You can
increase your musical enjoyment by, for example,
recording only the accompaniment then playing
the melody part yourself along with the playback.
In this case, the maximum number of notes that
can be concurrently sounded is eight notes,
which will be the sum of the notes played back
by SONG MEMORY and the notes of the keys
pressed. If you press any keys in excess of the
maximum eight notes, only the last keys you
press within this eight-note limit will be sounded.
__
Points to Remember.
•If the tempo is changed during recording, only
the tempo value that is valid when recording
is ended be memwized: and then: playback
will be performed using the memorized tempo.
•Even if you have changé the Transpose value,
your performance will not be recorded in the
transposed key. You can, however, use the
: Transpose feature tp change the key for playback.
•Even if you change the style during recording,
the preset tempo for that style will not take effect.
•The settings of the Digital Syndiesizer pm-ameters
will not be memorized. Even if a voice is
record«! with the Digital Synthesizer turn«! on,
it will be piayedbackas if ihe;Digital: Synthesizer:
had been turned off.
•if the recorded data exceeds the capacity of a
Song Memory bank, recording will stop auto-
: matically. The Song Memory bank of each
BANK button can store up to about 500 notes
maximum.. i ^ ^
★ Während der SONG MEMORY-Wiedergabe
können Sie auf der Tastatur normal weiter
spielen, wobei jedoch ungeachtet der Einstellung
des POWER/MODE-Schalters automatisch der
NORMAL-Modus gewählt wird. Verleihen Sie
Ihrem Spiel neue Dimensionen, indem Sie zum
Beispiel zuerst nur die Begleitung aufnehmen
und dann bei der Wiedergabe den Melodiepart
mitspielen.
In diesem Fall können maximal acht Noten
gleichzeitig erzeugt werden. Dies umfaßt die vom
SONG MEMORY-Datenspeicher wiedergegebenen
Noten sowie die durch Tastenanschlag erzeugten
Noten. Werden mehr als acht Noten angeschlagen,
klingen nur die Noten der zuletzt innerhalb des
Acht-Noten-Bereichs angeschlagenen Tasten.
Merkpunkte.
•Falls Sie während der Aufnahme das Tempo
ändern, wird nur der am Ende der Aufnahme
gültige Tempowert gespeichert. Die Wiedergabe
erfolgt dann mit dem gespeicherten Tempo.
•Selbst ;wenn Sie den Transpo^tionswert geändert
haben, wird Ihr Spiel nicht in der transponier
ten Tonart aufgenommen. Sie können sich
jedoch der Transpositionsfunktion zum Ändern
der Tonlage für die Wiedergabe bedienen.
•Selbst wenn Sie während der Aufnahme einen
änderen Musiksiil wählen, setzt das PresetTempo für diesen Stil nicht ein.
•DieHnsteliungenderf^talSynthesizer-
:Parameier werden ;nieht gespeichert. Selbst bei
Aufnahme einer Stimme mit eingeschalteter
: D^tal Synthesizers-Funktion, wird diese: so: :
wiedergegeben als wäre die Digital SynÖiesizer-
Funktion während der Aufnahme ausgescbaltet.
•Wenn die aufgenommenen Spieldaten die Kapa-
;:zität der;Mu^titei-Spmcherbank übemehreiten,;
" Stoppt der Aufnahmebeirfeb automatisch. M
::..Tite)speicherb^ einer jedeh::::BÄNK-Ta$te:.kanni
/maximal bis zu 500 Noten speiöhern.
* On peut jouer sur te clavier comme d'habitude
pendant la lecture de la mémoire de mélodie,
mais le mode NORMAL est alors sélectionné,
indépendamment du réglage courant du levier
POWER/MODE. Si l'on veut élargir les
possibilités créatrices de l'instrument, on peut,
par exemple, n'enregistrer que l'accompagnement,
puis jouer la partie de la mélodie en s'accom
pagnant de la lecture de l'accompagnement.
Dans ce cas, le nombre maximal des notes qui
peuvent retentir simultanément est huit. Ce
nombre est la somme des notes jouées par la
mémoire de mélodie et les notes des touches
enfoncées. Si l'on dépasse ce nombre en jouant,
seules les dernières notes enfoncées, dans ta
limite des huit tolérées, retentiront.
, A ne pas oublier.
•Si le terapo est modîüé pendant l’enregistrement,
seule la valeur du tempo valide lorsque l’en
registrement est tenniné sera mémorisée, puis
la lecture s'effectuera avec le tempo mémorisé,
•Même si l’on a cfiangé la valeur de transposition,
la performance ne sera pas enregistrée dans la
clé transposée. Cependant, il est possible
d'utiliser la fonction de transposition pour
changer la clé de la lecture,
• Même: K l’on change de style pendant^
l'enregistrement, le tempo préréglé pour
ce style ne s’activera pas.
•Les T^ages des paramètres du synthétiseur
numérique ne peuvent pas être mémorisés.
Même si une voix est mémorisée ;^rs que la
fonction de synthétiseur numérique est en service,
la vpiX: sera reproduite: comme к la fonction de
synthétiseur numérique était desendenchée.
•Si les dobnées enregistrées dépassent la
capacité de la banque de mémoire de méiodie,
l'enregistrement s’arrête automatiquement La
banque de mémoire de mélodie de chaque
; touche BANK peut mémoriser un maximum
de 300 notes environ.
★ Durante la reproducción con la memoria de
canciones, usted podrá tocar con el teclado en la
forma usual, pero el modo normal se seleccionará
independientemente del ajuste actual de la palanca
POWER/MODE. Usted podrá aumentar su disfrute
musical grabando, por ejemplo, sólo la parte de
acompañamiento y después tocando la parte de
la melodía junto con la reproducción.
En este caso, el número máximo de notas que
podrán sonar a la vez será de ocho, que es la
suma de la notas reproducidas por la memoria
de canciones (SONG MEMORY) y las correspon
dientes a las teclas pulsadas. Si pulsa más teclas
que el máximo de ocho, solamente sonarán las
últimas de este limite máximo de ocho.
Puntos a recordar.
•Si cambia el tempo durante la grabación,
solamente se raemorizará el valor del tempo
válido cuando finaüce la grabación, y la
reprodiKción se realizará empleando el tempo
memorizado.
•Aunque cambie el valor de transposición, su
: actuación no se grabará en el tono; transpuesto.:
Sin embarco, usted podrá emplear la fundón de
transposición para cambiar el tono para ;
reproducción.
•Aunque camMe e! estilo durante la grabación,
el tempo preajustado para tal estilo no tendrá
efecto.
•Los ajustes de los parámetros del dntet^ador
digital no se m«norizarán. Aunque grabe una
voz con ei sintetízador digital activado, se r r
reproducirá como si dicho siníeüzador hubiera
estado desactivado.
•Si ios datos grabados sobrepasan la capacidad ,
de un banco de memoria de date», la grabación
cesará automáticamente^ El banco de memoria
de canciones de cada botón BANK puede
almacenar hasta aproximadamente ^K) notas
como máximo.
* The recorded data will be retained in memory
even after the PortaSound is turned off. If you
take out the batteries when the AC power
adaptor is not connected, however, all of the
data in SONG MEMORY will be erased. (This
will not happen if the batteries are only removed
for no more than about five minutes, such as
during battery replacement.)
■* Die aufgenommenen Daten bleiben auch bei
Ausschalten des Instruments erhalten. Bei Heraus
nehmen der Batterien und nicht angeschlossenem
Netzteil werden jedoch sämtliche SONG MEMORY-
Daten gelöscht. (Hierzu kommt es jedoch nicht,
wenn die Batterien nur zum Austauschen, d.h.
nicht länger als etwa 5 Minuten, herausgenommen
werden.)
★ Les données enregistrées sont sauvegardées
même après la mise hors tension du PortaSound,
Cependant, si l'on retire les piles alors que l'adap
tateur d'alimentation secteur n'est pas raccordé,
toutes les données de la mémoire de mélodie
seront effacées (ceci ne peut arriver si les piles
ne sont retirées que pendant moins de 5 minutes,
comme lors de leur remplacement).
40
★ Los datos grabados se mantendrán en la memoria
aunque desconecte la alimentación del PortaSound.
Sin embargo, si extrae las pilas cuando el adaptador
de alimentación de CA no esté conectado, todos
los datos de la memoria de canciones se borrarán.
(Esto no sucederá si extrae las pilas solamente
durante no más de unos cinco minutos para
reemplazarlas, por ejemplo.)
Page 42

LET'S TRY PLAYING SPIELBEGINN
Piano sonata No. 8 2nd Mov. / Piano Sonata Nr. 8, 2. Satz
2ème mouvement de la sonate pour piano n°8 / Segundo movimìento de la sonata para piano N.** 8
ESSAYONS DE JOUER
PROBEMOS A TOCAR
MODE=SINGLE FINGER
VOiCE=NO. 41 (STRING ENSEMBLE)
STYLE=NO. 15 (POP BALLAD 2)
TEMPO J =90
----
A —g
7STC
fff ÄJ
C G? C G? C Am G
_
_
Í
----
D
Dm
---
TI
—
a
■ a*-
G?
1 1
G7
• ^
Am
---
1
J J.2
F
F
—
—e
C
—«1
G?
G7
—~
Em
C
Em
___
--------
=1^
-----
Í
----
c
Í--
E
1
—a
a
G?
—
eJ
---
1
“7
)
----
1
La
A?
G7 C
LJ
A7
1--------
1
Mi!! !
rh '
Ludwig van Beethoven
•—=
r-——-
-------
C
G
“fri
C
L
1
u_
]
MM
_____
!nr
....
1
1
1!PM
m
41
II
»HM
Page 43

TROUBLESHOOTING
If your PortaSound is not operating as you expect, please check the table below. The problem may not
necessarily indicate a malfunction of the instrument.
FEHLERSUCHE
Bitte überprüfen Sie Ihr PortaSound mit Hilfe der Fehlersuchtabelle unten, falls dieses einmal nicht wie
erwartet funktioniert. Auftretende Probleme sind nicht unbedingt auf eine Fehlfunktion des Instruments
zurückzuführen.
Sym^tom
When the Portsáound is turned on
or off. a buzzmg scmnd is produced.
The MULTI DISPLAY is dark.
No sound is produced from the
speakers.
When multiple keys are press»! at
the same time, certain not^ are
not sounded.
A different voice or rhythm canned
be sel»:ied.
No rhythm is beir^ sound»!
No Auto Accmnpatiiment is
product
While producing an Auto Accom*
! paniment, tíie chord does not
: change when you pre^ other keys.
While recording to SONG M^ORY,
the rhytiun suddenly ^qjped.
Cause Remedy
The power current is flowing into
This is not a malfunction.
the PortaSound.
®The batteries are running low. ©Replace all the batteries with
@The voltage temporarily drops new ones,
when the volume is turned up, ©This is not a malfunction.
The volume is set too low. ; Turn up the volume.
A headphone plug is connected to
the HEADPHONES/AUX. OUT
Unplug the headphones from the
jack.
jack.
The maximum number of notes
that can be concurrently sounded,
including Automatic Accompani
ment and SONG MEMORY play
back, is eight notes.
This is not a malfunction. When
you press more than eight notes at
one time, the notes will be sounded
on a last-note priority (that is, the
notes of the last eight keys pressed
will be sounded).
You need to press the VOICE or
STYLE button.
You need to press the START or
INTRO button at the RHYTHM
CONTROL section.
Review the steps for selecting a
voice (page 10) or a style (page 16).
Review the steps on page 16 to
make sure that you are using the
correct procedure.
After pressing the SYNCHRO START
button, you need to press keys on
the Auto Accompaniment section
of the keyboard.
©NORMAL mode is selected.
©You need to press keys on the
Auto Accompaniment section
of the keyboard.
©You are using the SINGLE FINGER
method of playing chords during
FINGERED mode.
©Select the desired Auto Accom
paniment mode.
@ FTess keys on the Auto
Accompaniment section of the
keyboard.
©The method for producing
chords varies in the FINGERED
and SINGLE FINGER modes.
When you moved your fingers
from one chord position to the
next, you didn’t lift your fingers
completely off the keyboard.
Recording was stopped because
the memory capacity of a Song
When changing chords, be sure to
release the keys of the current
chord completely before playing a
new chord.
Up to about 500 notes can be;
memorized into a single bank.
Memory bank was exceeded.
SympbHB i ^ Ursachè
Beim Ein- oda" Ausschaìten des Stromfluß in das Instrument.
1 Instruments wird an Summton
i'erz^^':J
j Das MULTI DISPLÄY-Anzdgefeld ©Die Batterien sind schwach.
; ist diHikel. ©Bei Erhöhen der Lautstärke
kommt es vorübergehend zu
einem Spannungsabfall.
iKein Klang aus den Lautsprechern; Die Lautstärke ist zu niedrig
eingestellt.
i Ein Kopfhörer ist an die Buchse
■HEADPHONES/AUX. OUT angeschlossen.
Bei gleidxzeitigan Anschlägen \ Bis zu acht Noten, einschließlich
I mehrerer Noten kl^en bestnnmte j der automatischen Begleitung und
Notai mcht j der SONG MEMORY-Wiedergabe,
I können maximal gleichzeitig
1 erzeugt werden.
Das Wählen einer anderen Stimme Hierzu ist die Taste VOICE oder
oder mes anderen RhyÜimus ist STYLE zu drücken,
nicht m^lich.
i Es wird kein Rhythmus erzeug. Hierzu ist die Taste START oder
INTRO in der RHYTHM CONTROL-
j Sektion zu drücken.
¡Nach Drücken der SYNCHRO
j START-Taste sind Tasten innerhalb
des Tastaturabschnitts der auto-
j matischen Begleitung anzuschlagen.
eSe automatisdies Begleitung wird © Der NORMAL-Modus ist eingemdit erzeug. schaltet.
©Hierzu sind Tasten innerhalb des
Tastaturabschnitts der automa
tischen Begleitung anzuschlagen.
©Sie verwenden zum Spielen von
Akkorden im FINGERED-Modus
die SINGLE FINGER-Akkord-
1 Spielmethode.
¡ Während des Spielens der auto- Sie haben die Finger beim Übergang
i matischen Breitung ändert sidi auf andere Akkorde nicht voll-
der Akkord I^i Anschlägen ständig von den Tasten des zuvor
anda'er Tasten nicht gespielten Akkords abgehoben.
; Während des Aufnehmern im I Die Speicherkapazität einer Musik-
1 SONG MEMORY stoppte der titel-Speicherbank wurde erreicht
1 Rhythmus plötzlich. und der Aufnahmebetrieb deshalb
1 unterbrochen.
42
Abhilfe
Es handelt sich hierbei nicht um
eine Fehlfunktion.
©Tauschen Sie alle Batterien
gegen neue aus,
© Dies ist keine Fehlfunktion.
Erhöhen Sie die Lautstärke.
Ziehen Sie den Stecker des Kopf
hörerkabels aus der Buchse.
Hierbei handelt es sich nicht um
eine Fehlfunktion, Wenn Sie mehr
als acht Tasten gleichzeit anschla
gen, klingen die Noten nach dem
Prinzip der Letztnoten-Priorität
(das heißt, das nur die Noten der
zuletzt angeschlagenen Tasten
erzeugt werden).
Lesen Sie die Beschreibung zur
Wahl einer Stimme (Seite 10) bzw.
eines Musikstiß (Seite 16) noch
einmal durch.
Lesen Sie die Beschreibung auf
Seite 16 noch einmal durch, um si
cherzugehen, daß Sie die Bedien
folge korrekt ausgeführt haben.
©Wählen Sie das gewünschte
automatische Begleitspiel.
©Spielen Sie Tasten innerhalb des
Tastaturabschnitts der auto
matischen Begleitung,
©Die Methode zum Spielen von
Akkorden ist im FINGEREDModus anders als im SINGLE
FINGER-Modus.
Beim Andern von Akkorden
immer die Tasten des gespielten
Akkords loslassen, bevor ein neuer
Akkord gespielt wird.
Jede der Speicherbanken kann
etwa bis zu 500 Noten speichern.
Page 44

GUIDE DE DEPANNAGE
St le PortaSound ne fonctionne pas normalement, vérifier le tableau ci-dessous. La difficulté ne signifie pas
toujours que l'appareil est en cause.
GUIA PARA LA SOLUCIÓN DE PROBLEMAS
Si su PortaSound no funciona como usted espera, compruebe la tabla siguiente. El problema puede no
indicar necesariamente un mal funcionamiento del instrumento.
Cause Elution J )
Lorsque le PortaSound est mis sous i Le courant passe dans le
ou hors tension, ; un biKirdonne- : PortaSound,
ment est audible.
L’aiKïchage multiple est sombre, ©Les piles s’épuisent.
Aucun son ne sort des haut-parieurs.
Lorsque plusieurs touches sont en
foncées simultanément, certaines
notes ne retentissent pas.
Impossible de sélectionner une ; Il faut appuyer sur la touche VOICE
■ autre voix ou un rythme. ou STYLE.
Aucun i^hme n’est audible.
Aucun accompagnement automati
que n’est produit. '
Pendant l’exécution de l’accom
pagnement automatique, l’accord
ne change pas îorequ'on enfonce
d'autres touches. i
Pendant l’enregistr^nent dans la : L’enregistrement s’est arrêté parce !
mémoire de mélodie, le rythme j que la capacité de la mémoire de
s’est brusquement arrêté, mélodie est saturée.
©La tension chute momentané-
i ment lorsque l’intensité sonore
' est augmentée.
L’intensité sonore est trop basse. Augmenter l’intensité sonore.
Un casque d’écoute est branché à ; Débrancher le casque d’écoute de
laprise HEADPHONES/AUX. OUT. la prise.
Le nombre maximal des notes qui
peuvent retentir simultanément, y
compris les notes de l’accompagne
ment automatique et de la mémoire
de mélodie, est de huit.
II faut appuyer sur la touche
START ou INTRO de la section
RHYTHM CONTROL.
Après avoir enfoncé la touche
SYNCHRO START, appuyer sur les
touches de la section de l’accom
pagnement automatique du clavier.
©Le mode NORMAL est choisi.
©11 faut appuyer sur les touches
de la section de l’accompagne
ment automatique du clavier.
©On utilise la méthode SINGLE
FINGER pour jouer les accords
alors que l’appareil est en mode !
FINGERED.
Lorsqu’on déplace les doigts d’une
position d'accord sur la suivante,
les doigts n’ont pas complètement :
quitté le davier.
Ced n’est pas un mauvais fonc
tionnement.
©Remplacer toutes les piles par
des neuves.
©Ceci n’est pas un mauvais
fonctionnement.
Ceci n’est pas un mauvais fonction- !
nement, Si l’on enclenche plus de
huit touches à la fois, les notes vont
retentir selon le système de la
priorité à la dernière, c’est-à-dire
que les notes des huit dernières
touches enfoncées vont retentir.
Réviser les étapes de la sélection de
voix (page 10) ou de style (page 16).
Réviser les étapes de la page 16
pour s’assurer que l’on utilise bien
la procédure correcte.
©Choisir le mode d’accompagne- !
ment automatique souhaité.
©Appuyer sur les touches de la :
section de l'accompagnement !
automatique du davier.
©La méthode pour jouer des
accords en mode FINGERED j
diffère de celle en mode SINGLE :
FINGER.
Lorsqu’on change d’accord, veiller !
à relâcher les touches de l’accord
complété avant de plaquer un !
nouvel accord.
Il est possible de mémoriser un ^
maximum de 500 notes environ ;
dans chaque mémoire de mélodie.
Solución
Ai conectar o desconectar la alii mentación de) PoríaSoiindi se proi duce un sonido de zumbido.
El rmdíivisualizador está obscuro.
i ü>s altavoces no emiten sonido;
Al pulsar simultáneamente varias ! El número máximo de notas que
tedas, ciertas notas no suenan.: : ; podrán sonar a la vez, incluyendo
No es posible selecdonar una voz o ^ Usted tendrá que presionar el
ritmo diferente. , botón VOICE o STYLE.
No suena el ritmo.
'i No se produce acompañamiento : ©Ha seleccionado el modo
automático. NORMAL.
Al producir un acompañamiento Cuando movió ios dedos de una Cuando cambie de acordes, cercióautomático. el acorde no camhia al i posición de acorde a la siguiente, i rese de soltar completamente las
pulsar otras teclas, | no levantó completamente los I teclas del acorde actual antes de
Durante la grabación en lamemoria | La grabación se paró debido a que ; En un banco podrán memorizarse
de ; canciones,: el: ritmo se paró le sobrepasó la capacidad de un : hasta unas 500 notas,
rép^tínamente.: ;! banco de memoria de canciones, j
__
! dedos del teclado. ^ tocar un nuevo acorde.
La corriente está fluyendo a través ; E^to no es un mal funcionamiento,
del PortaSound.
(T) Las pilas están débiles,
(2) La tensión cae temporalmente
cuando se aumenta el volumen.
El volumen está demasiado bajo.
Hay unos auriculares conectados a
la toma HEADPHONES.AUX. OUT.
la reproducción del acompaña; miento automático y de SONG
¡ MEMORY, será de ocho.
Usted tendrá que - presionar el
botón START o INTRO de la
sección RHYTHM CONTROL.
Después de presionar el botón
SYNCHRO START, tendrá que pulsar |
i tedas de la sección de acompaña- ¡
I miento automático del teclado.
@ Usted tendrá que pulsar teclas
de la sección de acompañamiento
j automático del teclado.
! @ Usted está empleando el método
SINGLE FINGER de tocar acordes
durante el modo FINGERED.
©Reemplace todas las pilas por
otras nuevas.
©Esto no es un mal funciona
miento.
Aumente el volumen.
Desenchufe los auticuiares de la
toma.
Esto no significa mal funciona
miento. Cuando pulse más de ocho
tedas al mismo tiempo, las notas
sonarán de acuerdo con la priori
dad de las últimas (es decir,
sonarán las notas de las últimas
ocho tedas que haya pulsado).
Revise los pasos de selección de
una voz (página 10) o un estilo
(página 16^
Revise los pasos de la página 16
para cerciorarse de que está em
pleando el procedimiento correcto.
pañamiento automático deseado,
) Pulse las teclas de la sección de
acompañamiento automático
del teclado.
)E1 método de producir acordes
varía en los modos FINGERED y
SINGLE FINGER.
43
Page 45

SPECIFICATIONS TECHNISCHE DATEN SPECIFICATIONS ESPECIFICACIONES
• Keybc»ard •Tastatur
49 keys (Cl -Cs)
• Voice (“00 - 99”)
iOO
• STYLE (“00 - 99”)
IOO
• POWER/MODE • POWER/MODE
OFF. NORMAL, SINGLE FINGER, FINGERED, AUTO BASS OFF, NORMAL, SINGLE FINGER, FINGERED, AUTO BASS HORS SERVICE, NORMAL, UN SEUL DOIGT, PLUS. DOIGTS, OFF, NORMAL, SINGLE FINGER, FINGERED, y AUTO BASS
•VOLUME • VOLUME
MASTER VOLUME, ACCOMP. VOLUME MASTER VOLUME, ACCOMP. VOLUME
• RHYTHM CONTROL • RHYTHM CONTROL
INTRO/FILL IN 1, 2, SYNCHRO START/ENDING, INTRO/FILL IN 1, 2, SYNCHRO START/ENDING, L'ACCOMPAGNEMENT
START/STOP
• VOICE/STYLE SELECT • VOICE/STYLE SELECT
+, 0, 1, 2, 3, 4, 5, 6, 7, 8, 9, VOICE, STYLE -, -(-,0, 1, 2, 3, 4, 5, 6, 7, 8, 9, VOICE, STYLE
• DUAL VOICE
ON/OFF ON/OFF -, -F, 0, 1, 2, 3, 4, 5, 6, 7, 8, 9, VOIX, STYLE ON/OFF
• DIGITAL SYNTHESIZER
ON/OFF, SPECTRUM. MODULATION, ATTACK, DECAY,
RELEASE. VIBRATO, VOLUME.
•TRANSPOSE
-, +
•TEMPO
• DEMONSTRATION
START/STOP
• SONG MEMORY
RECORD/END, START/STOP 1. 2, 3 RECORD/END, START/STOP 1, 2, 3
• Auxiliary jacks • Hilfsanschluftbuchsen
HEADPHONES/AUX. OUT, DC 9-12V IN
•Tone Generators • Tonerzeugungssysteme
FM Tone Generator (for voices), PCM Tone Generator (for
the rhythm patterns). TonerzeugungssyStern (für die Rhythmus-Pattern)
• Main Amplifiers • Hauptverstärker
Stereo 2W x 2
• Speakers • Lautsprecher
10 cm (4il)x2 (3.9" x2) 10 cm (4 j) X 2
• Rated Power Supply
DC 9-12V (six size “C batteries), AC power adaptor: PA-3,
PA-4, PA40
Battery size: lEC "R-14" Batterietypen; !EC "R-14"
• Battery Life • Batterielebensdauer
4 hours (when playing the Demo song)
• Power Consumption
During AC power adaptor: 9W
During battery use: 5W
• External dimensions • Auftenabmessungen
637,5 (total length) x 252 (total width) x 84,7 (total height) mm
(25-1/20" X 9-7/8" X 3-3/8")
•Weight
2.3 kg (5.11 lbs.) excluding batteries
• External casing
Styrene plastic
ANSI “C" ANSI “C" DC 9-12 V (six piles de format C). adaptateur d'alimentation
JIS “SUM-2”
49 Tasten (C] - C5)
• Stimmen (“00 - 99’*)
100
• STYLE (“00 - 99") •STYLE (“00 à 99”)
100 100
START/STOP
• DUAL VOICE •SELECTION DE VODi/DE STYLE
• DIGITAL SYNTHESIZER •VOIX DOUBLE
ON/OFF, SPECTRUM, MODULATION, ATTACK, DECAY,
RELEASE, VIBRATO, VOLUME
•TRANSPOSE
—, +
•TEMPO
• DEMONSTRATION
START/STOP
• SONG MEMORY
HEADPHONES/AUX, OUT, DC 9-12V IN
FM-TonerzeugungssyStern (für Stimmen), PCM-
Stereo 2 W X 2
• Nennstromversorgung Stéréo 2 W X 2
9-12 V Gleichstrom (sechs R14-Batterien), Netzteile: PA-3, • Haut-parleurs
PA4, PA-40
JIS “SUM-2”
4 Stunden (bei Abspielen des Demonstrationstitels)
• Leistungsaufnahme
Bei Netzteilanschluß: 9 W
Bei Batteriebetrieb: 5 W
637,5 (Gesamtlänge) x 252 (Gesamtfrontbreite) x 84,7
(Gesamthöhe) mm
• Gewicht Avec les piles: 5 W
2,3 kg ohne Batterien
• Auftengehäuse
Styrolkunststoff
•Clavier
49 touches (doi à dos)
•Voix (“00 à ”99) • Voces (“00 - 99")
100
• AUMENTATION / MODE
BASSES AUTOMATIQUES
• INTENSITE SONORE MASTER VOLUME y ACCOMP. VOLUME
INTENSITE SONORE GENERALE, INTENSITE SONORE DE
• REGLAGE DU RYTHME
INTRODUCTION/REMPLISSAGE 1, 2, DEPART • Selección de voces/estilos
SYNCHRONISE/FINAL, MARCHE/ARRET -F, 0, 1, 2, 3, 4. 5, 6, 7, 8. 9, VOICE, y STYLE
MARCHE/ARRET ON/OFF, SPECTRUM, MODULATION, ATTACK, DECAY,
• SYNTHETISEUR NUMERIQUE
MARCHE/ARRET, SPECTRE, MODULATION, AITAQUE,
CHUTE, LIBERAITON, VIBRATO, INTENSITE SONORE
• TRANSPOSITION
• TEMPO
—. +
• DEMONSTRATION
MARCHE/ARRET,
• MEMOIRE DE MELODIE
ENREGISTREMENT/FIN, MARCHE/ARRET 1, 2, 3
• Prises auxiliaires
CASQUE D'ECOUTE/SORTIE AUXILIAIRE, ENTREE Generador de tonos de FM (para voces) y generador de
D'ALIMENTATION EN COURANT CONTINU DC 9-12V
•Générateurs de tonalité
Générateur de tonalité FM (pour les voix), générateur de
tonalité PCM (pour les motifs rythmiques)
• Amplificateurs principaux
10 cm (4 ohms) x 2 (3,9 po. x 2)
• Alimentation de puissance nominale
secteur: PA-3. PA4, PA40
Format des piles: IEC ''R-14" • Duración de las pilas
• Durée de vie des piles
4 heures (lors de la reproduction de la mélodie de
démonstration)
• Consom mation
Avec l’adaptateur d'alimentation secteur: 9 W
• Dimensions hors tout
637,5 (long) X 252 (lar) x 84,7 (h) mm
•Poids
2,3 kg sans les piles
• Coffret extérieur
Plastique styrène
ANS! “C
JIS “SUM-2"
• Teclado
49 teclas (Ci ~C,>;}
100
• EstUos (“00 - 99")
100
• Alimentación/modo
•Volumen
• Control de ritmo
INTRO/FILL IN 1, 2, SYNCHRO START/ENDING, y
START/STOP
• Voz doble
• Sintetizador digital
RELEASE, VIBRATO, y VOLUME
•Transposición
“ y +
•Tempo
“ y +
• Demostración
START/STOP
• Memoria de canciones
RECORD/END y START/STOP 1, 2, 3
•Tomas auxiliares
HEADPHONES/AUX. OUT, y DC 9-12V IN
• Generadores de tonos
tonos de PGM (para patrones rítmicos)
• Amplifícadores principales
Estéreo 2W X 2
• Altavoces
10 cm (4 ohmios) X 2
• Alimentación nominal
9-12 V CC (seis pilas tamaño “C”) 0 adaptador de
alimentación de CA PA-3, PA4, 0 PA40
Tamaño de las pilas: lEC ''R-14"
4 horas (de reproducción de la canción de demostración)
•Consumo
Con el adaptador de alimentación de CA: 9W
Con las pilas: 5W
• Dimensiones externas
637,5 (longitud total) x 252 (anchura total) x 84,7 (altura total) mm
• Peso
2,3 kg excluyendo las pilas
• Caja exterior
Plástico de estireno
ANSI "C”
JIS "SUM-2”
44
Page 46

CANADA
THIS DIGITAL APPARATUS DOES NOT EXCEED THE “CLASS B” LIMITS FOR RADIO
NOISE EMISSIONS FROM DIGITAL APPARATUS SET OUT IN THE RADIO INTERFERENCE
REGULATIONS OF THE CANADIAN DEPARTMENT OF COMMUNICATIONS.
LE PRESENT APPAREIL NUMERIQUE N’EMET PAS DE BRUITS RADIOELECTRIQUES
DEPASSANT LES LIMITES APPLICABLES AUX APPAREILS NUMERIQUES DE LA “CLASS
B’’ PRESCRITES DANS LE REGLEMENT SUR LE BROUILLAGE RADIOELECTRIQUE EDICTE
PAR LE MINISTERE DES COMMUNICATIONS DU CANADA.
•This applies only to products distributed by YAMAHA Canada Music Ltd.
• Dies bezieht sich nur auf die von der YAMAHA Canada Music Ltd, vertriebenen Produkte.
•Ceci ne s’applique qu'aux produits distribués par Yamaha Canada Music Ltd.
•Esto se aplica solamente a productos distribuidos por Yamaha Canada Music Ltd.
FCC INFORMATION
Atteatioa users in the U.SA,
PortaSound PSS-380 is prepared in accordance with FCC rules.
The PortaSound PSS-380 uses frequencies that
appear in the radio frequency range, and if installed
in the immediate proximity {within three meters) of
some types of audio or video devices, interferaice
may occur.
The PortaSmmd P^380 has been type tested and
: found to comfrfy with the specifications set for a
dass 8 computing device in accordance with those
spedfications listed in Subpart J of Part 15 of the
FCC rules. These rules are designed to provide a
^ reasonable measure of protection against such
interference. However, this does not guarantee that
interference wiil not occur. If your PortaSound
1^380 should be suspected of eauang interference
■with other electronic devices, verification can be
made by turning your PortaSound PSS“380 off and
on.
If the interference continues when your PortaSound
I^S-380 is off, the PortaSound PSS-380 is not the
source of the interference, if your PortaSound
PSS-380 does appear to be the source of the
interference, you should try to correct the situation
by using one or more of the following measures:
Relocate either the PortaSound PSS-3S0 or the
electronic device that is being affected by the
interference.
Utilize power outlets for the PortaSound P^3^ and
the device being affected that are on different
branch (circuit breaker or fuse) circuits, OF install
A/C line filters.
In the case of radio-TV interference, relocate the
antenna or if the antenna lead-in is a 300 ohm ribbon
lead, change the iead-in to co-axial type cable.
if these corrective meisui^s do not produce satisfactory
results, please contact your Authorized Yamaha
Consumer Products dealer for suggestions and/or
corrective measures. If you can not locate an
Authorized Yamaha Ccaisumer Products dealer in your
general area, contact the Cemsumer Products'Service
Center, Yamaha Corporation of America, 6600
Orangethorpe Aye., Buena Park, CA 90620.
if for any reason, you should need additional
information relating to radio or TV interference,
you may find a booklet prepared by the Federal
Communications Commission hdlpful: “How to
Identify and Resolve Radio-TV Interference Problems.”
This booklet is avail^le from the U.S. Government
Printing Office, Washington D.C. 20402—Stock
#004-(K)0-345-4.
Wichtiger Hinwei.s für die Benutzung in der Bundesrepublik Deut.schland
Bescheinigung des Herstellers/Importeurs
Hiermit wird bescheinigt, daß der/die/das
Elektronische Orgel Typ PSS-380
{Gerät, Typ, Bezeichnung)
in Übereinstimmung mit den Bestimmungen der
y.ERFÜGUNG 1046/84
{Amtsblattverfügung)
funkentstört ist.
Der Deutschen ßunde,spost wurde das Inverkehrbringen dieses Gerätes
angezeigt und die Berechtigung zur Überprüfung der Serie auf
Einhaltung der Bestimmungen eingeräumt.
Yamaha Europa GmbH
Name des Importeurs
•This applies only to products distributed by YAMAHA Europe GmbH.
•Dies bezieht sich nur auf die von der YAMAHA EUROPA GmbH vertriebenen Produkte.
•Ceci ne s'applique qu’aux produits distribués par Yamaha Europe GmbH.
• Esto se aplica solamente a productos distribuidos por Yamaha Europa GmbH.
•This applies only to products distributed by Yamaha Corporation of America.
•Dies bezieht sich nur auf die von der YAMAHA CORPORATION OF AMERICA vertriebenen Produkte.
•Ced ne s’applique qu’aux produits distribués par Yamaha Corporation of America.
•Esto se aplica solamente a productos distribuidos por Yamaha Corporation of America.
Page 47

YA MA HA
YAMAHA CORPORATION
PO.Box 1, Hamamatsu, Japan
The serial number o1 this product may be iound on the
bottom of the unit. You should note this serial number
in the space provided below and retain this manual as a
permanent record of your purchase to aid identification
In the event of theft.
Model No. PSS-380
Serial No.
Die Seriennummer befindet sich an der Unterseite des
Insiruments. Wir empfehlen, diese Nummer sicherheits
halber an der unten vorgesehenen Stelle einzutragen,
um sie auch im Falle eines Diebstahls jederzeit zur
Hand zu haben.
Model-Nr. PSS-380
Serien-Nr.
Le numéro de série de ce produit figure sur le socle de
l'appareil. Il conviendra de noter ce numéro de série
dans l'espace réservé au-dessous et de conserver ce
manuel: celui-ci constitue le document permanent de
votre achat et permet l'identification en cas de vol.
Modèle No. PSS-380
No. de série:
E1 número de serie de este producto se encuentra en la
parte inferior de la unidad, Sirsase anotar este número
de serie en el espacio proporcionado debajo y guarde
este manual como comprobante de compra para ayudar
a la identificación en caso de robo.
N° de modelo PSS-380
№ de serie
^ 904 VH0895D Printed In Japan
 Loading...