

Page 1
Page 2
FCC INFORMATION (U.S.A.)
IMPORTANT NOTICE: DO NOT MODIEY TIMS UNIT!
This piocliict. when installed as indicated in the instructions contained in this manual, meets FCC reciuirements. Modifications not expressly
approved by Yamaha may void your authority, granted by the FCC. to use the product.
IMPORTANT; When connecting this product to accessories and/or another product use only high quality shielded cables, Cablc/s supplied
with this product MU55T be used. Follow all installation instructions. Failure to follow instructions could void your FCC authorization to
use this product in the USA.
NOTE: This product has been te.sted and found to comply with the requirements listed in FCC Regulations, Part 15 for Cla.ss "B” digital
devices. Compliance with these requirements provides a reasonable level of assurance that your use of this product in a residential environ
ment will not result in harmful interference with other electronic devices. This equipment generates/uses radio frequencies and, if not in
stalled and u.scd according to the instructions found in the ti.sers manual, may cau.se interference harmful to the operation of other electronic
devices. Compliance with FCC regulations does not guarantee that interference will not occur in all installations. If this product is found to
be the source of interference, which can be determined by turning the unit “OFF" and “ON", plea.se try to eliminate the problem by using
one of the following measures;
Relocate either this product or the device that is being affected by the interference.
Utilize power outlets that are on different branch (circuit breaker or fuse) circuits or install AC line filter/s.
In the case of radio or TV interference, relocate/reorient the antenna. If the antenna lead-in is .5()() ohm ribbon lead, change the lead-in to
co-axial type cable.
If these corrective metisures do not produce satisfactory results, please contact the local retailer authorized to distribute this type of product.
If you can not locate the appropiiate retailer, plea.se contact Yamaha Corporation of America, Electronic Service Division.
6600 Orangethorpe Avc, Buena Park, CA 90620
The above statements apply ONLY to those products distributed by Yamaha Corporation of America or its subsidiaries.
SPECIAL MESSAGE SECTION
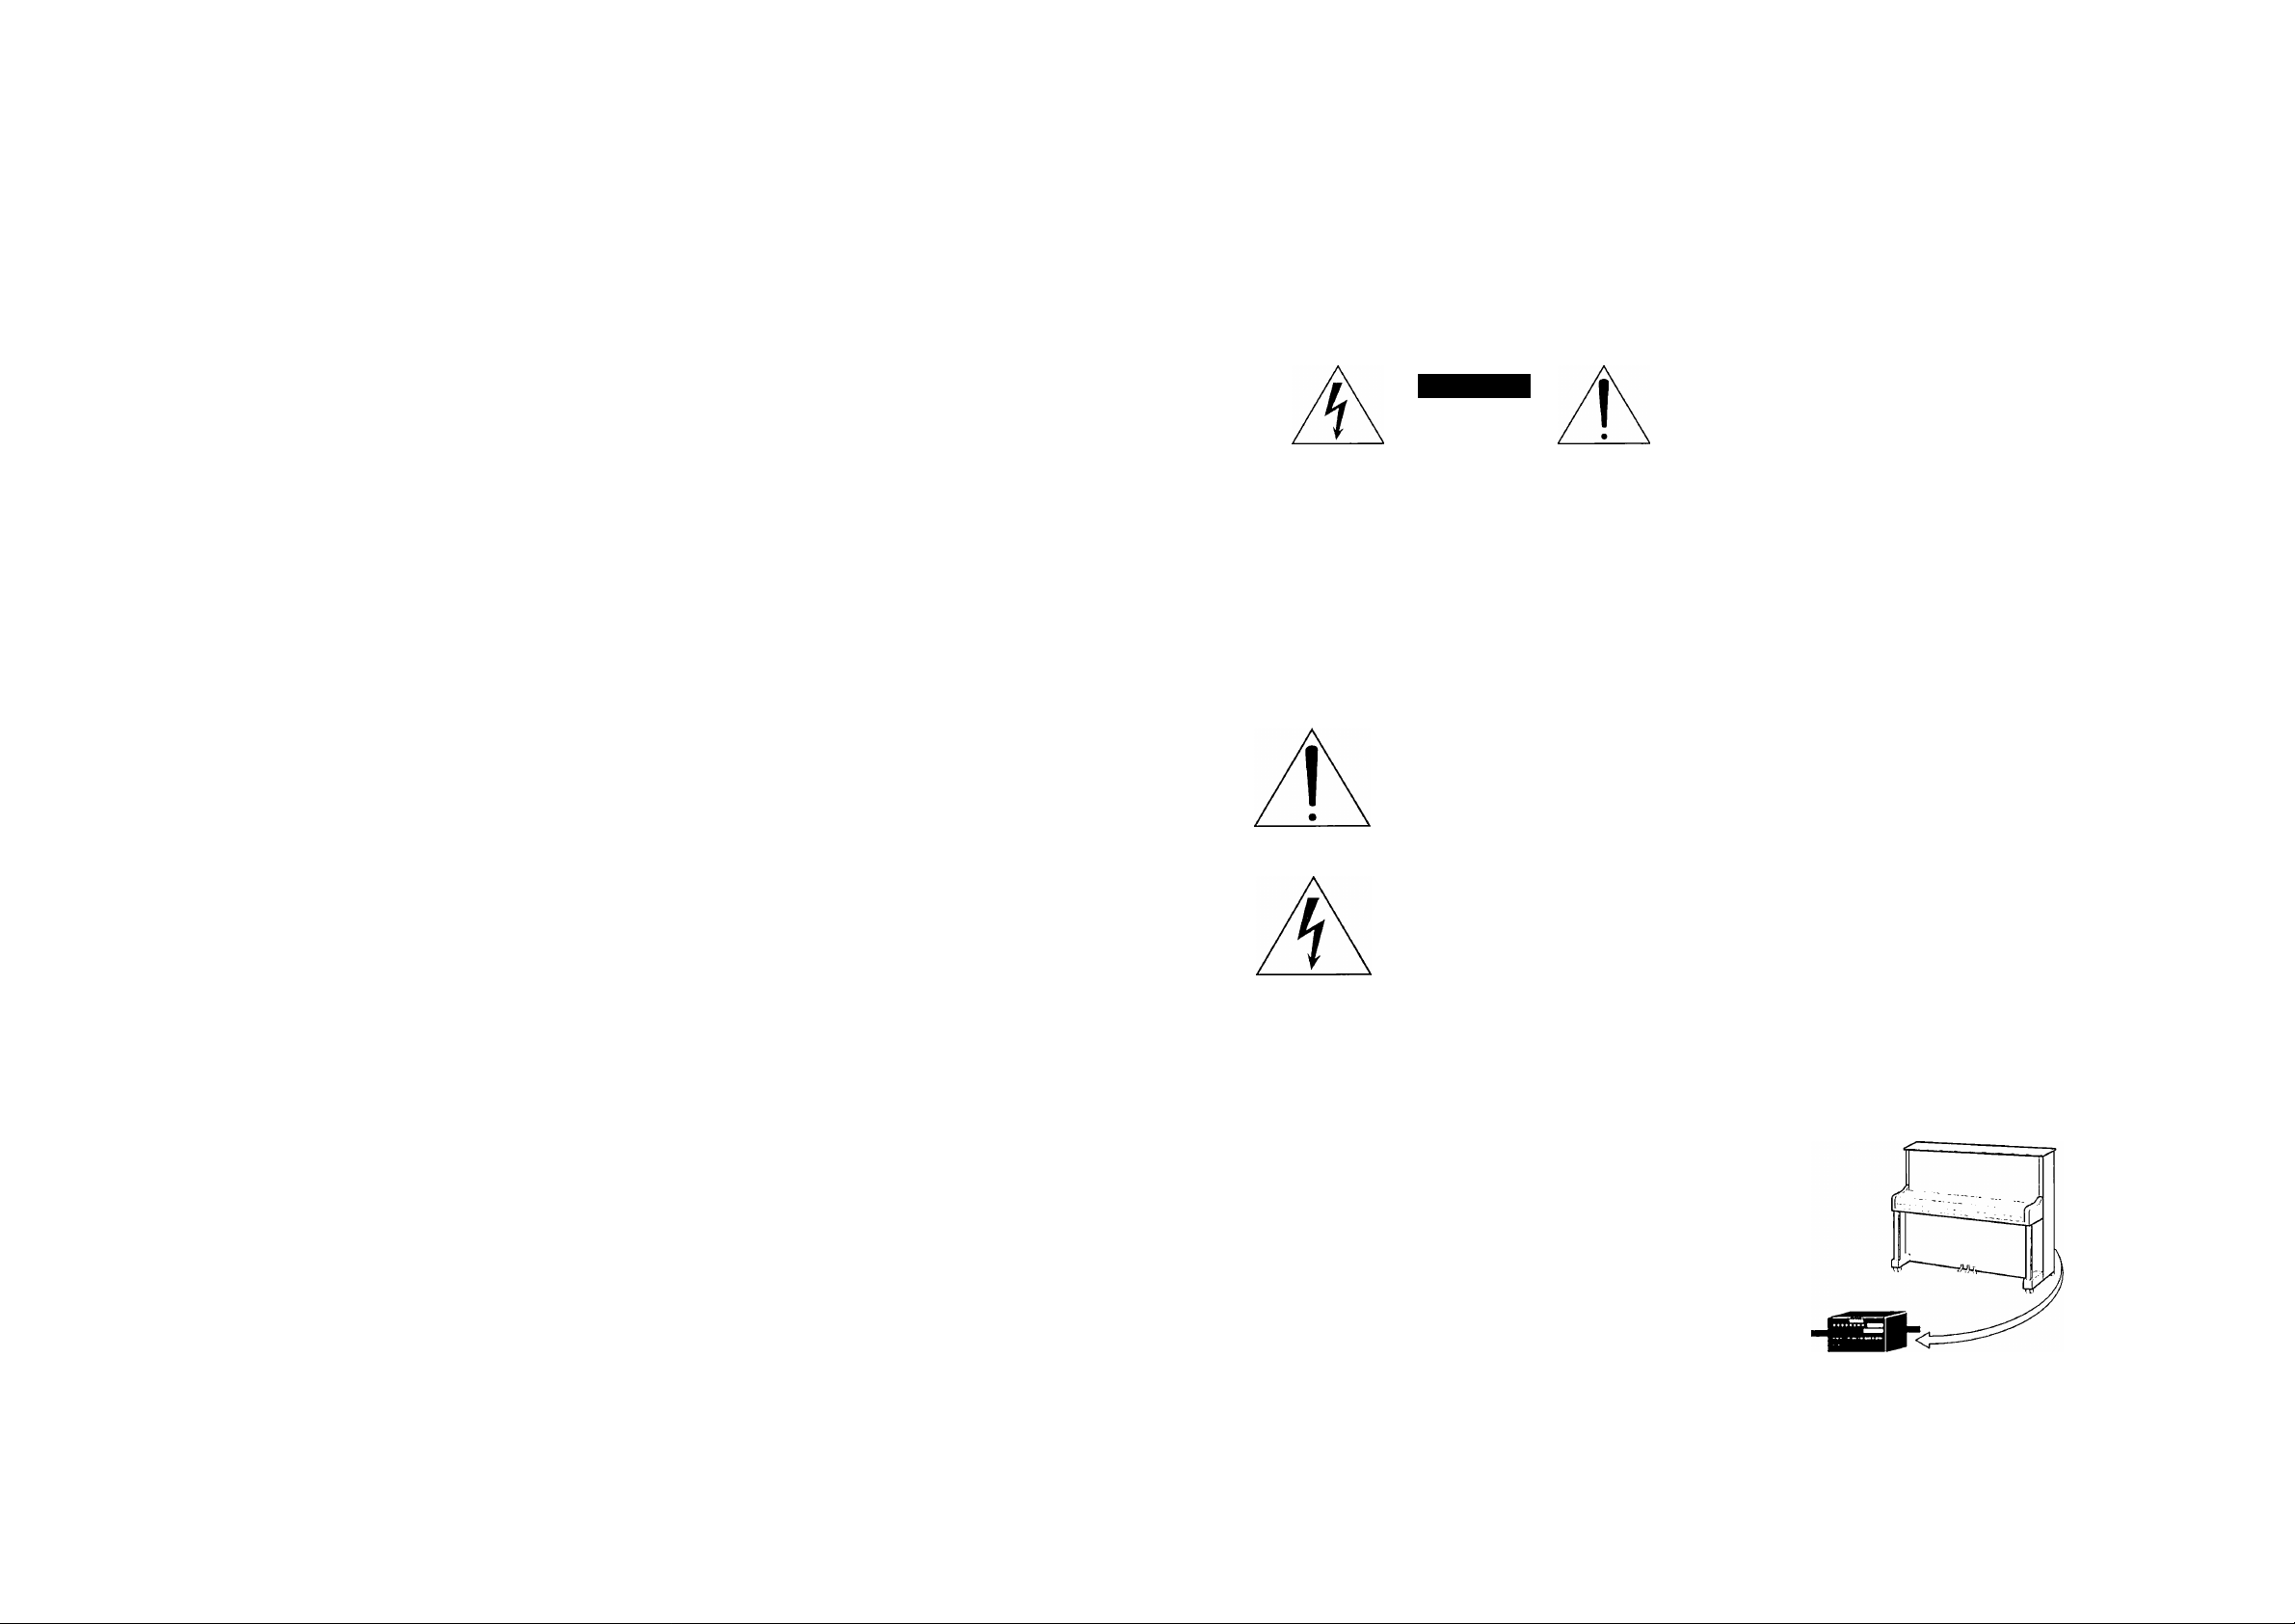
PRODUCT SAFETY MARKINGS: Yamaha electronic
product.s may have either labels similar to the graphics shown
below or molcled/stamped facsimiles of these graphics on the
enclosure. The explanation of these graphics appears on this
page. Plea.se observe all cautions indicated on this page and
those indicated on the safety instruction section.
CAUTION
RISK OF ELECTRIC SHOCK
DO NOT OPEN
CAUTION: TO REDUCE THE RISK OF
ELECTRIC SHOCK, DO NOT REMOVE
COVER (OR BACK). NO USER-SERVICEABLE
PARTS INSIDE. REFER SERVICING TO
QUALIFIED SERVICE PERSONNEL.
SEE BOTTOM OF ENCLOSURE OR LOWER FRONT
PANEL FOR GRAPHIC SYMBOL MARKINGS
The exclamation point within the equilat
eral triangle is intended to aleit the u.ser to
the presence of important operating and
maintainance (.servicing) instructions in the
literature accompanying the product.
The lightning flash with arrowhead symbol
within the equilateral triangle is intended to
alert the u.ser to the pre.sence of uninsulated
“dangerous voltage” within the product’s
enclosure that may be of sufficient magni
tude to constitute a risk of electrical shock.
IMPORTANT NOTICE: All Yamaha electronic product.s
are tested and approved by an independent safety testing
laboratory in order that you may be sure that when it is
properly installed and u.sed in its normal and customary
manner, all foreseeable risks have been eliminated. DO NOT
modify this unit or commission others to do so unless
specifically authorized by Yamaha. Product performance
and/or safety standards may be diminished. Claims filed
under the expressed warranty may be denied if the unit is/has
been modified. Implied warranties may also be affected.
ENVIRONMENTAL ISSUES: Yamaha strives to produce
products that are both u.ser .safe and environmentally friendly.
We sincerely believe that our products and the production
methods u.sed to produce them, meet these goals. In keeping
with both the letter and the spirit of the law, we want you to
be aware of the following:
Battery Notice: This product MAY contain a small nonre-
chargeable batteiy which (if applicable) is soldered in place.
The average life span of this type of battery is approximately
five years. When replacement becomes neccessary, contact a
qualified service representative to perform the replacement.
Warning: Do not attempt to recharge, disas.semble, or incin
erate this type of battei^. Keep all batteries away from
children. Dispo.se of u.sed batteries promptly and as regulated
by applicable laws. Note: In .some areas, the .seiwicer is
required by law to return the defective parts. However, you do
have the option of having the servicer dispo.se of these parts
for you.
Dispo.sal Notice: Should this product become damaged
beyond repair, or for some reason its u.seful life is considered
to be at an end, please ob.serve all local, state, and federal
regulations that relate to the disposal of products that contain
lead, batteries, plastics, etc.
NOTICE: Service charges incuired due to lack ol'knowledge
relating to how a function or effect works (when the unit is
operating as designed) are not covered by the manufacturer’s
warranty, and are therefore the owners responsibility. Please
study this manual carefully and consult your dealer before
requesting service.
NAME PLATE LOCATION: The graphic below indicates
the location of the name plate. The model number, .serial
number, power requirements, etc., are located on this plate.
You should record the model number, serial number, and the
date of purcha.se in the spaces provided below and retain this
manual as a permanent record of your purcha.se.
SPECIFICATIONS SUBJECT TO CHANGE: The infor
mation contained in this manual is believed to be coirect at
the time of printing. However, Yamaha reserves the right to
change or modify any of the specifications without notice or
obligation to update existing units.
92-469 (D
Located on the
backside of the
piano
Model
Serial No.
Purchase Date
Page 3

IMPORTANT SAFETY INSTRUCTIONS
INFORMATION RELATING TO PERSONAL INJURY, ELECTRICAL SHOCK,
AND FIRE HAZARD POSSIBILITIES HAS BEEN INCLUDED IN THIS LIST.
WARNING — When using any electrical or electronic prod
uct, basic precautions should always be followed. These pre
cautions include, but ai'e not limited to, the following:
\ ^ Read all Safety Instmctions, Installation Instructions,
Special Message Section items, and any Assembly
Instructions found in this manual BEFORE making any con
nections, including connection to the main supply.
2, Main Power Supply Verification: Yamaha products are
manufactured specifically for the supply voltage in the
area where they are to be sold. If you should move, or if any
doubt exists about the supply voltage in your area, please
contact your dealer for supply voltage verification and (if
applicable) instmctions. The required supply voltage is printed
on the name plate. For name plate location, please refer to the
graphic found in the Special Message Section of this manual.
3, This product may be equipped with a polarized plug (one
blade wider than the other). If you are unable to insert the
plug into the outlet, turn the plug over and try again. If the
problem persists, contact an electrician to have the obsolete
outlet replaced. DO NOT defeat the safety puipose of the plug.
4, DANGER — Grounding Instructions: Disklavier Grand
must be grounded and therefore has been equipped with
a three pin attachment plug. If this product should malfunction,
the ground pin provides a path of low resistance for electrical
current, reducing the risk of electrical shock. If your wall socket
will not accommodate this type plug, contact an electrician to
have the outlet replaced in accordance with local electrical
codes. Do NOT modify the plug or change the plug to a
different type!
5, WARNING: Do not place this product or any other
objects on the power cord or place it in a position wheie
anyone could walk on, trip over, or roll anything over power or
connecting cords of any kind. The use of an extension cord is
not recommended! If you must use an extension cord, the
minimum wire size for a 25’ cord (or less) is 18 AWG. NOTE:
The smaller the AWG number, the larger the current handling
capacity. For longer extension cords, consult a local electiician.
^ Ventilation: Electronic products, unless specifically de
signed for enclo.sed installations, should be placed in
locations that do not interi'ere with proper ventilation. If
instructions for enclosed installations are not provided, it must
be assumed that unobstructed ventilation is required.
7^ Temperature considerations: Electronic products should
be installed in locations that do not significantly contrib
ute to their operating temperature. Placement of this product
close to heat sources such as; radiators, heat registers and other
devices that produce heat should be avoided.
This product was NOT designed for use in wet/damp
locations and should not be used near water or exposed to
rain. Examples of wet/damp locations are; near a swimming
pool, spa, tub, sink, or wet basement.
9. This product should be used only with the components
supplied or; a cart, rack, or stand that is recommended by
the manufacturer. If a cart, rack, or stand is used, please observe
all safety markings and instructions that accompany the acces.S017 product.
10. The power supply cord (plug) should be disconnected
from the outlet when electronic products are to be left
unused for extended periods of time. Cords should also be
di.sconnected when there is a high probability of lightning
and/or electrical storm activity.
JI ^ Care should taken that objects do not fall and liquids are
not spilled into the enclosure through any openings that
may exist.
Electrical/electronic products should be serviced by a
12.
qualified service person when:
a. The power supply cord has been damaged; or
b. Objects have fallen, been inserted, or liquids have
been spilled into the enclosure through openings; or
c. The product has been exposed to rain; or
d. The product does not operate, exhibits a marked
change in performance; or
e. The product has been dropped, or the enclosure of
the product has been damaged.
Do not attempt to service this product beyond that
13.
described in the user-maintainance instructions. All other
seiwicing should be refeired to qualified service personnel.
14. This product, either alone or in combination with an
amplifier and headphones or speaker/s, may be capable of
producing sound levels that could cause permanent hearing
loss. DO NOT operate for a long period of time at a high
volume level or at a level that is uncomfortable. If you
experience any hearing loss or ringing in the eai's, you should
consult an audiologist. IMPORTANT: The louder the sound,
the shorter the time period before damage occurs.
15. Some Yamaha products may have benches and/or acces-
S017 mounting fixtures that are either supplied as a piirt or
the product or as optional accessories. Some of these items ai'e
designed to be dealer assembled or installed. Please make sure
that benches ai'e stable and any optional fixtures (where
applicable) iue well secured BEFORE using. Benches supplied
by Yamaha are designed for seating only. No other uses are
recommended.
Important
Read the following before operating the Disklavier.
Warnings
• Do not locate the Disklavier in a place subject to excessive heat, low temperatures, or direct
sunlight. This could be a fire hazard and may damage the finish and internal paits.
• Excessive humidity or dust can lead to fire or electiic shock.
• Connect the plug on the Disklavier power cable to a compatible AC outlet. Failure to do so will
present a fire and electric shock hazard. If the power cable plug is not compatible with your AC
outlet, consult your dealer.
• Do not plug several devices into the same AC outlet. This can overload the AC outlet, and lead
to fire and electric shock hazard. It may also affect the performance of some devices.
• Do not place heavy objects on the power cable. A damaged power cable is a potential fire and
electric shock hazard. If the power cable runs under a carpet, make sure heavy objects, including
the Disklavier, are not placed on top of the cable.
• If the power cable is damaged (i.e. cut or a bai'e wire is exposed), ask your dealer for a
replacement. Using the Disklavier in this condition is a fire and shock hazaid.
• When disconnecting the power cable from an AC outlet, always pull from the plug. Never pull
the cable. Damaging the cable in this way is a potential fire and electric shock hazard.
• The cover of the unit should be removed only by qualified service technicians.
• Do not place liquid containers such as vases, potted plants, glasses, cosmetic bottles, medicines,
etc., on top of the Disklavier.
• Do not try to modify the Disklavier, as this could lead to fire or electric shock hazai'd.
• When moving the Disklavier to another location, turn off the power, remove the power plug from
the AC outlet, and remove all cables connected to external devices.
Cautions
Turn off all audio devices when connecting to the Disklavier. Refer to the user’s guide for each
device. Use the coirect cables and connect as specified.
Set the volume level on all the devices to minimum before applying power.
Do not play the Disklavier at a high volume for extended periods; you may damage your
hearing. This is especially important when using headphones. If you think your hearing ability is
impaired, consult your doctor.
If the Disklavier is worked exti'emely hard - that is, prolonged playback of very “busy” songs the Disklavier’s thermal relay may trip. The thermal relay will automatically reset when the
Disklavier has cooled down.
If you notice any abnormality - such as smoke, odor, or noise - turn off the Disklavier
immediately, and remove the power plug from the AC outlet. Consult your dealer for repair.
If a foreign object or water gets inside the Disklavier turn it off immediately, and remove the
power plug from the AC outlet. Consult your dealer.
92-469-DK
(D PLEASE KEEP THIS MANUAL
If you plan not to use the Disklavier for a long period of time (such as when you are on
vacation), disconnect the electrical mains.
Page 4

• Always remove the power plug from the AC outlet before cleaning the Disklavier. Leaving the
power plug connected presents a risk of electric shock.
• Do not use benzene, thinner, cleaning detergent, or a chemical cloth to clean the Disklavier.
• Do not place metal objects with rubber feet on top of the Disklavier. The color and finish of the
Disklavier can be damaged.
• Do not place heavy objects on the Disklavier. Doing so can damage the Disklavier.
• Use a soft, diy cloth to clean the Disklavier. However, if you discover a stain, carefully use a soft
damp cloth to remove it.
Interference
• The Disklavier uses high-frequency digital circuits that may cause interference to radios and TVs
placed close to it. If interference does occur, relocate the affected equipment.
Handling Batteries
The remote control of this unit is powered by diy batteries. Improper use or misuse of the dry
batteries can cause the diy batteries to heat up, leak electrolyte or burst which in turn may result in a
fire, damage to equipment and/or nearby objects or in burns, injury or other bodily harm. Read
through and familiarize yourself with the following safety precautions prior to use to ensure correct
usage.
• Do not directly touch the chemicals (electrolyte) which have leaked from diy batteries.
1. If electrolyte from dry batteries has made contact with your eyes, rinse your eyes thoroughly
with clean water and seek medical treatment from a physician immediately.
2. If electrolyte from dry batteries has touched your skin or clothing, rinse it off immediately
with clean water.
3. If electrolyte from dry batteries has found its way inside your mouth, gargle immediately and
consult a physician.
• Do not install the diy batteries with the “+” and poles reversed. Misaligning the poles of diy
batteries can lead the dry batteries to be charged or shorted or it can cause them to heat up, leak
electrolyte or burst which in turn may result in a fire, damage to nearby objects or in burns,
injuiy or other bodily hai*m.
• Use only the designated batteries. Do not use used batteries with unused batteries or different
types of batteries together. This can cause them to heat up, leak electrolyte or burst which in turn
may result in a fire or in bums, injury or other bodily harm.
Replace all the dry batteries at the same time. Do not use new and old diy batteries together. Do
not use different types of batteries (alkaline and manganese batteries, batteries made by different
manufacturers or different batteiy products made by the same manufacturer) together: this can
cause them to heat up, ingite or leak elecLolyte.
• When the battery-powered unit is not going to be used for a prolonged period of time, remove
the diy batteries from the unit. Othei-wise the batteries will run down and their electrolyte may
leak, resulting in damage to the unit.
• Remove spent batteries immediately from equipment. Otherwise, batteries will overdischarge,
causing them to heat up, leak electrolyte or burst which in turn may result in damage to nearby
objects or in burns, injuiy or other bodily hcU'm.
• Dispose of batteries in accordance with the applicable regulations and ordinances.
Please keep this manual for future reference.
Table of Contents
Basic Operations
Chapter 1
Introduction............................................1
Welcome to the Disklavier Piano!
Items Supplied with the Disklavier
Conventions Used in the Disklavier Manuals..2
Trademarks & Copyright
Basic Disklavier Terminology.........................3
Application Guide
...........................................
................................
Chapter 2
Names of Parts and Their Functions ..7
Control Unit — Front Panel
Control Unit — Rear Panel.............................8
Switch Box
Remote Control............................................10
.....................................................
Chapter 3
Setting Up Your Disklavier
Connecting the Control Unit
Connecting the Power Cable.......................11
Connecting a Speaker System
Power On Procedure
Power Off Procedure
Connecting Other Equipment.......................13
...................................
...................................
Chapter 4
Using the Remote Control
Installing Batteries in the Remote Control....14
Battery Replacement....................................14
Using the Remote Control............................14
Chapter 5
Using Floppy Disks
Handling Floppy Disks
Accidental Erasure Protection......................15
Inserting & Ejecting Floppy Disks
.............................
.................................
Chapter 6
Display (LCD)
Various Displays
.......................................
..........................................
..................
.................
............................
.................
........................
.....................
11
..................
................
1
2
2
4
7
9
11
11
12
13
14
15
15
15
17
17
Chapter 7
Basic Playback.....................................20
starting Playback..........................................20
Pausing Playback
Stopping Playback.......................................21
Selecting Songs with the Control Unit
Selecting Songs with the Remote Control ....22
Fast Preview & Review
Fast Forward & Reverse
Adjusting the Volume
Balancing the Ensemble Volume (TG Master
Balance)
Changing the Tempo....................................26
Transposing a Song
...................................................
........................................
........
................................
..............................
...................................
.....................................
21
21
22
23
24
25
27
Chapter 8
Repeat Playback
All Song, Single Song, Random Repeat
Segment A~ B Repeat
Segment A~ (Return & Pause) Repeat
Starting Playback from a Specified Point
(Search)
..................................................
.................................
........
.................................
..........
28
29
31
Chapter 9
Auto Start & Space Playback
Setting Auto Start.........................................33
Auto Start
Timer-Controlled Playback
Setting Space Playback
Space Playback
.....................................................
...........................
...............................
...........................................
.............
33
33
34
35
36
Chapter 10
Useful Functions for Learning
Piano
Cancelling the Left-Hand or Right-Hand
Operating the Pedals Yourself
Using the Metronome...................................38
Playback with the Metronome
....................................................
Piano Part.................................................37
.....................
......................
37
37
40
28
30
II
III
Page 5

Chapter 11
Playing the Keyboard with an
Ensemble Voice
Assigning an Ensemble Voice
...................................
.....................
41
41
Chapter 12
Advanced Ensemble Song
Playback
Tuning the Tone Generator (TG Master
Tune)
...............................................
........................................................
43
43
Advanced Operations
Chapter 14
Using the Memory Disk and Floppy
Disks for Recording
Using the Memory Disk
Using Floppy Disks......................................51
Formatting Disks
..........................................
Chapter 15
Basic Recording...................................54
The [REC] Button
Recording a Song
Remaining Disk Space.................................56
Setting the Type of Time Display
Song Titling and Title Editing
Keyboard Character Map.............................59
Recording with the Metronome
Changing the Default Song Tempo
MDR (MIDI Data Recording) Mode
.........................................
........................................
Chapter 16
Recording L/R Songs
Recording the Left and Right Parts
Separately
Recording with a Left & Right Split Point
Re-Recording Both Parts Simultaneously......70
Re-Recording One Part
Recording a Pedal Count-In.........................72
Playback with a Pedal Count-In
................................................
Chapter 17
Recording Ensemble Songs
Ensemble Song Display
Recording Ensemble Tracks
........................
...............................
.................
.......................
....................
.............
..............
..........................
.......
...............................
...................
...............
...............................
........................
51
51
52
54
54
56
57
59
61
63
65
65
68
70
73
74
74
75
Playing the Piano Parts on the Tone
Generator..................................................44
Displaying Ensemble Voices........................45
Selecting Tracks for the Piano Parts
............
46
Chapter 13
Internal XG Tone Generator Voice &
Drum Kit List.........................................48
Internal XG Tone Generator Basic Voice
List............................................................48
Internal XG Tone Generator Drum Kit List....49
Overdubbing a Track....................................78
Quantizing Notes..........................................80
Chapter 18
Editing Tracks
Editing a Track's Voice & Volume
Mixing Two Tracks
Moving a Track.............................................85
Copying a Track
Deleting a Track...........................................89
Transposing a Track.....................................90
Editing the Piano Track Assignments
......................................
................
.......................................
...........................................
..........
82
82
84
87
92
Chapter 19
Disk & Song File Utilities.....................94
Titling Disks
Copying Songs.............................................96
Copying the Entire Contents of a Disk
(Disk Copy)...............................................98
Deleting Songs...........................................100
Rearranging the Song Order (Song Sort)....102
Changing the Song Time Display...............104
..................................................
94
Chapter 20
Song and Disk Formats and
Compatibility.................................. 106
Song Format
Disk Types
Converting Song Format
Converting Disk Type.................................109
..............................................
.................................................
............................
106
106
107
Chapter 21
The Disklavier & MIDI
Start/Stop Control of a MIDI Instrument with
the Disklavier..........................................111
Sending the Keyboard Data to a MIDI
Instrument
Receiving Data from a MIDI Sequencer
Controlling the Disklavier in Real Time
Sending Song Data to a MIDI Instrument...118
Playing Back Import Files
Summary of the MIDI Out Parameter in a
MIDI Setup
..............................................
.............................................
...........................
....
......
..........................
Ill
112
115
117
120
121
Chapter 22
The Disklavier & Computers
Connecting to a Computer
Setting the HOST SELECT Switch
Playing Back Songs in a Computer
Recording Songs to a Computer
(Sequencer)............................................126
Playing Back More than 16 Channels
.........................
.............
............
...........
........
123
123
124
125
127
Appendix
MIDI Data Format
..................
Appendix 1
Temporarily Deactivating the Internal
Tone Generators.....................................128
Summary of the MIDI Out Parameter in a
Computer Setup
.....................................
130
Chapter 23
Resetting Your Disklavier
.................
132
Chapter 24
Troubleshooting
.................................
134
Chapter 25
Display Error Messages
....................
137
Chapter 26
Glossary..............................................139
Chapter 27
Specifications.....................................143
IV
Page 6

Chapter 1
Introduction
Welcome to the Disklavier Piano!
Thank you for purchasing the Disklavier piano!
The Disklavier is a fascinating instrument that integrates a classic Yamaha acoustic piano with innovative
electronics to suit your entertainment, educational, and creative needs, while retaining the tone, touch and
long-term value that have long made Yamaha pianos the world’s finest.
Versatile Playback Functions
Using an advanced system of fiber-optic sensors, the Disklavier ensures that even the most
demanding performance is played back faithfully. A variety of playback controls — volume, tempo,
transposition, repeat and seai'ch — offers exceptional flexibility for music study, accompaniment and
other activities. A built-in metronome is also provided. With L/R recorded music, you can listen to
one hand at a time or practice one hand while the Disklavier plays the other.
A vast libnuy of Yamaha PianoSoff '"' and PianoSoft-Plus™ disks offer world-class professional
peiformances that you can play back on your Disklavier.
Integral Recording Functions
Songs you play on the Disklavier can be recorded with great accuracy. Specially designed optical
key sensors register every aspect of the player’s performance. Songs can be recorded onto the
internal Memoiy Disk, which provides I MB of memory, or onto standard 3.5” 2DD or 2HD floppy
disks.
As left- and right-hand parts can be recorded either separately or together, you can record an inspired
performance or compose pieces for four hands and Ensemble songs as well.
DO
CD
(/)
O
•D
fD
Q)
O
D
U)
Internal XG Tone Generator Features
A Yamaha XG tone generator gives you access to a full spectrum of instrumental accompaniment.
You can listen to fully orchestrated Ensemble songs or select from the variety of instrumental voices
available to create your own Ensemble song.
Compatible with Yamaha XG and General MIDI standards, the internal tone generator can deliver nearly
700 instrumental and percussion voices.
Music Editing & Utility Functions
The Disklavier supports both Standard MIDI File and E-SEQ format songs and disk types. For
compatibility, song formats and disk types can be converted. Other functions include versatile track
editing capabilities, plus formatting, copying, and titling disks.
Innovative External Interface
With a simple cable connection, you can play back and record songs using external MIDI devices,
such as synthesizers and sequencers. You can also connect your Disklavier directly to a personal
computer for a vm'iety of uses.
Welcome to the Disklavier Piano!
Page 7

Items Supplied with the Disklavier
Basic Disklavier Terminology
Check that the following items ai'e supplied with your Disklavier.
1
2
1
1
1
Remote Control
Batteries for the Remote Control
Disklavier Sample Disk (PianoSoft)
Blank Floppy Disk
Operation Manual
Conventions Used in the Disklavier Manuals
Control Unit Display
The LCD on the Control Unit is used in conjunction with most of Disklavier’s functions, for setting
parameters, selecting options and displaying various information.
n |P:i
ano
U f
Whenever a song is selected, the song number is indicated by the 2-digit indicator. However, in this
manual actual numbers have been omitted.
Control Unit and Remote Control Buttons
P Ì.
:i. i;:;. fiifi »
The following is a list of several basic Disklavier words that you may need to know before proceeding
with operational procedures in this manual. For other Disklavier terminology, see the glossary provided on
page 139.
Disk
“Disk” is used as a generic term to refer to both the floppy disk and internal Memory Disk. All
Disklavier playback, recording, and disk utility functions can be used for both the internal Memory
Disk and floppy disks.
Ensemble Song
An Ensemble song contains the same left and right-hand parts as an L/R song, and extra tracks that
are played by the internal XG tone generator. Accompanying tracks can include acoustic bass,
drums, sti'ings, vibes, etc.
Floppy Disk
The magnetic storage medium that the Disklavier uses to save songs. The Disklavier uses 3.5 inch
2DD and 2HD floppy disks.
L/R Song
In a L/R song, the left-hand piano part is stored on U'ack 1 (L) and the right-hand piano part is
stored on track 2 (R). During playback you can cancel either part, and practice that part yourself.
When recording an L/R song, you can record the two parts simultaneously or sepai*ately.
00
Q)
r»'
O
•D
fD
0)
o'
D
V)
Many of the Disklavier’s functions can be operated using either the Conti'ol Unit or the remote
conti'ol. When the remote control can be used, the relevant remote control button is illustrated, for
example, as below.
Remote Control
When a Control Unit or remote control button is mentioned in tlie text, the name of the button is
enclosed in square brackets, for example, the [PLAY/PAUSE] button.
Pedals
The Disklavier pedals are named as follows throughout this manual.
Left
Soft Pedal
Right
Sustain Pedal
Trademarks & Copyright
Yamaha, Disklavier, PianoSoft, and PianoSoft-Plus are trademarks of Yamaha Corporation. Unauthorized
copying of PianoSoft or PianoSoft-Plus disks is prohibited.
Memory Disk
The Disklavier also has an internal Memory Disk that allows you to store song data without a
floppy disk.
MIDI
An acronym for Musical Insti-ument Digital Interface. MIDI allows electronic musical instruments to
communicate with each other.
PianoSoft^'^
The PianoSoft Disk Collection is a library of prerecorded song disks, made by Yamaha, specially for
use with the Disklavier Series. There are many titles available and music styles include classical,
jazz, populai-, and others. As well as songs for listening enjoyment, there aie piano study disks for
the piano student and accompaniment disks for vocal and instrumental practice.
PianoSoft is sometimes used as a generic tenn for PianoSoft and PianoSoft-Plus.
PianoSoft-Plus^'^
PianoSoft-Plus disks contain prerecorded Ensemble songs featuring instrumental accompaniment that
can be played on the Disklavier. Since this Disklavier has an XG compatible tone generator built in,
all you need to start playing an Ensemble song is amplified speakers.
See your Disklavier dealer for a PianoSoft catalog.
Chapter 1: Introduction
Polyphony
The maximum number of voices (different sounds) that can be produced at a time.
Basic Disklavier Terminology
Page 8

Soft Mode
A volume setting for the Disklavier in normal mode, in the range -7 to -10. In this mode, playback
volume is greatly reduced by the extended use of the soft pedal mechanism.
Song
A “song” usually means a short piece of music with lyrics. However, in the Disklavier manuals, the
term “song” is used to refer to any piece of music.
XG
Yamaha XG is an extension of the GM (General MIDI) format. With greater polyphony, more voice,
and effects, it improves song compatibility between MIDI devices. When a song in the Yamaha XG
lormat is played on another XG compatible tone generator or synthesizer, it will play and sound as
the original composer/creator intended.
Application Guide
Acoustic Piano Playing
Home Listening Pleasure
You can use your Disklavier to provide live
piano entertainment in your home, at any time.
The comprehensive PianoSoft collection offers a
libraiy of music that the whole family can
enjoy, including selections from classical, jazz,
easy listening, and popular music.
The full-function remote control enables you to
control the Disklavier from your favorite
cumchair.
When entertaining guests, the Disklavier can be
used to provide live or pre-recorded genuine
piano performance.
Vocal or Instrumental Accompaniment
00
q;
ñ'
O
■o
fD
0)
i-f
o‘
3
in
The Disklavier is foremost a fine acoustic piano. The optical sensor system does not interfere in the
least with the renowned “touch” of a Yamaha piano. Therefore, you can always play your Disklavier
as you would any other Yamaha piano.
Note: It is not neces.sary to switch on the Disklavier when you simply want to play the piano.
A Wide Variety of Applications
The Disklavier is a wonderfully flexible instrument. This section offers a few general ideas on how
you can take the best advantage of your Disklavier.
The following applications are briefly described in this section:
• Home Listening Pleasure
• Music Education and Practice
• Vocal or Instrumental Accompaniment
• Ensemble Playing Using the Internal XG Tone Generator
• MIDI Musicians and Computer-Based Music Systems
With its versatile playback functions, the
Disklavier is an ideal accompanist for solo
vocal, chorus, flute, violin, trumpet, etc.
Better still, Disklavier accompaniment can be
played at different tempos, in different keys, and
any song or passage can be repeated again and
again — with far more patience than any living
accompanist could muster!
Ensemble Playing Using the Internal Tone Generator
The Disklavier reproduces not only live piano
music, but digital accompaniment as well,
thanks to the internal XG tone generator. You
can play back PianoSoft-Plus pre-recorded
Ensemble songs and enjoy the sound of a
Vtuiety of instruments — brass, woodwind,
strings, bass, percussion, and more. You can
also compose and record your own, assembling
up to 16 different instrument parts.
Chapter 1 : Introduction
Application Guide
Page 9

Chapter 2
MIDI Musicians and Computer-Based Music Systems
Those who enjoy making computer music can
connect the Disklavier to MIDI-compatible
synthesizers, sequencers, and drum machines, or
to personal computers for a vast range of
creative options. With its versatile abilities
besides playback and recording functions, the
Disklavier is an ideal tool for composition and
performance.
Names of Parts and Their
Functions
This chapter describes the functions of the buttons and parts of the Control Unit and remote control that
are used to operate the Disklavier and to connect peripheral equipment.
Control Unit — Front Panel_____________________
CONTROL UNIT DKC50R dlsklavlsp
miDl
o
O O PART O O
[ZZl
Ovoicd Ofunc. Onome°'
OVOLUME»**-10 -8 -6 -4 -2 0
Otempo O O O O O O
©TRANSPOSE -/NO +/YES
O BALANCE
ISTANDBY
ilON
®YAMAHA
PLAY/PAUSE STOP REC SONG SELECT/REV • FWD ENTER ♦
►/II
CD
0)
n’
O
•D
ro
0)
o‘
D
in
® @ ® ®
[STANDBY / ON] button
This switch powers on the Disklavier or puts
it in Standby mode. Press once to power on,
and again to put it in Standby mode. In
Standby mode, the control unit is in effect
switched off. However, electrically it is in a
state in which a very small quantity of
power is being consumed, as the MAINS
switch is still ON and the Disklavier is still
connected to the AC power receptacle.
Remote control sensor
When using the remote control, point it
towai'd this sensor.
Display
®
This display (LCD) shows the number of the
currently selected song, song time, and title.
It also displays options, parameters, and
settings in conjunction with all Disklavier’s
functions.
Floppy disk drive
®
Insert floppy disks here for playback,
formatting, recording, etc.
©©dM) ®
® Floppy disk eject button
This button is used to eject disks from the
floppy disk drive.
® [PLAY/PAUSE] button
This button is used to start and pause
playback and recording.
® [STOP] button
This button is used to stop playback and
recording.
® [REC] button
This button is used to engage the Record
Standby mode before recording starts.
® [SONG SELECT/REV FWD] buttons
These buttons work in three different modes.
In Stop mode they select songs.
In Play mode they work as fast preview and
review.
In Pause mode they work as fast forward and
reverse.
Chapter 1: Introduction
Control Unit— Front Panel
Page 10

PART [L] [R] buttons
For L/R and Ensemble songs, these buttons
allow you to choose which pait to play back
or record: L (left-hand) part, R (right-hand)
part, or both. The green indicators light
during playback, and the red indicators
during recording.
Pressing both buttons together switches pedal
playback on or off so that you can play the
pedals yourself.
® [ENTER] button
This button is used to select and execute
functions.
® [VOICE] button
This button is used to access the internal XG
tone generator when playing the piano. See
Chapter 11 “Playing the Keyboard with an
Ensemble Voice.”
® [◄■][■►] cursor buttons
These buttons are used to select various
options and parameters. They are also used
to move the cursor in the display when
titling songs and disks, and when calling up
a continuing display.
Control Unit — Rear Panel
(0) [FUNC.] button
This button is used to access disk and song
functions, MIDI setup, and TG Master tune,
and reset functions.
® [METRONOME] button
This button is used to access the metronome.
® Selector button
This button is used to select the feature you
want to adjust from among Volume, Tempo,
Transpose, and Balance.
® [-/NO] [+/YES] buttons
These buttons are used mainly to adjust
volume. They are also used to select options
and parameter values.
Pressing the [-t-ZYES] button increases a value.
It is also used to answer YES when the Control
Unit requires a yes/no-type answer.
Pressing the (-/NO] button decreases a value.
It is also used to answer NO when the Control
Unit requires a yes/no-type answer.
Pressing both buttons together returns the set
ting to its initial factory setting.
® LED volume level indicators
These LEDs indicate the playback volume
level. They also function as a visual
metronome.
@ TO CONTROL CABLE FOR PIANO
The control cable from the piano is
connected here.
® MIDI OUT
This connector is used to output MIDI data
from the Control Unit. It allows output to
MIDI-compatible tone generators,
synthesizers, samplers, etc.
Switch Box
MAINS (ON/OFF) switch
©
This switch is used to switch the Disklavier
on and off. See pages 12 and 13 for
information on power ON and OFF
procedures.
Note: The MAINS switch needs to be
switched off when you are not
going to use the Disklavier for a
long period of time. For daily
u.se, only the [STANDBY / ON]
button on the Control Unit needs
to be switched on and off.
MIDI IN
This connector provides access to the
Disklavier and internal XG tone generator.
You can connect a MIDI keyboai'd,
synthesizer, or MIDI sequencer to control the
Disklavier, internal XG tone generator, or
both.
® AUX OUT
This connector is used to output audio signal
from the internal XG tone generator. For
Ensemble song playback, an optional
amplifier or powered speakers are connected
here using the audio cable supplied (or
equivalent).
TJ
00
0)
LD
n'
O
ro
T
Qj
r+
5’
D
in
® TO HOST (serial port)
This connector is used to connect the
Disklavier with a computer via serial cable.
8 Chapter 2 : Names of Parts and Their Functions
HOST SELECT
This switch is used to select the host
computer machine to be connected to the TO
HOST connector.
Switch Box
Page 11

Chapter 3
Remote Control
RECORD PART SELECT
©-
d>-
(4>
d>-
REPEAT TRANSPOSE
-O ŒraxB-
A-B TEMPO
-O
SONG SELECT
■£S3 CS
PLAY PAUSE STOP
It L )l T R
SEARCH
C3-
-O
® [SONG SELECT] buttons
Used to select songs.
® [PLAY] button
Used to start playback.
® [PAUSE] button
Used to pause playback and recording.
® [STOP] button
Used to stop playback and recording.
® [PART SELECT] buttons
For L/R and Ensemble songs, these buttons
are used to choose which part will play; left-
hand pai t, right-hand pail, or both parts.
They are also used to select a part for
recording.
Setting Up Your Disklavier
Set up your Disklavier in the following order.
Connecting the Control Unit
Make sure that the control cable extending from the piano is firmly connected to the TO CONTROL
CABLE FOR PIANO connector on the rear panel of the Contiol Unit.
Control cable
00
0)
ñ’
O
■D
0
-n
0)
r+
5'
D
in
d>
YAMAHA
REMOTE CONTROL TRANSMITTER PPR-100
[RECORD] button
Press to engage the Record Standby mode
before recording starts.
Number keypad*
(D
Used for direct song selection and to enter a
start time for song playback.
[REPEAT] button*
@
Used to select one of the Repeat functions:
ALL, RPT, or RND.
[A-B] button*
Used to enter A and B points for Segments
A ~ B and A ~ Repeat modes.
[REV FWD] buttons
In Play mode, these buttons work as fast
preview and review.
In Pause mode, they work as fast forwai'd
and reverse.
© [SEARCH] button*
Used to stall playback from a specific time
in a song. Press this button, enter the start
time using the Number keypad, then press
this button again.
® [TRANSPOSE] buttons
Used to transpose song playback.
Press the [-] button to rtanspose down, the [+]
button to transpose up.
The [0] button is used to reset the Tansposition
value to 00.
® [TEMPO] buttons
Used to change the playback tempo.
Press the [-] button to decrease the tempo, the
[+] button to increase the tempo.
The [0] button is used to reset the tempo to 00.
® [VOLUME] buttons
Used to adjust the volume.
Press [-] button to decrease the volume, and
the [+] button to increase the volume.
Note: The control cable should have been connected to the Control Unit when the Disklavier was
installed. If, however, it was not, carefully connect the conti'ol cable to the Control Unit’s
TO CONTROL CABLE FOR PIANO connector on the rear panel.
The Control Unit may be placed on any stable surface on, neai; or away from the Disklavier as far as the
length of the cable will permit.
Connecting the Power Cable
Connect the Disklavier’s power cable to an AC wall outlet.
Important: Make sure that the voltage of the AC wall outlet matches that marked on the Disklavier’s
nameplate.
____________________
Connecting a Speaker System
To enjoy Ensemble songs, use an audio cable (ex. stereo RCA to mono phone plugs) to connect an
amplifier/speaker to the AUX connectors on the side panel of the Switch Box.
* These buttons are available only on the remote
control
10 Chapter 2 : Names of Parts and Their Functions Connecting the Control Unit 11
Page 12

Power Off Procedure
If you were using a sound system, turn it off.
Press the [STANDBY / ON] button on the Control Unit.
Audio cable (not supplied)
Power On Procedure
Set the MAINS switch to ON.
Press the [STANDBY / ON] button on the front panel of the Control Unit.
Set the MAINS switch to OFF.
Operating the Disklavier’s MAINS switch is effectively the same as disconnecting the
power cable from an AC wall outlet. So if the Disklavier is used regularly, you only
need to use the [STANDBY / ON] button on the Conti'ol Unit. If the Disklavier is not
going to be used for a long period, set the MAINS switch to OFF.
Note: The [STANDBY / ON] button on the control panel must be switched off
before switching off the MAINS .switch .so that “soft mode”, if used, is
released. If soft mode is not released, the keyboard will become uneven,
and the piano action will be unfit for playing. See “Adjusting the Volume”
on page 24.
When the Disklavier is powered off, wait at least 5 .seconds before powering on again.
Connecting Other Equipment
To connect MIDI instruments to the Disklavier, see Chapter 21 “The Disklavier & MIDI”.
T3
00
0)
j/j.
n‘
O
n>
QJ
r+
5’
D
in
The following message appears on the display.
Turn your sound system on if you will be playing back Ensemble songs.
Your Disklavier is now ready for use.
To connect a computer to the Disklavier, .see Chapter 22 “The Disklavier & Computers”.
12 Chapter 3: Setting Up Your Disklavier
Power Off Procedure 13
 Loading...