

Yaesu FTA-450, FTA-550, FTA-750 Firmware Upgrade Manual
How to update the FTA-750/FTA-550/FTA-450 series
To update the FTA-750/FTA-550/FTA-450 series, the following les are needed.
a) Firmware Update FTA_750_550_450_V3xx.exe : Firmware Update le
b) YCE01 V2.0.0.4 or higher : Programming Software
c) Upchk.exe : Radio Update check le
Caution!
Run the (Upchk.exe) diagnostic program to determine whether your FTA-750/FTA-550 can be updated to
rmware version (Ver. 03.xx).
Installing the Device Driver
The FTA-750/FTA-550/FTA-450 device driver must be
installed on your PC before starting the rmware update.
1. Download the YCE01 PC Programming Software
from the YAESU website and decompress the files
to anywhere on your computer. Note that all the les
must remain in the same folder.
2. Run the “setup.exe” in the same folder that you have
decompressed the les.
3. Follow the instructions on your computer screen.
If the YCE01 is successfully installed, a shortcut
icon “YCE01” will appear on the desktop of your
computer. The instruction screen for installing the
FTA-750/FTA-550/FTA-450 device driver will also
appear.
4. Follow the instructions on your computer screen.
The device driver will be installed.
How to check the new rmware possibility
Note: FTA-450 does not require this check, proceed to
“How to Update the Firmware” on the next page.
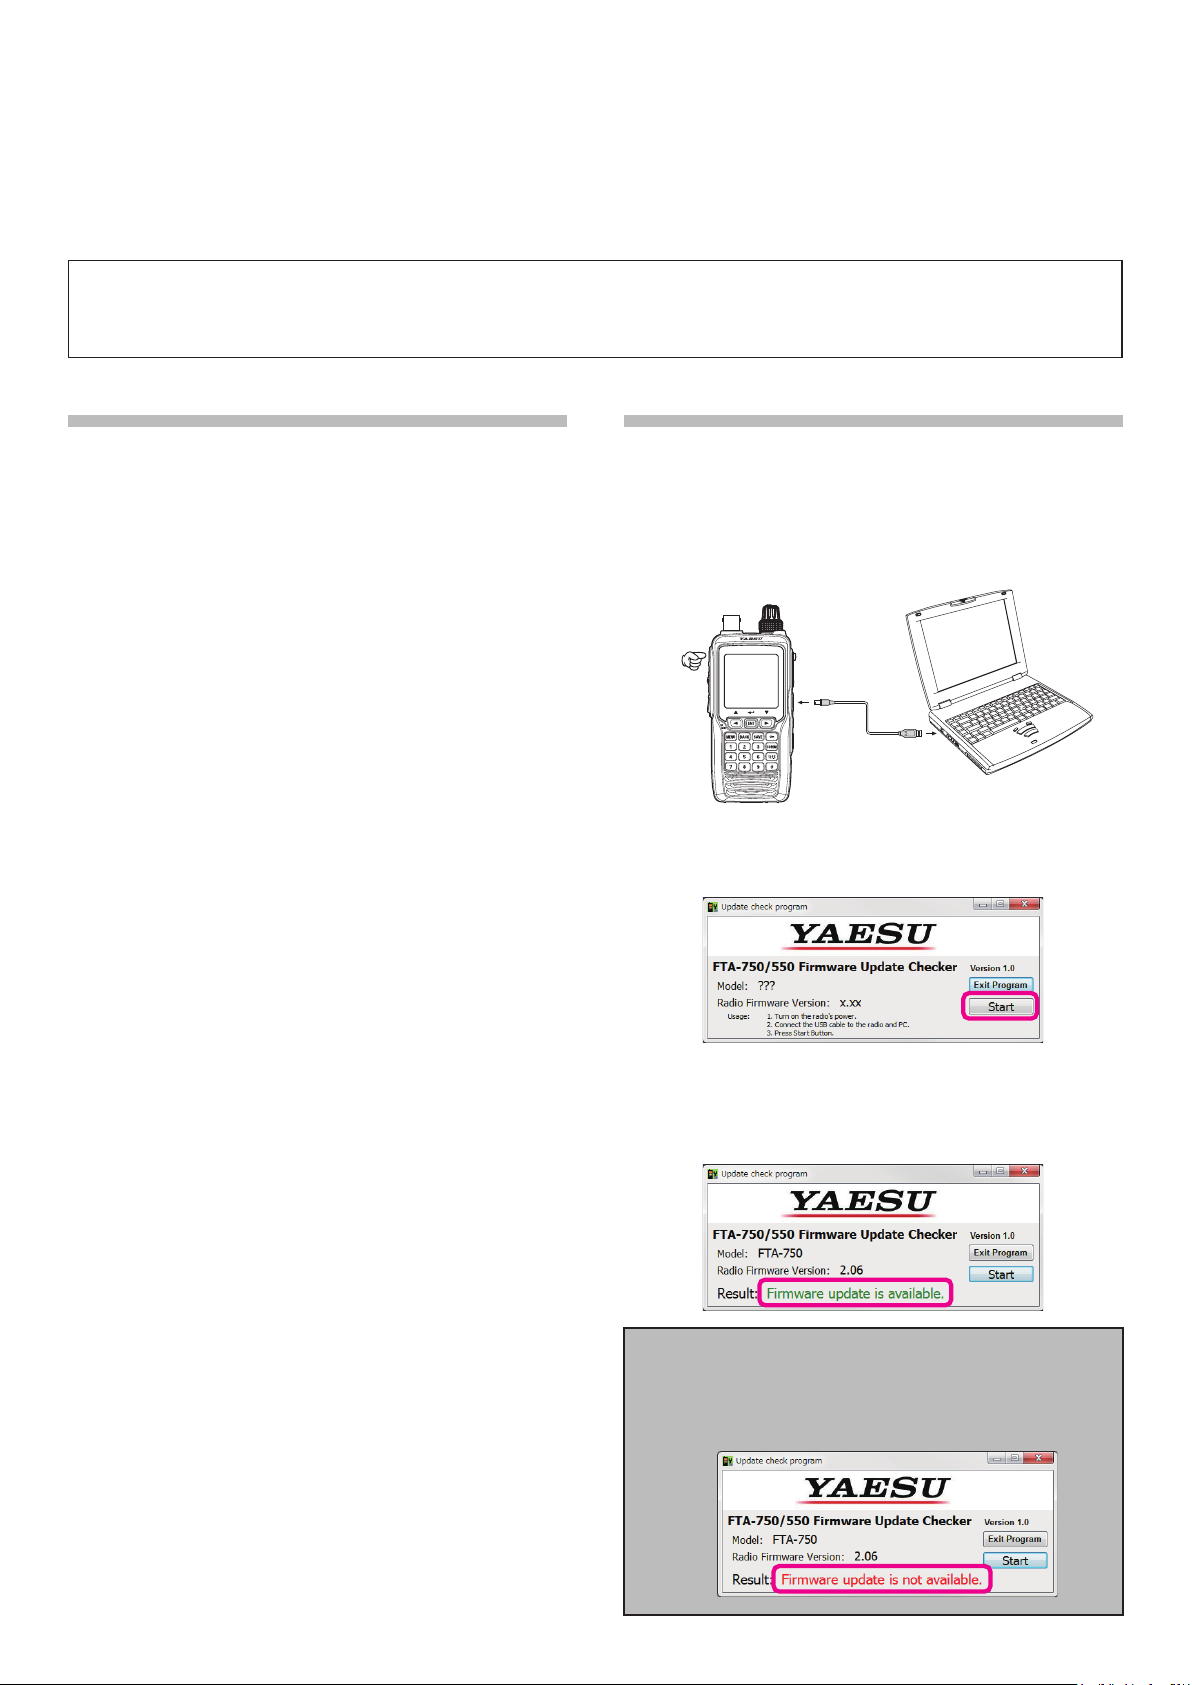
1. Turn the transceiver on.
2. Connect the computer to the transceivers DATA jack
using the USB Cable (T9101606) supplied with the
FTA-750/FTA-550, as shown below.
POWER
switch
USB Cable
Supplied with
FTA-750/FTA-550
3. To start the Update Check program (Upchk.exe),
double click the Upchk.exe.
4. Click the [Start] button.
5. After few second, the program will show the model
name, rmware version and result.
6.
If the program shows “Firmware update is available.”, the
transceiver can updated to the rmware version 03.xx.
If the program shows the result “Firmware update
is not available.”. In this case, do not update to
rmware version 03.xx. Updating the rmware, may
result in the transceiver not operating properly.

How to Update the Firmware
1. Start the Firmware Update.exe:
a) Connect the FTA-750/FTA-550/FTA-450 to the PC
USB port by using attached USB cable.
b) Turn the transceiver on while pressing and
holding the [MENU] key.
c) The transceiver will sound a short beep and show
the “CP MODE” in the LCD display.
To start the Firmware Update program, double
d)
click
the Firmware Update FTA_750_550_450_
V3xx.exe.
e) If transceiver and programmer are connected
correctly, the update program will show on the PC
display.
f) Conrm which current version rmware is installed
in the transceiver.
If the current rmware version is the same as the
update version, you don’t need to update it.
Please click the “Cancel” button to close the
update program.
2. To begin the update:
a)
Click the “Start” button to start installing the rmware.
The program starts writing the firmware to the
transceiver.
NOTE:
While writing the firmware, do not suspend
r
the program running, and do not disconnect
the transceiver from the PC. If the program is
suspended or the transceiver is disconnected from
the PC, the rmware writing may not complete, and
the transceiver will not work correctly.
While writing the firmware, do not use the power
r
save mode or the screen saver in the PC.
If firmware Ver. 03.xx is incorrectly updated to the
FTA-750/FTA-550, the LCD display will not be
displayed when the transceiver is powered on. You
will need to reinstall rmware Ver. 02.xx.
The method of reinstalling is the same as “How to
update the rmware”.
3. Finish of the update:
Approximately 5 minutes are required to complete
the rmware writing.
After the update is finished, the program will show
the pop-up.
Click the [OK] button to exit the update programmer.
YAESU MUSEN CO., LTD.
1709-A
 Loading...