

Page 1
User Guide
Page 2
Adobe, Adobe Type Connection, Acrobat, PostScript, the PostScript logo are trademarks of Adobe Systems
Incorporated.
Microsoft, Windows, Windows NT, Windows Server are either registered trademarks or trademarks of Microsoft
Corporation in the United States and/or other countries.
Novell, Netware are registered trademark of Novell, Inc., in the United States and other countries.
Macintosh, Apple, AppleTalk, EtherTalk, Mac OS, TrueType are trademark of Apple Computer, Inc., registered in
the U.S. and other countries.
PCL and HP-GL are registered trademarks of Hewlett-Packard Corporation.
UNIX is a registered trademark of The Open Group in the United States and other countries.
MagicGate Memory Stick, Memory Stick are registered trademarks or trademarks of Sony.
®
This product is equipped with RSA
RSA is a registered trademark of RSA Security Inc. BSAFE is
a registered trademark of RSA Security Inc. in the United States and other countries. RSA Security Inc.
All product/brand names are trademarks or registered trademarks of their respective holders.
This software is based in part on the work of the Independent JPEG Group.
BSAFE™ Crypto-C of RSA Security Inc.
All rights reserved.
It may be a legal offence to print currency notes, certificates of stocks and securities, or any other
documents of similar nature, regardless of whether they will be used.
Data loss from the hard disk drive
Saved data may be lost if hard disk of the machine breaks down due to external shocks or if the power is
accidentally cut off in a manner not following the methods listed in manuals or other documentations. Fuji
Xerox is not responsible for such data loss and any consequence caused by such data loss.
Data loss of media used for media printing
Be sure to back up the data in the such media as Smart Media or Compact Flash before using it as the data
may be lost or damaged due to the following:
Improper procedure when removing the media or power outage of the printer
Static charge or electrical noise.
Breakdown, or repair
Disaster
Fuji Xerox is not responsible for any damage directly or indirectly caused by the loss of data.
Damage by computer virus
Fuji Xerox is not responsible for any breakdown of machines due to infection of computer virus.
Precautions
(1) This guide is copyrighted with all rights reserved. Under the copyright laws, this guide may not be copied or
modified in whole or part, without the written consent of the publisher.
(2) Parts of this guide are subjected to change without prior notice.
(3) We welcome any comments on ambiguities, errors, omissions or missing pages.
(4) Never attempt any procedure on the machine that is not specifically described in this guide. Unauthorized
operation can cause faults or accidents. Fuji Xerox is not liable for any problems resulting from unauthorized
operation of the equipment.
Xerox, The Document Company and the stylized X are registered trademarks of Xerox Corporation.
All Xerox and Fuji Xerox product names are either registered trademarks or trademarks of Xerox Corporation and
Fuji Xerox Co., Ltd.
Page 3
Preface
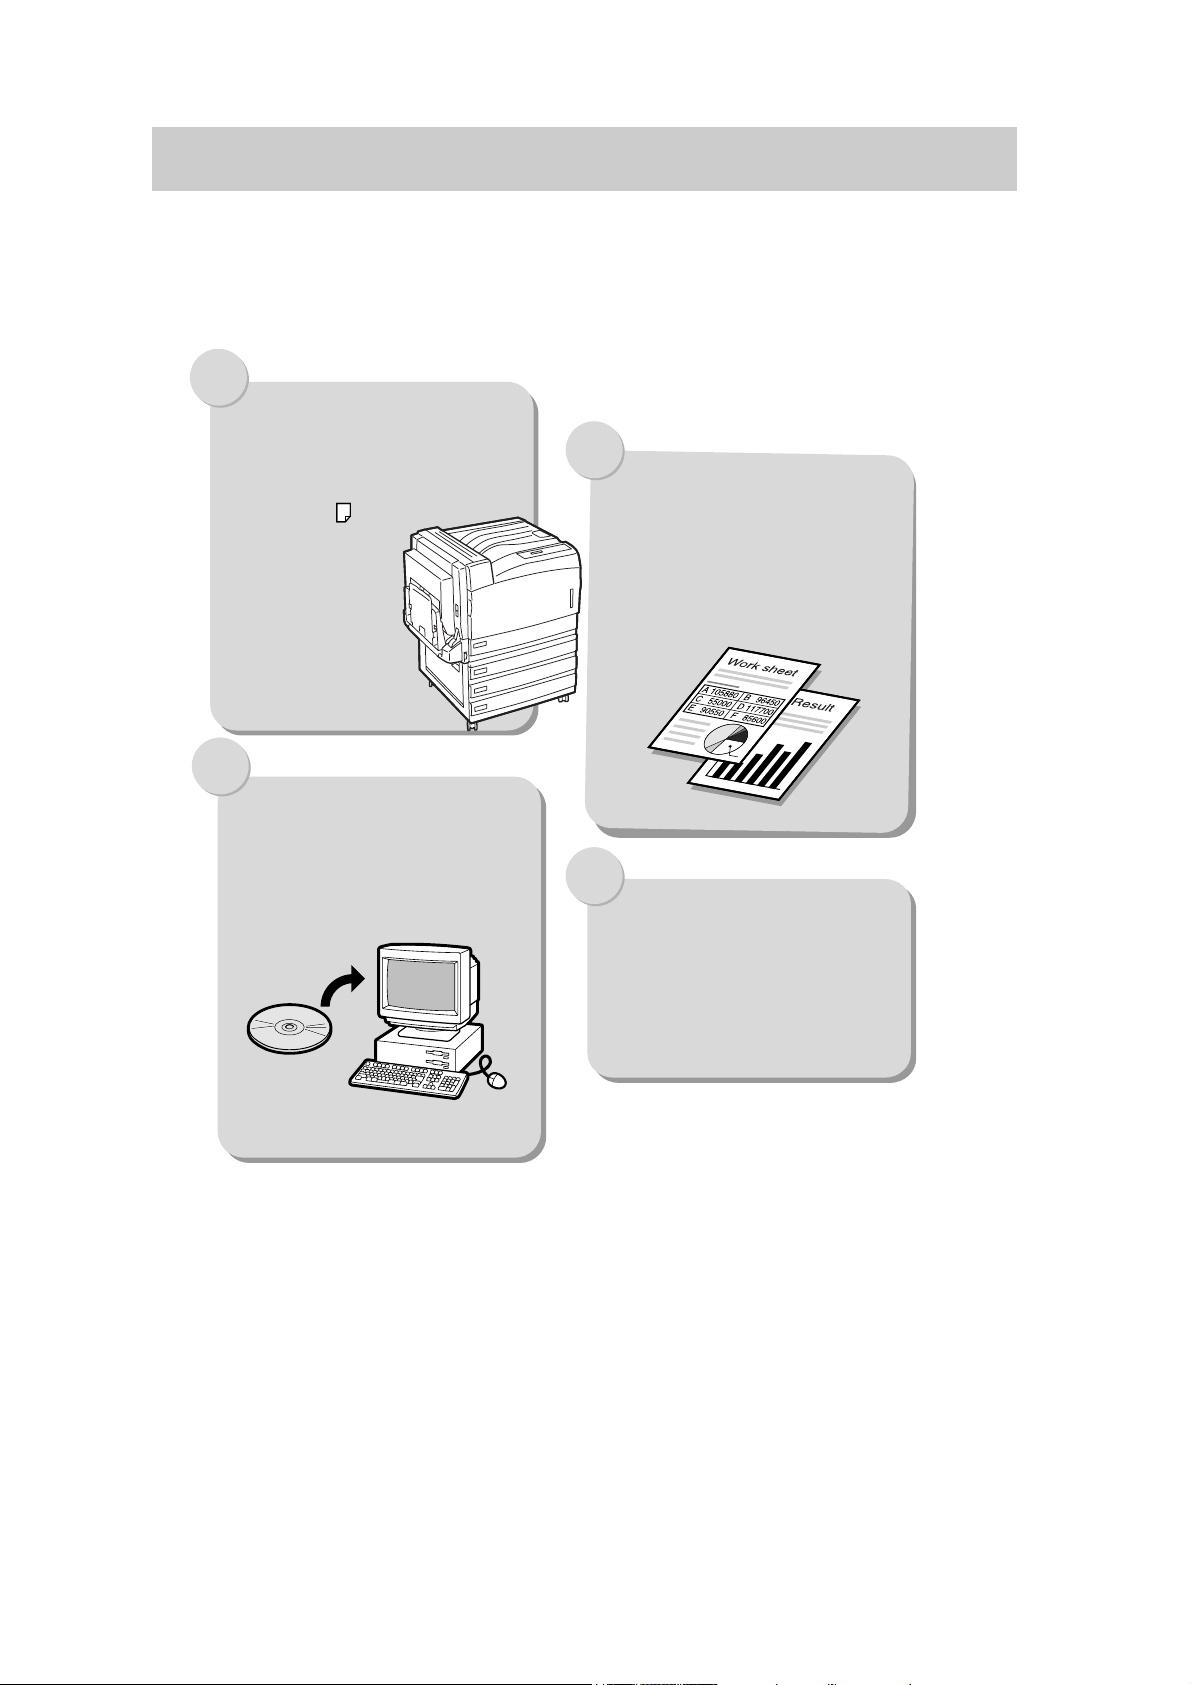
Thank you for purchasing the Fuji Xerox DocuPrint C2428. Written with the new user in mind,
this User Guide provides the necessary information on how to prepare this machine as a printer,
how to operate print jobs, and precautions on operating the printer functions. To get the most out
of this printer, please read this guide before using it.
After reading it keep this guide handy as a reference for problems which you might encounter
when using the printer.
In this manual, safety instructions are preceded by the symbol .
Always read and follow the instructions before performing the required procedures.
This equipment is certified as a Class 1 laser product, which does not emit hazardous laser radiation.
Follow the operations described in the User Guide. Do not operate the machine in any way other than
described in the User Guide. Unauthorized operation can cause faults or accidents.
As a member of the International Energy Star Program, Fuji Xerox confirms this product
satisfies the requirements for International Energy Star Program standards.
Fuji Xerox shares the global concern about environmental conservation and has integrated that concern
in its business activities—from research and development to disposal. We have implemented a number
of programs to lessen the burden on the environment. For example, we have totally eliminated
ozonedepleting chlorofluorocarbons from our manufacturing facilities. We are committed to leadership
in the conservation of resources by reusing and recycling post-consumer waste material such as paper,
cartridges, and parts from our customer's copiers and printers. Along with our efforts to make
environmental values a part of the Fuji Xerox culture, DocuPrint C2428 adopts recycled components
that satisfy our strict quality standards.
Reception interference
When installed at a certain location, the machine may cause interference with radio and television
reception. If you notice flickering or distorted images or noises on your audio-visual units, your machine
may be causing radio interference. Switch it off, and if the interference disappears, the machine is the
cause of radio interference. Perform the following procedure until the interference is corrected.
●
Move the machine and the TV and/or radio away from each other.
●
Reposition or reorientate the machine and TV and/or radio.
●
Unplug the machine, TV and/or radio, and replug them into outlets that operate on different circuits.
●
Reorientate the TV and/or radio antennas and cables until the interference stops. For an outdoor
antenna, ask your local electrician for support.
●
Use coaxial cable antennas.
3
Page 4

Types of Manuals
Guides supplied with this printer and their contents
■Setup Guide
Installation procedure for the printer.
■Manual included in Software Pack CD-ROM
● User Guide (guide.pdf)
●
Descriptions of print settings
●
Menu items on the control panel
●
Replacing consumables
●
Reports/lists
●Software Pack Operation Guide (manual.pdf)
●
Installation procedure of the printer driver
●
Descriptions of print settings using the printer driver
●HP-GL,HP-GL/2 Emulation Settings Guide (HPGL.pdf)
●
Setting items of the HP-GL and HP-GL/2 emulation modes
●Network Print Environment Guide (network.pdf)
●
Setting items of the network environment
■On-line Help of the printer driver
Descriptions of the setting items of the printer driver
Guide supplied with optional products
■PostScript Driver Library CD-ROM
●User Guide (PostScript
●
Setup procedure to use the printer as a Postscript printer
●
Setting items on the printer driver
■Installation procedure guides of optional products
The installation procedure guide is supplied with each option.
®
Software Kit) (PSGuide.pdf)
4
Page 5
Refer to the On-line Manual/Help
Using the on-line manual contained on the Software Pack CD-ROM
Procedure
Set the Software Pack CD-ROM in the CD-ROM drive.
1
The CD-ROM starts automatically.
If the CD-ROM does not start automatically, open the CD-ROM drive.
Click [CD ROM reference] to open the [Manual] folder.
2
Select the manual you want to see.
3
To view a PDF file, your computer must have Adobe Acrobat Reader installed.
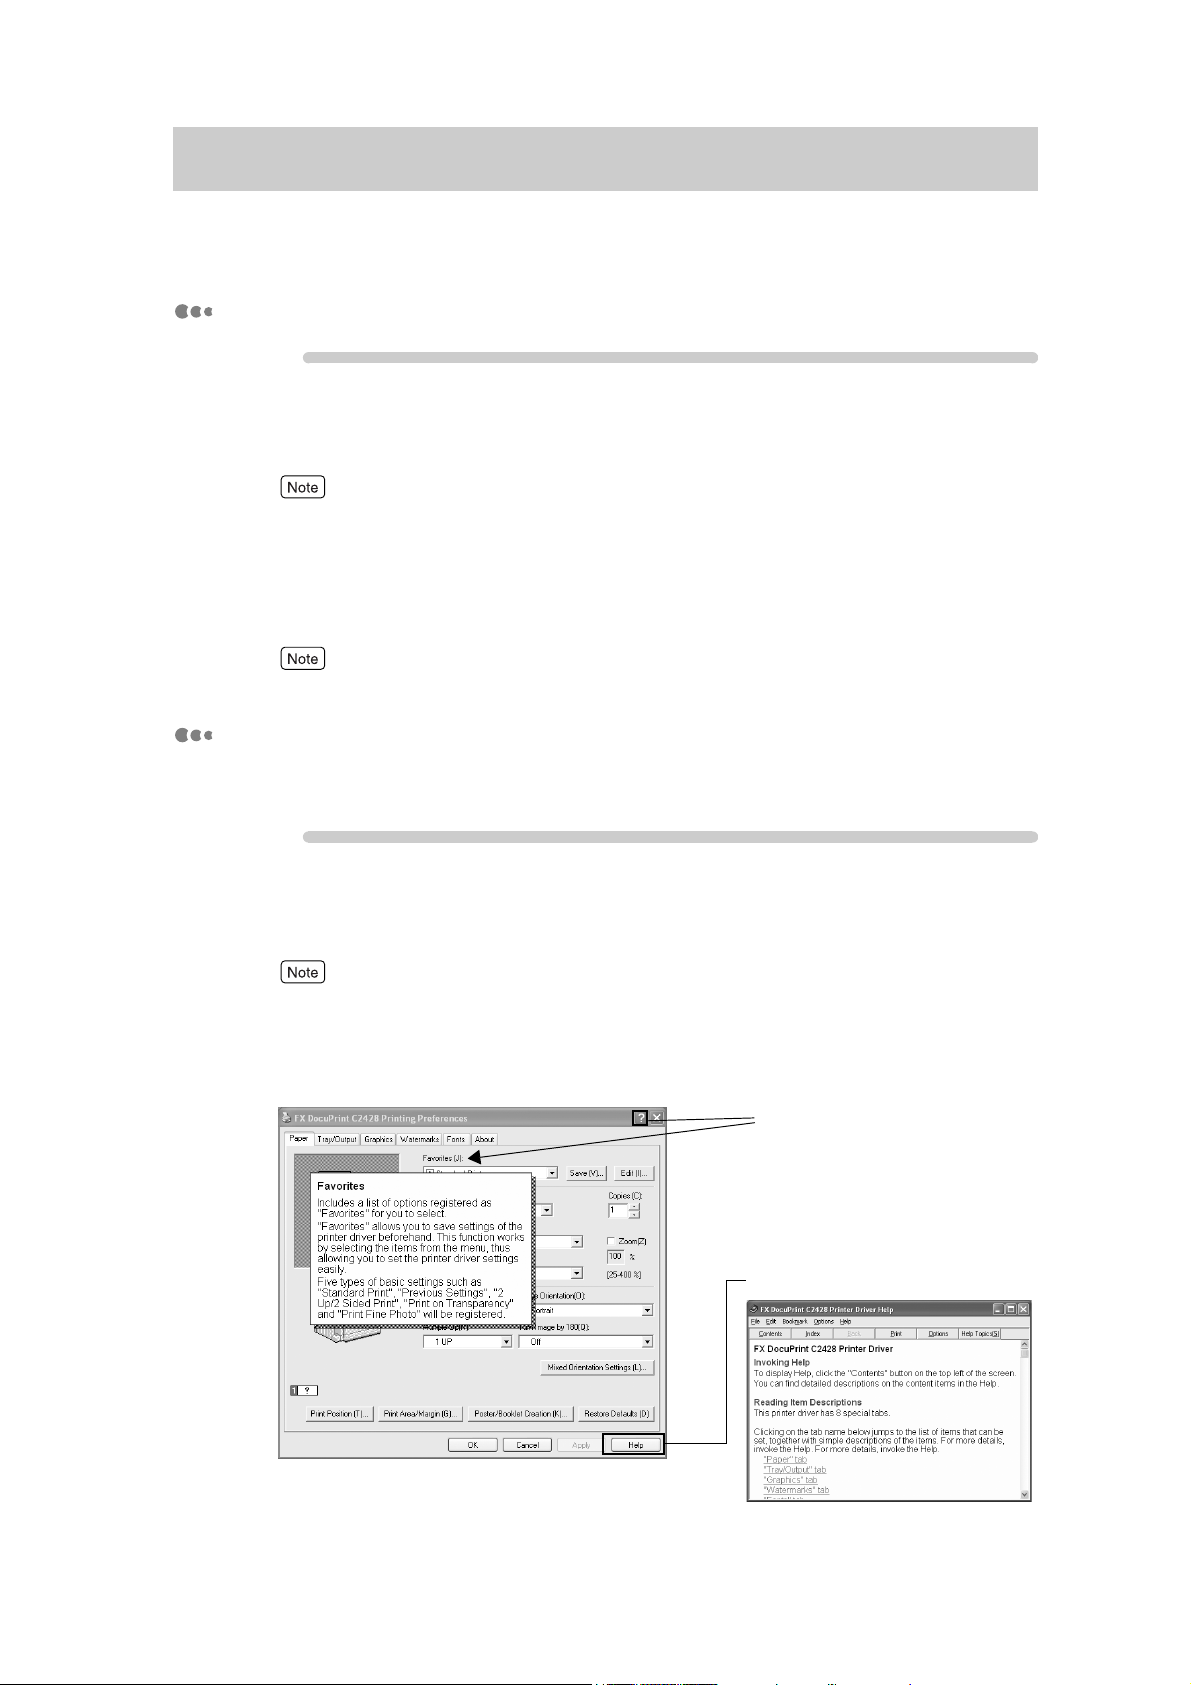
Using On-line Help
Using the On-line Help, you can check the descriptions of items in the printer
driver properties dialog box and how to set each function.
Procedure
Click [Start] on the taskbar, select [Printers] from the [Settings] menu,
1
and display the properties dialog box corresponding to your printer.
For Windows XP/Windows Server 2003, click [Start], then select [Printers and Faxes].
Click [?] and then the item you want to check (1), or click [Help] in the
2
lower right corner (2) to display the help information.
1. Click [?] and then the item
you want to check.
2. Click [Help].
5
Page 6
Features of DocuPrint C2428
DocuPrint C2428 has the following features.
olor and black &
C
white printing at
24 sheets per
erfect image quality
minute
Printing speed of 24 sheets per
minute for A4 size print jobs is
possible for both
color and black &
white
*
This speed is for
one-sided continuous
printing.
Printing speeds differ
depending on the image
quality, paper and other
printing conditions.
P
for printing business
documents.
Business documents featuring text
are easy to read and graphics and
photos have the distinctive luster of
color printing through oil free fusing
technology.
asy printer driver
E
installation and
settings
You can easily install the printer
driver and do various settings.
ulti-client
M
environment fully
supported
In addition to PCL and HP-GL, which
are standard page description
languages, an optional PostScript
Software Kit is available.
®
6
Page 7
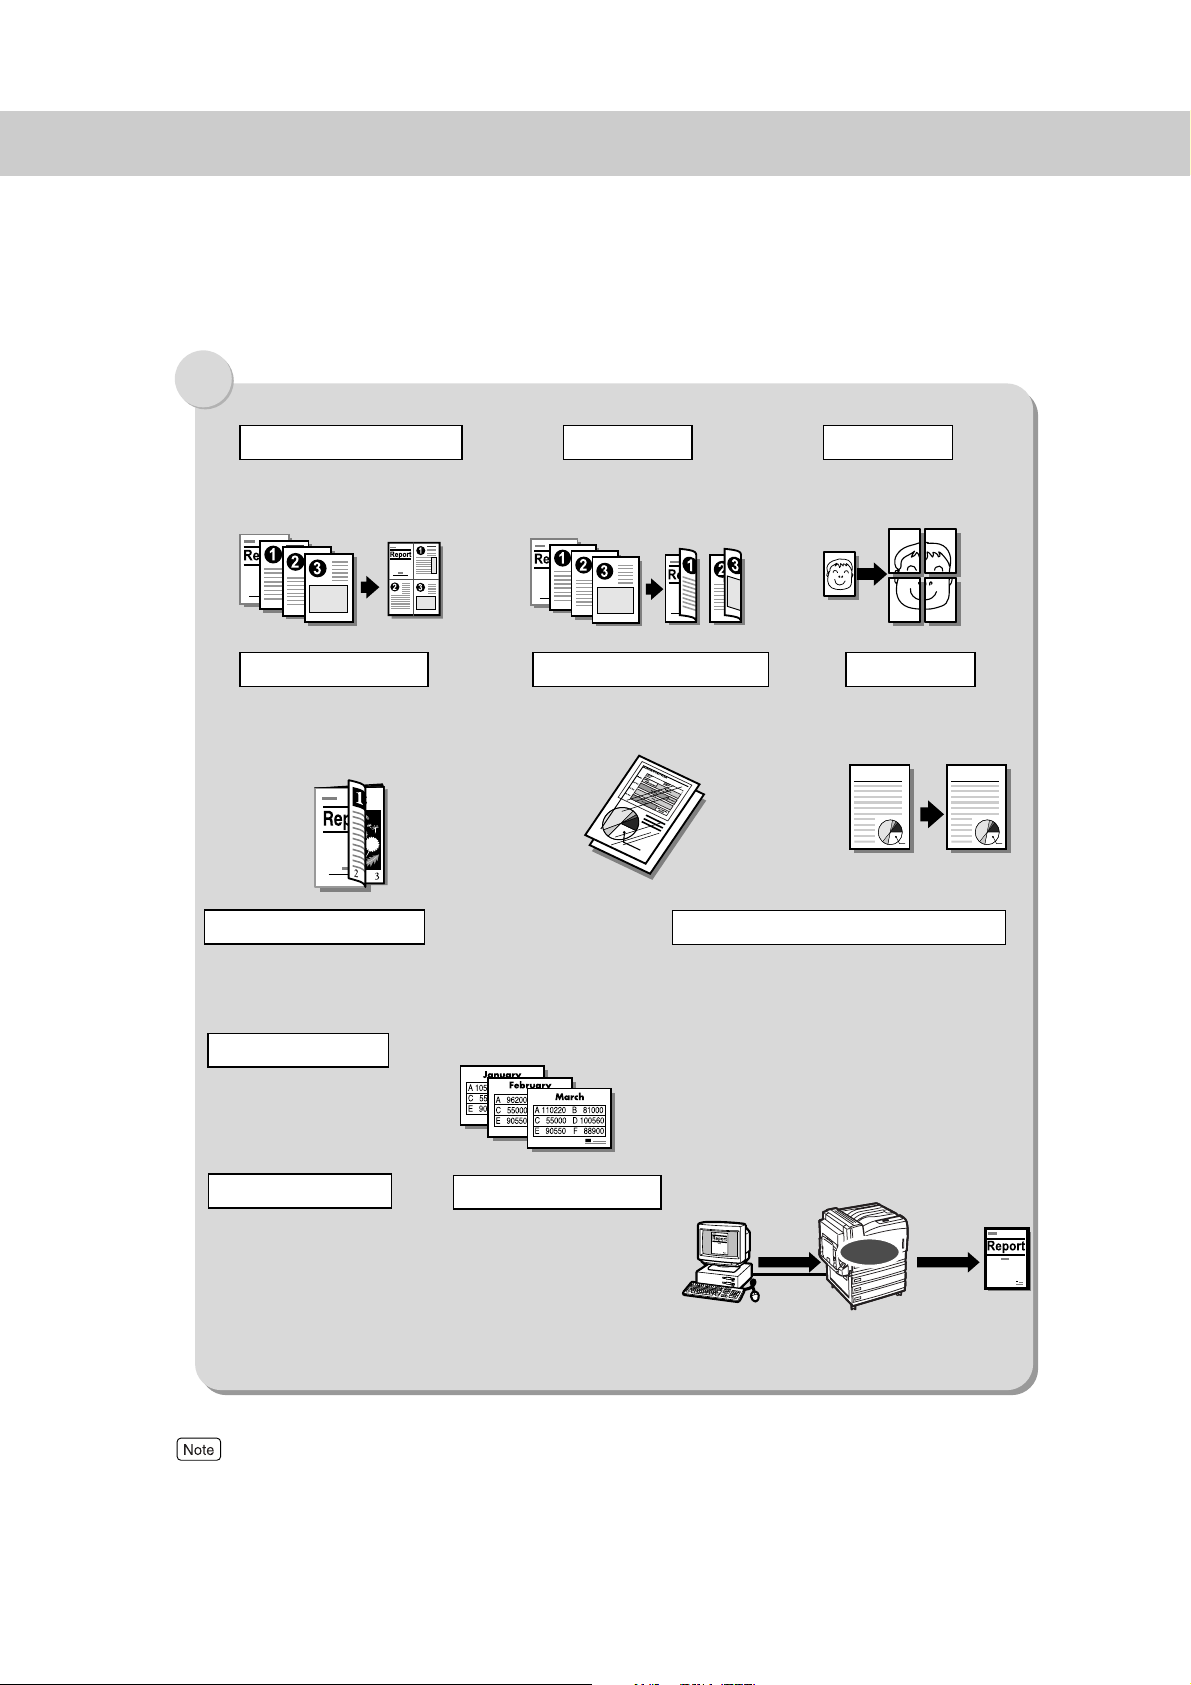
eatures in Brief
F
Multiple Up
Prints multiple pages on a single
sheet of paper with options of
different layouts.
Booklet Creation
Prints pages on both sides of the
paper and arranges them in the
correct order to form a booklet (when
optional duplex unit is installed).
Receiving restriction
You can limit the IP addresses from
which the printer will accept jobs
when the printer is set up for TCP/IP
protocol.
Favorites
Allow you to register frequently used
print settings in [Favorites] on the
printer drive’s properties, and select
them for printing.
2 sided print
Prints on both sides of the
paper (when optional
duplex unit is installed).
Transparency Separators
A sheet of paper is automatically
inserted in between transparencies
as they are printed.
Secure print/Sample print
What is security printing?
This function allows you to send print data to the printer,
where it is stored until you instruct the printer from the
operation panel to print it out. This function is handy
when printing secret documents or documents you don’t
want others to see.
What is sample printing?
When printing several copies of the same document, this
function allows you to print a sample copy, which you can
check for quality, before instructing the printer to print out
the remaining copies from the operation panel.
Poster
Prints an image across multiple
pages; suitable for creating
posters.
Watermarks
Prints specific characters, such
as “Confidential” over the print
data.
Work sheet
Work sheet
Confidential
*1
Media printing
You can print data stored on
compact flash and “Memory
Stick” media directly from the
printer. (Requires the optional
Media Print kit.)
*1 Secur ity and sample printing and the need the Hard Disk Drive (optional) and 384 MB of memory or more.
*2 Using the media pr int function requires 384 MB of memory or more.
*3 Pr inting on long size paper requires 384 MB of memory or more.
*2
Printing long paper
Can print on long paper with a
length of up to 1200 mm by using
Tray 5 (bypass tray).
*3
Use control
panel to
Send data
Store in
printer
output data
For information about the setting items, refer to the On-line Help for the printer driver.
For the procedure to see the On-line Help, refer to “Refer to the On-line Manual/Help” (P.5).
7
Page 8

Contents
◆ Preface
◆ Types of Manuals
◆ Refer to the On-line Manual/Help
◆ Features of DocuPrint C2428
◆
Contents
◆ Using This Guide
◆ Safety Notes
◆ The Objectives of the International Energy Star Program
◆ Illegal Copies and Printouts
Chapter 1 Setting Printer Environment
1.1 Printer Environments ........................................................................................... 28
1.2 Setting the Printer Environment With the Quick Setup Menu .............................. 30
1.3 Setting the IP Address......................................................................................... 33
1.3.1 Setting Address..................................................................................... 35
1.4 Configuring from the Computer (CentreWare Internet Services) ........................ 39
1.4.1 About CentreWare Internet Services .................................................... 39
1.4.2 Using CentreWare Internet Services .................................................... 42
1.5 Checking the Settings.......................................................................................... 44
1.6 Installing/Uninstalling
the Printer Driver46
Chapter 2 Basic Operations
2.1 Main Components and Their Functions............................................................... 48
2.1.1 Main Unit............................................................................................... 48
2.1.2 Control Panel ........................................................................................ 50
2.1.3 LCD Indications..................................................................................... 51
2.2 Switching On/Off the Power................................................................................. 52
2.2.1 Switching On the Power........................................................................ 52
2.2.2 Switching Off the Power........................................................................ 52
2.3 Canceling Sleep Mode ........................................................................................ 53
2.4 Canceling/Checking Print Jobs............................................................................ 54
2.4.1 Canceling Printing From the Computer................................................. 54
2.4.2 Canceling Print Jobs From the Printer .................................................. 55
2.4.3 Checking Print Jobs of Print Instruction................................................ 56
2.5 Loading Configuration of Options and Paper Settings of Trays ........................... 57
8
Page 9

Chapter 3 Printing
3.1 Printing from the Computer.................................................................................. 60
3.1.1 Flow of Printing ..................................................................................... 60
3.1.2 Setting Printing Features....................................................................... 61
3.2 Printing Transparencies ....................................................................................... 62
3.2.1 Loading Transparencies ........................................................................ 62
3.2.2 Printing Transparencies......................................................................... 63
3.3 Printing Non-Standard/Long Paper Sizes............................................................ 65
3.3.1 Loading Paper of Non-Standard Sizes.................................................. 65
3.3.2 Setting Non-Standard Paper Sizes ....................................................... 68
3.3.3 Printing on Non-Standard Paper Sizes ................................................. 72
3.4 Changing Paper Types......................................................................................... 74
3.4.1 Printing after Changing the Paper Type in Tray 5 (bypass tray) ............ 74
3.4.2 Printing after Changing the Paper Type in Trays 1 to 4 ......................... 75
3.5 Printing Confidential Documents - Secure Print - ................................................ 76
3.5.1 Registering User ID and Password ....................................................... 77
3.5.2 Printing Secure Print Jobs..................................................................... 78
3.6 Printing after Checking Output Result - Sample Print - ....................................... 81
3.6.1 Setting Sample Print Jobs..................................................................... 82
3.6.2 Printing Sample Print Jobs.................................................................... 83
3.7 Printing E-Mail - E-Mail Print - ............................................................................. 86
3.7.1 Setting up the Environment for E-mail Printing ..................................... 86
3.7.2 Sending E-mail...................................................................................... 89
3.7.3 Precautions for Sending Documents by E-mail..................................... 90
3.8 Printing from Flash Memory - Media Print -......................................................... 91
3.8.1 About Automatic Determination of Applicable Flash Memory and Data 91
3.8.2 Precautions for Using the Media Print Feature ..................................... 93
3.8.3 Inserting/Removing the Flash Memory ................................................. 94
3.8.4 Printing Data Taken with Digital Camera............................................... 96
3.8.5 Printing Stored Documents ................................................................. 102
3.9 Printing PDF Directly - ContentsBridge - ........................................................... 105
3.9.1 Printing PDF Files Using the ContentsBridge Utility ........................... 106
3.9.2 Printing PDF Files without Using the ContentsBridge Utility ............... 110
9
Page 10

Chapter 4 About Paper
4.1 About Paper....................................................................................................... 112
4.1.1 Paper that can be used ....................................................................... 112
4.1.2 Paper that cannot be used .................................................................. 115
4.1.3 Storage and Handling of Paper........................................................... 116
4.2 Loading Paper ................................................................................................... 117
4.2.1 Loading paper into Trays 1 to 4 ........................................................... 117
4.2.2 Loading Paper into Tray 5 (bypass tray) .............................................. 119
4.2.3 About the Auto Tray Switch ................................................................. 120
Chapter 5 Setting Control Panel
5.1 Outline of Common Menu.................................................................................. 122
5.1.1 About Menu Structure ......................................................................... 122
5.1.2 Changing Common Menu Settings ..................................................... 124
5.2 Description of Common Menu ........................................................................... 127
5.2.1 Print Language Setting ....................................................................... 127
5.2.2 The System Administrator Menu......................................................... 137
5.3 List of Common Menu........................................................................................ 157
Chapter 6 Troubleshooting
6.1 Type of Problem................................................................................................. 164
6.1.1 Course of action for troubleshooting ................................................... 164
6.2 Clearning Paper Jams ....................................................................................... 165
6.2.1 Removing Jammed Paper in Trays 1 to 4............................................ 166
6.2.2 Removing Jammed Paper in Tray 5 (Bypass Tray).............................. 167
6.2.3 Removing Jammed Paper Inside Cover C (Lower Left Cover)............ 168
6.2.4 Removing Jammed Paper Inside Cover B (Duplex Unit Cover)......... 170
6.2.5 Removing Jammed Paper Inside Cover A (Left Cover)...................... 171
6.3 Unusual Conditions............................................................................................ 177
6.4 Poor Print Quality............................................................................................... 181
6.4.1 Printout Is Defective ............................................................................ 181
6.4.2 Defective Prints on Special Media ...................................................... 185
6.5 List of Messages................................................................................................ 186
6.5.1 List of Messages (Alphabetical Order) ................................................ 186
6.5.2 List of Error Codes .............................................................................. 193
6.6 Network-Related Problems................................................................................ 201
10
Page 11

6.6.1 Troubleshooting When Working in a TCP/IP Environment .................. 201
6.6.2 Troubleshooting When Using CentreWare Internet Services .............. 203
6.7 Mail-Related Problems ...................................................................................... 204
6.8 Ejecting Remaining Data-When Printing Stops Halfway Through-.................... 205
Chapter 7 Daily Control
7.1 Replacing Toner Cartridge................................................................................. 208
7.2 Replacing Drum Cartridge ................................................................................. 211
7.3 Replacing Waste Toner Bottle............................................................................ 216
7.4 Printing Report/List............................................................................................ 218
7.4.1 Type of Reports/Lists........................................................................... 218
7.4.2 Printing Report/List ............................................................................. 219
7.4.3 Items in Reports/Lists ......................................................................... 220
7.5 Checking Printer Status by Web Browser.......................................................... 229
7.6 Checking Printer Status by E-Mail..................................................................... 230
7.6.1 Information to Be Notified by Mail Notice Service ............................... 230
7.6.2 Settings for Using Mail Notice Service ................................................ 230
7.7 Check Meter ...................................................................................................... 233
7.7.1 Checking Total Number of Printed Pages by Meter............................. 233
7.7.2 Checking Total Number of Printed Pages by [Printer Meter Report] ... 234
7.8 Adjusting Gradation ........................................................................................... 237
7.8.1 Gradation Adjustment ......................................................................... 237
7.8.2 Performing Gradation Adjustment ....................................................... 238
7.9 Adjusting Color Registration .............................................................................. 247
7.9.1 Printing Color Registration Chart ........................................................ 247
7.9.2 How to Get the Adjustment Value ....................................................... 248
7.9.3 Entering the Adjustment Value ............................................................ 249
7.10 Moving the Printer............................................................................................. 251
11
Page 12

Appendix
A Main Specifications............................................................................................ 254
A.1 Product Specifications......................................................................... 254
A.2 Printable Area ..................................................................................... 257
A.3 Internal Font........................................................................................ 258
B Optional Products and Consumables ............................................................... 260
B.1 Optional Products................................................................................ 260
B.2 Consumables ...................................................................................... 261
C Service Life of Consumables and Regular Replacement Parts......................... 262
D Obtaining Product Information........................................................................... 263
E Paper Sizes and Memory Capacity ................................................................... 264
F Precautions/Limitations ..................................................................................... 266
F.1 precautions/Limitations ....................................................................... 266
F.2 TCP/IP (1pd)....................................................................................... 267
G Glossary ............................................................................................................ 269
◆ Index ................................................................................................................................ 277
12
Page 13
Using This Guide
This section describes the organization of this guide.
Prerequisite Knowledge
This guide assumes that the operator has a basic knowledge of the operating
environment of the computer in use, networking environments, and how to
operate a personal computer.
For more information about the environment of the computer in use, basic
knowledge of networking environments, and how to operate a personal
computer, refer to the manuals provided with the computer, OS (operating
system), and network system.
Conventions
(1) In this guide, “computer” refers to personal computer and workstation.
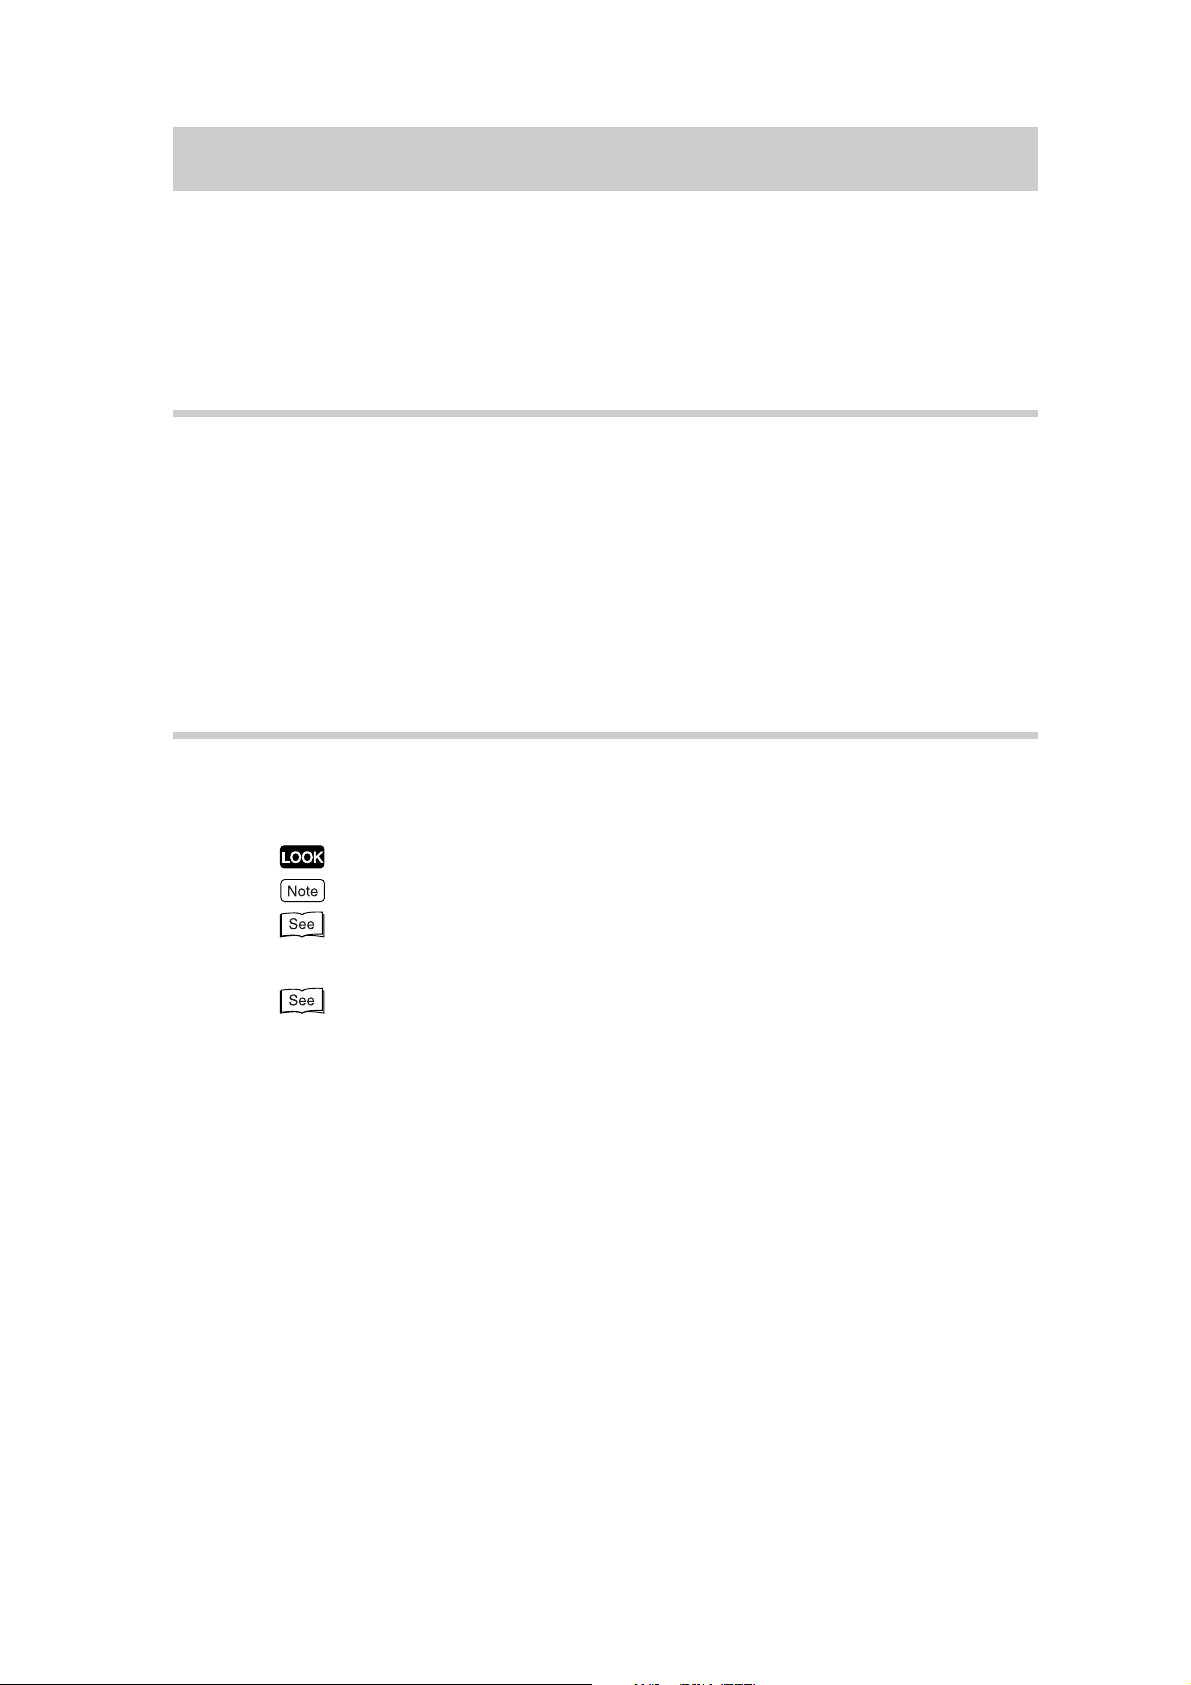
(2) The following icons are used in this guide.
Indicates important information which you should read.
Indicates additional information on operations or features.
Indicates reference sources.
(3) The following conventions are used in this guide.
“” : The reference is in other manuals instead of this guide.
“ ” : Indicates the name of a folder, file, application, or CD-ROM.
[ ] : Indicates the name of a menu, command, window, or dialog box on
the computer, and the name of a button or menu which is displayed in
the printer driver or the LCD on the control panel.
< > key : Indicates keys on the keyboard.
< > button : Indicates buttons on the control panel.
(4) When a checkbox is checked, it indicates ON, otherwise it indicates OFF.
(5) The item with the radio button checked is the selected item.
13
Page 14
Safety Notes
For your own safety, please read this page carefully before using the printer.
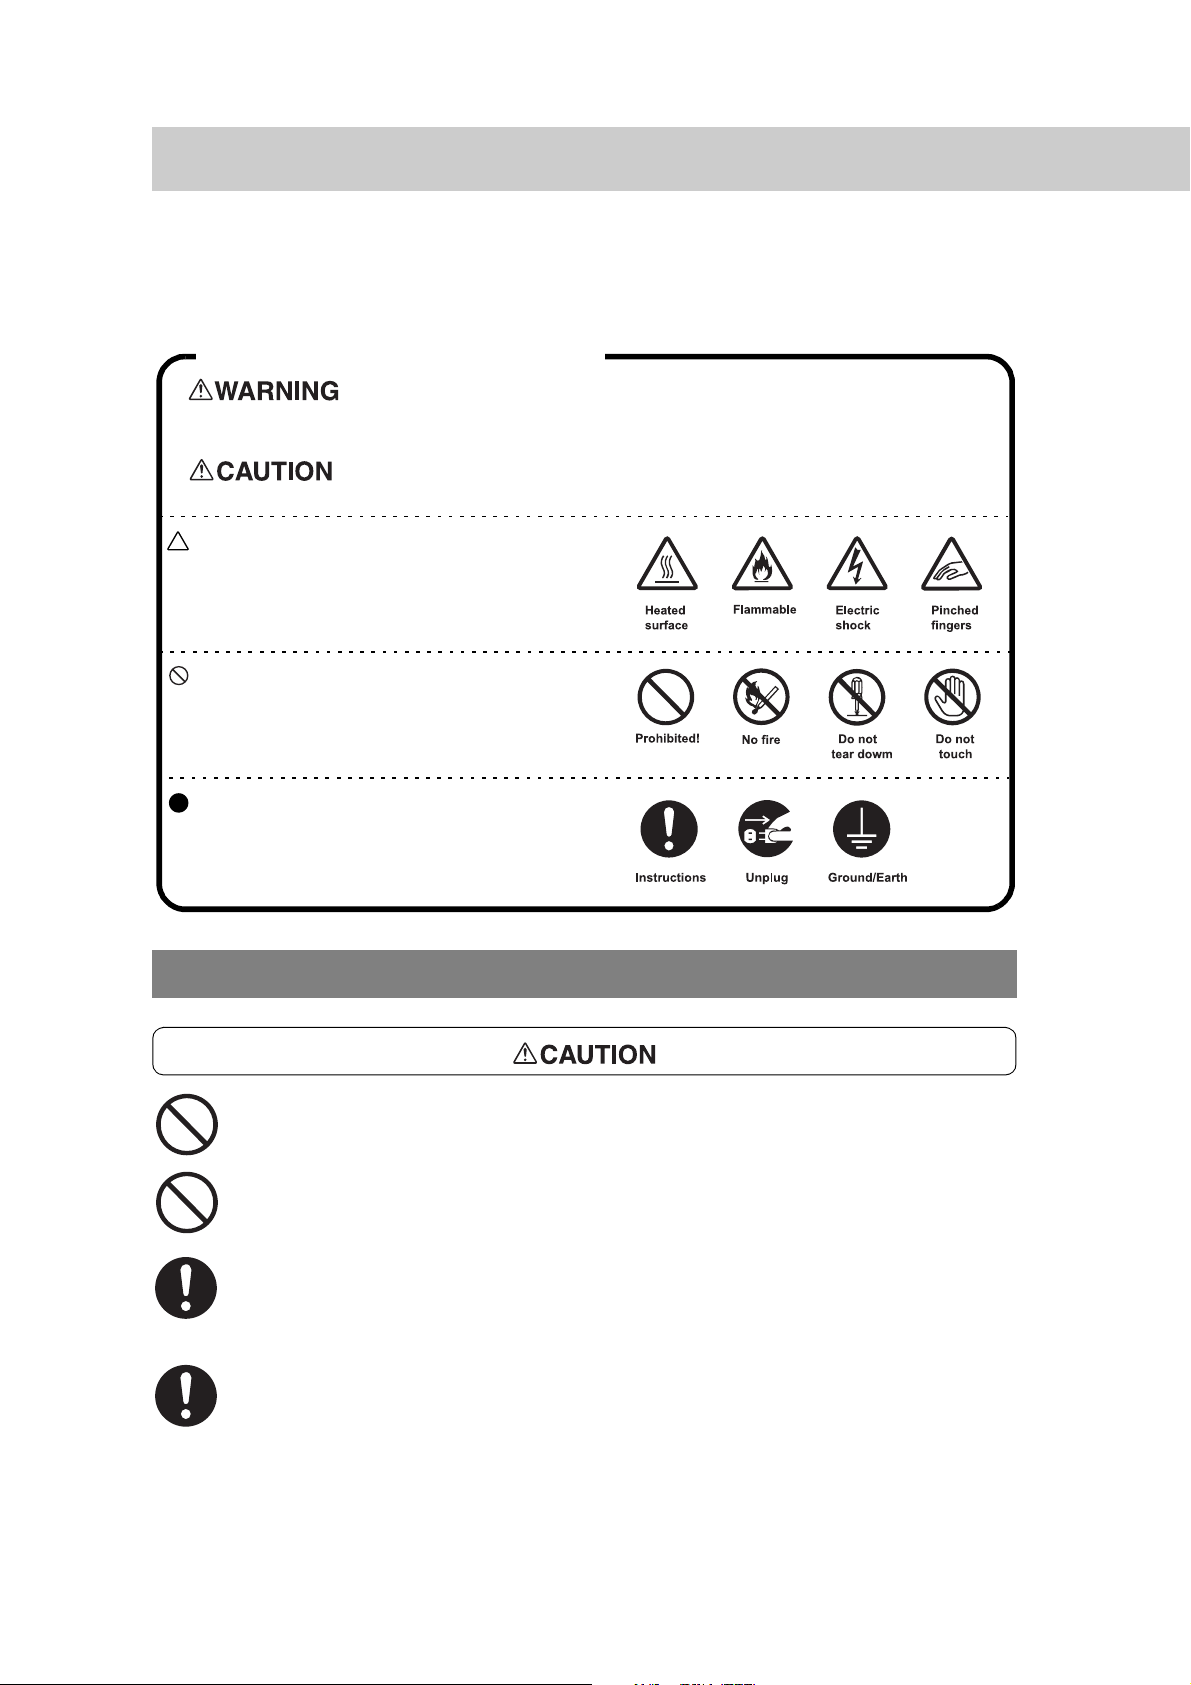
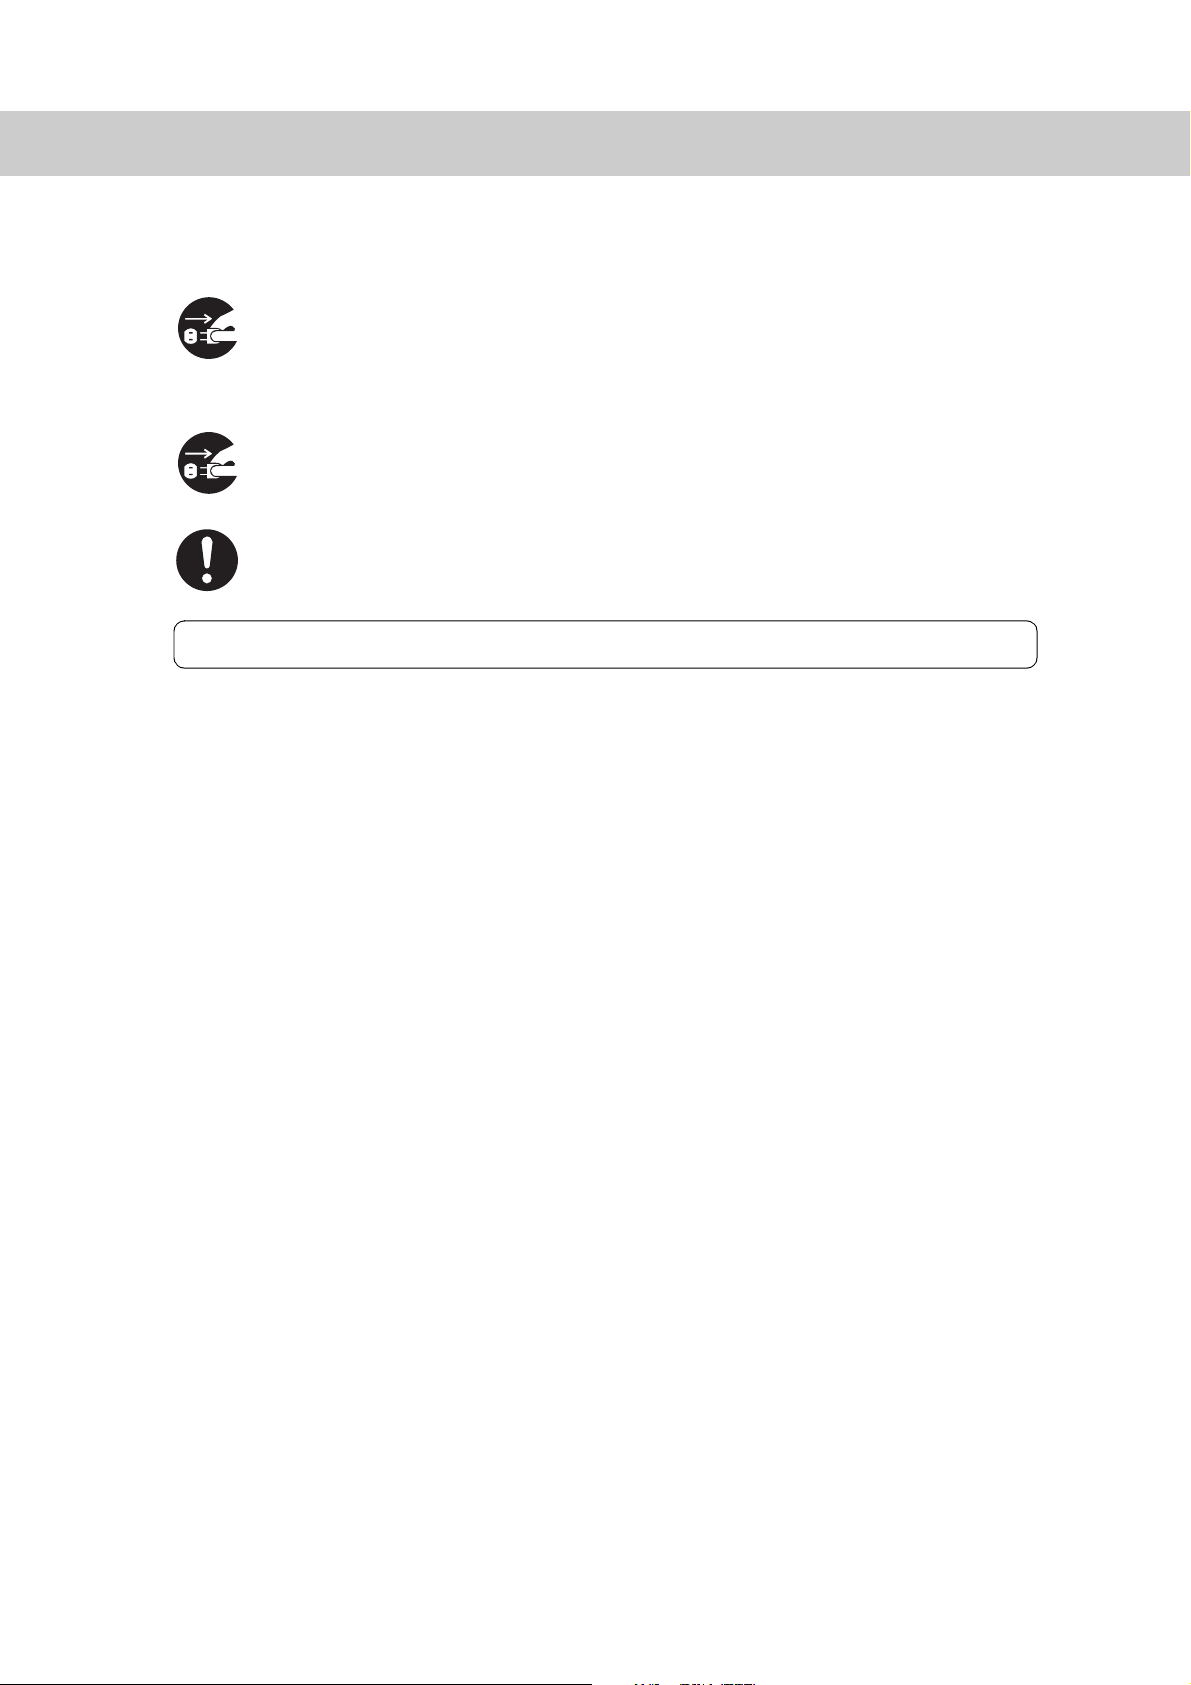
Graphic symbols used throughout this guide.
Used for items that if not followed strictly, can lead to severe or
fatal injuries.
Used for items that if not followed strictly, can cause injuries to
user or damages to printer.
A symbol for items to pay attention to when
handling printer. Follow instructions carefully to
use machine safely.
A symbol for prohibited items. Follow
instructions carefully to avoid any dangerous
acts.
A symbol for items that must be performed.
Follow instructions carefully to carry out these
essential tasks.
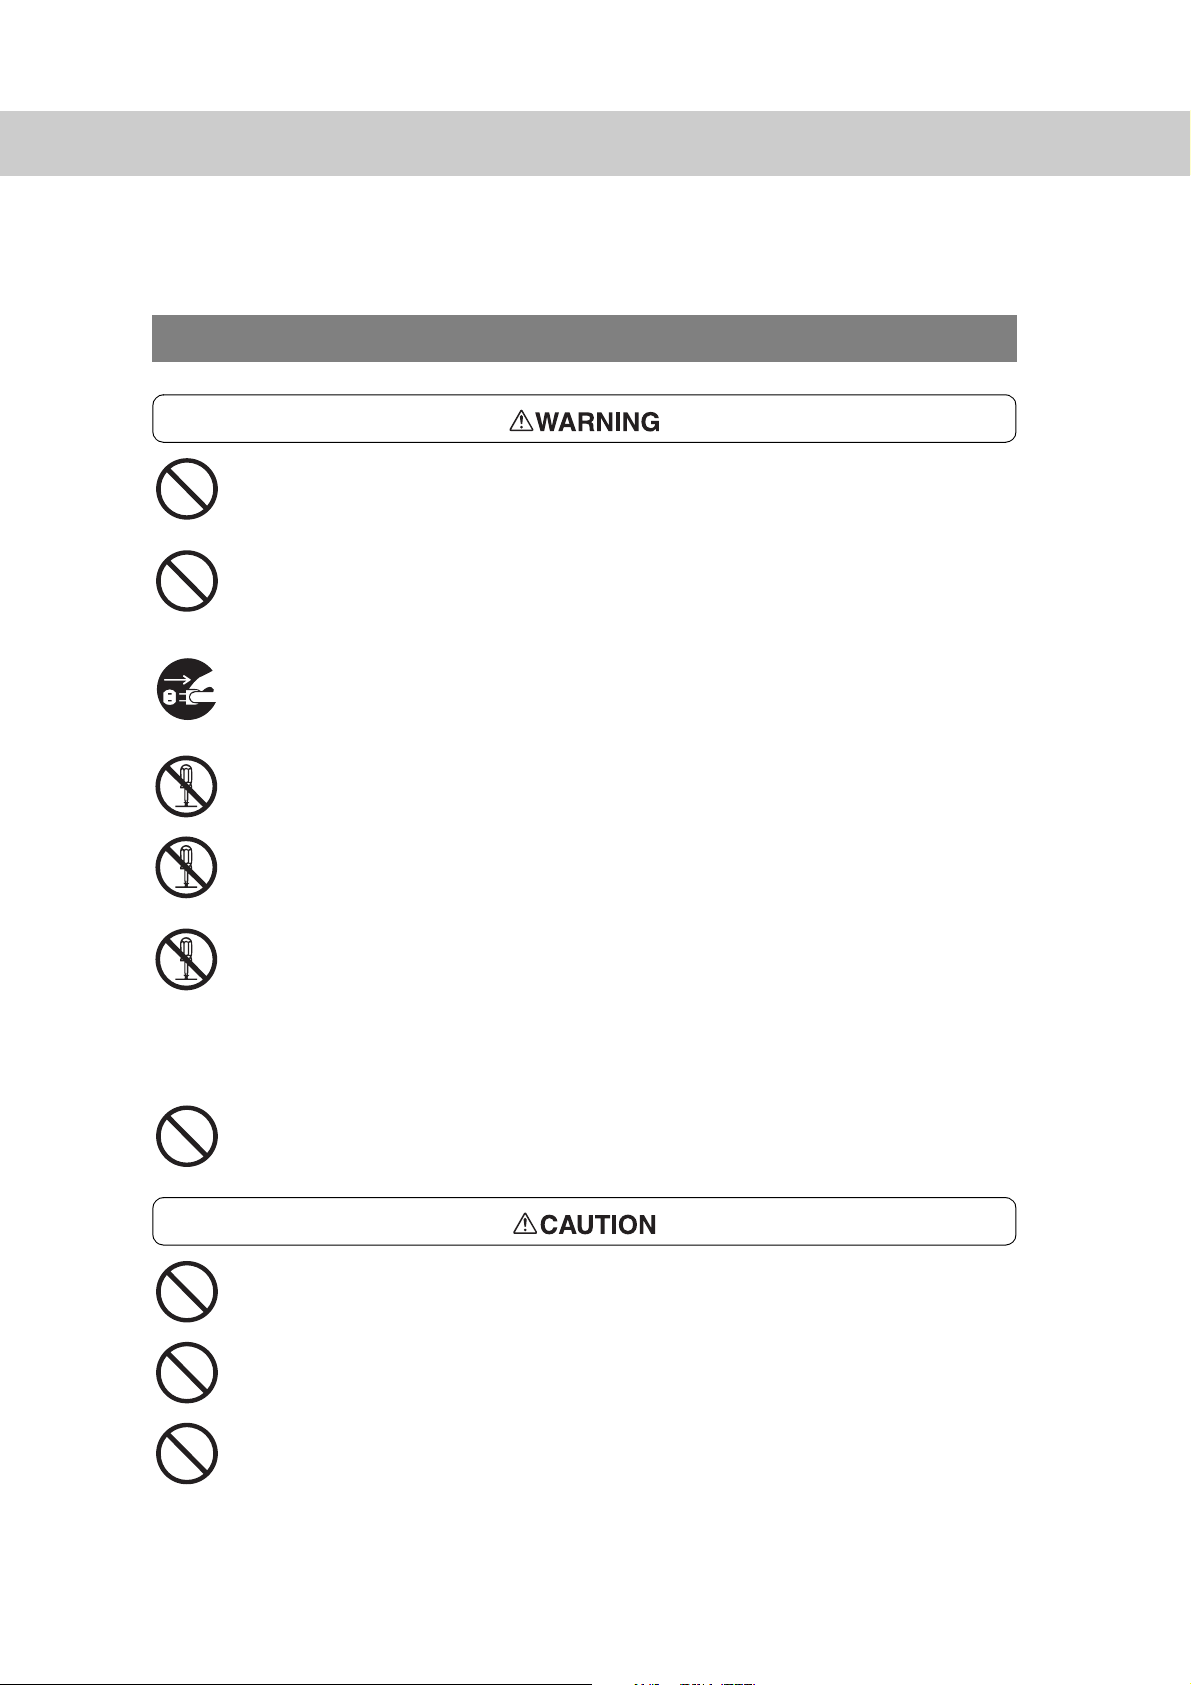
For Installation & Relocation
Do not place the printer in a hot, humid, dusty, or poorly ventilated environment.
Prolonged exposure to these adverse conditions may cause fire or electric shock.
Do not place the printer near heaters or volatile, flammable, or combustible
materials such as curtains that may catch fire.
Place the printer on a level and sturdy surface that can withstand a weight of 115 kg
(with all options installed, and A3-size paper loaded in every tray). If tilted, the
printer may fall over and cause injuries.
The printer weighs 64kg (without optional trays). When moving the equipment,
make sure that there are 3 or more persons carrying it. Also, make sure to remove
any optional trays from the main unit.
14
Page 15
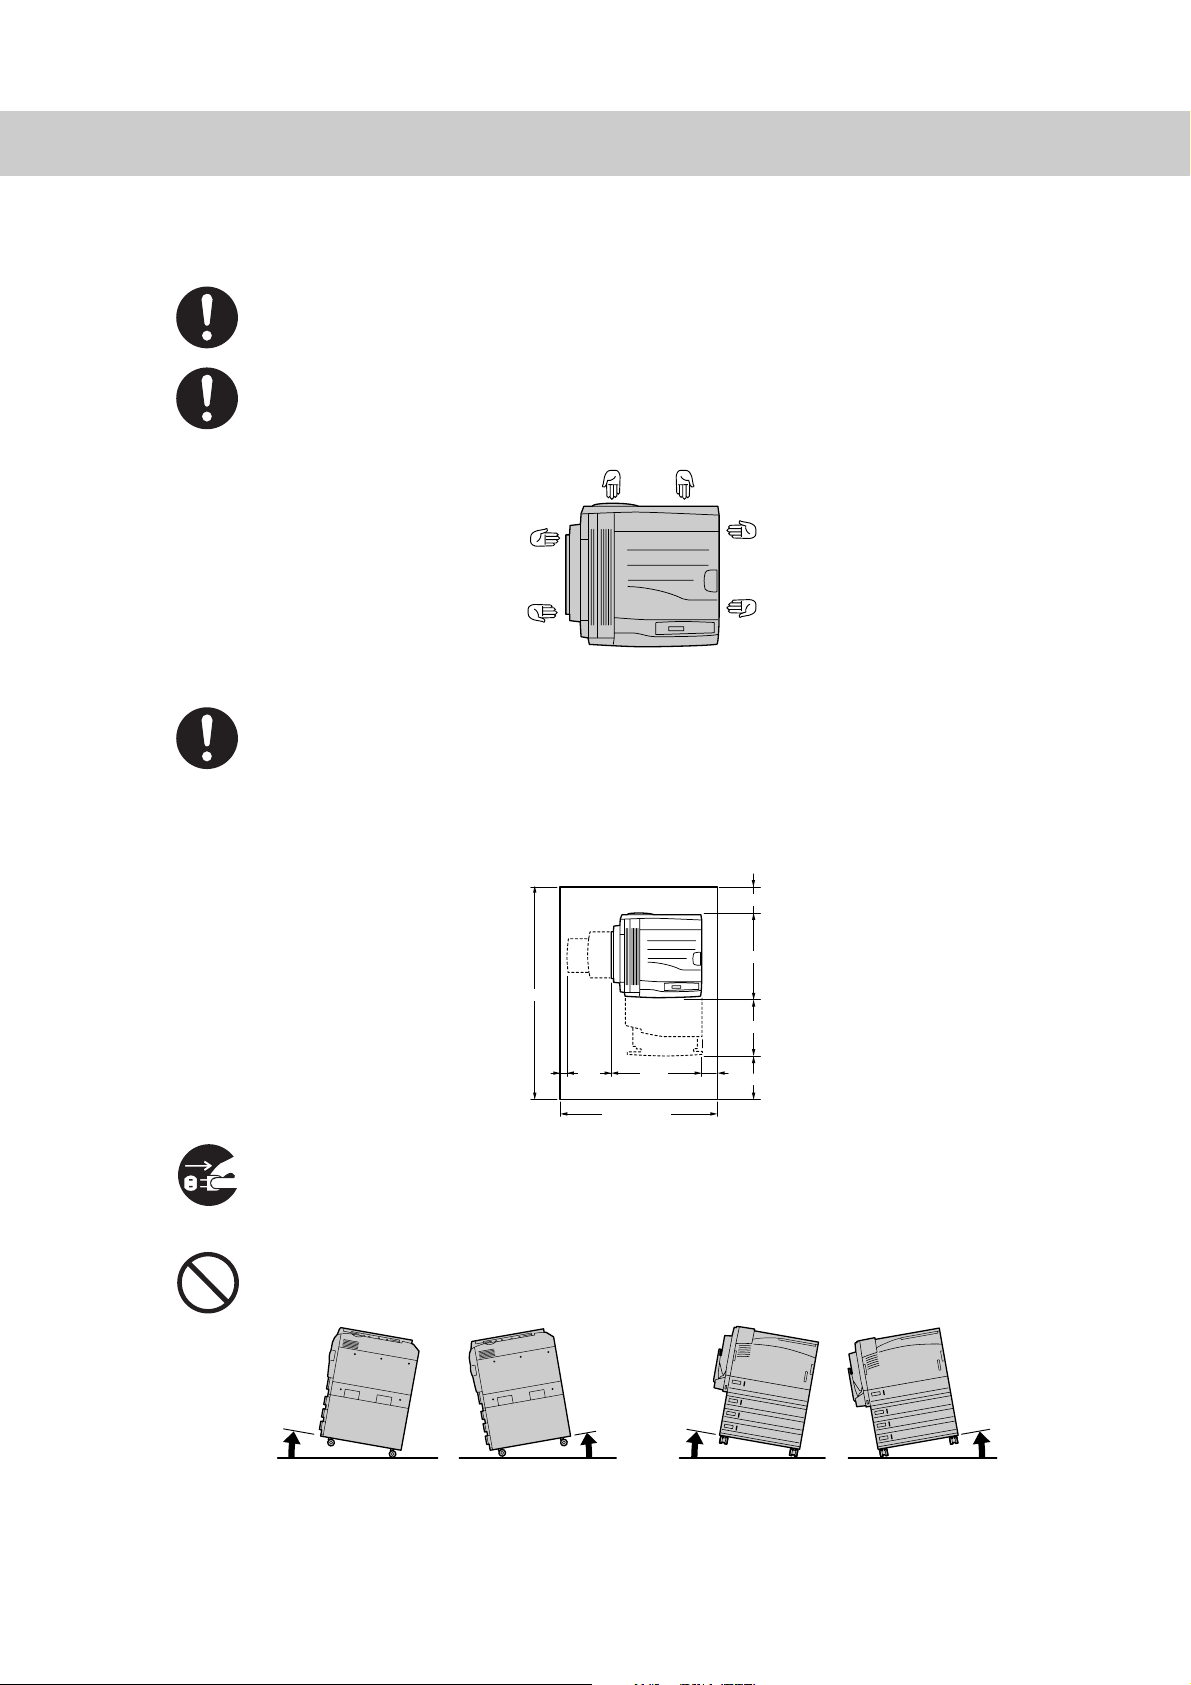
When lifting the printer, get a firm footing and bend your knees to avoid possible
injuries to your back.
When lifting the machine, face the right/left side and rear panel, and firmly grip the
recessed areas provided on both sides and rear of the machine. Never try to lift the
printer by gripping any other areas.
The printer has ventilation holes on the rear panel. Ensure that the printer is
installed with a minimum clearance of 200 mm from the rear vent to the wall. A
poorly ventilated printer may cause excessive internal heat and fire. The
accompanying diagram shows the minimum clearances required for normal
operation, consumables replacement, and maintenance to ensure your printer
operates at peak performance.
Unit:
200
631
1656
425
300
50
1128
678
100
400
When moving the printer, be sure to unplug the power cord from the outlet. If the
printer is moved with the power cord connected, it can cause damage to the cord
which could result in fire or electric shock.
When moving the printer, do not tilt it more than 10 degrees. If tilted excessively,
the printer may fall over and cause injuries.
Rear
10°
Left
Right
Right
Left
10°10°
10°
Front
Front
Rear
15
Page 16
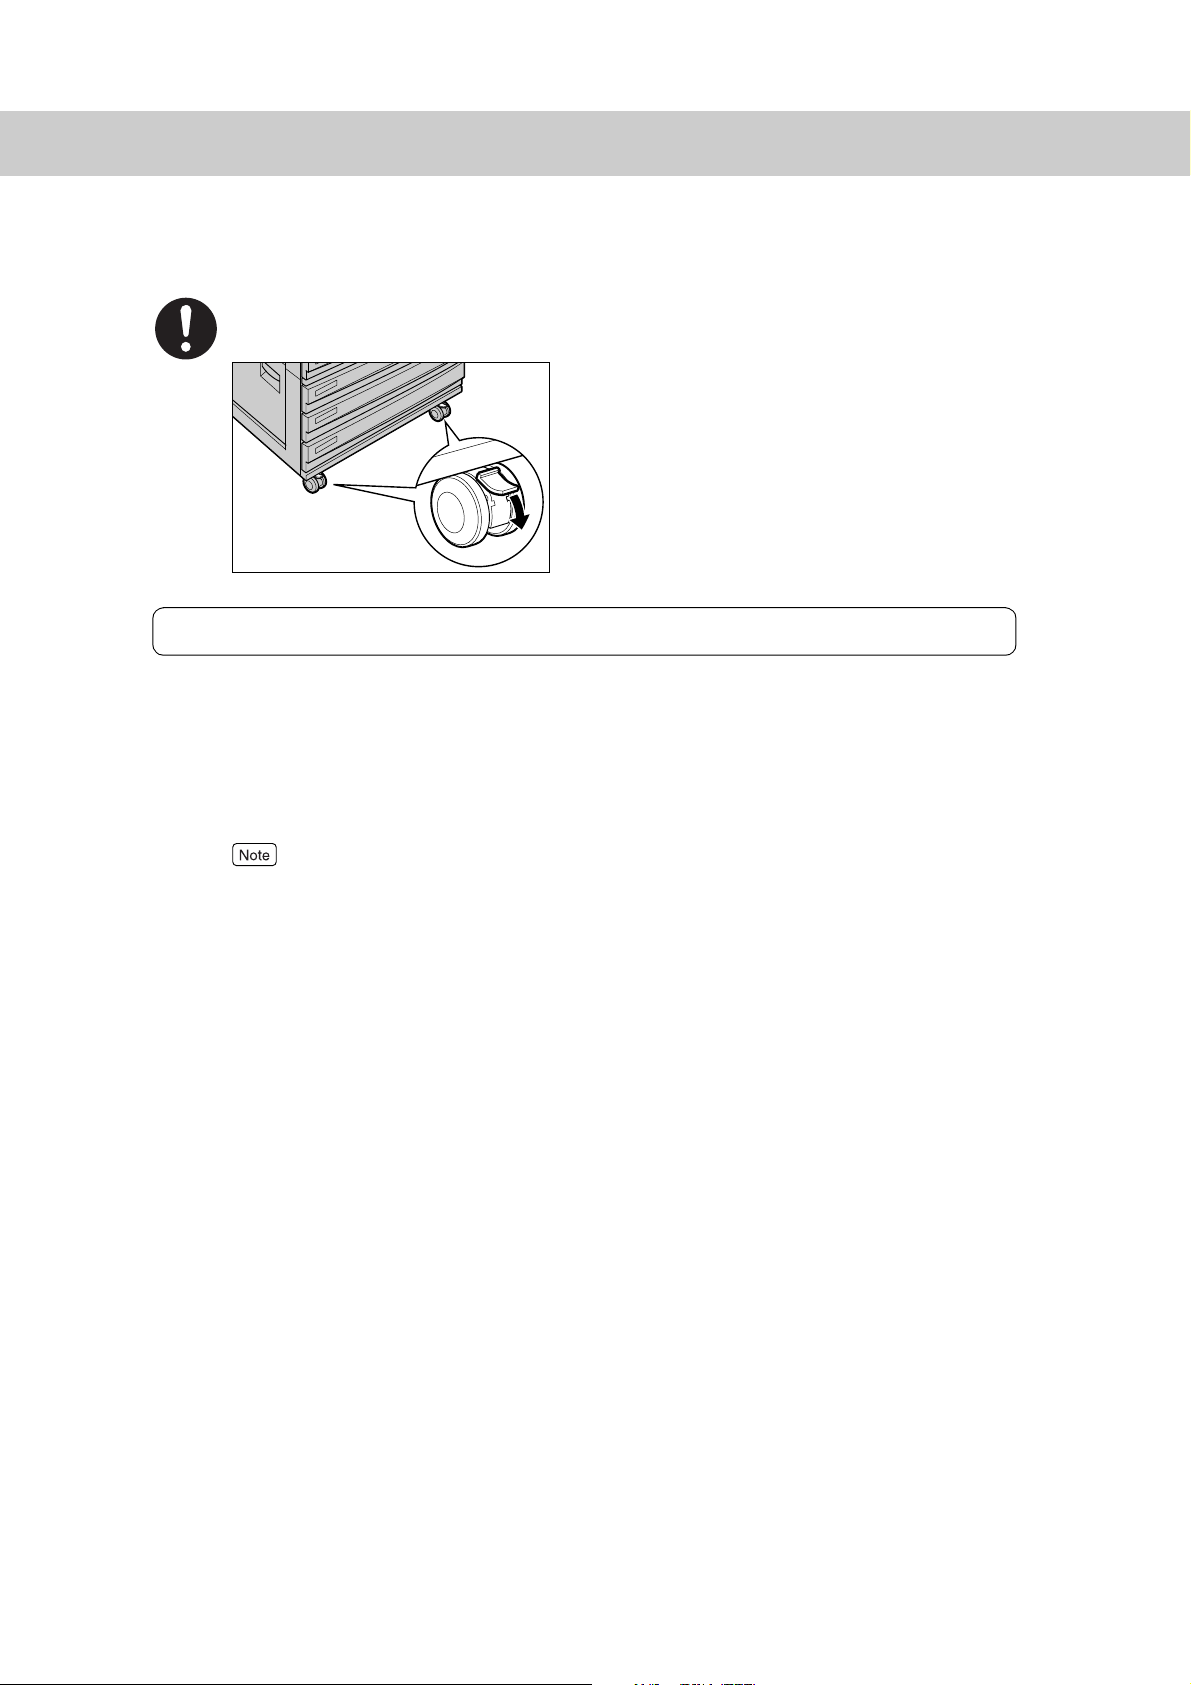
When the printer is installed, be sure to lock the caster stoppers. An unlocked
machine may fall over or slide and cause injuries.
Others
● The printer is capable of operating normally within the following recommended
environmental limits.
Temperature range 10-32°C
humidity range 15-85% (no condensation).
Humidity should be 65% or below at 32°C, and temperature should be 28°C or below at
85% humidity.
Sudden temperature fluctuations can affect copy quality. Rapid heating of a cold room can cause
condensation inside the printer, directly interfering with image transfer.
● Do not expose the printer to direct sunlight. Exposure to direct sunlight can
adversely affect the machine’s performance.
● Connecting an Ethernet cable directly to outdoor may cause printer breakdown by
lightning.
Use an Ethernet cable only for indoor connections.
●
Do not place the printer where it will be exposed directly to an air-conditioner.
Temperature conditions inside the printer will change and may cause the printer
breakdown.
16
Page 17
For Power & Earth Connection
The power specifications are listed below. The specifications that apply to your
printer depend on your printer configuration. Connect the power plug only to a
properly rated power outlet. Otherwise, it may cause fire or electric shock. If in
doubt, contact our Customer Support Center or your dealers.
●
Rated voltage 110 V
Rated frequency 60 Hz
●
Rated voltage 220-240 V
Rated frequency 50/60 Hz
Ensure that the plug connection is free of dust. In a damp environment, a
contaminated connector can draw a non-negligible amount of current that can
generate heat over an extended period of time and eventually cause fire.
Always use the power cord provided with your printer. When an extension power
cord is required, always use a properly rated cord.
In Japan: 125 V/15 A
In other countries: Contact our Customer Support Center or your dealers.
If you use a cord with an unspecified current rating, the printer or plug may emit
smoke or become hot to the touch externally.
Do not attempt to rework, pull, bend, chafe, or otherwise damage the power cord.
Do not place a heavy object on the cord. A damaged cord can cause fire or electric
shock.
Never touch a power cord with wet hands. Danger of electric shock exists.
Stop operation immediately if your printer produces smoke, excessive heat,
unusual noise, or smell, or if water is spilt onto the printer. These conditions can
cause fire. Immediately switch off and unplug the printer, and contact our Customer
Support Center or your dealers.
17
Page 18
To prevent fire or electric shock, follow the instructions below based on your printer
configuration.
If in doubt, contact our Customer Support Center or your dealers.
- If your printer is a 220-240 V model, there is no need to attach a separate earth
line since the earth connection is incorporated in the power line. Plug it into a
properly rated outlet.
- If your printer is a 100 or 110 V model, use the green earth bundled with the
power cord, located at the rear of the printer.
The earth wire must be connected to one of the following conductors:
- Earth terminal of the specified power outlet
- A piece of copper buried in the earth 650 mm or deeper
- Earth terminal with Class D* earthing.
*Class D is the regulation for Japan only.
Never connect the earth wire to any of the following:
●
Gas pipe, which can be ignited and explode
●
Telephone line earth wire or lightning rod, which can draw an excessive electric
current if hit by lightning
●
Water faucet or pipe whose electrical conductivity is broken by a non-metal part
If the power cord is broken or insulated wires are exposed, ask our Customer
Support Center or your dealers for a replacement. Using a damaged cord can
cause fire or electric shock.
18
Do not unplug or replug the printer while it is on. Unplugging a live connector can
deform the plug and cause fire.
When unplugging the printer, grasp the plug instead of the cord. Forcibly pulling on
a cord can damage it and cause fire or electric shock.
Once a month, unplug the printer and check the power cord for the following:
●
The power cord is plugged firmly into a receptacle.
●
The plug is not excessively heated, rusted, or bent.
●
The plug and receptacle are free of dust.
●
The cord is not cracked or frayed.
If you notice any unusual conditions, contact our Customer Support Center or your
dealers.
Page 19
When the printer is not used over an extended period of time, switch it off and,
when the display turns off, unplug it. If an unused printer is left connected to a
power source for a long period, degraded insulation can cause electric shock,
current leakage, or fire.
Be sure to switch off and wait for the display to turn off, and then unplug the printer
before accessing the interior of the printer for cleaning, maintenance, or fault
clearance. Access to a live printer's interior can cause electric shock.
Switch off the printer before connecting the interface cable or options. Connecting
the cable or card to a live printer can cause electric shock.
Others
● Use a soft cloth moistened with water when cleaning the printer exterior. If dirt is not
removed, wipe with a soft cloth using a small amount of mild detergent. Do not spray
the cleaner directly onto the printer. The cleaner mist may get into the printer through
gaps, resulting in trouble. Also, never use anything other than mild detergent.
● The printer has a built-in circuit for protection against lightning-induced surges in
current. If lightning strikes in your neighborhood, switch off the printer. Disconnect
the power cord “and telephone line” from the printer, and reconnect them only when
the lightning has stopped.
● Reception interference
If this printer is supposed to be the cause of poor reception such as radio static or
blinking and deflection in a television display, switch off the printer and check if the
poor reception goes away. If the poor reception goes away after switching off the
printer, combine the following methods to prevent it.
●
Reposition or reorientate the machine and TV and/or radio.
●
Move the machine and the TV and/or radio away from each other.
●
Unplug the machine, TV and/or radio, and replug them into outlets that operate
on different circuits.
●
Reorientate the TV and/or radio antennas and cables until the interference stops.
For an outdoor antenna, ask your local electrician for support.
●
Use coaxial cable antennas.
19
Page 20
For Machine Operation
Do not place any liquid container such as a vase or coffee cup on the printer. Spilt
water can cause a fire or electric shock.
Do not place any metal parts such as staples or clips on the printer. If metal and
flammable parts get into the printer, they can short-circuit internal components, and
cause fire or electric shock.
If debris (metal or liquid) gets into the printer, switch off the printer and, when the
display turns off, unplug the printer. Contact our Customer Support Center or your
dealers. Operating a debris-contaminated printer can cause fire or electric shock.
Never open or remove printer covers that are secured with screws unless specifically
instructed in the User Guide. A high voltage component can cause electric shock.
Do not try to alter the printer configuration, or modify any parts. An unauthorized
modification can cause smoke or fire.
This equipment is certified as a Class 1 laser product under IEC60825. This means
that the printer does not emit hazardous laser radiation. Since radiation emitted
inside the printer is completely confined within the protective housings and external
covers, the laser beam cannot escape from the printer during any phase of user
operation. Do not perform any operation apart from the instructions given in the
manual. There may be a danger of laser beam leakage.
Do not play this CD-ROM using an incompatible CD-ROM player. Playing at high
volume levels can cause hearing damage and speaker failure.
Do not use a highly flammable spray or solvent near the printer. It can cause fire.
Do not use conductive paper, e.g. folding paper, carbonic paper and coated paper.
When paper a jam occurs, they can cause a short circuit and fire.
Do not replace the battery inside the machine. Replacing a battery wrongly may
cause it to explode.
20
Page 21
Never touch areas labeled as “High Voltage.” You can get an electric shock.
Never touch a labeled area found on or near the heat roller. You can get burnt. If a
sheet of paper is wrapped around the heat roller, do not try to remove it by yourself
to avoid injuries or burns. Switch off the printer immediately, and contact our
Customer Support Center or your dealers.
When pulling out a paper tray, do it slowly. If pulled out with too much force, the tray
can hit and injure your knees.
When removing jammed paper, make sure that no pieces of torn paper are left in the
machine. A piece of paper remaining in the printer can cause fire. If a sheet of paper is
wrapped around the heat roller, or when clearing a jammed paper that is difficult or
impossible to see, do not try to remove it by yourself. Doing so can cause injuries or
burns. Switch off the machine immediately, and contact our Customer Support Center
or your dealers.
Keep the room ventilated when using the copier for a long period of time. If not, you
can get a headache.
Others
● When clearing a paper jam or other fault, follow this guide.
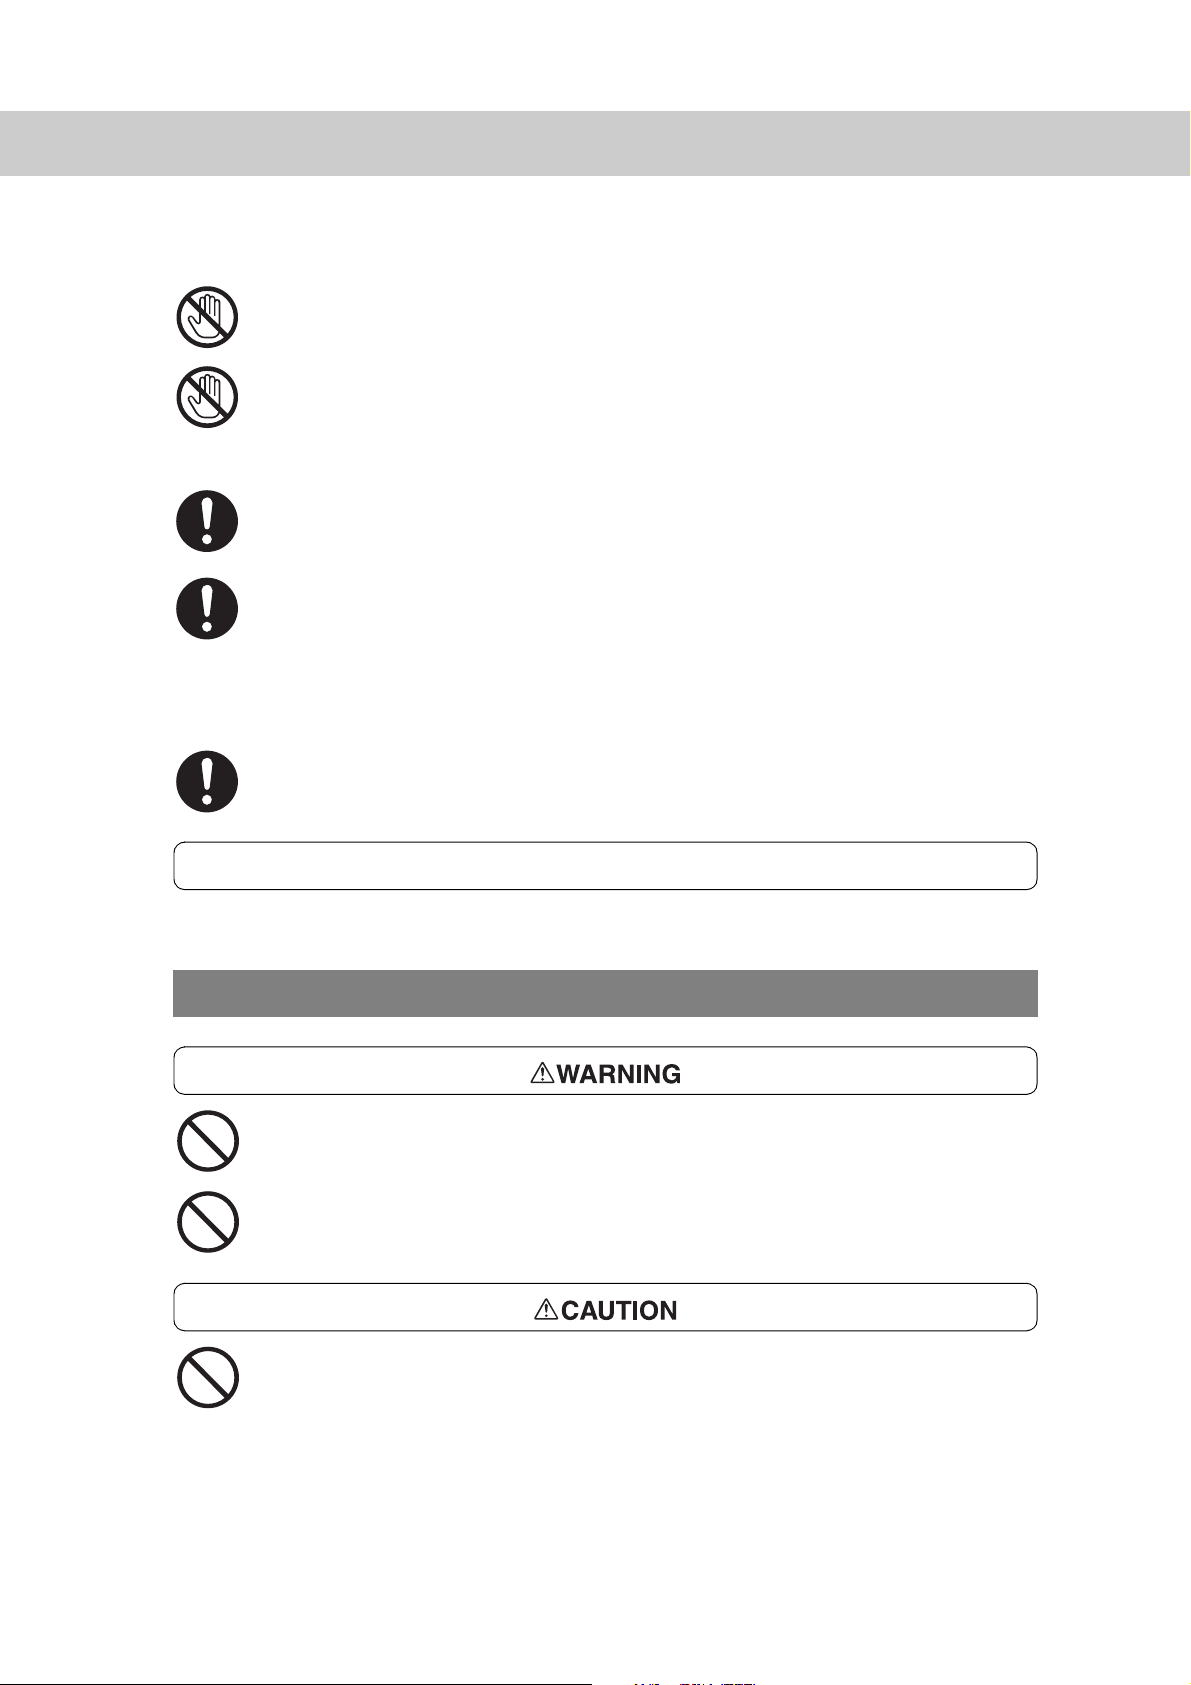
For Consumables
Never throw a toner cartridge into an open flame. It can cause an explosion and you
can get burnt.
Never throw toner, a toner recycle bottle, or a toner container into an open flame. It
can cause an explosion and you can get burnt.
When removing jammed paper, pull out the drum cartridge. Make sure you switch
off the power first and wait for 20 minutes before you remove the paper from the
fuser.
21
Page 22

Others
● Do not unpack consumables before use. Store consumables in a cool, dry, and
clean environment, away from an open flame, and out of direct exposure to sunlight.
● When using consumables, read and observe operating instructions and safeguards
given on the package and container.
● Post-consumer toner cartridges and drum cartridges are recycled for resource
conservation.
- Handling instructions -
Used toner cartridges, toner collection bottles, and drum cartridges should be
properly disposed of. Contact our Customer Support Center or your dealers for
disposal.
● Follow the procedure below to give first aid.
●
If toner gets into your eyes, bathe your eyes until the pain stops, and submit to
medical treatment if required.
●
If the toner adheres to your skin, wash away the toner with soap.
●
If you breathe the toner, gargle with large amounts of water.
●
If you swallow the toner, vomit it and submit to medical treatment immediately.
Switching Off
22
Others
● When the power is switched off, print data remaining in the printer and information
spooled in the memory will be erased.
Before switching off the power during normal operation, ensure that “Ready to print” is
displayed on the LCD of the control panel.
●
If the printer is equipped with a Media Print kit (optional), ensure that the power for
the kit is switched off before switching off the printer.
Page 23
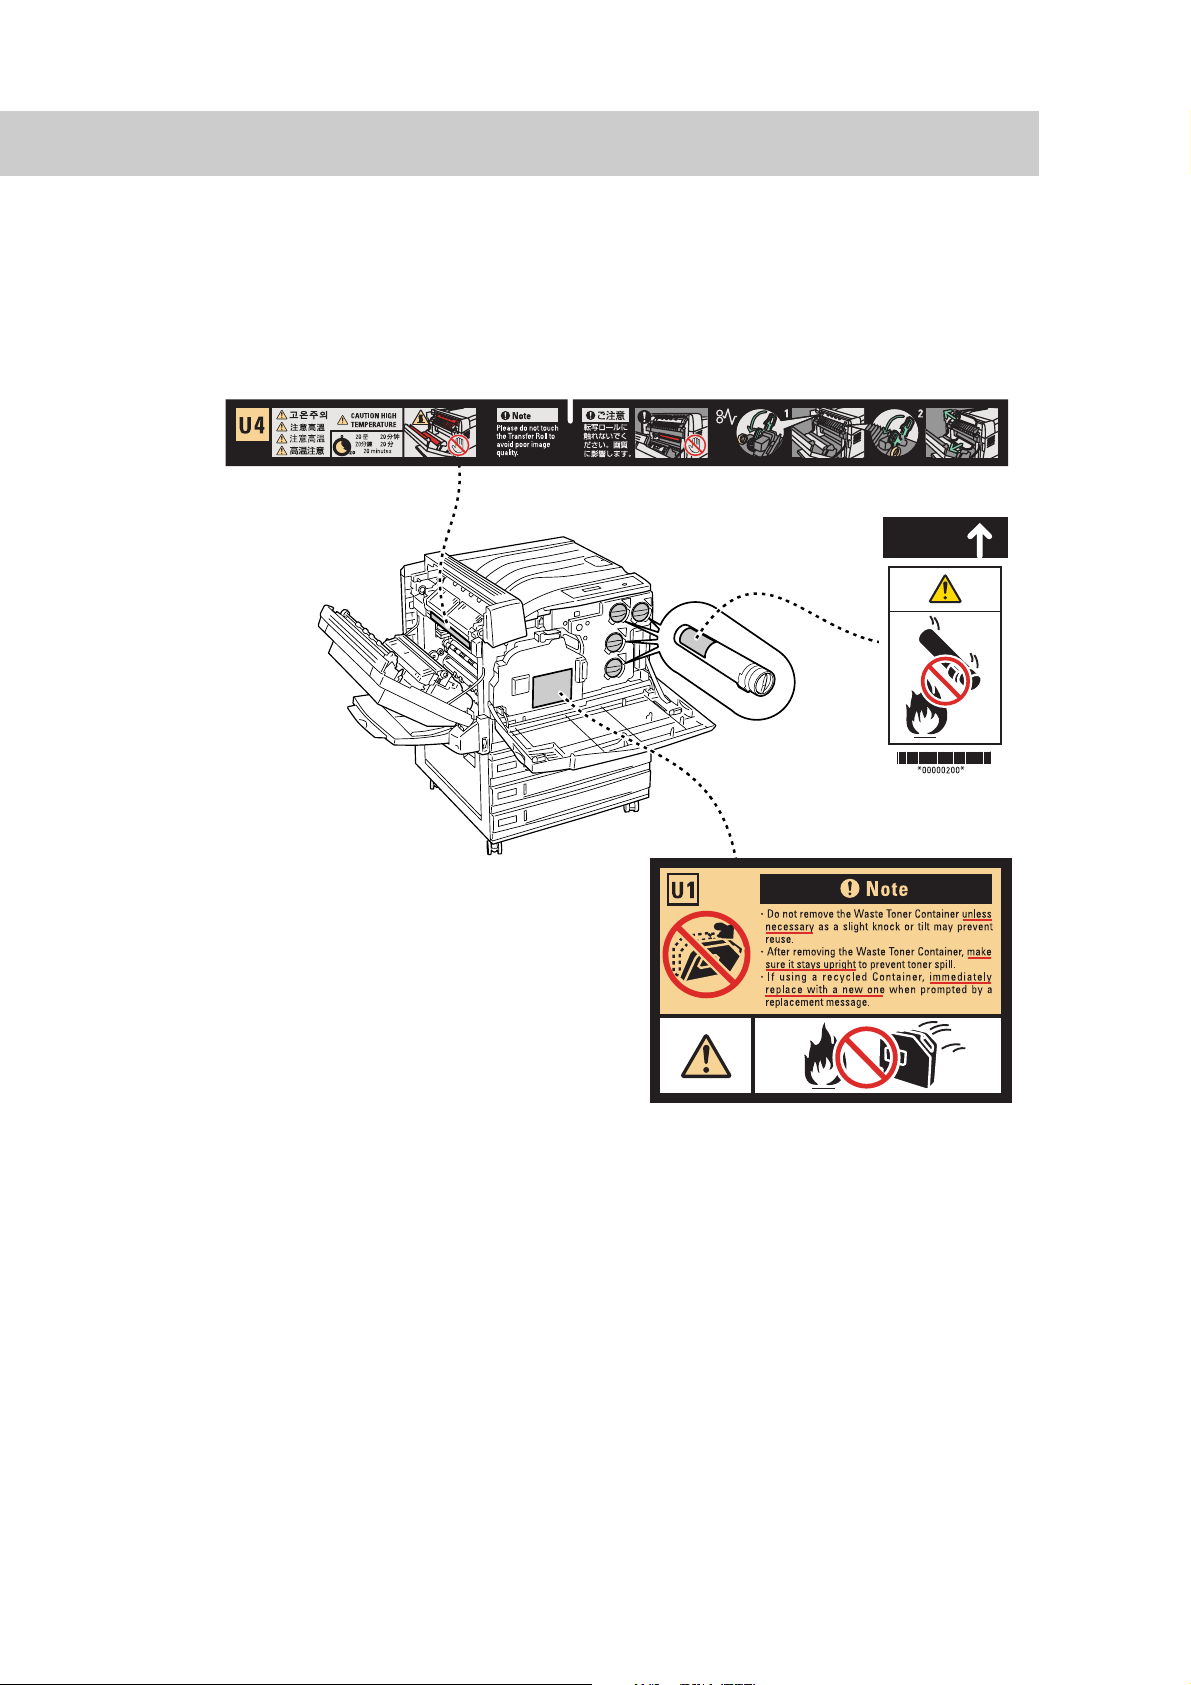
■ Labels indicating Warning and Caution
Warning and caution labels are attached inside the printer to ensure safe use of this
printer. Read and follow the instructions carefully for your safety.
23
Page 24

The Objectives of the International Energy Star Program
To protect the global environment and conserve energy sources, the International Energy
Star Program encourages the following product features. Fuji Xerox confirms DocuPrint
C2428 satisfies the requirements for this program.
Sleep Mode feature
This product has a power-saving feature, which switches the printer to the
sleep mode automatically if the printer is on and not operated for a certain
period of time. In this mode the machine lowers the fuser temperature and
saves the power consumption. The default sleep mode start time is set at 15
minutes. You can change this setting from 15 to 240 minutes at 1 minute
intervals.
For information about the procedure, refer to 5.2.2 The System Administrator
Menu (P.137).
The sleep mode is displayed as [Power Saver Mode] in the control panel.
24
Page 25

Illegal Copies and Printouts
Copying or printing certain documents may be illegal in your country. Penalties of fines
or imprisonment may be imposed on those found guilty. The following are examples of
items that may be illegal to copy or print in your country.
● Currency
● Banknotes and checks
● Bank and government bonds and securities
● Passports and identification cards
● Copyright material or trademarks without the consent of the owner
● Postage stamps and other negotiable instruments
This list is not inclusive and no liability is assumed for either its completeness or
accuracy. In case of doubt, contact your legal counsel.
25
Page 26

Page 27

1Setting Printer
Environment
1.1 Printer Environments ....................................................................... 28
1.2 Setting the Printer Environment With the Quick Setup Menu .......... 30
1.3 Setting the IP Address..................................................................... 33
1.4 Configuring from the Computer (CentreWare Internet Services)..... 39
1.5 Checking the Settings ...................................................................... 44
1.6 Installing/Uninstalling the Printer Driver ........................................... 46
Page 28
Setting Printer Environment
1
Printer Environments
1.1
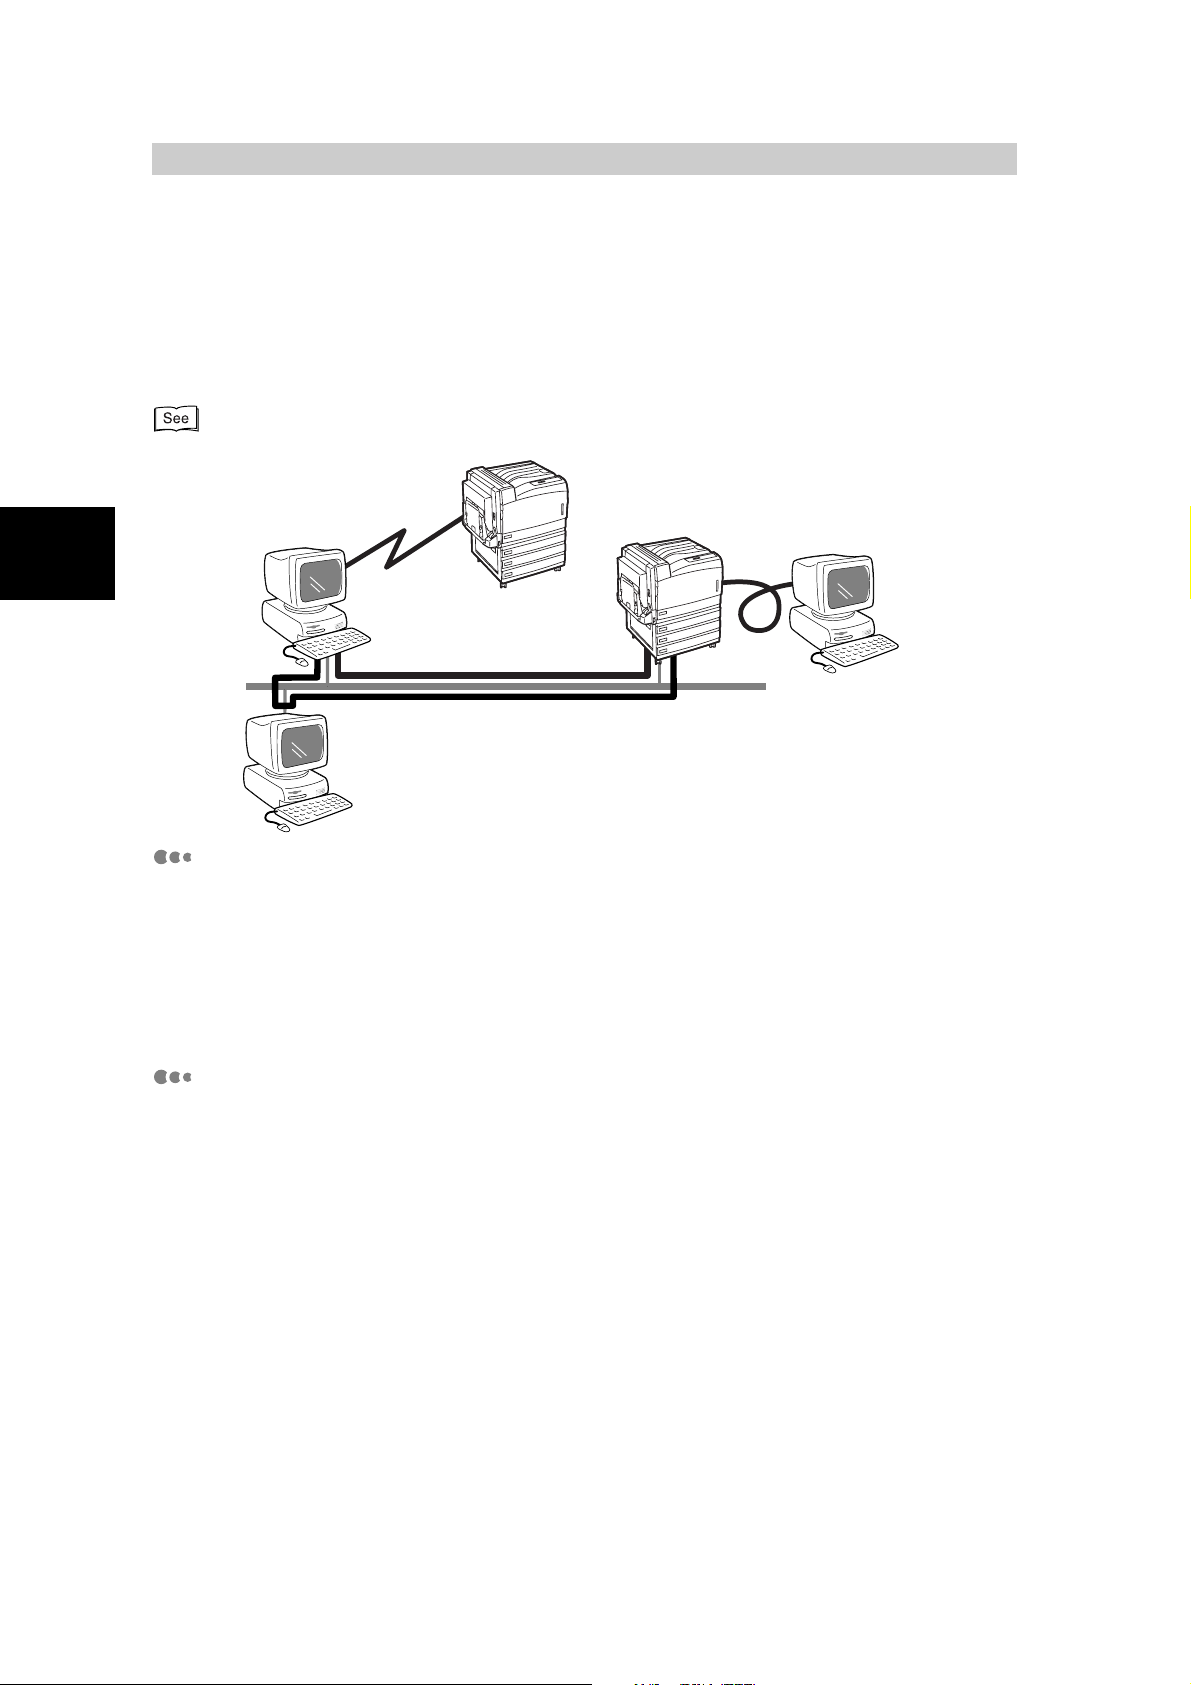
This section describes the different printer environments that can be set up for this printer.
When connected to a computer directly, this printer can be used as a local printer. Also,
when connected to a network, it can be used as a network printer.
On the control panel, enable the port you want to use.
“Chapter 5, Setting Control Panel” (P.121)
Internet
IPP
Network connection
LPD/SMB/Port9100/EtherTalk
Local connection
Parallel/USB
Printer shared in NetWare and Windows
Server
Network connection
Using it as a local printer
When using the printer as a local printer, the following connection types are
available:
●
Parallel connection: Connects this printer to a computer with a parallel cable. (Factory
default setting: enable)
●
USB connection: Connects this printer to a computer with a USB cable.
(Factory default setting: disable)
Using it as a network printer
The following printer environments can be set up for this printer when using it as
a network printer.
●
LPD: Enables direct communications with this printer using TCP/IP
protocol. (Factory default setting: enable)
●
NetWare: Enables shared control of this printer using the NetWare server.
(Factory default setting: disable)
●
SMB: Enables printing using a Windows network. (Factory default
setting: enable)
●
IPP: Enables printing over the Internet. (Factory default setting:
disable)
●
Port9100: Enables printing using Port9100 as a port. (Factory default setting:
disable)
●
EtherTalk:
Enables printing from Macintosh. PostScript Software Kit (optional)
required. (Factory default setting: disable)
is
28
Page 29
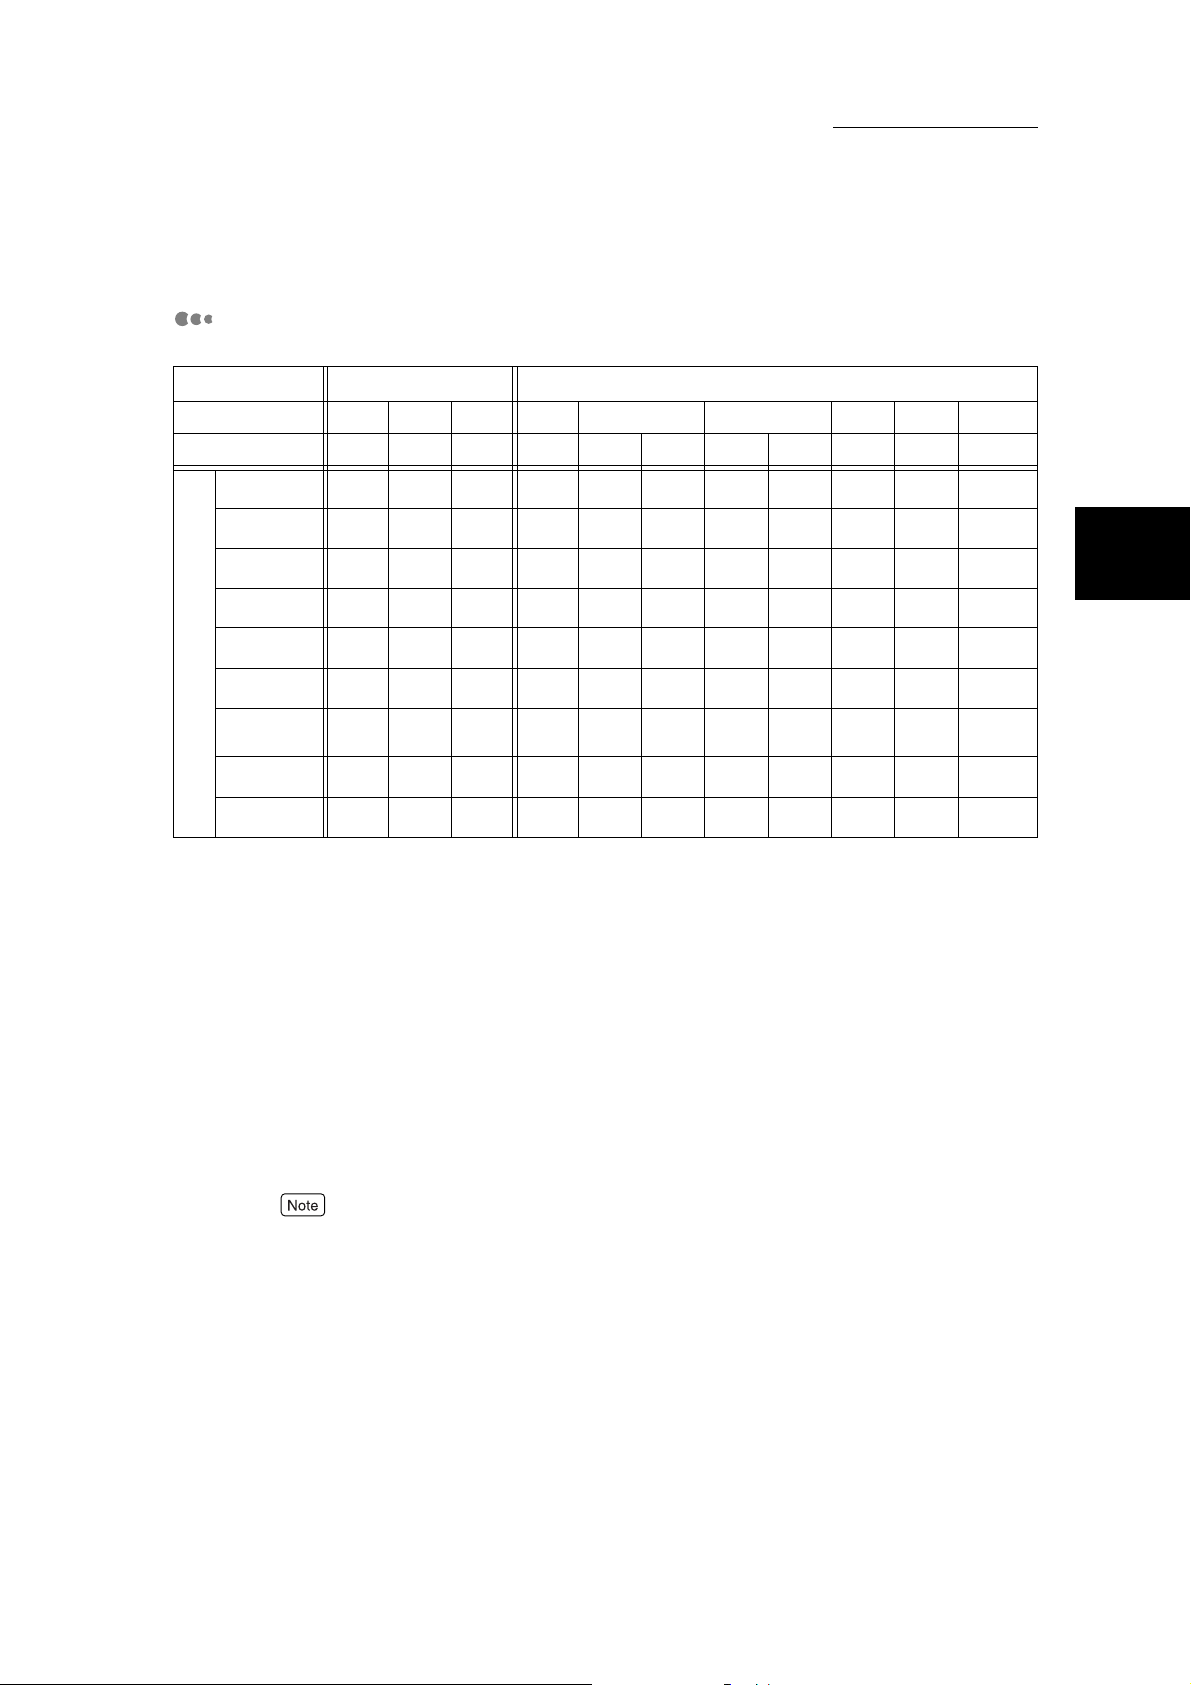
Environment available for each OS
1.1 Printer Environments
Setting Printer Environment
Connection type Local
Parallel
Port name
Protocol
Windows 95
Windows 98
Windows Me
Windows NT 4.0
Windows 2000
OS
Windows XP
Windows
Server 2003
UNIX
Macintosh
USB1.1 USB2.0 LPD NetWare SMB IPP
---
{
{
{
*1,3
*1,3
{
{
{ {{{{{
{
{*1{
{
{*1{
{
{
*1 : A computer to which this printer is connected must have a USB port.
*2 : An optional USB2.0 kit is required. In addition, a computer to which this
printer is connected must have USB2.0 port.
*3 : For Windows 95/Windows 98/Windows Me, use our USB Print Utility.
*4 : For Windows 2000, Microsoft USB driver supporting USB2.0 is required.
*5 : For Windows XP, SP1 and later are applicable.
*6 : For Windows 95/Windows 98/Windows Me, use our TCP/IP Direct Print
Utility.
*7 : PostScript Software Kit (optional) is required.
*8 : To print PostScript data, PostScript Software Kit (optional) is required.
*9 : Only for Mac OS X.
Network
Port9100
TCP/IP TCP/IP
*6
{
*2,3
{
*2,3
{
*2,4
*2,5
*1
{
*2
*6
{
*6
{
{{{{{{{
{{{ {{{
{{{ {{{
*8
{
*7,9
{
IPX/SPX NetBEUI
TCP/IP TCP/IP TCP/IP
{{{{
{{{{
{{{{{
{
{
{
*6
*6
*6
EtherTalk
AppleTalk
*7
{
1
For information about the network environment, refer to the Network Print Environment Guide
(network.pdf).
29
Page 30
Setting the Printer
Setting Printer Environment
1
1.2
Environment With the
Quick Setup Menu
When setting the printer environment, you can use the Quick Setup menu to configure the
minimum required settings.
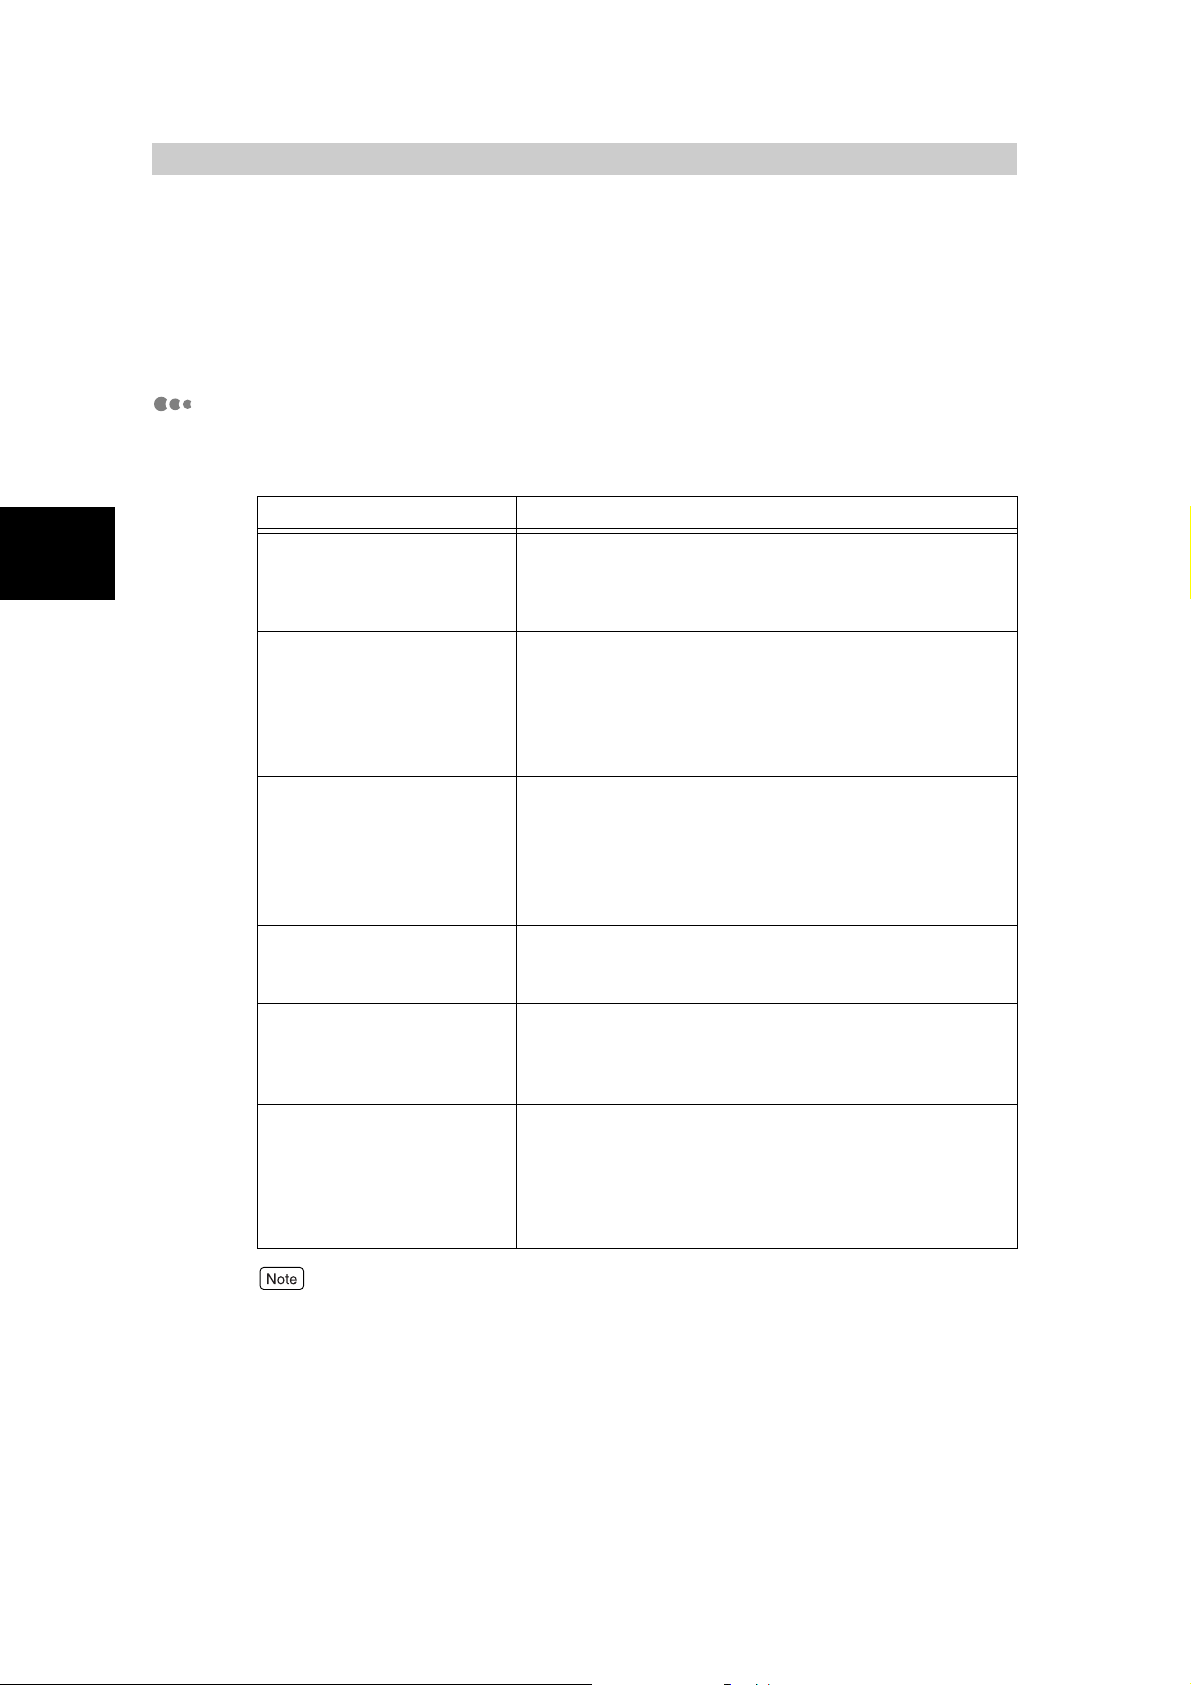
Setting items with the Quick Setup menu
The following items can be set using the Quick Setup menu.
Follow the instructions displayed on the control panel to configure the settings.
Setting item Description
Setting whether to
automatically print the Job
History Report
Setting the system clock Set the date (year/month/day) and time (hour/minute) of
Setting the network port,
protocol, and spool
Setting whether to use
Internet services
Setting whether to use
SNMP
Setting whether to use
DHCP, BOOTP, and RARP,
and setting IP address.
(Set this item only when
using TCP/IP.)
The information on a maximum of the 50 latest print jobs is
printed out to the [Job History Report]. Set whether to
automatically print out this [Job History Report] every time
the number of print jobs exceeds 50.
the system clock in this printer in the format of Christian
year (4 digits, in the range of 2000 to 2099) and 24 hours.
The date/time set here is printed out on the list or report.
(Enter the date in YYYY/MM/DD format, and time in
HH:MM format.)
The Setup menu allows you to set multiple ports at one
time according to a series of steps.
●
SMB, LPD, IPP, NetWare, Port9100, SNMP, EtherTalk
(optional)
Set the port, protocol, and spool you want to use
depending on the network environment.
Using Internet services (CentreWare Internet Services)
allows you to display the printer/job status or change the
settings of this printer by using the Web browser.
Set this item to activate when using software such as
CentreWare that remotely controls multiple printers, or
automatically installing the printer driver from Software
Pack CD-ROM.
Set whether to automatically obtain the information
required to use TCP/IP (IPaddress, subnet mask, and
gateway address) from DHCP (Dynamic Host
Configuration Protocol) server, BOOTP, and RARP.
When you do not use the DHCP server, BOOTP, or RARP,
enter the IP address manually.
30
You can also set items separately depending on the printer environment without using the Quick Setup
menu. For information about items which cannot be set with the Quick Setup menu and how to set
items separately, refer to “Chapter 5 Setting Control Panel” (P.121).
Page 31

Settings with the Setup menu
Configure the required settings on the control panel according to the following
procedures:
If you changed settings using the Quick Setup menu, the [System Settings List] may not be correct
when printed in step 8. Select for “Save Settings” in step 9, reboot the printer, and then print the
[System Settings List].
For information about printing the [System Settings List], refer to “1.5 Checking the Settings” (P.44).
If you press the <Menu> button during the setting procedure with the Quick Setup menu, settings will
be canceled.
Procedure
1.2 Setting the Printer Environment With the Quick Setup Menu
Setting Printer Environment
1
Ready to print
(1)Press the <Menu> button.
Menu
Print Language
(2)Press the < > or < > button several times.
Menu
Quick Setup
(3)Press the < > button.
Setup?
(4)Press the < > or < > button to select [Y].
Setup?
(5)Press the <Eject/Set> button.
Job History Auto
Print R/N
(Printer is in the standby mode.)
(The menu mode screen is displayed.)
(The Setup menu is displayed.)
/Y
N
N/Y
/Y
(6)Answer each question using the < >, < >, < >, < >, and <Eject/
Set> buttons. Use the < > and < > buttons to select [N/Y], use the
< >, < >, < >, and < > buttons to enter the value, and press the
<Eject/Set> button to save the setting. When you finish configuring the
settings, the following message is displayed.
To the next page
31
Page 32

1.2 Setting the Printer Environment With the Quick Setup Menu
Setting Printer Environment
Continued from the previous page
Print Settings
List? R/N
(7)Use the < > or < > button to select [R/N/Y]. (Here, select [Y]).
Print Settings
List? R/N/Y
/Y
1
(8)Press the <Eject/Set> button.
Print Settings
Printing... Tray1
Save Settings?
(Reboot)
R/Y
(9)Use the < > or < > button to select [Y], and press the <Eject/Set>
button (to reboot the printer).
Ready to Print
(The printer returns to the standby mode. It can now
receive data at any time.)
32
Page 33

Setting the IP Address
1.3
This section describes the procedures to set the IP address.
You can set the IP address with one of the following methods.
●
Using the Quick Setup menu on the control panel.
●
Setting the IP address from the control panel.
●
Using the IP Setup Tool contained on the Software Pack CD-ROM supplied with this
printer.
This section describes the procedure to set the IP address from the control panel.
To set the IP address using the IP Address Setting Tool, refer to the Software Pack
Operation Guide (manual.pdf).
To set the IP address using the Quick Setup menu, refer to “1.2 Setting the Printer
Environment With the Quick Setup Menu” (P.30).
●
You can change the IP address from the CentreWare Internet Services. For information about CentreWare
Internet Services, refer to “1.4 Configuring from the Computer (CentreWare Internet Services)” (P.39).
●
Depending on the network environment, you may need to set the subnet mask and gateway address for the printer.
If your network has the DHCP, BOOTP, or RARP environment, this printer can obtain these addresses from each
of these servers.
●
By factory default setting, these addresses are automatically obtained from the DHCP server.
Setting Printer Environment
1
●
Use the DHCP server together with the Windows Internet Name Service (WINS) server.
●
When using the BOOTP or RARP server, change the item [Get IP Address] to [BOOTP] or [RARP] on the
control panel. Check with your system administrator for any queries on the BOOTP or RARP environment.
“Chapter 5 Setting Control Panel” (P.121)
33
Page 34

Setting Printer Environment
1
1.3 Setting the IP Address
Printing out [System Settings List]
Procedure
Refer to “1.5 Checking the Settings” (P.44), and print out the [System
1
Settings List].
In the [System Settings List], check the address of each of [TCP/IP: IP
2
Address], [TCP/IP: Subnet Mask], [TCP/IP: Gateway Address] and
[WINS: Primary Wins Server Address], [WINS: Secondary Wins Server
Address] under [Communication Settings].
●
The layout of the [System Settings List] may differ depending on the configuration of options and
settings of this printer.
●
For information about how to check the [System Settings List], refer to the next section, “Checking
System Settings List”.
Checking [System Settings List]
■When neither TCP/IP nor WINS address is obtained
Your network has neither a DHCP server nor a WINS server. Refer to “1.3.1
Setting Address” (P.35) to set the IP address.
■When the address is obtained for TCP/IP but not for WINS
Your network has no WINS server. Do not use the DHCP environment
because printing may be disabled when the IP address assigned to this printer
is changed. Refer to “1.3.1 Setting Address” (P.35) to set the IP address of this
printer manually.
■When both TCP/IP and WINS addresses are obtained.
Your network has the DHCP and WINS servers operating. It is recommended
to use the DHCP environment. The IP address of this printer will be set by the
DHCP server. The host name displayed in the [SMB] column on the [System
Settings List] is registered in the WINS server.
34
Page 35

1.3.1 Setting Address
This section describes the procedure to set the IP address on the control panel.
Depending on the network environment used, you may need to set subnet mask
and gateway address. Consult your network administrator for details on setting
the needed item.
Even if [Ready to print Get IP Add. Fail] is displayed first, press the <Menu>
button to continue the procedure.
Setting IP address
Ready to print
(1)Press the <Menu> button.
Menu
Print Language
(2)Press the < > or < > button several times.
Menu
Admin Menu
(3)Press the < > button.
Admin Menu
Network/Port
(4)Press the < > button.
Network/Port
Parallel
(5)Press the < > or < > button several times.
Network/Port
TCP/IP Settings
(6)Press the < > button.
TCP/IP Settings
Get IP Address
1.3 Setting the IP Address
Setting Printer Environment
1
(7)Press the < > button.
Get IP Address
DHCP *
(8)Press the < > or < > button several times.
Get IP Adress
Manual
(9)Press the <Eject/Set> button.
To the next page
35
Page 36

Setting Printer Environment
1
1.3 Setting the IP Address
Continued from the previous page
IP Address
000.000.000.000*
(10)Use the < > < > < > < > buttons to enter the IP
address.
IP Address
XXX.XXX.XXX.XXX
(11)Press the <Eject/Set> button.
Get IP Address
Manual *
To set the subnet mask and gateway address continuously,
press the < > button, and proceed to “Setting the subnet
mask/gateway address” in step 8.
(12)Press the <Menu> button (to reboot the printer).
Ready to print
(The printer returns to the
standby mode. It can now
receive data at any time.)
Setting the subnet mask/gateway address
Ready to print
(1)Press the <Menu> button.
Menu
Print Language
(2)Press the < > or < > button several times.
Menu
Admin Menu
(3)Press < > button.
Admin Menu
Network/Port
(4)Press the < > button.
Network/Port
Parallel
(5)Press the < > or < > button several times.
To the next page
36
Page 37

Continued from the previous page
Network/Port
TCP/IP Settings
(6)Press the < > button.
TCP/IP Settings
Get IP Address
1.3 Setting the IP Address
Setting Printer Environment
(7)Press the < > or < > button several times.
TCP/IP Settings
Subnet Mask
(8)Press the < > button.
Subnet Mask
.000.000.000*
000
(9)Enter the subnet mask using the < > < > < > < > buttons.
Subnet Mask
XXX.XXX.XXX.XXX
(10)Press the <Eject/Set> button.
Subnet Mask
XXX.XXX.XXX.XXX*
(11)Press the < > button some times.
TCP/IP Settings
Subnet Mask
(12)Press the < > or < > button several times.
TCP/IP Settings
Gateway Address
1
(13)Press the < > button.
Gateway Address
000.000.000.000*
(14)Enter the gateway address using the < > < > < >
< > buttons.
Gateway Address
XXX.XXX.XXX.XXX
(15)Press the <Eject/Set> button.
To the next page
37
Page 38

1.3 Setting the IP Address
Setting Printer Environment
Continued from the previous page
Gateway Address
XXX.XXX.XXX.XXX*
(16)Press the <Menu> button (to reboot the printer).
1
Ready to print
(The printer returns to the
standby mode. It can now
receive data at any time.)
38
Page 39

Configuring from the Computer
1.4
(CentreWare Internet Services)
1.4.1 About CentreWare Internet Services
CentreWare Internet Services is a service that enables you to use a web browser
to display the printer/job status or change the settings of this printer when it has
been configured for use in TCP/IP environment.
Among the items that can be set through the control panel for this printer to be
used as a printer, you can use the Properties screen of this service to set items
like system setting as well as the setting of each network port.
When you use this printer as a local printer, CentreWare Internet Services are not available.
The environment, computer, and browser that can be used for CentreWare
Internet Services are as follows:
Applicable environment
To use CentreWare Internet Services, you need the network environment using
TCP/IP protocol as well as to set the Internet service to [Enable] (Factory default
setting: Enable) at the printer.
Setting Printer Environment
1
Applicable OS
●
Microsoft® Windows® 95 Operating System (ServicePack 1 and later)
●
Microsoft® Windows® 98 Operating System
●
Microsoft® Windows® Me Operating System
●
Microsoft® Windows NT® Workstation 4.0 (ServicePack 4 and later)
●
Microsoft® Windows NT® Server 4.0 (ServicePack 4 and later)
●
Microsoft® Windows® 2000 Professional
●
Microsoft® Windows® 2000 Server
●
Microsoft® Windows® XP
●
Microsoft® Windows Server™ 2003
●
MacOS 8.0 and later
39
Page 40

Setting Printer Environment
1
1.4 Configuring from the Computer (CentreWare Internet Services)
Browsers
●
Netscape Communicator 4.78, Netscape 6.2 for Windows
●
Internet Explorer ver5.0, 5.5, and 6.0 for Windows
●
Netscape Communicator ver4.7 for Macintosh
●
Internet Explorer ver5.1.4 (MacOS 8.x/9.x) and 5.2 (MacOS X) for Macintosh
About Web browser settings for using CentreWare Internet
Services
When using CentreWare Internet Services, it is recommended to specify the
address of this printer directly without going through a proxy server.
●
When specifying the address of this printer through a proxy server, the printer may take a long time
to respond or the screen might not be displayed.
●
For settings, refer to the manual of your Web browser.
To make CentreWare Internet Services work correctly, you need to set the web
browser as follows.
■For Netscape Communicator
●
For Java permission, any setting other than the one to disable Java must be
selected.
●
For documents in cache and documents on the network, any setting to
compare them by session or at every session.
■For Internet Explorer
●
For Java permission, any setting other than the one to disable Java must be
selected.
●
For stored pages, any setting to check their version every time the page is
displayed or Internet Explorer is activated.
Settings on the printer
To use CentreWare Internet Services, the IP address of this printer must be set,
and [InternetServices] must be enabled (factory default setting: Enable). If
[InternetServices] is disabled, enable it on the control panel.
“Chapter5 Setting Control Panel” (P.121)
40
Page 41

1.4 Configuring from the Computer (CentreWare Internet Services)
Items that can be set with CentreWare Internet Services
Main functions that can be set in each tab sheet of CentreWare Internet Services
are as follows:
Tab name Main function
Jobs
Status
Properties
Maintenance
Support
*: Items which can be set only through CentreWare Internet Services.
●
Displays the job list and job history. You can also delete jobs.
●
Displays the paper type/remaining amount of the paper loaded in the
paper tray, the status of the output tray, and the remaining amount/
status of consumables such as the toner cartridge.
●
Machine Details: Displays the product name and serial number of this
printer. This tab enables you to set the addresses of the administrator*
and the printer* which are required for e-mail printing.
●
Configuration: Displays the memory and printer language.
●
Counters: Displays the total number of color/black and white pages
output.
●
Paper Tray Attributes: Enables you to set the priority for the paper trays.
●
Paper Settings: Enables you to set the priority for each paper type.
●
Power Saver Settings: Enables you to set the duration of time until the
printer switches to thesde sleep mode (power saver mode).
●
Gradation Adjustment: Enables you to set the grayscale offset.
●
Mail Notice Settings*: Enables you to set the destination/notice interval
when using Mail Notice services. This item is displaye4d when [Mail
Notice Services] in [Port Status] is set to [Enabled].
●
Internet Services Settings*: Enables you to set whether to use System
Administration Mode of CentreWare Internet Services, as well as the
administrator name/password if used. By factory default setting, the
administrator name is set as “admin”, and the password is set as
“x-admin”.
●
Port Status: Enables you to set whether to activate or deactivate each
port.
●
Port Settings: Enables you to configure settings regarding the interface.
●
Protocol Settings: Enables you to configure detailed settings for each
protocol.
●
Emulation Settings: Enables you to configure detailed settings for each
emulation.
●
Memory Settings: Enables you to set the capacity of memory used by
the interface and protocol.
●
Displays the error history report.
●
Displays support information. You can change the settings.
Setting Printer Environment
1
41
Page 42

Setting Printer Environment
1
1.4 Configuring from the Computer (CentreWare Internet Services)
1.4.2 Using CentreWare Internet Services
To use this services, start the web browser by the following procedure.
If CentreWare Internet Services screen does not appear even though you follow the procedure below,
refer to “About Web browser settings for using CentreWare Internet Services” (P.40).
Procedure
Start your computer, and then the web browser.
1
Enter the IP address or URL of this printer in the address column of the
2
web browser, and then press the <Enter> key.
●
Example 1: When the IP address is 192.168.1.100
Enter “http://192.168.1.100/”.
●
Example 2: When the URL is dpc2428.aaa.bbb.fujixerox.co.jp (Host name:
dpc2428, Domain name: aaa.bbb.fujixerox.co.jp).
Enter “http://dpc2428.aaa.bbb.fujixerox.co.jp/”.
When specifying a port number, add “:” after the address, followed by “80” (default port number).
You can change the port number in [HTTP] on the [Port Number] of the [HTTP] of the [Prot Settings]
on the [Properties] screen. If you change the port number, you have to add “:” after the address,
followed by the port number when connecting from the web browser.
42
Page 43

1.4 Configuring from the Computer (CentreWare Internet Services)
The CentreWare Internet Services screen will be displayed.
Setting Printer Environment
1
Using On-line Help
For details on items that can be set on each screen, click [Help] to see On-line
Help.
Click here.
43
Page 44

Checking the Settings
Setting Printer Environment
1.5
To check the configured printer environment, print out the [System Settings List].
Procedure
1
Ready to print
(1)Press the <Menu> button.
Menu
Print Language
(2)Press the < > or < > button several times.
Menu
Report/List
(3)Press the < > button.
Report/List
Job History
(4)Press the < > or < > button several times to select [System Settings].
Report/List
System Settings
(5)Press the < > button.
System Settings
(Printer is in the standby mode.)
Use Set to Print
(The menu screen is displayed.)
(The Report/List menu is displayed.)
44
(6)Press the <Eject/Set> button.
System Settings
Printing... Tray 1
(The [System Settings List] is printed.)
System Settings
Use Set to Print
(7)Press the <Menu> button.
Ready to print
The layout of the [System Settings List] may differ depending on the configuration of options and settings of this
printer.
(The printer can receive data any time.)
Page 45

Check the IP address
settings.
1.5 Checking the Settings
Setting Printer Environment
1
Check the network/port
settings.
45
Page 46

Installing/Uninstalling
Setting Printer Environment
1
1.6
To print from the computer, install the printer driver on the computer.
The printer driver is software that converts print data or instructions from the computer into
data that can be understood by this printer.
The installation method varies depending on the environment you use. Refer to the
Software Pack Operation Guide (manual.pdf) supplied with this printer, and install or
uninstall the printer driver.
Also, refer to the Software Pack Operation Guide (manual.pdf) when installing our software such as TCP/IP Direct
Print Utility and USB Print Utility.
the Printer Driver
46
Page 47

2Basic Operations
2.1 Main Components and Their Functions ........................................... 48
2.2 Switching On/Off the Power ............................................................. 52
2.3 Canceling Sleep Mode ..................................................................... 53
2.4 Canceling/Checking Print Jobs ........................................................ 54
2.5 Loading Configuration of Options and Paper Settings of Trays........ 57
Page 48

Main Components and
Basic Operations
2
2.1
Their Functions
2.1.1 Main Unit
Front view
The illustration on the left shows when a
Duplex Unit (option), a 3 Tray Module
(option) and a Face Up Tray (option) are
installed.
Num
ber
1 Output tray The tray where documents are ejected with the printed side facing
2 Document stopper Raise this stopper when printing.
3 Control panel The panel where buttons to operate the printer and the LCD to
4 Front cover The cover located on the front of the printer. Open this cover when
5 Media card port The port to insert a media card when printing media print jobs.
6 Trays 1, 2, 3, 4 The trays where paper is loaded. The illustration shows the main
7 Caster Used to move the printer. Lock the casters when the printer is set
8 Cover C (lower left cover) If a paper jam occurs when the printer has more than two paper trays
9 Power switch The switch to turn the printer on and off.
10 Tray 5 (bypass tray) The tray used when printing with special paper. Special paper such
11 Cover A (left cover) Open this cover when replacing consumables or clearing paper
12 Cover B (duplex unit cover) If a paper jam occurs when the optional duplex unit is installed, open
13 Duplex Unit Open this unit when replacing consumables or clearing paper jams.
14 Face Up Tray The tray where printouts are ejected with the printed side facing up.
Name Function
down.
display messages are located.
replacing consumables in the printer.
For using the media print feature, an optional Media Print kit is
required.
unit with a 3 Tray Module installed.
up.
installed, open this cover to clear the paper jam.
as transparencies are loaded into Tray 5 (bypass tray).
jams.
this cover to clear the paper jam.
The Face Up Tray is optional.
48
Page 49

19
18
Rear view Inside
24
15
20
2.1 Main Components and Their Functions
25
Basic Operations
21
22
16
17
Num
ber
15 USB connector The connector to connect a USB cable.
16 Network interface
connector
17 Parallel interface
connector
18 Cover for printer options Open this cover when installing options such as additional memory.
19 Exhaust outlet Releases heat from the inside of the printer. Be sure not to block
20 Power cord connector The connector to connect a power cord.
21 Toner cartridge The cartridge containing four colors of toner; black (K), cyan (C),
22 Waste toner bottle The bottle to collect used toner for recycling.
23 IDT unit The unit to integrate images individually created with each of four
Drum cartridge The cartridge containing four photo conductors; black (K), cyan (C),
24 BTR unit The unit to transfer images created on the drum surface to paper.
25 Fuser unit The unit to fix toner on paper. Do not touch this unit as it becomes
Name Function
The connector to connect a 10Base-T/100Base-TX Ethernet
interface cable.
The connector to connect a Centronics-compatible interface cable
for a connection with a computer.
the exhaust outlet with anything when setting up the printer.
magenta (M), and yellow (Y).
photo conductors into one so that the transfer unit can print the
four-color image on paper.
magenta (M), and yellow (Y).
very hot.
23
2
Never touch the area (the fuser unit and surroundings) labeled as “High
Temperature”. You can get burnt. If a sheet of paper is wrapped around the fuser unit
or the roller, do not try to remove it by yourself. You can get injured or burnt. Instead,
switch off the printer immediately, and contact our Customer Support Center or your
dealers.
49
Page 50

2.1 Main Components and Their Functions
2.1.2 Control Panel
This section describes the control panel.
Basic Operations
2
Media Print/Secure Print/Sample Print
Menu
Online
Ready
Num
ber
1 Indicator Check the position of the cover or tray corresponding to the message
2 <Ready> indicator When this indicator is on, the printer is ready to receive data from the
3 <Error> indicator Indicates the abnormal condition of the printer.
4 LCD Displays the setting menus, status of the printer, messages.
5 <Menu> button Enables the menu control. In this guide, this button is indicated as the
6 <Online> button
7 Up/down/left/right/
buttons
Name Function
Error
when an error occurs.
computer.
“2.1.3 LCD Indications” (P.51)
<Menu> button.
Pressing this button switches the printer off-line. When switched off-line,
the printer cannot receive data or perform any printing operation.
Pressing this button again cancels the off-line mode and switches the
printer on-line (the printer is enabled to receive data from the computer).
In this guide, this button is indicated as the <Online> button.
Scroll through the menus, setting items, and option values. In this
guide, these buttons are indicated as the < >< >< >< >
buttons. When using the media print feature, or the secure/sample print
feature, press the < > button.
Eject/Set
Cancel Job
Press Menu to exit
Power Saver
50
●
< >< > buttons can scroll faster when kept down. Also pressing the
< > and < > buttons at the same time displays a default value.
●
For using the media print feature, an optional Media Print kit is required.
●
For using the secure/sample print feature, a Hard Disk Drive (optional)
and available memory of 384 MB or more are required.
8 <Eject/Set> button
9 <Cancel Job> botton Cancels printing.
10 <Power Saver> indicator When the indicator is on, the printer is in the sleep mode.
11 <Power Saver> button When the printer is in the sleep mode, pressing this button cancels the
Sets the optional value for the menu. This button is also used to print
reports/lists. In this guide, this button is indicated as the <Eject/Set> button.
sleep mode and, when in the standby mode, switches to the sleep mode.
In this guide, this button is indicated as the <Power Saver> button.
Page 51

2.1.3 LCD Indications
2.1 Main Components and Their Functions
The LCD has two types of screens; the [Print Mode] screen to indicate the printer
status, and the [Menu Mode] screen to configure settings for the printer.
The messages displayed in the LCD differs depending on optional accessories installed and the
settings on this printer.
Print mode screen
When the printer is in the process of printing or in the standby mode, the LCD
displays the print mode screen. The print mode screen displays the following:
Printer status
Printing...
LPD Tray1
Por t Tray
Name Description
Printer status Indicates the status of the printer.
Example: [Please wait], [Printing...]
Port Indicates the port to be used for receiving data.
Example: [Parallel], [LPD], [NetWare]
Tray Indicates the tray to be used as a paper source.
Example: [Tray1], [Tray2]
Basic Operations
2
Menu mode screen
This is the screen to configure the settings on the printer.
To display the menu mode screen, press the <Menu> button. The following is the
first screen of the menu mode screen:
Menu
Print Language
For more information about the menu screen, refer to “Chapter 5, Setting Control Panel” (P. 121).
51
Page 52

Switching On/Off the
Basic Operations
2
2.2
When using this printer, switch on the power to the printer.
When you finish all print jobs for the day or will not use the printer for a long time, switch off
the power.
When the power to the printer is switched off, print data remaining in the printer and information spooled in the
memory will be erased.
Power
2.2.1 Switching On the Power
Procedure
Press the power switch on the front left
1
side of the printer to the < > position.
The power is switched on.
When the power is switched on, [Please
2
wait] will be displayed in the LCD on the
control panel. Confirm that the LCD
displays [Ready to print].
When [Please wait] is displayed, the printer is warming-up. You cannot print while the printer is in this state.
In about 30 seconds, [Ready to print] will be displayed instead, indicating the printer is ready to print.
If an error message is displayed, refer to “6.5 List of Messages” (P.186).
2.2.2 Switching Off the Power
When an optional Media Print kit is installed and the power indicator (green) of the kit is on, do not remove
the medium or switch off the power to the printer. It may damage the data in the medium.
Procedure
Check the LCD on the control panel
1
and confirm that a print job is not being
processed.
Press the power switch on the front right
2
side of the printer to the <{> position.
If an error message is displayed, refer to “6.5 List of
Messages” (P.186).
Ready to print
52
Page 53

Canceling Sleep Mode
2.3
To save power, the printer is switched to the sleep mode (power saver mode) if it does not
receive print data for a certain period of time.
By default, the printer is switched to the sleep mode if it does not receive print data for 15
minutes. You can set whether the sleep mode is enabled or not and, if enabled, the duration
of time until the printer is switched to the sleep mode between 15 to 240 minutes. The power
consumption in sleep mode is 4 W or less. The transition time from the sleep mode to the
standby mode is about 30 seconds.
If the printer in the sleep mode receives print data, it is automatically released from the sleep
mode and starts printing.
●
The sleep mode is indicated as [Power Saver mode] on the control panel of the printer.
●
For information about the procedure for changing the settings of the sleep mode, refer to “Example: Changing
the power saver mode settings” (P.125).
●
This printer has the low-power mode besides the sleep mode. The low-power mode automatically decreases the
temperature of the fuser unit to save power consumption if the printer does not receive print data for about 15
minutes. The status of the printer in the low-power mode and the procedure to cancel the mode are the same as
the sleep mode. You cannot change the settings of the low-power mode.
Basic Operations
2
Canceling Sleep Mode
The printer is automatically released from the sleep mode when it receives data
from the computer. You can also cancel the sleep mode manually by pressing
the <Power Saver> button on the control panel.
53
Page 54

Canceling/Checking Print
Basic Operations
2
2.4
To abort print jobs, cancel the print instruction for the print jobs from the computer first. If the
print instruction cannot be canceled from the computer, cancel it from the printer.
You can also check the status of print jobs from the computer.
Jobs
2.4.1 Canceling Printing From the Computer
This section describes the procedures to cancel print instructions from the
computer.
Canceling with Windows
The procedure to cancel print instructions from Windows® is as follows:
Procedure
Click [Start], then select [Printers and Faxes] (or [Settings]>[Printers]
1
depending on OS).
Double-click the icon corresponding to the printer.
2
In the window displayed, click any document name and then press
3
<Delete> key on the keyboard.
Canceling with CentreWare Internet Services
The print instruction can also be canceled from CentreWare Internet Services.
For information about CentreWare Internet Services, refer to the On-line Help for
CentreWare Internet Services.
54
Page 55

2.4 Canceling/Checking Print Jobs
2.4.2 Canceling Print Jobs From the Printer
Canceling print jobs in the process of printing
To cancel print jobs in the process of printing from the printer, press the <Cancel
Job> button on the control panel. However, printing of the current page will be
completed.
Canceling all print jobs received on the printer
The process to cancel all print jobs received on the printer is as follows. Through
this procedure, you can interrupt reception of print jobs and empty the buffer.
●
Buffer is the location to store data sent from the computer.
●
You can also empty the buffer by interrupting reception of any more print jobs and printing all the
print jobs spooled in the printer. For more information, refer to “6.8 Ejecting Remaining Data-When
Printing Stops Halfway Through-” (P.205).
Procedure
Printing...
Parallel Tray1
(1)Press the <Online> button.
Off-line
Data exists
(Off-line status)
Basic Operations
2
(2)Press the <Cancel Job> button.
All data
Canceling...
(Printing of all the received print jobs is aborted.)
Off-line
(3)Press the <Online> button.
Ready to print
55
Page 56

2.4 Canceling/Checking Print Jobs
2.4.3 Checking Print Jobs of Print Instruction
Basic Operations
2
Checking with Windows
The procedure to check print jobs of print instruction is as follows.
Procedure
Click [Start], then select [Printers and Faxes] (or [Settings]>[Printers]
1
depending on OS).
Double-click the icon corresponding to the printer.
2
Check [Status] in the displayed window.
3
Checking with CentreWare Internet Services
You can also use CentreWare Internet Services to check print jobs sent to the
printer.
For information about CentreWare Internet Services, refer to the On-line Help for
CentreWare Internet Services.
56
Page 57

Loading Configuration of
2.5
Options and Paper
Settings of Trays
When the printer is used as a network printer, the printer driver can automatically load the
configuration of the printer options, and the paper type and size that are specified for a tray
on the control panel. The [Printer Configuration] tab enables this feature.
When the printer is used as a local printer, the feature is not available. For a local printer, set the appropriate
settings of the printer driver manually.
For Windows NT 4.0, Windows 2000, Windows XP, Windows Server 2003, only users with Administrator’s rights
can change these settings. Without Administrator’s rights, you can only view the settings.
Procedure
Click [Start] on the taskbar, select [Printers and Faxes] (or [Settings] >
1
[Printers] depending on OS), and display the properties dialog box
corresponding to the printer.
Click the [Options] tab.
2
Basic Operations
2
Click the [Get Information from Printer].
3
3
4
The printer information is loaded into the printer driver.
Click [OK].
4
The contents of the [Options] tab is updated in accordance with the information obtained from the
printer.
●
The paper size and orientation in the [Paper Tray Attributes] list box are automatically updated
with the detected values.
●
For the paper type in the [Paper Tray Attributes] list box, the paper type set on the control panel is
loaded.
57
Page 58

Page 59

3Printing
3.1 Printing from the Computer.............................................................. 60
3.2 Printing Transparencies ................................................................... 62
3.3 Printing Non-Standard/Long Paper Sizes ........................................ 65
3.4 Changing Paper Types..................................................................... 74
3.5 Printing Confidential Documents - Secure Print - ............................ 76
3.6 Printing after Checking Output Result - Sample Print -.................... 81
3.7 Printing E-Mail - E-Mail Print -.......................................................... 86
3.8 Printing from Flash Memory - Media Print -.....................................91
3.9 Printing PDF Directly - ContentsBridge - ....................................... 105
Page 60

Printing from the Computer
3.1
3.1.1 Flow of Printing
This section describes the basic flow of printing from a Windows® environment.
(This may differ according to the computer or system structure used.)
Start up an application on the computer
For information about the process, refer to the manual of the application program.
Printing
3
If necessary
When you change the type of paper loaded, make either of the following settings
depending on the paper tray used.
●
For Trays 1 to 4
Change the paper type for the appropriate tray on the control panel.
“3.4 Changing Paper Types” (P.74)
●
For Tray 5 (bypass tray)
Change the paper type for Tray 5 (bypass tray) on the printer driver.
On-line Help for the printer driver
Specify printing from an
application
For information about the process, refer to the manual of the application.
If necessary
Check the paper
Cancel the print job
60
“2.4 Canceling/Checking Print Jobs” (P.54)
If necessary
“6.8 Ejecting Remaining Data-When Printing Stops Halfway Through-” (P.205)
End
Eject the print job
Page 61

3.1.2 Setting Printing Features
You can set most printing features in the tab sheets of the properties dialog box
of the printer driver which appears when printing from the application program, or
that of the printer icon which is installed on your computer. When setting the
features, switch the settings displayed on the properties dialog box by clicking
each tab.
For information about the printer driver options and how to set them, refer to On-line
Help for PCL printer driver.
“Refer to the On-line Manual/Help” (P.5)
Some features are not available when the settings for the optional accessories installed are not
configured on the [Options] tab. Unavailable features appear in gray and cannot be set.
Properties dialog box
3.1 Printing from the Computer
Printing
3
Example: For Windows XP
■When you click [Printers and Faxes] in
[Start] menu, and display the Properties
dialog box corresponding to the printer
●
Tabs which appear in the [Properties] dialog box vary depending on the item selected from the
[File] menu of the [Printers] window for Windows NT
[File] menu of the [Printers and Faxes] window for Windows
●
For Windows® 98/Windows® Me/Windows 2000/Windows XP/Windows Server 2003, the [Color
Management] tab also appears.
■When you display the printer Properties dialog
box from the application program
Tab
®
4.0 and Windows® 2000, and from the
®
XP/Windows Server 2003.
61
Page 62

Printing Transparencies
3.2
This section describes how to print transparencies.
For information about using Tray 5 (bypass tray), refer to “4.2 Loading Paper” (P.117).
3.2.1 Loading Transparencies
For transparencies, load them into Tray 5 (bypass tray) or Tray 1.
Printing
3
Transparencies with white borders or full color transparencies cannot be used.
Procedure
■For Tray 5 (bypass tray)
Load the transparencies with the side
1
to be printed facing down.
Fan transparencies in small amounts
2
before loading.
■For Tray 1
The procedure of loading transparencies into Tray 1 is the same as the
procedure for loading standard-size paper. Refer to “4.2.1 Loading paper into
Trays 1 to 4” (P.117).
Also, you must set the paper type for the tray to transparency.
To change the setting, refer to “3.4 Changing Paper Types” (P.74).
Side to be
printed
62
Page 63

3.2.2 Printing Transparencies
To configure the settings for printing transparencies, display the [Tray/Output]
tab and the [Paper] tab. Here, we use Wordpad of Windows XP as an example.
●
Depending on the application, the way to display the printer properties dialog box might differ.
Refer to the guide for the application used.
●
When continuously printing transparencies, the output transparencies may stick to each other. To
prevent this, remove about 20 sheets from the output tray, and then fan well to lower the
temperature.
Procedure
Select [Print] from the [File] menu.
1
3.2 Printing Transparencies
Printing
Check [Select Printer] and then click [Preferences].
2
Click the [Tray/Output] tab, and then select the tray from [Paper
3
Source].
For transparencies, you can also select [Tray 1] or [Tray 5 (bypass tray) ]. To select Tray 1, you must
set the paper type on the control panel in advance.
“3.4 Changing Paper Types” (P.74)
3
4
3
When selecting [Tray 5 (Bypass)] from [Paper Source], select the paper
4
type from [Paper Type (Bypass Tray)].
When selecting Tray 1, proceed to step 5.
63
Page 64

3.2 Printing Transparencies
5
Printing
Click the [Paper] tab, and then select any desired size from [Paper
Size].
5
6
3
From [Output Size], select the transparency size.
6
Click [Print] to start printing.
7
64
Page 65

Printing Non-Standard/
3.3
This section describes how to print non-standard paper sizes such as long paper.
The following paper sizes can be used in this printer.
For Tray 1 For 2 to 4
Feeding
direction
Long edge
(horizontal): 148 to 431.8 mm
* Except for the sizes with a short
edge less than 182 mm and a long
edge exceeding 297 mm.
●
Non-standard paper sizes of less than 135 mm on a side cannot be output to the Face Up Tray (optional).
●
Printing long paper sizes (length: 431.9 to 1200 mm) requires memory of 384 MB or more.
●
Long paper sizes cannot be printed even if [High Resolution] is selected in [Print Mode].
Long Paper Sizes
Short edge
(vertical):
182 to 297 mm
Short edge
Feeding
direction
Long edge
(horizontal): 182 to 431.8 mm
* Except for the sizes with a short
edge less than 182 mm and a long
edge exceeding 297 mm.
(vertical):
182 to 297 mm
Short edge
(vertical):
90 to 305 mm
For Tray 5 (bypass tray)
Long edge (horizontal):
98 to 431.8 mm
Long paper Size:
431.9 to 1200 mm
Feeding
direction
Printing
3
3.3.1 Loading Paper of Non-Standard Sizes
This section describes how to load paper of non-standard sizes.
For Tray 5 (bypass tray)
This procedure loads long-size paper into Tray 5 (bypass tray) as an example.
●
To load paper of non-standard sizes other than long-size paper, refer to “4.2.2 Loading Paper into
Tray 5 (bypass tray)” (P.119).
●
To use the Banner Tray (optional), refer to “When using the Banner Tray (optional)” (P.66).
Procedure
Load long-size paper in Tray 5 (bypass
1
tray) with the side to be printed facing
down and the end of the paper curled
as shown in the figure.
●
Curl the end of the long-size paper at the location as
far as possible from the paper supply section.
Otherwise, the curled end may be caught in the paper
supply section, resulting in creased or wrinkled
paper.
●
Load only one sheet of paper at a time.
Side to be
printed
65
Page 66

3.3 Printing Non-Standard/Long Paper Sizes
Adjust the paper size guide to fit the
2
long paper size.
To prevent paper jam, remove the output paper from the
tray one sheet by one.
When using the Banner Tray (optional)
Printing
3
Attaching the Banner Tray (optional) to Tray 5 (bypass tray) allows you to load
up to 10 sheets of paper with a maximum long side length of 1200 mm.
Procedure
Spread the paper guide of Tray 5
1
(Bypass tray) to both sides.
Insert the Banner Tray into Tray 5
2
(bypass tray).
Insert it firmly to the end.
66
Stand the paper holder against the
3
printer.
Page 67

Insert long-size paper with the side to
4
be printed facing down through the
bottom of the paper holder, and push it
right to the end while aligning it with the
paper guide.
Insert the end of the paper to the paper
5
holder with the edge curled as shown in
the diagram.
3.3 Printing Non-Standard/Long Paper Sizes
Printed side
Printing
Adjust the paper guide of Tray 5
6
(bypass tray) to fit the paper that is
loaded.
●
To prevent paper jams, remove the output paper from
the tray one sheet at a time.
●
After printing, be sure to remove the Banner Tray and
keep it in a safe place.
For Trays 1 to 4
The procedure for loading non-standard paper sizes into Trays 1 to 4 is the same
as the procedure for loading paper of standard sizes. Refer to “4.2.1 Loading
paper into Trays 1 to 4” (P.117).
3
67
Page 68

Printing
3
3.3 Printing Non-Standard/Long Paper Sizes
3.3.2 Setting Non-Standard Paper Sizes
Register non-standard sizes on the printer driver.
To load paper of non-standard sizes into Trays 1 to 4 for printing, you also need
to change the settings on the control panel.
Settings on the control panel
This procedure registers paper with a 200 mm short edge and a 300 mm long
edge as an example.
The printer may be damaged if the correct paper size is not set while printing.
●
When loading paper of non-standard sizes into Tray 5 (bypass tray), you do not need to set the
paper type on the control panel.
●
To change the paper type loaded in Trays 1 to 4, see “3.4.2 Printing after Changing the Paper
Type in Trays 1 to 4” (P.75).
Ready to print
(1)Press the <Menu> button.
Menu
Print Language
(2)Press the < > or < > button several times.
Menu
Admin Menu
(3)Press the < > button.
Admin Menu
Network/Port
(4)Press the < > or < > button several times to select [Printer Settings].
Admin Menu
Printer Settings
(5)Press the < > button.
Printer Settings
Substitute Tray
To the next page
(Printer is in the standby mode.)
(The menu screen is displayed.)
(The System Administrator Menu is displayed.)
(Printer setting screen is displayed.)
68
Page 69

Continued from the previous page
(6)Press the < > or < > button several times to select [Paper Size].
Printer Settings
Paper Size
(7)Press the < > button.
Paper Size
ray1 Auto *
T
(8)Press the < > button.
3.3 Printing Non-Standard/Long Paper Sizes
Paper Size
Tray 1 A
(9)Press the < > button.
Paper Size
ray 1 Non-Std
T
(10)Press the <Eject/Set> button.
Tray 1 Non-Std
X:182
Tray 1 Non-Std
X:200 Y:300
Tray 1 Non-Std
X:200 Y:300
uto *
Y:148 *
(11)Enter the value using < > < > buttons, and move the
cursor using < > < > buttons.
(12)Press the <Eject/Set> button.
*
(13)Press the <Menu> button (the machine will be rebooted
when you change [Auto] to [Non-Std] and vice versa in
step (10).)
Ready to print
Printing
3
(The printer returns to the standby mode.
It can now receive data at any time.)
69
Page 70

Printing
3
3.3 Printing Non-Standard/Long Paper Sizes
Configuring the printer driver settings
Customize non-standard paper sizes in the [Custom Paper Size] dialog box.
The printer may be damaged if the correct paper size is not set while printing.
The printer may be damaged if the correct paper size is not set while printing.
●
For Windows NT 4.0, Windows 2000, Windows XP,Windows Server 2003, only users with
Administrator’s rights can change these settings. Without Administrator’s rights, you can only view
the settings.
●
As a local printer uses the computer’s form database, configuring settings in the [Custom Paper
Size] dialog box on Windows NT 4.0/Windows 2000/Windows XP/Windows Server 2003 will affect
other printers used by the computer. For network printer, using the form database of the server
with print queue will also affect the shared printer on the same network of other computers. For
Windows 95, Windows 98, Windows Me, defining customized paper sizes for each printer icon will
not affect settings of other printers used by the computer. For network printers, defining customized
paper sizes for each printer icon will also not affect the shared printer on the same network of other
computers.
Procedure
Click [Start] on the taskbar, select [Printers and Faxes] (or [Settings] >
1
[Printers] depending on OS), and display the properties dialog box
corresponding to the printer.
Click the [Configuration] tab.
2
Click [Custom Paper Size].
3
3
The [Custom Paper Size] dialog box is displayed.
70
Page 71

3.3 Printing Non-Standard/Long Paper Sizes
Select the desired custom definition from the [Details] list box.
4
4
5
6
In the [Change Setting For] group, specify the short edge and long
5
edge.
You can either enter the value with the keyboard or use the [ ] and [ ] buttons on the screen.
The short edge cannot be longer than the long edge even if it is still within the allowable range.
Conversely, the long edge cannot be shorter than the short edge even if it is still within the allowable
range.
Printing
3
6
7
8
9
10
11
To name the paper size, check the [Name the Paper Size] check box,
and then enter the name at the [Name] text box.
You can enter up to 14 characters for the name.
If necessary, repeat steps 4 to 6 to set the paper size.
Click [OK].
Click [Apply] on the [Configuration] tab.
When you customize custom sizes for Trays 1 to 4 on the control panel,
click [Get Information from Printer] on the [Options] tab.
The printer setting information is loaded into the printer driver.
“2.5 Loading Configuration of Options and Paper Settings of Trays”(P.57)
Click [OK].
71
Page 72

3.3 Printing Non-Standard/Long Paper Sizes
3.3.3 Printing on Non-Standard Paper Sizes
The procedure to print on non-standard paper sizes is as follows.
Here, we use Wordpad in Windows XP as an example.
Depending on the application program, the way to display the printer properties dialog box might
differ. Refer to the guide of the application program used.
Procedure
Printing
Select [Print] from the [File] menu.
1
Check [Select Printer] and then click [Preferences].
2
3
Click the [Tray/Output] tab.
3
Select the appropriate tray from [Paper Source].
4
4
5
For Tray 5 (bypass tray), select the paper type from [Paper Type
5
(Bypass Tray)].
Click the [Paper] tab.
6
72
Page 73

Select the document size from [Paper Size].
7
3.3 Printing Non-Standard/Long Paper Sizes
7
8
Printing
From [Output Size], select the non-standard paper size which was
8
registered.
Click [Print] to start printing.
9
3
73
Page 74

Changing Paper Types
3.4
When changing the paper type in use, you also need to change the paper type setting.
The procedure for setting the paper type differs between Trays 1 to 4 and Tray 5 (bypass tray).
Here, we use Wordpad in Windows XP as an example.
3.4.1 Printing after Changing the Paper Type in
Tray 5 (bypass tray)
●
Printing
Depending on the application program, the way to display the printer properties dialog box might
differ. Refer to the guide for the application program used.
●
For information about using Tray 5 (bypass tray), refer to “4.2 Loading Paper” (P.117).
●
To print on special paper using Trays 1 to 4, “3.4.2 Printing after Changing the Paper Type in
Trays 1 to 4” (P.75).
●
For information about paper that can be used, refer to “4.1 About Paper” (P.112).
3
Procedure
Load special paper in Tray 5 (bypass tray).
1
Select [Print] from the [File] menu.
2
Check [Select Printer] and then click [Preferences].
3
Click the [Tray/Output] tab.
4
From [Paper Source], select [Tray 5 (Bypass)].
5
5
6
74
Select the paper type from [Paper Type (Bypass Tray)].
6
Click [Print] to start printing.
7
Page 75

3.4 Changing Paper Types
3.4.2 Printing after Changing the Paper Type in
Trays 1 to 4
When changing paper type in Trays 1 to 4, you need to change the paper type
for the tray on the control panel.
●
Depending on the application program, the way to display the printer properties dialog box might
differ. Refer to the guide for the application program used.
●
For information about using Trays 1 to 4, refer to “4.2 Loading Paper” (P.117).
●
To print on special paper using Tray 5 (bypass tray), refer to “3.4.1 Printing after Changing the
Paper Type in Tray 5 (bypass tray)” (P.74).
●
For information about paper that can be used, refer to “4.1 About Paper” (P.112).
Here, we explain printing on A4-size heavyweight paper which is loaded in Tray
1 as an example.
Printing
Procedure
Select [Print] from the [File] menu.
1
Check [Select Printer] and then click [Preferences].
2
Click the [Tray/Output] tab.
3
Select Tray 1 from [Paper Source].
4
3
4
Click [Print] to start printing.
5
75
Page 76

Printing Confidential
Printing
3
3.5
The Secure Print feature can be used when this printer has a Hard Disk Drive (optional) and
available memory of 384 MB or more.
The Hard Disk Drive (optional) has a risk of failure. It is recommended to make a backup of important documents
stored on the Hard Disk Drive.
About the Secure Print feature
You can add security (passwords) to your print data on the computer, send it to
the machine for temporary storing; and then print out the data using the control
panel on the machine. This feature is known as Secure Print. You can also store
print data in the printer without security. Saving the frequently-used document in
the printer allows you to print directly from the printer without having to send print
instructions from the computer.
Documents - Secure Print -
Send
data
Store in
printer
Use control panel
to output data
●
You may select whether to delete the secure print data after printing during the steps for executing
the secure print feature. Refer to “3.5.2 Printing Secure Print Jobs, Operation on the control
panel” (P.79).
●
To delete any secure print data which is no longer necessary, refer to “5.2.2 The System
Administrator Menu, Init/Del Data” (P.154).
●
Secure Print data cannot be output when [Secure Print] is set to [Disable] on the control panel.
“Secure Print” (P.148)
76
Page 77

3.5 Printing Confidential Documents - Secure Print -
3.5.1
To use the Secure Print feature, you need to set the user ID and password
beforehand.
Procedure
Click [Start] on the taskbar, select [Printers and Faxes] (or [Settings] >
1
[Printers] depending on OS), and display the properties dialog box
corresponding to the printer.
Click the [Configuration] tab.
2
Select [Secure Print/Sample Print User ID] from the [Print Features] list
3
box.
Registering User ID and Password
Printing
3
3
4
5
Enter the user name consisting of up to eight alphanumeric characters
4
in the [Secure Print/Sample Print User ID] text box.
When setting a password, enter the password in the [Password] text
5
box.
You can enter a password consisting of up to four digits.
Click [OK].
6
77
Page 78

3.5 Printing Confidential Documents - Secure Print -
3.5.2 Printing Secure Print Jobs
This section describes how to print Secure Print jobs.
First, set and send the Secure Print job at the computer. Then, execute the print
instruction at the printer to print out the data.
At the computer
Here, we use Wordpad of Windows XP as an example. The procedure is the
same when using other OSs.
Printing
Depending on the application program, the way to display the printer properties dialog box might
differ. Refer to the guide of the application program used.
Procedure
3
Select [Print] from the [File] menu.
1
Check [Select Printer] and then click [Preferences].
2
Click the [Tray/Output] tab.
3
Click [Secure Print/Sample Print].
4
4
78
The [Secure Print/Sample Print] dialog box is displayed.
Page 79

3.5 Printing Confidential Documents - Secure Print -
Select [Secure Print] from the [Job Type] drop-down list box.
5
5
6
From [Retrieve Document Name] in [Secure Print Settings], select
6
either [Enter Document Name] or [Auto Retrieve].
If you select [Enter Document Name], enter the name equivalent to 12 bytes (12 characters) in the
[Document Name] text box. If the document name exceeds 12 bytes, the remaining is truncated.
If you select [Auto Retrieve], you can enter up to 12 alphanumeric characters for document name.
Printing
3
Click [OK].
7
Click [Print] in the [General] tab to start printing.
8
Operation on the control panel
This section describes the procedure to output print data stored inside the
machine using the Secure Print feature.
You can also delete the secure print data stored in the printer without printing. For more information,
refer to “Stored Documents” (P.155).
Procedure
Ready to print
(1)Press the < > button.
Print Menu
Secure Print
(When an optional Media Print kit is installed, [Media Print] is displayed. If so,
press the < > or < > button several times to select [Secure Print].)
(2)Press the < > button.
Select User ID
1001.yamada
(3)Press the < > or < > button several times to select the user ID.
To the next page
79
Page 80

3.5 Printing Confidential Documents - Secure Print -
Continued from the previous page
Select User ID
1005.User1
(4)Press the < > button.
Enter Password
Press Set [
(5)Move the cursor with the < > button, and enter the password (within
]
four digits) with the < > or < > button.
Printing
3
Enter Password
Press Set [1111
(6)Press the <Eject/Set> button.
Select Document
All documents
(7)Press the < > or < > button several times to select the
Select Document
1.Report
(8)Press the < > button.
1.Report
Print & Delete
1.Report
Print
]
document.
(9)Press the < > button.
& Save
(10)Press the < > button.
1.Report
Use Set to Print
(11)Press the <Eject/Set> button.
1.Report
Printing..............Tray
(If you delete the secure print data after
printed, Press the < > button, and then the
<Eject/Set> button.)
(Printing starts.)
1
80
1.Report
Use Set to Print
(12)Press the <Menu> button.
Ready to print
●
The user ID, the user name which you specified in [Secure Print/Sample Print User Name] on the
[Configuration] tab of the PCL printer driver is displayed (up to eight characters).
●
For the password, enter [Password] for secure print which you specified on the [Configuration] tab of the
PCL printer driver. When you have not set [Password], you need not enter the password on the control panel.
●
As the document name, the name which you have specified in [Retrieve Document] on the [Secure Print/
Sample Print] dialog box of the PCL printer driver is displayed (up to 12 bytes).
(Printing ends.)
(The printer returns to the standby
mode.)
Page 81

Printing after Checking
3.6
Output Result
- Sample Print -
The Sample Print feature (checking the output and then printing the remaining copies) can
be used when this printer has a Hard Disk Drive (optional) and available memory of 384 MB
or more.
The Hard Disk Drive (optional) has a risk of failure. It is recommended to make a backup of important documents
stored on the Hard Disk Drive.
About the Sample Print feature
When printing multiple copies of a document, this feature saves the print data on
Hard Disk Drive and then prints out only one copy first. You can start printing the
remaining copies on the control panel after checking the print result. This feature
is known as Sample Print.
You can delete the sample print data that is no longer necessary, using the control panel. Refer to
“3.6.2 Printing Sample Print Jobs, Operations on the control panel” (P.84).
OK
Print only first set
Print out remaining sets
using the control panel
Printing
3
Send
data
Store in
printer
Stop printing using
the control panel
NG
81
Page 82

3.6 Printing after Checking Output Result - Sample Print -
Printing
3
3.6.1
To use the Sample Print feature, you need to set the user ID beforehand.
Procedure
Click [Start] on the taskbar, select [Printers and Faxes] (or [Settings] >
1
[Printers] depending on OS), and display the properties dialog box for
the printer.
Click the [Configuration] tab.
2
Select [Secure Print/Sample Print User ID] from the [Print Features] list
3
box.
Setting Sample Print Jobs
3
4
Enter the user name consisting of up to eight alphanumeric characters
4
in the [Secure Print/Sample Print User ID] text box.
Click [OK].
5
82
Page 83

3.6 Printing after Checking Output Result - Sample Print -
3.6.2 Printing Sample Print Jobs
This section describes how to print sample print jobs.
First, set and send the sample print job at the computer. Then, execute the print
instruction at the printer to print out the data.
At the computer
Here, we use Wordpad in Windows XP as an example.
Depending on the application program, the way to display the printer properties dialog box might
differ. Refer to the guide for the application program used.
Procedure
Select [Print] from the [File] menu.
1
Check [Select Printer] and then click [Preferences].
2
Click the [Paper] tab, and set [Copies] to at least two.
3
Click the [Tray/Output] tab.
4
Click [Secure Print/Sample Print].
5
Printing
3
The [Secure Print/Sample Print] dialog box is displayed.
5
83
Page 84

3.6 Printing after Checking Output Result - Sample Print -
Select [Sample Print] from the [Job Type] drop-down list box.
6
When you set the number of copies to be printed to at least two, [Sample Print] is displayed.
Printing
6
7
3
From [Retrieve Document Name] in [Sample Print Settings], select
7
either [Enter Document Name] or [Auto Retrieve].
If you select [Enter Document Name], enter the name equivalent to 12 bytes (12 characters) at the
[Document Name] text box. If the document name exceeds 12 bytes, the remaining is truncated.
If you select [Auto Retrieve], you can enter up to 12 alphanumeric characters for the document name.
Click [OK].
8
Click [Print] in the [General] tab to start printing.
9
Operations on the control panel
This section describes the procedure to output/delete print data stored inside the
printer using the Sample Print feature.
Procedure
Ready to print
(1)Press the < > button.
Print Menu
Secure Print
(When an optional Media Print kit is installed, [Media Print] is displayed.)
(2)Press the < > or < > button some times.
Print Menu
Sample Print
(3)Press the < > button.
To the next page
84
Page 85

Continued from the previous page
Select User ID
2002.yamada
(4)Press the < > or < > button several times to select the user ID.
Select User ID
2005.User1
(5)Press the < > button.
Select Document
All documents
(6)Press the < > or < > button several times to select the document
(to select all documents, press the < > button).
Select Document
1.Report1
3.6 Printing after Checking Output Result - Sample Print -
Printing
(7)Press the < > button.
1.Report1
Print
(To delete the sample print data saved, press the < > or < > button to
select [Delete], and then press the < > button and <Eject/Set> button.)
(8)Press the < > button.
1.Report1
Use Set to Print
(9)Press the <Eject/Set> button.
1.Report1
Printing..............Tray
Select Document
1.Report1
(10)Press the <Menu> button.
Ready to print
●
The user ID, the user name which you specified in [Secure Print/Sample Print User Name] on the
[Configuration] tab of the PCL printer driver is displayed (up to eight characters).
●
As the document name, the name which you have specified in [Retrieve Document] on the [Secure
Print/Sample Print] dialog box of the PCL printer driver is displayed (up to 12 bytes).
(Printing starts)
1
(Printing ends)
(The printer returns to the standby
mode.)
3
85
Page 86

Printing E-Mail
Printing
3
3.7
E-mail can be sent to this printer from the computer when this printer is connected to the
network and configured for TCP/IP communications and mail reception, it also has a Hard
Disk Drive (optional).
You can print the E-mail itself as well as the attached TIFF or PDF documents with this
printer.
This feature is known as e-mail Printing.
The Hard Disk Drive (optional) has a risk of failure. It is recommended to make a backup of important documents
stored on the Hard Disk Drive.
- E-Mail Print -
Automatically
printed
Mail
Automatically
printed
3.7.1 Setting up the Environment for E-mail
Printing
To use the e-mail Print feature, you need to configure the settings for the feature
also on each server (SMTP server or POP3 server) in your network environment.
Setting up the mail environment incorrectly may cause serious trouble on the network. The network
administrator should set up the mail environment.
Setting up the network environment
●
User account registration
Setting up the mail environment.
86
Using CentreWare Internet Services, set the Port Status, Machine e-mail
Address, TCP/IP environment, and mail server settings.
Page 87

3.7 Printing E-Mail - E-Mail Print -
Configure the setting of the following items in the properties dialog box to match
the mail environment.
Be sure to click [Apply New Settings] to reboot the printer after completing the settings.
Item Setting item Description Setting value
Machine Details Administrator
E-mail
Address
Machine
E-mail Address
Port Status Receive
E-mail
Protocol Settings
>TCP/IP
Host Name Sets the host name of this machine. Enter any
Get DNS
Address
DNS Address
1-3
DNS Name Sets the DNS domain name. Enter a domain
Sets the administrator’s e-mail address. Enter an e-mail
address within 128
characters that can
Sets the e-mail address of this machine.
This address is displayed at the [From] box
on e-mail.
Sets to enable receiving of e-mails. - {{
When set to ON, the machine automatically
obtains the DNS server address from the
DHCP server.
Sets the DNS server address. xxx.xxx.xxx.xxx { -
be registered as an
e-mail address.
characters within 32
bytes
●
Off: Manual*
●
On: DHCP
name within 255
bytes using
alphanumeric
characters, . and -.
*: default value
Settings to define
based on the
protocol
SMTP POP3
{{
{{
{ -
{ -
Printing
3
87
Page 88

Printing
3
3.7 Printing E-Mail - E-Mail Print -
Item Setting item Description Setting value
Protocol
Settings > E-Mail
Receiving
Protocol
Print Mail
Headers and
Contents
POP3 Server
Address
POP3 Server
Check Interval
POP User
Name
POP User
Password
SMTP
Sending
Authorization
SMTP Server
Address
Sets how to receive e-mail messages.
Sets to insert the header of the e-mail onto
the attached documents (TIFF, PDF) when
printing. Select [All Headers and Contents]
when you want to print all items of the email.
Sets the POP3 server address for
receiving the mail.
Sets the interval to check mail in the POP3
server.
Sets the user name for connecting to the
POP3 server. Only one user can be set.
Set the password for each POP user name
and enter the same password again at the
[Confirm Password] box.
Set [POP before SMTP] to On when
authorizing the user in the POP server
before sending the mail to the SMTP
server.
Sets the SMTP server address for
receiving e-mail.
●
SMTP*
●
POP3
●
None
●
Auto Mail
Contents
●
*Basic Headers
and Contents
●
All Headers and
Contents
Enter a server
address within 128
bytes using
alphanumeric
characters, . and -.
1~120 minutes
10 minutes*
Enter a mail
address within 64
characters that can
be registered as an
e-mail address.
Enter a password
within 64
characters.
Enter a server
address within 128
bytes using
alphanumeric
characters, . and -.
Settings to define
based on the
protocol
SMTP POP3
{{
{{
- {
- {
- {
- {
- { -
{ -
88
Page 89

3.7.2 Sending E-mail
Attached files that can be sent
Files that can be sent as attached documents are as follows.
●
PDF file
●
TIFF file
This section describes how to send e-mail to the printer from the computer using
Outlook Express as an example.
Procedure
Using your e-mail software, create a mail and then attach a TIFF or
1
PDF document, if available.
3.7 Printing E-Mail - E-Mail Print -
Printing
3
Only the text format file can be used for the text body of e-mail. In your e-mail application, set the
format of the text for the e-mail to text format.
●
If the file format of the attached document is not .tif or .pdf, the attached document may be printed
correctly.
●
Up to 31 documents can be attached.
Enter the e-mail address of this printer in the destination field.
2
Send the e-mail.
3
After the e-mail has been received at the printer, it will be automatically printed.
The e-mail itself and the attached document will be printed at the printer based on the following
settings:
●
E-mail itself: Default values of the PCL printer driver for this printer that is installed on the
computer.
●
Attached TIFF documents: Default values of the logical printer settings for [Memory Settings] of
[TIFF] in [Emulation Settings] of CentreWare Internet Services.
●
Attached PDF document: The values specified in [PDF] under the Mode Menu of the control panel.
89
Page 90

Printing
3
3.7 Printing E-Mail - E-Mail Print -
3.7.3 Precautions for Sending Documents by
E-mail
Precautions on security
The e-mail is sent through the Internet which is connected to computers all over
the world. So, you need to pay much attention to security to prevent the e-mail
from being intercepted or altered by a third party.
It is recommended to use other secure methods when sending confidential data.
Also, it is recommended not to carelessly disclose the e-mail address of the
printer to a third party to prevent unnecessary mail from being received.
Setting the domain from which e-mail can be received
You can set this printer so that it receives e-mail from a specified domain only.
For how to set the domain from which the mail can be received, refer to the On-line
Help of CentreWare Internet Services.
Precautions for using the e-mail feature with this printer
connected to the Internet
●
If you do not make a flat-rate contract with the Internet provider, the calling
rate is charged every time the printer periodically retrieves the data received.
●
Use this machine in the IP-masqueraded environment. If you use this machine
with global IP address assigned, the operation cannot be guaranteed.
●
When receiving e-mail through POP, be sure to apply for an e-mail account for
this printer. Using the e-mail account shared with other users may cause
troubles.
●
If the line speed of the Internet is low, it may take a long time to receive large
data such as the images.
●
Some providers permit receiving data through SMTP. If so, thorough
coordination with the provider is required.
●
When installing this machine in the environment that MTA is set in the private
segment, you need to configure settings for this printer based on the
operation mode.
90
Page 91

Printing from Flash
3.8
Attaching an optional Media Print Kit allows you to print the data loaded in Smart Media,
Compact Flash or other memory cards directly from the printer.
The printer should have 384 MB of memory or more to print correctly with the Media Print Kit.
Memory - Media Print -
3.8.1 About Automatic Determination of
Applicable Flash Memory and Data
When inserting the Flash Memory into this printer, the media print mode is
automatically determined depending on the type of the file in the Flash Memory.
When the file in the Flash Memory contains the image data taken with the digital
camera (Exif), the [Digital Camera] mode is selected. When the file in the Flash
Memory is a PDF file, the [Document Print] mode is selected.
Applicable Flash Memory and file
The Flash Memory applicable for this printer and the type of data which can be
printed with the Media Print feature are as follows.
Printing
3
The [Digital Camera] mode is applicable for a image data taken with a digital camera (Exif2.0,
Exif2.1, and Exif2.2). Other image data may not be printed.
Applicable File
(Extension)
Applicable Flash Memory
●
Smart Media
●
Compact Flash
●
SD card
●
MEMORY STICK
●
Supported PDF files are Adobe Acrobat 4 and Adobe Acrobat 5 (except for some functions added
in PDF 1.4).
●
SD card includes multimedia cards.
●
Magic Gate MEMORY STICK cannot be used.
Digital
Camera
●
jpg
●
tif
●
jpeg
●
jpe
Print
Document
Print
●
pdf
91
Page 92

3.8 Printing from Flash Memory - Media Print -
About priority of automatic file determination and scanning
When inserting a Flash Memory into the printer, the file type which is stored on
the Flash Memory is automatically determined. The priority of automatic file
determination is as follows.
Priority File Storage Status File (extension) Mode
1
2
3
Printing
Example of priority 1
In the [DCIM] folder jpg, tif Digital Camera Print
No folder pdf Document Print
In any folder (multiple
folders)
jpg, tif, jpeg, and jpe in all
folders
Example of priority 2 Example of priority 3
Digital camera print
3
Files stored on a Flash Memory other than the file with the highest priority are not
scanned.
92
●
When files are stored in the configuration other than the above, an error message is displayed.
●
The image file edited by a computer may not be printed correctly.
●
The PDF file cannot be printed if it is stored in a folder.
Page 93

3.8 Printing from Flash Memory - Media Print -
3.8.2 Precautions for Using the Media Print
Feature
Take note of the following points when using the Media Print feature.
●
Use the Flash Memory which is formatted by the digital camera when storing
the image file, and that formatted by the computer when storing the document
(PDF) file.
●
Do not store the image file and PDF file together in the same Flash Memory.
●
The number of files to be printed by the Media Print feature is as follows.
●
When memory for this printer is 128 MB: 300 files
●
When memory for this printer is 384 MB: 900 files or less
“Memory Settings” (P.152)
●
When printing the PDF file with the Media Print feature, print processing mode
is always [PDF Bridge] regardless of the settings specified on the control
panel.
Printing
3
“Process Mode” (P.128)
●
When the access indicator of the Media Print kit is on, do not press the Eject
button or switch off the power to the printer. It may damage the data in the
Flash Memory.
●
When the power indicator lamp of the Media Print kit is on, do not press the
<Eject> button or switch off the power to the printer. When removing the
Flash Memory or switching off the power to this printer, perform the
procedure for removing the Flash Memory through the control panel and
check that the power indicator lamp on the Media Print kit is off beforehand.
●
Be sure to remove the Flash Memory after printing is finished.
●
When inserting/removing the Flash Memory such as Smart Media or Compact
Flash to/from the adapter, be sure to remove the adapter from this printer.
●
Be sure to use the Flash Memory such as Smart Media or Compact Flash
after making a backup of the data inside it.
●
The data cannot be scanned by the Media Print kit of this printer depending on
the type of the adapter. For details, contact our Customer Support Center or
your dealers.
●
Printing may take a long time depending on the number or capacity of files
within the Flash Memory.
93
Page 94

3.8 Printing from Flash Memory - Media Print -
3.8.3 Inserting/Removing the Flash Memory
Inserting a Flash Memory
Procedure
Insert the Flash Memory into the
1
adapter specific for that Flash Memory
(PCMCIA card).
Printing
3
Insert the adapter into this printer with
2
the side having the insertion mark such
as facing right.
When the Flash Memory is inserted correctly, the tab at
the bottom of the Flash Memory port comes out as
shown in the figure.
When the Flash Memory is inserted correctly, the power
of the Media Print kit is automatically switched on.
Check that the power indicator (green) at the upper side
of the Media Print kit is on.
When scanning of the Flash Memory starts, the access
indicator (orange) is on.
Proceed to “3.8.4 Printing Data Taken with Digital
Camera” (P.96) or “3.8.5 Printing Stored Documents”
(P.102) to start printing.
94
Page 95

Removing a Flash Memory
Remove the Flash Memory after checking that the power indicator (green) on the
Media Print Kit is off.
When the access indicator on the Media Print Kit is on, do not press the <Eject> button or switch off
the power to the printer. It may damage the data in the Flash Memory.
Procedure
■Switch off the power of Media Print kit
This operation is not required when the power indicator (green) of the Media
Print Kit is off. Proceed to “Remove a Flash Memory” below.
Ready to print
3.8 Printing from Flash Memory - Media Print -
Printing
(1)Press the < > button.
Print Menu
Media Print
(2)Press the < > or < > button several times to select [Remove PC Card].
Print Menu
Remove PC Card
(3)Press the < > button.
Use Set to
eject PC Card
(4) Press the <Eject/Set> button.
Print Menu
Remove PC Card
(5)Press the < > button.
Ready to print
■Remove a Flash Memory
3
(Message changes from [Request being processed...] to
[Please remove PC Card] and the message shown at left
is displayed.)
Check that the power indicator on the Media Print Kit is off, and
see “Remove a Flash Memory” below.
Press the tab at the bottom of the Flash
1
Memory port and pull out the Flash
Memory.
95
Page 96

3.8 Printing from Flash Memory - Media Print -
3.8.4 Printing Data Taken with Digital Camera
Loading paper
To print in the Digital Camera Print mode, load A4-size paper in Tray 5 (bypass
tray) in orientation.
To change the paper type, refer to “3.4 Changing Paper Types” (P. 74) or “Paper Type” (P.150).
Printing
3
●
The data taken with a digital camera is printed on the single side of A4-size paper. This setting
cannot be changed.
●
Use the control panel to print data stored on a Flash Memory.
Items that can be specified in the Digital Camera Print mode
The following items can be specified when printing the data taken with the digital
camera.
Index Print
Assigns a number to each file stored on the Flash Memory and prints an list
of frames (thumbnails).
When you specify the frames or the range of frames to print, perform Index
Print beforehand to check the frame numbers.
All (L Size)
Prints all files stored on the Flash Memory.
All files may not be printed depending on the type of the file stored on the Flash Memory or directory
configuration.
96
Select Frame
Prints the specified frames (index) in the file stored on the Flash Memory. You can select multiple
frames.
Page 97

3.8 Printing from Flash Memory - Media Print -
When you specify the frames in the file stored on the Flash Memory to print, perform Index Print
beforehand to check the frame numbers.
Select Range
You can print a range or files stored on the Flash Memory, specifying the range as, for example, 002
through 004.
When you specify the range of frames in the file stored on the Flash Memory to print, perform Index
Print beforehand to check the frame numbers.
1 frame selected
2 frames selected
3 frames selected
You can write
comments in the
space on the right.
Printing
3
97
Page 98

Printing
3
3.8 Printing from Flash Memory - Media Print -
Procedure
■Perform Index Print
Ready to print
(1)Press the < > button.
Print Menu
Media Print
(2)Press the < > button.
Insert PC Card
and Press Set
(3)Press the <Eject/Set> button ([Accessing media Please wait...] is displayed).
Digital Camera
Index Print
(4)Press the < > button.
Load A4SEF in
Bypass-Press Set
(5) Press the <Eject/Set> button.
Index Print
Printing...
(Check that the Flash Memory is inserted.)
Digital Camera
Index Print
(6)To end Media Print, press the <Menu> button and proceed to step 7. To
continue Media Print, press the < > button or < > button several times
to select the desired item. Refer to step 4 and subsequent steps in “Print
all data or the specified range of data stored on the Flash Memory” (P.99).
Refer to step 4 and subsequent steps in “Print the specified frames
(index)” (P.100).
Ready to print
(7)Press the tab at the bottom of the Flash Memory port and pull out the
Flash Memory.
(Message changes from [Request being processed...] to
[Please remove PC Card] and the message shown at left
is displayed.)
(The printer returns to the standby mode.)
98
Page 99

3.8 Printing from Flash Memory - Media Print -
■Print all data or the specified range of data stored on the Flash Memory
This section describes how to print all files stored on the Flash Memory, and how
to print a specified range of files.
To print a specified range of files, see steps 1 to 6 in “Perform Index Print” (P.98) to perform Index
Print, and check the file numbers.
Ready to print
(1)Press the < > button.
Print Menu
Media Print
(2)Press the < > button.
Insert PC Card
and Press Set
(3)Press the <Eject/Set> button ([Accessing media Please wait...] is displayed).
Digital Camera
Index Print
(Check that the Flash Memory is inserted.)
Printing
3
(4)Press the < > or < > button several times to select Select Range.
Digital Camera
Select Range
(5)Press the < > button.
Select first
frame 001
(6)Press the < > or < > button several times to select the first frame (index)
number.
Select first
frame 002
(7)Press the < > button.
Select last
frame 002
(8)Press the < > or < > button several times to select the last frame
Select last
frame 004
(9)Press the < > button.
Load A4SEF in
Bypass-Press Set
To the next page
(When you select [All (L Size)] proceed to step (9).)
(The following describes the setting when printing files 002
through 004 as an example.)
(index) number.
(10)Press the <Eject/Set> button.
99
Page 100

Printing
3
3.8 Printing from Flash Memory - Media Print -
Continued from the previous page
Digital Camera
Printing...
Digital Camera
Select Range
(11)To end Media Print, press the <Menu> button.
Ready to print
(12) Press the tab at the bottom of the Flash Memory port and pull
■Print the specified frames (index)
This section describes how to print the specified frames in the file stored on the
Flash Memory.
(Message changes from [Request being
processed...] to [Please remove PC Card] and
the message shown left is displayed.)
(The printer returns to the standby mode.)
out the Flash Memory.
To print the specified frames in the file, see steps 1 to 6 in “Perform Index Print” (P.98) to perform
Index Print beforehand to check the frame numbers.
Ready to print
(1)Press the < > button.
Print Menu
Media Print
(2)Press the < > button.
Insert PC Card
and press Set
(3)
Press the <Eject/Set> button ([Accessing media Please wait...] is displayed).
Digital Camera
Index Print
(4)Press the < > or < > button several times to select [Select frame].
Digital Camera
Select frame
(5)Press the < > button.
Select number
Pess Set 001
(Check that the Flash Memory is inserted.)
100
(6)Press the < > or < > button several times to select the frame (index)
number.
To the next page
 Loading...