

Page 1

Software
Installation Guide
English
Spire CXP8000 Color Server
for Xerox DocuColor 8000
Digital Press
version 1.0
731-00293A-EN
www.creo.com
Page 2

Copyright
Copyright © 2004 Creo Inc. All rights reserved. The Creo wordmark, Creo logo, and the names of the Creo
products and services referred to in this document are trademarks of Creo Inc.
Adobe, Acrobat, Adobe Illustrator, Distiller, Photoshop, PostScript, and PageMaker are trademarks of Adobe
Systems Incorporated. Apple, iMac, Power Macintosh, AppleShare, AppleTalk, TrueType, ImageWriter, and
ImageWriter are registered trademarks of Apple Computer, Inc. Macintosh is a trademark of Apple Computer,
Inc., registered in the U.S.A. and other countries. PANTONE, Hexachrome, PANTONE Hexachrome, and
PANTONE MATCHING SYSTEM are the property of Pantone, Inc. PEARL, PEARLsetter, PEARLhdp,
PEARLdry, and PEARLgold are registered trademarks of Presstek, Inc. Xerox, DocuColor, and MajestiK Color
Series are trademarks of Xerox Corporation in the U.S. and/or other countries. Other brand or product names
are the trademarks or registered trademarks of their respective owners.
No copying, distribution, publication, modification, or incorporation of this document, in whole or part, is
permitted without the express written permission of Creo Inc. In the event of any permitted copying, distribution, publication, modification, or incorporation of this document, no changes in or deletion of author
attribution, trademark legend, or copyright notice shall be made. No part of this document may be
reproduced, stored in a retrieval system, published, used for commercial exploitation, or transmitted, in any
form by any means, electronic, mechanical, photocopying, recording, or otherwise, without the express written
permission of Creo Inc. This document is distributed in Adobe Systems Incorporated's PDF (Portable
Document Format). You may reproduce the document from the PDF file for internal use. Copies produced
from the PDF file must be reproduced in whole.
. . . . . . . . . . . . . . . . . . . . . . . . . . . . . . . . . . . . . . . . . . . . . . . . . . . . . . . . . . . . . . . . . . . . . . . . . . . . . . . . . . . . . . . . . . . . . . . . . . . .. . . . . . .
Creo Inc.
3700 Gilmore Way
Burnaby, B.C., Canada
V5G 4M1
Tel: +1.604.451.2700
Fax:+1.604.437.9891
http://www.creo.com
. . . . . . . . . . . . . . . . . . . . . . . . . . . . . . . . . . . . . . . . . . . . . . . . . . . . . . . . . . . . . . . . . . . . . . . . . . . . . . . . . . . . . . . . . . . . . . . . . . . .. . . . . . .
Internal 731-00293A-EN
Revised August 2004
Page 3

Contents
Reinstalling the Spire CXP8000 Color Server Software 1
Overview ........................................................................................................................................................ 1
Backing Up and Restoring the Software .......................................................................................................... 4
Backing Up the Creo System Partition ...................................................................................................... 4
Backing Up the Job List Database............................................................................................................. 5
Restoring the Creo System Partition ......................................................................................................... 7
Restoring the Job List Database................................................................................................................ 9
Reinstalling the System ................................................................................................................................. 11
Reinstalling the Software Complete Overwrite .............................................................................................. 12
Reinstalling the Operating System (Windows XP).................................................................................... 13
Reinstalling the Creo Application Software............................................................................................. 15
Disk Striping .......................................................................................................................................... 15
Using the Configuration Wizard............................................................................................................. 24
Installing and Configuring Novell Client for Spire ................................................................................... 37
Configuring the McAfee VirusScan ........................................................................................................ 37
Enabling Unix Connectivity..................................................................................................................... 37
Activating Windows XP.......................................................................................................................... 38
Backing Up the Creo System Partition .................................................................................................... 41
Performing a Test Print........................................................................................................................... 41
Reinstalling the Software Preservation Installation ......................................................................................... 42
Appendix A: Formatting the Image Disk 43
Appendix B: Formatting the External Device 45
Appendix C: Installing and Configuring Novell Client for Spire 47
Appendix D: Configuring the McAfee VirusScan 51
Appendix E: Performing a Test Print 57
Page 4

This page is intentionally left blank.
Page 5

Reinstalling the Spire CXP8000 Color Server Software
Overview
This chapter describes when and how to back up and restore the entire operating
system and application software (including the current job list database) on your
computer, as well as when and how to reinstall the software configuration on your
Spire CXP8000 color server.
Backing up the application software on a regular basis (weekly) is always
recommended so that a working copy can be used for recovery, if necessary.
Performing the restore procedure requires a previous backup. To ensure a
successful recovery:
• Save a copy of the backup, either on the network or on an external device to
prevent loss of data in case your system disk becomes corrupted.
• Perform the backup and recovery procedure at any time that you want to back
up and restore the Creo system partition and the job list database.
• Windows XP activation is not required.
To reinstall the software configuration:
• Perform either a complete overwrite of the entire system or only a system
partition.
• When you reinstall the software configuration using either of the two methods,
your current job list database will be deleted.
• Both of these methods require:
Reinstalling the operating system (Windows XP)
Reinstalling the Creo application software
Using the Configuration Wizard to configure the system
Activating Windows XP
Backing up the Creo system partition at the end of the reinstallation process
Page 6

2 Spire CXP8000 Color Server 1.0 Software Installation Guide
The following scenarios will assist you in determining when to use the backup and
restore procedures and when to use the reinstallation procedures.
Procedure Use Windows XP
Activation
Backup and
restore
Always recommended except for when the
system must be reinstalled, see
Not required
Reinstallation in the following row.
Reinstallation System Partition Overwrite
• Windows operating system is corrupt
• Unrecoverable system crash
Required
Required
Complete Overwrite
• System disk replacement
• Upgrading the system disk
Notes:
There are two reinstallation methods:
System Partition Overwrite, which overwrites partition C, should be performed when the
Windows XP Professional operating system is corrupt and needs to be reinstalled.
Complete Overwrite, which overwrites partitions C and D, should be performed only when
installing a new operating system, when the system exhibits unpredictable behavior (for
example, error messages suddenly appearing or occasional GUI freezes), when physically
replacing the system disk or when upgrading the system disk.
Partition C contains the operating system files. Partition D contains the Creo application files
(job list database/user files).
Required
Required
Preloaded Software
The Spire CXP8000 color server is delivered to the customer site preloaded with the
following software and configuration:
• Windows XP Professional
• MS Service Pack 1a
• Internet Explorer 6.0
• Spire CXP8000 Color Server for Xerox DocuColor 8000 Digital Color Press
• Adobe Acrobat 6.0
• Network Parameters (hostname, IP address, network services and protocols)
• System backup
Page 7

Reinstalling the Spire CXP8000 Color Server Software 3
Disk Configuration
The following table outlines the Spire CXP8000 color server disk configuration:
Disk 0
Disk 1
Disk 2
Disk 3
C:
Windows XP Professional software
Creo application
Image storage
Image storage
Image storage
D:
Spool files
Shared files
Output directory files
APR high-resolution files
Backup folder
Page 8
4 Spire CXP8000 Color Server 1.0 Software Installation Guide
Backing Up and Restoring the Software
We recommend that you restore the software on your Spire color server after an
unrecoverable system crash or when you want to replace the system hard disk.
When you back up the Creo system partition (partition C), all the operating system
files are copied to partition D (see Backing Up the Creo System Partition).
The backup and restore procedures do not require Windows XP activation, and are
not related to the system reinstallation. The procedures can be performed at any
time that you want to backup and restore your Creo system partition, and backup
and restore your job list database.
Attention: Before performing the backup and restore procedures, make sure
that your computer’s configuration is the one that you want to use when
restoring the system.
To back up and restore the software, you first need to back up the Creo system
partition. To restore the software, you need to perform the following tasks:
1. Back up the job list database.
2. Restore the Creo system partition.
3. Restore the job list database.
The procedures for backing up and restoring the software are described in detail in
the following sections.
Notes:
Not
• To enable the restoration of customer settings and job data, we
recommend that you back up the Spire CXP8000 color server
configuration and other information before loading the operating
system, see Backing Up the Creo System Partition and Backing Up the
Job List Database on page 5.
• Once you have backed up all the required information to your local
disk, move this information to an external device or to a network
(you cannot back up directly to an external device or network)
Backing Up the Creo System Partition
You can back up the Creo system partition at any time.
When you backup your Creo system partition, Norton Ghost copies the files on
partition C to an image file on partition D.
.
Note: If you are already logged on your system and the Spire CXP8000 color
server workspace is open, exit the workspace, insert CD #1A, and proceed to
step 4.
1. Tur n on yo u r comp ut er.
2. Place CD #1A (Windows XP Fast Install) in the DVD-ROM drive.
3. Restart the computer.
Page 9

Reinstalling the Spire CXP8000 Color Server Software 5
4. If you are already logged on to your system, on the Windows desktop, follow
the path:
5. Wait until the PC DOS Start Up menu appears.
Start > Shut Down > Restart > OK.
The following choices are available:
• Creo Software Complete Overwrite Installation
• Creo Software Preservation Installation (System Partition Overwrite)
• Backup Creo System Partition
• Restore Creo System Partition
• DOS prompt
6. Use the keyboard arrows to select Backup Creo System Partition, and press
ENTER.
The Norton Ghost window appears. If a Norton License Agreement window
appears, click
file on partition D. The process takes about three minutes to complete.
7. A message appears instructing you to remove the CD from the DVD-ROM
drive and restart the computer.
Remove the CD and press
Yo u ha v e c o mp le te d Backing Up the Creo System Partition.
OK to continue. The files on partition C are copied to an image
CTRL+ALT+DELETE to restart the computer.
Tip: If you want to copy the files, to an external device, the files are located
on D:\Backup\SYSPART.<File Name>.
Backing Up the Job List Database
If you back up the Creo software and configuration (Backing Up the Creo System
Partition on page 4), your job list database is also backed up. If , at some later date,
you restore the configuration, the original job list database will be restored, thus
replacing your current job list database.
Note: If you are already logged on your system and the Spire CXP8000 color
server workspace is open, exit the workspace and proceed to step 3.
1. Tur n on yo u r comp ut er.
2. Exit the Spire application.
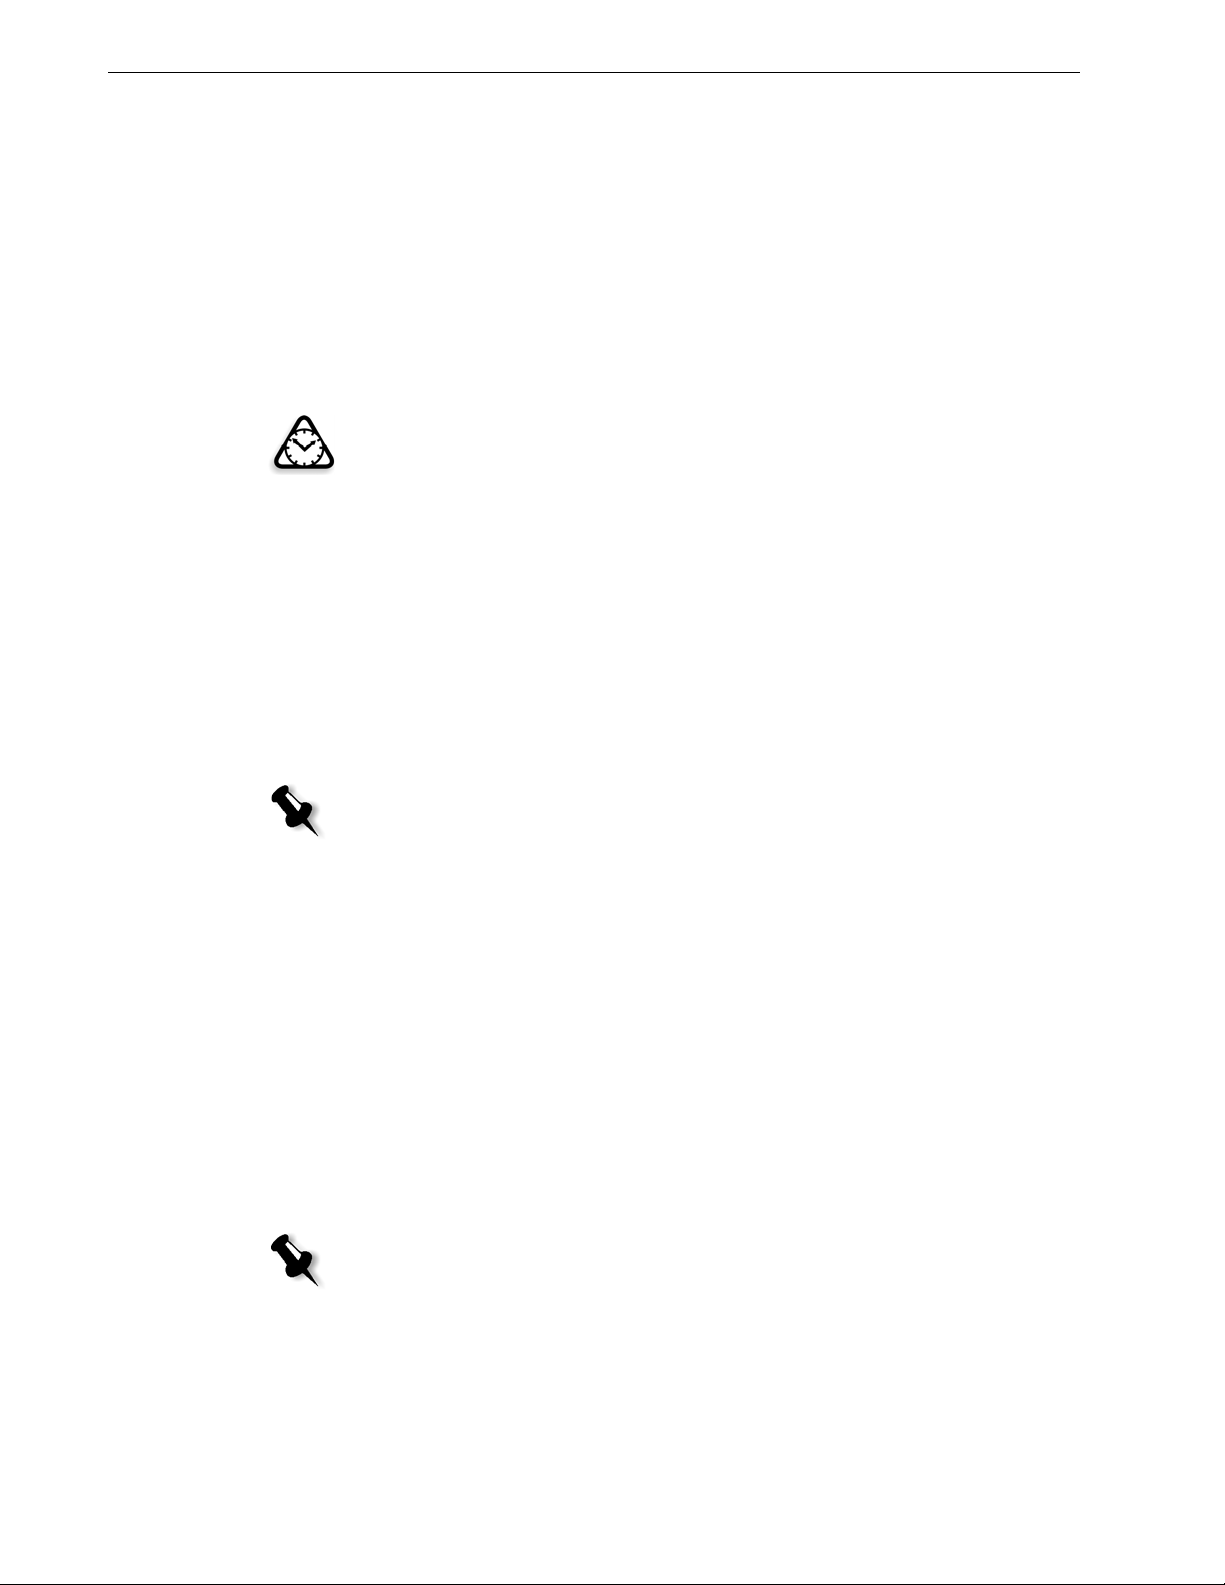
3. On the Windows desktop, double-click My Computer, and follow the path,
D: > Backup > Scripts.
Page 10
6 Spire CXP8000 Color Server 1.0 Software Installation Guide
4. In the Scripts window, double-click Backup_Joblist.bat.
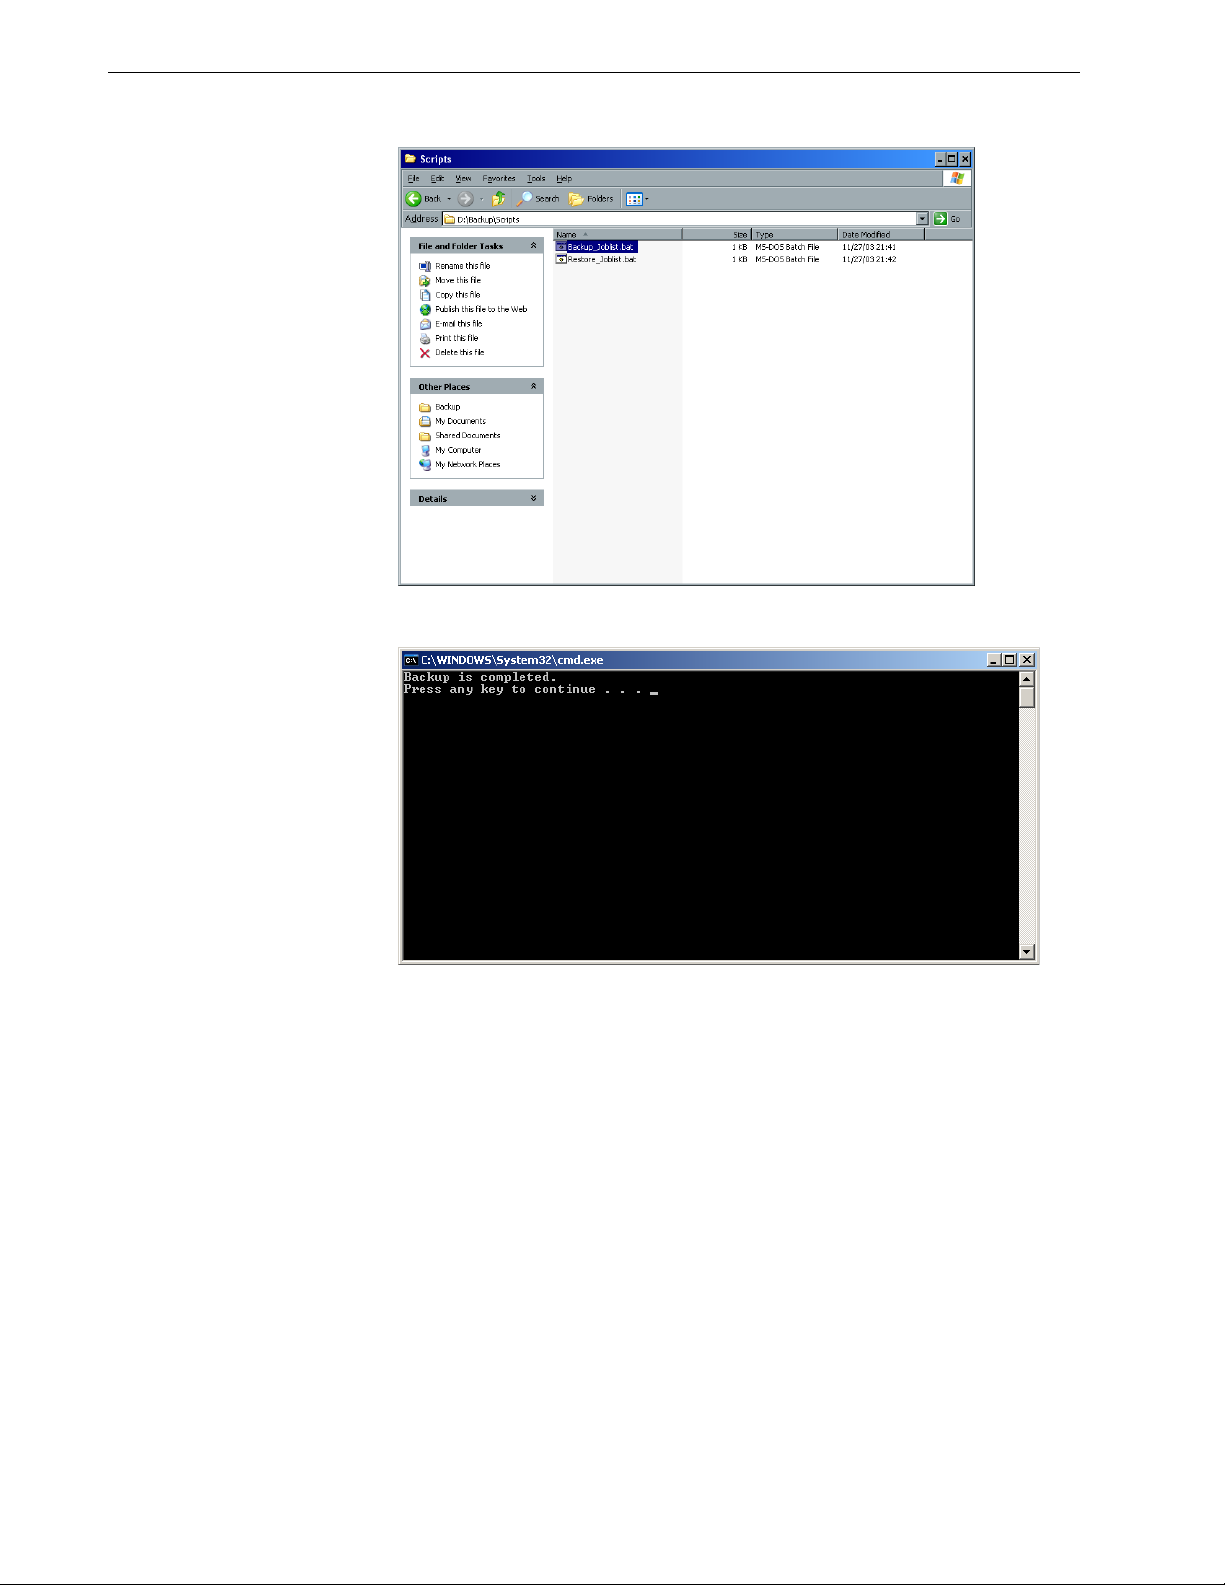
5. When the backup is complete, the following message appears.
Page 11
Reinstalling the Spire CXP8000 Color Server Software 7
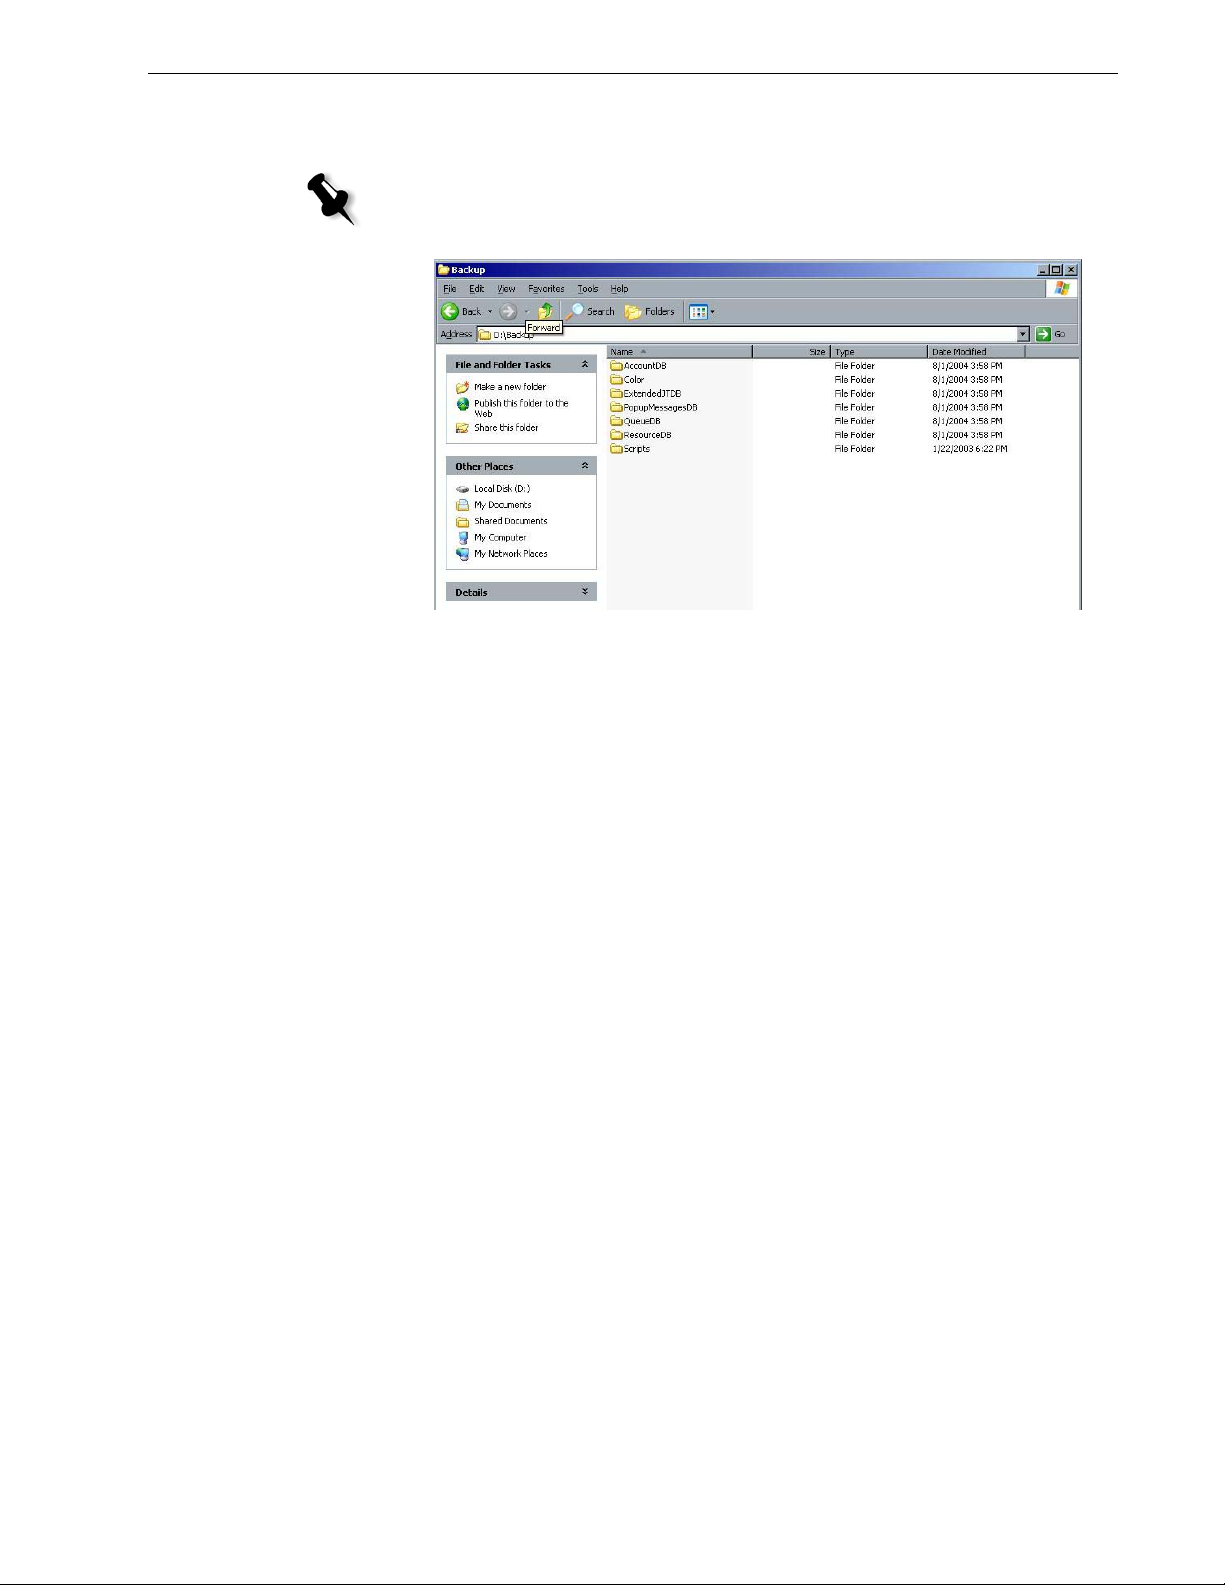
6. Make sure that the folders created in D:\Backup have the latest modification
date.
Note: The actual backup is a group of folders that are created the first time
you back up the job list database.
7. Press any key to continue.
Yo u ha v e c o mp le te d Backing Up the Job List Database.
Restoring the Creo System Partition
Performing the restore procedure requires a previous backup. Before restoring the
Creo system partition, we recommend that you back up any current important
jobs, using the procedure described in Backing Up the Job List Database on page 5.
If you want to restore the information from the image file on partition D back to
partition C, the current job list will be replaced with the old job list that was saved
while backing up partition C.
1. If required, return the ghost file, or files (SYSPART.<File Name>) you moved
to an external device, to D:\Backup
2. If your Spire color server is on, and the Spire workspace is open:
a. Exit the workspace.
b. Place CD #1A (Windows XP Fast Install) into the DVD-ROM drive.
c. On the Windows desktop, follow the path,
Start > Shut Down > Restart > OK.
Wait until the PC DOS 7.1 Startup menu appears.
If your Spire color server is off:
a. Press the Power On/Off button on the front panel.
b. As soon as power is applied, place CD #1A (Windows XP Fast Install) into
the DVD-ROM drive.
Wait until the PC DOS 7.1 Startup menu appears.
.
Page 12

8 Spire CXP8000 Color Server 1.0 Software Installation Guide
3. When the PC DOS Start Up menu appears, the following options are available:
• Creo Software Complete Overwrite Installation
• Creo Software Preservation Installation (System Partition Overwrite)
• Backup Creo System Partition
• Restore Creo System Partition
• DOS prompt
4. Use the keyboard arrows to select Restore Creo System Partition.
5. Press ENTER.
The system takes about one minute to respond, and then the following
message appears.
The restore process is irreversible and overwrites all
information on the system partition.
To save job and other resource information use the
Backup_Joblist.bat script.
Continue and restore system partition??
Yes/No
6.
If you press N (No), the following message appears.
Please remove the CD-ROM and floppy from the drive and press
CTRL+ALT+DELETE to reboot the computer.
a.
Backup the job list database, see Backing Up the Job List Database on
page 5.
b. Return to step 2 and repeat the procedure.
7. If you press Y (Yes), the Norton Ghost window appears, and the files on
partition D are restored to partition C.
8. When the process is complete, the following message appears.
Please remove the CD-ROM and floppy from the drive and press
CTRL+ALT+DELETE to reboot the computer.
9. Remove the CD from the DVD-ROM drive, and press CTRL+ALT+DELETE to
restart.
Yo u ha v e c o mp le te d Restoring the Creo System Partition.
Note: Before performing the restore procedure—if the job list database was not
backed up or cannot be restored, you must format the image disks. See Appendix
A, Formatting the Image Disk on page 43.
Page 13
Reinstalling the Spire CXP8000 Color Server Software 9
Restoring the Job List Database
When you restore the Creo software and configuration that you previously backed
up, you are replacing the current job list database with your original job list
database.
Note: If you are already logged on your system and the Spire CXP8000 color
server workspace is open, exit the workspace and proceed to step 3.
1. Tur n on yo u r comp ut er.
2. Exit the Spire application.
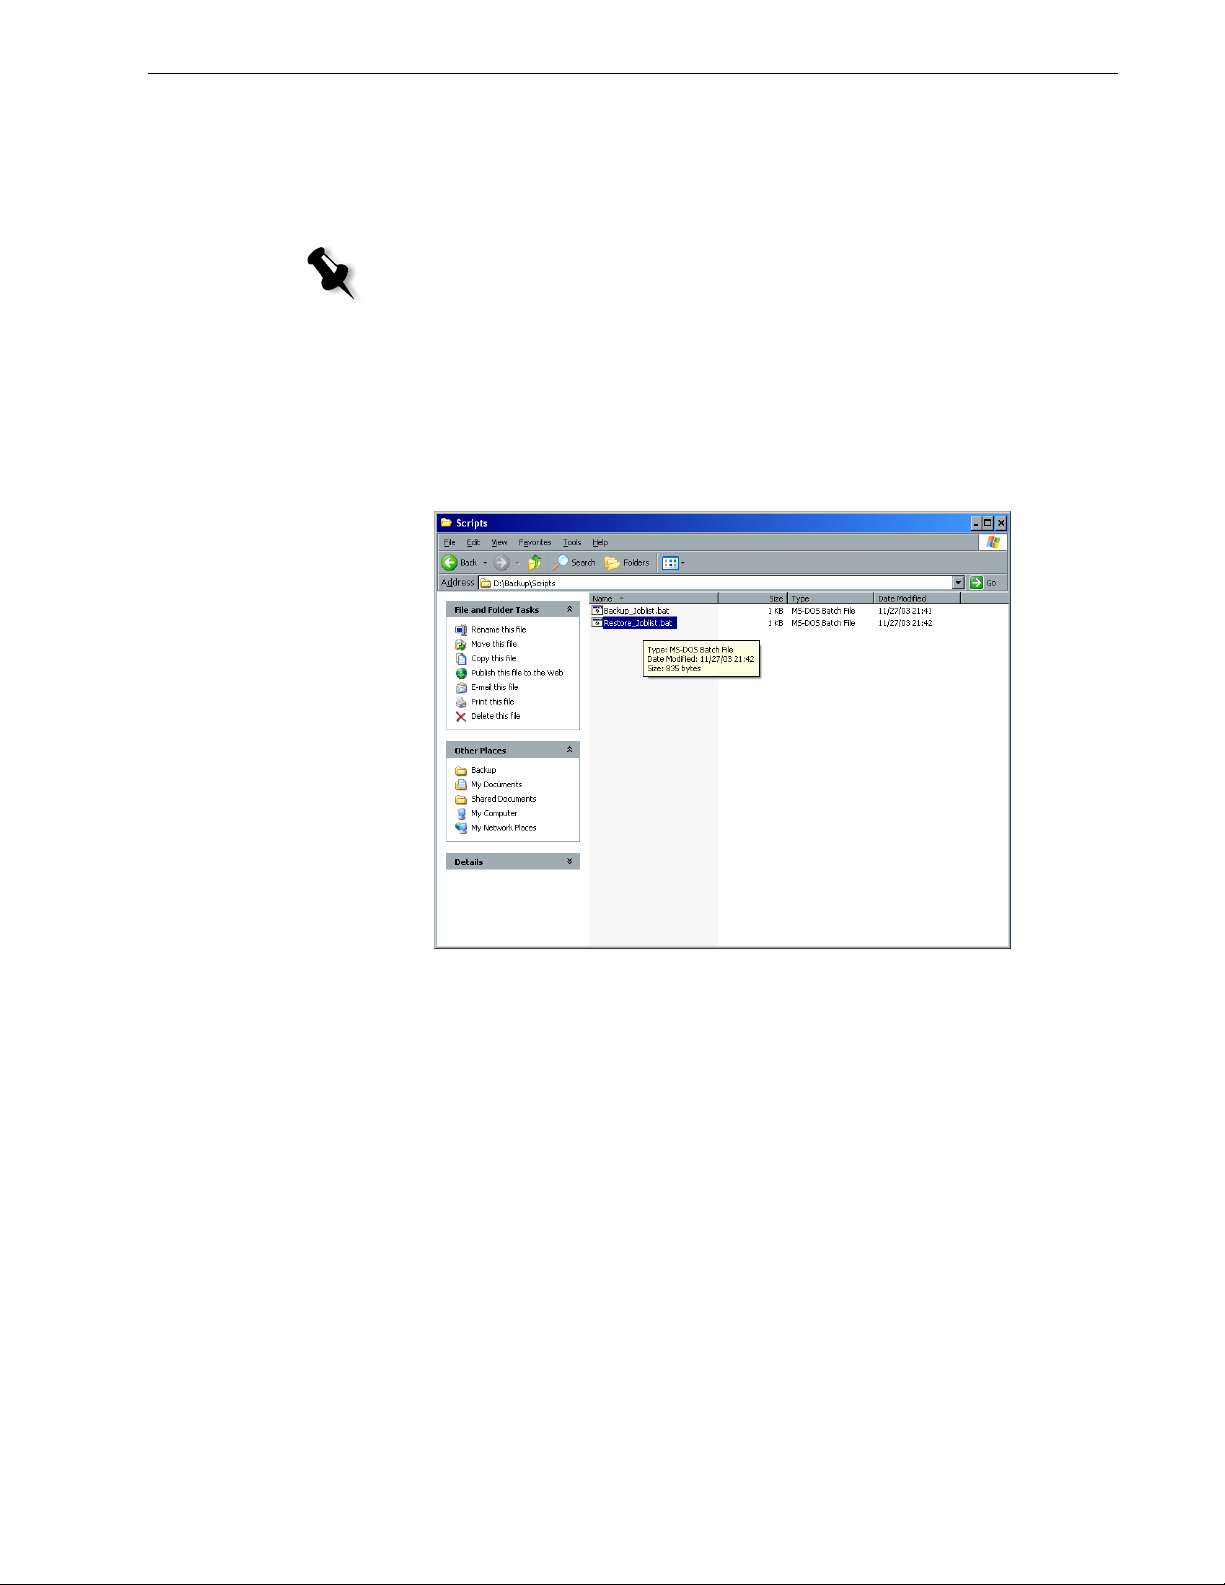
3. On the Windows desktop, double-click My Computer, and follow the path,
D: > Backup > Scripts.
4. In the Scripts window, double-click Restore_Joblist.bat.
Page 14
10 Spire CXP8000 Color Server 1.0 Software Installation Guide
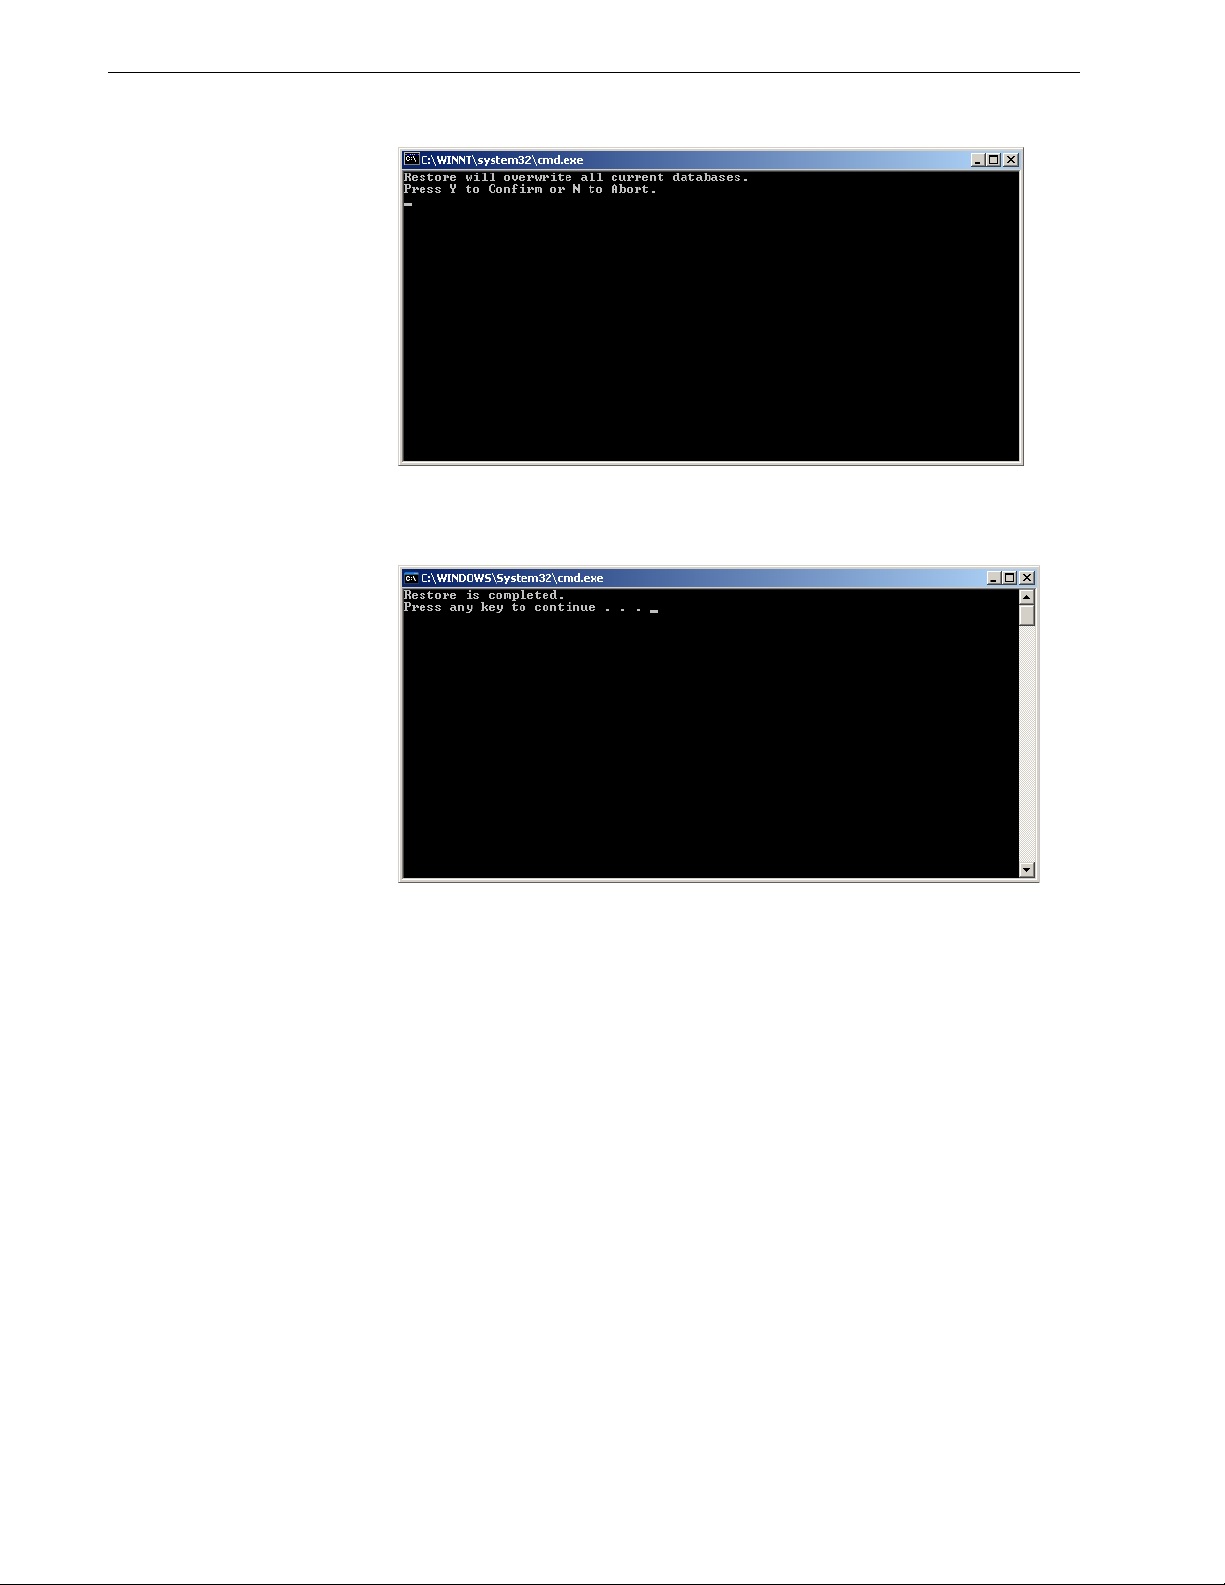
The following message appears.
5. Press Y to continue.
The following window appears.
6. Press any key to continue.
Yo u ha v e c o mp le te d Restoring the Job List Database.
Page 15

Reinstalling the Spire CXP8000 Color Server Software 11
Reinstalling the System
There are two methods by which you can reinstall the system:
• Creo Software Complete Overwrite Installation:
This procedure replaces the entire system disk, operating system partition,
Creo application, and user partition (partitions C and D).
A complete overwrite should be performed under the following condition:
when physically replacing the system hard disk
Note: This option deletes all the files stored on disks C and D. Make sure to
back up any important customer files before selecting this option.
Back up the files to the local disk, and then back up the files to an
external device or to a network (you cannot back up directly to an
external device or network).
Determine whether VIPP or any other Xerox/Creo supported
application is loaded on the Spire CXP8000 color server. Such
applications have to be reloaded after the Complete Overwrite
installation is completed.
• Creo Software Preservation Installation (System Partition Overwrite): This
procedure replaces only the operating system partition (C). You should
perform System Partition Overwrite under the following conditions:
when the Windows XP Professional operating system is corrupt and needs
to be reinstalled
when you are upgrading the operating system
after an unrecoverable system crash
Note: After reinstalling the Creo system partition (partition C), you can
restore files that were backed up on partition D, such as the system
configuration and activation string.
However, it may become necessary to reinstall the system at the customer’s site, for
example, after an unrecoverable system crash.
The reinstallation is mostly unattended. User interaction is needed only to insert
CD #1B into the DVD-ROM drive, and for entering the OS license number and the
computer hostname, for restarting the computer when requested, for inserting the
final application CD, and for the Configuration Wizard.
The reinstallation of the system requires three CDs:
Two CDs #1:
• CD #1A and #1B (Windows XP Professional Fast Install)
One CD #2:
• CD #2 (Spire CXP8000 color server version 1.0 for the DocuColor 8000
Application Software)
Page 16

12 Spire CXP8000 Color Server 1.0 Software Installation Guide
Reinstalling the Software Complete Overwrite
When possible, we recommend that you back up and restore the software. That
is, in cases other than system crash or system disk replacement. For more
information, see Backing Up and Restoring the Software on page 4.
We suggest that you study the following flowchart, which will assist you to establish
which procedure to perform and in what sequence.
Reinstall the operating
system (Windows XP)
Reinstall the Creo application
Stripe the Disks
Use the Configuration Wizard
DFE Configuration Recovery
(if backup is available)
Insta ll N o vell Clie nt for S p ire
Install virus protection
(highly recommended)
Ena b le U NIX c o n n ectivity
Activa te Wind o ws XP
Back up the Creo system
Perform a test print
First Time Configuration
(if recovery fails or no backup
is available)
(if required)
software
(if required)
partition
Page 17

Reinstalling the Spire CXP8000 Color Server Software 13
Reinstalling the Operating System (Windows XP)
Before reinstalling, ensure that:
• all external SCSI devices are disconnected from the Spire CXP8000 color
server.
• the following information is available:
CD software pack
Computer name (for example, Falcon_WinXP)
TCP/IP information
Windows XP Professional OEM product ID number
Gateway, WINS address, and DNS information
Required AppleTalk zone
IPX information
For more details, refer to the Xerox Installation and Planning Guide.
Reinstalling the Windows XP Professional Operating System
1. If your Spire color server is on, and the Spire color server workspace is open:
a. Exit the workspace.
b. Place CD #1A (Windows XP Fast Install) into the DVD-ROM drive.
c. On the Windows desktop, follow the path,
Start > Shut Down > Restart > OK.
Wait until the PC DOS 7.1 Startup menu appears.
If your Spire color server is off:
a. Press the Power On/Off button on the front panel.
b. As soon as power is applied, place CD #1A (Windows XP Fast Install) into
the DVD-ROM drive.
Wait until the PC DOS 7.1 Startup menu appears.
2. When the PC DOS Start Up menu appears, the following options are available:
• Creo Software Complete Overwrite Installation
• Creo Software Preservation Installation (System Partition Overwrite)
• Backup Creo System Partition
• Restore Creo System Partition
• DOS prompt
Page 18
14 Spire CXP8000 Color Server 1.0 Software Installation Guide
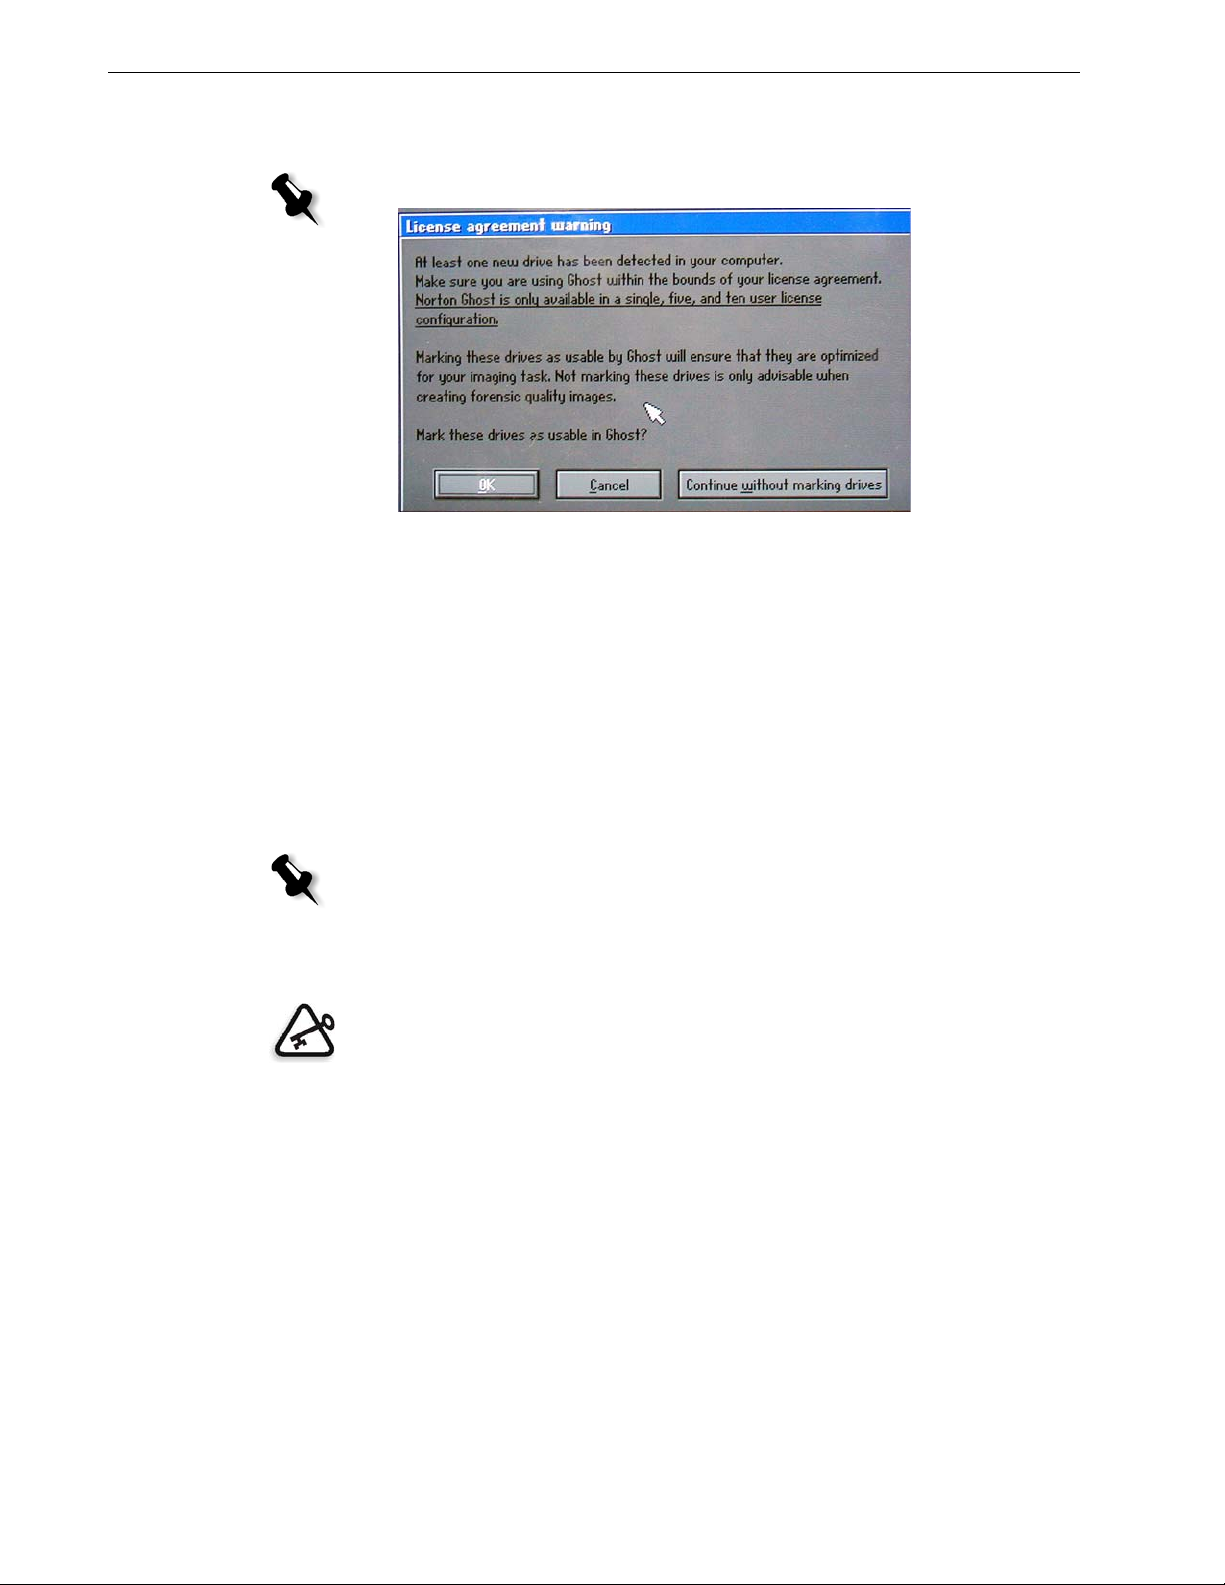
3. Use the keyboard arrows to select Creo Software Complete Overwrite
Installation
Note: If the Norton Ghost® License Agreement Warning appears, click OK.
(all data on C and D will be overwritten) and press ENTER.
The system starts copying the files. After about five minutes, the following
message appears.
SPAN Volume [1] Done
Norton Ghost needs to open the next part of the image. Please
either insert the next disk and choose OK.
4.
Remove the CD #1A from the DVD-ROM, insert CD # 1B, and click OK.
The system copies files and automatically restarts. This process takes about
eight minutes.
5. When the Windows XP Professional Setup screen appears type the 25-digit
Product Key, and click
Note: The product key is printed on a label that is stuck to the side of the
Spire CXP8000 color server.
6. In the Computer Name and Administrator Password screen, type the name for
Next.
the Spire CXP8000 color server, for example Falcon_WinXP.
Important:
In the administrator name and password area, use the default settings.
If required, you can change the administrator name and password, but only
at the end of the installation process (see Changing the Administrator Name
and User Password (Optional) on page 34).
7. Click Next.
The installation process continues.
8. At the end of the installation, the system restarts. You are asked to insert the
application software CD.
Proceed to Reinstalling the Creo Application Software.
Page 19
Reinstalling the Spire CXP8000 Color Server Software 15
Reinstalling the Creo Application Software
1. Insert CD #2 into the DVD-ROM drive.
2. In the SPIRE application splash screen that appears, click Start.
The Adobe Acrobat setup begins.
3. After the Adobe Acrobat setup is complete, the Spire CXP8000 color server
installation starts.
4. When the License Agreement window opens, click Yes to continue the Spire
CXP8000 color server installation.
5. When the installation is complete, remove CD #2 from the
DVD-ROM drive.
6. Click Finish to restart the computer.
Proceed to Disk Striping.
Disk Striping
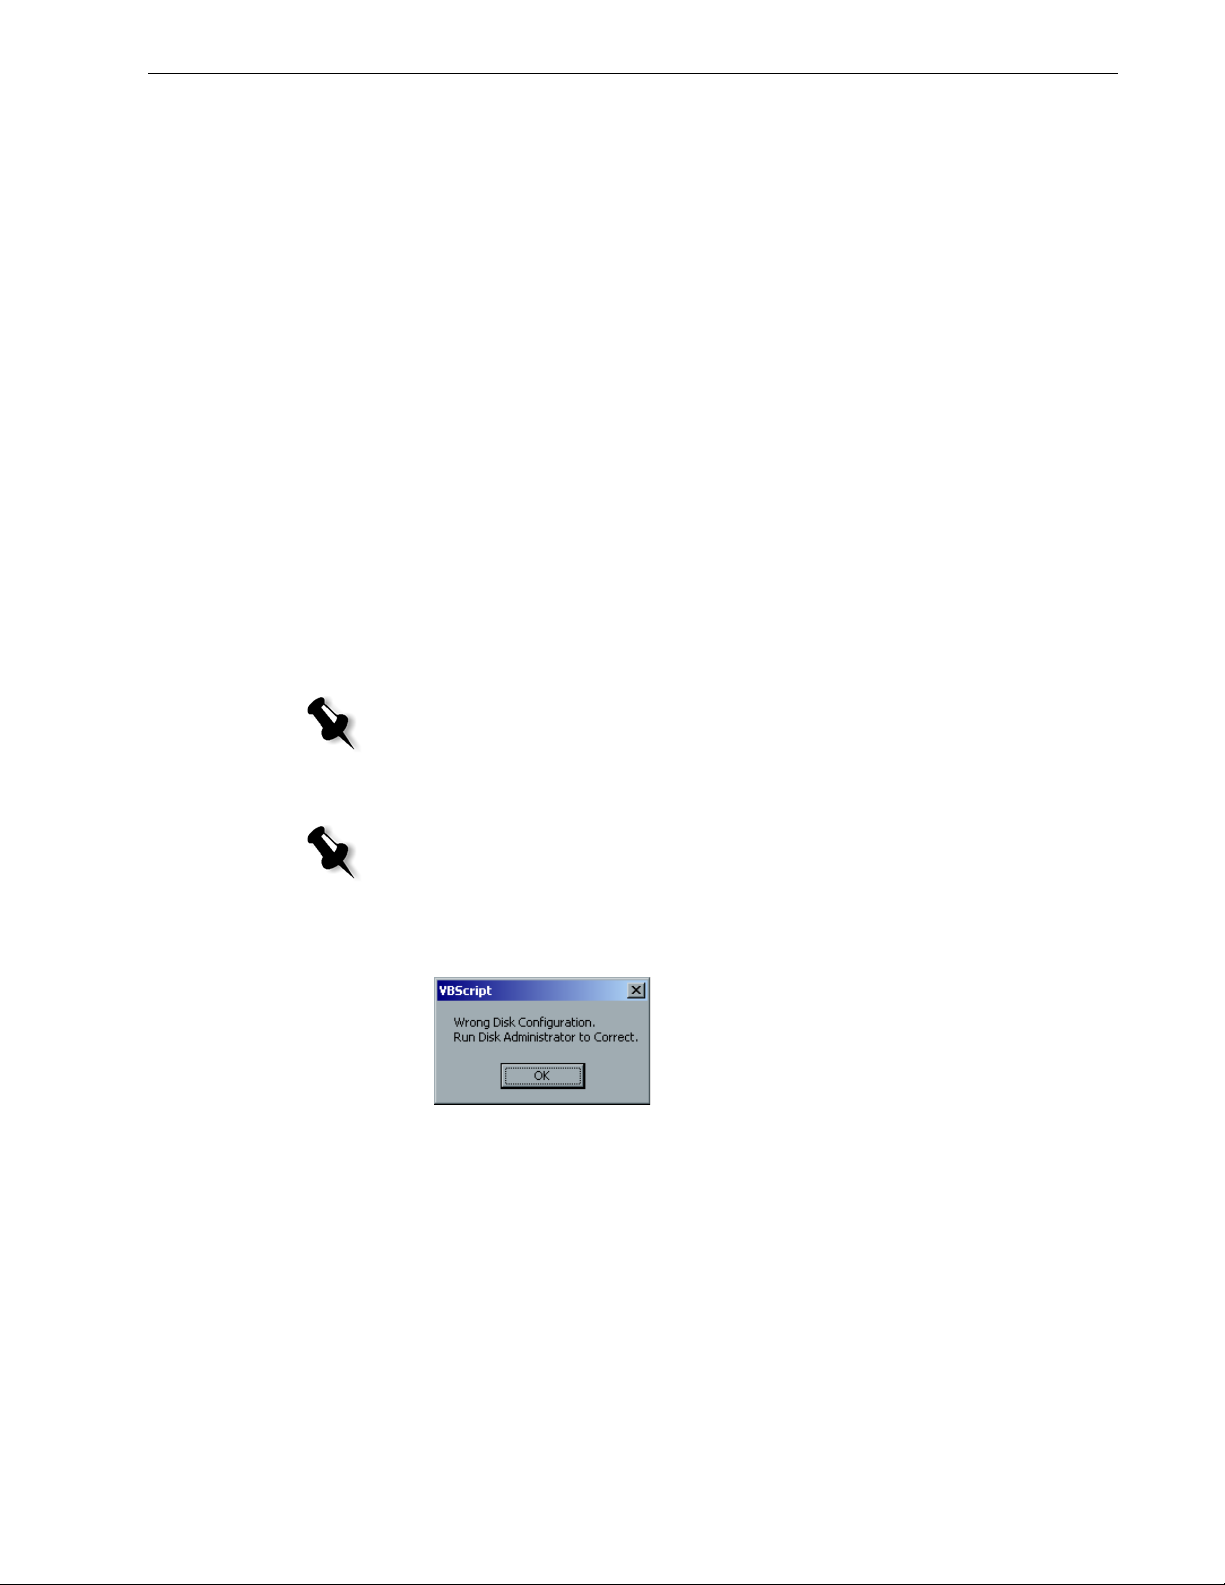
Once the Spire CXP8000 color server restarts, the Wrong Disk Configuration
message appears. This message indicates that the disks need to be striped.
Note: If a message appears requesting you to activate Windows XP, ignore it
until you have completed configuring the system. For more information, see
The
Activating Windows XP on page 38.
Initial Disk Striping Procedure
Note: If the Wrong Disk Configuration message appears, perform the Initial Disk
Striping procedure. If the Image Disks File System is not Formatted message
appears, proceed to step 3 of the Confirming the Disk Striping procedure on
page 23.
1. In the following message, click OK.
Page 20

16 Spire CXP8000 Color Server 1.0 Software Installation Guide
The Computer Management window appears.
2. Maximize the window.
Establishing the Correct Disk Striping Procedure
1. In the Computer Management window, verify that Disks 1, 2 and 3 are labelled
Dynamic. Perform the procedure: Striping Dynamic Disks.
2. If you have replaced a disk or low-level formatted any disk, low-level format all
the image disks (a required procedure, see Appendix B, Formatting the External
Device on page 45); the disks will all be labelled
Unknown.
Perform the procedure: Striping Unknown Disks on page 18.
Striping Dynamic Disks
1. Position the mouse pointer in the area where the disk is designated Dynamic.
Page 21

Reinstalling the Spire CXP8000 Color Server Software 17
2. Right-click and select Import Foreign Disks.
Foreign disks are any hard disks that were recognized as dynamic disks from
a previous installation.
3. Verify that the Foreign disk group (3 of 3 disks) check box is selected, and click
OK.
The following window appears.
4. Click OK.
The dynamic disks are striped as shown in the following window.
Page 22

18 Spire CXP8000 Color Server 1.0 Software Installation Guide
5. Close the Computer Management window.
6. The Image Disks File System is not Formatted message appears.
Click
OK.
7. Yo u ha v e c o mp le te d Disk Striping.
• If configuration recovery information is available, proceed to Restoring the
Configuration on page 34.
• If there is no backup and the system configuration must be done manually,
proceed to Configuring the Spire CXP8000 Color Server for the First Time on
page 25.
Striping Unknown Disks
Perform the following procedures if you:
• Have replaced an image disk (low-level format all disks)
• Have low-level formatted one image disk (low-level format all disks)
Important: When you replace an image disk or a low-level formatted one
disk, you must low-level format all image disks before you perform the
Striping Unknown Disks procedure, see Appendix B, Formatting the External
Device on page 45.
Initializing the Disks
1. Position the mouse pointer in the Disk 1 area, right-click, and select Initialize
Disk
.
2. In the Initialize Disk dialog box, verify that the three image disk check boxes
are checked.
3. Click OK.
Page 23

Reinstalling the Spire CXP8000 Color Server Software 19
4. Verify that the Computer Management window appears similar to the
following illustration.
5. Proceed to Converting the Disks to Dynamic Disks.
Converting the Disks to Dynamic Disks
1. Position the mouse pointer in the Disk 1 area, right-click, and select Convert to
Dynamic Disk
2. Check the Disk 1, 2 and 3 check boxes.
Attention: Do not check Disk 0. This is the system disk and checking the
Disk 0 check box will cause all information to be lost.
.
3. Click OK.
Page 24

20 Spire CXP8000 Color Server 1.0 Software Installation Guide
4. Verify that the Computer Management window appears similar to the
following illustration.
Creating a Striped Volume
1. Position the mouse pointer in the white area to the right of the first disk,
right-click, and select
New Volume.
The Create New Volume Wizard appears.
Page 25

Reinstalling the Spire CXP8000 Color Server Software 21
2. Click Next.
3. Select Striped Volume, and click Next.
The following window appears.
4. Select Disk 2 and click Add, then select Disk 3 and click Add.
Page 26

22 Spire CXP8000 Color Server 1.0 Software Installation Guide
5. Disks 1, 2, and 3 are listed under Selected. Click Next.
The following window appears.
6. Select the Do not assign a drive letter or drive path option, and click Next.
Select the Do not format this volume option, and click Next.
7.
Page 27
Reinstalling the Spire CXP8000 Color Server Software 23
The following window appears.
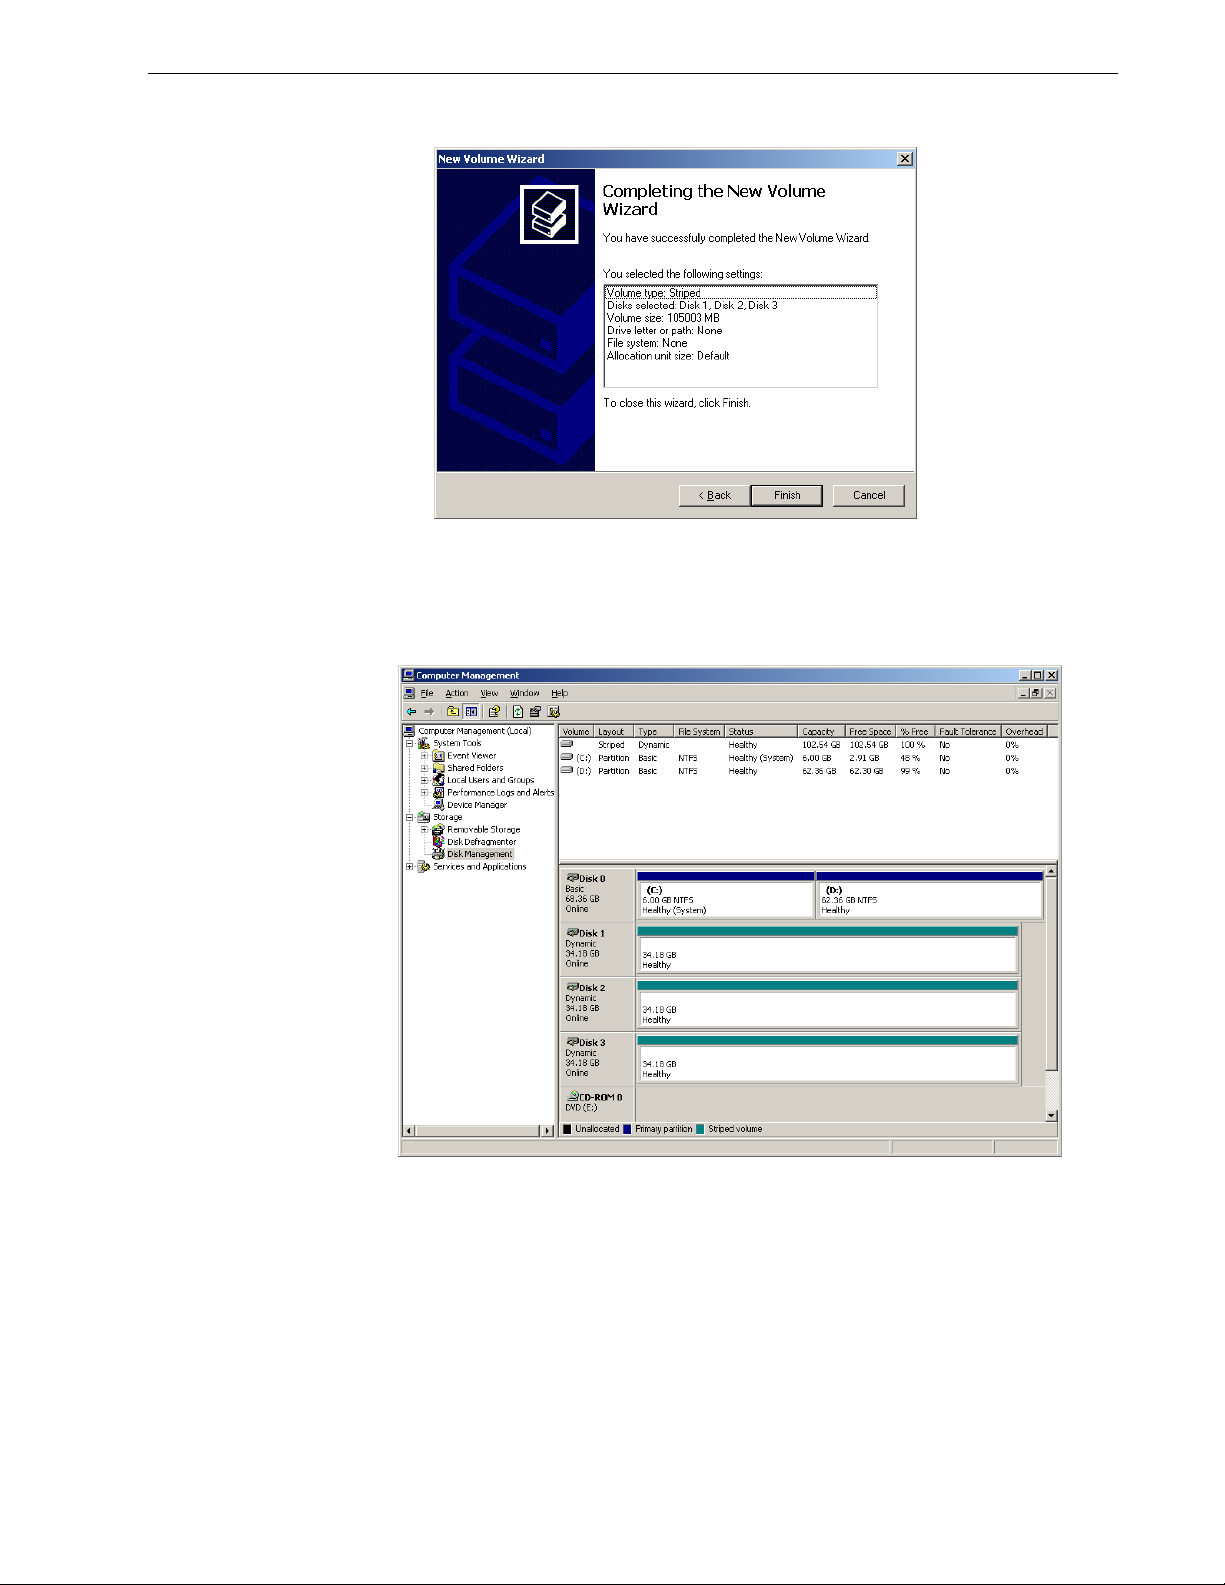
8. To complete the Create New Volume wizard, click Finish.
Confirming the Disk Striping
After you click Finish, the following window appears.
1. Confirm that the Computer Management window appears as illustrated in the
previous window, and verify that the drive letters have been removed.
2. Close the Computer Management window.
3. The Image Disks File System is not Formatted message appears.
Click
OK.
Page 28

24 Spire CXP8000 Color Server 1.0 Software Installation Guide
4. To make sure that the changes take effect, restart the Spire CXP8000 color
server. On the Windows desktop, follow the path:
Start > Shut Down > Restart > OK.
Yo u ha v e c o mp le te d Disk Striping.
5. After the computer restarts, the Configuration Wizard appears.
Note: If a message appears requesting you to activate Windows XP, ignore
it until you have completed configuring the system. For more information,
The
see Activating Windows XP on page 38.
• If configuration recovery information is available, proceed to Restoring the
Configuration on page 34.
• If there is no backup and the system configuration must be done manually,
proceed to Configuring the Spire CXP8000 Color Server for the First Time on
page 25.
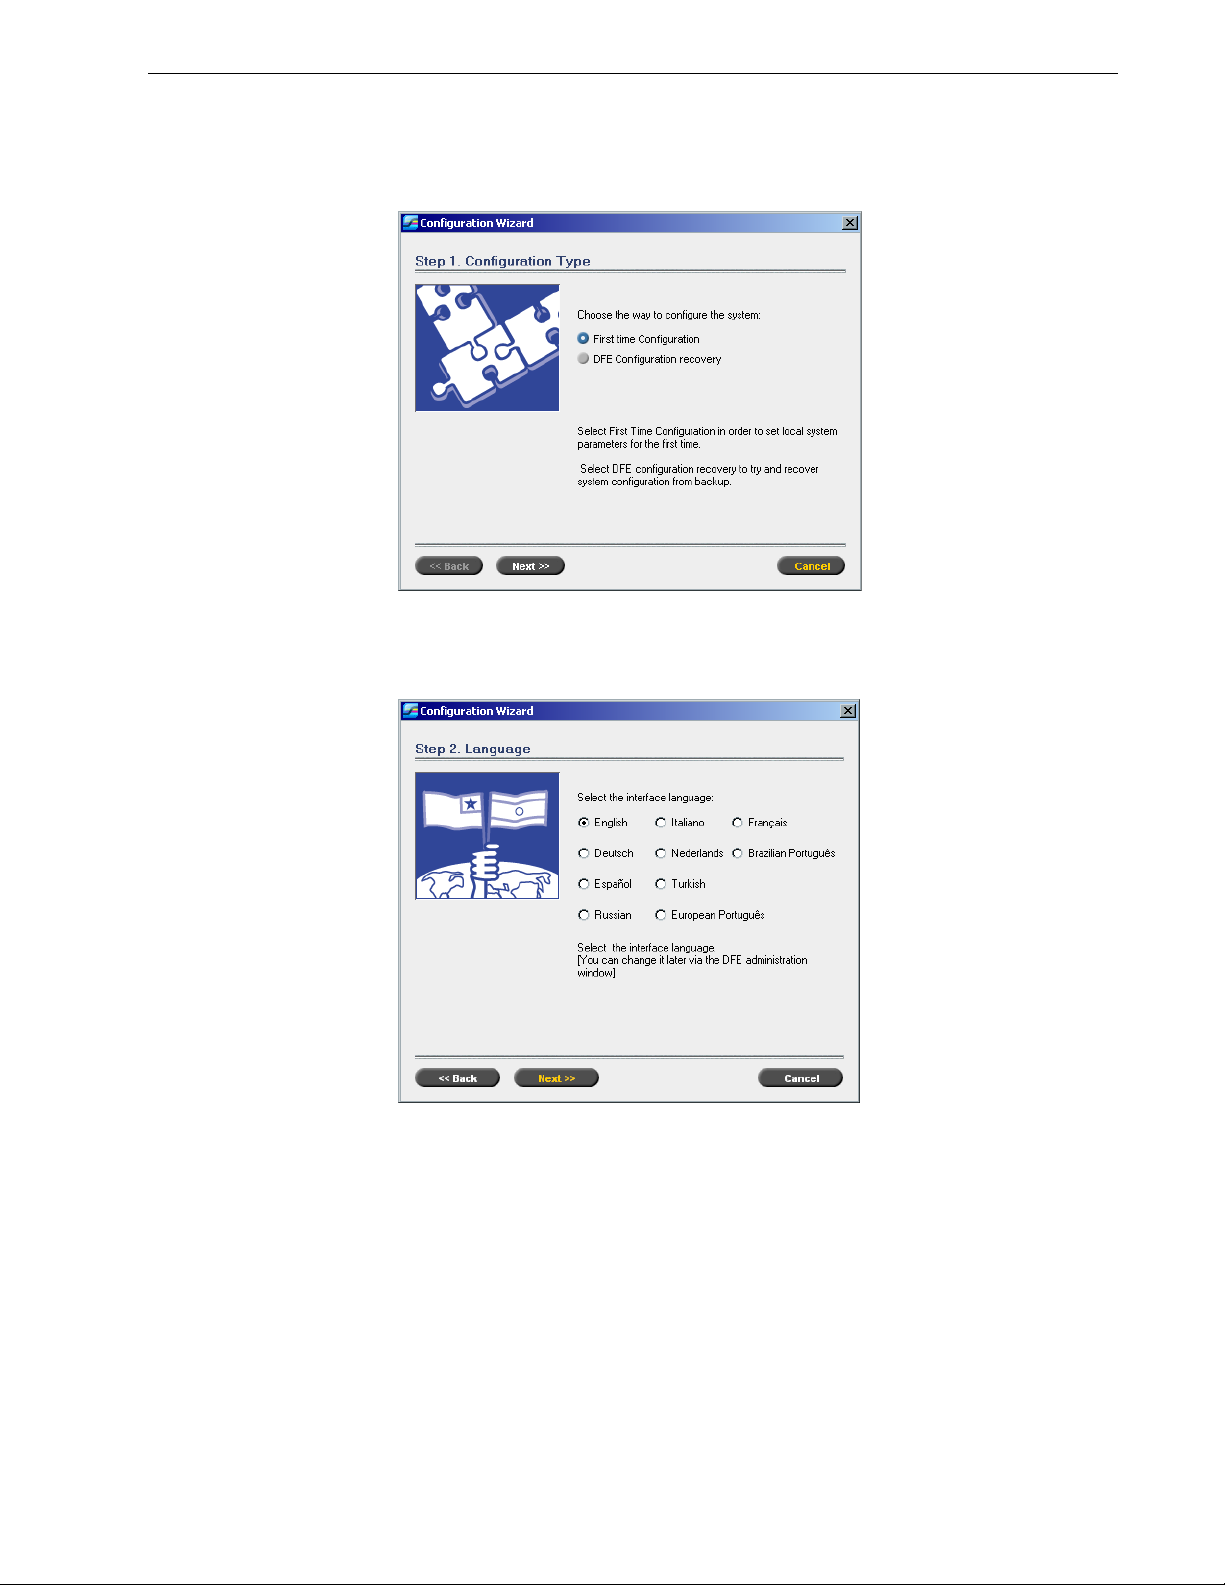
Using the Configuration Wizard
The Spire CXP8000 color server Configuration Wizard automatically appears after
the installation is complete. It provides the following two options:
• First time configuration—when no backup is available or recovery fails
• DFE configuration recovery—when a backup is available
Follow the steps in the wizard to complete the relevant Spire CXP8000 color server
configuration.
Note: During the configuring process, when prompted to restart your computer,
click No. At the end of the Configuration Wizard, you will be prompted to restart
your system.
Page 29
Reinstalling the Spire CXP8000 Color Server Software 25
Configuring the Spire CXP8000 Color Server for the First Time
The Spire CXP8000 color server Configuration Wizard automatically appears the
first time you turn on the Spire CXP8000 color server.
¾ Ver if y th a t t h e First Time Configuration option is selected and click Next.
Setting the Language
Select the required interface language, and click Next.
¾
Page 30
26 Spire CXP8000 Color Server 1.0 Software Installation Guide
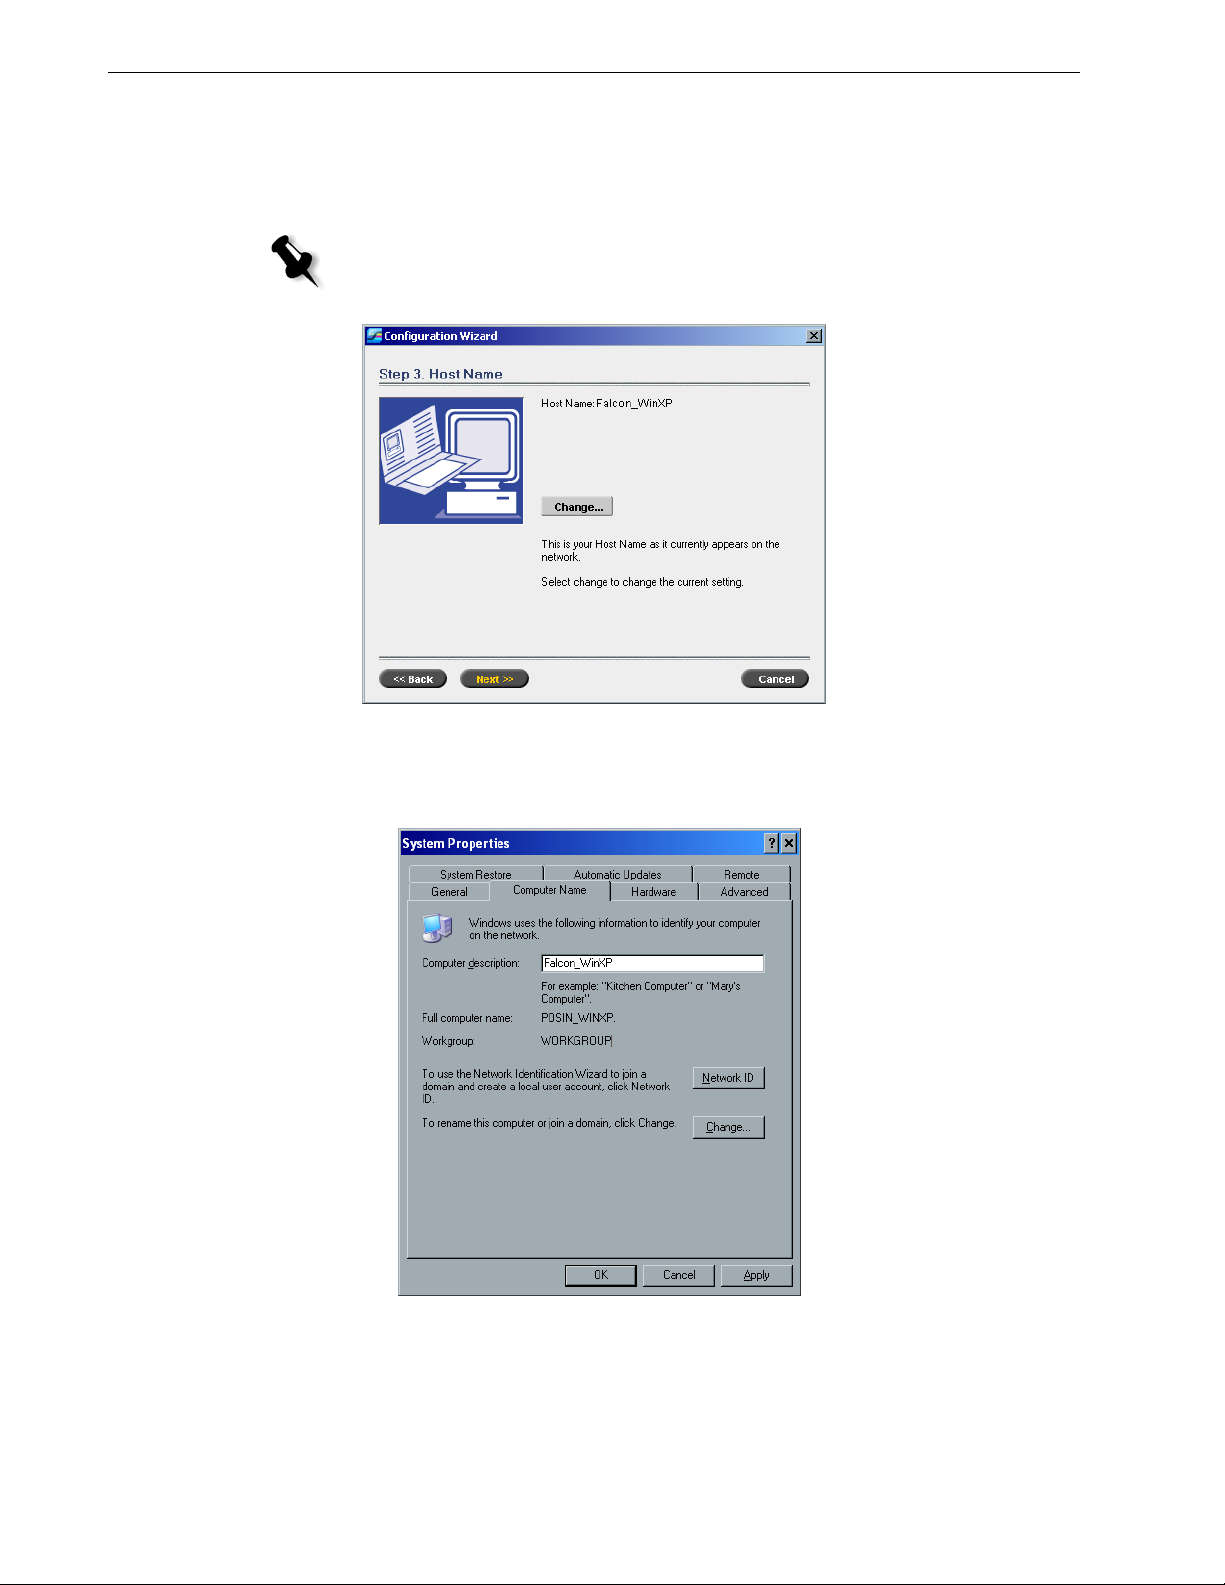
Configuring the Host Name
The Spire CXP8000 color server contains a default Computer Name (Hostname)
set from the factory. Check with your System Administrator if the computer’s name
needs to be changed.
Note: The Hostname is taken from the computer name you typed during the
Windows XP Professional Fast Installation, see Reinstalling the Operating System
(Windows XP) on page 13.
1. Verify that the correct host name is displayed and click Next. Otherwise, click
Change button.
the
The System Properties dialog box appears.
2. Click the Change button.
Page 31
Reinstalling the Spire CXP8000 Color Server Software 27
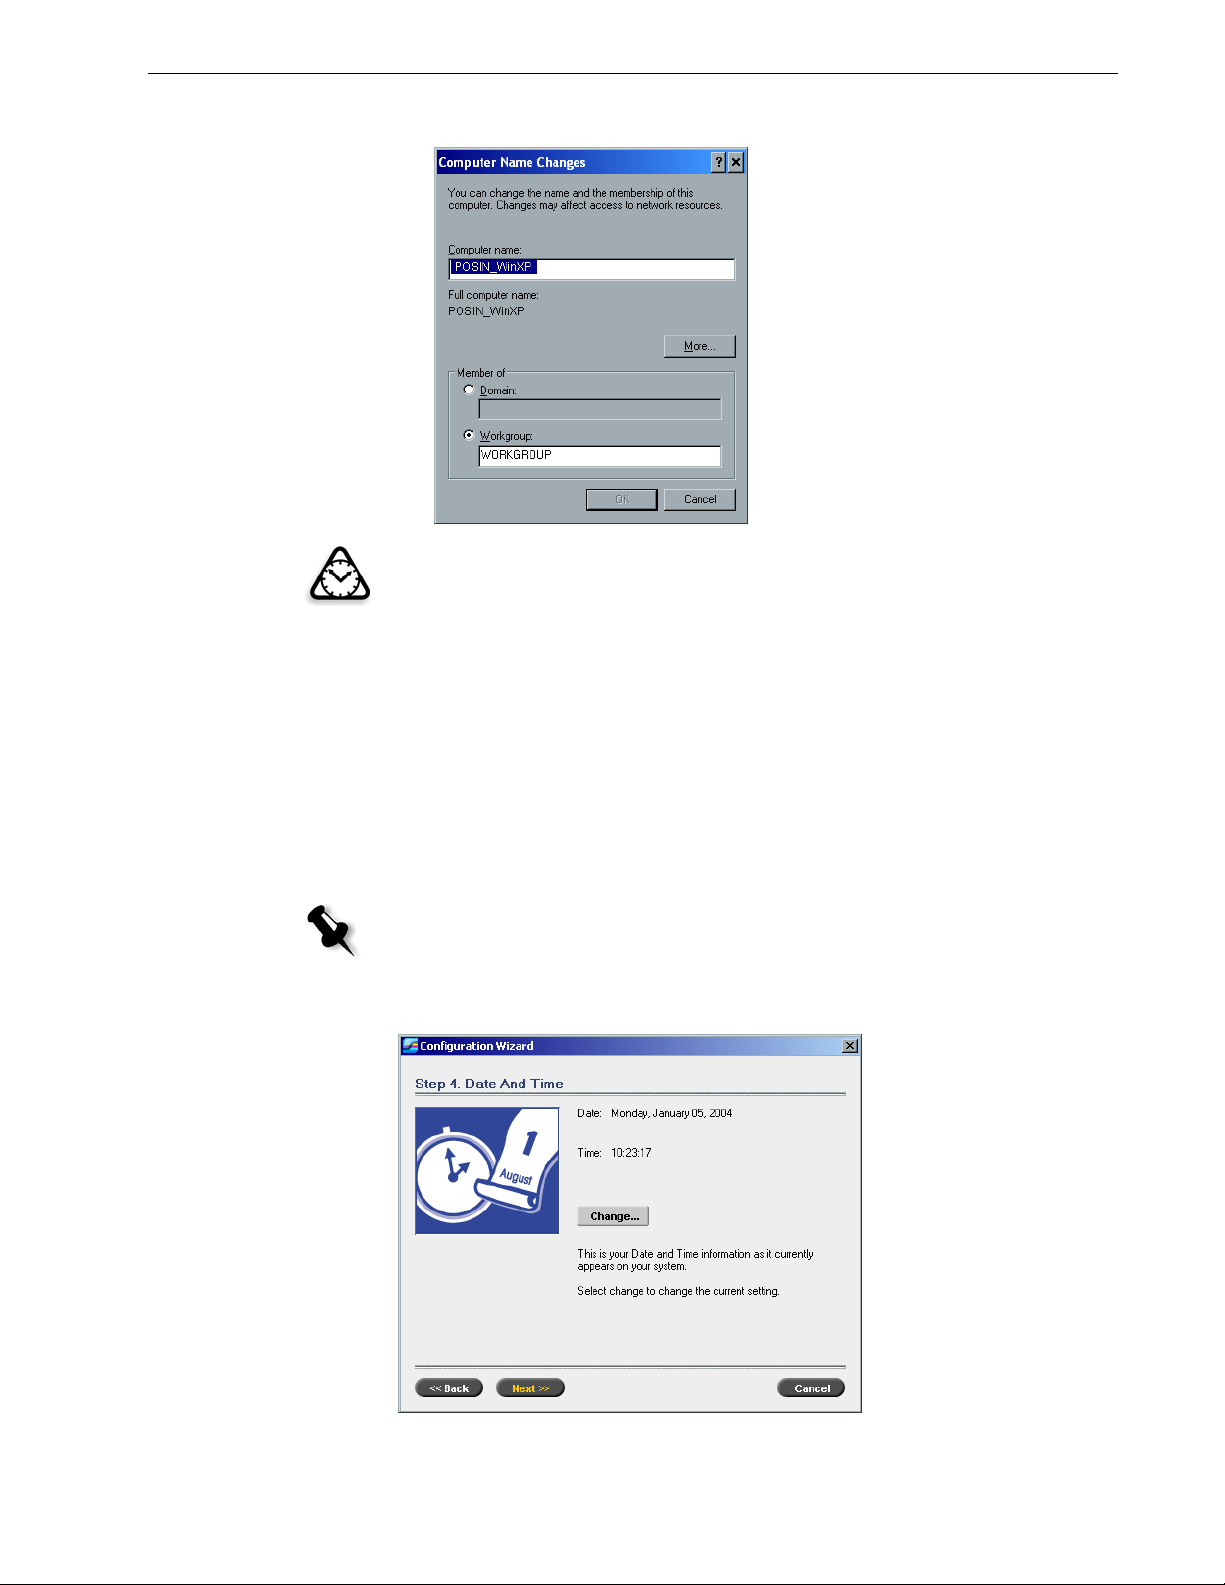
The Computer Name Changes dialog box appears.
Attention: Do not change the Workgroup or Domain in the following step 3
unless instructed. If you are changing the Domain/Workgroup, verify that you
have the user name and password for the Domain/ Workgroup.
3. In the Computer name area, type the new name for the computer. If you
would like to change the
appears, type the new name in the corresponding area and click
Workgroup or the Domain in which your computer
OK.
A message appears to inform you that changes will take effect only after
restarting the computer.
4. Click OK.
5. In the System Properties dialog box, click OK.
6. Click Next to continue.
Note: During the configuring process, when prompted to restart your
computer, click No. At the end of the Configuration Wizard, you will be
prompted to restart your system.
Setting the Date and Time
Page 32

28 Spire CXP8000 Color Server 1.0 Software Installation Guide
1. Check that the Date and Time are set correctly, and click Next. Otherwise, click
Change.
2. Set the Date and Time correctly.
3. Select the Time Zone tab.
4. Set the time zone and click OK.
5. Click Next.
Page 33

Reinstalling the Spire CXP8000 Color Server Software 29
Setting the Default Measurement Units
¾
Select the default measurement unit you require, and click Next.
Configuring the IP Address
1. The Spire CXP8000 color server is set to DHCP server configuration.
Next to continue.
Click
2. If you would like to specify a specific IP address, click the Change button.
Page 34

30 Spire CXP8000 Color Server 1.0 Software Installation Guide
The Local Area Connection Properties dialog box appears, followed by the
Internet Protocol (TCP/IP) Properties dialog box.
3. Select the Use the following IP address option, and type the IP address,
Subnet mask, and Default gateway in their corresponding boxes.
For more details on how to get the IP or DHCP (also subnet mask and
default gateway) information, refer to the Xerox Installation and Planning
Guide.
4. Click OK.
5. In the Local Area Connection Properties dialog box, click OK.
6. Click Next.
Page 35

Reinstalling the Spire CXP8000 Color Server Software 31
Configuring the AppleTalk Zone
This option enables you to change the AppleTalk network zone that your Spire
CXP8000 color server will appear in.
Note: This option only applies to networks that contain Macintosh computers.
1. Click the Change button.
The Local Area Connection Properties dialog box appears, followed by the
AppleTalk Protocol Properties dialog box.
Page 36

32 Spire CXP8000 Color Server 1.0 Software Installation Guide
2. Open the This system will appear in zone list.
3. Select the required zone from the list.
4. Click OK.
5. In the Local Area Connection Properties dialog box, click OK.
6. Click Next.
Page 37
Reinstalling the Spire CXP8000 Color Server Software 33
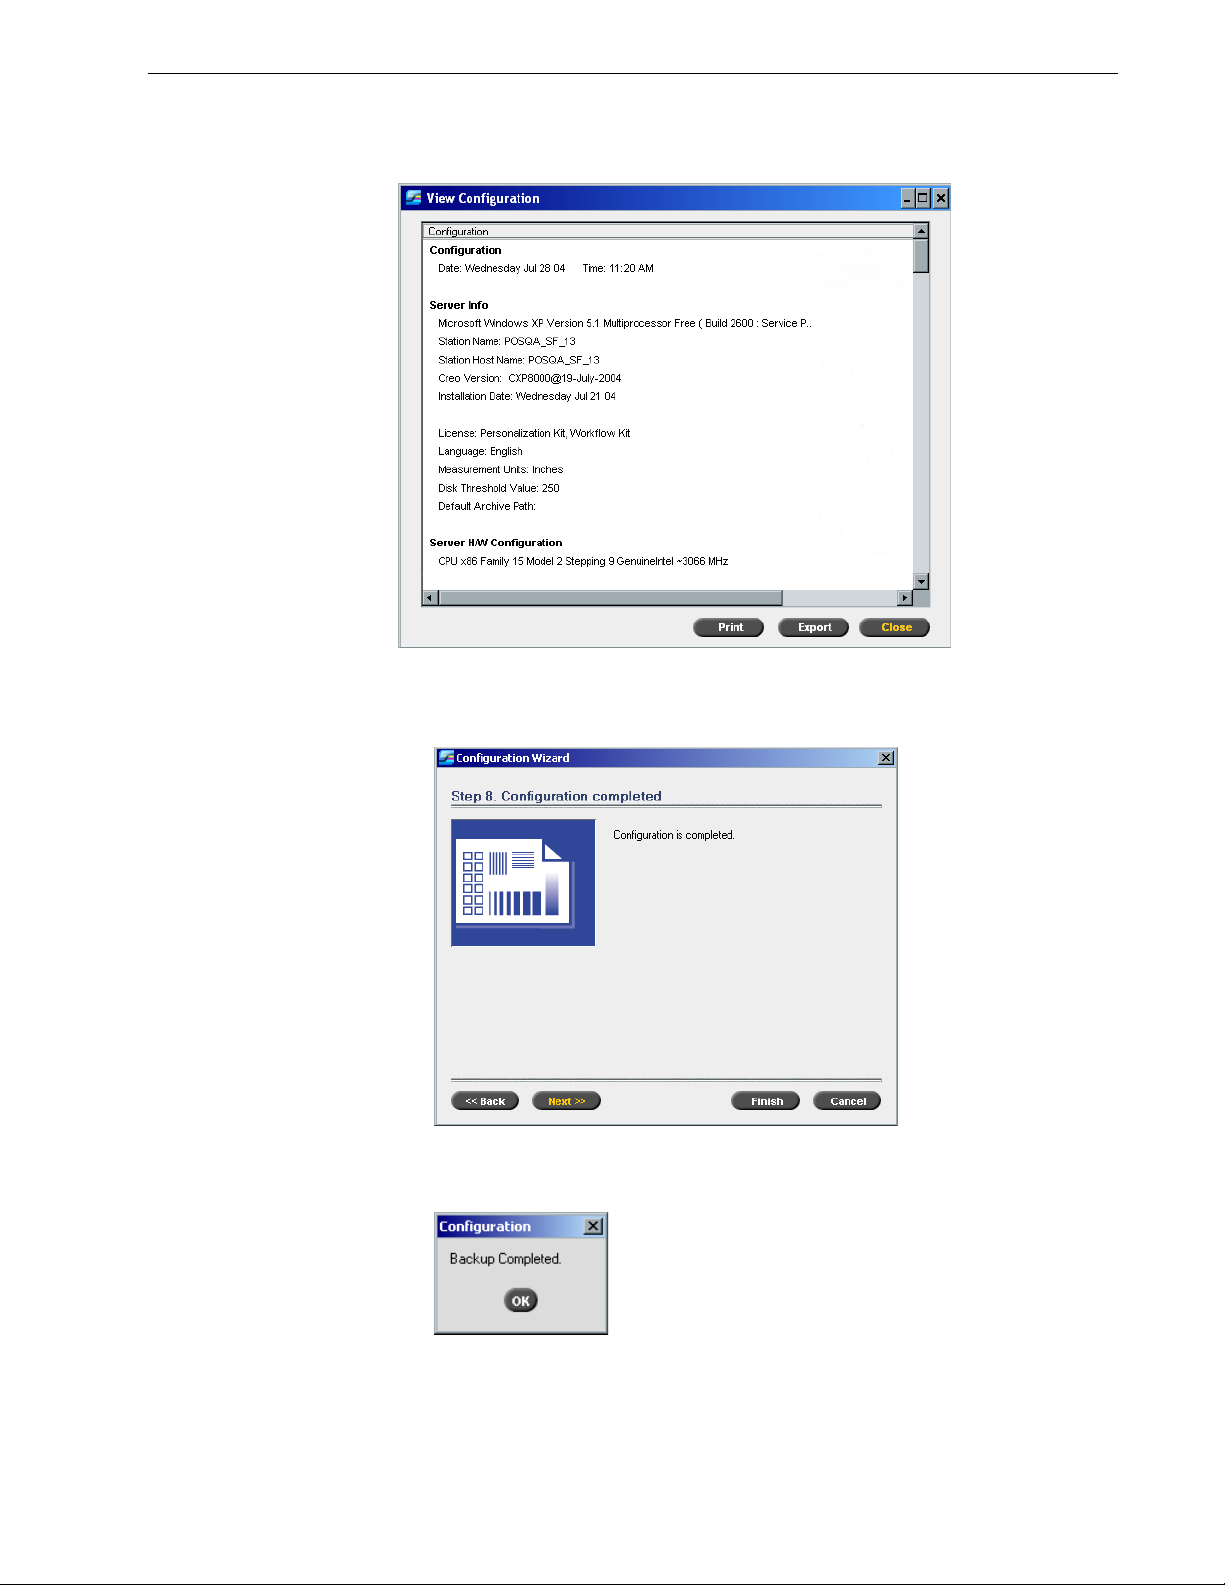
Completing the Configuration
After the configuration is complete, the View Configuration window appears.
1. Click Close.
The following window appears.
2. Click Finish to complete the First-time setup.
When the backup is complete, the following message appears.
3. Click OK.
After a few minutes, the Spire CXP8000 color server workspace appears on
your screen.
Page 38

34 Spire CXP8000 Color Server 1.0 Software Installation Guide
Changing the Administrator Name and User Password (Optional)
To change the administrator name and password:
1. On the Windows desktop, right-click My Computer and select Manage.
2. Expand the Local Users and Groups tree, and select Users.
3. Select Administrator. Right-click and select Properties.
4. Type the Full name, and click OK.
5. Select Administrator. Right-click and select Password.
6. Click Proceed, type and confirm the new password, and click OK.
To change the user password:
1. Press CTRL+ALT+DELETE.
2. In the Windows Security window, click Change Password.
3. Type the old and new password, confirm the new password, and click OK.
4. If you have a Novell network running IPX protocol, proceed to Appendix C,
Installing and Configuring Novell Client for Spire on page 47.
Restoring the Configuration
If a backup is available, follow the steps in the wizard to complete the Spire
CXP8000 color server configuration recovery.
Note: During the configuring process, when prompted to restart your computer,
click No. At the end of the Configuration Wizard, you will be prompted to restart
your system.
Page 39

Reinstalling the Spire CXP8000 Color Server Software 35
1. Select the DFE Configuration recovery option, and click Next.
The following dialog box appears.
2. If you would like to restore the default configuration, select the Default
Configuration
option.
3. If you received the message Error in default configuration, or if you
want to use a different configuration file than the default, choose
Configuration
4. Locate the required configuration file, and then click OK.
5. Click the Start Recovery button.
6. By default, no categories are selected. Select the categories you want to restore.
Note: When restoring the configuration all the custom tables/sets will be
added to the system (for example, imported user-defined imposition
templates, new virtual printers, and downloaded fonts).
and click Browse.
Select
Page 40

36 Spire CXP8000 Color Server 1.0 Software Installation Guide
7. Click OK.
The following message appears.
8. Click Yes .
After the recovery is complete, the following confirmation message appears.
9. Click OK.
10. Click Next in Step 2 Recovery window.
The View Configuration window appears.
Page 41

Reinstalling the Spire CXP8000 Color Server Software 37
11. Click Close.
The following window appears.
12. Click Finish.
The Spire CXP8000 color server application workspace appears on your
screen.
To make sure that your changes take effect, restart the computer.
13. Close all open applications, and on the Windows desktop, click Start > Shut
Down > Restart > OK
14. If you want to change the administrator name and password, or only the user
password, see Changing the Administrator Name and User Password (Optional)
on page 34.
.
Installing and Configuring Novell Client for Spire
If you want to install and configure the Novell Client for the Spire color server, see
Appendix C, Installing and Configuring Novell Client for Spire on page 47.
Configuring the McAfee VirusScan
If you want to configure the McAfee VirusScan, see Appendix D, Configuring the
McAfee VirusScan on page 51.
Enabling Unix Connectivity
If you want to enable Unix connectivity, see the Spire™ CXP8000 color server for
Xerox® DocuColor 8000 Digital Color Press User Guide, Chapter 3-Unix
Connectivity.
Page 42
38 Spire CXP8000 Color Server 1.0 Software Installation Guide
Activating Windows XP
Windows XP contains software-based product activation technology, which means
that you need to activate your copy of Windows XP in order to use it. There are two
methods by which you can activate Windows XP, both of which are performed
using an activation wizard:
• Activating Windows XP via the Internet, see Activating Windows XP via the
Internet on page 38.
• Activating Windows XP by telephone, see Activating Windows XP by Phone on
page 40.
Note: Activating Windows XP is required only when reinstalling the Spire color
server operating system.
If a message appears, requesting you to activate Windows XP, you have 30 days to
do so from the date you receive the message. However, we recommend that you
perform the activation procedure as soon as the message is received.
Activating Windows XP via the Internet
Note: To activate Windows XP via the Internet, all your Internet connection
settings must be configured. Contact your system administrator to ensure that
your Internet settings are configured correctly.
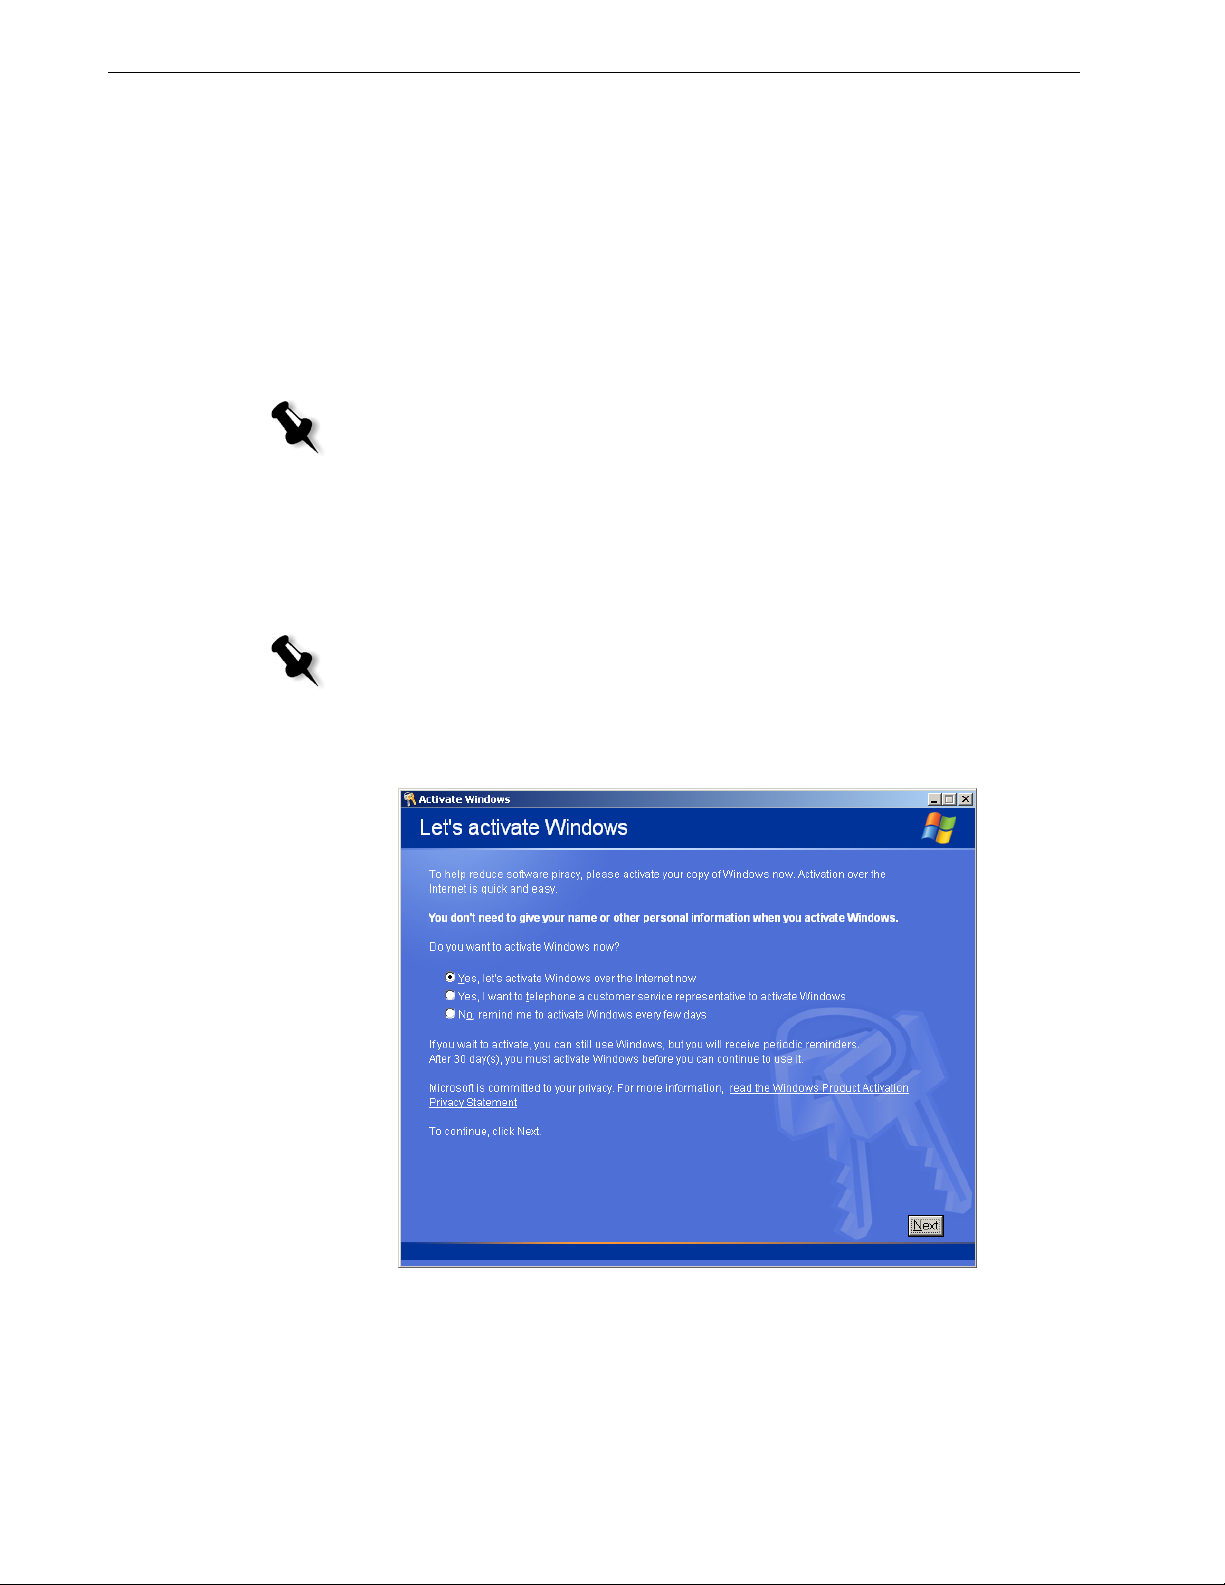
1. On the Windows desktop, click Start > Activate Windows. The Let’s activate
Windows wizard appears.
2. Select the Yes, let’s activate Windows over the Internet now option.
Page 43
Reinstalling the Spire CXP8000 Color Server Software 39
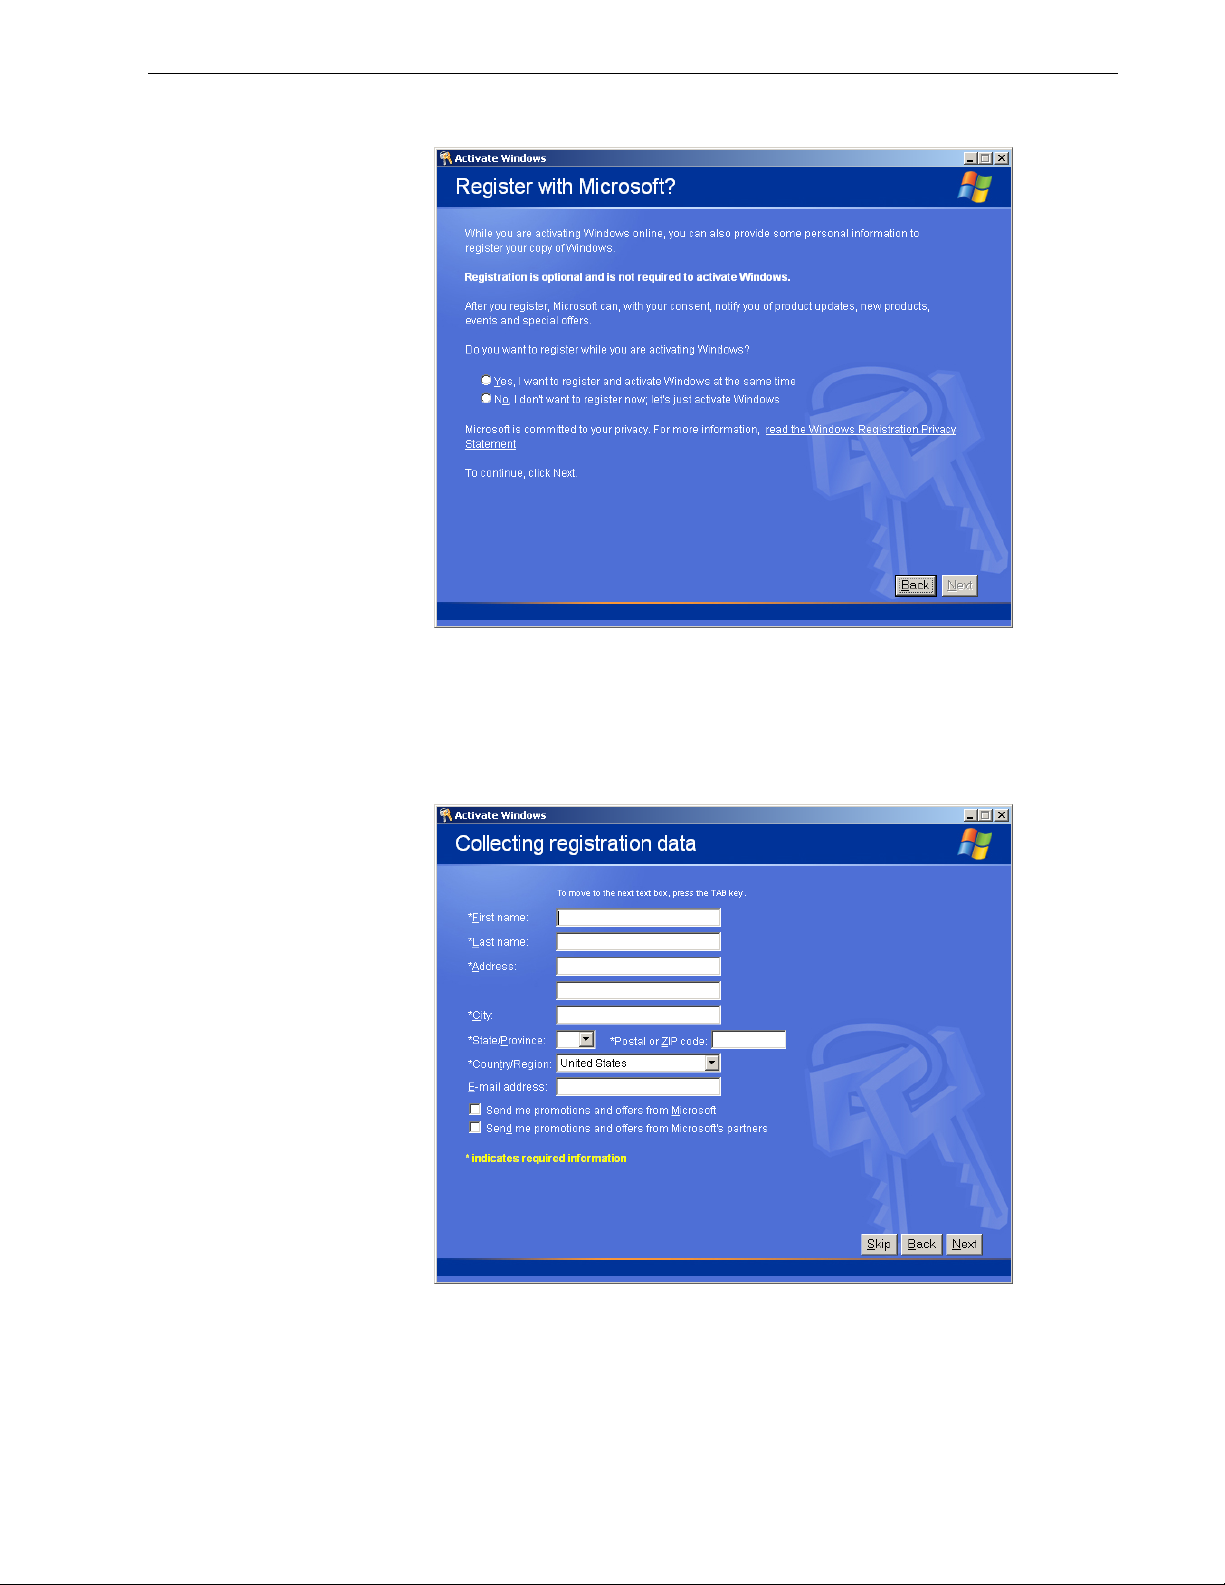
3. Click Next. The Register with Microsoft? screen appears.
4. Registering your copy with Microsoft is optional. If you do not want to
register, select the
windows
the
5. Click Next. The Collecting registration data screen appears.
option. If you do want to register your copy of Windows XP, select
Yes, I want to register and activate Windows at the same time option.
No, I don’t want to register now, let’s just activate
6. If you selected Yes in step 4, type the required information and click Next. If
you do not want to register, click
Skip.
Page 44

40 Spire CXP8000 Color Server 1.0 Software Installation Guide
7. Congratulations, you have successfully activated your copy of Windows XP.
8. Click OK to quit the Let’s activate Windows wizard.
Activating Windows XP by Phone
1. On the Windows desktop, click Start > Activate Windows. The Let’s activate
Windows wizard appears.
2. Select the Yes, I want to telephone a customer service representative to
activate Windows
option.
Page 45
Reinstalling the Spire CXP8000 Color Server Software 41
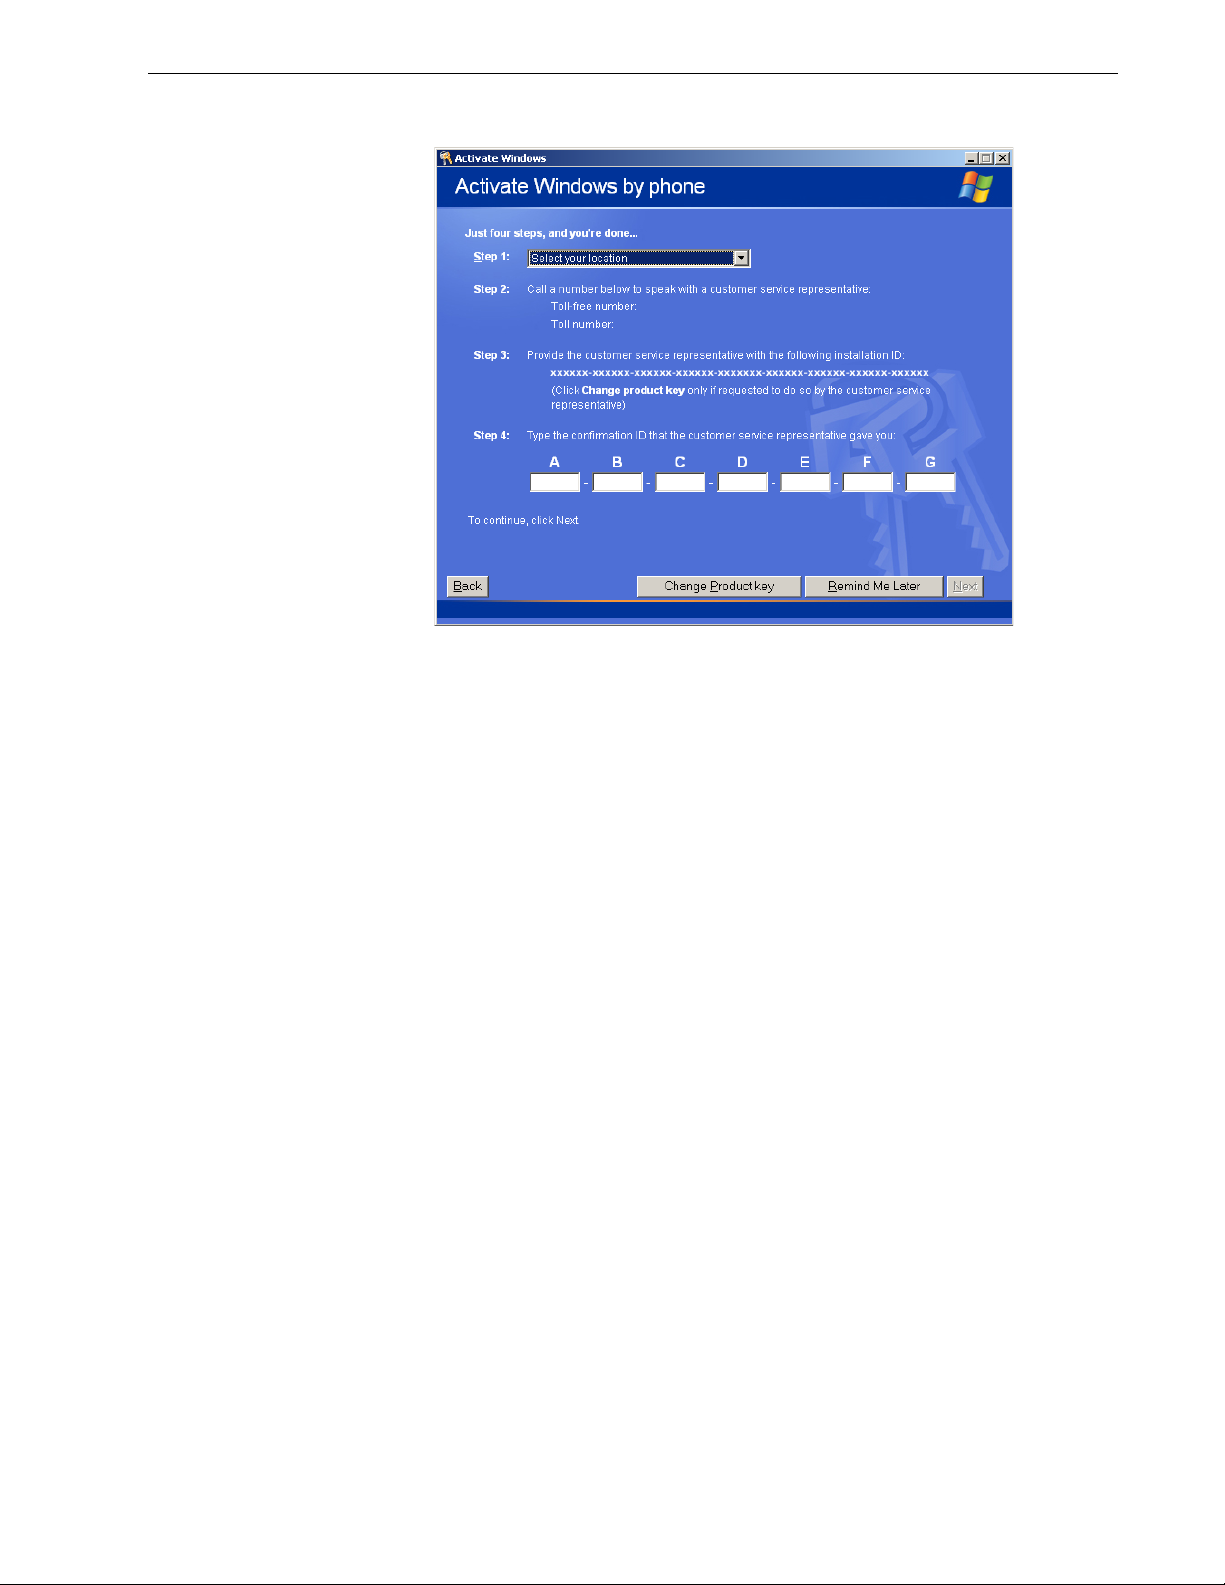
3. Click Next. The Activate Windows by phone screen appears.
4. Follow the instructions on the Activate Windows by phone screen.
5. Repeat steps 3 to 8 of the previous (Internet) procedure to complete the
activation process.
Backing Up the Creo System Partition
To back up the Creo system partition, see Backing Up the Creo System Partition on
page 4.
Performing a Test Print
To perform a test print, see Appendix E, Performing a Test Print on page 57.
Page 46

42 Spire CXP8000 Color Server 1.0 Software Installation Guide
Reinstalling the Software Preservation Installation
Note: To enable the restoration of customer settings and job data, we
recommend that you back up the Spire CXP8000 color server configuration and
other information before loading the operating system, see Backing Up the Creo
System Partition on page 4 and Backing Up the Job List Database on page 5.
The Software Preservation Installation mirrors the Software Complete Overwrite
Installation (including Windows XP activation), but does not affect the files stored
on partition D. Use the Software Preservation Installation option if a backup of
partition C is not available, or when you want to reinstall the operating system.
This enables you to install a fresh operating system on partition C without deleting
the user files on partition D. It will not preserve the current job list on partition C.
For this you must use the backup and restore option (see Backing Up and Restoring
the Software on page 4).
To reinstall the Software Preservation Installation, follow the flowchart described
in Reinstalling the Software Complete Overwrite on page 12. Make sure that CDROM #1A is in the DVD-ROM drive; then from the
Creo Software Preservation Installation (System Partition Overwrite) option.
the
PC DOS Start Up menu, select
Page 47
Formatting the Image Disk
Perform the following procedure when suggested as a recovery action.
Important: Formatting erases all data stored in the Storage folder. It is
recommended to back up your data, if possible, to an external device.
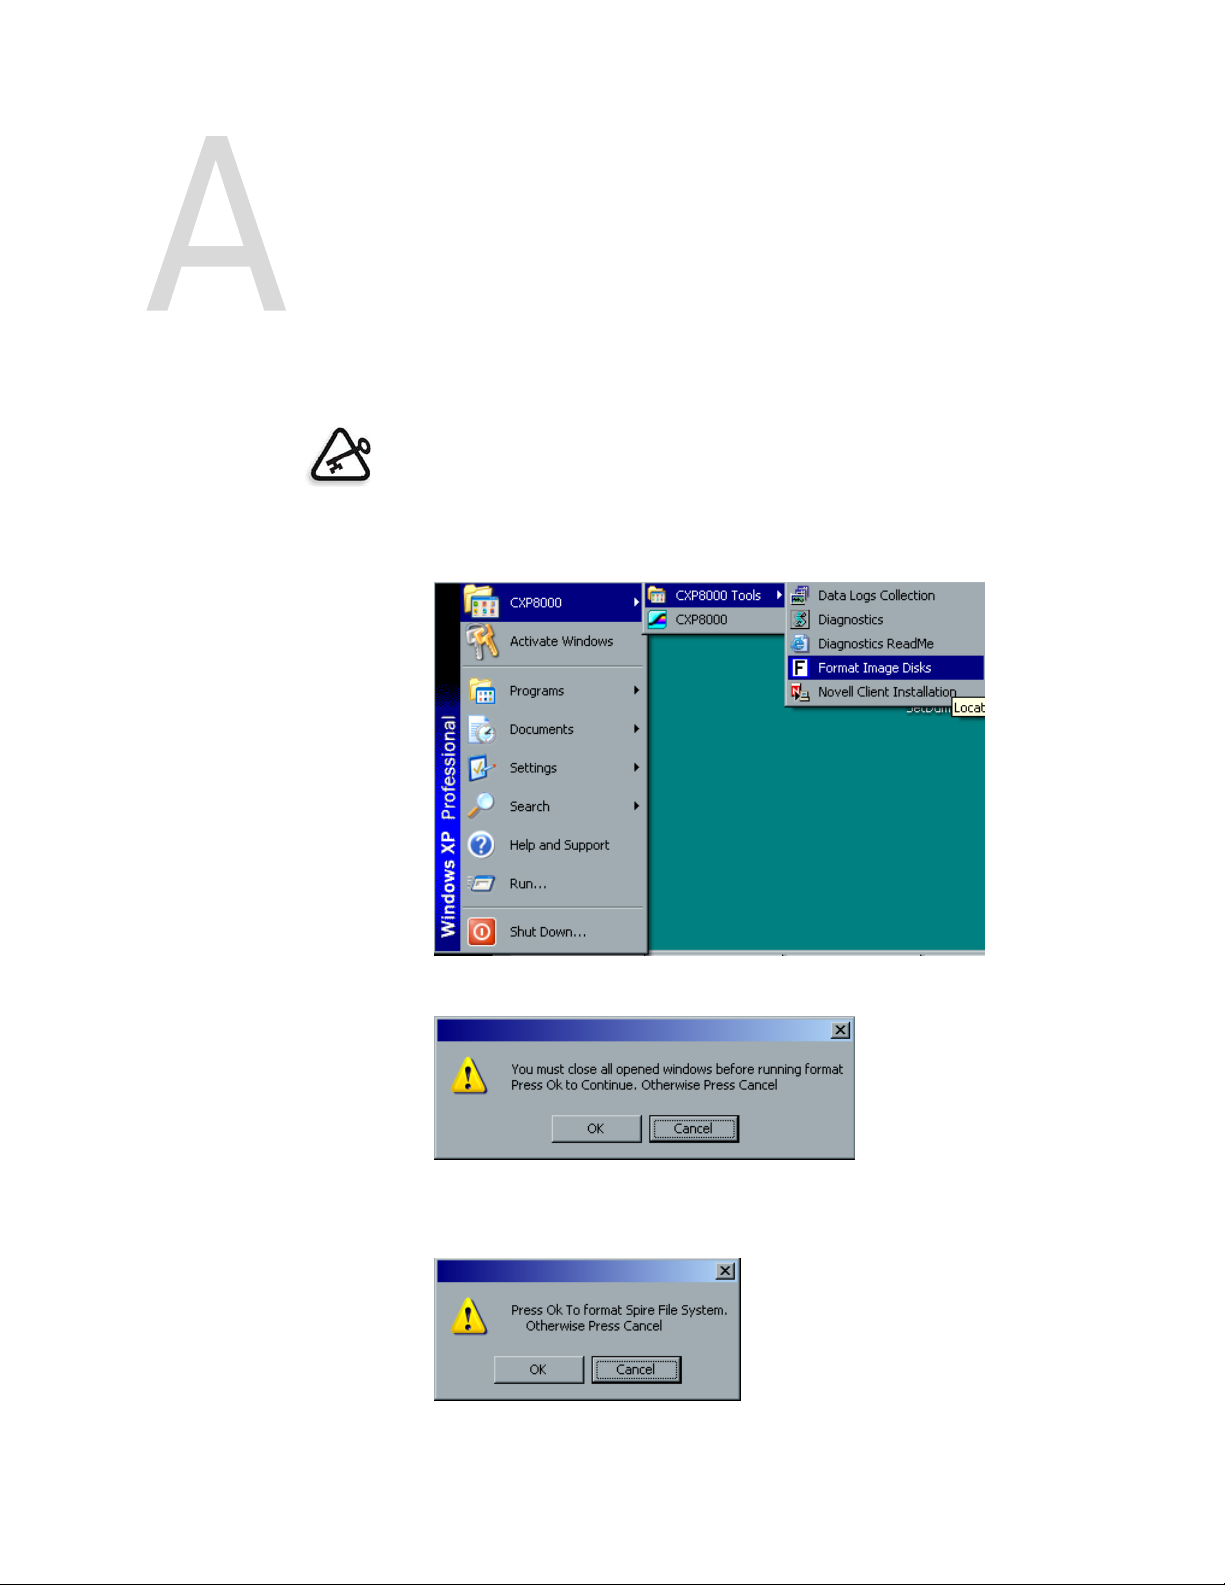
1. On the Windows desktop, follow the path:
Start > CXP8000 > CXP8000 Tools > Format Image Disks.
The following message appears.
2. Close all open windows, if required, and click OK.
The following message appears.
Page 48

44 Spire CXP8000 Color Server 1.0 Software Installation Guide
3. Click OK.
4. Click OK.
5. Click OK.
6. To enable the changes to take effect, restart your computer.
Page 49

Device
Formatting the External
This section describes how to format the external device, if the Spire CXP8000
color server has not located the device, or has identified that the device has not
been formatted.
1. On the Windows desk top, select My Computer and right-click New Volume
.
(F:)
2. From the menu select Format.
The Format New Volume (F:) window appears.
3. Select the Format options you require, and click Start.
4. After the formatting is complete, click OK.
5. Click Close.
The Formatting Complete message appears.
6. Click OK, and then click Close.
Page 50

46 Spire CXP8000 Color Server 1.0 Software Installation Guide
The Computer Management window appears, similar to the following
example.
You have completed all the procedures and are ready to use your external SCSI
device.
Page 51

Installing and Configuring
Novell Client for Spire
The following procedures are only relevant for those customers who have a Novell
network running IPX protocol. If you do not have this type of network, proceed to
Appendix D, Configuring the McAfee VirusScan on page 51, if required, and then
Appendix E, Performing a Test Print on page 57.
Further information about configuring the connection between the Spire CXP8000
color server and a Novell NDS server, in a Novell working environment, is
provided in the Spire CXP8000 Color Server for Xerox DocuColor 8000 Digital
Color Press, User Guide.
Installing Novell Client for Spire
1. Close the Spire workspace and the Spire application.
2. Close all other applications.
3. On the Windows desktop, click Start and follow the path, CXP8000 > CXP8000
Tools > Novell Client Installation
The following window appears.
.
Page 52

48 Spire CXP8000 Color Server 1.0 Software Installation Guide
4. Click Install.
5. Click Reboot.
6. Yo u ha v e c o mp le te d Installing Novell Client for Spire. Proceed to Configuring
Novell Client for Spire.
Configuring Novell Client for Spire
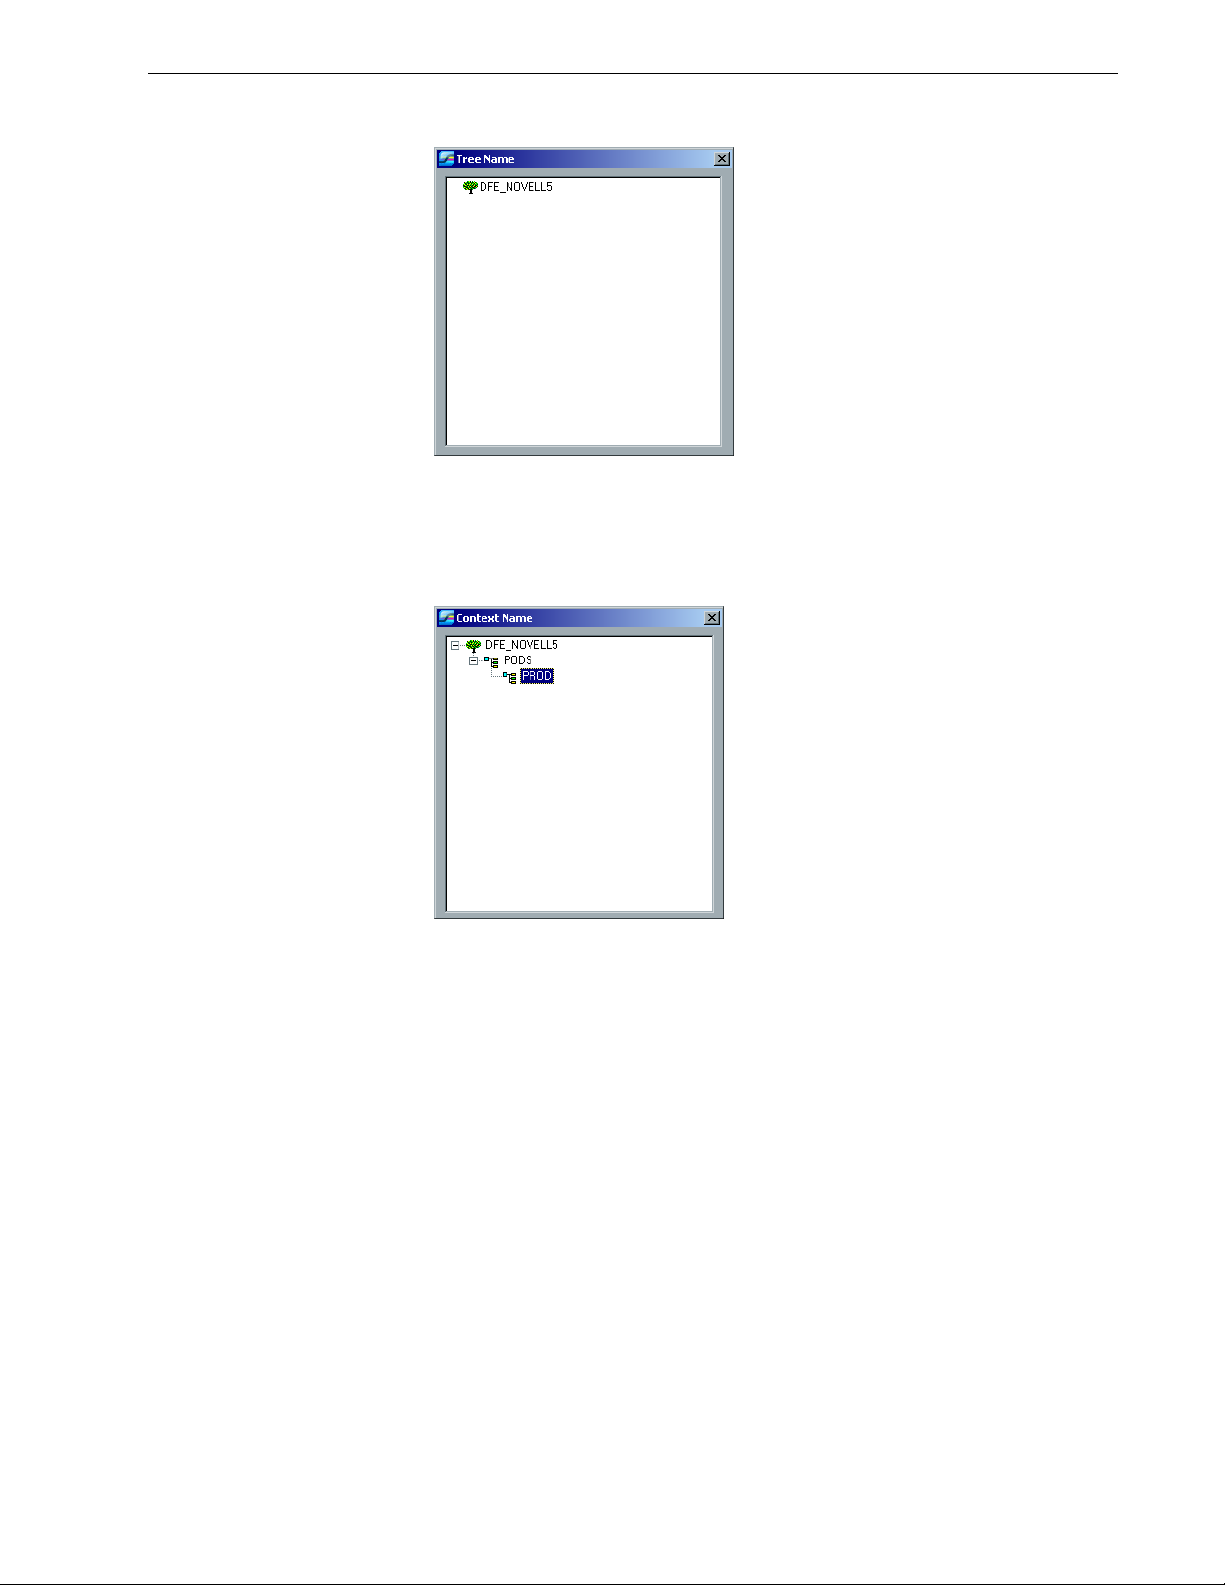
1. After the system reboots, the Novell Setup window appears.
2. Typ e t he Tree Name.
If you do not know the name, click
Browse.
Page 53
Installing and Configuring Novell Client for Spire 49
The following window appears.
3. Double-click the appropriate Tree N a me.
The Tree Name appears in the Novell Setup window.
4. Typ e th e Context Name.
If you do not know the name, click
Browse.
5. Double-click the appropriate Context Name.
The Context Name appears in the Novell Setup window.
6. Click OK.
The Spire workspace appears.
7. Yo u ha v e c o mp le te d Installing Novell Client for Spire.
Page 54

50 Spire CXP8000 Color Server 1.0 Software Installation Guide
Uninstalling Novell Client for Spire
Uninstall Novell Client for Spire if you no longer operate a Novell network running
IPX protocol.
To uninstall the Novell Client for Spire:
1. Close the Spire workspace and the Spire application.
2. Close all other applications.
3. Right-click My Network Places and select Properties.
4. Right-click Local Area Connection and select Properties.
5. Clear the Novell for Client for Windows check box.
6. Make sure that Novell for Client for Windows is selected, and click the
Uninstall button.
7. Click Yes twice.
The Spire CXP8000 color server reboots.
Yo u ha v e c o mp le te d Uninstalling Novell Client for Spire.
Page 55

VirusScan
Configuring the McAfee
It is highly recommended to install virus protection. The current Creo
recommended virus protection software is McAfee VirusScan.
Important: Running the McAfee VirusScan could slow down the process time
and effect the overall performance of the Spire CXP8000 color server.
Note: It is recommended to close all applications before installing and
configuring the McAfee VirusScan.
After installing the McAfee VirusScan, perform the following configuration
procedures.
1. Right-click the VShield icon in the Windows Taskbar and follow the path,
Properties > System Scan.
Page 56

52 Spire CXP8000 Color Server 1.0 Software Installation Guide
The following window appears.
2. Clear the Outbound files check box, and select the Exclusion tab.
The following window appears.
Page 57

Configuring the McAfee VirusScan 53
3. Click the Add button.
4. Ty pe D:\Output in the File or folder to exclude area, and click OK.
The following window appears.
Page 58
54 Spire CXP8000 Color Server 1.0 Software Installation Guide
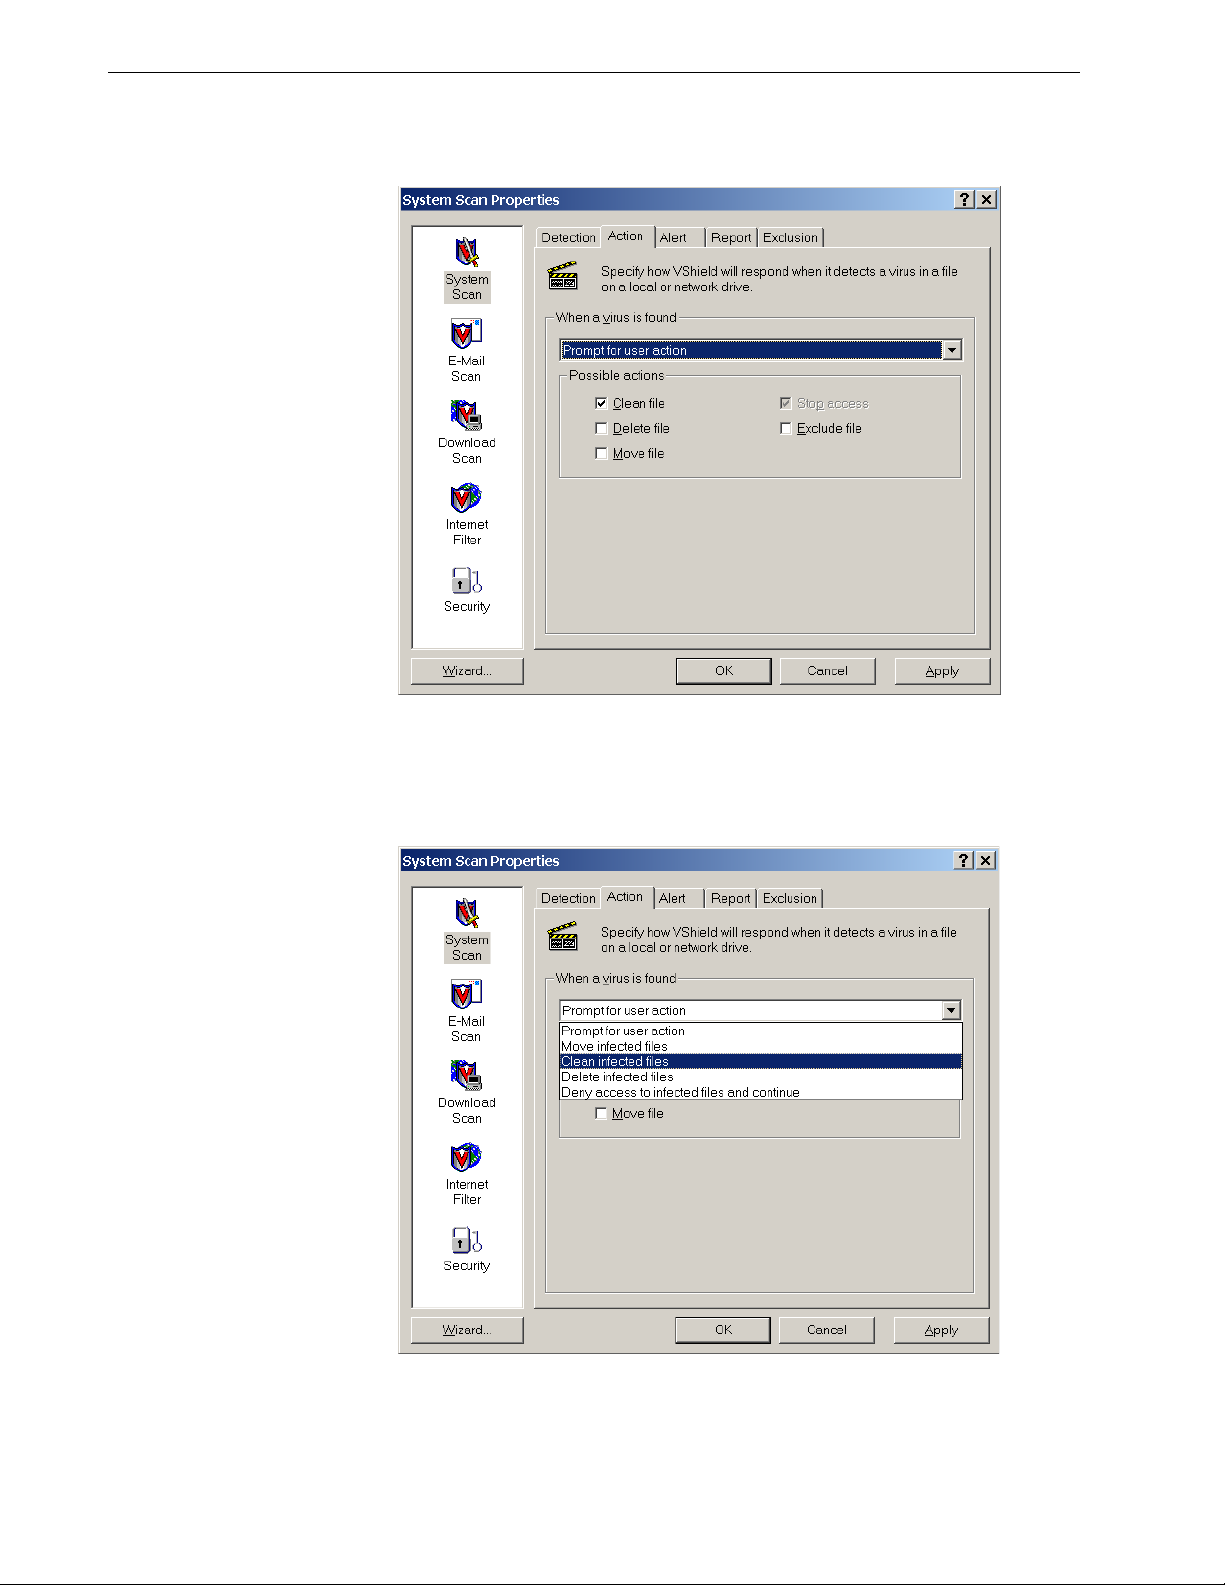
5. Select the Action tab.
The following window appears.
6. In the Possible actions area, clear the Delete File, Move File, and Exclude File
check boxes.
7. In the When a virus is found area, open the Prompt for user action list, and
Clean infected files.
select
8. Click Apply > OK and close the System Scan Properties window.
Page 59

Configuring the McAfee VirusScan 55
9. Open the VirusScan console by following the path, Programs > Network
Associates > VirusScan Console
10. In the VirusScan Console window, double-click AutoUpdate.
.
In the Task Properties window, select the
11. Select the Enable check box and in the Run area select Daily.
The
Start at time chosen should be after printing hours, but before the Spire
Schedule tab.
CXP8000 color server is turned off for the day.
12. Yo u ha v e c o mp le te d Configuring the McAfee VirusScan.
Page 60

This page is intentionally left blank.
Page 61

Performing a Test Print
To import a file and perform a test print on the Spire CXP8000 color server:
1. From the Job menu select Import Job.
2. Locate the ATF_A3.PS at:
D:\Sample_files\Color_files\ATF Europe (A4 or A3)\ATF_A3.PS,
locate the ATF_tab.PS at:
or
D:\Sample_files\Color_files\ATF US (Letter or Tabloid)\ATF _tab.PS.
3.
Double-click on the file to add it to the list for importing.
4. Select Virtual Printer: ProcessPrint.
5. Click Submit.
The file is processed, printed, and sent to the Storage Folder.
Note: If the job is not printed or is waiting in the print queue, check that the
finishing device is set properly in the Job Parameters window, Finishing tab.
Page 62

This page is intentionally left blank.
 Loading...