

Page 1
Print Driver Installation for Netware
Refer to the System Administration Guide in the User Documentation CD for complete
instructions on loading drivers.
Print Driver Installation information for printing using AppleTalk
Printer Type: Adobe PS
Printer Name: DocuColor2240
PPD Selection – Double-click the appropriate file in the MAC folder of the Driver
Software CD.
Use AdobePS Inst - 8.7.3 for OS 8.6 or later.
Use AdobePS Inst - 8.7.0 for OS 8.5
Use AdobePS Inst - 8.5.1 for OS 7.1 through 8.1
Follow the on-screen instructions, click “Install”, and restart workstation when
prompted.
Open Chooser, select Adobe PS printer, and locate your printer in the displayed list.
Click “Create” for initial installations or “Setup” for all subsequent installations
Click “Select PPD”, highlight your Printer’s PPD, and click “ok”.
Refer to the System Administration Guide in the User Documentation CD for complete
instructions on loading drivers.
Print Driver Installation information for printing using SMB
Add Printer wizard
Network Printer
Browse Network for printer: Refer to the Settings List for workgroup / printer name.
For Client Server browse network for server / Queue.
Print Queue: “Printer Name”-p (Default: fx-0d3595-p)
For complete instructions on setting up the Printer in a Net BIOS over IP environment
(also known as SMB), refer to the System Administration Guide in the User
Documentation CD.
701P38613
DOCUCOLOR 2240 / 1632
QUICK CONNECT GUIDE
Purpose: Refer to this guide to modify the printer network settings at the printer user interface
screen if required. For complete instructions refer to the Customer Documentation CD.
Note: A Network Administrator is required to ensure that the printer is configured properly.
To properly configure the printer, the Network Administrator must supply an IP Address, a Subnet
Mask, and a Gateway Address if applicable. For information to configure the printer on a Novell
network refer to the System Administration Guide in the Customer Documentation CD.
Procedure: The DocuColor 2240/1632 has been designed to connect to most networks with minimal
changes. Connect the printer to the network and review the Default Printer Settings. Continue with
Steps 2-6 and make changes to the printer port / network settings if required to enable it on your
network.
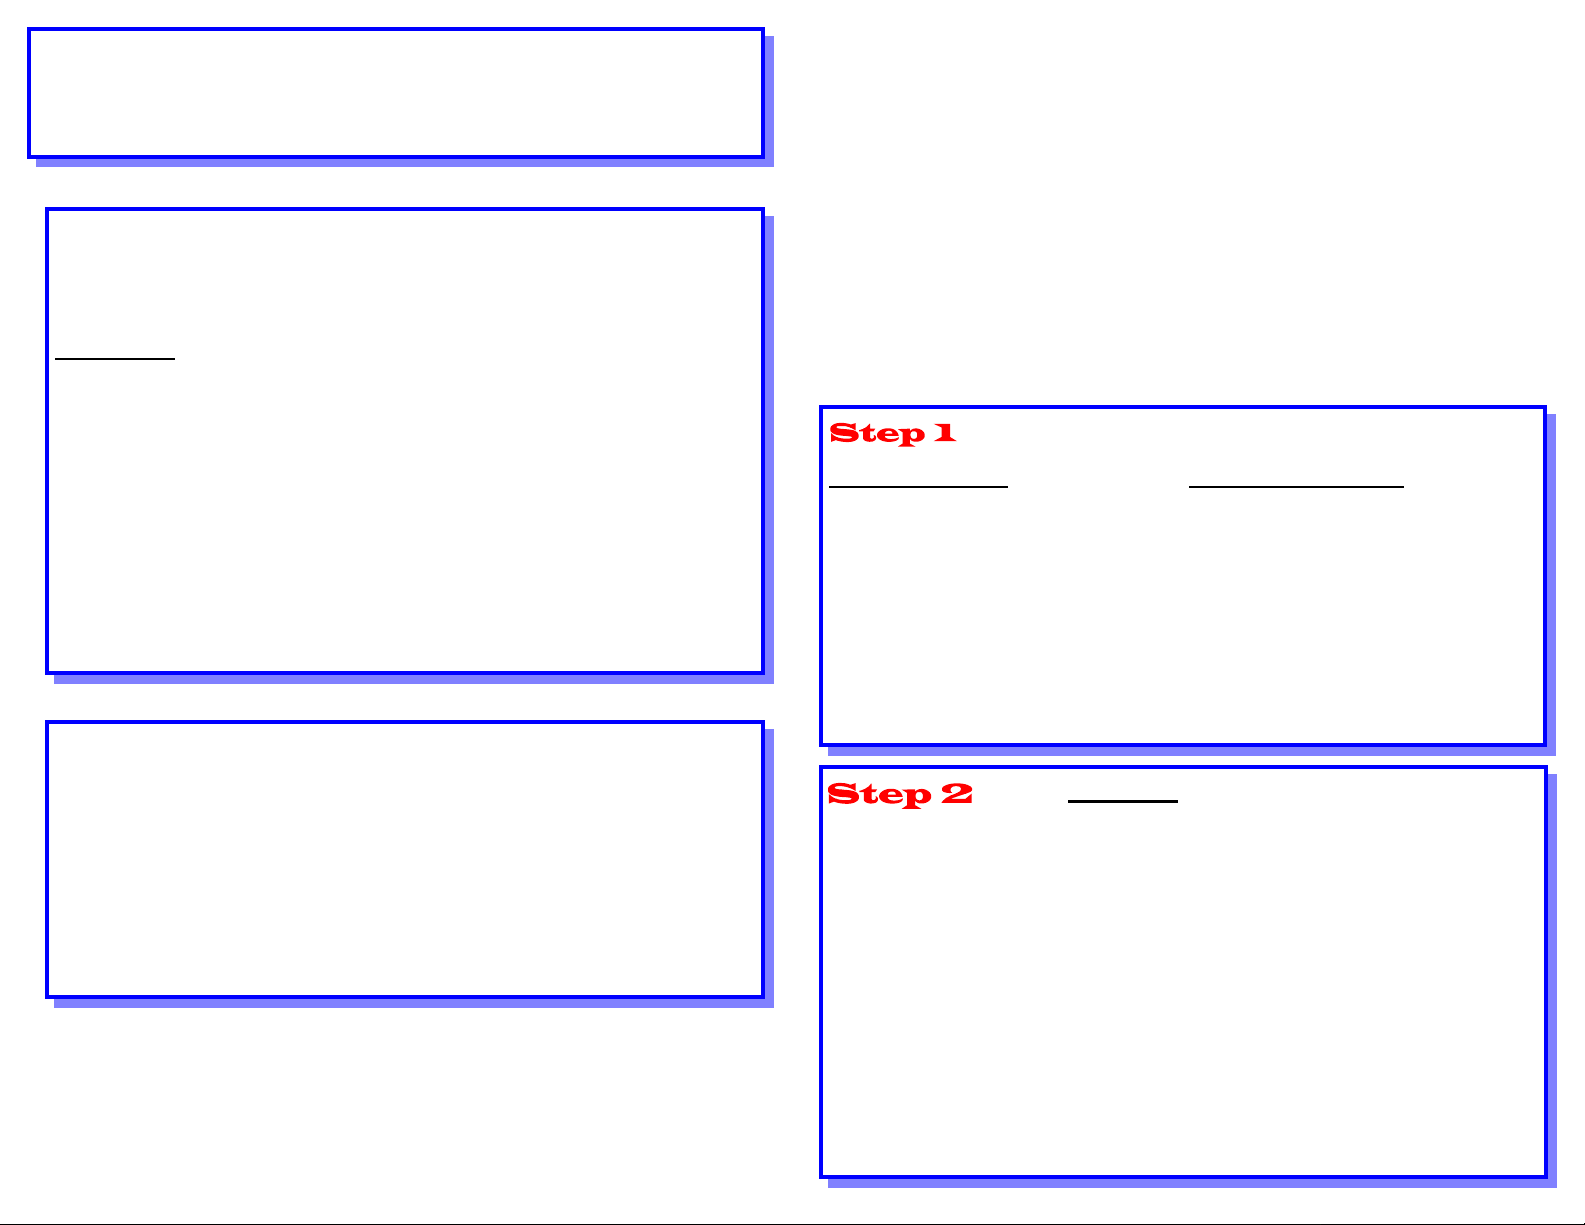
- These are the Default Printer Settings
Default Port Settings Default Network Settings
Parallel—Enabled IP Address: Get IP Address (DHCP)
LPD—Enabled Printer Name: FX-0D3595
Netware—Disabled Workgroup: “WORKGROUP”
SMB—Enabled Print Queue: fx-0d3595
IPP—Enabled
Ethertalk—Enabled
Salutation—Enabled
Port 9100—Enabled
SNMP—Enabled
FTP Client—Enabled
Internet Service—Enabled
Port Setup
Follow this procedure if you want to make any changes to the Port Settings. If no
changes are require, continue on Step 3.
1. Press “Access” button on the User Interface Control Panel.
2. Enter “System Administrator” Password. (Default – 11111)
3. Press “Confirm”
4. Press “System Settings”
5. Press “System Settings”
6. Press “Network Settings”
7. Select “Port Settings”
8. Select desired Port.
9. Select “Change Settings”
10. Follow Screen instructions to modify the port setting.
11. Select “Close” to return to the “Network Settings” screen and continue with item 7 in Step 3
“Protocol Setup”.
12. If no further changes are required, continue to select “Close” to exit the System Setup.
13. Continue on Step 4.
Page 2
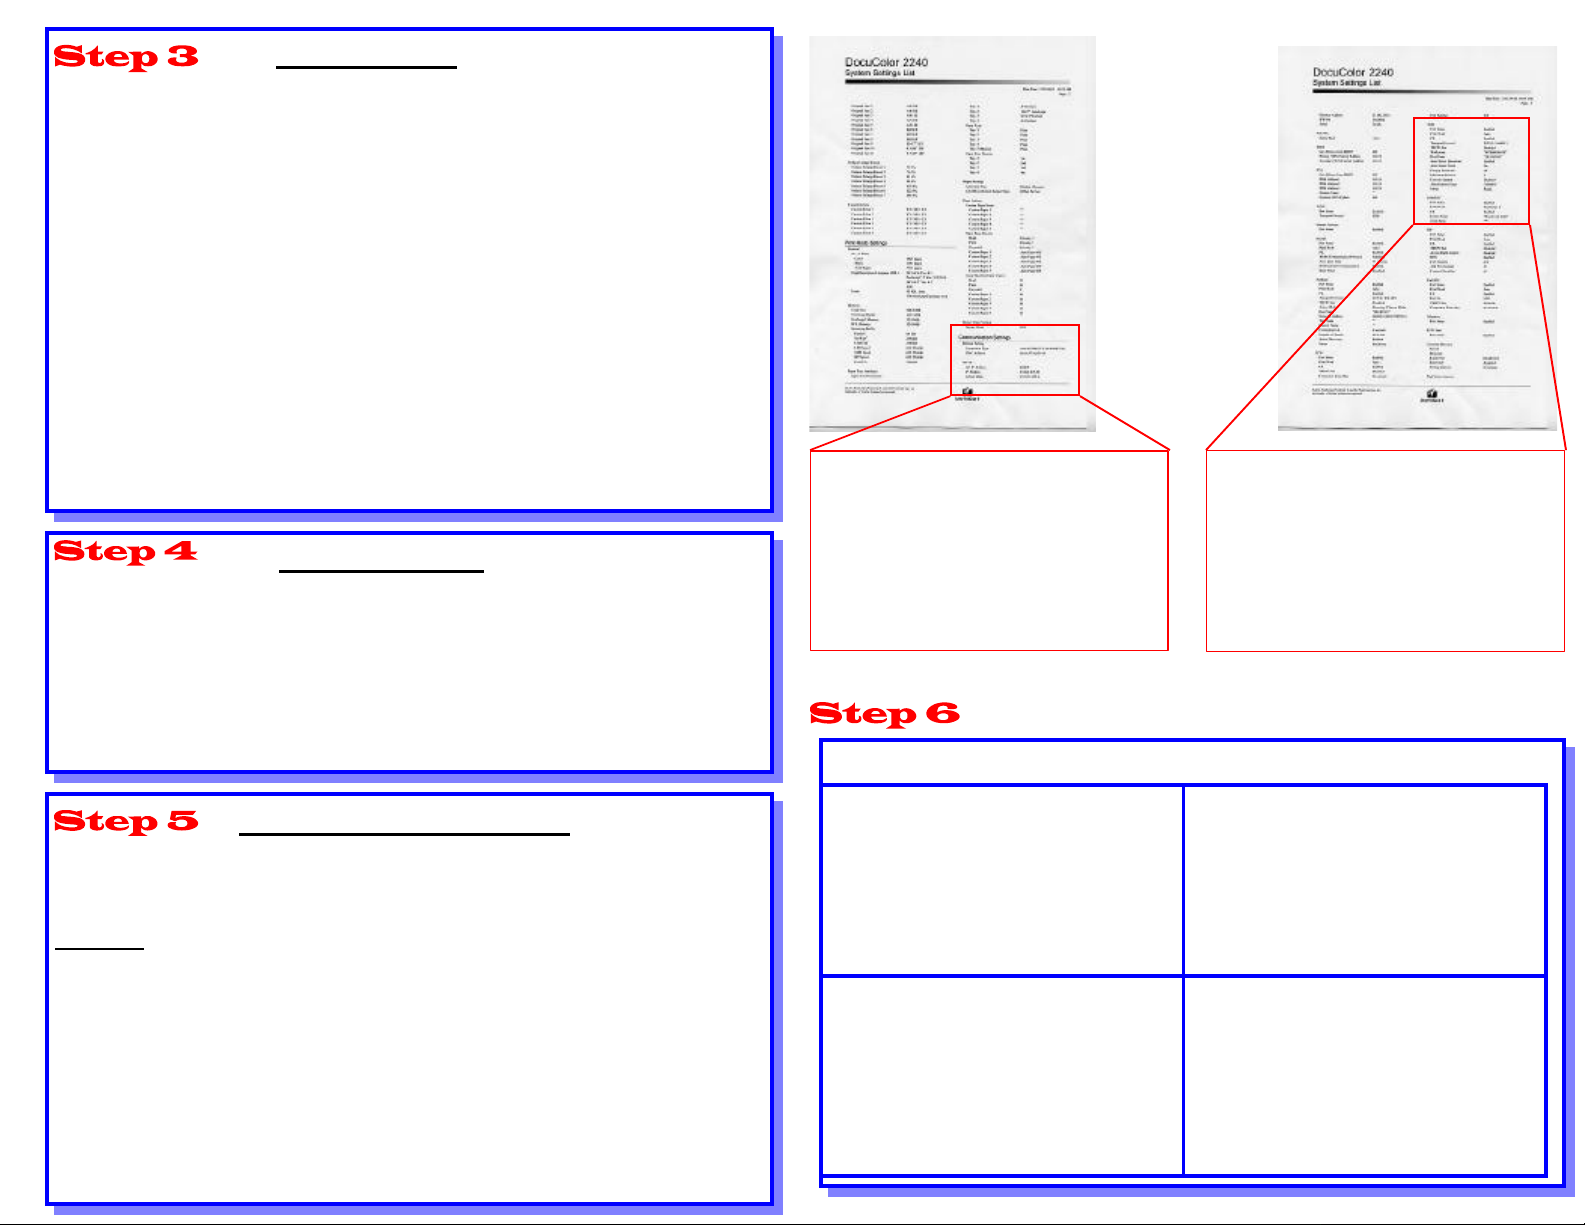
IP Protocol Setup
SMB
Auto IP (DHCP) - No Action required
Follow this procedure if you want to make any changes to the Protocol Settings. If no
changes are require, continue on Step 4.
Static IP Configuration
1. Press “Access” button on the User Interface Control Panel.
2. Enter “System Administrator” Password. (Default – 11111)
3. Press “Confirm”
4. Press “System Settings”
5. Press “System Settings”
6. Press “Network Settings”
7. Press “Protocol Settings”
8. Select setting to be changed.
9. Select “Change Settings”
10. Make desired changes
11. Press “Save”
12. Repeat steps 8-11 to make any other changes.
13. Select “Close” to exit.
Print a Settings List
1. Press “Machine Status” button on the User Interface Control Panel.
2. Select Billing Meter / Print Report
3. Select “Print Report / List”
4. Select “Print Mode Settings”
5. Select “Settings List (Common Items)”
6. Press “Start” Button to print a Settings List.
7. Refer to Sample Settings List on opposite page.
Page 2
Sample
Settings List
Pages
Communication Settings
Ethernet Setting
Connection Type Auto
Mac Address 08:xx:xx
TCP/IP
Get IP Address From DHCP / Manual
IP Address xxx.xxx.xxx.xxx
Subnet Mask xxx.xxx.xxx.xxx
Gateway Address xxx.xxx.xxx.xxx
Load Print Drivers
Print Driver Installation information for printing using LPR
Port Status Enabled
Print Mode Auto
PJL Enabled
Transport Protocol TCP/IP, NetBEUI
TBCP Filter Disabled
Workgroup WORKGROUP (Default)
Host Name FX-0D3595 (Default)
Auto Driver Download Enabled
Auto Master Mode On
Encript Password On
Page 3
Web User Interface Instructions
A PC client connected to the network is required to complete the printer network set-up.
Follow this procedure if you want to make any other changes to the printer configuration.
Procedure
1. Open a web browser (Internet Explorer)
2. Verify that Proxy Servers are being bypassed for local web addresses.
3. Type the TCP/IP address assigned to the printer in the URL window. (Refer to the
Settings List for the TCP/IP Address)
4. Select “Properties” Tab.
5. Make desired changes.
Note: Default User Name: admin / Default Password: admin
6. Reboot print server.
7. Print a new Settings List.
Win 95 / 98 / Me
Requires third party Print Utility (Spooler)
software to enable the creation of an LPR
Port.
Windows 2000
Add Printer wizard
Local Printer
Create new port—LPR Port
Server Name or Address – Refer to IP
Address on the Settings List.
Name of Printer or Print Queue—”raw”
Windows NT
Add Printer wizard
Add LPR Port
Server Name or Address – Refer to IP
Address on the Settings List.
Name of Printer or Print Queue—”raw”
Windows XP
Add Printer wizard
Local Printer
Create new port—LPR Port
Server Name or Address – Refer to IP
Address on the Settings List.
Name of Printer or Print Queue—”raw”
 Loading...