

Page 1
Page 2

Page 3

T
ABLE OF CONTENTS
Table of Contents
Overview 1
System Settings 2
Setting and Changing the Administrator Password 3
Entering and Exiting the System Settings Mode 5
Entering the System Settings Mode 5
Exiting System Settings Mode 6
Changing Settings in System Settings Mode 6
Setting the Common Settings 7
Machine Clock/Timers Setting 8
Audio Tone Settings 10
Setting Screen Defaults 12
Paper Tray Attributes 13
Setting Printing Priority Defaults 17
Image Quality Adjustment 18
Image Quality Setting 18
Auto Gradation Adjustment 21
Reports Settings 22
Other Machine Settings 23
TABLE OF CONTENTS
i
Page 4

T
ABLE OF CONTENTS
Copy Mode Settings 23
Basic Copying Presets 24
Copy Defaults 25
Copy Control 36
Original Size Defaults 37
Setting Reduce/Enlarge Presets 38
Setting Custom Colors 39
Network Settings 39
Print Mode Settings 40
Allocate Memory 41
Others (Print Mode Settings) 44
Scan Mode Settings 45
Basic Scanning Presets 45
Setting Scan Defaults 46
Setting the Scan Size Defaults 50
Setting the Output Size Defaults 51
Setting Reduce/Enlarge Presets 52
Other Settings (Scanner) 53
Setting/Deleting Mailboxes 55
Auditron 56
Create/Check Accounts 57
Deleting/Resetting Data by Account 58
Enabling Auditron Mode 59
System Administrator Data 59
Delete/Reset All Account Data 60
Printing Meter Reports 61
Internet Services 62
ii
Page 5
Overview
4. User Guide (Machine
Administrator)
This chapter describes the features found in the System Settings
Mode.
The System Settings Mode allows you to change the machine
default settings, and the image quality settings.
4–1
ADMINISTRATOR)
USER GUIDE (MACHINE
Page 6

U
SER GUIDE
(M
ACHINE ADMINISTRATOR
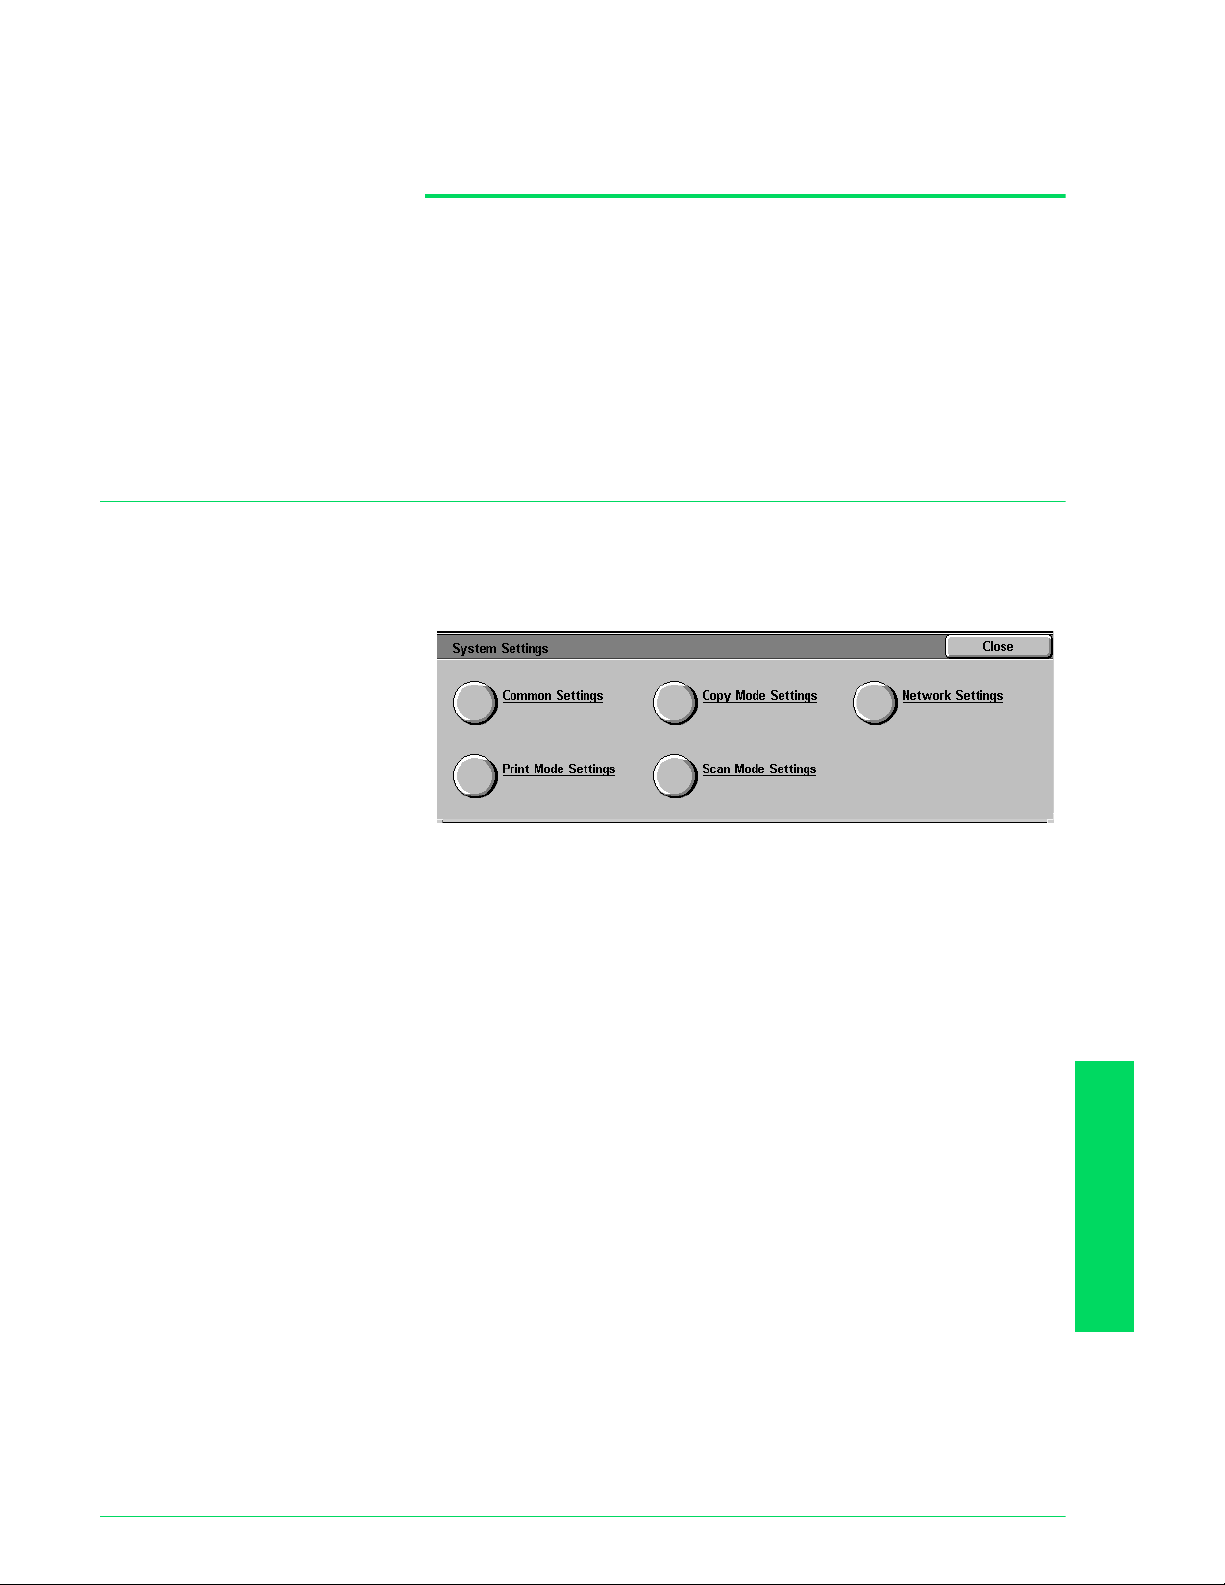
System Settings
Common Settings : Change the default settings for:
Copy Mode Settings: Change the default settings for:
)
System Settings allows you to change the default of the following
features:
• Date/Timers
• Audio Tones
• Screen Defaults
• Paper Trays
• Printing Priority
• Image Quality/Auto Gradation Adjustment
• Reports
•Sleep Mode
• Copy Defaults
• Control of Copy Operation
• Original Size
• Reduce/Enlarge
•Custom Colors
Network Settings: Set the default settings for:
• Port Settings
• Protocol Settings
Print Mode Settings: Set the default settings for:
• Memory Settings
• Other Settings (Printer Settings)
Scan Mode Settings: Change the default settings for:
• Scanner Settings
• Other Settings (Scanner Settings)
4–2
Page 7
U
SER GUIDE
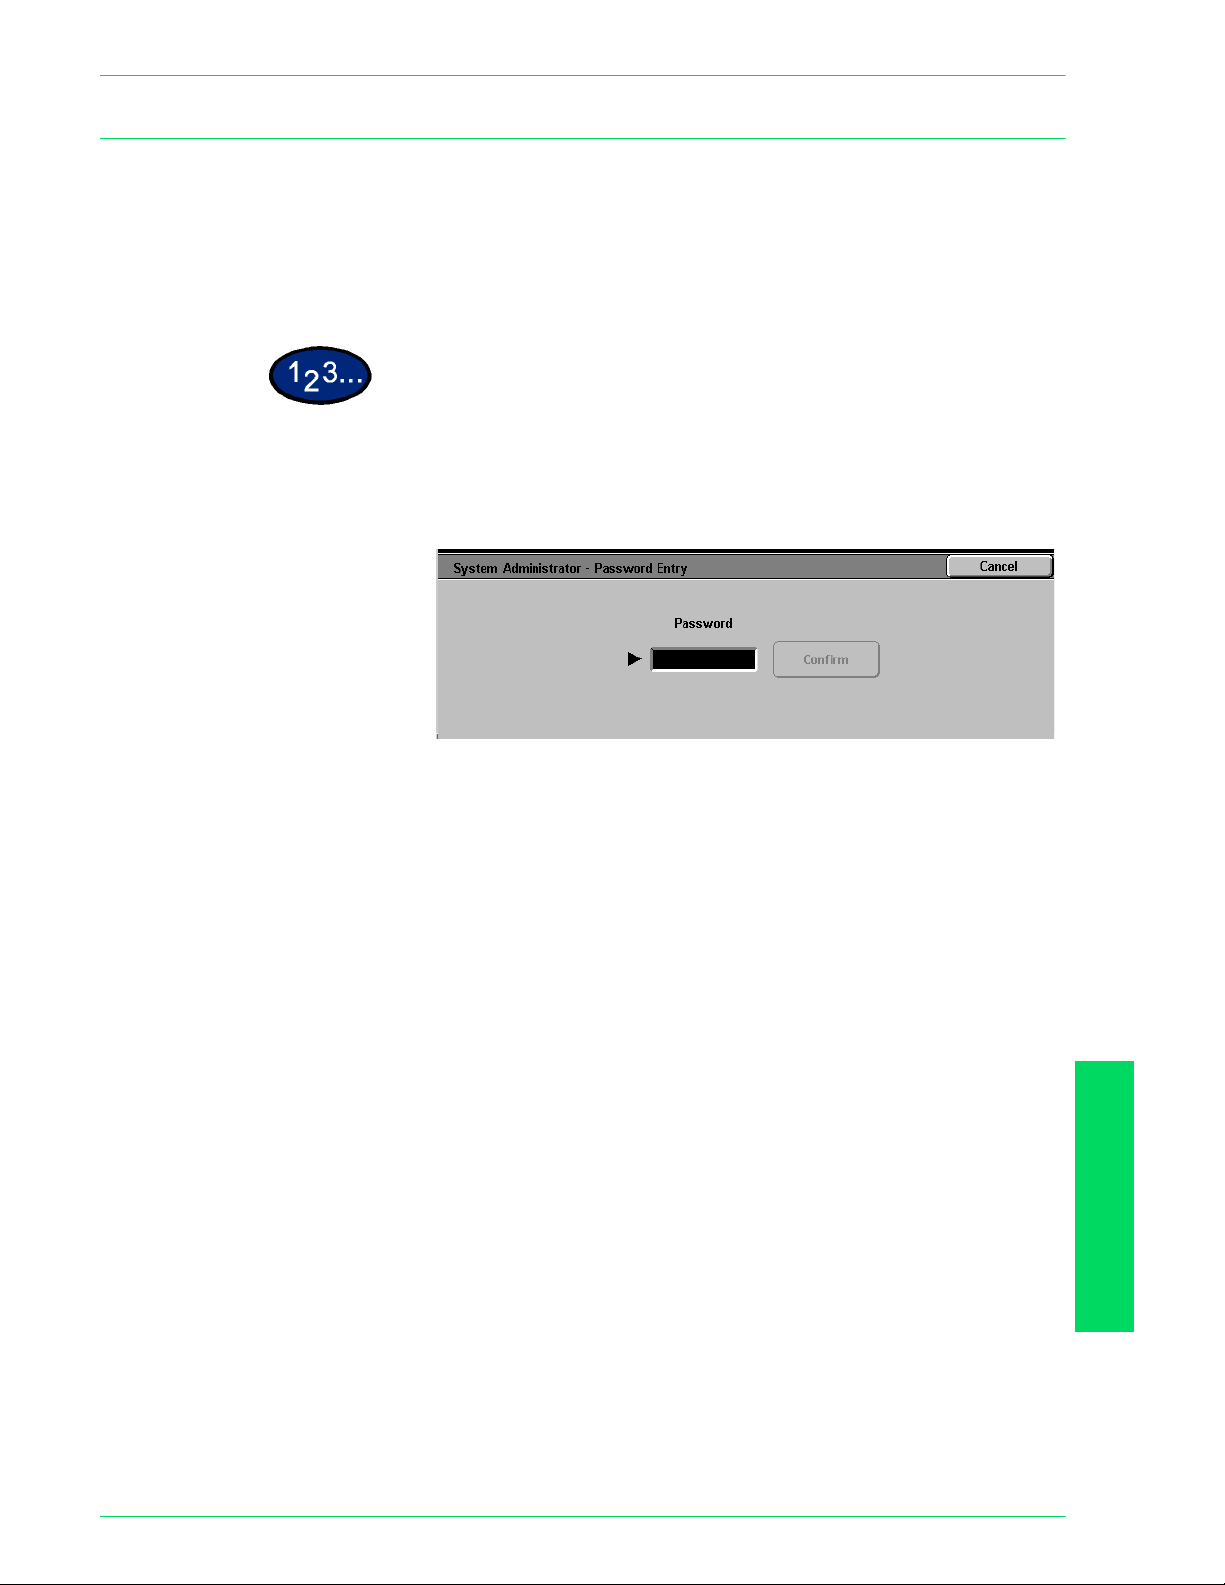
Setting and Changing the Administrator Password
This section explains how to set and change the System Settings
Mode password. The default password is set to "11111" . You
cannot enter System Settings Mode unless the password is
entered. Setting a password also allows you to output total reports
and a list of registered mailboxes.
Press the Access button. The Password Entry screen is
1
displayed.
(M
ACHINE ADMINISTRATOR
)
Enter the password using the numeric keypad on the Control
2
Panel, and select Confirm. The System Administrator Menu
screen is displayed.
NOTE: Your password will be displayed by an asterisk (*). If you
make a mistake, press Clear (C) and re-enter the password.
To cancel the operation, select Cancel.
Select System Settings. The System Settings screen is
3
displayed.
ADMINISTRATOR)
USER GUIDE (MACHINE
4–3
Page 8
U
SER GUIDE
(M
ACHINE ADMINISTRATOR
4
5
6
7
8
)
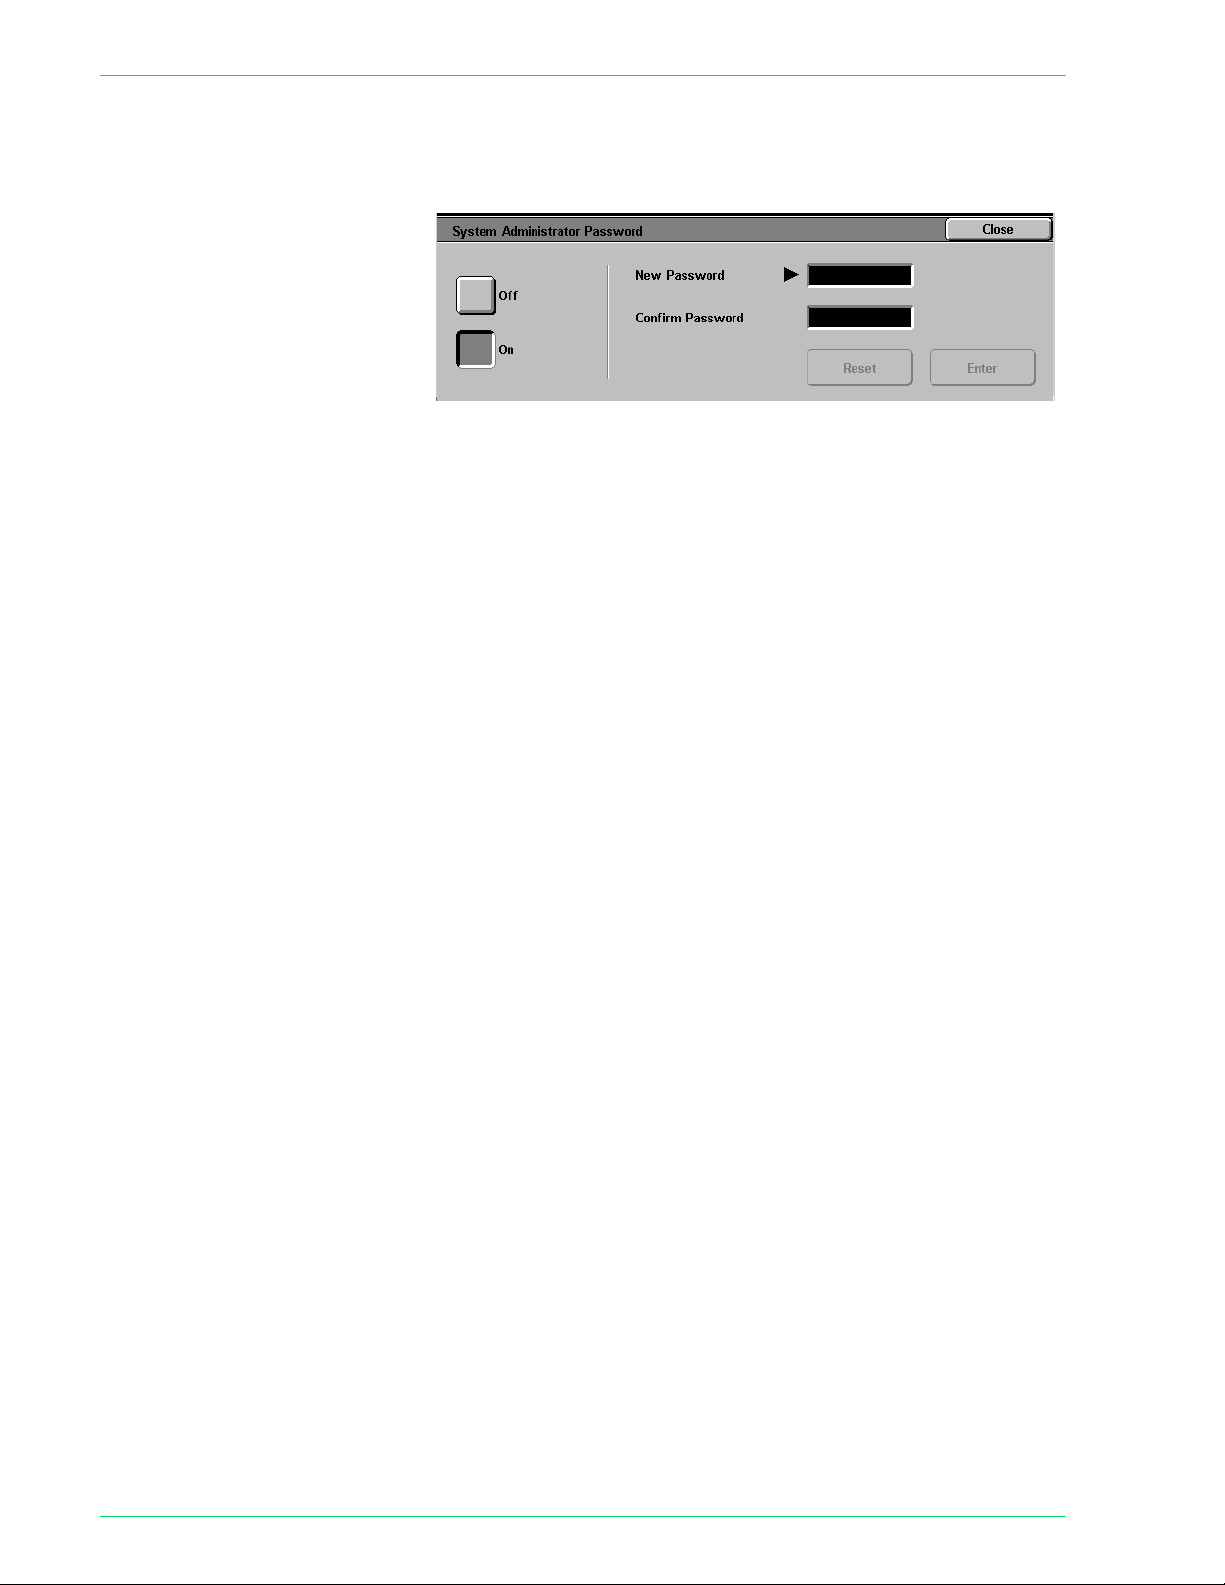
Select System Administrator Password. The System
Administrator Password screen is displayed.
Select Off to disable entering a password.
Select On, and enter the new password using the numeric keypad
on the Control Panel.
Select Enter.
Re-enter the password, exactly as you did in Step 5, and select
Enter.
9
10
NOTE: Enter the exact same number in Step 5 and Step 7. If you
make a mistake, select Reset and return to Step 5.
Select Close. You will be returned to the System Settings screen.
Select Exit to exit the System Settings Mode.
4–4
Page 9
U
SER GUIDE
Entering and Exiting the System Settings Mode
This section explains how to enter and exit System Settings Mode.
Entering the System Settings Mode
This section explains how to enter the System Settings Mode.
NOTE: The machine will not enter the System Settings Mode
when an error message is displayed.
Press the Access button. The Enter Password screen is
1
displayed. The default password is 11111.
Enter the password and select Confirm. The machine enters
2
System Settings Mode, and the System Administrator Menu
screen is displayed.
(M
ACHINE ADMINISTRATOR
)
NOTE: Your password will be displayed by an asterisk (*). If you
make a mistake, press the Clear button and re-enter the
password.
If you want to cancel the operation, select Cancel.
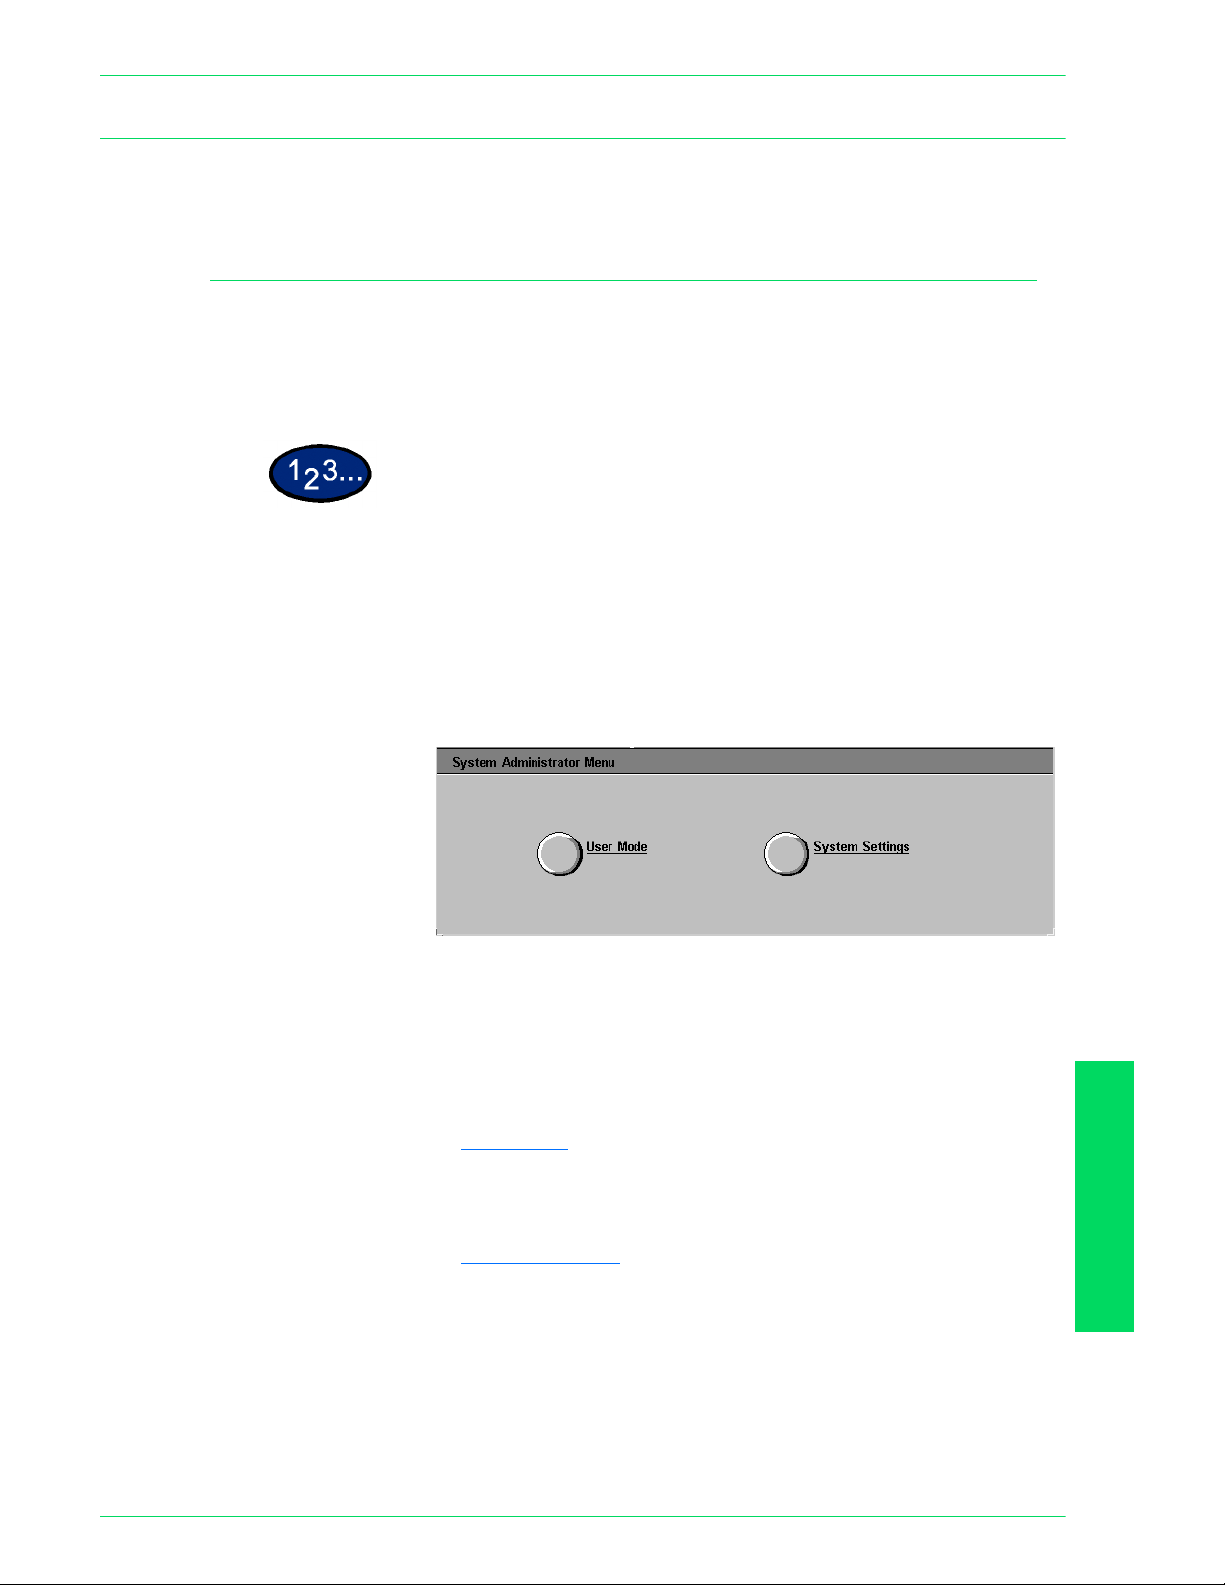
Select either User Mode or System Settings.
3
• User Mode
Settings Mode. If you select Machine Status or Job Status
while in the System Settings Mode, printer and copier total
reports can be printed.
• System Settings
- make copies and scan documents in the System
- you can change the settings of features.
ADMINISTRATOR)
USER GUIDE (MACHINE
4–5
Page 10
U
SER GUIDE
(M
ACHINE ADMINISTRATOR
Exiting System Settings Mode
This section outlines the procedure for exiting the System Settings
Mode.
When you finish performing the desired operations, select Close
1
until the System Settings screen is displayed.
Select Exit.
2
)
Changing Settings in System Settings Mode
This section provides an example of the basic procedures
required to change settings in System Settings Mode using the
System Clock Setting feature. Please follow these procedures for
all the features in System Settings Mode.
Press the Access button.
1
Enter the password, and select Confirm. The System
2
Administrator Menu screen is displayed.
Select System Settings. The System Settings screen is
3
displayed. Select System Settings.
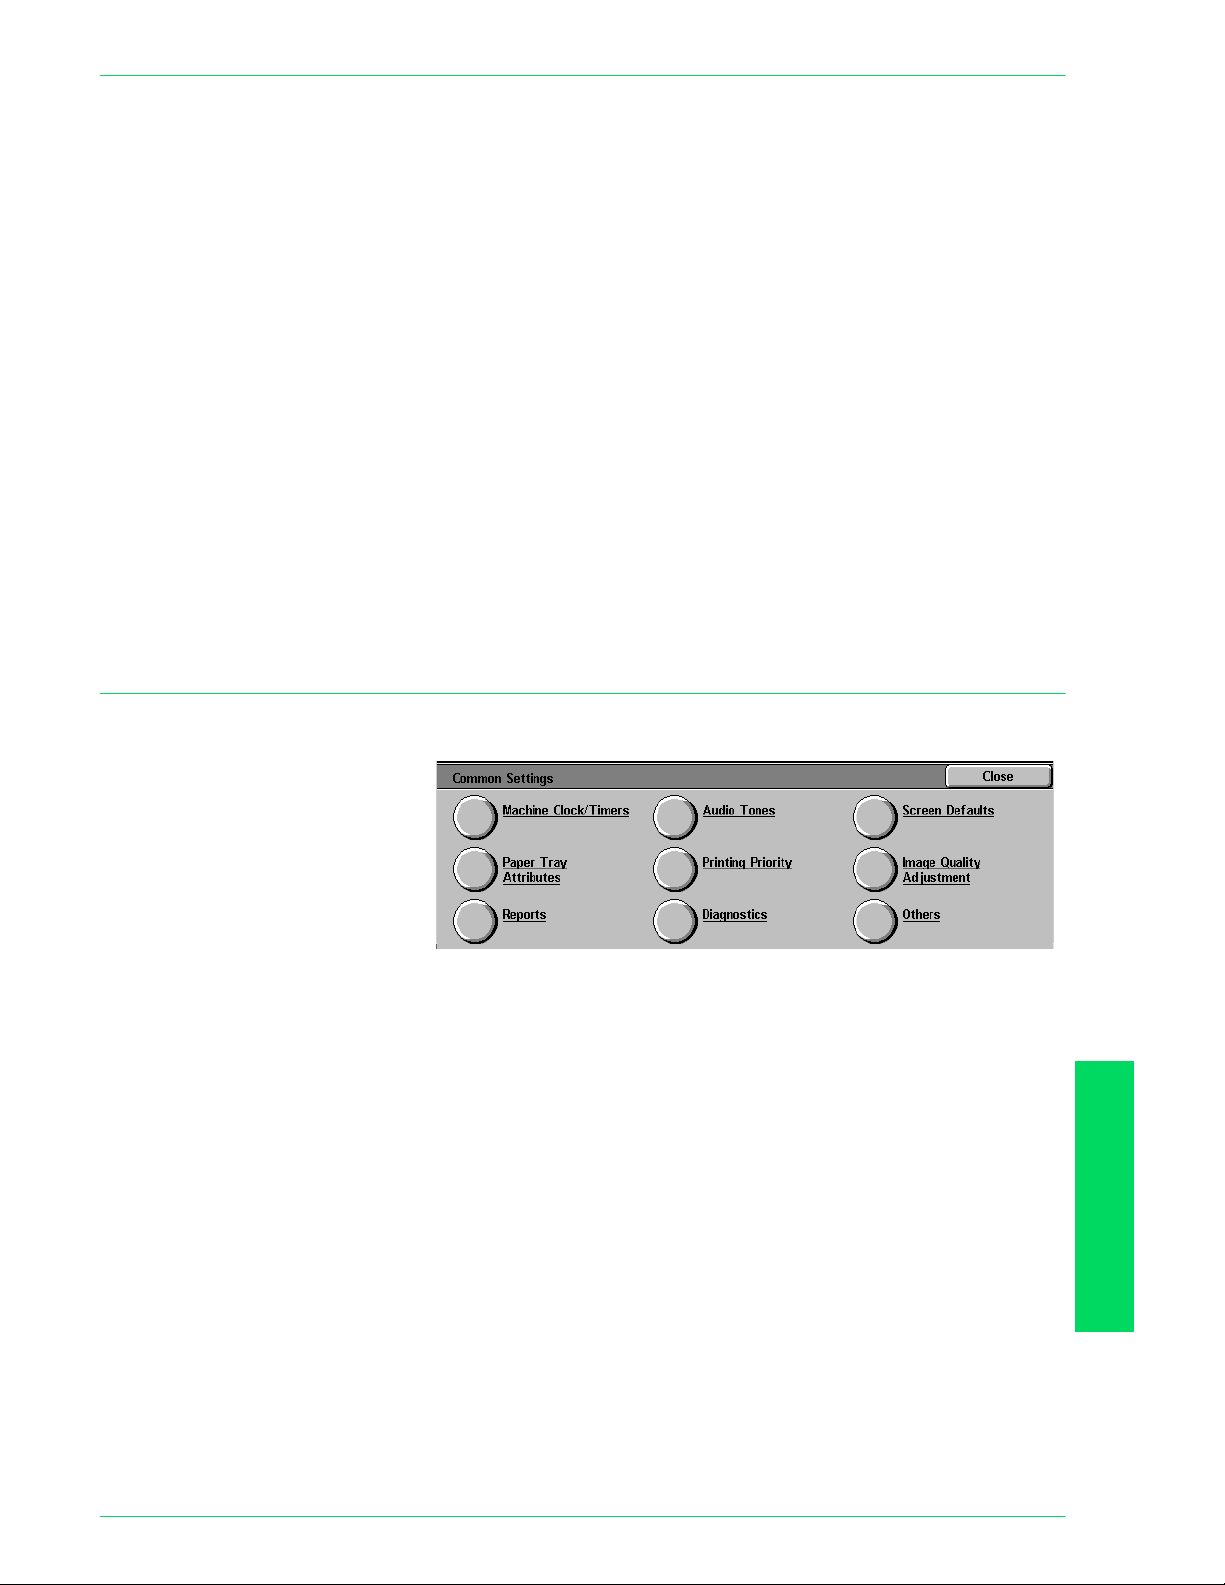
Select Common Settings. The Common Settings screen is
4
displayed.
NOTE: If you are setting a feature in Copy Mode Settings,
Network Settings, Print Mode Settings, or Scan Mode Settings,
press the desired button.
Select Machine Clock / Timers. The Machine Clock / Timers
5
screen is displayed.
4–6
Page 11
U
SER GUIDE
Select Date, then select Change Settings. The Date screen is
6
displayed.
Select the desired Date format.
7
Use the up and down arrow buttons to enter the year, month, and
8
date.
NOTE: If Cancel is selected, the machine will return to the
previous screen without saving any changes.
Select Save. You are returned to the Machine Clock / Timers
9
screen.
(M
ACHINE ADMINISTRATOR
)
10
11
12
To make changes to other settings, repeat the procedure.
When you are finished making changes, select Close until the
System Settings screen is displayed.
Select Exit. System Settings Mode closes.
Setting the Common Settings
This section describes the Common Setting items, which relate to
the main features on the machine.
4–7
ADMINISTRATOR)
USER GUIDE (MACHINE
Page 12

U
SER GUIDE
(M
ACHINE ADMINISTRATOR
)
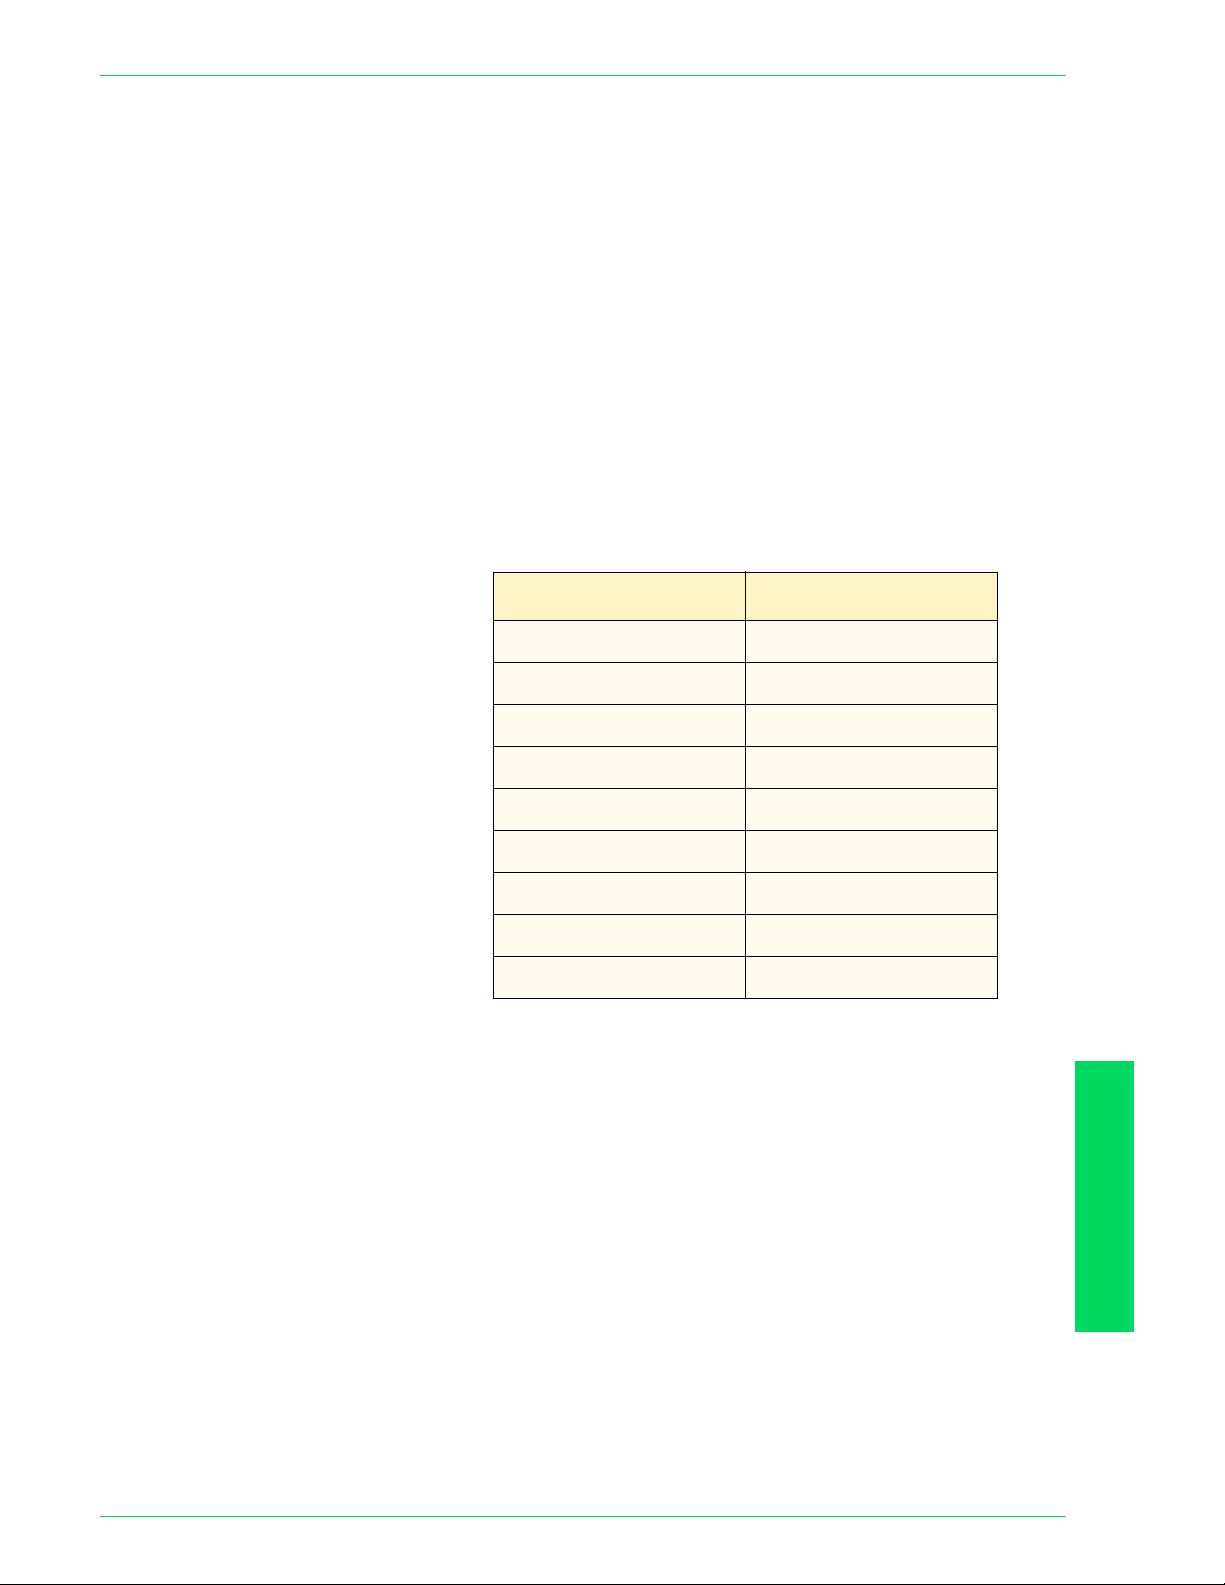
Machine Clock/Timers Setting
This setting allows you to set the time and date. You can also
determine the duration of time until the Power Saver Mode or
reset functions engage.
Machine Clock/Timers allows you to set the following items.
Date Sets the Date (Month/Day/Year) of the machine's system clock to:
• Date Format - Y/M/D, M/D/Y, or D/M/Y
• Month - 1 to 12
• Day - 1 to 31
• Year - 2000 to 2099
The date set here is printed on lists and reports. The default is
2001, January 1.
Time Sets the system clock time (H / M) by 12-hour clock display or 24-
hour clock display.
• Hours - 0~23 (24-hour clock) OR 1~12 (12-hour clock)
• Minutes - 0~59.
• Set AM or PM if it is a 12-hour clock display.
The time set here will be printed on lists and reports. The default is
12-hour clock display, 0:00 AM.
Time Zone Sets the time zone that you are in. Use the up and down arrow
buttons to set the time difference from Greenich Mean Time.
Daylight Savings Sets whether or not to apply daylight savings to the system clock
time.
•Adjust Off
•Adjust On
4–8
Page 13

U
SER GUIDE
(M
ACHINE ADMINISTRATOR
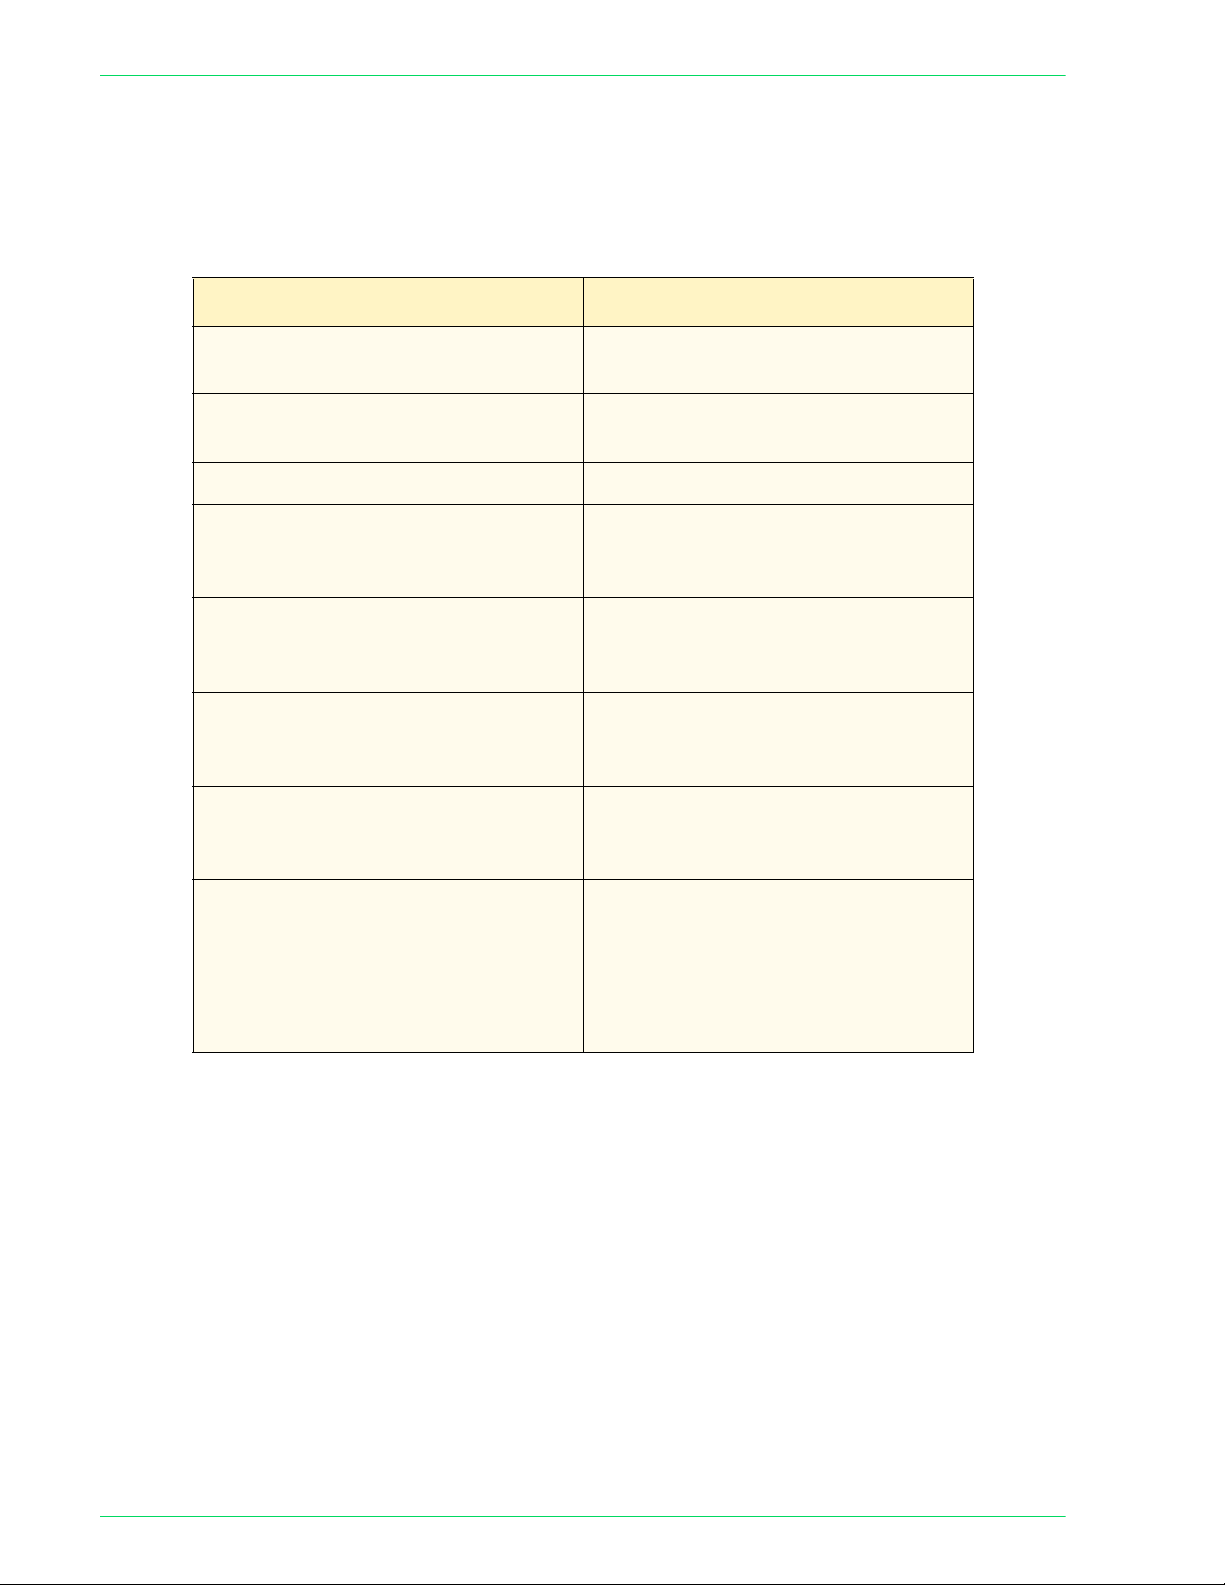
Auto Clear Sets the time to wait before returning the Control Panel to the
default screen. The amount of time until reset can be set to:
•0
OR
• 60 ~ 240 seconds, in 60-second increments.
Enter the value using the numeric keypad on the Control Panel.
The default is 60 seconds.
Auto Job Release Tells the machine to release the current job to enable the
execution of the next job when a fault occurs during copying or
scanning. The job can be executed only in parts of the machine
that are functioning normally. Set the time to:
• 0 - do not automatically release the job.
• 240 ~ 5940 seconds (4 ~ 99 minutes) in 60-second
increments.
Enter the value using the numeric keypad on the Control Panel.
The default is 600 seconds.
Auto Print Allows the machine to automatically start print jobs when there
has been no activity for a set amount of time. Set the time to:
)
• 1 ~ 240 seconds in 1-second increments.
Enter the value using the number keys on the Control Panel. The
default setting is 10 seconds.
Auto Power Saver Low Power Mode and Sleep Mode are part of the energy-saving
mode. As time lapses, the machine lowers power consumption:
Last Operation -> Low Power Mode -> Sleep Mode.
• Set the time to Low Power Mode from 6 ~ 240 minutes and
• Set the time to Sleep Mode from 0 ~ 234 minutes
Both are set in 1 minute increments.
NOTE: Low Power Mode cannot be disabled. The total set time of
both Low Power Mode and Sleep Mode must be between 15 - 240
minutes.
4–9
ADMINISTRATOR)
USER GUIDE (MACHINE
Page 14

U
SER GUIDE
(M
ACHINE ADMINISTRATOR
)
Audio Tone Settings
This determines the conditions under which Audio Tones are
used.
Audio Tone Settings allows you to set the following items.
Control Panel Select Tone Sets the tone when a button is selected on the display. It can be
set to:
•Off
•Soft
•Normal
• Loud
The default is Normal.
Control Panel Alert Tone Sets the tone when an incorrect button was selected, or an
operation was attempted during an error. It can be set to:
•Off
•Soft
•Normal
• Loud
The default is Normal.
Machine Ready Tone Sets the tone when the machine is ready for copying or printing. It
can be set to:
•Off
•Soft
•Normal
• Loud
The default is Normal.
Copy Job Complete Tone Sets the tone when copying has been completed successfully. It
can be set to:
•Off
•Soft
•Normal
• Loud
The default is Normal.
4–10
Page 15

U
SER GUIDE
(M
ACHINE ADMINISTRATOR
)
Non-Copy Job Complete
Tone
Fault Tone Sets the tone when a fault occurs and the job is held in a faulted
Alert Tone Sets the tone when a job finishes abnormally. It can be set to:
Sets the tone when a job other than copying has been completed
successfully. It can be set to:
•Off
•Soft
•Normal
• Loud
The default is Normal.
state. It can be set to:
•Off
•Soft
•Normal
• Loud
The default is Normal.
•Off
•Soft
•Normal
• Loud
The default is Off.
Low Toner Alert Tone Sets the tone when the Drum Cartridge or Toner Cartridge has to
be replaced. It can be set to:
•Off
•Soft
•Normal
• Loud
The default is Normal.
ADMINISTRATOR)
USER GUIDE (MACHINE
4–11
Page 16

U
SER GUIDE
(M
ACHINE ADMINISTRATOR
)
Setting Screen Defaults
This allows you to chose the default screen that is displayed when
the machine is turned on.
Screen Defaults allows you to set the following items.
Screen Default at Power On Select one of the following screens to display as the default
screen when the machine is turned on:
• Features
• Job Status
• Machine Status
The default is the Features screen.
Features Screen Default Select one of the following screens to display as the default
screen when Features is selected:
• Menu - gives you the option to select copy or scan.
• Copy - displays the copy feature tabs.
• Scan - displays the scan feature tabs.
The default is the Copy Screen.
4–12
Page 17

U
SER GUIDE
(M
ACHINE ADMINISTRATOR
Paper Tray Attributes
This enables you to set the type and priority of paper loaded in
trays, image quality processing settings by paper type, and other
paper tray related settings.
Paper Tray Attributes allows you to set the following items.
Custom Paper Name Allows you to set up to 5 custom paper types. The paper must be
plain, bond, or recycled. Set a name up to 12 characters long for
custom paper 1 to 5 using letters and symbols.
Paper Type Sets up the type of paper loaded in Trays 1, 2, 3, 4, and 5
(Bypass).
• Plain paper, recycled paper, bond paper and Custom Paper 1
~ 5 can be loaded in Trays 1 - 4.
Enter the setting on the Numeric Keypad using the numbers listed
in the following table.
The default is 14, or Bond Paper.
For more information on recommended paper types, refer to the
Recommended Materials List.
)
Setting Description Comments
14
0
3
161
162
Bond Paper
Plain Paper
Recycled Paper
Custom Paper 1
Custom Paper 2
Color-exclusive or laser print paper, usually
24 or 28 lb., such as Xerox Digital Color
Expressions+ 24 and 28 lb. In general, use for
81 - 105 gsm paper.
Office environment or multipurpose paper
usually 18 or 20 lb., such as Xerox Business
Multipurpose 4200 and Premium
Multipurpose 4024 20 lb. In general, use for
64 - 80 gsm paper.
Environmentally responsible paper usually 18
or 20 lb. In general, use for 64 - 80 gsm
paper.
User defined paper name for paper loaded in
Tray. Responds equivalent to Plain Paper as
printer default. If using Bond or Recycled
paper, change the Image Quality value. Refer
to Image Quality in Paper Tray Attributes.
User defined paper name for paper loaded in
Tray. Responds equivalent to Plain Paper as
printer default. If using Bond or Recycled
paper, change the Image Quality value. Refer
to Image Quality in Paper Tray Attributes.
ADMINISTRATOR)
USER GUIDE (MACHINE
4–13
Page 18
U
SER GUIDE
Setting Description Comments
(M
ACHINE ADMINISTRATOR
)
163
164
165
16
5
1
8
Custom Paper 3
Custom Paper 4
Custom Paper 5
Lightweight *
Transparency *
Heavyweight 1 *
Heavyweight 2 *
User defined paper name for paper loaded in
Tray. Responds equivalent to Plain Paper as
printer default. If using Bond or Recycled
paper, change the Image Quality value. Refer
to Image Quality in Paper Tray Attributes.
User defined paper name for paper loaded in
Tray. Responds equivalent to Plain Paper as
printer default. If using Bond or Recycled
paper, change the Image Quality value. Refer
to Image Quality in Paper Tray Attributes.
User defined paper name for paper loaded in
Tray. Responds equivalent to Plain Paper as
printer default. If using Bond or Recycled
paper, change the Image Quality value. Refer
to Image Quality in Paper Tray Attributes.
Office environment paper usually 16 lb. In
general, use for 55 - 63 gsm paper.
For use with transparencies.
Color-exclusive or office environment paper.
In general, use for 106 - 169 gsm paper.
Color-exclusive or office environment paper.
In general, use for 170 - 220 gsm paper.
12
13
17
Heavyweight 1 (Side 2) *
Heavyweight 2 (Side 2) *
Color-exclusive or office environment paper
for use on Side 2 while duplexing. In general,
use for 106 - 169 gsm paper.
Color-exclusive or office environment paper
for use on Side 2 while duplexing. In general,
use for 170 - 220 gsm paper.
Labels * Label special application media.
* indicates paper type for Tray 5 (Bypass) only.
4–14
Page 19
U
SER GUIDE
(M
ACHINE ADMINISTRATOR
Paper Tray Priority Select the order that Trays 1 - 4 are selected for Auto Tray
Switching. You can select the priority of each tray: First, Second,
Third, and Fourth.
The same tray cannot be selected twice. The default is Tray 1 ->
Tray 2 -> Tray 3 -> Tray 4.
Paper Type Priority Set the priority of each of the paper types for Auto Tray Switching.
Set the priority for:
• Bond Paper
• Plain Paper
• Recycled Paper
• Custom Paper 1 - 5
Enter the setting on the Numeric Keypad using the numbers listed
in the following table.
Setting Description
)
255
1
2
3
4
5
6
7
8
Auto Tray Switching Off
Highest priority
2nd priority
3rd priority
4th priority
5th priority
6th priority
7th priority
8th priority
4–15
ADMINISTRATOR)
USER GUIDE (MACHINE
Page 20
U
SER GUIDE
(M
ACHINE ADMINISTRATOR
)
Image Quality Different image quality settings can be selected for Bond Paper,
Plain Paper, Recycled Paper, and Custom Paper 1 to 5.
Enter the setting on the Numeric Keypad using the numbers listed
in the following table.
Setting Description
1
2
4
8
16
32
64
128
Best suited for color-exclusive bond
paper
Best suited for paper used in office
environments
Best suited for recycled paper
Select if small white spots or streaks
appear when printing on Plain paper
only
Select if small white spots or streaks
appear when printing on Plain paper
only
Select if small white spots or streaks
appear when printing on Plain paper
only
Select if small white spots or streaks
appear when printing on Plain paper
only
Your Xerox Customer Support Center
will set this if you are printing on
paper that does not fall under any of
the above categories. Use this setting
to improve gloss on 28 lb. Bond
paper.
4–16
NOTE: 16 and 64 are valid numerical values when printing from
the printer. When making copies using these settings, the result
will be the same as 8 and 32 respectively.
NOTE: Poor-texture paper refers to paper whose surface is
uneven when viewed against a strong light.
Page 21

U
SER GUIDE
(M
ACHINE ADMINISTRATOR
)
Tray 5 (Bypass) Paper Size
Defaults
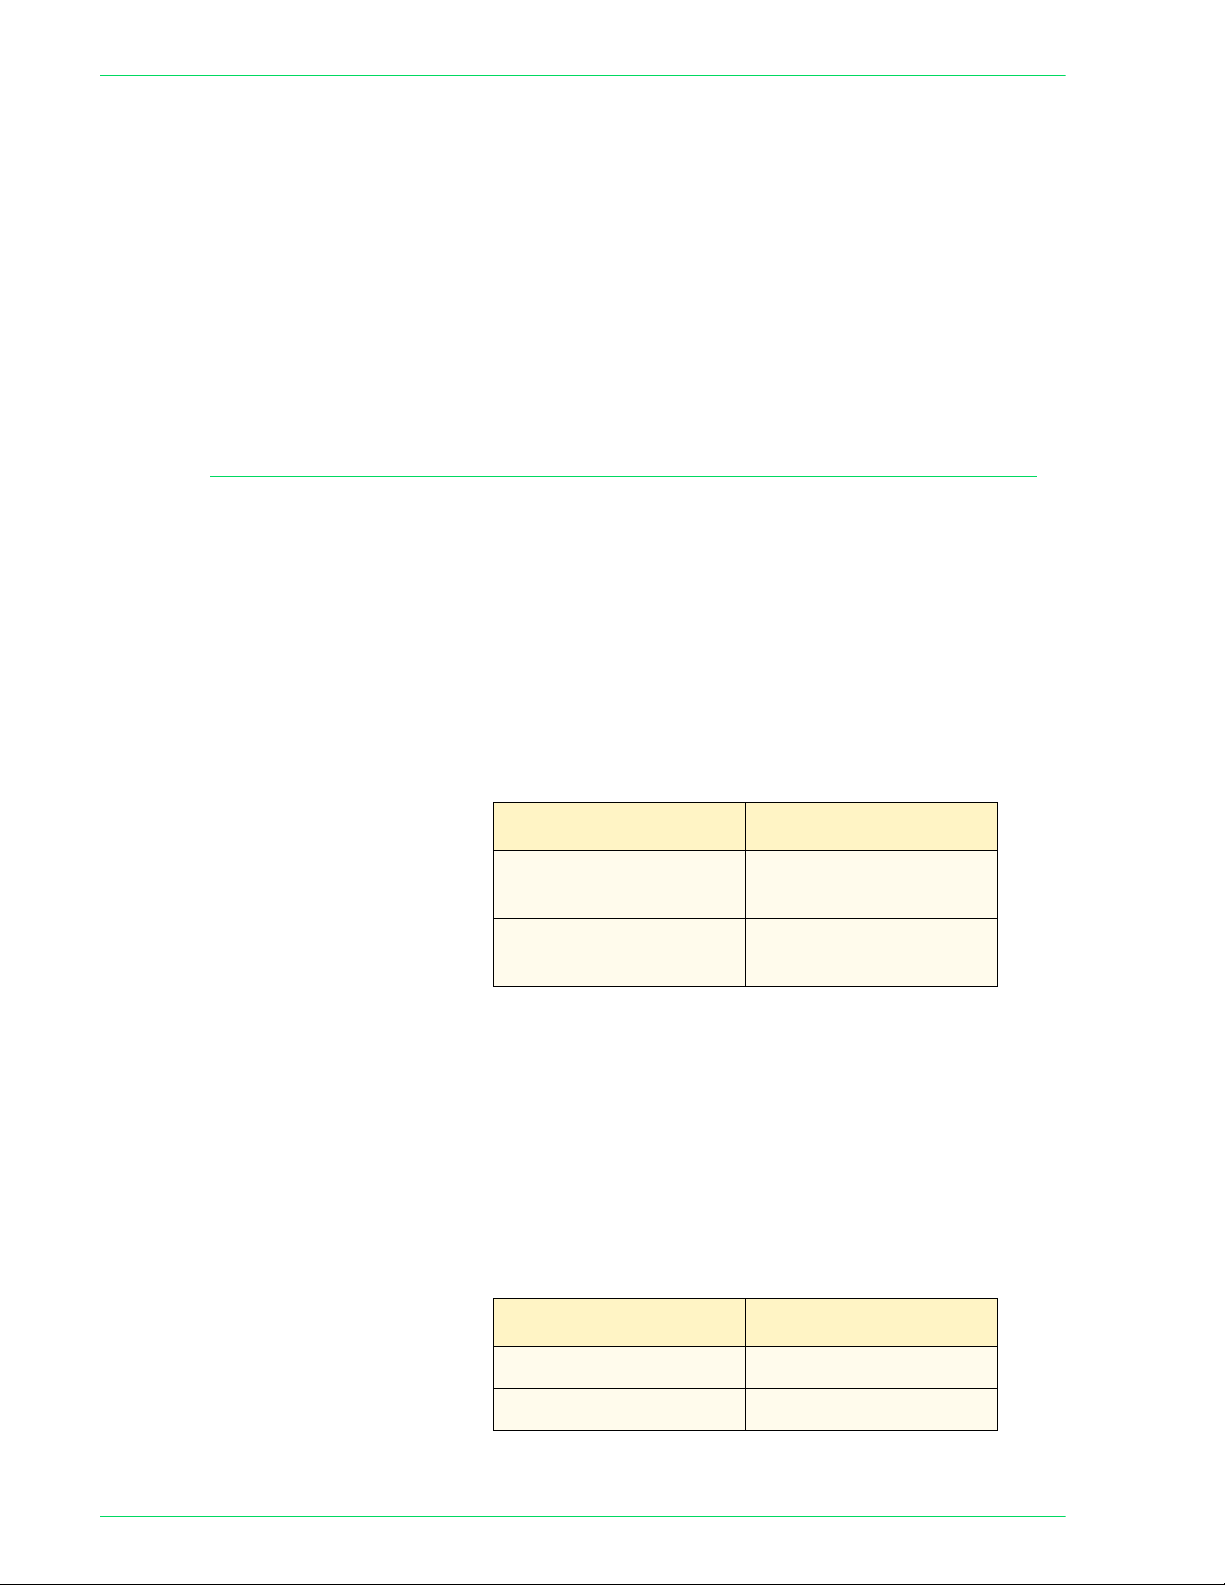
Setting Printing Priority Defaults
Copy Job Sets the priority that will be given to copy jobs.
Paper sizes can be assigned to Tray 5 Standard Size buttons 1 to
11. 11 sizes can be assigned to this paper size list.
• A/B Series Size -A3, A4 SEF, A4 LEF, A5 SEF, A5 LEF, A6,
B4, B5 SEF, B5 LEF, B6
• Inch Size - 12 x 8", 11 x 17", 11 x 15", 8.5 x 14", 8.5 x 13", 8.5
x 11" SEF, 8.5 x 11" LEF, 5.5 x 8.5" SEF, 5.5 x 8.5" LEF
• Others - 8K, 16K, 6K
• Variable - Set the X (horizontal) range between 140 and
483mm, and the Y (vertical) range between 100 and 305mm in
1mm increments
Select which job will be prioritized when the machine receives a
copy job and printer job at the same time. If both are set at the
same priority, jobs are processed in the order they are received.
Depending on the condition of the machine, they may not be
processed according to this setting.
Enter the setting on the Numeric Keypad using the numbers listed
in the following table. The default is 38, 3rd Priority.
Printer Job Sets the priority that will be given to print jobs.
Enter the setting on the Numeric Keypad using the numbers listed
in the following table. The default is 48, No Priority.
Setting Description
18
28
38
48
1st priority
2nd priority
3rd priority
No priority
ADMINISTRATOR)
USER GUIDE (MACHINE
4–17
Page 22

U
SER GUIDE
(M
ACHINE ADMINISTRATOR
)
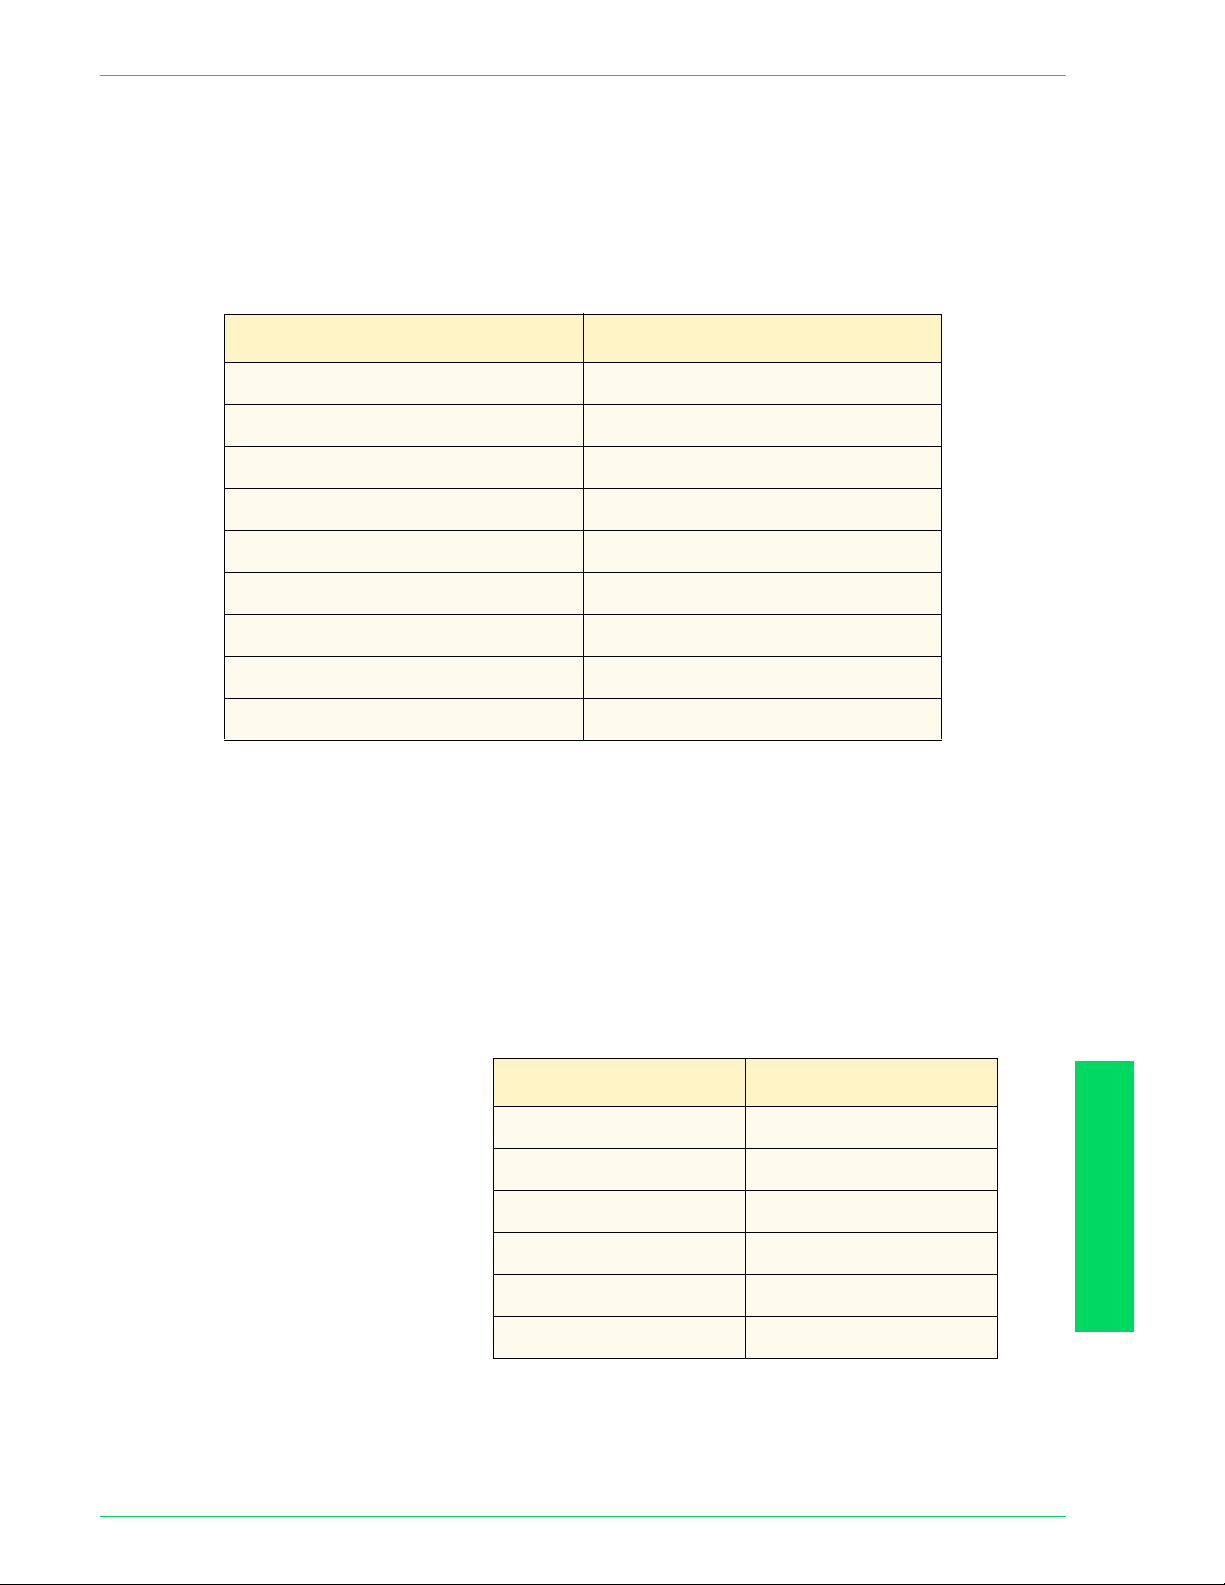
Promoted Job Set whether or not to automatically overtake a job if there is
another job that can be started when something on the machine
prevents execution of a job.
Enter the setting on the Numeric Keypad using the numbers listed
in the following table. The default is 0, Overtake Disabled.
Setting Description
0
Disables overtaking of
jobs
1
Enables overtaking of
jobs
Image Quality Adjustment
You can set the default for Image Quality/Automatic Gradation
Adjustment.
Image Quality Setting
The following items can be set in Image Quality Setting.
Photo & Text Recognition The level at which the machine judges text or photos during
document scanning can be changed when making copies by
selecting Text&Phot o on the Original Type screen.
• More Text - fine text can be easily identified as text.
• More Photo - halftone images, such as newspapers or
circulars, can be easily identified as photos.
4–18
Enter the setting on the Numeric Keypad using the numbers listed
in the following table. The default is 3, Normal.
Setting Description
1
2
3
4
5
More Text
Tex t
Normal
Photo
More Photo
Page 23

U
SER GUIDE
(M
ACHINE ADMINISTRATOR
Output Color Recognition The level at which the machine judges B/W and color during
document scanning can be changed when making copies by
selecting Auto under Output Color.
• More B/W - a black & white original is easily identified.
• More Color - a color original is easily identified.
Enter the setting on the Numeric Keypad using the numbers listed
in the following table. The default is 3, Normal.
Setting Description
)
1
2
3
4
5
More B/W
B/W
Normal
Color
More Color
Photo Reproduction Level You can adjust the color reproduction of images judged by the
machine as photos when making copies by selecting Text&Photo
on the Original Type screen.
• Heavy Text - the black areas of the image are intensified,
creating a sharper looking copy.
Select Heavy Text to emphasize black text in documents
containing both text and photos.
• Heavy Photo - the tones in photo areas in the images are
reproduced smoother.
Enter the setting on the Numeric Keypad using the numbers listed
in the following table. The default is 3, Normal.
Setting Description
1
3
5
Heavy Text
Normal
Heavy Photo
ADMINISTRATOR)
USER GUIDE (MACHINE
4–19
Page 24

U
SER GUIDE
Photo Image Quality You can adjust the image quality when printing photos.
(M
ACHINE ADMINISTRATOR
)
Enter the setting on the Numeric Keypad using the numbers listed
in the following table. The default is 1, Sharper, clearer photos.
Setting Description
0 Normal
1 Sharper, clearer photos
Color Copy - Auto
Exposure
You can set how the machine detects the density of background
color and processes to remove the background color.
• Speed Priority - part of the original will be scanned to
determine the background color level.
• Image Quality Priority - the machine pre-scans the
document, and samples the entire document to detect the
background color level.
Enter the setting on the Numeric Keypad using the numbers listed
in the following table.
B/W Copy - Auto Exposure Configure how background color is removed when making B/W
copies.
Enter the setting on the Numeric Keypad using the numbers listed
in the following table.
Setting Description
0
1
Speed Priority
Image Quality Priority
4–20
Image Enhancement Print data is smoothed to reproduce smoother images. This
feature is enabled on print jobs only.
Enter the setting on the Numeric Keypad using the numbers listed
in the following table. The default is 1, Image Enhance On.
Setting Description
0
1
Image Enhance Off
Image Enhance On
Page 25

U
SER GUIDE
(M
ACHINE ADMINISTRATOR
Auto Gradation Adjustment
Auto Gradation Adjustment is a color calibration for the copier and
printer. An Auto Gradation Adjustment compensates for
differences between the actual and the expected toner densities
for each color. An Auto Gradation Adjustment should be
performed whenever there is a noticeable change in the
appearance (quality) of the output, particularly changes in color
tones or densities. Performing an Auto Gradation Adjustment on a
regular basis will help to maintain consistent color quality over
time.
NOTE: Since an Auto Gradation Adjustment can affect all jobs for
all users, it is recommended that this procedure be performed only
by the Machine Administrator.
Copy Job - Text Compensates tones when a text original is copied.
Copy Job - Photo Compensates tones when a photo original is copied.
Print Job - Text Compensates tones when printing text documents.
Print Job - Photo Compensates tones when printing photo documents.
)
NOTE: Printing the chart for Auto Gradation does not increase the
meter count.
NOTE: When gradation adjustment is executed, the following
changes will be made to default copy settings set in System
Settings mode: Copy density = Normal or Auto, Color Shift =
Normal, Saturation = Normal, Color Balance = 0, Sharpness = 0.
On the Image Quality Adjustment screen, select Auto Gradation
1
Adjustment.
Load 8.5x11 inch or A4 paper into Tray 5 (Bypass). Move the
2
paper guide to gently touch the edge of the paper.
Select the desired gradation adjustment screen:
3
• Copy Job - Text
• Copy Job - Photo
• Print Job - Text
• Print Job - Photo
Press Start. The Adjustment Chart is output.
ADMINISTRATOR)
USER GUIDE (MACHINE
4–21
Page 26
U
SER GUIDE
(M
ACHINE ADMINISTRATOR
4
5
6
7
Reports Settings
)
Place the Adjustment Chart face down on the Document Glass
with both Magenta color patches against the left side of the glass.
Place 5 sheets of white paper on top of the Adjustment Chart and
close the DADF. Select Start.
To continue Auto Gradation Adjustment with other screens, repeat
steps 2 to 5. When you are finished, select Close until the System
Settings screen is displayed.
Select Exit to exit the System Settings mode.
This determines whether the job history report will be printed
automatically, and whether the reports/lists will be printed on one
side or two sides.
The following items can be set in Reports Settings.
Job History Report Sets up whether the information regarding already processed jobs
will be automatically printed.
Enter the setting on the Numeric Keypad using the numbers listed
in the following table. The default is 0, Automatic Printing Off.
Setting Description
0
1
When the job storage area fills up with 50 jobs that have not been
printed, the past 50 jobs are automatically printed in chronological
order. Print jobs that are currently printing or queued are not
recorded on the Job History Report.
2 Sided Report This determines whether the reports/lists will be printed on one
side or two sides.
Enter the setting on the Numeric Keypad using the numbers listed
in the following table. The default is 0, 2 Sided Printing Off.
Automatic printing of
Job History Reports Off
Automatic printing of
Job History Reports On
4–22
Setting Description
0
1
2 Sided Report Off
2 Sided Report On
Page 27

Other Machine Settings
Sleep Mode This sets up whether to allow machine to switch to the Sleep
Copy Mode Settings
U
SER GUIDE
(M
ACHINE ADMINISTRATOR
The following items can be set in Other Settings.
Mode.
When Sleep Mode is disabled, timers in Auto Power Saver on the
Machine Clock/Timers Settings screen cannot be set. The default
is Enabled.
NOTE: Low Power Mode cannot be disabled.
)
This section describes how to change the default for different
copier settings.
For more information on copying features, refer to the User Guide
(Copier).
ADMINISTRATOR)
USER GUIDE (MACHINE
4–23
Page 28

U
SER GUIDE
(M
ACHINE ADMINISTRATOR
Basic Copying Presets
You can increase efficiency for each copy job by setting frequently
used trays and Reduce/Enlarge settings.
)
Paper Tray - 2nd to 4th
Buttons
You can select which Paper Trays to display on the Basic Copying
screen. You can set Trays 1, 2, 3, 4, 5 (Bypass) to appear in 3 of
the 5 buttons displayed under Paper Supply on the Basic Copying
screen.
Enter the setting on the Numeric Keypad using the numbers listed
in the following table. The default is Tray 1 for the 2nd button from
the top, Tray 2 for the 3rd button from the top, Tray 3 for the 4th
button from the top.
Setting Description
1
2
3
4
5
Tray 1
Tray 2
Tray 3
Tray 4
Tray 5 (Bypass)
4–24
Page 29

U
SER GUIDE
(M
ACHINE ADMINISTRATOR
)
Reduce/Enlarge - 3rd to 4th
Buttons
The 3rd and 4th buttons under Reduce/Enlarge can be changed
on the Basic Copying screen. Select the ratio from the preset ratio
buttons.
Enter the setting on the Numeric Keypad using the numbers listed
in the following table. The default is 64% for the 3rd button from
the top, 129% for the 4th button from the top.
Setting Description
1
2
3
4
5
6
7
Ratio set to R/E Preset 1
Ratio set to R/E Preset 2
Ratio set to R/E Preset 3
Ratio set to R/E Preset 4
Ratio set to R/E Preset 5
Ratio set to R/E Preset 6
Ratio set to R/E Preset 7
Copy Defaults
Set up the defaults for different copy features. The machine
returns to the defaults when the power is turned on, the machine
is returned from the Power Saver mode, the Auto Clear timer
times out, or the Clear All button is pressed.
The following items can be set in Copy Defaults.
Output Color Set the default for Output Color on the Basic Copying screen.
Select one of the following options:
• No Default
•Auto
• Full Color
• Black
• Dual Color
• Single Color
The default is Auto.
ADMINISTRATOR)
USER GUIDE (MACHINE
4–25
Page 30

U
SER GUIDE
(M
ACHINE ADMINISTRATOR
)
NOTE: If No Default is selected, an Output Color must be selected
for copy jobs, or the machine will not start copying.
NOTE: If Black is selected on the Basic Copying screen, the copy
output will have the same image quality as Halftone, selected in
Text&Photo.
NOTE: When Dual Colors or Single Color is selected on the Basic
Copying screen, the Original Type cannot be set.
Single Color Set the default for Single Color on the Basic Copying screen.
Enter the setting on the Numeric Keypad using the numbers listed
in the following table. The default is 1, Red.
Dual Color - Color Image Sets the default for Color Image in Dual Color on the Basic
Copying screen.
Enter the setting on the Numeric Keypad using the numbers listed
in the following table. The default is 1, Red.
Dual Color - B/W Image Set the default for a B/W Image in Dual Color on the Basic
Copying screen.
Enter the setting on the Numeric Keypad using the numbers listed
in the following table. The default is 0, Black.
Setting Description
0
Black (can be only be set when Dual Color is
selected)
1
2
3
4
5
6
7
8
9
10
11
12
Red
Green
Blue
Yel lo w (Y )
Magenta (M)
Cyan (C)
Specified Color set to Custom Color 1
Specified Color set to Custom Color 2
Specified Color set to Custom Color 3
Specified Color set to Custom Color 4
Specified Color set to Custom Color 5
Specified Color set to Custom Color 6
4–26
Page 31
U
SER GUIDE
(M
ACHINE ADMINISTRATOR
Reduce/Enlarge Sets the default for Reduce/Enlarge on the Basic Copying screen.
Select one of nine buttons. Seven buttons are registered as preset
ratio buttons, 100%, and Auto %.
Enter the setting on the Numeric Keypad using the numbers listed
in the following table. The default is 0, 100%.
Setting Description
)
0
1
2
3
4
5
6
7
8
100%
Ratio set to R/E Preset 1
Ratio set to R/E Preset 2
Ratio set to R/E Preset 3
Ratio set to R/E Preset 4
Ratio set to R/E Preset 5
Ratio set to R/E Preset 6
Ratio set to R/E Preset 7
Auto%
NOTE: If the default for Paper Supply is set to Auto, Auto% cannot
be selected for Reduce/Enlarge.
Paper Supply This sets the default for Paper Supply on the Basic Copying
screen.
Enter the setting on the Numeric Keypad using the numbers listed
in the following table. The default is 0, Auto.
If the default for Reduce/Enlarge is set to Auto%, Auto cannot be
selected.
Setting Description
0
1
2
3
4
5
Auto
Tray 1
Tray 2
Tray 3
Tray 4
Tray 5 (Bypass)
ADMINISTRATOR)
USER GUIDE (MACHINE
4–27
Page 32

U
SER GUIDE
(M
ACHINE ADMINISTRATOR
2 Sided This sets up the default for 2 Sided on the Basic Copying and
)
Added Features screens.
Enter the setting on the Numeric Keypad using the numbers listed
in the following table. The default is 0, 1 to 1.
Setting Description
0
1
2
3
1 to 1 Sided
1 to 2 Sided
2 to 1 Sided
2 to 2 Sided
Output This sets up the default for Output on the Added Features screen.
Enter the setting on the Numeric Keypad using the numbers listed
in the following table. The default is 0, Auto.
Setting Description
0 Auto
1 Collated
2 Uncollated
Output Destination This sets up the Output Tray for copy and print jobs.
Enter the setting on the Numeric Keypad using the numbers listed
in the following table. The default is 0, Center Output Tray.
4–28
Setting Description
0 Center Output Tray
2 Finisher Tray
NOTE: The Optional Finisher must be installed to use the Finisher
Tray.
Page 33

U
SER GUIDE
(M
ACHINE ADMINISTRATOR
Margin Shift - Side 1 This sets up the default for Side 1 in Margin Shift on the Added
Features screen.
Enter the setting on the Numeric Keypad using the numbers listed
in the following table. The default is 0, No Shift.
Setting Description
)
0
1
2
3
4
5
6
7
8
9
No Shift
Auto Center
Corner Shift (Top Right)
Corner Shift (Bottom Right)
Corner Shift (Top Left)
Corner Shift (Bottom Left)
Corner Shift (Top Center)
Corner Shift (Bottom Center)
Corner Shift (Left Center)
Corner Shift (Right Center)
Margin Shift - Side 2 This sets up the default for Side 2 in Margin Shift on the Added
Features screen.
Enter the setting on the Numeric Keypad using the numbers listed
in the following table. The default is 10, Symmetrical with Side 1.
Setting Description
0
1
2
3
4
5
6
7
8
9
10
No Shift
Auto Center
Corner Shift (Top Right)
Corner Shift (Bottom Right)
Corner Shift (Top Left)
Corner Shift (Bottom Left)
Corner Shift (Top Center)
Corner Shift (Bottom Center)
Corner Shift (Left Center)
Corner Shift (Right Center)
Symmetrical with Side 1
ADMINISTRATOR)
USER GUIDE (MACHINE
4–29
Page 34

U
SER GUIDE
(M
ACHINE ADMINISTRATOR
)
Border Erase - Top &
Bottom
This sets up the default for the top and bottom Border Erase.
Enter the setting on the Numeric Keypad using the numbers listed
in the following table. The default is 5mm.
Setting Description
0
1 ~ 50
None
Set the border erase
amount in increments
of 1mm
Border Erase - Left & Right This sets up the default for the left and right Border Erase.
Enter the setting on the Numeric Keypad using the numbers listed
in the following table. The default is 5mm.
Setting Description
0
None
Center Erase This sets up the default for Center Erase. It is distributed along the
Original Type (Auto/Full
Color)
1 ~ 50
Set the border erase
amount in increments
of 1mm
center of the original image.
Enter the setting on the Numeric Keypad using the numbers listed
in the following table. The default is 0 mm.
Setting Description
0
1 ~ 50
None
Set the center erase
amount in increments
of 1mm
This sets up the default for Original Type on the Image Quality
screen, when Auto or Full Color is selected as the color mode on
the Basic Copying screen.
Enter the setting on the Numeric Keypad using the numbers listed
in the following table. The default is 1, Text & Photo (Halftone).
4–30
Page 35

U
SER GUIDE
(M
ACHINE ADMINISTRATOR
Original Type (Black) This sets up the default for Original Type on the Image Quality
screen, when Black is selected as the Output Color on the Basic
Copying screen.
Enter the setting on the Numeric Keypad using the numbers listed
in the following table. The default is 1, Text & Photo (Halftone).
Setting Description
)
0
1
2
3
4
5
6
7
8
Tex t
Text & Photo (Halftone)
Text & Photo (Photograph)
Text & Photo (Color Copies)
Photo (Halftone)
Photo (Photograph)
Photo (Color Copies)
Color Originals (Map)
Color Originals (Highlighted
Originals)
9
Color Originals (Inkjet Originals)
NOTE: When Dual Color or Single Color is selected as the Output
Color on the Basic Copying screen, the Original Type setting is
ignored.
Auto Exposure This sets up the default for Auto Exposure, when Text&Photo,
Text, or Color Originals is selected in Original Type on the Image
Quality screen.
Enter the setting on the Numeric Keypad using the numbers listed
in the following table. The default is 1, Auto Exposure On.
Setting Description
0
1
Auto Exposure Off
Auto Exposure On
4–31
ADMINISTRATOR)
USER GUIDE (MACHINE
Page 36

U
SER GUIDE
(M
ACHINE ADMINISTRATOR
)
Lighter/Darker This sets up the default for Lighter/Darker in Light/Dark/Contrast
on the Image Quality screen.
Enter the setting on the Numeric Keypad using the numbers listed
in the following table. The default is 3, Normal.
Setting Description
0
1
2
3
4
5
6
Light (+3)
Light (+2)
Light (+1)
Normal
Darker (-1)
Darker (-2)
Darker (-3)
Contrast This sets up the default for Contrast in Light/Dark/Contrast on the
Image Quality screen.
Enter the setting on the Numeric Keypad using the numbers listed
in the following table. The default is 2, Normal.
Setting Description
0
1
Higher
High
4–32
2
3
4
Normal
Low
Lower
Page 37

U
SER GUIDE
(M
ACHINE ADMINISTRATOR
Sharpness This sets up the default for Sharpness in Sharpness/Saturation on
the Image Quality screen.
Enter the setting on the Numeric Keypad using the numbers listed
in the following table. The default is 2, Normal.
Setting Description
)
0
1
2
3
4
Sharper
Sharp
Normal
Soft
Softer
Color Saturation This sets up the default for Color Saturation in Sharpness/
Saturation on the Image Quality screen.
Enter the setting on the Numeric Keypad using the numbers listed
in the following table. The default is 2, Normal.
Setting Description
0
1
2
3
Higher
High
Normal
Low
4
Lower
ADMINISTRATOR)
USER GUIDE (MACHINE
4–33
Page 38

U
SER GUIDE
(M
ACHINE ADMINISTRATOR
)
Color Shift This sets up the default for Color Shift on the Image Quality
screen.
Enter the setting on the Numeric Keypad using the numbers listed
in the following table. The default is 2, Normal.
Setting Description
Color Balance - Yellow,
Magenta, Cyan, Black
0
1
2
3
4
This sets up the default for each density level, Low Density,
Medium Density, and High Density, for Yellow, Magenta, Cyan and
Coolest
Cool
Normal
Warm
Warmest
Black in Color Balance on the Image Quality screen.
The defaults are all 0.
NOTE: The values set here will also be applied to Black and
Single Color modes.
Original Orientation This sets up the default for Original Orientation on the Scan
Options screen.
Enter the setting on the Numeric Keypad using the numbers listed
in the following table. The default is 0, Head to Top.
Setting Description
0
1
Head to Top
Head to Left
4–34
Page 39

U
SER GUIDE
(M
ACHINE ADMINISTRATOR
Image Rotation This sets up the default for Image Rotation on the Scan Options
screen. On during Auto refers to Auto Paper selection for Paper
supply or Auto % for Reduce/Enlarge.
Enter the setting on the Numeric Keypad using the numbers listed
in the following table. The default is 1, On during Auto.
Setting Description
)
0
1
2
Always On
On during Auto
Off
Rotation Direction Set the default for Rotation Direction when Always On or On
during Auto is selected in Image Rotation on the Scan Options
screen.
Enter the setting on the Numeric Keypad using the numbers listed
in the following table. The default is 1, Portrait Original - Left Edge.
Setting Description
0
Auto (can be selected only when the
machine is equipped with Finisher)
1
2
Portrait Original - Left Edge
Portrait Original - Right Edge
NOTE:When the machine is equipped with a Finisher, the default
will be 0, Auto.
4–35
ADMINISTRATOR)
USER GUIDE (MACHINE
Page 40

U
SER GUIDE
(M
ACHINE ADMINISTRATOR
)
Copy Control
This is the setting for Copy Control.
The following items can be set in Copy Control.
Auto Paper Off Set which tray will be selected when Auto % or Independent X-Y
Auto is selected in Reduce/Enlarge when Auto is selected in
Paper Supply, on the Basic Copying screen.
Enter the setting on the Numeric Keypad using the numbers listed
in the following table. The default is 1, Select Tray 1.
Setting Description
1
2
3
4
Select Tray 1
Select Tray 2
Select Tray 3
Select Tray 4
Memory Full Procedure Set the processing method when the hard disk runs out of memory
during a job.
Enter the setting on the Numeric Keypad using the numbers listed
in the following table. The default is 0, Disable.
Setting Description
0
Disable (Discard stored
documents)
1
Enables stored data
Maximum Stored Pages This determines the maximum number of stored pages when
copying documents. It can be set from 1 to 999 pages.
4–36
Enter the number of the pages using the numeric keypad on the
Control Panel. The default is 999.
Page 41

U
SER GUIDE
(M
ACHINE ADMINISTRATOR
Original Size Defaults
This sets up the original sizes that will be displayed when the
Original Size is displayed from the Scan Options tab.
An original size can be assigned to Original Size Buttons 1 ~ 11.
Setting frequently used non-standard size in advance prevents
you from having to input the size each time. When you set up nonstandard sizes, the range for X direction is 15 ~ 432 mm and for Y
direction is 15 ~ 297 mm.
Original Size Button 1 ~ 11 The sizes that can be selected for Original Size Buttons are as
follows. Select a button and set the size.
The defaults are as follows. The order is from Original Size Button
1 (Left Upper): A3, A4 SEF, A4 LEF, A5 SEF, A5 LEF, B4, B5 SEF,
B5 LEF, 11x17 in., 8.5x11 in. SEF, 8.5x11 in. LEF.
Setting Description
)
A/B Series Size
Inch Size
Others
Variable
A3, A4 SEF, A4 LEF, A5 SEF, A5 LEF, A6 SEF, A6
LEF, B4, B5 SEF, B5 LEF, B6 SEF, B6 LEF
11x17 in., 11x15 in., 8.5x14 in., 8.5x13 in., 8.5x11
in. SEF, 8.5x11 in. LEF, 5.5x8.5 in. SEF, 5.5x8.5
in. LEF
5x7 in., 3.5x5 in., 8K, 16K SEF, 16K LEF
Setting ranges are: 15 ~ 432 mm for X direction,
15 ~ 297 mm for Y direction in increments of 1 mm
4–37
ADMINISTRATOR)
USER GUIDE (MACHINE
Page 42

U
SER GUIDE
(M
ACHINE ADMINISTRATOR
)
Setting Reduce/Enlarge Presets
This sets up the magnifications that will be displayed in Preset%,
in Reduce/Enlarge on the Basic Copying screen. 18 different
magnifications can be assigned to R/E Preset 1 ~ 7.
R/E Preset 1 ~ 7 Assign magnifications to R/E Preset 1 ~ 7.
Enter the setting on the Numeric Keypad using the numbers listed
in the following table. The default for R/E Preset 1 is 25.0%.
Setting Description
1 25.0%
2 35.3%
3 50.0%
4 57.7%
5 61.2%
6 64.7%
7 70.0%
8 81.6%
9 86.6%
10 115.4%
11 122.5%
12 129.4%
13 141.4%
14 163.2%
15 173.2%
16 200.0%
17 282.8%
18 400.0%
4–38
Page 43

Setting Custom Colors
Custom Colors 1 ~ 6 Assign user registered colors, Yellow (0~100%), Magenta
Network Settings
U
SER GUIDE
(M
ACHINE ADMINISTRATOR
This sets up the user registered colors used in Single Color and
Dual Colors on the Output Color screen.
(0~100%), Cyan (0~100%), to Custom Color Buttons 1 ~ 6. The
default is 0.
NOTE: Adjust the registered color so that the sum of Yellow,
Magenta and Cyan is 240% or less.
)
Network Settings consists of Port Setting, which determines the
type of interface of the main unit that is connected to clients, and
Protocol Setting, which determines the necessary condition for the
communication.
For more information on setting the Network Settings, refer to the
System Administrator’s Guide.
ADMINISTRATOR)
USER GUIDE (MACHINE
4–39
Page 44

U
SER GUIDE
(M
ACHINE ADMINISTRATOR
Print Mode Settings
Allocate Memory Set the size of the reception buffer, where data sent from the client
Others Set printing area, substitute tray, banner sheet, and banner sheet
)
Memory volume for each interface, and printer-related settings
can be set. Print Mode Settings consists of the following
components.
is temporarily stored, for each interface.
tray.
For more information on printer features, refer to the User Guide
(Print).
4–40
Page 45

Allocate Memory
U
SER GUIDE
(M
ACHINE ADMINISTRATOR
Allocate Memory determines memory volume for the reception
buffer, where the data transmitted from clients is stored, for each
interface.
For LPD, SMB and IPP you can set whether or not to spool to
memory, and where to spool. The assigned memory size when
spooling to memory can also be configured (LPD and SMB only).
The size of the reception buffer can be changed according to
machine's conditions and your requirements. If the reception
buffer is increased, clients using each interface may be released
quicker. The maximum value you can set changes according to
the amount of available memory.
NOTE: When the memory size is changed, the memory will be
reset, and the data stored in each memory area will be erased.
NOTE:You cannot allocate the memory exceeding the total size.
If the set values exceed the size of the installed memory, the
system automatically adjusts the memory allocation when the
power is turned on.
)
NOTE: When a port is set to Disabled, corresponding items will
not be displayed.
The following items can be configured in Memory Settings.
PCLe Memory Set the memory size for PCLe.
The memory size can be set between 2.50 ~ 32.00 MB, in
increments of 0.25 MB.
PostScript Memory Set the amount of memory used by PostScript. This item will be
displayed only when a PostScript software kit is installed.
The memory size can be set between 8.00 ~ 32.00 MB, in
increments of 0.25 MB. The maximum value depends on the
amount of available memory. The default is 16.00 MB.
HP-GL/2 Auto Layout
Memory
Set the memory size for HP-GL/2.
This item only appears when the machine is equipped with PSROM. The size can be set between 64 KB ~ 5120 KB, in
increments of 32 KB. The maximum value depends on the amount
of available memory. The default is 64 KB.
Receiving Buffer-Parallel Set the receive buffer on the parallel interface.
The memory size can be set between 64 ~ 1024 KB, in increments
of 32 KB. The default is 64 KB.
4–41
ADMINISTRATOR)
USER GUIDE (MACHINE
Page 46

U
SER GUIDE
(M
ACHINE ADMINISTRATOR
)
Receiving Buffer-LPD
Spool
Choose from the following options:
• Off - Spooling is not performed.
While the machine is processing or printing LPD data from a
client, it cannot receive other data from other clients through
the same interface. The LPD reception buffer can be set
between 64 ~ 1024 KB, in increments of 32 KB. The default is
256 KB.
• Memory - Spooling is performed.
Memory is used as the reception buffer for the spooling
process. The size of the reception buffer for the spooling
process can be set between 512 KB ~ 32.00 MB, in
increments of 0.25 MB. The default is 1.00 MB.
NOTE:Printing data bigger than the memory size set here cannot
be received. If this happens, select Hard Disk Spooling or
Spooling Off.
• Hard Disk - Spooling is performed.
Hard drive is used as the reception buffer for the spooling
process.
The default is Off.
Receiving Buffer-NetWare Set the reception buffer for NetWare.
The memory size can be set between 64 ~ 1024 KB, in increments
of 32 KB. The default is 256 KB.
Receiving Buffer-SMB
Spool
Choose from the following options:
• Off - Spooling is not performed.
While the machine is processing or printing SMB data from a
client, it cannot receive other data from other clients through
the same interface. The SMB reception buffer can be set for
64 ~ 1024 KB, in increments of 32 KB. The default is 256 KB.
• Memory - Spooling is performed.
Memory is used as the reception buffer for the spooling
process. The size of the reception buffer can be set between
512 KB ~ 32.00 MB, in increments of 0.25 MB. The default is
1.00 MB.
NOTE:Printing data bigger than the set memory size cannot be
received. If this happens, select Hard Disk Spooling or Spooling
Off.
• Hard Disk - Spooling is performed.
Hard drive is used as the reception buffer for the spooling
process.
4–42
The default is Off.
Page 47

U
SER GUIDE
Receiving Buffer-IPP Spool Choose from the following options:
• Off - Spooling is not performed.
While the machine is processing or printing IPP data from a
client, it cannot receive other data from other clients through
the same interface. The IPP reception buffer can be set
between 64 ~ 1024 KB, in increments of 32 KB. The default is
256 KB.
• Hard Disk - Spooling is performed.
Hard drive is used as the reception buffer for the spooling
process.
The default is Off.
Receiving Buffer-EtherTalk Set the reception buffer for EtherTalk.
The size can be set between 64 ~ 1024 KB, in increments of 32
KB. The default is 256 KB.
Receiving Buffer - Port9100 Set the reception buffer for Port9100.
The size can be set between 64 ~ 1024 KB, in increments of 32
KB. The default is 256 KB.
(M
ACHINE ADMINISTRATOR
)
4–43
ADMINISTRATOR)
USER GUIDE (MACHINE
Page 48

U
SER GUIDE
(M
ACHINE ADMINISTRATOR
)
Others (Print Mode Settings)
In Others, several printer-related settings can be set.
Print Area Set whether or not to extend the printing area. The default is
Normal.
Substitute Tray Set whether or not to switch to paper in a different tray when the
tray that was selected in Auto Tray Switching runs out of paper.
To substitute other paper, the size of the paper must be specified.
• Display Message - Displays the message to add more paper
without substituting other paper.
• Use Larger Size - Substitutes with paper of the next size of
paper larger than the currently selected size. The image will be
printed at 100% magnification.
• Use Nearest Size - Substitutes with paper nearest to the
currently selected size, and prints on that paper. The image
will be automatically reduced if it is necessary.
The default is Display Message.
NOTE:If the paper size is specified by the client, the client setting
is given priority.
Banner Sheet Set whether or not to output copies with a banner sheet attached.
• Start Sheet - Banner sheet is printed before the job.
• End Sheet - Banner sheet is printed after the print job.
• Start Sheet + End Sheet - Banner sheets are printed before
and after the print job.
The default is Start Sheet.
NOTE:Banner sheets are not output if stapling is set. Banner
sheets are added to meters when they are printed.
Banner Sheet Tray Select the tray to be used for the banner sheets. Trays 1 - 5
(Bypass) can be selected. The default is Tray 1. The banner sheet
will be printed on whatever paper size is loaded in the selected
tray.
4–44
Page 49

Scan Mode Settings
Basic Scanning Presets
U
SER GUIDE
(M
ACHINE ADMINISTRATOR
These settings are enabled for the scan features.
For more information on scanner features, refer to the User Guide
(Scan).
You can change the magnification percentages assigned to the
buttons displayed in R/E Presets on the Basic Scanning screen.
)
Reduce/Enlarge Presets
2nd ~ 4th Buttons
Setting Description
1
2
3
4
5
Setting frequently used scan ratios prevents you from having to
change the setting each time you scan.
The following items can be configured in R/E Presets.
Set the ratios displayed for the 2nd to 4th buttons from the top
down, for each of the feature buttons. Select available ratios from
those currently assigned to R/E Preset buttons.
Enter the setting on the Numeric Keypad using the numbers listed
in the following table. The defaults are: 2 for the 2nd button from
the top, 4 for the 3rd button, and 7 for the 4th button.
Ratio set to R/E Preset 1
Ratio set to R/E Preset 2
Ratio set to R/E Preset 3
Ratio set to R/E Preset 4
Ratio set to R/E Preset 5
6
7
Ratio set to R/E Preset 6
Ratio set to R/E Preset 7
ADMINISTRATOR)
USER GUIDE (MACHINE
NOTE: This setting is not used when there is a DADF on the
machine.
4–45
Page 50

U
SER GUIDE
(M
ACHINE ADMINISTRATOR
)
Setting Scan Defaults
This sets the defaults for the scan features. The machine returns
to the defaults set here when the power is turned on, the machine
returns from the Power Saver mode, or the Clear All button is
pressed. Setting frequently used features prevents you from
having to change settings each time you scan. The following items
can be configured in Scan Defaults.
Output Color Set the default for Output Color on the Basic Scanning screen.
Select from Auto, Full Color, Grayscale, and Black. The default is
Auto.
Scan Resolution Set the default for Scan Resolution on the Basic Scanning screen.
Enter the setting on the Numeric Keypad using the numbers listed
in the following table. The default is 0, 200 dpi.
Setting Description
0
1
2
3
200 dpi
300 dpi
400 dpi
600 dpi
Mixed Size Originals Set the default for Mixed Size Originals on the Scan Options
screen in Scan mode. Set whether or not to use the Mixed Size
Originals feature when the DADF is used for scanning.
Enter the setting on the Numeric Keypad using the numbers listed
in the following table. The default is 0, Off.
Setting Description
0
1
Off
On
4–46
Page 51

U
SER GUIDE
(M
ACHINE ADMINISTRATOR
)
Border Erase - Top &
Bottom
Set the default for the top and bottom Border Erase amounts.
Enter the setting on the Numeric Keypad using the numbers listed
in the following table. The default is 2mm.
Setting Description
0
1 ~ 50
None
Set top & bottom
Border Erase amount
in increments of 1mm
Border Erase - Left & Right Set the default for the left and right Border Erase amounts.
Enter the setting on the Numeric Keypad using the numbers listed
in the following table. The default is 2mm.
Setting Description
0
None
1 ~ 50
Set Left & Right Border
Erase amount in
increments of 1mm
Center Erase Set the default for center erase. The center erase will be
distributed evenly along the center of the original image.
Enter the setting on the Numeric Keypad using the numbers listed
in the following table. The default is 0 mm.
Setting Description
0
1 ~ 50
None
Set Center Erase
amount in increments
of 1mm
ADMINISTRATOR)
USER GUIDE (MACHINE
4–47
Page 52

U
SER GUIDE
(M
ACHINE ADMINISTRATOR
)
Original Orientation Set the orientation of the document when it is scanned.
Determination of the top, bottom, left and right edges of the
original changes according to this setting. If it is set to 0, Head to
Top, the original image will always be saved rotated 90°.
Enter the setting on the Numeric Keypad using the numbers listed
in the following table. The default is 0, Head to Top.
Setting Description
0 Head to Top
1 Head to Left
Original Type Set the default for Original Type on the Image Quality/File Format
screen in Scan mode.
Enter the setting on the Numeric Keypad using the numbers listed
in the following table. The default is 1, Text & Photo.
Setting Description
0 Te xt
1 Text & Photo
2 Photo
Lighter/Darker Set the default for Lighter/Darker in Lighter/Darker/Contrast on the
Image Quality/File Format screen in Scan mode.
Enter the setting on the Numeric Keypad using the numbers listed
in the following table. The default is 3, Normal.
Setting Description
0
1
2
3
4
Light (+3)
Light (+2)
Light (+1)
Normal
Darker (-1)
4–48
5
6
Darker (-2)
Darker (-3)
Page 53

U
SER GUIDE
(M
ACHINE ADMINISTRATOR
Contrast This sets up the default for Contrast in Lighter/Darker/Contrast on
the Image Quality/file format screen in Scan mode. Set the
contrast for the document to be scanned. The contrast setting is
enabled if Output Color is not set to Black.
Enter the setting on the Numeric Keypad using the numbers listed
in the following table. The default is 2, Normal.
Setting Description
)
0
1
2
3
4
Higher
High
Normal
Low
Lower
Auto Exposure Set the default for Auto Exposure on the Image Quality/File
Format screen in Scan mode.
Enter the setting on the Numeric Keypad using the numbers listed
in the following table. The default is 0, Off.
Setting Description
0
1
Off
On
4–49
ADMINISTRATOR)
USER GUIDE (MACHINE
Page 54

U
SER GUIDE
(M
ACHINE ADMINISTRATOR
)
Setting the Scan Size Defaults
Set the sizes displayed on the Scan Size screen under the Scan
Options tab. Any scan size can be assigned to Scan Size buttons
1 ~ 11, except for Auto Size Detect.
Setting frequently used scan sizes will prevent you from having to
enter scanning size each time you scan. When entering nonstandard sizes, set the size between 15 ~ 432 mm for the X
direction, and 15 ~ 297 mm for Y direction, in increments of 1mm.
Scan Size 1 ~ 11 The following table shows the sizes that can be set to scan size
defaults. Select a button, and choose a size.
Setting Description
A/B Series Size
Inch Size
Others
Variable
A3, A4 SEF, A4 LEF, A5 SEF, A5 LEF, A6 SEF, A6
LEF, B4, B5 SEF, B5 LEF, B6 SEF, B6 LEF
11x17 in., 11x15 in., 8.5x14 in., 8.5x13 in., 8.5x11 in.
SEF, 8.5x11 in. LEF, 5.5x8.5 in. SEF, 5.5x8.5 in. LEF
5x7 in., 3.5x5 in., 8K, 16K SEF, 16K LEF
Setting ranges are: 15 ~ 432 mm for X direction, 15 ~
297 mm for Y direction in 1mm increments
The defaults are as follows. 5.5x8.5 in. LEF, 5.5x8.5 in. SEF,
8.5x11 in. LEF, 8.5x11 in. SEF, 8.5x14 in., 11x17 in., A4 LEF, A4
SEF, A3, 3.5x5 in., 5x7 in.
4–50
Page 55

U
SER GUIDE
(M
ACHINE ADMINISTRATOR
Setting the Output Size Defaults
Set the sizes displayed for Output Size when selecting Auto % in
Reduce/Enlarge on the Scan Options screen in Scan mode.
Any output size can be assigned to Output Size buttons 1 ~ 8.
Setting frequently used sizes prevents you from having to set
sizes each time you scan.
Output Size 1~8 Enter the setting on the Numeric Keypad using the numbers listed
in the following table.
Setting Description Setting Description
4 A6 SEF 9 5.5x8.5 SEF
68 A6 LEF 73 5.5x8.5 LEF
7 B6 SEF 20 8.5x11 in. SEF
71 B6 LEF 84 8.5x11 in. LEF
)
10 A5 SEF 28 8.5x13 in.
74 A5 LEF 29 8.5x14 in.
13 B5 SEF 33 11x15 in.
77 B5 LEF 34 11x17 in.
21 A4 SEF 31 8K
85 A4 LEF 52 16K SEF
30 B4 116 16K LEF
35 A3 54 3.5x5 in.
6 5x7 in.
4–51
ADMINISTRATOR)
USER GUIDE (MACHINE
Page 56

U
SER GUIDE
(M
ACHINE ADMINISTRATOR
)
Setting Reduce/Enlarge Presets
Set the Preset % ratios displayed in Reduce/Enlarge on the Scan
Options screen in Scan mode.
Any ratio can be assigned to R/E Preset 1 ~ 7, except for 100%.
Setting frequently used magnification ratio saves you from having
to change the setting each time.
R/E Preset 1 ~ 7 Enter the setting on the Numeric Keypad using the numbers listed
in the following table.
Setting Description Setting Description
1 25.0% 10 115.4%
2 35.3% 11 122.5%
3 50.0% 12 129.4%
4 57.7% 13 141.4%
5 61.2% 14 163.2%
6 64.7% 15 173.2%
7 70.7% 16 200.0%
8 81.6% 17 282.8%
9 86.6% 18 400.0%
4–52
Page 57

U
SER GUIDE
(M
ACHINE ADMINISTRATOR
Other Settings (Scanner)
This section describes how to set other scanner-related settings.
The following items can be configured in Other Settings.
Scan Service Set whether or not to enable scan features. The default is
Enabled.
Memory Full Procedure Set the processing method when the scanner runs out of memory
during scanning. Set whether or not to enable documents stored
so far.
Enter the setting on the Numeric Keypad using the numbers listed
in the following table. The default is 1, Enabled.
Setting Description
)
0
Disabled (Discard
stored documents)
1
Enables stored data
Maximum Stored Pages Set the maximum number of stored pages for scanning. Set any
number between 1 ~ 999.
Enter the number of the pages using the Numeric Keypad. The
default is 999.
Lighter/Darker Level Set the default for the density assigned to Lighter ~ Darker in
Lighter/Darker/Contrast on the Image Quality/File Format screen
in Scan mode. Set the density between -100 ~ +100 in increments
of 1.
Lighter (+3) ~ Lighter (+1) must be set between -100 and -1, and
Darker (+1) ~ Darker (+3) must be set between +1 ~ +100.
Normal, 0, cannot be changed. Set so that the values increase
from Lighter (+3) to Darker (+3).
Select scanning density using the up and down arrow buttons on
the left, and set the value using the up and down arrow buttons on
the right.
4–53
ADMINISTRATOR)
USER GUIDE (MACHINE
Page 58

U
SER GUIDE
(M
ACHINE ADMINISTRATOR
)
Contrast Level Set the default density assigned to Lower ~ Higher for Contrast in
Lighter/Darker/Contrast on the Image Quality screen. Contrast
Settings are not enabled when Output Color is set to Black. Set
the density between -100 ~ +100 in increments of 1.
Lower ~ Slightly Lower must be set between -100 and -1, and
Slightly Higher ~ Higher must be set between +1 ~ +100.
Standard, 0, cannot be changed. Set so that the values increase
from Lower to Higher.
Select Contrast using the up and down arrow buttons on the left,
and set the values using the up and down arrow buttons on the
right. The defaults from the top are, -50, -25, 0, 25, 50.
Color Space Set the default for Color Space.
Enter the setting on the Numeric Keypad using the numbers listed
in the following table. The default is 0, sRGB.
Setting Description
0
1
sRGB output
Output by device RGB. This limits the file
format to TIFF (with ICC profile). Profiles are
used to enable output at tones close to those
of the machine.
NOTE: You can find profile data on the Driver CD.
4–54
Page 59

Setting/Deleting Mailboxes
You can register or change mailboxes to store scanned
documents. Documents registered in a mailbox can be retrieved
from the client into an application using the scanner driver. Up to
200 mailboxes can be registered.
For more information on mailboxes and scanning, refer to the
User Guide (Scan).
From the System Settings Menu screen, select Setup Menu.
1
Select Mailbox. Select the desired mailbox using the up and down
2
arrow buttons.
To create or delete a mailbox, select Create/Delete. Select any of
3
the desired options described below.
U
SER GUIDE
(M
ACHINE ADMINISTRATOR
)
Password You can set passwords for mailboxes. Select the desired option.
• On - A password must be entered when selecting a mailbox.
• Off - Mailboxes can be set without a password.
The default is On.
Mailbox Name Set up names for mailboxes. Set names up to 10 characters long
using alphanumerics and symbols.
Check Password When a password is set, limits can be set for writing to and
reading from mailboxes.
• Save (Write) - A password must be entered when a mailbox is
selected.
• Print/Delete (Read) - A password must be entered when
printing or deleting a mailbox.
• Always - A password must be entered for both operations
described above.
The default is Always.
Delete/Save Documents Set whether or not to delete documents when they are retrieved or
printed from a mailbox.
• Do Not Delete - Document will be saved.
• Delete - Document will be deleted.
The default is Delete.
ADMINISTRATOR)
USER GUIDE (MACHINE
4–55
Page 60

U
SER GUIDE
Auditron
(M
ACHINE ADMINISTRATOR
)
Auditron is an audit feature. This feature electronically records the
number of copies or prints made for each user account and
controls the access and use of the printer/copier.
To enable Auditron for print you must set up user accounts for
printing, and turn it on through Internet Services.
Auditron Administration allows you to:
• Create, change, and delete up to 1000 user accounts.
• Control access to copy features.
• Control access to scan features.
• Limit copying to B/W, Color, or allow both.
• Limit the number of copies made per user account.
• Check the number of copies made per user account.
• Print account information.
• Reset account meters.
4–56
Page 61

U
SER GUIDE
(M
ACHINE ADMINISTRATOR
Create/Check Accounts
To setup Auditron you must create user accounts. Users will then
be required to enter the password setup with their account to
perform certain machine functions. You can create up to 1000
accounts. The following information is contained within each
account.
Password Set any password between 4 - 12 digits long.
Account Name Set any account name up to 31 characters long, using letters and
symbols.
Color Access Set whether or not to restrict color copying or B/W copying.
Account Limit Set the maximum number of copies that can be made with this
account. The account limit can be set between 100 - 1999900, in
100 page increments.
)
Select Create/Check Accounts on the Auditron Administration
1
screen. The Create/Check Accounts screen is displayed.
Select an item that is not in use, and select Create/Delete.
2
Enter a 4-digit number as the Password using the Numeric
3
Keypad on the Control Panel. The password cannot be set if an
identical password has already been registered to another
account. When you have finished entering the Password, select
Save. The screen for that account number is automatically
displayed.
Enter the desired password for that account.
4
Select Account Name. The screen for entering text is displayed.
5
4–57
ADMINISTRATOR)
USER GUIDE (MACHINE
Page 62

U
SER GUIDE
(M
ACHINE ADMINISTRATOR
Enter the account name, and select Save. The screen returns to
6
the Create/Delete screen.
Select Color Access. The Color Access screen is displayed.
7
Select the desired option, and select Save.
• Free Access - Allows both Color and B/W copies.
• Black Only - Allows only B/W copies.
Select Change Account Limit. The Account Limit screen is
8
displayed. Enter the maximum number of color copies using
Numeric Keypad, and select Next. Enter the maximum number of
B/W copies using Numeric Keypad, and select Save. The screen
returns to the Create/Delete screen.
Select Close.
9
Deleting/Resetting Data by Account
)
Information for individual user accounts can be deleted and reset.
Select Create/Check Accounts on the Auditron Administration
1
screen. The Create/Check Accounts screen is displayed.
Select the account whose data is to be deleted or reset, and select
2
Create/Delete. The Create/Delete screen is displayed.
Select Change Account Limit to change the limits for Color or
3
B/W copying.
Select Reset Total Pages Printed or Reset Account.
4
• When Reset Total Pages Printed is selected, the number of
copies made for the selected account is reset and returned to
0. A reset cannot be undone.
• When Reset Account is selected, account data and the
settings of registered account data are deleted. When this
button is selected, a confirmation screen is displayed. If you
select Yes, the account will be deleted. To cancel, select No.
4–58
Page 63
Enabling Auditron Mode
You can enable Auditron Mode for copy, scan, or both. When
Auditron Mode is enabled, the user must select the Access button
and enter the appropriate user account password to start using
the machine.
Select Auditron Mode on the Auditron Administration screen. The
1
Auditron Mode screen is displayed.
Select On or Off for Copy and Scan, and select Save. The screen
2
returns to the Auditron Administration screen.
Select Close until the System Settings screen is displayed.
3
U
SER GUIDE
(M
ACHINE ADMINISTRATOR
)
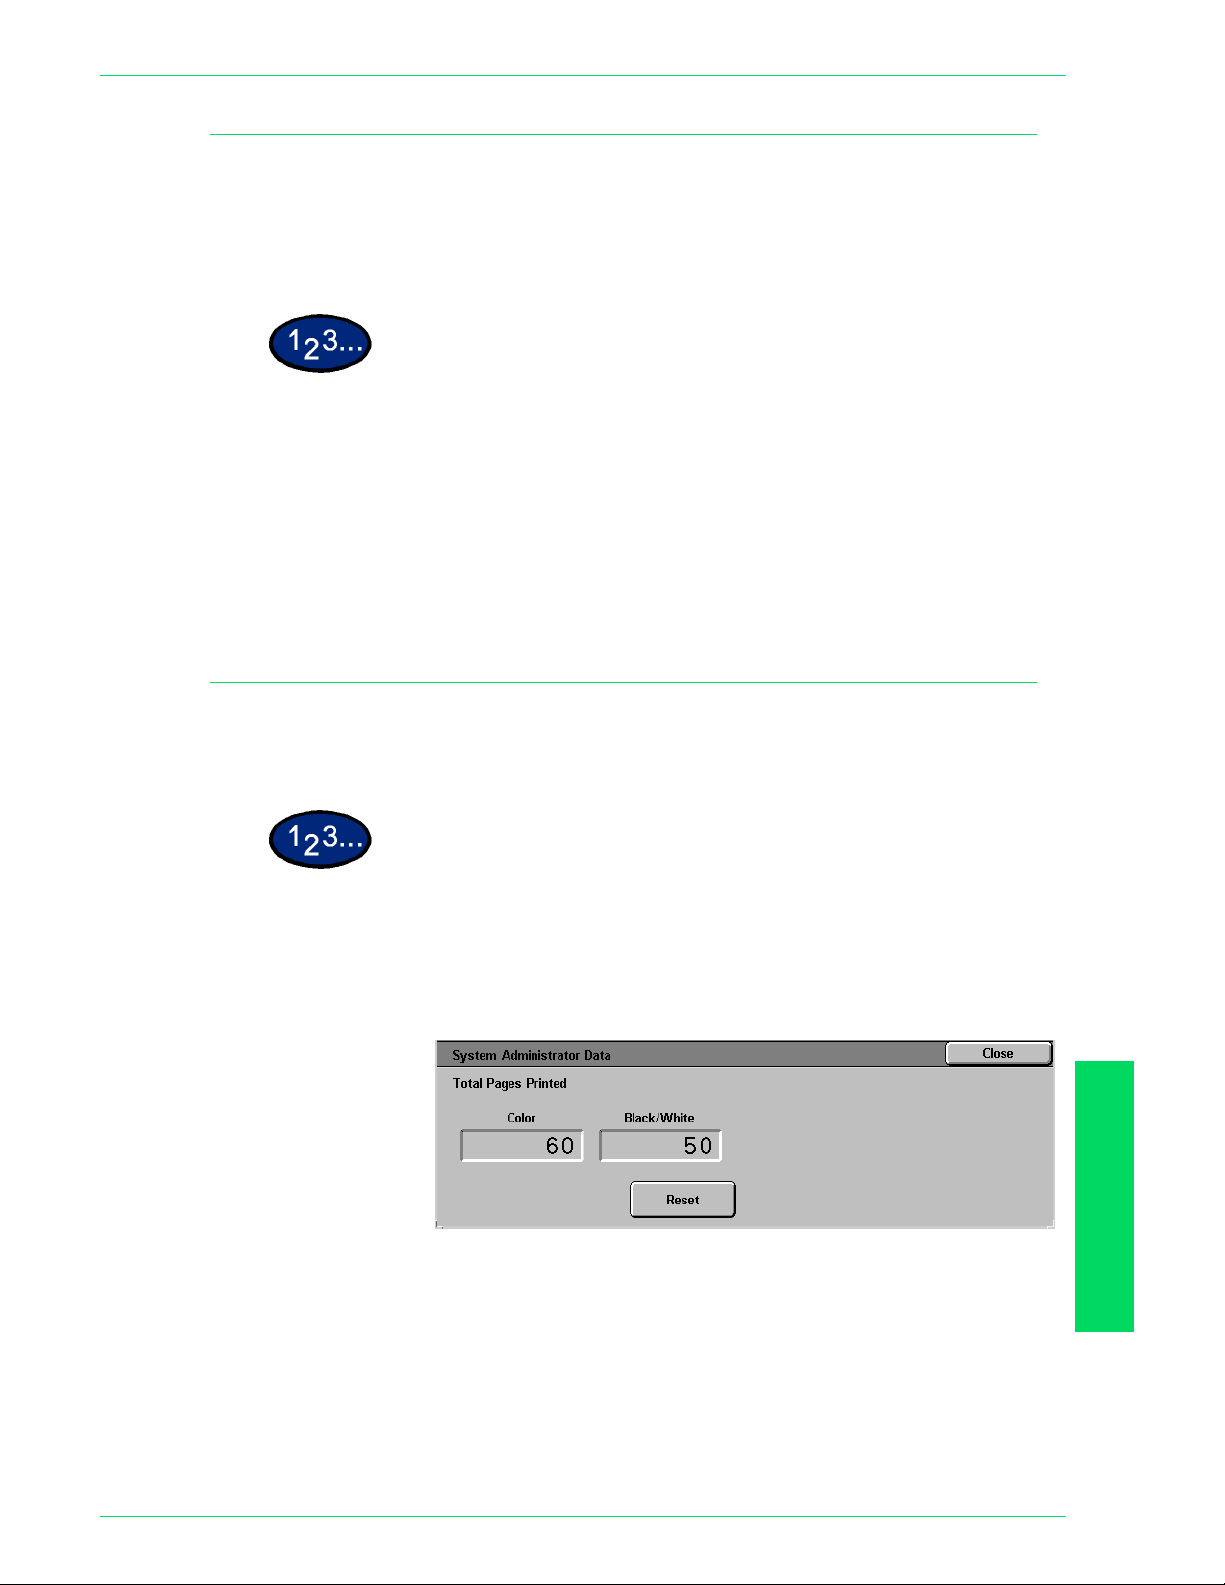
System Administrator Data
You can check the total number of pages printed for color and
B/W. You can also reset this data.
Select System Administrator Data on the Auditron
1
Administration screen. The System Administrator Data screen is
displayed.
Check the total number of pages printed. To reset this data, select
2
Reset.
Select Close.
3
ADMINISTRATOR)
USER GUIDE (MACHINE
4–59
Page 64

U
SER GUIDE
(M
ACHINE ADMINISTRATOR
)
Delete/Reset All Account Data
Five different types of data can be deleted from all accounts.
All Accounts Deletes all accounts and all account information associated with
each account.
All Copy Access Settings Enables color copying for all accounts by setting the Color Access
in all accounts to Free Access.
All Account Limits Sets all Account Limits to the maximum number on the machine,
1999900.
All Total Pages Printed Resets the Total Pages Printed for Color and B/W for each
account to 0.
Print Meter Data Resets the meters in System Administrator Data for the total
number of pages printed.
Select Delete/Reset Account Data on the Auditron
1
Administration screen. The Delete/Reset Account Data screen is
displayed.
Select the button for the desired operation, and select Delete/
2
Reset. The Confirmation screen is displayed.
Select Yes in the Confirmation screen. The details you selected
3
are cleared. Deleted data cannot be restored.
4–60
Page 65

U
SER GUIDE
Printing Meter Reports
When a password for entering System Settings mode is set, you
can print Printer Meter Reports and Auditron Reports.
Print Meter Report Check the total number of pages printed on this machine. The
number of printed pages is counted individually for color and for
B/W.
Auditron Report Check the number of pages printed by individual user accounts.
You can print a report for a certain account, or all the accounts set
up on the machine.
Press the Access button. Enter the password and select
1
Confirm.
Select User Mode.
2
(M
ACHINE ADMINISTRATOR
)
Press the Machine Status button on the Control Panel. The
3
Machine Status screen is displayed.
Select the Billing Meter/Print Report tab. The Billing Meter/Print
4
Report screen is displayed.
Select Print Report/List. The Print Report/List screen is
5
displayed.
Select Auditron Administration.
6
Select the desired report:
7
• Print Meter Report
• Auditron Report
If you select Auditron Report, select the desired account number
or All Accounts.
NOTE: 50 account numbers can be selected at a time or all
accounts can be selected as the account number.
Press Start. The report is printed.
8
Select Close.
9
ADMINISTRATOR)
USER GUIDE (MACHINE
4–61
Page 66

U
SER GUIDE
(M
ACHINE ADMINISTRATOR
Internet Services
)
Internet Services are a series of Web (HTML) Pages located
within the machine network communication settings to be
conveniently configured from a web browser running on a
remotely located workstation.
There are six features that are available within Internet Services.
Each contains specific options, depending on the task you are
performing. The following list shows the features and their usage:
Services You can process documents using the Services Page.
Jobs Allows you to view the active processed Job list/job history list and
delete jobs.
Status Allows you to review the status of the Paper Trays and
Consumables and displays the host device status.
Properties Allows you to configure the machine for job processing and
network communications, as well as to download scanned
documents to your desktop.
Maintenance Displays the machine’s error history.
Support Provides an editable, Internet hot link to an external Customer
Support Site.
NOTE: The rectangular button, containing a semi-circular arrow, is
meant to be used to Refresh the current screen.
For more information on Internet Services, refer to the Internet
Services Online Help system. This system can be accessed by
clicking on the help button, located in the bottom right corner of
the Internet Services web page.
For more information on how to access and use Internet Services,
refer to the User Guide (Print) and the User Guide (Scan).
4–62
 Loading...