

Page 1

Version 6.0, Sept. 2007
701P47169
®
FreeFlow
Process Manager
Operator and
Administrator
Guide
Page 2

Xerox Corporation
Global Knowledge & Language Services
800 Phillips Road
Building 845
Webster, New York 14580
Copyright © 1996-2007 Xerox Corporation. All rights reserved. XEROX®, Xerox Canada Ltd®, Xerox Limited®, FreeFlow®, The Document Company® and all
identifying numbers used in connection with the Xerox products mentioned in this publication are trademarks of XEROX CORPORATION. Copyright
protection claimed includes all forms and matters of copyrightable material and information now allowed by statutory or judicial law or hereinafter granted,
including without limitations, material generated from the software programs which are displayed on the screen such as styles, templates, icons, screen
displays looks, etc.
While every care has been taken in the preparation of this material, no liability will be accepted by Xerox Corporation arising out of any inaccuracies or
omissions.
Printed in the United States of America.
Other company trademarks are acknowledged as follows:
Adaptec®, the Adaptec logo, SCSlSelect®, and EZ-SCSI® are trademarks of Adaptec, Inc.
Adobe PDFL - Adobe PDF Library Copyright © 1987-2005 Adobe Systems Incorporated.
Adobe®, the Adobe logo, Acrobat®, the Acrobat logo, Acrobat Reader®, Distiller®, Adobe PDF JobReady™, and PostScript®, and the PostScript logo are
either registered trademarks or trademarks of Adobe Systems Incorporated in the United States and/or other countries. All instances of the name PostScript in
the text are references to the PostScript language as defined by Adobe Systems Incorporated unless otherwise stated. The name PostScript also is used as a
product trademark for Adobe Systems’ implementation of the PostScript language interpreter, and other Adobe products.
Copyright 1987 - 2005 Adobe Systems Incorporated and its licensors. All rights reserved.
Autologic® is a registered trademark of Autologic Information International, Inc.
Compaq® and QVision® are registered United States Patent and Trademark Office, for Compaq Computer Corporation.
DEC, DEC RAID, and Redundant Array of Independent Disks are registered trademarks of Digital Equipment Corporation.
Dundas - This software contains material that is (c) 1997-2000 DUNDAS SOFTWARE LTD., all rights reserved.
Imaging Technology provided under license by Accusoft Corporation.
ImageGear © 1996-2005 by AccuSoft Corporation. All Rights Reserved.
Intel® and Pentium® are registered trademarks of Intel Corporation.
Novell® and NetWare® are registered trademarks of Novell, Inc. in the United States and other countries.
Oracle® is a registered trademark of Oracle Corporation Redwood City, California
TMSSequoia - ScanFix® Image Optimizer Copyright © TMSSEQUOIA, Inc. 1991-2000. All rights reserved.
TM
and Storage by SonyTM are trademarks of Sony.
Sony
PAN TON E
Preps™ is a registered trademark of Creo Inc. All rights reserved.
Quark® and QuarkXpress® are registered trademarks of Quark, Inc.
StorageView
TIFF® is a registered trademark of Aldus Corporation.
Windows®, Windows XP®, Windows Server® 2003, and Internet Explorer are trademarks of Microsoft Corporation; Microsoft® and MS-DOS® are registered
trademarks of Microsoft Corporation.
Portions Copyright © 2001 artofcode LLC.
This software is based in part on the work of the Independent JPEG Group.
Portions Copyright © 2001 URW++. All Rights Reserved.
This product includes software developed by the Apache Software Foundation.
Copyright © 1999-2003 The Apache Software Foundation. All rights reserved.
This software is based in part on the work of Graeme W. Gill.
© Press-sense Ltd. 2002-2007. All rights reserved.
Includes Adobe® PDF Libraries and Adobe Normalizer technology
The Graphics Interchange Format © is the Copyright property of CompuServe Incorporated. GIF
Portions contain an implementation of the LZW algorithm licensed under U.S. Patent 4,558,302.
Parts of this software Copyright © 2004-2006 Enterprise Distributed Technologies Ltd. All Rights Reserved.
Parts of this software Copyright © 1995-2003, The Cryptix Foundation Limited. All Rights Reserved.
Parts of this software are a SSLv3/TLS implementation written by Eric Rescorla and licensed by Claymore Systems, Inc. All Rights Reserved.
Parts of this software Copyright © 2002, Lee David Painter and Contributors. Contributions made by Brett Smith, Richard Pernavas, Erwin Bolwidt.
Parts of this software Copyright © 1995-2005, Jean-loup Gailly and Mark Adler.
All other product names and services mentioned in this publication are trademarks of their respective companies. They are used throughout this publication for
the benefit of those companies, and are not intended to convey endorsement or other affiliation with the publication.
Companies, names, and data used in examples herein are fictitious unless otherwise noted.
Changes are periodically made to this document. Changes, technical inaccuracies, and typographical errors will be corrected in subsequent editions.
™ and other Pantone, Inc. trademarks are the property of Pantone Inc.
TM
is a trademark of CMD Technology, Inc.
SM
is a Service Mark property of CompuServe Incorporated.
Page 3

Table of Contents
Notices and Certifications ix
Approvals and certification . . . . . . . . . . . . . . . . . . . . . . . . . . . . . . . . . . . .ix
Radio Frequency Emissions. . . . . . . . . . . . . . . . . . . . . . . . . . . . . . . . . . .ix
Safety . . . . . . . . . . . . . . . . . . . . . . . . . . . . . . . . . . . . . . . . . . . . . . . . . . . . x
Ozone Safety . . . . . . . . . . . . . . . . . . . . . . . . . . . . . . . . . . . . . . . . . . . x
Electrical Safety . . . . . . . . . . . . . . . . . . . . . . . . . . . . . . . . . . . . . . . . .xi
Operational Safety . . . . . . . . . . . . . . . . . . . . . . . . . . . . . . . . . . . . . . xii
Illegal Usage in USA. . . . . . . . . . . . . . . . . . . . . . . . . . . . . . . . . . . . . . . .xiv
Illegal Usage in Canada . . . . . . . . . . . . . . . . . . . . . . . . . . . . . . . . . . . . xvii
Product Recycling and Disposal. . . . . . . . . . . . . . . . . . . . . . . . . . . . . . xviii
About this guide xix
About this chapter. . . . . . . . . . . . . . . . . . . . . . . . . . . . . . . . . . . . . . . . . .xix
Audience. . . . . . . . . . . . . . . . . . . . . . . . . . . . . . . . . . . . . . . . . . . . . . . . . xx
How to recognize important information. . . . . . . . . . . . . . . . . . . . . . . . . xx
Conventions . . . . . . . . . . . . . . . . . . . . . . . . . . . . . . . . . . . . . . . . . . . xx
Flag icons . . . . . . . . . . . . . . . . . . . . . . . . . . . . . . . . . . . . . . . . . . . . .xxi
Related information . . . . . . . . . . . . . . . . . . . . . . . . . . . . . . . . . . . . . . . xxii
FreeFlow Process Manager documentation. . . . . . . . . . . . . . . . . . xxii
Windows related information . . . . . . . . . . . . . . . . . . . . . . . . . . . . . xxii
Using the FreeFlow Process Manager Online Help . . . . . . . . . . . . . . . xxiii
Finding a Help topic . . . . . . . . . . . . . . . . . . . . . . . . . . . . . . . . . . . . xxiii
To get Help in a dialog box. . . . . . . . . . . . . . . . . . . . . . . . . . . . . . .xxiv
Using the Process Manager Help system. . . . . . . . . . . . . . . . . . . .xxiv
Obtaining additional support. . . . . . . . . . . . . . . . . . . . . . . . . . . . . . . . . xxv
About FreeFlow Process Manager 1-1
FreeFlow Process Manager applications . . . . . . . . . . . . . . . . . . . . . . . 1-1
The Workflow Builder application . . . . . . . . . . . . . . . . . . . . . . . . . . 1-2
The Workflow Submission Client application . . . . . . . . . . . . . . . . . 1-6
The Workflow Job Manager application . . . . . . . . . . . . . . . . . . . . . 1-7
FreeFlow Process Manager hardware and software configurations . . 1-8
Post-installation setup . . . . . . . . . . . . . . . . . . . . . . . . . . . . . . . . . . . . . 1-9
Xerox FreeFlow Process Manager Operator and Administrator Guide
iii
Page 4

Table of Contents
Using the FreeFlow Administration Tool . . . . . . . . . . . . . . . . . . . . . . . 1-13
Legacy Document Library . . . . . . . . . . . . . . . . . . . . . . . . . . . . . . . . . . 1-14
Document conversion . . . . . . . . . . . . . . . . . . . . . . . . . . . . . . . . . . 1-14
Managing backup and restore functions . . . . . . . . . . . . . . . . . . . . . . . 1-14
Logging in to the FreeFlow Process Manager applications . . . . . . . . 1-15
Authorization error message. . . . . . . . . . . . . . . . . . . . . . . . . . . . . 1-16
To log in to the FreeFlow Process Manager applications . . . . . . . 1-17
Group membership and authorization. . . . . . . . . . . . . . . . . . . . . . 1-17
Managing production printers . . . . . . . . . . . . . . . . . . . . . . . . . . . . . . . 1-18
Xerox FreeFlow Common Printer Administrators group . . . . . . . . 1-18
To register and add a production printer . . . . . . . . . . . . . . . . . . . . 1-19
Setting up Preps . . . . . . . . . . . . . . . . . . . . . . . . . . . . . . . . . . . . . . . . . 1-20
To configure the Preps default workflow . . . . . . . . . . . . . . . . . . . . 1-21
To create and save Preps Job files . . . . . . . . . . . . . . . . . . . . . . . . 1-22
To select a device type for PREPS versions prior to 5.2.2 . . . . . . 1-24
Missing hardware key error. . . . . . . . . . . . . . . . . . . . . . . . . . . . . . 1-24
Using PREPS with Adobe Acrobat 8.0. . . . . . . . . . . . . . . . . . . . . 1-25
Workflow Builder 2-1
About Workflow Builder. . . . . . . . . . . . . . . . . . . . . . . . . . . . . . . . . . . . . 2-1
Logging in to Workflow Builder. . . . . . . . . . . . . . . . . . . . . . . . . . . . . . . 2-2
To log in to Workflow Builder. . . . . . . . . . . . . . . . . . . . . . . . . . . . . . 2-2
Workflow Builder main window . . . . . . . . . . . . . . . . . . . . . . . . . . . . . . . 2-3
Workflow list . . . . . . . . . . . . . . . . . . . . . . . . . . . . . . . . . . . . . . . . . . 2-4
Workflow list columns . . . . . . . . . . . . . . . . . . . . . . . . . . . . . . . . . . . 2-5
Workspace . . . . . . . . . . . . . . . . . . . . . . . . . . . . . . . . . . . . . . . . . . . 2-6
Workflow Builder menus . . . . . . . . . . . . . . . . . . . . . . . . . . . . . . . . . . . . 2-9
The File menu . . . . . . . . . . . . . . . . . . . . . . . . . . . . . . . . . . . . . . . . . 2-9
The Edit menu. . . . . . . . . . . . . . . . . . . . . . . . . . . . . . . . . . . . . . . . 2-10
The View menu . . . . . . . . . . . . . . . . . . . . . . . . . . . . . . . . . . . . . . . 2-11
The Options menu. . . . . . . . . . . . . . . . . . . . . . . . . . . . . . . . . . . . . 2-11
The Insert menu and workflow process icons. . . . . . . . . . . . . . . . 2-13
Customizing a workflow process name. . . . . . . . . . . . . . . . . . . . . 2-18
The Help menu . . . . . . . . . . . . . . . . . . . . . . . . . . . . . . . . . . . . . . . 2-19
Workflow Builder toolbars . . . . . . . . . . . . . . . . . . . . . . . . . . . . . . . . . . 2-20
Workflows toolbar . . . . . . . . . . . . . . . . . . . . . . . . . . . . . . . . . . . . . 2-20
Workspace toolbar . . . . . . . . . . . . . . . . . . . . . . . . . . . . . . . . . . . . 2-21
Building workflows. . . . . . . . . . . . . . . . . . . . . . . . . . . . . . . . . . . . . . . . 2-22
Rules for building workflows . . . . . . . . . . . . . . . . . . . . . . . . . . . . . 2-22
Building a new workflow . . . . . . . . . . . . . . . . . . . . . . . . . . . . . . . . 2-23
Duplicating and modifying an existing workflow . . . . . . . . . . . . . . 2-24
iv
Xerox FreeFlow Process Manager Operator and Administrator Guide
Page 5

Table of Contents
Enabling a workflow . . . . . . . . . . . . . . . . . . . . . . . . . . . . . . . . . . . 2-25
Disabling a workflow. . . . . . . . . . . . . . . . . . . . . . . . . . . . . . . . . . . 2-25
Deleting a workflow . . . . . . . . . . . . . . . . . . . . . . . . . . . . . . . . . . . 2-26
Editing workflow properties. . . . . . . . . . . . . . . . . . . . . . . . . . . . . . 2-26
Creating fail branches. . . . . . . . . . . . . . . . . . . . . . . . . . . . . . . . . . 2-27
Exporting workflows . . . . . . . . . . . . . . . . . . . . . . . . . . . . . . . . . . . 2-28
Importing workflows . . . . . . . . . . . . . . . . . . . . . . . . . . . . . . . . . . . 2-30
Configuring process settings . . . . . . . . . . . . . . . . . . . . . . . . . . . . . . . 2-33
To modify the process settings . . . . . . . . . . . . . . . . . . . . . . . . . . . 2-33
About Input . . . . . . . . . . . . . . . . . . . . . . . . . . . . . . . . . . . . . . . . . . 2-34
Configuring Automatic Image Enhancement (AIE) settings . . . . . 2-35
Configuring Convert settings . . . . . . . . . . . . . . . . . . . . . . . . . . . . 2-38
About Join. . . . . . . . . . . . . . . . . . . . . . . . . . . . . . . . . . . . . . . . . . . 2-44
Configuring Optimize settings. . . . . . . . . . . . . . . . . . . . . . . . . . . . 2-45
Configuring Preflight settings . . . . . . . . . . . . . . . . . . . . . . . . . . . . 2-60
Upgrading legacy workflows that contain Job Level Edit nodes. . 2-63
Limitations for job level edits. . . . . . . . . . . . . . . . . . . . . . . . . . . . . 2-63
Fault handling for job level edits . . . . . . . . . . . . . . . . . . . . . . . . . . 2-63
Adding watermarks. . . . . . . . . . . . . . . . . . . . . . . . . . . . . . . . . . . . 2-64
Setting up or modifying a text watermark . . . . . . . . . . . . . . . . . . . 2-65
Setting up or modifying an image watermark . . . . . . . . . . . . . . . . 2-68
Duplicating or deleting a watermark . . . . . . . . . . . . . . . . . . . . . . . 2-70
Adding Bates numbers . . . . . . . . . . . . . . . . . . . . . . . . . . . . . . . . . 2-71
Adding page numbers. . . . . . . . . . . . . . . . . . . . . . . . . . . . . . . . . . 2-72
Adding a Barcode . . . . . . . . . . . . . . . . . . . . . . . . . . . . . . . . . . . . . 2-74
Previewing job level edits . . . . . . . . . . . . . . . . . . . . . . . . . . . . . . . 2-82
Rotating pages . . . . . . . . . . . . . . . . . . . . . . . . . . . . . . . . . . . . . . . 2-84
Flipping pages . . . . . . . . . . . . . . . . . . . . . . . . . . . . . . . . . . . . . . . 2-84
Resizing . . . . . . . . . . . . . . . . . . . . . . . . . . . . . . . . . . . . . . . . . . . . 2-85
Configuring Imposition settings . . . . . . . . . . . . . . . . . . . . . . . . . . 2-86
Configuring Preps settings . . . . . . . . . . . . . . . . . . . . . . . . . . . . . 2-100
Cropping . . . . . . . . . . . . . . . . . . . . . . . . . . . . . . . . . . . . . . . . . . . 2-102
Configuring Pressmarks settings . . . . . . . . . . . . . . . . . . . . . . . . 2-103
Duplicating or deleting a pressmark . . . . . . . . . . . . . . . . . . . . . . 2-105
About Review . . . . . . . . . . . . . . . . . . . . . . . . . . . . . . . . . . . . . . . 2-106
Configuring Notify settings . . . . . . . . . . . . . . . . . . . . . . . . . . . . . 2-107
Setting up a watermark in an email attachment . . . . . . . . . . . . . 2-110
Configuring Print settings . . . . . . . . . . . . . . . . . . . . . . . . . . . . . . 2-111
Configuring Save settings. . . . . . . . . . . . . . . . . . . . . . . . . . . . . . 2-115
Configuring JDF Export settings. . . . . . . . . . . . . . . . . . . . . . . . . 2-119
Limitations when creating JDF Tickets in
Adobe Acrobat Professional . . . . . . . . . . . . . . . . . . . . . . 2-122
Creating conditional branches . . . . . . . . . . . . . . . . . . . . . . . . . . 2-123
Xerox FreeFlow Process Manager Operator and Administrator Guide
v
Page 6

Table of Contents
Configuring external process settings . . . . . . . . . . . . . . . . . . . . . 2-136
Setting up repository credentials. . . . . . . . . . . . . . . . . . . . . . . . . 2-137
Checking the status of a process . . . . . . . . . . . . . . . . . . . . . . . . 2-139
Setting the number of concurrent processes and the copy count
divisor . . . . . . . . . . . . . . . . . . . . . . . . . . . . . . . . . . . . . . . 2-140
Checking the status of a workflow. . . . . . . . . . . . . . . . . . . . . . . . 2-145
About hot folders . . . . . . . . . . . . . . . . . . . . . . . . . . . . . . . . . . . . . 2-146
Using third party external processes. . . . . . . . . . . . . . . . . . . . . . 2-167
Setting up the SMTP Server . . . . . . . . . . . . . . . . . . . . . . . . . . . 2-185
Setting up the proxy server . . . . . . . . . . . . . . . . . . . . . . . . . . . . . 2-186
Creating preflight profiles . . . . . . . . . . . . . . . . . . . . . . . . . . . . . . 2-187
Workflow Submission Client 3-1
About Workflow Submission Client . . . . . . . . . . . . . . . . . . . . . . . . . . . . 3-1
Logging in to Workflow Submission Client . . . . . . . . . . . . . . . . . . . . . . 3-2
To log in to the Workflow Submission Client application . . . . . . . . . 3-2
Workflow Submission Client main window . . . . . . . . . . . . . . . . . . . . . . 3-3
The Get Files area . . . . . . . . . . . . . . . . . . . . . . . . . . . . . . . . . . . . . 3-4
The Select Workflow area . . . . . . . . . . . . . . . . . . . . . . . . . . . . . . . . 3-5
The Configure Settings area . . . . . . . . . . . . . . . . . . . . . . . . . . . . . . 3-6
The Submit Job area. . . . . . . . . . . . . . . . . . . . . . . . . . . . . . . . . . . . 3-7
Workflow Submission Client menus . . . . . . . . . . . . . . . . . . . . . . . . . . . 3-8
File menu . . . . . . . . . . . . . . . . . . . . . . . . . . . . . . . . . . . . . . . . . . . . 3-8
Edit menu . . . . . . . . . . . . . . . . . . . . . . . . . . . . . . . . . . . . . . . . . . . . 3-9
View menu. . . . . . . . . . . . . . . . . . . . . . . . . . . . . . . . . . . . . . . . . . . . 3-9
Options menu . . . . . . . . . . . . . . . . . . . . . . . . . . . . . . . . . . . . . . . . 3-10
Help menu. . . . . . . . . . . . . . . . . . . . . . . . . . . . . . . . . . . . . . . . . . . 3-10
Job submission . . . . . . . . . . . . . . . . . . . . . . . . . . . . . . . . . . . . . . . . . . 3-11
Job submission process . . . . . . . . . . . . . . . . . . . . . . . . . . . . . . . . 3-11
Workflow selection methods . . . . . . . . . . . . . . . . . . . . . . . . . . . . . 3-12
Submitting a job . . . . . . . . . . . . . . . . . . . . . . . . . . . . . . . . . . . . . . 3-13
Saving a File List. . . . . . . . . . . . . . . . . . . . . . . . . . . . . . . . . . . . . . 3-15
Limitations for Save File List . . . . . . . . . . . . . . . . . . . . . . . . . . . . . 3-16
Submitting Zip files . . . . . . . . . . . . . . . . . . . . . . . . . . . . . . . . . . . . 3-16
Submitting VI Containers (.vpc) . . . . . . . . . . . . . . . . . . . . . . . . . . 3-16
Submitting a file with saved job ticket information for reprinting . . 3-17
Submitting QuarkXPress files (.qxd, .qxp) . . . . . . . . . . . . . . . . . . 3-17
About submitting RDOs. . . . . . . . . . . . . . . . . . . . . . . . . . . . . . . . . 3-18
Remote Workflow Submission Client . . . . . . . . . . . . . . . . . . . . . . . . . 3-20
Accessing Workflow Builder from Workflow Submission Client . . . . . 3-20
vi
Xerox FreeFlow Process Manager Operator and Administrator Guide
Page 7

Table of Contents
Workflow Job Manager 4-1
About Workflow Job Manager . . . . . . . . . . . . . . . . . . . . . . . . . . . . . . . 4-1
Logging into Workflow Job Manager . . . . . . . . . . . . . . . . . . . . . . . . . . 4-2
To log in to the Workflow Job Manager application . . . . . . . . . . . . 4-2
The Workflow Job Manager main window . . . . . . . . . . . . . . . . . . . . . . 4-3
The Status area . . . . . . . . . . . . . . . . . . . . . . . . . . . . . . . . . . . . . . . 4-4
The Jobs area . . . . . . . . . . . . . . . . . . . . . . . . . . . . . . . . . . . . . . . . 4-6
The Jobs area columns . . . . . . . . . . . . . . . . . . . . . . . . . . . . . . . . . 4-7
Workflow Job Manager menus. . . . . . . . . . . . . . . . . . . . . . . . . . . . . . . 4-9
The File menu. . . . . . . . . . . . . . . . . . . . . . . . . . . . . . . . . . . . . . . . . 4-9
The Edit menu . . . . . . . . . . . . . . . . . . . . . . . . . . . . . . . . . . . . . . . 4-10
The View menu. . . . . . . . . . . . . . . . . . . . . . . . . . . . . . . . . . . . . . . 4-11
The Options menu . . . . . . . . . . . . . . . . . . . . . . . . . . . . . . . . . . . . 4-11
The Launch Menu. . . . . . . . . . . . . . . . . . . . . . . . . . . . . . . . . . . . . 4-12
The Help menu . . . . . . . . . . . . . . . . . . . . . . . . . . . . . . . . . . . . . . . 4-12
Workflow Job Manager toolbar. . . . . . . . . . . . . . . . . . . . . . . . . . . . . . 4-13
The Jobs toolbar. . . . . . . . . . . . . . . . . . . . . . . . . . . . . . . . . . . . . . 4-13
Managing Jobs . . . . . . . . . . . . . . . . . . . . . . . . . . . . . . . . . . . . . . . . . . 4-14
Checking the status of a job . . . . . . . . . . . . . . . . . . . . . . . . . . . . . 4-14
Creating reports . . . . . . . . . . . . . . . . . . . . . . . . . . . . . . . . . . . . . . 4-15
Viewing a report . . . . . . . . . . . . . . . . . . . . . . . . . . . . . . . . . . . . . . 4-19
Exporting a report . . . . . . . . . . . . . . . . . . . . . . . . . . . . . . . . . . . . . 4-20
Purging report data. . . . . . . . . . . . . . . . . . . . . . . . . . . . . . . . . . . . 4-21
Viewing and editing a document in Adobe Acrobat . . . . . . . . . . . 4-23
Viewing preflight results . . . . . . . . . . . . . . . . . . . . . . . . . . . . . . . . 4-24
Viewing print results . . . . . . . . . . . . . . . . . . . . . . . . . . . . . . . . . . . 4-25
Modifying workflow settings . . . . . . . . . . . . . . . . . . . . . . . . . . . . . 4-26
Pausing a job . . . . . . . . . . . . . . . . . . . . . . . . . . . . . . . . . . . . . . . . 4-27
Approving a job at a Review step. . . . . . . . . . . . . . . . . . . . . . . . . 4-28
Failing a job . . . . . . . . . . . . . . . . . . . . . . . . . . . . . . . . . . . . . . . . . 4-29
Deleting a job . . . . . . . . . . . . . . . . . . . . . . . . . . . . . . . . . . . . . . . . 4-29
Modifying the copy count . . . . . . . . . . . . . . . . . . . . . . . . . . . . . . . 4-30
Printing a hardcopy proof . . . . . . . . . . . . . . . . . . . . . . . . . . . . . . . 4-32
Adding a recipient to a Notify step with no recipient
address specified . . . . . . . . . . . . . . . . . . . . . . . . . . . . . . . 4-33
Viewing Web Services Job Instructions . . . . . . . . . . . . . . . . . . . . 4-34
Remote Workflow Job Manager Client . . . . . . . . . . . . . . . . . . . . 4-35
Accessing Workflow Builder from Workflow Job Manager . . . . . . 4-37
Accessing Workflow Submission Client from
Workflow Job Manager . . . . . . . . . . . . . . . . . . . . . . . . . . . 4-37
Managing jobs from third party management information systems
(MIS) . . . . . . . . . . . . . . . . . . . . . . . . . . . . . . . . . . . . . . . . . 4-38
Xerox FreeFlow Process Manager Operator and Administrator Guide
vii
Page 8

Table of Contents
viii
Xerox FreeFlow Process Manager Operator and Administrator Guide
Page 9

Notices and Certifications
Approvals and certification
For the UK, this product is serviced under a BS5750 Quality
system accepted by the British Standards Institution.
60HZ, 115V
The equipment is listed by the Underwriters Laboratories,
UL1950, certified by Canadian Standards Association, CSA22.2,
No. 1950.
50HZ, 220V-240V
The equipment is certified by the British Standards Institution,
IEC950 (EN60950). The equipment is manufactured under a
BS5750 Quality system accepted by the British Standards
Institution. The equipment is also certified in compliance with
applicable standards by various national bodies.
Radio Frequency Emissions
USA
This equipment generates, uses and can radiate radio frequency
energy. It may cause radio interference to radio communications if
not installed according to the installation instructions. The
equipment complies with the limits for a Class A computing device
as documented in Subpart J, Part 15 of the FCC rules which are
designed to provide reasonable protection against such
interference when operated in a commercial environment.
Operation of this equipment in a residential area is likely to cause
interference. In such cases, the user is responsible for the
expense of correcting the interference.
FreeFlow Process Manager Operator and Administrator Guide
ix
Page 10

Safety
Canada
The equipment does not exceed the class A limits for radio noise
emissions from a digital apparatus as documented in the radio
interference regulations of the Canadian Department of
Communications.
Cet appareil numÈrique est conforme aux limites d'Èmission de
bruits radioÈlectriques pour les appareils de classe A stipulÈes
dans le RÈglement sur le brouillage radioÈlectriques du ministÈre
des Communications du Canada.
Europe 50HZ, 220V-240V Equipment
The equipment was tested and is certified in conformance with the
European commission directive 82/499/ECC and VDE 0871/
0875, class B which relates to radio frequency interference. This
equipment is certified, manufactured and tested in compliance
with strict safety and radio frequency interference regulations.
Your Xerox equipment and supplies were designed and tested to
meet strict safety requirements. These include safety agency
examination, approval and compliance with established
environmental standards.
Ozone Safety
Attention to the following notes ensures the continued safe
operation of your equipment.
If you need any additional safety information concerning the
equipment or materials, contact your local representative.
This product will produce ozone during normal operation. The
ozone produced is heavier than air and is dependent on copy
volume. Providing the correct environmental parameters as
specified in the Xerox installation procedures will ensure that the
concentration levels meet safe limits.
If you need additional information about ozone, please request the
Xerox publication Ozone (part number 600E74140) by calling 1-
800-828-6571 in the United States and Canada.
x
FreeFlow Process Manager Operator and Administrator Guide
Page 11

Electrical Safety
Always follow a code of safe habits as described in the following
statements:
1. Use only the power cable supplied with this equipment.
2. Plug the power cable directly into a properly grounded
electrical outlet. Do not use an extension cord. If you are not
sure whether or not an outlet is properly grounded, consult a
qualified electrician.
3. Do not use a ground adapter plug to connect this equipment to
an electrical outlet that lacks a ground connection terminal.
WARNING: Improper connection of the equipment grounding
conductor can result in severe electrical shock.
4. Do not place this equipment where people might step or trip on
the power cable.
5. Do not place objects on the power cable.
6. Do not override or disable electrical or mechanical interlock
devices. Covers, guards, and interlock switches are provided
to prevent operator access to unsafe areas.
7. Do not obstruct ventilation openings. These openings are
provided to prevent overheating of the machine.
WARNING: Never push objects of any kind into slots and
openings on this equipment. Contacting a voltage point or shorting
out a part could result in electrical shock or fire
8. If any of the following conditions occur, turn off the machine
immediately and disconnect the power cable from the
electrical outlet. Contact an authorized Xerox Service
Representative to correct the problem:
• The equipment emits unusual odors or makes unusual noises.
• The power cable is damaged or frayed.
• A wall panel circuit breaker, fuse, or other safety device has
been tripped.
• Liquid is spilled into the machine.
• The machine is exposed to water.
• Any part of the machine is damaged.
FreeFlow Process Manager Operator and Administrator Guide
xi
Page 12

Operational Safety
Your Xerox equipment and supplies have been designed and
tested to meet strict safety requirements. These include safety
agency examination, approval, and compliance with established
environmental standards.
To ensure the continued safe operation of your Xerox equipment,
follow these safety guidelines at all times:
Do These
• Always connect equipment to a correctly grounded power
outlet. If in doubt, have the outlet checked by a qualified
electrician.
• Always follow all warnings and instructions that are marked
on or supplied with the equipment.
• Always exercise care when moving or relocating equipment.
Please contact your local Xerox Service Department to
arrange relocation of the copier to a location outside of your
building.
• Always locate the machine on a solid support surface (not on
plush carpet) that has adequate strength to support the weight
of the machine.
• Always locate the machine in an area that has adequate
ventilation and room for servicing.
• Always use materials and supplies specifically designed for
your Xerox equipment. Use of unsuitable materials may result
in poor performance and possibly a hazardous situation.
• Always unplug this equipment from the electrical outlet before
cleaning.
Do Not Do These
• Never use a ground adapter plug to connect the equipment to
a power outlet that lacks a ground connection terminal.
• Never attempt any maintenance function that is not
specifically described in this documentation.
xii
FreeFlow Process Manager Operator and Administrator Guide
Page 13

• Never obstruct ventilation openings. They are provided to
prevent overheating.
• Never remove covers or guards that are fastened with screws.
There are no operator serviceable areas within these covers.
• Never locate the machine near a radiator or any other heat
source.
• Never push objects of any kind into the ventilation openings.
• Never override or "cheat" any of the electrical or mechanical
interlock devices.
• Never operate the equipment if you notice unusual noises or
odors. Disconnect the power cord from the electrical outlet and
contact your Xerox Service Representative immediately.
FreeFlow Process Manager Operator and Administrator Guide
xiii
Page 14

Illegal Usage in USA
Congress, by statute, has forbidden the copying of the following
subjects under certain circumstances. Penalties of fines or
imprisonment may be imposed on those guilty of making such
copies.
1. Obligations or Securities of the United States Government,
such as:
• Certificates of indebtedness
• United States Bonds
• National Bank Currency
• Treasury Notes
• Coupons from bonds
• Federal Reserve Notes
• Federal Reserve Bank Notes
• Fractional Notes
• Silver Certificates
• Certificates of Deposit
• Gold Certificates
• Paper Money
• Bonds and obligations of certain agencies of the government,
such as FHA, etc.
• Bonds
NOTE: U.S. Savings Bonds may be photographed only for
publicity purposes in connection with the campaign for the sale of
such bonds.
• Internal Revenue Stamps
NOTE: If necessary to copy a legal document on which there is a
canceled revenue stamp, this may be done, provided the
reproduction of the document is performed for lawful purposes.
xiv
FreeFlow Process Manager Operator and Administrator Guide
Page 15

• Postage Stamps, canceled or not canceled
NOTE: For philatelic purposes, Postage Stamps may be
photographed, provided the reproduction is in black and white,
and is less than 3/4 or more than 1-1/2 times the linear
dimensions of the original.
• Postal Money Orders
• Bills, Checks, or Drafts for Money, drawn by or upon
authorized officers of the United States
• Stamps and other representatives of value, of whatever
denomination, which have been or may be issued under any
Act of Congress
2. Adjusted Compensation Certificates for Veterans of World
Wars.
3. Obligations or Securities of any Foreign Government, Bank, or
Corporation.
4. Copyrighted material, unless permission of the copyright
owner has been obtained or the copying falls within the ìfair
useî or library reproduction rights provisions of the copyright
law.
NOTE: Further information on these provisions may be obtained
from the Copyright Office, Library of Congress, Washington, D.C.
20559. Ask for Circular R21.
5. Certificates of Citizenship or Naturalization.
NOTE: Foreign Naturalization Certificates may be photographed.
6. Passports.
NOTE: Foreign passports may be photographed.
7. Immigration Papers.
8. Draft Registration Cards.
FreeFlow Process Manager Operator and Administrator Guide
xv
Page 16

9. Selective Service Induction Papers, which bear any of the
following information:
• Registrantís earnings or income
• Registrantís previous military service
• Registrantís dependency status
• Registrantís physical or mental condition
• Registrantís court record
NOTE: U.S. Army and Navy discharge certificates may be
photographed.
10. Badges, Identification Cards, Passes, or insignia carried by
Military, Naval personnel, or by members of the various
Federal Departments and Bureaus, such as FBI or Treasury,
unless the photograph is ordered by head of such department
or bureau.
11. Copying the following is also prohibited in certain states:
• Automobile Licenses
• Driver Licenses
• Automobile Certificates of Title
The above list is not all inclusive, and no liability is assumed for its
completeness or accuracy. In case of doubt, consult your attorney.
xvi
FreeFlow Process Manager Operator and Administrator Guide
Page 17

Illegal Usage in Canada
Parliament, by statute, has forbidden the copying of the following
subjects under certain circumstances. Penalties of fines or
imprisonment may be imposed on those guilty of making such
copies.
1. Current bank notes or current paper money.
2. Obligations or securities of a government or bank.
3. Exchequer bill paper or revenue paper.
4. The public seal of Canada or of a province, or the seal of a
public body or authority in Canada, or of a court of law.
5. Proclamations, orders, regulations or appointments, or notices
thereof (with intent to falsely cause same to purport to have
been printed by the Queenís Printer for Canada, or the
equivalent printer for a province).
6. Marks, brands, seals, wrappers, or designs used by or on
behalf of the Government of Canada or of a province, the
government of a state other than Canada or a department,
board, commission, or agency established by the Government
of Canada or of a province or of a government of a state other
than Canada.
7. Impressed or adhesive stamps used for the purpose of
revenue by the Government of Canada or of a province or by
the government of a state other than Canada.
8. Documents, registers, or records kept by the public officials
charged with the duty of making or issuing certified copies
thereof, where the copy falsely purports to be a certified copy
thereof.
9. Copyrighted material or trademarks of any manner or kind
without the consent of the copyright or trademark owner.
The above list is provided for your convenience and assistance,
but it is not all inclusive and no liability is assumed for its
completeness or accuracy. In case of doubt, consult your solicitor.
FreeFlow Process Manager Operator and Administrator Guide
xvii
Page 18

Product Recycling and Disposal
Xerox operates a worldwide equipment takeback and reuse/
recycle program. Contact your Xerox sales representative (1-800ASK-XEROX) to determine whether this Xerox product is part of
the program. For more information about Xerox environmental
programs, visit www.xerox.com/environment.html.
If your product is not part of the Xerox program and you are
managing its disposal, please note that the product may contain
lead, mercury and other materials whose disposal may be
regulated due to environmental considerations. For recycling and
disposal information, contact your local authorities. In the United
States, you may also refer to the Electronic Industries Alliance
web site: www.eiae.org.
xviii
FreeFlow Process Manager Operator and Administrator Guide
Page 19

About this chapter
About this guide
The Xerox FreeFlow Process Manager Operator and
Administrator Guide provides information and procedures for
using the Process Manager applications.
This chapter explains the information found in this guide and how
the information is organized. It helps you get the most out of this
guide by:
• Identifying the audience and the basic skills required to use
this guide effectively.
• Explaining the standard conventions and cues that highlight
important information.
• Listing related documentation you might find helpful.
• Listing available online FreeFlow Process Manager Help
systems.
• Providing information on ordering additional materials and
supplies.
• Providing information on obtaining additional information.
NOTE:
NOTE: If you are using Process Manager for the first time, it is
recommended that you first read Chapter 1, About Process
Manager, in this guide.
FreeFlow Process Manager Operator and Administrator Guide
xix
Page 20

Audience
The Xerox FreeFlow Process Manager Operator and
Administrator Guide is a comprehensive reference manual
intended for administrators and operators.
How to recognize important information
The following sections provide the conventions and flag icons that
are used in the Xerox FreeFlow Process Manager Operator and
Administrator Guide.
Conventions
The Xerox FreeFlow Process Manager Operator and
Administrator Guide uses the conventions listed in the table,
below, to help you recognize information:
Table 1-1. Description of conventions
Convention Description
<CAPS in angle
brackets>
<Angle brackets> Variable information is enclosed in angle
[
Square brackets]
Bold
Within procedures, the names of keys to
press are displayed in capital letters and
enclosed in angle brackets (for example,
press <ESCAPE>).
Keyboard combinations are represented by
the plus sign (+) between names of keys
(for example, press <CONTROL+C> to
copy).
brackets (for example, select <filename>).
Names of options you select, including
toolbar buttons and buttons in dialog boxes,
are enclosed in square brackets (for
example, select [
Menu commands are also displayed in
square brackets, with the menu name
appearing first, then a colon, followed by the
option name (for example, select [
]).
Close
Text you should enter exactly as it appears
is displayed in bold (for example, enter
Close]).
File:
test1.rdo).
xx
FreeFlow Process Manager Operator and Administrator Guide
Page 21
Table 1-1. Description of conventions
Convention Description
Flag icons
Italics
Titles of documents and manuals that
provide additional information on the current
topic are displayed in italics (for example,
the
Xerox FreeFlow Process Manager
Operator and Administrator Guide
).
The Xerox FreeFlow Process Manager Operator and
Administrator Guide uses the following flag icons to help you
recognize important information:
NOTE: The NOTE symbol and text in italics indicate there is
important or supplemental information when performing a task or
procedure.
CAUTION: The CAUTION symbol and bold text indicate that
you may lose data or damage equipment if care is not taken
when performing the task or procedure following the caution.
WARNING: The WARNING symbol and red text indicate that you
may cause personal injury or death if care is not taken when
performing the task or procedure following the warning.
Step-by-step
The step-by-step icon identifies the beginning of a procedure.
FreeFlow Process Manager Operator and Administrator Guide
xxi
Page 22

Related information
FreeFlow Process Manager documentation
Windows related information
This section lists additional materials you may need, or find
helpful, when using your FreeFlow Process Manager system.
To order the Xerox documentation listed below, or for additional
information on Xerox solutions, contact your Xerox
Representative.
For more information on FreeFlow Process Manager, refer to the
following publications:
• Xerox FreeFlow System Administrator Guide
• Xerox Customer Software Release Document (CSRD) for
FreeFlow Process Manager
Microsoft provides users and administrators with several different
resources to support the Windows 2003 environment. Some of
these resources include web sites and online Help. The following
sections describe these sources and tell you how to find and use
them.
Windows Online Help
Windows 2003 Server includes extensive online Help for all
aspects of the operating system. Most likely, the online Help will
be your primary source for information. Administrative procedures,
from adding users and managing groups to installing Windows
printers, can be found in the online Help files. Furthermore, most
Windows applications also contain their own online Help system
containing information that is specific to the application.
To access online Help, select [Start: Help] from the Windows task
bar. If you are looking for help within a specific application, use the
options available from the Help menu within that application.
xxii
FreeFlow Process Manager Operator and Administrator Guide
Page 23

Windows Microsoft Web site
Microsoft has a World Wide Web site that contains the latest
Windows 2003 Server news and information about upgrades. The
URL for this site is:
http://www.microsoft.com/
Using the FreeFlow Process Manager Online Help
This section provides a brief overview of the type of Help available
online from the FreeFlow Process Manager software.
You can access the FreeFlow Process Manager Online Help
system by selecting [<application> Help] in the Help menu,
located on the main window menu bar in each Process Manager
application. You can also access Help by selecting the [Help]
button, when available, in dialog boxes.
Finding a Help topic
In Help, click one of the following tabs:
• To browse through topics by category, select the Contents
tab.
• To see a list of index entries, select the Index tab; you can
then either search or scroll through the list or keywords.
• To search for words or phrases that might be contained in a
Help topic, select the Search tab.
In the left of the Help window, click the topic, index entry, or phrase
to display the corresponding topic in the right frame.
NOTE: Under the Index tab and the Search tab, you must select
<Display> to show the highlighted topic in the right frame.
FreeFlow Process Manager Operator and Administrator Guide
xxiii
Page 24

To get Help in a dialog box
Select the question mark [?] in the title bar of the dialog box, and
then click the item in the dialog box you need help with.
NOTE: You can print or copy the information in a pop-up window
by right-clicking inside the pop-up window, and then selecting
[Print Topic] or [Copy].
NOTE: If the dialog box does not have the [?] button, press <F1>
or search for the item in the Help system.
NOTE: You can also get Help with an item by right-clicking on it,
and selecting [What's This?].
Using the Process Manager Help system
For detailed information on using the online Help system, refer to
the topic “Using Help” in the Process Manager online help.
xxiv
FreeFlow Process Manager Operator and Administrator Guide
Page 25

Obtaining additional support
For additional information about the following topics, refer to the
Xerox Customer Software Release Document (CSRD) for
FreeFlow Process Manager:
• X-PRESS FAX
• FreeFlow FAQ Xerox web site
• Xerox Welcome Center
FreeFlow Process Manager Operator and Administrator Guide
xxv
Page 26

xxvi
FreeFlow Process Manager Operator and Administrator Guide
Page 27

1. About FreeFlow Process
Manager
This section provides information about Xerox FreeFlow Process
Manager applications, hardware and software components,
preparatory steps for workflow building and job management, user
and group access, the log in process, adding and removing
printers, creating Preps Job files, and backup and restore
functions.
FreeFlow Process Manager applications
About FreeFlow Process Manager
FreeFlow Process Manager consists of three applications that
allow you to create, submit, and manage automated workflows:
• Workflow Builder
• Workflow Submission Client
• Workflow Job Manager
FreeFlow Process Manager Operator and Administrator Guide
1-1
Page 28

About FreeFlow Process Manager
The Workflow Builder application
Use Workflow Builder to:
• Create workflows
• Import and export workflows.
• Take processes offline and change concurrency counts.
• Create preflight profiles by launching Adobe Acrobat.
• Set up and manage hot folders.
• Add external PDF processes to support third party software.
• Set up third-party scripts.
– Use graphical tools to assemble customized workflows
from workflow process steps.
– Configure the settings for workflow process steps.
– Enable workflows to receive jobs.
– Disable workflows to modify them or to prevent job
submission.
• Set up Notify attributes on the SMTP server; set up the Proxy
server.
• Set up repository credentionals.
The Workflow process steps include:
Table 1-1. Workflow process steps
Step Description
Input Displays automatically as the first workflow node when you select
<
Enter> during new workflow creation. Does not have a settings
dialog in Workflow Builder. In Workflow Job Manager, the
settings dialog and the tool tip display the original input files.
AIE Automatic Image Enhancement (AIE) optimizes sharpness, color
balance, saturation, exposure, noise reduction and contrast of
TIFF, JPEG, and BMP images, whether standalone or embedded
in a PDF. AIE also supports redeye removal for humans and
shadow detail enhancement. The AIE feature works only for color
and grayscale images.
Convert Converts documents submitted to the workflow to PDF. Converts
the following formats: MS Word, MS PowerPoint, MS Excel
(includes Microsoft Office 2007), MS Publisher, Adobe
Photoshop, Adobe InDesign, Adobe Illustrator,
TIFF-IT, TIF, BMP, PS, RDO, QXD, QXP, VPC, and EPS.
Allows you to flatten PDFs for printing.
Users can select from various job options to generate optimal
PDFs.
JPG, JPEG, TIFF,
1-2
Join Combines multiple PDF files into a single PDF file.
FreeFlow Process Manager Operator and Administrator Guide
Page 29

About FreeFlow Process Manager
Table 1-1. Workflow process steps
Step Description
Optimize The Optimize process allows you to modify a PDF file to be PDF/
X compliant, specify how fonts should be embedded, define PDF
Box settings, configure spot color settings, and manage color
profiles. You can also remove trap layers and replace hairlines.
Preflight Uses a preflight profile to validate and check formatting, verify the
image, fonts, and verify references to OPI image server images.
The preflight checks depend on the profile selected.
You can also use Preflight to let the workflow automatically
discover conditions. For example, you can create a single-rule
profile, use it as a filter to check a file for a specific condition, for
example, a certain page size, and then direct the file to the next
appropriate process or workflow.
Watermarks
Bates
Numbering
Page
Numbering
Barcode Allows you to add a barcode to your workflow. You can specify
Rotate Pages Allows you to rotate each page in the PDF file 90 degrees right or
Allows you to add
input PDF file. You can specify a combination of opaque or
transparent images or text, in various alignments, that can
appear either underneath or on top of the page content. The
Preview option allows you to dynamically view the content before
committing to the selected settings.
Allows you to add bate stamps to each page of an input PDF file.
Bate stamps consist of a page number with optional leading
zeros and an optional fixed text prefix. An optional extra line of
fixed text can appear either above or below the page number.
The Preview option allows you to dynamically view the content
before committing to the selected settings.
Allows you to add page numbers to each page of an input PDF
file. The Preview option allows you to dynamically view the
content before committing to the selected settings.
the barcode type, font, placement, alignment, rotation, frequency,
size and other options. Provides support for variable data in the
text and page range areas. The Preview option allows you to
dynamically view the content before committing to the selected
settings.
left, or 180 degrees.
a text or image watermark to each page of an
Flip Pages Allows you to flip each page in the PDF file horizontally or
vertically to create a mirror image.
Resize Allows you to select a specific size, or a size based on a
percentage of the original image size. For TIFFs, JPGs, or BMPs,
the image is resized; for PDFs, the page is resized.
FreeFlow Process Manager Operator and Administrator Guide
1-3
Page 30

About FreeFlow Process Manager
Step Description
Impose Allows you to do the following:
Crop Allows you to automatically crop jobs consisting of one or more
Table 1-1. Workflow process steps
• Use imposition to define the placement of page elements.
• Place crop marks.
• Select various job types—for example, signature booklets and
N-up.
• When the PREPS impostion node is selected, choose from a list
of preconfigured PREPS imposition job files.
• Select from various PDF Boxes.
• Select Cell Clustering, which provides the option of pulling
together cells on a sheet in a way that results in cell sizes that
contain the imposed page image with no waste space between
cells.
The Preview option allows you to dynamically view the content
before committing to the selected settings.
PDF pages and JPEG, TIFF, or BMP file images. For PDF
documents, crops the pages; for JPEG, TIFF, or BMP files, crops
the images.
Pressmarks Allows you to add a fixed pressmark to a workflow. You can
specify the pressmark placement, rotation, frequency, and
transparency, and then preview the specifications. The Preview
option allows you to dynamically view the content before
committing to the selected settings.
Review Can be used multiple times, at critical points in a workflow, to
view, check and edit the PDF file using Adobe Acrobat.
When stopped at the Review step, you can change process
settings, resubmit the job to a previous step for additional
processing, view a soft proof, or print a hardcopy proof.
You can approve the job and allow it to move to the next step in
the workflow, or you can fail the job.
If there is a Print step after the Review step, you can select
[Copies] to access the Copies dialog and change the number of
copies to print.
Notify Provides job status notification via e-mail. Allows you to attach
job files up to a maximum size of 1 GB.
Print Allows you to print PDF, VPC, or RDO (for reprint) files to a
specified production printing queue using a specified job ticket.
For information about reprinting RDOs, refer to the topic “About
submitting RDOs.”
1-4
Save Allows you to save all supported file types from the workflow to a
specified location in a Windows file system or document
repository.
You can also use Save to direct or “branch” a job to other
workflows by designating a hot folder as the Save location.
FreeFlow Process Manager Operator and Administrator Guide
Page 31

About FreeFlow Process Manager
Table 1-1. Workflow process steps
Step Description
JDF Export Creates a JDF ticket and exports a PDF and JDF ticket to a
specified location in a Windows file system or document
repository. You have the option to
made by the external process nodes.
The output file of a JDF export task can be re-imported and rerun by dropping it into a hot folder associated with an appropriate
workflow. The files associated with the JDF must exist in the
same location as the original job.
Conditional Conditional branching provides an added level of logic to a
workflow, allowing it to examine the properties of submitted jobs,
and then act accordingly without human intervention.
You can add one or more conditional branches to a workflow,
each with one or more user-designated conditions that specify
the desired attributes or properties of the submitted jobs.
export the JDF with changes
External
Process
External Processes enable the use of third party workflow
components. The processes are added and configured in
Workflow Job Manager.
FreeFlow Process Manager Operator and Administrator Guide
1-5
Page 32

About FreeFlow Process Manager
The Workflow Submission Client application
Use Workflow Submission Client to:
• Select files for submission from WIndows or from a document
• Save and load a file list.
• Select an optional job ticket for submission with the files.
• Submit the files to one of the automated workflows.
• Modify the workflow process settings.
• View the job ticket and resolve job ticket conflicts.
• Launch Workflow Buider
• Submit files remotely from a workstation or server with
repository.
Remote Workflow Submission Client installed.
1-6
FreeFlow Process Manager Operator and Administrator Guide
Page 33

The Workflow Job Manager application
Use Workflow Job Manager to:
• View job details and status.
• Review and edit jobs in Adobe Acrobat.
• Edit process settings.
• Print hardcopy proofs.
• Identify faulted jobs.
• Resubmit jobs.
• Approve, fail, pause, or delete jobs.
• Generate, view, and export reports.
• Launch Workflow Submission Client, Workflow Builder, Printer
Registration, and FreeFlow Administration Tool.
• Review and configure incoming third party jobs from
Management Information Systems (MIS).
• Perform selected tasks remotely from a workstation or server
with Remote Workflow Job Manager Client installed.
About FreeFlow Process Manager
FreeFlow Process Manager Operator and Administrator Guide
1-7
Page 34

About FreeFlow Process Manager
FreeFlow Process Manager hardware and software configurations
For information pertaining to FreeFlow Process Manager
hardware and software configurations, refer to the Xerox
Customer Software Release Document (CSRD) for FreeFlow
Process Manager.
1-8
FreeFlow Process Manager Operator and Administrator Guide
Page 35

Post-installation setup
Table 1-2. Workflow and Job Management Preparatory Procedures
Procedure Overview
About FreeFlow Process Manager
Table 1-2 provides a post-installation checklist you must complete
after your FreeFlow Process Manager system has been installed.
NOTE: This checklist assumes that a Xerox Representative has
installed of all hardware and software necessary to run the
FreeFlow Process Manager system.
Configure document
repository connections
Create user accounts;
add or edit user contact
information; change
XDL Admin account
password
Use the FreeFlow Administration Tool to configure the connection between
FreeFlow Process Manager and the supported document repositories.
For detailed procedures on configuring repository connections, refer to the
System Administrator Guide or to the FreeFlow Administration Tool online Help
system.
Creating User Accounts Process Manager user accounts are created and
managed using the Windows Local Users and Groups functionality in the
Computer Management application. Users that are created and added to the
appropriate Process Manager group accounts using Windows appear in the
FreeFlow Administration Tool list of users.
Storing User contact information The FreeFlow Administration Tool is
used to view user accounts that have been created in Windows, and to add or
edit user contact information.
Changing the XDL Admin account password
The FreeFlow Administration Tool allows you to change the password for the
XDL Admin account. This password is set during the installation of the software.
For detailed procedures on creating user accounts, refer to the Windows online
help. For detailed procedures on adding or editing user contact information or
changing the XDL Admin account password, refer to the System Administrator
Guide or to the FreeFlow Administration Tool online Help system.
FreeFlow Process Manager Operator and Administrator Guide
1-9
Page 36

About FreeFlow Process Manager
Table 1-2. Workflow and Job Management Preparatory Procedures
Procedure Overview
Manage production
printers for workflows
Production printers must be added to FreeFlow Process Manager before you
attempt to drag a Print process into a workflow during the workflow building
process.
In FreeFlow 6.0, a new common printer interface enables all FreeFlow
applications to maintain a single database of configured printers and to have a
common job setup GUI interface across FreeFlow applications. The common
printer interface includes the following utilities:
Registered Printer List Locator: Allows you to set whether the registered
printer list in use by a FreeFlow applicaton is located on a local computer or on a
remote computer.
Printer Registration: Allows you to register and manage supported
production printers and queues for use by FreeFlow software applications. To
configure the Print process step in a workflow, production printers must first be
added via the FreeFlow Printer Registration application.
Printer Status/Job Status Tool: Allows you to status jobs, queues, and
printers.
For additional information about Production Printing, refer to the
Customer Software Release Document for FreeFlow Process Manager
or the
Xerox Production Printing Guide for FreeFlow Applications.
Xerox
,
You can also access the online Help for the Registered Printer List Locator,
Printer Registration, or the Printer Status/Job Status Tool.
Configure the SMTP
server
Set up workflows Three default workflows are provided with the software: Simple, Main, and
Generate the preflight
profile repository on a
clean install.
The Simple Mail Transport Protocol (SMTP) Server is used for e-mail
notification. The SMTP Setup dialog, accessed via the Workflow Builder
application, allows you to identify the mail server for outgoing mail or
notifications and to establish the maximum size for e-mail attachments.
For details, refer to the following procedure in the
Operator and Administrator Guide
Server.”
Reprint. Modify these workflows or create your own, based on the needs of your
organization. You may want to name workflows based on clients (XYZ Co.) or
types of jobs (brochure, newsletter, flyer).
For details, refer to the following procedure in the
Operator and Administrator Guide
settings;” “Building a new workflow.”
Preflight profiles do not exist on a clean install. You will need to generate the
profile repository.
For details, refer to the following procedure in the
Operator and Administrator Guide
settings.”
or the online help: “Setting up the SMTP
or the online help: “Configuring process
or the online help: “Configuring preflight
Freeflow Process Manager
Freeflow Process Manager
Freeflow Process Manager
1-10
FreeFlow Process Manager Operator and Administrator Guide
Page 37

About FreeFlow Process Manager
Table 1-2. Workflow and Job Management Preparatory Procedures
Procedure Overview
Create or modify
preflight profiles.
Set the default job
option in Adobe
Acrobat
Upgrade legacy
workflows that contain
the Job Level Edit
process.
The preflight step validates and checks formatting and verifies the image, fonts
and references to OPI image server images. You may want to modify the
preflight profiles that are provided with FreeFlow Process Manager.
For details, refer to the following procedure in the
Operator and Administrator Guide
profiles.
For the Convert process, you can select from various job options, or create
custom job options, to generate optimal PDFs in Process Manager. The default
job option that is displayed in Process Manager is selected in Adobe Acrobat
Distiller. You can ensure that Process Manager displays the desired Adobe
Acrobat Distiller default job option by selecting a profile from the Default Settings
drop box in Acrobat Distiller.
For details, refer to the following procedure in the
Operator and Administrator Guide
settings.”
In previous versions of FreeFlow Process Manager, all job level edit functions
(for example, watermarks, page numbering, page rotation) were available via a
single Job Level Edit dialog. Legacy workflows that contain Job Level Edit
processes will perform as they did in earlier versions, but you will not be able to
edit them. To use the version 6.0 job level edit functions, save the existing Job
Level Edit workflow, and it will be converted into a series of individual,
Watermark, Bates Numbering, Page Numbering, Flip and Rotate nodes, as
appropriate.
or the online help: “Creating preflight
or the online help: “Configuring Convert
Freeflow Process Manager
Freeflow Process Manager
Ensure Color Manage
workflow consistency
between the server and
a remote client.
Importing 5.0
workflows with a Color
Manage node.
Import ICC profiles
ICC profile rights
For details, refer to the following procedure in the
Operator and Administrator Guide
workflows that contain the Job Level Edit process.”
Workflows that include color management can become inconsistent between the
Process Manager server and the remote client when profiles are uninstalled on
the server.
Color profiles are now managed in the Optimize node Color tab.
If you import a 5.0 workflow with a Color Manage node into FreeFlow Process
Manager 6.0, the 5.0 Color Manage icon is converted to an Optimize icon and
the settings transfer automatically to the Optimize settings Color tab.
For information, refer to the
Ensuring Color Manage workflow consistency
or the online help: “Upgrading legacy
between the server and a remote client
Freeflow Process Manager
procedure and Importing a 5.0
workflow with a Color Manage node.
Import any required ICC profiles.
You must own the rights to use the ICC profiles accessed by FreeFlow Process
Manager.
For details, refer to the following procedure in the
Operator and Administrator Guide
profile.”
or the online help: “To import an ICC
Freeflow Process Manager
FreeFlow Process Manager Operator and Administrator Guide
1-11
Page 38

About FreeFlow Process Manager
Table 1-2. Workflow and Job Management Preparatory Procedures
Procedure Overview
Set up hot folders You may want to designate hot folders ahead of time.
You can open a common browse folder dialog and select or create a folder in the
system via the Hot Folders dialog in Workflow Builder.
You can:
Schedule all hot folders for the same times of day or schedule hot folders
individually.
Pause/resume all hot folders or individual hot folders.
Enable file clustering on a per hot folder basis.
For details, refer to the following procedure in the
Operator and Administrator Guide
folder.”
Set up external
processes
You may want to add external processes to support third party software, or to
set up third party scripts.
For details, refer to the following procedure in the
Operator and Administrator Guide
external processes.
Set up Preps To use Preps, you will need to install it, configure the default Preps workflow,
and create and save Preps job files.
For details, refer to the following procedure in the
Operator and Administrator Guide
or the online help: “Setting up a hot
or the online help: “Using third party
or the online help: “Setting up Preps.”
Freeflow Process Manager
Freeflow Process Manager
Freeflow Process Manager
1-12
FreeFlow Process Manager Operator and Administrator Guide
Page 39

Using the FreeFlow Administration Tool
The FreeFlow Administration Tool provides the following options:
• Repository icon: Displays the Repository Connections tab,
where you can administer the connections between a
Repository Management System (RMS) server to available
Document Management System (DMS) repositories.
• Conversion Settings icon: Displays the Conversion Settings
tab which contains the settings for the dynamic conversion of
documents uploaded to document repositories. These settings
will serve as the defaults for the File Conversion Tool
application.
• Process Manager icon: Available only on machines running
FreeFlow Process Manager. Opens the following tabs:
– Backup: Allows you to back up FreeFlow Process
Manager user and group information, workflows, jobs, and
task information to a user selectable directory location.
– Restore: Allows you to restore previously back up
FreeFlow Process Manager user and group information,
workflows, jobs and task information.
About FreeFlow Process Manager
• User Accounts icon: Available only on machines running
FreeFlow Process Manager. Displays tabs used to view and
edit select FreeFlow Process Manager user account contact
information.
Process Manager user accounts are created and managed
using the Windows Local Users and Groups functionality in the
Computer Management application. Users that are created
and added to the appropriate Process Manager group
accounts using Windows will appear in the FreeFlow
Administration Tool list of users. The following options are
available:
– Storing User contact information: The FreeFlow
Administration Tool is used to view user accounts created
in Windows, and to add or edit user contact information.
– Changing the XDL Admin account password:The
FreeFlow Administration Tool allows you to change the
password for the XDL Admin account. This password is set
during the installation of the software.
For more information refer to the Xerox FreeFlow System
Administrator Guide and the FreeFlow Administration Tool online
Help system.
FreeFlow Process Manager Operator and Administrator Guide
1-13
Page 40

About FreeFlow Process Manager
Legacy Document Library
Document Library is no longer available with the FreeFlow 6.0
product offering. Supported document repositories in FreeFlow
6.0 include Xerox Docushare and SharePoint.
NOTE: Any previous version of FreeFlow Makeready, FreeFlow
Process Manager, and FreeFlow Web Services customers using
Document Library, must migrate to a supported repository. For
more information, contact your Xerox representative.
Document conversion
Previously, Document Library users used the background batch
utility, provided via the Conversion tab in the Library
Administration Tool, to convert documents within Document
Library cabinets to PDF.
In FreeFlow 6.0, you may wish to use the FreeFlow File
Conversion Tool, available via the Start menu, to convert
documents residing in file systems or repositories to PDF.
Managing backup and restore functions
In FreeFlow 6.0, the customer is ultimately responsible for backing
up and restoring the FreeFlow system, whereas in previous
versions of FreeFlow, a backup strategy was recommended.
The FreeFlow Administration Tool is used to back up and restore
FreeFlow Process ManagerProcess Manager user information,
workflow, job, and task information to a user-selectable directory
location.
For detailed information about backing up and restoring data with
the FreeFlow Administration Tool, refer to the FreeFlow
Administration Tool online Help.
1-14
FreeFlow Process Manager Operator and Administrator Guide
Page 41

About FreeFlow Process Manager
Logging in to the FreeFlow Process Manager applications
You can open all FreeFlow Process Manager applications via the
Start menu or the Control Center shortcut bar.
• You can open Workflow Builder via Workflow Submission
Client and Workflow Job Manager.
• You can open Workflow Submission Client via Workflow Job
Manager.
Process Manager user accounts are created and managed using
the Windows Local Users and Groups functionality in the
Computer Management application. During install, Xerox
FreeFlow Process Manager Administrators and Xerox
FreeFlowProcess Manager Operators groups are created. Your
administrator then populates these groups with users.
Permissions to launch applications are based on group
membership. For more information, see Group membership and
authorization.
When attempting to open a FreeFlow Process Manager
application:
• If you are currently logged into a Process Manager server, but
are not a member of either the Xerox FreeFlow Process
Manager Administrators or Xerox FreeFlow Process Manager
Operators group, a message displays and you may not have
permission to run the application. This also applies to loggedin users on remote client machines.
• If you are currently logged into a Process Manager server, are
a member of the Xerox FreeFlow Process Manager Operators
group, and you are attempting to access an application that
requires Xerox FreeFlow Process Manager Administrators
group privileges, a login screen displays and you must enter
the required credentials. This also applies to logged-in users
on remote client machines
• If you have permission to launch an application by virtue of
membership in an authorizing group, the application launches
without asking for credentials. See your administrator for
questions about your user account.
FreeFlow Process Manager Operator and Administrator Guide
1-15
Page 42

About FreeFlow Process Manager
Authorization error message
The Windows OS caches a user's group membership
information. If you add yourself to an authorization group (e.g.,
Xerox FreeFlow Process Manager Administrators) and then try to
launch an application, you will receive an error message indicating
you do not have permission to launch FreeFlow Process Manager
applications.To rectify this issue, log off and then log back on.
1-16
FreeFlow Process Manager Operator and Administrator Guide
Page 43

About FreeFlow Process Manager
To log in to the FreeFlow Process Manager applications
If you enter the incorrect username or password, you receive an
incorrect username or password error message. You can then
enter your correct username and password.
1. Select [Start: Programs: Xerox FreeFlow Software:
FreeFlow Process Manager: <application>]. The Login
dialog opens for the selected application.
2. In the User name text box, enter your user name.
3. In the Password text box, enter your password.
4. The Domain text box is populated with the domain of the
currently logged in user, or the last domain entered in the login
form. Confirm that the proper domain name appears.
5. Enter the appropriate Process Manager server name in the
Server text box.
6. Select [OK]. The main window for the selected application
opens.
Group membership and authorization
The following table shows authorization based on membership in
FreeFlow Process Manager Administrators or FreeFlow Process
Manager Operators groups.
Table 1-3. Group Membership and Authorization
Administrator Operator
Can launch Workflow Job Manager,
Workflow Submission Client, Manifest
Automation from Xerox (MAX)
Can launch Workflow Builder Cannot launch Workflow Builder
Can launch FreeFlow Adminstrator Tool
and perform all adminstrative tasks
NOTE: Printer Registration also supports user authentication
through the operating system and application-level authorization
through membership in operating system groups.
Can launch Workflow Job Manager, Workflow
Submission Client, Manifest Automation from
Xerox (MAX)
Can launch FreeFlow Adminstrator Tool and edit
repository connnection information
FreeFlow Process Manager Operator and Administrator Guide
1-17
Page 44

About FreeFlow Process Manager
Managing production printers
In FreeFlow 5.0, Workflow Printer Administration was used to
configure and manage production printers. In FreeFlow 6.0, a new
common printer interface enables all FreeFlow applications to
maintain a single database of configured printers and to have a
common job setup GUI interface across FreeFlow applications.
The common printer interface includes the following utilities:
• Registered Printer List Locator: Allows you to set whether
the registered printer list in use by a FreeFlow application is
located on a local computer or a remote computer.
• Printer Registration: Allows you to register and manage
supported production printers and queues for use by FreeFlow
software applications. To configure the Print process step in a
workflow, production printers must first be added via the
FreeFlow Printer Registration application.
• Printer Status/Job Status Tool: Allows you to status jobs,
queues, and printers.
Xerox FreeFlow Common Printer Administrators group
In order to make changes to registered printers with the Printer
Registration tool, a user must be a member of the Xerox FreeFlow
Common Printer Administrators group.
A logged-in user who is a member of the group has full access to
the add/edit functionality in the Printer Registration tool.
If the user is not a member of the group, the error message “The
logged in user does not have administrative access” displays and
the tool runs in read-only mode. A login dialog, accessed from the
file menu, allows the user to log in and turn on the add/edit
functionality. The login dialog requires a user name, a password,
and a domain.
1-18
FreeFlow Process Manager Operator and Administrator Guide
Page 45

To register and add a production printer
1. Select [Start: Programs: Xerox FreeFlow Software: Printer
Registration], or in Workflow Job Manager, select [Launch:
Printer Registration]. The Installed Products dialog displays.
2. Ensure the radio button for Process Manager is marked.
3. Select [OK].
4. In the Printer Registration dialog, select the desired task:
[Add...], [View/Edit...], or [Delete].
5. For additional information about registering and managing
printers, select [Help] in the Printer Registration dialog to open
the online Help.
For additional information about Production Printing, refer to the
Xerox Customer Software Release Document for FreeFlow
Process Manager, or the Xerox Production Printing Guide for
FreeFlow Applications, or access the online Help for the
Registered Printer List Locator, Printer Registration, or the Printer
Status/Job Status Tool.
About FreeFlow Process Manager
FreeFlow Process Manager Operator and Administrator Guide
1-19
Page 46

About FreeFlow Process Manager
Setting up Preps
To use PREPS, install PREPS in the following way:
NOTE: FreeFlow Process Manager, Version 6.0, supports Kodak
PREPS 5.2.2.
NOTE: When the PREPS documentation uses the term Xerox
DigiPath, it is referring to FreeFlow.
• For Setup Type, select the Custom Install.
• Select the following components during installation:
•PREPS Program
• Languages
• Xerox Digipath
• Automation
• iKey Hardware Key Driver or Sentinel Hardware Key
Driver
You also have to physically install the appropriate hardware key.
Once PREPS is installed, you need to perform the following:
• Configure PREPS to use the Default workflow PDF to PDF.
• Create and save PREPS Job files.
See also
To configure the Preps default workflow
To create and save Preps Job files
To select a device type for PREPS versions prior to 5.2.2
Missing hardware key error
Using PREPS with Adobe Acrobat 8.0
1-20
FreeFlow Process Manager Operator and Administrator Guide
Page 47

To configure the Preps default workflow
1. Start PREPS.
2. Select [Edit: Preferences...] to display the Preferences
dialog.
3. Select the [General] tab. In the Default workflow box, select
[PDF -> PDF].
4. Select [OK] to close the Preferences dialog.
5. Select [Setup: Save Profile...] to display the Save Profile
dialog.
6. In the Profile Name text box, ensure that “default” is entered,
and select [OK] to save the profile.
7. If the message “Profile default already exists. Overwrite
anyway.” displays, select [Yes].
8. Exit Preps.
9. The Save current configuration dialog prompts “Do you want
to save the current configuration into the profile,” select [Yes].
Preps closes.
About FreeFlow Process Manager
NOTE: The profile must be manually edited in a text editor to allow
output to a PDF file. After completing steps 1-9, above, do the
following:
10. On the Process Manager server, locate the file “default.cfg”
under <Preps Install dir>\Preps 5.2\Profiles\Default.
11. Open the file with a text editor.
a. Double-click “default.cfg”.
b. In the Windows dialog, select [Select the program from a
list], and select [OK].
c. In the Open With dialog, select Notepad, and select [OK].
FreeFlow Process Manager Operator and Administrator Guide
1-21
Page 48

About FreeFlow Process Manager
12. Find and change the following entries:
13. Save and close the file.
14. For Preps 5.2.2, make the default.cfg readonly once you have
15. If there is a .cfg file under <Preps Install dir>\Preps
• Change -O:P to -O:D
• Change -ADOBEPJTF:NO to -ADOBEPJTF:YES
• Change -JDFOUTPUT:YES to -JDFOUTPUT:NO
• Change -EXPORTPDF:NO to -EXPORTPDF:YES
• Change SkipDeviceSizeWarning:NO to
SkipDeviceSizeWarning:YES
made all changes:
a. In Windows Explorer, select the default .cfg file.
b. Right -click and select [Properties].
c. In the General Tab, in the Attributes area, mark the check
box for [Read-only].
d. Select [OK].
5.2\Profiles, make the same changes as in steps 11 - 13 to this
file, also.
To create and save Preps Job files
When you use PREPS, the FreeFlow Workflow Builder system
searches the Imposition Jobs directory for Preps files with a .job
suffix. Since no default .job files are provided, the user must
create them.
1. Start PREPS.
2. To create a new PDF job, select [File: New Job: PDF->PDF]
3. In the Signature List window, select [Signatures...] to open
the Signature Selection dialog.
4. In the Signature Selection dialog, select a style from the list in
the Binding style drop box.
5. Click [+] to expand the Sample Templates tree and display a
list of templates.
1-22
FreeFlow Process Manager Operator and Administrator Guide
Page 49

About FreeFlow Process Manager
6. In the displayed list of templates, click [+] to expand the
desired template, then select the appropriate signature.
7. Select [Add] to add the template and signature to the job file.
The job file template displays in the Template/Signature/Page
window.
8. Select [OK] to close the Signature Selection dialog.The job file
template displays in the Signature List window.
You must select a device type for each signature.
9. In the Signature List window, select the desired signature. The
[Device...] button is enabled.
10. Click [Device...].
11. In the Choose Device window, select [Press Sheet Size] as
the target device. You must select a device for each signature.
12. Select [OK] to close the Choose Device window.
13. To save the job file, select [File: Save Job] or [File: Save Job
As...]. Either opens the Save Job As dialog.
14. In the Save in list box, navigate to the FreeFlow Install
Directory\ImpositionJobs directory, typically, E:\ FreeFlow\
ImpositionJobs.
15. Type the appropriate file name, and select [Save].
16. Repeat steps 2-11 to add more job file templates.
FreeFlow Process Manager Operator and Administrator Guide
1-23
Page 50

About FreeFlow Process Manager
To select a device type for PREPS versions prior to 5.2.2
You must select a device type for each signature in order to use
old PREPS job files.
1. Start PREPS.
2. Select [Setup: Device Setup].
3. Select [Press Sheet Size] in the “Installed Devices” section.
4. Select [OK] to close the Device Setup dialog.
5. Close the PREPS application. You can now use the old job
For more information about device setup, refer to your PREPS
documentation.
Missing hardware key error
If the ”Preps Server error, check Preps Automation Front-End
server” error message is displayed on your PREPS UI or on the
server that you are using to run PREPS, do the following, even if
the PREPS hardware key is not missing:
files.
1. Stop the PREPS Automation Front-End server by performing
one of the following:
• If there is a yellow folder icon (with the tooltip “Waiting for
Jobs”) in the systray, double-click the icon to open the
Preps UI.
– In the UI, select [File: Exit] to close PREPS.
• If there is not a yellow folder icon (with the tooltip “Waiting
for Jobs”) in the systray, then the application must be
stopped in the Windows Task Manager.
– Open Windows Task Manager, find the PrepsSlv.exe
process, and end the process.
– Find the PrepsSrv.exe process and end the process.
2. Close the FreeFlow Process Manager applications and shut
down the FreeFlow Process Manager server.
3. Reinsert the hardware key.
4. Reboot the FreeFlow Process Manager server.
5. Open the FreeFlow Process Manager applications and
resubmit the job. The Preps Automation Front-End server
starts automatically.
1-24
FreeFlow Process Manager Operator and Administrator Guide
Page 51

Using PREPS with Adobe Acrobat 8.0
When using Adobe Acrobat 8.0, after PREPS installation, you
must change the PDF Conversion Acrobat directory.
To use PREPS with Adobe Acrobat 8.0
1. Start PREPS.
2. Select [Edit: Preferences...] to display the Preferences
dialog.
3. Select the [PDF] tab.
4. Select Adobe Acrobat and select the directory in which you
installed Adobe Acrobat 8.0, for example C:\Program
Files\Adobe\Acrobat 8.0\Acrobat.exe.
5. Select [OK] to close the Preferences dialog.
About FreeFlow Process Manager
FreeFlow Process Manager Operator and Administrator Guide
1-25
Page 52

About FreeFlow Process Manager
1-26
FreeFlow Process Manager Operator and Administrator Guide
Page 53

About Workflow Builder
Workflow Builder
2. Workflow Builder
Xerox FreeFlow Workflow Builder provides the ability to create
workflows by dragging and dropping processes into a userdefined sequence. The optional ability to configure and add third
party software workflow components to a workflow enhances the
flexibility and capabilities of the Process Manager system.
A workflow is a sequence of uniquely configured steps that define
how a document is processed. Use Workflow Builder to:
• Create workflows
– Use graphical tools to assemble customized workflows
from workflow process steps.
– Configure the settings for workflow process steps.
– Enable workflows to receive jobs.
– Disable workflows to modify them or to prevent job
submission.
• Import and export workflows.
• Take processes offline and change concurrency counts.
• Create preflight profiles by launching Adobe Acrobat.
• Set up and manage hot folders.
• Add external PDF processes to support third party software.
• Set up third-party scripts.
• Set up Notify attributes on the SMTP server; set up the Proxy
server.
• Set up repository credentionals.
FreeFlow Process Manager Operator and Administrator Guide
2-1
Page 54

Workflow Builder
Logging in to Workflow Builder
Process Manager user accounts are created and managed using
the Windows Local Users and Groups functionality in the
Computer Management application. During install, Xerox
FreeFlow Process Manager Administrators and Xerox FreeFlow
Process Manager Operators groups are created. Your
administrator then populates these groups with users.
Permissions to launch applications are based on group
membership.
NOTE: If you are not a member of an authorizing group, contact
your administrator. If you forget your username and password,
notify your administrator.
To log in to Workflow Builder
A login screen may or may not display, depending on group
membership and server location.
If you enter the incorrect username or password, you receive an
incorrect username or password error message. You can then
enter your correct username and password.
1. Select [Start: Programs: Xerox FreeFlow Software:
FreeFlow Process Manager: Workflow Builder]. The Login
dialog opens for the selected application.
2. In the User name text box, enter your user name.
3. In the Password text box, enter your password.
4. The Domain text box is populated with the domain of the
currently logged in user, or the last domain entered in the login
form. Confirm that the proper domain name appears.
5. Enter the appropriate Process Manager server name in the
Server text box.
6. Select [OK]. The main window opens.
2-2
FreeFlow Process Manager Operator and Administrator Guide
Page 55
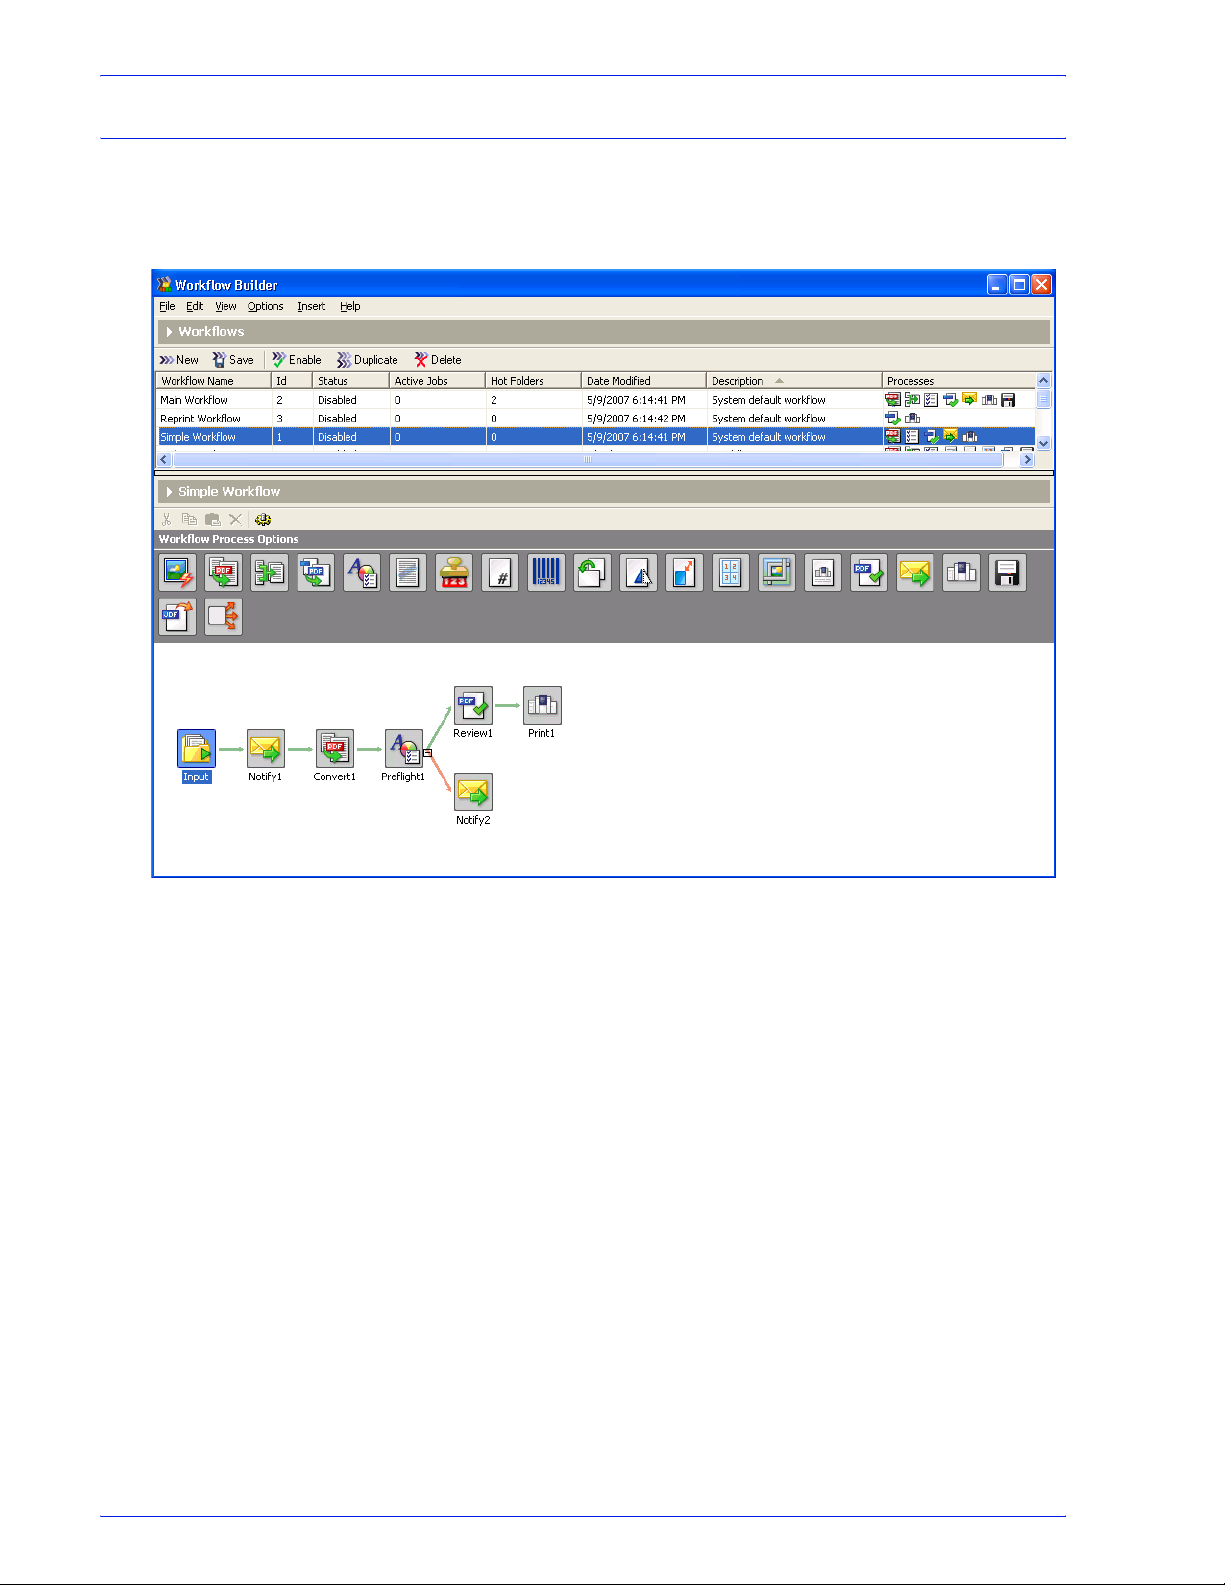
Workflow Builder main window
Two major areas comprise the Workflow Builder main window: the
workflow list and the workspace.
Workflow Builder
FreeFlow Process Manager Operator and Administrator Guide
2-3
Page 56
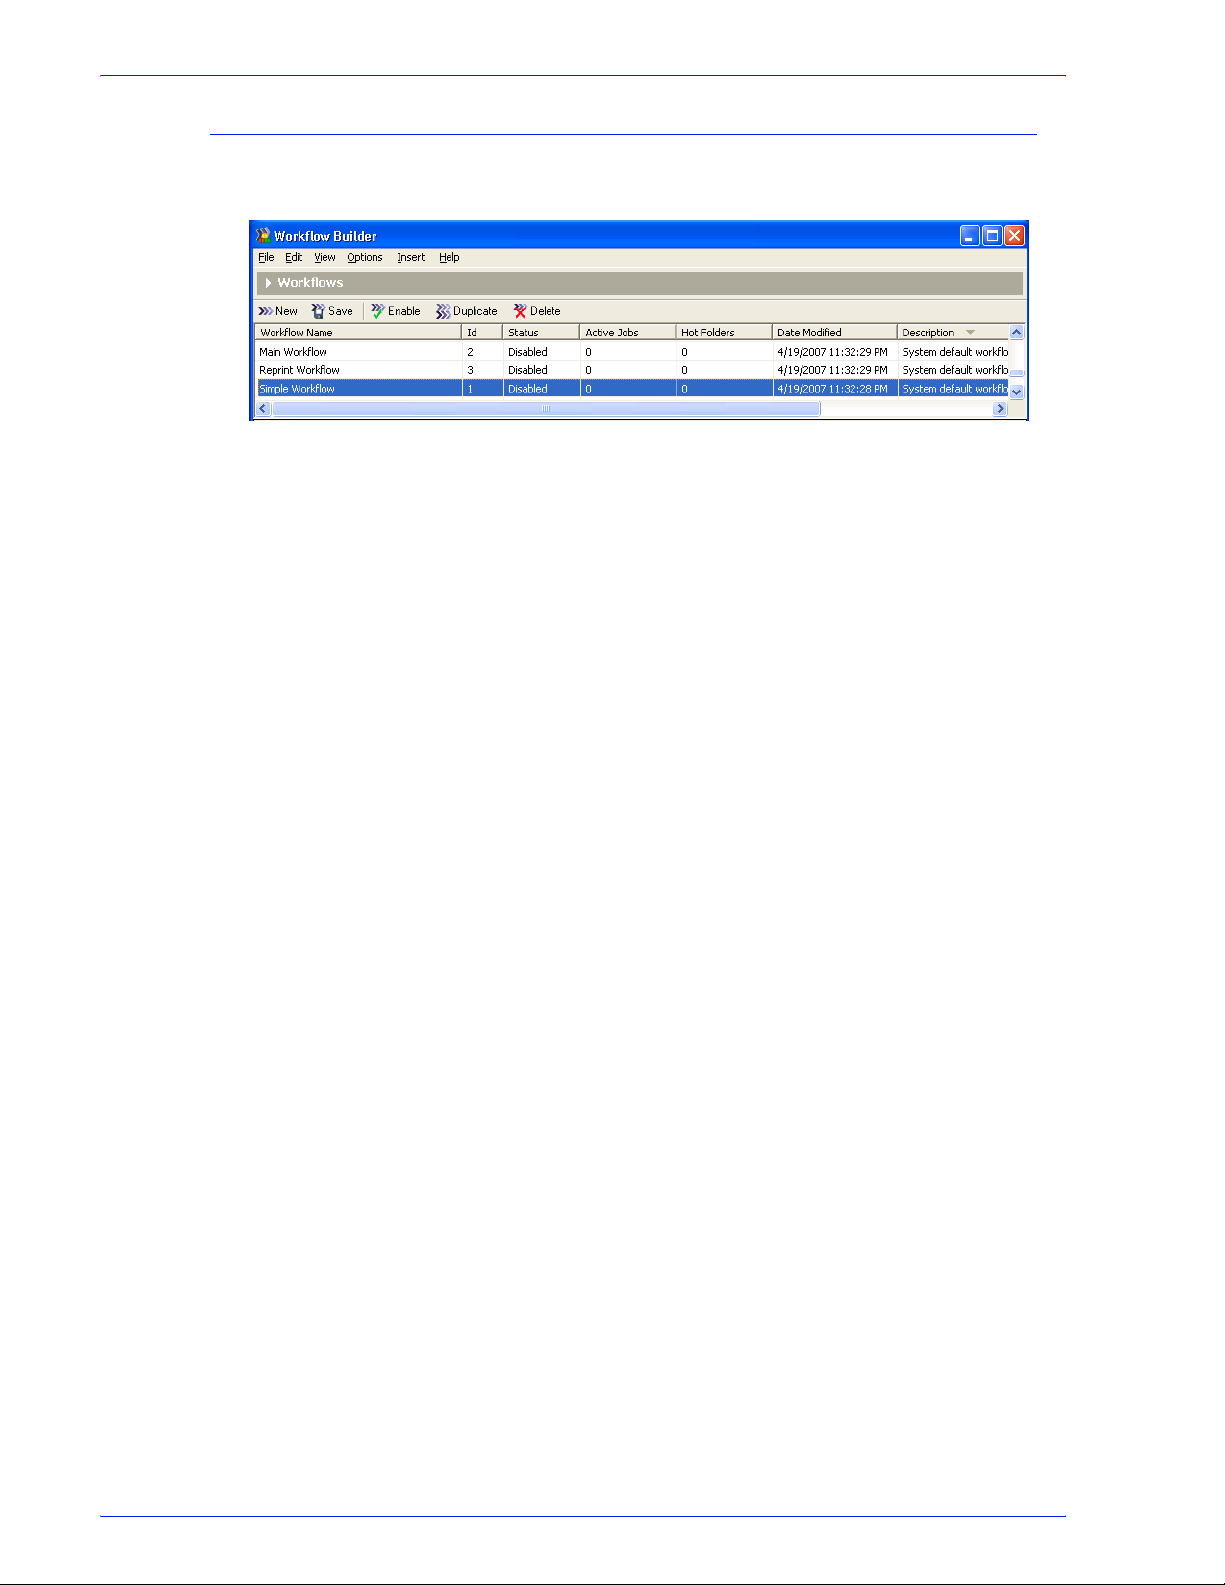
Workflow Builder
Workflow list
Workflow List
Area
Workspace
Area
The workflow list, in the upper portion of the window, includes the
following components:
• Menu bar
• Workflows toolbar
• List of the current workflows
• Three default application workflows:
– Main Workflow
– Simple Workflow
– Reprint Workflow
2-4
FreeFlow Process Manager Operator and Administrator Guide
Page 57

Workflow list columns
The workflow list contains the following columns:
Workflow Builder
Table 2-1. Workflow list columns.
Column
Workflow Name Lists the names of the workflows.
Id Lists the workflow Ids.
Status Lists whether the workflow is Enabled, Disabled,
Enabled-Busy, or Disabled-Busy.
Date Modified Lists the time and date the workflow was last
changed.
Description Displays workflow comments entered by users.
Processes Shows a small graphical representation of each
workflow.
Active Jobs Lists the number of active jobs.
Hot Folders Lists the number of hot folders associated with the
selected workflow.
Description
In the workflow list, you can sort the list by the items in any column
by clicking the column heading.
FreeFlow Process Manager Operator and Administrator Guide
2-5
Page 58

Workflow Builder
Workspace
The workspace, in the lower portion of the workflow window,
includes the following components:
• Name of the currently selected workflow
• Workspace toolbar
• Workflow Process Options— the workflow building blocks
• Workspace—for workflow assembly, display, and modification
When a user selects a workflow in the list, it is graphically
displayed in the workspace. If the workflow is in the “disabled”
status and does not currently have jobs that are being processed,
it is available for editing.
Zooming in and out of the workflow view
For large or complex workflows, this feature allows more
processes to be displayed in the workflow window. Three zoom
levels are available:
Small Icons: Displays small icons.
Medium Icons: Displays mid-sized icons.
Large Icons: Default; displays large icons.
NOTE: To display the process name in this view, hover over a
process with the mouse cursor to show the tool tip.
2-6
FreeFlow Process Manager Operator and Administrator Guide
Page 59

To zoom in or zoom out
•Select [View: Workflow Icons], and then select the desired
option, or
• Right-click in the graphical workflow area, select [Workflow
Icons], and select the desired option.
Expanding and restoring the viewing space
The expand and restore capability provides more viewing space in
selected areas.
To expand and restore the view
1. To expand the view, click the right-facing [Expand] arrow to
the left of the title area—for example, “Workflows” in Workflow
Builder.
2. To restore the view to the original size, click the down-facing
[Restore]arrow.
Workflow Builder
Enabling and disabling process tool tips
You can view process settings via tool tips in the graphical
workflow display by positioning the mouse pointer over a workflow
process.
NOTE: In Workflow Job Manager, the tool tip for the Input node
displays the original input files.
To enable/disable tooltips
bbb
In the View menu,
• To enable tool tips, select [Show Process Tool Tips].
• To disable tool tips, select [Hide Process Tool Tips].
FreeFlow Process Manager Operator and Administrator Guide
2-7
Page 60

Workflow Builder
Finding a process node
The Find feature simplifies the task of locating process node in a
workflow.
To find a node
1. In Workflow Builder, Workflow Job Manager or Workflow
Submission Client, select a workflow or a job.
2. Select [Edit: Find...].
3. In the Find what text box, enter the process name and select
[Find Next].
4. If the process is located, it becomes the selected process.
5. Select [Find Next] to locate the next instance of the process. If
no additional processes are found, the Reached end of
Workflow message displays.
6. To continue the search from the beginning, select [OK].
7. If the process is not located, a “Node name not found”
message displays. Select [OK] to close the Not Found dialog.
8. Begin a new search or close the dialog to end the search.
2-8
FreeFlow Process Manager Operator and Administrator Guide
Page 61

Workflow Builder menus
Workflow Builder
The Workflow Builder menu bar provides commands for creating
and modifying workflows.
Commands can also be accessed by right-clicking on a workflow
or workflow option to display the context menu. Menu items that
are not available are grayed out.
See also:
The File menu
The Edit menu
The View menu
The Options menu
The Insert menu and workflow process icons
The Help menu
The File menu
The Workflow Builder File menu contains the following options:
Table 2-2. Workflow Builder File menu
File Menu
Option Description
New Adds a new workflow to the list. Provides a cursor
for editing the workflow name. The new workflow is
added to the list and graphically displayed in the
workspace by a yellow Input folder.
Save Saves changes to the workflow that is currently
open for modification.
Revert Opens the selected workflow to its last saved state.
Displays a confirmation dialog.
Import... Opens the Open dialog; allows you to choose .xml
workflow files.
Export... Opens the Export dialog. Available if one or more
workflows are selected.
Exit Closes the Workflow Builder application. If a
workflow is open and has been changed since it
was last saved, displays a confirmation dialog.
FreeFlow Process Manager Operator and Administrator Guide
2-9
Page 62

Workflow Builder
The Edit menu
The Workflow Builder Edit menu contains the following options:
Table 2-3. Workflow Builder Edit menu
Edit Menu Option
Workflow
Properties...
Enable/Disable Enable: Allows a job to be submitted to the selected workflow.
Duplicate Adds a copy of the selected workflow to the list; provides a
Rename Workflow Highlights the selected workflow name and provides a cursor for
Delete Workflow(s) Deletes the selected workflow with a confirmation dialog.
Cut Deletes and stores the selected process and its properties for
Opens the workflow properties dialog, which allows you to edit
the workflow name, add a description of the workflow, and
enable submission to the workflow.
Enabled workflows are displayed in the Workflow Submission
Client window. Enable also auto-saves the workflow.
Disable: Prevents jobs from being submitted to the workflow.
Disabled workflows are not visible or available via the Workflow
Submission Client.
cursor for editing the workflow name. The user must select
<Enter> to complete the duplication operation.
editing the name. The workflow must first be disabled.
pasting into the same workflow.
Description
Copy Stores the selected process and its properties for pasting
elsewhere in the same workflow.
Paste Pastes the process stored in the clipboard.
Paste as Fail Branch Pastes the process stored in the clipboard as a fail branch of the
selected process.
Delete Process Deletes the selected process.
Rename Process Invokes the process rename mode for the selected process.
Process Settings... Opens the settings dialog for the selected workflow process.
Find...
Opens the Find dialog, which allows you to
node in a workflow.
locate a process
2-10
FreeFlow Process Manager Operator and Administrator Guide
Page 63

The View menu
Workflow Builder
The View menu contains the following options:
Table 2-4. Workflow Builder View menu
View Menu Option Description
The Options menu
Show/Hide Process
Too l Ti ps
Workflow Icons Small Icons: Displays small icons.
Show: Allows you to view process settings via
tool tips in the graphical workflow display by
positioning the mouse pointer over a workflow
process.
Hide: Disables the tool tips.
Medium Icons: Displays mid-sized icons.
Large Icons: Default; displays large icons.
The Options menu includes the following options:
Table 2-5. Workflow Builder Options menu
Options Menu
Option
Processes Opens the Processes dialog, which allows you
to check the status of a workflow process.
Allows you to open the Process Settings
dialog to place the process online or offline,
and to check or change the concurrent count
value.
Impose Process Settings allows you to turn
the copy count divisor functionality on or off.
This allows you to
maintain the original quantity intent for
workflows that contain multiple-up
impositions
Description
to adjust the copy count to
. See To enable the Copy Count
Divisor
Hot Folders Opens the Hot Folders dialog, in which you
can access the Hot Folder Setup dialog and
manage existing hot folders. You can delete
hot folders, pause and resume scanning for
new files, open the Hot Folder Settings dialog,
or check hot folder status.
External Processes Opens the External Processes dialog, which
allows you to move and delete processes, and
to access various dialogs for adding and
configuring external processes.
FreeFlow Process Manager Operator and Administrator Guide
2-11
Page 64

Workflow Builder
Table 2-5. Workflow Builder Options menu
Options Menu
Option
SMTP Setup... Opens the SMTP Setup dialog, which allows
you to set up the SMTP server for e-mail
notification and to establish a maximum e-mail
attachment size.
Proxy Setup... Opens the Proxy Setup dialog, which is used
to configure proxy settings. This enables the
iWay Prime application to submit PDF jobs to
Process Manager workflows.
Preflight Setup... Opens Adobe Acrobat, which is used to
configure preflight profiles.
Repository
Credentials Setup...
Email Attachment
Watermark Setup...
Opens a dialog that allows the current user to
enter a Username and Password for the
active repository.
Opens the Email Attachment Watermark
Setup dialog. Allows you to set up and
customize the security watermark on PDF
documents sent via email notification.
Description
2-12
FreeFlow Process Manager Operator and Administrator Guide
Page 65

The Insert menu and workflow process icons
The Workflow Builder Insert menu allows you to insert processes
into a displayed workflow.
To insert a process, select a process in a workflow, and select
[Insert: <item>]. The new process is inserted to the right of the
selected process.
Workflow processes are also available as icons in the Workflow
Process Options area. The icons can be dragged and dropped
into the workspace to assemble a workflow. Processes marked
with an asterisk (*) in the table, below, are not configurable.
See also:
Customizing a workflow process name
Table 2-6. Workflow Builder Insert menu and workflow process icons
Workflow Builder
Insert Menu
Options
Input
NOTE: Not an
Insert Menu
option
AIE Automatic Image Enhancement (AIE) optimizes sharpness,
Convert Converts documents submitted to the workflow to PDF.
Workflow
Process Icon
Description
Displays automatically as the first workflow node when you
select <
have a settings dialog in Workflow Builder. In Workflow Job
Manager, the settings dialog and the tool tip display the
original input files.
color balance, saturation, exposure, noise reduction and
contrast of TIFF, JPEG, and BMP images, whether
standalone or embedded in a PDF. AIE also supports
redeye removal for humans and shadow detail
enhancement. The AIE feature works only for color and
grayscale images.
Converts the following formats: Microsoft Word, Microsoft
Excel, Microsoft PowerPoint (including
2007), Microsoft Publisher, Adobe Photoshop, Adobe
InDesign, Adobe Illustrator,
BMP, PS, RDO, QXD, QXP, VPC and EPS.
You can select from various job options to generate optimal
PDFs.
Enter> during new workflow creation. Does not
Microsoft Office
JPG, JPEG, TIFF, TIFF-IT, TIF,
Allows you to flatten PDFs for printing.
Join
FreeFlow Process Manager Operator and Administrator Guide
Combines multiple PDF files into a single PDF file
.
2-13
Page 66
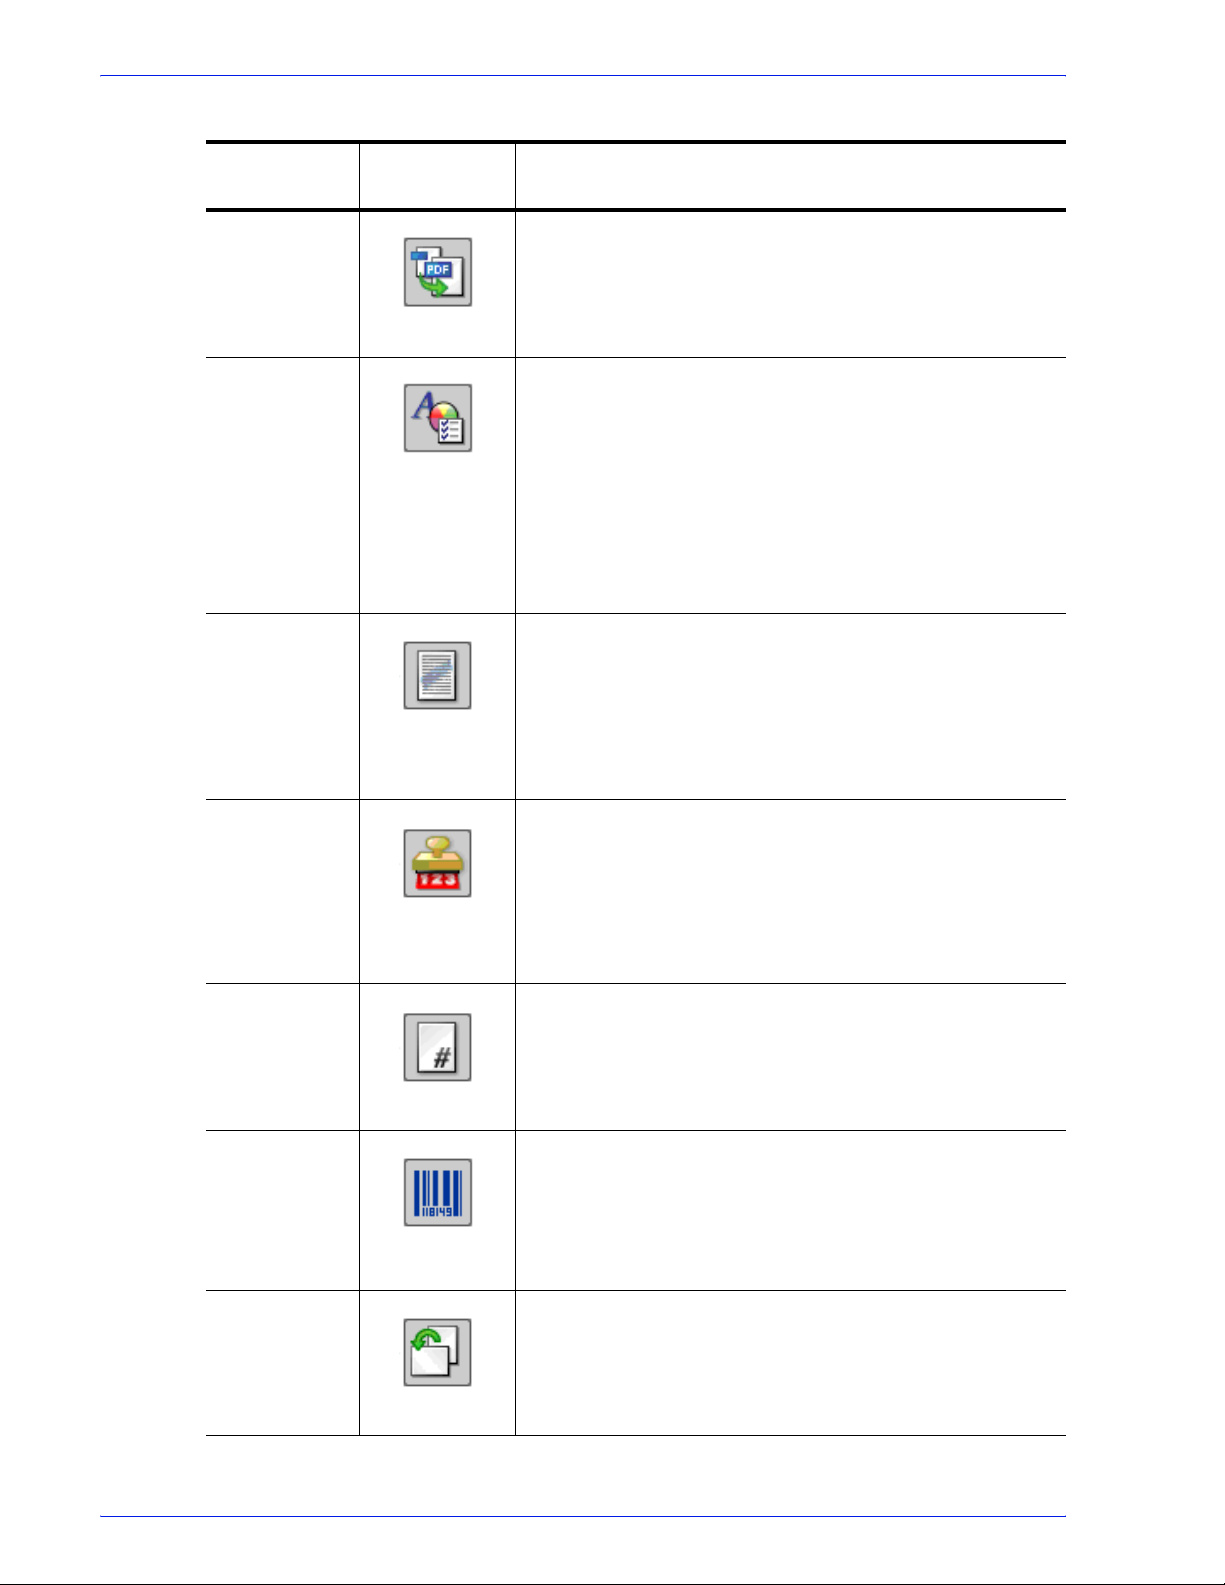
Workflow Builder
Table 2-6. Workflow Builder Insert menu and workflow process icons
Insert Menu
Options
Optimize The Optimize process allows you to modify a PDF file to be
Preflight Uses a preflight profile to validate and check formatting,
Watermarks
Workflow
Process Icon
Description
PDF/X compliant, specify how fonts should be embedded,
define PDF Box settings, configure spot color settings, and
manage color profiles. You can also remove trap layers and
replace hairlines.
verify the image, fonts, and verify references to OPI image
server images. The preflight checks depend on the profile
selected.
You can also use Preflight to let the workflow automatically
discover conditions. For example, you can create a singlerule profile, use it as a filter to check a file for a specific
condition, for example, a certain page size, and then direct
the file to the next appropriate process or workflow.
Allows you to add
of an input PDF file. You can specify a combination of
opaque or transparent images or text, in various
alignments, that can appear either underneath or on top of
the page content. The Preview option allows you to
dynamically view the content before you commit to the
selected settings.
a text or image watermark to each page
Bates
Numbering
Page
Numbering
Barcode Allows you to add a barcode to your workflow. You can
Rotate Pages Allows you to rotate each page in the PDF file 90 degrees
Allows you to add bate stamps to each page of an input
PDF file. Bate stamps consist of a page number with
optional leading zeros and an optional fixed text prefix. An
optional extra line of fixed text can appear either above or
below the page number. The Preview option allows you to
dynamically view the content before committing to the
selected settings.
Allows you to add page numbers to each page of an input
PDF file. The Preview option allows you to dynamically view
the content before committing to the selected settings.
specify the barcode type, font, placement, alignment,
rotation, frequency, size and other options. Provides
support for variable data in the text and page range areas.
The Preview option allows you to dynamically view the
content before committing to the selected settings.
right or left, or 180 degrees.
2-14
FreeFlow Process Manager Operator and Administrator Guide
Page 67
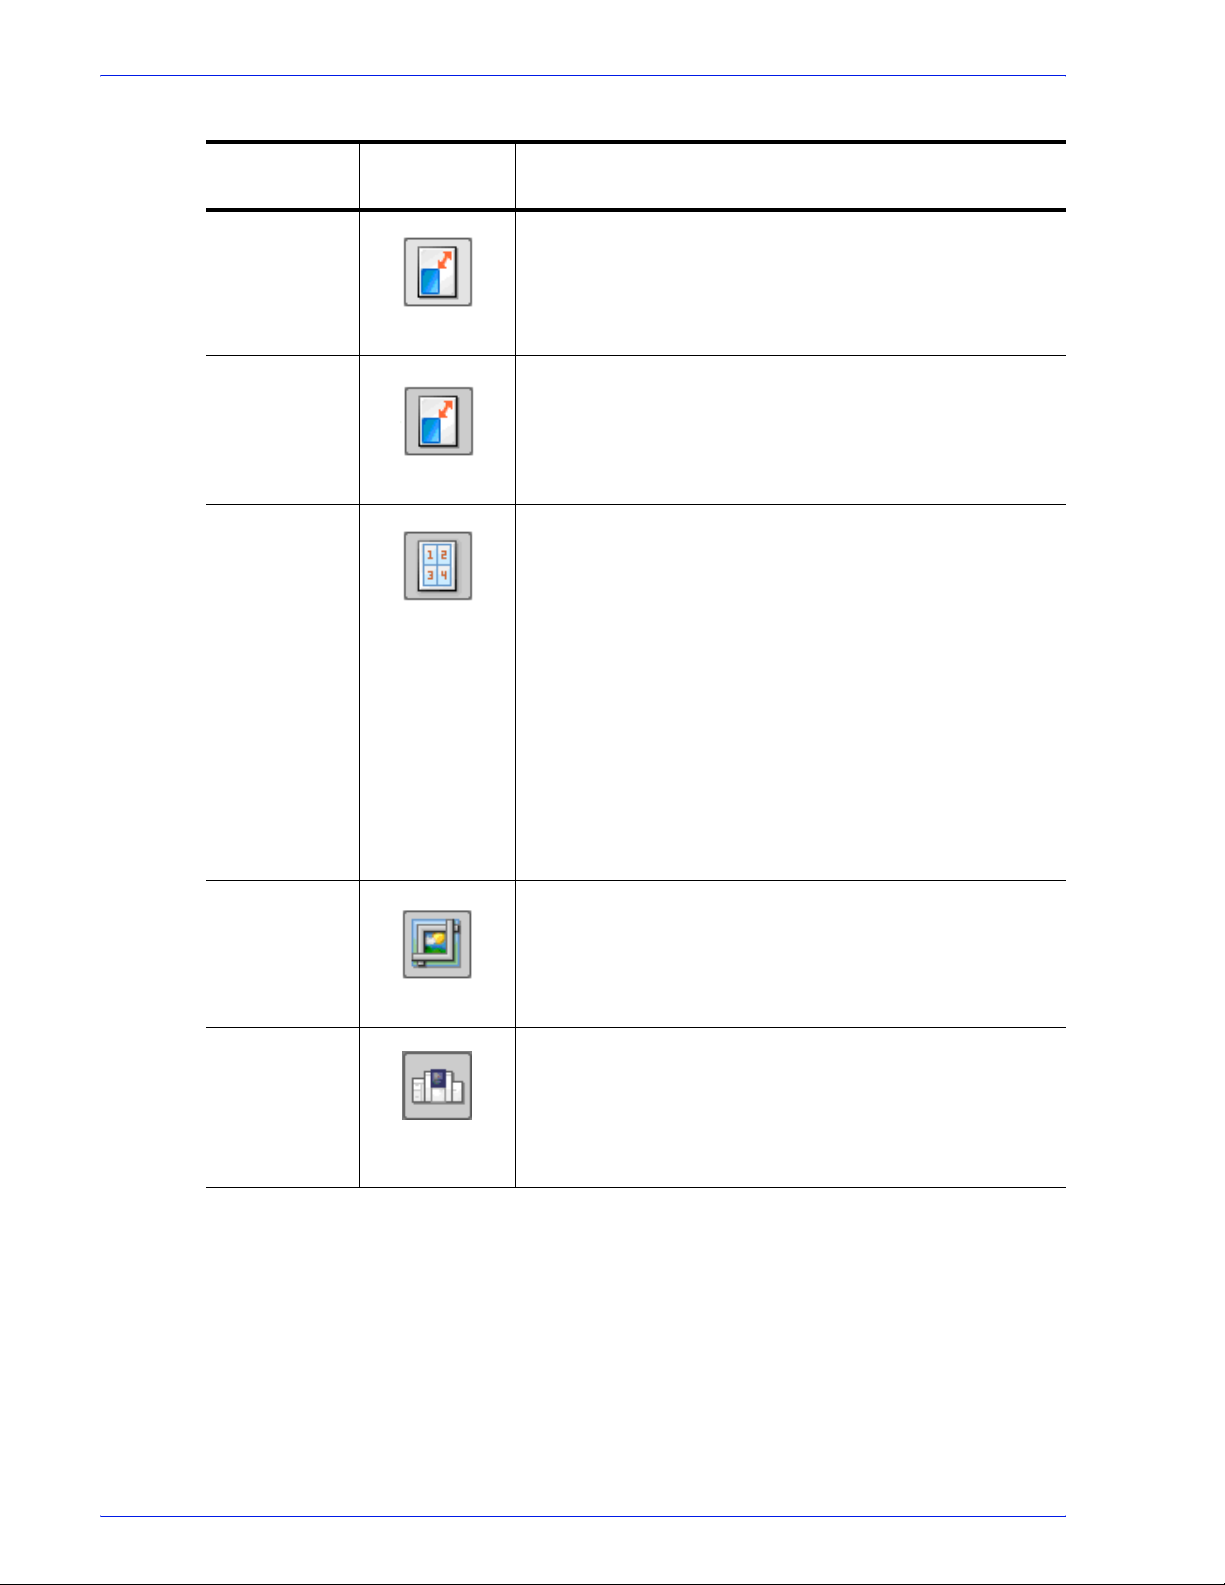
Workflow Builder
Table 2-6. Workflow Builder Insert menu and workflow process icons
Insert Menu
Options
Flip Pages Allows you to flip each page in the PDF file horizontally or
Resize Allows you to select a specific size, or a size based on a
Impose Allows you to do the following:
Workflow
Process Icon
Description
vertically to create a mirror image.
percentage of the original image size. For TIFFs, JPGs, or
BMPs, the image is resized; for PDFs, the page is resized.
• Use imposition to define the placement of page elements.
• Place crop marks.
• Select various job types—for example, signature booklets
and N-up.
• When the PREPS impostion node is selected, choose
from a list of preconfigured PREPS imposition job files.
• Select from various PDF Boxes.
• Select Cell Clustering, which provides the option of pulling
together cells on a sheet in a way that results in cell sizes
that contain the imposed page image with no waste space
between cells.
The Preview option allows you to dynamically view the
content before committing to the selected settings.
Crop Allows you to automatically crop jobs consisting of one or
more PDF pages and JPEG, TIFF, or BMP file images. For
PDF documents, crops the pages; for JPEG, TIFF, or BMP
files, crops the images.
Pressmarks Allows you to add a fixed pressmark to a workflow. You can
specify the pressmark placement, rotation, frequency, and
transparency, and then preview the specifications.
The Preview option allows you to dynamically view the
content before committing to the selected settings.
FreeFlow Process Manager Operator and Administrator Guide
2-15
Page 68
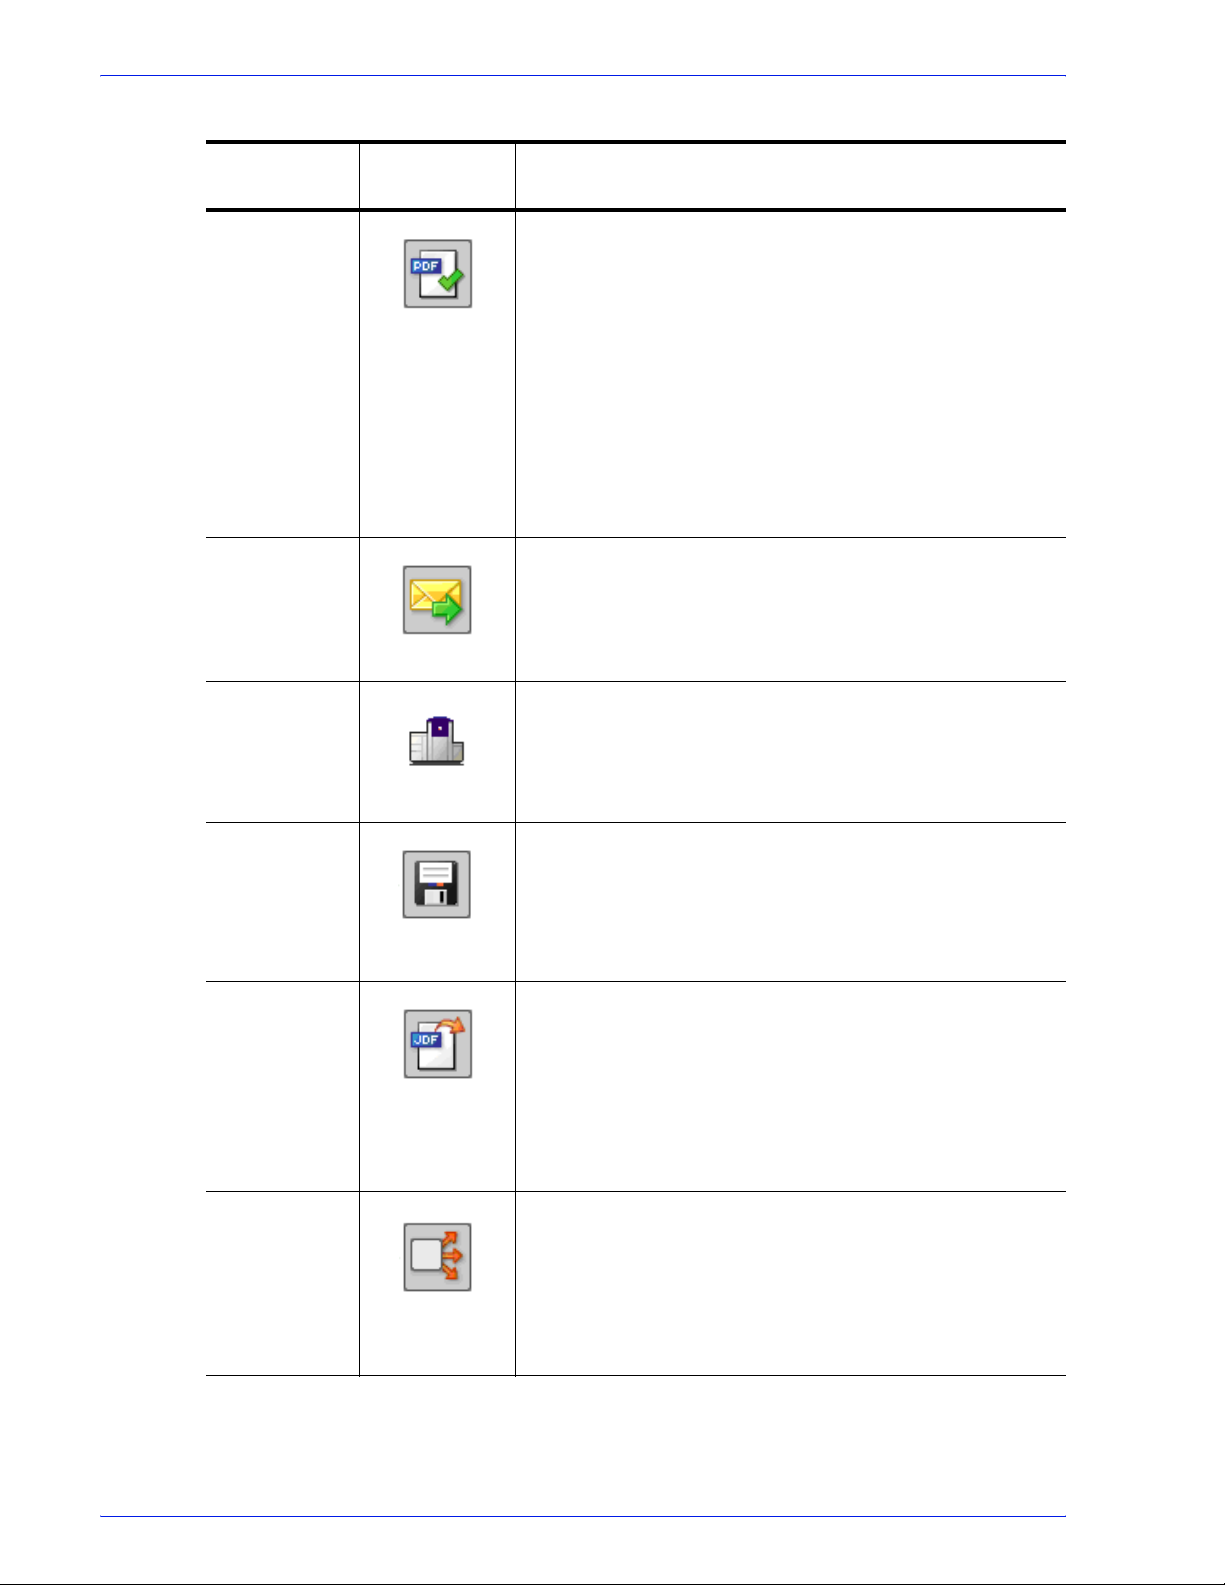
Workflow Builder
Table 2-6. Workflow Builder Insert menu and workflow process icons
Insert Menu
Options
Review Can be used multiple times, at critical points in a workflow,
Notify Provides job status notification via e-mail. Allows you to
Print Allows you to print PDF, VPC, or RDO (for reprint) files to a
Workflow
Process Icon
Description
to view, check and edit the PDF file using Adobe Acrobat.
When stopped at the Review step, you can change process
settings, resubmit the job to a previous step for additional
processing, view a soft proof, or print a hardcopy proof.
You can approve the job and allow it to move to the next
step in the workflow, or you can fail the job.
If there is a Print step after the Review step, you can select
[Copies] to access the Copies dialog and change the
number of copies to print.
attach job files up to a maximum size of 1 GB.
specified production printing queue using a specified job
ticket.
For information about reprinting RDOs, refer to the topic
“About submitting RDOs.”
Save Allows you to save all supported file types from the
workflow to a specified location in a Windows file system or
document repository.
You can also use Save to direct or “branch” a job to other
workflows by designating a hot folder as the Save location.
JDF Export Creates a JDF ticket and exports a PDF and JDF ticket to a
specified location in a Windows file system or document
repository. You have the option to
changes made by the external process nodes.
The output file of a JDF export task can be re-imported and
re-run by dropping it into a hot folder associated with an
appropriate workflow. The files associated with the JDF
must exist in the same location as the original job.
Conditional Conditional branching provides an added level of logic to a
workflow, allowing it to examine the properties of submitted
jobs, and then act accordingly without human intervention.
You can add one or more conditional branches to a
workflow, each with one or more user-designated
conditions that specify the desired attributes or properties of
the submitted jobs.
export the JDF with
2-16
FreeFlow Process Manager Operator and Administrator Guide
Page 69

Workflow Builder
Table 2-6. Workflow Builder Insert menu and workflow process icons
Insert Menu
Options
External
Process
(only an
option if one is
set up)
Workflow
Process Icon
Description
External Processes enable the use of third party workflow
components. The processes are added and configured in
Workflow Job Manager.
FreeFlow Process Manager Operator and Administrator Guide
2-17
Page 70

Workflow Builder
Customizing a workflow process name
The ability to change a process name is useful when multiple
instances of a process exist in a workflow. The new name displays
beneath the workflow icon and in the process settings window,
along with the process name. Follow these guidelines:
• Each process in a workflow must have a unique name.
• The name cannot have more than 60 characters.
• You cannot use the following characters: \, /, :, *, ?, “, <, >, or |.
To customize a workflow process name
To customize the process name
1. In Workflow Builder, ensure the workflow is disabled.
2. Double-click the process name below the desired workflow
node. The name highlights
3. Type a new name.
NOTE: You can also right-click a process, select [Rename], and
type a new name.
4. Select [Enter].
5. Save and enable the workflow to make the change effective in
Workflow Job Manager and Workflow Submission Client.
2-18
FreeFlow Process Manager Operator and Administrator Guide
Page 71

The Help menu
Workflow Builder
The Workflow Builder Help menu contains the following options:
Table 2-7. The Workflow Builder Help menu
Help Menu Option
Help Topics... Displays the Help application to allow you to
list the Help topics for Workflow Builder.
About Workflow
Builder...
Displays program, copyright and version
information for Workflow Builder.
Description
FreeFlow Process Manager Operator and Administrator Guide
2-19
Page 72
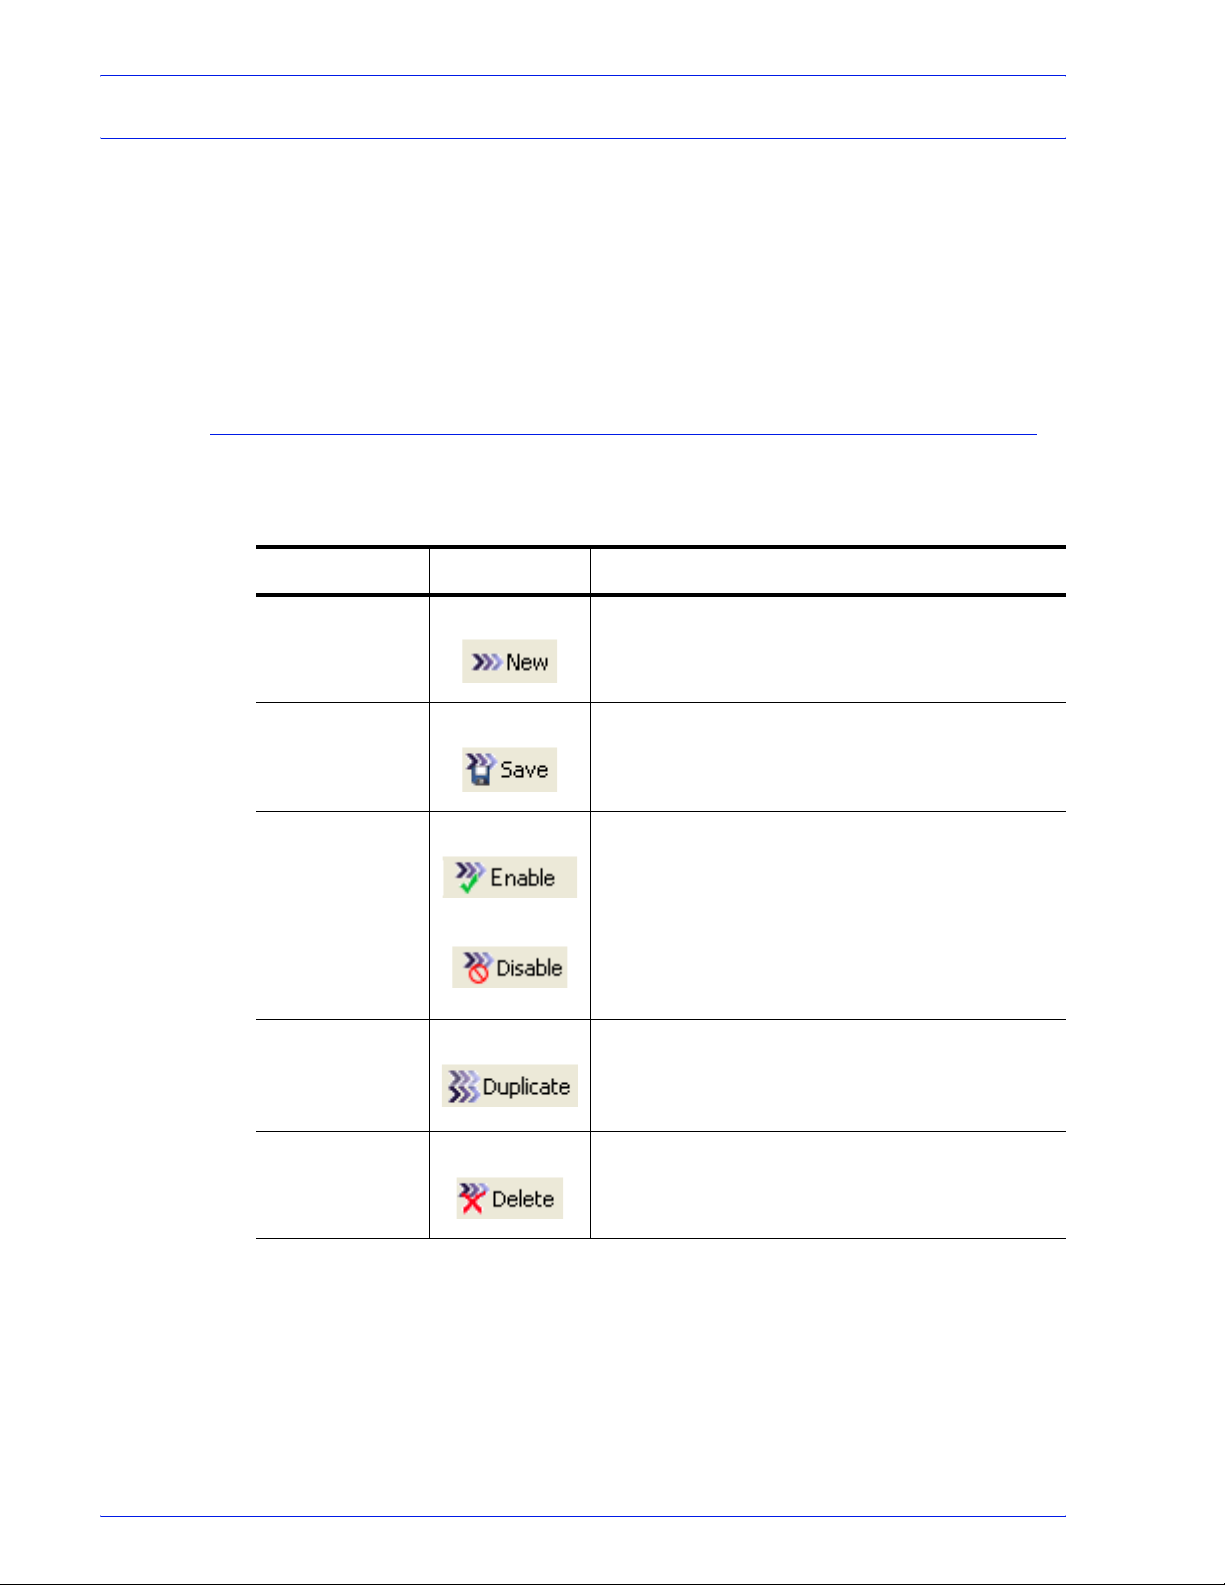
Workflow Builder
Workflow Builder toolbars
The Workflow Builder toolbars provide commands for creating and
modifying workflows.
See also:
Workflows toolbar
Workspace toolbar
Workflows toolbar
The Workflows toolbar contains the following options:
Toolbar Option Toolbar Icon Description
New Adds a new workflow to the list. Provides a cursor
Table 2-8. Workflows toolbar
for editing the workflow name. A Start icon is
displayed in the workspace.
Save Saves changes to the workflow that is currently
open for modification.
Enable/Disable Enable: Allows a job to be submitted to the
selected workflow. Enabled workflows are
displayed in the Workflow Submission Client
window. Enable also auto-saves the workflow.
Disable: Prevents jobs from being submitted to the
workflow. Disabled workflows are not visible or
available via the Workflow Submission Client.
Duplicate Adds a copy of the selected workflow to the list;
provides a cursor for editing the workflow name.
The user must select <Enter> in order to complete
the duplication operation.
Delete Deletes the selected workflow with a confirmation
dialog.
2-20
FreeFlow Process Manager Operator and Administrator Guide
Page 73

Workspace toolbar
Toolbar Option Toolbar Icon Description
Cut Deletes and stores the selected process and
Copy Stores the selected process and its properties
Paste Pastes a process that has been copied.
Workflow Builder
The Workspace toolbar allows you perform the following functions
on a selected workflow process step.
Table 2-9. Workspace Toolbar
its properties for pasting into the same
workflow.
for pasting elsewhere in the same workflow.
Delete Process Deletes the selected process.
Settings Displays the settings dialog for a selected
process.
FreeFlow Process Manager Operator and Administrator Guide
2-21
Page 74

Workflow Builder
Building workflows
Rules for building workflows
You can create Workflows from scratch or by duplicating, and then
modifying, an existing workflow. To build or modify a workflow,
you perform the following basic steps:
• Drag and drop process icons into the workspace. Processes
move from left to right in the workflow.
• Configure the process settings, as needed, to meet the
requirements of the workflow.
• Save and enable the workflow.
NOTE: All workflows are disabled after an upgrade or migration. A
pop-up message displays if you try to enable a workflow that
requires additional configuration. Complete the configuration, and
then enable the workflow.
Apply the following rules when you sequence workflow process
steps in the workspace:
Input is the first step in any workflow. Input is automatically
displayed in the workspace when you begin a new workflow.
If Convert exists in a workflow, it must precede the following
processes:
•Join
• PDF Optimize
• Preflight
• Impose
• Bates Numbering
• Page Numbering
• Watermarks
• Rotate Pages
• Flip Pages
•Print
• Barcodes
2-22
• Pressmarks
FreeFlow Process Manager Operator and Administrator Guide
Page 75

Workflow Builder
If Join exists in a workflow, it must precede the following
processes:
• Preflight
• Color Manage
• Impose
• Bates Numbering
• Page Numbering
• Watermarks
• Rotate Pages
• Flip Pages
•Print
• Barcodes
• Pressmarks
• Optimize
Building a new workflow
To build a new workflow, drag and drop process icons into the
workspace, configure the process settings to meet the workflow
requirements, and then save and enable the workflow.
To build a new workflow
1. Launch Workflow Builder.
2. In the Workflows toolbar, select [New]. A new workflow is
added to the list. A highlighted name cell is provided for
editing.
3. Type a workflow name in the cell, and select <Enter>. An
Input icon displays in the Workspace.
4. Select the desired process from the Workflow Process Options
area, and drag and drop the process into the workflow
workspace into the desired position. A Gray placeholder
indicates where a process can be placed. Links automatically
display between processes.
You can also use the Insert menu to add a process. The
process is inserted after the selected process in the workflow.
5. If necessary, configure the process settings.
6. Select [Save] and [Enable].
NOTE: A workflow must be enabled before it can accept new jobs
for processing.
FreeFlow Process Manager Operator and Administrator Guide
2-23
Page 76

Workflow Builder
Duplicating and modifying an existing workflow
Instead of creating a workflow from scratch, determine if an
existing workflow has the process steps and process settings that
approximate your needs. Then copy the existing workflow, add or
delete process steps, change the properties of a process step, or
otherwise modify the workflow.
To duplicate and modify an existing workflow
NOTE: To modify a workflow, it must first be disabled and all jobs
received for processing in the workflow must be completed.
1. In Workflow Builder, select a workflow from the list.
2. Select [Duplicate] in the Workflows toolbar.
3. Type a new workflow name in the cell, and select <Enter>.
The new workflow displays in the workspace.
4. Select from the following:
a. To delete a process: Select a process step, and select
[Delete] in the Workspace toolbar to remove the step from
the workflow.
b. To add a process: Select a process step from the
Workflow Process Options area, and drag and drop it into
the workflow. Repeat to add more processes. If necessary,
reconfigure the process steps.
5. Select [File: Save] to save the workflow, or select [Enable] to
enable and auto-save the workflow.
NOTE: After you edit a workflow, it must be enabled to accept new
jobs.
2-24
FreeFlow Process Manager Operator and Administrator Guide
Page 77

Enabling a workflow
To enable a workflow
Workflow Builder
A workflow is disabled by default. It must be enabled before it can
accept new jobs for processing.
“Enabled Busy” is the status of an enabled workflow that is
processing a job. The workflow is not available for editing.
NOTE: In Workflow Builder, all options in the node dialogs are
grayed and cannot be edited when a workflow is enabled.
1. In Workflow Builder, select a disabled workflow from the list.
2. Select [Enable] from the Workflows toolbar.
NOTE: If changes are made to a workflow, it must be saved
before can be enabled.
Disabling a workflow
A disabled workflow cannot accept new jobs for processing.
“Disabled Busy” is the status of a disabled workflow that is waiting
for jobs to finish processing. Once the jobs are completed, the
status changes to “Disabled” and the workflow is available for
editing.
To disable a workflow
1. In Workflow Builder, select an enabled workflow from the list.
2. Select [Disable] from the Workflows toolbar. The workflow is
disabled.
FreeFlow Process Manager Operator and Administrator Guide
2-25
Page 78

Workflow Builder
Deleting a workflow
Editing workflow properties
NOTE: To delete a workflow, the workflow must first be disabled,
and all jobs received for processing in the workflow must be
completed.
To delete a workflow
1. In Workflow Builder, select a workflow in the list.
2. In the Workflows toolbar, select [Delete]. A confirmation
message displays.
3. Select [Yes] to delete the workflow.
The Workflow Properties dialog allows you to change the workflow
name and description that appear in the list area. In the
Description field, you may want to include notes regarding when to
use a particular workflow.
To edit workflow properties
1. In Workflow Builder, select a workflow from the list.
2. Double-click on the workflow to display the Workflow
Properties dialog.
3. In the Name field, type a workflow name.
4. In the Description field, type a workflow description.
5. To enable the workflow, select “Enable submission to this
workflow.”
6. Select [OK] to save the changes and close the dialog.
2-26
FreeFlow Process Manager Operator and Administrator Guide
Page 79

Creating fail branches
You may also add fail branches -- contingency workflow steps for
fail conditions. For example, after a Preflight process, you might
want to add a fail branch that contains the following:
• A Notify process that contains Preflight results.
• A Review process, to check or edit the document.
The workflow defaults to having no fail branches open. You can
open a branch by clicking on the “plus” icon and collapse the
branch by clicking on the “minus” icon. Only one branch may be
open at a time. If you open another branch, the branch that is
currently open automatically closes.
To create a fail branch
1. Select the desired fail branch process and drag it downward,
2. Drag the process into the gray space holder that appears after
Workflow Builder
after the desired process in a workflow.
the red arrow.
NOTE: You can also place a fail branch after a process step as
follows: Select, and then [Copy] a process, point to the desired
position in the workflow, and select [Paste as Fail Branch] from
the Edit menu.
FreeFlow Process Manager Operator and Administrator Guide
2-27
Page 80

Workflow Builder
Exporting workflows
The Process Manager export/import workflow function provides
workflow portability and a method for backing up and restoring
workflows.
To import a workflow, you must first generate an .xml workflow file
by selecting a workflow and exporting it to the desired folder
location. The .xml file can then be imported into Workflow Builder
on the same Process Manager server or imported into Workflow
Builder on a second Process Manage server.
At the conclusion of the export process, the status of workflow
nodes is listed and the operator is notified if actions are required to
fully enable the exported workflows.
The Export Workflow dialog displays after you select the file to
export.
Status text: Status text displays above the upper and lower tables
and changes to reflect the on-going or completed status of the
export process.
In the Export Workflow dialog, the upper table shows the export
status of each workflow. The lower table shows the status of
nodes of the workflow selected in the upper table.
To export a workflow
1. In Workflow Builder, select a workflow or multiple workflows.
2. Select [File: Export].
3. In the File name window of the initial Export Workflow dialog,
type a new name, if desired.
4. To establish an export location, select [Browse].
5. In the Browse For Folder dialog, do one of the following:
• Select a folder. Select [OK].
•Select [Make New Folder]. Name the folder, and select
[OK].
2-28
FreeFlow Process Manager Operator and Administrator Guide
Page 81

Workflow Builder
6. In the Export Workflow dialog, select [OK]. A new Export
Workflow dialog displays. The blue process bar cycles until the
export process is complete.
7. Select a workflow and review the status of each workflow
node.
• The Workflows Exported table lists the workflow(s) in the
selected workflow file.
• The Export Action Summary displays the required actions,
if any, for nodes of the workflow selected in the upper
table. See
Import and Export Status Descriptions for a
description of status icons.
8. Take the action required, if any, for each workflow node.
9. Select [Done].
NOTE: A .wfc folder displays in the export save location, along
the .xml file. It contains configuration files, profiles and other
workflow information to enable workflow restoration during
import.
FreeFlow Process Manager Operator and Administrator Guide
2-29
Page 82

Workflow Builder
Importing workflows
The Process Manager export/import workflow function provides
workflow portability and a method for backing up and restoring
workflows.
To import a workflow, you must first generate an .xml workflow file
by selecting a workflow and exporting it to the desired folder
location. The .xml file can then be imported into Workflow Builder
on the same Process Manager server or imported into Workflow
Builder on a second Process Manager server.
The workflow is fully restored, including any referenced
directories, hot folders, and profiles that were deleted after the
workflow was exported. At the conclusion of the import process,
the status of workflow nodes is listed and the operator is notified if
actions are required to fully enable the imported workflows.
The Import Workflow dialog displays after you select the file to
import.
Status text: Status text displays above the upper and lower tables
and changes to reflect the on-going or completed status of the
import process.
The upper table shows the import status of each workflow. The
lower table shows the status of nodes of the workflow selected in
the upper table.
To import a workflow
NOTE 1: Only .xml files can be selected.
NOTE 2: If the .xml file is incorrectly formatted, an error message
similar to this displays: “The file [complete path] does not contain
readable workflow data.”
NOTE 3: If the .xml file contains workflows of the same names, the
following message displays: “Cannot import the following
workflows [workflow names]. Existing workflows of the same
name already exist. Please rename or delete the existing
workflows first.” Names are not case-sensitive: “Newsletter
Workflow” is the same as “newsletter workflow.”
1. In Workflow Builder, select [File: Import].
2-30
FreeFlow Process Manager Operator and Administrator Guide
Page 83

Workflow Builder
2. In the Open dialog, browse to the desired workflow file and
select from the following:
• If the .xml file contains one workflow, in the Open dialog,
select the workflow and select [Open].
• If the .xml file contains more than one workflow, it opens
an initial Import Workflow dialog, which allows you to
selectively import the workflows in the .xml file. Select from
the following:
–Select [Select all workflows] to import all the
workflows in the .xml file.
– In the list box, select specific workflows to import.
NOTE: A .wfc folder displays in the export save location, along
the .xml file. It contains configuration files, profiles and other
workflow information to enable workflow restoration during
import.
3. In the new Import Workflow dialog, review the status and/or
action required for each workflow node, and take the
necessary action.
• The Workflows Imported table lists the workflow(s) in the
selected workflow file.
• The Import Action Summary displays the nodes of the
workflow selected in the upper table.
• A check mark in a node means the node imported
successfully. A check mark in all the nodes results in a
checkmark for the entire workflow in the upper table.
4. Take any necessary action(s).
5. Select [Done]. The imported workflows display in the
Workflows list.
FreeFlow Process Manager Operator and Administrator Guide
2-31
Page 84

Workflow Builder
Icon Indicates Action Required
Import and Export Status Descriptions
The following table describes the import and export status icons
and provides a general descripion of actions required.
Table 2-10.
Successful workflow or node import. A check
mark in all nodes results in a checkmark for
the entire workflow in the upper table.
Successful workflow or node import but
attention is required.
Failed workflow or node import or export.
Overrides all other icons.
None
Locate node(s) with this symbol;
perform required action.
Locate node(s) with this symbol;
note the provided information.
Ensuring imported workflow compatibility
Workflows can be successfully imported from one Process
Manager server system to another Process Manager server if both
servers have the same software version of Process Manager and
if all the configurations on the second server are compatible.
The following items should be checked for compatibility:
• PREPS jobs lists
• Fonts used in Bates Numbering, Page Numbering,
Watermarks
2-32
FreeFlow Process Manager Operator and Administrator Guide
Page 85

Configuring process settings
Workflow process settings are configured after a step is inserted
into a workflow. Changes to the settings apply only to that
instance of the step.
All process settings, except the following, can be configured:
•Join
•Review
• Input
NOTE: In Workflow Job Manager only, you can open the Input
dialog and view a list of submitted files.
To modify the process settings
Refer to a specific process for a detailed description of the
settings. In general, do the following:
Workflow Builder
1. Select a workflow. The workflow displays in the workspace.
2. Double-click a process step in the workflow or right-click and
select [Process Settings...] to open the settings dialog.
3. Change the process settings as desired.
4. Select [OK] to save the settings and close the dialog.
NOTE: For all process settings, the option “Always use these
settings” has a default of “unchecked,” unless otherwise specified.
If checked, settings in the dialog override any similar settings in an
incoming JDF job ticket. The settings appear in the Workflow
Submission Client controls, but are grayed out and unchangeable.
FreeFlow Process Manager Operator and Administrator Guide
2-33
Page 86

Workflow Builder
About Input
When you create and name a new workflow and select <Enter>
an Input node automatically displays at the beginning of the
workflow.
In Workflow Builder, the Input node does not have a settings
dialog. In Workflow Job Manager, you can open the Input settings
dialog and view a list of the original input files, the file path, file
size and date modified. Input files can also be viewed via the tool
tip.
2-34
FreeFlow Process Manager Operator and Administrator Guide
Page 87

Configuring Automatic Image Enhancement (AIE) settings
Automatic Image Enhancement allows the application of a range
of image processing operations that optimize the sharpness, color
balance, saturation, exposure, noise reduction and contrast of
TIFF, JPEG, and BMP images, whether standalone, or embedded
in a PDF. AIE also supports redeye removal for humans and
shadow detail enhancement. The AIE feature works for only color
and grayscale images.
To configure Image Enhance settings
1. To access the Automatic Image Enhancement Settings,
double-click the AIE step in a workflow.
2. In the Enhance Files - [node name] dialog, select from the
following options:
NOTE: You must select the Contrast option to enable Shadow
Detail.
Workflow Builder
•[Contrast] to apply the selected contrast level
enhancements to incoming jobs. Choose from:
– Off: To disable the option.
– Low: For an image with less contrast.
– Normal: Default; for an image with normal contrast.
– High: For an image with higher contrast.
• Saturation to apply the selected color saturation
enhancements to incoming jobs. Choose from:
– Off: To disable the option.
– Low: For a less colorful image.
– Normal: Default; for an image with normal color
saturation.
– High: For a more colorful image.
• Sharpness to apply the selected image sharpness
enhancements to incoming jobs. Choose from:
– Off: To disable the option.
– Low: For a less sharp image.
– Normal: Default; for a normally sharp image.
– High: For a sharper image.
FreeFlow Process Manager Operator and Administrator Guide
2-35
Page 88

Workflow Builder
• Exposure to apply the selected exposure enhancements
to incoming jobs. Choose from:
– Off: To disable the option.
– Darker: For a darker image
– Normal: Default; for a normally enhanced image.
– Lighter: For a light image.
• Color Balance to apply normal color balance
enhancements to incoming jobs. Choose from:
– Off: To disable the option.
– On: Default; to enable the option.
• Noise Reduction to apply normal IE noise reduction
enhancements to incoming jobs.
– Off: To disable the option.
– Low: For less noise reduction.
– Normal: Default; for moderate noise reduction.
– High: For greater noise reduction.
• Red Eye Reduction to remove the red eye defect from
incoming jobs. For human red eye only. Choose from:
– Off: Default; to disable the option.
– On: To enable the option.
• Shadow Detail to enhance dark areas of the image in
incoming jobs. Choose from:
NOTE: You must select the Contrast option to enable Shadow
Detail.
– Off: To disable the option.
– On: Default; to enable the option.
3. Select [Always use these settings] to prevent users from
modifying the settings. The settings will appear in the
Submission Client controls, but will be grayed out and
unchangeable.
2-36
FreeFlow Process Manager Operator and Administrator Guide
Page 89

AIE and DocuSP
If you include the AIE process in a FreeFlow Process Manager
workflow and submit the job to a DocuSP 5.1 or a Xerox FreeFlow
Print Server 6.0, ensure that you submit it to a queue for which
AIE is not enabled.
If you have the option of performing the AIE processing in either
FreeFlow Process Manager or in the current DocuSP 5.1 or Xerox
FreeFlow Print Server 6.0, for reasons of flexibility and
performance, it is recommended that you do so in FreeFlow
Process Manager, rather than in DocuSP 5.1 or Xerox FreeFlow
Print Server 6.0.
Limitations for AIE
• AIE can be applied only to raster image files such as TIFFs,
JPEGs, and BMPs. It also supports those files if they are
embedded in PDFs.
• The image quality improvement for BMPs may be minimal.
Workflow Builder
• AIE red eye reduction applies only to photographs of humans,
and not to photographs of animals.
• The Exif data that is found in some JPEG files is not currently
supported by AIE and will result in the loss of resolution
information.
FreeFlow Process Manager Operator and Administrator Guide
2-37
Page 90

Workflow Builder
Configuring Convert settings
General tab: Process Manager automates the processing of PDF
documents. The Convert process step enables Microsoft Word
Microsoft Excel, Microsoft PowerPoint, Microsoft Publisher, Adobe
InDesign, Adobe Illustrator, Adobe Photoshop, JPG, JPEG, BMP,
TIFF, TIFF-IT, TIF, PS, VPC, QXD, QXP, RDO, and EPS
document types to be converted to a PDF document for
submission to Process Manager workflows.
You can select from various job options to generate optimal PDFs
for Microsoft Office (including Microsoft Office 2007) or PS files.
The job options include the basic Adobe Acrobat Distiller set with
the addition of various Xerox-specific job options, including
DocuColor iGen3. You can also create custom job options in
Adobe Acrobat Distiller for use in Process Manager.
The default job option that displays in Process Manager is
selected in Adobe Acrobat Distiller.
The [Flatten submitted PDF files for printing] option allows you
to re-process PDF files with known printing problems. “Flattening”
converts a PDF file to PostScript, and then converts it back to a
PDF file. This feature may result in a loss of features and image
degradation, including:
• Flattening of transparency.
• Loss of some interactive features such as thumbnails,
bookmarks, article threads, logical structure and trapping
information.
• Loss of functionality of other interactive features such as
forms, hyperlinks, JavaScript.
• Loss of some annotations such as comments, embedded files,
embedded media such as video/audio, and references to
external files or media.
Limitations for Flatten This feature potentially requires a large
amount of disk space for creating both the intermediate PostScript
and the flattened PDF file.The conversion will fail if the disk space
is insufficient.
2-38
FreeFlow Process Manager Operator and Administrator Guide
Page 91

Workflow Builder
Manual Conversion tab: Adobe Creative Suite and QuarkXPress
files must be manually converted to PDFs before they can be
processed in a workflow. To do this:
• Set up a working directory via the Convert Settings dialog.
Files are held in the directory until they are manually
converted.
• Set up an email notification address via the Convert Settings
dialog. This allows you to send an e-mail message to indicate
that a Adobe Creative Suite or QuarkXPress document is
waiting to be converted to PDF. A message will be sent for
each document processed.
• Submit Adobe Creative Suite or QuarkXPress files via
Workflow Submission Client to a workflow with a Convert
node. Files are sent to the appropriate working directory; an
email notification is sent.
• Manually convert the files to PDF via Adobe Creative Suite or
QuarkXPress, when the workflow is stopped at the Convert
step in Workflow Job Manager. Place the converted files in the
appropriate working directory to continue workflow processing.
NOTE: You are solely responsible for obtaining all appropriate
licenses from Adobe Creative Suite and QuarkXPress and their
licensors and for maintaining full compliance with those licenses.
See also:
To configure Convert settings
To set up a working directory
Unlimited User Conversion option
Working with PDF Files
Converting Adobe Illustrator and Adobe InDesign documents to
PDF
FreeFlow Process Manager Operator and Administrator Guide
2-39
Page 92

Workflow Builder
To configure Convert settings
1. (Optional) To ensure that Process Manager displays the
desired Adobe Acrobat Distiller default job option, select
[Start: Programs: Acrobat Distiller] and choose a profile
from the Default Settings drop box.
2. To access the Convert Settings dialog in Workflow Builder,
double-click the Convert step in a workflow.
3. Select [Flatten submitted PDF files for printing] to reprocess PDF files with known printing problems. This option
may result in a loss of features and image degradation.
4. In the “Select the job options that submitters can choose from”
text box, select the desired job options. The job options will
populate the “Select the default job option” drop box.
5. In the “Select the default job option” drop box, select a default
job option.
6. Select [Always use these settings] to prevent users from
modifying the settings. The settings will appear in the
Submission Client controls, but will be grayed out and
unchangeable.
NOTE: When “Always use these settings” is selected, it locks in
the default job option as the conversion type.
7. Select [OK] to accept changes and close the window.
2-40
FreeFlow Process Manager Operator and Administrator Guide
Page 93

To set up a working directory
1. To access the Convert Settings dialog in Workflow Builder,
double-click the Convert step in a workflow.
2. Select the Manual Conversion tab.
3. Select either [Enable manual QuarkXPress file (*.QXP,
*.QXD) conversion.] or [Enable manual Adobe Creative
Suite file (*.INDD, *.AI, *PSD) conversion.] to save files to
the working directory for manual conversion to PDF. After
conversion, files are saved to the working directory using the
given file name.
4. To set up a Working Directory in which to save and convert the
files to PDF, select [Browse]. Perform one of the following:
NOTE: You may be prompted for a login and password if you
attempt to access a mapped location.
NOTE: If you are using hot folders to support other FreeFlow
Process Manager features, such as job submission and third
party external processes, refer to the topic
setting up directories as input/output hot folders for more than
one feature.
Workflow Builder
Limitations when
• In the Browse For Folder dialog, navigate to the desired
folder, and select [OK].
• Select Make New Folder, name the folder, and select [OK].
5. Enter an address in the Email Notification Address text box.
The recipient will be automatically notified that a document is
waiting to be manually converted to a PDF.
6. Select [Always use these settings] to prevent users from
modifying the settings. The settings will appear in the
Workflow Submission Client controls but will be grayed out
and unchangeable.
7. Select [OK].
FreeFlow Process Manager Operator and Administrator Guide
2-41
Page 94

Workflow Builder
Unlimited User Conversion option
An Unlimited User Conversion option is available for Process
Manager. If you are upgrading from previous versions of Process
Manager, you will remain as no “Unlimited User Conversion”
installed unless you purchase this option.
The Unlimited User Conversion option allows:
• Unlimited high resolution generation and authoring.
• The conversion of all supported document types to PDF when
a hot folder is shared or is on a mapped drive.
The following conditions apply if the Unlimited User Conversion
option is not installed:
• Reprint of a FreeFlow 5.0 saved and password encrypted
job: If a reprint is requested of a saved job, the job is
decrypted and processed for Print. The job is not re-encrypted
during Save.
• 100 User Conversion This optional component allows a
maximumm of one hundred users to submit applications for
PDF conversion for all suppported document types.
See also:
Hot Folder submission with and without the Unlimited User
Conversion License
Setting up a watermark in an email attachment
• PDF files created through the conversion process and
saved by Save and JDF Export nodes: These files will be
password- protected against “Open.” This applies to PDF files
saved in both the Windows file system and the repository
system.
– A password is assigned by Process Manager and known
only by Process Manager.
– Acrobat and other FreeFlow applications will NOT be able
to open or process those PDF files.
– If any of the PDF files protected by the Save/JDF Export
node is selected for input to either Workflow Submission
Client or a hot folder, Process Manager will apply the
password and process the PDF files accordingly.
2-42
FreeFlow Process Manager Operator and Administrator Guide
Page 95

– If the workflow used in this case contains Save or JDF
Export nodes, the password protection will be reapplied to
output PDF files.
– If the “Unlimited User Conversion” option is installed and
those password protected PDF files were selected as
input, password protection will be permanently removed
from the PDF files. Review, Notification, Save, and JDF
Export will all behave normally, as before.
Working with PDF Files
• Adobe does not support PDF files larger than 2.25 Gb on the
Windows platform.
• PDF files containing more than 30,000 pages and are not
supported.
• To process only a range of pages within a PDF file, manually
edit the file in Adobe Acrobat in the Review step.
• If the input PDF file requires a password to open the PDF file,
most operations will fail.
Workflow Builder
Converting Adobe Illustrator and Adobe InDesign documents
to PDF
The third party software packages, Adobe Illustrator and Adobe
InDesign, must be installed and registered for the PDF conversion
capability to perform in a FreeFlow system.
If you encounter problems converting Adobe Illustrator and Adobe
InDesign documents to PDF, do the following:
1. Close all instances of Adobe Illustrator or Adobe InDesign that
are running in the Task Manager.
2. Invoke Illustrator or InDesign from the Start menu. The “Would
you like to register now?” dialog appears.
3. Register, then close the application. Conversion should now
work properly.
FreeFlow Process Manager Operator and Administrator Guide
2-43
Page 96

Workflow Builder
About Join
Join combines -- or concatenates -- multiple PDF files into a single
PDF file. All the PDF files must exist before you attempt to use the
Join process.
When submitting multiple files to a workflow:
• To create a single joined job, Join must be in the workflow.
• To create multiple separate jobs that are processed
individually, Join should not be in the workflow.
Join does not have a settings dialog.
See also:
Limitations for Join
Fault handling for Join
Limitations for Join
Bookmarks, logical structure, internal hyperlinks, and article
threads within PDF files might not be preserved by the PDF Join
component.
Fault handling for Join
Errors are logged in the Windows Event log and displayed in the
Job Manager status display area. The following errors cause the
Join operation to fail:
• If the input PDF file is missing.
• If the input PDF file is invalid.
• If the output PDF file is locked and cannot be overwritten, or if
the user lacks sufficient security privileges to access the
destination directory.
• If the input PDF file requires a password to open the PDF or
does not permit any of the following: content copying and
extraction, document assembly, or content accessibility.
2-44
FreeFlow Process Manager Operator and Administrator Guide
Page 97

Configuring Optimize settings
The Optimize process allows you to modify a PDF file to be PDF/X
compliant, specify how fonts should be embedded, define PDF
Box settings, configure spot color settings, manage color profiles,
and configure image quality settings for hairline correction and the
removal of color trapping layers.
You can have multiple instances of the Optimize node in a
workflow. However, there is no conflict checking for multiple
instances.
When working with non-PDF documents, the Convert node must
precede the Optimize node.
The Optimize Options dialog includes five tabs: General, PDF
Boxes, Color, Spot Colors, and Image Quality. The availability of
dialog options varies, depending on whether the [Create a
document that complies with PDF/X standards] option is
selected, for example:
• When compliance is selected, font embedding is automatically
set to ON, and output compliance error handling is available.
Workflow Builder
• When compliance is not selected, font embedding is
automatically set to OFF; Color Management is enabled, and
independent use of the PDF Box is enabled.
See also:
To configure the General Optimize settings
To configure the PDF Boxes settings
To configure the Color settings
To configure the Spot Colors settings
To configure Image Quality settings
Description of PDF/X-1a Standards
About PDF Boxes
Managing Color profiles
Ensuring Color Manage workflow consistency between the server
and a remote client
Importing a FreeFlow 5.0 workflow with a Color Manage node
FreeFlow Process Manager Operator and Administrator Guide
2-45
Page 98

Workflow Builder
To configure the General Optimize settings
The General tab allows you to select a Settings File, define
compliance criteria, designate font embedding options, and
optimize for fast web viewing.
1. Double-click the Optimize step in a workflow.
2. In the “Settings File” area, select from the following to load a
settings file:
• pdfx-1a2001.xml (pre-installed settings file)
• pdfx-1a2003.xml (pre-installed settings file)
NOTE: If created, other user-defined settings files are also
displayed.
3. To save the options you have selected in the Optimize node
as a custom settings file, and to display the file as an option in
the Settings File drop box, select [Save As...] to open the
Save Settings File dialog. For more information, see
the Settings File as
To s ave
4. To remove a settings file from the list, select the file in the drop
box, and then select [Delete].
5. In the “Compliance” area, mark the check box for [Create a
document that complies with PDF/X standards] and select
from the following options:
• PDFX-1a 2001
• PDFX-1a 2003
For more information, see Description of PDF/X-1a Standards.
6. In the “When a PDF/X compliant document cannot be created”
area, select from the following options:
•[Ignore] to disregard errors and move the job to the next
workflow process.
•[Warn and continue] to note errors in the error log for the
current job and move the file to the next workflow node.
•[Cancel job] to note errors in the error log for the current
job and to halt the job. A fail message displays for the
Optimize PDF node in Workflow Job Manager.
2-46
FreeFlow Process Manager Operator and Administrator Guide
Page 99

Workflow Builder
7. In the “Fonts” area, select from the following:
•[Embed Fonts] Selected by default and grayed out when
compliance is selected.
•[Embed as subset] to minimize the document file size.
•Select [Embed all fonts] to enable future text editing. If a
font has been previously subset embedded, it will be fully
embeddded. This option increases the file size.
NOTE: The font family must be loaded on the PC. Only fonts
with the appropriate permission bits will be embedded.
8. In the “When an error occurs embedding the fonts” area,
select from the following:
–[Ignore] to disregard errors and move the job to the
next workflow process.
–[Warn and continue] to note errors in the error log for
the current job and move the file to the next workflow
node.
–[Cancel job] to note errors in the error log for the
current job and to halt the job. A fail message displays
for the Optimize PDF node in Workflow Job Manager.
9. In the Fast Web Viewing area, mark the check box for
[Optimize the document for fast web view] to enable fast
page-at-a-time downloading from web servers.
10. Select [Show job submitter the settings file name only.
Settings details will be hidden] to display only the Settiings
File drop box to job submitters. All other dialog features are
hidden.
11. Select [Always use these settings] to prevent users from
modifying the settings. The settings will appear in the
Workflow Submission Client controls but will be grayed out
and unchangeable.
12. Select [OK] to accept the changes or select another tab and
continue configuring.
To save the Settings File as
The Save Settings File dialog allows you to save the current
settings of the Optimize node. For more infomation about the
available options, see To configure the General Optimize settings
1. In the Optimize Options dialog General Tab, select [Save
As...].
2. In the File Name text box, enter a new file name.
3. Select [Save].
FreeFlow Process Manager Operator and Administrator Guide
2-47
Page 100

Workflow Builder
To configure the PDF Boxes settings
The PDF Boxes tab allows you to define PDF Box settings. For a
description of the PDF boxes, see PDF Box Descriptions.
The availability of dialog options varies, depending on whether the
[Create a document that complies with PDF/X standards]
option is selected in the General tab.
1. Double-click the Optimize step in a workflow and select the
PDF Boxes tab.
2. Mark the check box for [Set crop box to media box].
• If a PDF document has a crop box, it is replaced with one
the size of the media box.
• If the PDF document does not have a crop box, one is
generated and set to the size of the media box.
3. In the “When both trim box and art box are missing” drop box,
select from the following:
•[Set trim box to media box and offset inwards by:]
– Select or type a value for each option: [Left], [Right],
[Top], and [Bottom].
•[Report an error] to register an error in the error log.
NOTE: Depending on the error handling specified in the
General tab in the Compliance area, the job may or may not
fail.
•[Ignore] to disregard errors and move the job to the next
workflow process.
4. In the “When bleed box is missing” drop box, select from the
following:
•[Set bleed box to media box].
•[Set bleed box to trim box and enlarge by:]
– Select or type a value for each option: [Left], [Right],
[Top], and [Bottom].
•[Ignore] to disregard errors and move the job to the next
workflow process.
2-48
FreeFlow Process Manager Operator and Administrator Guide
 Loading...