

Page 1

Version 1.1
December 2013
Xerox® Phaser 3320DN/3320DNI
User Guide
Page 2

©2013 Xerox Corporation. All rights reserved, Xerox® and Xerox and Design® are trademarks of Xerox Corporation in the United
States and/or other countries.
Document version 1.1: December 2013
Page 3

Table of Contents
1 Getting Started
Machine Overview. . . . . . . . . . . . . . . . . . . . . . . . . . . . . . . . . . . . . . . . . . . . . . . . . . . . . . . . . . . . . . . . . . . . . . . . .6
Powering on the Machine . . . . . . . . . . . . . . . . . . . . . . . . . . . . . . . . . . . . . . . . . . . . . . . . . . . . . . . . . . . . . . . . . .8
Control Panel Overview . . . . . . . . . . . . . . . . . . . . . . . . . . . . . . . . . . . . . . . . . . . . . . . . . . . . . . . . . . . . . . . . . . . .9
Menu Overview . . . . . . . . . . . . . . . . . . . . . . . . . . . . . . . . . . . . . . . . . . . . . . . . . . . . . . . . . . . . . . . . . . . . . . . . . 10
Reports . . . . . . . . . . . . . . . . . . . . . . . . . . . . . . . . . . . . . . . . . . . . . . . . . . . . . . . . . . . . . . . . . . . . . . . . . . . . . . . . . 12
Software. . . . . . . . . . . . . . . . . . . . . . . . . . . . . . . . . . . . . . . . . . . . . . . . . . . . . . . . . . . . . . . . . . . . . . . . . . . . . . . . 13
Loading Paper . . . . . . . . . . . . . . . . . . . . . . . . . . . . . . . . . . . . . . . . . . . . . . . . . . . . . . . . . . . . . . . . . . . . . . . . . . 14
Media Output Locations . . . . . . . . . . . . . . . . . . . . . . . . . . . . . . . . . . . . . . . . . . . . . . . . . . . . . . . . . . . . . . . . . 18
General Care and Consumables . . . . . . . . . . . . . . . . . . . . . . . . . . . . . . . . . . . . . . . . . . . . . . . . . . . . . . . . . . 20
Further Assistance. . . . . . . . . . . . . . . . . . . . . . . . . . . . . . . . . . . . . . . . . . . . . . . . . . . . . . . . . . . . . . . . . . . . . . . 21
2Print
Printing using Windows . . . . . . . . . . . . . . . . . . . . . . . . . . . . . . . . . . . . . . . . . . . . . . . . . . . . . . . . . . . . . . . . . . 24
Xerox Easy Printer Manager (EPM) . . . . . . . . . . . . . . . . . . . . . . . . . . . . . . . . . . . . . . . . . . . . . . . . . . . . . . . 45
Wireless Setting Program (Phaser 3320DNI) . . . . . . . . . . . . . . . . . . . . . . . . . . . . . . . . . . . . . . . . . . . . . . 46
SetIP . . . . . . . . . . . . . . . . . . . . . . . . . . . . . . . . . . . . . . . . . . . . . . . . . . . . . . . . . . . . . . . . . . . . . . . . . . . . . . . . . . . 48
Printing using Macintosh . . . . . . . . . . . . . . . . . . . . . . . . . . . . . . . . . . . . . . . . . . . . . . . . . . . . . . . . . . . . . . . . 49
Printing using Linux . . . . . . . . . . . . . . . . . . . . . . . . . . . . . . . . . . . . . . . . . . . . . . . . . . . . . . . . . . . . . . . . . . . . . 52
Printing using Unix . . . . . . . . . . . . . . . . . . . . . . . . . . . . . . . . . . . . . . . . . . . . . . . . . . . . . . . . . . . . . . . . . . . . . . 54
3 CentreWare Internet Services
Using CentreWare Internet Services . . . . . . . . . . . . . . . . . . . . . . . . . . . . . . . . . . . . . . . . . . . . . . . . . . . . . . 58
Status . . . . . . . . . . . . . . . . . . . . . . . . . . . . . . . . . . . . . . . . . . . . . . . . . . . . . . . . . . . . . . . . . . . . . . . . . . . . . . . . . . 59
Jobs . . . . . . . . . . . . . . . . . . . . . . . . . . . . . . . . . . . . . . . . . . . . . . . . . . . . . . . . . . . . . . . . . . . . . . . . . . . . . . . . . . . . 60
Print . . . . . . . . . . . . . . . . . . . . . . . . . . . . . . . . . . . . . . . . . . . . . . . . . . . . . . . . . . . . . . . . . . . . . . . . . . . . . . . . . . . . 62
Properties. . . . . . . . . . . . . . . . . . . . . . . . . . . . . . . . . . . . . . . . . . . . . . . . . . . . . . . . . . . . . . . . . . . . . . . . . . . . . . . 63
Support. . . . . . . . . . . . . . . . . . . . . . . . . . . . . . . . . . . . . . . . . . . . . . . . . . . . . . . . . . . . . . . . . . . . . . . . . . . . . . . . . 64
4 Paper and Media
Loading Paper . . . . . . . . . . . . . . . . . . . . . . . . . . . . . . . . . . . . . . . . . . . . . . . . . . . . . . . . . . . . . . . . . . . . . . . . . . 66
Setting Paper Size and Type . . . . . . . . . . . . . . . . . . . . . . . . . . . . . . . . . . . . . . . . . . . . . . . . . . . . . . . . . . . . . 70
Media Guidelines and Specifications. . . . . . . . . . . . . . . . . . . . . . . . . . . . . . . . . . . . . . . . . . . . . . . . . . . . . . 71
5 Machine Features and Setups
Accessing the Feature and Setup Options . . . . . . . . . . . . . . . . . . . . . . . . . . . . . . . . . . . . . . . . . . . . . . . . . 76
Feature Options . . . . . . . . . . . . . . . . . . . . . . . . . . . . . . . . . . . . . . . . . . . . . . . . . . . . . . . . . . . . . . . . . . . . . . . . . 77
Setup Options. . . . . . . . . . . . . . . . . . . . . . . . . . . . . . . . . . . . . . . . . . . . . . . . . . . . . . . . . . . . . . . . . . . . . . . . . . . 81
Xerox Phaser 3320DN/3320DNI
User Guide
3
Page 4

6 General Care and Troubleshooting
General Care . . . . . . . . . . . . . . . . . . . . . . . . . . . . . . . . . . . . . . . . . . . . . . . . . . . . . . . . . . . . . . . . . . . . . . . . . . . . 88
Troubleshooting. . . . . . . . . . . . . . . . . . . . . . . . . . . . . . . . . . . . . . . . . . . . . . . . . . . . . . . . . . . . . . . . . . . . . . . . . 93
Further Assistance . . . . . . . . . . . . . . . . . . . . . . . . . . . . . . . . . . . . . . . . . . . . . . . . . . . . . . . . . . . . . . . . . . . . . . 116
7 Specifications
Machine Specifications . . . . . . . . . . . . . . . . . . . . . . . . . . . . . . . . . . . . . . . . . . . . . . . . . . . . . . . . . . . . . . . . . 118
Electrical Specifications . . . . . . . . . . . . . . . . . . . . . . . . . . . . . . . . . . . . . . . . . . . . . . . . . . . . . . . . . . . . . . . . . 121
Print Specifications . . . . . . . . . . . . . . . . . . . . . . . . . . . . . . . . . . . . . . . . . . . . . . . . . . . . . . . . . . . . . . . . . . . . . 122
System Requirements. . . . . . . . . . . . . . . . . . . . . . . . . . . . . . . . . . . . . . . . . . . . . . . . . . . . . . . . . . . . . . . . . . . 123
Network Environment. . . . . . . . . . . . . . . . . . . . . . . . . . . . . . . . . . . . . . . . . . . . . . . . . . . . . . . . . . . . . . . . . . . 125
8Safety
Notices and Safety . . . . . . . . . . . . . . . . . . . . . . . . . . . . . . . . . . . . . . . . . . . . . . . . . . . . . . . . . . . . . . . . . . . . . 128
Safety Labels and Symbols . . . . . . . . . . . . . . . . . . . . . . . . . . . . . . . . . . . . . . . . . . . . . . . . . . . . . . . . . . . . . . 129
Operational Safety Information . . . . . . . . . . . . . . . . . . . . . . . . . . . . . . . . . . . . . . . . . . . . . . . . . . . . . . . . . 130
Basic Regulations. . . . . . . . . . . . . . . . . . . . . . . . . . . . . . . . . . . . . . . . . . . . . . . . . . . . . . . . . . . . . . . . . . . . . . . 134
Material Safety Data . . . . . . . . . . . . . . . . . . . . . . . . . . . . . . . . . . . . . . . . . . . . . . . . . . . . . . . . . . . . . . . . . . . 138
Product Recycling and Disposal. . . . . . . . . . . . . . . . . . . . . . . . . . . . . . . . . . . . . . . . . . . . . . . . . . . . . . . . . . 139
Energy Program Compliance . . . . . . . . . . . . . . . . . . . . . . . . . . . . . . . . . . . . . . . . . . . . . . . . . . . . . . . . . . . . 141
Environment, Health and Safety (EH&S) Contact Information . . . . . . . . . . . . . . . . . . . . . . . . . . . . . 142
Index
4
Xerox Phaser 3320DN/3320DNI
User Guide
Page 5

Getting Started
This chapter includes:
• Machine Overview on page 6
• Powering on the Machine on page 8
• Control Panel Overview on page 9
• Menu Overview on page 10
• Reports on page 12
• Software on page 13
• Loading Paper on page 14
• Media Output Locations on page 18
• General Care and Consumables on page 20
• Further Assistance on page 21
1
Xerox Phaser 3320DN/3320DNI
User Guide
5
Page 6
Machine Overview
8
1
2
3
4
5
6
7
9
10
11
1728394105116
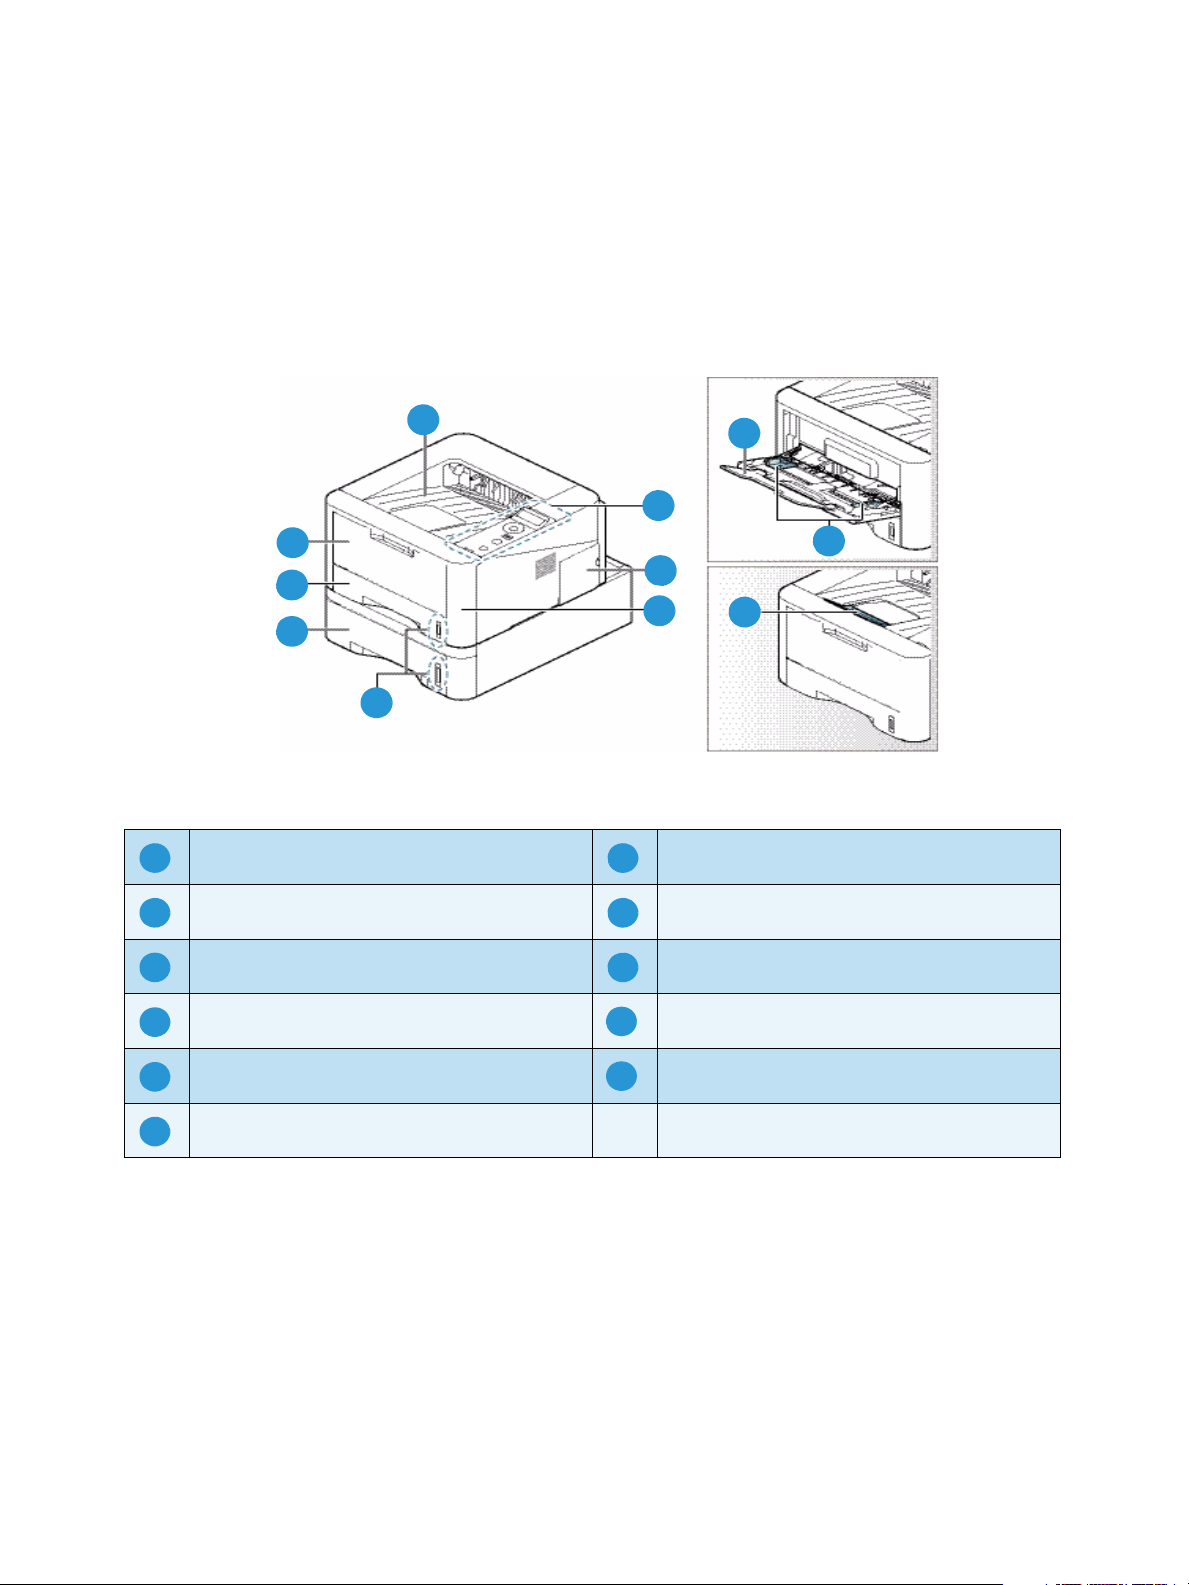
Machine Overview
Before you use your machine, take some time to familiarize yourself with the various features and
options.
Front View
Output Tray Paper Tray 1
Control Panel Bypass Tray
Control Board Cover Bypass Tray Extension
Front Cover Bypass Tray Width Guides
Paper Level Indicator Output Tray Support
Paper Tray 2 (Optional)
6
Xerox Phaser 3320DN/3320DNI
User Guide
Page 7
Rear View
1
2
3
4
5 6
7
1526374
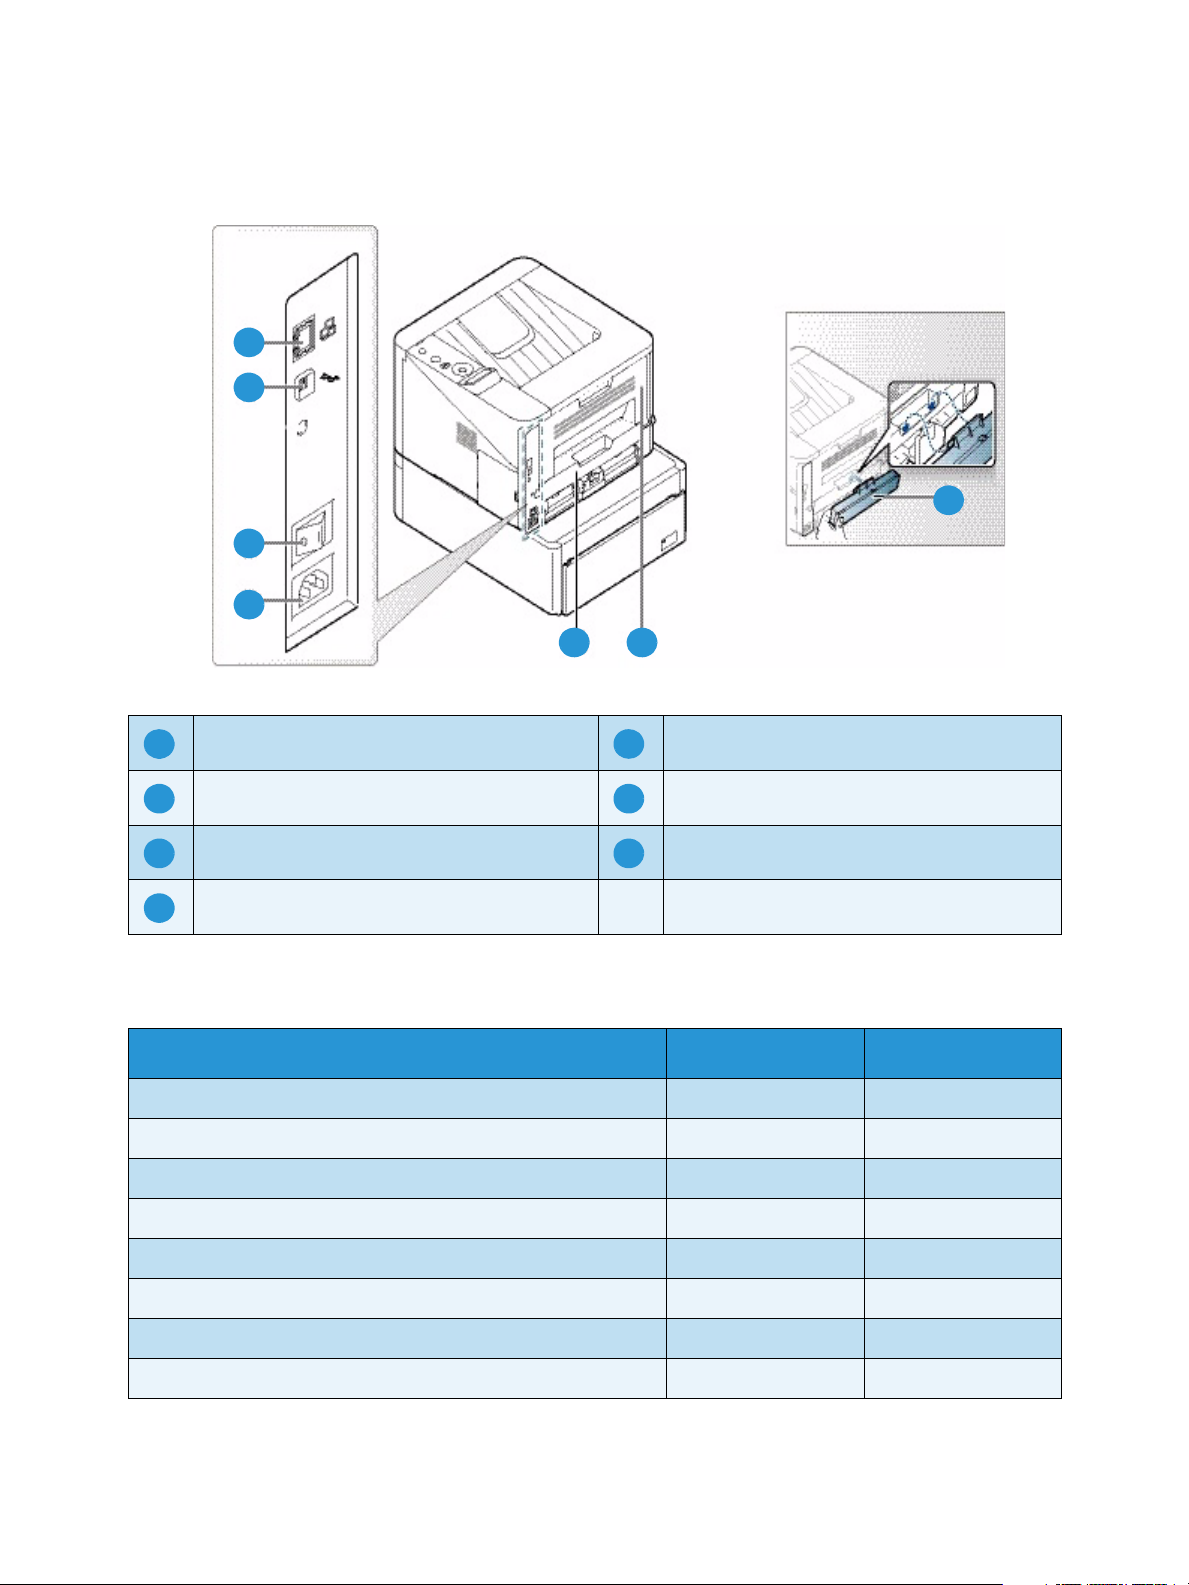
Machine Overview
Network Port Duplex Unit
USB Port Rear Door
Power Switch Paper Tray Rear Cover
Power Receptacle
Product Configurations
Component Phaser 3320DNI Phaser 3320DN
Paper Tray 1 (250 sheets) Standard Standard
Bypass Tray (50 sheets) Standard Standard
Paper Tray 2 (520 sheets) Optional Optional
Network Printing Standard Standard
USB Port Standard Standard
128MB Memory Standard Standard
256MB Additional Memory Expansion Optional Optional
Wireless Enabled Standard Not Applicable
Xerox Phaser 3320DN/3320DNI
7
User Guide
Page 8
Powering on the Machine
1
2
1
2
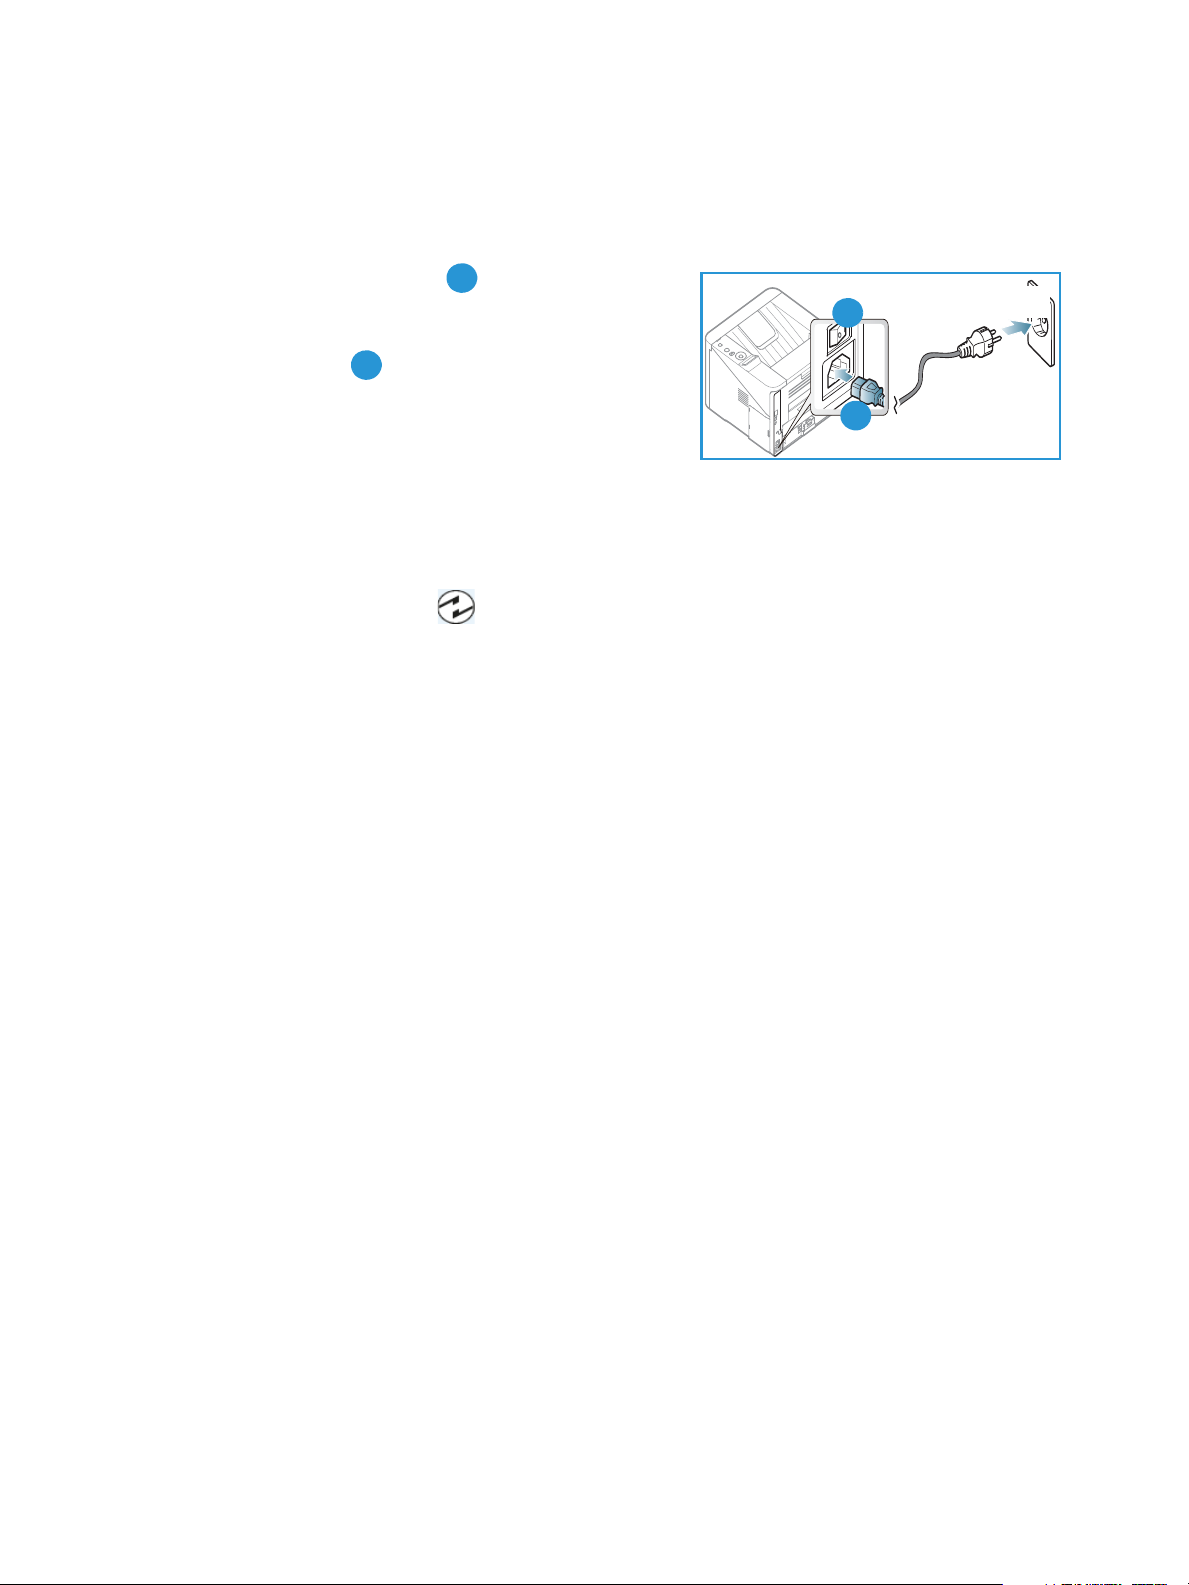
Powering on the Machine
The On/Off switch and the power cable socket are at the rear of the machine.
1. Connect the
power outlet. The power cord must be plugged into a
grounded power socket.
2. Press the
Power Save
This machine contains advanced energy conservation
technology that reduces power consumption when it is not in active use.
• When the printer does not receive data for an extended period of time, the Power Save mode
becomes active and power consumption is automatically lowered.
•Press the Power Save button to select the Power Save mode immediately.
To restore the machine to a normal state, press the Power Save button.
AC Power Cord to the machine and a
ON/OFF switch to the ON (I) position.
Powering off the Machine
There are two ways to switch the machine off:
•Press the ON/OFF switch to the (O) position.
•Press the Power Save button and use the arrow buttons on the control panel to select Power
Down and then press OK.
8
Xerox Phaser 3320DN/3320DNI
User Guide
Page 9
Control Panel Overview
1
2
3
4 5
6 7
8
123
45678
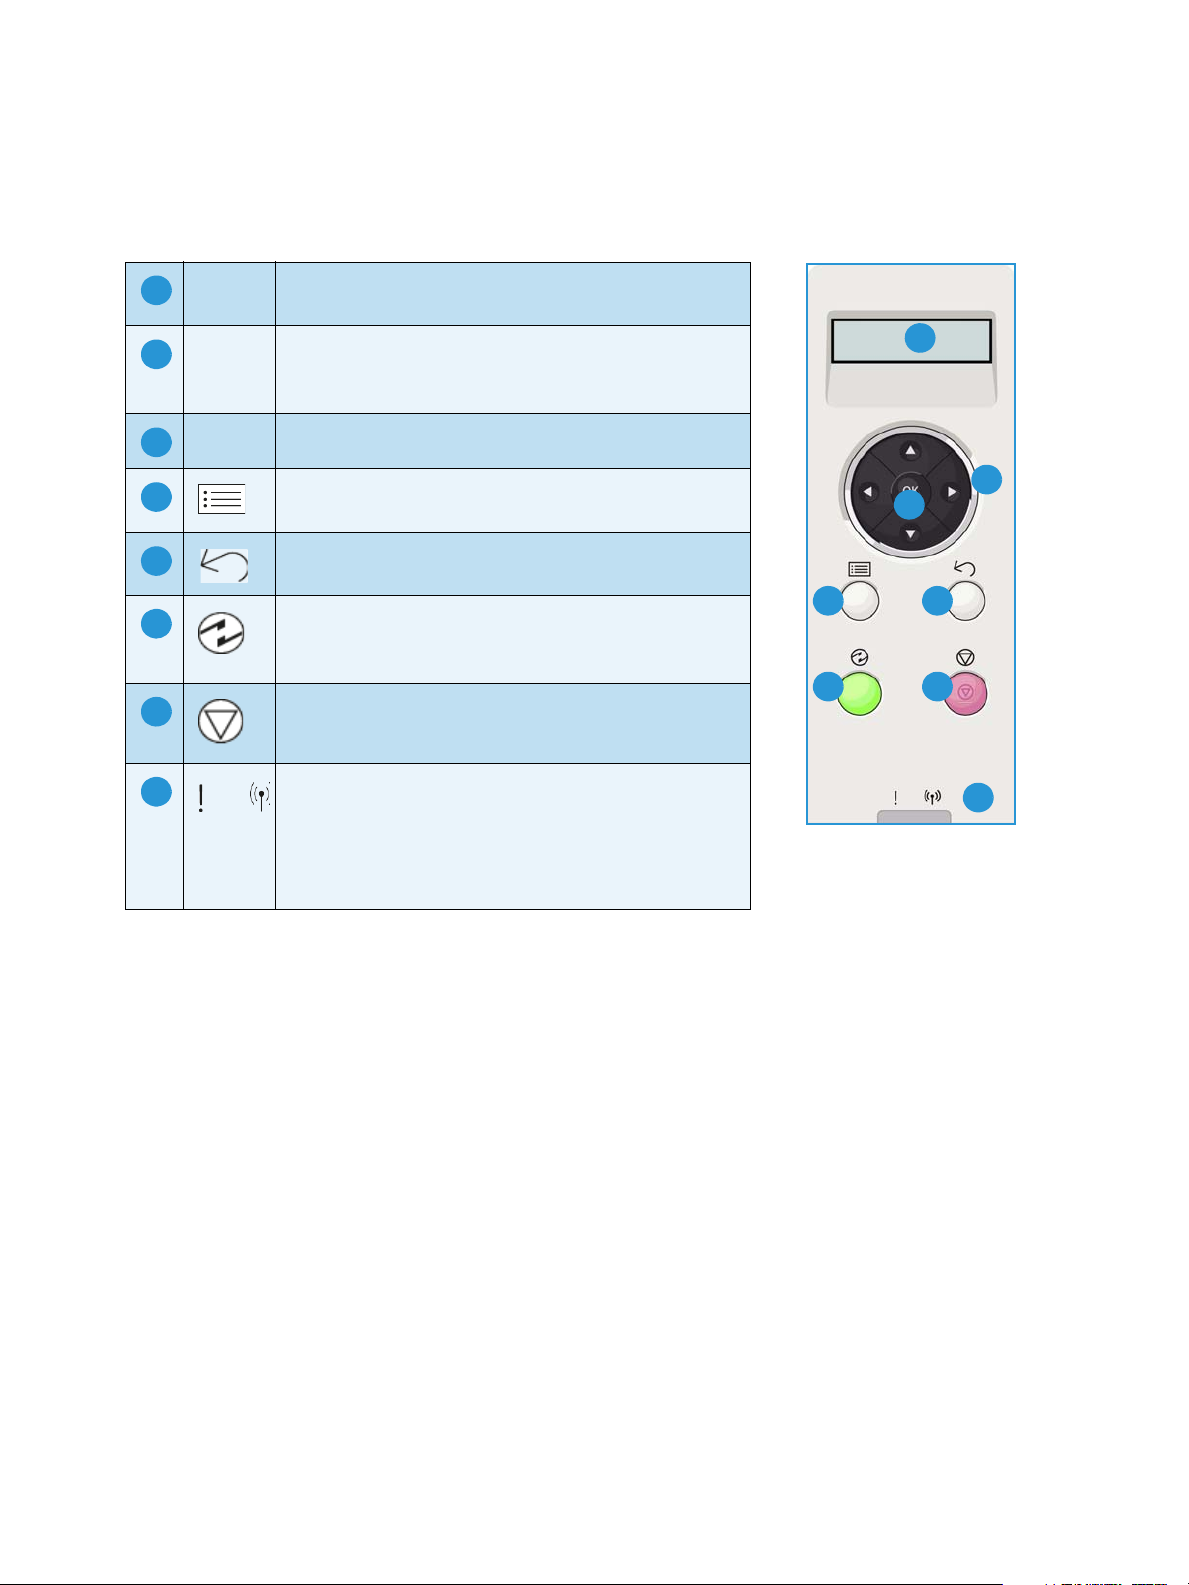
Display Screen: Displays the current machine status
and prompts during an operation.
Arrows: The up/down and left/right arrows are used to
scroll through the options available in the selected
menu, and to increase or decrease values.
OK: Confirms the selection on the screen.
Menu: Enters Menu Mode and enables you to access
options and settings.
Back: Used to go back one level in the menu.
Power Save: Sends the machine into Power Save
mode or Power Down. Press the button again to restart
the machine.
Control Panel Overview
Stop: Pressing the Stop button stops an operation at
any time.
Status / Wireless LED: The color of the LEDs indicates
the machine’s current status. For more information
refer to Status / Wireless LED on page 93.
Note: The Wireless LED applies to the Phaser
3320DNI only.
Xerox Phaser 3320DN/3320DNI
User Guide
9
Page 10
Menu Overview
Menu Overview
The control panel provides access to various menus. These menus can be accessed by pressing the
Menu button and using the arrow buttons to navigate to the menu item you require and pressing OK.
Selecting Menu Items
•Press the Menu Button on the control panel.
•Press the Up/Down arrow buttons to scroll through the menu items. Press OK to select the menu
item.
•Press the Right/Left arrow buttons to scroll to a menu option in the selected menu item. Press OK
to select the menu option.
Entering Alphanumeric Characters
As you perform various tasks, you may need to enter alphanumeric characters. For example, when
entering a margin measurement. When this is required, the arrow keys are used as follows:
• UP Key: Increases the character code (A -> B -> C …)
• Down Key: Decreases the character code (C -> B -> A…)
• Right Key: Moves to the next input field
• Left Key: Deletes the last character
• OK Key: Enters the current input
Feature Menu
You can change the settings for various feature options within the print environment to meet your
preferences and needs. A password may be required to access and change these settings.
The following table shows the available options for each menu item. For more detailed information
refer to Machine Features and Setups on page 75.
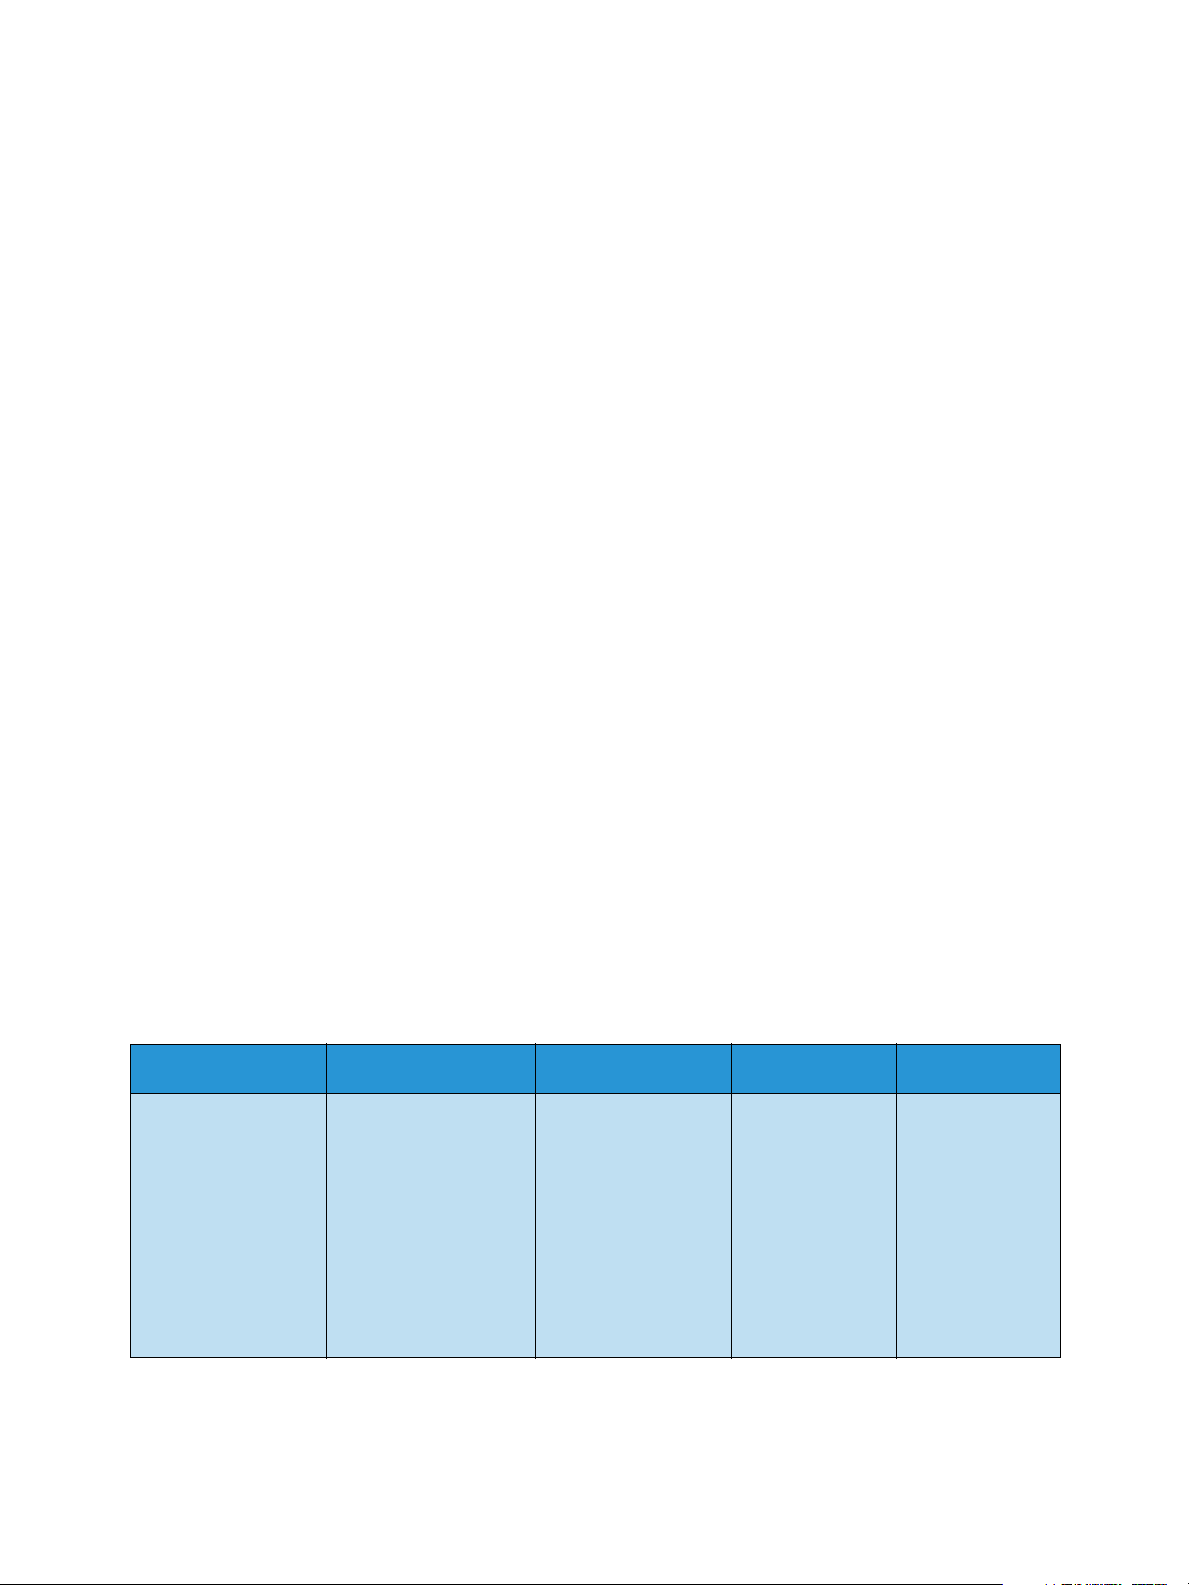
Information Layout Paper Graphic Job Manage
•Menu Map
• Configuration
• Supplies info.
•Demo Page
•PCL Font
•PS Font
•EPSON Font
•Stored Job
•Usage Counters
Note: Some menu options may be unavailable depending on your machine configuration and
whether the machine is in the Ready state.
•Orientation
•Common Margin:
- Simplex Margin
- Duplex Margin
- Binding Margin
• Bypass Tray
•Tray X
•Emulation Margin
•Duplex
•Quantity
•Bypass Tray/Tray
1 & 2: Paper Size
and Type
•Paper Source
•Bypass Mode
•Resolution
•Darken Text
•Active Job
•Stored Job
•File Policy
10
Xerox Phaser 3320DN/3320DNI
User Guide
Page 11
Menu Overview
Setup Menu
The Setup menu enables you to customize options which are specific to the machine, such as
Language and Power Save and Emulation settings. A password may be required to access and change
these Setup settings.
You may also set up the network using the machine's display screen. Before doing that, you must have
the relevant information concerning the type of network protocols and computer system you use. If
you are not sure which setting to use, contact your System Administrator to configure this machine on
the network. A password may be required to access and change the Network Setups.
The following table shows the available options for each menu item. For more detailed information
refer to Machine Features and Setups on page 75.
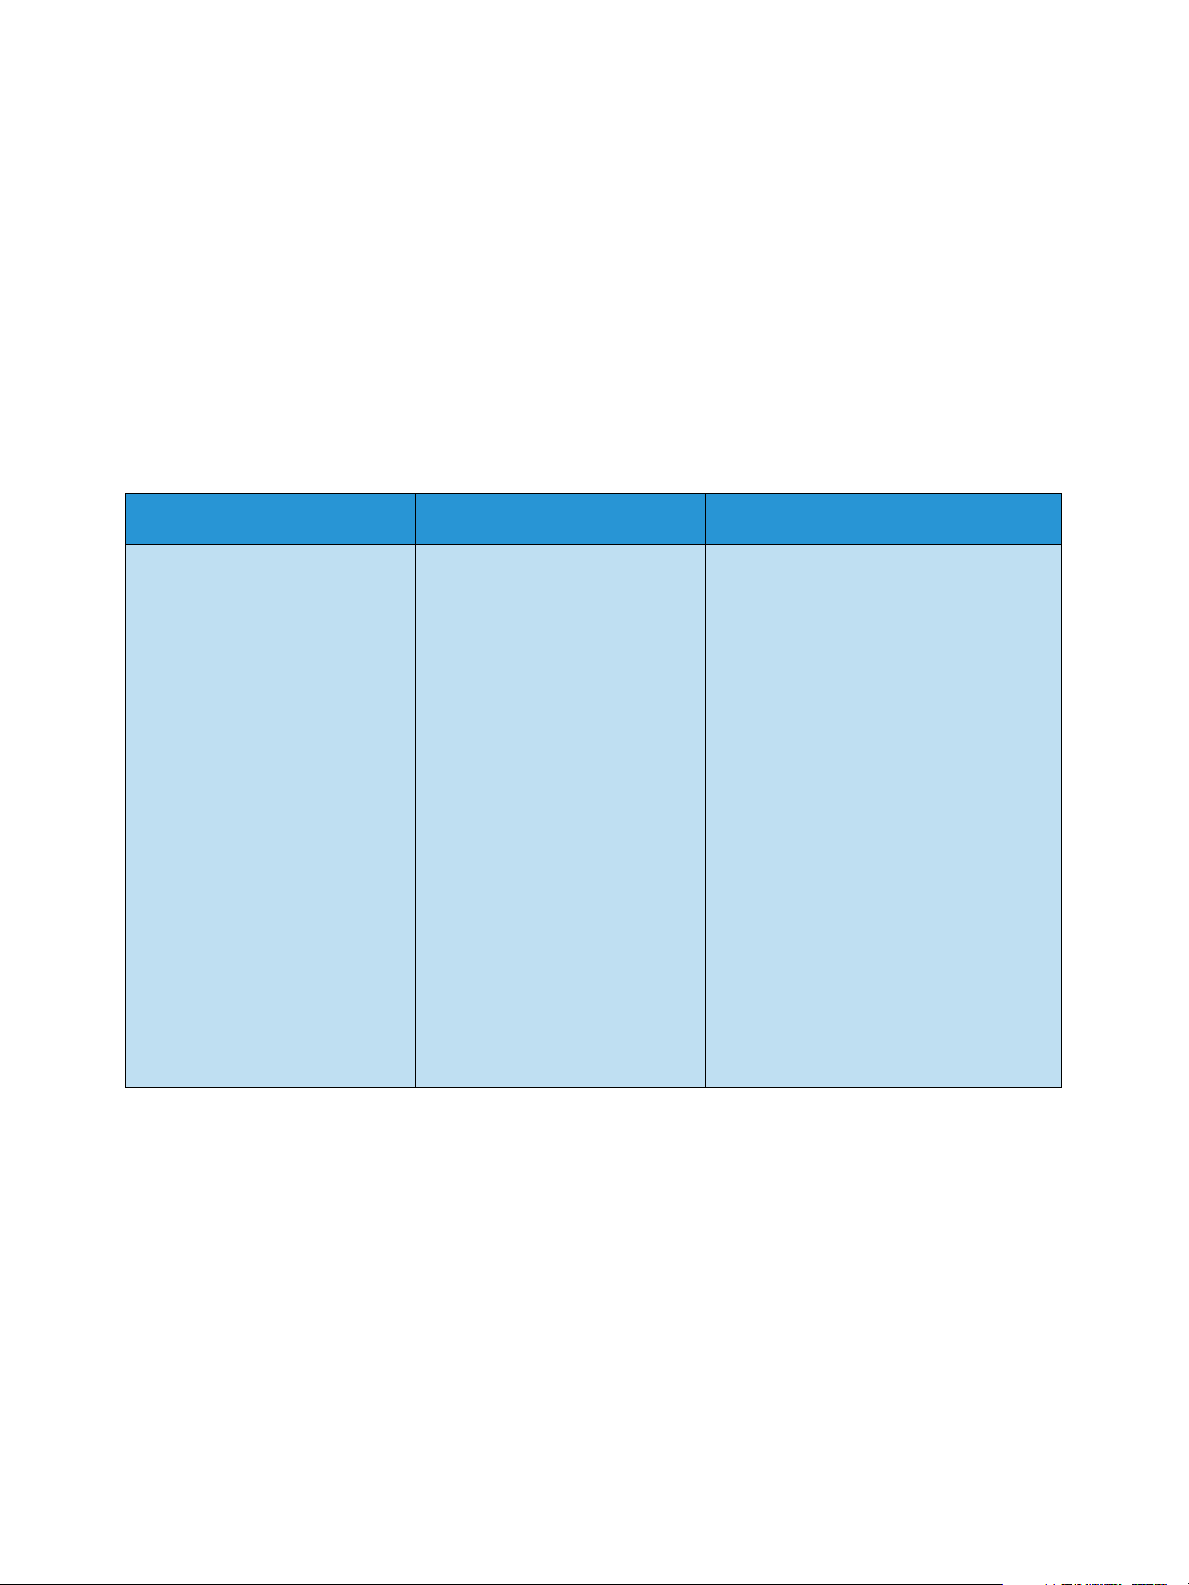
System Setup Emulation Network Setup
• Language
•Power Save
• Wakeup Event
•Auto Continue
•Paper Subst.
•Paper Mismatch
• Tray Chaining
•Default Paper
•Metric Default
•Altitude Adj.
•Line Term.
• Job Timeout
• Config. Page
• Maintenance
- Supplies Info
- Toner Low Alert
•Toner Save
•Earth Smart
• Clear Setting
•Emulation Type
•Setup:
•Setup-PCL
- Typeface
- Symbol
- Courier
- Pitch
- Lines
- Wide A4
•Setup-Postscript
•Setup-EPSON/IBM
- Font
- Character Set
- Character Tab
- Pitch
- LPI
- Autowrap
•TCP/IP(IPv4)
•TCP/IP(IPv6)
• Ethernet Speed
• 802.1x
- Off
- On
• Wireless (Phaser 3320DNI only)
• Clear Setting
•Network Conf.
•Net. Activate
• HTTP Activate
Note: Some menu options may be unavailable depending on your machine configuration. You
may be required to enter a password before making setup changes.
Xerox Phaser 3320DN/3320DNI
User Guide
11
Page 12
Reports
Reports
Various reports can be printed to provide information about your machine.
1. Select the Menu button on the control panel.
2. Use the up/down arrows to scroll to the Information menu and select OK.
3. Use the up/down arrows until the report you require displays and select OK.
4. Select OK to print the report.
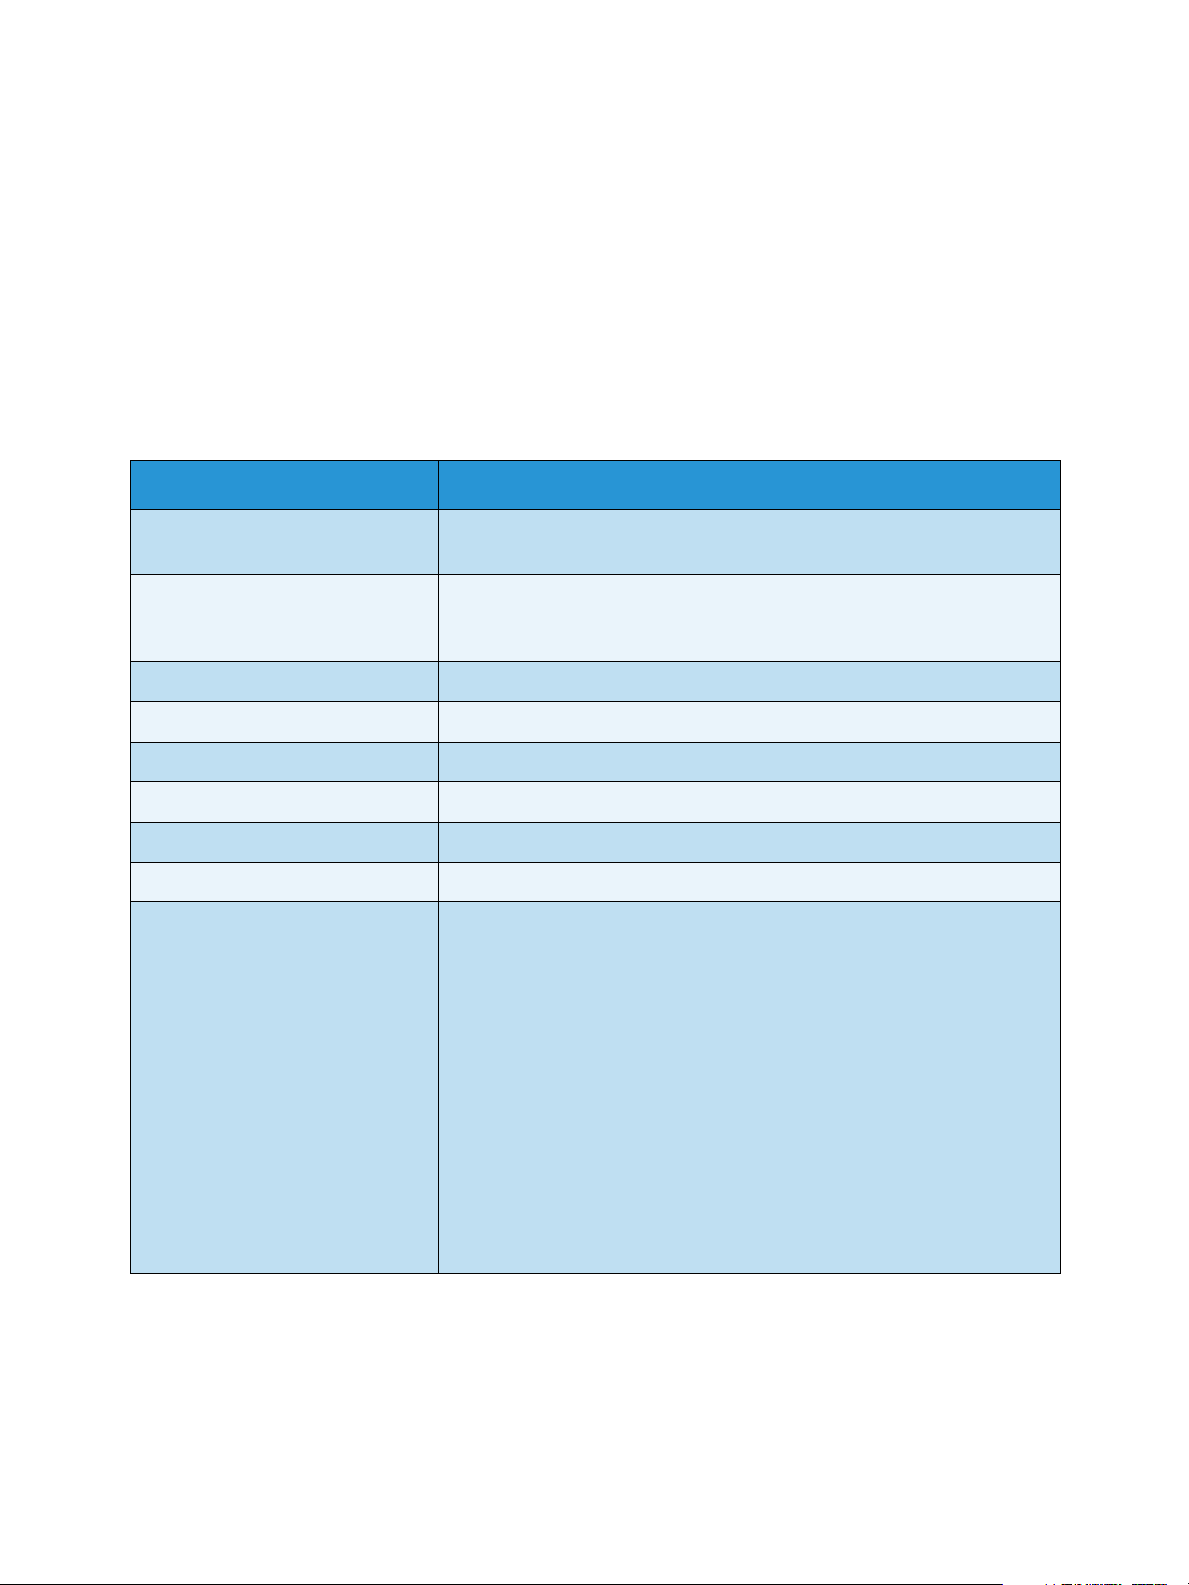
The following reports can be printed:
Report Description
Menu Map Prints the menu map which shows the layout and current settings of this
machine.
Configuration This report provides information about your machine setup, including
the serial number, IP Address, installed options and the software
version.
Supplies Info Prints the supplies information page.
Demo Page The demo page is printed to check the quality of the print.
PCL Font Prints the PCL font list.
PS Font Prints the PS font list.
EPSON Font Prints the EPSON font list.
Stored Job Prints the stored job list.
Usage Counters This list shows the number of impressions made on the machine. The list
includes:
• Total Impressions
• Black Impressions
• Black Printed Impressions
• Sheets
• 2 Sided Sheets
• Printed Sheets
• Printed 2 Sided Sheets
• Black Printed Sheets
• Black Printed 2 Sided Sheets
• Maintenance Impressions
• Black Maintenance Impressions
Note: Some options may be unavailable depending on your machine configuration.
12
Xerox Phaser 3320DN/3320DNI
User Guide
Page 13

Software
Software
After you have set up your machine and connected it to your computer, you must install the printer
software. The software is supplied on the CD delivered with your machine, or can be downloaded from
www.xerox.com. The following software is provided:
CD OS Contents
Printer
Software
CD
Printer
Software
Printer
Software
Printer
Software
CD
Windows • Printer Driver: Use the printer driver to take full advantage of your
printer’s features. PCL6, Postscript and XPS drivers are provided.
• Xerox Easy Printer Manager (EPM): Conveniently combines access to
device settings, printing environments and the launch of applications
such as Xerox CentreWare Internet Services into one location.
Note: Login is required to change Printer Settings.
• Wireless Setting Program: When installing the Phaser 3320DNI you can
use the Wireless Setting program that was automatically installed with
the printer driver to configure the wireless settings.
• SetIP program: A utility program allowing you to select a network
interface and manually configure the addresses for use with the TCP/IP
protocol.
Linux • Printer Driver: Use this driver to take full advantage of your printer’s
fea tures.
Note: Linux software is available on xerox.com only.
Unix • Printer Driver: Use this driver to take full advantage of your printer’s
fea tures.
Note: Unix software is available on xerox.com only.
Macintosh • Printer Driver: Use this driver to take full advantage of your printer’s
fea tures.
• SetIP program: A utility program allowing you to select a network
interface and manually configure the addresses for use with the TCP/IP
protocol.
• Smart Panel: This utility enables remote management, displaying toner
levels, printer status and problem alerts.
Xerox Phaser 3320DN/3320DNI
User Guide
13
Page 14
Loading Paper
1
2
1
2
Loading Paper
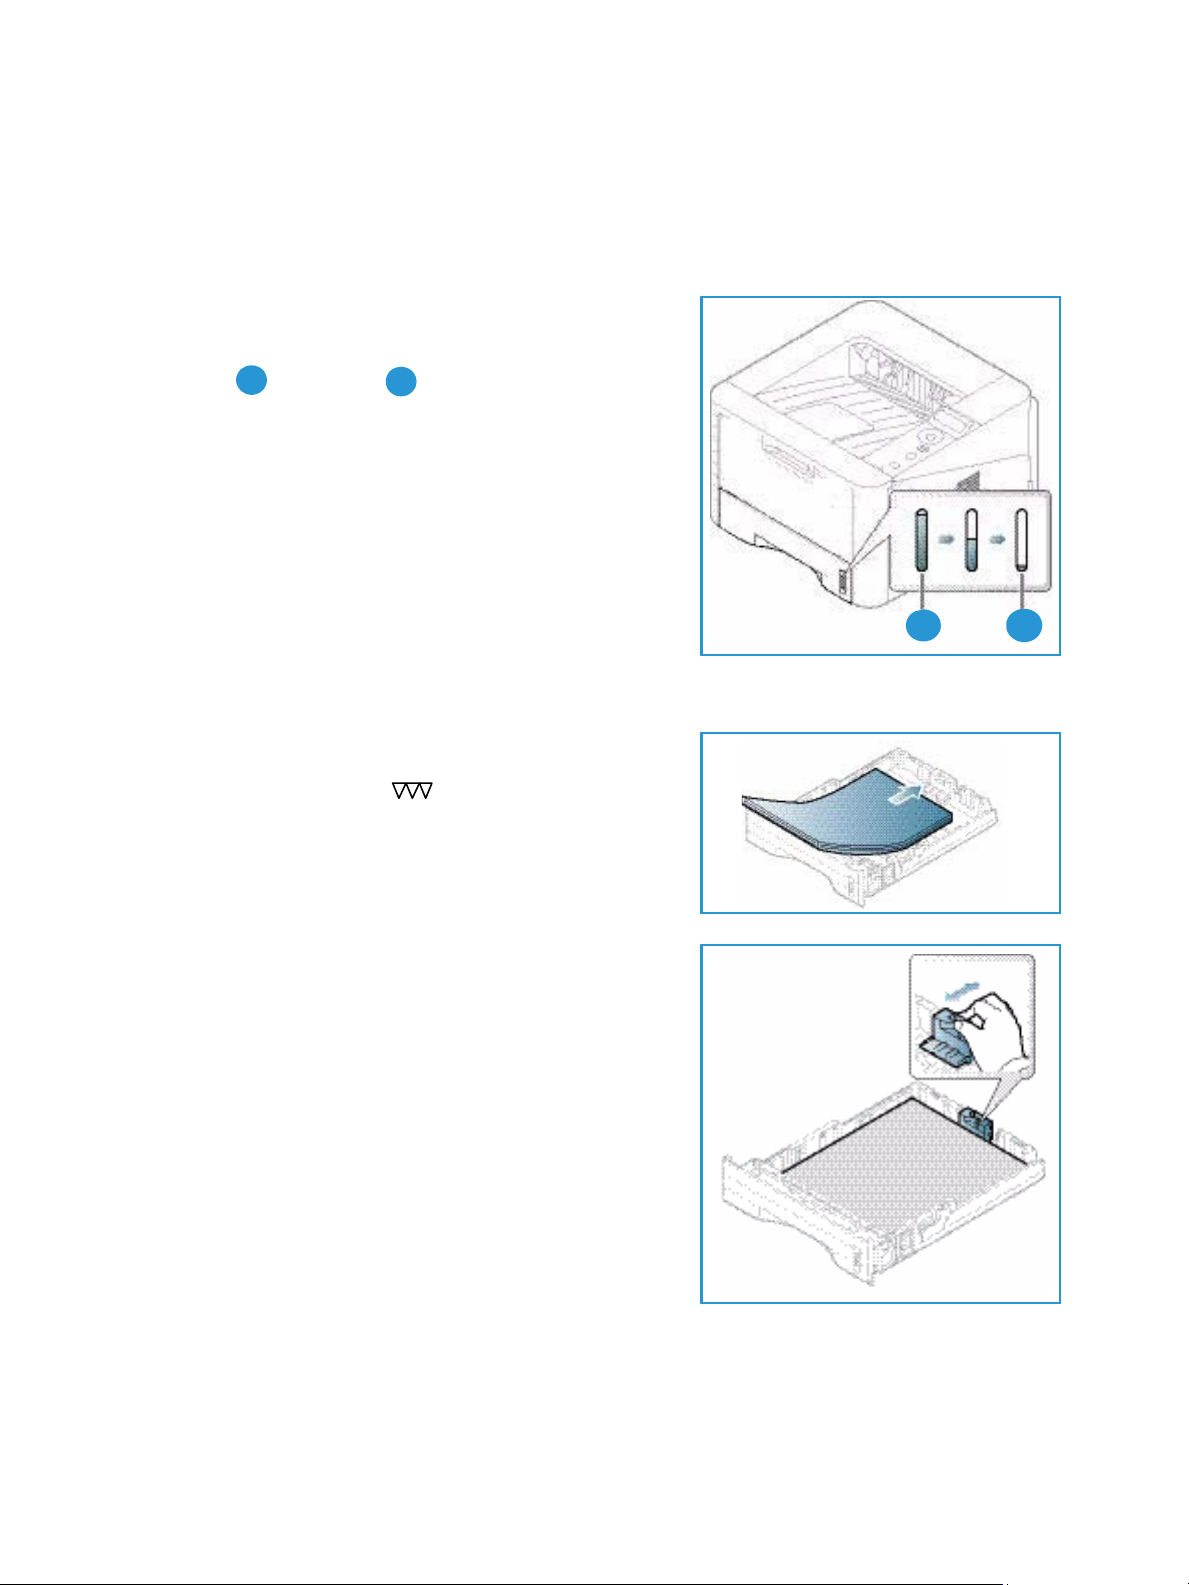
Paper Tray 1 and Paper Tray 2 (optional)
The paper level indicator on the front of trays 1 and 2 shows
the amount of paper currently left in the tray. When the tray
is empty, the indicator is completely lowered as shown in the
illustration: shows full, shows empty. Paper tray 1
can hold up to 250 sheets and paper tray 2 (optional) can
hold up to 520 sheets of 20 lb (80 g/m
media specifications, refer to Media Specifications on
page 119.
2
) paper. For more
To load the paper:
1. Pull out the paper tray and load paper into the tray, print
side down. Do not fill above the Maximum Fill line
indicated by the symbol .
2. Slide the paper length guide until it lightly touches the
end of the paper stack.
14
Xerox Phaser 3320DN/3320DNI
User Guide
Page 15
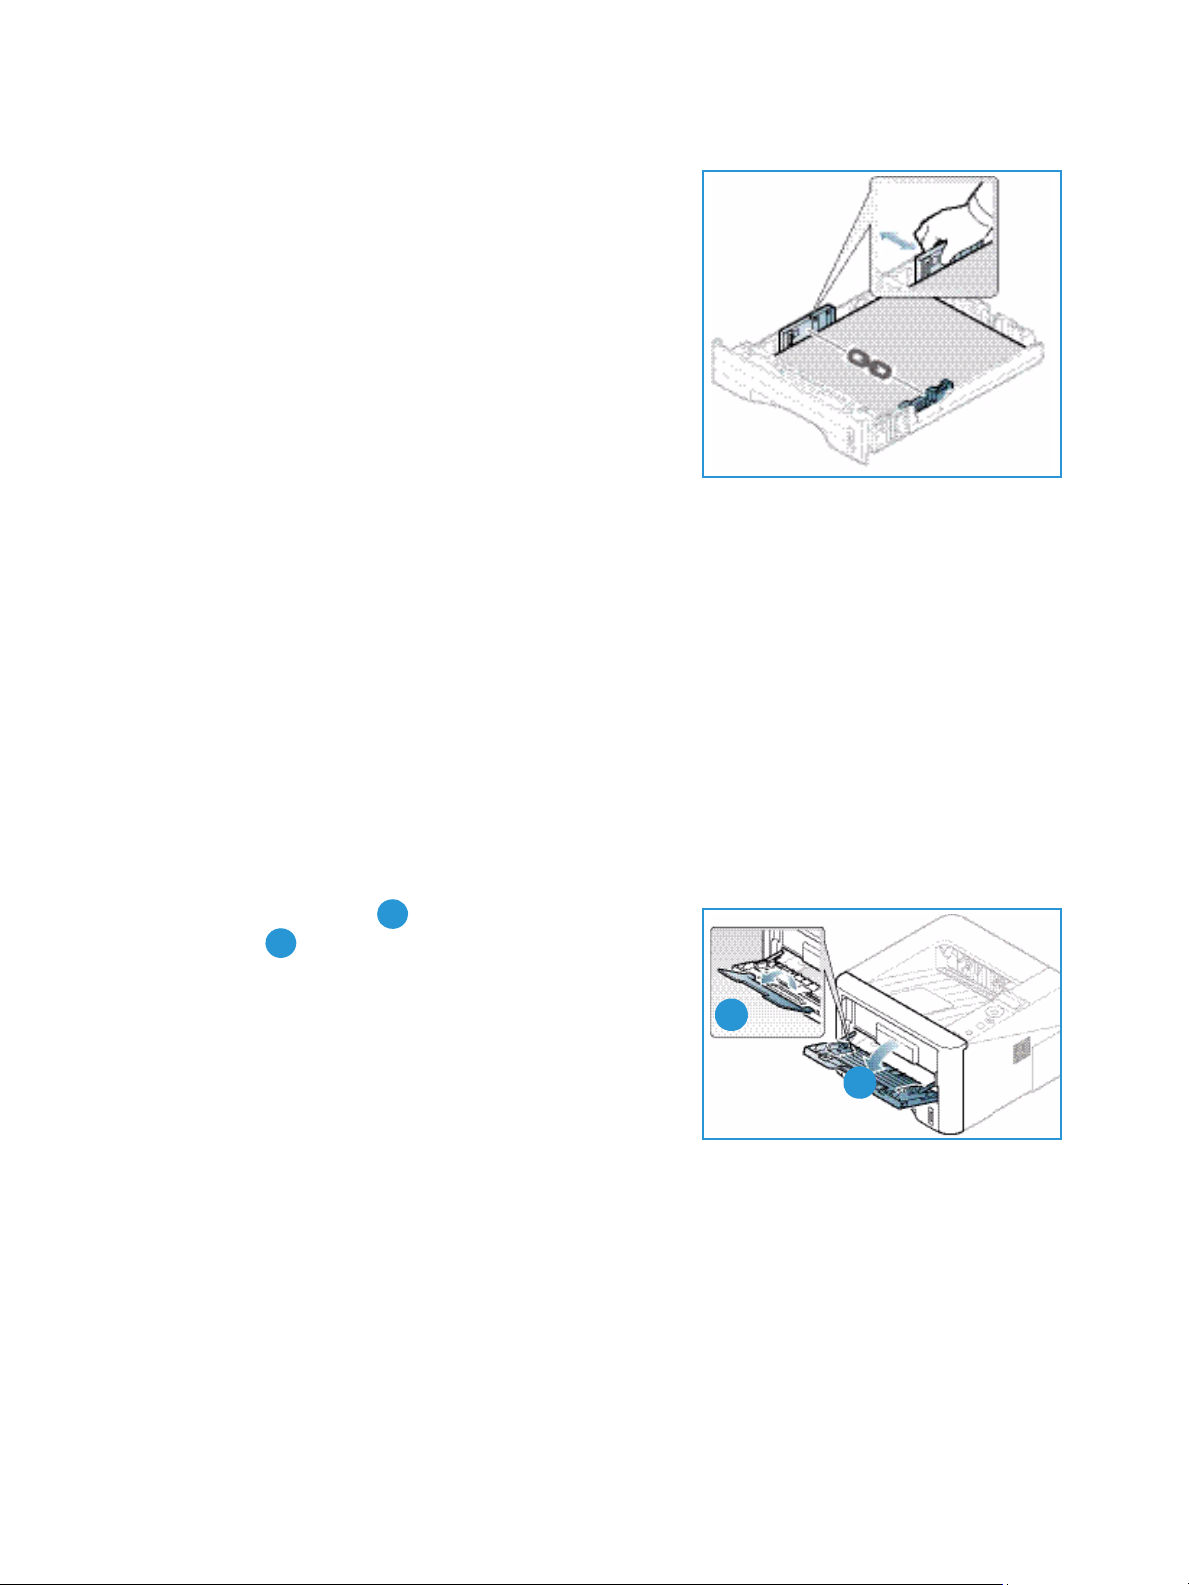
3. Position the side guide by squeezing the lever and sliding
2
1
1
2
it towards the stack of paper, until it gently touches the
side of the stack.
4. Insert the paper tray into the machine.
5. After loading paper in the paper tray, set the paper size
and type using the control panel. For information about
setting the paper size and type on the control panel, refer
to Setting Paper Size and Type on page 70.
6. When printing from your computer, ensure you select
Size on the driver Paper tab to specify the correct paper
size and type. Not confirming the paper details may
result in printing delays. For information about setting
the paper size and type in the printer driver, refer to Paper Tab on page 38.
Note: The settings made from the printer driver on your computer override the settings on the
control panel.
For more information on loading paper, refer to Paper and Media on page 65.
Loading Paper
Bypass Tray
The bypass tray is located on the front of your machine. It can be closed when not in use, making the
product more compact. Use the bypass tray to print transparencies, labels, envelopes or postcards in
addition to making quick runs of paper types or sizes that are not currently loaded in the main paper
tray.
The bypass tray can hold a maximum of 50 sheets of 20 lb (80 g/m²) bond paper, 5 transparency
sheets or 5 envelopes.
1. Lower the bypass tray and unfold the paper support
extension .
2. Prepare a stack of paper for loading by flexing or fanning
it back and forth. Straighten the edges on a level surface.
Remove any curl on postcards, envelopes and labels
before loading them into the bypass tray.
When using the bypass tray for special media it may be
necessary to use the rear door for the output. For further
information refer to Media Output Locations on page 18.
Note: The rear door output can only be used for simplex jobs. Duplex printing with the rear door
open will cause paper jams.
Xerox Phaser 3320DN/3320DNI
User Guide
15
Page 16
Loading Paper
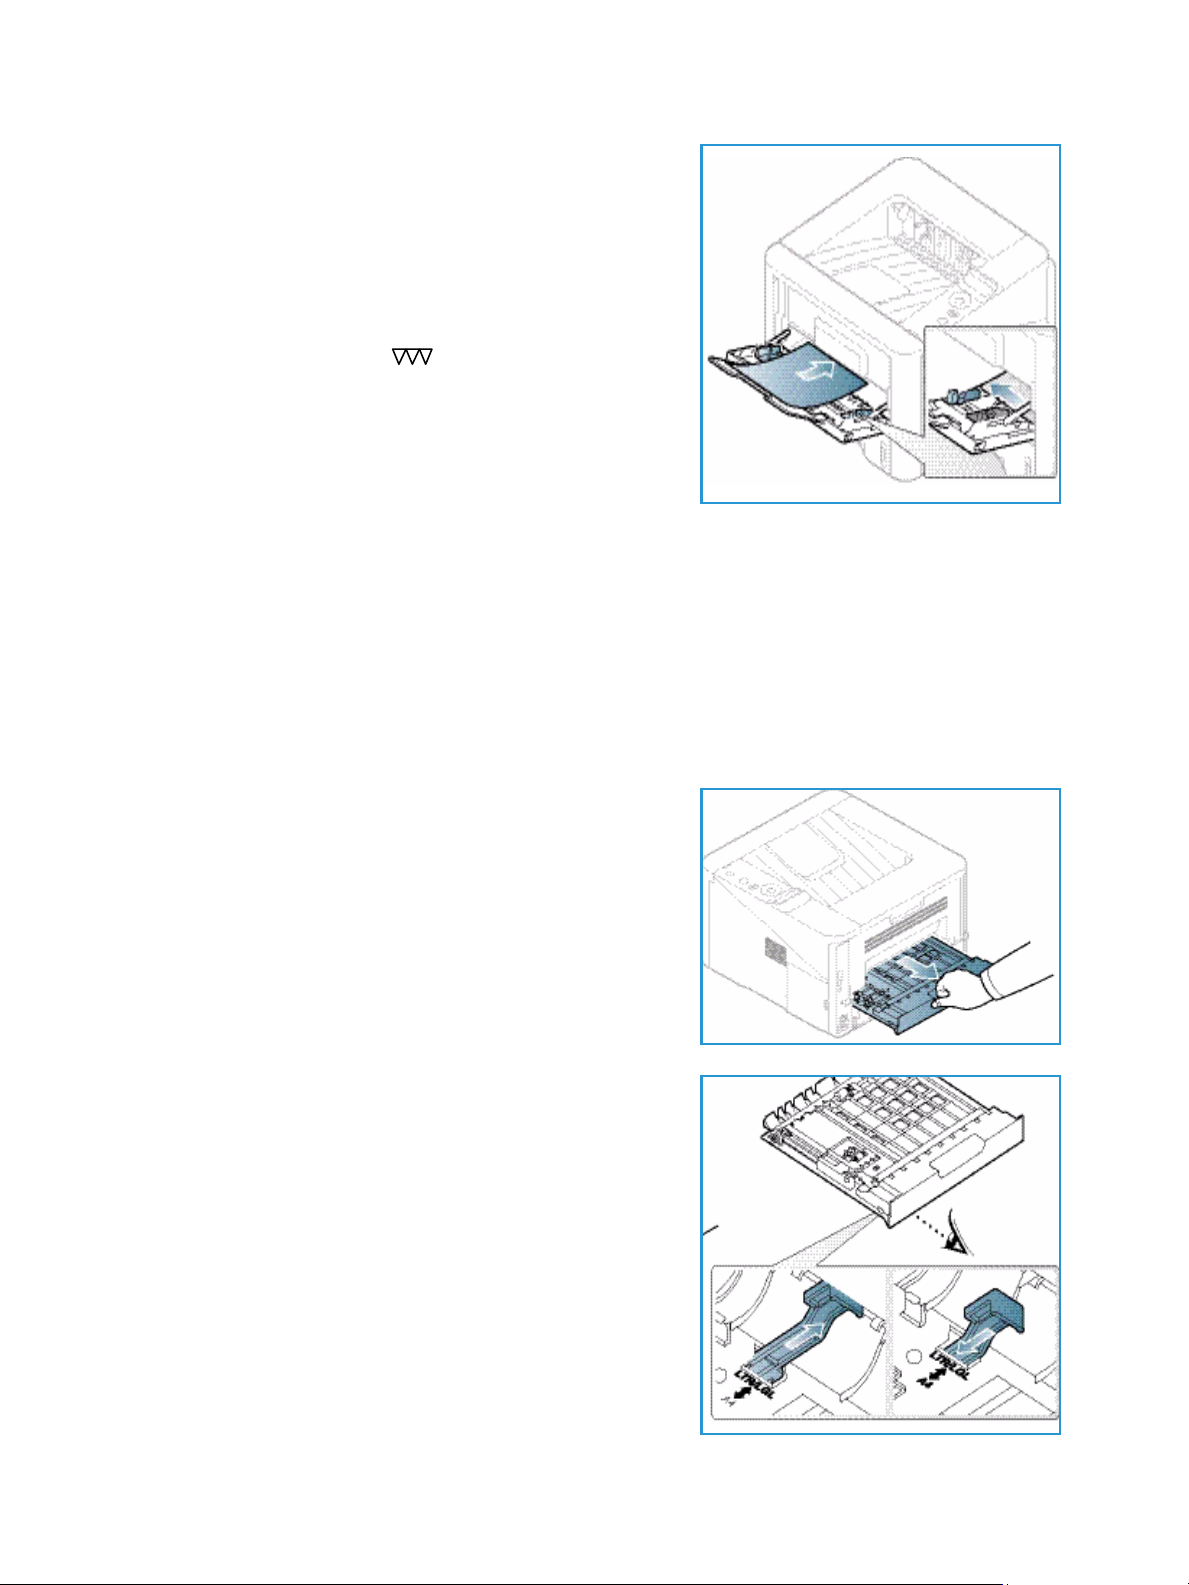
3. Load the print material between the width guides with
the print side facing up.
Note: Hold transparencies by the edges and avoid
touching the print side.
4. Adjust the paper guide to the width of the stack of print
material. Ensure you have not loaded too much print
media. The stack should be below the Maximum Fill line
indicated by the symbol .
5. When printing from your computer, ensure you select
Size on the driver Paper tab to specify the correct paper
size and type. Not confirming the paper details may
result in printing delays. For information about setting
the paper size and type in the printer driver, refer to
Paper Tab on page 38.
Note: The settings made from the printer driver on your computer override the settings on the
control panel.
6. After printing, remove any unfed paper and close the bypass tray.
Duplex Unit
The duplex unit is preset to either Letter size or A4 depending on your country. To change the size of
the duplex unit, follow the instructions below.
1. Pull the duplex unit out of the machine.
2. Adjust the guides to match the size of paper you will be
using.
16
Xerox Phaser 3320DN/3320DNI
User Guide
Page 17
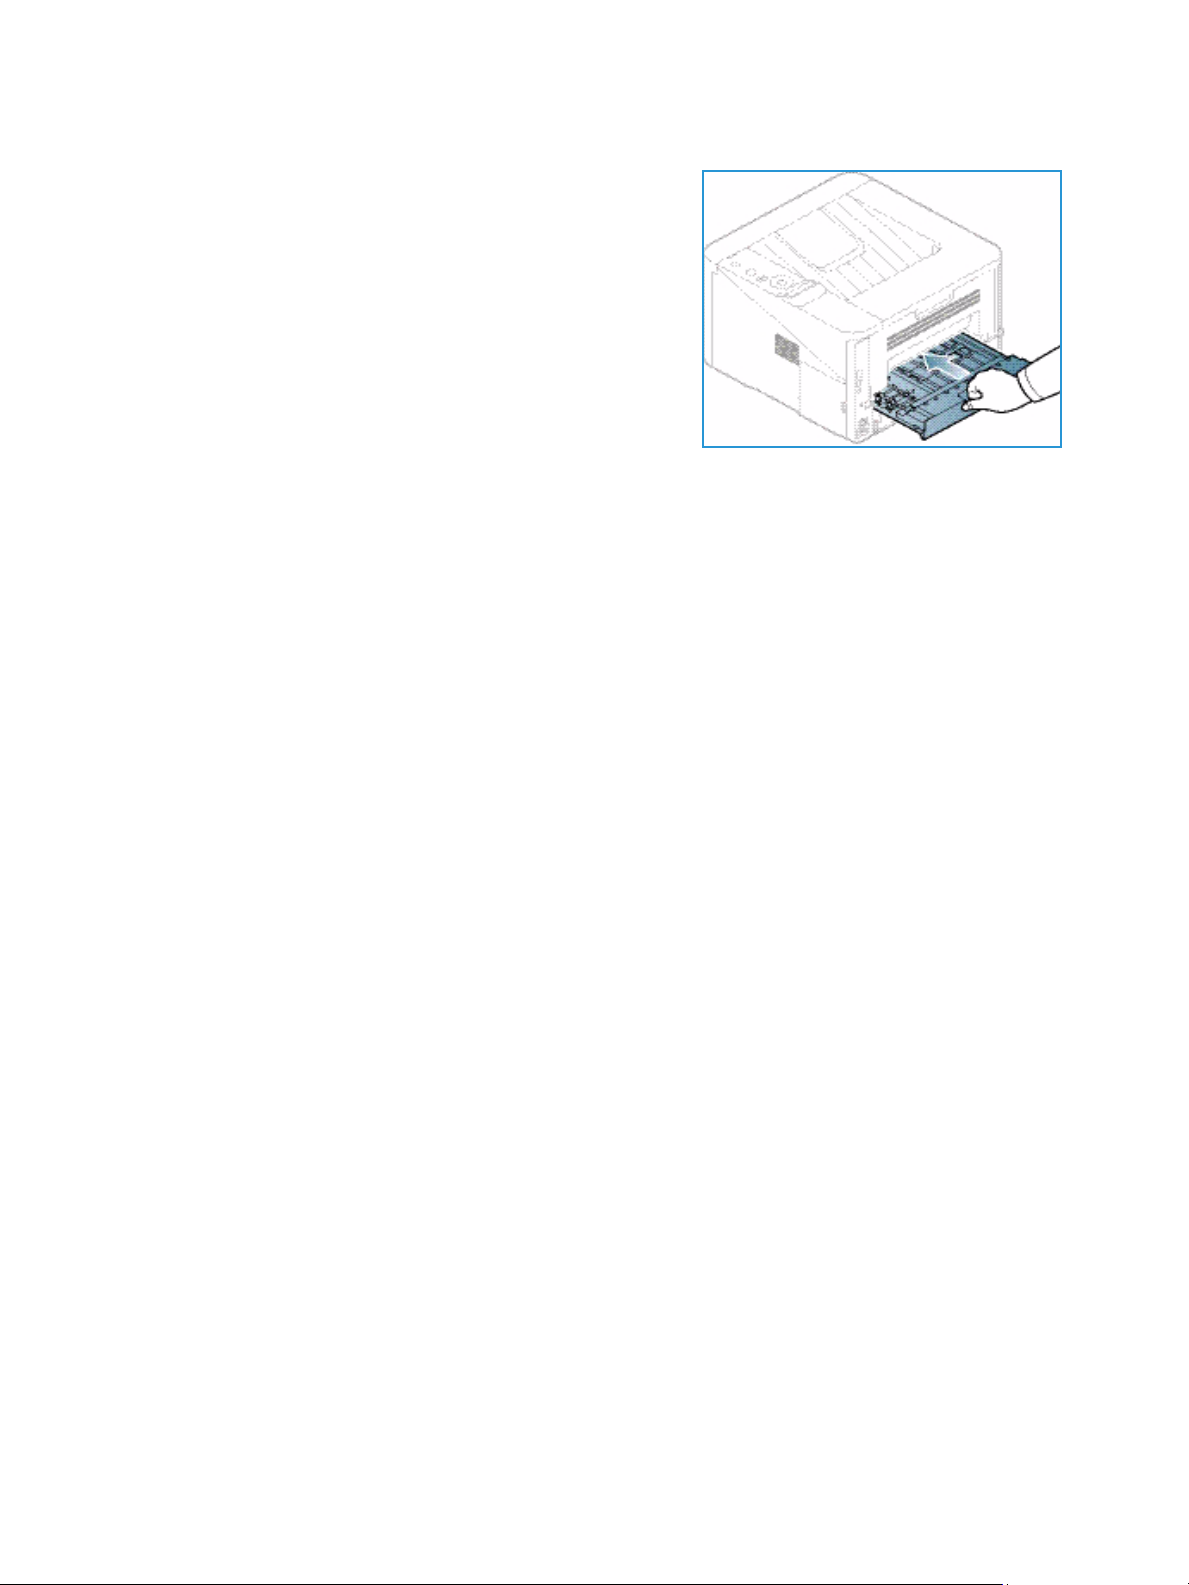
3. Insert the duplex unit back into the machine, aligning
the edges of the unit with the feed grooves on the inside
of the machine. Make sure the duplex unit is fully pushed
in.
Loading Paper
Xerox Phaser 3320DN/3320DNI
User Guide
17
Page 18
Media Output Locations
1
1
2
2
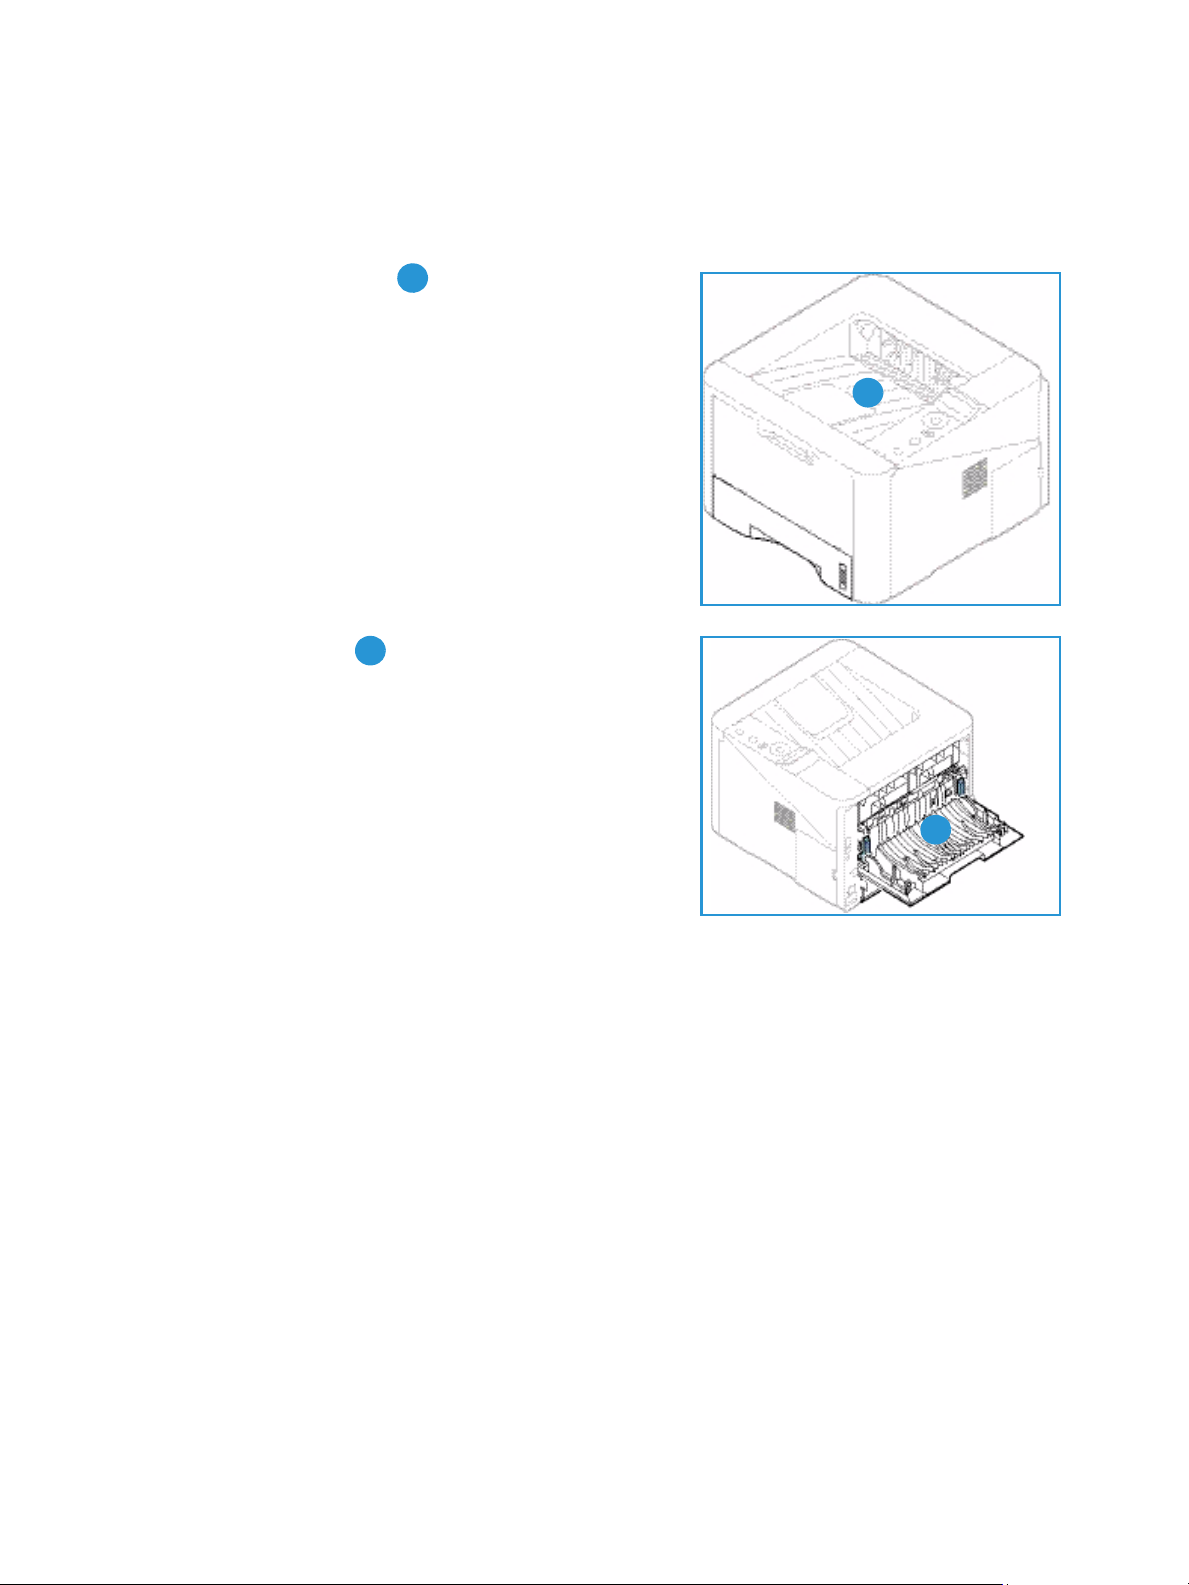
Media Output Locations
The machine has two output locations:
• Output tray (face down) up to a maximum of 150
sheets of 20 lb (80 g/m²) paper.
• Rear door (face up) one sheet at a time for 1-sided
output only.
The machine sends output to the output tray by default. If special media such as envelopes print out
with wrinkles, curl, creases or black bold lines, the rear door should be used for the output. Open the rear
door and keep it open while printing one sheet at a time.
Note: The rear door output can only be used for simplex jobs. Duplex printing with the rear door
open will cause paper jams.
Using the Output Tray
The output tray collects printed paper face down, in the order in which the sheets were printed. The
output tray should be used for most jobs. When the output tray is full, a message displays on the
control panel.
18
Xerox Phaser 3320DN/3320DNI
User Guide
Page 19
To u s e th e output tray, make sure that the rear door is closed.
Notes:
• To reduce paper jams, do not open or close the rear door while the printer is printing.
• If paper coming out of the output tray has problems, such as excessive curl, try printing
to the rear door.
• The rear door output can only be used for simplex jobs. Duplex printing with the rear
door open will cause paper jams.
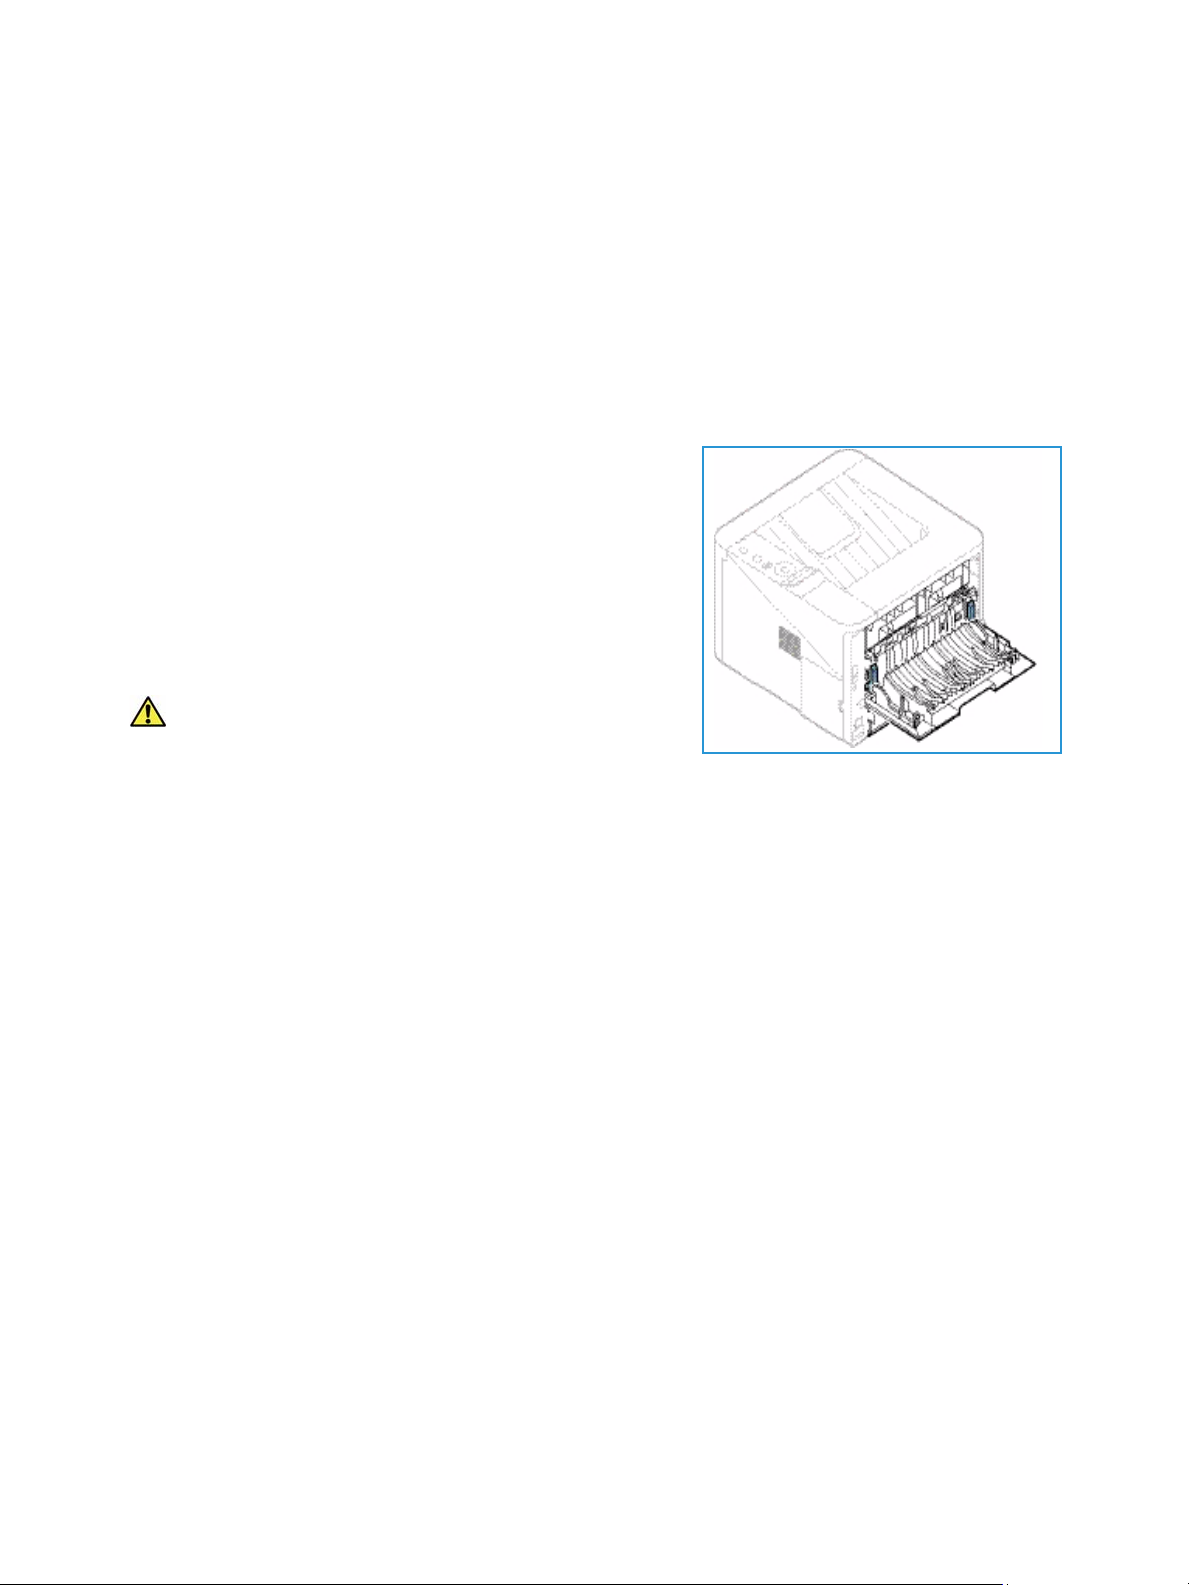
Using the Rear Door
When using the rear door, paper comes out of the machine
face up. Printing from the bypass tray to the rear door
provides a straight paper path and might improve the output
quality when printing on special media. Whenever the rear
door is open, the output is delivered there.
Note: The rear door output can only be used for simplex
jobs. Duplex printing with the rear door open will cause
paper jams.
Media Output Locations
CAUTION: The fuser area inside the rear door of your
machine becomes very hot when in use. Take care when
you access this area.
Xerox Phaser 3320DN/3320DNI
User Guide
19
Page 20
General Care and Consumables
General Care and Consumables
There is only one customer replaceable consumable in the machine, the print cartridge. To place an
order for Xerox consumables, please contact your local Xerox Representative giving your Company
Name, product number and the machine serial number. Supplies can also be ordered from
www.xerox.com, refer to Support on page 64 for further information.
The machine’s serial number is located on the inside of the front door on the machine and is printed on
the configuration report. For further information about locating the serial number, please refer to
Locating the Serial Number on page 116.
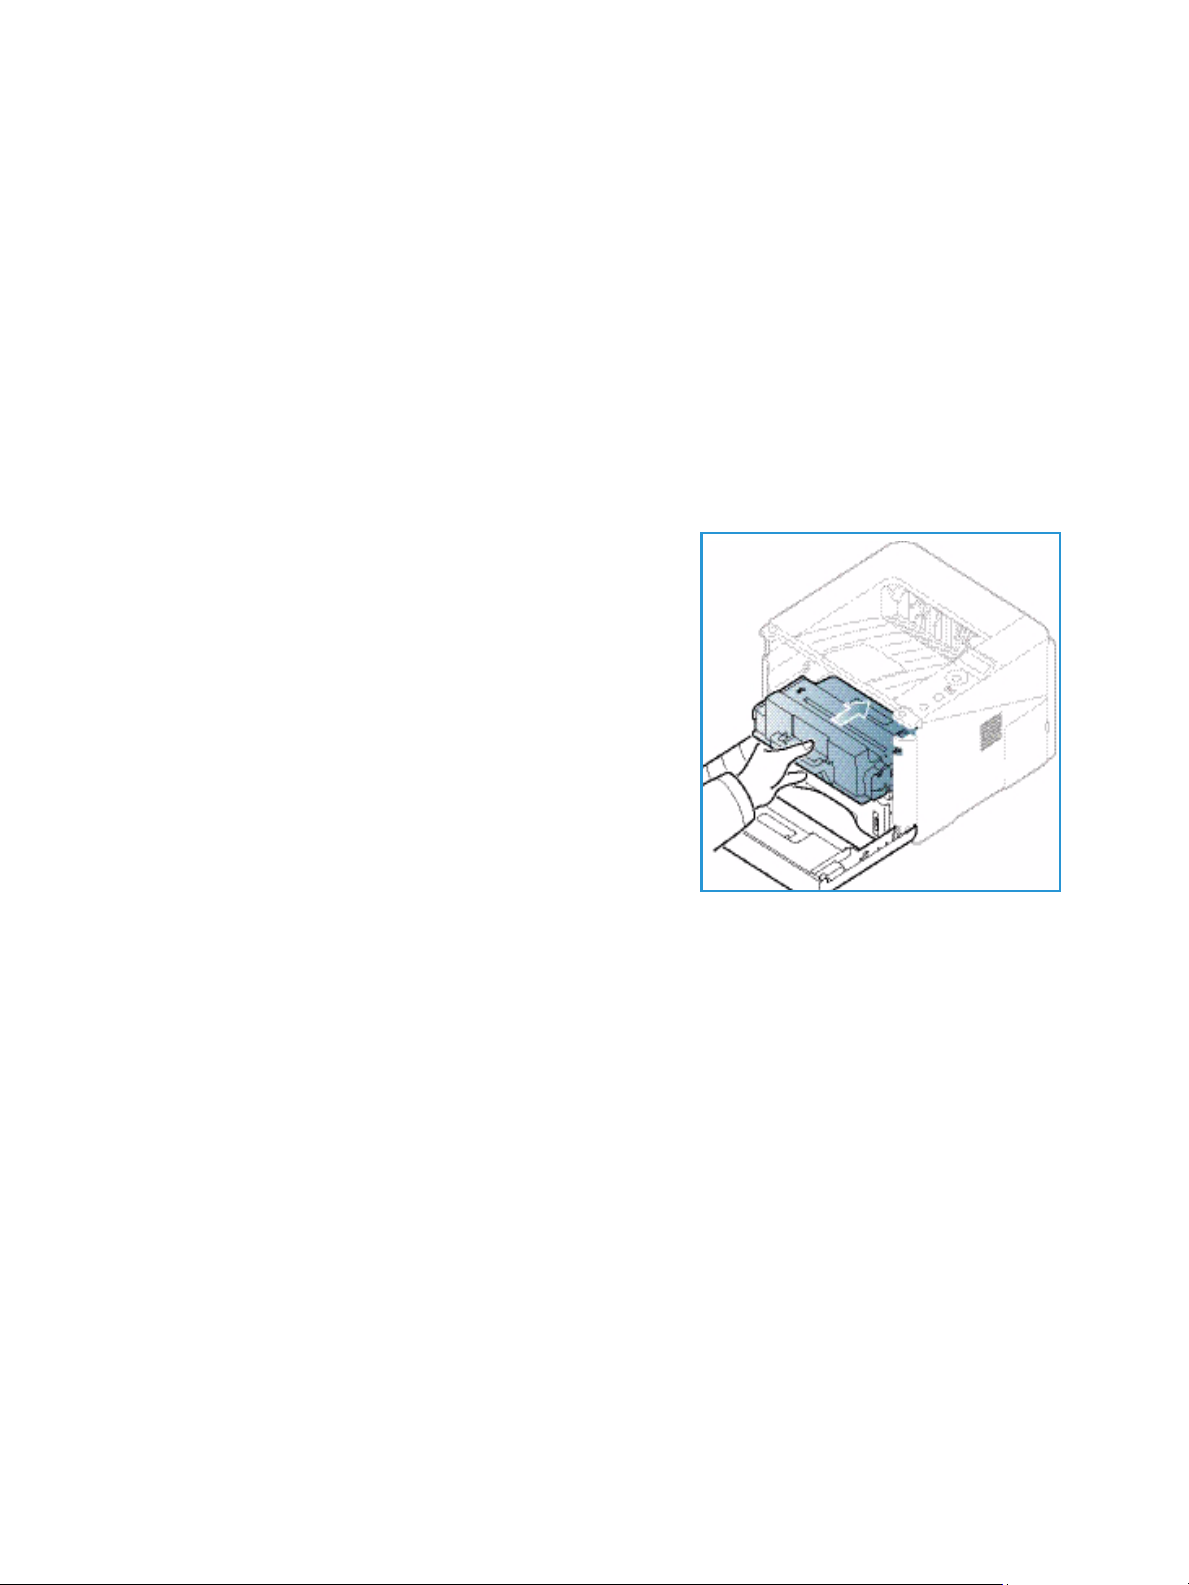
Print Cartridge
To avoid print quality problems resulting from worn parts and
to maintain your machine in top working condition, the print
cartridge will need to be replaced after printing the specified
number of pages or when the life span of the cartridge has
expired.
The machine will display a message when the print cartridge
needs to be replaced. Only replace the cartridge when a
message instructs you to do so or when instructed by a Xerox
representative. To replace the print cartridge, follow the
instructions provided within this guide or with the
consumable.
To re pla c e t h e print cartridge, refer to General Care and
Troubleshooting on page 87. To purchase a new print
cartridge, contact your local Xerox representative or authorized dealer. Supplies can also be ordered
from www.xerox.com, refer to Support on page 64 for further information.
Cleaning Tasks
Performing regular cleaning activities ensures the machine is kept free of dust and debris. The machine
covers and control panel should all be cleaned using a soft lint-free cloth, lightly dampened with water.
Remove any residue with a clean cloth or paper towel.
For further information on maintenance tasks, refer to General Care and Troubleshooting on page 87.
20
Xerox Phaser 3320DN/3320DNI
User Guide
Page 21

Further Assistance
Further Assistance
For any additional help visit our customer web site at www.xerox.com or contact the Xerox Support
Center quoting the machine serial number.
The machine’s serial number is located on the inside of the front door on the machine and is printed on
the configuration report. For further information about locating the serial number, please refer to
Locating the Serial Number on page 116.
Xerox Support Center
If a fault cannot be resolved by following the display instructions, check Error Messages on page 101. If
the difficulty persists, contact the Xerox Support Center. The Xerox Support Center will want to know
the nature of the problem, the machine serial number, the fault code (if any) plus the name and
location of your company.
Documentation
Most answers to your questions will be provided by the documentation that is supplied with your
machine or on the Software and Documentation CD supplied with your machine. Alternatively you can
access the documents from www.xerox.com/support.
• Installation Guide - contains information about installing the machine.
• User Guide (this document) - contains instructions and information about all the features on the
machine.
• System Administration Guide - provides detailed instructions and information about connecting
your machine to the network and installing optional features.
Xerox Phaser 3320DN/3320DNI
User Guide
21
Page 22

Further Assistance
22
Xerox Phaser 3320DN/3320DNI
User Guide
Page 23

The Xerox Phaser 3320DN/DNI produces high quality prints from electronic documents. You can access
the printer from your computer by installing the appropriate printer driver. To access the many printer
drivers which can be used with your machine, refer to the Drivers CD or download the latest versions
from the Xerox website at www.xerox.com.
This chapter includes:
• Printing using Windows on page 24
• Xerox Easy Printer Manager (EPM) on page 45
• Wireless Setting Program (Phaser 3320DNI) on page 46
• SetIP on page 48
• Printing using Macintosh on page 49
• Printing using Linux on page 52
• Printing using Unix on page 54
2
Xerox Phaser 3320DN/DNI
User Guide
23
Page 24
Printing using Windows
Printing using Windows
The following provides an overview of the print procedure and features available when printing using
Windows.
Install Printer Software
You can install the printer software for local printing and network printing. To install the printer
software on the computer, perform the appropriate installation procedure depending on the printer in
use.
A printer driver is software that lets your computer communicate with your printer. The procedure to
install drivers may differ depending on the operating system you are using. All applications should be
closed on your PC before beginning installation.
You can install the printer software for a local, networked or wireless printer using the typical or custom
method. For further information refer to the System Administrator Guide.
Local Printer
A local printer is a printer directly attached to your computer using a printer cable, such as a USB cable.
If your printer is attached to a network, refer to Networked Printer on page 26.
Note: If the “New Hardware Wizard” window appears during the installation procedure, select
Close or Cancel.
1. Make sure that the printer is connected to your computer and powered on.
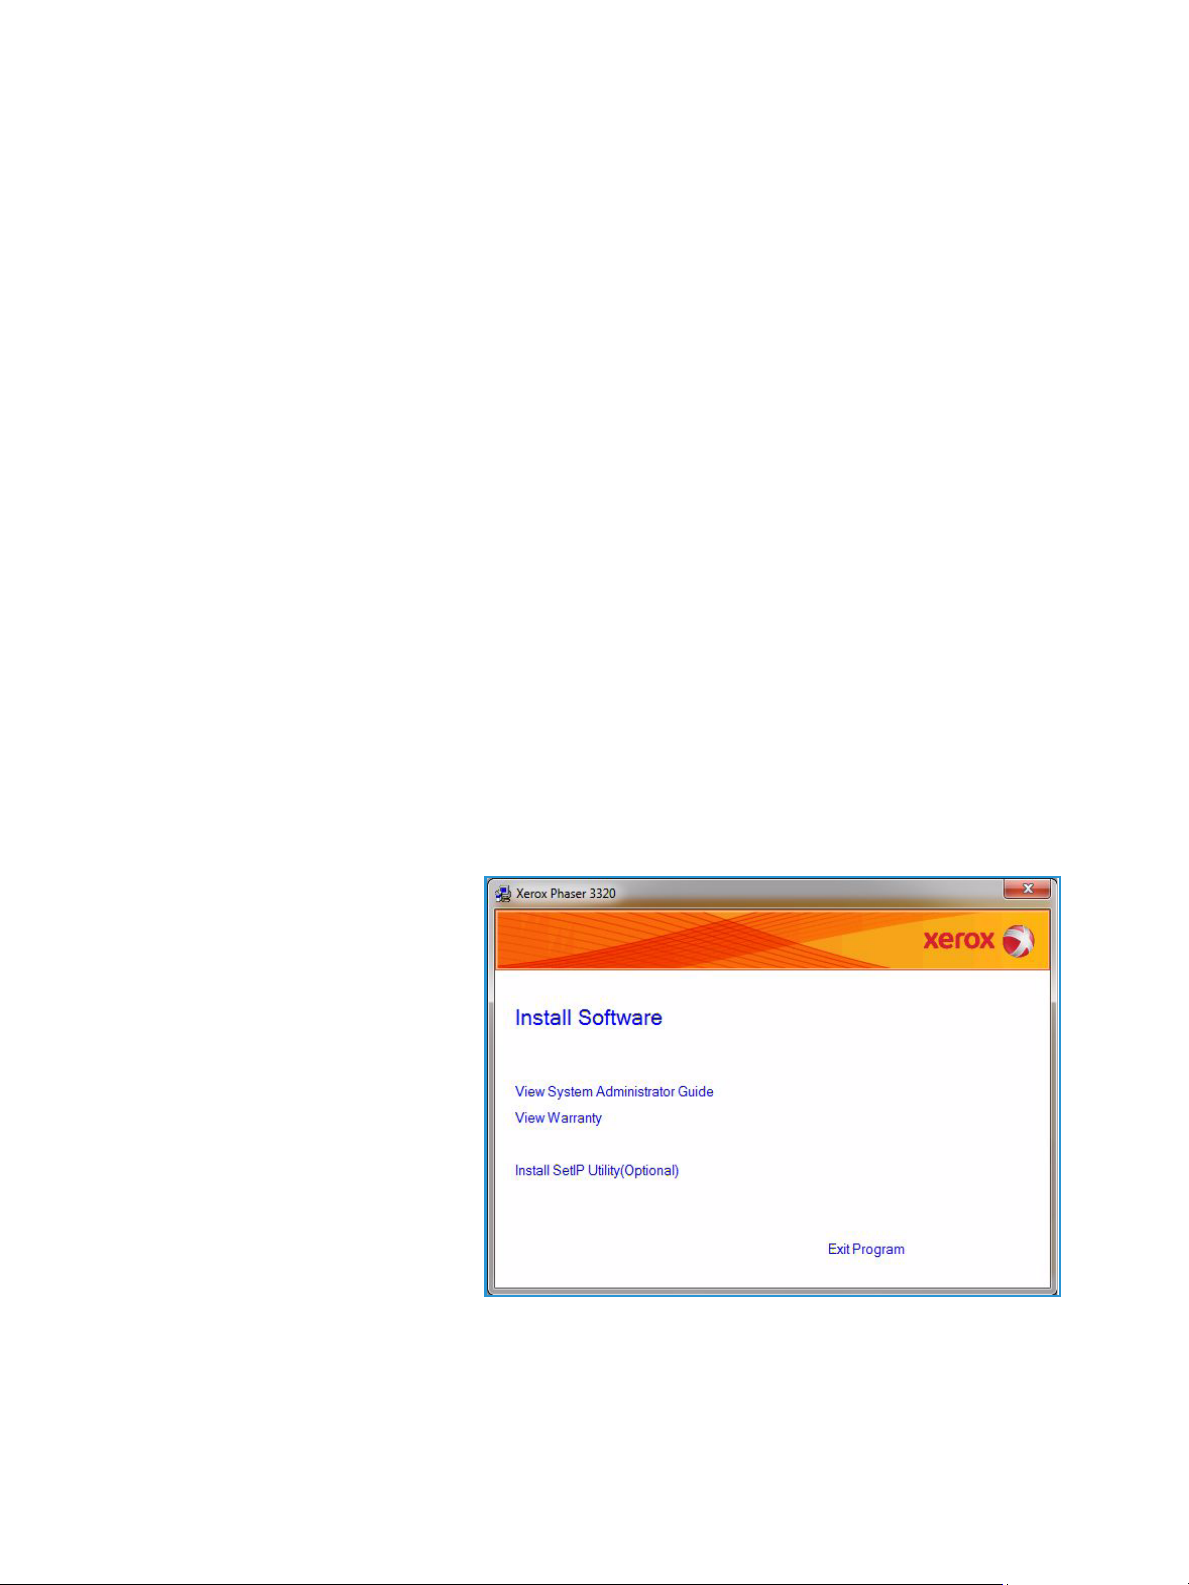
2. Insert the supplied CD-ROM into
your CD-ROM drive. The CD-ROM
should automatically run, and an
installation window appear.
• If the installation window
does not appear, select the
Start button and then Run.
Ty pe X:\Setup.exe,
replacing “X” with the letter
which represents your drive
and select OK.
• If you use Windows Vista,
select Start > All programs
> Accessories > Run, and
type X:\Setup.exe. If the
AutoPlay window appears in
Windows Vista, select Run
Setup.exe in the Install or run program field, and select Continue in the User Account
Control window.
3. Select Install Software.
24
Xerox Phaser 3320DN/DNI
User Guide
Page 25
Printing using Windows
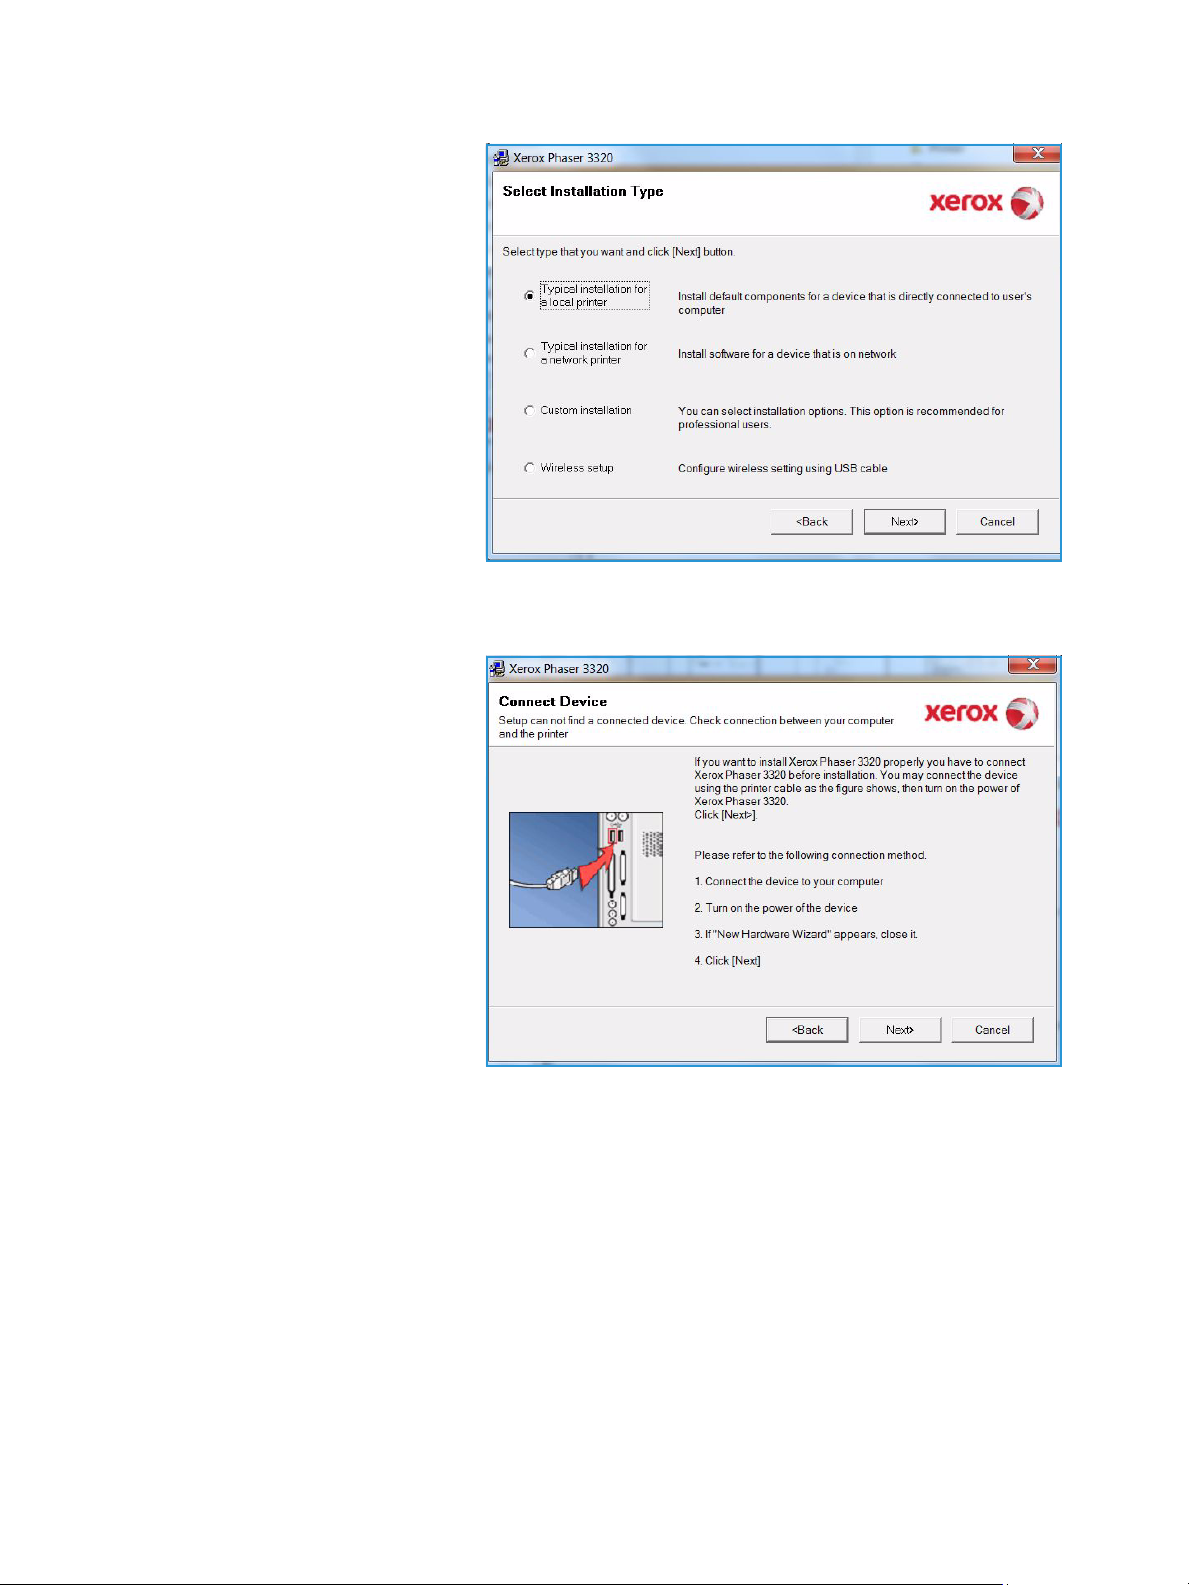
4. Select Typical installation for a
local printer and follow the
wizard instructions to install the
local printer.
If your printer is not already connected to the computer, the Connect Device screen will appear.
After connecting the printer, select Next.
Note: If you don’t want to
connect the printer at this time,
select Next and then No on the
following screen. Then the
installation will start and a test
page will not be printed at the
end of the installation.
Xerox Phaser 3320DN/DNI
User Guide
25
Page 26
Printing using Windows
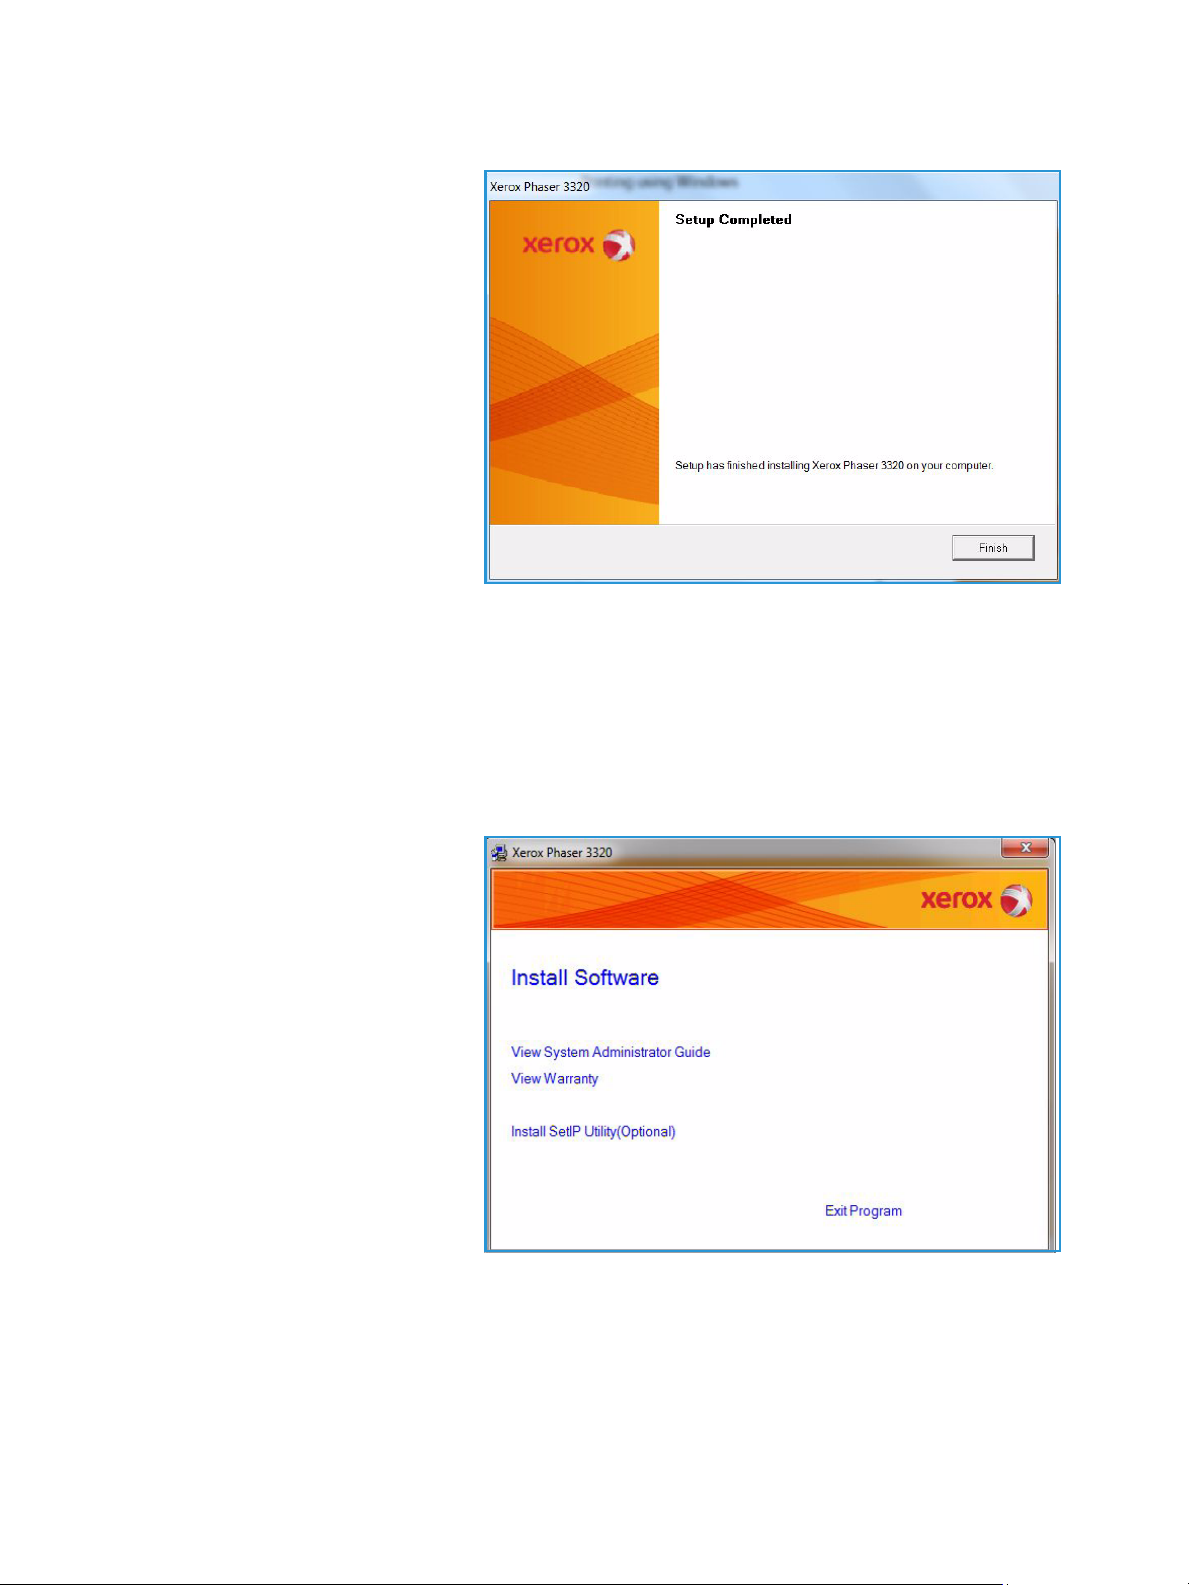
5. After the installation is finished,
select Finish.
If your printer is connected to the
computer, a Tes t Pri nt page will be
printed. If the Te s t Pr i nt operation is
successful, continue on to Print
Procedure on page 34 in this
document. If the print operation
failed, refer to Troubleshooting on
page 93.
Networked Printer
When you connect your printer to a network, you must first configure the TCP/IP settings for the
printer. After you have assigned and verified the TCP/IP settings, you are ready to install the software
on each computer on the network.
1. Make sure that the printer is connected to your network and powered on. For details about
connecting to the network, refer to the System Administrator Guide.
2. Insert the supplied CD-ROM into
your CD-ROM drive.
The CD-ROM should
automatically run, and an
installation window appears.
• If the installation window
does not appear, select the
Start button and then Run.
Ty pe X:\Setup.exe,
replacing “X” with the letter
which represents your drive
and select OK.
• If you use Windows Vista,
select Start > All programs
> Accessories > Run, and
type X:\Setup.exe. If the
AutoPlay window appears in Windows Vista, select Run Setup.exe in the Install or run
program field, and select Continue in the User Account Control window.
3. Select Install Software.
26
Xerox Phaser 3320DN/DNI
User Guide
Page 27
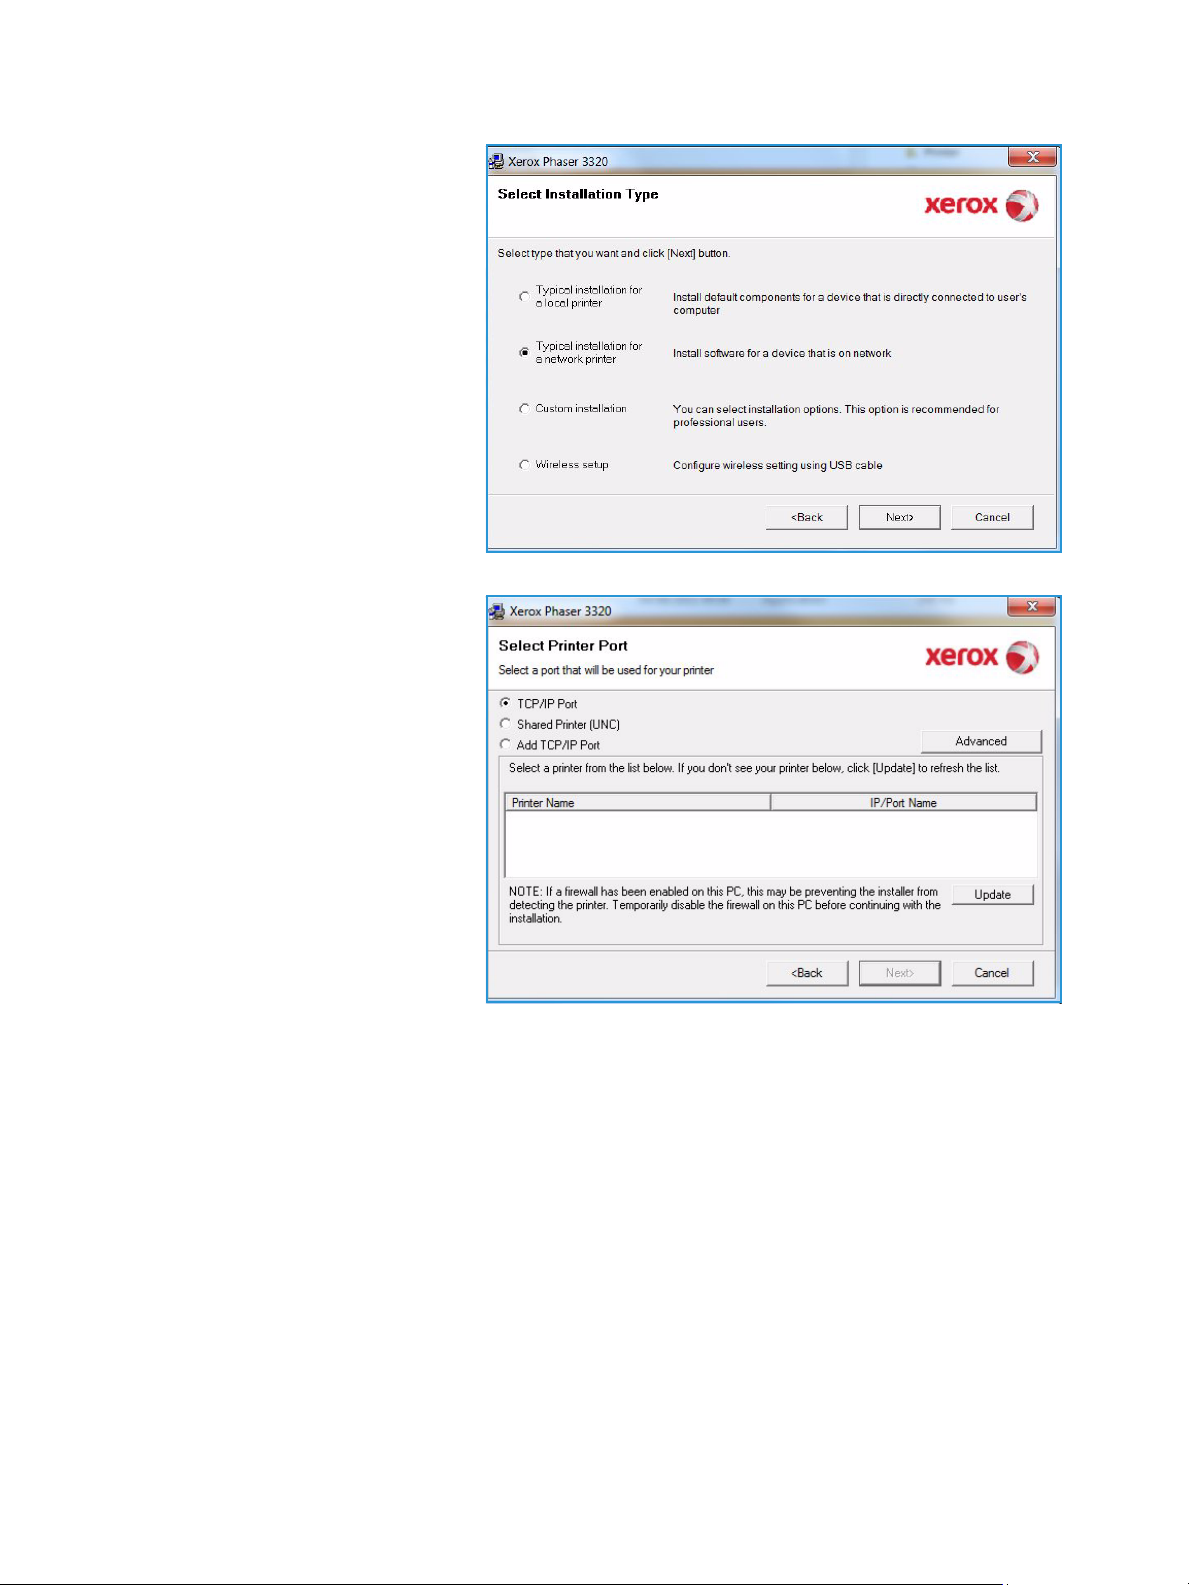
4. Select Typical installation for a
network printer and click Next.
Note: For custom install
instructions, see Custom
Installation on page 29.
5. Select the required Printer Port. If
TCP/IP Port is selected, select
your printer from the list and click
Next. Click Update to refresh the
list.To select a different port go
to the next step, otherwise follow
the wizard instructions to install
the printer.
Printing using Windows
Xerox Phaser 3320DN/DNI
User Guide
27
Page 28
Printing using Windows
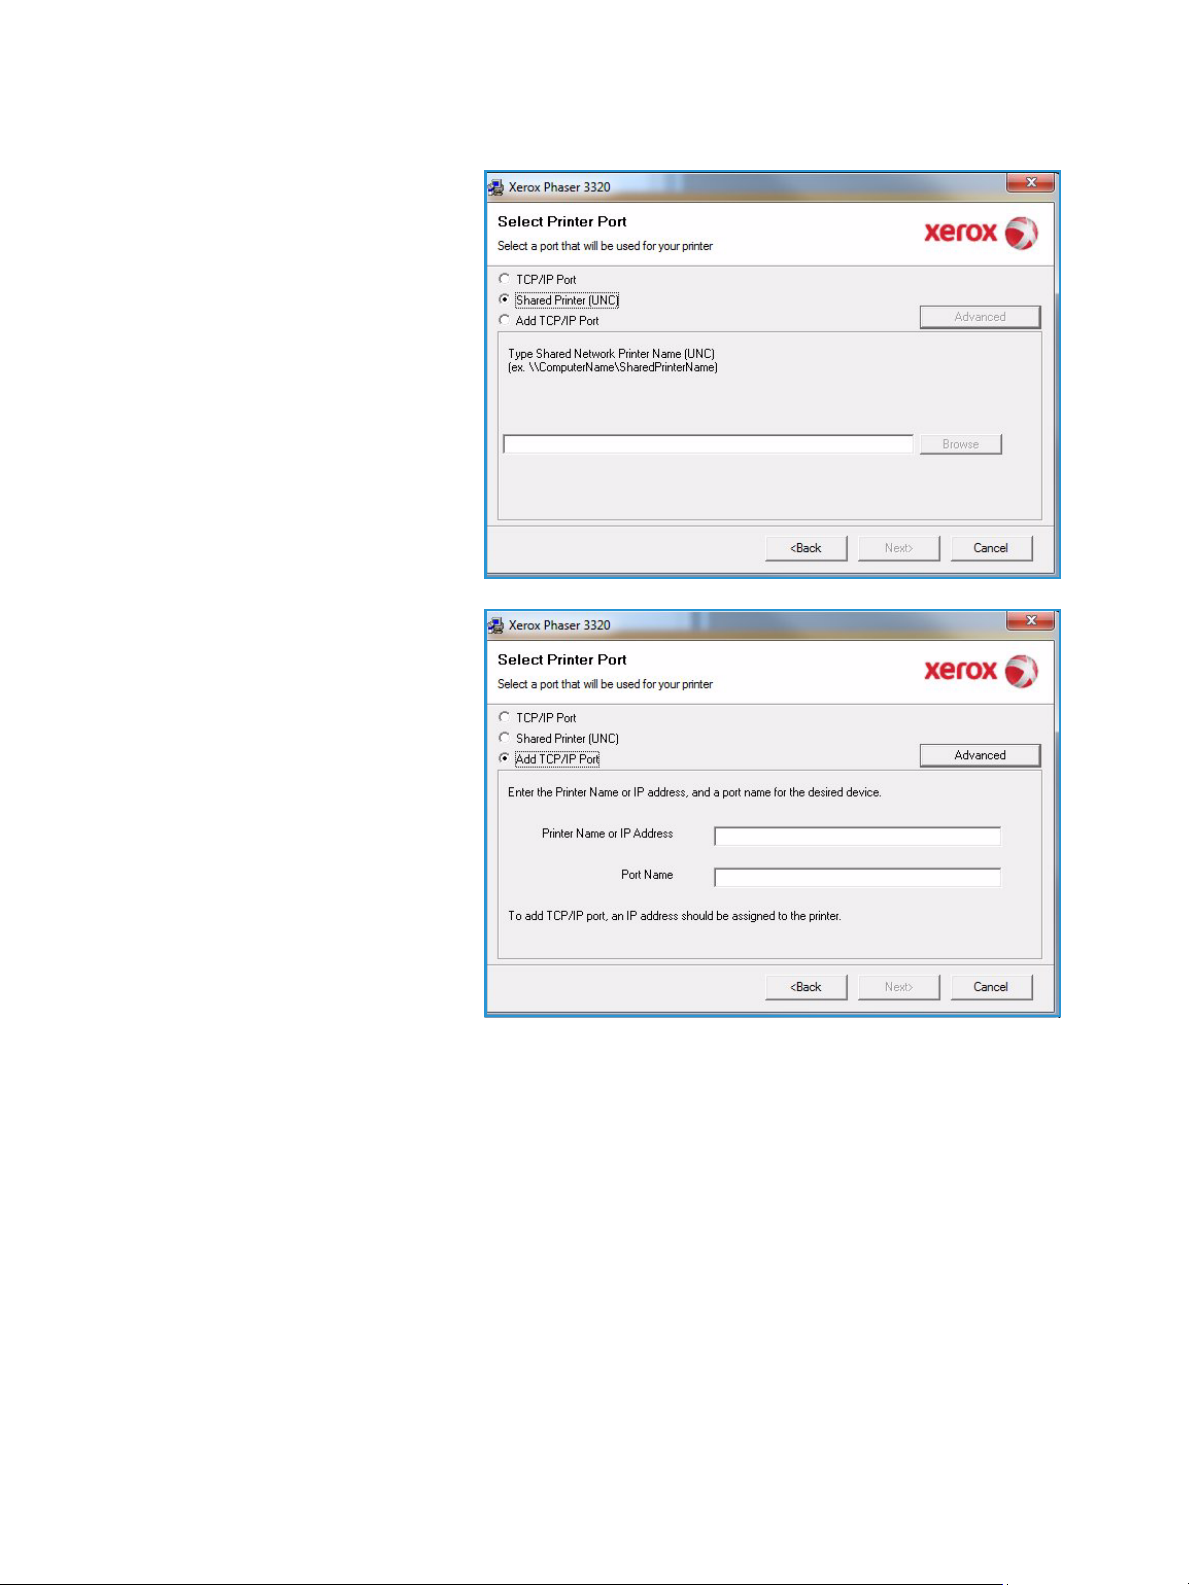
6. Select the required Printer Port. If
Shared Printer (UNC) is selected,
type in the name of the shared
network printer and select
Next.To select a different port go
to the next step, otherwise follow
the wizard instructions to install
the printer.
7. If Add TCP/IP Port is selected,
enter the Printer Name or the
assigned IP address and a port
name for the desired device. Click
Next and follow the wizard
instructions to install the printer.
28
Xerox Phaser 3320DN/DNI
User Guide
Page 29
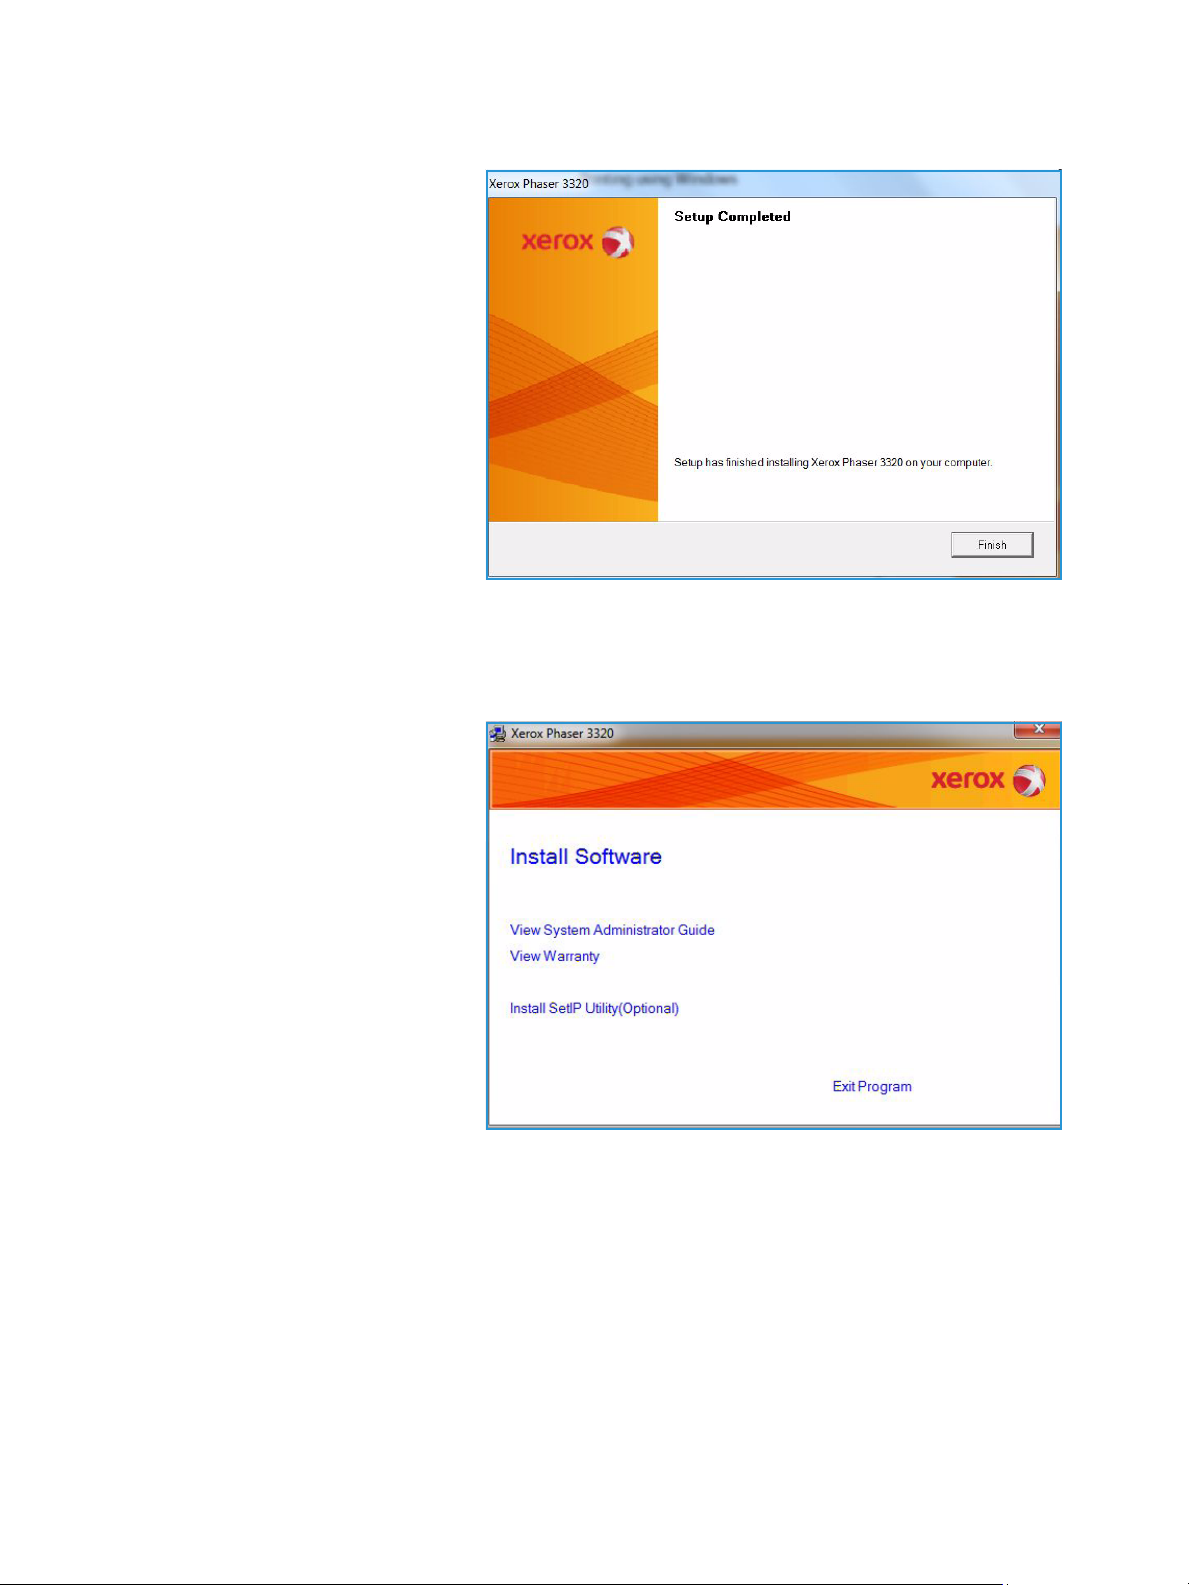
8. After the installation is finished,
select Finish.
If your printer is connected to the
network, a Tes t Pri n t page will be
printed. If the Te s t Pr i nt operation is
successful, continue on to Print
Procedure on page 34 in this
document. If the print operation
failed, refer to Troubleshooting on
page 93.
Custom Installation
Printing using Windows
With the custom installation, you can choose individual components to install.
1. Make sure that the printer is
connected to your computer and
powered on.
2. Insert the supplied CD-ROM into
your CD-ROM drive.The CD-ROM
should automatically run, and an
installation window appears.
• If the installation window
does not appear, select the
Start button and then Run.
Ty pe X:\Setup.exe,
replacing “X” with the letter
which represents your drive
and select OK.
• If you use Windows Vista,
select Start > All programs
> Accessories > Run, and type X:\Setup.exe. If the AutoPlay window appears in Windows
Vista, select Run Setup.exe in the Install or run program field, and select Continue in the
User Account Control window.
3. Select Install Software.
Xerox Phaser 3320DN/DNI
User Guide
29
Page 30
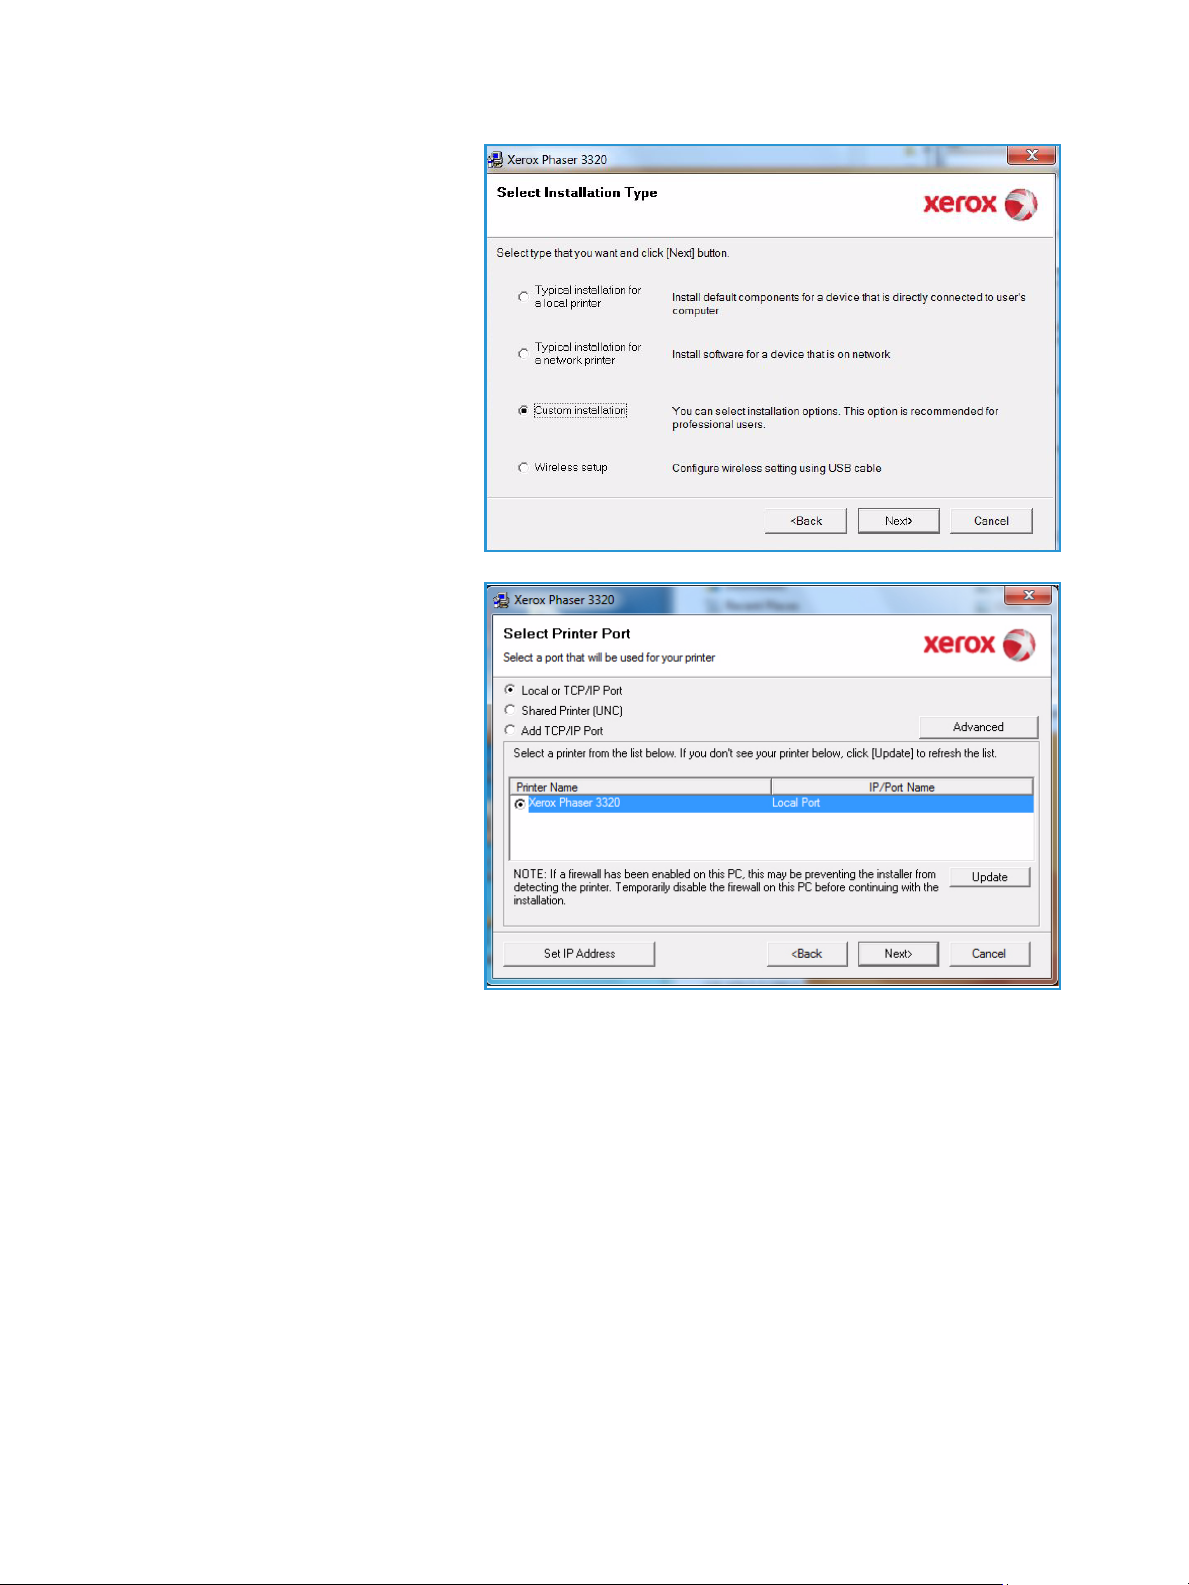
Printing using Windows
4. Select Custom installation.
5. Select Next.
6. Select the desired Printer Port
and follow the instructions to
select your printer or enter your
printer details. Click Next.
Note: If your printer is not
already connected to the
computer, the Connect Device
window will display, refer to the
next step.
30
Xerox Phaser 3320DN/DNI
User Guide
Page 31

7. Connect the printer and select
Next.
If you don't want to connect the
printer at this time, select Next,
and then No on the following
screen. Then the installation will
start and a test page will not be
printed at the end of the
installation.
Note: The installation window
that appears in this User Guide
may differ depending on the
printer and interface in use.
8. Select the components to be
installed and select Next. You
can change the desired
installation folder by selecting
Browse.
9. After the installation is finished,
a window asking you to print a
test page appears. If you choose
to print a test page, select the
checkbox and select Next.
Otherwise, just select Next.
10. If the test page prints out
correctly, select Yes. If not, select
No to reprint it.
Printing using Windows
Xerox Phaser 3320DN/DNI
User Guide
31
Page 32

Printing using Windows
11. Select Finish.
Wireless Printer (Phaser 3320DNI)
When you connect your printer to a network, you must first configure the TCP/IP settings for the
printer. After you have assigned and verified the TCP/IP settings, you are ready to install the software
on each computer on the network.
Note: If you choose a wireless connection for your printer, you cannot use a wired connection at
the same time.
1. Make sure that the printer is connected to your computer with a usb cable and powered on. For
details about connecting to the network, refer to the System Administrator Guide.
2. Insert the supplied CD-ROM into
your CD-ROM drive.
The CD-ROM should
automatically run, and an
installation window appears.
• If the installation window
does not appear, select the
Start button and then Run.
Ty pe X:\Setup.exe,
replacing “X” with the letter
which represents your drive
and select OK.
• If you use Windows Vista,
select Start > All programs
> Accessories > Run, and
type X:\Setup.exe. If the
AutoPlay window appears in Windows Vista, select Run Setup.exe in Install or run program
field, and select Continue in the User Account Control window.
3. Select Install Software.
32
Xerox Phaser 3320DN/DNI
User Guide
Page 33

4. Select Wireless Setup and follow
the wizard instruction to select
and install the printer.
If your printer is not already
connected to the computer, the
Connect Device screen will
appear. After connecting the
printer, select Next and follow
the wizard instruction to install
the printer.
Printing using Windows
5. After the installation is finished,
select Finish.
If your printer is connected to the
network, a Tes t Pri n t page will be
printed. If the Te s t Pr i nt operation is
successful, continue on to Print
Procedure on page 34 in this
document. If the print operation
failed, refer to Troubleshooting on
page 93.
For more information refer to the
System Administrator Guide.
Xerox Phaser 3320DN/DNI
User Guide
33
Page 34

Printing using Windows
Print Procedure
Documents can be printed from your computer using the printer drivers supplied. The printer driver
must be loaded on each PC which uses the machine for printing.
Note: Some options may be unavailable depending on your machine configuration.
1. Select Print in your application.
2. From the Printer: Name drop
down menu, select your machine.
3. Select Properties or Preferences
to make your print selections on
the individual tabs. For more
information refer to the
following:
• Basic Tab on page 35
• Paper Tab on page 38
• Graphics Tab on page 39
• Advanced Tab on page 40
• Earth Smart Tab on page 43
• Xerox Tab on page 44
4. Select OK to confirm your
selections.
5. Select OK to print your document.
34
Xerox Phaser 3320DN/DNI
User Guide
Page 35

Basic Tab
The Basic tab provides selections for
the print mode to use and options to
adjust how the document appears on
the printed page. These options
include orientation settings, quality
settings, layout options and doublesided printing settings.
Note: Some options may be
unavailable depending on your
printer model and configuration.
Print Mode
The Print Mode drop down menu
enables selection of various job types.
Note: Not all job types are
available, depending on your
model and machine
configuration.
Printing using Windows
• Normal: This is the default print
mode and is used for printing
without saving the print file in
memory.
• Sample: Useful when printing more than one copy. Allows you to print one copy first, and the rest
of the copies later when they have been checked.
• Secure: This mode is used for printing confidential documents. A pop-up screen enables you to
enter a job name, user ID and a 4-digit password. At the machine, re-enter the password to release
the job for print.
Printing a Secure Job
At the machine:
1. Select the Menu button on the control panel.
2. Press the down arrow button to scroll to Job Manage. and press OK.
3. Press the down arrow button to scroll to Stored Job and press OK.
4. Press the down arrow button to scroll to your job and press OK to select the job.
5. Enter your 4 digit pin by pressing the up arrow button to select the required number, then select
the right arrow button to get to the second number in your pin.
6. Continue pressing the up arrow to select the number and the right arrow to move across until you
have entered all 4 numbers.
7. Select OK.
8. The Print option appears. If you select the down arrow you have the option to Delete the job if
you wish.
Xerox Phaser 3320DN/DNI
User Guide
35
Page 36

Printing using Windows
9. To print the job, select Print and press OK.
10. The Copies menu appears. Press the up arrow to enter the required number of copies and press
OK.
11. The Print menu appears with No as the option - press the down arrow to select Ye s.
12. Press OK. Your document prints.
Orientation
Orientation allows you to select the direction in which information is
printed on a page.
• Portrait: Prints across the width of the page, letter style.
• Landscape: Prints across the length of the page, spreadsheet
style.
• Rotate 180 Degrees: This allows you to rotate the page 180
degrees.
Layout Options
Layout Options allow you to select a different layout for your output and a page border.
Type:
You can select the number of pages to print on a single sheet of paper. To print more than one page
per sheet, the pages will be reduced in size and arranged in the order you specify.
• Single Page Per Side: Use this option if the layout does not require changing.
• Multiple Pages Per Side: Use this option to print multiple pages
on each page. You can print up to 16 pages on one sheet. Select
the number of images required on each side, the page order and
if borders are required.
• Poster Printing: Use this option to divide a single-page
document onto 4, 9 or 16 segments. Each segment will be
printed on a single sheet of paper for the purpose of pasting the
sheets together to form one poster-size document. Select Poster
2x2 for 4 pages, Poster 3x3 for 9 pages or Poster 4x4 for 16
pages. Then choose the overlap amount in mm or inches.
36
Xerox Phaser 3320DN/DNI
User Guide
Page 37

Printing using Windows
• Booklet Printing: This allows you to print your document on both
sides of the paper and arrange the pages so that the paper can
be folded in half after printing to produce a booklet.
Page Border
You can select to have a border printed around each page. Various line styles are available from the
drop down menu, together with corner marks or crop marks.
2 sided Printing
You can print on both sides of a sheet of paper. Before printing, decide how you want your document
oriented.
• Printer Default: If you select this option, this feature is determined by the settings made on the
control panel of the printer.
• None: The document is printed single-sided.
• Long Edge: This is the conventional layout used in book binding.
• Short Edge: This is the type often used with calendars.
• Reverse Double-Sided Printing: The document is printed two sided and the second side images
are rotated 180 degrees.
Xerox Phaser 3320DN/DNI
User Guide
37
Page 38

Printing using Windows
Paper Tab
Use the Paper tab options to set the
basic paper handling specifications
when you access the printer
properties.
Copies
This allows you to choose the number
of copies to be printed. You can select
1 to 999 copies.
Paper Options
• Size: This allows you to set the
size of paper required for
printing. If the required size is
not listed in the Size box, select
Edit. When the Custom Paper
Setting window appears, set the
paper size and select OK. The
setting appears in the list so that
you can select it.
• Source: Use this option to select
the paper tray required. Use the bypass tray when printing on special materials like envelopes and
transparencies. If the paper source is set to Auto Select, the printer automatically selects the
paper source based on the requested size.
• Type: Set Type to correspond to the paper loaded in the tray selected. This will provide the best
quality printout. If printing envelopes, ensure the Envelope tab is selected and the envelopes
loaded into the bypass tray.
• Advanced: The advanced paper options allow you to select a different paper source for the first
page of your document. From the drop-down menu, select the paper tray containing the paper
required.
Scaling Options
This allows you to automatically or manually scale your print job on a page.
• Fit to Page: This allows you to scale your print job to any selected paper size, regardless of the
digital document size.
• Percentage: Use this option to change the contents of a page to appear larger or smaller on the
printed page. Enter the scaling rate in the Percentage input box.
38
Xerox Phaser 3320DN/DNI
User Guide
Page 39

Printing using Windows
Graphics Tab
Use the following options to adjust
the print quality for your specific
printing needs.
Quality
Use this option to select the image
quality setting required.
• Best: Use this option if printing
graphics or photographs.
• Normal: Use this option for text
or line art.
Font/Text
• Darken Text: Use this option to
select the level of darkness to
apply to the text in your
document.
• All Text Black: Select this
checkbox to have all text in your
document print in solid black,
regardless of the color it appears
on the screen.
• Advanced: Use this option to set font options. True Type fonts can be downloaded as Outline or
Bitmap Images or printed as Graphics. Select the Use Printer Fonts option if the fonts do not
require downloading and the printer fonts should be used.
Ton er S ave
Selecting this option extends the life of your print cartridge and reduces your cost per page without a
significant reduction in print quality.
Xerox Phaser 3320DN/DNI
User Guide
39
Page 40

Printing using Windows
Advanced Tab
You ca n s elec t Advanced output
options for your document, such as
Watermarks or Overlay Text.
40
Xerox Phaser 3320DN/DNI
User Guide
Page 41

Printing using Windows
Watermark.
This option allows you to print text
over an existing document. There are
several predefined watermarks that
come with the printer which can be
modified, or you can add new ones to
the list.
Using an Existing Watermark
Select the required watermark from
the Watermark drop-down list. You
will see the selected watermark in the
preview image.
Creating a Watermark
1. Select Edit from the Watermark
drop-down list. The Edit
Watermark window appears.
2. Enter a text message in the
Watermark Message box. You
can enter up to 40 characters.
The message displays in the
preview window. When the First Page Only box is checked, the watermark prints on the first page
only.
3. Select the watermark options. You can select the font name, style, size or shade from the Font
Attributes section and set the angle of the watermark from the Message Angle section.
4. Select Add to add the new watermark to the list.
5. When you have finished editing, select OK.
Editing a Watermark
1. Select Edit from the Watermark drop-down list. The Edit Watermark window appears.
2. Select the watermark you want to edit from the Current Watermarks list and change the
watermark message options.
3. Select Update to save the changes.
4. When you have finished editing, select OK.
Deleting a Watermark
1. Select Edit from the Watermark drop-down list. The Edit Watermark window appears.
2. Select the watermark you want to delete from the Current Watermarks list and select Delete.
3. Select OK.
Xerox Phaser 3320DN/DNI
User Guide
41
Page 42

Printing using Windows
Overlay
An Overlay is text and/or images stored on the computer hard disk drive as a special file format that
can be printed on any document. Overlays are often used to take the place of preprinted forms and
letterhead paper.
Note: This option is only available when you use the PCL6 Printer Driver.
Creating a New Page Overlay
To use a page overlay, you must first create one containing your logo or another image.
1. Create or open a document containing text or an image for use in a new page overlay. Position the
items exactly as you want them to appear when printed as an overlay.
2. Select Edit from the Overlay drop-down list. The Edit Overlay window appears.
3. Select Create and type a name in the File name box. Select the destination path, if necessary.
4. Select Save. The name appears in the Overlay List box.
5. Select OK.
Note: The overlay document size must be the same as the documents you print with the overlay.
Do not create an overlay with a watermark.
6. Select OK on the Advanced tab page.
7. Select OK in the main Print window.
8. An Are you Sure? message displays. Select Ye s to confirm.
Using a Page Overlay
1. Select the required overlay from the Overlay drop-down list box.
If the overlay file you want does not appear in the overlay list, select the Edit button and Load
Overlay, and select the Overlay file.
If you have stored the overlay file you want to use in an external source, you can also load the file
when you access the Load Overlay window.
After you select the file, select Open. The file appears in the Overlay List box and is available for
printing. Select the overlay from the Overlay List box.
2. If necessary, select Confirm Page Overlay When Printing. If this box is checked, a message
window appears each time you submit a document for printing, asking you to confirm your wish to
print an overlay on your document.
If this box is not checked and an overlay has been selected, the overlay automatically prints with
your document.
3. Select OK.
Deleting a Page Overlay
1. Select Edit from the Overlay drop-down list. The Edit Overlay window appears.
2. Select the Overlay you want to delete from the
Overlay List box.
3. Select Delete Overlay. When a confirming message window appears, select Yes.
4. Select OK.
42
Xerox Phaser 3320DN/DNI
User Guide
Page 43

Printing using Windows
Output Options
Select the required Print order from the drop-down list box:
• Normal: All pages are printed.
• Reverse All Pages: Your printer prints all pages from the last page to the first page.
• Print Odd Pages: Your printer prints only the odd numbered pages of the document.
• Print Even Pages: Your printer prints only the even numbered pages of the document.
Tick the Skip Blank Pages checkbox if you do not want blank pages to be printed.
To add a binding margin, tick the Manual Margin checkbox and select Details to select the margin
position and width.
Earth Smart Tab
The Earth Smart tab provides options
to decrease the amount of energy
and paper used in the printing process
and displays a visual representation
of the savings made.
Type
The Type drop-down list is used to
select the main Earth Smart option
for the printer.
• None: No energy or paper saving
options are automatically
selected.
• Earth Smart Printing: When this
option is selected, 2 Sided
Printing, Layout, Skip Blank
Pages and Ton er S a ve can be
customized to suit requirements.
Printer Default. This option
automatically selects the printer default settings.
Result Simulator
This area of the Earth Smart tab shows a visual representation of the estimated energy and paper
savings based on the selections made.
Xerox Phaser 3320DN/DNI
User Guide
43
Page 44

Printing using Windows
Xerox Tab
This tab provides version and
copyright information as well as links
to drivers and downloads, supplies
ordering and the Xerox website.
44
Xerox Phaser 3320DN/DNI
User Guide
Page 45

Xerox Easy Printer Manager (EPM)
Xerox Easy Printer Manager (EPM)
Xerox Easy Printer Manager is a Windows-based application that combines Xerox machine settings
into one location. Xerox Easy Printer Manager conveniently combines access to device settings,
printing environments and the launch of applications such as Xerox CentreWare Internet Services into
one location. All of these features provide a gateway to conveniently use Xerox devices.
For information about using the Easy Printer Manager, refer to the Xerox Phaser 3320DN/DNI Utilities
Guide available on Xerox.com.
Xerox Phaser 3320DN/DNI
User Guide
45
Page 46

Wireless Setting Program (Phaser 3320DNI)
Wireless Setting Program (Phaser 3320DNI)
When installing the Phaser 3320DNI you can use the Wireless Setting program that was
automatically installed with the printer driver to configure the wireless settings.
Note: If you choose a wireless connection for your printer, you cannot use a wired connection at
the same time.
To open the program:
• Select Start > Programs or All Programs > Xerox Printers > Xerox Phaser 3320DNI > Wireless
Setting Program
1. Connect the machine to your
computer using the USB cable
Note: During installation, the
printer needs to be temporarily
connected using the USB cable.
2. Select Next
46
Xerox Phaser 3320DN/DNI
User Guide
Page 47

3. Once the machine is connected
to the computer with the USB
cable, the program searches for
WLAN data.
Note: It may be necessary to
select the program again before
this screen appears.
Wireless Setting Program (Phaser 3320DNI)
4. When the search is complete, the
wireless Network Setting
Information is displayed.
5. If you want to configure the
settings, select Next.
Xerox Phaser 3320DN/DNI
User Guide
47
Page 48

SetIP
SetIP
The SetIP program is a utility program allowing you to select a network interface and manually
configure the addresses for use with the TCP/IP protocol. This program is on the software CD that
comes with your printer.
For information on using the SetIP program, refer to refer to the Xerox Phaser 3320DN/DNI Utilities
Guide available on Xerox.com.
48
Xerox Phaser 3320DN/DNI
User Guide
Page 49

Printing using Macintosh
Printing using Macintosh
This section explains how to print using a Macintosh. You need to set the print environment before
printing. Refer to the System Administrator Guide.
Smart Panel is a program that monitors and informs you of the machine’s status, and allows you to
customize the machine’s settings. Smart Panel is installed automatically when you install the machine
software.
Printing a Document
When you print with a Macintosh, you need to check the printer driver setting in each application you
use. Follow the steps below to print from a Macintosh.
1. Open the document you want to print.
2. Open the File menu and select Page Setup (Document Setup in some applications).
3. Choose your paper size, orientation, scaling and other options. Make sure that your machine is
selected and select OK.
4. Open the File menu and select Print.
5. Choose the number of copies you want and indicate which pages you want to print.
6. Select Print.
Changing Printer Settings
You can use advanced printing features provided by your machine.
Open an application and select Print from the File menu. The machine name, which appears in the
printer properties window may differ depending on the machine in use. Except for the name, the
composition of the printer properties window is similar to the following.
Note: The setting options may differ depending on the printer and the Macintosh OS version.
Layout
The Layout tab provides options to adjust how the document appears on the printed page. You can
print multiple pages on one sheet of paper.
Graphics
The Graphics tab provides options for selecting Resolution. Select Graphics from the drop-down list
under Orientation to access the graphic features.
Resolution
This option allows you to select the printing resolution. The higher the setting, the sharper the clarity of
printed characters and graphics. The higher setting also may increase the time it takes to print a
document.
Xerox Phaser 3320DN/DNI
User Guide
49
Page 50

Printing using Macintosh
Paper
Set Paper Type to correspond to the paper loaded in the tray from which you want to print. This will let
you get the best quality printout. If you load a different type of print material, select the corresponding
paper type.
Printer Features
The Printer Features tab provides Reverse Duplex Printing. Select Printer Features from the dropdown list under Orientation to access the following features.
• Reverse Duplex Printing: The document is printed 2 sided and the second side images are rotated
180 degrees.
Toner Save Mode
Selecting this option extends the life of your print cartridge and reduces your cost per page without a
significant reduction in print quality.
• On: Select this option to allow the printer to use less toner on each page.
• Off: If you do not need to save toner when printing a document, select this option.
Printing Multiple Pages on one Sheet
You can print more than one page on a single sheet of paper. This feature provides a cost-effective way
to print draft pages.
1. Open an application, and select Print from the File menu.
2. Select Layout from the drop-down list under Orientation. In the Pages per Sheet drop-down list,
select the number of pages you want to print on one sheet of paper.
3. Select the other options you want to use.
4. Select Print. The machine prints the selected number of pages you want to print on one sheet of
paper.
Two Sided Printing
You can print on both sides of the paper. Before printing in the duplex mode, decide on which edge you
will be binding your finished document.
1. From your Macintosh application, select Print from the File menu.
2. Select Layout from the drop-down list under Orientation.
3. Select a binding orientation from the Two Sided Printing option:
• Long-Edge Binding: This option is the conventional layout used in book binding.
• Short-Edge Binding: This option is the type often used with calendars.
4. Select the other options you want to use and select Print.
50
Xerox Phaser 3320DN/DNI
User Guide
Page 51

Printing using Macintosh
Using Smart Panel
If an error occurs while operating, you can check the error from the Smart Panel. You can also launch
Smart Panel manually:
• For Mac OS 10.5: Select Print & Fax from System Preferences > Open Printer Queue... of a printer >
Utility.
• For Mac OS 10.6: Select Print & Fax from System Preferences > Open Printer Queue... of a printer >
Printer Setup > Utility > Open Printer Utility.
Xerox Phaser 3320DN/DNI
User Guide
51
Page 52

Printing using Linux
Printing using Linux
Printing from Applications
There are a lot of Linux applications that allow you to print using Common UNIX Printing System
(CUPS). You can print on your machine from any such application.
1. Open an application, and select Print from the File menu.
2. Select Print directly using lpr.
3. In the LPR GUI window, select the machine from the printer list and select Properties.
4. Change the print job properties using the following four tabs displayed at the top of the window.
• General: This option allows you to change the paper size, the paper type, and the orientation
of the documents. It enables the duplex feature, adds start and end banners, and changes
the number of pages per sheet.
• Text: This option allows you to specify the page margins and set the text options, such as
spacing or columns.
• Graphics: This option allows you to set image options that are used when printing image
files, such as color options, image size, or image position.
• Advanced: This option allows you to set the print resolution, paper source, and destination.
5. Select Apply to apply the changes and close the Properties window.
6. Select OK in the LPR GUI window to start printing.
The Printing window appears, allowing you to monitor the status of your print job.
Printing Files
You can print many different file types on your machine using the standard CUPS utility, directly from
the command line interface. However, the drivers package replaces the standard lpr tool with a much
more user-friendly LPR GUI program.
To print any document file:
1. Type lpr <file_name> from the Linux shell command line and press Enter. The LPR GUI window
appears.
2. When you type only lpr and press Enter, the Select file(s) to print window appears first. Just
select any files you want to print and select Open.
3. In the LPR GUI window, select your machine from the list, and change the print job properties.
4. Select OK to start printing.
Configuring Printer Properties
Using the Printer Properties window provided by the Printers configuration, you can change the
various properties for your machine as a printer.
1. Open the Unified Driver Configurator.
If necessary, switch to Printers configuration.
2. Select your machine on the available printers list and select Properties.
52
Xerox Phaser 3320DN/DNI
User Guide
Page 53

Printing using Linux
3. The Printer Properties window opens.
The following five tabs display at the top of the window:
• General: This option allows you to change the printer location and name. The name entered
in this tab displays on the printer list in Printers configuration.
• Connection: This option allows you to view or select another port. If you change the machine
port from USB to parallel or vice versa while in use, you must re-configure the machine port in
this tab.
• Driver: This option allows you to view or select another machine driver. By selecting Options,
you can set the default device options.
• Jobs: This option shows the list of Print jobs. Select Cancel job to cancel the selected job and
select the Show completed jobs check box to see previous jobs on the job list.
• Classes: This option shows the class that your machine is in. Select Add to Class to add your
machine to a specific class or select Remove from Class to remove the machine from the
selected class.
4. Select OK to apply the changes and close the Printer Properties window.
Xerox Phaser 3320DN/DNI
User Guide
53
Page 54

Printing using Unix
Printing using Unix
Printing Files
After installing the printer, choose any of the image, text, PS to print.
1. Execute “printui <file_name_to_print>” command. For example, if you are printing “document1”
use printui document1 command.
This will open the UNIX Printer Driver Print Job Manager in which the user can select various print
options.
2. Select a printer that has already been added.
3. Select the printing options from the window such as Page Selection.
4. Select how many copies are needed in Number of Copies.
5. Press OK to start the print job.
Configuring Printer Properties
The UNIX printer driver Print Job Manager allows you to configure various print options using the
printer Properties option. The following hot keys may also be used: H for Help, O for OK, A for Apply,
and C for Cancel.
General Tab
• Paper Size: Set the paper size as A4, Letter, or other paper sizes, according to your requirements.
• Paper Type: Choose the type of the paper. Options available in the list box are Printer Default,
Plain, and Thick.
• Paper Source: Select from which tray the paper is used. By default, it is Auto Selection.
• Orientation: Select the direction in which information is printed on a page.
• Duplex: Print on both sides of paper to save paper.
• Multiple pages: Print several pages on one side of the paper.
• Page Border: Choose any of the border styles (e.g., Single-line hairline, Double-line hairline)
Image Tab
In this tab, you can change the brightness, resolution, or image position of your document.
Tex t Ta b
Use this tab to set the character margin, line space, or the columns of the actual print output.
Margins Tab
• Use Margins: Set the margins for the document. By default, margins are not enabled. The user
can change the margin settings by changing the values in the respective fields. Set by default,
these values depend on the page size selected.
54
Xerox Phaser 3320DN/DNI
User Guide
Page 55

Printing using Unix
• Unit: Change the units to points, inches, or centimeters.
Printer-Specific Settings Tab
Select various options in the JCL and General frames to customize various settings. These options are
specific to the printer and depend on the PPD file.
Xerox Phaser 3320DN/DNI
User Guide
55
Page 56

Printing using Unix
56
Xerox Phaser 3320DN/DNI
User Guide
Page 57

CentreWare Internet
3
Services
CentreWare Internet Services uses the embedded HTTP Server on the machine. This allows you to communicate with your machine through a web browser. Entering the IP Address of the machine as the URL (Universal Resource Locator) in the browser provides direct access to the machine over the internet or intranet. For detailed setup information refer to the System Administrator Guide.
This chapter includes:
• Using CentreWare Internet Services on page 58
• Status on page 59
• Jobs on page 60
• Print on page 62
• Properties on page 63
• Support on page 64
Xerox Phaser 3320DN/3320DNI
User Guide
57
Page 58

Using CentreWare Internet Services
Using CentreWare Internet Services
Prior to connecting to CentreWare Internet Services the machine must be connected to the network
either physically (all models) or wirelessly (Phaser 3320DNI only) and have TCP/IP and HTTP enabled.
An operational workstation with TCP/IP Internet or Intranet accessibility is also required.
Note: Some options may be unavailable depending on your machine configuration.
To access CentreWare Internet Services:
1. Open the web browser from your workstation.
2. In the URL field, enter http:// followed by the IP Address of the machine. For example: if the IP
Address is 192.168.100.100, enter the following into the URL field: http://192.168.100.100
3. Press Enter to view the Home page.
The CentreWare Internet Services options for your machine are displayed.
Note: To find the IP Address of your machine, print a configuration report. For instructions, refer
to Information on page 77.
Home Page
The Internet Services Home page
provides information about your
machine and access to the
CentreWare Internet Services options.
The Home Page provides information
about the machine name and address
details. Use the Refresh Status
button to update the machine status
information.
The Earth Smart option available at
the top of the screen enables this
feature to be turned On or Off.
Note: You must be logged in as Administrator to enable this feature.
If a different language is required, select the language drop-down menu and change to the language
required.
Use the Index option to navigate to specific topics.
Note: Some options may be unavailable depending on your machine configuration.
58
Xerox Phaser 3320DN/3320DNI
User Guide
Page 59

Status
Status
Use this option to review status information about your machine.
The Status page allows you to view
any active alerts being displayed by
the machine, and see the status of
the print cartridge.
The Usage Counters page allows you
to view the number of impressions
made by the machine. This page also
displays the machine serial number
and in the Current Settings menu,
information about the machine setup and network information can also be viewed.
The Print Information page allows you to print the configuration report and other documents about
the machine.
Xerox Phaser 3320DN/3320DNI
User Guide
59
Page 60

Jobs
Jobs
The Job Management page provides
information about active, stored and
secure jobs.
Click the links in the left hand menu to
see your jobs. The options are:
•Active Jobs
•Stored Print
• Secure Job
Stored Print allows you to save your
job on the device to print at a later date.
To use the Stored Print feature:
1. Select a document to store and select file > print.
2. Select the 3320 printer driver and click Properties.
3. Select Sample from the Print Mode menu.
Print your document:
1. At the Internet Services Jobs screen select Stored Print.
2. Select your job. To print your document select Print. Your document will be printed at the device.
To delete your document select Delete.
You can also print your document at the machine:
1. Select the Menu button on the control panel.
2. Press the down arrow to scroll to Job Manage. and press OK.
3. Select the down arrow to scroll to Stored Job and select OK.
4. Select your document and press OK to print.
To use the Secure Print feature:
1. Open a document to print and select file > print.
2. Select the 3320 printer driver and click Properties.
3. Select Secure from the Print Mode menu and enter a 4-digit pin number for your job. Select OK.
4. At the Internet Services Jobs page, select Secure Print.
5. Select your job in the list and click Print.
6. Enter your 4-digit pin number in the Password box and Confirm Password box to release your job.
You can also print your secure document at the machine:
1. Select the Menu button on the control panel.
2. Press the down arrow to scroll to Job Manage. and press OK.
60
Xerox Phaser 3320DN/3320DNI
User Guide
Page 61

3. Select the down arrow to scroll to Stored Job and select OK.
4. Select your document and press OK.
5. Enter your 4-digit password and press OK.
6. Select Print and press OK to print your document.
Jobs
Xerox Phaser 3320DN/3320DNI
User Guide
61
Page 62

Print
The Print option enables you to send
a print ready job to the printer over
the internet. You can send the job
from your desktop or from a remote
location.
File Download
Print-ready documents can be quickly
and easily submitted for printing
using the File Download page. A printready document is a file that has
been formatted and saved for
printing from the application that
created it, or the Print to File check box was checked in the printer driver screen.
The following file formats can be printed from the Job Submission page:
•PCL
• PostScript®
•Plain Text
•PRN files
1. At your Workstation, open the web browser and enter the IP Address of the machine in the
Address Bar.
2. Press Enter.
3. Select the Print icon. The Print Options page displays.
4. Select the number of copies required in the Quantity menu.
5. Select the required orientation of your print from the Orientation menu.
6. Select the required option for 2-Sided printing.
7. In the Print-Ready File area, select the Browse button. The File Download page displays.
8. Select the print-ready document and select OK.
9. Select Apply to print the document.
62
Xerox Phaser 3320DN/3320DNI
User Guide
Page 63

Properties
The Properties option contains all the
settings, setups and default values for
installing and setting up the machine.
These are usually protected by a user
name and password and should only
be changed by your System
Administrator.
For information about all the
Properties options, refer to the
System Administrator Guide.
Note: The Properties tab only
appears when the administrator
is logged in or when the CWIS Access Control has been disabled.
Properties
Xerox Phaser 3320DN/3320DNI
User Guide
63
Page 64

Support
Support
The Support option contains
information about the firmware
version of your product and contact
information for your System
Administrator.
Links are also provided to the Xerox
website for downloading the Printer
Drivers and User Guides, ordering
supplies, accessing Technical Support
or registering your machine.
64
Xerox Phaser 3320DN/3320DNI
User Guide
Page 65

Paper and Media
This chapter contains information about the different types of stock and stock sizes that can be used
on your machine, available paper trays and the types of stock and sizes supported by each tray.
This chapter includes:
• Loading Paper on page 66
• Setting Paper Size and Type on page 70
• Media Guidelines and Specifications on page 71
4
Xerox Phaser 3320DN/3320DNI
User Guide
65
Page 66

Loading Paper
1 2
1
2
Loading Paper
One paper tray and a bypass tray are standard on your machine. Paper tray 2 is available to purchase
as an option.
Various media sizes and types can be used in the trays. For more media specifications, refer to Media
Guidelines and Specifications on page 71 and Media Specifications on page 119.
Preparing Paper for Loading
Before loading paper into the paper trays, flex or fan the
edges of the paper stack. This procedure separates any sheets
of paper that are stuck together and reduces the possibility of
paper jams.
Note: To avoid unnecessary paper jams and misfeeds do
not remove paper from its packaging until required.
Loading Paper Tray 1 and Paper Tray 2 (optional)
The paper level indicator on the front of tray 1 and the
optional tray 2 shows the amount of paper currently left in
the tray. When the tray is empty, the indicator is completely
lowered as shown in the illustration: shows full,
shows empty.
Using the instructions provided below, load paper into the
machine. Paper tray 1 can hold up to 250 sheets and paper
tray 2 (optional) can hold up to 520 sheets of 20 lb (80 g/m²)
paper. For more media specifications, refer to Media
Guidelines and Specifications on page 71 and Media
Specifications on page 119.
1. Pull out the paper tray and load paper into the tray, print
side down. Do not fill above the Maximum Fill line
indicated by the symbol .
66
Xerox Phaser 3320DN/3320DNI
User Guide
Page 67

2. Slide the paper length guide until it lightly touches the
end of the paper stack.
3. Position the side guide by squeezing the lever and sliding
it towards the stack of paper, until it gently touches the
side of the stack.
4. Insert the paper tray into the machine.
5. After loading paper in the paper tray, set the paper size
and type using the control panel. For information about
setting the paper size and type on the control panel, refer
to Setting Paper Size and Type on page 70.
6. When printing from your computer, ensure you select
Size on the driver Paper tab to specify the correct paper
size and type. Not confirming the paper details may
result in printing delays. For information about setting
the paper size and type in the printer driver, refer to Paper Tab on page 38.
Loading Paper
Note: The settings made from the printer driver on your computer override the settings on the
control panel.
Using the Bypass Tray
The bypass tray is located on the front of your machine. It can be closed when not in use, making the
product more compact. Use the bypass tray to print transparencies, labels, envelopes or postcards in
addition to making quick runs of paper types or sizes that are not currently loaded in the paper tray.
When using the bypass tray for special media it may be necessary to use the rear door for the output.
For further information refer to Media Output Locations on page 18.
Note: The rear door output can only be used for simplex jobs. Duplex printing with the rear door
open will cause paper jams.
Acceptable print media is plain paper from 3.0 x 5.0 inches to 8.5 x 14 inches Legal (76 mm x 127 mm
to 216 mm x 356 mm) and weighing between 16 lb and 58 lb (60 g/m²
specifications, refer to Media Guidelines and Specifications on page 71 and Media Specifications on
page 119.
and 220 g/m²). For more media
Xerox Phaser 3320DN/3320DNI
User Guide
67
Page 68

Loading Paper
1
2
1
2
Loading the Bypass Tray
1. Lower the bypass tray , located on the front of the
machine and unfold the paper support extension .
2. Prepare a stack of paper for loading by flexing or fanning
it back and forth. Straighten the edges on a level surface.
Remove any curl on postcards, envelopes and labels
before loading them into the bypass tray.
Note: The bypass tray can hold a maximum of 50 sheets
of 20 lb (80 g/m²) bond paper, 5 transparency sheets or
5 envelopes.
3. Load the print material between the width guides with
the print side facing up.
Note: Hold transparencies by the edges and avoid touching the print side.
4. Adjust the paper guide to the width of the stack of print
material. Ensure you have not loaded too much print
media. The stack should be under the Maximum Fill line
indicated by the symbol .
5. When printing from your computer, ensure you select
Size on the driver Paper tab to specify the correct paper
size and type. Not confirming the paper details may
result in printing delays. For information about setting
the paper size and type in the printer driver, refer to
Paper Tab on page 38.
Note: The settings made from the printer driver on your
computer override the settings on the control panel.
6. After printing, remove any unfed paper and close the bypass tray.
Envelope Mode
1. Lower the bypass tray, located on the front of the machine and unfold the paper support
extension.
2. Remove any curl on envelopes before loading them into the bypass tray. Prepare a stack of
envelopes for loading by flexing or fanning them back and forth. A maximum of 5 envelopes can
be loaded. Straighten the edges on a level surface.
Note: For more information on media specifications, refer to Media Guidelines and Specifications
on page 71 and Media Specifications on page 119.
68
Xerox Phaser 3320DN/3320DNI
User Guide
Page 69

3. Load envelopes short edge feed and with the flaps facing
down as shown in the illustration.
4. Adjust the paper guide to the width of the stack of print
material. Ensure you have not loaded too much print
media. The stack should be under the Maximum Fill line
indicated by the symbol .
5. Open the rear door and leave the door open during
printing.
6. When printing from your computer, ensure you select
Size on the driver Paper tab to specify the correct paper
size and type. Not confirming the paper details may
result in printing delays. For information about setting
the paper size and type in the printer driver, refer to
Paper Tab on page 38.
Loading Paper
Note: The settings made from the printer driver on your
computer override the settings on the control panel.
7. After printing, close the bypass tray.
Xerox Phaser 3320DN/3320DNI
User Guide
69
Page 70

Setting Paper Size and Type
Setting Paper Size and Type
After loading paper in the paper tray, set the paper size and type using the control panel. For computer
printing, select the paper size and type in the application program you use on your computer.
Note: The settings made from the printer driver on your computer override the settings on the
control panel.
After closing the paper tray the Paper Size and Type settings are automatically displayed. If correct,
use the settings displayed or follow the steps below to change the settings to match the Paper Size and
Type of paper loaded.
Setting the Paper Size
1. Press Menu on the control panel.
2. Press the up/down arrows to scroll to Paper and press OK. If necessary, enter the Administrator’s
Password using the keypad. Refer to Accessing the Feature and Setup Options on page 76 for
instructions.
3. Press the arrow buttons to scroll to the required Paper Tray and press OK.
4. Press the arrow buttons to scroll to Paper Size and press OK.
5. Press the arrow buttons to scroll to the paper size you want and press OK.
6. Press OK to save the selection.
Note: If you want to use special sized paper, select a custom paper size in the Printer Driver. Refer
to Paper Options on page 38 for instructions.
Setting the Paper Type
1. Press Menu on the control panel.
2. Press the up/down arrows to scroll to Paper and press OK. If necessary, enter the Administrator’s
Password using the keypad. Refer to Accessing the Feature and Setup Options on page 76 for
instructions.
3. Press the arrow buttons to scroll to the required Paper Tray and press OK.
4. Press the arrow buttons to scroll to Paper Type and press OK.
5. Press the arrow buttons to scroll to the paper type you want and press OK.
6. Press OK to save the selection.
Note: If you want to use special sized paper, select a custom paper size in the Printer Driver. Refer
to Paper Options on page 38 for instructions.
70
Xerox Phaser 3320DN/3320DNI
User Guide
Page 71

Media Guidelines and Specifications
Media Guidelines and Specifications
Media Guidelines
When selecting or loading paper, envelopes or other special media please adhere to these guidelines:
• Attempting to print on damp, curled, wrinkled or torn paper can cause paper jams and poor print
quality.
• Use only high quality copier grade paper. Avoid paper with embossed lettering, perforations or
texture that is too smooth or too rough.
• Store paper in its ream wrapper until ready to use. Place cartons on pallets or shelves, not on the
floor. Do not place heavy objects on top of the paper, whether it is packaged or unpackaged. Keep
it away from moisture or other conditions that can cause it to wrinkle or curl.
• During storage, moisture-proof wrap (any plastic container or bag) should be used to prevent dust
and moisture from contaminating your paper.
• Always use paper and other media that conforms to the specifications.
• Use only well-constructed envelopes with sharp, well creased folds:
• DO NOT use envelopes with clasps and snaps.
• DO NOT use envelopes with windows, coated lining, self-adhesive seals, or other synthetic
materials.
• DO NOT use damaged or poorly made envelopes.
• Only use the special media recommended for use in laser printers.
• To prevent special media such as transparencies and label sheets from sticking together, remove
them from the exit tray as they are printed.
• Place transparencies on a flat surface after removing them from the machine.
• Do not leave the special media in the bypass tray for long periods of time. Dust and dirt may
accumulate on them resulting in spotty printing.
• To avoid smudging caused by fingerprints, handle transparencies and coated paper carefully.
• To avoid fading, do not expose the printed transparencies to prolonged sunlight.
• Store unused media at temperatures between 59
should be between 10% and 70%.
• When loading paper, do not fill above the Maximum Fill line indicated by the symbol .
• Verify that your labels’ adhesive material can tolerate fusing temperature of 200
second.
• Ensure that there is no exposed adhesive material between labels.
°F and 86°F (15°C to 30°C). The relative humidity
o
C (392oF) for 0.1
CAUTION: Exposed areas can cause labels to peel off during printing, which can cause paper
jams. Exposed adhesive can also cause damage to machine components.
• Do not feed a sheet of labels through the machine more than once. The adhesive backing is
designed for one pass only through the machine.
• Do not use labels that are separating from the backing sheet or are wrinkled, bubbled, or
otherwise damaged.
Xerox Phaser 3320DN/3320DNI
User Guide
71
Page 72

Media Guidelines and Specifications
Supported Not SupportedOX
Media Types
The table below shows the media types supported for each tray for the following paper sizes:
• A4 8.27 x 11.69 inches (210 x 297 mm)
• Letter 8.5 x 11.0 inches (216 x 279 mm)
• Legal 8.5 x 14.0 inches (216 x 355. mm)
• Oficio 8.5 x 13.5 inches (216 x 343 mm)
• Folio 8.5 x 13.0 inches (216 x 330 mm
Key:
Types Supported Weights Tray 1 Tray 2
Plain
Thick
Thicker
Thin
Cotton
Colored
Preprinted
Recycled
Trans par enc y
(A4 / Letter
only)
Labels
Card Stock
19 to 24 lb (70 to 90 g/m²)
24 to 28 lb (91 to 105 g/m²)
43 to 58 lb (164 to 220 g/m²)
16 to 18 lb (60 to 70 g/m²)
20 to 24 lb (75 to 90 g/m²)
20 to 24 lb (75 to 90 g/m²)
20 to 24 lb (75 to 90 g/m²)
19 to 24 lb (70 to 90 g/m²)
37 to 39 lb (138 to 146 g/m²)
32 to 40 lb (120 to 150 g/m²)
32 to 43 lb (121 to 163 g/m²)
O O O O
O O O O
X X O X
O O O O
X X O X
X X O X
X X O X
O O O O
X X O X
X X O X
O O O X
Bypass
Tray
Duplex
Unit
Bond
Archival
72
Xerox Phaser 3320DN/3320DNI
User Guide
28 to 32 lb (105 to 120 g/m²)
28 to 32 lb (105 to 120 g/m²) if you
need to keep the print-out for a long
period time, such as archives, select this
option
O O O O
O O O X
Page 73

Media Guidelines and Specifications
Supported Not SupportedOX
The table below shows the media types supported for Print for each tray for the following paper sizes:
• JIS B5 7.17 x 10.12 inches (182 x 257 mm)
• ISO B5 6.93 x 9.84 inches (176 x 250 mm)
• Executive 7.25 x 10.50 inches (184.2 x 266.7 mm)
• A5 5.85 x 8.27 inches (148.5 x 210 mm)
• A6 4.13 x 5.85 inches (105 x 148.5 mm)
• Postcard 4x6inches (101.6x152.4mm)
•Monarch
Envelopes
• DL Envelopes 4.33 x 8.66 inches (110 x 220 mm)
• C5 Envelopes 6.38 x 9.02 inches (162.0 x 229 mm)
• C6 Envelopes 4.49 x 6.38 inches (114 x 162 mm)
• No.10 Envelopes 4.12 x 9.5 inches (105 x 241 mm)
3.88 x 7.5 inches (98.4 x 190.5 mm)
Key:
Types Supported Weights Tray 1 Tray 2
Plain
Thick
Thicker
Thin
Cotton
19 to 24 lb (70 to 90 g/m²)
24 to 28 lb (91 to 105 g/m²)
43 to 58 lb (164 to 220 g/m²)
16 to 18 lb (60 to 70 g/m²)
20 to 24 lb (75 to 90 g/m²)
O O O X
O O O X
X X O X
O O O X
X X O X
Bypass
Tray
Duplex
Unit
Colored
Preprinted
Recycled
Postcard
Envelopes
20 to 24 lb (75 to 90 g/m²)
20 to 24 lb (75 to 90 g/m²)
19 to 24 lb (70 to 90 g/m²)
32 to 43 lb (121 to 163 g/m²) card
stock
20 to 24 lb (75 to 90 g/m²)
For more information on supported paper sizes and weights, refer to Media Specifications on page 119.
X X O X
X X O X
O O O X
X X O X
X X O X
Xerox Phaser 3320DN/3320DNI
User Guide
73
Page 74

Media Guidelines and Specifications
74
Xerox Phaser 3320DN/3320DNI
User Guide
Page 75

Machine Features and
5
Setups
This chapter identifies the key settings that you can customize to meet your requirements. Changing
these settings is easy and will save you time when using the machine.
Note: Some options may be unavailable depending on your machine configuration.
This chapter includes:
• Accessing the Feature and Setup Options on page 76
• Feature Op tions on page 77
• Setup Options on page 81
Xerox Phaser 3320DN/3320DNI
User Guide
75
Page 76

Accessing the Feature and Setup Options
Accessing the Feature and Setup Options
The machine feature and setup options are accessed through the Menu button on the control panel.
The setup options should be set up and customized by the System Administrator. Access to these
options is sometimes password protected.
Entering a password:
1. Press the Menu button on the control panel.
2. Press the down arrow button to scroll to Network Setup and press OK. The Enter Password screen
displays.
3. Enter the machine password, the default is 1111:
• Press the up arrow button to get number 1 on the screen.
• Press the right arrow button to get the second number in the password.
• Continue pressing the up arrow to select the required number and the right arrow to move
across until you have entered the whole password.
4. Select OK.
Access the menu options:
1. Press the Menu button on the control panel.
2. Press the Up/Down arrow buttons to scroll through the menu items. Press OK to select the menu
item.
3. Press the Right/Left arrow buttons to scroll to a menu option in the selected menu item. Press OK
to select the menu option.
4. Customize the options required using the instructions on the following pages.
5. Settings can also be customized using CentreWare Internet Services. Refer to the System
Administrator Guide for more information.
76
Xerox Phaser 3320DN/3320DNI
User Guide
Page 77

Feature Options
The feature menu items fall into the following groups:
• Information
•Layout
•Paper
• Graphics
A description of the options available for each follows.
Information
The following Information Pages are available to print:
Report Description Setting
Fea ture Options
Menu Map This option enables you to print all the reports and
information pages.
Configuration This report provides information about your machine
setup, including the serial number, IP Address, installed
options and the software version.
Supplies Info Prints the supplies information page. Print? Yes / No
Demo Page The demo page is printed to check the quality of the
print.
PCL Font Prints the PCL font list Print? Yes / No
PS Font Prints the PS font list. Print? Yes / No
EPSON Font Prints the EPSON font list. Print? Yes / No
Stored Job Prints a list of the stored jobs Print? Yes / No
Usage Counter This report shows the number of impressions made on
the machine. The list includes:
• Total Impressions
• Black Impressions
• Black Printed Impressions
•Sheets
• 2 Sided Sheets
•Printed Sheets
• Printed 2 Sided Sheets
• Black Printed Sheets
• Black Printed 2 Sided Sheets
• Maintenance Impressions
• Black Maintenance Impressions
Print? Yes / No
Print? Yes / No
Print? Yes / No
Print? Yes / No
Xerox Phaser 3320DN/3320DNI
User Guide
77
Page 78

Fea ture Options
Layout
The following Layout feature options are available.
Option Description
Orientation Selects the direction in which information is printed
on the page. Portrait is printed on the long edge
vertically and Landscape horizontally.
Common Margin • Simplex Margin: Sets the margin for one-sided
printing.
• Duplex: Sets the margin for double-sided
printing.
• Binding: When printing on both sides of the
paper, the side A margin closest to the binding
will be the same as the side B margin closest to
the binding. Likewise, the side margins farthest
from the binding will be the same.
Bypass Tray Sets the paper margins when the Bypass Tray is
used:
Settings
* denotes factory default
• Portrait*
•Landscape
• Top Margin: -5 to 5mm (0*)
• Left Margin: -5 to 5mm (0*)
Side 1:
• Top Margin: -5 to 5mm (0*)
• Left Margin: -5 to 5mm (0*)
Side 2:
• Top Margin: -5 to 5mm (0*)
• Left Margin: -5 to 5mm (0*)
• Short Binding: 0* to 22mm
• Long Binding: 0* to 22mm
• Simplex Margin: Sets the margin for one sided
printing.
• Duplex: Sets the margin for double-sided
printing.
Tray X Sets the paper margins when Tray 1 or Tray 2 is
used:
• Simplex Margin: Sets the margin for one-sided
printing.
• Duplex: Sets the margin for double-sided
printing.
• Top Margin: -5 to 5mm (0*)
• Left Margin: -5 to 5mm (0*)
Side 1:
• Top Margin: -5 to 5mm (0*)
• Left Margin: -5 to 5mm (0*)
Side 2:
• Top Margin: -5 to 5mm (0*)
• Left Margin: -5 to 5mm (0*)
• Top Margin: -5 to 5mm (0*)
• Left Margin: -5 to 5mm (0*)
Side 1:
• Top Margin: -5 to 5mm (0*)
• Left Margin: -5 to 5mm (0*)
Side 2:
• Top Margin: -5 to 5mm (0*)
• Left Margin: -5 to 5mm (0*)
78
Xerox Phaser 3320DN/3320DNI
User Guide
Page 79

Fea ture Options
Option Description
Emulation Margin Sets the paper margins for emulation printed
pages.
Duplex Selects the binding edge when printing on both
sides of the paper:
• Off: Disables this option.
• Long Edge: This binding is the conventional
layout used in book binding.
• Short Edge: This binding is the conventional
layout used in calendars.
Paper
Settings
* denotes factory default
• Top Margin: 0* to 250mm
• Left Margin 0* to 186mm
•Off*
• Long Edge
• Short Edge
The following Paper feature options are available:
Option Description
Quantity Selects the number of copies.
Bypass Tray and Tray X• Paper Size: Sets the default paper size.
• Paper Type: Selects the paper type
currently loaded in the tray.
Paper Source • Selects the default paper tray.
Bypass Mode • Allows for printing from the Bypass
Tray regardless of the media loaded or
the job attributes.
Settings
* denotes factory default
•1* to 999
• Paper Size selection - refer to Media
Specifications on page 119 for
available sizes for each tray.
(A4/Letter*)
• Custom:
- Width: 76 to 216mm (210*)
- Height: 127 to 356mm (297*)
• Paper Type selection - refer to Media
Specifications on page 119 for
available paper types for each tray.
(Plain Paper*)
•Tray 1
• Tray 2 (if installed)
• Bypass Tray
•Auto*
•Off*
•On
Xerox Phaser 3320DN/3320DNI
User Guide
79
Page 80

Fea ture Options
Graphics
The following Graphics feature options are available
•Resolution
•Darken Text:
Option Description
Resolution Specifies the number of dots printed per
inch (dpi). The higher the setting, the
sharper printed characters and graphics.
Darken Text • Lightens or darkens the print on the
page. The Normal setting usually
produces the best result.
* denotes factory default
• 600dpi - Normal*
• 1200dpi - Best
•Off
• Lighter
• Normal*
•Darker
Settings
Job Manage (Optional)
If your machine has the optional memory fitted, the following Job Management feature options are
available:
•Active Job
•Stored Job
•File Policy:
Option Description Settings
Active Job
• All of the print jobs waiting to be
printed are listed in the active job
queue in the order you sent them to
the printer.
•Print
•Cancel
Stored Job • Accesses the stored jobs.
File Policy
80
Xerox Phaser 3320DN/3320DNI
User Guide
• You can choose the file policy for
generating the file name before you
proceed with the job
• Image Overwrite is a security measure
to prevent unauthorized access and
duplication of classified or private
documents. When Image Overwrite is
selected after a job is printed, all the
data stored in the optional memory for
that job is deleted.
• Print: Yes / No
• Delete
•Rename
• Overwrite
Page 81

Setup Options
Setup Options
The Setup menu enables you to customize options which are specific to the machine, such as
Language and Power Save and Emulation settings. A password may be required to access and change
these Setup settings.
You may also set up the network using the machine's display screen. Before doing that, you must have
the relevant information concerning the type of network protocols and computer system you use. If
you are not sure which setting to use, contact your System Administrator to configure this machine on
the network. A password may be required to access and change the Network Setups.
The Setup menu items fall into the following groups:
•System Setup
•Emulation
• Network Setup
A description of the options available for each follows.
System Setup
The following System Setup feature options are available:
Option Description
Language Use this option to set the message display
language.
Power Save Use this option to set the time the
machine waits before entering power save
mode. When the machine does not receive
data for an extended period of time,
power consumption is automatically
lowered.
Wakeup Event Use this option to determine what ‘wakes’
the machine up from power save mode.
• Button Press: When you press any
button the machine will ‘wake up’
from the power save mode.
• Printer: When you open or close the
paper tray, the machine will ‘wake up’
from the power save mode.
Settings
* denotes factory default
•English *
• List of Available Languages
•1 Min*
•5 Min
• 10 Min
• 15 Min
• 20 Min
• 30 Min
• 45 Min
• 60 Min
• 120 Min
• Button Press: On / Off*
• Printer: On / Off*
Xerox Phaser 3320DN/3320DNI
User Guide
81
Page 82

Setup Options
Option Description
Auto Continue Determines whether or not the machine
continues printing when it detects the
paper does not match the paper settings.
• Off: If a paper mismatch occurs, the
machine waits until you insert the correct
paper.
• On: If a paper mismatch occurs, an error
message will display. The machine waits
for about 30 seconds, then automatically
clear the message and continues printing.
Paper Subst. Automatically substitutes the printer
driver’s paper size to prevent the paper
mismatch between Letter and A4. For
example, if you have A4 paper in the tray
and you select Letter in the printer driver,
the machine prints on A4 paper and vice
versa.
Paper Mismatch Determines whether to disregard the
paper mismatch error or not. If Off is
selected, the machine continues to print
even if the paper mismatches.
Settings
* denotes factory default
•On*
•Off
•On
•Off*
•On*
•Off
Tray Chaining (Auto
Tray Switch)
Determines whether or not the machine
continues printing when a tray runs out of
paper. When On is selected, the paper
supply will be switched to an alternative
tray if possible and printing will continue.
Option not available if Paper Source is set
to Auto.
Default Paper Use this option to set the default size of
paper.
Metric Default Use to set the machine to display
measurements in millimeters or inches.
Altitude Adj. The xerographic process used in your
machine to make prints is affected by air
pressure. Air pressure is determined by the
height of the machine above sea level.
The machine will automatically
compensate for differences in air pressure
if you enable the feature.
Line Term. Allows you to append the required
carriage return to each line feed, which is
useful for Unix or DOS users.
•On*
•Off
•Letter*
•A4
•Inches*
•Millimeters
• Normal*
• High1
• High2
• High3
•LF*
•LF+CR
82
Xerox Phaser 3320DN/3320DNI
User Guide
Page 83

Setup Options
Option Description
Job Timeout When there is no input for a certain period
of time, the machine cancels the current
job. You can set the amount of time the
machine will wait before canceling the job.
Config. Page This report provides information about
your machine setup, including the serial
number, IP Address, installed options and
the software version. Select On to enable
this feature.
Maintenance Supplies Info.: Allows you to check how
many pages are printed and how much
toner is left in the cartridge.
Ton e r L ow A l e rt: If toner in the cartridge
has run out, a message informing the user
to change the toner cartridge appears.
You can set the option for this message to
appear or not.
Ton e r Save Activating this mode extends the life of
your toner cartridge and reduces your cost
per page beyond what one would
experience in the normal mode, but it
reduces print quality.
Settings
* denotes factory default
• 15 to 300 sec. (16 sec.*)
•On*
•Off
• Printed Pages displays
•On*
•Off
•On
•Off *
Earth Smart Enables you to save print resources and
enables eco-friendly printing. The Onforce
setting requires a password to turn Earth
Smart off.
Default Mode:
Choose Off, On or Onforce.
Onforce Sets the Earth Smart mode On
with a password. If a user wants to turn
the Earth Smart mode On or Off, the user
needs to enter a password.
Change Template: Selects the Earth
Smart template set from the CentreWare
Internet Services.
Clear Setting Restores the machine’s factory default
settings.
•Off*
•On
•Onforce
•Default*
•Custom
•Yes / No
Xerox Phaser 3320DN/3320DNI
User Guide
83
Page 84

Setup Options
Emulation
The following Emulation feature options are available:
Option Description
Emulation Type The machine language defines how the
computer communicates with the
machine.
Emulation Setup Sets the detailed settings for the selected
emulation type:
•PCL
•PostScript
•EPSON/IBM
Settings
* denotes factory default
•Auto*
•PCL
•PostScript
•EPSON
•IBM
•Typeface
•Symbol
• Courier
•Pitch
•Lines
•Wide A4
• Print PS Error: On / Off*
•Font
• Character Set
• Character Tab
•Pitch
•LPI
• Auto Wrap
Network Setup
The following Network Setup feature options are available:
84
Xerox Phaser 3320DN/3320DNI
User Guide
Page 85

Setup Options
For more detailed information refer to the Xerox Phaser 3320DN/3320DNI System Administrator
Guide.
Option Description
TCP/IP(IPv4) Selects the appropriate protocol and
configures parameters to use the network
environment.
Note: There are lots of parameters to be
set. If you are not sure, leave as is, or
consult the network administrator.
TCP/IP(IPv6) Selects this option to use the network
through IPv6.
Ethernet Speed Configure the network transmission speed.
802.1x Use to enable 802.1x and CentreWare
Internet Services.
Settings
* denotes factory default
•DHCP*
• BOOTP
•Static
IPv6 Activate:
•On*/ Off
DHCPV6 Config:
• Router*
• DHCPv6 Address
• DHCPv6 Off
•Auto*
• 10M Half
• 10M Full
• 100M Half
• 100M Full
•Giga Full
Off* / On:
•EAP-MD5
• EAP-MSCHAPv2
•PEAP
•EAP-TLS
Wireless (Phaser
3320DNI only)
Use to enable the machine to be
configured on a wireless network
connection.
Note: If you choose a wireless connection
for your printer, you cannot use a wired
connection at the same time.
Clear Setting Reverts the network settings to the default
values.
Network Conf. Enables printing of the Network
Configuration report.
Wi-Fi:
•On / Off
WPS Setting:
•PBC*
•PIN
WLAN Default:
•Restore
WLAN Signal:
• Excellent
• Very Good
• Good
•Low
• Very Low
•No Signal
• Clear? Yes / No
•Print? Yes / No
Xerox Phaser 3320DN/3320DNI
User Guide
85
Page 86

Setup Options
Option Description
Net. Activate Turns access to the Ethernet network on or
off.
HTTP Activate Enables Http on the machine giving access
to the embedded web page.
Settings
* denotes factory default
•On* / Off
•On* / Off
86
Xerox Phaser 3320DN/3320DNI
User Guide
Page 87

General Care and Troubleshooting
This chapter includes:
• General Care on page 88
• Troubleshooting on page 93
• Further Assistance on page 116
6
Xerox Phaser 3320DN/3320DNI
User Guide
87
Page 88

General Care
General Care
There is only one customer replaceable consumable in the machine, the print cartridge.To place an
order for Xerox consumables, please contact your local Xerox Representative giving your Company
Name, product number and the machine serial number. Supplies can also be ordered from
www.xerox.com, refer to Support on page 64 for further information.
The machine’s serial number is located on the inside of the front door on the machine and is printed on
the configuration report. For further information about locating the serial number, please refer to
Locating the Serial Number on page 116.
Print Cartridge
To avoid print quality problems resulting from worn parts and
to maintain your machine in top working condition, the print
cartridge will need to be replaced after printing the specified
number of pages or when the life span of the cartridge has
expired.
The machine will display a message when the print cartridge
needs to be replaced. Only replace the cartridge when a
message instructs you to do so or when instructed by a Xerox
representative. To replace the print cartridge follow the
instructions provided within this guide or with the
consumable.
WARNING: When replacing consumables, DO NOT
remove the covers or guards that are fastened with
screws. You cannot maintain or service any of the parts that are behind these covers and guards.
Do NOT attempt any maintenance procedure that is NOT specifically described in the
documentation supplied with your machine.
Storage and Handling
Follow the guidelines below for storing and handling consumables:
• Always store print cartridges unopened and inside their original package.
• Store the correct side up in a horizontal position (not standing on end).
• Do not store consumables in:
• Temperatures greater than 40°C (104°F).
• Humidity range less than 20% and not greater than 80%.
• An environment with extreme changes in humidity or temperature.
• Direct sunlight or room light.
• Dusty places.
• A vehicle for a long period of time.
• An environment where corrosive gases are present.
88
Xerox Phaser 3320DN/3320DNI
User Guide
Page 89

General Care
1
2
3
• An environment with salty air.
• Do not store consumables directly on the floor.
• Do not touch the surface of the photosensitive drum in the print cartridge.
• Do not expose the print cartridge to unnecessary vibrations or shock.
• Never manually rotate the drum in the print cartridge, especially in the reverse direction; this can
cause internal damage and toner spillage.
Replacing the Print Cartridge
The print cartridge contains components that are sensitive to light, temperature, and humidity. Follow
the recommendations provided to ensure the optimum performance, highest quality, and longest life
from your new print cartridge.
Store the cartridge in the same environment as the printer it will be used in; this should be in controlled
office temperature and humidity conditions. The print cartridge should remain in its original, unopened
package until installation. If the original packaging is not available, cover the top opening of the
cartridge with paper and store in a dark cabinet. Opening the cartridge package prior to use
dramatically shortens its operating life.
When the print cartridge is empty the Replace new cartridge message appears on the display screen. At
this stage the print cartridge needs to be replaced. If not replaced, the machine will stop printing.
Replace the print cartridge using the following instructions.
1. Press the release latch on the left side of the machine.
2. Open the front door.
3. Pull the print cartridge out.
Xerox Phaser 3320DN/3320DNI
User Guide
89
Page 90

General Care
4. Remove the new print cartridge from the packaging.
5. Remove the protective sheet from the cartridge and the
plastic handle that is attached to the protective sheet.
Carefully remove all the remaining tape and packaging
from the cartridge.
6. Slowly shake the cartridge five or six times to distribute
the toner evenly inside the cartridge.
Note: If toner gets on your clothing, wipe it off with a dry
cloth and wash clothing in cold water. Hot water sets
toner into fabric.
CAUTION: Do not touch the green underside of the print
cartridge. Use the handle on the cartridge to avoid
touching this area.
7. Hold the print cartridge by the handle and slowly insert the cartridge into the opening in the
machine.
8. Tabs on the sides of the cartridge and corresponding
grooves within the machine will guide the cartridge into
the correct position until it locks into place.
9. Close the front door. Make sure that the door is securely
closed.
Checking the Supplies Life
1. Press Menu on the control panel.
2. Use the arrow buttons to scroll to Maintenance and press OK.
3. Use the arrow buttons to scroll to Supplies Info. and press OK.
90
Xerox Phaser 3320DN/3320DNI
User Guide
Page 91

General Care
1
2
3
Toner information and the number of pages printed is displayed.
Cleaning the Machine
WARNING: When cleaning the machine do NOT use organic or strong chemical solvents or
aerosol cleaners. Do NOT pour fluids directly onto any area. Use supplies and cleaning materials
only as directed in this documentation. Keep all cleaning materials out of the reach of children.
WARNING: Do not use pressurized air-spray cleaning aids on or in this equipment. Some
pressurized air-spray containers contain explosive mixtures and are not suitable for use in
electrical applications. Use of such cleaners can result in a risk of explosion and fire.
Control Panel, Paper Trays and Output Tray
Regular cleaning keeps the display, control panel and other machine areas free from dust and dirt.
1. Use a soft, lint-free cloth, lightly dampened with water.
2. Wipe clean the entire area of the control panel, including the display.
3. Wipe clean the output tray, paper trays and other outside areas of your machine.
4. Remove any residue with a clean cloth or paper towel.
Internal Areas
During the printing process, paper, toner, and dust particles can accumulate inside the machine. This
can cause print quality problems, such as toner specks or smearing. Cleaning inside the machine clears
and reduces these problems.
1. Turn the machine off and unplug the power cord. Wait
for the machine to cool down.
2. Press the release latch on the left side of the machine
and open the front door.
3. Pull the print cartridge out and place it on a clean flat
surface.
CAUTIONS:
• To prevent damage to the print cartridge, do not
expose it to light for more than a few minutes. Cover
it with a piece of paper, if necessary.
• Do not touch the green surface on the underside of
the print cartridge. Use the handle on the cartridge to avoid touching this area.
Xerox Phaser 3320DN/3320DNI
User Guide
91
Page 92

General Care
4. With a dry, lint-free cloth, wipe away any dust and spilled
toner from the print cartridge area.
CAUTION: While cleaning the inside of the machine, be
careful not to damage the transfer roller or any other
inside parts. Do not use solvents such as benzene or
thinner to clean. Printing quality problems can occur and
damage can be caused to the machine.
5. Re-install the print cartridge. Tabs on the sides of the
cartridge and corresponding grooves within the machine
will guide the cartridge into the correct position until it
locks into place. Close the front door.
6. Plug in the power cord and turn the machine on.
Moving the Machine
• When moving the machine, do not tilt or turn it upside down as the inside of the machine may
become contaminated with toner, which can cause damage to the machine or adversely affect
print quality.
• When moving the machine, make sure at least two people are holding the machine securely.
92
Xerox Phaser 3320DN/3320DNI
User Guide
Page 93

Troubleshooting
Troubleshooting
If a problem occurs, messages appear on the control panel display to indicate the error. Perform the
following problem solving procedure:
1. When errors occur, a message appears on the display. Press OK.
2. Check the display message to see what kind of error has occurred.
If several messages appear, press the up/down arrows to highlight the message you want solve.
3. Use the following information to resolve the problem:
• Redistributing Toner on page 94
• Paper Jams on page 95
• Error Messages on page 101
• Paper Feeding Problems on page 104
• Printing Problems on page 105
4. Press OK on the control panel. If the error message still appears, repeat the procedure.
5. If the problem cannot be resolved, power off and on, and try the job again.
If the problem persists, call for service. When you call for service, provide the service representative
with the contents of the display message.
Status / Wireless LED
The color of the Status / Wireless LED located on the control panel indicate’s the machine’s current
status. The table below describes the various indicators.
Note: Some LEDs may not be available, depending on machine configuration.
LED Color Status Description
Status LED None Off Machine is offline
Green On The machine is on-line and can be used.
Green Blinking When the backlight blinks. the machine is receiving and
printing data.
Orange On • A cover is open. Close the cover.
• There is no paper in the tray. Load paper in the tray.
• The machine has stopped due to a fault. Check the
display message to resolve.
• The print cartridge has reached its estimated end of
life. Replace the print cartridge - see Replacing the
Print Cartridge on page 89
Xerox Phaser 3320DN/3320DNI
User Guide
93
Page 94

Troubleshooting
1
2
3
LED Color Status Description
Orange Blinking • A minor error has occurred and the machine is
waiting for the error to be corrected. Check the
display message. When the problem is resolved, the
machine resumes.
• The print cartridge is near its estimated end of life.
Prepare a new cartridge for replacement. You may
temporarily increase the printing quality by
redistributing the toner - see Redistributing Toner on
page 94.
Wireless LED
(Phaser 3320DNI
only)
Blue On This is the default setting. Also shows blue when the
machine is connected to a wireless network. (Phaser
3320 DNI only.)
Redistributing Toner
When the print cartridge is near the end of its life:
• White streaks or light printing occurs.
• Prepare new cartridge or Replace new cartridge message appears on the display.
If this happens, you can temporarily improve print quality by redistributing the remaining toner in the
cartridge. In some cases, white streaks or light printing will still occur even after you have redistributed
the toner.
1. Press the release latch on the left side of the machine.
2. Open the front door.
3. Pull the print cartridge out.
4. Slowly shake the cartridge five or six times to distribute
the toner evenly inside the cartridge.
Note: If toner gets on your clothing, wipe it off with a dry
cloth and wash clothing in cold water. Hot water sets
toner into fabric.
CAUTION: Do not touch the green underside of the print
cartridge. Use the handle on the cartridge to avoid
touching this area.
94
Xerox Phaser 3320DN/3320DNI
User Guide
Page 95

5. Hold the print cartridge by the handle and slowly insert
the cartridge into the opening in the machine.
6. Tabs on the sides of the cartridge and corresponding
grooves within the machine will guide the cartridge into
the correct position until it is fully pushed into place.
7. Close the front door. Ensure that the door is securely
closed.
Paper Jams
Tips for Avoiding Paper Curls
Troubleshooting
1. Open the rear door.
2. Leave the rear door open. Prints will be delivered face up.
Note: The rear door output can only be used for simplex
jobs one sheet at a time. Duplex printing with the rear
door open will cause paper jams.
Note: Only use when the printout has more than 20mm
curl.
Tips for Avoiding Paper Jams
By selecting the correct media types, most paper jams can be avoided. When a paper jam occurs, refer
to Paper Jams on page 95.
• Ensure that the adjustable guides on the paper tray are positioned correctly. (See Loading Paper
Tray 1 and Paper Tray 2 (optional) on page 66.)
Xerox Phaser 3320DN/3320DNI
User Guide
95
Page 96

Troubleshooting
• Do not overload the tray. Ensure that the paper level is below the paper capacity mark on the
inside of the tray.
• Do not remove paper from the tray while your machine is printing.
• Flex, fan, and straighten paper before loading.
• Do not use creased, damp, or highly curled paper.
• Do not mix paper types in a tray.
• Use only recommended print media. (See Media Types on page 72.)
• Ensure that the recommended side of the print media is facing down in the tray, or facing up in
the bypass tray.
• Do not print duplex output with the rear door open.
When a paper jam occurs, a warning message appears on the display screen.
CAUTION: To avoid tearing the paper, pull the jammed paper out slowly and gently. Follow the
instructions in the following sections to clear the jam.
Paper Tray 1
1. Press the release latch on the left side of the machine
and open then close the front door. The jammed paper is
automatically ejected from the machine.
If the paper does not exit, go to the next step.
2. Pull out paper tray 1.
3. Remove the jammed paper by gently pulling it straight
out.
4. If the paper does not move when you pull, or if you do
not see the paper in this area, check the area around the
print cartridge. Refer to Inside the Machine on page 98.
5. Insert tray 1 back into the machine until it snaps into
place. Printing automatically resumes.
96
Xerox Phaser 3320DN/3320DNI
User Guide
Page 97

Paper Tray 2
1. Pull out paper tray 2.
2. Remove the jammed paper from the machine.
If the paper does not move when you pull it or if you do
not see the paper in this area, stop and go to the next
step. If the paper has been removed, insert tray 2 back
into the machine until it snaps into place. Printing
automatically resumes.
3. Pull tray 1 half-way out.
Troubleshooting
4. Pull the paper straight up and out.
5. Insert the trays back into the machine. Printing
automatically resumes.
Xerox Phaser 3320DN/3320DNI
User Guide
97
Page 98

Troubleshooting
1
2
3
Bypass Tray
1. If the paper is not feeding properly, pull the paper out of
the machine.
2. Press the release latch on the left side of the machine
and open then close the front door.
3. Re-load the bypass tray to resume printing.
Inside the Machine
CAUTION: The fuser area is hot. Take care when removing paper from the machine.
1. Press the release latch on the left side of the machine.
2. Open the front door.
3. Pull the print cartridge out, lifting it up slightly at the
front.
98
Xerox Phaser 3320DN/3320DNI
User Guide
Page 99

Troubleshooting
3
1
2
3
123
4. Remove the jammed paper by gently pulling it straight
out.
5. Replace the print cartridge. Tabs on the sides of the
cartridge and corresponding grooves within the machine
will guide the cartridge into the correct position until it
locks into place. Close the front door. Printing
automatically resumes.
Output Area
1. Press the release latch on the left side of the machine and open then close the front door. The
jammed paper is automatically ejected from the machine.
If no paper is automatically ejected and you do not see the jammed paper, go to the next step.
2. Gently pull the paper out of the output tray.
If you do not see the jammed paper or if there is any
resistance when you pull, stop and go to the next step.
3. Press the release button and open the rear door .
4. If you see the jammed paper, pull down the pressure
levers on each side about 90 degrees and remove the
paper .
If you still do not see the paper, go to step 1 in the next
section, otherwise close the rear cover. Printing
automatically resumes.
Xerox Phaser 3320DN/3320DNI
User Guide
99
Page 100

Troubleshooting
Duplex Unit Area
If the duplex unit is not inserted correctly, a paper jam may occur. To avoid paper jams, make sure that
the duplex unit is inserted correctly with the edges of the unit aligned with the feed grooves on the
inside of the machine. The duplex unit is located at the rear of the machine.
1. Pull the duplex unit out of the machine.
2. Remove the jammed paper from the duplex unit
If the paper does not come out with the duplex unit, go
to the next step.
3. Remove the paper from the bottom of the machine.
4. Insert the duplex unit back into the machine, aligning
the edges of the unit with the feed grooves on the inside
of the machine. Make sure the duplex unit is fully pushed
in.
5. If paper is still jammed, go to the next step.
100
Xerox Phaser 3320DN/3320DNI
User Guide
 Loading...