


 Loading...
Installation Instructions
Pedestal
For use only with
|
|
|
® |
|
|
® |
|
OR |
|
|
|
|
|
|
|
||
™ |
™ |
™ |
™ |
||
Washers and Dryers |
|
|
Washers and Dryers |
|
|
|
23-5/8" |
|
|
|
(60 cm) |
|
|
18-9/16" |
2-5/8" |
|
|
(6.7 cm) |
27" |
||
(47.2 cm) |
|||
|
(68.6 cm)
13" (33 cm)
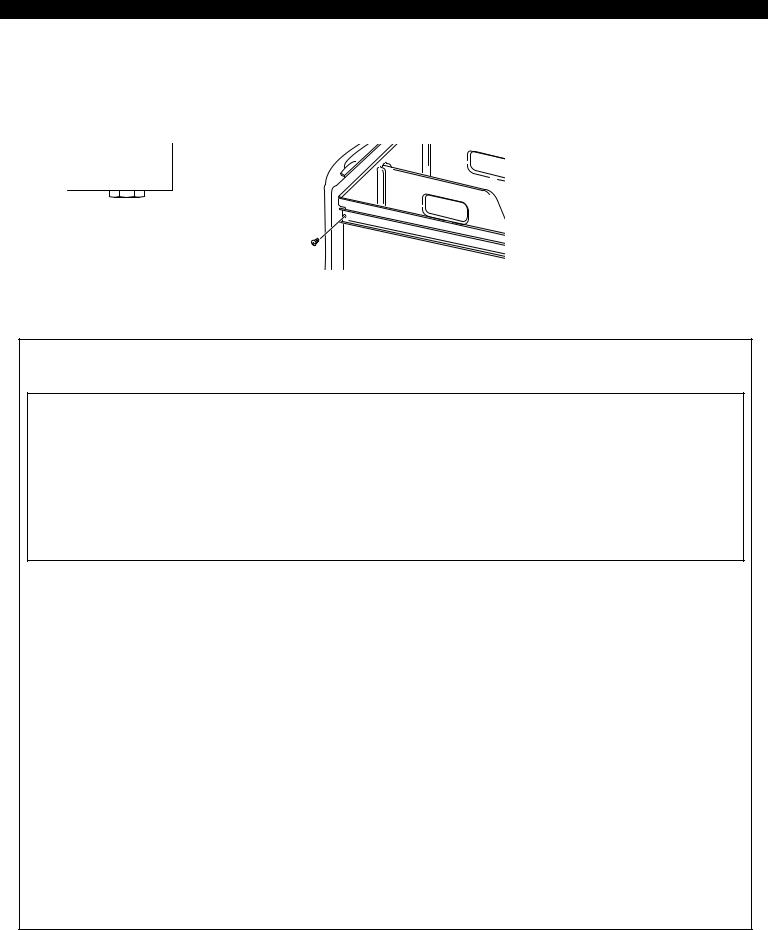
Important: Check that all 4 pads are present as shown. If they are not, do not install the pedestal and contact your dealer.
IMPORTANT:
Read and save these instructions.
IMPORTANT:
Installer: Leave Installation
Instructions with the homeowner.
Homeowner: Keep Installation
Instructions for future reference.
Part No. 8528308 Rev. B

Your safety and the safety of others are very important.
We have provided many important safety messages in this manual and on your appliance. Always read and obey all safety messages.
This is the safety alert symbol.
This symbol alerts you to potential hazards that can kill or hurt you and others.
All safety messages will follow the safety alert symbol and either the word “DANGER” or “WARNING”. These words mean:
 DANGER
You can be killed or seriously injured if you don’t immediately follow instructions.
 WARNING
You can be killed or seriously injured if you don’t follow instructions.
All safety messages will tell you what the potential hazard is, tell you how to reduce the chance of injury, and tell you what can happen if the instructions are not followed.
 WARNING
Explosion Hazard
Keep flammable materials and vapors, such as gasoline, away from dryer.
Place dryer at least 18 inches (45.7 cm) above the floor for a garage installation.
Failure do to so can result in death, explosion, or fire.
Note: If dryer and pedestal assembly is located in a garage, 6" (15.2 cm) must be added under pedestal so that dryer is 18" (45.7 cm) above garage floor.
Tools required:
•Utility knife
•Phillips screwdriver (drawer removal)
•1/4" (6.5 mm) hex head ratchet or open-end wrench (leveling legs)
•5/16" (8 mm) hex head ratchet (sheet metal screws)
•Level
•9/16" (14.3 mm) open-end wrench (leveling leg locknuts)
•pliers or slip-joint pliers (for drain and inlet hoses)
2
Before you start...
Important: If your washer and dryer are already installed, they MUST be uninstalled.
If you need to uninstall your washer or dryer, see Installation Instructions that came with your model for tools required.
Uninstalling your washer:
 WARNING
Excessive Weight Hazard
Use two or more people to move and uninstall washer.
Failure to do so can result in back or other injury.
1. Turn off the hot and cold water faucets.
2.Unplug the power supply cord.
3.Slowly loosen the fill hoses at the faucets to relieve the water pressure. Use a sponge or towel to absorb the released water.
4.Remove the “HOT” and “COLD” fill hoses from the back of the washer. Drain water in the hoses into a bucket.
5.Squeeze the ears of the drain hose clamp with pliers to open and slide the clamp down the hose. Disconnect the drain hose from the washer and drain any water in the hose into a bucket.
6.Pull the washer away from wall so it can be tipped on its back.
7.Protect the floor with a large piece of cardboard cut from the pedestal carton. Lay the washer on its back (make sure that the power supply cord is not under the washer) so that the cardboard is under the entire lower back edge of the washer (see Figure 1). An additional small amount of water will drain out of the washer when it is tipped back. Go to “Installing the Pedestal”.
Figure 1
12" (30.5 cm)
cardboard
15" (38.1 cm)
Uninstalling your electric dryer:
 WARNING
Excessive Weight Hazard
Use two or more people to move and uninstall dryer.
Failure to do so can result in back or other injury.
1.Unplug the power supply cord.
2.Pull the dryer away from the wall enough to loosen the vent clamp. Loosen the clamp and carefully remove the exhaust vent from the dryer exhaust outlet.
3.Pull the dryer away from wall so that it can be tipped on its back.
4.Protect the floor with a large piece of cardboard cut from the pedestal carton. Lay the dryer on its back (make sure that the power supply cord is not under the dryer) so that the cardboard is under the entire lower back edge of the dryer (see Figure 1). Go to “Installing the Pedestal”.
Uninstalling your gas dryer:
 WARNING
Excessive Weight Hazard
Use two or more people to move and uninstall dryer.
Failure to do so can result in back or other injury.
1.Unplug the power supply cord.
2.Turn off the gas supply.
3.Pull the dryer away from the wall enough to loosen the vent clamp. Loosen the clamp and carefully remove the exhaust vent from the dryer exhaust outlet.
4.Disconnect the flexible gas supply line from the dryer. Put a piece of tape over the open ends of the gas line connection fittings.
5.Pull the dryer away from wall so that it can be tipped on its back.
6.Protect the floor with a large piece of cardboard cut from the pedestal carton. Lay the dryer on its back (make sure that the power supply cord is not under the dryer) so that the cardboard is under the entire lower back edge of the dryer (see Figure 1). Go to “Installing the Pedestal”.

If your washer or dryer is still in its packaging:
 WARNING
Excessive Weight Hazard
Use two or more people to move washer or dryer.
Failure to do so can result in back or other injury.
1. Position the packaged washer/dryer close to the final location. Using a utility knife, cut through the packaging along the dotted lines around the packaging near its base. Note: Do not remove the packaging at this time.
cut along dotted lines
2. Protect the floor with a large piece of cardboard cut from the pedestal carton. Lay the washer/dryer on its back (make sure that the power supply cord is not under the washer/dryer) so that the cardboard is under the entire lower back edge of the washer/dryer.
washer/dryer laying on its back with packaging bottom removed
12" (30.5 cm)
cardboard
15" (38.1 cm)
3. Remove the bottom of the packaging. Go to “Installing the Pedestal”.
Installing the pedestal
Follow these instructions to install the pedestal on a washer or dryer.
 WARNING
Excessive Weight Hazard
Use two or more people to move and install pedestal.
Failure to do so can result in back or other injury.
1. Open the pedestal drawer. Remove the envelope taped inside the drawer. This envelope contains four #12 x 5/8" (1.6 cm) hex head sheet metal screws that will be used in Step 4.
2. Remove the Phillips head screw from both drawer slides and save screws. Remove the drawer from the slides and set aside. Push the slides back into the pedestal.
3. If your washer/dryer has feet installed, remove them. DO NOT install the feet that came with a new washer/dryer.
4. Partially install the two lower #12 x 5/8” (1.6 cm) hex head sheet metal screws leaving a space of about 3/8” (1 cm) between the screw head and the bottom of the washer/dryer.
washer bottom |
dryer bottom |
install screws |
install screws |
5. Move the pedestal against the washer/ dryer bottom. Slide the pedestal’s keyhole slots over the lower two partially installed screws.
Position the pedestal toward the front of the washer/dryer and install the two remaining hex head sheet metal screws. Do not tighten completely.
Align the sides of the pedestal so that they are even with the sides of the
washer/dryer. Reach inside pedestal drawer opening and securely tighten all four pedestal screws.
lower screws in keyhole slots
6. Tip the washer/dryer and pedestal assembly back to upright position. Remove protective cardboard.
7. Slide the washer/dryer close to its final location.
If your washer/dryer is still in its packaging, follow the instructions on the packaging and remove it.
8. Follow the Installation Instructions that came with your model to finish installing or reinstalling your washer/dryer (i.e., hoses, vents, etc.).
9. Level the washer/dryer from side to side and front to back. Make sure all four pedestal feet are in solid contact with the floor.
Place a level on the top. Locate the 1/4" (6.4 mm) hex on the top of each pedestal foot. Reach inside the pedestal and use a 1/4" (6.4 mm) hex head ratchet or open-end wrench to adjust the feet up or down as needed to level the washer/dryer.
3
10. When the washer/dryer is level, use a 9/16" (14.3 mm) open-end wrench to securely tighten all four locknuts against the pedestal. The locknuts must be tightened.
locknut 
11. Pull both drawer slides out and reassemble the drawer to the drawer slides with the two Phillips head screws. Use of the two dividers is optional. Close the drawer.
WARRANTY
Full One-Year Warranty on Mechanical parts.
For one year from the date of purchase, supplier will repair or replace any of its mechanical parts if defective in material or workmanship. This Pedestal must be installed with the listed washer or dryer and operated according to the instructions provided in the washer or dryer Owner's Manual or Use and Care Guide.
Warranty Restriction
If the Pedestal is subject to other than private family use and or used with any other product than those listed in the installation instructions, the warranty is null and void.
Warranty Service
Warranty service is available by contacting the retailer where the Pedestal was purchased. If retailer is not available, please refer to the Owner’s Manual or Use and Care Guide that came with the washer or dryer that is installed with the Pedestal and contact the service department listed there.
This warranty applies only while the Pedestal is in use in the United States or Canada*. This warranty gives you specific legal rights and you may also have other rights which vary from state to state or province to province.
*Warranty terms may vary in Canada.
In the space below, record your model number information and purchase date. See the serial plate located behind the drawer, on the side frame of the Pedestal, for model number information
Have this information available to help you quickly obtain assistance or service.
Model number |
|
Item number |
|
|
|
|
|
|
|
||
Serial number |
|
Purchase date |
|
|
|
|
|
||||
Save these instructions and your sales receipt for future reference.
KENMORE ELITE, HE3 and HE3T are trademarks of Sears, Roebuck and Co. |
|
|
WHIRLPOOL, DUET and DUETHT are trademarks of Whirlpool, U.S.A. |
Whirlpool Corporation |
|
Part No. 8528308 Rev. B |
Printed in U.S.A. |
|
©2001 |
All rights reserved. |
|
Loading...