

Westinghouse WD32HKB1001 User Manual

WD32HKB1001
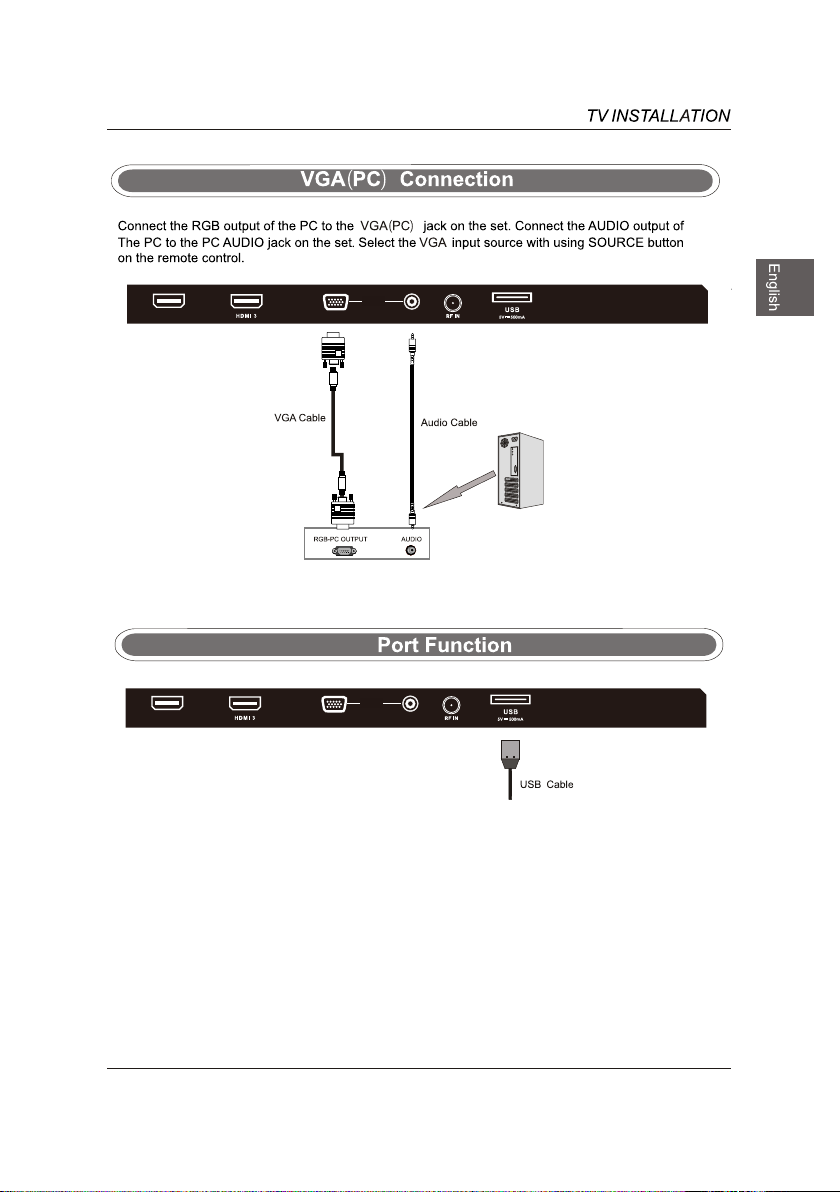
VGA(PC) Connection
USB Port Function
Audio
Menu
USB
DVD OPERATION 32
DVD FUNCTIONS 35
43
44
1
2
18
3
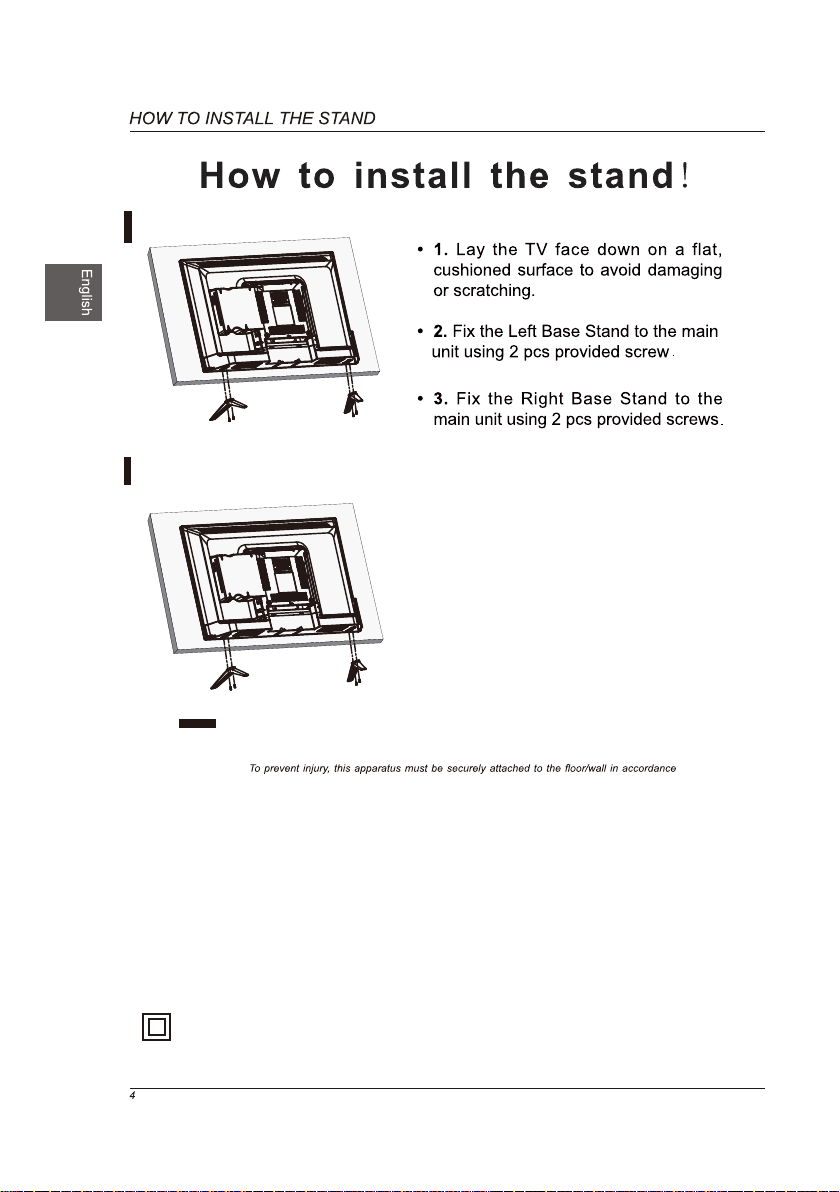
Installing the Stand
Removing the Stand for Wall-Mounting
• 1.Lay the TV face down on a flat,
cushioned surface to avoid damaging
or scratching.
• 2. gnidloh swercs scp 4 eht nethgitnU
the stand assembly and remove them.
• 3.Attach the wall-mount bracket to
the TV using the mounting holes on
the back of the TV. Mount this TV
according to the instructions included
in the wall-mount bracket.
Wall-Mounting Screws
WARNING:
with the installation instruction.
WARNING
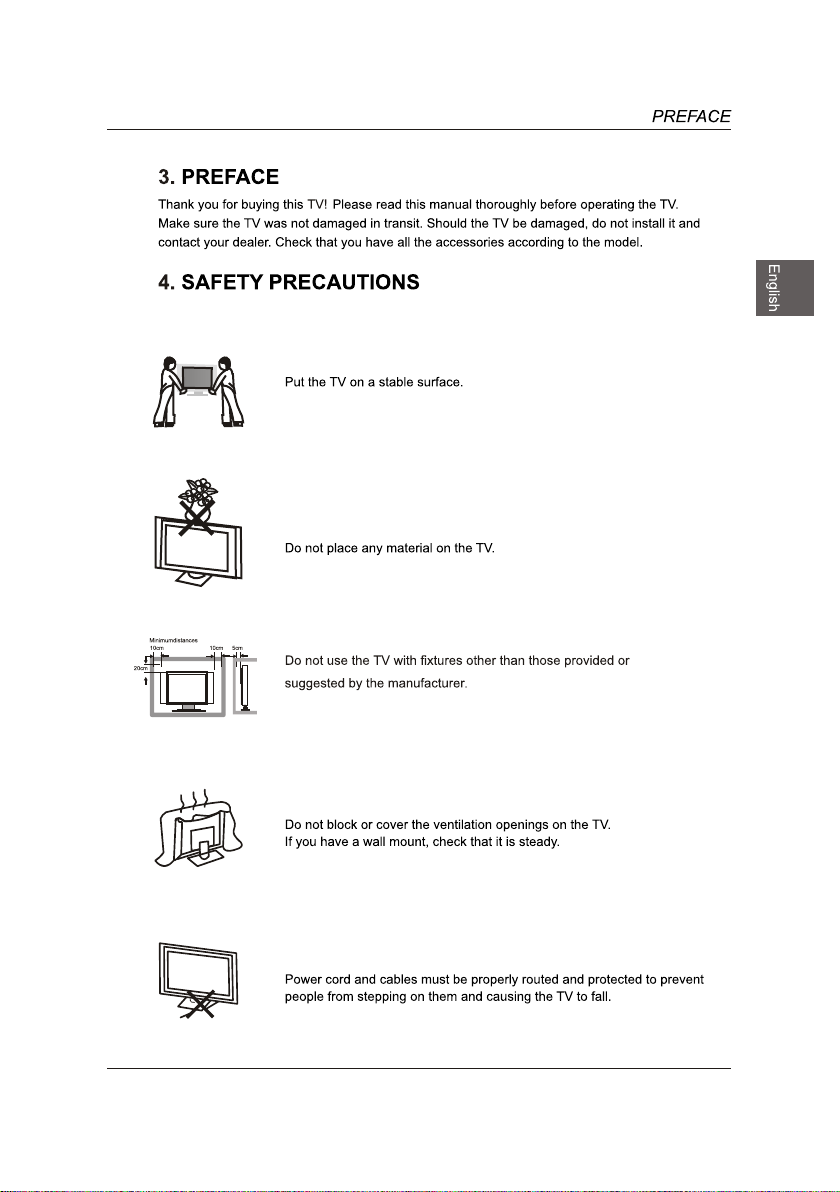
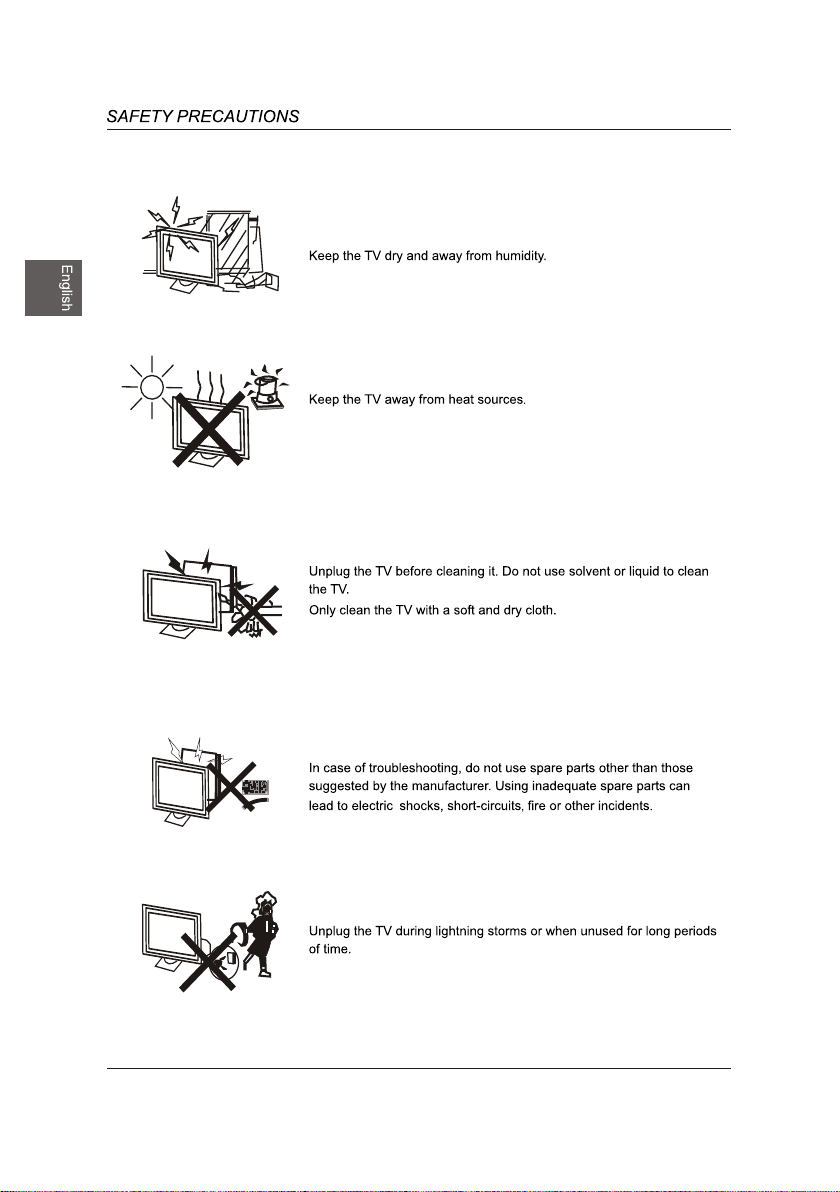
Never place a television set in an unstable location. A television set may fall, causing serious personal injury
or death. Many injuries, particularly to children, can be acoided by taking simple precautions such as:
If your existing television set is being retained and relocated, the same considerations as above should be
applied.
:
-Using cabinets or stands recommended by the manufacturer of the television set.
-Only using furniture that can safely support the television set.
-Ensuring the television set is not overhanging the edge of the supporting furniture.
-Not placing the television set on tall furniture(for example, cupboards or bookcases) without anchoring
both the furniture and the television set to a suitable support.
-Not placing the television set on cloth or other materials that may be located between the television
set and supporting furniture.
-Educating children about the dangers of climbing on furniture to reach the television set or its controls.
This equipment is a Class II or double insulated electrical appliance. It has been designed in such a
way that it does not require a safety connection to electrical earth.
The use of apparatus in moderate climates.
.)dedulcni ton( swercs dedaerht cirtemosi 01*6M*4 gnisu tekcarb ASEV eht tnuoM
5
6
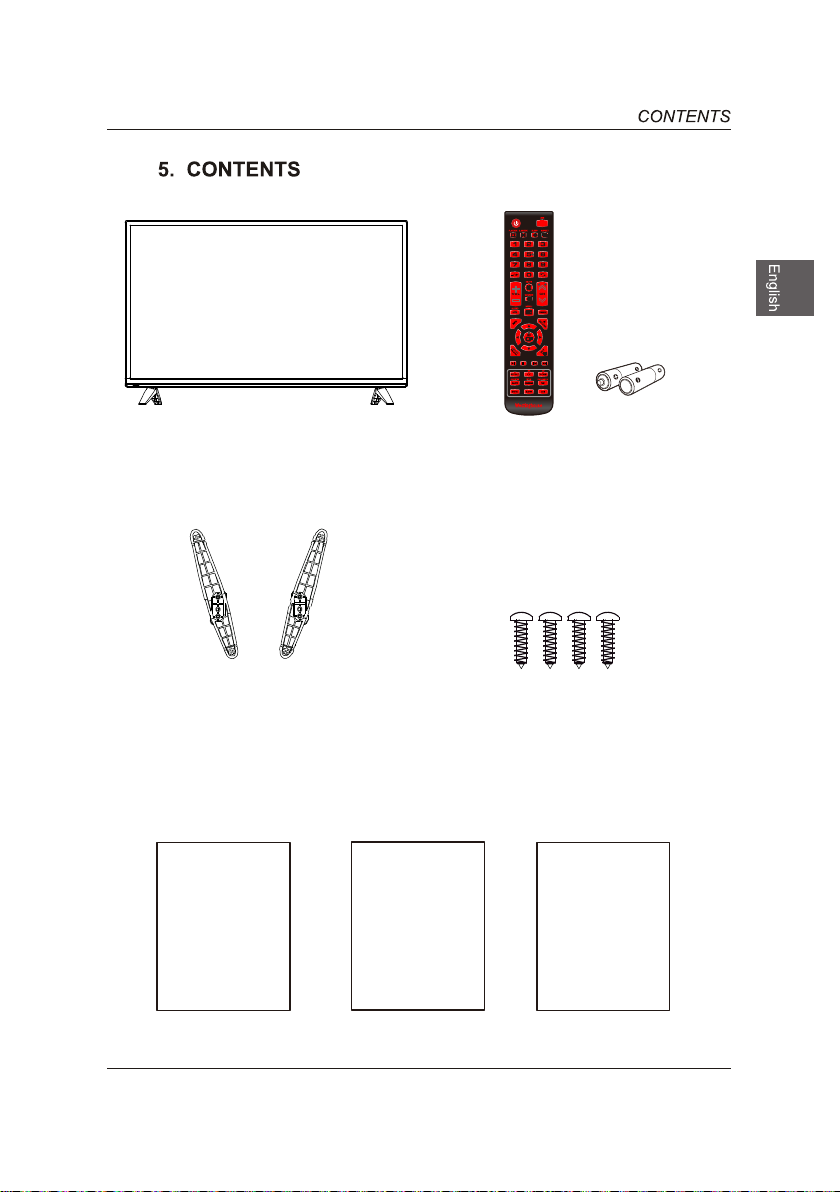
TV Set
Remote Control with Batteries
TV Stand
User Manual
User Manual
Quick
Connect
Guide
Quick Connect Guide
Four Screws
Warranty
Card
Warranty Card
7
7 8
HDMI3 HDMI2
8
HDMI 1
HDMI 2
PC IN
PC AUDIO
VGA
USB
5V 500mA
9
HDMI 1
HDMI 1
10
HDMI 2
VGA
USB
PC IN
PC AUD IO
HDMI 2
PC IN
VGA
PC AUD IO
11
HDMI 1
HDMI 2
PC IN
PC AUDI O
VGA
12
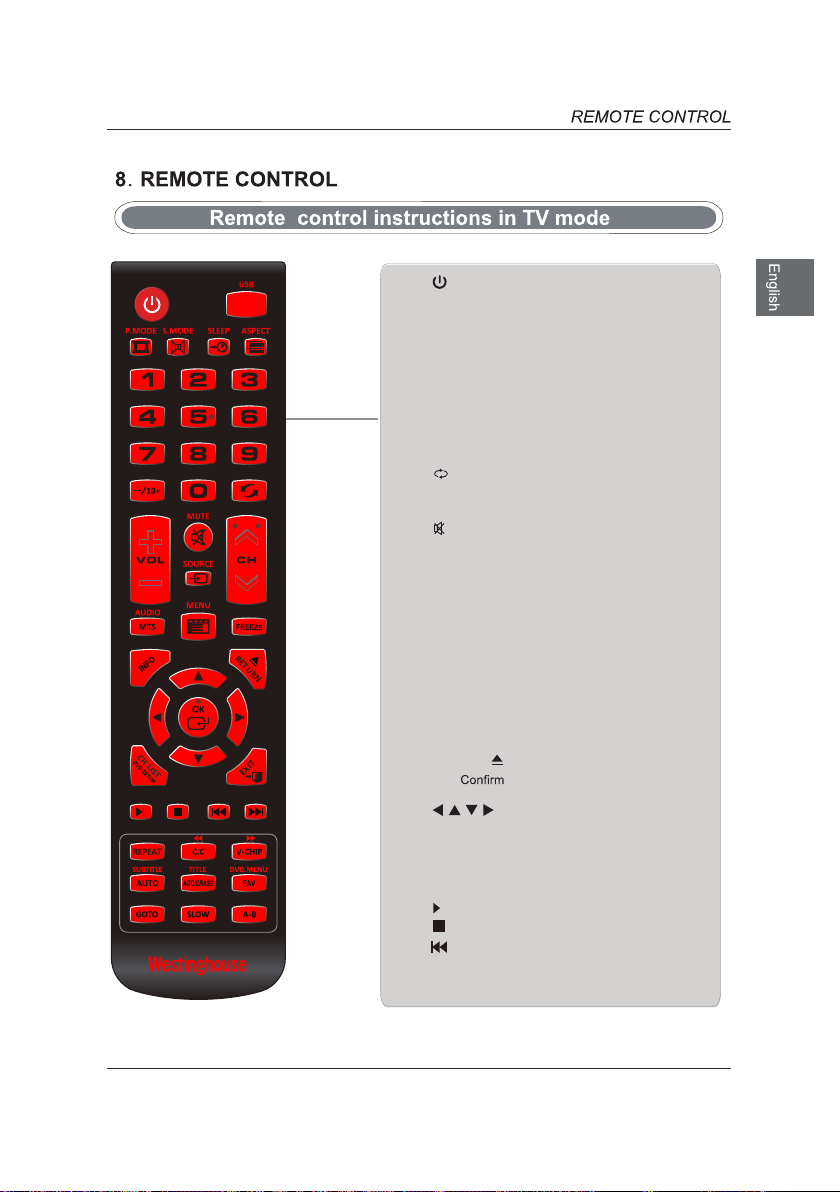
: Sw itc h the T V betw een o n and
standby mode
Select USB mode
USB:
P.MODE: S
S.MODE: Select sound mode
SL E EP : S e t t h e TV sl e ep t i me r:
OFF/5/10…/180/240 min
ASP E C T: S e l e ct the as pe ct ra ti o
settings
0~10:
—/10+ Ent er mu ltip le progra m chann el
number such as 2-1
VOL+/-:
MUTE:
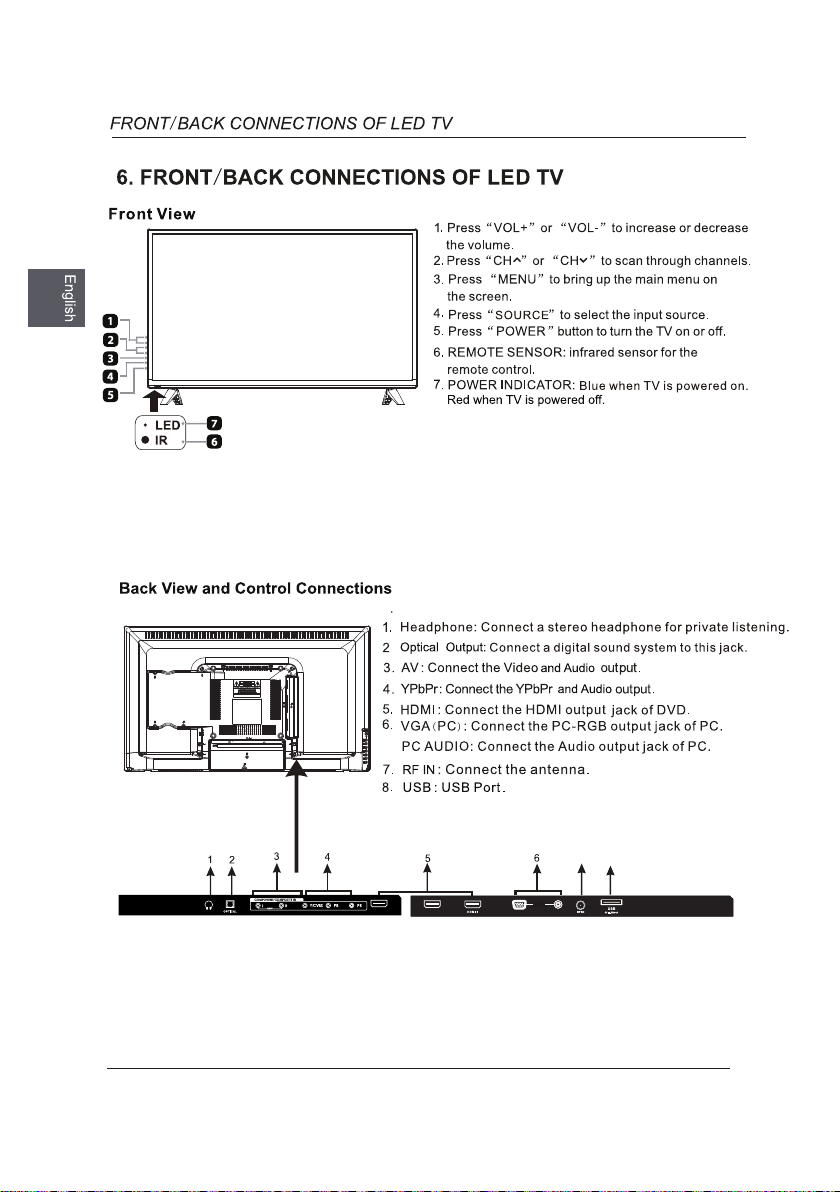
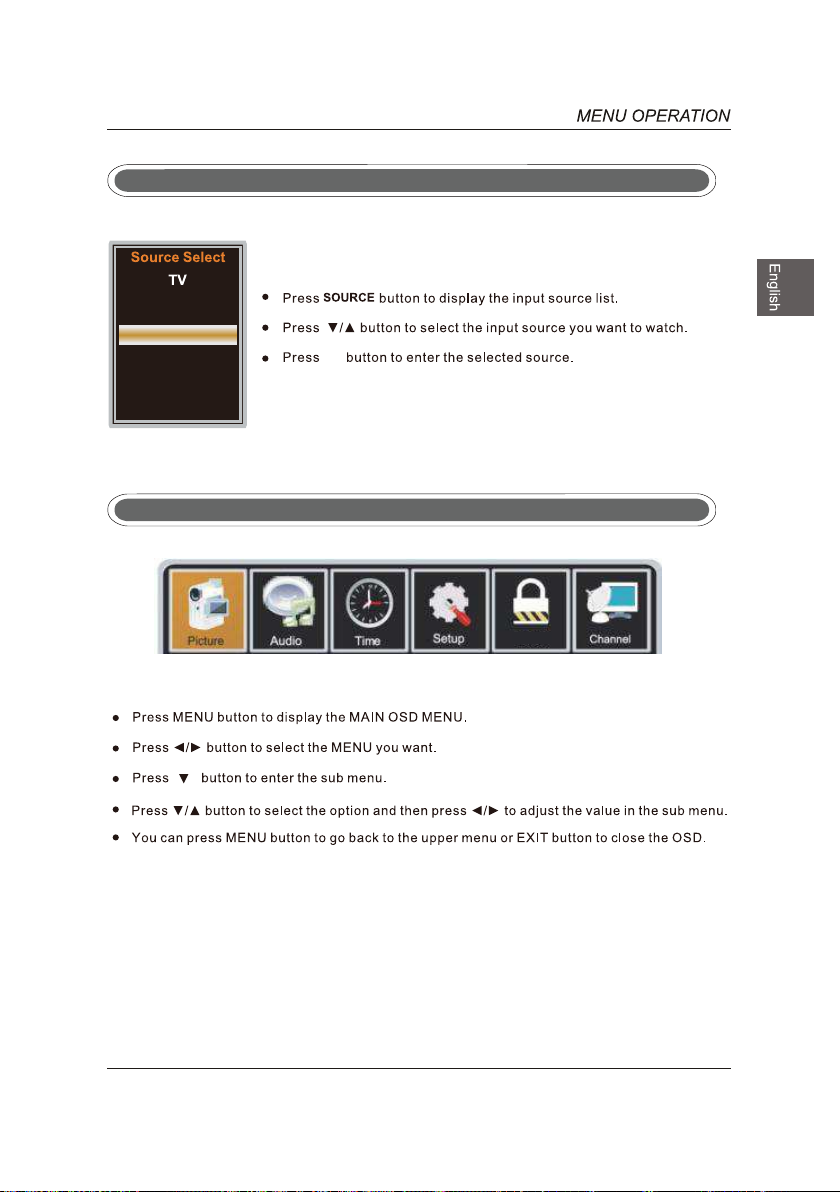
SOU RCE: Select among the differ
input signal sources
CH+/-: Select a channel
elect picture mode
Select a program (ATV/DTV mode)
: Return to previous viewing channel
Adjust the volume
Press this button to mute or restore sound.
: Mute and restore your TV sound
AUDIO: Change the audio language or
audio channel (DVD mode).
MT S: Sw itc h among d iff ere nt au dio
channels: STEREO/MONO/SAP
MEN
U: Display the OSD (on scr ee n
display) menu
Freeze the picture.
FREEZE:
INF O: Displ ay th e pr esent sc reen
information such as the current channel
and input source
RETURN/ :
OK:
screen dislay' menus
OS D men us and adju st th e sys tem
settings to your preference.
Open/Close the DVD.
the selection in the OSD'on
: Allows you to navigate the
CH.LIST:Display program list.
DVD.SETUP: Displays the DVD OSD menu.
EXIT: Exit the OSD menu
II: Start playback or pause
: .Press once to stop.
:Skip to the beginning of the previous
chapter/track/photo.
ent
13
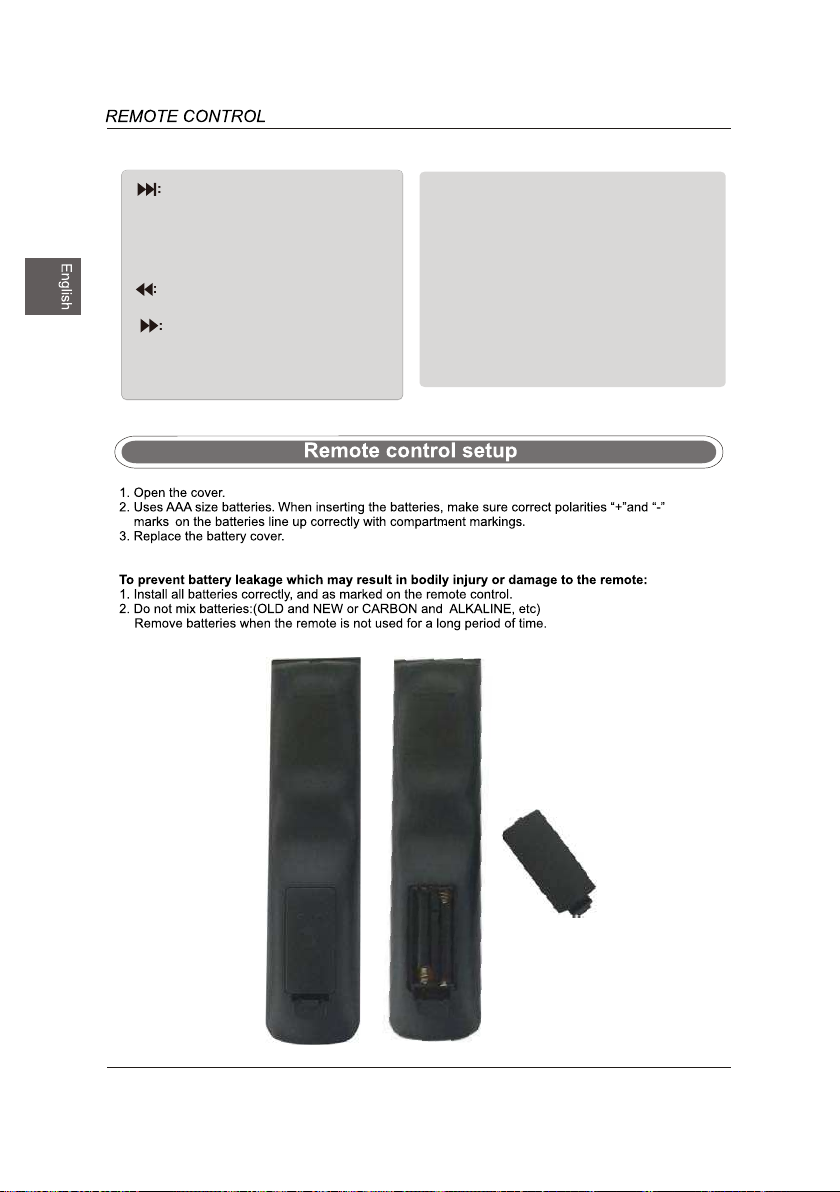
14
AD
D/ERASE:
Add or
del
ete f
avor
ite
channels
DVD.MENU:
FAV:
Display the favorite channel list.
To show the menu of the DVD disc.
TITLE:
Press to ret
ur
n to the
mai
n title
page. (DVD mode).
SUBTITLE:
Display the subtitle.
Reverse playback rapidly.
Advance playback rapidly.
V-CHIP:
Set up parental control
Skips to a specific location on a
A-B:
Repeats a segment between A and
S
erutcip eht tsujda ot sserP
,
standard mode
OK
.
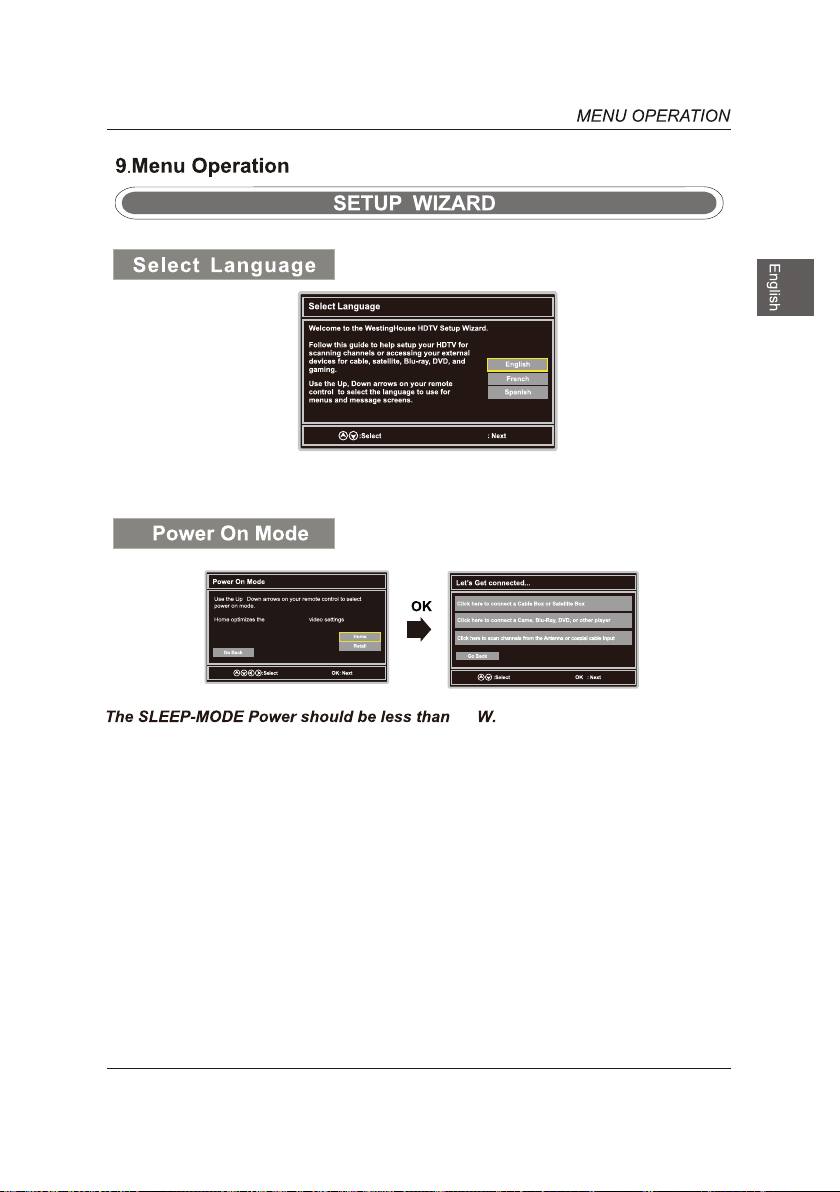
0.5
15
OK
,
OK
s
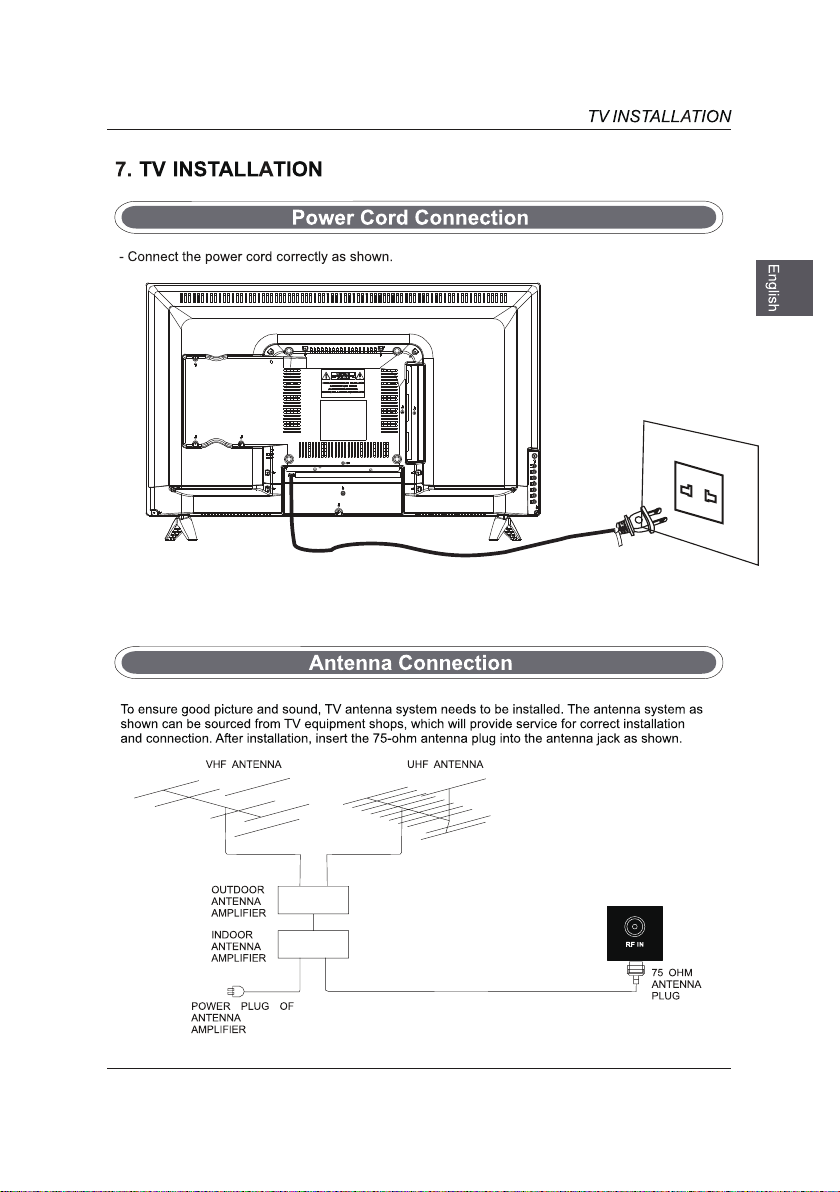
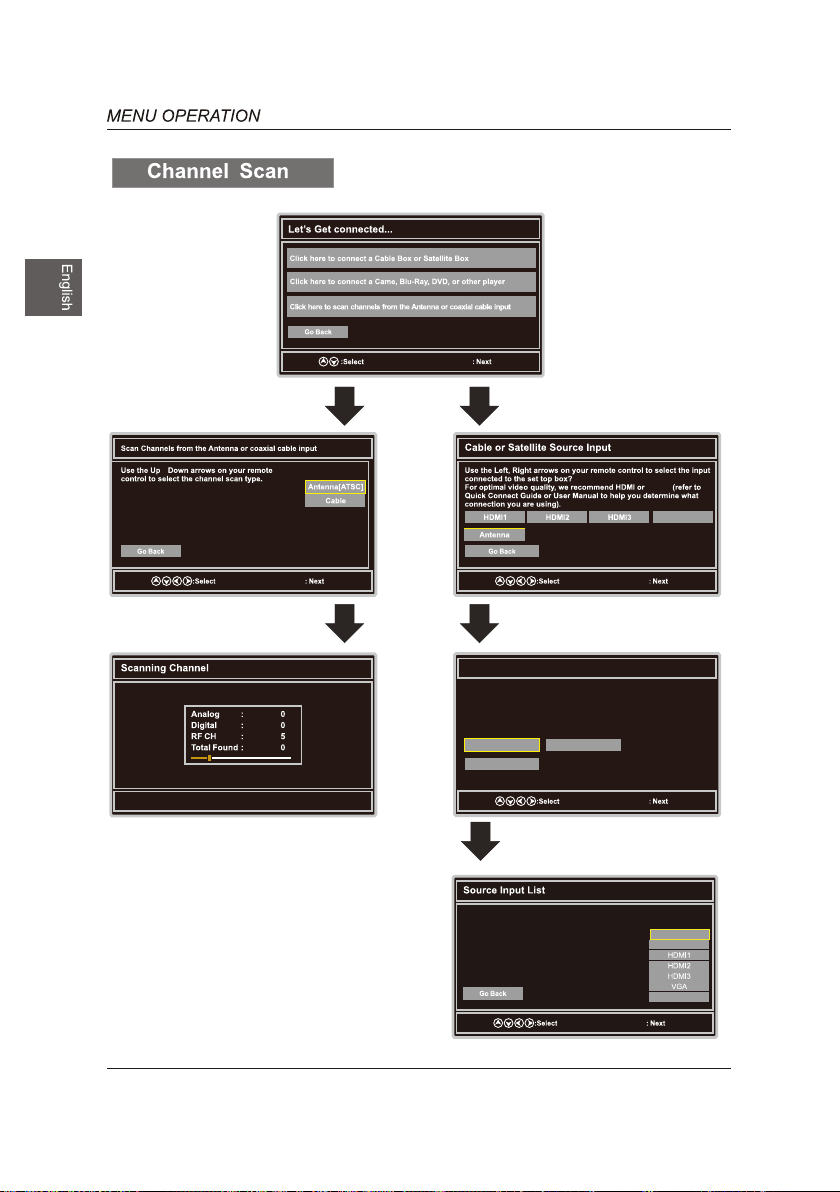
Ant enna RF Warn ing
Notice :Westing house E lectr onics do es not re comme nd usin g the RF
Ante nna inp ut as you r cable o r satel lite conne ction b ecaus e it will
provid e poor vi deo qua lity to y our HDT V.Use a dif feren t conne ction
for op timum c ondit ions. If you do n ot have a c able bo x that pr ovides
an HD qu ality s ignal ,we rec ommend th at you ca ll your c able pr ovide r
for an u pgrad e.Other wise,se lect Pr oceed .
Exi t Setup Pro ceed
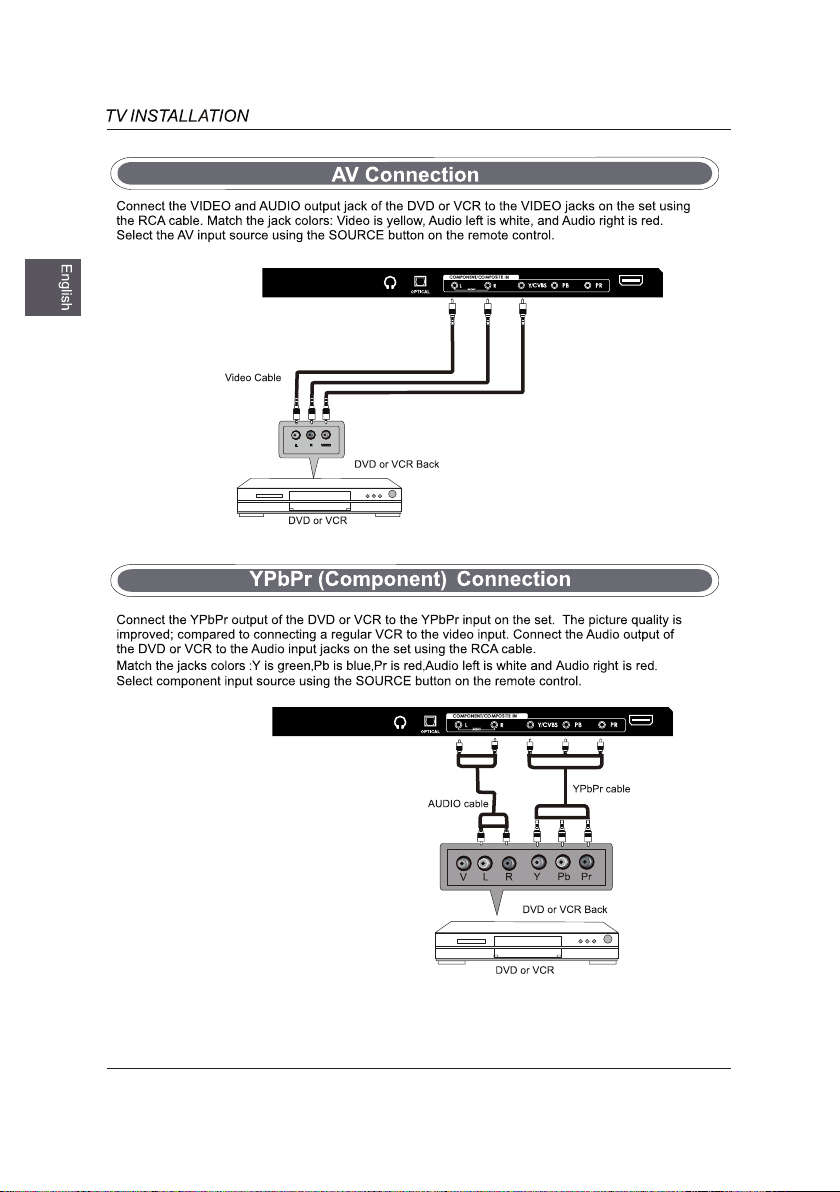
YPbPr
YPbPr/AV
OK
Go Ba ck
Menu : Skip DT V
OK
YPbPr/AV
DVD
USB
OK
16
YPbPr/AV
DVD
HDMI1
HDMI2
HDMI3
VGA
USB
Select Input Source
ok
Basic Operation
Lock
17
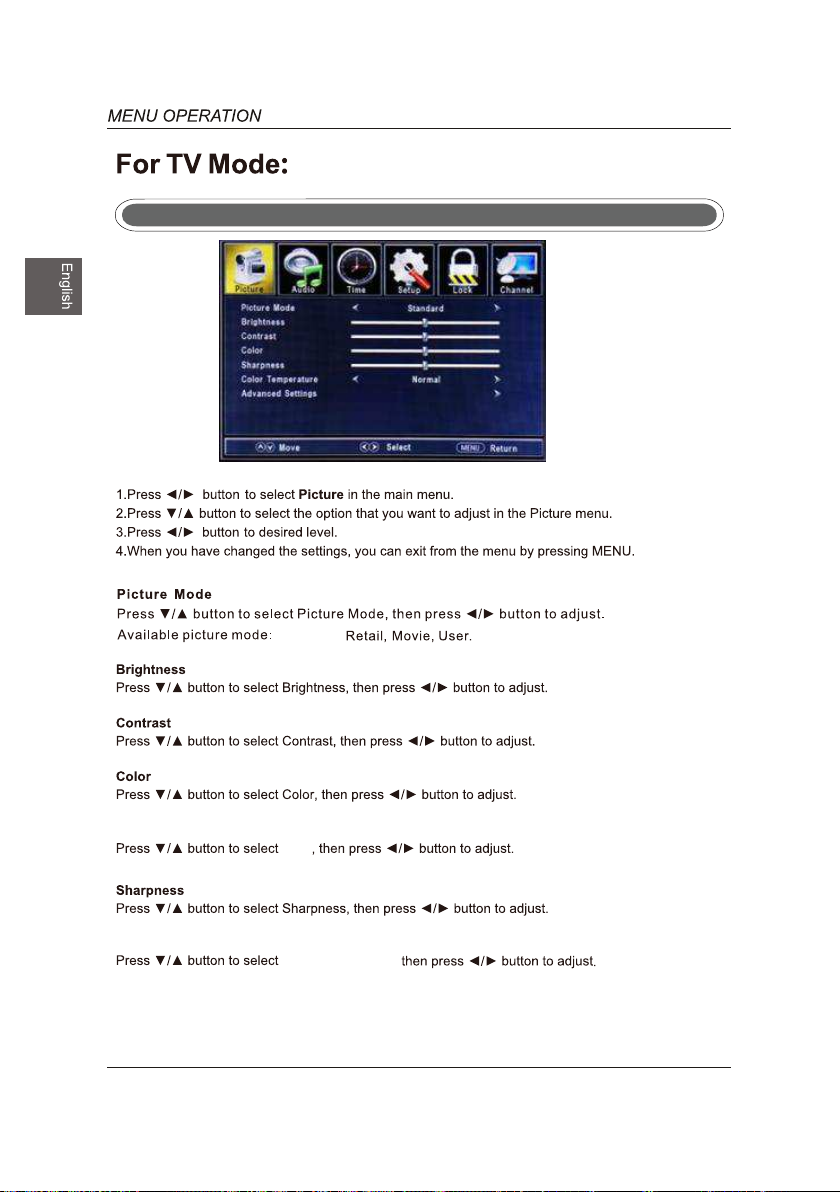
Standard,
Picture Menu
Tint
Color Temper at ur e
18
Tint
Color Temperature,
ok
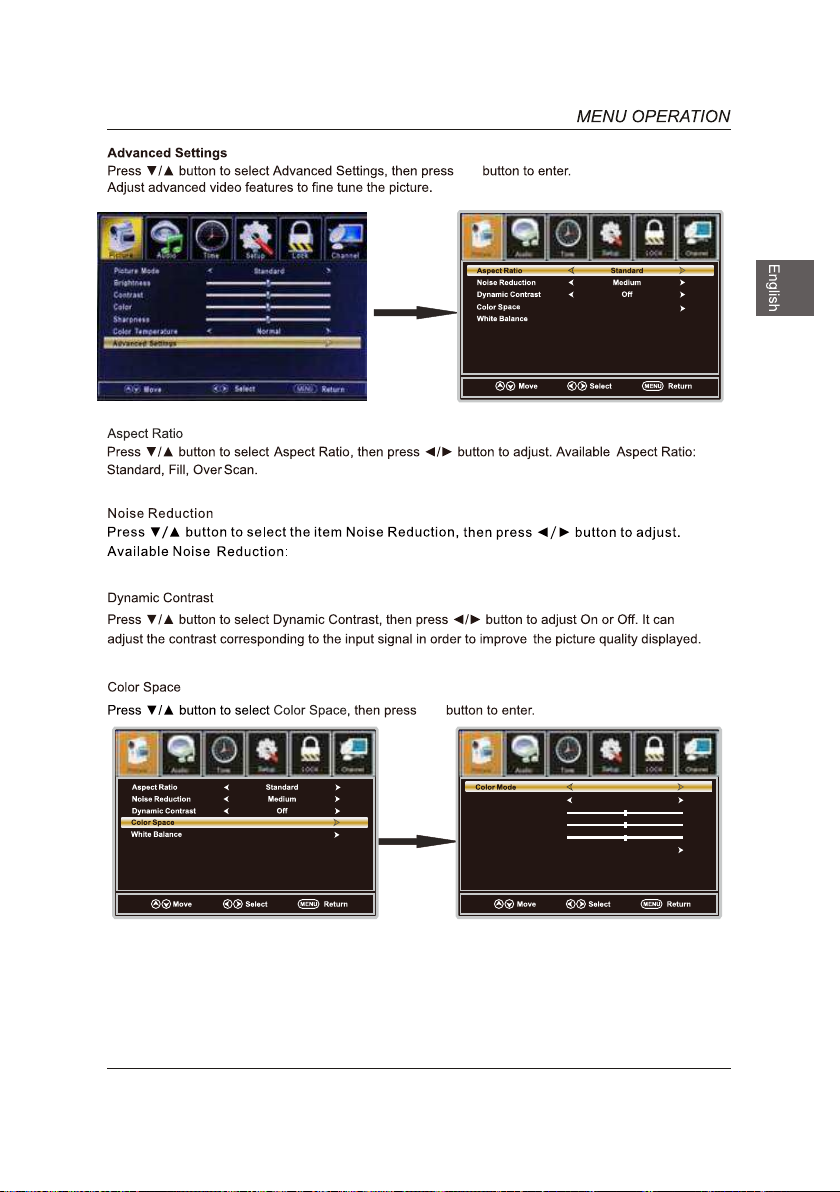
Off ,Weak,Medium,Strong.
ok
ok
Lock
LockLock
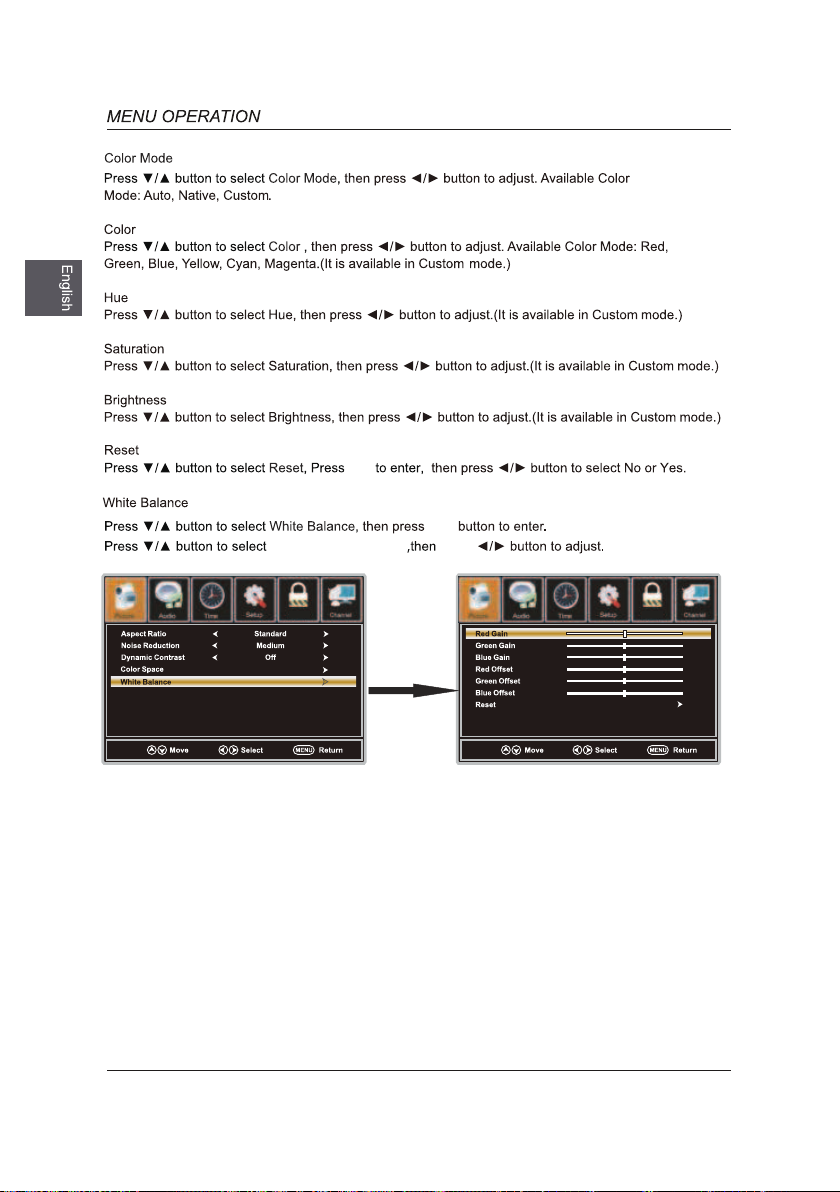
Colo r
Hue
ok
Satu ratio n
Brig htnes s
Rese t
Custom
Red
19
ok
the option you want
Lock
press
Lock
ok
20
ok
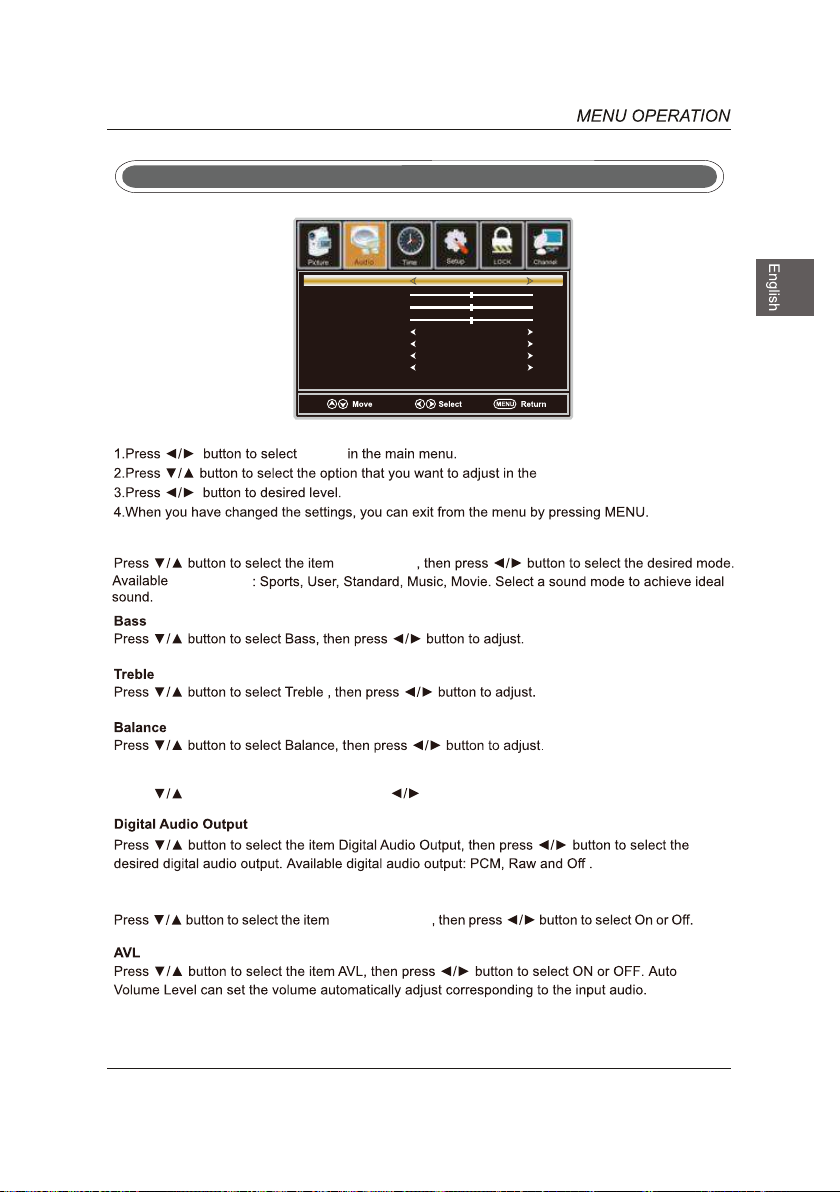
Audio
Menu
Sound Mode
Bass
Treble
Bala nce
MTS
Digi tal Aud io Oupu t
Surr ound Mo de
AVL
Standard
Stereo
PCM
On
On
Lock
Audio
Sound Mode
Sound Mode
Sound Mode
MTS
Press button to select MTS, then press button to adjust.
Audio m en u.
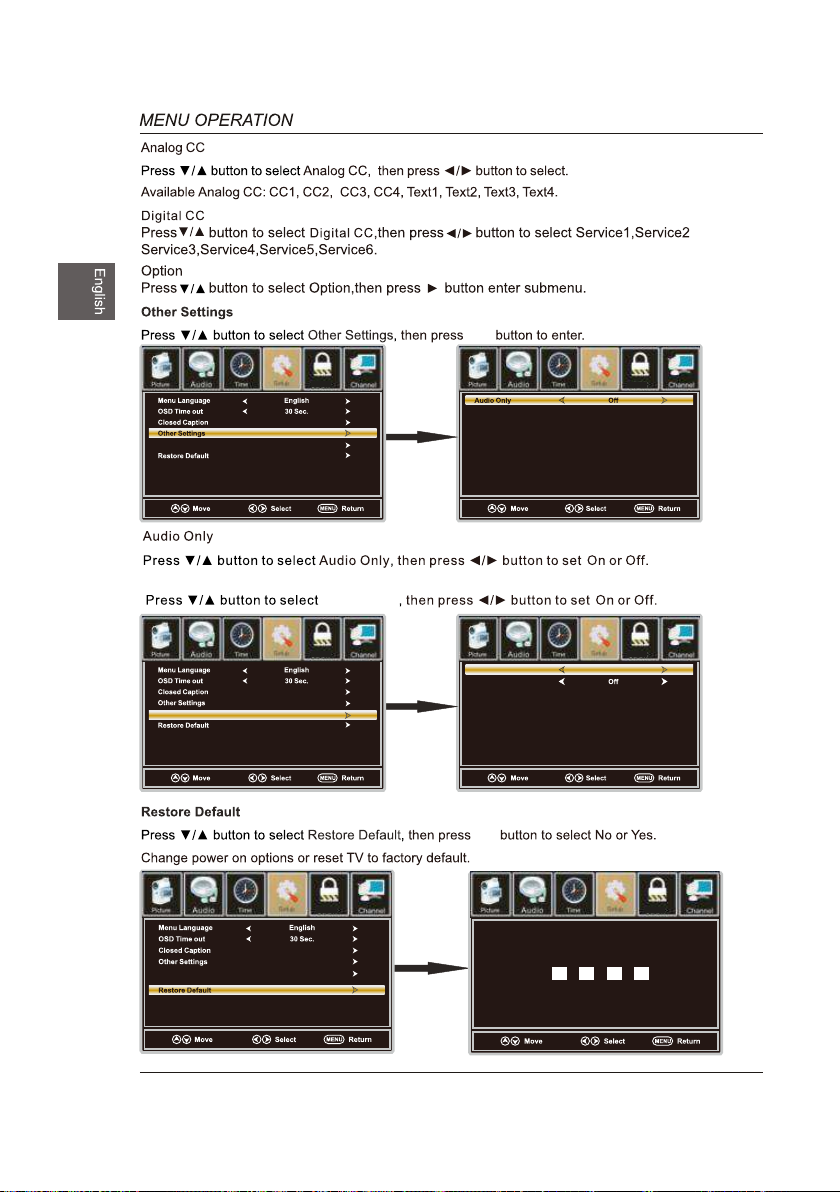
Surround Mode
Surround Mode
21
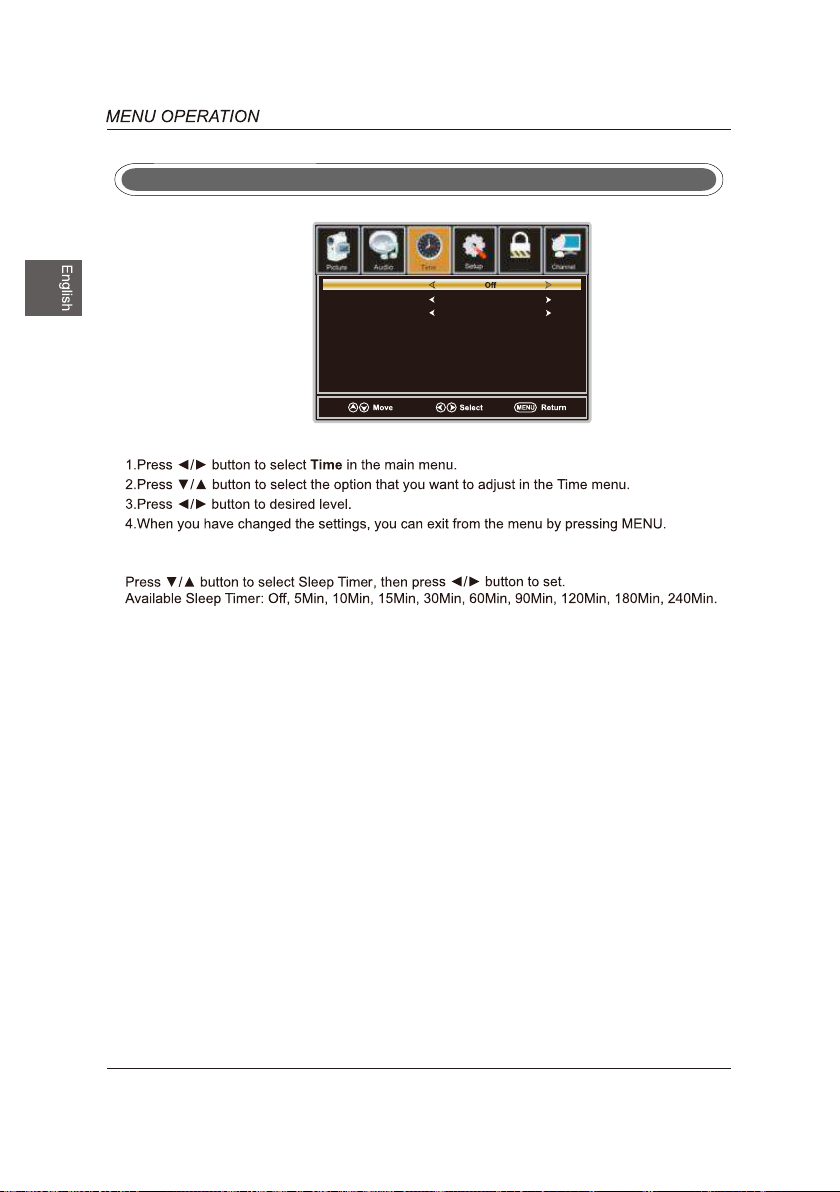
Time Menu
Sleep Timer
Time Zone Pacific
Daylight Saving Time Off
Lock
Sleep Time
Time Zone
Select a Time Z one among: Pacific/Alaska/H aw aii/Eastern/Central/Mountain/A tlantic or
Newfoundland.
Daylight Saving Time
Select to turn On/Off daylight saving time.
22
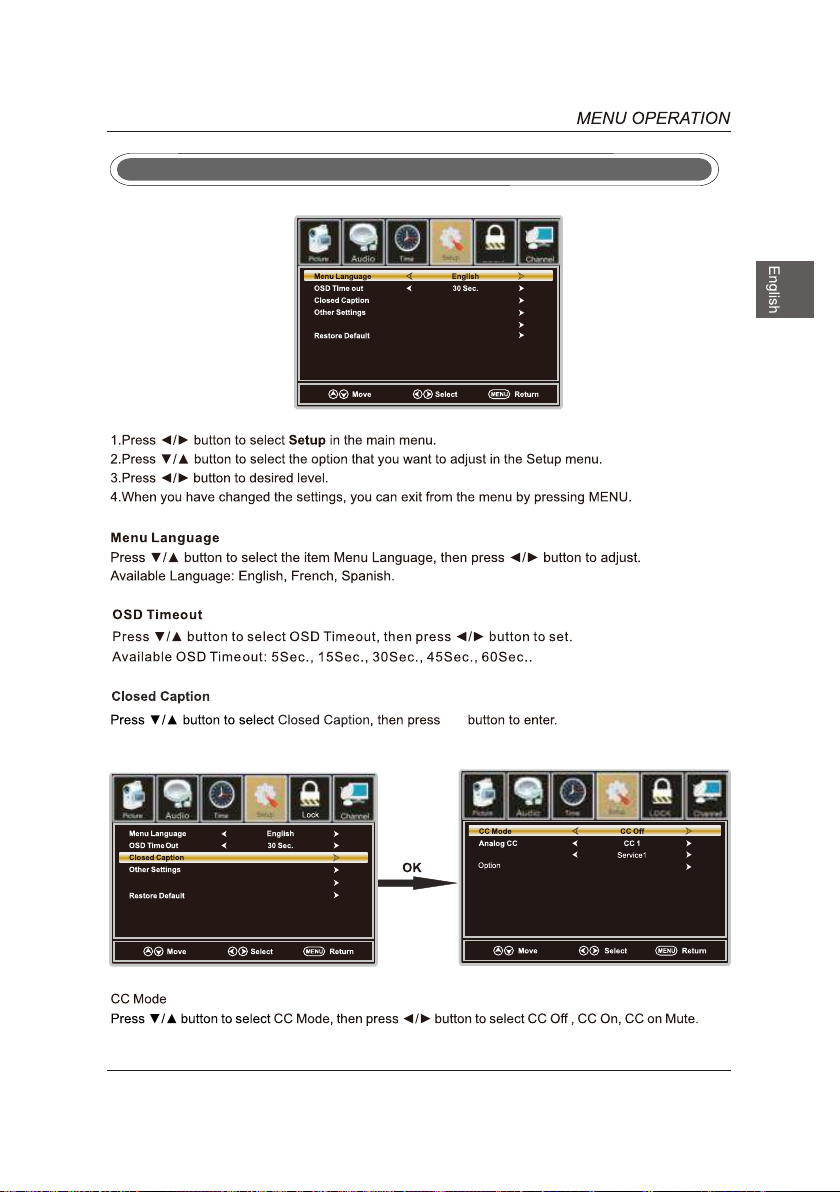
Setup Menu
Accessibility
Lock
OK
Accessibility
Digita l CC
23
OK
OK
Accessibility
Accessibility
Accessibility
Accessibility
Lock
Accessibility
Lock
Lock
Lock
ok
Lock
Voice Guide
ok
Video Description
On
ok
(0000)
(0000)
Lock
ok
Enter Password
OK"
Press to confirm"
24
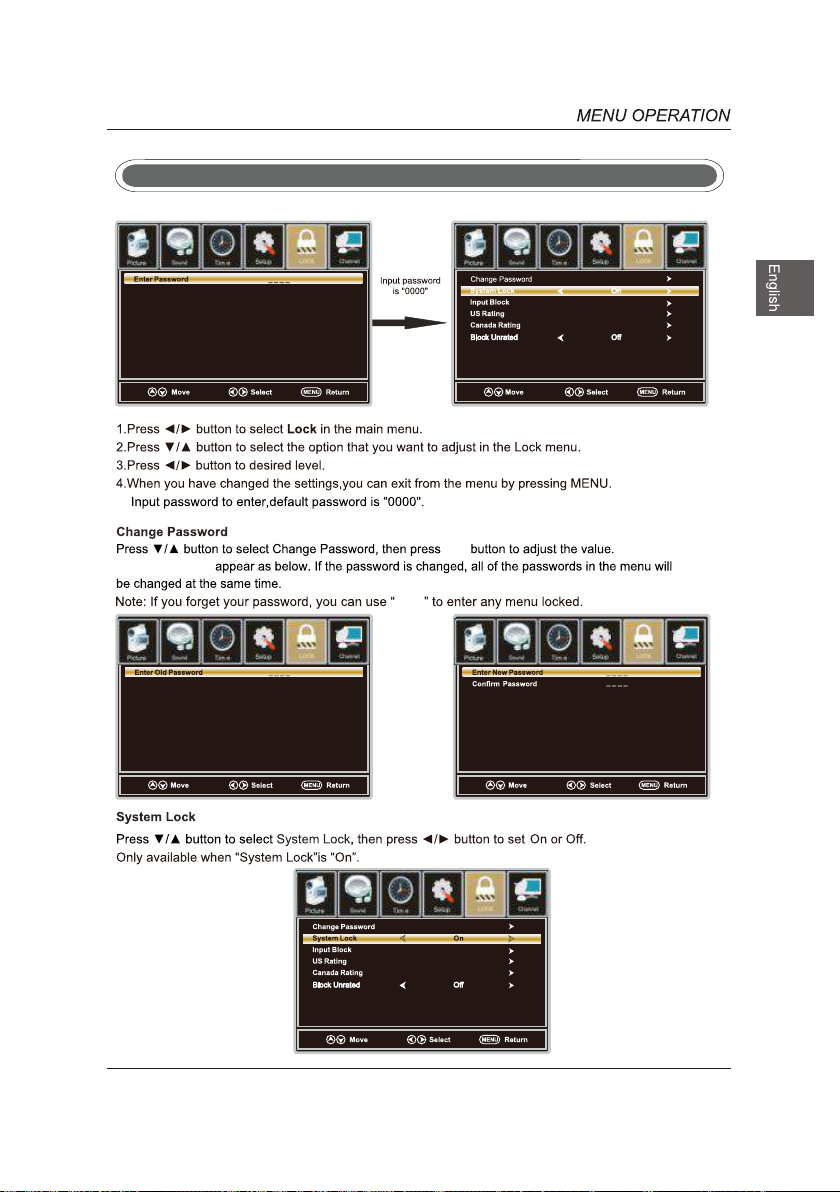
Lock Menu
a sub menu will
Lock
Lock
ok
ok
8899
Lock
Lock
Lock
25
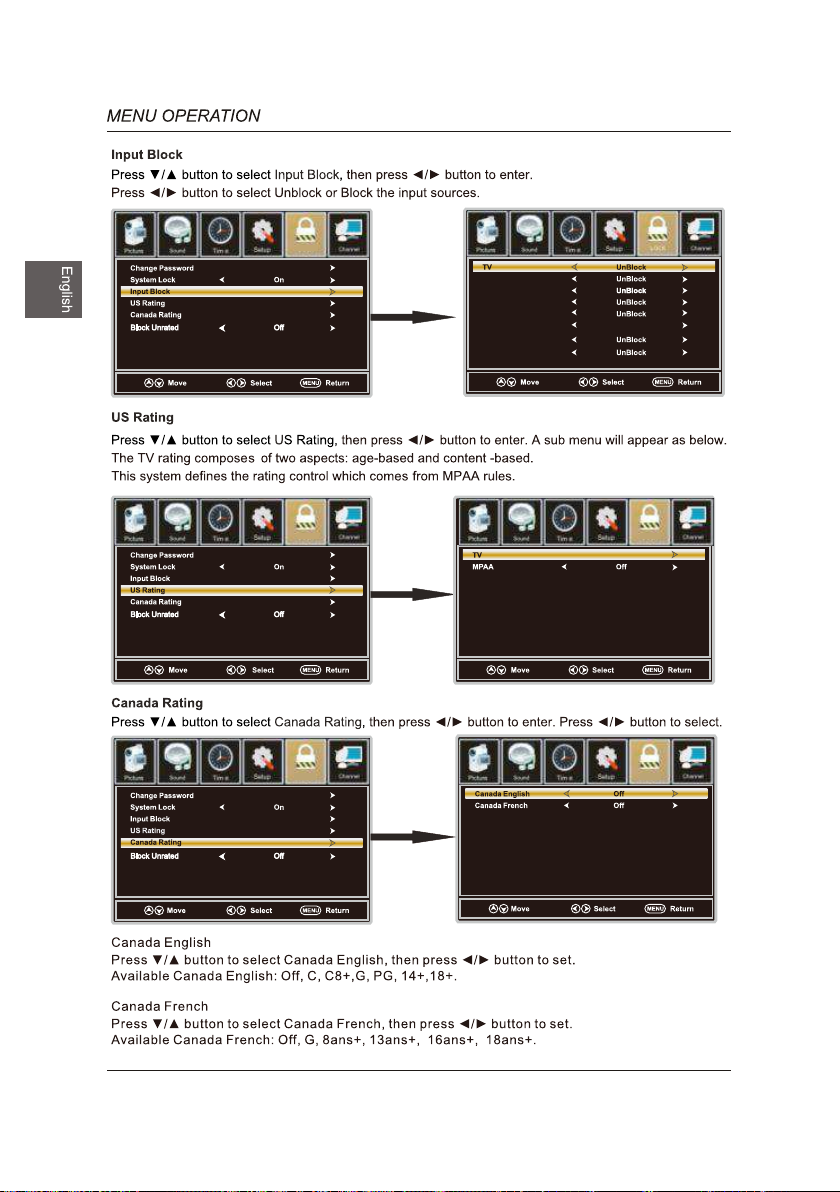
Lock
YPbP r/AV
DVD
ok
Lock Lock
HDMI1
HDMI2
HDMI3
VGA
USB
ok
Lock
Lock
ok
26
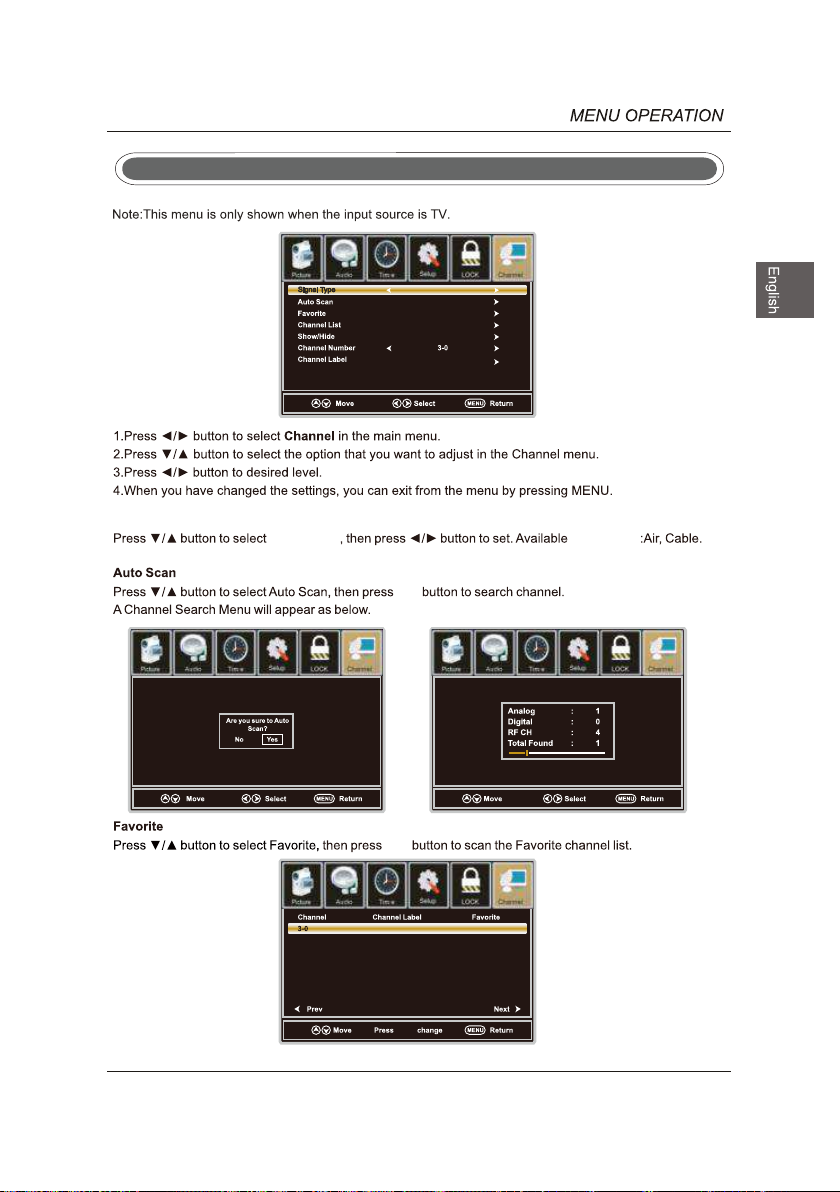
Channel Menu
Lock
Air
Signal Type
Sig nal Type
Lock
Sig nal Type
ok
Lock
ok
Lock
ok
27
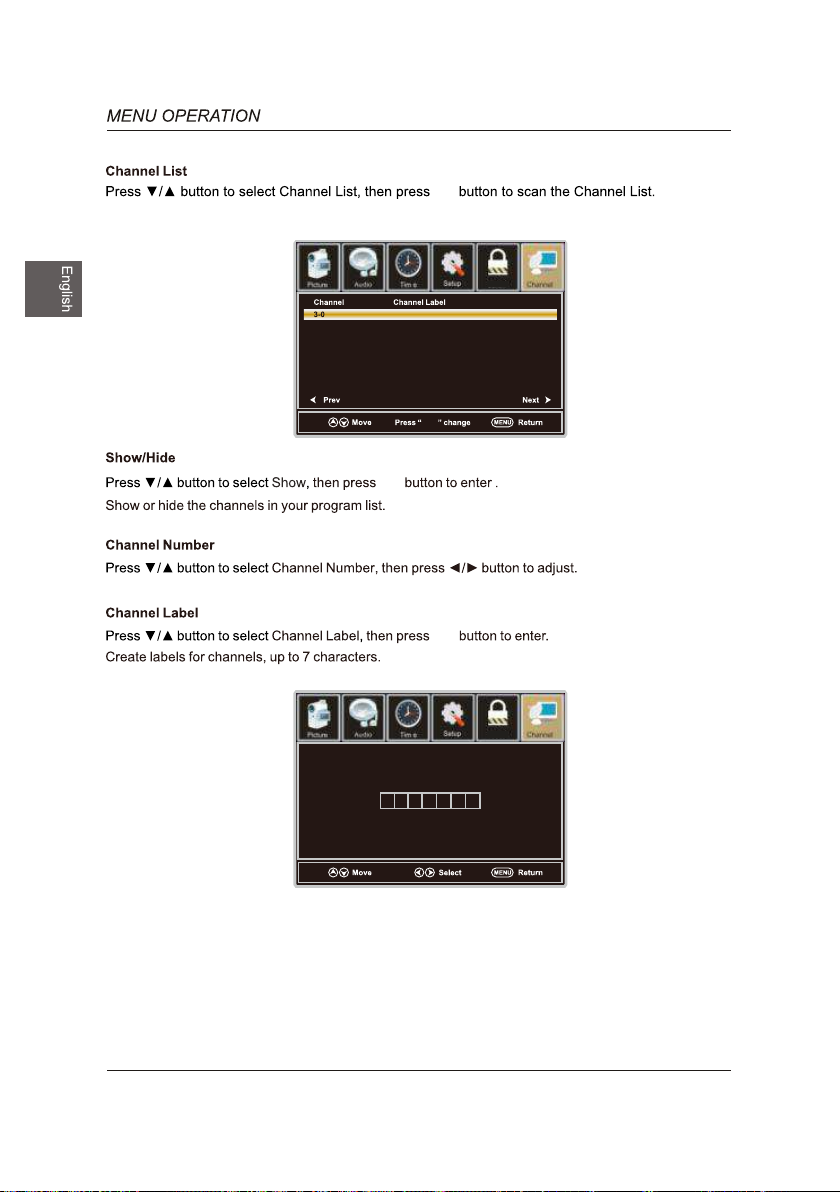
ok
ok
Lock
ok
ok
Lock
28
Setup Menu
Accessibility
3
Setup
Lock
ok
Lock
ok
AUD IO
are
29
 Loading...