

Page 1
Model No. OF-LT2 PENTAX
LEAK TESTER INSTRUCTIONS
The PENTAX Leak Tester allows for a simple two (2) stage testing of the
watertight integrity of PENTAX Endoscopes. Air pressure is delivered by
means of a hand operated bulb, eliminating the need for any electromechanical devices.
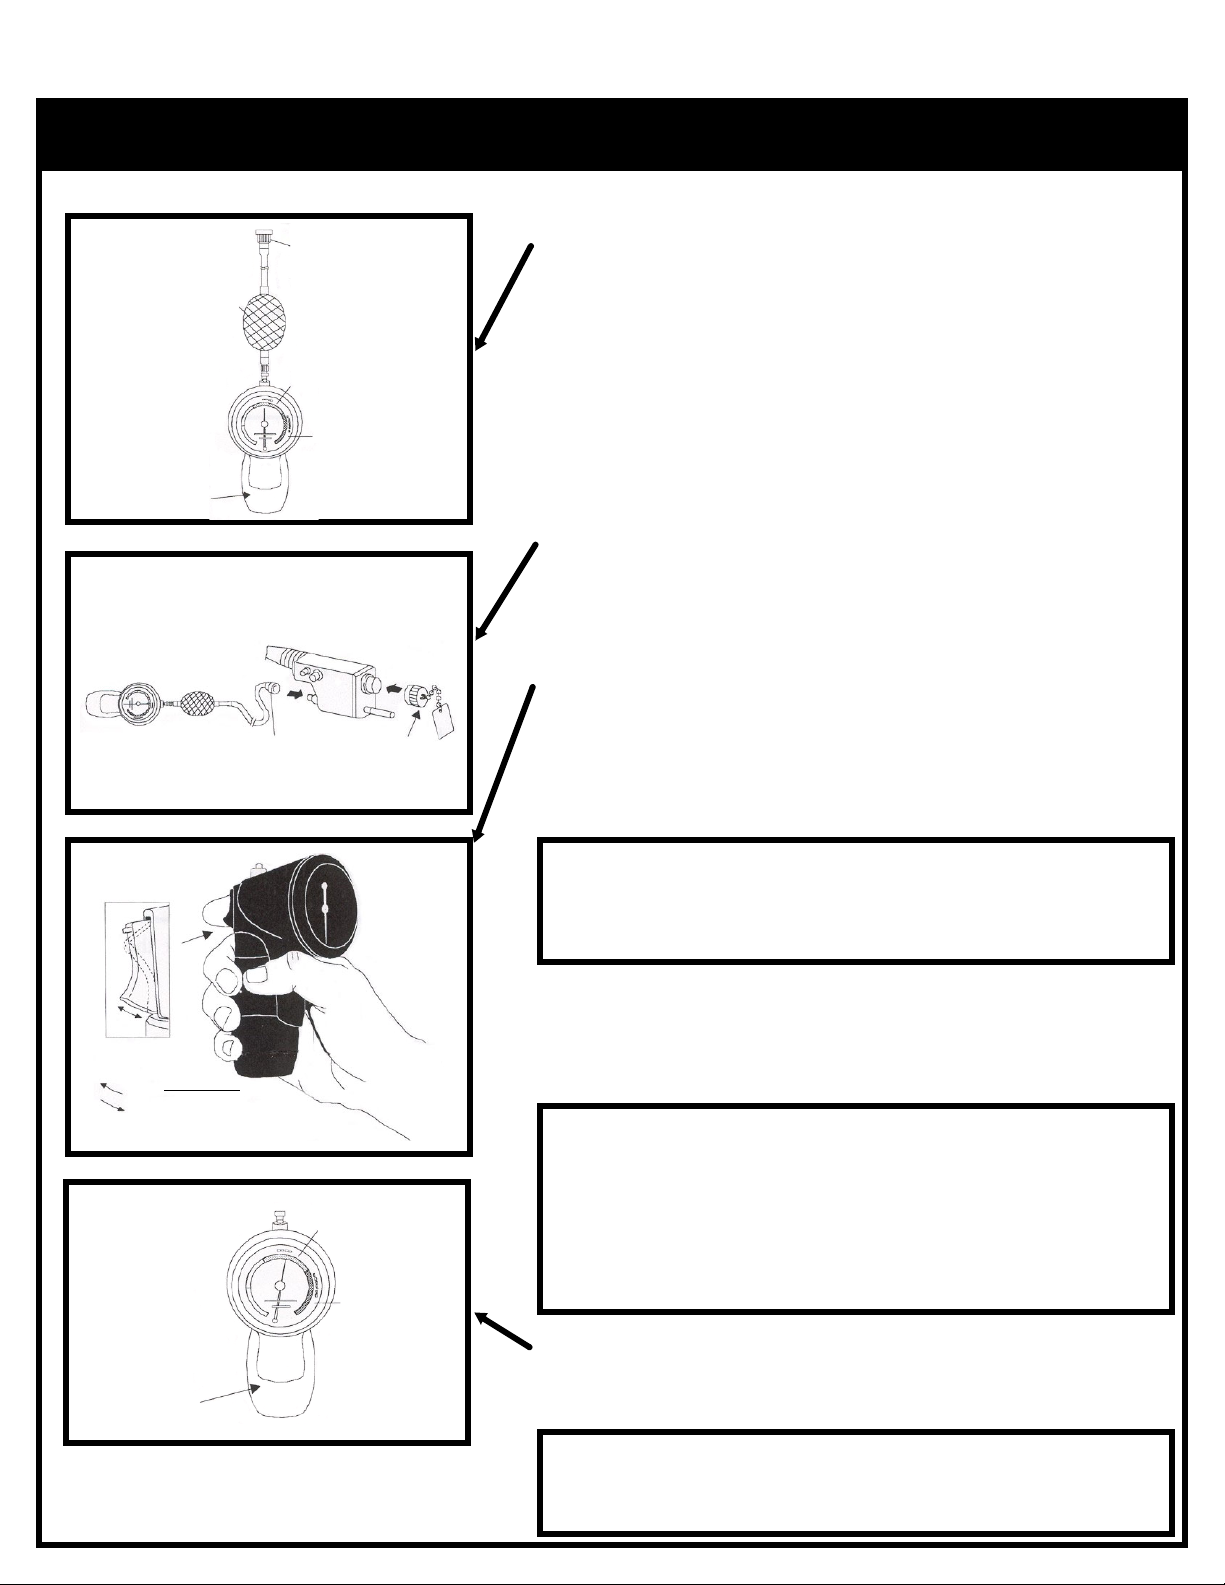
DRY TEST, STAGE I
BEFORE IMMERSION, PENTAX Endoscopes should be tested for any
major loss of integrity in their watertight construction (example: major tear
in the working channel).
AIR BLADDER
SCOPE
CONNECTOR
GREEN
ZONE
RED
ZONE
PRESSURE
BULB
SCOPE CONNECTOR
POSITION
“OUT” OR “PUMP”
“IN” OR “RELEASE”
SOAKING CAP
GREEN
ZONE
RED
ZONE
PVE
1) Secure the Leak Tester connector to the air vent on the scope
light guide. A soaking cap should be securely connected and
covering the electrical contacts of the light guide plug. The Leak
Tester connector and the air vent on the scope light guide MUST
be dry before connecting. Proper connection will require alignment of the air vent pin and clockwise rotation of the Leak Tester
connector.
2) Make sure that the pressure release trigger is in the “OUT” or
“PUMP” position.
3) Pressurize the scope by pumping the hand bulb until the indicator (needle) on the gauge is in the GREEN zone. DO NOT pressurize into the RED zone as it may cause serious damage to the
scope.
NOTE:
During the leak test procedure, the insertion tube of the scope
should be flexed in various positions and the distal bending section
should be fully angulated in a all directions to confirm the absence
of a leak.
Align the needle with one of the incremental pressure markings
(reference lines) in the Green one. It will be easier to notice any
minor leak with slow needle movement if the needle is lined up
with a point of reference.
NOTE:
This leak tester gauge is designed according to AAMI standards for
non-automatic sphygmomanometers to provide precise and accurate readings. As such, this unit incorporates a standard built-in
manometer bleed/leak rate which is illustrated by very slight pressure loss and needle movement.
Therefore, to confirm any suspected minor endoscope leaks, perform a stage II, wet leak test and carefully look for the presence of a
trail of air bubbles.
PRESSURE
BULB
4) Carefully observe the gauge pressure to determine if the indicator remains in the GREEN zone. If the indicator drops from the
GREEN zone rapidly, a major leak may be indicated.
NOTE:
DO NOT IMMERSE the entire instrument if the gauge indicator does
not remain in the GREEN zone. Instead, contact your PENTAX Service Center.
Page 2
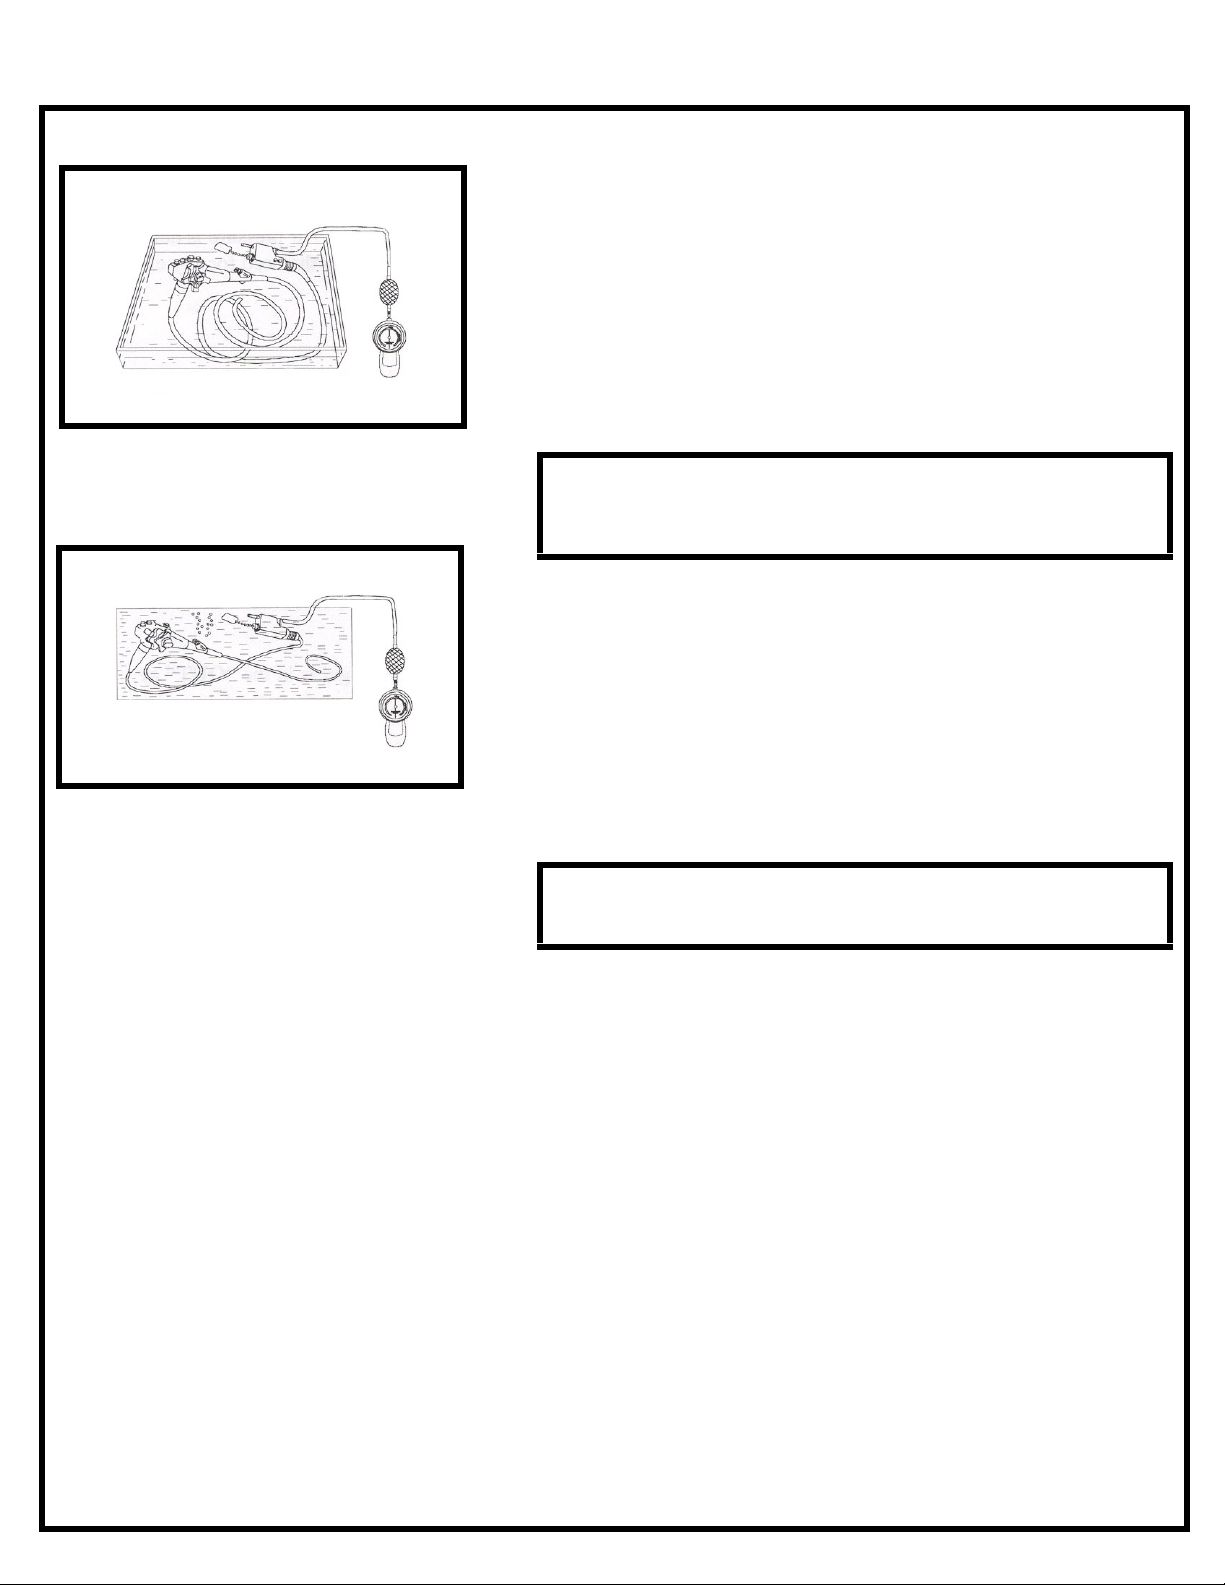
WET TEST, STAGE II
After determining the absence of any major leak in Stage I testing, PENTAX Endoscopes may be immersed to test for loss of integrity in their
watertight construction.
1) With the Leak Tester securely attached to the scope and the
scope pressurized with the gauge indicator in the GREEN zone,
and the soaking cap securely attached over the electrical contacts on the umbilical cable of the scope, the entire scope may
be immersed in clean water.
NOTE:
Only the Leak Tester connector and a small portion of its tubing
should be immersed.
bulb/gauge areas.
2) Observe the instrument carefully while fully angulating the distal tip of the scope. A few bubbles may occur initially from the
recessed areas of the scope. This is normal. If a continuous
stream of bubbles is observed from the same spot, a leak is
indicated. Immediately remove the scope from the water. DO
NOT use the scope.
NEVER
immerse the entire Leak Tester or
3) After removing the scope from water, release the air pressure
within the scope by pushing the “IN” pressure “RELEASE”
trigger on the handle of the Leak Tester. After the gauge indicates ‘zero’, disconnect the Leak Tester from the scope.
NOTE:
NEVER
connect or disconnect the Leak Tester under water. This
will cause leakage of water into the scope and Leak Tester.
4) If leakage was discovered in step (2), thoroughly dry the instrument and contact your PENTAX Service Center.
5) If no leakage was discovered in step (2), you may proceed with
cleaning and disinfection/sterilization of the scope as described
in the Operating Manual for the specific PENTAX scope
involved.
Pentax Precision Instrument Corporation
30 Ramland Road * Orangeburg, NY 10962 * 800.431.5880
Rev 10.97.00
95P419 Rev B
 Loading...