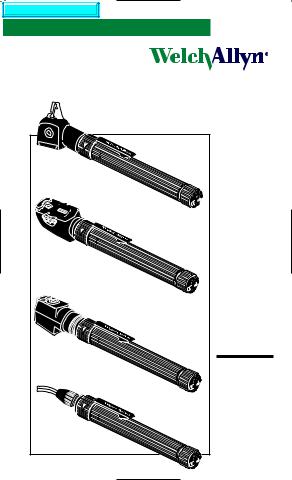
Welch Allyn Pocketscopes User manual

Diagnostic Instructions
PocketScopes™
Otoscope
Ophthalmoscope
Operating
Instruction
Manual
Retinoscope
Transilluminator

Thank you for purchasing the Welch Allyn Halogen PocketScope Set. The operating and maintenance instructions found in this manual are for both the Ophthalmic and Diagnostic model sets. They should be followed to ensure many years of accurate and reliable service. Please read these instructions thoroughly before using your PocketScope.
Note:
While the handles and instrument heads of the PocketScopes are interchangeable, different lamps are required for different instrument heads. For the retinoscope use lamp No. 06200, for the ophthalmoscope No. 03900 and for the otoscope/throat illuminator and transilluminator lamp No. 03400.
For guaranteed performance, use genuine Welch Allyn lamps only.
Mode d'emploi des PocketScopes™
Merci d'avoir acheté un jeu de PocketScope™ WelchAllyn.
A la différence des poignées et des têtes, qui sont interchangeables, les lampes à utiliser sont spécifiques à chaque tête d'instrument. Veuillez consulter les diagrammes pour savoir comment remplacer les différentes lampes.
Otoscope : (p. 7)
21131 – Tête d'otoscope standard (lampe 03400)
21111 – Otoscope avec source lumineuse pour la gorge ( lampe 03400). Pour convertir l'otoscope en source lumineuse pour la gorge, il suffit de dévisser la tête de l'otoscope.
Rétinoscope : (p. 6)
Pour utiliser le rétinoscope, déployez l'appareil en tirant la tête vers l'extérieur.
Le manchon de mise au point permet d'effectuer la mise au point et la rotation des stries.
Ophtalmoscope : (p. 8)
Instructions relatives aux lentilles –
Dioptries ‘+’ - Faites pivoter le cadran de la lentille dans le sens horaire. A +6, faites de nouveau tourner le cadran de la lentille dans le sens horaire puis placez le ‘multiplier lever’ sur la position ‘+’. Faites de nouveau pivoter le cadran de la lentille dans le sens horaire si vous souhaitez atteindre les paramètres +7 à +22.
Dioptries ‘–’ - Faites pivoter le cadran de la lentille dans le sens horaire inverse. A –9, faites de nouveau tourner le cadran de la lentille dans le sens horaire inverse. Placez ensuite le ‘multiplier lever’ sur la position ‘–’. Continuez à faire pivoter le cadran de la lentille dans
le sens horaire inverse si vous souhaitez atteindre les paramètres –10 à –25.
1

Bedienungsanleitung für
PocketScopes™
Wir bedanken uns für Ihren Kauf eines PocketScope™- Satzes von WelchAllyn.
Obwohl die Griffe und Instrumentenköpfe untereinander austauschbar sind, werden für die verschiedenen Instrumentenköpfe verschiedene Lampen benötigt.
Der Lampenaustausch ist auf den diagrammatischen Abbildungen angezeigt.
Otoskop: (p. 7)
21131 – standardmäßiger Otoskopkopf (Lampe 03400)
21111 – Otoskop mit Halsbeleuchter (Lampe 03400). Zur Konversion des Otoskops in einen Halsbeleuchter wird einfach der Otoskopkopf aufgeschraubt.
Skiaskop: (p. 6)
Zur Verwendung des Skiaskops dieses zunächst teleskopisch auseinander ziehen, indem der Kopf nach außen gezogen wird.
Ein Brennpunktaufsatz ermöglicht die Scharfeinstellung und Rotation des Streifens.
Ophthalmoskop: (p. 8)
Linsenanleitung –
‘+’ Dioptrie – Die Linsenscheibe im Uhrzeigersinn drehen. Bei +6 die Linsenscheibe wiederum im Uhrzeigersinn drehen und dann den ‘Multiplier Lever’ in die Position ‘+’ stellen. Die Linsenscheibe dann wieder im Uhrzeigersinn für +7 bis +22 drehen.
‘-‘ Dioptrie – Die Linsenscheibe gegen den Uhrzeigersinn drehen. Bei +9 die Linsenscheibe wiederum gegen den Uhrzeigersinn drehen. Danach den ‘Multiplier Lever’ in die Position ‘-‘ stellen. Die Linsenscheibe dann weiter für –10 bis –25 gegen den Uhrzeigersinn drehen.
Istruzioni d'uso del PocketScopes™
Grazie per avere acquistato un set PocketScope™ WelchAllyn.
Le impugnature e le teste degli strumenti sono intercambiabili, tuttavia le teste degli strumenti richiedono l'uso di lampadine diverse. Per la sostituzione delle lampadine fare riferimento alle figure riportate qui di seguito.
Otoscopio (p. 7)
21131 – Testa standard per otoscopio (lampadina 03400)
21111 – Otoscopio con illuminatore laringeo (lampadina
03400). Per convertire l'otoscopio in illuminatore laringeo basta svitare la testa dell'otoscopio.
Retinoscopio (p. 6)
Per usare il retinoscopio estrarre la testa dello strumento.
Un apposito cilindro di focalizzazione consente di ruotare il fascio luminoso e di regolarne l’ampiezza.
Oftalmoscopio (p. 8)
Istruzioni per la regolazione della messa a fuoco.
Diottrie ‘+’ – Ruotare il selettore della lente in senso orario. A +6 ruotare nuovamente il selettore in senso orario, quindi portare la ‘multiplier lever’ sulla posizione ‘+’. Per le diottrie comprese tra +7 e +22, ruotare ancora il selettore in senso orario.
Diottrie ‘-‘ Ruotare il selettore della lente in senso antiorario. A -9 ruotare nuovamente il selettore in senso antiorario, quindi portare la ‘multiplier lever’ sulla posizione ‘-‘ . Per le diottrie comprese tra -10 e -25 continuare a ruotare il selettore in senso antiorario.
2 |
3 |

Instrucciones de funcionamiento de PocketScopes™
Le agradecemos su compra del SET PocketScope™ de WelchAllyn.
Aunque los mangos y las cabezas del instrumento son intercambiables, se necesitan bombillas diferentes para las DISTINTAS cabezas del instrumento. En los diagramas se indica cómo cambiar de bombilla.
Otoscopio: (p. 7)
21131 – cabeza de otoscopio normal (bombilla 03400)
21111 – Otoscopio con iluminador de garganta (bombilla
03400). Para convertir el otoscopio en un iluminador de la garganta sólo hay que desenroscar la cabeza del otoscopio
Retinoscopio: (p. 6)
Para usar el retinoscopio, tire primero de la cabeza hacia fuera para que salga como un telescopio.
El manguito de enfoque permite enfocar y hacer girar la FRANJA.
Oftalmoscopio: (p. 8)
Instrucciones para la lente –
‘+’ Dioptrías - Gire el dial de la lente en sentido horario. A +6 mueva otra vez el dial de la lente en sentido horario, luego mueva la ‘multiplier lever’ a la posición ‘+’. Vuelva a mover el dial de la lente en sentido horario para +7 a +22
‘-‘Dioptrías – Gire el dial de la lente en sentido antihorario. A –9 mueva otra vez el dial de la lente en sentido antihorario. Luego mueva la ‘multiplier lever’ a la posición ‘-‘. Siga moviendo el dial de la lente en sentido antihorario para –10 a -25
PocketScope Retinoscope |
|
Retinoscope Features...................................... |
6 |
PocketScope Otoscope |
|
Throat Illuminator............................................. |
7 |
PocketScope Ophthalmoscope |
|
Ophthalmoscope.............................................. |
8 |
Ophthalmoscope Lens Instructions .............. |
8-9 |
PocketScope Transilluminator |
|
Transilluminator Features .............................. |
10 |
Transilluminator Attachment .......................... |
10 |
Lamp Replacement |
|
Retinoscope Lamp Replacement................... |
11 |
Otoscope Lamp Replacement ....................... |
12 |
Ophthalmoscope Lamp Replacement ........... |
13 |
Transilluminator Lamp Replacement ............. |
14 |
PocketScope Desk/Wall Charger |
|
Desk/Wall Charger Installation ................. |
14-15 |
PocketScope Handles |
|
AA Battery Handle ......................................... |
16 |
Convertible Handle (AA & Rechargeable) |
.....17 |
Batteries |
|
Recharging Batteries ..................................... |
18 |
Changing Batteries ................................... |
18-19 |
Cleaning Recommendations ...................... |
20 |
Replacement Parts ................................. |
20-21 |
Technical Specifications ........................ |
22-24 |
Maintenance ................................................. |
25 |
4 |
5 |

PocketScope Retinoscope
Retinoscope Features
•External focusing sleeve allows for easy adjustment regardless of what size hand or how instrument is held. Continuous 360˚ rotation.
•Dust-free optics to keep instrument clean longer.
•Fixation cards that easily attach for use during dynamic retinoscopy.
•Collapsible head for compact size.
Patents: US 5,189,449 and 5,459,535
NOTE: The retinoscope must be telescoped out by pulling in an outward direction. The retinoscope can only be used if this operation is performed.
Patient Side |
Practitioner Side |
Rubber brow rest
Dust-free
optics
Focusing
sleeve
6
PocketScope Otoscope
Throat Illuminator (21111 only)
To convert otoscope to throat illuminator, unscrew otoscope head in counterclockwise direction.
NOTE: Illuminator section can become hot. Avoid more than momentary direct skin contact.
To turn instruments on and off, and vary intensity rotate switch at base of instrument head. As intensity increases, green band gets thicker.
Throat |
Illuminator |
On/Off |
Rheostat Switch |
7 |
 Loading...