

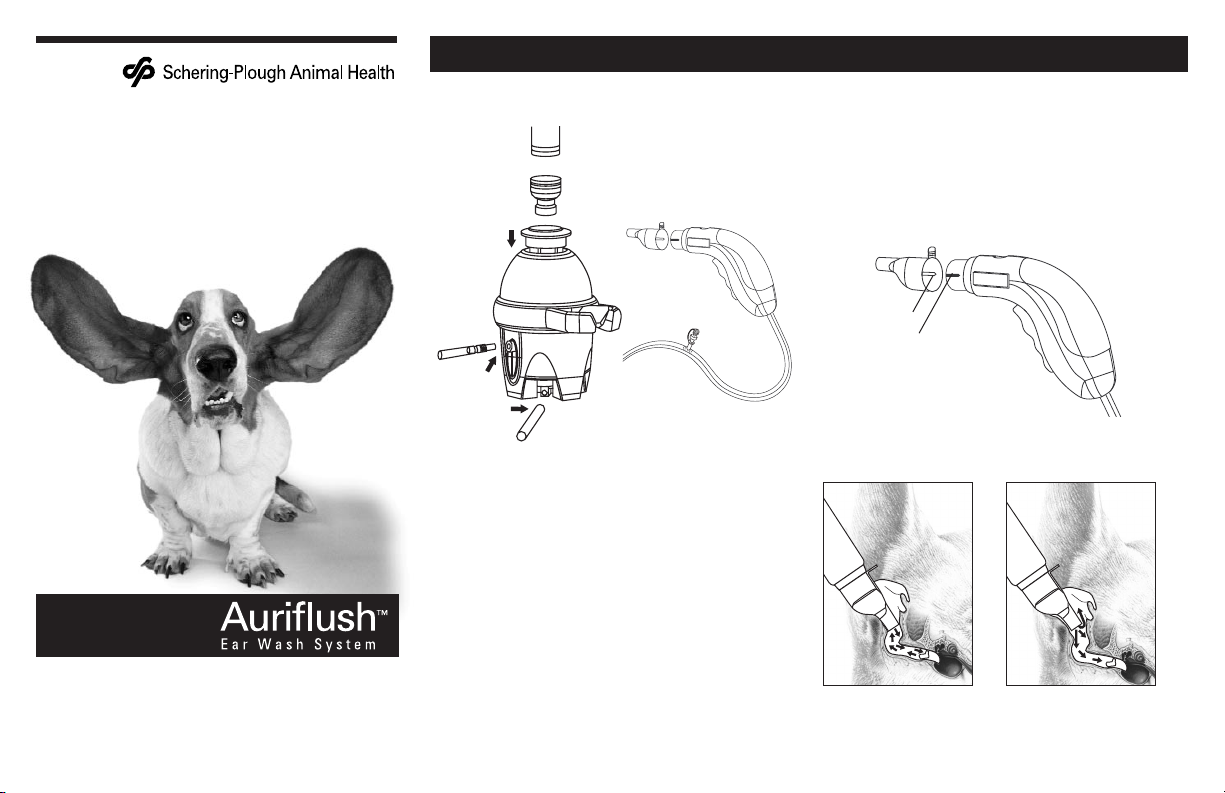
Figure 2: Attaching an eartip to the handle (note that the tab
on the eartip is facing up).
Figure 3: Correct and incorrect irrigation techniques.
Arrows indicate water flow.
Ridge
Groove
Quick Reference Guide
Match
colors
Pull down
on ring
Snap Aerator
To Faucet
Injection
Port
Figure 1: Auriflush Ear Wash System Assembly
Initial Set Up
See the manual for more detailed instructions.
1. Unscrew current aerator and its washer from the faucet.
2. Attach the snap aerator.
3. Match the colors and connect the tubing to the chamber.
4. Attach the chamber to the faucet.
Pull down the white
plastic ring on the top of the chamber and then snap the
chamber over the snap aerator on the faucet. When the
chamber is in place, release the white plastic ring.
5. Set the temperature.
First turn on the cold water
completely, then gradually turn on the hot water.
6. Depress the actuator on the handle. The blue sensor on
the handle will become white when the water temperature going through it becomes approximately 90
°
F. If the
water is too cold, the patient may experience vertigo or
discomfort.
NOTE:
If the water temperature exceeds 110°F, water will stop
flowing from the eartip. Reduce the water temperature
and then adjust to an approximate body temperature
again.
NOTE:
If you are experiencing an excessive amount of water
splash around your sink, you may attach the optional
chamber aerator to the bottom of the chamber. See
the Operating Instruction Manual for more details.
CORRECT FLOW INCORRECT FLOW
SPAH-AFL-8
Pour 1⁄2cup of cleaning
solution into chamber
AuriflushTMEar Wash System
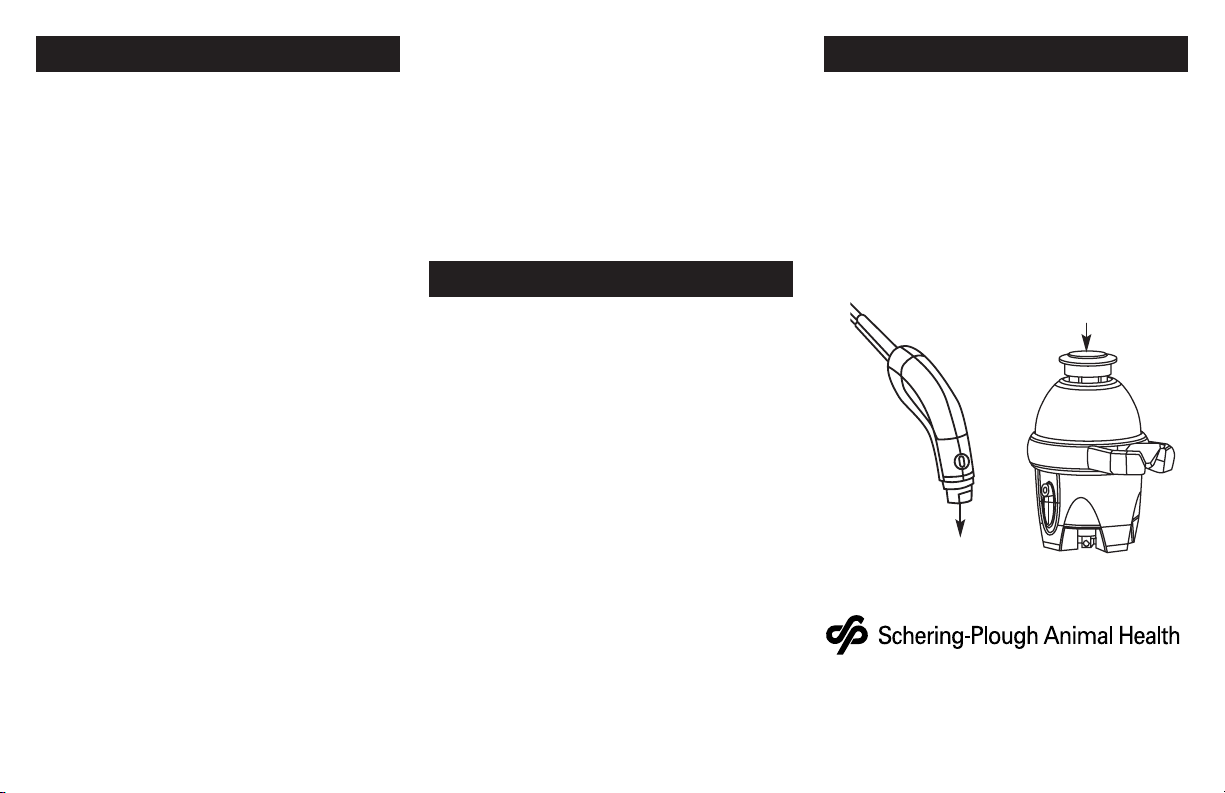
Figure 4: Cleaning/Disinfecting the Ear Wash System.
Place handle
into 3
1
⁄2cups of
cleaning solution
Ear Wash System Usage
Cleaning the Unit (see Figure 4)
To Disassemble
www.sp-animalhealth.com
Schering-Plough Animal Health Corp., Union, NJ 07083
© 2001, Schering-Plough Animal Health Corp.
All rights reserved.
NOTE:
Always inspect the ear before cleaning procedures
to ensure there is not a perforated or compromised
tympanic membrane. Use of the Auriflush System on
patients with current or prior history of chronic middle
ear infection is left to the discretion of the veterinarian.
To reduce procedure time, use an ear cleansing solution or
cerumenolytic agent, such as Gent-L Clens
®
.
1. Attach an eartip to the interface on the irrigation handle
with the tab side up. Line up the ridge on the inside of
the eartip with the corresponding grooves on the handle
interface. Press firmly on the eartip until it is flush against
the handle interface (Figure 2).
2. Gently pull the pinna up and away from the head. While
maintaining tension on the pinna, insert the tip of the
handle into the ear to create a seal.
3. Aim the stream of water toward the ear canal walls by
rotating the handle during the irrigation (Figure 3). Flood
the ear with water. The suction return system will return
the discharge away from the ear.
4. If you wish to administer an additional agent to augment
the cleansing effect, simply inject it into the Injection Port
while continuing to irrigate the ear canal.
NOTE:
Discoloration or staining of the tubing can occur over
time due to local water conditions and/or introduction
of Betadine or other ear cleaning solutions.
5. Maintain the temperature of the irrigating water.
Glance occasionally at the temperature sensor to ensure
the sensor is still white. If the temperature of the water
becomes too hot, the unit will restrict the flow to the
handle, while continuing the discharge out of the bottom
of the unit. To reset, bring water temperature down to a
safe level. Adjust the knobs on the faucet until the water
cools sufficiently.
6. Release actuator and keep the eartip by the ear canal for
5 to 10 seconds to vacuum any residual water.
EAR WASH SYSTEM USAGE (continued)
NOTE:
The procedure typically takes 30 seconds to 5 minutes
depending on the consistency of the cerumen, quantity
of debris, degree of inflammation and/or infection and
whether a wax softening agent was used.
7. When the procedure is complete, grasp the tab located on
the eartip and pull off with a downward motion.
Eartip is disposable and should be placed in appropriate
receptacle.
If you are running low on eartips, contact your SPAH
representative, SPAH authorized distributor, or call SPAH
direct at 800-521-5767, and reorder Part #0061-2005-02.
1. To clean the unit, prepare a 4-cup solution of soap and
water.
2. Detach the chamber from the faucet. Leave hoses attached
to the unit. Pour
1/2
cup of the solution into the top opening
of the coupler. Save the remainder of the solution for later
steps of this procedure.
3. Replace the chamber on the faucet head and submerge
the exposed handle interface surface (where the tip
attaches) into the remainder of the solution.
4. Turn on the water. Squeeze the actuator to allow the
solution to flow from the handle into the container.
The suction line will remove the solution. Continue this
process for 5 minutes.
5. Turn the water off and remove both tubes from
the chamber.
6. To remove any stagnant solution in the tubing, disconnect
the hoses from the chamber and place the open end in the
sink. Hold the handle higher than the tube and squeeze
the actuator. The water will run out of the open end into
the sink basin.
7. Remove the chamber from the faucet. Allow the chamber
to drip dry. Replace the unit in its holding container.
For additional cleaning and disinfecting instructions,
see the User‘s Manual.
1. Turn off the faucet and disconnect the tubing from the
chamber; place the end of the tubing into the sink.
2. Detach the chamber from the faucet. Press down the
white ring on top of the unit and then pull the unit from
the coupler. The unit will drain through the open hose
ports at the front and bottom.
3. Remove any stagnant water from the tubing. Hold the
handle higher that the tubing and squeeze the actuator.
Roll the tubing up in a coil. The water should run out
of the open end into the sink basin if the handle is held
higher than the tubing.
 Loading...