

Page 1
WAVES
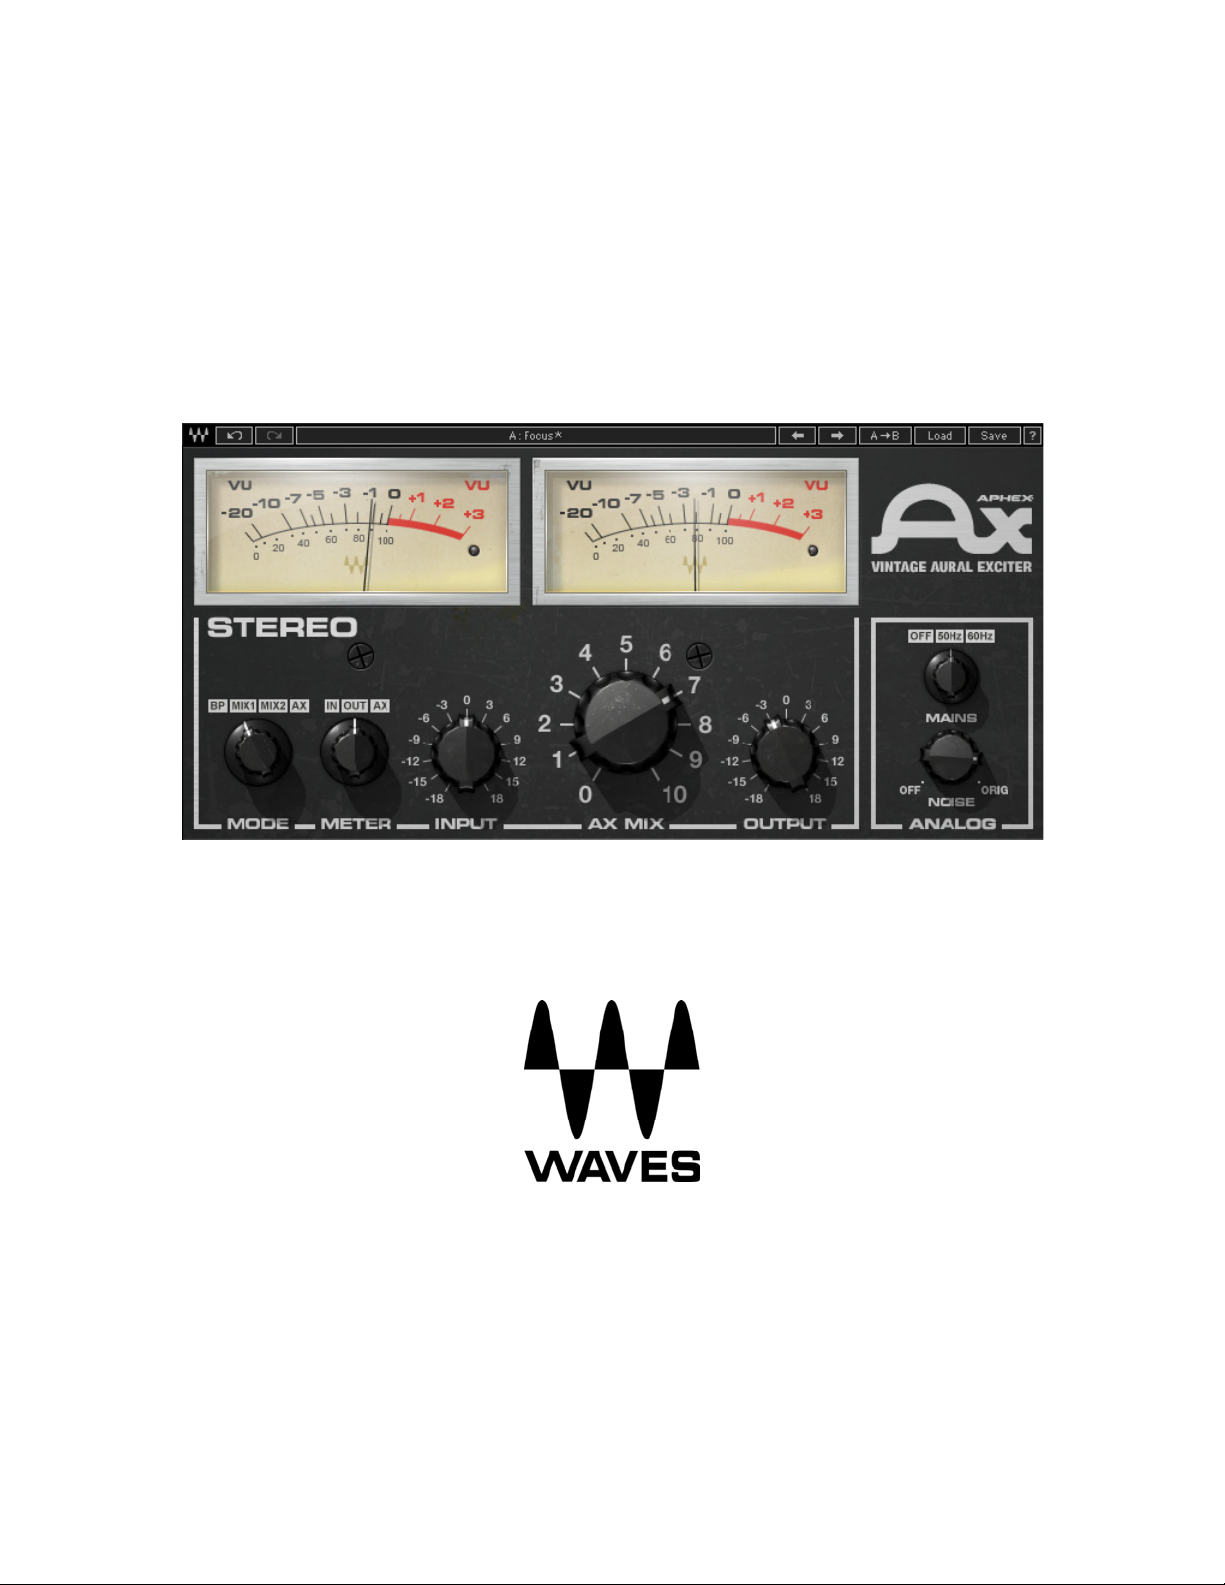
APHEX VINTAGE AURAL EXCITER®
USER GUIDE
Page 2

TABLE OF CONTENTS
CHAPTER 1 – INTRODUCTION..........................................................................3
1.1 WELCOME......................................................................................................3
1.2 PRODUCT OVERVIEW......................................................................................3
1.3 CONCEPTS AND TERMINOLOGY........................................................................4
1.4 COMPONENTS ................................................................................................6
CHAPTER 2 – QUICK START GUIDE.................................................................7
CHAPTER 3 – INTERFACE AND CONTROLS ...................................................8
3.1 INTERFACE.....................................................................................................8
3.2 CONTROLS.....................................................................................................9
CHAPTER 4 – THE WAVESYSTEM..................................................................11
4.1 THE WAVESYSTEM TOOLBAR ........................................................................11
4.2 PRESET HANDLING .......................................................................................11
4.3 INTERFACE CONTROLS..................................................................................13
4.4 WAVES PREFERENCES (PRO TOOLS ONLY) ....................................................15
Waves Aphex Vintage Aural Exciter®
User Guide
2
Page 3

Chapter 1 – Introduction
1.1 Welcome
Thank you for choosing Waves! In order to get the most out of your Waves processor,
please take the time to read through this manual.
In conjunct
There you will find an extensive Answer Base, the latest Tech Specs, detailed
Installation guides, new Software Updates, and current information on Authorization
and Registration.
By signing up at www.wavesupport.net
your registered products, reminders when updates are available, and information on
your authorization status.
ion, we also suggest that you become familiar with www.wavesupport.net
, you will receive personalized information on
.
1.2 Product Overview
When it was originally introduced in the mid-1970s, the Aphex Aural Exciter® brought its
distinctive sound to sele
studio as an exclusive (and expensive) rental unit.
ct sessions by leading recording artists, traveling from studio to
A true groundbreaker, the original Aural Exciter was highly regarded for its ability to
increase and enhance presence, brightness, and detail on vocal tracks and masters
alike. It was even credited as a "session player" on popular albums by the likes of
Jackson Browne, Linda Ronstadt, and James Taylor.
Modeled on one of only a few tube-powered units ever made, the new Waves Aphex
Vintage Aural Exciter plugin delivers all the unique character of the rare original
hardware unit, with all the advantages of software.
Waves Aphex Vintage Aural Exciter®
User Guide
3
Page 4

1.3 Concepts and Terminology
While the original 402 Aural Exciter unit we modeled has only one mix mode, the
Vintage Aural Exciter plugin has two. Here’s how that came about:
When we originally modeled the unit, replicating its sound in both insert and aux
send/return modes, we realized that
each mode had its own unique sound. This is
primarily because the phase relation between the direct sound and the AX sound is
reversed, and the signal that the AX is mixed with is a pure direct, while the device’s BP
(bypassed) signal includes its own phase response which, while not fully inverted, does
affect the sound of the mix.
Producer/engineer Val Garay, one of the high-profile users who helped popularize the
original Aural Exciter, listened to th
e plugin prototype and confirmed that the sound of
our software corresponds perfectly with the hardware unit. However, he also told us that
he always used the device in a send/return auxiliary setup in AX mode. Val’s aux
send/return setup delivers “the sound” that is forever etched on hit records of the late
‘70s and early ‘80s. Since today’s users may prefer to insert the plugin directly on a
track, we wanted to make this send/return sound available in insert mode. We decided to
provide both sounds in insert mode for the user’s convenience, by introducing an
additional MIX mode. This is what we call MIX1 mode.
MIX2 mode is based on the sound of the original hardware unit’s MIX mode, as an
insert. While it may be “o
ver the top” for a mastering task, it may be just the thing for a
vocal track that needs enhancement or presence that cannot be achieved using EQ.
Due to the processor’s unique phase behavior, modulations in frequency response may
occur at certain AX MIX settings in MIX2 mode. At AX MIX settings of 1 to 4.5, the effect
is very subtle; settings of 4.5 to 7.2 result in a frequency dip; settings from 7.2 to 10 bring
about a pretty, not subtle sound.
To recap:
• MIX1, as an insert, recre
ates the har
• MIX2, as an insert, recreates the har
• AX mode is designed to be used for
Waves Aphex Vintage Aural Exciter®
dware unit’s AX mode send/return sound.
dware unit’s MIX mode insert sound.
send/return auxiliary setups.
User Guide
4
Page 5
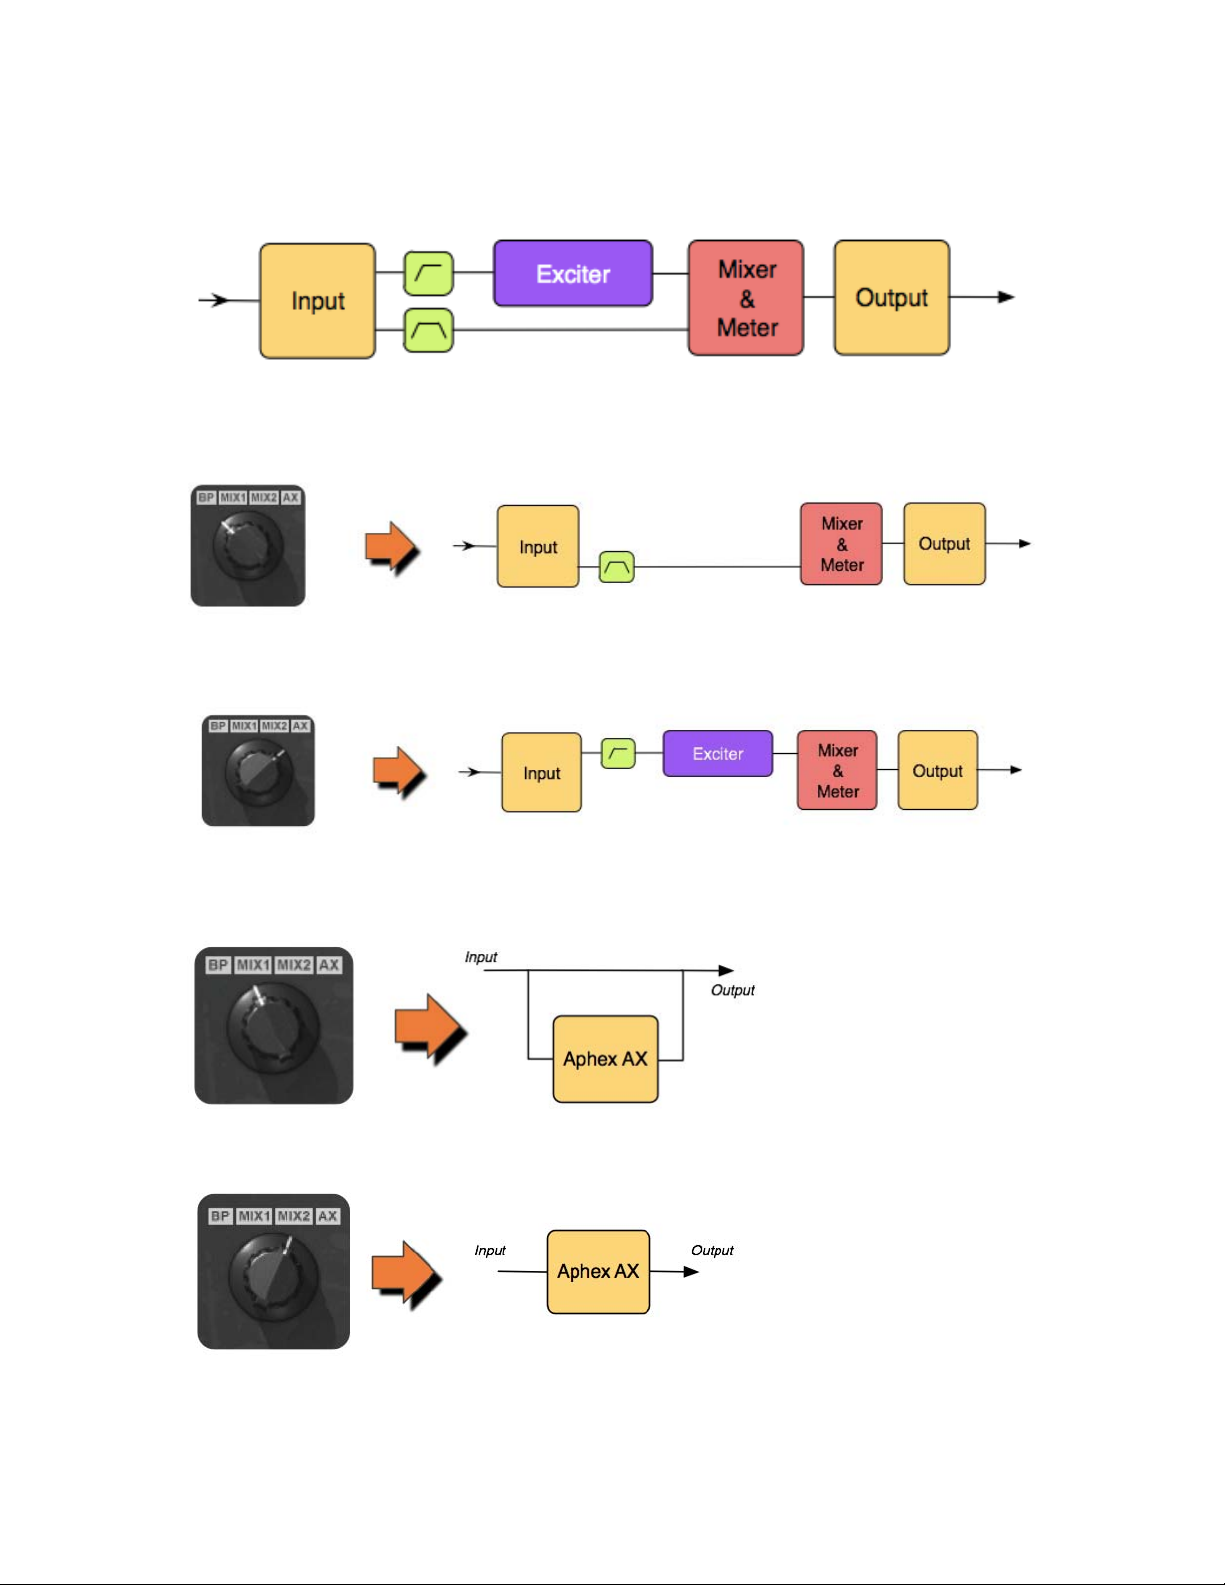
Signal Path
BP
AX
MIX1
MIX2
Waves Aphex Vintage Aural Exciter®
User Guide
5
Page 6

1.4 Components
The Aphex Vintage Aural Exciter® consists of two components:
Aphex Mono
Aphex Stereo
Waves Aphex Vintage Aural Exciter®
User Guide
6
Page 7

Chapter 2 – Quick Start Guide
There are two primary ways to use the Waves Aphex Vintage Aural Exciter plugin:
1. As an insert on the track, using MIX1 or MIX2 modes.
2. As a send/return effect on an aux track, usin
g AX mode.
MIX1/MIX2
o Insert the Vintage Aural Exciter on your track.
o Set to MIX1 or MIX2 mode.
o Adjust the AX MIX knob to blend the desired amount of effect with your dry
signal.
o Adjust input and output levels as necessary.
AX
o Insert the Vintage Aural Exciter on an aux bus, and route a ‘send’ to that bus.
o Set to AX mode.
o Adjust the ‘send’ to blend the desired amount of effect with your dry signal.
o Adjust input and output levels on the Aural Exciter plugin as necessary.
Please note:
recommend
Since input levels have a significant impact on the sound of the plugin, we
experim
enting in order to find your optimal input settings.
Waves Aphex Vintage Aural Exciter®
User Guide
7
Page 8

Chapter 3 – Interface and Controls
3.1 Interface
Waves Aphex Vintage Aural Exciter®
User Guide
8
Page 9

3.2 Controls
VU Meter with clip indicator displays input or output level in dBVU
Clip LED lights up when levels exceed 0 dBFS. Click to reset.
VU Calibration controls VU meter headroom calibration.
Range
24 – 8dB (16dB)
Default
18 dB of headroom (0 dBVU = -18 dBFS)
Please note: The VU Calibration con
the VU meter display. It does not have a visible label and, for most users, the default
setting of 18 dB headroom should be the best choice. On the Stereo component, use the
screw located on the left to calibrate both meters.
trol is represented by the small screw-head below
MODE selects the processing mode.
Range: BP, MIX1, MIX2, AX
• BP = Bypass (Please note: BP does not function as a pure bypass; the plugin
models the original hardware’s BP mode behavior.)
• MIX1, as an insert, recreates the har
• MIX2, as an insert, recreates the har
• AX mode is designed to be used for
dware unit’s AX mode send/return sound.
dware unit’s MIX mode insert sound.
send/return auxiliary setups.
Default: MIX1
METER selects VU meter view options.
Range: Input / Output / AX
Default: Out
Waves Aphex Vintage Aural Exciter®
User Guide
9
Page 10

INPUT controls input gain.
Range: -18dB to +18db
Default: 0dB
AX MIX controls the amount of AX (aural excitement) added to the original
signal. (Functional in Mix mode only.)
Range: 0 to 10
Default: 7.87
OUTPUT controls output gain.
Range: -18dB to +18db
Default: 0dB
NOISE controls the level of the modeled analog noise.
Range: Off / -48dB to 0 (0 = original HW)
Default: Orig.
MAINS controls analog characteristics caused by hum, based on the power
supplies of the original units.
Range: Off / 50Hz / 60Hz
Default: 50Hz
Waves Aphex Vintage Aural Exciter®
User Guide
10
Page 11

Chapter 4 – The WaveSystem
4.1 The WaveSystem Toolbar
All Waves plugins feature the WaveSystem toolbar which takes care of most
administrativ
features of the WaveSystem toolbar are the same on practically all Waves plugins, so
familiarity with its features will be helpful whichever plugin you are using.
Toolbar Functions
Opens the plugin About box
Undo Undoes the last 32 actions
Redo Redoes the last 32 undone actions
e functions you will encounter while working with your Waves software. The
Setup A/B
L/R Arrows Move to the previous or next preset
→B Copies the current settings to the second preset register
y A
Cop
Load Recalls presets from file
Save Saves presets in the Wa
? Opens the PDF manual for the plugin you are using
Toggles bet
settings
ween two presets, useful for comparison of parameter
ves file formats
4.2 Preset Handling
Preset Types
Factory Presets are permanent presets in the Load menu. Factory presets cannot be
overwritten or deleted.
factory presets.
User Presets are your favorite settings of the plugin saved as a preset in the Load
menu, under ‘User Presets’. User Presets can b
Setup Files may contain more than one preset.
the presets for a session. When you open a Setup File, all its setups become part of
your Load pop-up menu for fast access. This can be particularly useful with multiple
instances of a plugin in a single session. By saving all the settings you create into a
single Setup File, they can all be quickly available for every instance of that plugin.
When applicable, different component plugins may have different
e overwritten and deleted.
For example
, a single file can contain all
Waves Aphex Vintage Aural Exciter®
User Guide
11
Page 12

Loading Presets and Setups
Click on the Load button to see the Load pop-up menu. The menu is divided into four
sections. If a section is not currently available it will not appear in the Load pop-up menu.
Open Preset File… Select to op
en any setup or preset file, whether from the Library or
your own creations.
‘Filename.xps’: Displays any currently loaded Setup File and it
Factory
Presets: Displays the default Factory Presets.
s presets.
User Presets: Displays any loaded User Presets.
Saving Presets and Setups
Click on the Save button to see the Save pop-up menu. Four options are available. If an
option is not
currently available it will be grayed out and inaccessible.
Save to New
File… Select this to start a ne
w Setup file. There are two
prompts - first for the setup filename, then for the
preset name. You must provide a name for both the
setup file and the preset. Click OK (ENTER) to
complete the save. It is a good idea to create a
folder in which to save several setup files for a
project.
Save ‘File Name’ – “Preset Name” Overwrites the settings
of the loade
d preset
(whether a User Preset or a preset from a Setup
File) with the current settings. If a Setup File is
currently loaded, the name of the Setup File is
displayed followed by the name of the preset itself.
If a User Preset is loaded, its name is displayed.
Save to ‘File Name’ As… Saves the current settin
gs as a new preset into the
Setup file that is open (if one is not open, the option
is grayed out). You will be prompted to give the
preset a name.
Put into Preset Menu As… Save the current setting
s into a User Preset that
will always be in your Load menu (until deleted).
You will be prompted to give this preset a name.
User Presets are stored in the plugin’s preference
file.
Please note:
names.
Special characters (such as: !, @, #, %, ^, etc.) are not supported in preset
Waves Aphex Vintage Aural Exciter®
User Guide
12
Page 13

Deleting Presets
You may delete User Presets and presets within a Setup File. Factory Presets and
Setup Library files cannot be deleted
or overwritten.
1. Hold the Command (Mac)/Control (PC) key down.
2. Click-and-hold the Load button to see the pop-up menu.
3. While still holding the Command/Control key, select the preset or setup to delete.
4. A confirmation box will appear, allowing you to cancel or ‘OK’ the deletion.
A/B Comparison and Copying
The Setup A/Setup B button may be clicked to compare two settings. If you load a preset
in the Setup B position, t
his will not affect the preset loaded into the Setup A position,
and vice-versa.
If you want to slightly modify the settings in Setup A, you can copy them t
o Setup B by
clicking on the Copy to B button, then alter Setup A and compare with the original Setup
B.
The name of the current setup will be shown in the title bar (on platforms which support
m
it), and will switch as you change fro
Setup A to Setup B.
Note: an asterisk will be added to the preset name when a change is made to the preset.
4.3 Interface Controls
Controls can be in one of three states:
• Not Selected where the control is
• Selected where the con
trol is the target of mouse control entry only
• Selected and Active where the control is the tar
keyboard entry
Toggle Buttons
Toggle buttons display the state of a control, and allow switching between two or more
states.
le-click to change the control’s state. Some toggle buttons have a text
Sing
display which updates with the current setting, and others (bypass, solo, or monitoring
toggles) illuminate when the control is active.
Some plugins have link buttons between a pair of toggle but
drag adjustment while retaining the offset between the controls.
Waves Aphex Vintage Aural Exciter®
not the target of any user entry
get for both mouse and
tons, allowin
User Guide
13
g click-and-
Page 14

Value Window Buttons
Value windows display the value of a control and allow click-and-drag
adjustment, or
direct control via the keyboard.
• Using the mouse, click-and-drag
windows support left/rig
ht, some up/down (as you hover over a button, arrows
on the value window to adjust. Some value
will appear to let you know which direction of movement that button supports).
You may also use your mouse-wheel to adjust parameter values.
• Using the arrow
s, click once with mouse to select the button, and then use
key
up/down – left/right (depending on the direction supported by that button) to
move in the smallest incremental steps across the button’s range (holding down
the arrow keys will move faster through the range).
• Using key
entry, double click on the button to open the value window, and
directly enter the value from your keyboard. If you enter an out of range number,
the button stays selected but remains at the current setting (system beeps? If
system sounds are on?)
Some plugins have link buttons between a pair of value windows, allowing click-and
drag adjust
ment while retaining the offset between the controls.
-
Sliders
Click or scroll the mouse-wheel on the slider itself or anywhere within the sliders track.
The numerical value of the slider set
tings is
displayed in a hover window above the
slider path.
Hover Box
Hovering boxes will appear and display the control value when hovering with the mouse
over the control.
Multiple Control Selection
One of the most powerful features of the WaveSystem is the ability to select and adjust
multiple con
trols simulta
neously. Using the mouse, drag-select the desired group of
buttons or graphic controls by clicking and holding at a point outside the controls, and
forming a rectangle that includes the controls you wish to adjust. Alternatively, press and
hold Shift while clicking the mouse on any control you wish to link. This method is useful
when you want to select two or more controls that are not adjacent to one another.
TAB Functions
TAB moves the ‘selected’ status to the next control, with shift-TAB moving in the reverse
direction.
Waves Aphex Vintage Aural Exciter®
User Guide
14
Page 15

Additionally, the Mac has an option-TAB function for ‘down’ movement and shift-optionTAB for ‘up’ movement
where applicable.
If you have several Value Window Buttons selected, TAB functions will take you through
the selected
controls on
ly.
Hitting Esc or Return will return the 'focus' to the DAW application.
4.4 Waves Preferences (Pro Tools only)
When launching Pro Tools, hold Shift to view the Waves plugin Preferences window.
The followin
g options ar
• Don't use AudioSuite plugins
• Don’t use RTAS plugins
• Rescan all plugins
• HUI control surface support (low resolution)
• Enable single-click text entry
e available:
Waves Aphex Vintage Aural Exciter®
User Guide
15
 Loading...