

Page 1

ORIGINAL INSTRUCTIONS
SYMBOL INDEX
Winch Installation Guide
Every winching situation has the potential for personal injury. In order to minimize that risk, it is important to read this guide and The Basic Guide to
Winching Techniques carefully. Please familiarize yourself with the operation of your winch before using it and be constantly safety oriented. In this
guide we provide important safety information and instructions on how to install your winch. Please read the Basic Guide to Winching Techniques
for information on how to properly use your winch and proper rigging techniques.
Please keep this manual and other product literature found in this kit for future reference. In this kit you will find the following pieces of literature:
Winch Installation Guide, Basic Guide to Winching Techniques, Specification and Performance Data, Product Warranty, Replacement Parts List and
other product literature specific to some products. Should any of these be missing, please visit www.warn.com or contact us at the number below.
TABLE OF CONTENTS:
SAFETY
Symbol Index .............................................................................................................................................................................2
General Safety Precautions ............................................................................................................................................... 3-5
INSTRUCTIONS
Safe Working Conditions .......................................................................................................................................................6
Know Your Winch ..................................................................................................................................................................... 7
Mounting .................................................................................................................................................................................8-9
Electrical Connections .........................................................................................................................................................10
First Time Operation Instructions ..............................................................................................................................11-13
Final Analysis and Maintenance .....................................................................................................................................14
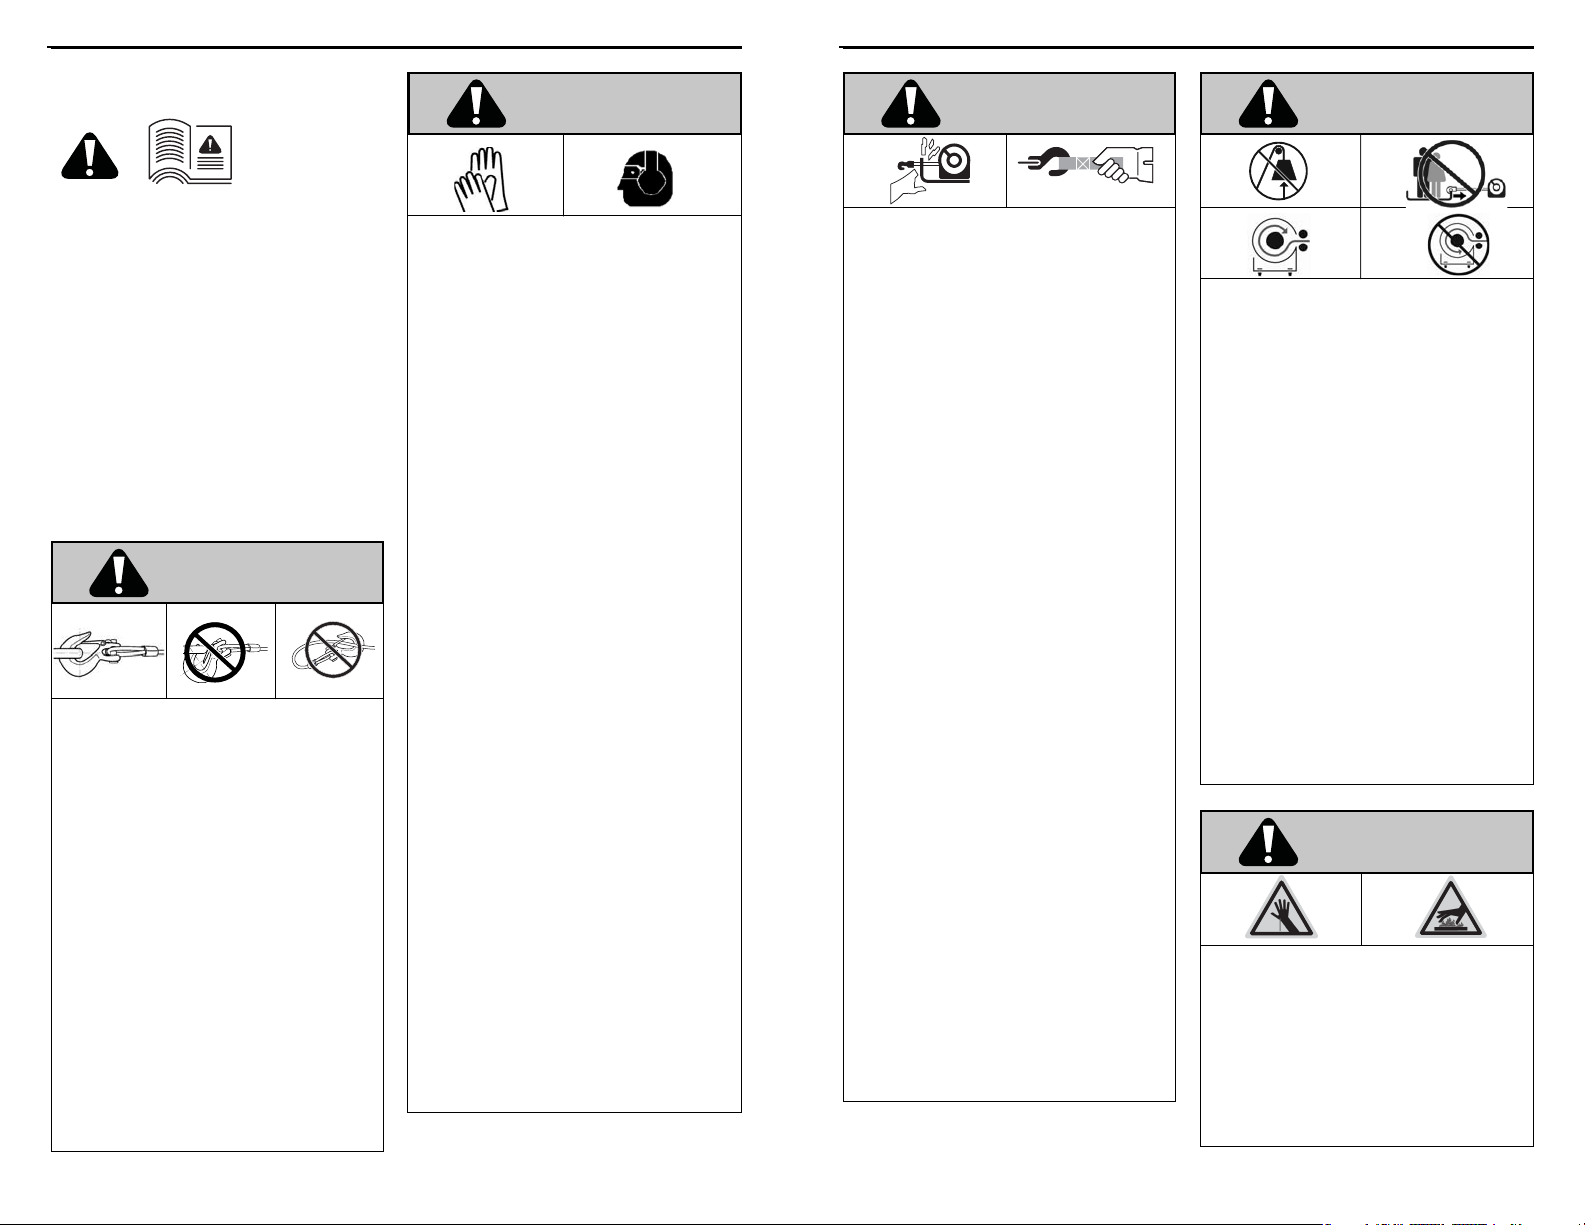
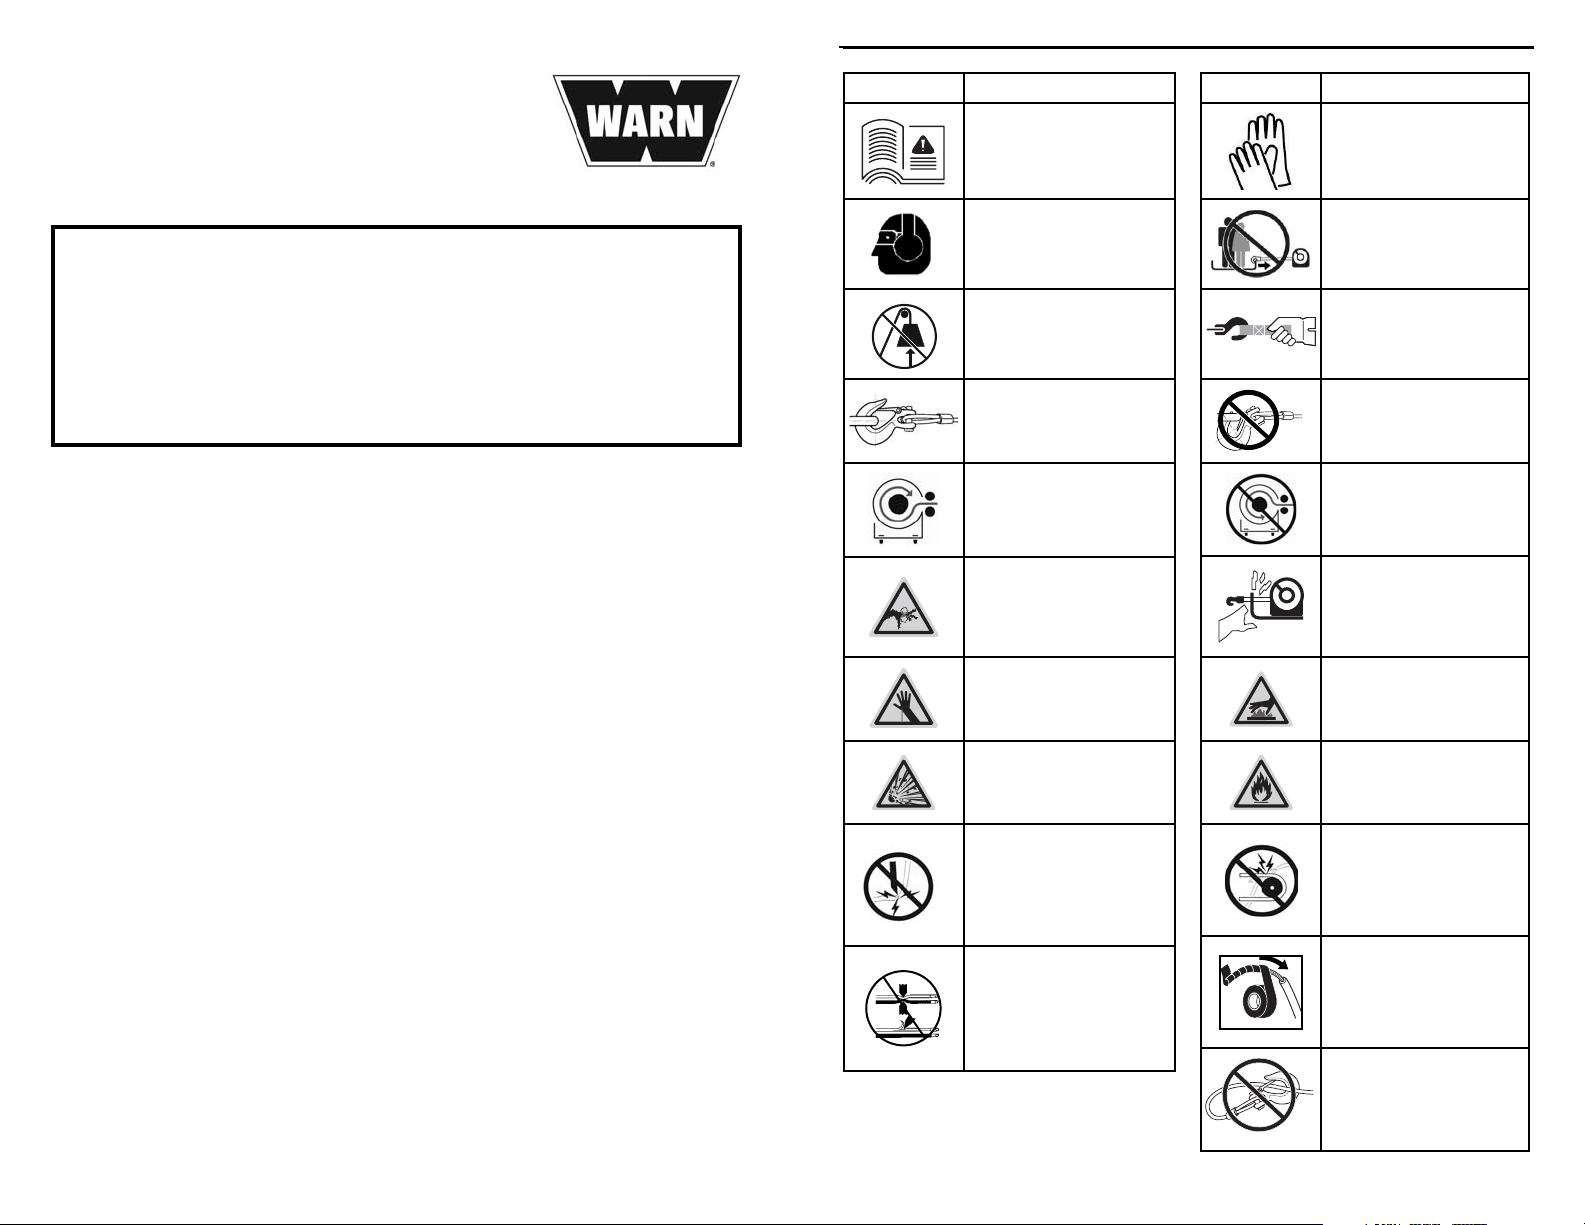
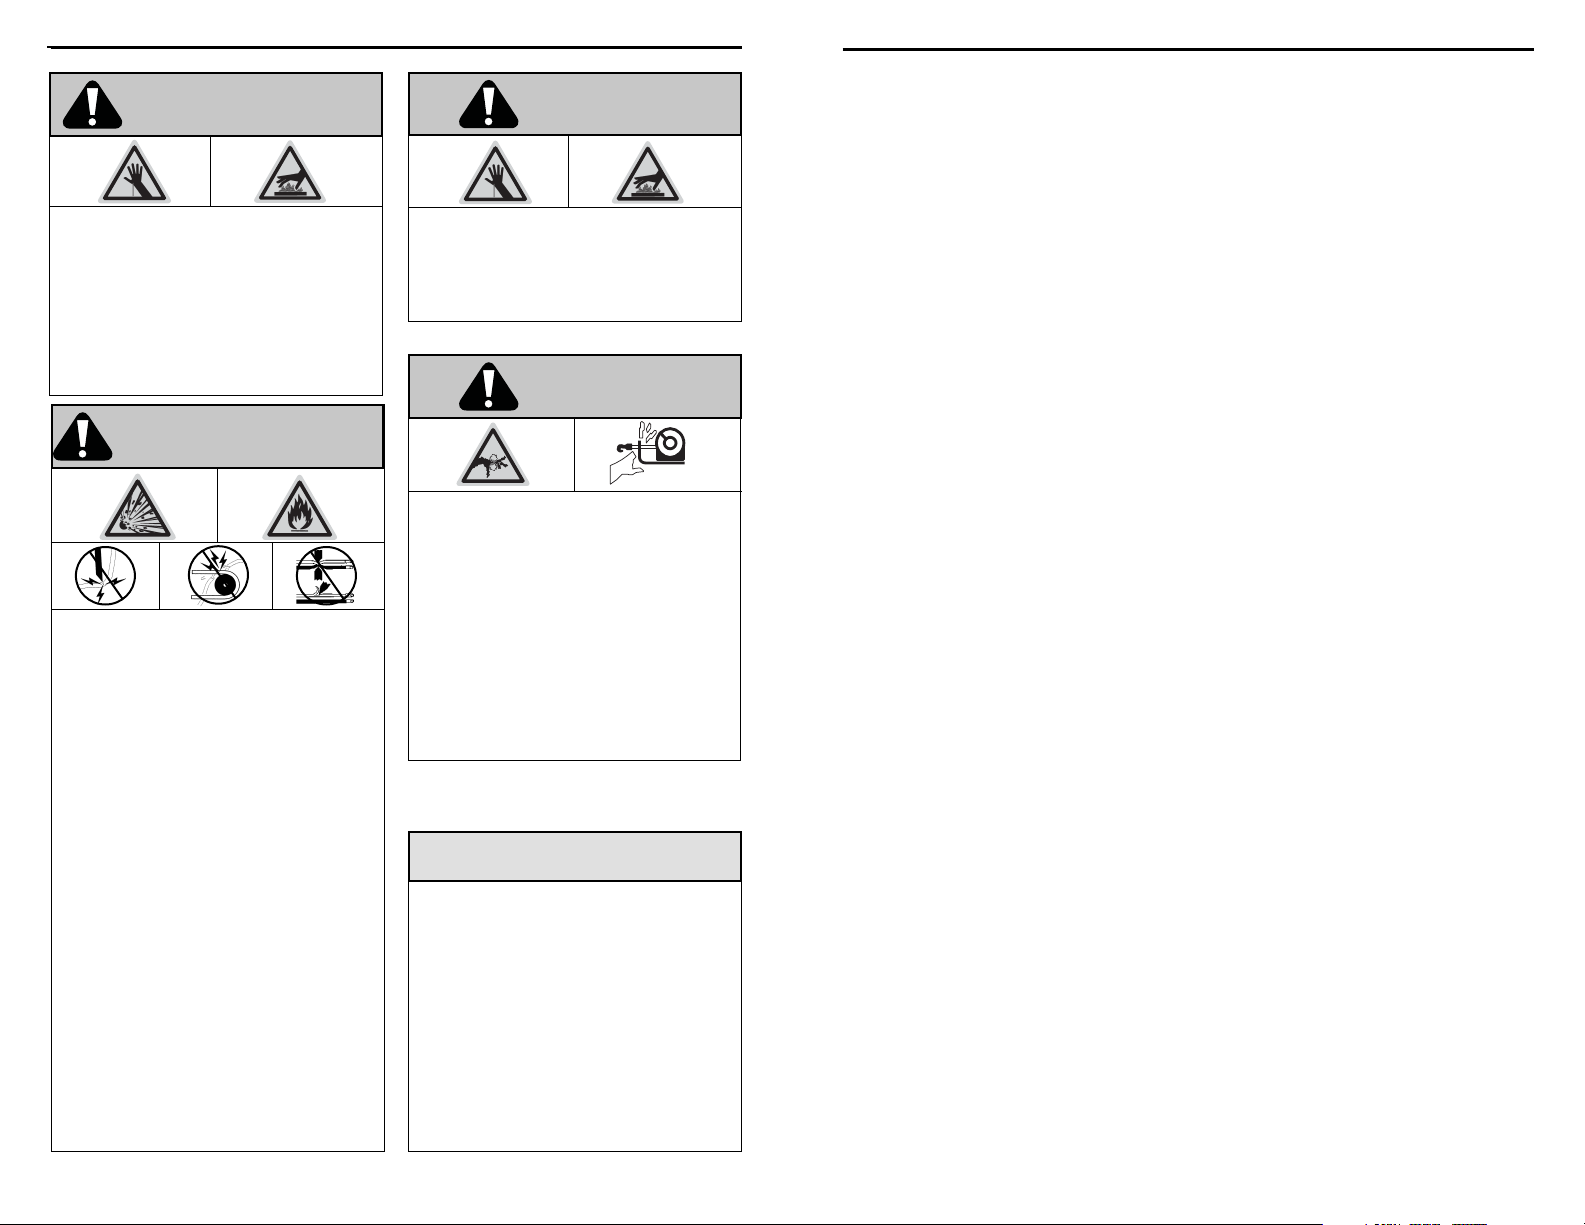
SYMBOL EXPLANATION
Read All Product
Literature
Always Wear Hearing and
Eye Protection
Never Use Winch as a
Hoist
Properly Seat Load in
Throat of Hook
Wind Rope on Bottom of
Drum
Finger/Fairlead Crushing
Hazard
Hand Piercing/Cutting
Hazard
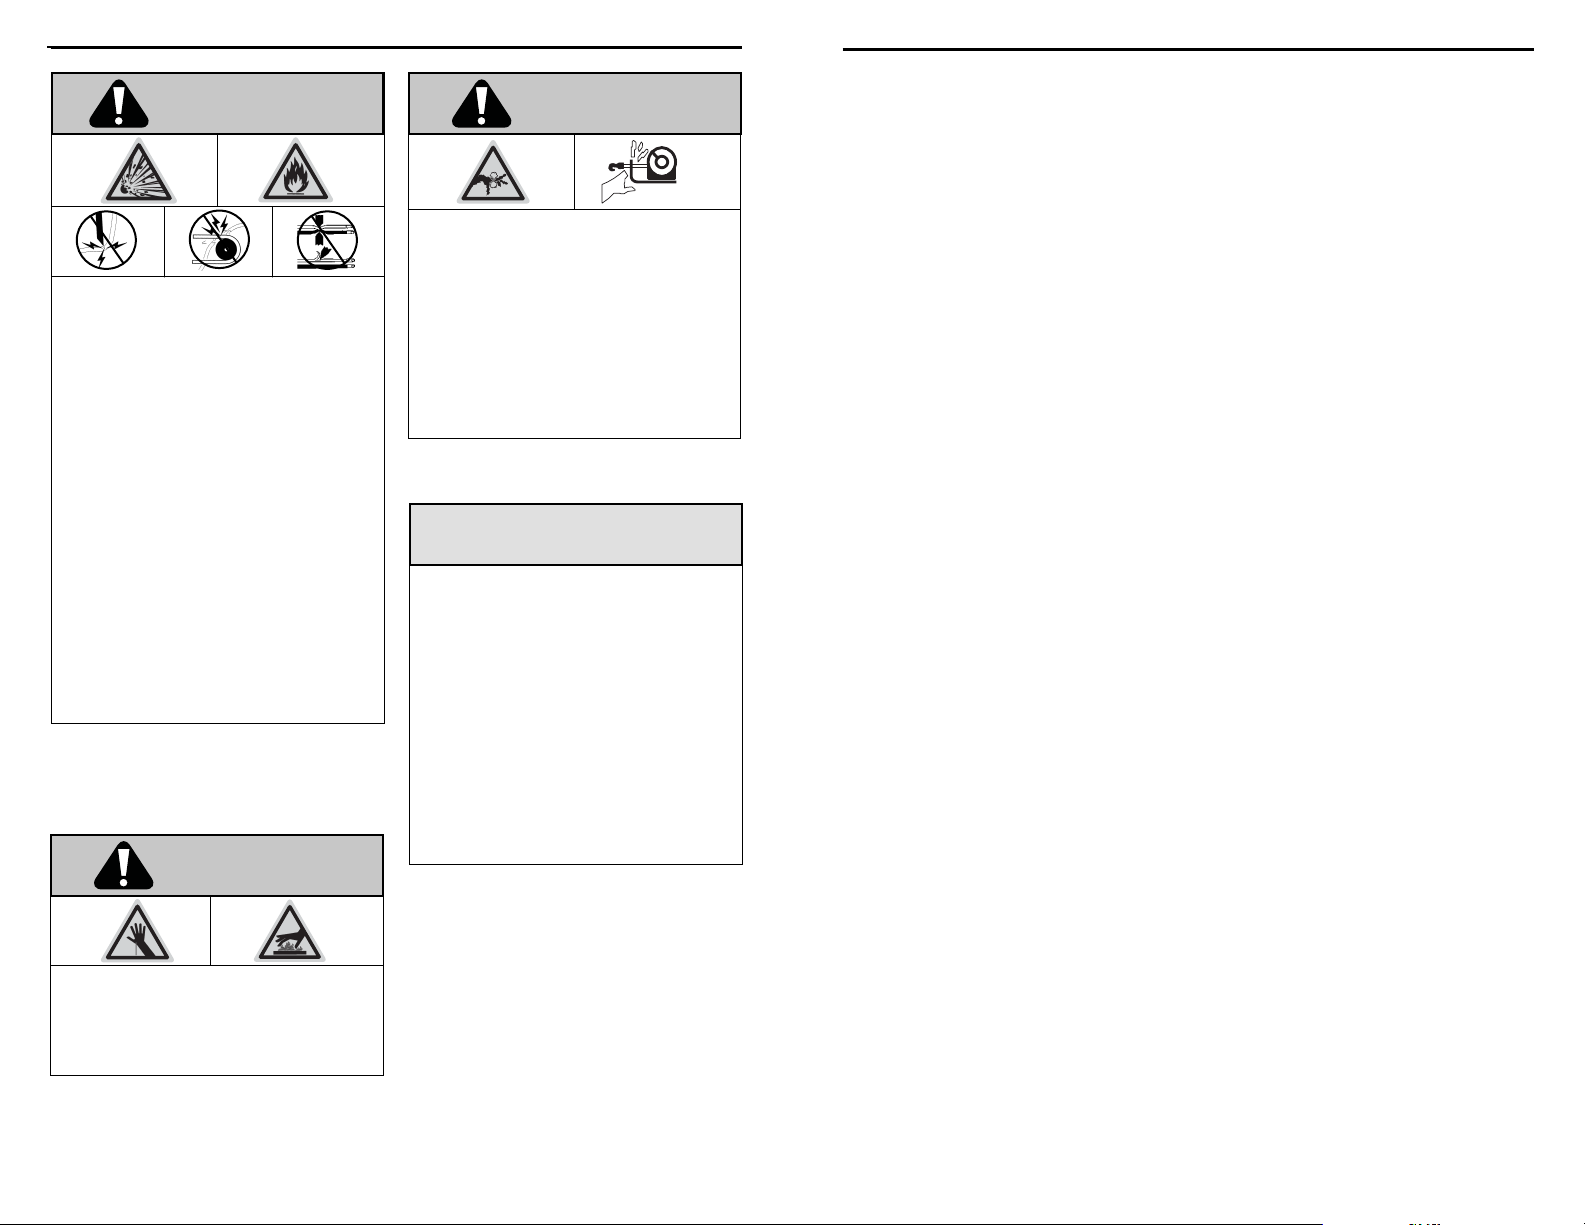
Explosion/Bursting
Hazard
SYMBOL EXPLANATION
Always Wear Leather
Gloves
Do Not Move People
Always Use Supplied
Hook Strap
Never Apply Load to
Hook Tip or Latch
Never Wind Rope Over
Top of Drum
Fairlead Pinch Point
Hot Surface Hazard
Fire and Burn Hazard
WARN® and th e WARN logo are reg istered tr ademark s of Warn Indus tries, Inc.
© 2012 Warn Industries, Inc.
WARN INDUSTRIES
1
Warn Industries Inc.
12900 SE Capps Road
Clackamas, OR 97015
USA
Customer Service: (800) 543-9276
International Fax: (503) 722-3005
Fax: (503) 722-3000
www.warn.com
Never Route Electrical
Cables through Sharp
Edges Hazard
Avoid Installing Electrical
Cables around Pinch and
Wear/Abrasion Points
WARN INDUSTRIES
83449A0 2
Never Route Electrical
Cables through or near
Moving Parts Hazard
Exposed Wiring Hazard,
Insulate Exposed Wiring
and Terminals
Never Hook Back on
Rope
Page 2
GENERAL SAFETY PRECAUTIONS
GENERAL SAFETY PRECAUTIONS
Warnings and Cautions
As you read these instructions, you will see WARNINGS,
CAUTIONS, NOTICES and NOTES. Each message has a specifi c
purpose. WARNINGS are safety messages that indicate
a potentially hazardous situation, which, if not avoided
could result in serious injury or death. CAUTIONS are safety
messages that indicate a potentially hazardous situation
which, if not avoided, could result in minor or moderate
injury. A CAUTION may also be used to alert against unsafe
practice. CAUTIONS and WARNINGS identify the hazard,
indicate how to avoid the hazard, and advise of the probable
consequence of not avoiding the hazard. NOTICES are
messages to avoid property damage. NOTES are additional
information to help you complete a procedure. PLEASE
WORK SAFELY!
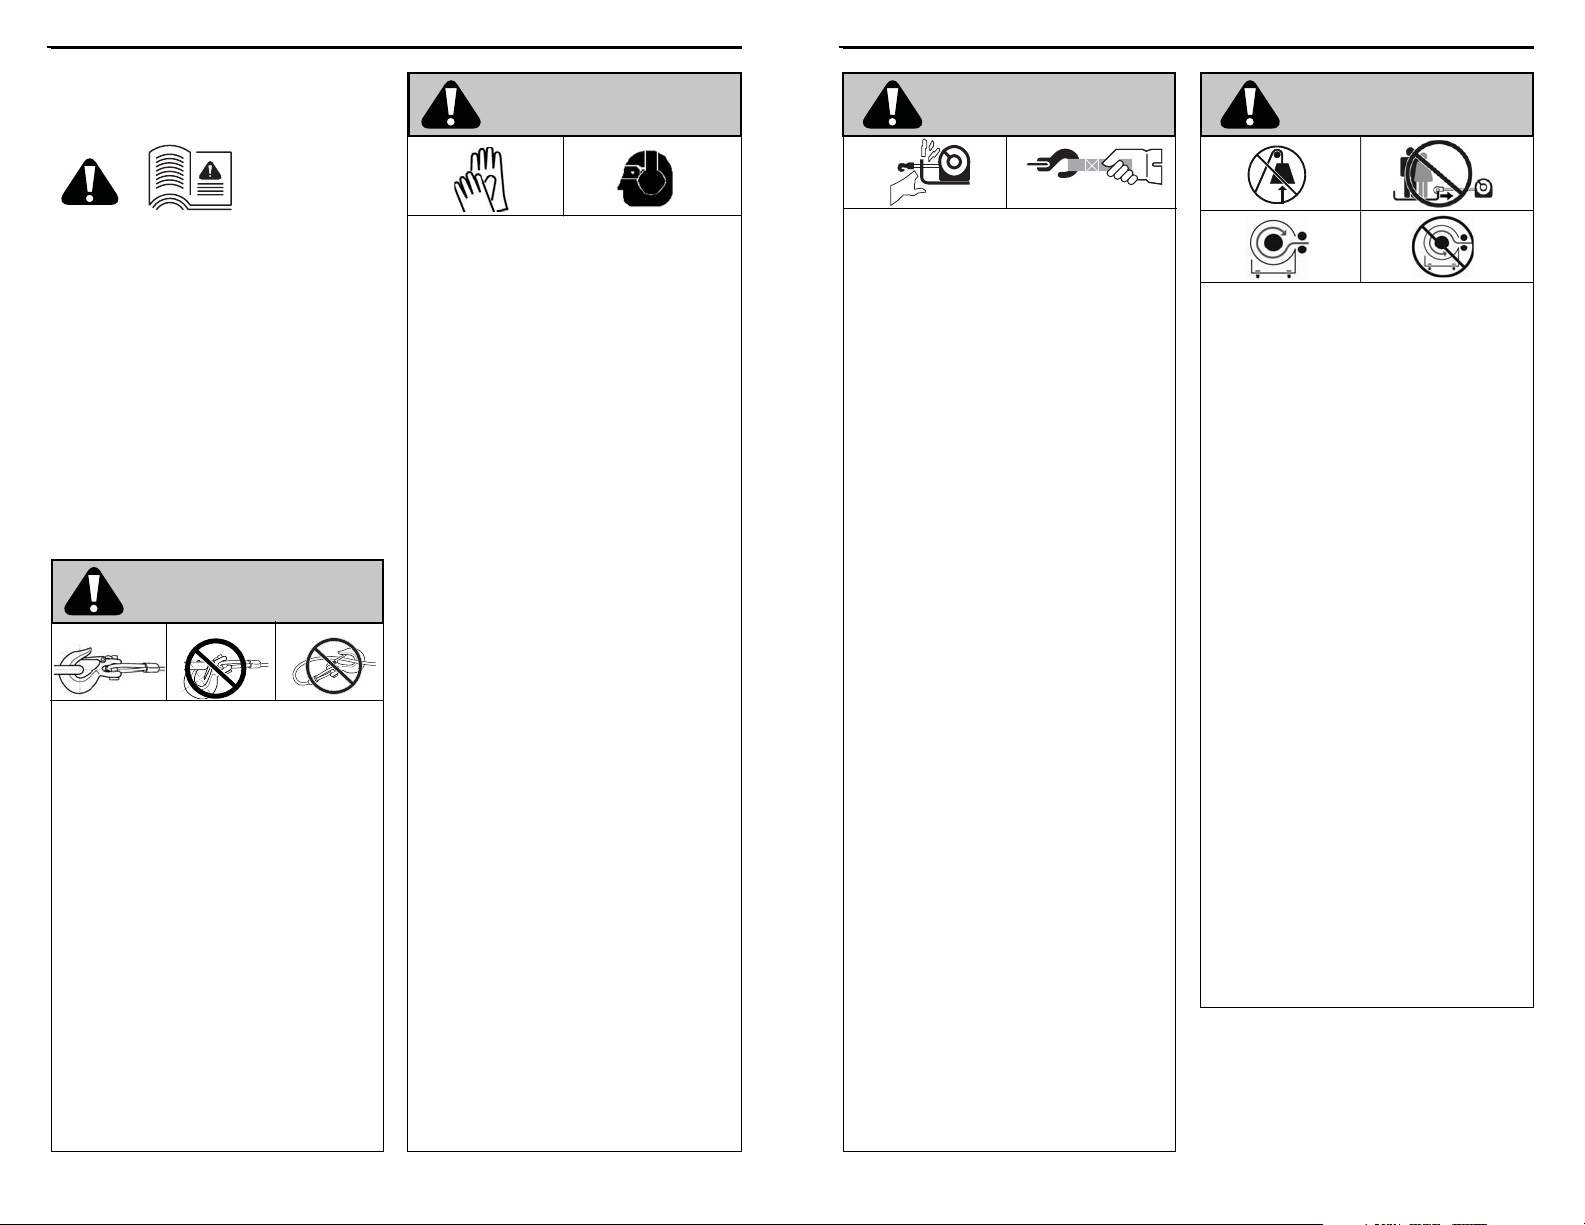
WARNING
MOVING PARTS ENTANGLEMENT HAZARD
Failure to observe these instructions could lead to
serious injury or death.
• Always ensure hook latch is closed and not
supporting load.
• Never apply load to hook tip or latch. Apply load only
to the center of hook.
• Never use a hook whose throat opening has
increased, or whose tip is bent or twisted.
• Always use a hook with a latch.
• Always ensure the operator and bystanders are aware
of the stability of the vehicle and/or load.
• Always keep wired remote control lead and power
cord clear of the drum, rope, and rigging. Inspect for
cracks, pinches, frayed wires or loose connections.
Damaged components must be replaced before
operation.
• Always pass remote lead thru window when used in
vehicle.
• Never hook back on rope.
WARNING
MOVING PARTS ENTANGLEMENT HAZARD
Failure to observe these instructions could lead to
serious injury or death.
General Safety:
• Always Know Your Winch. Take time to fully read the
Instructions and/or Operations Guide, and/or Basic
Guide to Winching Techniques, in order to understand
your winch and its operations.
• Never exceed winch or winch rope rated capacity.
Double line using a snatch block to reduce winch load.
• Always wear heavy leather gloves when handling
winch rope.
• Never use winch or winch rope for towing. Shock
loads can damage, overload and break rope.
• Never use a winch to secure a load.
• Never operate this winch when under the infl uence of
drugs, alcohol or medication.
• Never operate this winch if you are under 16 years of
age.
Installation Safety:
• Always choose a mounting location that is suffi ciently
strong to withstand the maximum pulling capacity of
your winch.
• Always use class 8.8 metric (grade 5) or better
hardware.
• Never weld mounting bolts.
• Always use factory approved mounting hardware,
components, and accessories.
• Never use bolts that are too long.
• Always complete the winch installation and hook
attachment before installing the wiring.
• Always keep hands clear of winch rope, hook loop,
hook and fairlead opening during installation,
operation, and when spooling in or out.
• Always position fairlead with warning readily visible
on top.
• Always prestretch rope and respool under load before
use. Tightly wound rope reduces chances of “binding”,
which can damage the rope.
WARNING WARNING
MOVING PARTS ENTANGLEMENT HAZARD
Failure to observe these instructions could lead to
serious injury or death.
Winching Safety:
• Always inspect winch rope, hook, and slings before
operating winch. Frayed, kinked or damaged winch
rope must be replaced immediately. Damaged
components must be replaced before operation.
Protect parts from damage.
• Always remove any element or obstacle that may
interfere with safe operation of the winch.
• Always be certain the anchor you select will
withstand the load and the strap or chain will not
slip.
• Always use supplied hook strap whenever spooling
winch rope in or out, during installation and during
operation.
• Always require operators and bystanders to be
aware of vehicle and or load.
• Always be aware of stability of vehicle and load
during winching, keep others away. Aler t all
bystanders of an unstable condition.
• Always unspool as much winch rope as possible
when rigging. Double line or pick distant anchor
point.
• Always take time to use appropriate rigging
techniques for a winch pull.
• Never touch winch rope or hook while someone else
is at the control switch or during winching operation.
• Never engage or disengage clutch if winch is under
load, winch rope is in tension or drum is moving.
• Never touch winch rope or hook while under tension
or under load.
• Always stand clear of winch rope and load and keep
others away while winching.
• Never use vehicle to pull load on winch rope.
Combined load or shock load can damage, overload
and break rope.
• Never wrap winch rope back onto itself. Use a
choker chain or tree trunk protector on the anchor.
FALLING OR CRUSHING HAZARD
Failure to observe these instructions could lead to
serious injury or death.
•
Always stand clear, keep hands clear, keep others away.
• Never operate winch with less than 5 wraps of rope
around the drum. Rope could come loose from the
drum, as the rope attachment to the drum is not
designed to hold a load.
• Never use winch as a hoist or to suspend a load.
• Always be certain anchor will withstand load, use
appropriate rigging and take time to rig correctly.
• Never use winch to lift or move persons.
• Never use excessive eff ort to freespool winch rope.
•
Always use proper posture/lifting technique or get
lifting assistance while handling and installing product.
• Always wind the winch rope on bottom (mountside)
of drum.
• Never wind rope over top of drum.
• Always spool the winch rope onto the drum in the
direction specifi ed by the drum rotation labels on the
winch and/or in the documentation. This is required
for the automatic brake (if so equipped) to function
properly.
WARNING
CUT AND BURN HAZARD
Failure to observe these instructions could lead to
serious injury or death.
To avoid injury to hands and fi ngers:
• Always wear heavy leather gloves when handling
winch rope.
• Always be aware of possible hot surfaces at winch
motor, drum or rope during or after winch use.
WARN INDUSTRIES
3 83449A0
WARN INDUSTRIES
83449A0 4
Page 3
GENERAL SAFETY PRECAUTIONS
SAFE WORKING CONDITIONS
WARNING CAUTION
CHEMICAL AND FIRE HAZARD
Failure to observe these instructions could lead to
serious injury or death.
• Always remove jewelry and wear eye protection.
• Never route electrical cables across sharp edges.
• Never route electrical cables near parts that get hot.
• Never route electrical cables through or near moving
parts.
• Always place the supplied terminal boots on
wires and terminals as directed by the installation
instructions.
• Never lean over battery while making connections.
• Never route electrical cables over battery terminals.
• Never short battery terminals with metal objects.
• Always verify area is clear of fuel lines, fuel tank,
brake lines, electrical wires, etc., when drilling.
• Always consult operator’s manual for proper wiring
details.
• Always insulate and protect all exposed wiring and
electrical terminals.
MOVING PARTS ENTANGLEMENT HAZARD
Failure to observe these instructions could lead to
minor or moderate injury.
To avoid injury to hands or fi ngers:
• Never leave remote control where it can be activated
during free spooling, rigging, or when the winch is not
being used.
• Never leave the winch remote control plugged in
when installing, freespooling, rigging, servicing or
when the winch is not being used.
NOTICE
AVOID WINCH AND EQUIPMENT DAMAGE
• Always avoid side pulls which can pile up winch rope
at one end of the drum. This can damage winch rope
or winch.
• Always ensure the clutch is fully engaged or
disengaged.
• Always use care to not damage the vehicle frame
when anchoring to a vehicle during a winching
operation.
• Never submerge winch in water.
• Always store the remote control in a protected, clean,
dry area.
This manual provides instructions on how to
install your WARN winch system and initial
operating instructions. Please read the Basic
Guide To Winching Techniques for complete
operational instructions for your WARN winch
system.
Safety
When installing your WARN winch system, read
and follow all mounting and safety instructions.
Always use caution when working with electricity
and remember to verify that no exposed electrical
connections exist before energizing your winch
circuit.
For specifications and performance data, refer to
the specification sheet supplied with your winch.
CAUTION
CUT AND BURN HAZARD
Failure to observe these instructions could lead to
minor or moderate injury.
• Never let winch rope slip through your hands.
WARN INDUSTRIES
5 83449A0
WARN INDUSTRIES
83449A0 6
Page 4
KNOW YOUR WINCH
MOUNTING
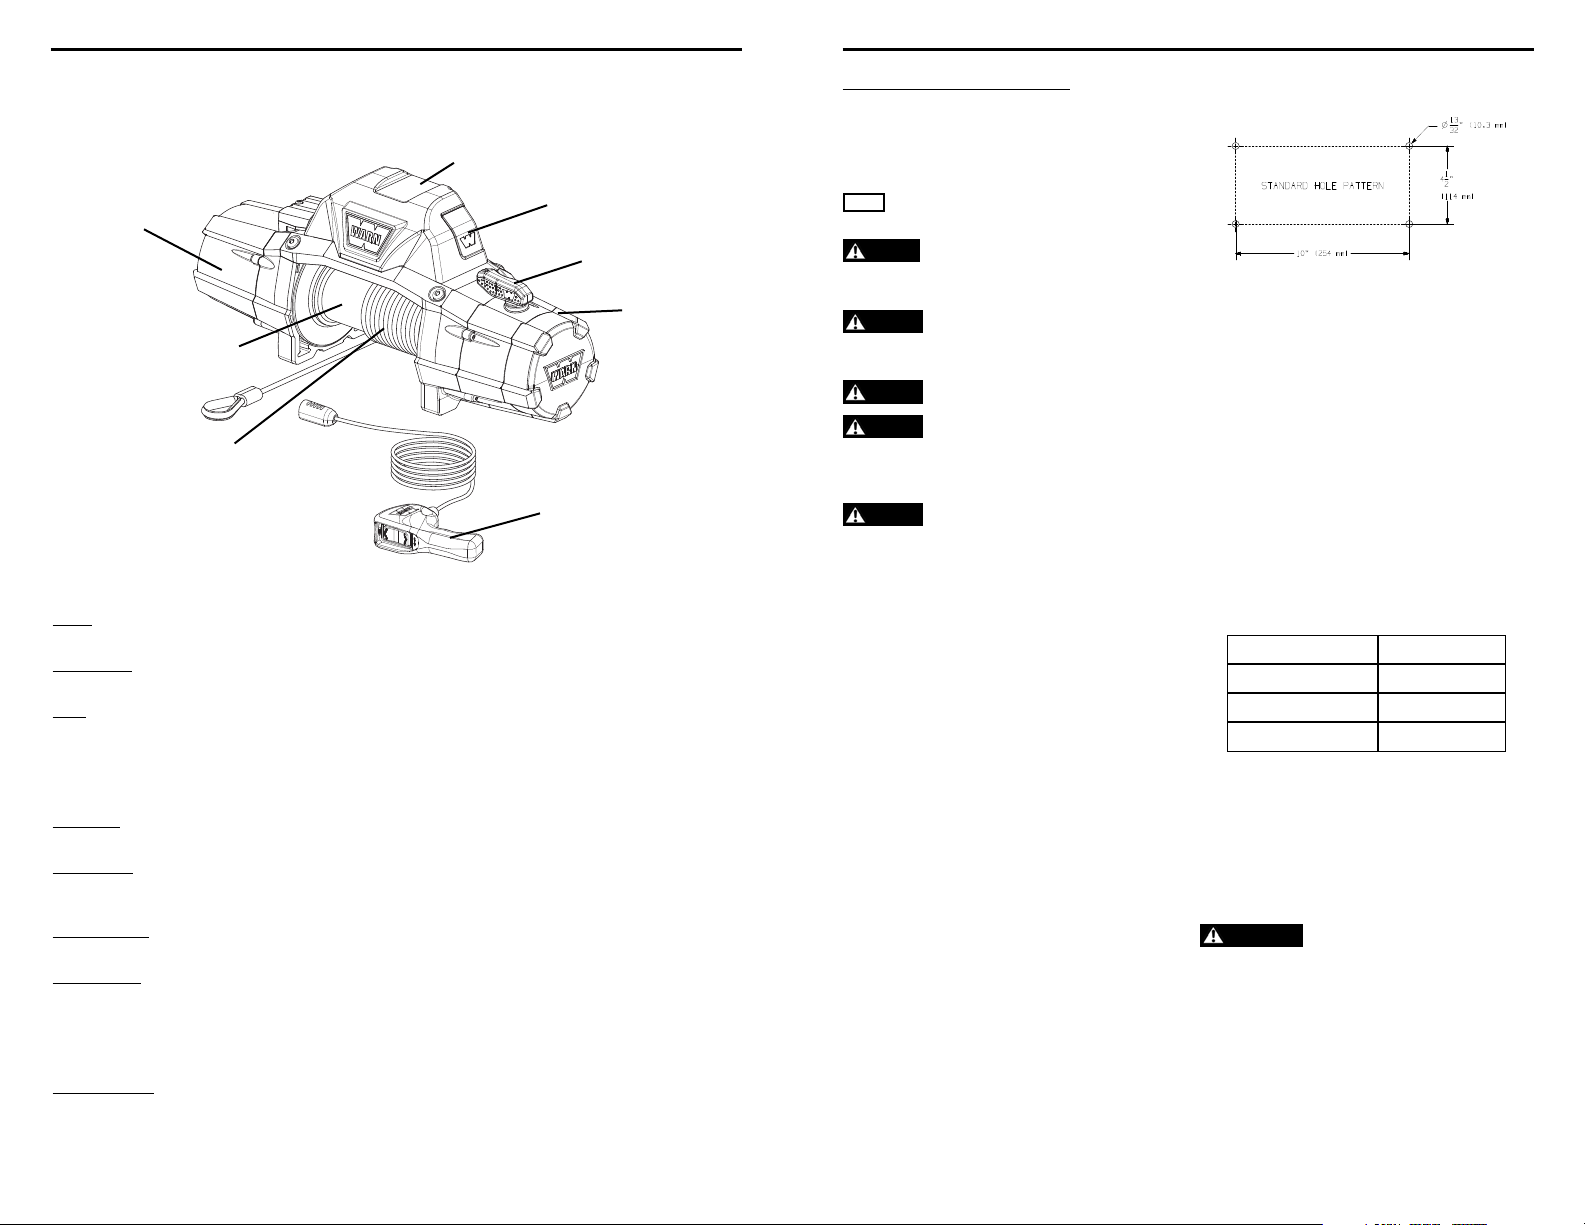
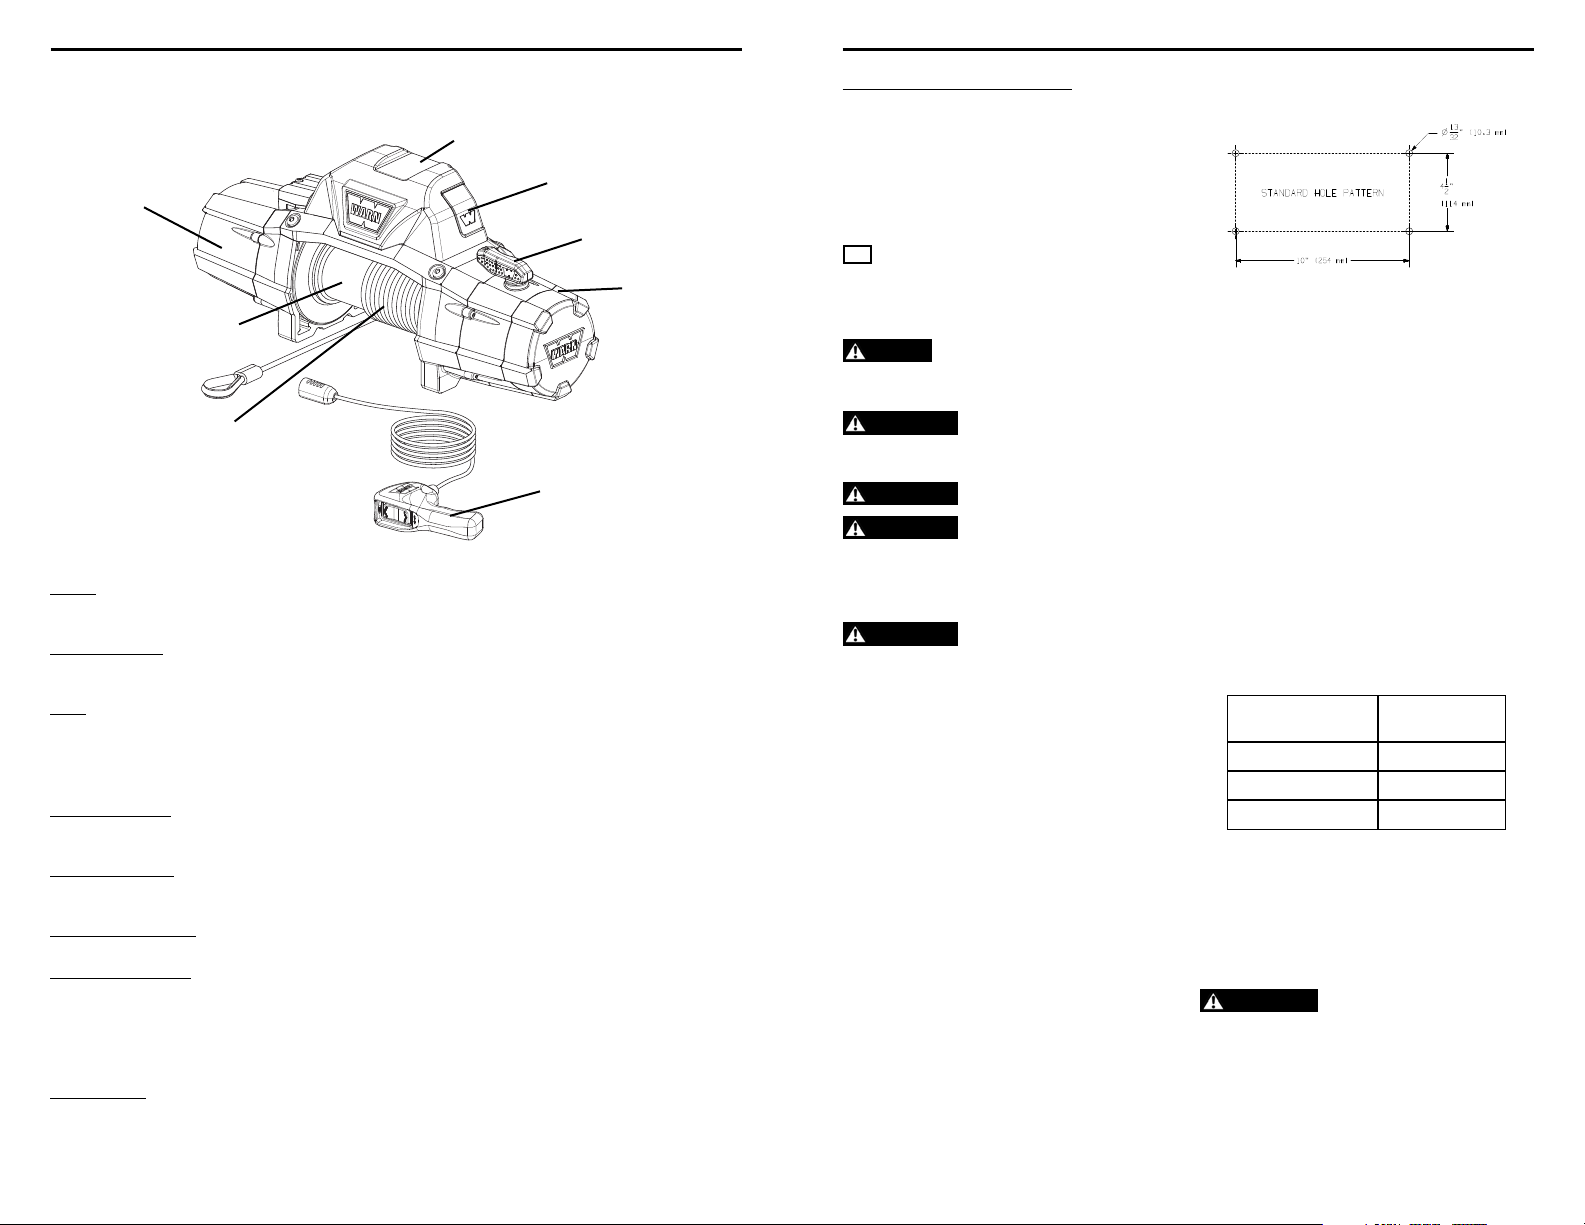
Know Your Winch
Before you begin, you should familiarize yourself with your WARN winch and each of its components:
Control Pack
Remote Socket
Motor
Clutch Lever
Transmission
(Gear Train)
Winch Drum
Rope
Remote Control
Figure 1
Motor: The winch motor is powered by the vehicle’s battery. The motor provides power to the gear
mechanism, which turns the winch drum and winds the winch rope.
Winch Drum: The winch drum is the cylinder onto which the winch rope feeds. The drum is driven by the
motor and drive train. Its direction can be changed using the remote control.
Rope*: The winch rope’s diameter and length are determined by the winch’s load capacity and
design. Wrapped around the winch drum and fed through the fairlead, the winch rope is
looped at the end to accept the hook’s clevis pin.
* For synthetic rope models, be sure to fully read the WARN Synthetic Rope Installation
Instruction manual, included in kit.
Gear Train: The reduction gear converts the winch motor power into a large pulling force. The gear train
design makes it possible for the winch to be lighter and more compact.
Clutch Lever: The clutch allows the operator to manually disengage the spooling drum from the gear train,
enabling the drum to rotate freely (known as “freespooling”). Engaging the clutch “locks” the
winch drum back onto the gear train.
Remote Socket: The remote socket is where the operator plugs in the wired remote control or optional
wireless remote receiver, in order to control the winch.
Control Pack*: Using electrical power from the vehicle’s battery, the control pack’s contactor switches
power to the motor, enabling the operator to change the direction of the winch drum
rotation.
*For specific applications, the optional Control Pack Relocation Kit details can be found at
your WARN Authorized Dealer or www.warn.com.
Remote Control: The remote control plugs into the winch control pack, via the remote socket, allowing the
operator to control the winch direction, as well as stand well clear of the wire rope while
operating the winch.
Step 1 - Mount the Winch
Winch mounting kits are available from your
WARN Dealer to satisfy nearly all applications. For
information on available kits, contact your WARN
product dealer.
For optimal performance and the results you expect,
NOTICE
WARN mounting plates are strongly recommended.
CAUTION
and serious injury, complete the winch installation and attach
the hook before installing the wiring.
suffi ciently strong enough to withstand the maximum pulling
capacity of your winch.
in the direction specifi ed by the drum rotation labels on the
winch and/or in the documentation. This is required for the
automatic brake (if so equipped) to function properly.
(mount side) of the drum.
horizontal orientation with the rope winding on/
off the drum on the mount side of the drum and
following the drum rotation arrow as labeled on the
winch, see Figures 2 and 3.
brake to function properly. Horizontal mounting
helps prevent the rope from piling up on one end of
the drum which can damage the winch.
combinations torqued to recommended levels will
prevent vibration during operation. Specifications
listed below. Mounting system will dictate bolt
length.
To prevent accidental activation of the winch
WARNING
Always choose a mounting location that is
Never use bolts that are too long.
WARNING
Always spool the winch rope onto the drum
WARNING
Always wind the winch rope on the bottom
WARNING
This winch should always be mounted in a
Correct rotation is required for the automatic
The use of recommended bolt and lock washer
Mounting Bolt Pattern:
Standard: 254 mm x 114.3 mm (10”x 4.5”)
Smooth and fl at mounting surface, minimum
thickness = 6.4 mm (1/4”)
Included Hardware:
• M10x1.5 fl anged locknut 15mm hex
• M10-1.5 x 35 hex fl ange, 8.8, bolt (4x)
• M10-1.5 x 40 hex fl ange, 8.8, bolt (2x)
Torque: 41 to 47 Nm (30-35 ft. lbs.)
Choose a mounting location that is sufficiently
strong enough to withstand the maximum pulling
capacity of your winch.
1. Set flanged nuts into pockets of winch feet.
2. Set winch in mounting location. Confirm
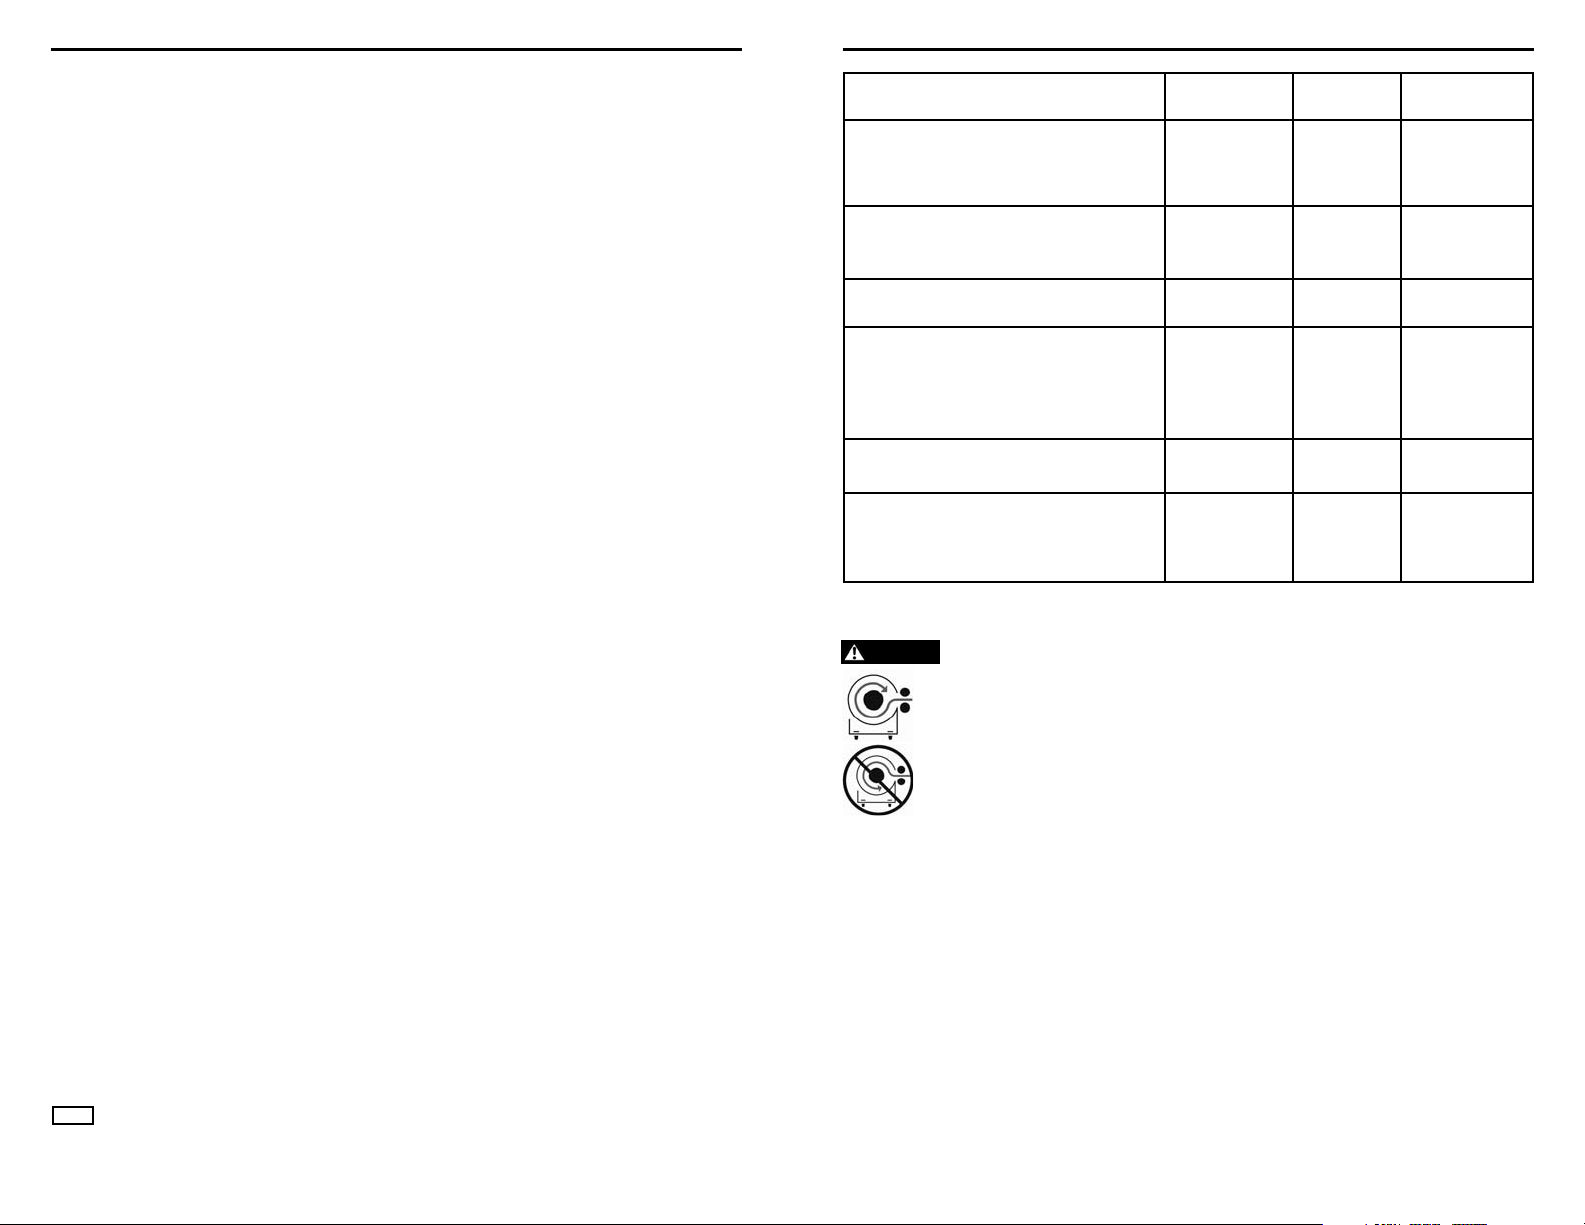
required bolt length.
Plate Thickness Bolt Length
7 mm (1/4”) 32 mm
10 mm (3/8”) 40 mm
13 mm (1/2”) 40 mm
3. Install bolts and tighten to 41 to 47 Nm (30-35
ft. lbs.)
4. Cut elastic band retaining rope.
5. Put clutch into free spool position.
6. Manually feed rope loop through fairlead.
WARNING
Always use supplied hook strap.
7. Attach hook to cable loop. Attach hook strap to
hook.
8. Rotate clutch back into fully engaged position.
WARN INDUSTRIES
7 83449A0
WARN INDUSTRIES
83449A0 8
Page 5
MOUNTING
ELECTRICAL CONNECTIONS
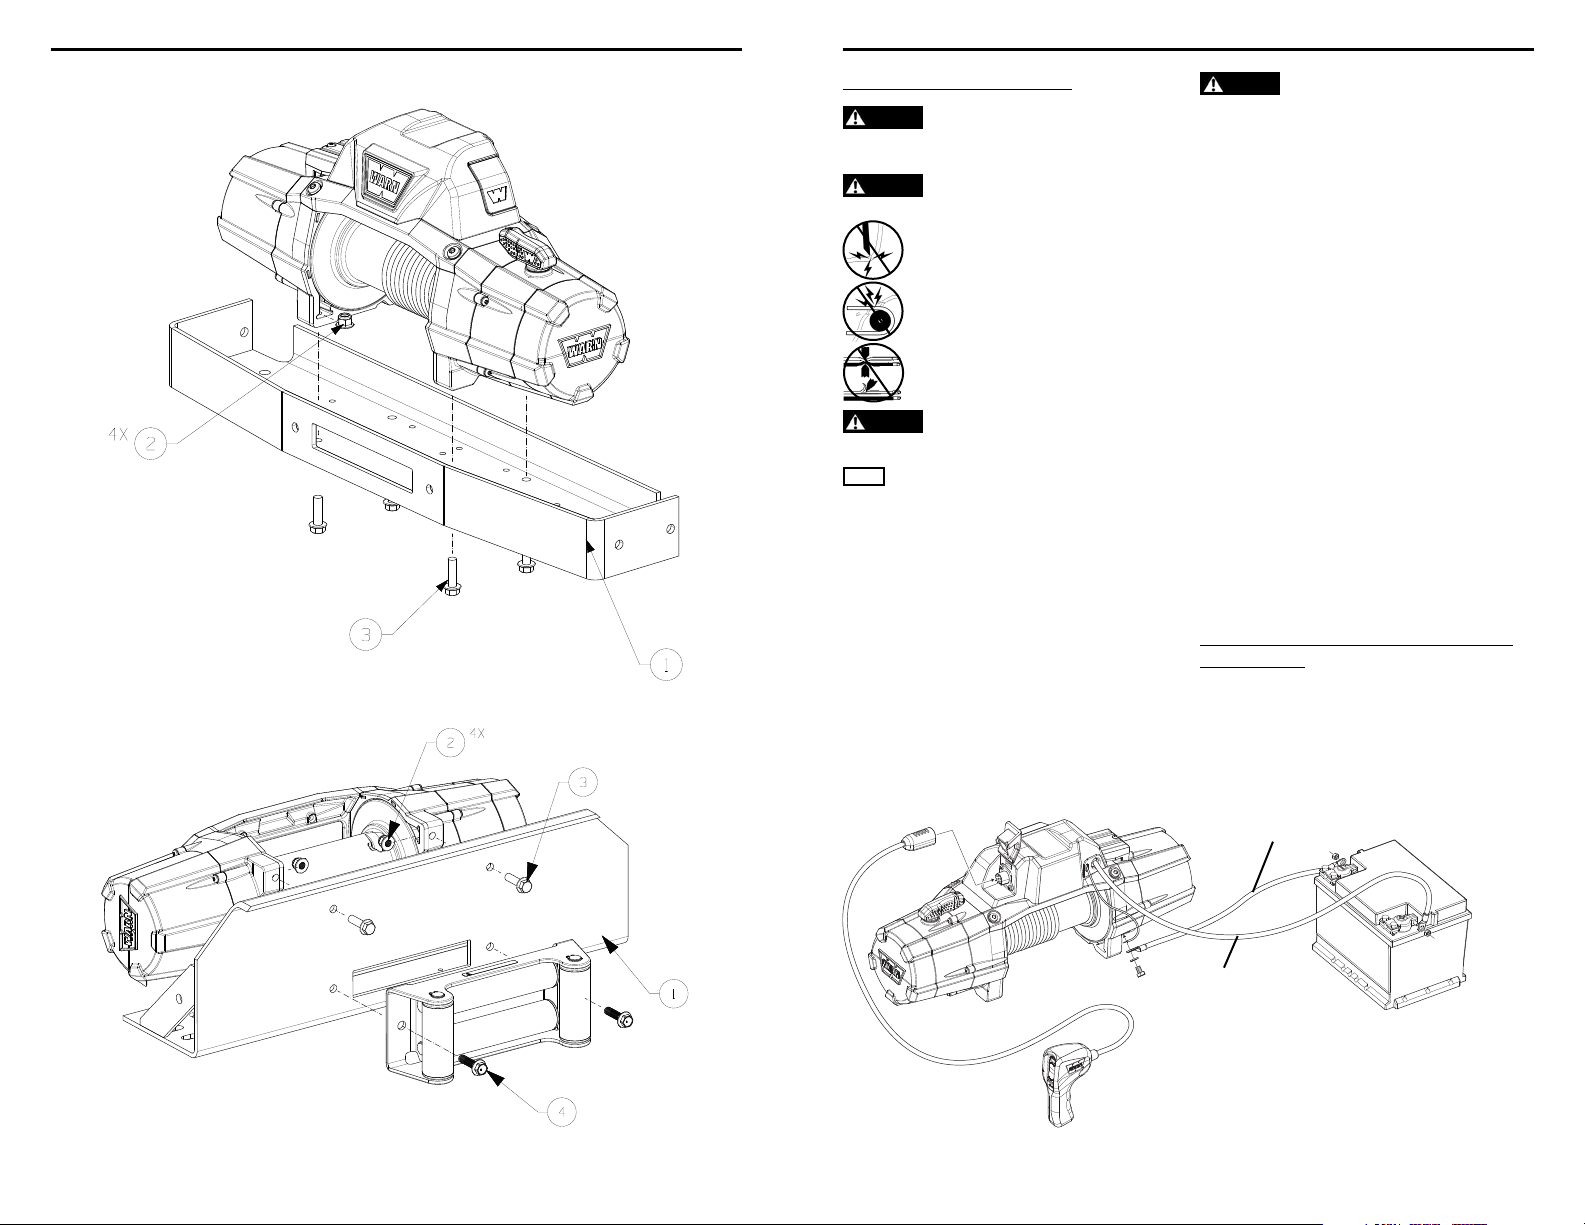
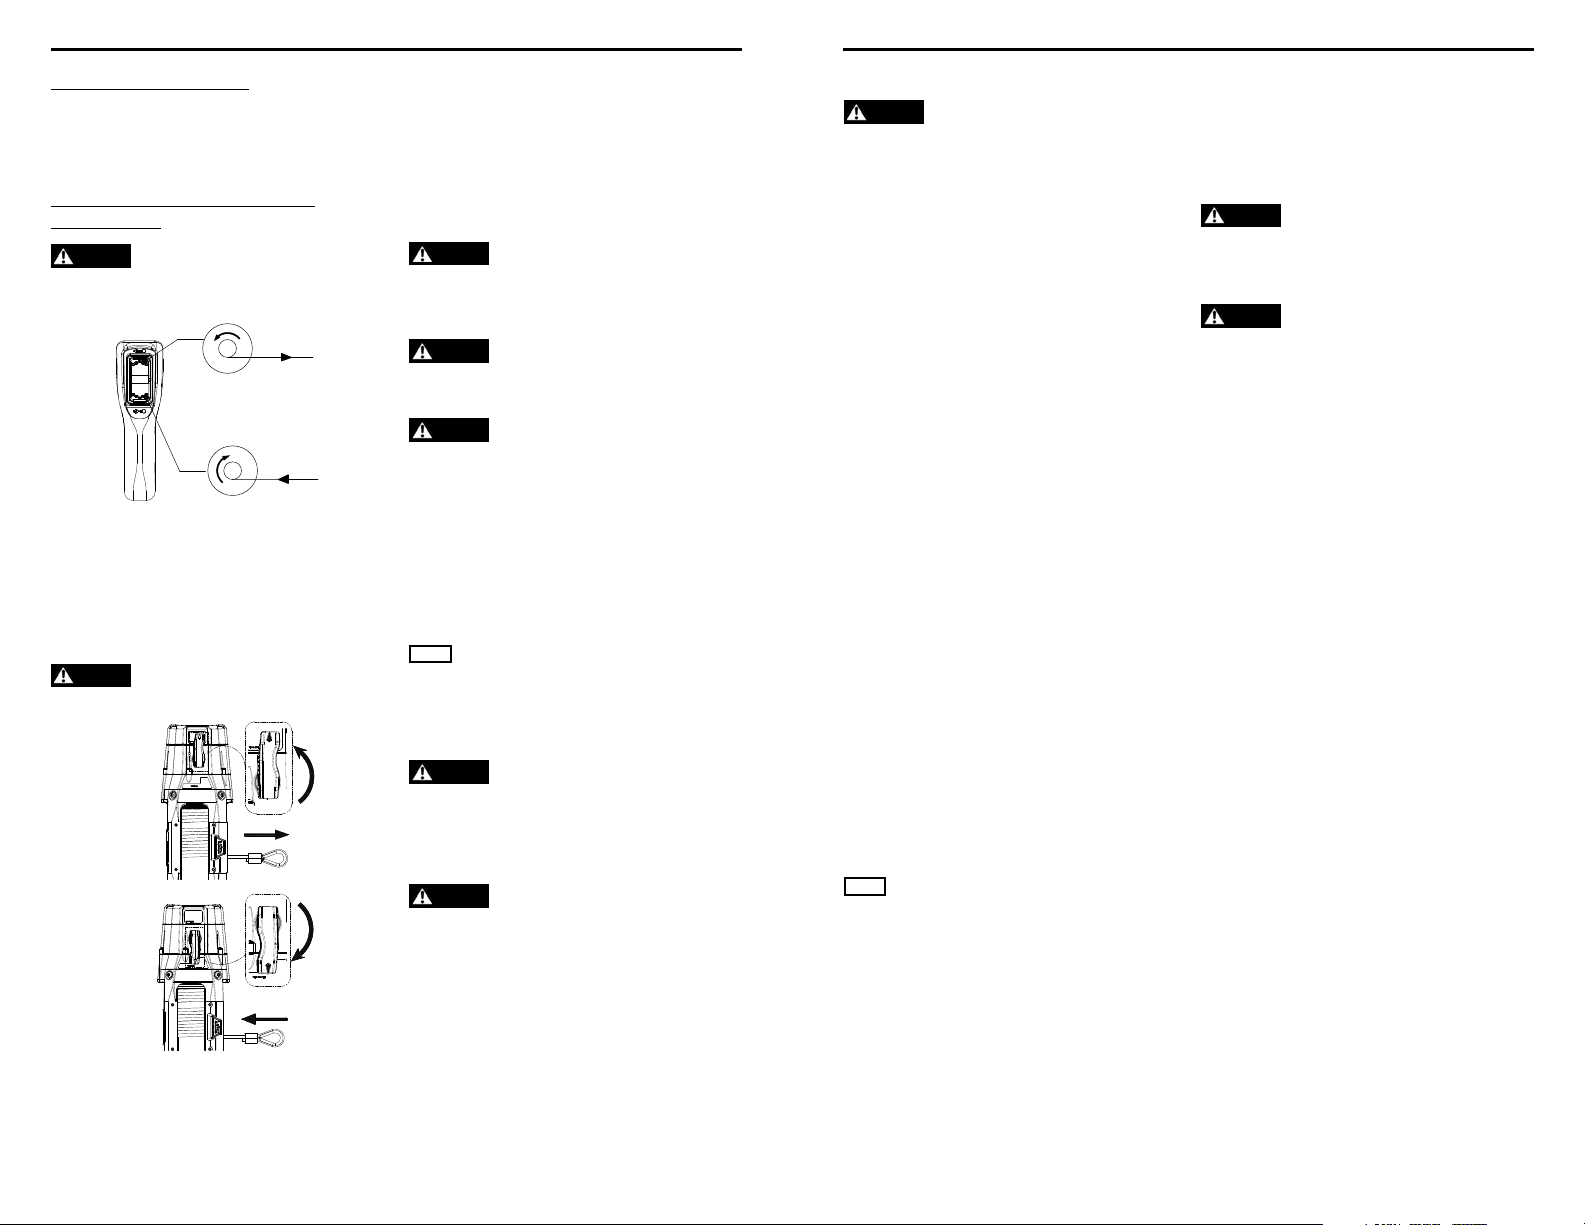
Mounting Orientation
4 x M10-1.5x35
Figure 2 Horitontal Feet Down Orientation
2 x M10-1.5x35
Step 2 - Install the Wiring
To prevent serious injury or death. Always
WARNING
place the supplied terminal boots on wires and terminals as
directed by the installation instructions.
To prevent serious injury or death from
WARNING
electrical fi re:
Never route electrical cables across sharp edges.
Never route electrical cables near parts that get
hot.
Never route electrical cables through or near
moving parts.
Avoid pinch and wear/abrasion points when
installing all electrical cables.
Always insulate and protect all exposed wiring
WARNING
and electrical terminals.
A fully charged battery and good connections are
NOTICE
essential to the proper operation of your winch. The minimum
requirement for a 12 volt DC battery is 650 Cold Cranking Amps.
Route battery connection cables in areas which
will not cause them to chafe or cut through the
insulation causing a potential short circuit.
The winch power wire must be routed to the
battery. A direct battery connection of the power
(red) and ground (black) cable is required. WARNING!
Do not connect ground to vehicle chassis.
Routing the battery cables may require removal
of vehicle facia or body parts.
Always route battery cables along a path that
allows the cables to be secured with zip ties.
Loose or unsecured power cables can cause
WARNING
serious injury or death.
Always protect power cables from sharp edges,
areas that get too hot to touch with your hand and
any moving parts.
1. Plan the routing path.
2. Loosely secure power cables along path.
3. Confirm power cables are protected from sharp
edges, heat and moving parts. Consider chassis
flex and vibration which might damage cable.
4. Carefully inspect electrical cable routing. Is
it neat and tidy? Zip tie and secure electrical
cables. Zip ties should be snug, but not cutting
into wire insulation. Use electrical tape, pieces
of rubber hose or electrical conduit to protect
electrical cables and wire harness where
needed to avoid electrical cable insulation wear
or abrasion.
5. Attach battery cables, red (positive) cable
FIRST, black (negative) second. Install boots
as appropriate to protect connections. Torque
battery terminal fasteners as directed by vehicle
service manual.
Upon completion of installation, check winch for
proper operation.
Step 3 - (Optional) Synthetic Rope
Installation
For synthetic rope models, be sure to fully read
the WARN Synthetic Rope Installation Instruction
manual for detailed synthetic rope installation
instructions.
2 x M10-1.5x40
Figure 3 Horizontal Feet Forward Orientation
WARN INDUSTRIES
9 83449A0
Ground (Black) Cable
Power (red) Cable
Figure 4 Electrical Diagram
WARN INDUSTRIES
83449A0 10
12v Battery
650 CCA Minimum
Page 6
FIRST TIME OPERATING INSTRUCTIONS
FIRST TIME OPERATING INSTRUCTIONS
Step 4 - System Check
Once you have performed a system check, you are
ready to confirm winch function. Proceed to First
Time Operation Instructions and Final Analysis and
Maintenance sections in this booklet.
Step 5 - First Time Operating
Instructions
Always understand your winch and the
WARNING
winching operation by reviewing The Basic Guide to Winching
Techniques included with your winch.
OUT
IN
Remote Control Switch
Do not leave the remote plugged into the winch
when not in use. Leaving the remote plugged in
may result in a dangerous condition and/or battery
drain.
Clutch Operation:
Never engage or disengage clutch if winch is
WARNING
under load, winch rope is in tension or drum is moving.
DISENGAGED
ENGAGED
When the clutch is engaged, the gear train is
coupled to the winch drum and power can be
transferred from the winch motor. When the clutch
is disengaged the drum is in the freespool position
and the gear train and winch rope drum are
uncoupled allowing the drum to rotate freely.
T
he clutch lever, located on the winch housing
opposite the motor, controls the clutch position.
To prevent damage, always fully engage or fully
disengage the clutch lever.
Spooling Out
Never operate winch with less than 5 wraps of
WARNING
rope around the drum. Rope could come loose from the drum,
as the rope attachment to the drum is not designed to hold
a load.
Always keep hands clear of winch rope, hook
WARNING
loop, hook and fairlead opening during installation, operation,
and when spooling in or out.
Always wear heavy leather gloves when
WARNING
handling winch rope.
Freespooling is generally the quickest and easiest
way to spool out winch rope. Before freespooling
winch rope out from the winch, power out enough
rope to remove any tension the winch rope might
be under. Disengage the clutch. Then freespool
by manually spooling out enough winch rope for
the winching operation. See The Basic Guide to
Winching Techniques for more information.
NOTICE
Do NOT power out more than 30ft without allowing
the winch to cool for 20 minutes before powering rope back in.
Instead, place the clutch in freespool and pull the rope out by
hand.
Always use supplied hook strap whenever
WARNING
spooling winch rope in or out, during installation or operation
to avoid injury to hands and fi ngers.
Spooling In Under Load
Never exceed winch’s rated line pull.
WARNING
Power-in the winch rope evenly and tightly on
the drum. This prevents the outer winch wraps
from sinking into the inner wraps, binding, and
damaging the winch rope.
Avoid shock loads when spooling, by pulsing the
control switch to take up winch rope slack. Shock
loads can momentarily far exceed the winch and
rope ratings.
Spooling In Under No Load
Never touch winch rope or hook while
WARNING
someone else is at the control switch or during winching
operation.
Spooling with an Assistant: Have the assistant
hold the hook strap putting as much constant
tension on the winch rope as possible. While
keeping tension, the assistant should walk toward
the winch while you operate the control switch
spooling in the winch rope. Release the
when the hook is a minimum of 6 ft. (2m) from the
fairlead opening.
Spool in the remainder for storage as directed
below.
Spooling Alone: Arrange the winch rope to
be spooled so it will not kink or tangle when
spooled. Be sure any winch rope on the drum is
tightly and evenly layered. Spool enough winch
rope to complete the next full layer on the drum.
Tighten and straighten the layer. Repeat process
until the hook is a minimum of 6 ft. (2 m) from the
fairlead opening.
Spool in the remainder for storage as directed
below.
switch
Spooling Remainder for Storage
When the hook is within 6 ft. (2 m) of the fairlead,
disconnect the hook from the anchor or load.
Hold onto the supplied hook strap and hold
tension on the winch rope. Slowly power-in the
winch by “pulsing” the power-in switch on the
remote control until the hook is within 3 ft. (1 m)
of the fairlead.
Stop winching in and attach the hook to a
suitable anchor point on the vehicle.
NOTICE
Do not power the hook into the fairlead. This could
cause damage to the fairlead.
Once the hook is suitably attached to the
vehicle, power-in the remaining slack in the winch
rope by “pulsing” the power-in switch on the
remote control until there is minimal slack in the
winch rope.
Overloading/Overheating
This winch is rated for intermittent duty. When
the motor approaches stall speed, very rapid heat
buildup occurs which may cause motor damage.
Double-line rigging (see The Basic Guide to
Winching Techniques) will reduce the amperage
draw, and reduce heat buildup in the motor. This
allows longer continual use.
STRETCHING WINCH ROPE
Always prestretch rope and respool under load
WARNING
before use. Tightly wound rope reduces chances of “binding”,
which can damage the rope.
Never operate winch with less than 5 wraps of
WARNING
rope around the drum. Rope could come loose from the drum,
as the rope attachment to the drum is not designed to hold
a load.
The life of a winch rope is directly related to
the use and care it receives. During its first use, a
new winch rope must be spooled onto its drum
under a load of at least 1000 lbs. (454 kgs). Use
the following instructions to properly stretch the
winch rope onto the winch drum.
1) Choose a FLAT AND LEVEL location that is large
enough to run out the entire length of winch
rope.
2) Turn the clutch lever on the winch to the “Free
Spool” position. Spool out the winch rope to the
last 5 wraps on the drum. Once the winch rope is
spooled out, turn the clutch lever on the winch to
the “Engaged” position.
3) Attach the hook end of the rope to a suitable
anchor point and back the vehicle away from the
anchor point until there is very little slack in the
winch rope. Before getting out of the vehicle, set
the parking brake, place the vehicle in gear or
park and turn the vehicle off .
4) Connect the remote control to the winch.
Standing approximately 8 ft. (2.44 m) away from
the winch, power-in the winch until all of the
slack is wound onto the winch drum. Disconnect
the remote control from the winch. Hold tension
on the winch rope with one hand; carefully push
the winch rope to the side of the drum the winch
rope is attached to so there are no gaps between
each coil on the drum. Be sure to check that the
winch rope is winding off of the bottom if the
drum, not the top, or the automatic load holding
brake will not function properly. (If the winch
rope is winding off the top you have powered the
winch “out” instead of “in” on the remote control).
WARN INDUSTRIES
11 83449A0
WARN INDUSTRIES
83449A0 12
Page 7
FIRST TIME OPERATING INSTRUCTIONS
FINAL ANALYSIS AND MAINTENANCE
5) The following steps should be done using two
people for proper safety. If you attempt to tension
your winch rope alone be sure to always engage
the parking brake, place the transmission in gear
or park and turn the vehicle off every time you
exit the vehicle to inspect the winch rope. Never
exit the vehicle with a load on the winch rope.
Tensioning the winch rope is critical to ensure a
long product life. Tensioning the winch rope will
prevent outer layers of winch rope from pinching
and deforming the inner layers.
6) Use care to evenly wrap each layer to prevent
damage to the rope.
7) Pass the remote control through the driver’s
window for the driver of the vehicle to operate.
Instruct your assistant to stand to the side of
the vehicle and away from the winch rope. Your
assistant should signal you if the winch rope is
winding correctly by watching it move across
the fairlead as the winch rope is powered in.
Start the vehicle and place the transmission in
neutral. Release the parking brake while applying
moderate brake pedal pressure.
Press power-in on the remote control switch.
After winching in for approximately 6 ft. (2m),
stop winching. Slowly let up off of the brake
pedal and then apply the parking brake. This will
ensure that there is no load on the winch rope.
Then place the transmission in park or in gear and
turn the vehicle off . Exit the vehicle and inspect
the winch to make sure that the winch rope is
being evenly wound onto the winch drum and
not sinking into the lower layer. If the winch rope
is sinking, power the winch rope out and repeat
this step from the beginning with more brake
pedal pressure.
8) When you are convinced the winch rope is
winding onto the winch drum properly, repeat
step 6 until the vehicle is within 6 ft. (2 m) of the
winch anchor. Once within 6 ft. (2 m), slowly let up
off of the brake pedal and then apply the parking
brake. This will ensure that there is no load on
the winch rope. Then place the transmission in
park or in gear and turn the vehicle off . Exit the
vehicle. Disconnect the hook from the anchor.
While holding onto the supplied hook strap, hold
tension on the winch rope and slowly power-in
the winch by “pulsing” the power-in switch on the
remote control until the hook is within 3 ft. (1 m)
of the fairlead. Stop winching in and attach the
hook to a suitable anchor point on the vehicle.
Once the hook is suitably attached to the
vehicle, power-in the remaining slack in the winch
rope by “pulsing” the power-in switch on the
remote control until there is minimal slack in the
winch rope.
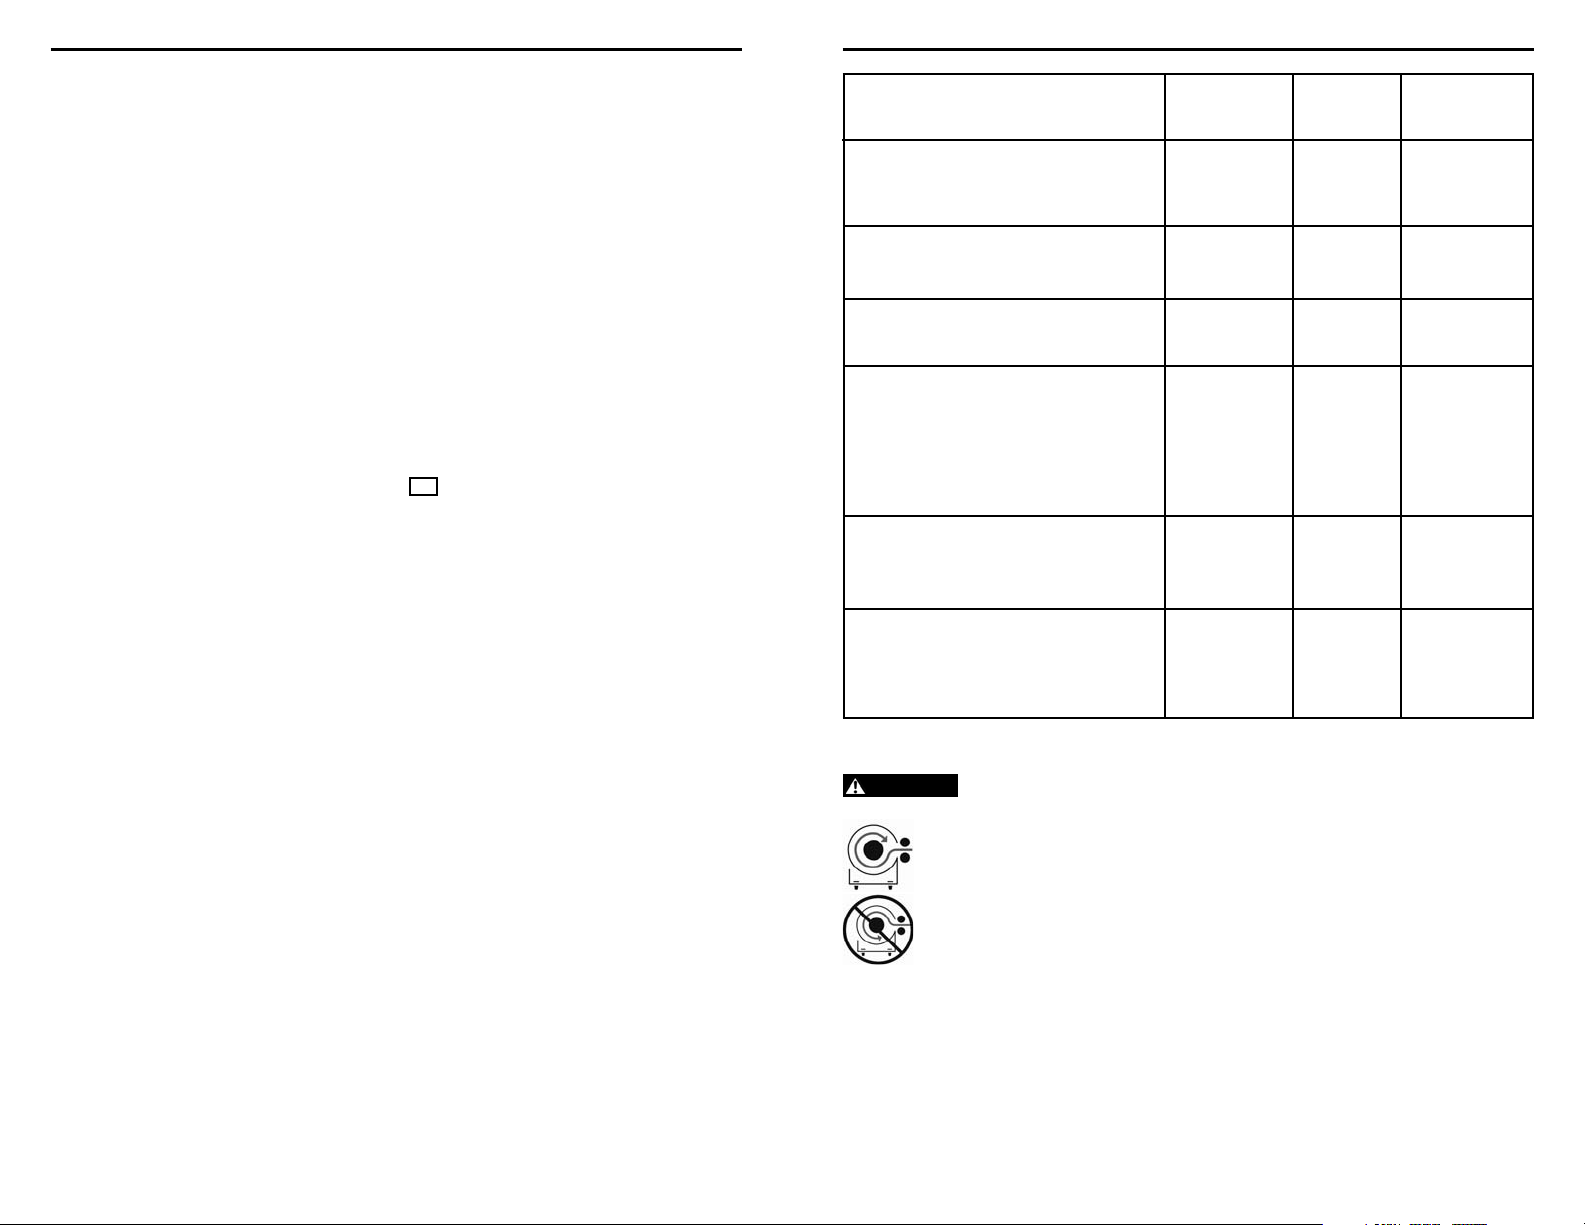
Check
Take time to fully read the Instructions and/
or Operations Guide, and/or Basic Guide to
Winching Techniques, in order to understand
your winch and its operations
Check fasteners and make sure they are tight
and to proper torque.
Replace damaged fasteners.
Verify wiring to all components is correct and
be certain that all connections are tight.
Verify there is no exposed/bare wiring,
terminals or cable insulation damage
(chafi ng/cutting).
Cover any exposures with terminal boots.
Repair or replace damaged electrical cable.
Inspect rope for damage.
Replace rope immediately if damaged.
Keep winch, rope and switch control free
from contaminants.
Use a clean rag or towel to remove any
dirt and debris.
WARNING
To prevent serious injury or death:
Always spool the winch rope onto the drum as
indicated by the drum rotation label.
Always Wind Rope on Bottom of Drum.
Never Wind Rope Over Top of Drum.
Before fi rst
operation
After each
use
Every 90 days
X
XX
XX
XX
XXX
X
Take time to fully understand your winch and
the winching operation by reviewing the Basic
Guide to Winching Techniques included with your
winch.
For further information or any questions
contact:
WARN INDUSTRIES, INC.
12900 S.E. Capps Road, Clackamas
OR USA 97015-8903, 1-503-722-1200,
Customer Service: 1-800-543-9276
Dealer Locator Service: 1-800-910-1122
or visit www.warn.com.
Do not power the hook into the fairlead. This could
NOTICE
cause damage to the fairlead.
WARN INDUSTRIES
13 83449A0
WARN INDUSTRIES
83449A0 14
Page 8
INSTRUCTIONS
INDEX DES SYMBOLES
Guide d’installation du treuil
Chaque situation de treuillage peut potentiellement occasionner des blessures. Afin de minimiser ce risque, il est important de lire attentivement
le présent guide ainsi que le manuel de base des techniques de treuillage. Veillez à vous familiariser avec le maniement du treuil avant de l’utiliser
et à vous préoccuper avant tout de la sécurité. Nous exposons dans ce guide de nombreuses règles de sécurité fondamentales pour le maniement
du treuil. Veuillez lire le manuel de base des techniques de treuillage pour de plus amples informations concernant votre treuil et les techniques
adéquates de câblage. N’oubliez pas que, comme chaque situation de treuillage est différente, votre bon sens et votre attachement constant aux
principes de sécurité sont d’une importance primordiale.
À titre de référence, veuillez conserver ce manuel et les documents complémentaires qui se trouvent dans ce kit. Vous trouverez dans ce kit
la documentation suivante : Le manuel de base des techniques de treuillage, les spécifications techniques, la déclaration de conformité, les
informations relatives à la garantie, le guide d’installation du treuil et un guide de l’utilisateur des câbles synthétiques en option. En cas de
document manquant, veuillez nous contacter aux numéros ci-dessous ou visiter notre site www.warn.com.
TABLE DES MATIÈRES :
SÉCURITÉ
Index des symboles ..............................................................................................................................................................16
Mesures générales de sécurité ...................................................................................................................................17-19
INSTRUCTIONS
Conditions de travail sûres................................................................................................................................................. 20
Se familiariser avec le treuil ............................................................................................................................................... 21
Montage ..............................................................................................................................................................................22-23
Raccordements électriques ............................................................................................................................................... 24
Instructions relatives à une première utilisation .................................................................................................25-27
Dernière analyse et entretien ........................................................................................................................................... 28
SYMBOLE EXPLICATION
Lire tous les documents
relatifs au produit
Toujours porter un
dispositif de protection
auditive et oculaire
Ne jamais utiliser le treuil
comme palan
Positionner correctement
la charge dans la gorge du
crochet
Enrouler le câble sur
le dessous du tambour
Danger d’écrasement des
doigts dans
le guide-câble
Risque de percement/
coupure des mains
Risque d’explosion/
rupture
SYMBOLE EXPLICATION
Toujours porter
des gants de cuir
Ne pas déplacer
des personnes
Toujours utiliser la sangle
de crochet fournie
Ne jamais appliquer la
charge sur l’extrémité ou
le loquet du crochet
Ne jamais enrouler
le câble sur le dessus
du tambour
Point de pincement
du guide-câble
Risque de surface
chaude
Risque d’incendie
et de brûlure
Warn® et le lo go WARN sont des m arques dép osées de Warn In dustrie s Inc.
© 2012 Warn Industries Inc.
WARN INDUSTRIES
15
Warn Industries Inc.
12900 SE Capps Road
Clackamas, OR 97015
États-Unis
Service à la clientèle : (800) 543-9276
No. de Fax international : (503) 722-3005
Télécopie : (503) 722-3000
www.warn.com
Danger en raison
d’une arête tranchante
Éviter les points de
pincement et d’usure/
abrasion lors de
l’installation des câbles
électriques
WARN INDUSTRIES
83449A0 16
Danger lié à des
pièces mobiles
Isoler tous les câbles
exposés
Ne jamais accrocher le
câble à lui-même
Page 9
MESURES GÉNÉRALES DE SÉCURITÉ
MESURES GÉNÉRALES DE SÉCURITÉ
Avertissements et mises en
garde
Les directives suivantes comprennent des indications
intitulées AVERTISSEMENT, ATTENTION, AVIS et REMARQUE.
Chacune d’entre elles comporte un objectif bien précis :
AVERTISSEMENT présente des consignes de sécurité
soulignant un danger potentiel qui, s’il n’est pas évité,
peut entraîner des blessures graves ou la mort. ATTENTION
comprend des consignes de sécurité signalant un danger
potentiel qui, s’il n’est pas évité, peut entraîner des blessures
légères ou modérées. ATTENTION sert aussi à signaler une
utilisation dangereuse. ATTENTION et AVERTISSEMENT
identifi ent un danger, indiquent comment l’éviter et
montrent ses conséquences possibles si on l’ignore. AVIS
présente des consignes visant à éviter les dommages
matériels. REMARQUE donne des renseignements
additionnels qui aident à accomplir une procédure.
TRAVAILLEZ PRUDEMMENT !
AVERTISSEMENT
DANGER DE HAPPEMENT PAR DES PIÈCES
MOBILES
Le non-respect des consignes peut entraîner des
blessures graves ou la mort.
• Toujours s’assurer que le loquet du crochet est fermé et
qu’il ne soutient aucune charge.
• Ne jamais appliquer la charge sur l’extrémité ou le loquet
du crochet. Appliquer la charge uniquement au centre du
crochet.
• Ne jamais utiliser un crochet dont l’ouverture de la gorge a
augmenté ou dont l’extrémité est courbée ou tordue.
• Toujours utiliser un crochet avec loquet.
• Toujours s’assurer que l’opérateur et les personnes
présentes sont conscients de la stabilité du véhicule et/ou
de la charge.
• Toujours garder le fi l de la télécommande et le cordon
d’alimentation à l’écart du tambour, du câble et du
câblage. S’assurer qu’il n’y a pas de fi ssures, de points de
pincement, de fi ls effi lochés ou de connexions desserrées.
Tous les composants endommagés doivent être remplacés
avant d’utiliser le produit.
• Toujours faire passer la télécommande par la fenêtre, si
on l’utilise de l’intérieur d’un véhicule.
• Ne jamais accrocher le câble à lui-même
AVERTISSEMENT
DANGER DE HAPPEMENT PAR DES PIÈCES
MOBILES
Le non-respect des consignes peut entraîner des
blessures graves ou la mort.
Consignes de sécurité générales :
• Toujours se familiariser avec le treuil. Prendre le
temps de bien lire le manuel d’utilisation, et/ou le
manuel de base des techniques de treuillage, afi n de
comprendre le treuil et son fonctionnement.
• Ne jamais excéder la capacité nominale du treuil
ou du câble d’acier. Un câblage double avec poulie
ouvrante permet de réduire la charge subie par le
treuil.
• Toujours porter des gants de cuir épais durant
la manipulation du câble du treuil.
• Ne jamais utiliser le treuil ou le câble du treuil
pour faire du remorquage. Cela peut endommager,
surcharger et casser le câble.
• Ne jamais se servir du treuil pour maintenir une
charge.
• Ne jamais faire fonctionner l’appareil sous l’eff et
de drogues, de l’alcool ou de médicaments.
• Ne jamais laisser des personnes âgées de moins de 16
ans utiliser ce treuil.
Consignes de sécurité se rapportant à l’installation :
• Toujours choisir une surface de montage
suffi samment résistante pour supporter la capacité de
traction maximale du treuil.
• Toujours utiliser un matériel de montage de catégorie
8,8 ou supérieure.
• Ne jamais souder les boulons de montage.
• Toujours utiliser un matériel de montage, des
composants et des accessoires homologués par
le fabricant.
• Ne jamais utiliser des boulons trop longs.
• Toujours achever le montage du treuil et la fi xation
du crochet avant d’eff ectuer le câblage.
• Toujours garder les mains éloignées du câble du
treuil, de la boucle du crochet, du crochet et de
l’ouverture du guide-câble durant l’installation
et l’utilisation de l’appareil et l’enroulement ou le
déroulement du câble.
• Toujours positionner le guide-câble avec
l’avertissement visible sur le dessus.
• Toujours étirer au préalable le câble et l’enrouler sous
charge avant de l’utiliser. Un câble enroulé de manière
serrée réduit le risque qu’il coince et soit endommagé.
AVERTISSEMENT
DANGER DE HAPPEMENT PAR DES PIÈCES
MOBILES
Le non-respect des consignes peut entraîner des
blessures graves ou la mort.
Consignes de sécurité concernant le treuillage :
• Toujours inspecter le câble du treuil, le crochet et les
élingues avant de faire fonctionner le treuil. Tout câble de
treuil effi loché, tordu ou endommagé doit être remplacé
immédiatement. Tous les composants endommagés doivent
être remplacés avant d’utiliser le produit. Protéger toutes les
pièces contre le risque de dommages.
• Toujours s’assurer que tout objet ou obstacle pouvant gêner
la bonne utilisation du treuil est écarté.
• Toujours s’assurer que le point d’ancrage choisi peut
supporter la charge et que la sangle ou la chaîne ne glisse pas.
• Toujours utiliser la sangle de crochet fournie pour enrouler
ou dérouler le câble du treuil, durant l’installation ou
l’utilisation.
• Toujours exiger de l’opérateur et des personnes présentes
d’être attentifs au véhicule et à la charge.
• Toujours être conscient de la stabilité du véhicule et de
la charge durant le treuillage. Veiller à ce que personne ne
s’approche. Alerter toutes les personnes alentour en cas
d’instabilité.
• Toujours dérouler autant de câble du treuil que possible
avant de procéder au câblage. Utiliser une ligne double ou
choisir un point d’ancrage distant.
• Toujours prendre le temps d’utiliser des techniques de câblage
adaptées avant d’utiliser le treuil pour tirer.
• Ne jamais toucher le câble du treuil ou le crochet lorsqu’une
autre personne est à l’interrupteur de commande ou durant le
fonctionnement du treuil.
• Ne jamais essayer d’embrayer ou de débrayer si le treuil
est sous charge, si le câble du treuil est en tension ou si le
tambour est en train de tourner.
• Ne jamais toucher le câble ou le crochet lorsque le câble est
tendu ou sous charge.
• Toujours se tenir à l’écart du câble du treuil et de la charge
durant l’utilisation et ne jamais laisser personne s’approcher.
• Ne jamais se servir d’un véhicule pour tirer une charge
sur le câble du treuil. La charge combinée ou un choc peut
endommager, surcharger et casser le câble.
• Ne jamais replier le câble du treuil sur lui-même.
• Utiliser toujours une chaîne ou une protection de tronc
d’arbre sur le point d’ancrage.
AVERTISSEMENT
DANGER DE CHUTE OU D’ÉCRASEMENT
Le non-respect des consignes peut entraîner des
blessures graves ou la mort.
• Toujours rester à l’écart, en gardant les mains et les
autres personnes à l’écart également.
• Ne jamais utiliser le treuil avec moins de 5 spires de câble
enroulées autour du tambour, car le câble pourrait se
dérouler du tambour, étant donné que l’ancrage du câble
n’est pas conçu pour retenir une charge.
• Ne jamais utiliser le treuil comme palan ou pour
suspendre une charge.
• Toujours s’assurer que le point d’ancrage peut supporter
la charge, et prendre le temps d’employer des techniques
de câblage appropriées.
• Ne jamais utiliser le treuil pour soulever ou transporter
des personnes.
• Ne jamais forcer trop fort pour dérouler le câble du treuil.
• Toujours utiliser une posture/technique de levage
adéquate ou demander de l’aide lors de la manipulation
ou de l’installation du produit.
• Toujours enrouler le câble sur le tambour dans le
sens spécifi é par l’étiquette d’avertissement apposée
sur le treuil ou la documentation du treuil. Cela est
nécessaire pour que le frein automatique (le cas échéant)
fonctionne correctement.
• Toujours enrouler le câble du treuil sur le tambour comme
indiqué par l’autocollant de rotation du tambour.
• Toujours enrouler le câble du treuil sur le dessous (côté
support) du treuil.
• Ne jamais enrouler le câble sur le dessus du tambour.
• Toujours enrouler le câble du treuil sur le tambour dans
le sens spécifi é par les étiquettes de rotation du tambour
apposées sur le treuil et/ou par la documentation du
treuil. Cela est nécessaire pour que le frein automatique
(le cas échéant) fonctionne correctement.
WARN INDUSTRIES
17 83449A0
WARN INDUSTRIES
83449A0 18
Page 10
AVERTISSEMENT
MESURES GÉNÉRALES DE SÉCURITÉ
ATTENTION
CONDITIONS DE TRAVAIL SÛRES
Ce manuel contient des consignes d'installation
du système de treuil WARN et les instructions
pour la première utilisation. Veuillez consulter le
Manuel de base des techniques de treuillage pour
des instructions d'utilisation complètes relatives
au système de treuil WARN.
RISQUE DE COUPURE ET DE BRÛLURE
Le non-respect des consignes peut entraîner des
blessures graves ou la mort.
Pour éviter de se blesser les mains et les doigts :
• Toujours porter des gants de cuir épais durant
la manipulation du câble du treuil.
• Toujours penser aux surfaces chaudes au niveau du moteur
du treuil, du tambour ou du câble durant ou après l’utilisation
du treuil.
RISQUE DE COUPURE ET DE BRÛLURE
Le non-respect des instructions peut entraîner des
blessures mineures ou modérées.
• Ne jamais laisser le câble du treuil glisser dans
les mains.
ATTENTION
AVERTISSEMENT
DANGER DE HAPPEMENT
PAR DES PIÈCES MOBILES
Le non-respect des instructions peut entraîner des
blessures mineures ou modérées.
Pour éviter de se blesser les mains ou les doigts :
RISQUES ASSOCIÉS AUX PRODUITS CHIMIQUES
ET RISQUE D’INCENDIE
Le non-respect des consignes peut entraîner des
blessures graves ou la mort.
• Toujours retirer les bijoux et porter des lunettes de sécurité.
• Ne jamais faire passer les câbles électriques
par-dessus des bords tranchants.
• Ne jamais faire passer les câbles électriques à proximité de
pièces qui s’échauff ent.
• Ne jamais faire passer les câbles électriques à travers des
pièces mobiles ou à proximité.
• Toujours placer les capuchons fournis sur les fi ls et les
bornes, conformément aux instructions d’installation.
• Ne jamais se pencher au-dessus de la batterie en procédant
aux connexions.
• Ne jamais faire passer les câbles électriques
par-dessus les bornes de la batterie.
• Ne jamais court-circuiter les bornes de la batterie avec des
objets métalliques.
• Toujours s’assurer que la zone ne contient pas de conduites
de carburant, de réservoir de carburant, de conduites de
frein, de câblage électrique, etc., avant de percer.
• Toujours consulter le manuel de l’utilisateur pour
les informations correctes de câblage.
• Toujours isoler et protéger tous les fi ls et bornes électriques
exposés.
WARN INDUSTRIES
19 83449A0
• Ne jamais laisser la télécommande dans un
emplacement où elle peut être activée durant la mise en
roue libre, le câblage ou quand le treuil n’est pas utilisé.
• Ne jamais laisser la télécommande du treuil
branchée durant l’installation, le déroulement en
roue libre, le câblage, l’entretien ou quand le treuil
n’est pas utilisé.
AVIS
ÉVITER D’ENDOMMAGER LE TREUIL ET
L’ÉQUIPEMENT
• Toujours éviter de tirer sur le côté, ce qui a pour eff et
d’empiler le câble du treuil sur l’une des extrémités du
tambour. Cela peut endommager le câble ou le treuil.
• Toujours s’assurer d’avoir complètement embrayé
ou complètement débrayé.
• Toujours faire attention à ne pas endommager le
châssis du véhicule si l’on décide de s’arrimer à un
véhicule pour pouvoir travailler avec le treuil.
• Ne jamais submerger le treuil dans l’eau.
• Toujours ranger la télécommande dans un endroit
sûr, propre et sec.
Sécurité
Lire et suivre les instructions de montage et de
sécurité lors de l’installation du système de treuil
WARN.
Toujours faire attention lorsqu’on travaille avec
l’électricité et ne pas oublier de s’assurer qu’aucune
connexion électrique n’est exposée avant de mettre
le circuit du treuil sous tension.
Pour les spécifications et les données de
performance, veuillez vous référer à la fiche
technique fournie avec le treuil.
WARN INDUSTRIES
83449A0 20
Page 11
SE FAMILIARISER AVEC LE TREUIL
MONTAGE
Se familiariser avec le treuil
Avant de commencer, vous devez vous familiariser avec votre treuil Warn et chacun de ses composants :
Coff ret de commande
Prise de télécommande
Moteur
Levier d'embrayage
Transmission
(Train d’engrenages)
Tambour du treuil
Câble
Télécommande
Figure 1
Moteur : Le moteur du treuil est alimenté par la batterie du véhicule. Le moteur fournit de la
puissance au système de rapports qui fait tourner le tambour et enroule le câble du
treuil.
Tambour du treuil : Le tambour du treuil est le cylindre sur lequel s'enroule le câble. Le tambour est
entraîné par le moteur et le train d'engrenage. Son sens peut être changé en utilisant
la télécommande.
Câble* : Le diamètre du câble du treuil et sa longueur sont déterminés par la structure et la
puissance de traction du treuil. Enroulé autour du tambour du treuil, le câble passe
par le guide-câble et se termine par une boucle pour l'axe de chape du crochet.
*Pour des modèles avec un câble synthétique, prenez soin de lire le manuel
des Instructions d'installation du câble synthétique, inclus dans le kit.
Train d’engrenages : Le rapport de démultiplication convertit la puissance du moteur en une force de
traction considérable. La conception du train d'engrenages permet au treuil d'être
compact et léger.
Levier d'embrayage : L'embrayage permet à l'opérateur de dissocier manuellement le tambour du train
de rapports, permettant au tambour de tourner librement. L'engagement de
l'embrayage rend de nouveau le tambour solidaire du train d'engrenages.
Prise de télécommande : La prise de télécommande permet à l'opérateur de brancher le fil de la commande
à distance ou le récepteur sans fil en option, afin de contrôler le treuil.
Coff ret de commande* : En utilisant le courant de la batterie du véhicule, le contacteur du coffret de commande
commute l'alimentation vers le moteur, permettant ainsi à l'opérateur de changer le
sens de rotation du tambour.
*Pour des applications spécifiques, consultez les informations relatives au Kit de
repositionnement du coffret de commande en option chez votre concessionnaire
agréé ou sur www.warn.com.
Télécommande : La télécommande se branche dans le coffret de commande, sur la prise de
télécommande, et permet à l'opérateur de commander le sens de rotation du treuil tout
en restant loin du câble pendant le fonctionnement du treuil.
Étape 1 – Monter le treuil
Vous trouverez auprès de votre concessionnaire
Warn des kits de montage de treuil capables de
satisfaire pratiquement tous vos besoins. Pour de
plus amples informations sur les kits disponibles,
contactez votre concessionnaire de produits WARN.
Pour obtenir une performance optimale et les résultats
AVIS
que vous attendez, les plaques de montage WARN sont fortement
recommandées.
ATTENTION
du treuil et des blessures graves, terminer l'installation du
treuil et fi xer le crochet avant d'installer le câblage.
AVERTISSEMENT
suffi samment résistante pour supporter la c apacité de traction
maximale du treuil.
AVERTISSEMENT
AVERTISSEMENT
tambour dans le sens spécifi é par les étiquettes de rotation du
tambour apposées sur le treuil et/ou par la documentation du
treuil. Cela est nécessaire pour que le frein automatique (le cas
échéant) fonctionne correctement.
AVERTISSEMENT
le dessous (côté support) du treuil.
Ce treuil doit toujours être monté à l'horizontale
avec l'enroulement/le déroulement du câble sur le
côté support du tambour et en respectant le sens de
rotation du tambour indiqué par la flèche apposée
sur le treuil, voir Figures 2 et 3.
Le sens de rotation correct est nécessaire pour
que le frein automatique fonctionne correctement.
Le montage à l'horizontale permet d'éviter que le
câble s'accumule à une extrémité du tambour, ce qui
pourrait endommager le treuil.
Utiliser les boulons et les rondelles d’arrêt
recommandés, ainsi que les couples de serrage
recommandés pour éviter les vibrations du treuil
pendant son fonctionnement. Les caractéristiques
techniques sont présentées ci-après. Le système de
montage détermine la longueur des boulons.
Afi n de prévenir toute activation accidentelle
Toujours choisir une surface de montage
Ne jamais utiliser des boulons trop longs.
Toujours enrouler le câble du treuil sur le
Toujours enrouler le câble du treuil sur
Entraxe de fi xation :
Standard : 254 mm x 114,3 mm (10” x 4,5”)
Surface de montage lisse et plane, épaisseur
minimale = 6,4 mm (1/1”)
Matériel inclus :
• Contre-écrou M10 x 1,5 15 mm hexagonal
• Boulon à embase hexagonale M10-1,5 x 35,
8,8 (4x)
• Boulon à embase hexagonale M10-1,5 x 40,
8,8 (2x)
Couple : Entre 41 et 47 Nm
Choisir une surface de montage suffisamment
résistante pour supporter la capacité de traction
maximale du treuil.
1. Placer les contre-écrous dans les poches des
pieds du treuil.
2. Installer le treuil sur la surface de montage.
Confirmer la longueur de câble requise.
Épaisseur
de plaque
Longueur
de boulon
7 mm (1/4”) 32 mm
10 mm (3/8”) 40 mm
13 mm (1/2”) 40 mm
3. Installer les boulons et serrer au couple de
serrage compris entre 41 et 47 Nm.
4. Couper la bande élastique qui retient le câble.
5. Mettre l'embrayage en position de roue libre.
6. Passer manuellement la boucle du câble dans
le guide-câble.
AVERTISSEMENT
Toujours utiliser le cordon
du crochet fourni.
7. Fixer le crochet à la boucle du câble. Fixer le
cordon du crochet au crochet.
8. Faire tourner l'embrayage pour qu'il soit
complètement embrayé.
WARN INDUSTRIES
21 83449A0
WARN INDUSTRIES
83449A0 22
Page 12

MONTAGE
RACCORDEMENTS ÉLECTRIQUES
Orientation de montage
4 x M10-1,5x35
Figure 2 Orientation horizontale pieds abaissés
2 x M10-1,5x35
Étape 2 – Installation du câblage
AVERTISSEMENT
mort. Toujours placer les capuchons fournis sur les fi ls et les
bornes, conformément aux instructions d'installation.
AVERTISSEMENT
graves ou mortelles suite à un feu électrique :
AVERTISSEMENT
bornes électriques exposés.
La charge de la batterie et la qualité des connexions sont
AVIS
essentielles pour que le treuil fonctionne correctement. La
capacité de démarrage à froid minimale requise pour une batterie
de 12 V c.c. est de 650 A.
Les fils de batterie doivent passer par des
endroits qui ne risquent pas d'endommager ou
de percer l’isolation et de créer des risques de
court-circuit.
Le câble d'alimentation du treuil doit passer par
la batterie. Il est obligatoire d'avoir une connexion
directe de l'alimentation à la batterie (rouge) et un
câble de mise à la terre (noir). AVERTISSEMENT ! Ne pas
brancher le câble de mise à la terre sur le châssis.
Il peut s'avérer nécessaire de retirer le tableau
de bord du véhicule ou des pièces de carrosserie
pour faire passer les câbles de la batterie.
Toujours faire passer les câbles de la batterie le
long d'un chemin permettant de les fixer avec des
attaches mono-usage.
Pour éviter des blessures graves ou la
Pour éviter les risques de blessures
Ne jamais faire passer les câbles électriques
par-dessus des bords tranchants.
Ne jamais faire passer les câbles électriques
à proximité de pièces qui s'échauff ent.
Ne jamais faire passer les câbles électriques
à travers des pièces mobiles ou à proximité.
Éviter les points de pincement et d’usure/abrasion
lors de l’installation des câbles électriques.
Toujours isoler et protéger tous les fi ls et
AVERTISSEMENT
mal fi xés peuvent causer des accidents corporels graves,
voire mortels.
Protéger toujours les câbles d'alimentation des
bords tranchants, des zones qui deviennent trop
chaudes pour y poser la main et des pièces mobiles.
1. Planifier le chemin de passage des câbles.
2. Fixer provisoirement les câbles d'alimentation.
3. Confirmer que les câbles d'alimentation sont
protégés des bords tranchants, de la chaleur
et des pièces mobiles. Tenir compte de la
flexibilité et des vibrations du châssis pouvant
endommager le câble.
4. Inspecter avec soin le chemin de passage des
câbles électriques. Ils doivent être propres et
bien rangés. Fixer les câbles électriques au
moyen d'attaches mono-usage. Les attaches
plastiques ne doivent pas être trop serrées
pour ne pas couper l'isolant du câble. Utiliser
du ruban isolant, des morceaux de tubes en
caoutchouc ou une gaine électrique pour
protéger les câbles électriques et le faisceau
de fils, le cas échéant, pour éviter l'usure ou
l'abrasion de l'isolant des câbles.
5. Fixer les câbles de la batterie, le câble rouge
(positif) en premier, le noir (négatif) en second.
Installer les capuchons au besoin pour protéger
les connexions. Serrer les fixations des bornes
de la batterie comme indiqué dans le manuel
technique du véhicule. Une fois l’installation
terminée, vérifier que le treuil fonctionne
correctement.
Des câbles d'alimentation pas ou
Étape 3 – Installation du câble synthétique (en option)
Pour des modèles avec un câble synthétique,
prenez soin de lire le manuel des Instructions
d'installation du câble synthétique, qui donne des
précisions.
Câble de mise à la terre (noir)
2 x M10-1,5x40
Figure 3 Orientation horizontale pieds vers l'avant
WARN INDUSTRIES
23 83449A0
Câble d'alimentation
(rouge)
Figure 4 Schéma électrique
WARN INDUSTRIES
83449A0 24
Batterie 12 V
650 A (démarrage à froid) minimum
Page 13

INSTRUCTIONS RELATIVES À UNE PREMIÈRE UTILISATION
INSTRUCTIONS RELATIVES À UNE PREMIÈRE UTILISATION
Étape 4 – Vérifi cation du système
Une fois la vérification du système achevée, vous pouvez
confirmer le fonctionnement du treuil. Passez aux sections
intitulées Instructions relatives à une première utilisation et
Dernière analyse et entretien du présent livret.
Étape 5 – Instructions relatives à
une première utilisation
AVERTISSEMENT
et son fonctionnement en examinant le Manuel de base des
techniques de treuillage inclus avec le treuil.
Interrupteur télécommande
Ne pas laisser la télécommande branchée
dans le treuil lorsque celui-ci n’est pas utilisé.
Une télécommande qui reste branchée risque de
créer des conditions dangereuses et de vider la
batterie.
Fonctionnement de l'embrayage :
AVERTISSEMENT
de débrayer si le treuil est sous charge, si le câble du treuil
est en tension ou si le tambour est en train de tourner.
DÉBRAYÉ
EMBRAYÉ
Lorsque l’embrayage est en prise, le train
d'engrenages est couplé au tambour du treuil et
l’entraînement peut alors être transféré du moteur
WARN INDUSTRIES
25 83449A0
Toujours se familiariser avec le treuil
SORTIE
ENTRÉE
Ne jamais essayer d'embrayer ou
du treuil. Lorsque l’embrayage est débrayé, le
tambour est en position de déroulement en roue
libre et le train d’engrenages et le tambour du treuil
se désaccouplent, ce qui permet au tambour de
tourner librement.
L
e levier d’embrayage, situé sur le carter du
treuil en face du moteur, permet de commander la
position de l’embrayage. Pour éviter tout dommage,
tourner complètement le levier d'embrayage dans
l'une ou l'autre position.
Déroulement du câble
AVERTISSEMENT
de 5 spires de câble enroulées autour du tambour, car le câble
pourrait se dérouler du tambour, étant donné que l'ancrage
du câble n'est pas conçu pour retenir une charge.
AVERTISSEMENT
du câble du treuil, de la boucle du crochet, du crochet et de
l'ouverture du guide-câble durant l'installation et l’utilisation
de l'appareil et l'enroulement ou le déroulement du câble.
AVERTISSEMENT
durant la manipulation du câble du treuil.
Le déroulement en roue libre constitue
généralement la façon la plus rapide et la plus facile
de dérouler le câble du treuil. Avant de mettre le
treuil en roue libre pour dérouler le câble, dérouler
au moteur une quantité suffisante de câble pour
soulager le câble de toute tension. Débrayer.
Dérouler ensuite manuellement une quantité
suffisante de câble pour pouvoir travailler avec le
treuil. Voir le manuel de base des techniques de
treuillage pour de plus amples informations.
AVIS
Ne PAS dérouler le câble de plus de 9 m sans laisser
refroidir le treuil pendant 20 minutes avant de recommencer
l'enroulement. Utiliser plutôt l'embrayage en déroulement libre
en tirant le câble à la main.
AVERTISSEMENT
fourni pour enrouler ou dérouler le câble, durant l'installation
ou l’utilisation pour éviter de se blesser les mains ou les doigts.
Ne jamais utiliser le treuil avec moins
Toujours garder les mains éloignées
Toujours porter des gants de cuir épais
Toujours utiliser le cordon du crochet
Enroulement sous charge
AVERTISSEMENT
couche du treuil.
Enrouler mécaniquement le câble du treuil
sur le tambour de manière uniforme et serrée.
Cela empêche les spires extérieures de s’enfoncer
dans les spires intérieures, ce qui peut coincer et
endommager le câble.
Ne jamais dépasser l’eff ort en 1ère
Pour éviter les charges de choc durant
l’enroulement du câble, actionner l’interrupteur de
commande de manière intermittente afin d'éliminer
le mou du câble. Les charges de choc peuvent
momentanément dépasser de loin la capacité du
treuil et du câble.
Enroulement à vide
AVERTISSEMENT
ou le crochet lorsqu'une autre personne est à l'interrupteur
de commande ou durant le fonctionnement du treuil.
Déroulement avec un assistant : demander à
un assistant de tenir la sangle de crochet en
appliquant une tension aussi constante que
possible sur le câble du treuil. Tout en maintenant
la tension, il devra se déplacer en direction du
treuil pendant l'actionnement de l'interrupteur
de commande pour enrouler le câble. Relâcher
l’interrupteur lorsque le crochet parvient à une
distance minimale de 2 m de l’ouverture du guidecâble.
Enrouler le reste du câble pour le ranger,
de la manière indiquée ci-dessous.
Déroulement sans assistance : Arranger le câble
à enrouler de manière à ce qu’il ne s’entortille ni
ne s’emmêle pendant le rembobinage. Veiller à
ce que le câble soit enroulé sur le tambour de
manière uniforme et serrée. Enrouler une quantité
suffi sante de câble pour compléter une couche
entière sur le tambour. Serrer et étaler de manière
égale la couche de câble. Faire de même jusqu’à
ce que le crochet se trouve à au moins 2 m de
l'ouverture du guide-câble.
Enrouler le reste du câble pour le ranger,
de la manière indiquée ci-dessous.
Ne jamais toucher le câble du treuil
Enroulement du reste du câble pour le
ranger
Lorsque le crochet se trouve à moins de 2 m
du guide-câble, détacher le crochet du point
d'ancrage ou de la charge. En tenant la sangle de
crochet fournie, maintenir la tension sur câble du
treuil. Enrouler lentement le treuil en appliquant
de petites pressions sur la touche « Power in »
(enrouler) de la télécommande jusqu'à ce que le
crochet soit à moins de 1 m du guide-câble.
Arrêter le treuillage et fixer le crochet sur un
point d'ancrage approprié sur le véhicule.
WARN INDUSTRIES
83449A0 26
AVIS
Cela pourrait endommager le guide-câble.
enrouler le câble de façon à éliminer le mou restant
en appliquant de petites pressions sur la touche
« Power in » (enrouler) de la télécommande jusqu'à
ce que le mou soit minime sur le câble du treuil.
Surcharge/surchauff e
Lorsque le moteur est sur le point de caler, une
accumulation rapide de chaleur se produit et peut
endommager le moteur.
des techniques de treuillage) permet de
réduire le débit en ampères et de réduire ainsi
l’accumulation de chaleur dans le moteur. Cela
permet une utilisation continue prolongée.
ÉTIREMENT DU CÂBLE DU TREUIL
l’enrouler sous charge avant de l’utiliser. Un câble enroulé de
manière serrée réduit le risque qu'il coince et soit endommagé.
de 5 spires de câble enroulées autour du tambour, car le câble
pourrait se dérouler du tambour, étant donné que l'ancrage du
câble n'est pas conçu pour retenir une charge.
à son utilisation et à l’entretien qu’il recevra.
Lors de sa première utilisation, un câble neuf
doit être enroulé sur son tambour sous une
charge d'au moins 454 kg . Suivre simplement les
directives suivantes pour étirer correctement le
câble sur le tambour.
1) Choisir un emplacement PLAT ET DE NIVEAU
suffi samment grand pour pouvoir dérouler le
câble sur toute sa longueur.
2) Mettre le levier d'embrayage du treuil en
position « Free Spool » (déroulement en roue
libre). Dérouler le câble de façon à ne laisser que
5 spires sur le tambour. Une fois le câble déroulé,
mettre le levier d'embrayage du treuil en position
« Engaged » (en prise).
3) Attacher le crochet du câble à un point
d'ancrage adéquat et éloigner le véhicule du
point d'ancrage en marche arrière jusqu'à ce
que le câble du treuil soit presque tendu. Avant
de descendre du véhicule, serrer le frein à main
et mettre le véhicule en prise ou en position de
stationnement, puis couper le moteur.
Ne pas laisser le crochet atteindre le guide-câble.
Une fois le crochet fixé correctement au véhicule,
Ce treuil est conçu pour un service intermittent.
Le câblage double (voir le manuel de base
AVERTISSEMENT
AVERTISSEMENT
La durée de vie du câble est directement liée
Toujours étirer au préalable le câble et
Ne jamais utiliser le treuil avec moins
Page 14
INSTRUCTIONS RELATIVES À UNE PREMIÈRE UTILISATION
DERNIÈRE ANALYSE ET ENTRETIEN
4) Connecter la télécommande au treuil. Se
tenir à environ 2,44 m du treuil et enrouler le
câble sur le tambour du treuil jusqu'à éliminer
complètement le mou du câble. Déconnecter la
télécommande du treuil. Maintenir le câble tendu
d'une main ; pousser avec précaution le câble
vers le côté du tambour auquel le câble est fi xé de
façon à ce qu'il n'y ait pas d'espace entre les spires
sur le tambour. S'assurer que le câble s'enroule
sur le bas du tambour et non sur le haut, sinon
le frein de retenue automatique de la charge
ne fonctionnera pas correctement. (Si le câble
s'enroule sur le haut, cela signifi e que l'on a
actionné le treuil en mode de déroulement et non
d'enroulement au moyen de la télécommande).
5) Par mesure de sécurité, les étapes suivantes
devraient être eff ectuées par deux personnes.
Si vous tentez de tendre le câble tout seul,
assurez-vous de toujours mettre le frein à
main, la transmission en prise ou en position
de stationnement et d'éteindre le moteur du
véhicule chaque fois que vous descendez du
véhicule pour inspecter le câble du treuil. Ne
jamais quitter le véhicule alors que le câble du
treuil porte une charge. Il est essentiel de tendre
le câble pour assurer une longue durée de vie au
produit. Tendre le câble empêchera les couches
extérieures du câble de pincer et déformer les
couches intérieures.
6) Prendre soin d'enrouler chaque couche de
manière uniforme afi n d'éviter d'endommager le
câble.
dérouler le câble et répéter cette étape à partir du
début en appliquant davantage de pression sur la
pédale de frein.
8) Après vous être assuré que le câble s'enroule
correctement sur le tambour, répéter l'étape 6
jusqu'à ce que le véhicule soit à moins de 2 m
du point d'ancrage. Une fois la distance atteinte,
relâcher lentement la pédale de frein puis serrer
le frein à main. Cela permet d'assurer qu'il n'y a
aucune charge sur le câble. Mettre le levier de
vitesse en position de stationnement ou en prise,
puis couper le moteur. Descendre du véhicule.
Décrocher le crochet du point d'ancrage. Tout en
retenant le cordon du crochet fourni, maintenir la
tension sur câble et enrouler lentement le treuil
par de petites pressions sur l'interrupteur de
commande jusqu'à ce que le crochet soit à moins
de 1 m du guide-câble. Arrêter le treuillage et
fi xer le crochet sur un point d'ancrage approprié
sur le véhicule.
Ne pas laisser le crochet atteindre le guide-câble.
AVIS
Cela pourrait endommager le guide-câble.
Une fois le crochet fixé correctement au véhicule,
enrouler le câble de façon à éliminer le mou restant
en appliquant de petites pressions sur la touche
« Power in » (enrouler) de la télécommande jusqu'à
ce que le mou soit minime sur le câble du treuil.
Contrôle
Prendre le temps de bien lire le manuel
d’utilisation, et/ou le manuel de base des
techniques de treuillage, afi n de comprendre
le treuil et son fonctionnement
Véri fi er les fi xations et s'assurer qu'elles sont
bien serrées aux couples de serrage indiqués.
Remplacer toute fi xation endommagée.
Véri fi er que chaque composant est correct et
que tous les points de connexion sont bien
serrés;
Véri fi er qu'il n'y a pas de fi ls exposés/nus,
de bornes ou de câbles dont l'isolant est
endommagé (frottement/coupure).
Couvrir les parties exposées au moyen
de capuchons. Au besoin, réparer
ou remplacer les câbles électriques
endommagés.
Véri fi er que les câbles ne sont pas
endommagés.
Remplacer le câble immédiatement s'il est
endommagé.
Garder le treuil, le câble et la
télécommande exempts de contaminants.
Utiliser un chiff on ou une serviette
propre pour enlever les saletés et débris
éventuels.
Avant la
première
utilisation
Après
chaque
utilisation
Tous les 90
jours
X
XX
XX
XX
XXX
X
7) Faire passer la télécommande par la fenêtre
du conducteur afi n de l’utiliser. Demander à
l’assistant de s'éloigner du véhicule et du câble.
L’assistant doit indiquer si le câble s'enroule
correctement à mesure qu'il défi le sur le guidecâble et s'enroule. Démarrer le véhicule et mettre
le levier de vitesses au point mort. Desserrer le
frein à main tout en appuyant modérément sur la
pédale de frein.
Appuyer sur la touche « Power in » (enrouler)
de la télécommande. Eff ectuer le treuillage sur
environ 2m, puis arrêter. Relâcher lentement la
pédale de frein, puis serrer le frein à main. Cela
permet d'assurer qu'il n'y a aucune charge sur
le câble. Mettre le levier de vitesse en position
de stationnement ou en prise, puis couper le
moteur. Descendre du véhicule et inspecter le
treuil pour vous assurer que le câble est enroulé
uniformément sur le tambour du treuil et qu'il
ne creuse pas la couche inférieure. Si c'est le cas,
WARN INDUSTRIES
27 83449A0
AVERTISSEMENT
mort :
Pour éviter des blessures graves ou la
Toujours enrouler le câble du treuil sur le
le treuil et son fonctionnement en examinant
le Manuel de base des techniques de treuillage
inclus avec le treuil.
tambour comme indiqué par l’autocollant de
rotation
du tambour.
question, contactez :
Toujours enrouler le câble sur le dessous du tambour.
Ne jamais enrouler le câble sur le dessus du tambour.
12900 S.E. Capps Road, Clackamas, OR USA 97015-
Registre des concessionnaires : 1-800-910-1122
WARN INDUSTRIES
83449A0 28
Prendre le temps de bien vous familiariser avec
Pour plus d'informations ou pour toute
WARN INDUSTRIES, INC.
8903, 1-503-722-1200,
Service à la clientèle : 1-800-543-9276
ou visitez le site www.warn.com
Page 15

INSTRUCCIONES ORIGINALES
ÍNDICE DE SÍMBOLOS
Manual de instalación del
cabrestante
En cada situación donde se utiliza un cabrestante existe la posibilidad de ocasionar daños personales. Para reducir al mínimo ese riesgo, es
importante que lea detenidamente esta guía y la Guía básica de técnicas para el uso del cabrestante. Por favor, familiarícese con la operación del
cabrestante antes de usarlo y tenga siempre presente la seguridad. En esta guía se establecen muchas de las reglas de seguridad para el uso del
cabrestante. Lea la Guía básica de técnicas para el uso del cabrestante para obtener más información sobre su cabrestante y sobre las técnicas de
maniobrado adecuadas. Recuerde que debido a que cada situación en la que se utiliza el cabrestante es diferente, es muy importante el buen juicio
y un enfoque constante en la seguridad.
Guarde este manual y demás documentos suministrados con el kit para consultas futuras. Se incluyen los siguientes documentos: Guía básica del
cabrestante, Características técnicas, Declaración de conformidad, Información sobre la garantía, Guía para la instalación del cabrestante, Guía del
usuario del cable sintético (opcional). A falta de cualquiera de estos documentos, contacte con los siguientes números o visite www.warn.com.
ÍNDICE:
SEGURIDAD
Índice de símbolos ................................................................................................................................................................ 30
Precauciones generales de seguridad ..................................................................................................................... 31-33
INSTRUCCIONES
Condiciones de trabajo seguras....................................................................................................................................... 34
Familiarícese con el cabrestante ...................................................................................................................................... 35
Montaje ............................................................................................................................................................................... 36-37
Conexiones eléctricas .......................................................................................................................................................... 38
Instucciones de primer funcionamiento .................................................................................................................39-41
Análisis final y mantenimiento ......................................................................................................................................... 42
SÍMBOLO EXPLICACIÓN
Lea toda la
documentación sobre el
producto
Lleve siempre puesta
protección ocular
y auditiva
Nunca utilice el
cabrestante como
si fuese una grúa
Fije de forma apropiada
la carga en la garganta
del gancho
Enrolle el cable en la
parte inferior del tambor
Peligro de aplastamiento
de los dedos o de la guía
del cable
Peligro de perforación
o corte en las manos
Peligro de explosión
o rotura
Peligro de borde afilado
SÍMBOLO EXPLICACIÓN
Lleve siempre puestos
guantes de cuero
No lo use para desplazar
personas
Use siempre la correa del
gancho suministrada
No aplique nunca una
carga a la punta del
gancho o al seguro
Nunca enrolle el cable en
la parte superior
del tambor
Punto de pellizco
de la guía del cable
Peligro de superficie
caliente
Peligro de incendio
y quemaduras
Peligros asociados
a la presencia
de piezas móviles
WARN® y el log otipo de WARN so n marcas com erciale s registr adas de Warn In dustries , Inc.
© 2012 Warn Industries, Inc.
WARN INDUSTRIES
29
Warn Industries Inc.
12900 SE Capps Road
Clackamas, Oregón 97015
EE.UU.
Servicio de atención al cliente: (800) 543-9276
Fax internacional: (503) 722-3005
Fax: (503) 722-3000
www.warn.com
Evite la instalación de
cables eléctricos en
torno a aristas filosas
y puntos abrasivos o
desgastadores
WARN INDUSTRIES
83449A0 30
Aísle los cableados
expuestos
No enganche nunca el
cable sobre sí mismo
Page 16

PRECAUCIONES GENERALES DE SEGURIDAD
PRECAUCIONES GENERALES DE SEGURIDAD
Advertencias y precauciones
Al leer estas instrucciones, verá ADVERTENCIAS,
PRECAUCIONES, AVISOS y NOTAS. Cada mensaje tiene un
propósito específico. Las ADVERTENCIAS son mensajes
de seguridad que indican que está ante una situación
potencialmente peligrosa que, si no se evita, puede resultar en
lesiones graves o en la muerte. Las PRECAUCIONES son mensajes
de seguridad que indican una situación de posible peligro que,
si no se evita, puede resultar en lesiones menores o de baja
gravedad. Las PRECAUCIONES pueden alertar también contra
prácticas no seguras. Las PRECAUCIONES y ADVERTENCIAS
identifican el peligro, indican cómo evitarlo y advierten de las
posibles consecuencias si no se evita tal peligro. Los AVISOS son
mensajes para evitar daños a la propiedad. Las NOTAS contienen
información adicional que le ayudarán a llevar a cabo un
procedimiento. TRABAJE SIEMPRE DE FORMA SEGURA.
ADVERTENCIA
PELIGRO DE ENREDO
EN LAS PARTES MÓVILES
De no seguirse estas instrucciones, podrían producirse
lesiones graves o incluso la muerte.
• Verifique siempre que el seguro del gancho está cerrado y que
no soporta carga.
• Nunca aplique una carga a la punta del gancho o al seguro. Aplique
la carga únicamente al centro del gancho.
• No utilice nunca un gancho cuya abertura haya aumentado o
cuya punta esté doblada o retorcida.
• Utilice siempre un gancho con seguro.
• Asegúrese siempre de que el operador y otras personas sean
conscientes de la estabilidad del vehículo y/o de la carga.
• Mantenga siempre el cable del control remoto y el cable de
alimentación alejados del tambor, del cable y del cordaje.
Inspeccione el aparato para comprobar la posible existencia de
grietas, pellizcos, cables deshilachados o conexiones sueltas.
Los componentes dañados deberán reemplazarse antes de la
operación.
• Pase siempre el control remoto a través de una ventana cuando
lo utilice en un vehículo.
•
No enganche
nunca
el cable sobre sí mismo
ADVERTENCIA
PELIGRO DE ENREDO
EN LAS PARTES MÓVILES
De no seguirse estas instrucciones, podrían producirse
lesiones graves o incluso la muerte.
Seguridad general:
• Conozca siempre el funcionamiento de su cabrestante.
Lea detenidamente las Instrucciones, la Guía de operación y/o
la Guía básica de técnicas del cabrestante para comprender el
funcionamiento y la manipulación del cabrestante.
• No exceda nunca la capacidad nominal del cabrestante ni del
cable del cabrestante. Emplee un cable doble con una polea para
reducir la carga del cabrestante.
• Lleve puestos siempre guantes gruesos de cuero para manipular
el cable del cabrestante.
• No use nunca el cabrestante o el cable del cabrestante para
remolcar. Un golpe a las cargas puede dañar, sobrecargar o romper
el cable.
• No utilice nunca el cabrestante para amarrar una carga.
• No ponga nunca en funcionamiento este cabrestante si se
encuentra bajo los efectos de drogas, alcohol o medicamentos.
• Nunca utilice este cabrestante si es menor de 16 años de edad.
Seguridad en la instalación:
• Elija siempre una ubicación de montaje que sea lo
suficientemente sólida para soportar la capacidad de carga
máxima del cabrestante.
• Utilice siempre piezas de grado 5 (grado 8.8 métrico) o superior.
• No suelde nunca los pernos de montaje.
• Use siempre piezas de montaje, componentes y accesorios
aprobados por el fabricante.
• No utilice nunca pernos que sean demasiado largos.
• Complete siempre la instalación del cabrestante y el
acoplamiento del gancho antes de instalar el cableado.
• Mantenga siempre las manos alejadas del cable del cabrestante,
del bucle del gancho, del gancho y de la abertura de la guía
durante la instalación, la operación
y en el enrollado y desenrollado.
• Ponga siempre la guía del cable con la etiqueta de advertencia
visible en la parte superior.
• Realice siempre un estiramiento previo del cable y vuelva a
enrollarlo con carga antes de usarlo. Un cable bien enrollado
reduce las posibilidades de tener “dobleces” que puedan dañar el
cable.
ADVERTENCIA ADVERTENCIA
PELIGRO DE ENREDO EN LAS PARTES MÓVILES
De no seguirse estas instrucciones, podrían producirse
lesiones graves o incluso la muerte.
Seguridad durante la operación del cabrestante:
• Inspeccione siempre el cable del cabrestante, el gancho y las
eslingas antes de poner el cabrestante en funcionamiento. Si el
cable del cabrestante está deshilachado, retorcido o dañado, deberá
reemplazarse de inmediato. Los componentes dañados deberán
reemplazarse antes de la operación. Evite que las piezas resulten
dañadas.
• Retire siempre cualquier elemento u obstáculo que pueda interferir
en la seguridad de la operación del cabrestante.
• Verifique siempre que el anclaje seleccionado soportará la carga y
que la correa o la cadena no se deslizará.
• Utilice siempre la correa del gancho suministrada cuando vaya a
enrollar o desenrollar el cable del cabrestante, durante la instalación
y durante la operación.
• Haga siempre que los operadores y otras personas presentes vigilen
el vehículo y/o la carga.
• Tenga siempre presente la estabilidad del vehículo y de la carga
durante el uso del cabrestante; haga que las personas presentes se
mantengan alejadas. Alerte a todas las personas presentes de una
posible inestabilidad.
• Desenrolle siempre tanto cable del cabrestante como sea posible
para el maniobrado. Emplee un cable doble o elija un punto
de anclaje distante.
• Tómese siempre su tiempo para utilizar técnicas apropiadas de
maniobrado cuando utilice el cabrestante.
• No toque nunca el cable del cabrestante ni el gancho si hay
alguien cerca del interruptor de control, o si el cabrestante está en
funcionamiento.
• Nunca embrague ni desembrague si el cabrestante está soportando
una carga, si el cable está en tensión o si el tambor está en
movimiento.
• No toque nunca el cable del cabrestante ni el gancho mientras
están tensos o con carga.
• Manténgase siempre alejado del cable del cabrestante y de la
carga, y no deje que otros se acerquen cuando el cabrestante esté en
funcionamiento.
• No utilice nunca un vehículo para tirar de la carga en el cable del
cabrestante. La carga combinada o un golpe en la carga pueden
dañar, sobrecargar o romper el cable.
• No enrolle nunca el cable del cabrestante sobre sí mismo. Utilice
una cadena de estrangulación o un protector de tronco de árbol en el
anclaje.
PELIGRO DE CAÍDA O APLASTAMIENTO
De no seguirse estas instrucciones, podrían producirse
lesiones graves o incluso la muerte.
• Manténgase siempre alejado y haga que otras personas también lo
estén.
• Nunca accione el cabrestante si no hay, al menos, 5 vueltas de cable
alrededor del tambor. El cable podría soltarse del tambor, ya que el
acoplamiento del cable al tambor no está diseñado para aguantar
cargas.
• No use nunca el cabrestante como grúa o para suspender una
carga.
• Compruebe siempre que el anclaje soportará la carga. Utilice
técnicas de maniobrado adecuadas y tómese tiempo para operar de
forma correcta.
• No utilice nunca el cabrestante para levantar o desplazar personas.
• No realice nunca esfuerzos excesivos para enrollar el cable del
cabrestante.
• Utilice siempre posturas y técnicas de levantamiento adecuadas o
solicite ayuda a la hora de manipular e instalar el producto.
• Enrolle y desenrolle el cable del tambor siempre en la dirección
especificada en la etiqueta de advertencia del cabrestante o en la
documentación. Esto es necesario para el funcionamiento correcto
del freno automático (si viene equipado con ello).
• Siempre enrolle el cable del cabrestante alrededor del tambor en el
sentido indicado por la marca de rotación del cabrestante.
• Siempre enrolle el cable del cabrestante en la parte inferior (lado
de montaje) del tambor.
• Nunca enrolle el cable en la parte superior del tambor.
• Siempre enrolle y desenrolle el cable al tambor en la dirección
especificada en las etiquetas de rotación del tambor en el
cabrestante o en la documentación. Esto es necesario para el
funcionamiento correcto del freno automático (si viene equipado
con ello).
WARN INDUSTRIES
31 83449A0
WARN INDUSTRIES
83449A0 32
Page 17

PRECAUCIONES GENERALES DE SEGURIDAD
ADVERTENCIA
PELIGRO DE CORTES Y QUEMADURAS
De no seguirse estas instrucciones, podrían producirse
lesiones graves o incluso la muerte.
Para evitar daños en las manos:
• Lleve puestos siempre guantes gruesos de cuero para
manipular el cable del cabrestante.
• Tenga siempre en cuenta que las superficies del motor, del
tambor o del cable del cabrestante pueden estar calientes
durante o después del uso del mismo.
ADVERTENCIA
PELIGRO DE INCENDIO O POR PRESENCIA DE
PRODUCTOS QUÍMICOS
De no seguirse estas instrucciones, podrían producirse
lesiones graves o incluso la muerte.
• Acuérdese siempre de quitarse las joyas y utilizar protección
ocular.
• No pase nunca los cables eléctricos por bordes afilados.
• No pase nunca los cables eléctricos cerca de piezas que se
calienten.
• No pase nunca los cables eléctricos por partes móviles
o cerca de ellas.
• Coloque siempre las fundas de terminales suministradas
en los cables y los terminales, tal como se indica en las
instrucciones de instalación.
• No se apoye nunca en la batería si está haciendo conexiones.
• No pase nunca los cables eléctricos sobre los terminales de la
batería.
• No cortocircuite nunca los terminales de la batería con
objetos metálicos.
• Si va a perforar, verifique siempre que en el área no haya
tuberías o tanques de combustible, líneas de frenos, cables
eléctricos, etc.
• Consulte siempre el manual del usuario para obtener
detalles de cableado adecuados.
• Aísle y proteja siempre los cables y los terminales eléctricos
que queden expuestos.
PRECAUCIÓN
PELIGRO DE CORTES Y QUEMADURAS
Si no observa estas instrucciones, podrían
producirse lesiones menores o moderadas.
• Nunca deje que el cable del cabrestante se deslice por sus
manos.
PRECAUCIÓN
PELIGRO DE ENREDO EN LAS PARTES MÓVILES
Si no observa estas instrucciones, podrían
producirse lesiones menores o moderadas.
Para evitar daños en las manos:
• No deje nunca el control remoto donde pueda activarse
durante el enrollado libre, el maniobrado o cuando el
cabrestante no esté en uso.
• No deje nunca el control remoto del cabrestante conectado
cuando se esté instalando o haciendo enrollado libre,
maniobras o mantenimiento ni cuando no se esté utilizando
el cabrestante.
AVISO
EVITE DAÑOS AL EQUIPO
Y AL CABRESTANTE
• Evite siempre los tirones laterales, ya que pueden apilar el
cable del cabrestante en un extremo del tambor. Esto puede
dañar el cable del cabrestante o el propio cabrestante.
• Compruebe siempre que se ha embragado o desembragado
completamente.
• Evite siempre dañar la estructura cuando vaya a anclar su
vehículo en una operación con el cabrestante.
• No sumerja nunca el cabrestante en agua.
• Guarde siempre el control remoto en un área protegida,
limpia y seca.
CONDICIONES DE TRABAJO SEGURAS
Este manual proporciona instrucciones sobre la
instalación de su sistema de cabrestante WARN
y las instrucciones de funcionamiento inicial.
Lea la Guía básica de técnicas de operación
del cabrestante para obtener instrucciones
completas de funcionamiento para su sistema de
cabrestante WARN.
Seguridad
Cuando instale su sistema de cabrestante WARN,
lea y siga todas las instrucciones de montaje y de
seguridad.
Sea precavido siempre que trabaje con
electricidad y no olvide comprobar que no haya
ninguna conexión eléctrica expuesta antes de
alimentar el circuito del cabrestante.
Para obtener las especificaciones y los datos de
funcionamiento, consulte la hoja de información
que viene con el cabrestante.
WARN INDUSTRIES
33 83449A0
WARN INDUSTRIES
83449A0 34
Page 18
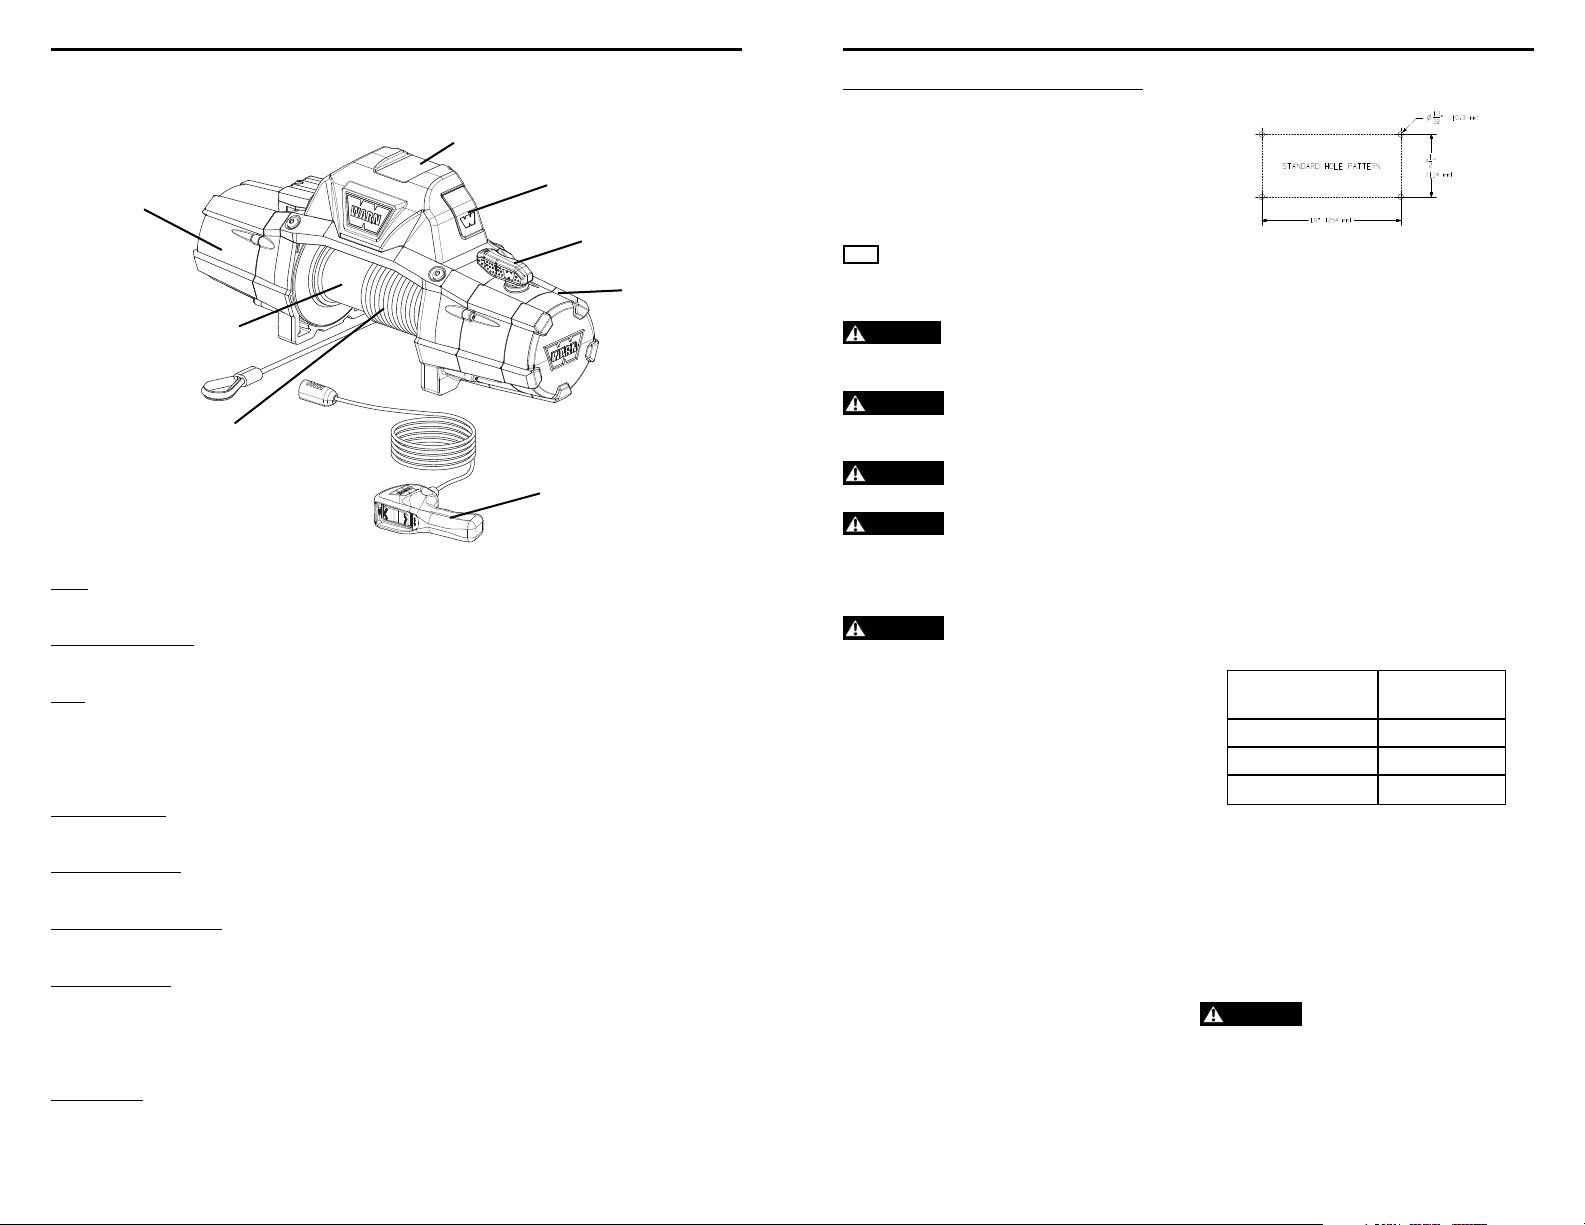
FAMILIARÍCESE CON EL CABRESTANTE
MONTAJE
Conozca el funcionamiento de su cabrestante
Antes de comenzar, debe familiarizarse con el cabrestante WARN y con cada uno de sus componentes:
Paquete de control
Casquillo del control remoto
Motor
Palanca de embrague
Transmisión
(Tren de engranajes)
Tambor del cabrestante
manualmente
Control remoto
Figura 1
Motor: El motor del cabrestante funciona con la batería del vehículo. El motor proporciona
energía al mecanismo de engranajes, que gira el tambor del cabrestante y enrolla
el cable del cabrestante.
Tambor del cabrestante: El tambor del cabrestante es el cilindro en el cual se enrolla el cable del cabrestante.
El motor acciona esta pieza y el tren accionador. Se puede cambiar el sentido de giro
utilizando el control remoto.
Cable*: El diámetro del cable del cabrestante y su longitud se determinan de acuerdo a la
capacidad de carga del cabrestante y al diseño del mismo. Enrollado alrededor del
tambor del cabrestante a través de la guía, el cable del cabrestante se enlaza al final
para aceptar el perno del enganche.
* Para modelos con cable sintético, asegúrese de leer completamente la Guía
de instalación del cable sintético de WARN, incluida en el kit.
Tren de engranajes: El engranaje de reducción convierte la energía del motor del cabrestante en una
fuerza de gran tracción. El diseño del tren de engranajes hace posible que el
cabrestante sea más ligero y compacto.
Palanca de embrague: El embrague permite al usuario desactivar el tambor de enrollado desde el sistema
de engranajes, permitiendo al tambor girar libremente (llamado “enrollado manual”).
Al embragar se vuelve a “bloquear” el tambor del cabrestante en el tren de engranaje.
Casquillo del control remoto: El casquillo del control remoto es donde el operador enchufa el control remoto
con cable o el receptor del control remoto sin cables opcional para controlar el
cabrestante.
Paquete de control*: Los contactores del paquete de control transmiten corriente al motor utilizando la
energía eléctrica de la batería del vehículo. Esto permite que el usuario cambie la
dirección de la rotación del tambor del cabrestante.
* Para aplicaciones específicas, puede encontrar los detalles del Kit de reubicación
del paquete de control opcional en su distribuidor autorizado de WARN o en www.
warn.com.
Control remoto: El control remoto se conecta al paquete de control del cabrestante a través del casquillo
del control remoto, que permite al usuario controlar la dirección del cabrestante
y mantenerse alejado del cable mientras funciona.
Paso 1 – Montaje del cabrestante
Puede encontrar los kits de montaje para
cabrestantes en su distribuidor de WARN para
la mayoría de las aplicaciones. Si desea más
información sobre los kits disponibles, comuníquese
con su distribuidor de productos WARN.
Para obtener las máximas prestaciones y los resultados
AVISO
esperados se recomienda el uso de las placas de montaje WARN.
PRECAUCIÓN
del cabrestante y lesiones de gravedad, realice la instalación
del cabrestante y acople el gancho antes de instalar el cable.
ADVERTENCIA
que sea lo suficientemente sólida para soportar la capacidad
de carga máxima del cabrestante.
ADVERTENCIA
demasiado largos.
ADVERTENCIA
al tambor en la dirección especificada en las etiquetas
de rotación del tambor en el cabrestante o en la
documentación. Esto es necesario para el funcionamiento
correcto del freno automático (si viene equipado con ello).
ADVERTENCIA
en la parte inferior (lado de montaje) del tambor.
Este cabrestante debe montarse siempre en
una orientación horizontal con el cable enrollando
o desenrollando del tambor en el lado de montaje
del tambor y siguiendo la flecha de rotación del
tambor como indican las etiquetas del cabrestante,
consulte la Figuras 2 y 3.
La rotación correcta es necesaria para que
el freno automático funcione correctamente. El
montaje horizontal evita que el cable se apile en
un extremo del tambor, lo que puede dañar el
cabrestante.
El uso de las combinaciones recomendadas de
arandelas de presión y pernos, aplicando los niveles
de apriete recomendados, evita las vibraciones
durante el accionamiento. A continuación se
enumeran las especificaciones. El sistema de
montaje dictará la longitud de los pernos.
Para evitar la activación accidental
Elija siempre una ubicación de montaje
No utilice nunca pernos que sean
Siempre enrolle y desenrolle el cable
Siempre enrolle el cable del cabrestante
Patrón de los pernos de montaje:
Estándar: 254 mm x 114,3 mm (10 pulg. x 4,5 pulg.)
Superficie de montaje suave y plana,
grosor mínimo = 6,4 mm (1/4 pulg.)
Hardware incluido:
• Contratuerca tapón M10 x 1,5 de 15 mm
hexagonal
• Tuerca tapón hexagonal M10-1,5 x 35, 8,8,
perno (4x)
• Tuerca tapón hexagonal M10-1,5 x 40, 8,8,
perno (2x)
Par de apriete: 41 a 47 Nm (30-35 lb/pie)
Seleccione una ubicación de montaje que sea
lo suficientemente sólida para soportar la capacidad
de carga máxima del cabrestante.
1. Coloque las tuercas tapón en los huecos de los
pies del cabrestante.
2. Coloque el cabrestante en la ubicación de
montaje. Confirme la longitud necesaria de los
pernos.
Grosor
de la placa
Longitud
del perno
7 mm (1/4”) 32 mm
10 mm (3/8”) 40 mm
13 mm (1/2”) 40 mm
3. Instale los pernos y apriete de 41 a 47 Nm
(30-35 lb/pie)
4. Corte la banda elástica de retención del cable.
5. Coloque el embrague en la posición de
enrollado libre.
6. Pase manualmente el bucle del cable a través
de la guía.
ADVERTENCIA
Use siempre la correa del gancho
suministrada.
7. Coloque el gancho en el bucle del cable.
Coloque la cinta del gancho en el gancho.
8. Gire el embrague a la posición de embragado
completo.
WARN INDUSTRIES
35 83449A0
WARN INDUSTRIES
83449A0 36
Page 19

MONTAJE
CONEXIONES ELÉCTRICAS
Orientación de montaje
4 x M10-1,5x35
Figura 2 Orientación horizontal con pies hacia abajo
2 x M10-1,5x35
Paso 2 – Instalación del cableado
ADVERTENCIA
o la muerte: Coloque siempre las fundas de terminales
suministradas en los cables y en los terminales, tal como
se indica en las instrucciones de instalación.
ADVERTENCIA
mortales debidos a incendios de origen eléctrico:
ADVERTENCIA
terminales eléctricos que queden expuestos.
Una batería completamente cargada y unas conexiones
AVISO
correctas resultan esenciales para el buen funcionamiento del
cabrestante. El requisito mínimo para una batería de 12 voltios de
CC es de 650 amperios para el arranque en frío.
No instale los cables de la batería donde puedan
desgastarse debido al roce o sufrir cortes en el material
aislante produciéndose así un cortocircuito.
El hilo de alimentación del cabrestante debe
pasarse hasta la batería. Se requiere una conexión
directa a batería del hilo de alimentación (rojo) y de
masa (negro). ¡ADVERTENCIA! No conecte la masa al chasis del
vehículo.
El cableado hasta la batería puede requerir
el desmontaje del cuadro o piezas del vehículo.
Pase siempre los hilos de la batería por pasos
que permitan que estos queden fijados con bridas.
Para prevenir lesiones de gravedad
Para prevenir lesiones graves o accidentes
No pase nunca los cables eléctricos por bordes
afilados.
No pase nunca los cables eléctricos cerca de piezas
que se calienten.
No pase nunca los cables eléctricos por partes
móviles o cerca de ellas.
Evite los puntos de pellizco y desgaste o abrasión
cuando instale todos los cables eléctricos.
Aísle y proteja siempre los cables y los
ADVERTENCIA
lesiones graves o la muerte.
Proteja en todo momento los hilos de
alimentación de bordes afilados, de zonas que se
calienten mucho al contacto o de piezas móviles.
1. Planifique el paso de los hilos.
2. Fije holgadamente los hilos de alimentación por
el paso.
3. Confirme que los hilos de alimentación están
protegidos de bordes afilados, calor y piezas
móviles. Tenga en cuenta la vibración y la
flexibilidad del chasis que pueden dañar los hilos.
4. Inspeccione cuidadosamente el paso de los hilos
eléctricos. ¿Está en orden? Apriete las bridas y fije
los hilos eléctricos. Las bridas deberían estar bien
apretadas pero no deberían cortar el aislamiento
de los cables. Utilice cinta aislante, trozos de
manguera de goma o conductos eléctricos para
proteger los cables eléctricos y el arnés y evitar
el desgaste y la abrasión del aislamiento.
5. Conecte los cables de la batería, PRIMERO el
rojo (positivo) y luego el negro (negativo).
Instale las fundas para proteger las conexiones.
Asegure los bornes de la batería siguiendo las
instrucciones del manual del vehículo.
Cuando haya finalizado la instalación, compruebe
si el cabrestante funciona correctamente.
Los hilos flojos o sueltos pueden provocar
Paso 3 – Instalación del cable sintético (opcional)
* Para modelos con cable sintético, asegúrese
de leer completamente la Guía de instalación del
cable sintético de WARN para obtener instrucciones
detalladas de instalación del cable sintético.
2 x M10-1,5x40
Figura 3 Orientación horizontal con pies hacia adelante
WARN INDUSTRIES
37 83449A0
Cable de masa
(negro)
Cable de
alimentación (rojo)
Figura 4 Diagrama eléctrico
WARN INDUSTRIES
83449A0 38
Batería de 12 V
Mínimo de 650 CCA
Page 20

INSTRUCCIONES DE PRIMER FUNCIONAMIENTO
INSTRUCCIONES DE PRIMER FUNCIONAMIENTO
Paso 4 – Revisión del sistema
Una vez haya realizado una revisión del sistema,
estará listo para confirmar el funcionamiento del
cabrestante. Siga en las secciones Instrucciones de primer
funcionamiento y Análisis final y mantenimiento de este
documento.
Paso 5 – Instrucciones
de primer funcionamiento
ADVERTENCIA
completamente el cabrestante y su funcionamiento revisando la
Guía básica de técnicas de uso del cabrestante que viene con el
mismo.
Interruptor del control remoto
No deje el control remoto conectado al cabrestante
cuando no se esté utilizando. El dejar el control
enchufado puede producir una situación peligrosa
o desgastar la batería.
Accionamiento del embrague:
ADVERTENCIA
si el cabrestante está soportando una carga, si el cable está
en tensión o si el tambor está en movimiento.
EMBRAGADO
DESEMBRAGADO
Tome siempre su tiempo para conocer
DESENROLLADO
ENROLLADO
Nunca embrague ni desembrague
está desembragado el tambor se encuentra en
posición de enrollado manual y el sistema de
engranajes y el tambor del cable del cabrestante están
desengranados, lo que permite que el tambor gire
libremente.
La palanca del embrague, ubicada en la cubierta
del cabrestante, enfrente del motor, controla la
posición del embrague. Para evitar daños, engrane y
desengrane siempre completamente la palanca del
embrague.
Desenrollado
ADVERTENCIA
menos, 5 vueltas de cable alrededor del tambor. El cable podría
soltarse del tambor, ya que el acoplamiento del cable al tambor no
está diseñado para aguantar cargas.
ADVERTENCIA
cable del cabrestante, del bucle del gancho, del gancho y de la
abertura de la guía durante la instalación, la operación y en el
enrollado y desenrollado.
ADVERTENCIA
gruesos de cuero para manipular el cable del cabrestante.
Generalmente, el desenrollado manual es la forma
más rápida y sencilla de sacar el cable del cabrestante.
Antes de proceder al desenrollado manual, saque
suficiente cable del cabrestante a fin de eliminar
cualquier tensión a la que pueda estar sometido el
mismo. Quite el embrague. A continuación, proceda al
desenrollado manual, sacando manualmente suficiente
cable del cabrestante para la operación. Consulte la
Guía básica de técnicas para el uso del cabrestante
para obtener más información.
AVISO
NO desenrolle el cable más de 9 metros sin dejar que el
cabrestante se enfríe durante 20 minutos antes de volver a enrollar el
cable. En su lugar, coloque el embrague en posición de enrollado libre
y tire del cable a mano.
ADVERTENCIA
suministrada cuando vaya a enrollar o desenrollar el cable
del cabrestante o durante la instalación o el funcionamiento para
evitar daños en las manos.
Nunca accione el cabrestante si no hay, al
Siempre mantenga las manos alejadas del
Siempre lleve puestos siempre guantes
Siempre utilice la correa del gancho
Enrollado bajo carga
ADVERTENCIA
cable del cabrestante.
Enrolle el cable del cabrestante uniformemente
Cuando el embrague está activado, el sistema
de engranajes se acopla al tambor del cabrestante y,
en estas condiciones, puede transferirse movimiento
desde el motor del cabrestante. Cuando el embrague
WARN INDUSTRIES
39 83449A0
y bien tensado alrededor del tambor. Esto evita que
las vueltas más externas del cable del cabrestante
se hundan en las vueltas internas; asimismo, evita
atascamientos y daños al cable del cabrestante.
No exceda nunca los límites de tracción del
Evite las sacudidas de la carga cuando esté
enrollando; para ello, pulse el interruptor de control a
fin de tensar y hacer entrar las porciones del cable del
cabrestante que puedan quedar flojas. Las sacudidas de
la carga pueden hacer sobrepasar momentáneamente
la capacidad nominal del cabrestante y del cable.
Enrollado sin carga
ADVERTENCIA
el gancho si hay alguien cerca del interruptor de control, o si el
cabrestante está en funcionamiento.
Enrollado o desenrollado con un ayudante: Pida al
ayudante que sujete la correa del gancho tensando
el cable del cabrestante de forma constante y tanto
como sea posible. Manteniendo tenso el cable, el
ayudante debe caminar hacia el cabrestante mientras
usted acciona el interruptor de control para enrollar el
cable del cabrestante. Suelte el interruptor cuando el
gancho esté a una distancia mínima de 2 m (6 pies) de
la abertura de la guía.
Luego, enrolle la parte final del cable para
almacenarlo tal como se indica a continuación.
Enrollado o desenrollado solo: Disponga el cable del
cabrestante de forma que no se doble ni se trabe al
enrollarlo. Asegúrese de que el cable del cabrestante
ya enrollado alrededor del tambor esté bien tenso y
dispuesto en capas uniformes. Enrolle suficiente cable
del cabrestante como para formar la siguiente capa
completa en el tambor. Tense y enderece la capa.
Repita este proceso hasta que el gancho quede a una
distancia mínima de 2 m (6 pies) de la abertura de la
guía.
Luego, enrolle la parte final del cable para
almacenarlo tal como se indica a continuación.
Nunca toque el cable del cabrestante ni
Enrollado del resto del cable
para el almacenamiento
Cuando el gancho se encuentre a 2 m (6 pies) de
la guía, desconéctelo del punto de anclaje o carga.
Sostenga la correa del gancho (incluida con el
producto) y mantenga la tensión en el cable del
cabrestante. Enrolle el cabrestante lentamente
pulsando el botón de enrollado en el control remoto
hasta que el gancho se encuentre a 1 metro (3 pies) de
la guía.
Pare de enrollarlo y enganche el gancho al punto
de anclaje apropiado en el vehículo.
AVISO
No permita que el gancho toque la guía.
Esto podría causar daños a la guía.
WARN INDUSTRIES
83449A0 40
vehículo, enrolle el resto del cable suelto pulsando el
interruptor de enrollado en el control remoto hasta
que haya una holgura mínima en el cable.
Sobrecarga/sobrecalentamiento
intermitente. Cuando el motor se aproxima a la
velocidad crítica, se genera calor muy rápidamente,
lo que puede ocasionar daños al motor.
la Guía básica del técnicas para el uso del cabrestante)
reduce el amperaje de consumo y el recalentamiento
del motor. Esto permite un uso continuo más
prolongado.
ESTIRAMIENTO DEL CABLE
DEL CABRESTANTE
cable y vuelva a enrollarlo con carga antes de usarlo. Un cable bien
enrollado reduce las posibilidades de tener “dobleces” que puedan
dañar el cable.
menos, 5 vueltas de cable alrededor del tambor. El cable podría
soltarse del tambor, ya que el acoplamiento del cable al tambor no
está diseñado para aguantar cargas.
directamente relacionada con la forma en que se
utiliza y se cuida. Durante su primer uso, un cable
del cabrestante nuevo debe enrollarse en el tambor
bajo una carga de, por lo menos, 454 kg. (1000 lbs).
Siga las instrucciones siguientes para tensar el cable
del cabrestante correctamente en el tambor del
cabrestante.
1) Escoja una superficie PLANA Y PAREJA que sea lo
suficientemente amplia como para poder extender
todo el cable del cabrestante.
2) Gire la palanca del embrague del cabrestante hacia
la posición “Free Spool” (enrollado libre). Desenrolle
el cable del cabrestante del tambor hasta las últimas 5
vueltas. Una vez desenrollado el cable del cabrestante,
ponga la palanca del embrague del cabrestante en la
posición “Engaged” (embragado).
3) Acople el extremo del cable con gancho a un punto
de anclaje apropiado y aleje el vehículo de tal punto
hasta que quede muy poco cable del cabrestante
suelto. Antes de salir del vehículo, ponga el freno
de mano, deje una velocidad puesta o en aparcado
(vehículos automáticos) y apague el vehículo.
Una vez que el gancho esté bien acoplado al
El cabrestante está indicado para un servicio
El maniobrado con línea de doble cable (consulte
ADVERTENCIA
ADVERTENCIA
La vida útil del cable del cabrestante está
Realice siempre un estiramiento previo del
Nunca accione el cabrestante si no hay, al
Page 21

INSTRUCCIONES DE PRIMER FUNCIONAMIENTO
ANÁLISIS FINAL Y MANTENIMIENTO
4) Conecte el control remoto al cabrestante. Desde
una distancia de aproximadamente 2,44 metros
(8 pies) del cabrestante, enrolle el cable hasta que
se halla enrollado todo el cable suelto en el tambor
del cabrestante. Desconecte el control remoto del
cabrestante. Mantenga la tensión en el cable del
cabrestante con una mano; empuje cuidadosamente
el cable del cabrestante hacia el lado del tambor al
que esté enganchado, de forma que no haya espacios
libres en el tambor entre cada vuelta. Verifique que
el cable del cabrestante se enrolle en la parte inferior
del tambor y no en la superior, ya que, en caso
contrario, el freno de carga automático no funcionará
correctamente. (Si el cable del cabrestante se enrolla en
la parte superior, habrá desenrollado el cabrestante en
lugar de enrollarlo con el control remoto).
5) Para una mayor seguridad, dos personas deberán
realizar los pasos siguientes. Si trata de tensar el cable
del cabrestante usted solo, verifique siempre que el
freno de mano esté puesto, deje una marcha puesta
o estacione y apague el vehículo cada vez que lo
abandone para inspeccionar el cable del cabrestante.
No salga nunca del vehículo con una carga aplicada al
cable. Tensar el cable del cabrestante es fundamental
para garantizar una larga vida útil del mismo. Al
tensarse el cable del cabrestante, se evitará que sus
capas exteriores pellizquen o deformen las capas
interiores.
6) Procure enrollar cada vuelta de forma pareja para
evitar daños al cable.
7) Pase el control remoto a través de la ventanilla del
conductor para que pueda usarlo el conductor del
vehículo. Pida a su ayudante que se ubique en la parte
lateral del vehículo, alejado del cable del cabrestante.
Él deberá indicarle si el cable del cabrestante se está
enrollando correctamente al verlo pasar por la guía.
Arranque el vehículo y ponga la transmisión en punto
muerto. Suelte el freno de mano mientras presiona
moderadamente el pedal del freno.
Pulse el botón de enrollar en el control remoto.
Después de enrollar aproximadamente 2m (6 pies)
de cable, pare el enrollado. Lentamente, deje de
presionar el pedal del freno para aplicar el freno de
mano. Esto asegurará que no haya carga en el cable
del cabrestante. A continuación, ponga la transmisión
en aparcado (vehículos automáticos) o ponga una
velocidad con la palanca de cambios y apague el
vehículo. Salga del vehículo y asegúrese de que el cable
del cabrestante esté enrollándose de forma pareja en
el tambor del cabrestante y no hundiéndose en la capa
inferior. Si el cable del cabrestante se está hundiendo,
desenróllelo y repita este paso desde el principio con
más presión en el pedal del freno.
8) Cuando esté convencido de que el cable del
cabrestante está enrollándose correctamente en
el tambor, repita el paso 6 hasta que el vehículo
se encuentre a 2 metros (6 pies) del anclaje del
cabrestante. Una vez que esté a 2 m (6 pies), deje de
presionar el pedal del freno lentamente para utilizar
el freno de mano. Esto asegurará que no haya carga
en el cable del cabrestante. A continuación, ponga
la transmisión en aparcado (vehículos automáticos)
o ponga una velocidad con la palanca de cambios y
apague el vehículo. Salga del vehículo. Desenganche el
gancho del punto de anclaje. Mientras que sostiene la
correa del gancho (incluida en el producto), mantenga
la tensión en el cable del cabrestante y enróllelo
lentamente pulsando el interruptor de enrollado en el
control remoto hasta que el gancho se encuentre a 1
metro (3 pies) de la guía. Pare de enrollarlo y enganche
el gancho al punto de anclaje apropiado en el vehículo.
No permita que el gancho toque la guía. Esto podría causar
AVISO
daños a la guía.
Una vez que el gancho esté bien acoplado al
vehículo, enrolle el resto del cable suelto pulsando
el interruptor de enrollado en el control remoto hasta
que haya una holgura mínima en el cable.
Control
Lea detenidamente las Instrucciones, la
Guía de operación y/o la Guía básica de
técnicas del cabrestante para comprender
el funcionamiento y la manipulación del
cabrestante.
Controle los elementos de fijación y
asegúrese de que estén apretados con el par
de apriete correcto.
Sustituya todos los elementos de fijación
que estén dañados.
Verifique que el cableado de todos los
componentes es correcto y que todas
las conexiones están bien apretadas.
Verifique que no hay cableado ni terminales
expuestos/al aire o daños en el aislante
(desgaste/corte).
Cubra las exposiciones con fundas para
terminales. Repare o sustituya los cables
eléctricos dañados.
Compruebe que el cable no presente daños.
Sustituya el cable de inmediato
si está dañado.
Mantenga libres de contaminantes
el cabrestante, el cable y el control
de conmutación.
Utilice un paño limpio o una toalla para
quitar la suciedad.
ADVERTENCIA
Para prevenir lesiones de gravedad o
la muerte:
Siempre enrolle el cable del cabrestante
alrededor del tambor en el sentido indicado por
la marca de rotación del cabrestante.
Enrolle el cable en la parte inferior del tambor.
Nunca enrolle el cable en la parte superior
del tambor.
Antes del
primer uso
Después
de cada uso
Cada 90 días
X
XX
XX
XX
XXX
X
Tómese su tiempo para comprender
completamente el cabrestante y su
funcionamiento revisando la Guía básica de
técnicas de uso del cabrestante que viene con el
mismo.
Para más información o preguntas contacte con:
WARN INDUSTRIES, INC.
12900 S.E. Capps Road, Clackamas, OR USA 97015-
8903, 1-503-722-1200,
Servicio de atención al cliente: 1-800-543-9276
Servicio localizador de distribuidor: 1-800-910-1122
o visite www.warn.com.
WARN INDUSTRIES
41 83449A0
WARN INDUSTRIES
83449A0 42
Page 22

ORIGINALANLEITUNG
SYMBOLINDEX
Windeninstallationsanleitung
Jeder Windeneinsatz birgt ein Verletzungsrisiko. Um dieses Risiko zu minimieren, ist es wichtig, dass Sie diese Anleitung und die “Grundlegenden
Richtlinien zur Windentechnik” aufmerksam lesen. Bitte machen Sie sich mit dem Betrieb Ihrer Winde vor deren Verwendung vertraut und achten
Sie immer auf Sicherheit. In dieser Anleitung sind zahlreiche grundlegende Sicherheitsvorschriften für den Windenbetrieb aufgeführt. Bitte lesen
Sie die “Grundlegenden Richtlinien zur Windentechnik” für weitere Information über Ihre Winde und Windentechnik. Denken Sie immer daran, dass
gesundes Urteilsvermögen und sicherheitsorientiertes Handeln wichtig sind, da nicht alle Situationen gleich sind.
Bitte heben Sie dieses Handbuch und sonstige ergänzende Unterlagen, die Sie in diesem Set vorfinden, für künftige Verwendungszwecke auf.
In diesem Set finden Sie die folgenden Unterlagen: Grundlegende Richtlinien zur Windentechnik, Technische Daten, Konformitätserklärung,
Gewährleistungsinformationen, Windeninstallationsanleitung und eine optionale Anleitung zu synthetischen Seilen. Sollte etwas davon fehlen,
setzen Sie sich bitte unter den nachstehend angegebenen Telefonnummern mit uns in Verbindung oder besuchen Sie www.warn.com.
INHALTSVERZEICHNIS:
SICHERHEIT
Symbolindex............................................................................................................................................................................ 44
Allgemeine Sicherheitsmaßnahmen ........................................................................................................................45-47
ANLEITUNG
Sichere Arbeitsbedingungen ............................................................................................................................................ 48
Mit der Winde vertraut machen ....................................................................................................................................... 49
Montage ..............................................................................................................................................................................50-51
Elektrische Anschlüsse .........................................................................................................................................................52
Anleitungen für den Erstbetrieb ................................................................................................................................ 53-55
SYMBOL ERKLÄRUNG
Lesen Sie die gesamte
Produktdokumentation
Immer Gehör- und
Augenschutz tragen
Winde niemals zum
Heben verwenden
Last ordnungsgemäß
im Hakenhals platzieren
Seil von unten auf die
Trommel aufspulen
Quetschgefahr für die
Finger in der Führung
Schnitt-/Stichgefahr
für die Hände
Explosionsgefahr
SYMBOL ERKLÄRUNG
Immer Lederhandschuhe
tragen
Keine Personen
befördern
Immer mitgelieferten
Hakengurt verwenden
Hakenspitze oder Riegel
niemals belasten
Seil nie von oben auf die
Trommel aufspulen
Quetschgefahr
durch Führung
Gefahr durch
heiße Flächen
Brand- und
Verbrennungsgefahr
Schlussanayse und Wartung ............................................................................................................................................ 56
Warn Industries Inc.
12900 SE Capps Road
Clackamas, OR 97015
Kundendienst: (800) 543-9276
WARN® und da s WARN-Logo sind e ingetrag ene Warenze ichen von Warn I ndustrie s Inc.
© 2012 Warn Industries, Inc.
WARN INDUSTRIES
43
Fax (International): (503) 722-3005
Fax: (503) 722-3000
www.warn.com
USA
Gefahr durch
scharfe Kanten
Vermeiden Sie
Quetschpunkte und
scharfe Kanten bei
der Installation von
elektrischen Kabeln
WARN INDUSTRIES
83449A0 44
Gefahr durch bewegliche
Teile
Isolieren Sie freiliegende
Drähte
Niemals das Seil an sich
selbst einhaken
Page 23

ALLGEMEINE SICHERHEITSMASSNAHMEN
ALLGEMEINE SICHERHEITSMASSNAHMEN
Warnhinweise und
Vorsichtsmaßnahmen
In diesem Handbuch befi nden sich WARNHINWEISE,
VORSICHTSMASSNAHMEN, WICHTIGE ANMERKUNGEN und HINWEISE.
Jeder dieser Punkte hat einen besonderen Zweck. WARNHINWEISE sind
Sicherheitshinweise, die auf eine möglicherweise gefährliche Situation
hinweisen, die zu schweren oder tödlichen Verletzungen führen
kann, wenn sie nicht vermieden wird. VORSICHTSMASSNAHMEN sind
Sicherheitshinweise, die auf eine möglicherweise gefährliche Situation
hinweisen, die zu leichten oder mäßigen Verletzungen führen kann,
wenn sie nicht vermieden wird. Eine VORSICHTSMASSNAHME kann
auch auf unsichere Praktiken hinweisen. VORSICHTSMASSNAHMEN und
WARNHINWEISE kennzeichnen die Gefahr, weisen auf Möglichkeiten zur
Vermeidung der Gefahr hin und geben Aufschluss über die möglichen
Folgen, wenn diese Gefahr nicht vermieden wird. Das Signalwort
WICHTIG weist auf Anmerkungen mit Vorgehensweisen zur Vermeidung
von Sachschäden hin. HINWEISE liefern zusätzliche Informationen,
die Ihnen helfen, ein bestimmtes Verfahren durchzuführen. BITTE
UNBEDINGT ALLE SICHERHEITSMASSNAHMEN BEACHTEN!
ACHTUNG
GEFAHR DURCH BEWEGLICHE TEILE
Die Missachtung dieser Anweisungen kann zu
schweren oder tödlichen Verletzungen führen.
• Immer sicherstellen, dass der Riegel geschlossen ist und keine Last
trägt.
• Niemals Hakenspitze oder Riegel belasten. Nur die Hakenmitte
belasten.
• Niemals verworfene Haken bzw. Haken mit einer verbreiterten
Durchlassöff nung verwenden.
• Immer einen Haken mit Riegel verwenden.
• Immer gewährleisten, dass Bedienpersonal und in der Nähe
befi ndliche Personen auf die Stabilität von Fahrzeug und Last während
des Windenbetriebs achten.
• Fernsteuerungs- und Stromversorgungskabel immer von der Trommel,
dem Seil und beim Abspannen fernhalten. Auf rissige, geknickte oder
ausgefranste Drähte oder lockere Anschlüsse achten. Beschädigte
Komponenten sind vor der Inbetriebnahme auszuwechseln.
• Fernsteuerungskabel bei Verwendung im Fahrzeug immer durch
Fenster verlegen.
• Niemals das Seil an sich selbst einhaken.
ACHTUNG
GEFAHR DURCH BEWEGLICHE TEILE
Die Missachtung dieser Anweisungen kann zu
schweren oder tödlichen Verletzungen führen.
Allgemeine Sicherheitsmaßnahmen:
• Immer mit der Winde vertraut machen. Nehmen Sie sich Zeit,
um die Anleitung und/oder Bedienungsanleitung und/oder
Grundlegenden Richtlinien zur Windentechnik zu lesen, um
sich mit der Winde und deren Betrieb vertraut zu machen.
• Niemals die Nennkapazität der Winde bzw. des Windenseils
überschreiten. Zur Reduzierung der Last sind eine Umlenkrolle
und ein zweifach geschertes Seil erforderlich.
• Immer schwere Lederhandschuhe bei der Handhabung des
Windenseils tragen.
• Winde oder Windenseil niemals zum Abschleppen ver wenden.
Schockbelastungen können das Seil beschädigen, überlasten
und zum Reißen bringen.
• Winde niemals zum Sichern einer Last verwenden.
• Winde niemals unter Alkohol-, Drogen- oder
Medikamenteneinfl uss in Betrieb nehmen.
• Nur Personen, die mindestens 16 Jahre alt sind, dürfen diese
Winde in Betrieb nehmen.
Sicherheitsmaßnahmen bei der Installation:
• Immer eine Befestigungsstelle wählen, die fest genug ist,
um der maximalen Nennleistung der Winde standhalten
zu können.
• Die Befestigungsteile müssen immer mindestens Grad 5 (d. h.
8,8) entsprechen.
• Befestigungsschrauben niemals schweißen.
• Immer nur vom Hersteller zugelassene Befestigungsteile,
Komponenten und Zubehörteile verwenden.
• Niemals zu lange Schrauben verwenden.
• Immer die Windeninstallation und Hakenbefestigung
abschließen, bevor die Verkabelung installiert wird.
• Immer Kontakt mit dem Windenseil, der Öse, dem Haken und
der Seilführung während der Installation, des Betriebs und
beim Ab- und Aufspulen vermeiden.
• Seilführung immer so positionieren, dass der Warnhinweis
deutlich sichtbar nach oben zeigt.
• Immer vor Inbetriebnahme das Seil dehnen und unter Last
neu aufspulen. Ein fest aufgespultes Windenseil reduziert das
Risiko, dass sich die Seillagen lockern und hängen bleiben oder
Schäden verursachen.
ACHTUNG ACHTUNG
GEFAHR DURCH BEWEGLICHE TEILE
Die Missachtung dieser Anweisungen kann zu
schweren oder tödlichen Verletzungen führen.
Sicherheitsmaßnahmen beim Windenbetrieb:
• Windenseil, Haken und Schlingen vor Inbetriebnahme
der Winde immer prüfen. Ausgefranste, geknickte oder
beschädigte Windenseile müssen umgehend ausgetauscht
werden. Beschädigte Komponenten sind vor der
Inbetriebnahme auszuwechseln. Alle Einzelteile sind vor
Schäden zu schützen.
• Gegenstände oder Hindernisse, die einen sicheren Betrieb der
Winde beeinträchtigen könnten, sind immer zu entfernen.
• Immer sicherstellen, dass der gewählte Anker der Last
standhalten kann und dass weder der Riemen noch die Kette
verrutschen können.
• Beim Auf- und Abspulen des Windenseils, während
der Installation und während des Betriebs immer den
mitgelieferten Hakengurt verwenden.
• Bedienpersonal und in der Nähe befi ndliche Personen müssen
sich des Fahrzeugs und der Last immer bewusst sein.
• Beim Windenbetrieb immer auf die Stabilität des Fahrzeugs
und der Last achten und andere Personen davon fernhalten. In
der Nähe befi ndliche Personen müssen über instabile Zustände
informiert werden.
• Beim Abspannen immer möglichst viel abspulen. Windenseil
zweifach scheren oder weit entfernten Ankerpunkt wählen.
• Immer Vorsicht beim Abspannen in Vorbereitung des
Windenvorgangs!
• Niemals während des Windenbetriebs, oder wenn jemand
anders die Steuerung der Winde übernommen hat, Windenseil
oder Haken berühren.
• Niemals die Kupplung bei belasteter Winde, gespanntem
Windenseil oder sich bewegender Seiltrommel ein- oder
ausrasten lassen.
• Niemals Windenseil oder Haken berühren, wenn diese unter
Spannung stehen.
• Immer Abstand zum Windenseil und zur Last einhalten und
andere Person während des Windenbetriebs fernhalten.
• Niemals Fahrzeug verwenden, um Last mit Windenseil zu
ziehen. Kombinierte Lasten oder Schockbelastungen können
das Seil beschädigen, überlasten und zum Reißen bringen.
• Windenseil niemals übereinander aufspulen. Verwenden Sie
eine Kette oder eine Baumschutzvorrichtung am Anker.
STURZ- ODER QUETSCHGEFAHR
Die Missachtung dieser Anweisungen kann zu
schweren oder tödlichen Verletzungen führen.
• Immer Abstand halten, Hände fernhalten, andere Personen
fernhalten.
• Niemals die Winde mit weniger als fünf Seilwicklungen um die
Trommel betreiben. Das Seil könnte sich von der Trommel lösen,
da die Seilbefestigung an der Trommel nicht für eine Belastung
konzipiert wurde.
• Winde niemals als Hebevorrichtung oder zum Anheben von
Lasten verwenden.
• Immer sicherstellen, dass der Anker der Last standhalten kann;
unbedingt auf ordnungsgemäßes Abspannen achten.
• Winde niemals als Lift oder zur B eförderung von Personen
verwenden.
• Niemals übermäßige Kraft für den Freilauf des Windenseils
anwenden.
• Beim Handling und Installieren des Produkts immer auf richtige
Haltung/Hebetechnik achten oder Hebehilfe beschaff en.
• Seil immer in der auf dem Warnetikett der Winde und/oder in
den Unterlagen angegebenen Richtung auf die Trommel spulen.
Diese Maßnahme ist für die ordnungsgemäße Funktion der
Automatikbremse (wenn vorhanden) unerlässlich.
• Windenseil immer entsprechend den Rotationsangaben auf dem
Trommelaufkleber aufspulen.
• Windenseil immer von unten (Montageseite) auf die Trommel
aufspulen.
• Seil nie von oben auf die Trommel aufspulen.
• Windenseil immer in der den Rotationsangaben auf
dem Trommelaufkleber und/oder in den Unterlagen
entsprechenden Richtung auf die Trommel spulen. Dies ist für
die ordnungsgemäße Funktion der Automatikbremse (wenn
vorhanden) unerlässlich.
WARN INDUSTRIES
45 83449A0
WARN INDUSTRIES
83449A0 46
Page 24

ACHTUNG
ALLGEMEINE SICHERHEITSMASSNAHMEN
VORSICHT
SICHERE ARBEITSBEDINGUNGEN
Dieses Handbuch enthält Anleitungen zur
Installation Ihres WARN Windensystems und
für den ersten Betrieb. Eine vollständige
Bedienungsanleitung für Ihr WARN Windensystem
fi nden Sie in den "Grundlegenden Richtlinien zur
Windentechnik".
SCHNITTVERLETZUNGS- UND
VERBRENNUNGSGEFAHR
Die Missachtung dieser Anweisungen kann zu
schweren oder tödlichen Verletzungen führen.
So lassen sich Verletzungen an den Händen und
Fingern vermeiden:
• Immer schwere Lederhandschuhe bei der Handhabung des
Windenseils tragen.
• Während des Betriebs und nach Verwendung der Winde immer
auf möglicherweise heiße Flächen in der Nähe des Motors, der
Trommel oder des Seils achten.
ACHTUNG
CHEMISCHE UND BRANDGEFAHR
Die Missachtung dieser Anweisungen kann zu
schweren oder tödlichen Verletzungen führen.
• Immer Schmuck entfernen und Augenschutz tragen.
• Niemals Elektrokabel über scharfe Kanten verlegen.
• Niemals Elektrokabel in der Nähe von Teilen verlegen, die heiß
werden.
• Niemals Elektrokabel durch bewegliche Teile oder in der Nähe
von beweglichen Teilen verlegen.
• Immer die mitgelieferten Schutzmanschetten an Kabeln und
Anschlüssen gemäß den Installationsanweisungen anbringen.
• Beim Herstellen von Anschlüssen niemals über die Batterie
beugen.
• Niemals Elektrokabel über Batterieanschlüsse verlegen.
• Niemals Batterieanschlüsse mit Metallgegenständen
kurzschließen.
• Immer sicherstellen, dass ein Bereich, in dem gebohrt
werden soll, frei von Kraftstoffl eitungen, Kraftstoff tanks,
Bremsleitungen, elektrischen Kabeln usw. ist.
• Einzelheiten über richtige Verkabelung immer der
Bedienungsanleitung entnehmen.
• Immer freiliegende Kabel und elektrische Anschlüsse isolieren
und schützen.
SCHNITTVERLETZUNGS- UND
VERBRENNUNGSGEFAHR
Die Missachtung dieser Anweisungen kann zu
leichten oder mäßigen Verletzungen führen.
• Windenseil niemals durch die Hände gleiten lassen.
VORSICHT
GEFAHR DURCH BEWEGLICHE TEILE
Die Missachtung dieser Anweisungen kann zu
leichten oder mäßigen Verletzungen führen.
So lassen sich Verletzungen an Händen und Fingern
vermeiden:
• Fernsteuerung beim Freilauf, Abspannen oder bei
Nichtgebrauch der Winde immer entfernen, damit sie nicht
aktiviert werden kann.
• Fernsteuerung beim Installieren, Freilauf, Abspannen,
Wartungs-/Reparaturarbeiten oder bei Nichtgebrauch
der Winde niemals angeschlossen lassen.
HINWEIS
SO LASSEN SICH SCHÄDEN AN DER WINDE UND
AN GERÄTEN VERMEIDEN:
• Das Einziehen des seil von der Seite ist immer zu vermeiden,
da sich das Windenseil sonst an einem Ende der Trommel
ansammeln kann. Bei Nichtbeachtung dieser Anweisung können
Schäden am Windenseil oder der Winde entstehen.
• Immer darauf achten, dass die Kupplung vollkommen ein- oder
ausgerastet ist.
• Immer sicherstellen, dass das Chassis bei der Verankerung des
Fahrzeugs während des Windenbetriebs nicht beschädigt wird.
• Niemals die Winde in Wasser eintauchen.
• Fernsteuerung immer an einem geschützten, sauberen,
trockenen Ort aufbewahren.
Sicherheit
Bei der Installation des WARN Windensystems sind
alle Installations- und Sicherheitshinweise zu lesen
und zu beachten.
Gehen Sie bei der Arbeit mit Elektrizität stets
vorsichtig vor. Vergewissern Sie sich, dass keine
elektrischen Anschlüsse frei liegen, bevor Sie
den Windenschaltkreis an die Stromversorgung
anschließen.
Technische Daten und Leistungsangaben
entnehmen Sie bitte dem mit Ihrer Winde
mitgelieferten Datenblatt.
WARN INDUSTRIES
47 83449A0
WARN INDUSTRIES
83449A0 48
Page 25

MIT DER WINDE VERTRAUT MACHEN
MONTAGE
Mit der Winde vertraut machen
Zunächst sollten Sie sich mit der WARN-Winde und ihren Komponenten vertraut machen:
Steuerung
Fernanschluss
Motor
Kupplungshebel
Getriebe
(Antriebsstrang)
Windentrommel
Seil
Fernsteuerung
Abbildung 1
Motor: Der Windenmotor wird über die Fahrzeugbatterie gespeist. Der Motor treibt den
Getriebemechanismus an, der wiederum die Trommel der Winde dreht und das Windenseil aufund abspult.
Windentrommel: Bei der Windentrommel handelt es sich um den Zylinder, auf den das Seil gespult wird. Die
Trommel wird vom Motor und Antriebsstrang bewegt. Die Drehrichtung der Trommel kann über
die Fernsteuerung geändert werden.
Seil*: Der Durchmesser und die Länge des Windenseils richten sich nach der Lastkapazität und
Konstruktion der Winde. Das Windenseil wird um die Trommel gewickelt und tritt durch
die Seilführung aus. Am Seilende befindet sich eine Schlaufe für den Lastösenbolzen des
Windenhakens.
* Für Modelle mit Synthetikseil bitte unbedingt die dem Set beiliegende WARN Synthetikseil-
Installationsanleitung vollständig lesen.
Antriebsstrang: Das Untersetzungsgetriebe setzt die Motorleistung in eine sehr große Zugkraft um. Dank der
Bauweise des Antriebsstrangs ist die Winde leicht und kompakt.
Kupplungshebel: Anhand der Kupplung kann die Seiltrommel manuell vom Antriebsstrang gelöst und somit in
den Freilauf geschaltet werden. Bei Einrasten der Kupplung wird die Trommel der Winde wieder
mit dem Antriebsstrang gekuppelt.
Fernanschluss: Am Fernanschluss schließt der Bediener die kabelgebundene Fernsteuerung oder den
optionalen Empfänger für die drahtlose Fernsteuerung der Winde an.
Steuerung*: Der über die Fahrzeugbatterie gespeiste Schaltschütz in der Steuerung überträgt Strom an den
Motor, um die Änderung der Trommeldrehrichtung zu bewirken.
*Einzelheiten zum optionalen Control Pack Relocation Kit für die Versetzung der Steuerung
erhalten Sie bei Ihrem autorisierten WARN-Händler oder unter www.warn.com.
Fernsteuerung: Die Fernsteuerung wird an der Steuerung der Winde angeschlossen. Anhand der
Fernsteuerung kann unter Einhaltung des Sicherheitsabstandes zur Winde die Drehrichtung der
Windentrommel geändert werden.
Schritt 1 – Montieren der Winde
Montagebausätze für Winden sind für fast alle
Anwendungen bei Ihrem WARN-Händler erhältlich.
Informationen zu den verfügbaren Bausätzen
erhalten Sie bei Ihrem WARN-Händler.
Für optimale Leistung und ihren Erwartungen
HINWEIS
entsprechende Ergebnisse werden dringend WARNBefestigungsplatten empfohlen.
VORSICHT
und somit schwere Verletzungen zu vermeiden, führen Sie die
Windeninstallation aus und bringen Sie den Haken an, bevor
Sie die Verkabelung installieren.
fest genug ist, um der maximalen Nennleistung der Winde
standhalten zu können.
Rotationsangaben auf dem Trommelaufkleber und/oder in
den Unterlagen entsprechenden Richtung auf die Trommel
spulen. Dies ist für die ordnungsgemäße Funktion der
Automatikbremse (wenn vorhanden) unerlässlich.
auf die Trommel aufspulen.
Diese Winde muss immer in horizontaler
Ausrichtung montiert werden, sodass das Seil auf
der Montageseite der Trommel und in Richtung des
Rotationspfeils auf der Winde auf-/abgewickelt wird,
siehe Abbildung 2 und 3.
Die richtige Rotationsrichtung ist für die
ordnungsgemäße Funktion der Automatikbremse
unerlässlich. Die horizontale Montage verhindert,
dass sich das Seil an einem Ende der Trommel
aufwickelt und die Winde beschädigt.
Die Verwendung der empfohlenen Schrauben
und Sicherungsscheiben verhindert Vibrationen
während des Betriebs, wenn sie mit den
empfohlenen Drehmomenten festgezogen
werden. Die Spezifikationen sind nachfolgend
auflistet. Die Schraubenlänge ist abhängig vom
Befestigungssystem.
Um ein versehentliches Aktivieren der Winde
ACHTUNG
Immer eine Befestigungsstelle wählen, die
Niemals zu lange Schrauben verwenden.
ACHTUNG
Windenseil immer in der den
ACHTUNG
Windenseil immer von unten (Montageseite)
ACHTUNG
Montageschablone:
Standard: 254 mm x 114,3 mm
Glatte und fl ache Montagefl äche, Mindeststärke = 6,4 mm
Enthaltene Montageteile:
• M10 x 1,5 Bundmutter, 15 mm Sechskant
• M10-1,5 x 35 Sechskantfl ansch, 8.8, Schraube
(4 x)
• M10-1,5 x 40 Sechskantfl ansch, 8.8, Schraube
(2 x)
Drehmoment: 41 bis 47 Nm
Eine Befestigungsstelle wählen, die fest genug
ist, um der maximalen Nennleistung der Winde
standhalten zu können.
1. Setzen Sie die Bundmuttern in die
Aussparungen der Windenfüße.
2. Platzieren Sie die Winde an der Montagestelle.
Überprüfen Sie die benötigte Schraubenlänge.
Blechdicke
Schraubenlänge
7 mm 32 mm
10 mm 40 mm
13 mm 40 mm
3. Bringen Sie die Schrauben an und ziehen Sie
diese mit 41 bis 47 Nm fest.
4. Entfernen Sie das Gummiband um das Seil.
5. Schalten Sie die Kupplung auf Freilauf.
6. Legen Sie die Seilschlaufe manuell durch die
Seilführung.
ACHTUNG
Immer den mitgelieferten Hakengurt
verwenden.
7. Befestigen Sie den Haken an der Kabelschlaufe.
Befestigen Sie den Hakengurt am Haken.
8. Drehen Sie die Kupplung in die vollständig
eingerastete Position zurück.
WARN INDUSTRIES
49 83449A0
WARN INDUSTRIES
83449A0 50
Page 26

MONTAGE
ELEKTRISCHE ANSCHLÜSSE
Montageausrichtung
4 x M10-1,5 x 35
Abbildung 2 Horizontale Ausrichtung, Füße nach unten
2 x M10-1,5 x 35
Schritt 2 – Installieren der Verkabelung
So lassen sich schwere oder tödliche Verletzungen
ACHTUNG
verhindern: Immer die mitgelieferten Schutzmanschetten an
Kabeln und Anschlüssen gemäß den Installationsanweisungen
anbringen.
Um schwere oder tödliche Verletzungen durch
ACHTUNG
Brand zu vermeiden:
Niemals Elektrokabel über scharfe Kanten verlegen.
Niemals Elektrokabel in der Nähe von Teilen verlegen, die
heiß werden.
Niemals Elektrokabel durch bewegliche Teile oder in der
Nähe von beweglichen Teilen verlegen.
Vermeiden Sie Quetschpunkte und scharfe Kanten bei der
Installation aller elektrischen Kabel.
Isolieren Sie freiliegende Kabel und elektrische
ACHTUNG
Anschlüsse immer und schützen Sie sie.
Eine vollständig geladene Batterie und gute Anschlüsse
HINWEIS
sind für den ordnungsgemäßen Betrieb der Winde unumgänglich.
Die Mindestanforderungen für eine 12-V-Batterie (Gleichspannung)
liegen bei 650 CCA.
Verlegen Sie die Batterieanschlusskabel an Stellen, wo
sie die Isolierung nicht aufreiben oder durchschneiden und
so einen Kurzschluss verursachen können.
Das Stromkabel der Winde muss zur Batterie geführt
werden. Die Leitungen für Strom (rot) und Erde (schwarz)
müssen direkt an die Batterie angeschlossen werden.
ACHTUNG! Die Erdung nicht mit dem Fahrzeugchassis verbinden.
Für die Verlegung der Batteriekabel müssen eventuell
das Armaturenbrett des Fahrzeuges oder Teile der
Karosserie entfernt werden.
Verlegen Sie die Batteriekabel so, dass sie mit
Kabelbindern gesichert werden können.
zu schweren oder tödlichen Verletzungen führen.
Kanten, Bereichen, die zu heiß werden, um sie
anzufassen, und vor beweglichen Teilen.
1. Planen Sie die Kabelroute.
2. Befestigen Sie die Stromkabel lose entlang der
3. Überprüfen Sie, dass die Stromkabel vor scharfen
4. Überprüfen Sie sorgfältig den Verlauf der
5. Schließen Sie die Batteriekabel an, ZUERST das rote
ordnungsgemäße Funktion überprüft werden.
Schritt 3 – Synthetikseil-Installation
(Optionale)
detaillierte WARN Synthetikseil-Installationsanleitung
vollständig lesen.
Lose oder nicht gesicherte Stromkabel können
ACHTUNG
Schützen Sie Stromkabel immer vor scharfen
Route.
Kanten, Hitze und beweglichen Teilen sicher sind.
Berücksichtigen Sie Biegungen im Fahrgestell und
Vibrationen, die Kabel beschädigen könnten.
Elektrokabel. Ist er sauber und ordentlich?
Binden Sie die Elektrokabel mit Kabelbindern
zusammen und sichern Sie sie. Die Kabelbinder
sollten eng anliegen, aber nicht in die
Drahtisolierung einschneiden. Verwenden
Sie Isolierband, Gummischlauchstücke oder
Elektroinstallationsrohre, um Elektrokabel und
Kabelbäume zu schützen, wo dies notwendig
ist, um einen Verschleiß oder Abrieb der
Elektrokabelisolierung zu verhindern.
(positive) Kabel, dann das schwarze (negative).
Installieren Sie nach Bedarf Manschetten, um
die Anschlüsse zu schützen. Ziehen Sie die
Anschlussbefestigungen der Batterie auf das im
Wartungshandbuch des Fahrzeug angegebene
Drehmoment an.
Nach der Installation muss die Seilwinde auf
Für Modelle mit Synthetikseil bitte unbedingt die
2 x M10-1,5 x 40
Abbildung 3 Horizontale Ausrichtung, Füße nach vorne
WARN INDUSTRIES
51 83449A0
Erdungskabel (schwarz)
Stromkabel (rot)
Abbildung 4 Verkabelungsplan
WARN INDUSTRIES
83449A0 52
12-V-Batterie
650 CCA Minimum
Page 27

ANLEITUNG FÜR DEN ERSTBETRIEB
ANLEITUNG FÜR DEN ERSTBETRIEB
Schritt 4 – Systemtest
Nach erfolgter Systemprüfung können Sie die Funktion
der Winde bestätigen. Fahren Sie fort mit den Abschnitten Anleitung für den Erstbetrieb und Wartung in
diesem Handbuch.
Schritt 5 – Anleitung für den Erstbetrieb
Nehmen Sie sich die Zeit, sich anhand
ACHTUNG
der Grundlegenden Richtlinien zur Windentechnik im
Lieferumfang Ihrer Winde vollständig mit der Funktionsweise
und dem Windenbetrieb vertraut zu machen.
ABSPULEN
AUFSPULEN
Fernsteuerungsschalter
Die Fernsteuerung sollte bei Nichtgebrauch nicht
an die Winde angeschlossen sein. Bei Nichtbeachtung
dieser Anweisung können Gefahrensituationen
entstehen und/oder die Batterie entladen werden.
Kupplungsbetrieb:
Niemals die Kupplung bei belasteter Winde,
ACHTUNG
gespanntem Windenseil oder sich bewegender Seiltrommel
ein- oder ausrasten lassen.
AUSGEKUPPELT
EINGEKUPPELT
Bei eingerasteter Kupplung ist das Getriebe mit
der Windentrommel verbunden. Unter Umständen
wird jetzt schon Kraft vom Windenmotor übertragen.
Wenn die Kupplung ausgekuppelt ist, befindet sich
die Trommel im Leerlauf (Seilfreilauf), und es besteht
keine Verbindung zwischen dem Getriebe und der
Windentrommel. Die Trommel dreht sich somit
ungehindert.
D
Windengehäuse auf der anderen Seite des Motors
befindet, steuert die Kupplungstätigkeit. Die Kupplung
sollte über den Knauf immer nur voll eingerastet sein
oder sich ungehindert im Leerlauf befinden. Nur so
können Schäden vermieden werden.
er Kupplungshebel, der sich auf dem
Abspulen
Niemals die Winde mit weniger als fünf
ACHTUNG
Seilwicklungen um die Trommel betreiben. Das Seil könnte sich
von der Trommel lösen, da die Seilbefestigung an der Trommel
nicht für eine Belastung konzipiert wurde.
Immer Kontakt mit dem Windenseil, der Öse,
ACHTUNG
dem Haken und der Seilführung während der Installation, des
Betriebs und beim Ab- und Aufspulen vermeiden.
Bei der Handhabung des Windenseils immer
ACHTUNG
schwere Lederhandschuhe tragen.
Beim Freilauf handelt es sich generell um die
schnellste und einfachste Methode, das Windenseil
abzuspulen. Bevor das Windenseil im Freilauf von der
Winde gespult wird, sollte so viel Seil abgerollt werden,
dass jegliche Spannung entfernt wird. Kupplung lösen.
Dann per Hand genug Seil für den Windenbetrieb
abspulen. Weitere Informationen entnehmen Sie bitte
den Grundlegenden Richtlinien zur Windentechnik.
HINWEIS
Spulen Sie NICHT mehr als 10 m Seil ab, ohne die
Winde 20 Minuten abkühlen zu lassen, bevor Sie das Seil wieder
aufspulen. Schalten Sie stattdessen die Kupplung in den Freilauf
und ziehen Sie das Seil manuell ab.
Immer den mitgelieferten Hakengurt beim
ACHTUNG
Auf- und Abspulen, während der Installation oder während
des Betriebs verwenden, um Verletzungen an den Händen und
Fingern zu vermeiden.
Aufspulen unter Last
Die maximale Zugkraft der Winde darf nie
ACHTUNG
überschritten werden.
Das Windenseil gleichmäßig einziehen und fest
um die Trommel legen. Dadurch wird verhindert, dass
die äußeren Wickelschichten die darunter liegenden
Schichten und Wicklungen und somit das Windenseil
beschädigen.
Vermeiden Sie Stoßbelastungen beim Spulen, indem
Sie regelmäßig den Steuerschalter verwenden, um
lockere Seilabschnitte einzuziehen. Stoßbelastungen
können die Nennwerte der Winde und des Seils
kurzzeitig weit überschreiten.
Aufspulen ohne Last
Niemals während des Windenbetriebs, oder
ACHTUNG
wenn jemand anders die Steuerung der Winde übernommen
hat, Windenseil oder Haken berühren.
Spulen mit Hilfspersonal: Lassen Sie das
Hilfspersonal den Hakengurt halten, wobei diese
Person das Windenseil ohne Unterbrechung und
möglichst stark spannt. Unter Aufrechterhaltung
der Spannung sollte diese Person nun auf die
Winde zugehen, während Sie das Seil unter
Verwendung des Steuerschalters aufspulen.
Schalter loslassen, wenn der Haken mindestens 2 m
von der Führungsöff nung entfernt ist.
Das restliche Seil nun zu Lagerzwecken wie folgt
aufspulen.
Alleine spulen: Legen Sie das Windenseil so, dass es
beim Aufspulen weder geknickt wird oder hängen
bleiben kann. Vergewissern Sie sich, dass die
Seillagen um die Trommel fest und gleichmäßig
angeordnet sind. So viel Seil aufspulen, bis die
nächste Lage um die Trommel voll ist. Seillage
festziehen und gerade ausrichten. Wiederholen Sie
diesen Vorgang, bis der Haken mindestens 2 m vom
Seilfenster entfernt ist.
Das restliche Seil nun zu Lagerzwecken wie folgt
aufspulen.
Aufspulen des Restseils zu Lagerzwecken
Den Haken vom Anker oder der Last lösen, wenn
er sich 2 m von der Führung entfernt befi ndet.
Den mitgelieferten Hakengurt festhalten und
sicherstellen, dass das Windenseil weiterhin
unter Spannung steht. Wickeln Sie das Seil
langsam durch mehrfaches kurzes Einschalten der
Wickelfunktion an der Fernsteuerung so weit auf,
dass der Haken weniger als 1 m von der Seilführung
entfernt ist.
Windenvorgang beenden und den Haken
an einem geeigneten Ankerpunkt am Fahrzeug
befestigen.
Nicht den Haken in die Seilführung ziehen. Dadurch
HINWEIS
könnte die Seilführung beschädigt werden.
Sobald der Haken an einer geeigneten Stelle am
Fahrzeug befestigt ist, wickeln Sie das Windenseil
durch mehrfaches kurzes Einschalten der Winde
an der Fernsteuerung weiter auf, bis das Seil fast
gespannt ist.
Überlastung/Überhitzung
Die Winde ist für den Aussetzbetrieb vorgesehen.
Sinkt die Drehzahl, sodass die Gefahr besteht, dass
der Motor bald stehen bleibt, kann sich die Winde
sehr schnell erhitzen und den Motor beschädigen.
Bei Verwendung einer Umlenkrolle (siehe
Richtlinien zur Windentechnik) werden die
Stromaufnahme und die Hitzebildung im Motor
reduziert. Dadurch verlängert sich die mögliche
Einsatzzeit der Winde.
DEHNEN des WINDENSEILS
Immer vor Inbetriebnahme das Seil dehnen
ACHTUNG
und unter Last neu aufspulen. Ein fest aufgespultes Seil
reduziert das Risiko, dass sich die Seillagen lockern und
hängen bleiben oder Schäden verursachen.
Niemals die Winde mit weniger als fünf
ACHTUNG
Seilwicklungen um die Trommel betreiben. Das Seil könnte
sich von der Trommel lösen, da die Seilbefestigung an der
Trommel nicht für eine Belastung konzipiert wurde.
Die Lebensdauer des Windenseils hängt von
seiner Pflege und Einsatzhäufigkeit ab. Beim ersten
Gebrauch muss ein neues Windenseil mit einer Last
von mindestens 454 kg auf die Trommel gespult
werden. Folgende Anweisungen beachten, damit
das Windenseil korrekt auf die Windentrommel
aufgespult wird.
1) Wählen Sie einen FLACHEN UND EBENEN
Standort mit ausreichend Platz, um das Windenseil
in ganzer Länge auszulegen.
2) Drehen Sie den Kupplungshebel an der
Winde in die Freilaufstellung. Das Windenseil
bis auf fünf Trommelumwindungen abwickeln.
Kupplungshebel an der Winde nach dem Abspulen
des Windenseils in die eingekuppelte Position
stellen.
3) Das Hakenende des Seils an einem geeigneten
Ankerpunkt befestigen und das Fahrzeug so weit
zurückfahren, bis das Windenseil fast gespannt
ist. Vor dem
einen Gang einlegen bzw. bei Automatikgetriebe
die Parkstellung wählen und den Motor abstellen..
4) Die Fernsteuerung an die Winde anschließen.
Halten Sie ungefähr 2,5 m Abstand von der Winde
und spulen Sie das Seil auf die Winde auf, bis
es gespannt ist. Nehmen Sie die Fernsteuerung
von der Winde ab. Windenseil mit einer Hand
unter Spannung halten. Windenseil vorsichtig
in Richtung der Trommelseite drücken, an der
es befestigt ist, damit zwischen den einzelnen
Wicklungen keine Abstände bleiben. Vergewissern
Sie sich, dass das Windenseil auf der Unterseite
der Trommel und nicht auf der Oberseite abläuft.
Anderenfalls kann die automatische Lastbremse
nicht ordnungsgemäß funktionieren. (Wenn das
Windenseil auf der Oberseite abläuft, wurde der
Aussteigen Feststellbremse anziehen,
WARN INDUSTRIES
53 83449A0
WARN INDUSTRIES
83449A0 54
Page 28

ANLEITUNG FÜR DEN ERSTBETRIEB
SCHLUSSANALYSE UND WARTUNG
Spulvorgang der Winde bei Verwendung der
Fernsteuerung in die falsche Richtung aktiviert.)
5) Aus Sicherheitsgründen sollten die folgenden
Schritte immer von zwei Personen ausgeführt
werden. Falls Sie beabsichtigen, das Windenseil
ohne die Unterstützung einer weiteren Person
unter Spannung zu setzen, müssen Sie unbedingt
darauf achten, dass die Feststellbremse angezogen
ist, ein Gang eingelegt oder das Getriebe in die
Parkposition gestellt ist und der Fahrzeugmotor
abgeschaltet ist, wenn Sie zum Überprüfen des
Windenseils aus dem Fahrzeug steigen. Steigen Sie
niemals aus dem Fahrzeug aus, während das Seil
unter Belastung steht. Das korrekte Anspannen
des Windenseils trägt entscheidend dazu bei, dass
es lange nutzbar bleibt. Durch das Anspannen
des Windenseils wird verhindert, dass die inneren
Lagen des Windenseils durch die äußeren
Wicklungen eingeklemmt und verformt werden.
6) Darauf achten, dass jede Lage sauber
aufgewickelt wird, um eine Beschädigung des Seils
zu verhindern.
7) Übergeben Sie dem Fahrzeugführer die
Fernsteuerung durch das Fenster auf der
Fahrerseite. Weisen Sie Ihren Helfer an, sich neben
das Fahrzeug zu stellen und Abstand zum Seil zu
halten. Ihr Helfer sollte das Windenseil beobachten
und Ihnen durch Signale mitteilen, dass es korrekt
über die Seilführung aufgewickelt wird. Starten
Sie den Fahrzeugmotor, und nehmen Sie den
Gang heraus. Feststellbremse lösen und dabei mit
mäßigem Druck auf die Bremse treten.
Aktivieren Sie die Aufwickelfunktion über die
Fernsteuerung. Wickelvorgang nach ungefähr
2m stoppen. Langsam den Fuß von der Bremse
nehmen und dann die Feststellbremse anziehen.
Dadurch wird sichergestellt, dass das Windenseil
nicht unter Belastung steht. Das Getriebe
dann wieder in die Parkposition schalten oder
einen Gang einlegen und den Fahrzeugmotor
abschalten. Aus dem Fahrzeug aussteigen und
überprüfen, ob das Windenseil gleichmäßig auf die
Windentrommel aufgewickelt und nicht in einer
darunter liegenden Lage eingeklemmt wird. Wenn
das Windenseil sich zu verklemmen droht, wieder
abspulen und den Vorgang wiederholen. Diesmal
jedoch etwas fester auf die Bremse treten.
8) Wenn Sie sich davon überzeugt haben, dass
das Windenseil korrekt auf die Windentrommel
aufgewickelt wird, Schritt 6 so lange wiederholen,
bis sich das Fahrzeug nur noch weniger als 2 m
vom Windenankerpunkt entfernt befi ndet. Wenn
der Abstand weniger als 2 m beträgt, langsam
den Fuß von der Bremse nehmen und dann
die Feststellbremse anziehen. Dadurch wird
sichergestellt, dass das Windenseil nicht unter
Belastung steht. Das Getriebe dann wieder in die
Parkposition schalten oder einen Gang einlegen
und den Fahrzeugmotor abschalten. Aus dem
Fahrzeug aussteigen. Den Haken vom Ankerpunkt
lösen. Halten Sie den mitgelieferten Hakengurt
fest und stellen Sie sicher, dass das Windenseil
weiterhin unter Spannung steht. Wickeln Sie das
Seil langsam durch mehrfaches kurzes Einschalten
der Wickelfunktion an der Fernsteuerung so
weit auf, dass der Haken weniger als 1 m von der
Seilführung entfernt ist. Windenvorgang beenden
und den Haken an einem geeigneten Ankerpunkt
am Fahrzeug befestigen.
HINWEIS
Nicht den Haken in die Seilführung ziehen. Dadurch
könnte die Seilführung beschädigt werden.
Sobald der Haken an einer geeigneten Stelle am
Fahrzeug befestigt ist, wickeln Sie das Windenseil
durch mehrfaches kurzes Einschalten der Winde
an der Fernsteuerung weiter auf, bis das Seil fast
gespannt ist.
Prüfung
Nehmen Sie sich Zeit, um die Anleitung und/oder
Bedienungsanleitung und/oder Grundlegenden
Richtlinien zur Windentechnik zu lesen, um sich mit
der Winde und deren Betrieb vertraut zu machen.
Befestigungselemente prüfen und vergewissern,
dass sie fest und mit dem richtigen Drehmoment
angezogen sind.
Beschädigte Befestigungselemente ersetzen.
Vergewissern Sie sich, dass die Verkabelung aller
Komponenten korrekt ist, und stellen Sie sicher, dass
alle Anschlusspunkte fest sitzen.
Vergewissern Sie sich, dass keine freiliegenden/
blanken Drähte oder Anschlüsse oder schadhaften
Kabelisolierungen (Abrieb/Schnitte) vorhanden sind.
Alle freiliegenden Stellen mit Schutzmanschetten
abdecken. Schadhafte Stromkabel reparieren
oder erneuern.
Überprüfen Sie das Seil auf Schäden.
Das Seil bei Schäden sofort ersetzen.
Halten Sie Winde, Seil und Schalter schmutzfrei.
Entfernen Sie Schmutz und Rückstände mit
einem sauberen Tuch.
So lassen sich schwere oder tödliche
ACHTUNG
Verletzungen verhindern:
Windenseil immer entsprechend den Rotationsangaben
auf dem Trommelaufkleber aufspulen.
Seil immer von unten auf die Trommel aufspulen.
Seil nie von oben auf die Trommel aufspulen.
Vor dem ersten
Betrieb
Nach jedem
Einsatz
Alle 90 Tage
X
XX
XX
XX
XXX
X
Nehmen Sie sich die Zeit, um sich anhand der
Richtlinien zur Windentechnik im Lieferumfang
Ihrer Winde mit der Funktionsweise und dem
Windenbetrieb vollständig vertraut zu machen.
Für weitere Informationen oder bei Fragen
wenden Sie sich bitte an:
WARN INDUSTRIES, INC.
12900 S.E. Capps Road, Clackamas, OR USA 97015-
8903, 1-503-722-1200,
Kundendienst: 1-800-543-9276
Händlersuchdienst: 1-800-910-1122
oder besuchen Sie www.warn.com.
WARN INDUSTRIES
55 83449A0
WARN INDUSTRIES
83449A0 56
Page 29

ORGINALANVISNINGAR
SYMBOLINDEX
Vinschinstallationsguide
Alla vinschsituationer innebär risk för personskador. För att minimera denna risk är det viktigt att noga läsa dessa anvisningar och Grundläggande
guide för vinschteknik. Lär dig hur man sköter vinschen innan du använder den och var alltid uppmärksam på säkerhet. I denna guide vill vi
beskriva många grundläggande regler om säker vinschning. Läs Grundläggande guide för vinschteknik för ytterligare information om vinschen och
korrekta sätt att rigga den. Kom ihåg att eftersom varje vinschsituation är olika är det viktigt att du alltid använder gott omdöme och genomgående
koncentrerar dig på säkerheten.
Förvara denna bruksanvisning och andra trycksaker som medföljer denna sats för framtida referens. Dessa trycksaker medföljer denna sats:
Grundläggande vinschtekniksguide, Specifikationer, Konformitetsdeklaration, Garantiinformation, Vinschinstallationsguide och en Bruksanvisning
för syntetisk lina (tillval). Om någon av dessa saknas, kontakta oss på telefonnumren nedan eller besök www.warn.com.
INNEHÅLLSFÖRTECKNING
SÄKERHET
Symbolindex............................................................................................................................................................................ 58
Allmänna säkerhetsföreskrifter ..................................................................................................................................59-61
ANVISNINGAR
Säkra arbetsförhållanden ....................................................................................................................................................62
Lär känna din vinsch ............................................................................................................................................................. 63
Montering ...........................................................................................................................................................................64-65
Elektriska anslutningar ........................................................................................................................................................ 66
Bruksanvisning för första användning .....................................................................................................................67-69
Slutkommentar och underhåll ......................................................................................................................................... 70
SYMBOL FÖRKLARING
Läs all produktlitteratur
Ha alltid på dig skydd för
öron och ögon
Använd aldrig vinschen
som lyftkran
Placera lasten rätt i
krokens hals
Linda linan runt
trummans botten
Risk för att du krossar
fi ngrar i linledaren
Risk för att genomborra
eller skära händerna
Risk för explosion eller
bristning
SYMBOL FÖRKLARING
Ha alltid på dig
läderhandskar
Flytta inte människor
Använd alltid
medföljande krokstropp
Belasta aldrig krokens
spets eller spärr
Linda aldrig lina över
trummans topp
Klämpunkt på linledare
Risk för het yta
Risk för brand och
brännskador
WARN® och WARN s logo är regis trerade va rumärken s om tillhör Wa rn Industr ies Inc.
© 2012 Warn Industries, Inc.
WARN INDUSTRIES
57
Warn Industries, Inc.
12900 SE Capps Road
Clackamas, OR 97015
USA
Kundservice: (800) 543-9276
Fax utanför USA: (503) 722-3005
Fax: (503) 722-3000
www.warn.com
Risk för skarp kant
Undvik att installera
elektriska kablar nära
ställen där det fi nns risk
att kabeln kommer att
klämmas eller utsättas för
slitage
WARN INDUSTRIES
83449A0 58
Risk för rörliga delar
Isolera exponerade
ledningar
Kroka aldrig tillbaka på
linan
Page 30

ALLMÄNNA SÄKERHETSFÖRESKRIFTER
ALLMÄNNA SÄKERHETSFÖRESKRIFTER
Fara och varningar
När du läser dessa anvisningar ser du FARA, VARNINGAR,
OBSERVERA och ANM. Varje meddelande har ett speciellt
syfte. FARA är säkerhetsmeddelanden som identifi erar en
situation som kan vara farlig och som, om du inte undviker
den, kan leda till allvarlig skada eller dödsfall. VARNING är ett
säkerhetsmeddelande som antyder att situationen kan vara
farlig. Om du inte undviker den kan det leda till lindriga eller
mindre allvarliga skador. En VARNING kan också användas för
att göra dig uppmärksam på en farlig arbetsmetod. VARNING
och FARA identifi erar faran, anger hur faran kan undvikas och
varnar för vad som kan hända, om du inte undviker faran.
OBSERVERA är meddelanden att undvika skada på egendom.
ANMÄRKNINGAR innehåller ytterligare information till hjälp för
att genomföra proceduren. ARBETA PÅ ETT SÄKERT SÄTT!
FARA
RISK FÖR ATT FASTNA I RÖRLIGA DELAR
Risk för allvarlig skada eller dödsfall om dessa
anvisningar inte följs.
• Säkerställ alltid att krokens spärr är stängd och inte stöder
en last.
• Belasta aldrig krokens spets eller spärr. Belasta bara krokens
centrum.
• Använd aldrig en krok vars öppning har blivit större eller
vars spets är böjd eller vriden.
• Använd alltid en krok med en spärr.
• Se alltid till att operatören och åskådare är medvetna om
fordonets och/eller lastens stabilitet.
• Se alltid till att den anslutna ärrkontrollens sladd går fritt
från trumman, lina och riggning. Kontrollera att det inte
fi nns några sprickor, något sitter fastklämt, fransade kablar
eller lösa anslutningar. Skadade komponenter måste bytas ut
innan vinschen används.
• Dra alltid in ärrkontrollens sladd genom fönstret när den
används i fordonet.
• Kroka aldrig tillbaka på linan
FARA
RISK FÖR ATT FASTNA I RÖRLIGA DELAR
Risk för allvarlig skada eller dödsfall om dessa
anvisningar inte följs.
Allmänna säkerhetsföreskrifter:
• Lär alltid känna din vinsch. Tag dig tid att ordentligt läsa
igenom anvisningarna och/eller bruksanvisningen och/eller
den grundläggande guiden för vinschteknik så att du förstår
din vinsch och hur den fungerar.
• Överskrid aldrig vinschens eller vinschlinans angivna
kapacitet. För att minska belastningen på vinschen dubbleras
vajern med hjälp av ett brytblock.
• Ha alltid på dig kraftiga läderhandskar när du hanterar en
vinschlina.
• Använd aldrig vinschen eller vinschlinan för bogsering.
Stötbelastning kan skada, överbelasta och slita sönder linan.
• Använd aldrig vinschen till att säkra en last.
• Använd aldrig denna vinsch om du är påverkad av droger,
alkohol eller mediciner.
• Använd aldrig denna vinsch om du är under 16 år.
Säkerhetsföreskrifter för installation:
• Använd alltid en monteringsplats som är tillräckligt stark för
att motstå vinschens maximala dragkraft.
• Använd alltid klass 5 (klass 8,8 metriskt) eller bättre
monteringsbeslag.
• Svetsa aldrig monteringsbultar.
• Använd alltid monteringsbeslag, komponenter och tillbehör
som godkänts av fabriken.
• Använd aldrig bultar som är för långa.
• Genomför alltid installationen av vinschen och krokfästet
innan du ansluter ledningarna.
• Håll alltid händerna borta från vajer, ögla, krok och
linledaröppning under installation, drift samt vid in- och
utspolning.
• Placera alltid linledaren med varningen tydligt synlig på
ovansidan.
• Dra alltid först ut linan och spola upp den med belastning
innan den används. Lina som är stramt lindad minskar
chansen av ”inlindning” som kan skada linan.
FARA FARA
RISK FÖR ATT FASTNA I RÖRLIGA DELAR
Risk för allvarlig skada eller dödsfall om dessa
anvisningar inte följs.
Säkerhetsföreskrifter för vinschning:
• Titta alltid på vinschlina, krok och remmar innan du
använder vinschen. Uppsplitsad, trasslig eller skadad
vinschlina måste omedelbart bytas ut. Skadade
komponenter måste bytas ut innan vinschen används.
Skydda delar från skada.
• Avlägsna alltid ett element eller hinder som kan
hindra att vinschen körs säkert.
• Se alltid till att den utvalda förankringen klarar
belastningen och att stroppen eller kedjan inte kan
glida.
• Använd alltid medföljande krokstropp när du spolar
lina in eller ut, under installation och under drift.
• Se alltid till att den som sköter vinschen och de som
står bredvid är medvetna om fordon och/eller last.
• Var alltid medveten om hur stabilt fordonet och
lasten är under vinschning och håll alla andra borta.
Varna alla som står bredvid för eventuellt instabilt
tillstånd.
• Spola alltid av så mycket vinschlina som möjligt
vid riggning. Dubblera vajern eller välj en avlägsen
förankringspunkt.
• Ta dig alltid tid att använda rätt riggningsteknik för
dragning med vinschen.
• Rör aldrig vajer eller krok då någon annan sköter
reglaget eller då vinschen drar.
• Koppla aldrig i eller ur kopplingen om vinschen är
belastad, linan är spänd eller vajertrumman rör sig.
• Rör aldrig vajer eller krok som är spänd eller belastad.
• Stå alltid en bit ifrån vajer och last och håll andra
borta under vinschningen.
• Använd aldrig fordonet till att belasta vinschlinan.
En kombination av belastning eller stötbelastning kan
skada, överbelasta och slita sönder linan.
• Linda aldrig vinschlina runt dig själv. Använd
löpkedja, löpvajer eller trädstamsskydd på
förankringsstället.
RISK FÖR FALL ELLER ATT BLI KROSSAD
Risk för allvarlig skada eller dödsfall om dessa
anvisningar inte följs.
• Håll dig alltid ur vägen, håll händerna borta och håll
andra borta.
• Kör aldrig vinschen med mindre än 5 varv lina runt
trumman. Linan kan lossa från trumman eftersom
linans infästning i trumman inte är utformad för att
hålla en last.
• Använd aldrig vinschen som lyftkran eller för att
hänga last.
• Se alltid till att förankringen kan klara belastningen,
använd lämplig riggning och ta dig tid att rigga på rätt
sätt.
• Använd aldrig vinschen för att lyfta eller fl ytta på
människor.
• Använd aldrig överdriven kraft till att dra ut vajern i
friläge.
• Använd alltid rätt hållning och lyftteknik eller skaff a
hjälp när du hanterar och installerar produkten.
• Spola alltid på linan på trumman i den riktning
som specifi ceras på vinschens varningsetikett och/
eller i dokumentationen. Detta krävs för att den
automatiska bromsen (om den fi nns) ska fungera
riktigt.
• Spola alltid upp vajern på trumman i den riktning
som framgår av riktningsvisaren på vinschen.
• Linda alltid vajern på botten (monteringssidan) av
trumman.
• Linda aldrig vajern över trummans topp.
• Spola alltid på vajern på trumman i den riktning som
anges av etiketterna för trumrotation på vinschen
och/eller i dokumentationen. Detta krävs för att den
automatiska bromsen (om den fi nns) ska fungera
riktigt.
WARN INDUSTRIES
59 83449A0
WARN INDUSTRIES
83449A0 60
Page 31

FARA
ALLMÄNNA SÄKERHETSFÖRESKRIFTER
VARNING
SÄKRA ARBETSFÖRHÅLLANDEN
Den här bruksanvisningen innehåller
instruktioner om hur du installerar din WARNvinsch och instruktioner för hur du använder
den första gången. Läs Grundläggande guide för
vinschteknik för fullständig information om hur
du använder WARN-vinschen.
RISK FÖR SÅR OCH BRÄNNSKADOR
Risk för allvarlig skada eller dödsfall om dessa
anvisningar inte följs.
Undvik skador på händer och fi ngrar:
• Ha alltid på dig kraftiga läderhandskar när du
hanterar en vinschlina.
• Var alltid medveten om att ytor på vinschmotorn,
trumman eller vajern kan vara varma under eller efter
användning.
FARA
RISK FÖR BRAND OCH KEMISKA SKADOR
Risk för allvarlig skada eller dödsfall om dessa
anvisningar inte följs.
• Ta alltid av smycken och använd alltid
skyddsglasögon.
• Drag aldrig elkablar över vassa kanter.
• Dra aldrig elektriska ledningar nära delar som blir
heta.
• Drag aldrig elkablar genom eller i närheten av rörliga
delar.
• Placera alltid medföljande kabelskor på kablar och
poler som visas i installationsanvisningarna.
• Luta dig aldrig över batteriet när du kopplar.
• Dra aldrig elektriska ledningar över batteripoler.
• Kortslut aldrig batteripoler med metallföremål.
• Kontrollera alltid att bränsleslangar, bränsletank,
bromsledningar, elledningar osv. inte berörs av
borrningsarbete.
• Läs alltid bruksanvisningen beträff ande elektriska
kopplingar.
• Isolera och skydda alltid alla lösa ledningar och
elterminaler.
RISK FÖR SÅR OCH BRÄNNSKADOR
Om instruktionerna inte följs fi nns risk för mer eller
mindre allvarliga skador.
• Låt aldrig vinschens lina glida genom händerna.
VARNING
RISK FÖR ATT FASTNA I RÖRLIGA DELAR
Om instruktionerna inte följs fi nns risk för mer
eller mindre allvarliga skador.
Undvik skador på händer och fi ngrar:
• Lämna aldrig ärrkontrollen där den kan aktiveras
under frispolande, riggning eller när vinschen inte
används.
• Lämna aldrig vinschens ärrkontroll inkopplad när
du installerar, frispolar, riggar, utför service eller när
vinschen inte används.
OBSERVERA
UNDVIK SKADOR PÅ VINSCH OCH UTRUSTNING
• Undvik alltid att enbart dra i sidled, eftersom vajern då
kan samlas endast på trummans ena sida. Detta kan skada
vinschlina eller vinschen.
• Se alltid till att kopplingen är helt i- eller urkopplad.
• Se alltid till att fordonets ram inte skadas då fordonet
förankras under vinschning.
• Sänk aldrig ner vinschen i vatten.
• Förvara alltid ärrkontrollen på en skyddad, ren och torr
plats.
Säkerhet
Då WARN-vinschsystemet installeras skall alla
monterings- och säkerhetsföreskrifter läsas igenom
och följas.
Var alltid försiktig med elarbeten och kom ihåg
att kontrollera att inga exponerade elanslutningar
förekommer, innan vinschens ström kopplas på.
Om du vill titta på specifikationer och prestanda,
ska du läsa igenom specifikationsbladet som
levereras med vinschen.
WARN INDUSTRIES
61 83449A0
WARN INDUSTRIES
83449A0 62
Page 32

LÄR KÄNNA DIN VINSCH
MONTERING
Lär känna din vinsch
Innan du börjar skall du bekanta dig med din WARN-vinsch och alla dess delar.
Kontrollenhet
Fjärrkontrolluttag
Motor
Kopplingsspak
Transmission
(Växellåda)
Vinschtrumma
Vajer
Fjärrkontroll
Figur 1
Motor: Vinschmotorn drivs av fordonets batteri. Elmotorn driver kuggväxeln som vrider
vinschtrumman och lindar upp vajern.
Vinschtrumma: Vinschtrumman är den cylinder på vilken vajern matas upp. Trumman drivs av elmotorn
och kraftöverföringen. Vridningsriktningen kan ändras med fjärrkontrollen.
Vajer*: Vajerns diameter och längd bestäms av vinschens lastkapacitet och utformning. Vajern
är lindad runt vinschtrumman och matas genom linledaren. Den har en ögla i änden för
krokens schackelbult.
* För modeller med syntetisk lina: läs noga igenom hela Installationsguide för WARNs
syntetiska lina, som medföljer satsen.
Transmission: Nedväxlingen omvandlar vinschmotorns kraft till en stor dragkraft. Transmissionens
utformning gör att vinschen blir lättare och mer kompakt.
Kopplingsspak: Kopplingen används för att koppla ifrån spoltrumman från transmissionen, vilket gör
att trumman kan rotera fritt (kallas "frispolning"). Inkoppling av kopplingsspaken "låser"
vinschtrumman tillbaka i transmissionen.
Fjärrkontrolluttag: Fjärrkontrolluttaget är den plats där operatören kopplar in fjärrkontrollen med sladd eller
den trådlösa fjärrmottagaren (tillval) för att styra vinschen.
Kontrollenhet*: Reglerenhetens kontaktorbrytare styr ström till elmotorn från fordonets batteri så att
operatören kan ändra riktningen på vinschtrummans rotation.
* För specifika tillämpningar finns information om tillvalssatsen för att placera om
kontrollenheten hos din auktoriserade WARN-återförsäljare
eller på www.warn.com.
Fjärrkontroll: Fjärrkontrollen kopplas in i vinschens reglerenhet via fjärrkontrolluttaget, vilket gör att
man kan kontrollera vinschriktningen, samt att man kan stå på tryggt avstånd från vajern
då vinschen används.
Steg 1 – Montera vinschen
Monteringssatser för vinschar som klarar nästan
alla tillämpningar finns tillgängliga hos närmaste
återförsäljare av WARN-produkter. Kontakta Warns
återförsäljare för information om tillgängliga
produkter.
OBSERVERA
rekommenderas starkt WARNs fästplattor.
VARNING
orsaka allvarlig skada genom att genomföra installationen av
vinschen och fästa kroken innan du ansluter ledningarna.
tillräckligt stark för att motstå vinschens maximala dragkraft.
som anges av etiketterna för trumrotation på vinschen
och/eller i dokumentationen. Detta krävs för att den
automatiska bromsen (om den fi nns) ska fungera riktigt.
av trumman.
Vajern ska lindas på och av trumman på trummans
monteringssida och i den riktning som anges av
trumrotationspilen enligt etiketten på vinschen. Se
Figur 2 och 3.
bromsen ska fungera riktigt. Horisontell montering
hindrar att repet bara lindas upp på vinschens ena
ände, vilket kan skada vinschen.
kombination av bult och låsbricka, åtdragen
till rekommenderade värden, undviks vibrationer
under vinschningen. Specifikationerna listas nedan.
Monteringssystemet är avgörande för bultarnas
längd.
För bästa prestanda och de resultat du förväntar dig
Undvik att aktivera vinschen av misstag och
FARA
Använd alltid en monteringsplats som är
Använd aldrig bultar som är för långa.
FARA
Spola alltid på vajern på trumman i den riktning
FARA
Linda alltid vajern på botten (monteringssidan)
FARA
Den här vinschen ska monteras horisontellt.
Korrekt rotation krävs för att den automatiska
Genom att använda rekommenderad
Mönster för monteringsbultar:
Standard: 254 x 114,3 mm
Jämn och fl at monteringsyta, minsta tjocklek 6,4
mm
Hårdvara som ingår:
• M10 x 1,5 låsmutter med fl änsar 15 mm hex
• M10-1,5 x 35 sexkantsfl äns, 8,8, bult (4x)
• M10-1,5 x 40 sexkantsfl äns, 8,8, bult (4x)
Vridmoment: 41 till 47 Nm
Välj en monteringsplats som är tillräckligt stark
för att motstå vinschens maximala dragkraft.
1. Sätt flänsmuttrarna i vinschfötternas fickor.
2. Placera vinschen där den ska monteras.
Kontrollera bultarnas längd.
Plåttjocklek Bultlängd
7 mm 32 mm
10 mm 40 mm
13 mm 40 mm
3. Installera bulotarna och dra åt dem till 41 till 47
Nm.
4. Klipp av det elastiska band som håller vajern på
plats.
5. Sätt kopplingen i friläge.
6. Mata in vajeröglan för hand genom linledaren.
FARA
Använd alltid medföljande krokstropp.
7. Fäst kroken på vajeröglan. Fäst krokstroppen på
kroken.
8. Vrid tillbaka kopplingen tills den är helt
ikopplad.
WARN INDUSTRIES
63 83449A0
WARN INDUSTRIES
83449A0 64
Page 33

MONTERING
ELEKTRISKA ANSLUTNINGAR
Monteringsorientering
4 x M10-1,5x35
Figur 2 Horisontell orientering, fötter nedåt
2 x M10-1,5x35
Steg 2 – Installera kablaget
För att förhindra allvarlig skada eller dödsfall.
FARA
Placera alltid medföljande kabelskor på kablar och poler som
visas i installationsanvisningarna.
Hur man undviker livsfarliga skador från elbränder:
FARA
Drag aldrig elkablar över vassa kanter.
Dra aldrig elektriska ledningar nära delar som
blir heta.
Drag aldrig elkablar genom eller i närheten av
rörliga delar.
Undvik ställen som klämmer eller sliter på elkablar
då de installeras.
Isolera och skydda alltid alla lösa ledningar och
FARA
elterminaler.
OBSERVERA
att alltid ha ett fulladdat batteri och bra anslutningar. För ett 12
Volt batteri är minimikravet 650 amperetimmar kallstartström.
kan nötas eller skadas genom isoleringen vilket kan ge
upphov till kortslutning.
Både spänningssladden (röd) och jordsladden (svart)
måste vara direkt anslutna till batteriet. FARA! Anslut inte
jord till fordonets chassi.
på rätt sätt kan du behöva montera loss fordonets
instrumentbräda eller delar av karossen.
de kan fästas med buntband.
För korrekt användning av vinschen är det viktigt
Dra batterianslutningarna på ställen där de inte
Vinschens strömsladd måste anslutas till batteriet.
För att batterisladdarna ska kunna kopplas
Koppla alltid batterisladdarna på ett sådant sätt att
Strömsladdar som sitter löst eller inte är korrekt
FARA
fastsatta kan orsaka allvarlig skada eller dödsfall.
Skydda alltid strömsladdar från vassa kanter,
områden som blir så varma att de inte kan beröras
med handen och alla rörliga delar.
1. Planera hur sladdarna ska dras.
2. Fäst strömsladdarna löst längs dragningen.
3. Kontrollera att strömsladdarna är skyddade från
skarpa kanter, heta ytor och rörliga delar. Tänk
på att karossen kan röra sig eller vibrera och
skada sladdarna.
4. Inspektera noggrant sladdragningen. Är det
fint och ordentligt? Använd kabelband till att
fästa elektriska sladdar. Kabelband ska vara
fasta men inte skära in i ledningarnas isolering.
Använd elektrisk tejp eller bitar av gummislang
till att skydda elektriska sladdar och kablage
där så erfordras för att undvika slitage på de
elektriska sladdarnas isolering.
5. Fäst batterisladdar, röd (positiv) sladd FÖRST,
svart (negativ) sedan. Installera höljen där så
är lämpligt för att skydda anslutningarna. Dra
åt batteripolernas fästdon enligt fordonets
serviceanvisning.
Kontrollera att vinschen fungerar ordentligt efter
installationen.
Step 3 – (Tillval) Installation av syntetisk lina
För modeller med syntetisk lina: läs noga igenom
hela Installationsguide för WARNs syntetiska lina,
som medföljer satsen. Den innehåller detaljerade
instruktioner för att installera syntetisk lina.
2 x M10-1,5x40
Figur 3 Horisontell orientering, fötter framåt
WARN INDUSTRIES
65 83449A0
Jordsladd (svart)
Strömsladd (röd)
Figur 4. Kopplingsschema
WARN INDUSTRIES
83449A0 66
Batteri, 12 V
650 CCA minimum
Page 34

BRUKSANVISNING FÖR FÖRSTA ANVÄNDNING
BRUKSANVISNING FÖR FÖRSTA ANVÄNDNING
Steg 4 – Systemkontroll
När du har utfört en systemkontroll är det dags att
bekräfta vinschens funktion. Fortsätt till avsnitten
Bruksanvisning för första användning och
Slutkommentar och underhåll i den här handboken.
den i friläge. Transmission och vinschtrumma är inte
hopkopplade, och trumman kan rotera fritt.
K
opplingsspaken, som finns på vinschkåpan mitt
emot motorn, kontrollerar kopplingens läge. Undvik
skador genom att se till att kopplingsspaken alltid är
ordentligt till- eller frånkopplad.
Steg 5 – Bruksanvisning för första
användning
Ta dig alltid tid att helt och fullt förstå hur
FARA
vinschen och dess hantering fungerar genom att gå igenom
den grundläggande guiden för vinschteknik som medföljer
denna vinsch.
Fjärrkontrollskontakt
UT
IN
Lämna inte fjärrkontrollen inkopplad i vinschen
då den inte används. Det kan vara farligt att lämna
fjärrkontrollen inkopplad. Dessutom kan batteriet
tömmas.
Använda kopplingen:
Koppla aldrig i eller ur kopplingen om vinschen är
FARA
belastad, vajern är spänd eller vajertrumman rör sig.
URKOPPLAD
IKOPPLAD
Då kopplingen är inkopplad är kugghjulet
kopplat till vinschtrumman och kraft kan överföras
från vinschmotorn. Då kopplingen är urkopplad står
WARN INDUSTRIES
67 83449A0
Utspolning
Kör aldrig vinschen med mindre än 5 varv vajer runt
FARA
trumman. Vajern kan lossa från trumman eftersom vajerns
infästning i trumman inte är utformad för att hålla en last.
Håll alltid händerna borta från vajer, ögla, krok och
FARA
linledaröppning under installation, under drift samt vid in- och
utspolning.
Ha alltid på dig kraftiga läderhandskar när du
FARA
hanterar en vajer.
Frikoppling är oftast det snabbaste och enklaste
sättet att spola ut vajern. Innan vajern spolas
ut under frikoppling skall tillräckligt med vajer
släppas ut med motorn, så att eventuell spänning
i vajern försvinner. Koppla ur kopplingen. Då kan
fri utspolning ske för hand till dess tillräckligt med
vajer erhålls för vinschningen. Se Grundläggande
guide för vinschteknik för ytterligare information.
OBSERVERA
vinschen kallna under minst 20 minuter innan du vinschar in
vajern igen. Placera i stället kopplingen i friläge och dra ut vajern
för hand.
eller ut, vid montering eller hantering, så händer och fi ngrar
inte skadas.
Vinscha inte ut vajern mer än 10 m utan att låta
Använd alltid bifogad stropp då vajern spolas in
FARA
Inspolning med belastning
Överskrid aldrig vinschens nominella dragkraft.
FARA
Drag in vajern jämnt och tätt på trumman. Detta
förhindrar att de yttre lindningarna sjunker in i de
inre lindningarna, fastnar och skadar vajern.
Undvik chockbelastning vid spolning genom att
pulsa kontrollenhetens kontakt för att ta upp den
slaka vajern. Chockbelastning kan tillfälligt vida
överskrida vinschens och vajerns kapacitet.
Inspolning utan belastning
Rör aldrig vajer eller krok då någon annan sköter
FARA
reglaget eller då vinschen drar.
Spolning med en medhjälpare: Låt en medhjälpare
hålla krokstroppen med så mycket konstant
spänning på vajern som möjligt. Med bibehållen
spänning skall medhjälparen sedan gå mot
vinschen medan du använder reglaget för att
spola in vajern. Släpp
minst 2 m från linledarens öppning.
Spola in resten för förvaring som anges nedan.
Spolning ensam: Arrangera så att den vajer
som skall spolas in inte kinkar eller trasslar till
sig under inspolningen. Se till att all vajer som
redan fi nns på trumman är fördelad i täta och
jämna lager. Spola in tillräckligt med vajer för att
fullborda nästa hela lager på trumman. Spänn
och räta ut lagret. Upprepa förfarandet tills
kroken är minst 2 m från linledarens öppning.
Spola in resten för förvaring som anges nedan.
kontakten då kroken är
Spola in resten för förvaring
När kroken är inom 2 m från linledaren, lossa
kroken från förankringsstället eller lasten. Håll
i medföljande krokstropp och håll spänning på
vajern. Vinscha långsamt in vinschen genom att
"pulsa" drag-in-kontakten på ärrkontrollen tills
kroken är inom 1 m från linledaren.
Sluta vinscha in och fäst kroken på ett lämpligt
förankringsställe på fordonet.
OBSERVERA
Kör inte in kroken i linledaren.
Detta kan skada linledaren.
När kroken är lämpligt fäst på fordonet kör du
in återstående slack i vajern genom att "pulsa" in
resten med drag in-kontakten på fjärrkontrollen tills
det är minimalt slack kvar i vajern.
Överbelastning/överhettning
Denna vinsch är klassad för intermittent arbete.
Då motorn närmar sig en hastighet då den stannar
sker en mycket snabb värmeuppbyggnad som kan
skada motorn.
Riggning med dubbel vajer (se Grundläggande
guide för vinschteknik) minskar ampereuttaget
och minskar värmeutvecklingen i motorn. Detta
medger längre kontinuerlig användning.
WARN INDUSTRIES
83449A0 68
STRÄCKNING AV VAJERN
belastning innan den används. Vajer som är stramt lindad
minskar chansen för "inlindning" som kan skada vajern.
trumman. Vajern kan lossa från trumman eftersom vajerns
infästning i trumman inte är utformad för att hålla en last.
den sköts och används. Då den först används
måste vajern spolas upp på trumman med
minst 450 kg belastning. 450 kg belastning. Följ
nedanstående instruktioner för att sträcka vajern
på vinschtrumman på rätt sätt.
1) Använd en PLAN OCH ICKE LUTANDE plats som
är tillräckligt lång för att kunna dra
ut vajern i hela dess längd.
2) Vrid kopplingsspaken på vinschen till det
frispolande läget "Free Spool". Dra ut vajern tills
det återstår 5 varv på trumman. När vajern är
avspolad vrids kopplingsspaken på vinschen till
inkopplingsläget "Engaged".
3) Fäst repets krokförsedda ände i ett lämpligt
förankringsställe och backa bort fordonet från
förankringsstället till dess det bara är lite slack
kvar i vajern. Innan fordonet sedan lämnas skall
man dra åt handbromsen och lägga i en växel
eller sätta den i parkeringsläget och stänga av
motorn.
4) Koppla ärrkontrollen till vinschen. Stå
cirka 2,5 m från vinschen och drag in vajern
tills all slack är upplindad på vinschtrumman.
Koppla ur ärrkontrollen från vinschen. Håll
spänning i vajern med ena handen och maka
samtidigt vajern försiktigt till den sidan av
trumman som vajern är fäst på så att det inte
blir något glapp mellan varven på trumman.
Kontrollera noga att vajern spolas från trummans
undersida, inte ovansida, för annars fungerar
inte den automatiska bromsen för att hålla
lasten ordentligt. (Om vajern spolas av från
ovansidan har du använt "out" i stället för "in" på
ärrkontrollen.)
5) Följande steg skall genomföras av två personer
tillsammans för att det skall vara säkert. Om du
försöker spänna vajern ensam skall du, innan
du kliver ur fordonet för att inspektera vajern,
alltid dra åt handbromsen, lägga i en växel (eller,
Dra alltid först ut vajern och spola upp den med
FARA
Kör aldrig vinschen med mindre än 5 varv vajer runt
FARA
Vajerns livslängd är direkt beroende av hur
Page 35

BRUKSANVISNING FÖR FÖRSTA ANVÄNDNING
SLUTKOMMENTAR OCH UNDERHÅLL
för auomatväxlade fordon, ställa växelspaken i
parkeringsläge) och stänga av motorn. Kliv aldrig
ur fordonet med last på vajern. Det är absolut
nödvändigt att spänna vajern för att den skall
hålla länge. Genom att spänna vajern förhindrar
du att yttre vajerlager kommer i kläm och förstör
de inre lagren.
6) Se noga till att varje lager byggs upp jämnt så
att vajern inte skadas.
7) Räck in ärrkontrollen genom förarsidans ruta
så att fordonsföraren kan sköta den. Säg till den
som hjälper till att stå vid sidan av fordonet och
hålla sig borta från vajern. Den som hjälper till
skall signalera om vajern lindas upp ordentligt
genom att fl ytta sig utmed linledaren medan
vajern körs in. Starta motorn och lägg växeln
i neutralläge. Släpp handbromsen medan du
trycker ner bromspedalen med måttlig kraft.
Tryck in "drag in"-knappen på ärrkontrollens
reglage. Sluta vinscha när du har vinschat in
ungefär 2 meter. Lätta sakta på bromspedalen
och lägg i handbromsen. Detta förfarande gör
att det inte är någon belastning på vajern. Lägg
sedan in en växel eller i parkeringsläget och stäng
av motorn. Kliv ur fordonet och kontrollera att
vajern lindas upp jämnt på vinschtrumman och
inte sjunker in i lagret under. Om vajern sjunker
in, matar du ut vajern och upprepar det här steget
från början med högre tryck på bromspedalen.
8) När du är övertygad om att vajern lindas upp
på trumman riktigt upprepas steg 6 tills fordonet
är inom 2 m från vinschens förankringsställe.
När du väl är inom 2 m, släpper du sakta på
bromspedalen och drar sedan åt handbromsen.
Detta förfarande gör att det inte är någon
belastning på vajern. Lägg sedan in en växel eller
parkeringsläget och stäng av motorn. Kliv ur
fordonet. Ta bort kroken från förankringsstället.
Håll i den medföljande stroppen så att du håller
spänning på vajern och drag sakta in vinschen
genom att "pulsa" med "drag in"-kontakten
på ärrkontrollen tills kroken är inom 1 m från
linledaren. Sluta vinscha in och fäst kroken på ett
lämpligt förankringsställe på fordonet.
Kontrollera
Tag dig tid att ordentligt läsa igenom
anvisningarna och/eller bruksanvisningen
och/eller den grundläggande guiden för
vinschteknik så att du förstår din vinsch och
hur den fungerar
Kontrollera fästdon och se till att
de är åtdragna till rätt vridmoment.
Byt ut skadade fästdon.
Bekräfta att ledningarna till alla komponenter
är rätt och se till att alla anslutningar sitter
ordentligt.
Kontrollera att det inte fi nns några
exponerade sladdar eller poler och att
det inte fi nns några skador på sladdarnas
isolering.
Täck exponerade sladdar med kabelskor.
Reparera eller byt ut
skadade elektriska sladdar.
Inspektera vajern beträff ande skada.
Om vajern är skadad skall den omedelbart
bytas ut.
Håll vinsch, vajer och manöverkontakt rena.
Använd en ren trasa eller handduk
för att avlägsna smuts och skräp.
För att förhindra allvarlig skada eller dödsfall:
FARA
Spola alltid upp vajern på trumman i den riktning
som framgår av riktningsvisaren
på vinschen.
Linda alltid vajern runt trummans botten.
Linda aldrig vajern över trummans topp.
Innan första
användning
Efter varje
användning
Var 90:e dag
X
XX
XX
XX
XXX
X
Ta tid på dig att helt och fullt förstå hur
vinschen och dess hantering fungerar genom att
gå igenom Grundläggande Vinschtekniksguide
som tillhör denna vinsch.
För ytterligare information eller frågor,
kontakta:
WARN INDUSTRIES, INC.
12900 S.E. Capps Road, Clackamas
OR, USA 97015-8903, +1 503 722-1200,
Kundservice: 1-800-543-9276
Fråga om återförsäljare: 1-800-910-1122
eller besök www.warn.com.
OBSERVERA
Kör inte in kroken i linledaren. Detta kan skada
linledaren.
När kroken är lämpligt fäst på fordonet kör du
in återstående slack i vajern genom att "pulsa" in
resten med "drag in"-kontakten på fjärrkontrollen
tills det är minimalt slack kvar i vajern.
WARN INDUSTRIES
69 83449A0
WARN INDUSTRIES
83449A0 70
Page 36

 Loading...