

Page 1

3486.qxd 24.09.2004 18:05 Page 2
Page 2
MANUAL INSTRUCTION
ИНСТРУКЦИЯ ПО ЭКСПЛУАТАЦИИ
MINISYSTEM WITH CD/MP3
МИНИСИСТЕМА С CD/MP3 ПРОИГРЫВАТЕЛЕМ
МОДЕЛЬ VT-3486
3486.qxd 24.09.2004 18:05 Page 3
Page 3

2
ENGLISH
LCD display indicator
3486.qxd 24.09.2004 18:05 Page 2
Page 4

3
ENGLISH
LOCATION OF CONTROLS
FRONT PANEL:
1. Power button
2. Function switch (CD/TAPE/RADIO)
3. Band switch
4. Tuning knob
5. LCD display
6. Radio tuning scale
7. Remote control sensor
8. Power indicator
9. FM-STEREO indicator
9à. Mute indicator
10. Microphone jack
11. Headphones jack
12. On/Off bass extension button XBS
13. Volume up control VOLUME+
14. Volume down control VOLUME-
15. STOP button (CD/MP3 mode)
16. Skip-forward button 10+ tracks(CD/MP3
mode)
17. Skip-back button 10 - tracks (CD/MP3 mode)
18. EQUALIZER/PROGRAM button (CD/MP3
mode)
19. PLAY/PAUSE button (CD/MP3 mode)
20. Skip-forward button (CD/MP3 mode)
21. Skip-back button (CD/MP3 mode)
22. REPEAT button (CD/MP3 mode)
23. CD compartment opening
24. PAUSE key
25. STOP/EJECT key
26. Cassette Fast Forward key
27. Cassette Rewind key
28. Cassette PLAY key
29. Cassette RECORD key
30. Cassette compartment
LCD DISPLAY INDICATION
31. DBB (5-band equalizer mode)
32. ROCK (5-band equalizer mode)
33. POP (5-band equalizer mode)
34. JAZZ (5-band equalizer mode)
35. CLASSIC (5-band equalizer mode)
36. MP3 (lights up when playing MP3 discs)
37. CD (lights up when playing compact discs)
38. REP lights up when track/CD repeat function
is on)
39. "PROG" (lights up when tracks are played in
program mode)
40. Reproduced signal level scale
41. (CD/MP3 playback mode indication)
(CD/MP3 pause indication)
42. Sequence number of the track being played
REAR PANEL OF THE UNIT:
43. FM-antenna jack
44. Network cable jack
45. Right speaker jack
46. Left speaker jack
SPEAKER REAR PANEL
47. Right speaker cable jack
48. Left speaker cable jack
49. Right speaker wall mounting hole
50. Left speaker wall mounting hole
REMOTE CONTROL PANEL:
R1 - remote control power button
R2 - infrared sensor
R3 - Play button
R4 - skipping the tracks back
R5 - skipping the tracks forward
R6 - Stop button
R7 - Pause button
R8 - Equalizer button
R9 - PROGRAM button
R10 - figure buttons
R11 - 10 + figure button
R12 - REPEAT button
R13 - Volume-up button VOLUME+
R14 - Mute button MUTE
R15 - Volume-down button VOLUME-
Ensure that no water get s on or inside
the unit, do not place vases or other liquid
containers on top of the unit.
3486.qxd 24.09.2004 18:05 Page 3
Page 5
GETTING STARTED
CONNECTING THE SPEAKERS
Connect the right-speaker cable (47) to the right-speaker jack (45) on the rear panel of the system.
Connect the left-speaker cable (48) to the left-speaker jack (46) on the rear panel of the system.
The speakers can be mounted on the wall using the mounting holes located on the rear panels of the
right and left speakers (49,50).
HOW TO PUT BATTERIES IN THE REMOTE CONTROL
Insert ÀÀÀ batteries in the Remote Control; match the polarity on the batteries with the corresponding
markings in the battery compartment.
AM ANTENNA
An AM antenna is located inside the unit. Rotate the unit so as to obtain the best reception of AM radio
stations.
FM ANTENNA
Extend the antenna to its full length to obtain the best reception of FM radio stations.
STEREOPHONE JACK
For private listening , connect stereophones (not provided) to the corresponding jack (11). Adjust the
required volume level using the volume controls. After connecting the stereo phones, the sound from
speakers switches off automatically.
TURNING THE SYSTEM ON AND OFF
Press the POWER ON button (1) to turn the system on and the Power indicator (8) will light up.
Press the POWER ON button (1) again and the system will turn off.
BASS EXTENSION SYSTEM XBS
Press the On/Off bass extension button XBS (12) to enrich the sound.
VOLUME
To adjust the required volume level , press and hold VOLUME+ (13) or VOLUME- (14) control, or
respectively R13 or R15 on the Remote Control.
ANTI-SHOCK FUNCTION
The playback interruption protection can be activated in CD/MP3 mode only. The maximum period of
the function is 20 seconds.
CD PLAYBACK
Using the Function switch (CD/CASSETTE/RADIO) (2) select CD playback mode. After that CD will turn
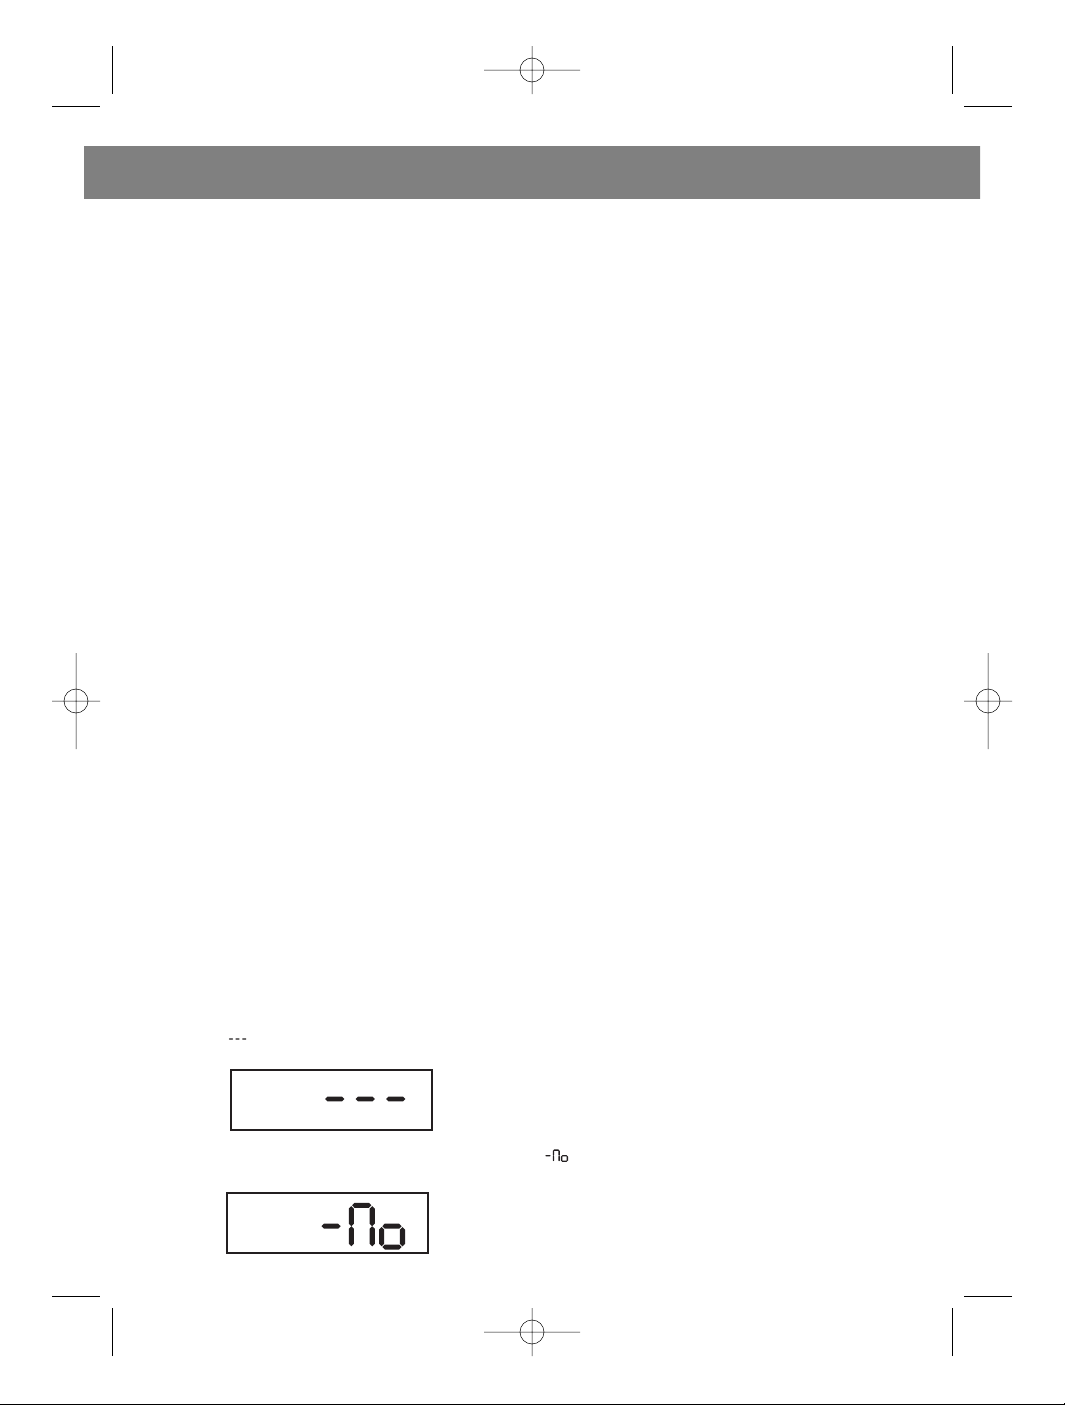
on, and " " will blink on the display as shown in FIG. 1.
[FIG. 1.]
Should there be no disc in the CD compartment, the " " indication lights up on the LCD display, as
shown in fig. 2.
[FIG.2.]
4
ENGLISH
3486.qxd 24.09.2004 18:05 Page 4
Page 6

Press CD compartment door (23) and the door will open. Insert a disc in the CD compartment and
close the door. LCD display will show the "CD" indication and the total number of tracks on the disc
(Fig.3).
[FIG.3.]
LISTENING TO CD/MP3 DISCS
• To start playing CD/MP3 discs press PLAY/PAUSE button (19) once.
• When the first track starts playing, " " symbol lights up on the display.
• In the playback mode the display shows the sequence number of the track being played.
• In CD mode the equalizer turns on.
SKIPPING BACK TO THE PREVIOUS TRACK
• Press the DN button (20) to return to the previous track.
• Each pressing of the button will cause skipping back.
SKIPPING BACK TO 10 PREVIOUS TRACKS
• Press the DN/10 button (17) to return to 10 tracks.
• Each pressing of the button will cause skipping back.
REPEATING ONE TRACK WHILE PLAYING THE DISC
• While playing the disc, press the REPEAT button (22) once to replay current track. The "REP" indication will blink on the display.
• The selected track will be played until You press the STOP button (15)
• You may also press the REPEAT button to cancel the repeat mode.
REPEATING ALL TRACKS WHILE PLAYING THE DISC
• While playing the disc, press the REPEAT button (22) twice. The "REP" indication will light up on the
display.
PLAYBACK PROGRAMMING
YOU CANNOT PROGRAME A TRACK LIST IN PLAYBACK MODE. PRESS THE STOP BUTTON (15) AND
FOLLOW THE INSTRUCTIONS BELOW:
• Press the EQ /PROG button (18). LCD display will show PROG indication and 000 symbol, as shown
on Fig. 4.
[FIG.4.]
• Press the UP (20) and DOWN (21) buttons to select the required tracks.
• Press the EQ /PROG button (18) to save the selected tracks. The display will show the sequence
numbers of the selected tracks (Fig. 4).
5
ENGLISH
Total No. of Track
Stored position
The track to store
3486.qxd 24.09.2004 18:05 Page 5
Page 7

• Repeat the above steps to program the list of all the required tracks (20 tracks maximum).
• When all 20 tracks are programmed, LCD display will show 20. From that time, continuing the programming procedure will result in modification of the previous ly saved track list.
• Once you have finished track list programming, press the PLAY/PAUSE button (19) to play the programmed tracks.
• To clear the program memory press the STOP button (15).
REPLAYING THE PROGRAMMED TRACKS
• To replay one track, repeat the steps described in section "Repeating one track while playing the
disc".
• To replay all tracks, repeat the steps described in section "Repeating all tracks while playing the
disc".
LISTENING TO THE RADIO
• Turn on the system by pressing the POWER ON button (1). Using the Function switch (CD/CASSETTE/RADIO) (2) select RADIO playback mode. Using the Band switch (3) select the required reception mode - FM, FM STEREO or AM. Adjust the required volume level pressing the VOLUME+ (13) and
VOLUME- (14) buttons.
• Using the Tuning knob (4), tune in the required radio station. Radio tuning scale (6) will show the frequency of the radio station being tuned in.
• Press the POWER ON button (1) to stop listening.
LISTENING TO CASSETTES
• Turn on the system by pressing the POWER ON button (1). Turn the Function switch
CD/TAPE/RADIO (2) into TAPE playback mode.
• Press the CASSETTE STOP/EJECT key (25) and open the Cassette compartment (3).
• Insert a cassette into the Cassette compartment (3) and close the compartment.
• Press the CASSETTE PLAY key (28) to start playing the cassette.
• Press the CASSETTE FAST FORWARD key (26) to wind the tape forward or CASSETTE FAST
REWIND key (27) to wind the tape back.
• Press the POWER ON button (1) to stop listening.
RECORDING FROM CD TO TAPE
With the built-in ALC circuit, the optimum recording quality is automatically adjusted.
• Turn on the system by pressing the POWER ON button (1). Turn the Function switch
CD/TAPE/RADIO (2) into CD playback mode.
• By pressing the CASSETTE STOP/EJECT key (25) open the Cassette compartment (3).
• Press the CASSETTE STOP/EJECT key (25), open the Cassette compartment (3) and press the
CASSETTE PAUSE key.
6
ENGLISH
3486.qxd 24.09.2004 18:05 Page 6
Page 8

• Press the CASSETTE RECORD (29) and CASSETTE PLAY (28) keys simultaneously to prepare the
unit for recording.
• Press the CD DOOR OPEN button (23) and insert CD in the compartment.
• Press the PLAY/PAUSE button (19) to start playing CD.
• Press the CASSETTE PAUSE (24) key to start recording.
• To make a pause during the recording press the CASSETTE/PAUSE key (24) again.
• Once you have finished, press the CASSETTE STOP/EJECT button (25) to stop the recording and
press the STOP button (15) to stop playing the CD.
RECORDING FROM RADIO TO TAPE
With the built-in ALC circuit, the optimum recording quality is automatically adjusted.
• Turn on the system by pressing the POWER ON button (1). Turn the Function switch
CD/TAPE/RADIO (2) into RADIO playback mode. Using the Band switch (3) select the required reception band - FM, FM STEREO or AM.
• By pressing the CASSETTE STOP/EJECT key (25) open the Cassette compartment (3).
• Press the CASSETTE STOP/EJECT key (25), open the Cassette compartment (3) and press the
CASSETTE PAUSE key.
• Press the CASSETTE RECORD (29) and CASSETTE PLAY (28) keys simultaneously to prepare the
unit for recording.
• Using the Tuning knob (4) select the required radio station.
• Press the CASSETTE PAUSE (24) key to start recording.
• To make a pause during the recording press the CASSETTE/PAUSE key (24) again.
• Once you have finished, press the CASSETTE STOP/EJECT button (25) to stop the recording.
RECORDING FROM MICROPHONE TO TAPE
• Turn on the system by pressing the POWER ON button (1). Turn the Function switch
CD/TAPE/RADIO (2) into TAPE playback mode.
• Connect the microphone (not provided) to the Microphone jack (10).
• Press the CASSETTE RECORD (29) and CASSETTE PLAY (28) keys simultaneously to start the
recording from the microphone to tape.
• Once you have finished, press the CASSETTE STOP/EJECT button (25) to stop the recording.
7
ENGLISH
3486.qxd 24.09.2004 18:05 Page 7
Page 9

SPECIFICATIONS
FREQUENCY BAND: FM1 64-108 MHz FM2 88-108 MHz ÀÌ 520-1600 KHz
CD Player: CD/CDR/CDRW/MP3 compatible
Speaker units: 4", 4 Ohm x 2, 2" 4 Ohm x 2, 4.2 W x 2
Power supply: AC 230 V / 50 Hz
Input power 14 W
NOTE: Reliable playback of CD-R and CD-RW discs cannot be guaranteed, as the quality of blank
discs and recording methods may vary.
CARE AND MAINTENANCE
• Do not expose the unit to moisture or splashes; never place liquid containers, such as vases, on top
of the unit.
• Do not place the unit in closed containers and equipment cabinets without proper ventilation.
• Ensure that the ventilation openings are not blocked with newspapers, towels, curtains etc.
• Do not place the unit in the close vicinity of open flame sources such as burning candles.
• The unit is Class I Laser Product.
• If the body of the unit becomes dusty, wipe it with a soft cloth. Remove stains with a slightly damp,
soft cloth. See that no liquid gets inside the unit. Do not use abrasives or cleaning pads as they may
damage the body of the unit.
THE MANUFACTURER RESERVES THE RIGHT TO CHANGE THE CHARACTERISTICS OF THE
DEVICE WITHOUT PRIOR WARNING
SERVICE LIFE OF THE UNIT NOT LESS 5 YEARS
8
ENGLISH
3486.qxd 24.09.2004 18:05 Page 8
Page 10

9
РУССКИЙ
ЖК - дисплей
3486.qxd 24.09.2004 18:05 Page 9
Page 11

10
РУССКИЙ
КНОПКИ УПРАВЛЕНИЯ
ВИД СПЕРЕДИ
1. кнопка включения/выключения питания
2. переключатель режимов работы
(CD/КАССЕТА/РАДИО)
3. переключатель диапазонов радио
4. ручка поиска радиостанций
5. ЖК-дисплей
6. шкала настройки радио
7. датчик дистанционного управления
8. индикатор включения
9. индикатор FM-STEREO
9а) индикатор отключения звука
10. гнездо для подключения микрофона
11. гнездо для подключения наушников
12. кнопка включения/выключения усиления
низких частот XBS
13. кнопка увеличения громкости VOLUME+
14. кнопка уменьшения громкости VOLUME-
15. кнопка СТОП (режим CD/MP3)
16. кнопка перебора треков вверх 10+
(режим CD/MP3)
17. кнопка перебора треков вниз 10 (режим CD/MP3)
18. кнопка ЭКВАЛАЙЗЕР/ПРОГРАММА
(режим CD/MP3)
19. кнопка ВОСПРОИЗВЕДЕНИЕ/ПАУЗА
(режим CD/MP3)
20. кнопка перебора треков вверх (режим
CD/MP3)
21. кнопка перебора треков вниз (режим
CD/MP3)
22. кнопка функции ПОВТОР (режим CD/MP3)
23. место открывания отсека CD
24. клавиша ПАУЗА
25. клавиша СТОП/ВЫГРУЗКА
26. клавиша перемотки кассеты впер¸д
27. клавиша перемотки кассеты назад
28. клавиша ВОСПРОИЗВЕДЕНИЕ
29. клавиша ЗАПИСЬ
30. отсек для кассеты
НАДПИСИ НА ЖК-ДИСПЛЕЕ
31. DBB - Усиление баса (режим работы 5полосного эквалайзера)
32. ROCK - Рок (режим работы 5-полосного
эквалайзера)
33. POP - Поп (режим работы 5-полосного
эквалайзера)
34. JAZZ - Джаз (режим работы 5-полосного
эквалайзера)
35. CLASSIC - Классика (режим работы 5-
полосного эквалайзера)
36. MP3 (появляется при воспроизведении
MP3-дисков)
37. CD (появляется при воспроизведении CD-
дисков)
38. REP (появляется при включении функции
повтор - трека/диска)
39. "PROG" (появляется при воспроизведении
треков в программном режиме)
40. Шкала уровня воспроизводимого сигнала
41." " (отображает режим воспроизведения
CD/MP3)
" " (отображает режим паузы CD/MP3)
42. Отображение порядкового номера
воспроизводимого трека
ЗАДНЯЯ ПАНЕЛЬ МУЗЫКАЛЬНОГО ЦЕНТРА
43. Разъ¸м для подключения FM-антенны
44. Разъ¸м для подключения сетевого кабеля
45. Разъ¸м для подключения правой колонки
46. Разъ¸м для подключения левой колонки
ЗАДНЯЯ ПАНЕЛЬ КОЛОНКИ
47. разъ¸м провода правой колонки
48. разъ¸м провода левой колонки
49. креп¸жное отверстие правой колонки для
установки на стене
50. креп¸жное отверстие левой колонки для
установки на стене
ПУЛЬТ Д/У
R1 - кнопка включения/выключения
R2 - ИК-передатчик
R3 - кнопка воспроизведения
R4 - переход к предыдущему треку
R5 - переход к следующему треку
R6 - кнопка Стоп
R7 - кнопка Пауза
R8 - кнопка Эквалайзер
R9 - кнопка ПРОГРАММИРОВАНИЕ
R 10 - числовые кнопки
R11 - кнопка 10+
R12 - кнопка ПОВТОР
R13 - кнопка увеличения громкости VOLUME+
R14 - кнопка отключения звука MUTE
R15 - кнопка уменьшения громкости VOLUME-
Не допускайте попадание воды на
поверхность и внутрь музыкального центра,
не помещайте на его поверхность вазы или
сосуды с водой.
3486.qxd 24.09.2004 18:05 Page 10
Page 12

ПОДГОТОВКА К РАБОТЕ
ПОДКЛЮЧЕНИЕ КОЛОНОК
Подключите провод правой колонки (47) к разъ¸му правой колонки (45), расположенного на
задней панели музыкального центра.
Подключите провод левой колонки (48) к разъ¸му левой колонки (46), расположенного на задней
панели музыкального центра.
Вы также можете установить колонки на стене с помощью специальных креп¸жных отверстий,
расположенных сзади правой и левой колонок (49,50).
УСТАНОВКА БАТАРЕЕК В ПУЛЬТ Д/У
Установите две батарейки класса ААА внутри пульта Д/У в соответствии с указанной
полярностью.
ИНФОРМАЦИЯ ОБ АНТЕННЕ ДИАПАЗОНА AM
Антенна диапазона AM размещена внутри корпуса музыкального центра. Для наилучшего
при¸ма радиостанций диапазона AM найдите положение наиболее уверенного приема путем
поворота корпуса.
ИНФОРМАЦИЯ ОБ АНТЕННЕ ДИАПАЗОНА FM
Для наилучшего при¸ма радиостанций в диапазоне FM установите антенну на всю ее длину.
РАЗЪЕМ ДЛЯ ПОДКЛЮЧЕНИЯ СТЕРЕОНАУШНИКОВ
Для индивидуального прослушивания подключите стереонаушники (не входят в комплект) к
соответствующему разъ¸му (11). С помощью кнопок регулировки уровня звука установите
желаемый уровень громкости. Во время подключения наушников звук в колонках автоматически
выключается.
ВКЛЮЧЕНИЕ/ВЫКЛЮЧЕНИЕ МУЗЫКАЛЬНОГО ЦЕНТРА
Для включения музыкального центра нажмите кнопку POWER ON (ВКЛЮЧЕНИЕ) (1). При этом
загорится индикатор включения музыкального центра (8).
Повторное нажатие на кнопку POWER ON (ВКЛЮЧЕНИЕ/ВЫКЛЮЧЕНИЕ) (1) приведет к
выключению музыкального центра.
СИСТЕМА УСИЛЕНИЯ НИЗКИХ ЧАСТОТ XBS
Для увеличения воспринимаемого звукового эффекта, нажмите на кнопку
включения/выключения системы усиления низких частот XBS (12).
ГРОМКОСТЬ
Для установки желаемого уровня звука нажмите и удерживайте кнопку регулировки громкости
VOLUME+ (13) или кнопку VOLUME- (14), а на пульте ДУ - кнопки R13 или R15 соответственно.
ФУНКЦИЯ "АНТИ-ШОК"
Функция защиты от прерывания воспроизведения возможна только при воспроизведении MP3дисков. Максимальное время непрерывного действия функции "АНТИ-ШОК" составляет 20
секунд.
ВОПРОИЗВЕДЕНИЕ CD-ДИСКОВ
Установите переключатель режимов работы (CD/КАССЕТА/РАДИО) (2) в режим
воспроизведения CD. При этом включится CD-плеер, на ЖК-дисплее замигает " " (см.
рис.1).
ÐÈÑ.1
11
РУССКИЙ
3486.qxd 24.09.2004 18:05 Page 11
Page 13

В случае отсутствия диска в отсеке CD на ЖК-дисплее появится надпись "No" (см. рис.2).
ÐÈÑ.2
Нажмите на крышку отсека CD (23) - крышка откроется. Вставьте внутрь отсека CD-диск и
закройте крышку. На ЖК-дисплее появится надпись "CD" и количество треков, содержащихся на
диске (см. рис.3).
ÐÈÑ.3
ПРОСЛУШИВАНИЕ CD/MP3-ДИСКА
• Для проигрывания CD/MP3-ДИСКА один раз нажмите на кнопку PLAY/PAUSE
(ВОСПРОИЗВЕДЕНИЕ /ПАУЗА) (19).
• При воспроизведении первого трека на дисплее появится символ " ".
• Во время режима воспроизведения на дисплее будет отображаться порядковый номер
воспроизводимого трека.
• В режиме CD включается эквалайзер.
ПЕРЕХОД К ПРЕДЫДУЩЕМУ ТРЕКУ
• Для возврата к предыдущему треку один раз нажмите на кнопку DN (20).
• Возврат будет происходить каждый раз после очередного нажатия кнопки.
ВОЗВРАТ К ПРЕДЫДУЩИМ 10 ТРЕКАМ
• Один раз нажмите на клавишу DN/10 (17) для возврата к предыдущим 10 трекам.
• Возврат будет происходить каждый раз после очередного нажатия кнопки.
ПОВТОР ОДНОГО ТРЕКА ВО ВРЕМЯ ВОСПРОИЗВЕДЕНИЯ ДИСКА
• Во время воспроизведения диска один раз нажмите на кнопку REPEAT (ПОВТОР) (22) для
повторного воспроизведения текущего трека. На дисплее будет мигать символ "REP".
• Выбранный трек будет воспроизводиться до тех пор, пока, Вы не нажм¸те на кнопку STOP
(СТОП) (15)
• Или дважды нажмите на кнопку REPEAT (ПОВТОР) для отмены повтора.
ПОВТОР ВСЕХ ТРЕКОВ ВО ВРЕМЯ ВОСПРОИЗВЕДЕНИЯ ДИСКА
• Во время воспроизведения диска дважды нажмите на кнопку REPEAT (ПОВТОР). На дисплее
появится символ REP.
12
РУССКИЙ
общее кол-во треков на диске
3486.qxd 24.09.2004 18:05 Page 12
Page 14

ПРОГРАММИРОВАНИЕ ВОСПРОИЗВЕДЕНИЯ
ПРОГРАММИРОВАНИЕ ДИСКА НЕВОЗМОЖНО ВО ВРЕМЯ ЕГО ВОСПРОИЗВЕДЕНИЯ. НАЖМИТЕ
КНОПКУ STOP (СТОП) (15) И ДАЛЕЕ СЛЕДУЙТЕ ПРИВЕД¨ННЫМ НИЖЕ ИНСТРУКЦИЯМ.
• Нажмите на кнопку EQ /PROG (ЭКВАЛАЙЗЕР/ПРОГРАММИРОВАНИЕ) (18). На ЖК-дисплее
появится символ PROG и символ 000 (см. рис.4).
ÐÈÑ.4
• нажмите на кнопку UP (ВВЕРХ) (20) и DOWN (ВНИЗ) (21) для поиска желаемых треков.
• нажмите на кнопку EQ /PROG (ЭКВАЛАЙЗЕР/ПРОГРАММИРОВАНИЕ) (18) для сохранения
выбранных треков. На дисплее будут отображаться номера сохран¸нных треков (рис.4).
• Продолжайте эту процедуру до тех пор, пока все желаемые треки не будут
запрограммированы (максимум 20 треков).
• Когда все 20 треков будут запрограммированы, на ЖК-дисплее появится цифра 20. С этого
момента в случае продолжения процедуры программирования предыдущий список треков
будет изменен.
• По окончании ввода треков в программу, один раз нажмите на кнопку PLAY/PAUSE
(ВОСПРОИЗВЕДЕНИЕ/ПАУЗА) (19) для последующего воспроизведения запрограммированных
треков.
• Для очистки памяти ввода нажмите на кнопку STOP (СТОП) (15).
ПОВТОРЕНИЕ ВОСПРОИЗВЕДЕНИЯ ЗАПРОГРАММИРОВАННЫХ ТРЕКОВ
• Для повторного проигрывания одного трека повторите шаги, описанные в разделе "Повтор
одного трека во время воспроизведения диска".
• Для повторного воспроизведения всех треков повторите шаги, описанные в разделе "Повтор
всех треков во время воспроизведения диска".
ПРОСЛУШИВАНИЕ РАДИО
• Включите музыкальный центр, нажав на кнопку POWER ON (ВКЛЮЧЕНИЕ/ВЫКЛЮЧЕНИЕ) (1).
Установите переключатель режимов работы CD/TAPE/RADIO (2) в положение RADIO (РАДИО). С
помощью переключателя диапазонов (3) выберите желаемый диапазон приема - FM, FM STEREO
или AM. Кнопками VOLUME+ (13) и VOLUME- (14) установите желаемый уровень громкости.
• С помощью ручки настройки (4) найдите желаемую радиостанцию. Шкала настройки радио
(6) покажет частоту радиостанции, на которую настроено радио.
• По окончании прослушивания нажмите на кнопку POWER ON
(ВКЛЮЧЕНИЕ./ВЫКЛЮЧЕНИЕ) (1).
13
РУССКИЙ
Позиция трека в программе Номер сохраненного трека
3486.qxd 24.09.2004 18:05 Page 13
Page 15

ПРОСЛУШИВАНИЕ КАССЕТЫ
• Включите музыкальный центр, нажав на кнопку POWER ON (ВКЛЮЧЕНИЕ/ВЫКЛЮЧЕНИЕ). (1).
Установите переключатель режимов работы CD/TAPE/RADIO (2) в положение TAPE (КАССЕТА).
• Нажмите на клавишу CASSETTE STOP/EJECT (СТОП/ВЫГРУЗКА) (25) и откройте кассетный
отсек (3).
• Вставьте кассету в кассетный отсек (3) и закройте его крышку.
• Нажмите клавишу CASSETTE PLAY (ВОСПРОИЗВЕДЕНИЕ) (28) для начала воспроизведения
кассеты.
• Нажмите кнопку CASSETTE FAST FORWARD (ПЕРЕМОТКА ВПЕРЕД) (26) для перемотки
вперед или CASSETTE FAST REWIND (ПЕРЕМОТКА НАЗАД) (27) - для перемотки назад.
• По окончании прослушивания нажмите на кнопку
POWER ON (ВКЛЮЧЕНИЕ/ВЫКЛЮЧЕНИЕ) (1).
ЗАПИСЬ С CD НА КАССЕТУ
Наличие встроенной системы ALC (Автоматическая Регулировка Уровня) обеспечивает
автоматическую регулировку уровня записи.
• Включите музыкальный центр, нажав на кнопку POWER ON (ВКЛЮЧЕНИЕ/ВЫКЛЮЧЕНИЕ).
Установите переключатель режимов работы CD/TAPE/RADIO (2) в положение CD.
• Нажатием на клавишу CASSETTE STOP/EJECT (СТОП/ВЫГРУЗКА) (25) откройте кассетный
отсек (3).
• Вставьте кассету в кассетный отсек (3), закройте его крышку и нажмите клавишу CASSETTE
PAUSE (ПАУЗА).
• Нажмите одновременно клавиши CASSETTE RECORD (ЗАПИСЬ) (29) и CASSETTE PLAY
(ВОСПРОИЗВЕДЕНИЕ) (28) для подготовки к началу записи.
• Нажмите кнопку CD DOOR OPEN (ОТКРЫТИЕ CD ОТСЕКА) (23) и загрузите CD в отсек.
• Нажмите кнопку PLAY/PAUSE (ВОСПРОИЗВЕДЕНИЕ/ПАУЗА) (19) для начала
воспроизведения CD.
• Для начала записи нажмите клавишу CASSETTE PAUSE (ВОСПРОИЗВЕДЕНИЕ/ПАУЗА) (24).
• Для временной остановки записи пользуйтесь клавишей CASSETTE/PAUSE (ПАУЗА) (24).
• По окончании записи нажмите кнопку CASSETTE STOP/EJECT (СТОП/ВЫГРУЗКА) (25) и
нажатием кнопки STOP (СТОП) (15) остановите воспроизведение CD.
ЗАПИСЬ С РАДИО НА КАССЕТУ
Наличие встроенной системы ALC (Автоматическая Регулировка Уровня) обеспечивает
автоматическую регулировку уровня записи.
• Включите музыкальный центр, нажав на кнопку POWER ON (ВКЛЮЧЕНИЕ/ВЫКЛЮЧЕНИЕ).
Установите переключатель режимов работы CD/TAPE/RADIO (2) в положение RADIO (РАДИО). С
помощью переключателя диапазонов (3) выберите желаемый диапазон приема - FM, FM
STEREO или AM.
• Нажатием на клавишу CASSETTE STOP/EJECT (СТОП/ВЫГРУЗКА) (25) откройте кассетный
отсек (3).
• Вставьте кассету в кассетный отсек (3), закройте его крышку и нажмите клавишу CASSETTE
PAUSE (ПАУЗА).
• Нажмите одновременно клавиши CASSETTE RECORD (ЗАПИСЬ) (29) и CASSETTE PLAY
(ВОСПРОИЗВЕДЕНИЕ) (28) для подготовки к началу записи.
• С помощью ручки настройки (4) найдите желаемую радиостанцию.
• Для начала записи нажмите клавишу CASSETTE PAUSE (ВОСПРОИЗВЕДЕНИЕ/ПАУЗА) (24).
• Для временной остановки записи пользуйтесь клавишей CASSETTE/PAUSE (ПАУЗА) (24).
• По окончании записи нажмите кнопку CASSETTE STOP/EJECT (СТОП/ВЫГРУЗКА) (25).
14
РУССКИЙ
3486.qxd 24.09.2004 18:05 Page 14
Page 16

ЗАПИСЬ С МИКРОФОНА НА КАССЕТУ
• Включите музыкальный центр, нажав на клавишу POWER ON (ВКЛЮЧЕНИЕ/ВЫКЛЮЧЕНИЕ).
Установите переключатель режимов работы CD/TAPE/RADIO (2) в положение TAPE (КАССЕТА).
• Подключите микрофон (не входит в комплект поставки) к гнезду для подключения
микрофона (10).
• Нажмите одновременно клавиши CASSETTE RECORD (ЗАПИСЬ) (29) и CASSETTE PLAY
(ВОСПРОИЗВЕДЕНИЕ) (28) для начала записи с микрофона на кассету.
• По окончании записи нажмите кнопку CASSETTE STOP/EJECT (СТОП/ВЫГРУЗКА) (25).
ТЕХНИЧЕСКИЕ ХАРАКТЕРИСТИКИ
Диапазон принимаемых частот: FM1 64-108 МГц FM2 88-108 МГц АМ 520-1600 KГц
Проигрыватель компакт-дисков: CD/CDR/CDRW/MP3 совместим
Динамические головки: 4", 4 Ом X 2, 2" 4 Ом X 2, 4.2 ВтX2
Электрическое питание: AC 230 В ~50 Гц
Потребляемая мощность 14 Âò
ПРИМЕЧАНИЕ: Надежное проигрывание дисков CD-R/CD-RW не гарантировано, т.к. качество
CD-дисков и метод их записи могут существенно меняться.
ОБСЛУЖИВАНИЕ И УХОД
• Устройство не следует подвергать воздействию сырости или брызг, a также размещать на
нем предметы, наполненные жидкостью, например вазы.
• Не размещайте устройство в тесных шкафах или стойках для аппаратуры без достаточного
пространства для вентиляции.
• Не препятствуйте доступу воздуха, закрывая вентиляционные отверстия газетами,
салфетками, занавесками и т. д.
• Не следует размещать устройство вблизи источников открытого огня, как, например, горящие
свечи.
• Устройство является лазерным изделием класса I.
• Если корпус устройства становится пыльным, протрите его мягкой тканью. Удаление пятен
производится слегка увлажненной мягкой тканью. Не допускайте попадания какой-либо
жидкости внутрь устройства. Не используйте абразивные чистящие вещества или салфетки, так
как это может повредить корпус устройства.
В ПРОЦЕССЕ ПОСТОЯННОГО УСОВЕРШЕНСТВОВАНИЯ ПРОДУКЦИИ, ПРОИЗВОДИТЕЛЬ
ОСТАВЛЯЕТ ЗА СОБОЙ ПРАВО ВНОСИТЬ ИЗМЕНЕНИЯ В ТЕХНИЧЕСКИЕ ХАРАКТЕРИСТИКИ
МИНИСИСТЕМЫ БЕЗ ПРЕДВАРИТЕЛЬНОГО УВЕДОМЛЕНИЯ ПОТРЕБИТЕЛЕЙ
СРОК СЛУЖБЫ МИНИСИСТЕМЫ НЕ МЕНЕЕ 5 ЛЕТ
15
РУССКИЙ
3486.qxd 24.09.2004 18:05 Page 15
 Loading...