

Page 1

Quick
Install
Guide
www.verizonwireless.com/Support/One-Talk/
One TalkSM T41P IP Desk Phone, Basic
Page 2
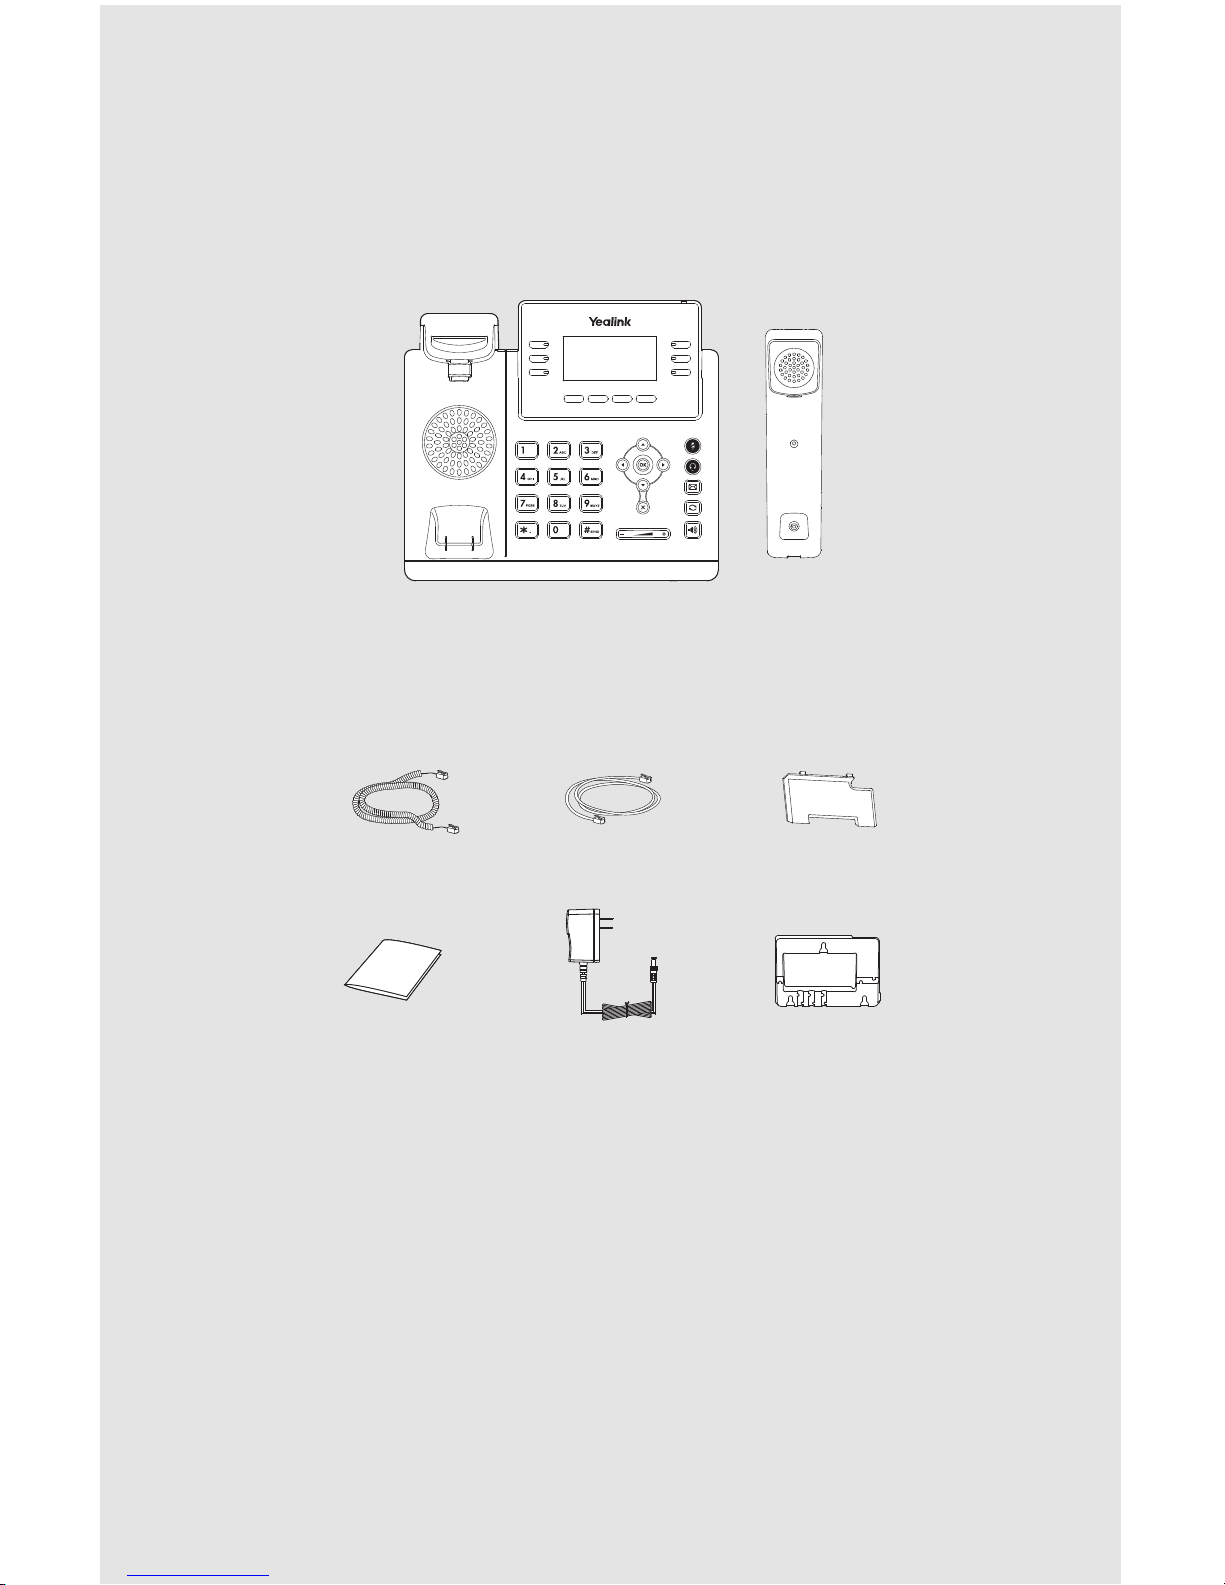
Handset cord Ethernet cable T41 Stand
Packaging contents
T41 Desk Phone
T41
Handset
T41 Power adapterQuick Install Guide
Quick Reference Guide
T41 Wall
mount bracket
(not included)
Page 3

Higher angle position
Lower angle position
Assembling the phone
1. Attach the stand.
40°
45°
2. Connect the handset and optional headset.
Note: You can also mount the phone to a wall. Purchase of the optional T41P Wall mount bracket is required.
Note: The headset and wireless headset adapter EHS36 must be purchased separately. EHS36 is used for
connecting the phone and a compatible wireless headset. For more information on how to use the EHS36,
www.verizonwireless.com/Support/One-Talk/.
Wireless headset adapter EHS36
A
B
Insert the handset cord with the
longer straight end into the back of
the phone and affix into the channel.
Page 4

© 2016 Verizon.
3. Connect power.
You have two options for power connections. Your system administrator will advise you on which
one to use.
PC connection
(optional)
PC connection
(optional)
IEEE 802.3af compliant
Data Router with PoE
Power adapter
(DC 5V)
AC power option
A
PoE (Power over
Ethernet) option
B
Note: If inline power (PoE) is provided, you don’t need to connect the power adapter. Make sure the hub/switch is
PoE-compliant.
Startup
After the One Talk phone is connected to the network and
supplied with power, it automatically begins the initialization
process. After startup, and confirming the 911 address, the
phone is ready for use.
EXT
EXTPCPC
Internet
Internet
Note: Ethernet cable from
either Wall jack or data router.
Welcome
Initializing... Please wait
Note: Check with your system administrator if any error appears during the registration process or if a specific
configuration is required for your registration.
© 2016 Verizon.
 Loading...