

Page 1
Bedienungsanleitung
Instructions for use | Notice d´utilisation
Gebruiksaanwijzing | Istruzioni per l’uso
Instrucciones de uso | Návod k obsluze
Instrukcja obsługi
Modell 78402
SPIRALSCHNEIDER
Copyright UNOLD AG | www.unold.de
Page 2

Impressum:
Copyright UNOLD AG | www.unold.de
Bedienungsanleitung Modell 78402
Stand: August 2016 /nr
Copyright ©
Mannheimer Straße 4
68766 Hockenheim
Telefon +49 (0) 62 05/94 18-0
Telefax +49 (0) 62 05/94 18-12
E-Mail info@unold.de
Internet www.unold.de
Page 3
Weitere Informationen zu unserem Sortiment erhalten Sie unter www.unold.de
Copyright UNOLD AG | www.unold.de
Page 4

INHALTSVERZEICHNIS
Copyright UNOLD AG | www.unold.de
Bedienungsanleitung Modell 78402
Technische Daten .....................................8
Symbolerklärung .......................................8
Sicherheitshinweise ..................................8
Vor dem ersten Gebrauch...........................12
Tipps zur Verwendung ...............................12
Schneideinsätze .......................................13
Bedienen .................................................14
Reinigen und Pflegen ................................15
Rezepte ...................................................16
Garantiebestimmungen .............................18
Entsorgung / Umweltschutz .......................18
Informationen für den Fachhandel ..............18
Service-Adressen ......................................19
Instructions for use Model 78402
Technical Specifications ............................20
Explanation of symbols ..............................20
Important Safeguards ................................20
Before using the appliance for the
first time..................................................24
Tips for use ..............................................24
Cutting inserts ..........................................25
Operation .................................................26
Cleaning and care .....................................27
Recipes ...................................................27
Guarantee Conditions ................................29
Waste Disposal /
Environmental Protection ..........................29
Service ....................................................19
Notice d’utilisation modèle 78402
Spécification technique ............................30
Explication des symboles ...........................30
Consignes de sécurité ...............................30
Avant la première utilisation ......................33
Astuce pour l‘utilisation ............................34
Porte-lames ..............................................35
Utilisation ................................................36
Nettoyage et entretien ...............................37
Recettes ..................................................37
Conditions de Garantie ..............................40
Traitement des déchets /
Protection de l’environnement ....................40
Service ....................................................19
Gebruiksaanwijzing model 78402
Technische gegevens ................................41
Verklaring van de symbolen ........................41
Veiligheidsvoorschriften .............................41
Vóór het eerste gebruik ..............................44
Tips voor gebruik ......................................45
Inzetmessen .............................................46
Bedienen .................................................47
Reinigen en onderhouden ..........................48
Recepten .................................................48
Garantievoorwaarden .................................50
Verwijderen van afval /
Milieubescherming ...................................50
Service ....................................................19
Page 5

INHALTSVERZEICHNIS
Copyright UNOLD AG | www.unold.de
Istruzioni per l’uso modello 78402
Dati tecnici .............................................51
Significato dei simboli ..............................51
Avvertenze di sicurezza .............................51
Prima del primo utilizzo ............................55
Consigli per l‘utilizzo .................................55
Inserti di taglio .........................................56
Uso .........................................................57
Pulizia e cura ...........................................58
Ricette ....................................................59
Norme die garanzia ...................................61
Smaltimento / Tutela dell’ambiente ............61
Service ....................................................19
Manual de Instrucciones modelo 78402
Datos técnicos .........................................62
Explicación de los símbolos .......................62
Indicaciones de seguridad .........................62
Antes del primer uso .................................66
Consejos para el uso .................................66
Cuchillas .................................................67
Manejo ....................................................68
Limpieza y cuidado ...................................69
Recetas ...................................................70
Condiciones de Garantia ............................72
Disposición/Protección del
medio ambiente .......................................72
Service ....................................................19
Návod k obsluze model 78402
Technické údaje ......................................73
Vysvětlení symbolů ....................................73
Bezpečnostní pokyny .................................73
Před prvním použitím ................................76
Tipy pro použití .........................................76
Řezací vložky............................................77
Obsluha ...................................................78
Čištění a péče ..........................................79
Recepty ...................................................80
Záruční podmínky .....................................82
Likvidace / Ochrana životného prostředí ......82
Service ....................................................19
Instrukcja obsługi Model 78402
Dane techniczne .......................................83
Objaśnienie symboli ..................................83
Dla bezpieczeństwa użytkownika ................83
Przed pierwszym użyciem ..........................86
Porady dotyczące stosowania .....................87
Wkłady z ostrzami .....................................88
Obsługa ...................................................89
Czyszczenie i pielęgnacja ..........................90
Przepisy ...................................................90
Warunki gwarancji.....................................92
Utylizacja / ochrona środowiska ..................92
Service ....................................................19
Page 6
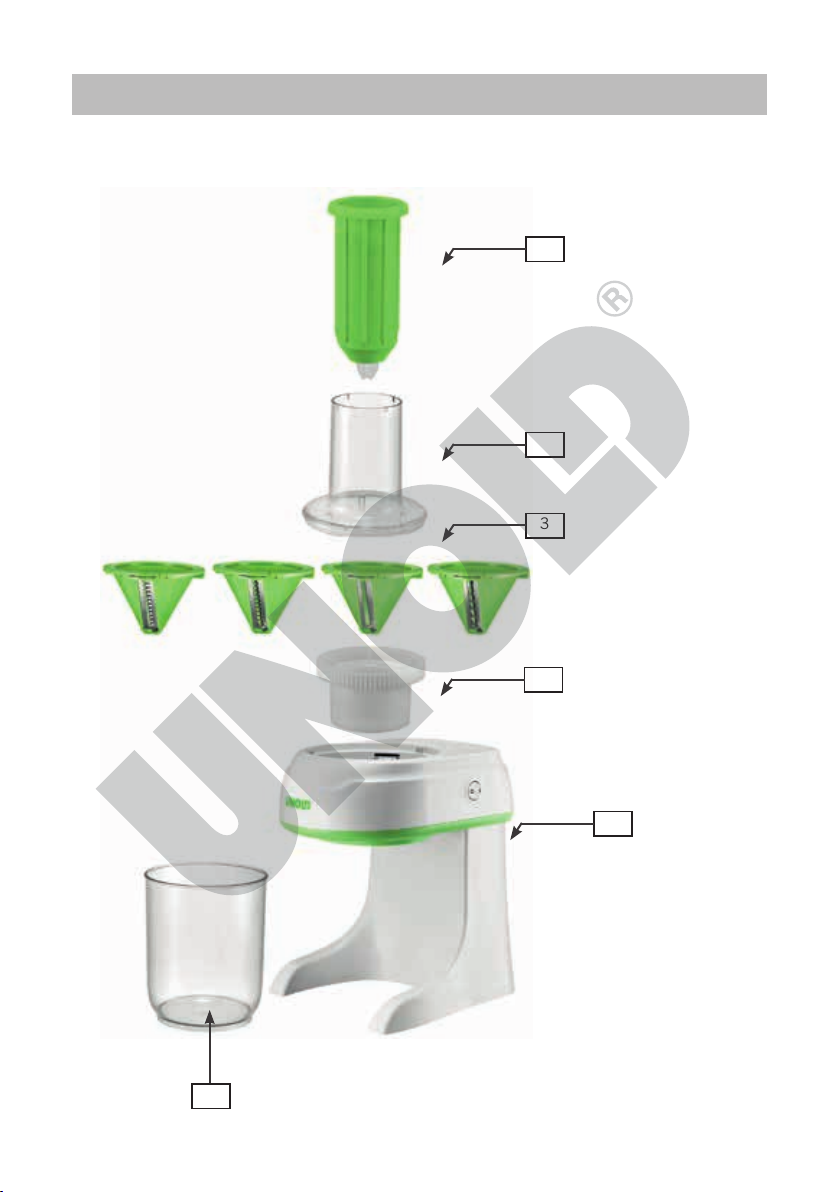
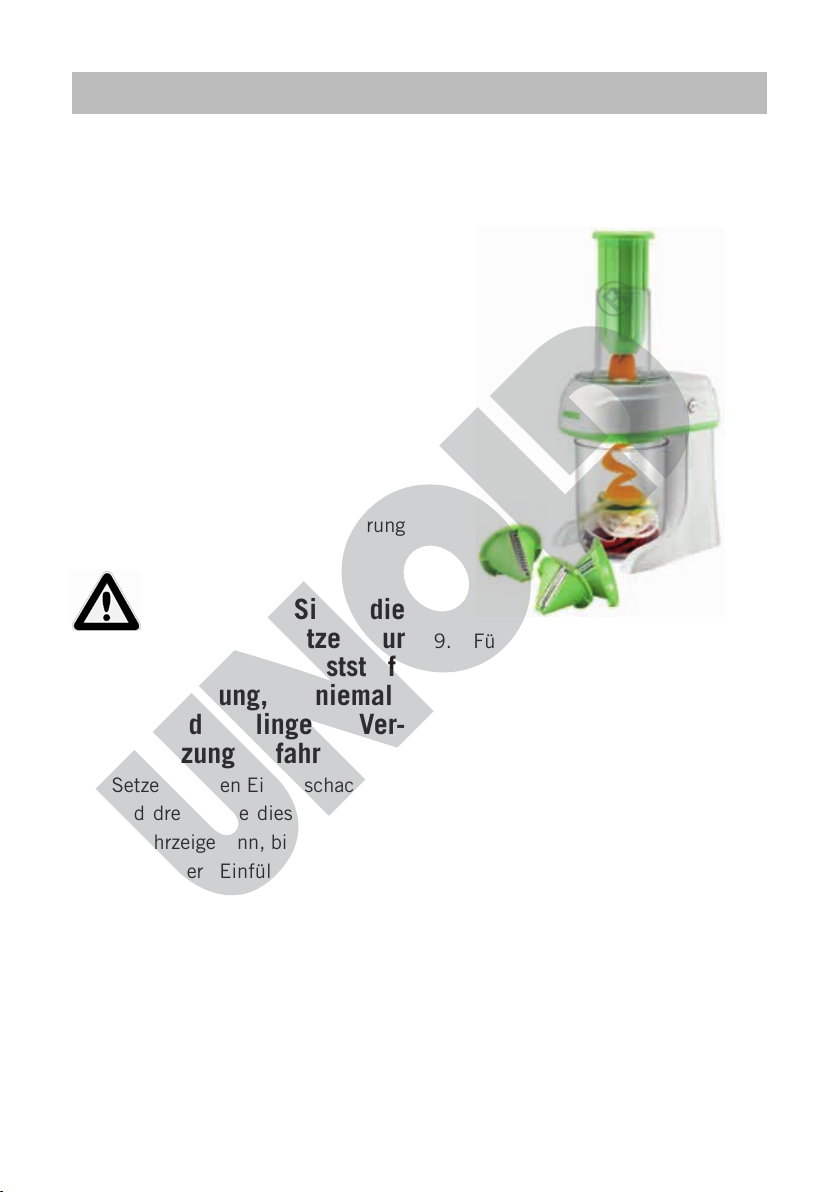
EINZELTEILE
Copyright UNOLD AG | www.unold.de
1
2
3
4
6
6
5
Page 7

EINZELTEILE
Copyright UNOLD AG | www.unold.de
D Ab Seite 8
1 Stopfer mit Krone
2 Einfüllschacht
3 Schneideinsatz
4 Antriebsrad/Schneideinsatz-
Halterung
5 EIN/AUS-Schalter
6 Auffangbehälter
GB Page 20
1 Tamper with crown
2 Filling shaft
3 Drive wheel/cutting insert holder
4 Cutting inserts
5 ON/OFF switch
6 Collection container
F Page 30
1 Poussoir à couronne
2 Cheminée de remplissage
3 Porte-lame
4 Roue d'entraînement/support de
lame
5 Interrupteur MARCHE / ARRÊT
6 Bol
NL Pagina 41
1 Stop met kartelrand
2 Vulbuis
3 Inzetmes
4 Aandrijfwiel / houder voor
inzetmes
5 AAN/UIT-schakelaar
6 Opvangbeker
I Pagina 51
1 Pressino con corona
2 Pozzetto di riempimento
3 Inserto di taglio
4 Meccanismo di azionamento/
supporto inserto di taglio
5 Interruttore ON/OFF
6 Recipiente di raccolta
E Página 62
1 Empujador con corona
2 Tubo de llenado
3 Cuchilla
4 Rueda de accionamiento/soporte
de cuchilla
5 Interruptor CON/DES
6 Recipiente colector
CZ Strany 73
1 Nacpavač s korunkou
2 Plnicí otvor
3 Řezací vložka
4 Hnací kolo/držák řezací vložky
5 Spínač ZAP/VYP
6 Záchytná nádoba
PL Strony 83
1 Popychacz
2 Pokrywa z otworem wsadowym
3 Wkład z ostrzem
4 Koło napędowe / mocowanie
wkładów z ostrzami
5 Przycisk WŁ./WYŁ.
6 Pojemnik na warzywa
7
Page 8
BEDIENUNGSANLEITUNG MODELL 78402
Copyright UNOLD AG | www.unold.de
TECHNISCHE DATEN
Leistung: 80 Watt, 220-240 V, 50/60 Hz
Maße: ca. 21,0 x 15,0 x 36,7 cm (L/B/H)
Gewicht: ca. 1,5 kg
Zuleitung: ca. 90 cm
Schutzklasse: II
Volumen Behälter: ca. 1,25 l
Material: Kunststoff
Ausstattung: zur schnellen Herstellung von z. B. Gemüsenudeln
oder Salat-/Gemüsebeilagen, innenliegende Klingen,
transparenter Auffangbehälter
Zubehör: 4 Schneideinsätze, Auffangbehälter, Reinigungsbürste,
Bedienungsanleitung mit Rezepten
Änderungen und Irrtümer in Ausstattungsmerkmalen, Technik, Farben und Design
vorbehalten
SYMBOLERKLÄRUNG
Dieses Symbol kennzeichnet eventuelle Gefahren,
die Verletzungen nach sich ziehen können oder zu
Schäden am Gerät führen.
SICHERHEITSHINWEISE
Bitte lesen Sie die folgenden
Anweisungen und bewahren
Sie diese auf.
Hinweise zu Personen im
Haushalt
1. Das Gerät kann von Kindern ab 8 Jahren und
von Personen mit ver-
8
ringerten physischen,
sensorischen oder
mentalen Fähigkeiten
oder Mangel an Erfahrung und/oder Wissen
benutzt werden, wenn
sie beaufsichtigt werden oder bezüglich des
Page 9
sicheren Gebrauchs
Copyright UNOLD AG | www.unold.de
des Gerätes unterwiesen wurden und die
daraus resultierenden
Gefahren verstanden
haben. Das Gerät ist
kein Spielzeug. Das
Säubern und die Wartung des Geräts dürfen
von Kindern nur unter
Aufsicht durchgeführt
werden.
2. Kinder unter 3 Jahren
sollten dem Gerät fernbleiben oder durchgehend beaufsichtigt wer-
den.
3. Kinder zwischen 3 und
8 Jahren sollten das
Gerät weder anschlie-
ßen noch bedienen,
säubern oder warten.
4. Kinder sollten beauf-
sichtigt werden, um
sicherzustellen, dass
sie nicht mit dem Gerät
spielen.
Elektrische Sicherheit
5. Dieses Gerät darf nicht
mit einer externen Zeitschaltuhr oder einem
Fernbedienungssystem
betrieben werden.
6. Nach Gebrauch, vor
der Reinigung oder bei
evtl. Störungen während des Betriebs bitte
immer den Netzstecker
ziehen.
7. Die Zuleitung muss vor
Feuchtigkeit geschützt
werden.
8. Der Motorblock darf
nicht mit Wasser oder
anderen Flüssigkeiten
in Kontakt kommen.
Falls dies doch einmal
geschehen sollte, muss
er vor erneuter Benutzung vollkommen trocken sein.
9. Das Gerät ist ausschließlich für den Haushaltsgebrauch oder ähnliche
Verwendungszwecke
bestimmt, z. B.
Teeküchen in Geschäf-
ten, Büros oder sonstigen Arbeitsstätten,
in landwirtschaftlichen
Betrieben,
zur Verwendung durch
Gäste in Hotels, Motels
oder sonstigen Beherbergungsbetrieben,
in Privatpensionen oder
Ferienhäusern.
10. Das Gerät ist nicht spülmaschinengeeignet.
11. Gerät und Zuleitung
aus Sicherheitsgrün-
9
Page 10
den nie auf oder in der
Copyright UNOLD AG | www.unold.de
Nähe von heißen Oberflächen abstellen oder
Hinweise zum Aufstellen und
sicheren Betrieb des Gerätes
17. Stellen Sie das Gerät
betreiben.
12. Die Zuleitung vor
Gebrauch vollständig
18. Verwenden Sie das
abwickeln.
13. Die Zuleitung darf
nicht über die Kante
19. Die Klingen der
der Arbeitsfläche herunterhängen.
14. Das Gerät oder die
Zuleitung dürfen nicht
in der Nähe von Flammen betrieben werden.
15. Das Gerät niemals
unbeaufsichtigt lassen,
wenn der Netzstecker
eingesteckt ist.
20. Halten Sie die Schneid-
16. Prüfen Sie regelmä-
ßig Stecker und Zuleitung auf Verschleiß
21. Reinigen Sie das Gerät
oder Beschädigungen.
Bei Beschädigung des
Anschlusskabels oder
anderer Teile senden
Sie das Gerät zur Über-
22. Wenn Sie die Schneidprüfung und Reparatur
an unseren Kundendienst. Unsachgemäße
Reparaturen können
zu Gefahren für den
Benutzer führen und
den Ausschluss der
23. Vermeiden Sie den KonGarantie bewirken.
10
auf eine freie und
ebene Fläche.
Gerät nur in Innenräumen.
Schneideinsätze sind
sehr scharf. Gehen Sie
entsprechend vorsichtig mit den Schneideinsätzen um und sorgen Sie dafür, dass
auch anderen Nutzern
des Gerätes die Gefahr
bewusst ist.
einsätze von Kindern
und Tieren fern.
aus hygienischen Gründen sofort nach dem
Herstellen von Gemüseoder Obstspiralen.
einsätze in Spülwasser reinigen, lassen Sie
diese nicht längere Zeit
im Wasser liegen, um
versehentliche Verletzungen zu vermeiden.
takt des Gerätes mit
heißen Oberflächen.
Page 11
24. Entfernen Sie den
Copyright UNOLD AG | www.unold.de
Schneideinsatz aus
dem Gerät, wenn Sie
das Gerät bewegen
oder zur Aufbewahrung
verstauen.
25. Schalten Sie das Gerät
am EIN/AUS-Schalter
aus und ziehen Sie den
Netzstecker, bevor Sie
Zubehörteile wechseln
oder das Gerät reinigen.
26. Der Motor des Gerätes
muss zum Stillstand
gekommen sein, bevor
Sie Zubehörteile wech-
seln.
27. Ziehen Sie ebenso
immer den Netzste-
cker, wenn Sie das
Gerät unbeaufsichtigt
lassen.
28. Schalten Sie das Gerät
niemals ein, wenn kein
Schneideinsatz angebracht ist.
29. Die Kurzbetriebszeit
beträgt 1 Minute. Lassen Sie danach das
Gerät einige Minuten
abkühlen, bevor Sie es
erneut in Betrieb nehmen.
30. Das Gerät darf nicht
mit Zubehör anderer
Hersteller oder Marken
benutzt werden, um
Schäden zu vermeiden.
Die Klingen in den Schneideinsätzen sind sehr scharf
– Verletzungsgefahr!
Öffnen Sie auf keinen Fall das Gehäuse des Gerätes.
Es besteht die Gefahr eines Stromschlages.
Der Hersteller übernimmt keine Haftung bei fehlerhafter Montage, bei unsachgemäßer oder fehlerhafter
Verwendung oder nach Durchführung von Reparaturen durch nicht autorisierte Dritte.
11
Page 12

VOR DEM ERSTEN GEBRAUCH
Copyright UNOLD AG | www.unold.de
1. Entfernen sie alle Verpackungsmaterialien und ggf. Transportsicherungen. Halten Sie Verpackungsmaterialien von Kindern
fern – Erstickungsgefahr!
TIPPS ZUR VERWENDUNG
1. Mit Ihrem neuen Spiralschneider
können Sie schnell und einfach
Gemüsenudeln, Salatbeilagen
oder auch dekorative Zutaten für
verschiedene Gerichte herstellen.
2. Das zu verarbeitende Obst oder
Gemüse sollte gleichmäßig
geformt und fest sein, damit das
Messer einwandfrei arbeiten kann.
Achten Sie darauf, nur trockene
Lebensmittel zu verarbeiten. Die
Schale von feuchten Lebensmit-
teln kann die Klinge verstopfen.
3. Ideal geeignet sind z. B.
Zucchini, Karotten, Äpfel, feste
Salatgurken, Rettiche, Kartoffeln
usw. Bitte beachten Sie, dass Sie
die Zutat ggf. halbieren müssen,
damit diese in den Einfüllschacht
passt. Ideal lassen sich Zutaten
mit einem Durchmesser von ca.
30 – 60 mm verarbeiten.
4. Nachdem die Schale von z. B.
einer Kartoffel entfernt ist und
diese mit dem Gerät verarbeitet
wurde, erhalten Sie Kartoffelspa-
2. Reinigen Sie das Gerät wie im
Kapitel „Reinigen und Pflegen“
beschrieben, mit einem feuchten
Tuch und trocknen Sie es gut ab.
ghetti, die Sie auf verschiedene
Arten verarbeiten können (z. B.
frittieren oder als Rösti mit Zwiebeln anbraten). Auch aus anderen
Zutaten wie z. B. Zucchini lassen
sich Gemüsespaghetti herstellen, die vielfältig weiterverwendet
werden können. Braten Sie z. B.
die Zucchinispaghetti einfach in
ein wenig Öl an, würzen Sie nach
Geschmack mit Zwiebeln, Knoblauch und Salz und mischen Sie
die Zucchinistreifen unter herkömmliche Spaghetti.
5. Grundsätzlich ergeben Gemüsesorten wie Zucchini lange Spiralen, während aus Kartoffeln oder
auch Roter Bete eher kurze Spiralen entstehen.
6. Oder bereiten Sie aus Gemüsestreifen Ihrer Wahl einen vitaminreichen, knackigen Gemüsespaghetti-Salat zu. Auch als
Suppeneinlage eignet sich spiralisiertes Gemüse hervorragend.
12
Page 13
Einige Rezeptideen erhalten Sie
Copyright UNOLD AG | www.unold.de
im Rezeptteil.
7. Besonders weiche Zutaten wie
Auberginen lassen sich mit dem
Gerät nicht verarbeiten.
SCHNEIDEINSÄTZE
Das Gerät verfügt über vier verschiedene Schneideinsätze
13
Page 14
BEDIENEN
Copyright UNOLD AG | www.unold.de
1. Stellen Sie sicher, dass das Gerät
am EIN/AUS-Schalter ausgeschaltet ist.
2. Schälen Sie die gewünschte Zutat
(bei einigen wenigen Zutaten wie
z. B. Zucchini nicht notwendig)
und schneiden Sie die Enden mit
einem Messer ab.
3. Prüfen Sie, ob das weiße Antriebsrad/die Halterung im Gerät sitzt.
4. Setzen Sie nun den gewünschten
Schneideinsatz in die Halterung.
Prüfen Sie, ob sich der Schneideinsatz gerade in der Halterung
befindet.
Achtung:
Berühren Sie die
Schneideinsätze nur
an der Kunststoffhalterung, niemals
an den Klingen – Ver-
letzungsgefahr!
5. Setzen Sie den Einfüllschacht auf
und drehen Sie diesen vorsichtig
im Uhrzeigersinn, bis er einrastet.
Wenn der Einfüllschacht nicht
richtig montiert ist, lässt sich das
Gerät nicht einschalten.
6. Platzieren Sie den Auffangbehälter.
7. Stecken Sie nun den Stecker in
eine Steckdose (220-240 V~,
50/60 Hz).
8. Spießen Sie die vorbereitete Zutat
auf die Krone am Ende des Stopfers auf.
9. Führen Sie den Stopfer mit dem
Lebensmittel in den Einfüllschacht und schalten Sie das
Gerät am EIN/AUS-Schalter ein.
10. Drücken Sie den Stopfer leicht
nach unten.
11. Sobald die Zutat verarbeitet ist,
schalten Sie das Gerät am EIN/
AUS-Schalter aus. Befüllen Sie
den Stopfer ggf. wieder neu und
fahren Sie wie beschrieben fort,
bis Ihre Zutaten aufgebraucht
sind. Beachten Sie dabei aber
immer, dass vor dem erneuten
Befüllen das Gerät ausgeschaltet
werden muss.
14
Page 15
12. Hinweis: Die Kurzbetriebszeit
Copyright UNOLD AG | www.unold.de
beträgt 1 Minute. Lassen Sie
danach das Gerät einige Minuten
abkühlen, bevor Sie weitere Zutaten verarbeiten.
13. Wenn Sie mit der Zubereitung fertig sind, ziehen Sie den Stecker
aus der Steckdose.
14. Lösen Sie vorsichtig den Einfüllschacht, indem Sie diesen gegen
REINIGEN UND PFLEGEN
den Uhrzeigersinn drehen und
vom Gerät herunterheben.
15. Um den Schneideinsatz einfach
zu entnehmen, drücken Sie diesen leicht von unten nach oben
aus der Halterung.
Die Klingen in den
Schneideinsätzen
sind sehr scharf –
Verletzungsgefahr!
Schalten Sie das Gerät
am EIN/AUS-Schalter
aus und ziehen Sie
den Stecker aus der
Steckdose.
Tauchen Sie das
Gerät zum Reinigen
nie in Wasser oder
eine andere Flüssigkeit ein.
1. Wischen Sie das Gehäuse mit
einem feuchten Tuch ab und
trocknen Sie es anschließend gut.
2. Spülen Sie die Schneideinsätze
unter fließendem Wasser ab, um
Lebensmittelrückstände zu entfernen. Verwenden Sie hierfür
am besten die mitgelieferte Reinigungsbürste oder eine Spülbürste, um Verletzungen durch
die Klingen zu vermeiden.
3. Die Schneideinsätze vollständig
trocknen lassen, bevor Sie sie
wieder benutzen.
4. Der Auffangbehälter, der Stopfer,
die Schneideinsätze, die Halterung sowie der Einfüllschacht
können auch im oberen Korb der
Spülmaschine gereinigt werden.
Bitte verwenden Sie ein Programm mit einer niedrigen Temperatur, um Schäden am Kunststoff zu vermeiden.
5. Wählen Sie einen staubfreien, trockenen Aufbewahrungsort. Tipp:
Bewahren Sie die Verpackung des
Gerätes auf und verstauen Sie das
Gerät bei Nichtgebrauch in diesem Karton.
15
Page 16

REZEPTE
Copyright UNOLD AG | www.unold.de
Gemüsenudeln
Stellen Sie aus einem Gemüse Ihrer
Wahl mit dem Spiralschneider leckere
Gemüsenudeln her. Diese können
wie herkömmliche Nudeln im Wasser
gegart werden. Damit die Nährstoffe
voll erhalten bleiben und das Gemüse
knackig bleibt, raten wir dazu, die
Nudeln nur kurz zu blanchieren.
Servieren Sie die Gemüsenudeln
anschließend mit einer Sauce Ihrer
Wahl.
Wenn Sie die Gemüsenudeln roh
verzehren möchten, können Sie diese
mit einem leckeren Dressing als Salat
servieren.
Zucchini-Nudeln mit Knoblauch
1 Portion
1 – 2 Zucchini, 2 gewürfelte
Knoblauchzehen, 1 EL Öl, 1 EL saure
Sahne oder Crème fraîche, Kräuter
nach Wunsch, 1 EL geriebenen
Parmesan.
Bereiten Sie mit dem Schneideinsatz
Nr. 4 breite Zucchininudeln vor.
Erhitzen Sie das Öl in der Pfanne,
lassen Sie den gewürfelten Knoblauch
im Öl leicht glasig werden, die
Zucchininudeln dazugeben und für
ca. 5-10 Minuten bis zur gewünschten
Bissfestigkeit garen. Saure Sahne,
Kräuter und Parmesan verrühren
und unter die Zucchini geben, kurz
erwärmen und servieren.
Frittierte Kartoffelnester
1 Portion
2 – 3 Kartoffeln, Salz, Paprikapulver
edelsüß, evtl. getrocknete Kräuter,
Fett für die Fritteuse
Kartoffeln in Spiralen schneiden.
Fritteuse vorbereiten, Kartoffelspiralen
in die Fritteuse geben und kurz
bräunen lassen. Herausnehmen und
das überschüssige Fett abtropfen
lassen. Nach Wunsch mit Salz und
Paprika oder den Kräutern würzen.
Sie können die Kartoffelnester sehr
gut als Beilage zu verschiedenen
Gerichten servieren oder als selbst
hergestellte abendliche Knabberei
bereitstellen.
Tipp: Bereiten Sie die Kartoffelnester
im Backofen statt in der Fritteuse zu, so
erhalten Sie eine fettarme Alternative.
Wenden Sie die Kartoffelspiralen in
einer Mischung aus Öl und Gewürzen
und backen Sie die Spiralen bei
ca. 180 °C für ca. 30 Minuten im
Backofen (regelmäßig prüfen, ob der
gewünschte Gargrad schon erreicht
ist). Sie können die Kartoffelnester
auch um Fleischstücke wie z. B.
16
Page 17

Hähnchenbrust wickeln und diese im
Copyright UNOLD AG | www.unold.de
Backofen zubereiten.
Rote-Bete-Pasta mit veganem Bärlauchpesto
1 Portion
250 g Rote Bete, 1 EL Olivenöl,
150 g Bärlauch, 50 g Pinienkerne
oder andere Nüsse nach Wahl, Salz,
Olivenöl
Bereiten Sie mit einem Schneideinsatz
nach Wahl Spiralen aus der Roten
Bete zu. Bringen Sie ausreichend
Wasser mit einer Prise Salz in einem
großen Topf zum Kochen und lassen
Sie die Rote Bete kurz blanchieren.
Herausnehmen und im heißen Öl kurz
anbraten.
Für das Pesto den Bärlauch, die
Pinienkerne, Salz und Öl in einen
Mixer geben und zu einer feinen Paste
verarbeiten. Gelingt auch leicht mit
dem ESGE-Zauberstab! Tipp: Cashew-
Nüsse mahlen und als Parmesan über
das Gericht geben.
Salat griechischer Art
1 feste Salatgurke, 1 -2 Paprikaschoten, 250 g Tomaten, ½ Zwiebel, 100 g
Feta, schwarze Oliven nach Wunsch,
Saft von ½ Bio-Zitrone, 50 ml Olivenöl, Oregano, evtl. gewürfelter Knoblauch, Salz, Pfeffer
Die gewaschene und geschälte Gurke
in Spiralen schneiden. Paprika
entkernen und in Stücke schneiden,
Tomaten und Feta ebenfalls in
Würfel schneiden. Zwiebel in Ringe
schneiden. Alle Zutaten bis auf den
Feta in einer Schüssel vermengen.
Aus Zitronensaft, Öl, Oregano, Salz,
Pfeffer und evtl. Knoblauchwürfeln
eine Salatsauce herstellen und über
das Gemüse geben. Den Feta erst zum
Schluss über den Salat geben, so wird
der Salat nicht matschig.
Obstsalat
Äpfel, Birnen, Bananen, Kiwi usw.
nach Belieben, Zitronensaft, etwas
Ananassaft, Honig nach Wunsch
Aus Äpfeln und Birnen Spiralen
schneiden. Die weiteren Obstsorten
ggf. schälen und in kleine Stücke
schneiden. Mit etwas Zitronen- und
Ananassaft sowie bei Bedarf mit etwas
Honig abschmecken.
17
Page 18
GARANTIEBESTIMMUNGEN
Copyright UNOLD AG | www.unold.de
Wir gewähren auf unsere Geräte eine Garantie von 24 Monaten, bei gewerblichem Gebrauch 12 Monate, ab dem Kaufda-
tum für Schäden, die bei bestimmungsgemäßem Gebrauch nachweislich auf Werksfehler zurückzuführen sind. Innerhalb
der Garantiezeit beheben wir Material- und Herstellungsfehler nach unserem Ermessen durch Reparatur oder Umtausch.
Unsere Garantieleistungen gelten ausschließlich für in Deutschland und Österreich verkaufte Geräte. Bei anderen Ländern
wenden Sie sich bitte an den zuständigen Importeur. Geräte, für die eine Mängelbeseitigung beansprucht wird, senden Sie
bitte zusammen mit einer Kopie des maschinell erstellten Kauf belegs, aus dem das Kaufdatum ersichtlich sein muss, sowie
einer Fehlerbeschreibung gut verpackt und freigemacht an unseren Kundendienst. Im Garantiefall werden dem Kunden ent-
standene Versandkosten zurückerstattet. Von der Garantie ausgeschlossen sind Schäden durch Verschleiß, unsachgemäße
Handhabung und Nichteinhaltung der Wartungs- und Pflegeanweisungen. Der Garantieanspruch erlischt, wenn Reparaturen
oder Eingriffe am Gerät von dritter Stelle vorgenommen werden. Eventuelle Ansprüche des Endverbrauchers gegenüber dem
Verkäufer oder Händler werden durch diese Garantie nicht eingeschränkt.
ENTSORGUNG / UMWELTSCHUTZ
Unsere Geräte werden auf hohem Qualitätsniveau für eine lange Nutzungsdauer her ge stellt. Regelmäßige
Wartung und fachge rechte Reparaturen durch unseren Kunden dienst können die Nutzungsdauer des Gerätes
verlängern. Wenn ein Gerät defekt und nicht mehr zu reparieren ist, beachten Sie bitte: Dieses Produkt darf
nicht zusammen mit dem normalen Hausmüll entsorgt werden. Sie müssen dieses Produkt an einer ausge-
wiesenen Sammelstelle zum Recycling von elektrischen oder elektronischen Geräten ab liefern. Durch das
separate Sammeln und Recyceln von Abfallprodukten helfen Sie mit, die natürlichen Ressourcen zu schonen
und stellen sicher, dass das Produkt in gesundheits- und umweltverträglicher Weise entsorgt wird.
INFORMATIONEN FÜR DEN FACHHANDEL
Hiermit erklärt die UNOLD AG, dass sich der Spiralschneider 78402 in Übereinstimmung mit den
grundlegenden Anforderungen der europäischen Richtlinie für elektromagnetische Verträglichkeit
und der Niederspannungsrichtlinie bendet.
Hockenheim, 14.5.2016
UNOLD AG, Mannheimer Straße 4, 68766 Hockenheim
Die Rezepte in dieser Bedienungsanleitung wurden von den Autoren und von der UNOLD AG
sorgfältig erwogen und geprüft, dennoch kann keine Garantie übernommen werden. Eine Haftung der
Autoren bzw. der UNOLD AG und ihrer Beauftragten für Personen-, Sach- und Vermögensschäden
ist ausgeschlossen.
Diese Anleitung kann im Internet unter www.unold.de als pdf-Datei heruntergeladen werden.
18
Page 19

SERVICE-ADRESSEN
Copyright UNOLD AG | www.unold.de
DEUTSCHLAND
Kundendienst
Telefon +49 (0) 62 05/94 18-27
Mannheimer Straße 4
68766 Hockenheim
Sie möchten innerhalb der Garantiezeit ein Gerät zur Reparatur einsenden? Auf unserer
Internetseite www.unold.de/ruecksendung können Sie sich einen Rücksendeaufkleber ausdrucken,
um damit das Paket kostenlos bei der Post abzugeben (nur für Einsendungen aus Deutschland
und Österreich).
SCHWEIZ
MENAGROS AG
Hauptstr. 23
CH 9517 Mettlen
Telefon +41 (0) 71 6346015
Telefax +41 (0) 71 6346011
E-Mail info@bamix.ch
Internet www.bamix.ch
Telefax +49 (0) 62 05/94 18-22
E-Mail service@unold.de
Internet www.unold.de
POLEN TSCHECHIEN
Quadra-Net
Dziadoszanska 10
61-248 Poznań
Internet www.quadra-net.pl
befree.cz s.r.o.
Škroupova 150
537 01 Chrudim
Telefon +42 0 46 46 01 881
E-Mail obchod@befree.cz
19
Page 20
INSTRUCTIONS FOR USE MODEL 78402
Copyright UNOLD AG | www.unold.de
TECHNICAL SPECIFICATIONS
Power: 80 watt, 220-240 V, 50/60 Hz
Dimensions: approx. 21.0 x 15.0 x 36.7 cm (L/W/H)
Weight: approx. 1.5 kg
Power cord: approx. 90 cm
Protection class: II
Capacity: approx. 1.25 l
Material: Plastic
Features: For fast preparation of vegetable noodles or salad/vegetables,
interior blades, transparent collection container
Accessories: 4 cutting inserts, collection container, cleaning brush,
operating instructions with recipes
Equipment features, technology, colours and design are subject to change without
notice. Errors and omissions excepted
EXPLANATION OF SYMBOLS
This symbol denotes a possible hazard which could
cause injury or damage to the appliance.
IMPORTANT SAFEGUARDS
Please read the following
instructions and keep them
on hand for later reference.
1. Instructions for persons
in the household
2. The appliance can be
used by children 8 years
and older and by persons with limited phys-
20
ical, sensory or mental
abilities or with lack of
experience or limited
knowledge, if they are
supervised by a person who is responsible
for their safety or they
have been instructed
with regard to safe use
Page 21

of the appliance and
Copyright UNOLD AG | www.unold.de
have understood the
dangers that can result
from use of the appliance. The appliance
is not a toy. Children
should only clean and
maintain the appliance
under supervision.
3. Children under the age
of 3 should stay away
from the appliance or
they must be under
constant supervision.
4. Children between 3 and
8 years of age should
neither connect or
operate the appliance,
nor should they clean
or maintain the appli-
ance.
5. Children should be
supervised to ensure
that they do not play
with the appliance.
Electrical safety
6. This appliance must
not be operated with
an external timer or a
remote control system.
7. After use, before cleaning or if there are
faults during operation, always unplug the
mains plug.
8. The power cord must
be protected against
moisture.
9. The motor block should
never come into contact with water or other
liquids. If this should
occur, the base must be
completely dry before
operating the appliance
again.
10. The appliance is
intended for household
use only, or for similar
areas of use, such as,
kitchenettes in busi-
nesses, offices or other
workplaces,
agricultural enterpri-
ses,
for use by guests in
hotels, motels or other
lodgings,
in private guest houses
or holiday homes.
11. The appliance is not
dishwasher safe.
12. For safety reasons,
never place or operate
the appliance on or in
the vicinity of hot surfaces.
13. Carefully and completely unwind the
power cord before use.
21
Page 22
14. The power cord must
Copyright UNOLD AG | www.unold.de
not hang down over the
edge of the work surface.
15. Do not place the appliance or power cord
near open flames during operation.
16. Never leave the appliance unattended when
the mains plug is
plugged in.
17. Check the plug and the
power cord regularly
for wear or damage. If
the power cord or other
parts are damaged,
send the appliance to
our customer service
department for inspec-
tion and repair. Unauthorised repairs can
result in serious risks
for the user and void
the warranty.
Instructions for set-up and
safe use of the appliance
18. Place the appliance on
a free and level surface.
19. Only use the appliance
indoors.
20. The blades of the cutting inserts are very
sharp. Handle cutting
inserts with appropri-
ate caution and ensure
that the other users of
the appliance are also
aware of the danger.
21. Keep the cutting inserts
away from children and
animals.
22. For hygienic reasons
clean the appliance
immediately after preparing vegetable or fruit
spirals.
23. Ensure that the appliance does not come
into contact with hot
surfaces.
24. Remove the cutting
insert from the appliance when you move
the appliance or stow it
for safekeeping.
25. Switch off the appliance via the ON/OFF
switch and unplug the
mains plug, before
changing the accessories or cleaning the
appliance.
26. The motor of the appliance must come to a
complete standstill
before you change the
accessories.
27. Likewise, always unplug
the mains plug when
22
Page 23
you leave the appliance
Copyright UNOLD AG | www.unold.de
unattended.
28. Never switch on the
appliance if a cutting
insert is not attached.
30. To avoid damage, do
not use the appliance
with accessories of
other manufacturers or
brands.
29. The brief operating time
is 1 minute. Thereafter
allow the appliance to
cool several minutes
before placing it in service again.
The blades of the cutting inserts are very sharp – danger
of injury!
Never open the housing of the appliance. This can result
in electric shock.
The manufacturer will not be liable in the event of incorrect assembly, improper or incorrect use or if
repairs are carried out by unauthorized third parties.
23
Page 24

BEFORE USING THE APPLIANCE FOR THE FIRST TIME
Copyright UNOLD AG | www.unold.de
1. Remove all packaging materials
and any transport safeguards.
Keep packaging materials away
from children – danger of suffocation!
TIPS FOR USE
1. With your new spiral cutter you
can quickly and easily prepare
vegetable noodles, salad side
dishes, or even decorative ingredients for various dishes.
2. The fruit or vegetables to be pre-
pared should be uniformly shaped
and firm so that the knife can
work faultlessly. Ensure that you
only process dry food. The peels
of wet food can clog the blade.
3. For example, zucchini, carrots,
apples, firm cucumbers, radishes,
potatoes, etc. are ideally suited.
Please note that you must halve
the ingredient, so that it can fit
into the filling shaft. Ingredients
with a diameter of 30 - 60 mm
are ideal for processing.
4. After the peel of a potato, for
example, is removed, and the
potato has been processed with
the appliance, you get potato
spaghetti that you can prepare
in different ways (e.g. frying or
browning with onions as Rösti
2. Clean the appliance as described in the section „Cleaning and
care“ with a damp cloth and dry it
thoroughly.
(fried grated potatoes). Vegetable spaghetti, which can be used
with great variety, can also be
prepared from other ingredients,
such as zucchini. For example,
simply sauté the zucchini spaghetti in a little oil, season to
taste with onions, garlic, and salt
and mix the zucchini strips into
conventional spaghetti.
5. Basically with vegetable types
like zucchini long spirals are produced, with potatoes or red beets
short spirals are produced.
6. Or prepare a vitamin-rich, crisp
vegetable spaghetti salad from
vegetable strips of your choice.
Spiralised vegetables are outstanding as an addition in soups.
Several recipe ideas are provided
in the recipe section.
7. Ingredients that are quite soft,
such as aubergines, cannot be
processed with the appliance.
24
Page 25
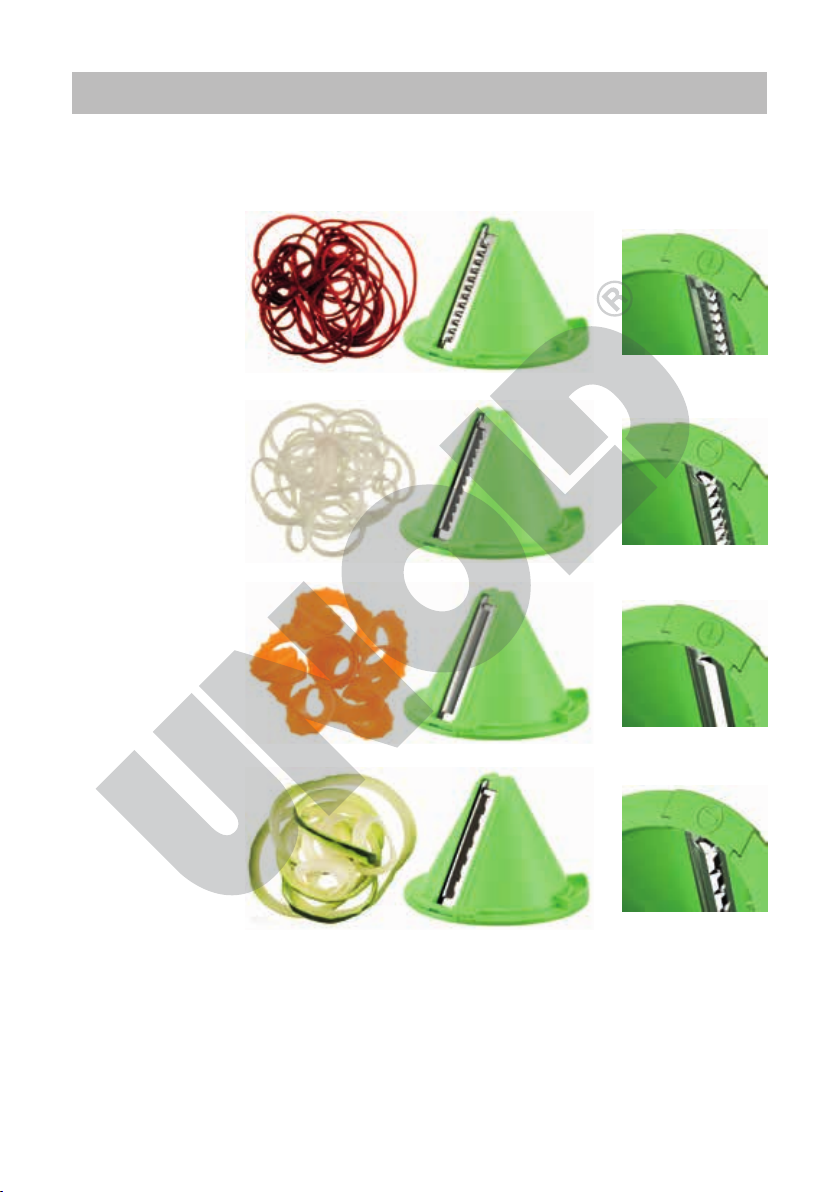
CUTTING INSERTS
Copyright UNOLD AG | www.unold.de
The appliance has four different cutting inserts
25
Page 26
OPERATION
Copyright UNOLD AG | www.unold.de
1. Ensure that the appliance is switched off via the ON/OFF switch.
2. Peel the desired ingredient (for
some ingredients, such as zucchini, this is not necessary) and
cut off the ends with a knife.
3. Check whether the white drive
wheel/the holder is seated in the
appliance.
4. Now insert the desired cutting
insert into the holder. Check whether the cutting insert is straight
in the holder.
Caution: Always touch
the cutting inserts
on the plastic holder
only, never touch the
blades – danger of
injury!
5. Introduce the tamper with the
food attached into the filling shaft
and switch on the appliance via
the ON/OFF switch.
6. Press the tamper lightly downwards.
7. As soon as the ingredient is prepared, switch off the appliance
via the ON/OFF switch. Refill the
tamper as needed and proceed as
described until your ingredients
are used up. Please note that prior
to filling the appliance again, it
must always be switched off.
8. Note: The brief operating time is
1 minute. Thereafter allow the
appliance to cool several minutes before processing more ingredients.
9. Unplug the mains plug when you
are finished preparing the vegetables.
10. Carefully detach the filling shaft
by turning it anti-clockwise and
lifting it down from the appliance.
11. To easily take out the cutting
insert, from below, press it lightly
upwards and out of the holder.
26
The blades of the cutting inserts are very
sharp – danger of injury!
Page 27
CLEANING AND CARE
Copyright UNOLD AG | www.unold.de
Switch off the
appliance via the ON/
OFF switch and unplug
the power cord from
the electrical outlet.
Never immerse the
appliance in water or
other liquids in order
to clean it.
1. Wipe off the housing with a damp
cloth and dry it thoroughly.
2. Rinse off the cutting inserts
under running water, to remove
food residues. Ideally use a dish-
washing brush or the included
cleaning brush to do this, to avoid
injuries due to the blades.
3. Allow the cutting inserts to dry
completely before reusing them.
4. Collection container, tamper, cutting inserts, holder, as well as
filling shaft can also be cleaned
in the top basket of the washing
machine. Please use a program
with a low temperature, to avoid
damaging the plastic.
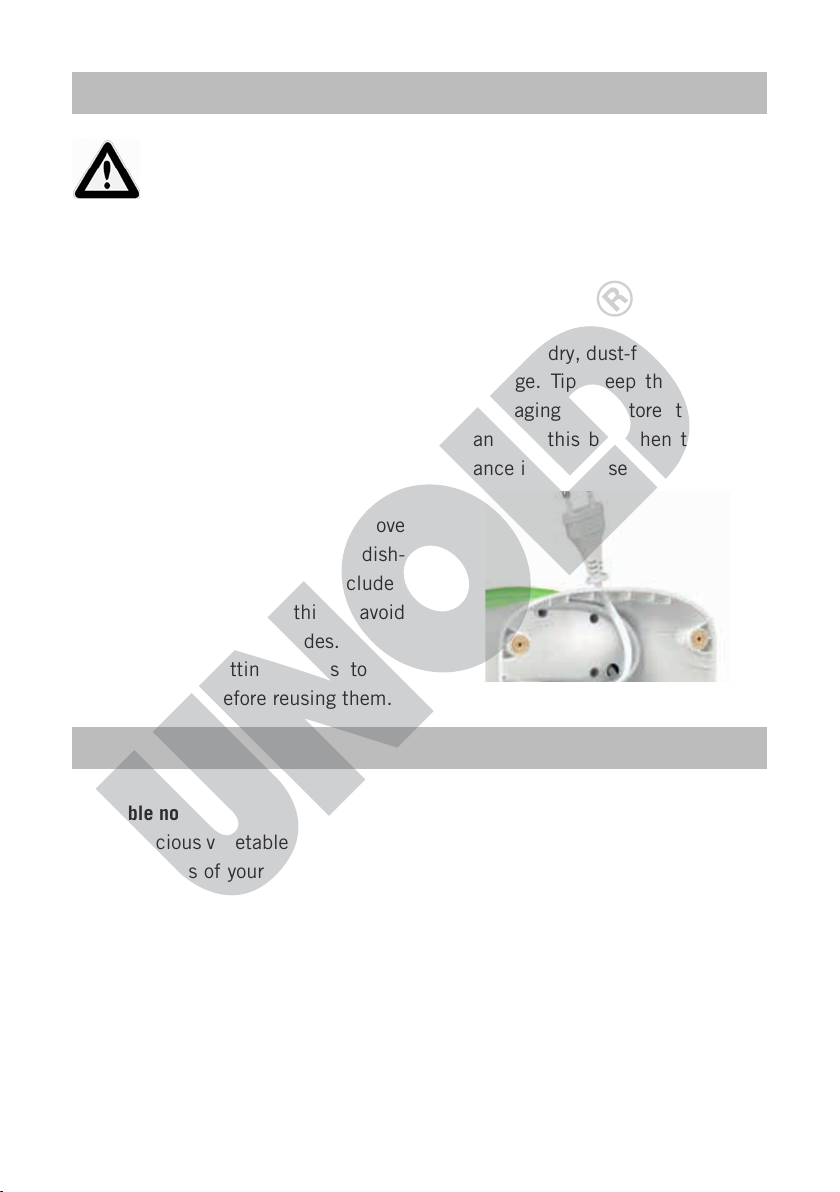
5. Select a dry, dust-free location for
storage. Tip: Keep the appliance
packaging and store the appliance in this box when the appliance is not in use.
RECIPES
Vegetable noodles
Make delicious vegetable noodles from
the vegetables of your choice with the
spiral cutter. Vegetable noodles can
be cooked in water like conventional
noodles. To ensure that the nutrients
remain fully intact and the vegetables
remain crispy, we recommend that you
only blanch the noodles briefly. Then
serve the vegetable noodles with a
sauce of your choice.
If you want to eat the vegetable
noodles raw, you can serve them as a
salad with a delicious dressing.
Zucchini noodles with garlic
1 portion
1 - 2 zucchini, 2 diced garlic cloves,
1 TBSP oil, 1 TBSP sour cream or
crème fraîche, herbs as desired,
1 TBSP grated parmesan.
27
Page 28
Prepare wide zucchini noodles with
Copyright UNOLD AG | www.unold.de
cutting insert no. 4. Heat the oil in the
pan, simmer the garlic in the oil until
slightly transparent, add the zucchini
noodles and cook for 5-10 minutes
until the desired texture (firmness) is
reached. Mix sour cream, herbs and
parmesan and stir it into the zucchini,
heat briefly and serve.
Deep-fried potato nests
1 portion
2-3 potatoes, salt, paprika powder sweet, dried herbs, if desired, fat for
the deep-fat fryer
Cut potatoes in spirals. Prepare the
deep-fat fryer, place potato spirals in
the deep-fat fryer and let them brown
briefly. Take them out and allow excess
oil to drip off. Season to taste with salt
and paprika or the herbs.
You can serve the potato nests as an
excellent accompaniment for many
dishes, or on their own as an evening
snack.
Tip: Prepare the potato nests in the
oven for a low-fat alternative. Toss
the potato spirals in a mixture of oil
and spices and bake them at approx.
180°C for approx. 30 minutes in the
oven (regularly check whether the
desired degree of cooking has already
been reached). You can also wrap the
potato nests around pieces of meat,
such as chicken breasts, and prepare
them in the oven.
Red-beet pasta with vegan wild garlic
pesto
1 portion
250 g red beets, 1 TBSP olive oil,
150 g wild garlic, 50 g pine nuts or
other nuts of your choice, salt, olive oil
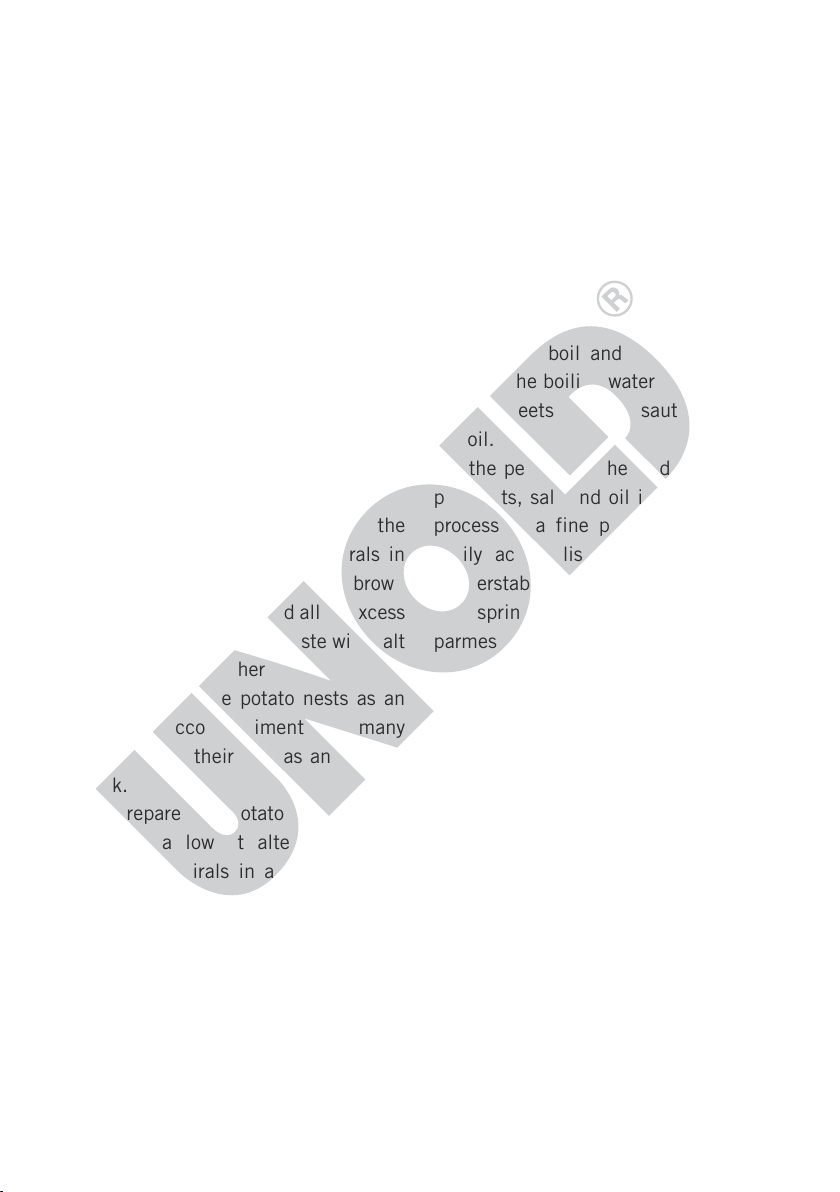
With the cutting insert of your choice,
prepare spirals of red beets. In a large
pot, bring sufficient water with a pinch
of salt to a boil and blanch the red
beets in the boiling water briefly. Take
the red beets out and sauté them in
hot oil.
For the pesto, put the wild garlic, the
pine nuts, salt and oil in a mixer and
process to a fine paste. This is also
easily accomplished with the ESGE
Zauberstab! Tip: Grind cashew nuts
and sprinkle them over the dish as
parmesan.
Greek salad
1 firm cucumber, 1-2 bell peppers,
250 g tomatoes, ½ onion, 100 g
feta, black olives as desired, the juice
of ½ organic lemon, 50 ml olive oil,
oregano, diced garlic if desired, salt,
pepper
Cut the washed and peeled cucumber
into spirals. Remove the seeds of the
bell peppers and cut them in pieces,
dice tomatoes and feta. Cut onion in
rings. Mix all ingredients except the
feta in a bowl. Make a salad dressing
of lemon juice, oil, oregano, salt,
pepper and, if desired, diced garlic,
28
Page 29

and sprinkle it over the vegetables.
Copyright UNOLD AG | www.unold.de
Sprinkle the feta over the salad, just
before serving so that the salad is not
mushy.
Cut spirals of apples and pears. Peel
the other fruits if necessary and cut
them in small pieces. Season with a
little lemon juice and pineapple juice,
and with a little honey as needed.
Fruit salad
Apples, pears, bananas, kiwi, etc. as
desired, lemon juice, a little pineapple
juice, honey as desired
GUARANTEE CONDITIONS
We grant a 24 months guarantee, and in case of commercial use a 12 months guarantee, starting from the date of purchase
for any damage demonstrably due to manufacturing defects and when the appliance has been used according to its intended
use. Within the warranty period we will remedy defective materials or workmanship through repair or replacement, at our
option. Our warranty terms apply only to appliances sold in Germany and Austria. For other countries, please contact the re-
sponsible importer. In the event of a claim for remedy of defects, please send the appliance to our after sales service, properly
packaged and postage paid, together with a copy of the automatically generated sales receipt, which must show the date of
purchase, and a description of the defect. If the defect is covered by the warranty, the customer will be reimbursed for the
shipping costs only in Germany and Austria. The warranty does not cover damage from normal wear, improper handling and
failure to comply with the maintenance and care instructions. The warranty is void if repairs or modifications are made to the
appliance by third parties. Any claims of the end consumer vis-à-vis the retailer are not limited by this warranty.
WASTE DISPOSAL / ENVIRONMENTAL PROTECTION
Our appliances are produced on a high quality level for a long lifetime. Regular maintenance and expert
repairs by our after-sales service can extend the useful life of the appliance. If an appliance is defective
and repair is not possible we ask you to follow the following instructions for disposal. Do not dispose this
appliance together with your standard household waste. Please bring this product to an approved collection
point for recycling of electric and electronic products. By separate collection and disposal of waste products
you help to protect natural resources and ensure, that the product is disposed in an adequate way to protect health and
environment.
The authors have thoroughly considered and tested the recipes included in these operating
instructions. Nevertheless, a guarantee cannot be accepted. The authors, respectively UNOLD AG
and their assignees shall not be liable for personal injuries, material damages and financial loss.
The instruction booklet is also available for download: www.unold.de
29
Page 30

NOTICE D’UTILISATION MODÈLE 78402
Copyright UNOLD AG | www.unold.de
SPÉCIFICATION TECHNIQUE
Puissance : 80 Watt, 220-240 V, 50/60 Hz
Dimensions : env. 21,0 x 15,0 x 36,7 cm (L / l / h)
Poids : env. 1,5 kg
Cordon d’alimentation : env. 90 cm
Classe de protection : II
Contenance : env. 1,25 l
Matériau : plastique
Équipement : pour obtenir rapidement par ex. des nouilles de légumes
ou des accompagnements de salade/légumes, lames
placées à l‘intérieur, bol transparent
Accessoires : 4 porte-lames, bol, brosse, mode d‘emploi avec recettes
Modifications et erreurs des caractéristiques de l‘équipement, de la technique, des couleurs et du design
réservées
EXPLICATION DES SYMBOLES
Ce symbole indique les dangers susceptibles de
provoquer des blessures ou des endommagements
de l’appareil.
CONSIGNES DE SÉCURITÉ
Veuillez lire les instructions
suivantes et les conserver.
Remarques relatives aux
personnes vivant dans le
foyer
1. L‘appareil peut être
utilisé par des enfants
30
de plus de 8 ans et par
des personnes dont les
capacités physiques,
sensorielles ou intellectuelles sont limitées ou
dont l‘expérience et/ou
les connaissances sont
Page 31

insuffisantes, si ceux-
Copyright UNOLD AG | www.unold.de
ci sont surveillés ou
s‘ils ont été formés à
une utilisation sûre de
l‘appareil et aux dangers pouvant en résulter. L‘appareil n‘est pas
un jouet. Le nettoyage
et la maintenance
de l‘appareil peuvent
être exécutés par des
clients, exclusivement
sous surveillance.
2. Les enfants de moins
de 3 ans doivent se
tenir loin de l‘appareil
ou être surveillés en
permanence.
3. Les enfants âgés de 3
à 8 ans ne doivent ni
brancher, ni utiliser, ni
nettoyer ou entretenir
l‘appareil.
4. Les enfants doivent être
surveillés afin de s’assurer qu’ils ne jouent
pas avec l’appareil.
Sécurité électrique
5. Cet appareil ne doit
pas être utilisé avec
une minuterie externe
ou avec un système de
télécommande.
6. Après utilisation, avant
le nettoyage ou en cas
d‘éventuels dysfonctionnements durant le
fonctionnement, veuillez toujours débrancher
la prise.
7. Le cordon d‘alimentation doit être protégé
de l‘humidité.
8. Le bloc-moteur ne
doit pas entrer en
contact avec de l’eau
ou d’autres liquides. Si
toutefois cela arrive, il
faut le laisser sécher
complètement avant
nouvelle utilisation.
9. L‘appareil est exclusivement destiné à un
usage ménager ou à
des fins similaires, par
ex.
une kitchenette dans
des boutiques, des
bureaux ou d‘autres
lieux de travail,
des exploitations agri-
coles,
à l‘usage des clients
dans des hôtels, motels
ou autres lieux d‘hébergement,
dans des pensions pri-
vées ou des résidences
de vacances.
31
Page 32

10. L‘appareil ne doit pas
Copyright UNOLD AG | www.unold.de
lavé dans un lave-vaisselle.
11. Pour des raisons de
sécurité, ne jamais placer ou utiliser l‘appareil et le cordon sur ou
à proximité de surfaces
chaudes.
12. Dérouler intégralement
le cordon avant utilisation.
13. Le cordon d‘alimentation ne doit jamais
pendre par dessus le
bord du plan de travail.
14. L’appareil ou le câble
ne doivent pas être
utilisés à proximité de
flammes.
15. Ne jamais laisser l’appareil sans surveillance
lorsque la prise est
branchée.
16. Vérifier régulièrement
que la prise mâle et le
cordon d‘alimentation
ne sont pas usés ni abîmés. Si le câble de raccordement ou d’autres
pièces sont abîmés,
envoyer l’appareil pour
contrôle et réparation
à notre service aprèsvente. Toute mauvaise
réparation peut exposer
l’utilisateur à des dangers et entraîner l’annulation de la garantie.
Remarques relatives
à l‘installation et au
fonctionnement sécurisé de
l‘appareil
17. Poser l’appareil sur une
surface plane et dégagée.
18. Utilisez exclusivement
l‘appareil à l‘intérieur.
19. Les lames des portelames sont très coupantes. Manipulez les
porte-lames avec prudence et assurez-vous
que les autres utilisateurs de l‘appareil soit
conscients du danger.
20. Éloignez les lames des
enfants et des animaux.
21. Nettoyez l‘appareil tout
de suite après avoir
coupé des spirales de
légumes ou de fruits
pour des raisons d‘hygiène.
22. Évitez tout contact de
l‘appareil avec des surfaces chaudes.
23. Retirez le porte-lames
de l‘appareil si vous
déplacer l‘appareil ou
le ranger.
32
Page 33

24. Éteignez l‘appareil avec
Copyright UNOLD AG | www.unold.de
le bouton Marche/arrêt
et débranchez la prise
avant de changer les
accessoires ou de nettoyer l‘appareil.
25. Le moteur de l‘appareil doit être immobile
avant de changer les
accessoires.
26. Débranchez également
la prise avant de laisser
l‘appareil sans surveillance.
27. N’allumez jamais l’appareil si la lame n‘est
pas montée.
Les lames sont coupantes - Risque de blessure !
28. La durée de fonctionnement bref est de 1
minute. Laissez l‘appareil refroidir quelques
minutes avant de le
remettre en marche.
29. L‘appareil ne doit pas
être utilisé avec des
accessoires d‘un autre
fabricant ou d‘une
autre marque pour ne
pas risquer de l‘abîmer.
N’ouvrez en aucun cas la coque de l’appareil. Risque
d‘électrocution.
Le fabricant n’est nullement responsable en cas de montage non conforme, d‘utilisation irrégulière ou non
conforme ou suite à l’exécution de réparations par des tiers non autorisés.
AVANT LA PREMIÈRE UTILISATION
1. Retirez tous les matériaux
d‘emballage et, le cas échéant,
les protections de transport. Conservez les éléments d‘emballage
hors de portée des enfants Risque d‘asphyxie !
2. Nettoyez l‘appareil à l’aide d’un
chiffon humide, comme décrit
33
Page 34

dans le chapitre « Nettoyage et
Copyright UNOLD AG | www.unold.de
Entretien » et séchez-le bien.
ASTUCE POUR L‘UTILISATION
1. Avec votre nouveau découpeur
en spirale, vous pouvez obtenir
rapidement et simplement des
nouilles de légumes, des accompagnements de salade ou d’autres
ingrédients décoratifs pour les
différents plats.
2. Les fruits ou les légumes à préparer doivent être de même forme
et fermes afin que la lame puisse
travailler sans peine. Veillez à
n’utiliser que des aliments secs.
La peau des aliments humides
peut bourrer la lame.
3. Les courgettes, les carottes, les
pommes, les concombres fermes,
les radis noirs, les pommes
de terre etc. conviennent par
exemple très bien. Veuillez noter
que l’ingrédient, le cas échéant,
doit être coupé en deux afin qu’ils
puissent entrer dans la cheminée. Un diamètre d’env. 30 – 60
mm convient parfaitement pour le
traitement.
4. Une fois que vous avez épluché par ex. les pommes de terre
et qu’elles ont été traitées avec
l’appareil, vous obtenez des spaghetti de pommes de terre que
vous pouvez préparer de diffé-
rentes manières (par ex. frire ou
comme rösti avec des oignons).
Vous pouvez également obtenir
des spaghetti de légumes à partir d’autres ingrédients par ex.
des courgettes que vous pouvez
utiliser de manière très variée.
Faites rôtir par ex. les spaghetti
de courgette simplement dans un
peu d’huile, ajoutez selon votre
goût des oignons, de l’ail du sel
et mélangez les bandes de courgette avec des spaghetti conventionnels.
5. D’une manière générale, les
légumes comme les courgettes
donnent de longues spirales tandis que les pommes de terre ou
les betteraves forment des spirales plus courtes.
6. Vous pouvez aussi préparer avec
des bandes de légumes de votre
choix une salade croquante de
spaghetti de légumes riche en
vitamines. Les légumes spiralés conviennent aussi très bien
comme complément pour la soupe
Vous trouverez quelques idées de
recette dans la partie recettes.
34
Page 35

7. Les ingrédients mous comme les
Copyright UNOLD AG | www.unold.de
aubergines ne peuvent pas être
traités par l’appareil.
PORTE-LAMES
L‘appareil dispose de plusieurs porte-lames
35
Page 36

UTILISATION
Copyright UNOLD AG | www.unold.de
1. Assurez-vous que l‘appareil est
éteint avec le bouton marche/
arrêt.
2. Épluchez les ingrédients que vous
souhaité (ce n‘est pas nécessaire
sur certains ingrédients comme
les courgettes) et coupez les
bouts avec un couteau.
3. Vérifiez que la roue d‘entraînement blanche / le support sont
dans l‘appareil.
4. Poser le porte-lame souhaité dans
le support. Vérifiez que le portelame est bien droit dans le sup-
port.
Attention : Ne sai-
sissez le porte-lame
que par le support en
plastique, jamais par
la lame – risque de
blessure !
5. Posez la cheminée de remplissage
dessus et tournez-la avec prudence dans le sens des aiguilles
d‘une montre jusqu‘à ce qu‘elle
s‘encrante. Si la cheminée de
remplissage n‘est pas bien montée, l‘appareil ne s‘allume pas.
6. Placez le bol.
7. Branchez la fiche dans une
prise de courant (220-240 V~,
50/60 Hz).
8. Piquez les ingrédients préparés
sur la couronne au bout du poussoir.
9. Introduisez le poussoir avec l‘ingrédient dans la cheminée de
remplissage et allumez l‘appareil à l‘aide de l‘interrupteur
MARCHE / ARRÊT.
10. Enfoncez légèrement le poussoir.
11. Dès que l‘ingrédient est traité,
éteignez l‘appareil avec l‘interrupteur marche/arrêt. Remplissez au
besoin le poussoir une nouvelle
fois et procédez comme décrit
jusqu‘à ce que vos ingrédients
soient tous prêts. Notez qu‘il faut
toujours éteindre l‘appareil avant
de le remplir à nouveau.
12. Remarque : La durée de fonctionnement bref est de 1 minute. Laissez l‘appareil refroidir quelques
minutes avant de traiter d‘autres
ingrédients.
13. Lorsque votre préparation est terminée, débranchez la prise.
14. Détachez prudemment la cheminée de remplissage en tournant dans le sens contraire des
aiguilles d‘une montre.
36
Page 37

15. Pour retirer simplement le porte-
Copyright UNOLD AG | www.unold.de
lame, appuyez légèrement du bas
vers le haut hors du support.
NETTOYAGE ET ENTRETIEN
Éteindre l‘appareil à
l‘aide de l‘interrupteur
MARCHE / ARRÊT et
débrancher la prise.
Ne plongez en aucun
cas l’appareil pour le
nettoyer dans de l’eau
ou un autre liquide.
1. Essuyez le corps de l‘appareil
avec un chiffon humide et séchezle ensuite soigneusement.
2. Rincez les porte-lames sous l‘eau
courante pour retirer les résidus
d‘aliment. Utilisez de préférence
la brosse jointe ou une brosse
pour la vaisselle pour de vous
blesser avec les lames.
Les lames sont
coupantes - Risque de
blessure !
3. Laissez sécher les porte-lames
complètement avant de les réutiliser.
4. Le bol, le poussoir, les portelames, le support ainsi que la
cheminée de remplissage peuvent
aussi être nettoyés dans le panier
supérieure du lave-vaisselle.
Veuillez utiliser un programme
à basse température pour éviter
d‘endommager le plastique. Un
climat agressif dans le lave-vaisselle peut émousser les lames
après un certain temps.
5. Choisir un lieu de stockage sec,
à l‘abri de la poussière. Conseil : conserver l‘emballage de
l‘appareil et ranger l‘appareil dans
ce carton en cas d‘inutilisation.
RECETTES
Nouilles de légumes
Fabriquez avec les légumes de
votre choix des nouilles de légumes
délicieuses grâce au découpeur en
spirale Elles peuvent être cuites de
la même manière que les nouilles
traditionnelles dans l‘eau. Afin que les
nutriments soient conservés et que les
légumes restent croquants, nous vous
conseillons de blanchir rapidement les
nouilles. Servez les nouilles de légume
ensuite avec une sauce de votre choix.
37
Page 38

Si vous souhaitez déguster les nouilles
Copyright UNOLD AG | www.unold.de
de légume crues, vous pouvez les
servir avec un délicieux dressing.
Nouilles de courgettes à l‘ail
1 portion
1 - 2 courgettes, 2 gousses d‘ail
hachées, 1 c.s. d‘huile, 1 c.s. de
crème acidulée ou de crème fraîche,
herbes aromatiques au choix, 1 c.s. de
parmesan râpé.
Préparez des nouilles de courgette
à l‘aide du porte-lame n° 4. Faites
chauffer l‘huile dans une poêle, faire
revenir l‘ail dans l‘huile, ajoutez les
nouilles de courgette et laissez cuire
pendant 5 - 10 minutes pour obtenir
la consistance désirée. Mélanger
la crème acidulée, les herbes et le
parmesan et ajouter aux courgettes,
réchauffer rapidement et servir.
Nids de pommes de terre frits
1 portion
2-3 pommes de terre, sel, paprika
doux, éventuellement des herbes
aromatiques séchées, graisse pour la
friteuse.
Couper les pommes de terre en spirales
Préparer la friteuse, mettre les spirales
de pommes de terre dans la friteuse et
laisser dorer. Retirer et égoutter l‘huile
excessive. Épicer selon votre goût avec
du sel et du paprika ou des herbes
aromatiques.
Vous pouvez servir les nids de pommes
de terre comme accompagnements de
différents plats ou comme grignotages
faits maison pour la soirée.
Conseil : Préparez les nids de pommes
de terre dans le four à la place de la
friteuse pour obtenir une alternative
moins grasse. Tournez les spirales de
pommes de terre dans un mélange
d‘huile et d‘épices et enfournez les
spirales à env. 180° C pendant env.
30 minutes (vérifier régulièrement si
le degré de cuisson souhaité est déjà
atteint). Vous pouvez aussi enrouler
les nids de pommes de terre autour
de morceaux de viande comme des
blancs de poulets et les préparer au
four.
Pâtes à la betterave avec pesto végan à
l‘ail des ours
1 portion
250 g de betterave, 1 c.s. d‘huile
d‘olive, 150 g d‘ail des ours, 50 g de
pignons ou autres noix au choix, sel,
huile d‘olive
Préparez les spirales de betterave avec
le porte-lame souhaité. Faire bouiller
beaucoup d‘eau avec un pincée de sel
dans une grande casserole et faites
blanchir les betteraves. Retirer et faire
dorer rapidement dans l‘huile chaude.
Pour le pesto d‘ail des ours, mettre
les pignons le sel et l‘huile dans un
mixeur et préparer une pâte lisse.
38
Page 39

C‘est facile avec le mixer plongeant
Copyright UNOLD AG | www.unold.de
ESGE ! Conseil : Moudre des noix de
cajou et parsemer sur le plat comme
du parmesan.
Salade grecque
1 concombre ferme, 1 - 2 poivrons,
250 g de tomates, 1/2 oignon, 100 g
de feta, olives noires, jus d‘un 1/2
citron bio, 50 ml d‘huile d‘olive,
origan, éventuellement ail haché, sel,
poivre
Couper le concombre lavé et épluché
en spirales. Enlever les graines du
poivron et couper en petits morceaux,
couper également les tomates et
la feta en petits morceaux. Couper
l‘oignon en rondelles Mélanger tous
les ingrédients sauf la feta dans un
saladier. Préparer une sauce salade
avec le jus de citron, l‘huile, l‘origan,
le sel, le poivre et éventuellement l‘ail
et ajouter aux légumes. Ajouter la feta
au dernier moment afin que la salade
ne devienne pas de la bouillie.
Salade de fruits
Pommes, poires, bananes, kiwi etc.
au choix, jus de citron, un peu de jus
d‘ananas, miel selon le goût
Couper des spirales dans les pommes
et les poires. Épluchez les autres fruits
si nécessaire et les couper en petits
morceaux. Rectifier le goût avec le jus
de citron et d‘ananas ainsi qu‘un peu
de miel au besoin.
39
Page 40

CONDITIONS DE GARANTIE
Copyright UNOLD AG | www.unold.de
En cas d’utilisation conforme et lors de dégâts manifestement dus à des défauts de fabrication, nos appareils sont garantis
24 mois, lors d’utilisation professionnelles 12 mois, à dater de l’achat. Notre garantie n’est valide que pour les appareils
vendus en Allemagne et en Autriche. Dans tout autre pays veuillez contacter l’importateur. Veuillez envoyer à notre adresse
les appareils, pour lesquels vous réclamez une suppression de défauts, avec le bon d’achat montrant la date d’achat, port
payé et proprement emballé. Les coûts de transport seront remboursés en cas de garantie en Allemagne et en Autriche. Les
défauts causés par usure, utilisation incorrecte ou non-respect des instructions de maintenance sont exclus. Notre obligation
de garantie cesse, si de réparations ou des interventions sont accomplies par des tiers. Cette garantie n’affecte pas les droits
du consommateur contre le commerçant.
TRAITEMENT DES DÉCHETS / PROTECTION DE L’ENVIRONNEMENT
Nos appareils sont produits selon un standard élevé de qualité pour une longue durée d’utilisation. Un
entretien régulier et des réparations compétentes par notre service après-vente prolongent cette durée
d’utilisation. Si néanmoins l’appareil est endommagé et ne peut plus être réparé, veuillez suivre les in-
structions suivantes. Ne jamais disposer ce produit avec les dégâts de ménage. Apportez ce produit à une
station de collection pour récupération de produits électriques et électroniques. Par la collection séparée
vous aidez à protéger les ressources naturelles et prenez soin, que le produit est démonté sans risque pour
la santé et l’environnement.
Les recettes disponibles dans ce mode d’emploi ont été soigneusement examinées et contrôlées
par leurs auteurs respectifs et par la société UNOLD AG. Notre responsabilité n’est toutefois en
aucun cas engagée. Les auteurs et la société UNOLD AG ainsi que ses représentants déclinent toute
responsabilité en cas de dommages corporels, matériels et pécuniaires.
40
Page 41

GEBRUIKSAANWIJZING MODEL 78402
Copyright UNOLD AG | www.unold.de
TECHNISCHE GEGEVENS
Vermogen: 80 Watt, 220-240 V, 50/60 Hz
Afmetingen: ca. 21,0 x 15,0 x 36,7 cm (l x b x h)
Gewicht: ca. 1,5 kg
Snoer: ca. 90 cm
Beveiligingsklasse: II
Capaciteit: ca. 1,25 l
Materiaal: kunststof
Uitvoering: voor snelle bereiding van bijv. groentepasta, salade of
groentegerechten, met naar binnen gerichte messen en
transparante opvangbeker
Toebehoren: 4 inzetmessen, opvangbeker, borstel, gebruiksaanwijzing
met recepten
Wijzigingen en vergissingen in de uitrustingskenmerken, techniek, kleuren en design voorbehouden.
VERKLARING VAN DE SYMBOLEN
Dit symbool wijst op eventuele gevaren die letsel
tot gevolg kunnen hebben of tot schade aan het
apparaat leiden.
VEILIGHEIDSVOORSCHRIFTEN
Lees de volgende aanwijzingen a.u.b. door en bewaar ze
goed.
Instructies m.b.t. personen
in het huishouden
1. Het apparaat kan door
kinderen vanaf 8 jaar
worden gebruikt en
door personen die over
gebrekkige fysieke, sensorische of geestelijke
vaardigheden of gebrek
aan ervaring en/of kennis beschikken, mits
41
Page 42

zij onder toezicht staan
Copyright UNOLD AG | www.unold.de
of instructies hebben
gekregen aangaande
het veilige gebruik van
dit apparaat en de hieruit resulterende gevaren begrepen hebben.
Het apparaat is geen
speelgoed. Schoonmaak en onderhoud van
het apparaat mogen uitsluitend onder toezicht
worden uitgevoerd.
2. Kinderen onder 3 jaar
moeten uit de buurt van
het apparaat blijven of
voortdurend onder toe-
zicht staan.
3. Kinderen tussen 3 en 8
jaar moeten het appa-
raat noch aansluiten,
noch bedienen, schoonmaken of onderhouden.
4. Kinderen moeten onder
toezicht staan om te
waarborgen dat zij niet
met het apparaat spelen.
Elektrische veiligheid
5. Dit apparaat mag niet
worden gebruikt met
een externe tijdschakelklok of afstandsbesturing.
6. Na het gebruik, voor
de reiniging of bij evt.
storingen tijdens de
werking a.u.b. altijd de
stekker uit het stopcontact trekken.
7. Houd het snoer weg bij
vocht.
8. Het motorblok mag niet
in contact komen met
water of andere vloeistoffen. Als dit toch
eens gebeurt, moet de
behuizing volkomen
droog zijn, voordat het
weer gebruikt wordt.
9. Het apparaat is uitsluitend bestemd voor
huishoudelijk gebruik
of voor soortgelijke
doeleinden, bijv.
theekeukens in bedrij-
ven, kantoren of overige werklocaties,
landbouwbedrijven,
voor gebruik door gas-
ten in hotels, motels of
overige logiesbedrijven,
in particuliere pensions
of vakantiehuizen.
10. Het apparaat is niet
geschikt voor de afwasmachine.
11. Het apparaat en de
aansluitkabel om veilig-
42
Page 43

heidsredenen nooit op
Copyright UNOLD AG | www.unold.de
of in de buurt van hete
oppervlakken neerzetten of gebruiken.
12. De aansluitkabel vóór
gebruik helemaal afwikkelen.
13. Het aansluitsnoer mag
niet over de rand van
het werkvlak hangen.
14. Het apparaat of het
snoer mogen niet in
de buurt van vlammen
worden gebruikt.
15. Het apparaat nooit zonder toezicht laten als
de netstekker ingesto-
ken is.
16. Controleer de stekker en
het snoer regelmatig op
slijtage of beschadigingen. Bij beschadiging
van de aansluitkabel of
van andere onderdelen
stuurt u het apparaat
voor controle en reparatie naar onze klantenservice. Ondeskundige reparaties kunnen
gevaren voor de gebruiker veroorzaken en hebben uitsluiting van de
garantie tot gevolg.
Aanwijzingen om het
apparaat veilig op te stellen
en te gebruiken
17. Zet het apparaat op een
vrij en effen werkvlak.
18. Gebruik het apparaat
uitsluitend binnen.
19. De snijvlakken van de
inzetmessen zijn heel
scherp. Hanteer de
inzetmessen heel voorzichtig en zorg ervoor,
dat ook andere gebruikers doordrongen zijn
van de risico‘s van het
apparaat.
20. Houd de inzetmessen
buiten bereik van kinderen en dieren.
21. Reinig het apparaat
omwille van de hygiëne
meteen na het maken
van groente- of fruitspiralen.
22. Vermijd contact van
het apparaat met hete
oppervlakken.
23. Haal het inzetmes uit
het apparaat als u het
apparaat wilt verzetten
of opbergen.
24. Schakel het apparaat
uit via de AAN/UIT-
43
Page 44

schakelaar en trek de
Copyright UNOLD AG | www.unold.de
stekker uit het stopcontact, voordat u toebehoren wisselt of het
apparaat reinigt.
25. De motor van het apparaat moet helemaal tot
stilstand zijn gekomen
voordat u toebehoren
wisselt.
26. Trek ook altijd de stekker uit het stopcontact
als het apparaat zonder
toezicht achterblijft.
27. Schakel het apparaat
nooit in als er geen
inzetmes geplaatst is.
De snijvlakken van de inzetmessen zijn scherp – verwondingsgevaar!
28. De korte werkingstijd
bedraagt een minuut.
Laat het apparaat dan
een paar minuten
afkoelen voordat u het
opnieuw gebruikt.
29. Om schade te vermijden, mag het apparaat
niet met toebehoren
van andere fabrikanten
of andere merken worden gebruikt.
Open in geen geval de behuizing van het apparaat. Er
bestaat gevaar van een stroomstoot.
De fabrikant aanvaardt geen aansprakelijkheid bij foutieve montage, bij ondeskundig of foutief gebruik of
als reparaties door niet geautoriseerde personen worden uitgevoerd.
VÓÓR HET EERSTE GEBRUIK
1. Verwijder alle verpakkingsmaterialen en evtl. transportbeveiligingen. Houd verpakkingsmaterialen
uit de buurt van kinderen - gevaar
voor verstikking!
44
2. Reinig het apparaat met een
vochtige doek, zoals beschreven
in het hoofdstuk „Reiniging en
onderhoud“.
Page 45

TIPS VOOR GEBRUIK
Copyright UNOLD AG | www.unold.de
1. Gebruik uw nieuwe spiraalsnijder om snel en eenvoudig groentepasta, salade en decoratieve
ingrediënten te maken voor uiteenlopende gerechten.
2. Alle fruit en groente moet gelijkmatig van vorm en stevig zijn,
zodat de messen probleemloos
kunnen snijden. Let erop dat er
alleen droge levensmiddelen worden verwerkt. Door de schillen van
vochtige levensmiddelen kunnen
de inzetmessen verstopt raken.
3. Ideaal voor gebruik zijn bijvoor-
beeld courgettes, wortels, appels,
stevige komkommers en rammenas. Soms moeten ingrediën-
ten worden gehalveerd omdat ze
anders niet in de vulbuis passen.
Ingrediënten met een doorsnede
van ca. 30 – 60 mm zijn ideaal
om te verwerken.
4. Door een geschilde aardappel te
verwerken krijgt u aardappelspaghetti, die vervolgens op verschillende manier te bereiden is (bijv.
frituren of als rösti aanbraden met
uien). Ook van andere ingrediënten, zoals courgette, kan groentespaghetti worden gemaakt die
op talloze manieren kan worden
bereid. Courgettespaghetti kan
bijvoorbeeld eenvoudig worden
gefruit in wat olie en op smaak
gebracht met ui, knoflook en zout
en dan worden gemengd met
gewone spaghetti.
5. Groente als courgette is geschikt
voor het maken van lange spiralen, terwijl van aardappelen en
rode bieten alleen korte spiralen
kunnen worden gemaakt.
6. Of maak van groentelinten naar
keuze een vitaminerijke, knapperige salade. Maar groentespiralen
zijn ook heel geschikt als ingrediënt voor soep. Verderop vindt u
enkele ideeën voor recepten.
7. Heel zachte groenten zoals aubergine, kan niet worden verwerkt in
dit apparaat.
45
Page 46

INZETMESSEN
Copyright UNOLD AG | www.unold.de
Het apparaat heeft verschillende inzetmessen
46
Page 47

BEDIENEN
Copyright UNOLD AG | www.unold.de
1. Controleer of het apparaat via de
AAN/UIT-schakelaar uitgezet is.
2. Schil de ingrediënten van uw
keuze (bij enkele ingrediënten
zoals courgette is dit niet noodzakelijk) en snijd de uiteinden af
met een mes.
3. Controleer of het witte aandrijfwiel / de houder in het apparaat
zit.
4. Plaats nu het gewenste inzetmes
in de houder. Controleer of het
inzetmes recht in de houder zit.
Let op: Raak alleen het
kunststof gedeelte van
de inzetmessen aan en
nooit de snijvlakken–
verwondingsgevaar!
5. Plaats de vulbuis en draai deze
voorzichtig met de klok mee tot
deze vastklikt. Als de vulbuis niet
goed vast zit, kan het apparaat
niet ingeschakeld worden.
6. Plaats de opvangbeker.
7. Steek nu de stekker in een stopcontact (220-240 V~, 50/60 Hz).
8. Prik het voorbereide ingrediënt op
de kartels aan het uiteinden van
de stop.
9. Breng de stop met het ingrediënt
in de vulbuis en zet het apparaat
aan via de AAN/UIT-schakelaar.
10. Druk de stop licht omlaag.
11. Als het ingrediënt verwerkt is, zet
u het apparaat met de AAN/UITschakelaar uit. Vul de stop desgewenst opnieuw en herhaal boven
beschreven werkwijze tot alle
ingrediënten zijn verwerkt. Let op:
telkens als het apparaat opnieuw
wordt gevuld, moet het eerst weer
worden uitgezet.
12. Aanwijzing: De korte werkingstijd
bedraagt een minuut. Laat het
apparaat dan een paar minuten
afkoelen voordat u de volgende
ingrediënten verwerkt.
13. Als het helemaal klaar bent met
het apparaat, trek dan de stekker
uit het stopcontact.
14. Maak de vulbuis voorzichtig los
door deze tegen de klok in te
draaien en van het apparaat te
nemen.
15. Om het inzetmes eenvoudig uit te
nemen, drukt u er aan de onderkant op, zodat het naar boven uit
de houder komt.
De snijvlakken van
de inzetmessen zijn
scherp – verwondingsgevaar!
47
Page 48

REINIGEN EN ONDERHOUDEN
Copyright UNOLD AG | www.unold.de
Schakel het apparaat
met de AAN/UITschakelaar uit en trek
de stekker uit het
stopcontact.
Dompel het apparaat
nooit in water of in
een andere vloeistof
om het te reinigen.
1. Veeg de behuizing met een vochtige doek af en droog deze vervolgens goed af.
2. Spoel het inzetmes af onder stro-
mend water om resten van levens-
middelen te verwijderen. Gebruik
hierbij een afwasborstel of de
meegeleverde borstel om verwon-
ding door aanraking van de snijvlakken te voorkomen.
3. Laat de inzetmessen helemaal
opdrogen voordat ze opnieuw worden gebruikt.
4. De opvangbeker, stop, inzetmessen, houder en vulbuis kunnen ook worden gereinigd in het
bovenste rek van de vaatwasser.
Gebruik een programma met een
lage temperatuur om schade aan
het kunststof te voorkomen. Door
de agressieve reiniging in de vaatwasser kunnen de snijvlakken van
de inzetmessen na verloop van
tijd minder scherp worden.
5. Kies een stofvrije, droge opslagplaats. Tip: Bewaar de verpakking van het apparaat en sla het
apparaat in deze doos op als u het
niet gebruikt.
RECEPTEN
Groentepasta
Maak met de spiraalsnijder smakelijke
groentepasta van de groente van uw
keuze. Deze kan dan net als gewone
pasta in water worden gegaard. Voor
een zo hoog mogelijke voedingswaarde
en om de groente knapperig te houden,
wordt aangeraden om de paste maar
enkele minuten te blancheren. Serveer
de groentepasta met een saus naar
keuze.
48
De groentepasta kan ook rauw worden
gebruikt. Voeg een smakelijke dressing
toe en serveer als salade.
Courgettepasta met knoflook
1 portie
1 – 2 courgettes, 2 gesnipperde
knoflooktenen, 1 el olie, 1 el zure
room of crème fraîche, kruiden naar
keuze, 1 el geraspte parmezaan.
Page 49

Maak brede courgettepasta met
Copyright UNOLD AG | www.unold.de
inzetmes nr. 4. Verhit de olie in de pan,
fruit de gesnipperde knoflook glazig,
voeg de courgettepasta toe en laat
5-10 minuten garen tot de gewenste
beet. Roer dan de zure room, kruiden
en parmezaan door de courgette. Nog
even doorwarmen en serveren.
Gefrituurde aardappelnestjes
1 portie
2 – 3 aardappelen, zout, paprikapoeder
(licht pikant), evt. gedroogde kruiden,
frituurvet/-olie
Snijd de aardappelen tot spiralen.
Bereid de friteuse voor, leg de
aardappelspiralen erin en laat ze
in korte tijd bruin worden. Neem de
spiralen uit en laat het overtollige
vet afdruipen. Naar smaak zou,
paprikapoeder of kruiden toevoegen.
Serveer de aardappelnestjes als
bijgerecht bij uiteenlopende gerechten
of als tussendoortje voor ‚s avonds.
Tip: De aardappelnestjes kunnen ook
in de oven worden bereid in plaats van
in de friteuse, als vetarm alternatief.
Roer de aardappelspiralen door een
mengsel van olie en kruiden en bak
de spiralen op ca. 180 °C gedurende
ca. 30 minuten in de oven (controleer
regelmatig of de gewenste gaarheid al
bereikt is). De aardappelnesten kunnen
ook om een stuk vlees heen worden
gewikkeld, bijv. een kippenborst, en
dan vervolgens in de oven worden
bereid.
Pasta van rode bieten met veganistische
pesto van wilde knoflook
1 portie
250 g rode bieten, 1 el olijfolie, 150 g
wilde knoflook, 50 g pijnboompitten of
andere noten naar keuze, zout, olijfolie
Maak spiralen van de rode bieten met
een inzetmes naar keuze. Breng in
een grote ruim water met zout aan de
kook en blancheer de rode bieten kort.
Neem de spiralen uit de pan en fruit
deze in hete olie.
Meng voor de pesto de wilde knoflook,
pijnboompitten, zout en olie in een
keukenmachine en maal tot een smeuïg
mengsel. Dit gaat heel eenvoudig met
de staafmixer van ESGE! Tip: Maal
cashewnoten strooi deze in plaats van
parmezaan over het gerecht.
Griekse salade
1 stevige komkommer, 1 -2 paprika‘s,
250 g tomaten, ½ ui, 100 g feta,
zwarte olijven naar keuze, sap van ½
bio-citroen, 50 ml olijfolie, oregano,
evt. gesnipperde knoflook, zout, peper
Snijd de gewassen en geschilde
komkommer in spiralen. Verwijder de
zaadlijsten uit de paprika en snijd deze
in stukken. Snijd ook de tomaten en
feta in blokjes. Snijd de ui in ringen.
Meng alle ingrediënten behalve de feta
49
Page 50

in een schaal. Maak een dressing van
Copyright UNOLD AG | www.unold.de
citroensap, olie, oregano, zout, peper
en evt. knoflook en schenk deze over
de groente. Voeg de feta pas toe als de
salade wordt geserveerd, dan blijft de
Snijd spiralen van appels en peren.
Schil de andere fruitsoorten en snijd
ze in kleine stukken. Breng op smaak
met citroen- en ananassap en evt. wat
honing.
groente lekker knapperig.
Fruitsalade
Appels, peren, bananen, kiwi‘s enz.
naar keus, citroensap, scheutje
ananassap, honing naar smaak
GARANTIEVOORWAARDEN
Wij geven op onze apparaten een garantietermijn van 24 maanden (12 maanden bij commerciële gebruik), gerekend vanaf de
dag van aanschaf. Deze garantie geldt voor schade, die bij correct gebruik aantoonbaar is veroorzaakt door een fout in de pro-
ductie. Binnen de garantietermijn verhelpen wij materiaal- en productiefouten door herstelling of vervanging naar onze keuze.
Onze garantie is slechts geldig voor in Duitsland en Oostenrijk verkopte apparaten. In andere landen a.u.b. de importeur aan-
spreken. Apparaaten, waarvoor garantie in aanspraak wordt genomen, moeten ons samen met een kopie van de machineel
gegenereerde kassabon waaruit de koopdatum duidelijk wordt, alsmede een beschrijving van de fout goed verpakt aan onze
klantenservice worden toegezonden, porto betaald. Als er sprake van garantie is, worden de verzendingskosten in Duitsland en
Oostenrijk aan de klant vergoed. De garantie dekt geen schade veroorzaakt door slijtage, onbehoorlijk gebruik/foutieve han-
delingen en niet-naleving van de onderhouds- en reinigingsaanwijzingen. Het recht op garantie vervalt, wanneer reparaties
of manipulaties aan het apparaat door derden worden doorgevoerd. Eventuele rechten van de eindgebruiker t.o.v. de verkoper
of distributeur worden door deze garantie niet aangetast.
VERWIJDEREN VAN AFVAL / MILIEUBESCHERMING
Onze apparaten zijn geproduceerd met een hoge qualiteit voor een lange gebruik. Regelmatige onderhoud
en vakkundig reparaties door onze klantenservice verlengt de gebruiksduur. Wanneer het apparat defekt is
en kan niet meer gerepareerd worden, let op de volgende instructies. Dit product mag niet samen met het
normale huishoudelijke afval worden afgevoerd. U dient dit product bij een voor het recycleren van elek-
trische of elektronische apparaten aangewezen verzamelplaats in te leveren. Door het separaat inzamelen
en recycleren van afvalproducten helpt u mee bij het zuinig omgaan met de natuurlijke hulpbronnen en zorgt
u ervoor dat het product op een gezondheids- en milieuvriendelijke manier afgevoerd wordt.
De recepten in deze gebruiksaanwijzing zijn door de auteurs en door UNOLD AG zorgvuldig ontwikkeld en getest.
Een garantie kan er echter niet worden aanvaard. De auteurs en/of UNOLD AG en haar gemachtigden kunnen in
geen geval aansprakelijk worden gesteld voor letsel, materiële schade en financiële schade.
50
Page 51

ISTRUZIONI PER L’USO MODELLO 78402
Copyright UNOLD AG | www.unold.de
DATI TECNICI
Potenza: 80 Watt, 220-240 V, 50/60 Hz
Misure: circa 21,0 x 15,0 x 36,7 cm (lungh./largh./alt.)
Peso: circa 1,5 kg
Cavo di alimentazione: circa 90 cm
Classe di isolamento: II
Capacità: circa 1,25 l
Materiale: Plastica
Dotazioni: per preparare rapidamente ad es. spaghetti di verdure
o contorni di insalate/verdure, lame poste all‘interno,
recipiente di raccolta trasparente
Accessori: 4 inserti di taglio, recipiente di raccolta, spazzola,
istruzioni per l‘uso con ricettario
Con riserva di modifiche ed errori relativi a caratteristiche delle dotazioni, tecnica, colore e design.
SIGNIFICATO DEI SIMBOLI
Questo simbolo segnala possibili pericoli in grado di
provocare lesioni a persone o danni all‘apparecchio.
AVVERTENZE DI SICUREZZA
Si raccomanda di leggere
e conservare le presenti
istruzioni.
Avvertenze sulle persone in
ambito domestico
1. L‘apparecchio può
essere utilizzato da
bambini a partire dagli
8 anni di età e da persone che presentano
ridotte capacità fisiche, sensoriali o mentali o che difettano
della necessaria espe-
51
Page 52

rienza e/o conoscenze
Copyright UNOLD AG | www.unold.de
solo se adeguatamente
sorvegliati o addestrati
6. Dopo l‘uso, prima della
sull‘uso in sicurezza
dell‘apparecchio e se
a conoscenza dei rischi
correlati. L‘apparecchio
non è un giocattolo.
La pulizia e la manu-
7. Il cavo di alimentazione
tenzione dell‘apparecchio possono essere
effettuate da bambini
8. Il blocco motore non
soltanto sotto sorveglianza.
2. L‘apparecchio deve
essere tenuto fuori
dalla portata dei bam-
bini di età inferiore a
3 anni oppure questi
devono essere costan-
9. L’apparecchio è pro-
temente sorvegliati.
3. I bambini di età compresa tra 3 e 8 anni non
dovrebbero collegare,
comandare, pulire o
sottoporre a manutenzione l‘apparecchio.
4. I bambini vanno sorvegliati per assicurarsi
che non giochino con
l‘apparecchio.
Sicurezza elettrica
5. Questo apparec-
10. L‘apparecchio non è
chio non deve essere
comandato tramite
52
timer esterni o sistemi
di telecomando.
pulizia o in caso di anomalie durante l‘esercizio staccare sempre la
spina dalla presa elettrica.
deve essere protetto
dall‘umidità.
deve entrare a contatto con acqua o altri
liquidi. Se ciò dovesse
accadere, prima di
essere riutilizzato deve
comunque essere completamente asciutto.
gettato esclusivamente
per l’uso domestico o
per impieghi similari,
ad es.
in aree cucina di negozi,
uffici o altri luoghi di
lavoro,
aziende agricole,
per l‘uso da parte degli
ospiti di hotel, motel o
altre strutture ricettive,
in pensioni private o
case di vacanza.
adatto per il lavaggio in
lavastoviglie.
Page 53

11. Per ragioni di sicurezza
Copyright UNOLD AG | www.unold.de
non riporre o far funzionare mai l‘apparecchio
e il cavo di alimentazione su o nei pressi di
superfici calde.
12. Prima dell‘uso srotolare
completamente il cavo
di alimentazione.
13. Il cavo di alimentazione
non deve pendere oltre
lo spigolo della superficie di lavoro.
14. L‘apparecchio e il cavo
di alimentazione non
devono essere impiegati
nei pressi di fiamme.
15. Non lasciare mai incustodito l‘apparecchio
quando la spina è inse-
rita.
16. Controllare regolarmente la spina e il cavo
di alimentazione per
verificare che non presentino tracce di usura
o danni. Qualora il cavo
di collegamento o altri
componenti siano danneggiati inviare l‘apparecchio alla nostra
assistenza clienti per la
verifica e la riparazione.
Riparazioni inadeguate
possono causare pericoli per l’utente e com-
portano il decadere
della garanzia.
Avvertenze per l‘installazione
e il funzionamento in
sicurezza dell‘apparecchio
17. Appoggiare l’apparecchio su una superficie
sgombra e piana.
18. Usare l‘apparecchio
solo in interni.
19. Le lame degli inserti di
taglio sono molto affilate. Maneggiare gli
inserti di taglio con la
dovuta cautela e fare
in modo che anche gli
altri utenti dell‘apparecchio siano consapevoli dei pericoli.
20. Tenere gli inserti di
taglio fuori dalla portata di bambini e animali.
21. Per motivi igienici,
pulire sempre l‘apparecchio subito dopo
aver prodotto le spirali
di verdura o frutta.
22. Evitare il contatto
dell‘apparecchio con
superfici calde.
23. Rimuovere l‘inserto di
taglio dall‘apparecchio
quando lo si sposta o lo
53
Page 54

si ripone per la conser-
Copyright UNOLD AG | www.unold.de
vazione.
24. Prima di sostituire gli
accessori o di procedere
alla pulizia spegnere
sempre l‘apparecchio
tramite l‘interruttore
ON/OFF e staccare la
spina dalla presa elettrica.
25. Il motore dell‘apparecchio deve essere fermo
prima di sostituire gli
accessori.
26. La spina deve essere
staccata dalla presa
elettrica anche quando
l‘apparecchio è lasciato
incustodito.
Le lame degli inserti di taglio sono molto affilate –
pericolo di ferirsi!
27. Non accendere mai
l‘apparecchio senza
inserto di taglio applicato.
28. Il tempo di funzionamento breve è di un
minuto. Quindi lasciar
raffreddare l‘apparecchio per alcuni minuti
prima di rimetterlo in
funzione.
29. Per evitare danni, non
usare l‘apparecchio
con accessori di altri
marchi o produttori.
Non aprire mai la scocca dell‘apparecchio. Sussiste
il pericolo di scosse elettriche.
Il produttore non si assume alcuna responsabilità per un montaggio scorretto, un utilizzo inappropriato o
errato oppure in seguito a riparazioni effettuate da officine o persone non autorizzate.
54
Page 55

PRIMA DEL PRIMO UTILIZZO
Copyright UNOLD AG | www.unold.de
1. Rimuovere tutti i materiali da
imballo e le eventuali protezioni
da trasporto. Tenere il materiale
da imballo fuori dalla portata dei
bambini – pericolo di soffocamento!
CONSIGLI PER L‘UTILIZZO
1. Con la vostra nuova affettatrice
a spirale potete preparare, in
maniera semplice e rapida, spaghetti di verdure, contorni in insalata o anche ingredienti decorativi
per diverse pietanze.
2. Affinché la lama possa lavorare al
meglio, la frutta o la verdura da
lavorare dovrebbero essere sode e
di dimensioni uniformi. Prestare
attenzione a lavorare solo alimenti
asciutti. Le bucce degli alimenti
umidi possono infatti intasare la
lama.
3. Sono perfettamente adatti ad es.
zucchine, carote, mele, cetrioli da
insalata sodi, rafano, patate ecc.
Si tenga presente che in alcuni
casi può eventualmente essere
necessario tagliare l’ingrediente
per farlo entrare nel pozzetto. Ideali da lavorare sono gli ingredienti
con un diametro di circa 30 – 60
mm.
2. Pulire tutto l‘apparecchio con un
panno umido, come descritto nel
capitolo „Pulizia e manutenzione“, e asciugarlo accuratamente.
4. Eliminando la buccia ad es. dalle
patate e lavorandole poi con l’apparecchio, si ottengono degli
spaghetti di patate che possono
essere preparati in tanti modi (ad
es. fritti o come rösti assieme a
delle cipolle). Gli spaghetti di
verdure possono essere preparati
anche con altri ingredienti, ad
es. zucchine, e anche in questo
caso possono essere usati in tanti
modi. Gli spaghetti di zucchine
possono ad es. venir semplicemente rosolati con un po’ d’olio
e conditi a piacere con cipolla,
aglio e sale come pure mescolati
a dei normali spaghetti.
5. In linea generale, verdure come
le zucchine permettono di creare
spirali lunghe, mentre patate e
barbabietole rosse danno spirali
piuttosto corte.
6. Alternativamente, con striscioline di verdure a scelta si possono
55
Page 56

preparare insalate di spaghetti di
Copyright UNOLD AG | www.unold.de
verdure croccanti e ricchissime
di vitamine. La verdura tagliata
a spirale è perfetta anche da
aggiungere alle minestre, al posto
di pasta o riso. Alcuni spunti per
le ricette sono forniti nel ricettario.
7. Ingredienti particolarmente
teneri, come le melanzane, non
possono essere lavorati con l’apparecchio.
INSERTI DI TAGLIO
L‘apparecchio è corredato da quattro inserti di taglio differenti
56
Page 57

USO
Copyright UNOLD AG | www.unold.de
1. Assicurarsi che l‘apparecchio sia
spento tramite l‘interruttore ON/
OFF.
2. Sbucciare l‘ingrediente desiderato (per alcuni rari ingredienti,
come ad es. le zucchine, non è
necessario farlo) e tagliarne le
estremità con un coltello.
3. Controllare che il meccanismo di
azionamento bianco/il supporto
siano posizionati nell‘apparecchio.
4. Quindi mettere nel supporto l‘inserto di taglio desiderato. Veri-
ficare che l‘inserto di taglio sia
posizionato dritto nel supporto.
Attenzione: Toccare
gli inserti di taglio
sempre sul supporto
in plastica, mai sulle
lame – pericolo di
ferirsi!
5. Posizionare il pozzetto di riempimento e ruotarlo cautamente
in senso orario finché si fissa in
posizione. Se il pozzetto di riempimento non è correttamente
montato, l‘apparecchio non può
essere acceso.
6. Posizionare il recipiente di raccolta.
7. A questo punto inserire la spina in
una presa elettrica (220-240 V~,
50/60 Hz).
8. Infilzare l‘ingrediente preparato
sulla corona all‘estremità del
pressino.
9. Introdurre il pressino con l‘alimento nel pozzetto di riempimento e accendere l‘apparecchio
tramite l‘interruttore ON/OFF.
10. Premere il pressino leggermente
verso il basso.
11. Non appena l‘ingrediente è lavorato, spegnere l‘apparecchio tramite l‘interruttore ON/OFF. Eventualmente riempire nuovamente
il pressino e proseguire come
illustrato fino a esaurimento degli
ingredienti. Si tenga presente che
prima di venir riempito nuovamente
l‘apparecchio deve essere spento.
12. Avvertenza: Il tempo di funzionamento breve è di un minuto.
Quindi lasciar raffreddare l‘apparecchio per alcuni minuti prima di
lavorare altri ingredienti.
13. Quando la preparazione è terminata, staccare la spina dalla presa
elettrica.
14. Staccare cautamente il pozzetto
di riempimento ruotandolo in
senso antiorario e sollevandolo
dall‘apparecchio.
57
Page 58

15. Per rimuovere l‘inserto di taglio in
Copyright UNOLD AG | www.unold.de
maniera semplice premerlo leggermente dal basso verso l‘alto in
modo da spingerlo fuori dal supporto.
PULIZIA E CURA
Le lame degli inserti
di taglio sono molto
affilate – pericolo di
ferirsi!
Spegnere l‘apparecchio tramite l‘interruttore ON/OFF e staccare la spina dalla
presa elettrica.
Per la pulizia non
immergere mai l’apparecchio in acqua o
altri liquidi.
1. Strofinare la scocca con un panno
umido e quindi asciugarla accu-
ratamente.
2. Lavare gli inserti di taglio sotto
acqua corrente, in modo da elimi-
nare i residui di alimenti. Per evitare di ferirsi con le lame è preferibile usare la spazzola di pulizia
incluso.
3. Lasciar asciugare completamente
gli inserti di taglio prima di riutilizzarli.
4. Il recipiente di raccolta, il pressino, gli inserti di taglio, il supporto e il pozzetto di riempimento
possono essere lavati anche nel
cestello superiore della lavastoviglie. Si raccomanda di usare un
programma a bassa temperatura,
in modo da evitare danni alla plastica. A causa del clima aggressivo nella lavastoviglie, dopo qualche tempo le lame degli inserti di
taglio divengono meno affilate.
5. Per la conservazione scegliere un
luogo asciutto e non polveroso.
Consiglio: Conservare l‘imballo e
quando l‘apparecchio non viene
utilizzato riporlo in tale cartone.
58
Page 59

RICETTE
Copyright UNOLD AG | www.unold.de
Spaghetti di verdure
Con l‘affettatrice a spirale preparare,
con delle verdure a scelta, dei
deliziosi spaghetti di verdure.
Possono essere cotti in acqua come
gli spaghetti normali. Per preservare
tutte le sostanze nutritive e per far
in modo che le verdure rimangano
croccanti consigliamo di sbollentare
gli spaghetti molto brevemente. Infine
servire gli spaghetti di verdure una
salsa a piacere.
Se si desidera consumare gli spaghetti
di verdure crudi, possono essere serviti
con un buon dressing come insalata.
Spaghetti di zucchine con aglio
1 porzione
1 – 2 zucchine, 2 spicchi d‘aglio
tagliati a dadini, 1 cucchiaio d‘olio, 1
cucchiaio di panna acida o di crème
fraîche, erbe aromatiche a piacere, 1
cucchiaio di parmigiano grattugiato.
Con l‘inserto di taglio N° 4 preparare
degli spaghetti di zucchine larghi.
Scaldare l‘olio in padella, lasciar
imbiondire leggermente nell‘olio l‘aglio
a dadini, aggiungere gli spaghetti
di zucchine e cuocerli per circa
5-10 minuti fino al grado di cottura
desiderato. Mescolare la panna acida,
le erbe aromatiche e il parmigiano e
usare questo composto per condire
le zucchine, scaldare brevemente e
servire.
Nidi di patate fritti
1 porzione
2 – 3 patate, sale, paprica in polvere
dolce, eventualmente erbe aromatiche
secche, grasso per la friggitrice
Tagliare le patate a spirali. Preparare la
friggitrice, mettervi le spirali di patate
e lasciarle dorare brevemente. Estrarle
e sgocciolare il grasso in eccesso.
Insaporire con sale e paprika o erbe
aromatiche a piacere.
I nidi di patate sono adattissimi sia
come contorno per diverse pietanze
che come stuzzichini autoprodotti.
Consiglio: Cuocendo i nidi di patate
al forno invece che nella friggitrice,
si ottiene un‘alternativa a basso
contenuto di grassi. Passare le spirali
di patate in una miscela di olio e spezie
e quindi cuocerle in forno a 180 °C
per circa 30 minuti (controllando
regolarmente se il grado di cottura
desiderato è già ottenuto). I nidi di
patate possono anche essere avvolti
attorno a dei pezzi di carne, come ad
es. dei petti di pollo, e cotti al forno.
59
Page 60

Pasta di barbabietole rosse con pesto
Copyright UNOLD AG | www.unold.de
vegano all‘aglio orsino
1 porzione
250 g di barbabietole rosse, 1
cucchiaio di olio d‘oliva, 150 g di aglio
orsino, 50 g di pinoli o altri semi oleosi
a scelta, sale, olio d‘oliva
Con un inserto di taglio a scelta
preparare delle spirali di barbabietole
rosse. In una pentola capiente portare
a ebollizione abbondante acqua
salata e sbollentarvi brevemente la
barbabietola rossa. Estrarla e rosolarla
velocemente in olio caldo.
Per il pesto mettere in un mixer l‘aglio
orsino, i pinoli, il sale e l‘olio e lavorarli
fino a ottenere un composto uniforme.
Riesce a meraviglia anche con l‘ESGEZauberstab! Consiglio: Macinare degli
anacardi e cospargerli sulla pietanza
come fossero parmigiano.
Insalata greca
1 cetriolo da insalata ben sodo, 1
-2 peperoni, 250 g di pomodori, ½
cipolla, 100 g di feta, olive nere a
piacere, succo di ½ limone biologico,
50 ml di olio d‘oliva, origano,
eventualmente aglio tagliato a dadini,
sale, pepe
Tagliare a spirale il cetriolo lavato e
sbucciato. Togliere i semi dai peperoni e
tagliarli a pezzi, tagliare a dadini anche
i pomodori e la feta. Tagliare la cipolla
ad anelli. In una ciotola mescolare
tutti gli ingredienti, tranne la feta. Con
il succo di limone, l‘olio, l‘origano, il
sale, il pepe ed eventualmente l‘aglio
a dadini preparare una salsa e con
questa irrorare l‘insalata. Disponendo
la feta sull‘insalata solo alla fine,
l‘insalata non diventa molle.
Macedonia di frutta
Mele, pere, banane, kiwi ecc. a
seconda dei gusti, succo di limone, un
po‘ di succo d‘ananas, miele a piacere
Tagliare a spirali le mele e le pere.
Eventualmente sbucciare e tagliare
a pezzettini le altre varietà di frutta.
Insaporire con un po‘ di succo di
limone e d‘ananas e, se necessario,
con un po‘ di miele.
60
Page 61

NORME DIE GARANZIA
Copyright UNOLD AG | www.unold.de
I nostri prodotti sono garantiti per 24 mesi, 12 mesi in caso di uso professionale, dalla data di acquisto per i guasti manife-
statisi durante un utilizzo conforme alle disposizioni e attribuibili in modo dimostrabile a difetti di fabbricazione. Nel periodo
di garanzia porremo rimedio ai difetti materiali e di produzione secondo la nostra valutazione, procedendo alla riparazione
o alla sostituzione dell’apparecchio. Le nostre prestazioni di garanzia valgono esclusivamente per gli apparecchi venduti
in Germania e Austria. In tutti gli altri casi rivolgersi all‘importatore. Gli apparecchi per i quali si richiede la riparazione di
guasti ci devono essere inviati con spedizione affrancata e debitamente imballati, unitamente a una copia del documento
di acquisto redatto a macchina dal quale risulti la data di vendita, nonché la descrizione del guasto. In caso di garanzia al
cliente verranno rimborsati i costi di spedizione sostenuti in Germania e Austria. Sono esclusi dalla garanzia i guasti dovuti
all’usura, all’uso inappropriato o al mancato rispetto delle regole di manutenzione. Il diritto di garanzia decade qualora siano
state effettuate riparazioni o interventi da parte di terzi. Eventuali diritti del consumatore finale verso il venditore o negoziante
non vengono limitati dalla presente garanzia.
SMALTIMENTO / TUTELA DELL’AMBIENTE
I nostri apparecchi vengono prodotti rispettando un elevato standard qualitativo per una lunga durata
di utilizzo. Una corretta manutenzione e riparazioni adeguate a cura dal nostro servizio clienti possono
prolungare la durata di utilizzo del prodotto. Se un apparecchio è difettoso e non più riparabile, per il suo
smaltimento si presti attenzione ai punti che seguono. Questo prodotto non deve essere smaltito unitamente
ai comuni rifiuti domestici. Consegnare il prodotto a un centro di raccolta per il riciclaggio dei rifiuti elettrici
o elettronici. Con la raccolta differenziata dei rifiuti e dei prodotti riciclabili è possibile contribuire alla tutela
delle risorse naturali e far smaltire il prodotto nel rispetto dell’ambiente e della salute.
Le ricette di queste istruzioni per l’uso sono state ideate e verificate dagli autori e da UNOLD AG.
Tuttavia non può essere emessa alcuna garanzia. È esclusa la responsabilità degli autori, di UNOLD
AG e dei rispettivi incaricati per danni provocati a persone, cose o materiali.
61
Page 62

MANUAL DE INSTRUCCIONES MODELO 78402
Copyright UNOLD AG | www.unold.de
DATOS TÉCNICOS
Potencia: 80 vatios, 220-240 V, 50/60 Hz
Dimensiones: aprox. 21,0 x 15,0 36,7 cm (L/An/Al)
Peso: aprox. 1,5 kg
Cable de alimentación: aprox. 90 cm
Clase de protección: II
Volumen: aprox. 1,25 l
Material: plástico
Equipamiento: para la preparación rápida de, p. ej., fideos de verduras o
guarniciones de ensalada/verduras, cuchillas interiores,
recipiente colector transparente
Accesorios: 4 cuchillas, recipiente colector, cepillo, manual de
instrucciones con recetas
Reservado el derecho de modificaciones y errores en características de equipamiento, técnica, colores
y diseño.
EXPLICACIÓN DE LOS SÍMBOLOS
Este símbolo advierte de posibles riesgos que
pueden traer consigo lesiones personales o daños
al aparato.
INDICACIONES DE SEGURIDAD
Por favor lea y guarde las siguientes instrucciones.
Indicaciones sobre personas
en el hogar
1. Este aparato puede ser
manejado por niños a
partir de 8 años y por
personas con una capacidad física, mental o
62
sensorial reducida o
carentes de experiencia y/o conocimientos siempre que estén
supervisados o hayan
sido correspondientemente instruidos en el
manejo seguro de dicho
aparato y comprendan
Page 63

los peligros que con-
Copyright UNOLD AG | www.unold.de
lleva. Este aparato no
es ningún juguete. Los
niños solo pueden llevar a cabo la limpieza
y el mantenimiento del
mismo si están supervisados por un adulto.
2. Mantener vigilados o
alejados del aparato a
los niños menores de 3
años.
3. Los niños de entre 3
y 8 años no deberán
conectar, manejar,
limpiar ni realizar el
mantenimiento del
aparato.
4. Los niños deben ser
supervisados para
asegurar que no
jueguen con el aparato.
Seguridad eléctrica
5. Este aparato no debe
utilizarse con un reloj
programador externo
ni con un sistema de
mando a distancia.
6. Desenchufar siempre
el aparato después
de usarlo, antes de
limpiarlo o si se produce
algún fallo durante el
funcionamiento.
7. El cable de alimentación
se debe proteger de la
humedad.
8. El bloque de motor no
debe entrar en contacto
con agua u otros
líquidos. Si a pesar
de ello esto ocurriese
alguna vez, deberá
estar completamente
seco antes de un nuevo
uso.
9. El aparato está diseñado
exclusivamente para un
uso doméstico o para
fines de uso similares,
por ejemplo,
cocinas tipo office en
comercios, oficinas u
otros lugares de trabajo,
empresas agrícolas,
para el uso por parte
de clientes en hoteles,
moteles u otros establecimientos de alojamiento colectivo,
en pensiones privadas
o en casas vacacionales.
10. El aparato no es apto
para el lavavajillas.
11. Por motivos de seguridad, nunca coloque
63
Page 64

ni ponga en marcha el
Copyright UNOLD AG | www.unold.de
aparato sobre o cerca
de superficies calientes.
12. Desenrollar completamente el cable de alimentación antes del
uso.
13. El cable de alimentación no debe quedar
colgando por el borde
de la superficie de trabajo.
14. El aparato o el cable de
alimentación no deben
utilizarse cerca de
llamas.
15. No deje nunca el
aparato sin vigilancia
cuando esté enchufado.
16. Compruebe periódicamente si el enchufe y
el cable de alimenta-
ción están desgastados
o deteriorados. En caso
de daños en el cable de
alimentación o en otras
piezas, envíe el aparato
para su verificación y
reparación a nuestro
servicio de atención al
cliente. Las reparaciones inadecuadas pueden ocasionar peligros
para el usuario y provo-
can la exclusión de la
garantía.
Indicaciones para la colocación y el uso seguro del aparato
17. Coloque el aparato
sobre una superficie
plana y despejada.
18. Utilice el aparato solo
en espacios interiores.
19. Las hojas de las
cuchillas están muy
afiladas. Por lo tanto,
tenga cuidado con las
cuchillas y asegúrese
también de que los
demás usuarios del
aparato conozcan el
peligro.
20. Mantenga las cuchillas
alejadas de los niños y
los animales.
21. Por razones higiénicas,
limpie el aparato inmediatamente después de
preparar las espirales
de verdura o de fruta.
22. Evite el contacto del
aparato con superficies
calientes.
23. Retire la cuchilla del
aparato cuando lo
mueva o lo guarde.
64
Page 65

24. Desconecte el aparato
Copyright UNOLD AG | www.unold.de
en el interruptor CON/
DES y retire la clavija
de red antes de cambiar
los accesorios o limpiar
el aparato.
25. El motor del aparato
debe estar parado
antes de cambiar los
accesorios.
26. Igualmente, retire la
clavija de red si deja el
aparato sin vigilancia.
27. Nunca conecte el aparato si no hay colocada
ninguna cuchilla.
Las hojas en las cuchillas están muy afiladas. ¡Peligro
de lesiones!
28. El tiempo de operación
breve es de 1 minuto.
Después, deje enfriar
el aparato durante unos
minutos antes de volver
a ponerlo en marcha.
29. Para evitar daños, no
use el aparato con
accesorios de otros
fabricantes o marcas.
No abra nunca la carcasa del aparato. Existe peligro
de descarga eléctrica.
El fabricante no asume ninguna responsabilidad en caso de montaje defectuoso, uso inapropiado o incorrecto o después de reparaciones realizadas por terceros no autorizados.
65
Page 66

ANTES DEL PRIMER USO
Copyright UNOLD AG | www.unold.de
1. Retire todos los materiales de
embalaje y, dado el caso, los
seguros de transporte. Mantenga
los materiales de embalaje alejados de los niños. ¡Peligro de asfixia!
CONSEJOS PARA EL USO
1. Con su nuevo cortador en espiral podrá preparar rápida y fácilmente fideos de verdura, guarniciones de ensalada o incluso
ingredientes decorativos para
diferentes platos.
2. La fruta y la verdura que se vaya
a procesar debe ser sólida y uni-
forme para que la cuchilla pueda
trabajar perfectamente. Asegúrese de procesar solo alimentos
secos. La piel de alimentos húme-
dos puede obstruir la hoja.
3. Son perfectamente adecuados,
p. ej., calabacín, zanahoria, manzanas, pepinos firmes, rábanos,
patatas, etc. Tenga en cuenta que
quizás deba cortar el alimento por
la mitad para que entre en el tubo
de llenado. Los ingredientes se
procesan perfectamente con un
diámetro de aprox. entre 30 y 60
mm.
4. Después de retirar la piel de, p.
ej., una patata y procesarla con
2. Limpie el aparato con un paño
húmedo y séquelo bien como se
describe en el capítulo “Limpieza
y cuidado”.
el aparato, obtendrá fideos de
patatas que puede cocinar de
diferentes formas (p. ej., freír o
sofreír como Rösti (un plato de
patatas muy popular en la cocina
de Suiza) con cebolla). También
se pueden preparar espaguetis
de verdura de otros ingredientes
como, p. ej., de calabacín, que
después se pueden cocinar de
múltiples formas. P. ej., sofría los
fideos de calabacín con un poco
de aceite, condimente al gusto
con cebolla, ajo y sal y añada las
tiras de calabacín en los espaguetis convencionales.
5. Principalmente, con las verduras como el calabacín obtendrá
espirales largas, mientras que las
espirales de patatas o incluso de
remolacha serán más bien cortas.
6. También a partir de las tiras de
verdura de su elección puede preparar una ensalada de espaguetis
de verdura crujiente y rica en vita-
66
Page 67

minas. La verdura en espiral es
Copyright UNOLD AG | www.unold.de
perfectamente apta como guarnición para la sopa. En el apartado
de recetas podrá consultar algu-
7. Los ingredientes especialmente
blandos como las berenjenas no
se pueden procesar con el aparato.
nas ideas.
CUCHILLAS
El aparato dispone de cuatro cuchillas diferentes.
67
Page 68

MANEJO
Copyright UNOLD AG | www.unold.de
1. Asegúrese de que el aparato esté
desconectado en el interruptor
CON/DES.
2. Pele el ingrediente deseado (en
algunos pocos ingredientes como,
p. ej., el calabacín, no es necesario) y corte los extremos con un
cuchillo.
3. Compruebe si la rueda de accionamiento blanca/el soporte esté
en el aparato.
4. Ahora, coloque la cuchilla deseada
en el soporte. Compruebe si la
cuchilla está colocada de forma
recta en el soporte.
Atención: Toque las
cuchillas siempre
solo por el soporte de
plástico y nunca por
las hojas. ¡Peligro de
lesiones!
5. Coloque el tubo de llenado y gírelo
con cuidado en el sentido de las
agujas del reloj hasta que encaje.
Si el tubo de llenado no está montado correctamente, no se puede
conectar el aparato.
6. Coloque el recipiente colector.
7. Ahora, enchufe la clavija en una
caja de enchufe (220-240 V~,
50/60 Hz).
8. Pinche el ingrediente preparado
sobre la corona en el extremo del
empujador.
9. Introduzca el empujador con el
alimento en el tubo de llenado
y conecte el aparato a través del
interruptor CON/DES.
10. Presione el empujador ligeramente hacia abajo.
11. En cuanto se haya procesado el
ingrediente, desconecte el aparato en el interruptor CON/DES.
En su caso, vuelva a rellenar el
empujador y proceda como se
describe hasta que hayan gastado
todos sus ingredientes. Al hacerlo,
recuerde siempre desconectar el
aparato antes de llenarlo de nuevo.
12. Indicación: El tiempo de operación breve es de 1 minuto. Después, deje enfriar el aparato
durante unos minutos antes de
procesar más ingredientes.
13. Si ha terminado con la preparación, desenchufe la clavija.
14. Afloje con cuidado el tubo de llenado girándolo en el sentido contrario a las agujas del reloj y elevándolo del aparato.
15. Para retirar fácilmente la cuchilla,
empújela ligeramente desde abajo
hacia arriba fuera del soporte.
Las hojas en las
cuchillas están muy
afiladas. ¡Peligro de
lesiones!
68
Page 69

LIMPIEZA Y CUIDADO
Copyright UNOLD AG | www.unold.de
Desconecte el aparato mediante el interruptor ON/OFF y desenchufe la clavija de
la caja de enchufe.
No sumerja nunca el
aparato en agua o en
otros líquidos para
limpiarlo.
1. Limpie la carcasa con un paño
húmedo y séquela después.
2. Lave las cuchillas bajo agua
corriente para eliminar restos de
alimentos. Al hacerlo, utilice pre-
ferentemente el cepillo de limpieza incluido o un cepillo para
evitar lesiones por las hojas.
3. Seque las cuchillas completamente antes de volver a utilizar-
las.
4. El recipiente colector, el empujador, las cuchillas, el soporte, así
como el tubo de llenado se pueden lavar también en la cesta
superior del lavavajillas. Utilice
un programa con una baja temperatura para evitar daños en el
plástico. Debido al carácter agresivo del lavavajillas es posible que
las hojas de las cuchillas estén
menos afiladas con el tiempo.
5. Elija un lugar de almacenamiento
seco y sin polvo. Consejo: conserve el embalaje del aparato y
guárdelo en él mientras no lo utilice.
69
Page 70

RECETAS
Copyright UNOLD AG | www.unold.de
Fideos de verdura
Prepare con una verdura de su
elección sabrosos fideos de verdura
con el cortador en espiral. Estos se
pueden cocer en agua como fideos
convencionales. Para que se conserven
todos los nutrientes y se mantenga
la verdura crujiente, aconsejamos
escaldar los fideos brevemente. A
continuación, sirva los fideos de
verdura con una salsa de su elección.
Si desea comer los fideos de verdura
crudos puede servirlos con un sabroso
aliño como ensalada.
Fideos de calabacín con ajo
1 ración
De 1 a 2 calabacines, 2 dientes de
ajo en dados, 1 cucharada de aceite,
1 cucharada de nata agria o crème
fraîche, hierbas al gusto, 1 cucharada
de queso parmesano rallado.
Preparar los fideos de calabacín con
la cuchilla n.º 4. Calentar el aceite en
la sartén, pochar ligeramente el ajo en
dados en el aceite, añadir los fideos
de calabacín y cocer durante aprox. 5
a 10 minutos hasta que queden „al
dente“ como desea. Mezclar la nata,
las hierbas y el queso parmesano
y agregar al calabacín, calentar
brevemente y servir.
Nidos de patata fritos
1 ración
De 2 a 3 patatas, sal, pimentón dulce,
hierbas secas y, si lo desea, grasa para
la freidora
Cortar las patatas en espiral. Preparar
la freidora, echar las espirales
de patata en la freidora y freír
brevemente. Retirar y escurrir la grasa
sobrante. Salpimentar o condimentar
con hierbas al gusto.
Puede servir los nidos de patata como
guarnición con diferentes platos o o
presentarlos como un aperitivo casero
a la hora de la cena.
Consejo: En vez de preparar los nidos
de patata en la freidora, prepárelos
en el horno. De este modo, obtendrá
una alternativa sin grasa. Rebozar las
espirales de patata en una mezcla de
aceite y especias y hornearlas a aprox.
180 °C durante unos 30 minutos en
el horno (comprobar periódicamente
si se ha alcanzado el grado de tueste
deseado). También puede enrollar los
nidos de patata alrededor de trozos de
carne como, p. ej., pechuga de pollo,
y prepararlos en el horno.
70
Page 71

Pasta de remolacha con pesto vegano de
Copyright UNOLD AG | www.unold.de
ajo de oso
1 ración
250 g de remolacha, 1 cucharada de
aceite de oliva, 150 g de ajo de oso,
50 g de piñones u otras nueces según
gusto, sal, aceite de oliva
Con una cuchilla de su elección,
preparar espirales de remolacha.
Hervir en una olla agua suficiente con
una pizca de sal y escaldar brevemente
la remolacha. Retirar y sofreír
brevemente en el aceite caliente.
Para el pesto, añadir el ajo de oso,
los piñones, la sal y el aceite en
una batidora y batirlo hasta obtener
una pasta fina. ¡Se puede preparar
fácilmente con la batidora ESGEZauberstab! Consejo: Moler anacardos
y pulverizar como queso parmesano
sobre el plato.
Ensalada al estilo griego
1 pepino firme, de 1 a 2 pimientos,
250 g de tomates, ½ cebolla, 100 g
de queso feta, aceitunas negras al
gusto, zumo de ½ limón ecológico,
50 ml de aceite de oliva, orégano, ajo
en dados al gusto, sal, pimienta
Cortar el pepino lavado y pelado en
espirales. Quitar las semillas del
pimiento y cortarlo en trozos. Cortar
en dados los tomates y el queso feta.
Cortar la cebolla en aros. Mezclar todos
los ingredientes menos el queso feta
en un cuenco. Con el zumo de limón,
aceite, orégano, sal, pimienta y, si lo
desea, los dados de ajo, preparar un
aliño para ensaladas y añadir sobre la
verdura. Agregar el queso feta al final
sobre la ensalada, para que no quede
pastoso.
Macedonia
Manzanas, peras, plátanos, kiwi etc.,
al gusto, zumo de limón, un poco de
zumo de piña, miel al gusto
Cortar las manzanas y las peras en
espirales. En su caso, pelar las otras
frutas y cortarlas en trozos pequeños.
Aderezar con un poco de zumo de
limón y de piña, así como con un poco
de miel si lo necesita.
71
Page 72

CONDICIONES DE GARANTIA
Copyright UNOLD AG | www.unold.de
La garantía para nuestros equipos es de 24 meses, y de 12 meses en el caso de uso comercial, a partir de la fecha de
compra, cubriendo los daños que con un uso acorde a lo prescrito pueden atribuirse fehacientemente a defectos de fabri-
cación. Dentro del período de garantía, solucionamos errores de material y de fabricación a consideración nuestra mediante
reparación o cambio. Nuestros servicios de garantía son válidos únicamente para los aparatos que han sido vendidos en
Alemania y Austria. Para todos los demás casos diríjase por favor al importador correspondiente. Aquellos aparatos que se
presentan para eliminar errores, por favor enviarlos junto a una copia del comprobante de compra extendido a máquina, del
cual debe desprenderse la fecha de compra, así como una breve descripción de las deficiencias, apropiadamente embalado
y con los sellos correspondientes a nuestro servicio al cliente. En caso de garantía, los gastos de envío serán restituidos al
cliente solamente en Alemania y Austria. Aquellos daños causados por desgaste están excluidos de la garantía, así como
manipulación incorrecta, e incumplimiento de las condiciones de mantenimiento y cuidado. El derecho a garantía expira si las
reparaciones o mantenimiento son realizadas por terceros. Todo reclamo del consumidor final ante el vendedor, comerciante
no se ve afectado por esta garantía.
DISPOSICIÓN/PROTECCIÓN DEL MEDIO AMBIENTE
Nuestros aparatos se fabrican con un alto nivel de calidad por un largo período de uso. El mantenimiento
regular y las reparaciones de tipo técnico a través de nuestro servicio al cliente pueden prolongar la du-
ración del aparato. Cuando un aparato está defectuoso y ya no puede repararse, por favor considere en la
disposición final los siguientes puntos: Este producto no puede ser eliminado junto a la basura domiciliaria.
Usted debe entregar este producto a un lugar oficial para el reciclaje de aparatos eléctricos o electrónicos.
Mediante la clasificación por separado y el reciclaje de productos residuales, Usted contribuye a proteger
los recursos naturales y asegura que el producto sea eliminado de forma salubre y acorde con el medio
ambiente.
Las recetas del presente manual de instrucciones han sido cuidadosamente seleccionadas y probadas
tanto por sus autores como por UNOLD AG quienes, no obstante, no asumen garantía alguna. Queda
explícitamente excluida cualquier responsabilidad de los autores y UNOLD AG o sus delegados por
daños personales, materiales o financieros.
72
Page 73

NÁVOD K OBSLUZE MODEL 78402
Copyright UNOLD AG | www.unold.de
TECHNICKÉ ÚDAJE
Výkon: 80 W, 220-240 V, 50/60 Hz
Rozměry: cca 21,0 x 15,0 x 36,7 cm (D/Š/V)
Hmotnost: cca 1,5 kg
Přívod: cca 90 cm
Stupeň ochrany: II
Objem: cca 1,2 l
Materiál: plast
Vybavení: pro rychlou výrobu např. zeleninových nudlí nebo salátových/
zeleninových příloh, uvnitř uložené čepele, průhledná záchytná
nádoba
Příslušenství: 4 řezací vložky, záchytná nádoba, návod k obsluze s recepty
Je vyhrazeno právo na omyly a změny vybavení, techniky, barev a designu.
VYSVĚTLENÍ SYMBOLŮ
Tento symbol označuje případná ohrožení, která
mohou způsobit poranění nebo poškození přístroje.
BEZPEČNOSTNÍ POKYNY
Následující pokyny si přečtěte a uložte.
Pokyny pro osoby v domácnosti
1. Přístroj může být používán dětmi od 8 let a
osobami se sníženými
fyzickými, smyslovými
nebo duševními schop-
nostmi nebo s nedo-
statkem zkušeností a/
nebo nedostatkem znalostí, pokud jsou pod
dohledem nebo pokud
byly poučeny o bezpečném používání přístroje
a porozuměly z něj
vyplývajícím rizikům.
73
Page 74

Přístroj není hračka.
Copyright UNOLD AG | www.unold.de
Čištění a údržbu přístroje smí provádět děti
pouze pod dohledem.
2. Děti do 3 let by se
neměly k přístroji přibližovat nebo být pod
trvalým dohledem.
3. Děti mezi 3 a 8 roky
by neměly přístroj ani
připojovat ani ovládat,
čistit nebo provádět
údržbu.
4. Je potřeba dohlížet na
děti, aby bylo zajištěno, že si s přístrojem
nehrají.
Elektrická bezpečnost
5. Tento přístroj nesmí
být používán s externími časovými spína-
cími hodinami nebo se
systémem pro dálkové
ovládání.
6. Po použití, před čiště-
ním nebo při případných poruchách během
provozu vždy vytáhněte
zástrčku ze zásuvky.
7. Přívod musí být chráněn před vlhkostí.
8. Blok motoru se nesmí
dostat do kontaktu
s vodou nebo jinými
tekutinami. Pokud by
k tomu přesto došlo,
musí být před novým
použitím zcela suché.
9. Přístroj je určen
výhradně pro domácí
použití nebo podobné
účely, např.
pro kuchyňky v obcho-
dech, kancelářích nebo
podobných pracoviš-
tích,
zemědělské provozy,
pro použití hosty v
hotelu, motelu nebo
jiných ubytovacích zařízeních,
v soukromých penzió-
nech nebo rekreačních
objektech.
10. Přístroj není vhodný pro
čištění v myčce.
11. Přístroj a přívod z bezpečnostních důvodů
nikdy neodkládejte na
horké plochy nebo do
jejich blízkosti.
12. Před použitím přívod
kompletně odviňte.
13. Přívod nesmí viset dolů
přes hranu pracovní
plochy.
14. Přístroj ani přívodní
kabel nesmí být používány v blízkosti plamenů.
74
Page 75

15. Nikdy nenechávejte pří-
Copyright UNOLD AG | www.unold.de
stroj bez dozoru, když
je připojen do sítě.
16. Pravidelně kontrolujte
zástrčku a přívodní
kabel, zda nejsou opo-
třebeny nebo poškozeny. Při poškození pří-
vodního kabelu nebo
jiných dílů pošlete
přístroj na kontrolu a
opravu do našeho ser-
visu. Neodborné opravy
mohou vést k nebezpečí
pro uživatele a způso-
bují ztrátu záruky.
Pokyny k postavení a bez-
pečnému provozu přístroje
17. Postavte přístroj na vol-
nou a rovnou plochu.
18. Používejte přístroj
pouze ve vnitřních pro-
storech.
19. Čepele řezacích vlo-
žek jsou velmi ostré.
S řezacími vložkami
zacházejte přiměřeně
opatrně a zajistěte, aby
si také ostatní uživatelé
přístroje byli vědomi
nebezpečí.
20. Udržujte řezací vložky
mimo dosah dětí a zvířat.
21. Z hygienických důvodů
přístroj ihned po přípravě zeleninových a
ovocných spirál vyčistěte.
22. Vyvarujte se kontaktu
přístroje s horkými
povrchy.
23. Vyndejte z přístroje
řezací vložku, když s
ním chcete pohybovat
nebo jej uložit.
24. Vypněte přístroj spínačem ZAP/VYP a vytáhněte síťovou zástrčku,
než budete měnit části
příslušenství nebo přístroj čistit.
25. Motor přístroje se musí
zastavit, než budete
části příslušenství
měnit.
26. Když přístroj necháváte bez dozoru, rovněž
vždy vytáhněte síťovou
zástrčku.
27. Nikdy přístroj nezapínejte, když není nasazena žádná řezací
vložka.
28. Krátká doba provozu
činí 1 minutu. Před
opětným uvedením pří-
stroje do provozu jej
75
Page 76

potom nechte několik
Copyright UNOLD AG | www.unold.de
minut chladnout.
značek, aby se předešlo
poškození.
29. Přístroj nesmí být používán s příslušenstvím
jiných výrobců nebo
Čepele v řezacích vložkách jsou velmi ostré –
nebezpečí zranění!
V žádném případě těleso přístroje neotevírejte. Je
nebezpečí úderu elektrickým proudem.
Výrobce nepřebírá záruku v případě chybné montáže, neodborného a chybného používání nebo po
provedení opravy ze strany neoprávněné třetí osoby.
PŘED PRVNÍM POUŽITÍM
1. Odstraňte všechny části balení
a případné transportní pojistky.
Materiály balení udržujte mimo
dosah dětí – nebezpečí udušení!
TIPY PRO POUŽITÍ
1. S Vaším novým spiralizérem
můžete rychle a jednoduše vyrobit
zeleninové nudle, salátové přílohy
nebo také dekorativní oblohy pro
různé pokrmy.
2. Zpracovávané ovoce nebo zele-
nina by měly mít pravidelný tvar
a být pevné, aby nože mohly bez-
76
2. Vyčistěte přístroj vlhkou utěrkou a
dobře jej osušte, jak je popsáno v
kapitole „Čištění a péče“.
chybně pracovat. Dbejte na to,
abyste zpracovávali pouze suché
potraviny. Slupka vlhkých potravin může čepel ucpat.
3. Ideálně vhodné jsou např. cukety,
mrkve, jablka, pevné salátové
okurky, ředkvičky, brambory
atd. Dbejte na to, že je případně
Page 77

musíte rozpůlit, aby se vešly do
Copyright UNOLD AG | www.unold.de
plnicího otvoru. Ideálně se zpracovávají přísady s průměrem cca
30 – 60 mm.
4. Po odstranění slupky např. z
brambory a zpracování přístrojem
získáte bramborové špagety, které
můžete zpracovat různými způsoby (např. fritovat nebo opéci na
cibulce). Také s jinými přísadami
jako např. cuketami je možné
vyrábět zeleninové špagety, které
mají mnohostranné použití. Cuketové špagety můžete např. opéci
na trošce oleje, podle chuti okoře-
nit cibulí, česnekem a solí a zamíchat je mezi běžné špagety.
5. Zásadně z druhů zeleniny jako
cukety vznikají dlouhé spirály,
zatímco z brambor nebo i červené
řepy vznikají spíše krátké spirály.
6. Nebo můžete ze zeleniny podle
Vaší volby připravit křupavý, na
vitamíny bohatý salát ze zeleninových špaget. Zeleninové spirály se
výborně hodí také jako přísada do
polévek. Několik podnětů získáte
v části Recepty.
7. Mimořádně měkké přísady jako
lilky přístrojem zpracovávat nelze.
ŘEZACÍ VLOŽKY
Přístroj disponuje čtyřmi různými řezacími vložkami
77
Page 78

OBSLUHA
Copyright UNOLD AG | www.unold.de
1. Zajistěte, aby byl přístroj vypnut
spínačem ZAP/VYP.
2. Oloupejte zvolené přísady (u
několika málo přísad jako např.
cuket to není nutné) a odkrojte
jejich konce nožem.
3. Zkontrolujte, zda bílé hnací kolo/
držák jsou vloženy v přístroji.
4. Nyní do držáku vložte požadovanou
řezací vložku. Zkontrolujte, zda
se řezací vložka nachází přímo v
držáku.
Pozor: Vždy řezací
vložky berte pouze za
plastový držák, nikdy
za čepele – nebezpečí
zranění!
5. Nasaďte kryt s plnicím otvorem
a otočte jej opatrně ve směru
hodinových ručiček, až zaskočí.
Když kryt s plnicím otvorem není
správně nasazen, není možné
přístroj zapnout.
6. Umístěte záchytnou nádobu.
7. Nyní zastrčte zástrčku do zásuvky
(220-240 V~, 50/60 Hz).
8. Připravenou přísadu napíchněte
na korunku na konci nacpavače.
9. Zastrčte nacpavač s potravinou do
plnicího otvoru a zapněte přístroj
spínačem ZAP/VYP.
10. Nacpavač mírně tlačte dolů.
11. Jakmile je přísada zpracována,
vypněte přístroj spínačem ZAP/
VYP. Případně nacpavač znovu
naplňte a postupujte, jak bylo
popsáno, až jsou všechny přísady
spotřebovány. Vždy přitom dbejte
na to, aby byl přístroj před novým
plněním vypnutý.
12. Upozornění: Krátká doba provozu
činí 1 minutu. Před zpracováním
78
Page 79

dalších přísad nechte přístroj
Copyright UNOLD AG | www.unold.de
několik minut chladnout.
13. Když jste s přípravou hotovi,
vytáhněte zástrčku ze zásuvky.
14. Opatrně uvolněte kryt s plnicím
otvorem otočením proti směru
hodinových ručiček a zvedněte jej
z přístroje.
ČIŠTĚNÍ A PÉČE
15. Pro snadné vyjmutí řezací vložky
ji mírně vymáčkněte zespodu
nahoru z držáku.
Čepele v řezacích
vložkách jsou velmi
ostré – nebezpečí
zranění!
Vypněte přístroj
spínačem ZAP/VYP a
vytáhněte zástrčku ze
zásuvky.
V žádném případě
přístroj pro čištění
neponořujte do vody
nebo do jiné kapaliny.
1. Otřete kryt vlhkou utěrkou a
potom jej dobře osušte.
2. Řezací vložky opláchněte pod
tekoucí vodou, abyste odstranili
zbytky potravin. Použijte k tomu
nejlépe kartáč, abyste předešli
zranění o čepele.
3. Před opětným použitím nechte
řezací vložky zcela oschnout.
4. Záchytnou nádobu, nacpavač,
řezací vložky, držák i kryt s plnicím
otvorem můžete také čistit v horním koši myčky. Použijte program
s nízkou teplotou, abyste předešli
poškození plastu. V důsledku
agresivního prostředí v myčce je
možné, že čepele řezacích vložek
budou po určité době méně ostré.
5. Pro uložení zvolte suché místo
bez prachu. Tip: Uložte si obal
přístroje a při delším nepoužívání
přístroj vložte do tohoto kartonu.
79
Page 80

RECEPTY
Copyright UNOLD AG | www.unold.de
Zeleninové nudle
Připravte se spiralizérem ze zeleniny
podle Vašeho výběru chutné zeleninové
nudle. Ty mohou být vařeny ve vodě
jako běžné nudle. Aby živiny zůstaly
plně zachovány a zelenina zůstala
křupavá, doporučujeme nudle jen
krátce povařit. Potom zeleninové nudle
podávejte s omáčkou podle Vašeho
výběru.
Když chcete zeleninové nudle
konzumovat syrové, můžete je s
chutným dresingem podávat jako salát.
Cuketové nudle s česnekem
1 porce
1 – 2 cukety, 2 pokrájené stroužky
česneku, 1 polévková lžíce oleje, 1
polévkové lžíce zakysané smetany
nebo Crème frache, bylinky podle
přání, 1 polévkové lžíce strouhaného
parmazánu.
S řezací vložkou č. 4 připravte široké
cuketové nudle. Na pánvi rozehřejte
olej, nechte v něm pokrájený česnek
mírně zesklovatět, přidejte cuketové
nudle a připravujte cca 5-10 minut,
aby byly na skus. Zakysanou smetanu,
bylinky a parmazán rozmíchejte a
přidejte k cuketovým nudlím, krátce
ohřejte a podávejte.
Fritovaná bramborová hnízda
1 porce
2 – 3 brambory, sůl, sladká paprika v
prášku, případně sušené bylinky, tuk
pro fritovací hrnec
Z brambor udělejte spirály. Připravte
fritovací hrnec, dejte do něj bramborové
spirály a nechte krátce zezlátnout.
Vyjměte je a přebytečný tuk nechte
okapat. Podle přání okořeňte solí a
paprikou nebo bylinkami.
Bramborová hnízda se velmi dobře hodí
jako přílohy k různým pokrmům nebo
je můžete připravit jako pochoutku k
večernímu mlsání.
Tip: Připravte bramborová hnízda v
troubě místo ve fritovacím hrnci, získáte
tak alternativu s malým množstvím
tuku. Zamíchejte bramborové spirály
ve směsi z oleje a koření a pečte je
v troubě při 180 °C po dobu cca 30
minut (pravidelně kontrolujte, zda je
již dosaženo požadované opečení).
Bramborová hnízda můžete také
ovinout kolem kousků masa, jako
jsou např. kuřecí prsa, a připravit je v
troubě.
80
Page 81

Veganská pasta z červené řepy s
Copyright UNOLD AG | www.unold.de
medvědím česnekem
1 porce
250 g červené řepy, 1 polévková lžíce
olivového oleje, 150 g medvědího
česneku, 50 g piniových jader nebo
jiných ořechů podle volby, sůl, olivový
olej
S řezací vložkou podle volby připravte
z červené řepy spirály. Ve velkém hrnci
uveďte do varu vodu se špetkou soli a
nechte červenou řepu krátce povařit.
Vyjměte ji a krátce ji opečte v horkém
oleji.
Medvědí česnek, piniová jádra, sůl
a olej na pesto dejte do mixéru a
zpracujte na jemnou pastu. Snadno to
jde také s ponorným mixérem ESGEZauberstab! Tip: Rozemelte kešu
ořechy a jako parmazán nasypte na
pokrm.
Řecký salát
1 pevná salátová okurka, 1 -2 paprikové
lusky, 250 g rajčat, ½ cibule, 100 g
sýru Feta, černé olivy podle přání,
šťáva z ½ bio-citrónu, 50 ml olivového
oleje, oregáno, popř. pokrájený česnek,
sůl, pepř
Z omyté a oloupané okurky udělejte
spirály. Papriku zbavte jader a
rozkrájejte na kousky, rajčata a sýr Feta
rovněž rozkrájejte na kostičky. Cibuli
pokrájejte na kroužky. Všechny přísady
kromě sýru Feta promíchejte v misce.
Z citrónové šťávy, oleje, oregána,
soli, pepře a případných česnekových
kostiček vytvořte salátovou zálivku
a přelijte jí zeleninu. Sýr Feta dejte
na salát až na závěr, aby salát nebyl
rozbředlý.
Ovocný salát
Podle chuti jablka, hrušky, kiwi atd.,
citrónová šťáva, trochu ananasové
šťávy, podle přání med
Z jablek a hrušek udělejte spirály.
Další druhy ovoce popř. oloupejte a
rozkrájejte na malé kousky. Dochuťte
trochou citrónové a ananasové šťávy a
v případě potřeby ještě trochou medu.
81
Page 82

ZÁRUČNÍ PODMÍNKY
Copyright UNOLD AG | www.unold.de
Na naše přístroje poskytujeme záruku v trvání 24 měsíců (u průmyslového využití 12 měsíců) od data koupě výrobku, záruka
se vztahuje na poškození, která prokazatelne vznikla při správném použití v důsledku výrobních vad. Po dobu záruky budeme
odstraňovat materiální i výrobní vady opravou nebo výměnou podle našeho uvážení. Poskytnutí záruky výhradně platí pro
zařízení prodány v Německu i Rakousku. V jiných zemích se obrat’te prosím na kompetentní dovozce. Přístroje, na které
bylo uplatňováno odstranění vad, zašlete prosím s mechanicky vyhotovenou kopií nákupního dokladu, ze kterého musí být
bezpodmínečně patrný datum nákupu i s popisem vad, přístroj musí být bezpečně zabalen a nafrankován na náš záruční
servis. V připadě opravněné záruky jsou kupujícím vraceny poštovní poplatky v Německu i Rakousku. Tato záruka se nevztahuje
na poškození způsobená opotřebením, nesprávným zacházením a nedodržováním návodů kúdržbě a obsluze. Záruční doba
zaniká, když opravy nebo manipulace s přístrojem byly provedeny třetí osobou. Eventuální nároky zákazníka vůči prodejci/
obchodníku nejsou touhle zárukou omezeny.
LIKVIDACE / OCHRANA ŽIVOTNÉHO PROSTŘEDÍ
Naše vyrobené přístroje mají vysoce kvalitní standard pro zajišt’ění jejich dlouhé životnosti. Pravidel-
né údržby i opravy odborně provedeny naším prodejním servisem mohou mít vliv na prodloužení provozní
životnosti přístroje. Když je přístroj vadný a už ho nelze opravit, neopomeňte prosím: Toto zařízení nepatří
do běžného domovního odpadku, ale musí být předáno do autorizované sběrny pro recyklování elektrických
nebo elektronických zařízení. Separátní sběr a recyklování odpadních produktů umožňuje šetření přírodních
zdrojů a zajišt’uje, aby byly odpady likvidovány způsobem, který je pro zdraví a kologii přijatelný.
Recepty v tomto návodu k použití byly pečlivě zváženy a odzkoušeny autory z firmy UNOLD AG, přesto
není možno za tyto převzít záruku. Poskytnutí záruky na poškození zdraví, věcné a majetkové škody
prostřednictvím autorů popř. firmou UNOLD AG a jí pověřenými osobami je vyloučeno.
82
Page 83

INSTRUKCJA OBSŁUGI MODEL 78402
Copyright UNOLD AG | www.unold.de
DANE TECHNICZNE
Moc: 80 W, 220-240 V, 50/60 Hz
Wymiary: ok. 21,0 x 15,0 x 36,7 cm (dł./szer./wys.)
Ciężar: ok. 1,5 kg
Przewód zasilający: ok. 90 cm
Stopień ochrony: II
Pojemność: ok. 1,25 l
Materiał: Tworzywo sztuczne
Wyposażenie: do szybkiego robienia np. makaronu z warzyw lub dodatków
z sałaty i warzyw, wewnętrzne ostrza, przezroczysty pojem-
nik na warzywa
Akcesoria: 4 wkłady z ostrzami, pojemnik na warzywa, instrukcja
obsługi z przepisami
Zmiany i błędy w opisie wyposażenia, technice, kolorach i konstrukcji są zastrzeżone.
OBJAŚNIENIE SYMBOLI
Symbol ten oznacza ewentualne niebezpieczeństwa,
które mogą prowadzić do obrażeń lub uszkodzenia
urządzenia.
DLA BEZPIECZEŃSTWA UŻYTKOWNIKA
Prosimy przeczytać poniższe
instrukcje i zachować je.
Wskazówki dotyczące osób
w gospodarstwie domowym
1. Urządzenie może być
używane przez dzieci
w wieku powyżej 8 lat
oraz osoby o ograniczonej sprawności fizycznej, sensorycznej lub
umysłowej lub też nie
posiadające doświad-
czenia i/lub wiedzy,
jeśli są one nadzorowane lub zostały poin-
struowane w zakresie
bezpiecznego użytkowania i zrozumiały niebezpieczeństwa wynikające z użytkowania
83
Page 84

urządzenia. Urządzenie
Copyright UNOLD AG | www.unold.de
nie jest zabawką. Dzieci
mogą czyścić i konserwować urządzenie tylko
pod nadzorem.
2. Nie dopuszczać do
urządzenia dzieci w
wieku poniżej 3 lat lub
nadzorować je przez
cały czas.
3. Dzieci w wieku od 3 do
8 lat nie mogą urządzenia podłączać, obsługiwać, czyścić ani konserwować.
4. Pilnować, aby dzieci
nie bawiły się urządze-
niem.
Bezpieczeństwo elektryczne
5. Urządzenie nie może
pracować z zewnętrz-
nym regulatorem cza-
sowym lub systemem
zdalnego sterowania.
6. Po użyciu, przed czyszczeniem lub w razie
ewentualnych zakłóceń
podczas pracy należy
zawsze wyciągnąć
wtyczkę z gniazdka.
7. Chronić przewód przed
wilgocią.
8. Blok silnika nie może
mieć kontaktu z wodą
ani z innymi cieczami.
Jeśli doszło do kontaktu, to przed ponow-
nym użyciem wszystkie
części należy całkowicie wysuszyć.
9. Urządzenie przeznaczone jest wyłącznie do
użycia w gospodarstwie
domowym lub w podobnych zastosowaniach,
np.
aneksach kuchennych
w sklepach, biurach
lub innych zakładach,
zakładach rolnych,
do użycia przez gości w
hotelach, motelach lub
innych noclegowniach,
w prywatnych pensjo-
natach lub domach letniskowych.
10. Urządzenie nie nadaje
się do mycia w zmywarce do naczyń.
11. Ze względów bezpieczeństwa nie umieszczać i nie używać urzą-
dzenia ani kabla na
gorących powierzchniach lub w ich pobliżu.
12. Przed użyciem kabel
całkowicie rozwinąć.
13. Kabel nie może zwisać
z krawędzi powierzchni
roboczej.
84
Page 85

14. Nie wolno używać urzą-
Copyright UNOLD AG | www.unold.de
dzenia ani kabla w
pobliżu płomieni.
15. Nigdy nie pozostawiać
urządzenia bez nadzoru, gdy wtyczka włożona jest do gniazdka
sieciowego.
16. Regularnie spraw-
dzać wtyczkę i kabel
pod kątem zużycia lub
uszkodzenia. Jeżeli
uszkodzony jest kabel
lub inne części, prosimy odesłać urządze-
nie do sprawdzenia i
naprawy do naszego
serwisu klienta. Nie-
właściwie wykonane
naprawy mogą stanowić
zagrożenie dla użytkownika i prowadzą do
unieważnienia gwaran-
cji.
Wskazówki dotyczące
ustawienia i bezpiecznej
eksploatacji urządzenia
17. Urządzenie należy stawiać na wolnej i równej
powierzchni.
18. Używać urządzenie
wyłącznie wewnątrz
pomieszczeń.
19. Ostrza wkładów są bardzo ostre. Należy się z
nimi ostrożnie obchodzić i zadbać o to, aby
również inni użytkownicy urządzenia byli
świadomi niebezpieczeństwa.
20. Trzymać wkłady z
ostrzami z dala od
dzieci i zwierząt.
21. Ze względów higienicznych należy urządzenie
czyścić zaraz po przy-
gotowaniu warzywnych
lub owocowych spiralek.
22. Unikać kontaktu urzą-
dzenia z gorącymi
powierzchniami.
23. Wyjąć wkład z ostrzem
z urządzenia, gdy urządzenie jest przesuwane
lub przechowywane.
24. Wyłączyć urządzenie
przyciskiem WŁ./WYŁ.
i wyciągnąć wtyczkę
sieciową przed doko-
naniem wymiany akcesoriów lub wyczyszcze-
niem urządzenia.
25. Silnik urządzenia musi
się zatrzymać, zanim
85
Page 86

dokona się wymiany
Copyright UNOLD AG | www.unold.de
akcesoriów.
26. Zawsze wyciągać
wtyczkę sieciową przed
pozostawieniem urzą-
dzenia bez nadzoru.
27. Nigdy nie włączać urzą-
dzenia bez zamontowa-
nego wkładu z ostrzem.
zaczekać kilka minut,
aż urządzenie całkowicie ostygnie, zanim się
je ponownie uruchomi.
29. Urządzenia nie wolno
używać z akcesoriami
innych producentów
lub marek, aby uniknąć
szkód.
28. Krótki czas pracy wynosi
1 minutę. Następnie
W żadnym wypadku nie wolno otwierać obudowy
urządzenia. Istnieje niebezpieczeństwo porażenia
prądem elektrycznym.
Producent nie przejmuje odpowiedzialności za nieodpowiednie bądź wadliwe użytkowanie lub po
przeprowadzonych naprawach przez nieautoryzowane zakłady bądź niekompetentne osoby.
PRZED PIERWSZYM UŻYCIEM
1. Usunąć cały materiał opakowa-
niowy i ewentualne zabezpiecze-
nia transportowe. Przechowywać
opakowania poza zasięgiem dzieci
– niebezpieczeństwo uduszenia!
86
2. Wyczyścić urządzenie w sposób
podany w rozdziale „Czyszczenie i
pielęgnacja“ przy użyciu wilgotnej
ściereczki i dobrze wysuszyć.
Page 87

PORADY DOTYCZĄCE STOSOWANIA
Copyright UNOLD AG | www.unold.de
1. Państwa nowa tarka spiralna służy
do szybkiego i łatwego robienia
makaronu warzywnego, cięcia
sałaty i wykonywania dekoracyjnych dodatków do różnych potraw.
2. Warzywa i owoce powinny mieć
równą formę i być twarde, aby nóż
mógł prawidłowo pracować. Obrabiać należy tylko suchą żywność.
Skórka wilgotnych warzyw lub
owoców może zatkać ostrze.
3. Do cięcia idealnie nadają się np.
cukinia, marchew, jabłka, twarde
ogórki sałatkowe, rzodkiew, ziem-
niaki itp. Zwrócić uwagę na to, że
może być konieczne przekrojenie na pół, aby produkt mógł się
zmieścić do otworu wsadowego.
Idealnie dają się obrabiać składniki o średnicy ok. 30-60 mm.
4. Po obraniu ze skórki np. ziem-
niaka i obrobieniu go w urządzeniu powstaje spaghetti z ziem-
niaka, które można wykorzystać
w różny sposób (np. usmażyć na
głębokim tłuszczu lub usmażyć z
cebulą jako placki ziemniaczane).
Spaghetti można zrobić również
z innych warzyw, np. cukinii,
które można użyć na różne sposoby. Można je np. przysmażyć na
odrobinie oleju, doprawić cebulą,
czosnkiem i solą i zmieszać z nor-
malnym spaghetti.
5. Zasadniczo z warzyw takich jak
cukinia można uzyskać długie spirale, natomiast z ziemniaków lub
buraków powstają krótsze spirale.
6. Z pasków wybranych przez sie-
bie warzyw można zrobić pełną
witamin, chrupiącą spaghetti-
-surówkę. Warzywne spirale świetnie nadają się również jako dodatek do zup. Niektóre pomysły na
przepisy znajdą Państwo w części
z przepisami.
7. Miękkie warzywa, takie jak bakła-
żan, nie nadają się do obróbki w
tym urządzeniu.
87
Page 88

WKŁADY Z OSTRZAMI
Copyright UNOLD AG | www.unold.de
Urządzenie posiada cztery różne wkłady z ostrzami.
88
Page 89

OBSŁUGA
Copyright UNOLD AG | www.unold.de
1. Upewnić się, że urządzenie jest
wyłączone przyciskiem WŁ./WYŁ.
2. Obrać dany składnik ze skórki (w
przypadku niektórych produktów,
np. cukinii, nie jest to konieczne)
i odciąć końce nożem.
3. Sprawdzić, czy koło napędowe /
mocowanie wkładów z ostrzami
jest włożone do urządzenia.
4. Włożyć do mocowania żądany
wkład z ostrzem. Sprawdzić, czy
wkład z ostrzem jest włożony do
mocowania prosto.
Uwaga: Wkłady z
ostrzami należy doty-
kać zawsze tylko za
uchwyt z tworzywa
sztucznego, nigdy za
ostrza – niebezpie-
czeństwo obrażeń
ciała!
5. Nałożyć pokrywę z otworem do
napełniania i obrócić ostrożnie
w kierunku zgodnym z ruchem
wskazówek zegara, aż do zatrzaśnięcia. Gdy pokrywa z otworem do
napełniania nie jest prawidłowo
zamontowana, urządzenia nie da
się włączyć.
6. Podstawić pojemnik na warzywa.
7. Włożyć wtyczkę do gniazdka (220-
240 V~, 50/60 Hz).
8. Nabić przygotowany składnik na
popychacz.
9. Wprowadzić popychacz z produk-
tem do otworu wsadowego i włączyć urządzenie przyciskiem WŁ./
WYŁ.
10. Lekko wcisnąć popychacz do
środka.
11. Gdy składnik zostanie pocięty,
wyłączyć urządzenie przyciskiem
WŁ./WYŁ. W razie potrzeby nabić
na popychacz następny składnik i
kontynuować obróbkę, aż do zużycia wszystkich składników. Zwra-
cać przy tym zawsze uwagę na to,
aby przed ponownym napełnieniem
wyłączyć urządzenie.
12. Wskazówka: Krótki czas pracy
wynosi 1 minutę. Następnie
zaczekać kilka minut, aż urządzenie ochłodzi się, zanim dokona się
obróbki kolejnych składników.
13. Po zakończeniu obróbki, wyciągnąć wtyczkę z gniazda.
14. Ostrożnie obrócić pokrywę z otworem wsadowym w kierunku przeciwnym do ruchu wskazówek
zegara i zdjąć z urządzenia.
15. Aby łatwo wyjąć wkład z ostrzem,
wycisnąć go lekko od spodu z
mocowania.
Ostrza wkładów
są bardzo ostre –
niebezpieczeństwo
obrażeń ciała!
89
Page 90

CZYSZCZENIE I PIELĘGNACJA
Copyright UNOLD AG | www.unold.de
Wyłączyć urządzenie
naciskając przycisk
WŁ./WYŁ. i wyciągnąć
wtyczkę z gniazdka.
Nigdy nie zanurzać
urządzenia w wodzie
lub innej cieczy w
celu jego czyszczenia.
1. Przetrzeć obudowę wilgotną
ściereczką i dobrze ją wysuszyć.
2. Wypłukać wkłady z ostrzami pod
bieżącą wodą, aby usunąć z nich
resztki jedzenia. Użyć do tego
celu najlepiej szczotki do mycia
naczyń, aby uniknąć skaleczenia
ostrzami.
3. Wkłady z ostrzami muszą
całkowicie wyschnąć, zanim
będzie je można ponownie użyć.
4. Pojemnik na warzywa, popychacz,
wkłady z ostrzami, mocowanie i
pokrywę z otworem wsadowym
można również myć w górnym
koszu w zmywarce. Użyć programu
z niską temperaturą, aby uniknąć
uszkodzenia tworzywa sztucznego. Agresywny klimat zmywarki
może prowadzić po jakimś czasie
do stępienia ostrzy wkładów.
5. Przechowywać urządzenie w
suchym, niezakurzonym miej-
scu. Porada: Zachować opakowanie urządzenia i przechowywać
urządzenie w oryginalnym karto-
nie.
PRZEPISY
Makaron z warzyw
Zrobić przy użyciu tarki spiralnej
smaczny makaron z wybranych
warzyw. Można go ugotować w wodzie
jak normalny makaron. Aby zachować
wartości odżywcze i jędrność warzyw,
zalecamy je tylko krótko blanszować.
Podawać makaron z warzyw z sosem
własnego wyboru.
90
Jeżeli preferowany jest surowy
makaron z warzyw, można go podać z
sosem sałatkowym jako surówkę.
Makaron z cukinii z czosnkiem
1 porcja
1-2 cukinie, 2 pokrojone w kostkę
ząbki czosnku, 1 łyżka oleju, 1 łyżka
śmietany lub crème fraîche, dowolne
zioła, 1 łyżka startego parmezanu
Page 91

Pociąć cukinię na szerokie wstążki
Copyright UNOLD AG | www.unold.de
przy użyciu wkładu z ostrzem nr 4.
Olej rozgrzać na patelni, lekko zeszklić
w nim pokrojony czosnek, dodać
makaron z cukinii i smażyć przez ok.
5-10 minut do uzyskania żądanej
twardości. Śmietanę, zioła i parmezan
zmieszać, dodać do cukinii, krótko
przysmażyć i podawać.
Smażone gniazdka z ziemniaków
1 porcja
2-3 ziemniaki, sól, słodka papryka w
proszku, ew. suszone zioła, tłuszcz do
frytownicy
Pociąć ziemniaki na spiralki.
Przygotować frytownicę, włożyć spiralki
z ziemniaków i krótko przysmażyć.
Wyjąć, odsączyć tłuszcz. Przyprawić
do smaku solą i papryką lub ziołami.
Ziemniaczane gniazdka doskonale
nadają się jako dodatek do różnych dań
lub jako własnoręcznie przygotowany
chrupiący przysmak.
Porada: Ziemniaczane gniazdka można
zamiast we frytownicy przygotować
w piekarniku, będą one wtedy
zawierać mniej tłuszczu. Zmieszać
ziemniaczane spiralki z olejem i
przyprawami i piec w piekarniku
przez ok. 30 minut w temperaturze
ok. 180°C (regularnie sprawdzać,
czy osiągnięty został żądany stopień
upieczenia). Ziemniaczane gniazdka
można również owinąć wokół kawałków
mięsa, np. piersi z kurczaka i również
upiec w piekarniku.
Makaron z buraków z wegańskim pesto z
czosnku niedźwiedziego
1 porcja
250 g czerwonych buraków, 1
łyżka oliwy z oliwek, 150 g czosnku
niedźwiedziego, 50 g orzeszków
piniowych lub innych orzechów, sól,
oliwa z oliwek
Przygotować spiralki z czerwonych
buraków przy użyciu wybranego
wkładu z ostrzem. W dużym garnku
zagotować wystarczającą ilość wody ze
szczyptą soli i krótko blanszować w niej
czerwone buraki. Wyjąć i przysmażyć
na gorącym oleju.
Aby otrzymać pesto, włożyć czosnek
niedźwiedzi, orzeszki piniowe, sól i
olej do miksera i zmiksować na gładką
pastę. Można ją łatwo przyrządzić przy
użyciu ESGE-Zauberstab! Porada:
Zmielić orzechy nerkowca i posypać
nimi potrawę jak parmezanem.
Sałatka grecka
1 twardy ogórek sałatkowy, 1-2 papryki,
250 g pomidorów, ½ cebuli, 100 g
sera feta, ew. czarne oliwki, sok z ½
cytryny z uprawy ekologicznej, 50 ml
oliwy z oliwek, oregano, ew. czosnek
pokrojony w kostkę, sól, pieprz
Umyty i obrany ogórek pokroić w spiralki.
Wyciąć z papryki gniazda nasienne
91
Page 92

i pokroić na kawałki, pomidory i fetę
Copyright UNOLD AG | www.unold.de
pokroić w kostkę. Cebulę pokroić w
krążki. Wszystkie składniki oprócz fety
zmieszać w misce. Z soku z cytryny,
oleju, oregano, soli i pieprzu i ew.
kostek czosnku zrobić sos sałatkowy i
polać nim warzywa. Na końcu posypać
sałatkę fetą, w ten sposób ser nie
„rozciapie się“ w sałatce.
Sałatka owocowa
Jabłka, gruszki, banany, kiwi lub inne
owoce, sok z cytryny, trochę soku
ananasowego, miód do smaku
Z jabłek i gruszek wyciąć spiralki.
Pozostałe owoce w razie potrzeby obrać
i pokroić na małe kawałki. Doprawić do
smaku sokiem z cytryny i ananasa i ew.
miodem.
WARUNKI GWARANCJI
Udzielamy na nasze produkty 24 miesięcznej gwarancji od daty zakupu (warunkiem jest zachowanie faktury zakupu lub
paragonu) na szkody, które przy użytkowaniu zgodnym z przeznaczeniem wskazują na wadę fabryczną. W czasie trwania
gwarancji usuniemy wady materiałowe bądź fabryczne zgodnie z naszym osądem poprzez naprawę lub wymianę. Gwarancja
udzielana jest na produkty sprzedawane na terenie Niemiec i Austrii. W innych krajach proszę zwrócić się do właściwego
Importera. Urządzenia, w których wymagane jest usunięcie wady, proszę przesłać razem z kopią faktury zakupu, na której musi
być widoczna data zakupu, z załączonym opisem wady, w oryginalnym pudełku, dobrze zapakowane i na własny koszt na adres
serwisu. Gwarancja nie obejmuje szkód wynikających ze zużycia, użytkowania niezgodnie z przeznaczeniem i nieprzestrzegania
wskazówek dotyczących konserwacji i pielęgnacji. Roszczenie gwarancji wygasa, jeżeli naprawa bądź otwarcie przedmiotu
będą przeprowadzone przez stronę trzecią. Ewentualne roszczenia użytkownika końcowego wobec sprzedawcy/dealera nie są
ograniczone tą gwarancją.
UTYLIZACJA / OCHRONA ŚRODOWISKA
Nasze urządzenia wyprodukowane zostały na wysokim poziomie do długiego użytkowania. Regularna kons-
erwacja i fachowe naprawy poprzez nasz serwis mogą wydłużyć pracę urządzenia. W razie kiedy urządzenie
jest uszkodzone i nie nadaje się do naprawy, proszę przestrzegać zaleceń: Ten produkt nie może być zuty-
lizowany razem z normalnymi odpadami domowymi. Muszą Państwo dostarczyć ten produkt do zbiorczego
punktu recyklingowego dla urządzeń elektrycznych i elektronicznych. Poprzez oddzielne zbieranie i recykling
odpadów pomagają Państwo chronić naturalne zasoby i sprawiają, że ten produkt będzie zutylizowany w
sposób bezpieczny dla zdrowia i środowiska naturalnego.
Przepisy podane w tej instrukcji obsługi zostały starannie opracowane i sprawdzone przez autorów
i przedsiębiorstwo UNOLD AG, ale bez gwarancji. Wyklucza się odpowiedzialność autorów lub
przedsiębiorstwa UNOLD AG i ich pełnomocników za szkody osobowe, rzeczowe i majątkowe.
92
Page 93

Copyright UNOLD AG | www.unold.de
93
Page 94

94
Copyright UNOLD AG | www.unold.de
Page 95

Copyright UNOLD AG | www.unold.de
95
Page 96

Aus dem Hause
Copyright UNOLD AG | www.unold.de
 Loading...