How it Works
Log In / Sign Up
Buy Points
How it Works
FAQ
Contact Us
Questions and Suggestions
Users
Uniflame
Loading...
G
Gbc1059wb
Gbc1059wb-c
Gbc1059we-c
GBC1059WE-C / Gilmour
Gbc1069wb-c
Gbc1076we-c
Gbc1103w
Gbc1117wb
Gbc1117wrs
GBC1128W
Gbc1134w
Gbc1134wbl
GBC1134W-C
Gbc1134wrs
GBC1143W-C
Gbc1203w-c
GBC1205W
GBC1273SP
3
GBC1349W Series
GBC1405SP
GBC1747WBS-U
GBC1747WPF-U
GBC1747WRS-U
GBC1756WS-U
GBC1762WSP-U
GBC1765WL-U
GBC1786WF-U
GBC1793W-U
Gbc621c
Gbc621cr-c
Gbc730w
Gbc772w
Gbc772w-c
GBC790W
Gbc790w-c
Gbc820w-c
Gbc820wc-c
Gbc831wb
Gbc831wb-c
GBC850W
2
Gbc873w
Gbc900w
Gbc9129a
Gbc9129m
GBC920W1
GBC940WIR
GBC940WIR-C
GBC956W1-C
GBC956W1NG-C
Gbc976w
GBC981W-C
Gbc983w-c
2
Gbt10039l
Gbt1012w
Gbt1012w-c
Gbt1022sp
Gbt1102w-c
GBT1111W
Gbt1111wbl
GBT1111W-C
GBT1123WRS
Gbt1123wrs-c
GBT1712W-U
Gbt702g
GBT702W
Gbt726m
Gbt806a
Gbt806g
Gbt806t
Gbt830l
Gbt830l-c
Gbt9080l
Gbt9080l-c
Gbt926w
GBT926W1-C
Gbt926w-c
2
Gbt926wrs
GCT1201W-C
Gct903w
GLT1332SP
GLT1343SP
Glt905w
GR1700W-U
Gtc1000sp
Gtc1000w-c
GTC1205B
Gtc1205whl
3
Gtl905w
Gwu501e
Gwu8300l
Gwu9209sp
Gwu9300h
Gwu9850f
H
Hbt722w
Hbt822w
HBT920W
J
Jackson GBC1069WB-C
M
Memphis GBC1076WE-C
N
NBC1218G
2
Nbc1218g-c
Loading...
Loading...
Nothing found
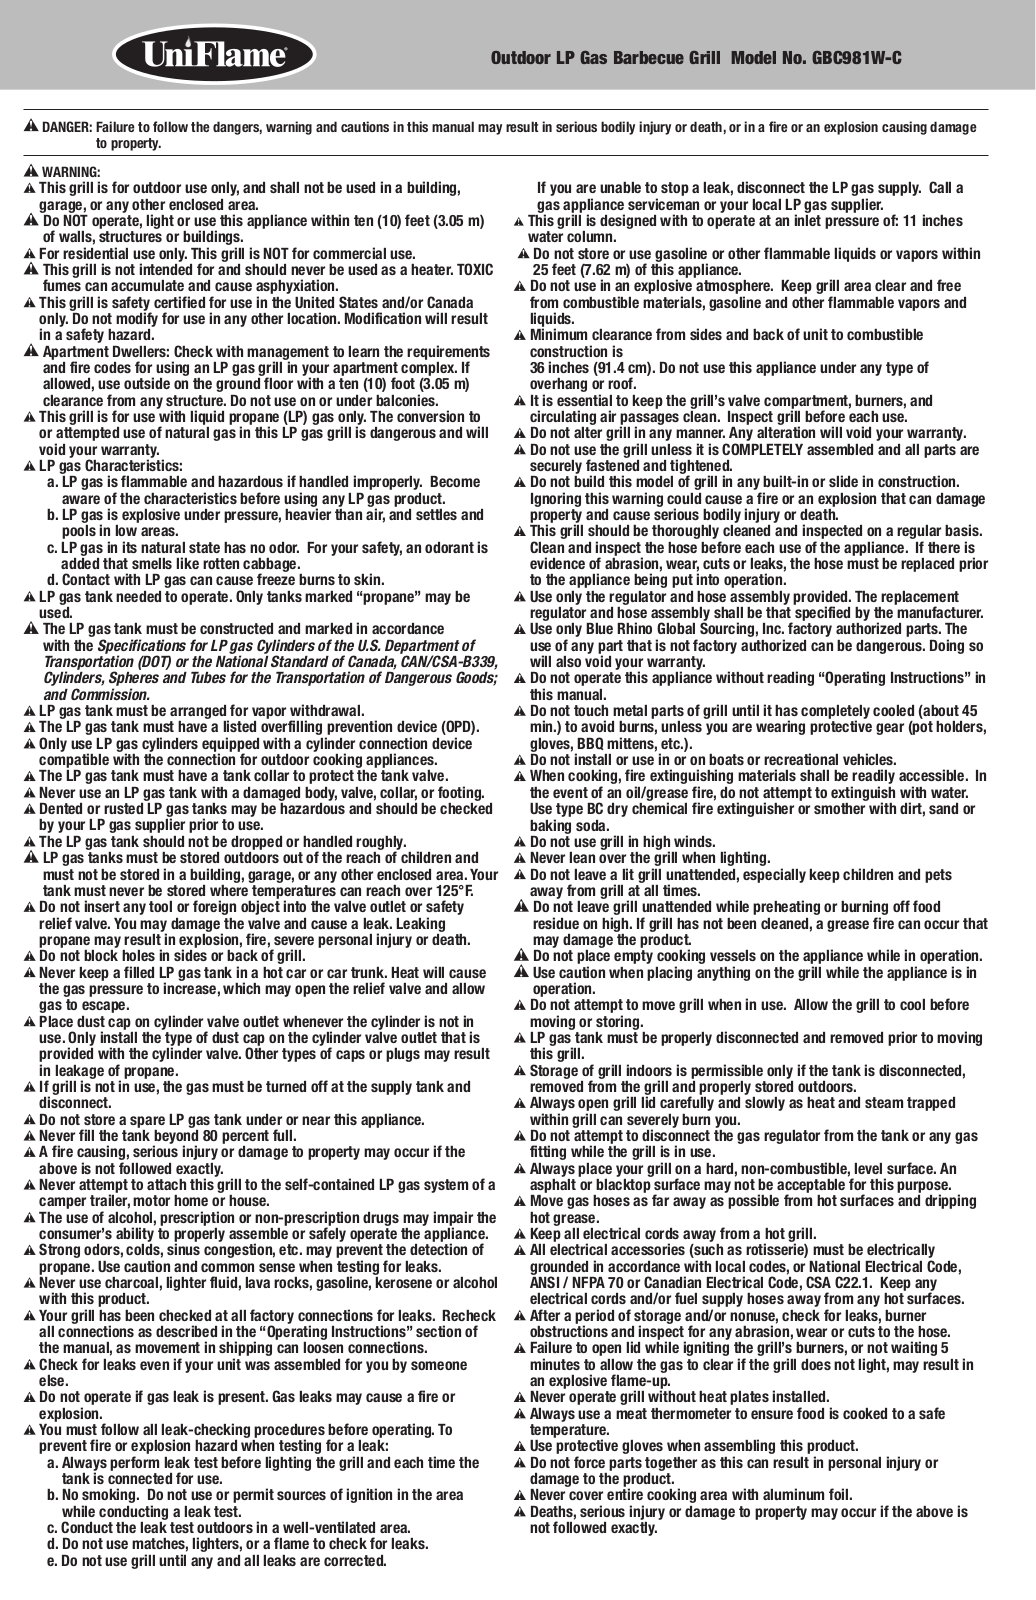
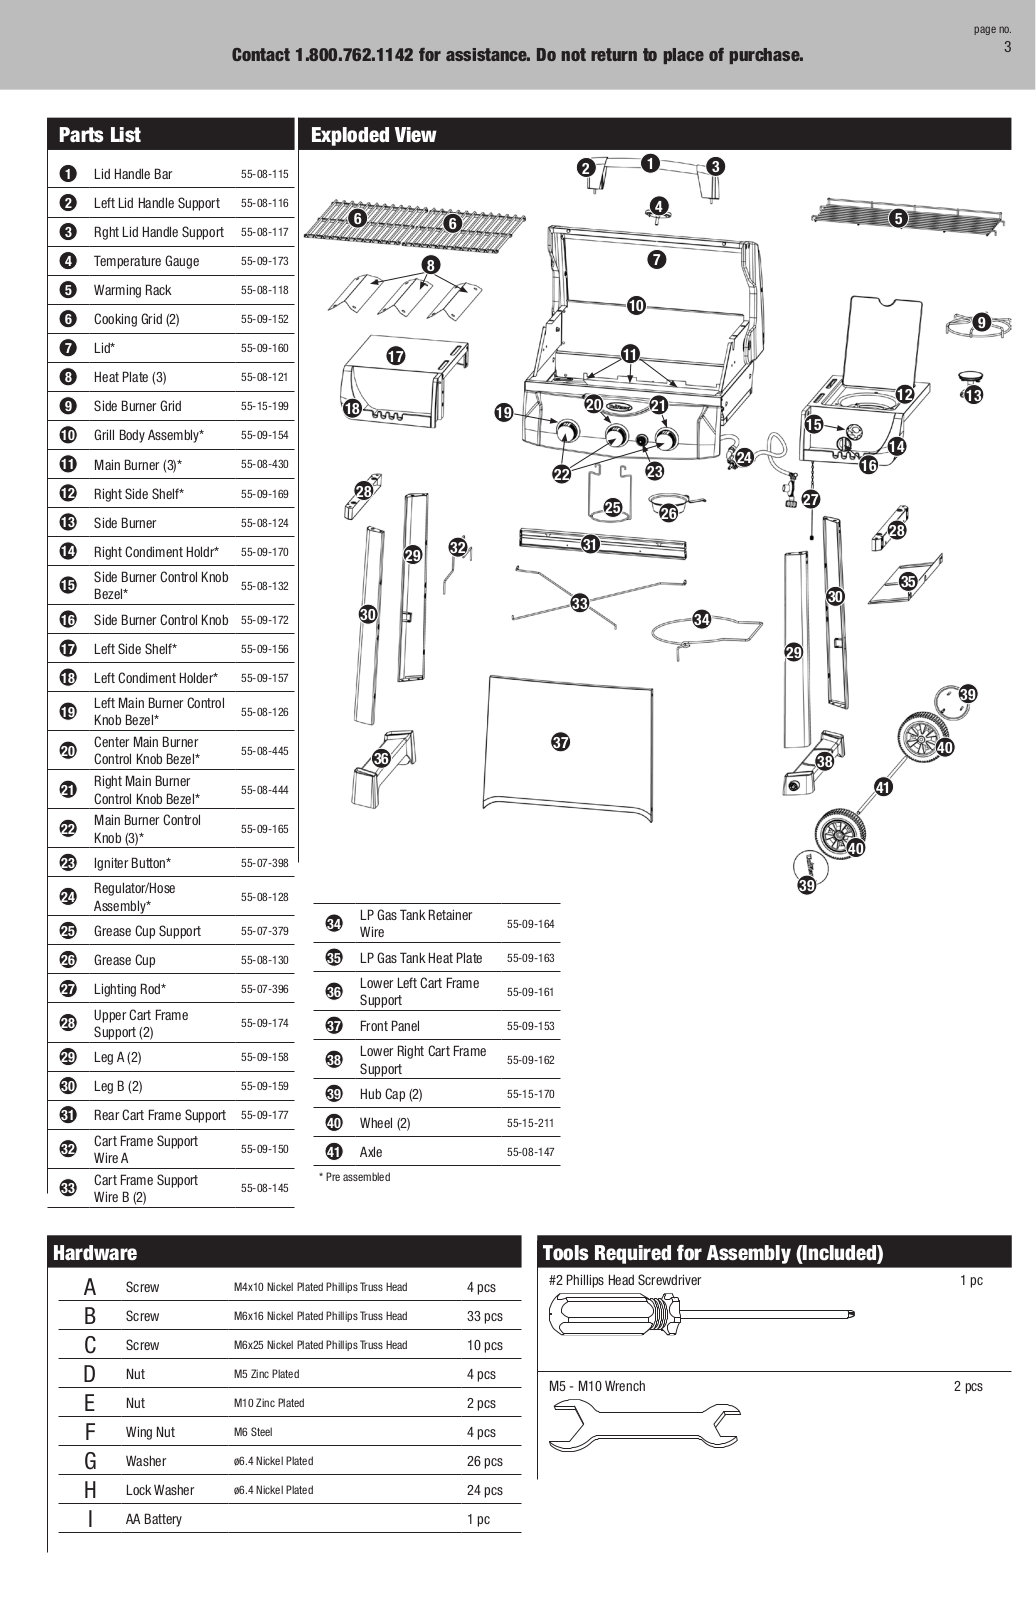
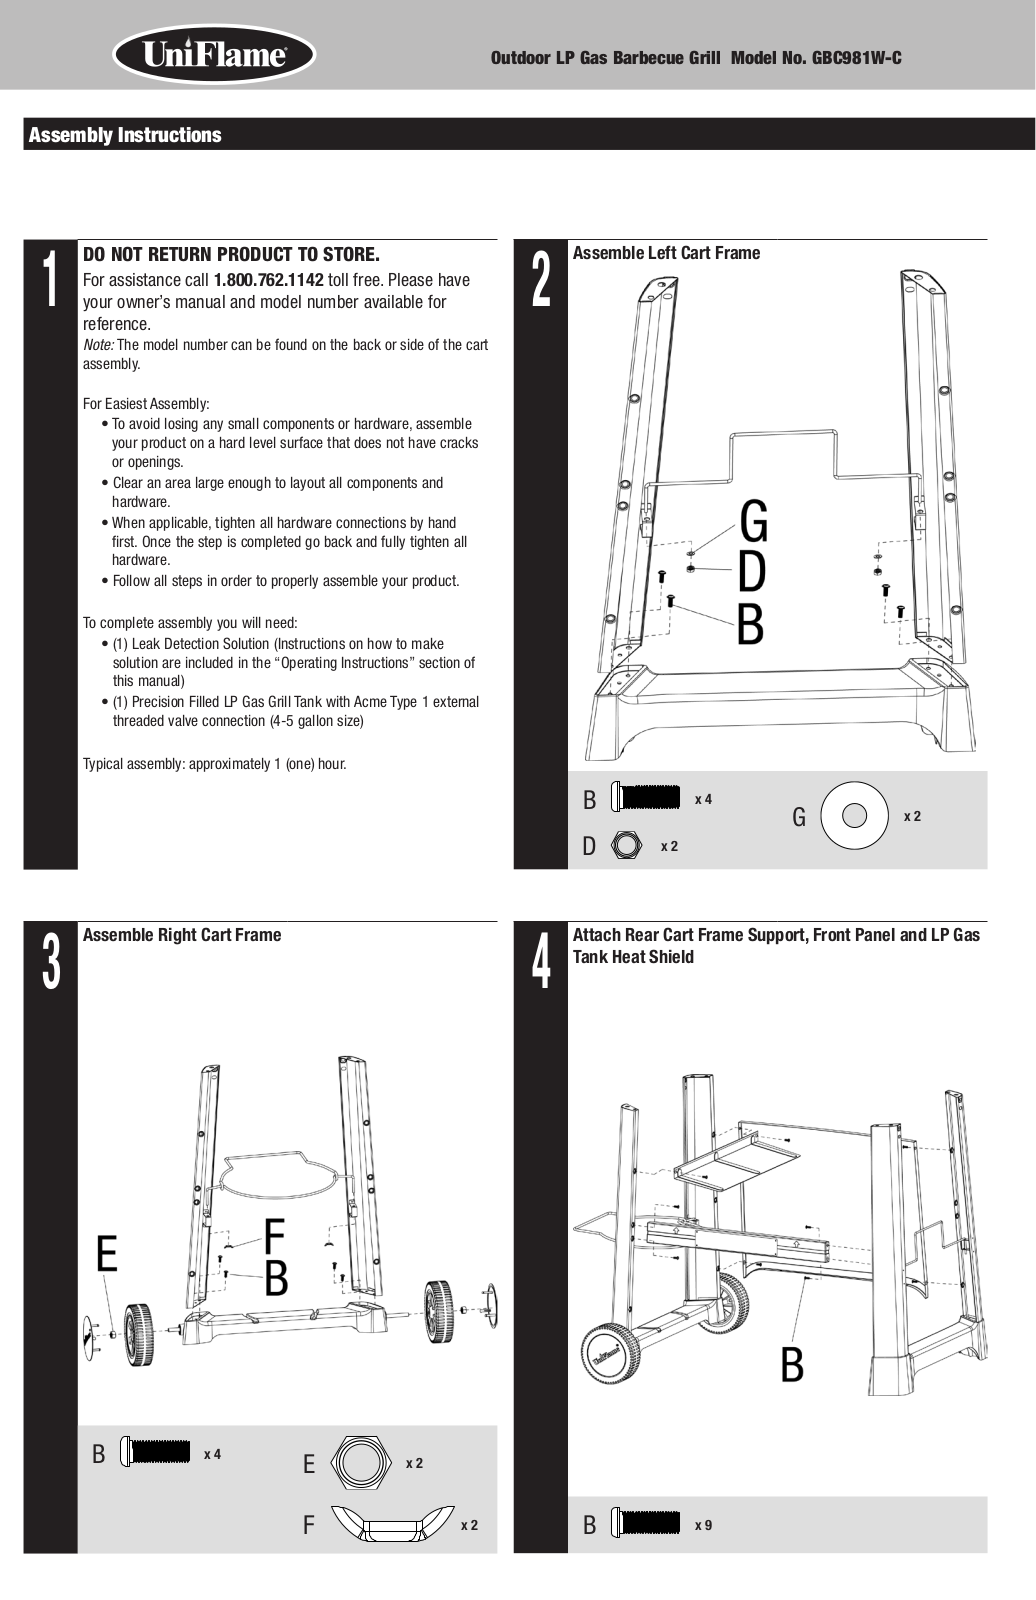
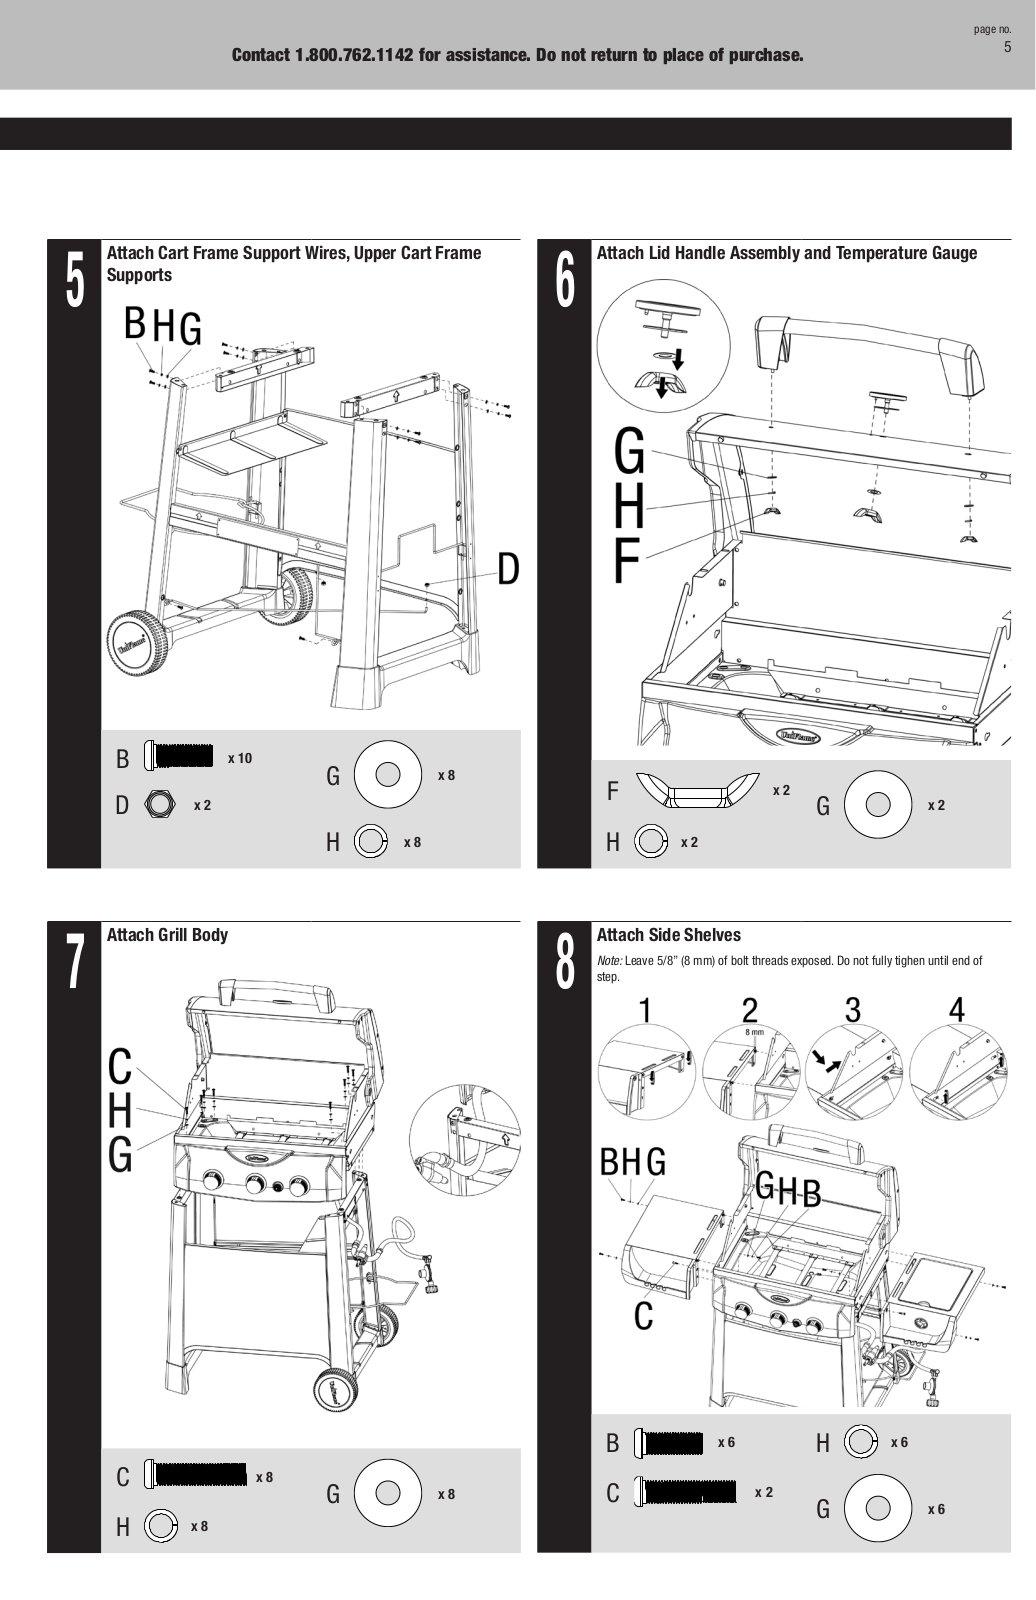
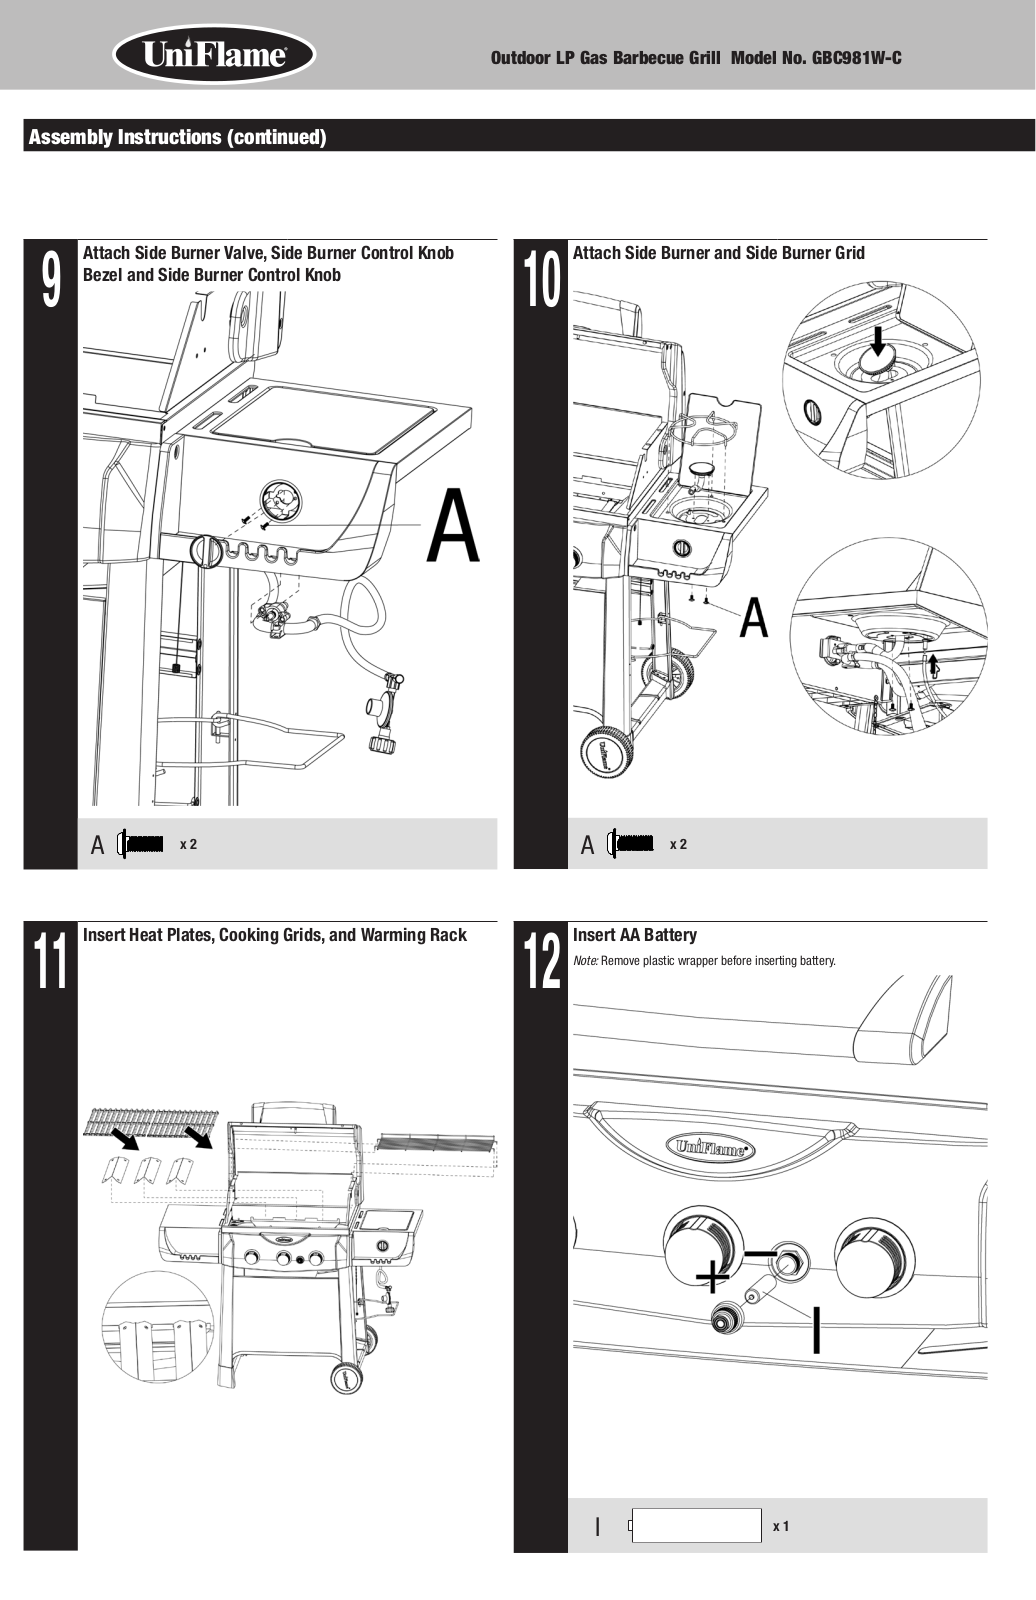
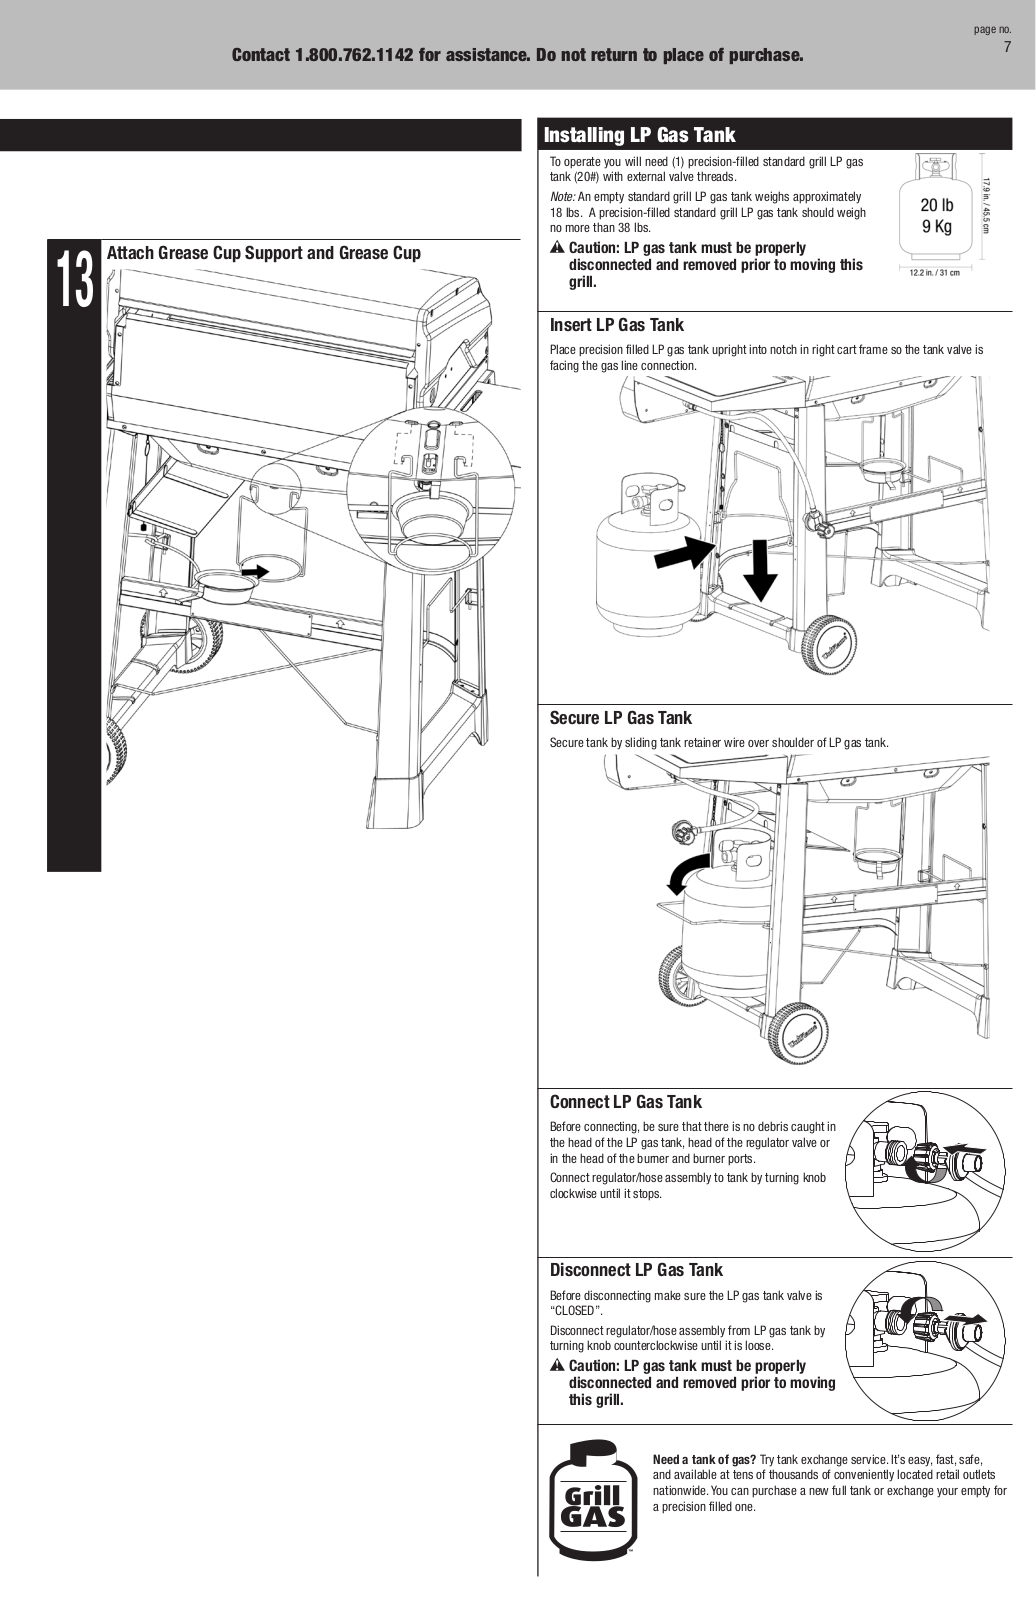
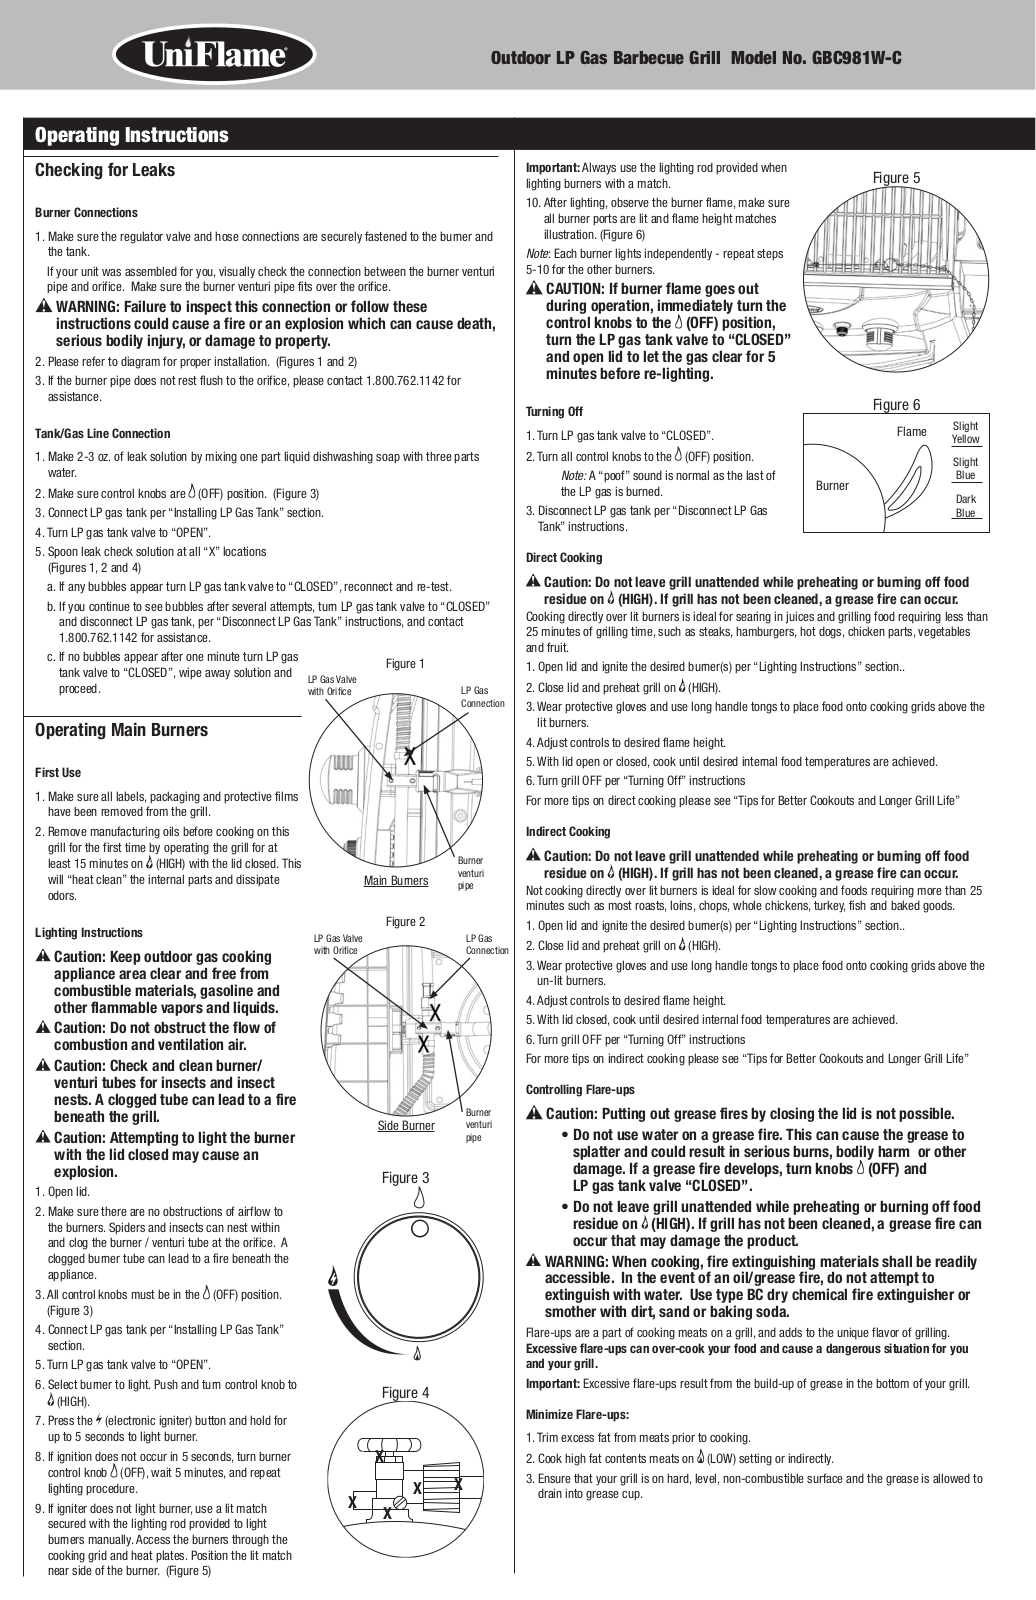
GBC981W-C
User Manual
24 pgs
3.18 Mb
0
Table of contents
Loading...
Uniflame GBC981W-C User Manual
...
Uniflame User Manual
Download
Specifications and Main Features
Frequently Asked Questions
User Manual
Download
Loading...
+
hidden pages
Unhide
You need points to download manuals.
1 point = 1 manual.
You can buy points or you can get point for every manual you upload.
Buy points
Upload your manuals
 Loading...