


NL |
Gebruikershandleiding |
UK |
User manual |
FR |
Manuel d'utilisation |
DE |
Bedienungsanleitung |
ES |
Manual de usuario |
IT |
Manuale utente |
PT |
Manual de utilizador |
HR |
Korisnički priručnik |
Onderdelenbeschrijving | Parts description | Description des pièces | Teile
Beschreibung | Descripción de las partes | Parti de scrizione | Peças descrição
ST-8908
2 |
3 |
5 |
1
4
|
|
|
6 |
|
|
|
1 |
2 |
3 |
|
|
|
4 |
Strijkzool |
Controle lamp |
Stoom schakelaar |
Bedieningspaneel |
|||
Ironsole |
Control light |
Steam knob |
|
|
|
Control Panel |
Fer |
Contrôle de la lumière |
Bouton devapeur |
Panneau de controle |
|||
Eisensohlen Kontroll-Lampe |
Dampf-regler |
|
|
|
Control Panel |
|
Hierro |
Control de luz |
Mando de vapor |
Panel de control |
|||
Ferro |
Controllo luce |
Manopola di regolazione vapore |
Pannello di controllo |
|||
Ferro |
Controlo luz |
Vapor manípulo |
|
|
|
Painel de Contrôle |
Ploča glačala Kontrolno svjetlo |
Ručica za paru |
|
|
|
Upravljačka ploča |
|
5 |
|
|
6 |
|
|
|
Vulopening |
|
|
Stoom snoer |
|
||
Fuel filler |
|
|
Steam Cord |
|
||
Remplissage des réservoirs carburant |
Steam cordon |
|
||||
Treibstoff Füllstoff |
Dampf-Kabel |
|
||||
Del tanque de combustible |
|
De vapor de cordón |
||||
Carburante riempitivo |
|
Cordone di vapore |
|
|||
Enchimento de combustível |
|
Vapor cordão |
|
|||
Uljevnik vode |
|
Vod za paru |
|
|||
|
|
|
|
|
|
|

10
7
8
9
7 |
8 |
9 |
10 |
Schakelaar Boiler |
Controle lamp |
Schakelaar strijkijzer |
Stoom schakelaar |
Boiler switch |
Control light |
Iron switch |
Steam knob |
Bascule chaudière |
Contrôle de la lumière |
Fer basculer |
Bouton de vapeur |
Schalter kessel |
Kontroll-Lampe |
Eisen-Schalter |
Dampf-regler |
Cambiar caldera |
Control de luz |
ferro passare |
Mando de vapor |
Caldaia passare |
Controllo luce |
interruptor de hierro |
Manopola di |
|
|
|
regolazione vapore |
Caldeira alternar |
Controlo luz |
ferro passer |
Vapor manípulo |
Sklopka grijača za voduKontrolno svjetlo |
Sklopka glačala |
Ručica za paru |
|
VOOR GEBRUIK |
NL |
Verwijder alle verpakkingen van het apparaat.
Controleer of de spanning van het apparaat overeenkomt met de netspanning van uw huis. Het stroomstrijksysteem moet op de strijkplank worden gezet, en zet het strijkijzer altijd terug op het basisstation als u niet aan het strijken bent.
Laat uw stoomstrijksysteem nooit onbewaakt achter. Zet uw strijkijzer altijd terug op het basisstation voor uw veiligheid en gemak.
HET VULLEN MET WATER VAN UW STOOMSTRIJKSYSTEEM.
U moet gebruik maken van gedestilleerd water. Zorg ervoor dat het apparaat op OFF staat en op een stabiele, vlakke ondergrond, draai de knop van het basisstation en vul met behulp van de bijgeleverde trechter en beker het basisstation, maximaal 700 ml water ! Let op dat u niet meer water toevoegt. Voeg nooit andere vloeistoffen toe aan het water !
Als het apparaat is ingeschakeld kunt u de knop niet van het basisstation afdraaien zonder de in deze handleiding beschreven voorschriften te hanteren.
U dient de knop in te drukken en te draaien, dit is een beveiliging.
Let op ! De vulknop van het basisstation wordt zeer heet, wees hier voorzichtig mee.
De stoomkabel tussen het strijkijzer en het basisstation kan warm worden, dit is normaal. De straal van de uitgestoten stoom is zeer krachtig, dus zorg ervoor dat u niet richt op personen, huisdieren of delicate punten.
HET GEBRUIK VAN UW STOOMSTRIJKSYSTEEM MET STOOM.
Schakel het apparaat in door zowel de strijkijzer schakelaar (nr.9) als de boiler schakelaar (nr.7) op ON te zetten. De controle lamp op het strijkijzer gaat branden, de controlelamp op het basisstation gaat branden zodra als het basisstation voldoende druk heeft opgebouwd. De controlelamp zal aan en uit gaan, dit is normaal en wordt veroorzaakt door de temperatuurverschillen.
Het kan tot 7 minuten duren voordat het apparaat op druk is en gebruikt kan worden. Als het controlelampje aangaat kunt u beginnen met het stoom strijken.
1.Stel de schakelaar op het strijkijzer in op de gewenste stand. Van 0 tot MAX.Op het label in uw kledingstuk kunt u de juiste stand vinden die voor het kledingstuk geschikt is, zie in de tabel de betekenis van de standen.
2.Om met stoom te strijken druk u de stoomschakelaar(nr.10) op het strijkijzer in. Voor constante stoom zet u de schakelaar vast met de knop in de schakelaar.
3.Zet het strijkijzer altijd terug op het basisstation.
WATER BIJVULLEN TIJDENS HET GEBRUIK
Deze instructies moeten correct worden nageleefd om ongelukken te voorkomen,.
Als de stoomproductie ophoudt tijdens het gebruik, is de water boiler leeg, volg de volgende instructies:
1.Druk de boiler schakelaar(nr.7) op OFF, laat de strijkijzer schakelaar op ON.
2.Druk de stoomschakelaar(nr.10) net zolang in totdat er geen stoom en/of lucht meer uitkomt, de druk van de ketel is nu verdwenen.
3.Zet de strijkijzerschakelaar(nr. 9) op OFF, haal de stekker uit het stopcontact en draai de stoomknop voorzichtig van de vulopening. Deze kan nog heet zijn, wees voorzichtig. Er kan nog wat stoom uit de vulopening komen, gebruik handschoenen of een doek.
4.Voeg nieuw water toe met de bijgeleverde trechter en beker.
5.Draai de stoomknop weer in de vulopening
6.De stekker kan weer in het stopcontact en zet beide schakelaars weer op ON.
NA GEBRUIK
Zorg ervoor dat de stekker uit het stopcontact is en laat het apparaat volledig afkoelen voor u het oppakt. Er kan condens op het ijzer ontstaan, dit is normaal. Maak het ijzer droog met een zachte doek. U dient het basisstation leeg te maken voordat u het opbergt.
UW STRIJKIJZER GEBRUIKEN ZONDER STOOM
Schakel het apparaat in door alleen de strijkijzer schakelaar (nr.9) op ON te zetten. De controle lamp op het strijkijzer gaat branden, de controlelamp op het basisstation gaat niet branden. Stel de schakelaar op het strijkijzer in op de gewenste stand. Van 0 tot MAX.Op het label in uw kledingstuk kunt u de juiste stand vinden die voor het kledingstuk geschikt is, zie in de tabel de betekenis van de standen. De stoomschakelaar(nr.10) heeft nu geen functie.
VRAGEN EN ANTWOORDEN
Er komt meer water dan stoom uit het strijkijzer.
Indien het ijzer nog niet heet genoeg is zal de stoom direct gaan condenseren op het metalen oppervlak, er vormen zich druppels.Wacht tot het strijkijzer warmer is geworden, of zet de stand hoger.
Er komt geen stoom uit het strijkijzer.
Zit er water in het basisstation? Staan de schakelaars nr.7 en 9 op ON. Kijk of het stoomsnoer niet geknikt is.
Indien er geen gedestilleerd water wordt gebruikt, kan er verkalking in het apparaat optreden, neem contact op met uw leverancier.
Er past geen 0,7 liter water in het vulstation.
U dient het water zeer rustig met de bijgeleverde trechter in de vulopening te gieten, heb geduld. Of de tank is de laatste keer niet helemaal geleegd.
Indien u meer dan 0,8 liter water wilt vullen zal het basisstation overstromen.
De stoomknop wil niet los.
Zorg dat alle stoom verdwenen is door meerdere malen op de stoomknop(nr10) te drukken. Druk de knop in draai gelijktijdig tegen de klok in.
Gebruik eventueel handschoenen of een doek voor meer grip.
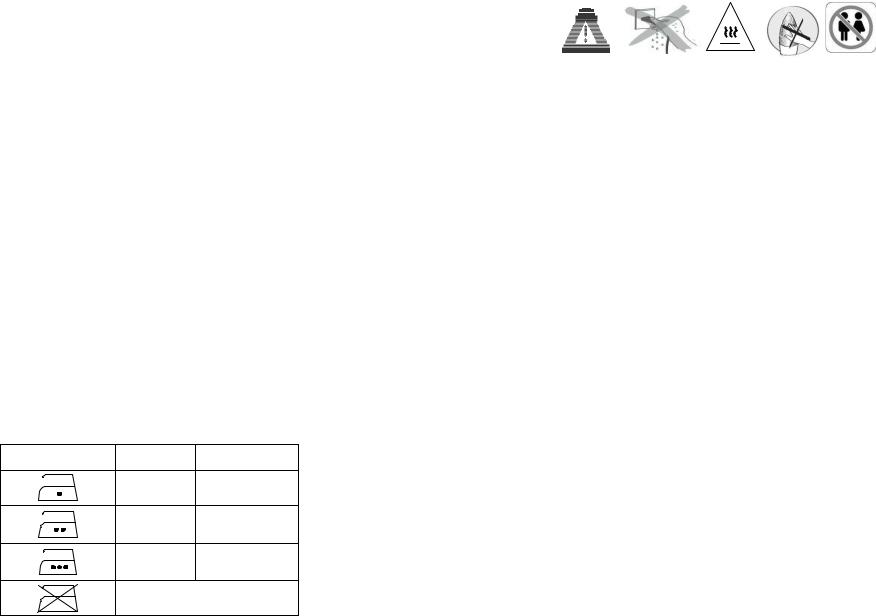
KLEDINGSETIKET |
TYPE |
THERMOSTAAT |
|
STOF |
REGELING |
||
|
|||
|
synthetisch |
· |
|
|
lage temperatuur |
||
|
|
||
|
|
·· |
|
|
Zijde - wol |
medium |
|
|
|
temperatuur |
|
|
Katoen - |
··· |
|
|
hoge |
||
|
linnen |
||
|
temperatuur |
||
|
|
||
|
Stof mag niet gestreken worden |
||
BELANGRIJKE VEILIGHEIDSVOORSCHRIFTEN
∙Lees alle instructies voor gebruik
∙Raak geen hete oppervlakken aan. Gebruik handgrepen of knoppen.
∙Om u te beschermen tegen een elektrische schok; snoer, stekker of het apparaat niet onderdompelen in water of een andere vloeistof.
∙Haal de stekker uit het stopcontact indien het apparaat niet in gebruik is of voor reiniging.
∙Laat het apparaat afkoelen alvorens onderdelen te verwijderen of te monteren.
∙Het apparaat niet gebruiken met een beschadigd snoer of stekker of indien het toestel beschadigd is op enigerlei wijze.
∙Het gebruik van accessoires die niet zijn aanbevolen door de fabrikant van het
apparaat kan letsel veroorzaken en beëindigt ied ere garantie die u heeft.
∙Gebruik het apparaat niet buitenshuis of op of in de buurt van directe warmtebronnen
∙Laat geen snoer hangen over de rand van de tafel of tegen, hete oppervlakken of in contact komen met het apparaat. Plaats het product niet onder of dicht bij de gordijnen, raambekleding enz.
∙Dit apparaat is alleen voor huishoudelijk gebruik en voor het doel waar het voor bestemd is.
∙Het apparaat moet worden geplaatst op een stabiele, vlakke ondergrond.
∙Dit apparaat mag alleen worden gebruikt onder toezicht van volwassenen.
BEWAAR DEZE INSTRUCTIES VOOR LATERE RAADPLEGING
Garantievoorwaarden en service
∙Bij schade veroorzaakt door het niet opvolgen van de gebruiksaanwijzing, vervalt het recht op garantie! Voor vervolgschade die hieruit ontstaat zijn wij niet aansprakelijk.
∙Voor materiële schade of persoonlijk letsel veroor zaakt door ondeskundig gebruik of het niet opvolgen van de veiligheidsvoorschriften zijn wij niet aansprakelijk. In dergelijke gevallen vervalt elke aanspraak op garantie.
∙Anders dan het schoonmaken, zoals genoemd in deze handleiding, is aan dit apparaat geen ander onderhoud noodzakelijk
∙Indien er reparaties moeten worden uitgevoerd, mag dit uitsluitend door een geautoriseerd bedrijf gebeuren.
∙Dit apparaat is alleen bedoeld voor HUISHOUDELIJK gebruik en niet voor commercieel of industrieel gebruik.
∙Het product mag niet worden gewijzigd of veranderd.
∙Indien zich problemen zouden voordoen gedurende 2 jaar na aankoopdatum, welke gedekt zijn door de fabrieksgarantie, zal TRISTAR, middels haar servicebureau het apparaat repareren of vervangen.
∙Uitsluitend materiaalen/of fabricagefouten zijn voorbegrepen in deze garantie. TRISTAR is niet verantwoordelijk voor schade:
1)Ten gevolge van een val of ongeluk
2)Indien het apparaat technisch is gewijzigd door gebruiker of derde
3)Door oneigenlijk gebruik van het apparaat
4)Schade door normale gebruiksslijtage

∙Door eventuele reparatie wordt de oorspronkelijke garantieperiode van 2 jaar niet verlengd. Deze garantie is slechts geldig op europees grondgebied. Deze garantie heft de gebruikersrechten volgens Europese richtlijn 1944/44CE niet op.
∙Voor vragen of klachten kunt zich melden bij uw verkooppunt.
∙Bewaart u altijd uw aankoopbewijs, zonder dit aankoopbewijs kunt u geen aanspraak maken op enige vorm van garantie.
Aanwijzingen ter bescherming van het milieu
Dit product mag aan het einde van zijn levensduur niet bij het normale huisafval worden gedeponeerd, maar dient bij een speciaal inzamelpunt voor het hergebruik van elektrische en elektronische apparaten te worden aangeboden. Het symbool op artikel, gebruiksaanwijzing en verpakking attendeert u hier op. De gebruikte grondstoffen zijn geschikt voor hergebruik. Met het hergebruik van gebruikte apparaten of grondstoffen levert u een belangrijke bijdrage voor de bescherming van ons milieu. Informeer bij uw lokale overheid naar het bedoelde inzamelpunt.
Verpakking
Het verpakkingsmateriaal is 100% recyclebaar, lever het verpakkingsmateriaal gescheiden in.
Product
Dit apparaat is voorzien van het merkteken volgens de Europese richtlijn 2002/96/EG
Inzake Afgedankte elektrische en elektronische apparaten(AEEA). Door ervoor te zorgen dat dit product op de juiste manier als afval wordt verwerkt, helpt u mogelijk negatieve consequenties voor het milieu en de menselijke gezondheid te voorkomen.
EG-conformiteitsverklaring
Dit apparaat is ontworpen om in contact te komen met levensmiddelen en is ontworpen in overeenstemming met de EG-richtlijn 89/109/EEC
Dit apparaat is ontworpen, vervaardigd en in de handel gebracht in overeenstemming met: de veiligheidsdoeleinden van de “laagspanningsrichtlijn”nr. 73/23/EG, de beschermingsvoorschriften van de EMC-richtlijn 89/336/EG “Electromagnetische compatibiliteit” en de vereiste van richtlijn 93/68/EG.
BEFORE USE |
GB |
Check that the voltage of the appliance corresponds to the mains voltage of your home. This appliance is fitted with an earth for extra safety . Remove all packaging from the iron, including any protective covering on the soleplate (which cannot be reused).
The Pro Steam Generator should be placed on the ironing board, and always rest the iron on the Iron Rest when not ironing.
Your new Pro Steam Generator is an attended appliance, and as such should not be left operating unattended. Always rest the iron on the Iron Rest provided for your safety and convenience.
FILLING YOUR PRO STEAM GENERATOR IRON
You must use demineralised or distilled water, even if you are in a ‘soft water’ area; ensure the iron is OFF and on a stable, flat surface, unscrew the Pressure Cap and, using the funnel and beaker provided, fill with up to 800 ml water. Take care not to overfill the unit. Tighten up the Pressure Cap afterwards. NOTE THAT ONCE SWITCHED ON, THE CAP CANNOT BE REMOVED WITHOUT FOLLOWING THE CORRECT PROCEDURE. THERE IS A SAFETY DEVICE TO PREVENT ACCIDENTAL OPENING IN USE. The jet of steam emitted is very powerful; so make sure it is not directed at persons, pets or delicate items.
USING YOUR PRO STEAM GENERATOR IN STEAM MODE
Switch on the unit by pressing both the Iron on/off and the Pro Steam Generator on/off switches; the Iron on/off light will be illuminated, the Pressure Ready Light will start un-lit and will only be illuminated once pressure is reached. Note that it will cycle on and off in use, this is quite normal. The soleplate temperature of the iron is set by setting the iron’s Temperature Dial.
Your Pro Steam Generator iron may take up to 7 minutes to reach operating temperature and boiler pressure. You cannot effectively use the unit during this time. The Pressure Ready Light coming on indicates the end of the warm-up period, you can then start to use the Iron
1.Set the temperature dial in line with the label of your garment, using the desired heat setting between ‘MIN’ and . The mark for setting the temperature is towards the front of the iron, align the dots with the arrow mark.
2.To steam the garment or fabric being ironed, merely squeeze the Steam Trigger on the iron, releasing it when steam is no longer required. Flick the lock-on toggle for constant steaming, flick again to release the lock-on feature.
3.You must rest the iron on the upper, ribbed surface of the base unit – the Iron Rest.
4.NOTE that the cord between iron and base will warm up in use.
AFTER USE & MAINTENANCE
Ensure the iron is unplugged and left to completely cool down. Some condensation may form on the Iron Rest as the iron cools down; this is entirely normal and not a cause for concern. Wipe clean with a soft damp cloth, occasionally you may use a mild detergent only; do not use any form of descaler or fabric treatment in the boiler as this will damage the internal components and may invalidate any warranty you may have.
RE-FILLING WITH WATER IN USE
These instructions must be correctly observed to avoid a hazard.
If the steam output ceases during use, it is likely that the steam chamber has run dry. To continue ironing, follow the following notes:
1.Depress the Pro Steam Generator on/off switch to the OFF position; keep the Iron on/off switch in the ON position.
2.Use the Steam Trigger until no more steam or air is expelled in order to release the steam pressure from within the generator station. This may take a few minutes. FAILURE TO COMPLETELY DO THIS IS LIKELY TO RESULT IN A HAZARD TO THE USER.
3.Depress the Iron on/off switch to the OFF position, disconnect the power supply, and SLOWLY unscrew the Pressure Cap, NOTE THAT THERE MAY STILL BE SOME PRESSURE WITHIN, SO STEAM WILL STILL ESCAPE UPWARDS. THE CAP GETS HOT IN USE, SO HANDLE WITH CARE; YOU MAY WISH TO USE HAND MITTS.
4.After a few moments, add the fresh water.
5.Close the Pressure Cap, taking care it is tight.
6.Switch on the Pro Steam Generator by pressing both the Iron on/off and the Pro Steam Generator on/off switches; the Iron on/off light will be illuminated, the Pressure Ready Light will start un-lit and will only be illuminated once pressure is reached. Note that it will cycle on and off in use, this is quite normal
Your Pro Steam Generator iron may take up to 7 minutes to reach operating temperature and boiler pressure. You cannot effectively use the unit during this time. The Pressure Ready Light coming on indicates the end of the warm-up period, you can then start to use the Iron** FINISHING STEAM IRONING WITH STEAM STILL AVAILABLE
If you have finished ironing and steam is still available, there will still be water in the boiler.
USING YOUR NEW PRO STEAM GENERATOR IN DRY MODE (i.e. no steam)
Switch ON the iron by pressing just the iron on/off switch; the individual tell-tale light will be illuminated – do not activate the Pro Steam Generator on/off switch.
Set the temperature dial in line with the label of the garment, using the desired heat setting between ‘MIN’ and . Since no water has been added, and the boiler on/off switch has not been activated, no steam is created.
Your Pro Steam Generator iron will not become effective until the light on the iron goes out indicating that the temperature as determined by the temperature dial setting has been reached.
The steam trigger will be ineffective in this mode.
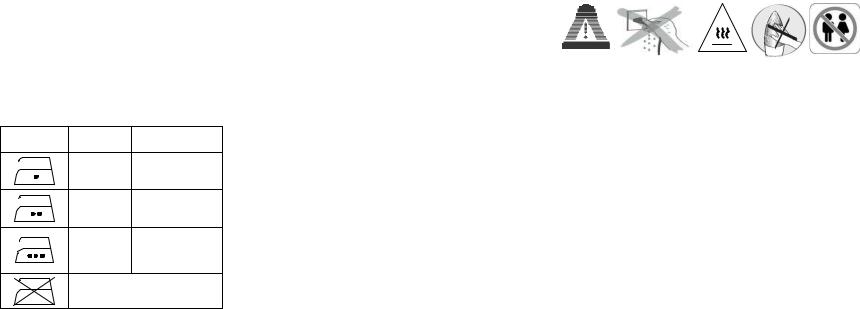
GARMENT |
FABRIC |
THERMOSTAT |
LABEL |
TYPE |
REGULATION |
|
|
· |
|
Synthetic |
low |
|
|
temperature |
|
silk – |
·· |
|
medium |
|
|
wool |
|
|
temperature |
|
|
|
|
|
Cotton |
··· |
|
high |
|
|
– linen |
|
|
temperature |
|
|
|
Fabric not to be ironed
Help! I THINK MY PRO STEAM GENERATOR HAS GONE WRONG
If you think your Pro Steam Generator has gone wrong, look here for some hints and tips. If your query is still not answered, please call us or e-mail.
Water comes out of the soleplate The Pro Steam Generator develops a massive amount of steam, which is expelled through the soleplate holes. If the soleplate is not hot enough, the cool temperature of the soleplate will condense that steam, giving the impression of leaking water. Increase the iron temperature by turning the temperature dial clock-wise; this will solve your problem. We do not recommend using the Steam system until at least the iron heat setting.
No steam comes out Check you have water in the boiler. Check the power/steam cord has not become kinked. Check the pressure cap is tight. Are you in a hard water area and have you used distilled water (otherwise the internal components may have become blocked with limescale).
I can’t get 0.7-litre of water in / Water is leaking The boiler has a capacity of 0.7-litre. If it is not wholly emptied in use or manual pouring, you will not be able to get 0.7-litre of water in. It can be difficult to pour out the last few millilitres of water….have patience! Equally, it can be difficul t to completely fill the boiler. Always use the funnel. Sometimes a meniscus forms in the filler neck. If the boiler has not been wholly emptied AND you fill it with 0.7-litre of water, this ‘excess’ will escape and you will think you have aleak! If in doubt, manually empty (invert base and pour out) or fill with, say, 0.5-litre.
I can’t get the pressure cap off Make sure that you have wholly de-pressurised the boiler, see the section REFILLING WITH WATER IN USE. Repeat steps 1-3, making sure that you leave the Steam Trigger on for a few minutes to ensure all steam and/or air has been released.
IMPORTANT SAFEGUARDS
∙Read all instructions before use.
∙Do not touch hot surfaces. Use handles or knobs.
∙To protect against electric shock, do not immerse cord, plug or appliance in water or any other liquid.
∙Unplug from outlet when not in use and before cleaning. Allow the device to cool before putting on or taking off parts. Do not operate any appliance with a damaged cord or plug or after the appliance malfunctions, or has been damaged in any manner.
∙The use of accessory attachments not recommended by the appliance manufacturer may cause injuries and invalidate any warranty you may have.
∙Do not use outdoors, or on or near direct heat sources
∙Do not let cord hang over edge of table or counter, or touch hot surfaces or come into contact with the hot parts or allow the product to be situated underneath or close to curtains, window coverings etc.
∙This appliance is for household use only and only for the purpose it is made for.
∙The appliance must be placed on a stable, level surface.
∙This appliance is an attended appliance, and as such should never be left ON or
whilst hot without adult supervision.
SAVE THESE INSTRUCTIONS FOR FUTURE REFERENCE

Guarantee
∙The device supplied by our Company is covered by 24 month guarantee starting on the date of purchase (receipt).
∙During the life of the guarantee any fault of the device or its accessories to material or manufacturing defects will be eliminated free of charge by repairing or, at our discretion, by replacing it. The guarantee services do not entail an extension of the life of the guarantee nor do they give rise to any right to a new guarantee!
∙Proof of the guarantee is provided by the proof of purchase. Without proof of purchase no free replacement or repair will be carried out.
∙If you wish to make a claim under the guarantee please return the entire machine in the original packaging to your dealer together with the receipt.
∙Damage to accessories does not mean automatic free replacement of the whole machine. In such cases please contact our hotline. Broken glass or breakage of plastic parts are always subject to a charge.
∙Defects to consumables or parts subject to wearing , as well as cleaning, maintenance or the replacement of said parts are not covered by the guarantee and hence are to be paid!
∙The guarantee lapses in case of unauthorized tampering.
∙After the expiry of the guarantee repairs can be carried by the competent dealer or repair service against the payment of the ensuing costs.
Guidelines for protection of the environment
This appliance should not be put into the domestic garbage at the end of its useful life, but must be disposed of at a central point for recycling of electric and electronic domestic appliances. This symbol on appliance, instruction manual and packaging puts your attention to this important issue. The materials used in this appliance can be recycled. By recycling used domestic appliances you contribute an important push to the protection of our environment. Ask your local authorities for information regarding the point of recollection
Packaging
The packaging is 100% recyclable, return the packaging separated.
Product
This device is equipped with a mark according to European Directive 2002/96/EC.
On Waste Electrical and Electronic Equipment (WEEE). By ensuring that the product correctly as waste is processed, it helps you may have adverse consequences for the environment and human health.
EC declaration of conformity
This device is designed, manufactured and marketed in accordance with the safety objectives of the Low Voltage Directive "No 73/23/EEC, the protection requirements of the EMC Directive 89/336/EC "Electromagnetic Compatibility" and the requirement of Directive 93/68/EEC.
AVANT UTILISATION |
FR |
Assurez vous que la tension de l'appareil corresponde à celle de l'alimentation sur secteur de votre foyer. Cet appareil est doté d'une liaison à la terre afin d'en améliorer la sécurité d'utilisation. Retirez du fer tous les éléments del'emballage y compris la protection installée sur la semelle (cette protection ne peut être réuti lisée). Le Pro Steam Generator doit être placé sur la planche à repasser et le fer doit toujours reposer sur le Repose Fer lorsqu'il n'est pas utilisé.
Votre nouveau Pro Steam Generator n'est pas destinéà fonctionner sans la présence d'un opérateur. Remplacez toujours le fer sur le Repose Fer fourni pour votre sécurité et votre confort.
REMPLIR VOTRE FER PRO STEAM GENERATOR
Vous devez utiliser de l'eau déminéralisée ou distillée, même si vous vous trouvez dans une zone ou l'eau n'est pas calcaire. Assurez-vous que le fer se trouve en position '"OFF" et soit qu'il repose sur une surface stable et plane. Dévissez le bouchon de pression et, à l'aide du bec et de l'entonnoir fournis, remplissez de 800 ml d'eau. Faites attention à ne pas trop remplir l'appareil. Replacez le Bouchon de Pression et serrez bien. NOTEZ QU'UNE FOIS LE FER ALLUME, LE BOUCHON NE PEUT PLUS ETRE RETIRE SANS SUIVRE LA PROCEDURE NORMALE. IL S'AGIT D'UN DISPOSITIF DE SECURITE DESTINE A EMPECHER UNE OUVERTURE ACCIDENTELLE EN COURS D'UTILISATION. Le jet de vapeur émis est très puissant, prenez garde à ce qu'il ne soit pas dirigé vers des personnes, des animaux familiers ou des objets fragiles.
UTILISER VOTRE PRO STEAM GENERATOR EN MODE VAPEUR
Mettez l'appareil en marche en appuyant sur les boutons marche/arrêt du Pro Steam Generator et du fer. Le voyant Marche/Arrêt du fer va s'allumer et le voyant "Pressure Ready" [Pression requise] sera éteint au démarrage et ne s'allumera qu'une fois que la pression requise est atteinte. Notez que ce voyant va continuellement s'allumer et s'éteindre en cours d'utilisation, il s'agit d'un phénomène normal. Latempérature de la semelle du fer est réglée à l'aide de la molette de température du fer.
Votre fer Pro Steam Generator a besoin de 7 minutes pour atteindre sa température de fonctionnement et la pression de la bouilloire. Vous ne pouvez utiliser l'appareil avant ce délai. Le voyant lumineux "Pressure Ready" [Pression Requise] va s'allumer pour indiquer la fin de la période de préchauffage. Vous pouvez alors commencer à utiliser le fer.
1.Positionnez la molette de réglage de la température en fonction du vêtement que vous repassez, en utilisant les réglages disponibles compris entre "MIN" et . La marque de réglage de la température se trouve vers l'avant du fer, placez les points en face de la marque fléchée.
2.Pour passer le vêtement ou le tissu repassé à la vapeur, appuyez légèrement sur le Bouton Vapeur du fer et relâchez-le lorsque vous n' avez plus besoin de vapeur. Utilisez le bouton de verrouillage pour obtenir une vapeur constante, remettez le bouton dans sa position initiale pour en finir avec la fonction de verrouillage.
3.Vous devez reposer le fer sur la surface supérieur striée de la station d'accueil – le Repose Fer.
4.NOTEZ que le cordon entre le fer et la station va chauffer au cours de l'utilisation.
APRES USAGE, ENTRETIEN
Assurez-vous que votre fer soit débranché et qu'ilait le temps de refroidir complètement. Il est possible que de la condensation se forme sur le Repose Fer lorsque le fer est en train de refroidir. Il s'agit d'un phénomène normal qui ne doit pas vous inquiéter. Essuyez la condensation à l'aide d'un chiffon doux, vous pouvez également utiliser de temps en temps un détergent léger. N'utilisez jamais de produits détartrants ou de lessive dans la bouilloire, les éléments internes en seraient endommagés et votre garantie serait annulée.
REMPLISSAGE D'EAU EN COURS D'UTILISATION
Ces instructions doivent être suivies avec soin pou r éviter tout risque.
Si la vapeur cesse de sortir alors que vous vous en servez, il est probable que la chambre à vapeur soit vide. Pour continuer de repasser, effectuez la démarche suivante :
1.Replacez l'interrupteur Marche/Arrêt du Pro Stea m Generator sur la position Arrêt [OFF], laissez l'interrupteur du Fer sur la position ON [MARCHE].
2.Utilisez le Bouton Vapeur jusqu'à ce qu'il n'y ait plus de vapeur et que l'air soit expulsé afin de libérer la pression vapeur de l'intérieur de la station. Ceci peut prendre quelques minutes. SI VOUS NE SUIVEZ PAS COMPLETEMENT CETTE PROCEDURE, IL EXISTE UN DANGER POUR L'UTILISATEUR.
3.Replacez l'interrupteur Marche/Arrêt du fer sur la position Arrêt [OFF], débranchez l'alimentation électrique et dévissez LENTEMENT leBouchon de Pression, NOTEZ QU'IL EST POSSIBLE QUE DE LA PRESSION SUBSISTE A L'INTERIEUR ET QUE LA VAPEUR CONTINUE DE S'ECHAPPER. LE BOUCHON DEVIENT CHAUD LORS DE L'UTILISATION, MANIPULEZ-LE AVEC PRECAUTIONS. VOUS POUVEZ UTILISER DES GANTS DE PROTECTION.
4.Au bout d'un moment, ajoutez de l'eau fraîche.
5.Refermez et serrez bien le Bouchon de Pression.
6.Allumez le Pro Steam Generator en appuyant à la fois sur l'interrupteur Marche/Arrêt du fer et sur celui du Pro Steam Generator; Le voyant lumineux Marche/Arrêt du fer va s'allumer, le voyant "Pressure Ready" [Pression Requise] sera d'abord éteint puis va s'allumer une fois la pression requise atteinte. Notez que ce voyant va continuellement s'allumer et s'éteindre et qu'il s'agit d'un phénomène normal.
Votre fer Pro Steam Generator a besoin d'environ 7 minutes pour atteindre sa température de fonctionnement et une pression suffisante dans la bouilloire. Vous ne pouvez pas utiliser l'appareil durant ce délais. Le voyant "Pressure Ready" [Pression Requise] s'allume à la fin de la période de préchauffage, vous pouvez alors commencer à utiliser le fer **.
REPASSAGE VAPEUR TERMINE ALORS QU'IL RESTE DE LA VAPEUR DISPONIBLE Si vous avez fini de repasser et que le jet de vapeur est toujours disponible, il reste de l'eau dans la bouilloire.
UTILISATION DE VOTRE NOUVEAU PRO STEAM GENERATOR EN MODE SEC (sans vapeur)
Mettez en marche le fer en appuyant simplement sur le bouton Marche/Arrêt du fer, les voyants lumineux individuels vont s'allumer – n'actionnez pas l'interrupteur Marche/Arrêt du Pro Steam Generator.
Réglez la molette de réglage de la température en onctionf des indications figurant sur l'étiquette du vêtement, en utilisant la chaleur désirée, entre "MIN" et . Etant donné qu'il n'y a pas eu d'eau ajoutée et que l'interrupteur Marche/Arrêt de la bouilloire n'a pas été actionné, il n'y a pas de vapeur.
Votre Pro Steam Generator ne fonctionnera pas avant que le voyant sur le fer ne s'éteigne pour indiquer que la température réglée sur la molette de température est atteinte.
Le bouton vapeur ne fonctionne pas avec ce mode.
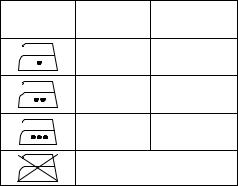
ETIQUETTE |
TYPE DE |
REGLAGE |
|
DU |
|||
TISSUS |
THERMOSTAT |
||
VÊTEMENT |
|||
|
|
||
|
|
· |
|
|
Synthétique |
basse |
|
|
|
température |
|
|
|
·· |
|
|
soie – laine |
température |
|
|
|
moyenne |
|
|
|
··· |
|
|
Coton – lin |
température |
|
|
|
élevée |
Tissu à ne pas repasser
A l'aide ! IL ME SEMBLE QUE MON PRO STEAM GENERATOR A UN PROBLEME
Si vous pensez que votre Pro Steam Generator a un problème, jetez un œil ici afin de profiter de quelques astuces et conseils. Si cela ne suffit pas à résoudre votre problème, veuillez nous appeler ou nous envoyer un courrier électronique.
L'eau sort de la semelle. Le Pro Steam Generator libère une grande quantité de vapeur par les orifices de la semelle. Si la semelle n'est pas assez chaude, sa température va provoquer la condensation de cette vapeur, donnant l'impression d'une fuite d'eau. Augmentez la température du fer en tournant la molette de réglage de la température dans le sens des aiguilles d'une montre, ceci résoudra votre problème. Nous ne recommandons pas d'utiliser le Système Vapeur tant que le fer n'est pas réglé surle niveau de chaleur ou supérieur.
Aucune vapeur n'est produite. Vérifiez si vous avez bien de l'eau dans la bouilloire. Vérifiez si le cordon d'alimentation/de vapeur n'est pas entortillé. Assurez-vous que le bouchon de pression soit bien serré. Si vous-vous trouvez dans une zone ou l'eau est très calcaire, utilisez de l'eau distillée (sinon les composants internes peuvent être bloqués par le calcaire).
Je n'arrive pas à introduire 0,7 litre d'eau / L'eau fuit. La bouilloire a une capacité de 0,7 litre. Si elle n'est pas complètement vidée lors de l'utilisation ou que l'eau n'est pas versée ensuite, vous ne pourrez la remplir de 0,7 litre d'eau. Il peut s'avérer difficile de verser les derniers millilitres d'eau… soyez patient ! Il peut également s'avérer difficile de remplir complètement la bouilloire. Utilisez toujours l'entonnoir. Il arrive qu'un ménisque se forme dans le cou de l'entonnoir. Si la bouilloire n'a pas été complètement vidée ET que vous la remplissez de 0,7 litre d'eau, l'excès d'eau va s'échapper et vous obtiendrez une fuite ! En cas de doute, videz manuellement (retournez la base et versez l'eau) ou remplissez avec 0,5 litre par exemple.
Je ne parviens pas à retirer le bouchon de pression. Assurez-vous d'avoir complètement dépressurisé la bouilloire, voir le paragraphe REMPLISSAGE D'EAU EN COURS D'UTILISATION. Répétez les étapes 1-3 en prenant soin de laisser le Bouton Vapeur activé durant quelques minutes afin de vous assurer que toute la vapeur et/ou l'air se soient échappés.
 Loading...