


TP-PS210U
Table of contents
 Loading...
TABLE OF CONTENTS
COPYRIGHT........................................................................................................................................2
1. INTRODUCTION ...........................................................................................................................3
PRODUCT OVERVIEW ........................................................................................................................3
COMPONENTS AND FEATURES ..........................................................................................................3
HARDWARE INSTALLATION.................................................................................................................3
2. MFP SERVER INSTALLATION..................................................................................................5
PREPARATION ....................................................................................................................................5
CONFIGURATION SOLUTION TABLE ...................................................................................................5
3. THE SETUP UTILITY FOR WINDOWS 2000/XP/VISTA.......................................................6
INSTALLING THE SETUP UTILITY AND DRIVER:....................................................................................6
UNINSTALLING THE SETUP UTILITY ON WINDOWS 2000/XP/VISTA COMPUTER.............................14
4. CONFIGURATION FROM EMBEDDED WEB SERVER......................................................17
OVERVIEW........................................................................................................................................17
USING EMBEDDED WEB SERVER ....................................................................................................17
SETUP MENU ...................................................................................................................................19
5. UPGRADING MFP SERVER.....................................................................................................22
OVERVIEW........................................................................................................................................22
UPGRADING THE MFP SERVER BY WEB BROWSER .......................................................................22
6. TROUBLESHOOTING ...............................................................................................................24
GENERAL TROUBLESHOOTING OVERVIEW......................................................................................24
CABLE RELATED PROBLEMS ...........................................................................................................24
POWER RELATED PROBLEMS..........................................................................................................24
USB PORT RELATED PROBLEMS....................................................................................................25
APPENDIX:.......................................................................................................................................26
LOAD DEFAULT SETTING .................................................................................................................26
HOW TO SCAN VIA MFP SERVER....................................................................................................28
H
OW TO FAX VIA MFP SERVER ......................................................................................................33
H
OW TO USE STORAGE OF YOUR MFP...........................................................................................36
FREQUENTLY ASKED QUESTIONS ...................................................................................................40
1

Trademarks
Windows 2000/XP/Vista are registered trademarks of Microsoft Corp. All other brands and
product names are trademarks of their respective companies.
Copyright
No part of this publication may be reproduced in any form or by any means or used to make
any derivative (such as translation, transformation or adaptation) without the express written
consent of the manufacturer as stipulated by the United States Copyright Act of 1976.
FCC Warning
This equipment has been tested and found to comply with the limits for a Class B digital
device, pursuant to subpart J of Part 15 of the FCC Rules. These limits are designed to
provide reasonable protection against harmful interference when the equipment is operated
in a commercial environment. This equipment generates, uses, and can radiate radio
frequency energy and, if not installed and used in accordance with the instruction manual,
may cause harmful interference to radio communications. Operation of this equipment in a
residential area is likely to cause harmful interference in which the user will be required to
correct the interference at their own expense.
All contents are subject to change without prior notice.
Part No. PS210U-V1.0
2

1. Introduction
Product Overview
The external MFP servers enhance capability by letting you place your MFP printers at
convenient locations directly on the Ethernet network, and by increasing network MFP printer
performance and management.
Network Management
The MFP servers support the WEB management, which remote management and a warning.
A standard WEB server is permanent on these MFP servers. Any standard WEB browser
can be used to access and manage these MFP servers.
Components and Features
1-USB Port MFP Server
․1 USB2.0 port (High-speed)
․Fast Ethernet network port: RJ-45 for 10Base-T or 100Base-TX
․1 LED to indicate Status, 2 LED’s to indicate 10/100M link lights, 1 LED to indicate USB
1.1 or 2.0 link
․One Setup CD for Windows 2000/XP/Vista, User’s Guide
․One external AC power adapter
․One Quick Installation Guide
․Built-in Reset Button
Before you start, you should prepare:
One Windows 2000/XP/Vista computer with CD-ROM drive
One MFP Printer with USB port
Hardware Installation
3

To install the MFP server(s), you need to complete these steps:
․Confirm that your MFP printer works well.
․Connect the MFP server to the network and MFP printer(s) and plug in the MFP server.
Follow these instructions to install the MFP server(s), please refer to any peripheral
you are connecting to the MFP server:
1. Connect one end of the UTP cable to the Ethernet port on MFP Server and the other end
to a wall jack or HUB.
2. Connect the power adapter.
3. Connect the USB cable to the USB port on the side of MFP Server and the other end to
your MFP printer.
4

2. MFP Server Installation
Preparation
To meet users’ network printing/scan needs in today’s heterogeneous and multiple protocol
networking environments, the MFP server supports industrial standard protocols: TCP/IP.
Supported Networks
MFP server supports the TCP/IP network protocol. In addition, we provide a setup utility for
network configuration on the following networks:
․Microsoft Windows 2000/XP/Vista
Configuration Solution Table
Setup Operating
System
Function Remarks
Setup utility
Windows
2000/XP/Vista
Install a single
network on a
peer-to-peer
network
Easy MFP server installation runs from setup CD
5

3. The Setup Utility for Windows 2000/XP/Vista
The setup utility is a proprietary Windows-based management program that can assist you in
configuring and managing your MFP server in Windows 2000/XP/Vista environments. The
program can be installed from the setup CD of MFP server.
Installing the setup utility and driver:
Hardware Installation:
1. Connect one end of the UTP cable to the Ethernet port on MFP Server and the other end
to a wall jack or HUB.
2. Connect the power adapter.
3. Connect the USB cable to the USB port on the side of MFP Server and the other end to
your MFP device.
Note:
You can install the MFP printer’s driver and utility into your computer in advance.
Or, you can install the MFP server’s driver and utility first, and then install the MFP printer’s
driver and utility by the notice of Windows pop-up message (recommended).
Software Installation:
1. Insert the MFP server setup CD. If the start-up screen does not appear, double-click My
Computer, double-click the CD-ROM icon, and then double-click autorun.exe.
2. Choose Installation to install all software programs.
6

3. Click OK.
4. Click Next.
7
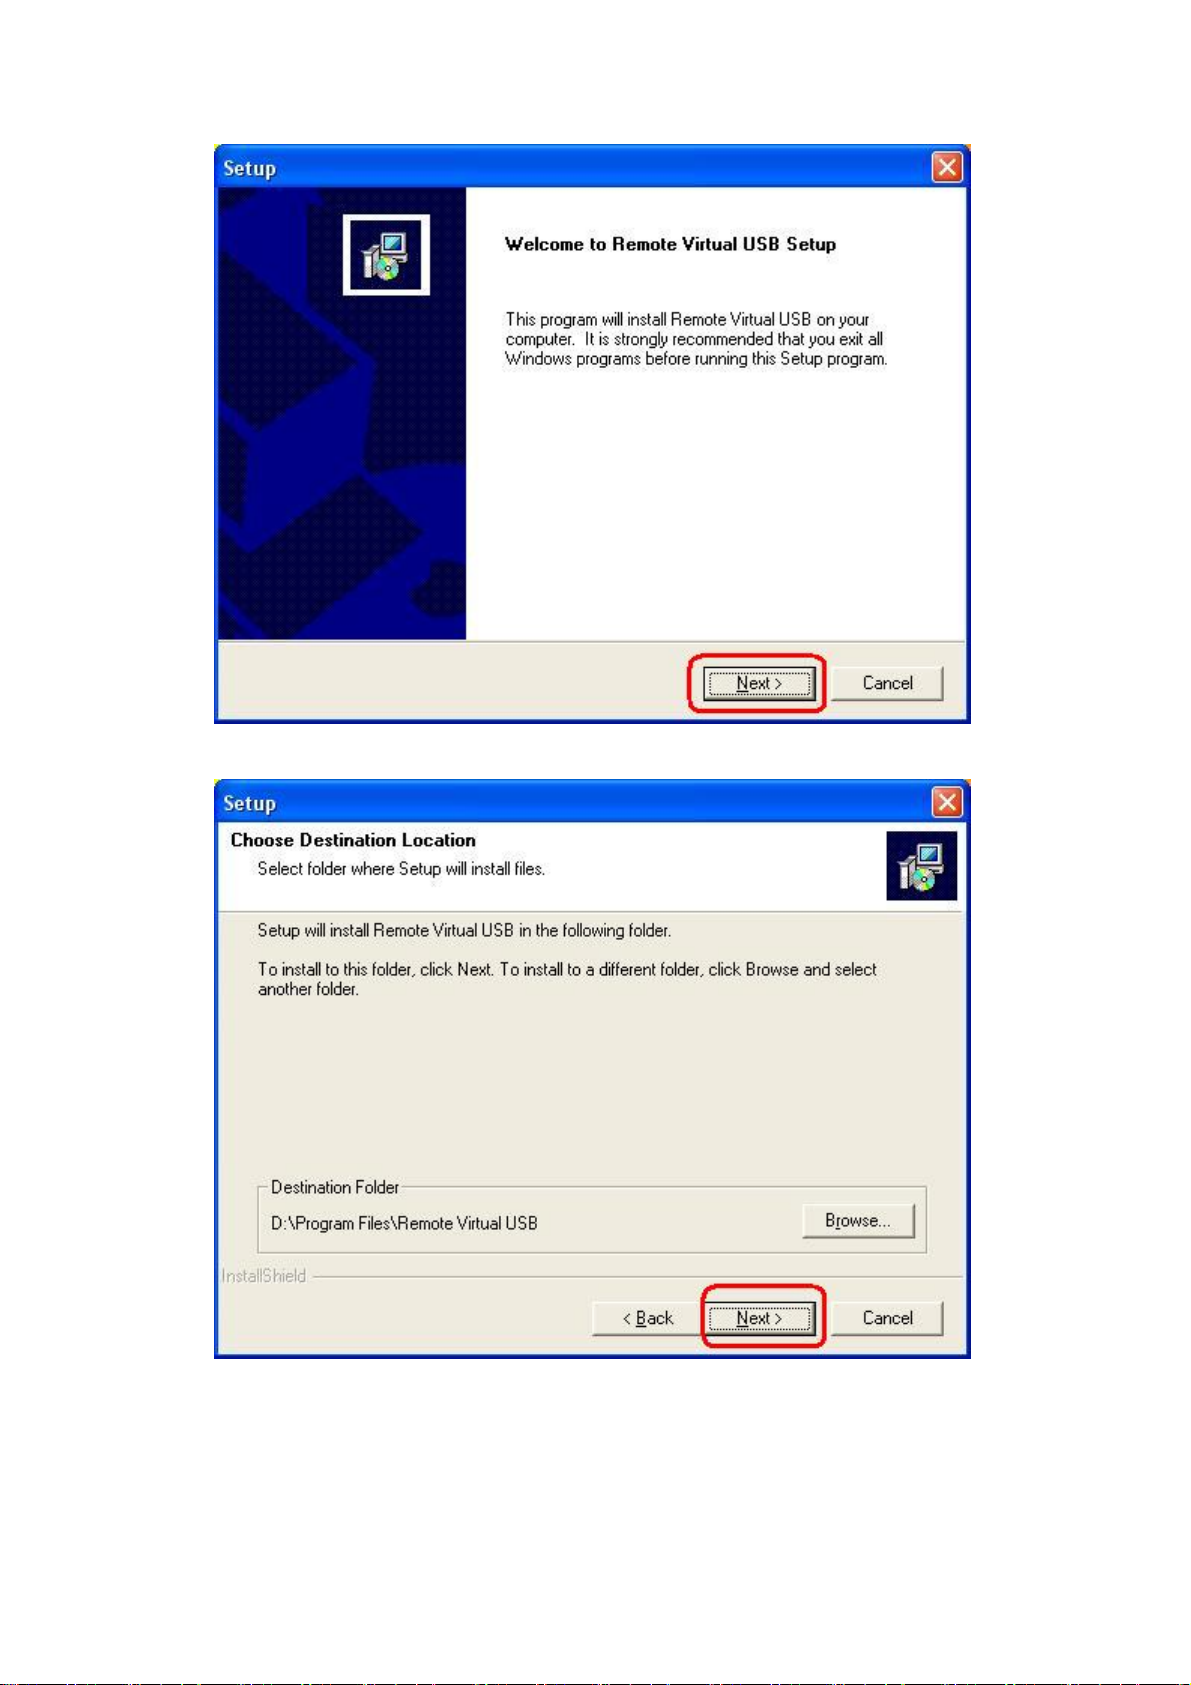
5. Click Next.
6. Click Next.
8
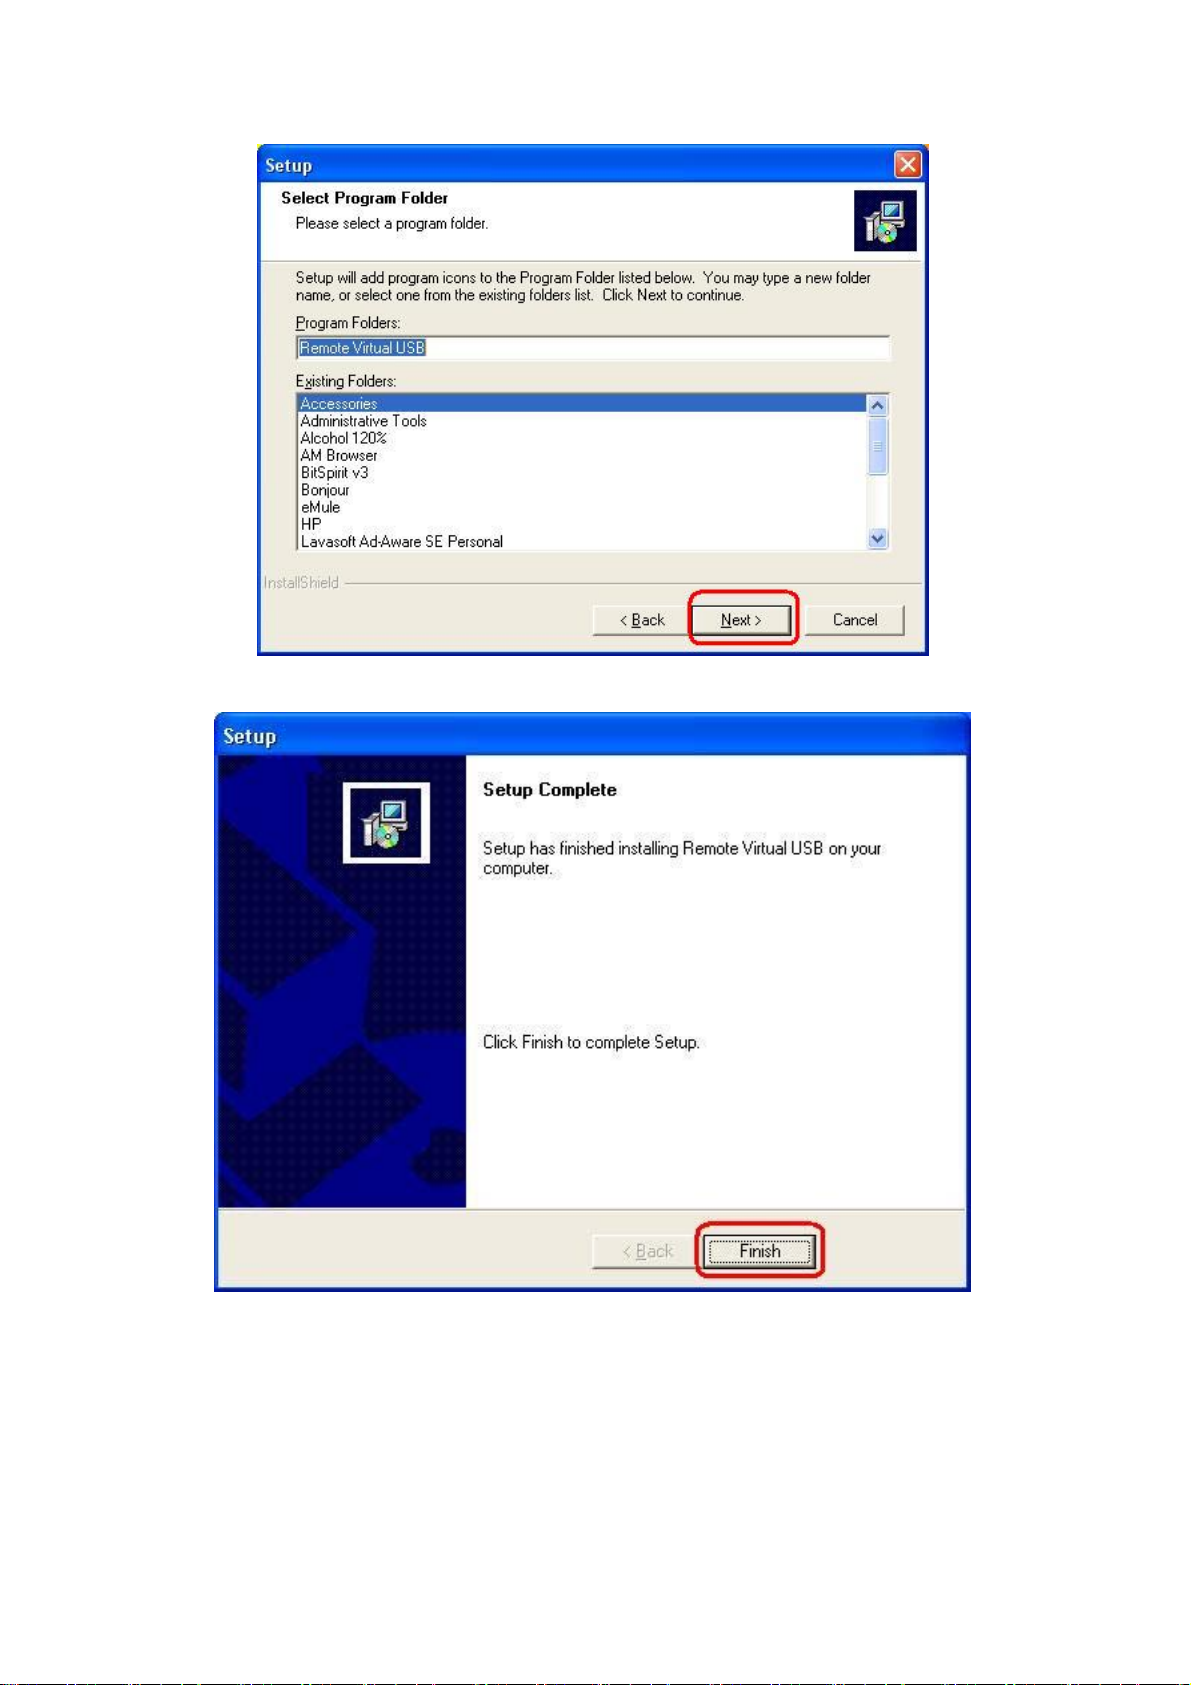
7. Click Finish.
8. Select No, not this time, and then click Next.
9
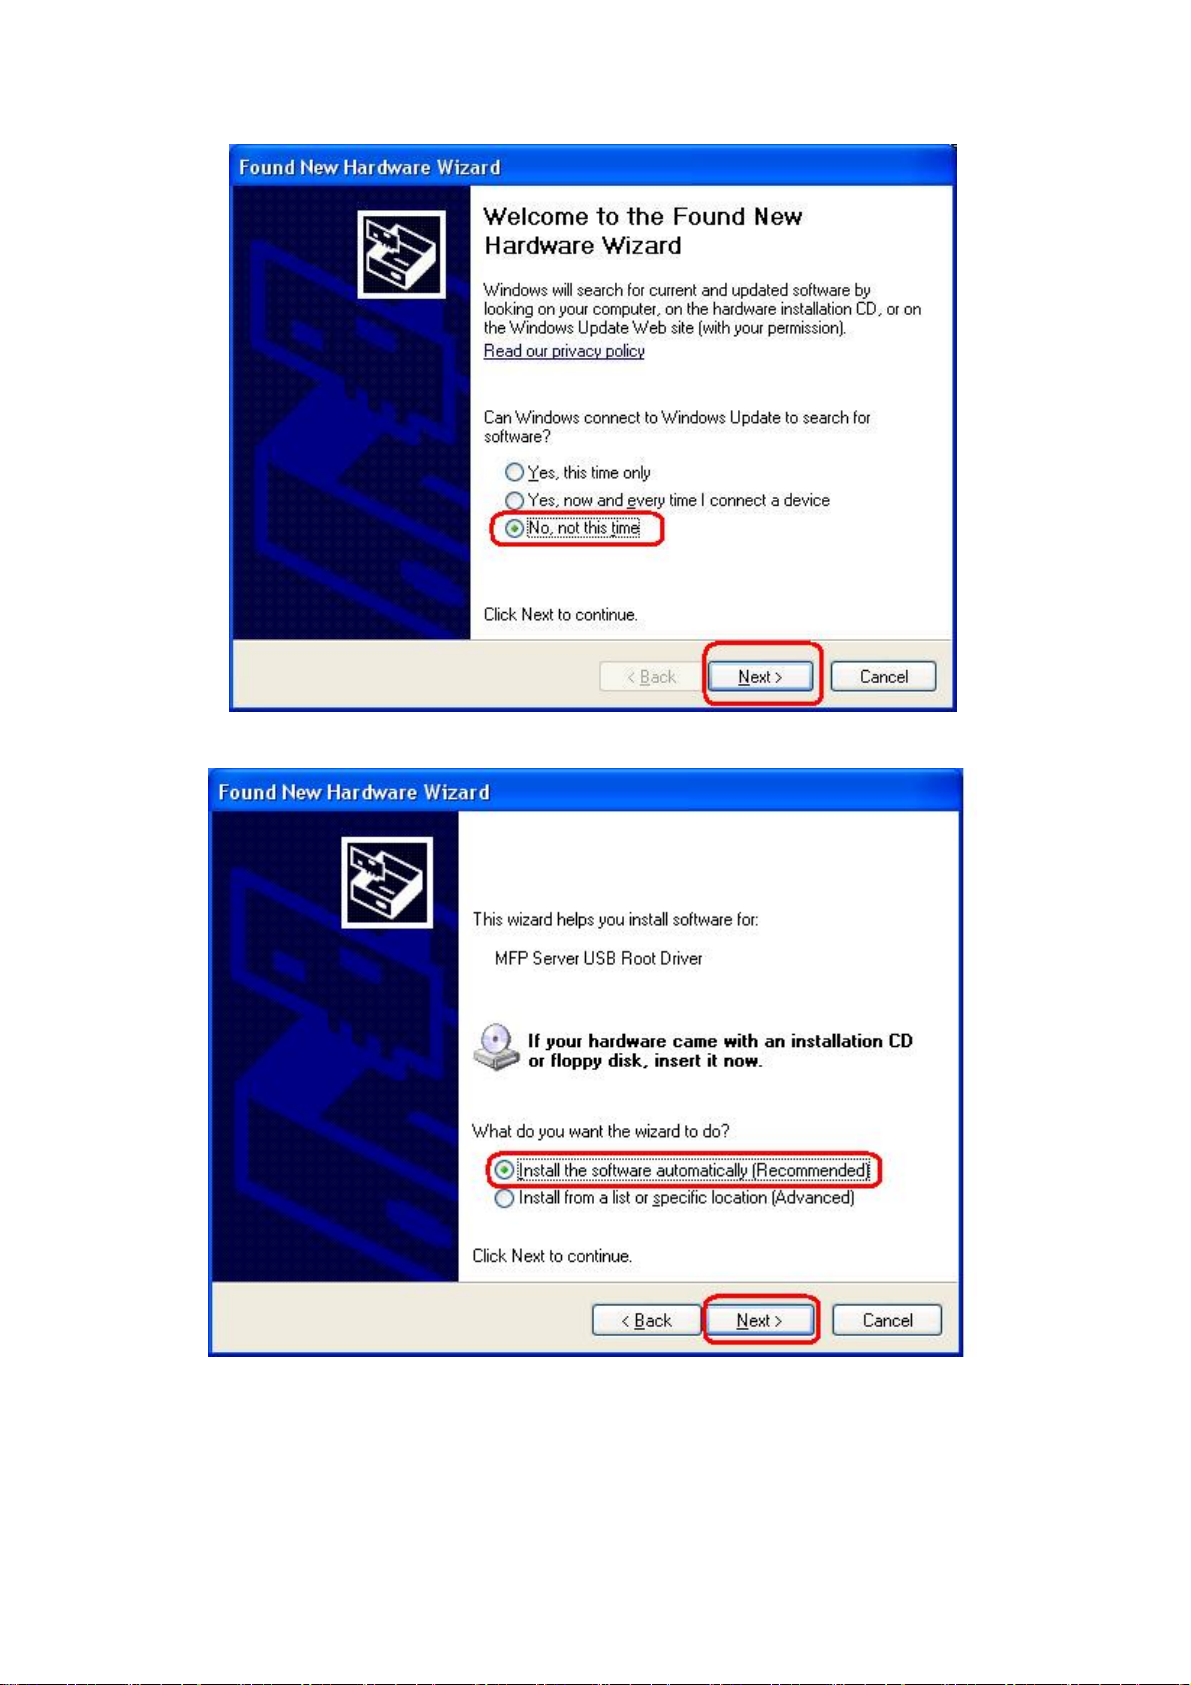
9. Select Install the software automatically (Recommended), and then click Next.
10. Click Continue Anyway.
10
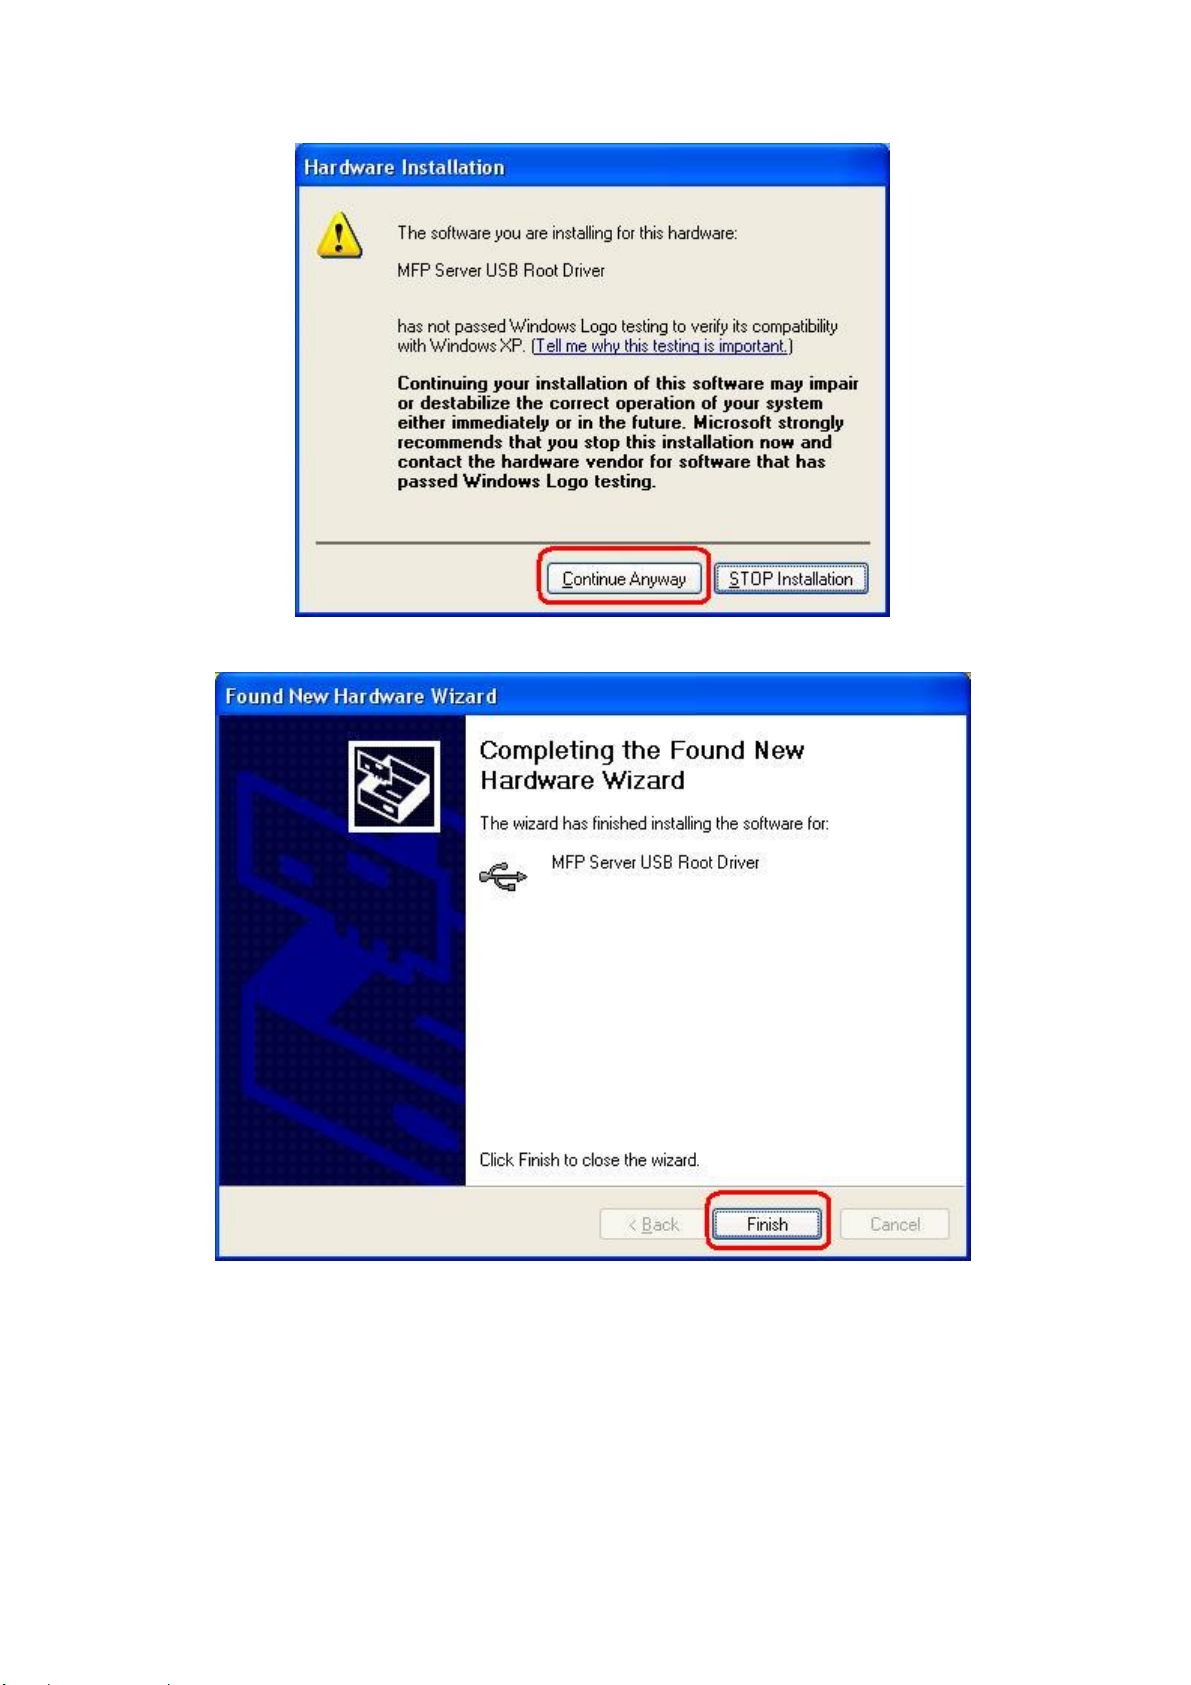
11. Click Finish to complete the software installation.
12. Then, start to setup MFP server. Click start -> All Programs -> Remote Virtual USB
folder; click Remote Virtual USB to launch MFP server utility.
13. If you have Windows XP and the Windows Firewall is enabled you will see this window
pop-up message when the MFP server utility is first launched. Make sure you click the
unblock button to allow communication with the MFP server. Other software firewalls
may display similar options – make sure the MFP server software is allowed to bypass
such programs.
11
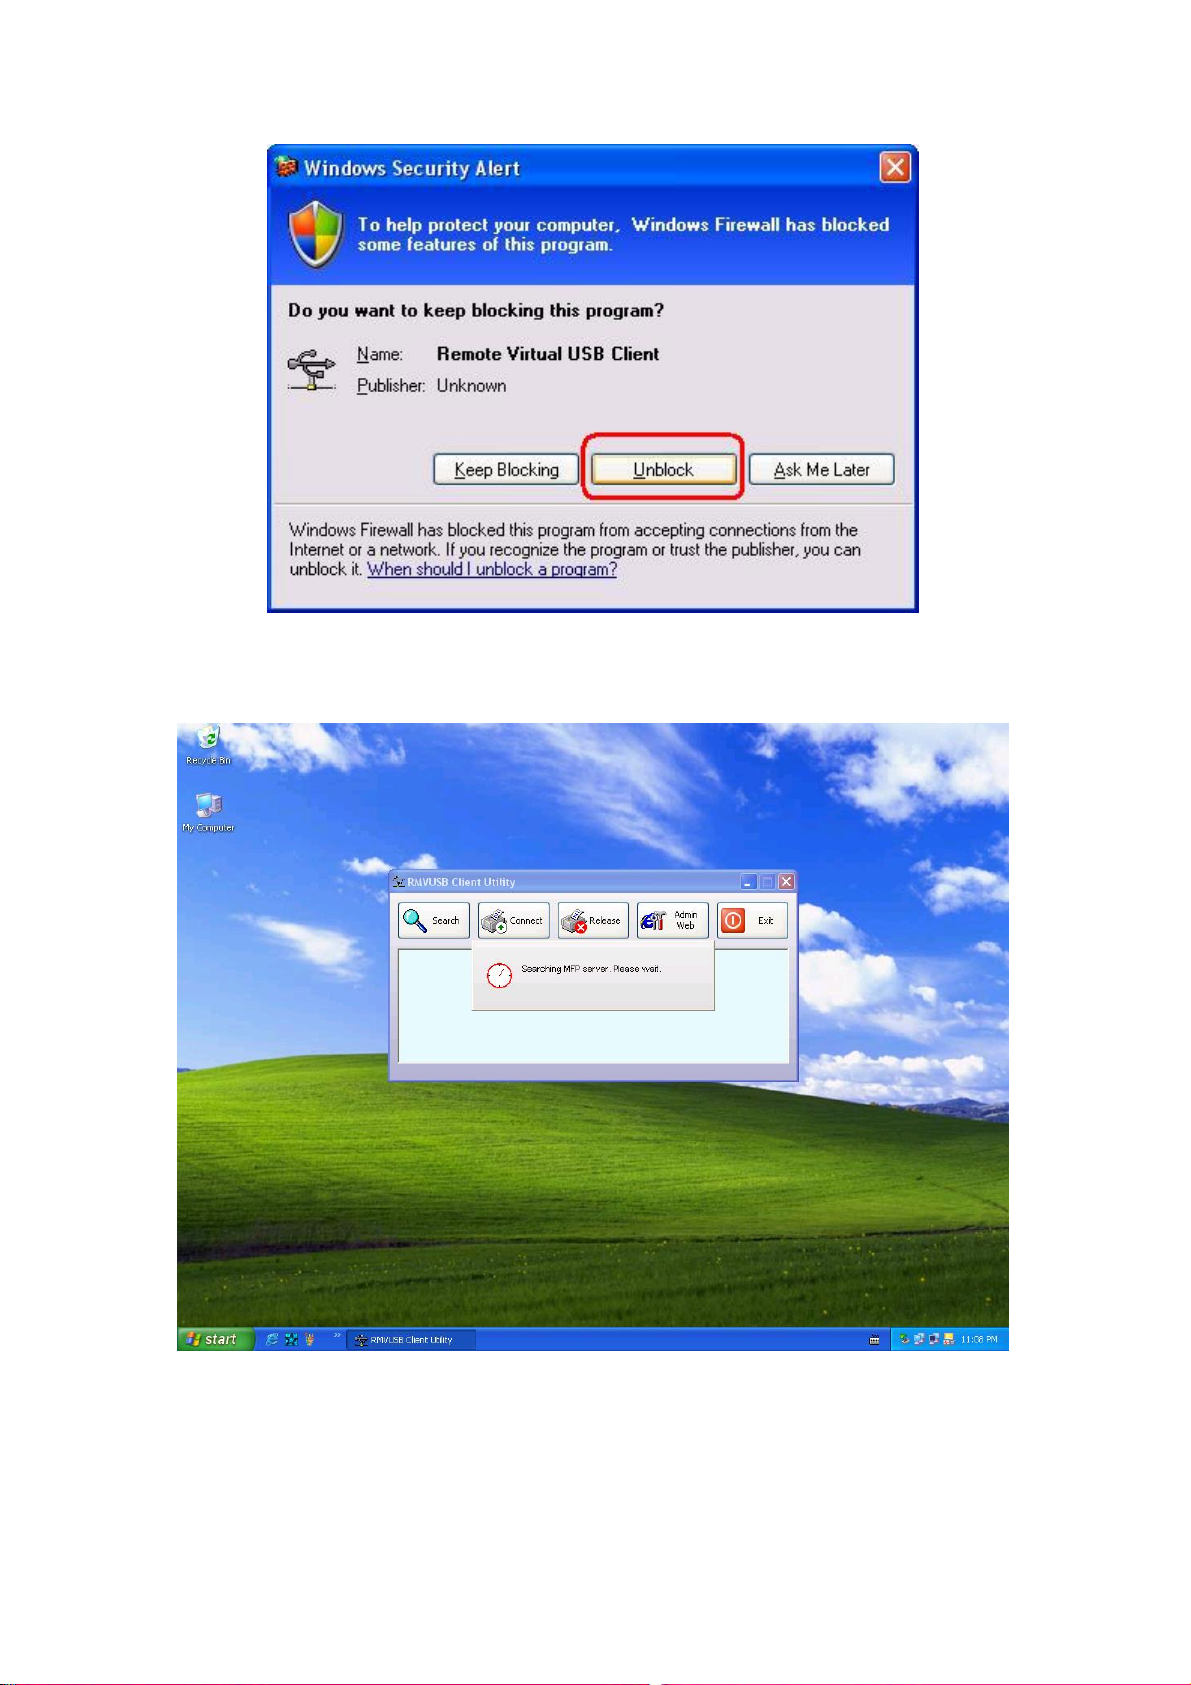
14. The MFP server utility will search your network for the MFP server and display it in the
window. If no MFP server is found, please make sure any third party firewalls have been
disabled or bypassed and click the Search button to try again.
Note:
The default IP address of MFP server is 192.168.0.10, and subnet mask is
255.255.255.0. If the MFP server utility didn’t find MFP server, please make sure of the
MFP server and your computer’s IP segment are the same, e.g. 192.168.0.xxx.
12
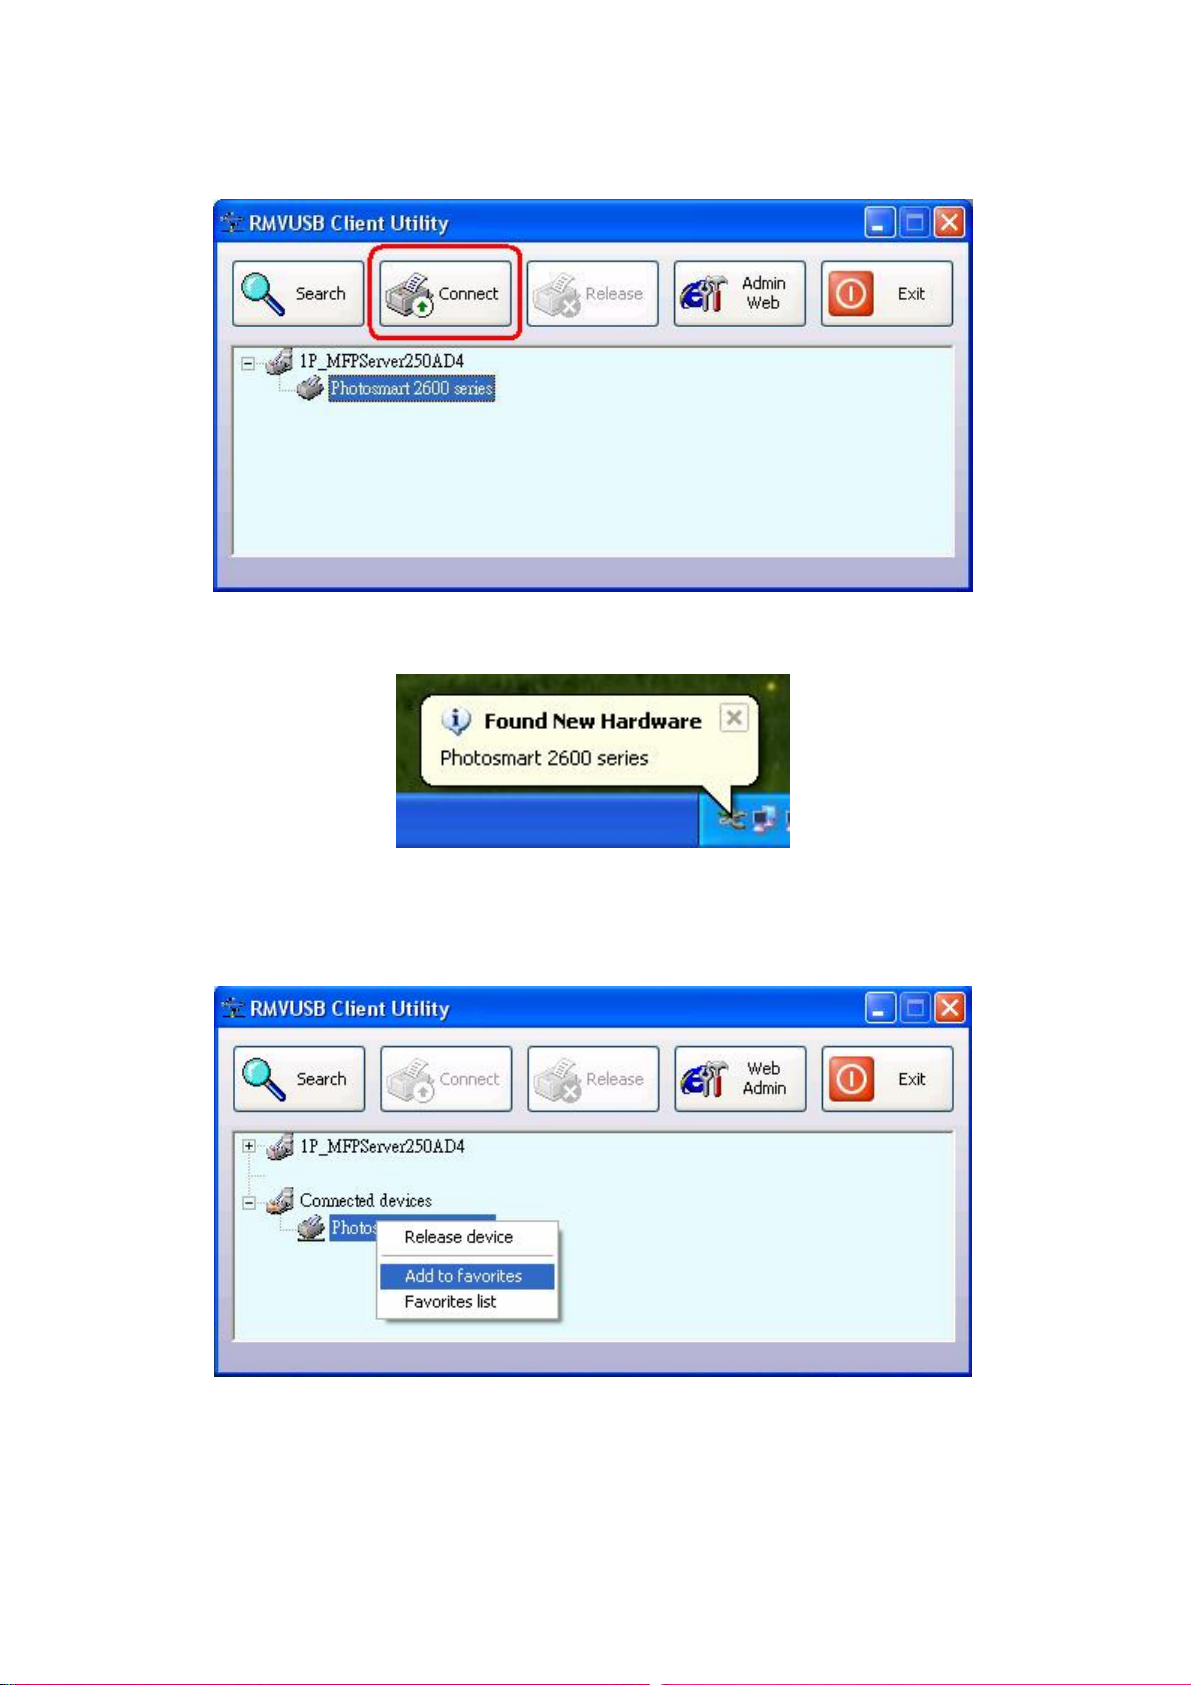
15. Click the “+” in front of the MFP server name to show the name of the attached printer.
Then select the printer name and click the Connect button in the MFP server utility.
16. The printer should be detected as if it was plugged directly into the computer. Finish any
remaining setup needed by the printer software. Your MFP printer should be ready to use.
17. If you would like the connection to this printer to be restored automatically when the MFP
server utility launches, you will need to add the device to your favorites list. Click the “+” in
front of Connected devices and right-click the name of the printer. Choose Add to
favorites from the menu that pop-up menu.
18. Click OK to confirm that the printer is in your favorites list.
13
Loading...