


AC 1750
Table of contents
 Loading...
REV1.1.1 1910011761
RE450
User Guide
AC1750 Wi-Fi Range Extender
Downloaded from www.vandenborre.be

Contents
About This Guide ............................................................................................... 1
Chapter 1. Get to Know About Your Extender . . . . . . . . . . . . . . . . . . . . . . . 2
1. 1. Product Overview . . . . . . . . . . . . . . . . . . . . . . . . . . . . . . . . . . . . . . . . . . . . . . . . . . . . . . . . . . 3
1. 2. Appearance . . . . . . . . . . . . . . . . . . . . . . . . . . . . . . . . . . . . . . . . . . . . . . . . . . . . . . . . . . . . . . . . 3
1. 2. 1. LED Explanation. . . . . . . . . . . . . . . . . . . . . . . . . . . . . . . . . . . . . . . . . . . . . . . . . . . . . . 4
1. 2. 2. Port and Button Description . . . . . . . . . . . . . . . . . . . . . . . . . . . . . . . . . . . . . . . . . . 4
Chapter 2. Set Up Internet Connection . . . . . . . . . . . . . . . . . . . . . . . . . . . . . 5
2. 1. Quick Setup . . . . . . . . . . . . . . . . . . . . . . . . . . . . . . . . . . . . . . . . . . . . . . . . . . . . . . . . . . . . . . . . 6
2. 1. 1. Method One: Via the WPS button . . . . . . . . . . . . . . . . . . . . . . . . . . . . . . . . . . . . . 6
2. 1. 2. Method Two: Via a web browser. . . . . . . . . . . . . . . . . . . . . . . . . . . . . . . . . . . . . . 7
2. 2. Position Your extender . . . . . . . . . . . . . . . . . . . . . . . . . . . . . . . . . . . . . . . . . . . . . . . . . . . . 11
Chapter 3. Customize Your Network. . . . . . . . . . . . . . . . . . . . . . . . . . . . . . . 12
3. 1. Check Internet Status. . . . . . . . . . . . . . . . . . . . . . . . . . . . . . . . . . . . . . . . . . . . . . . . . . . . . . 13
3. 2. Configure Wireless Network . . . . . . . . . . . . . . . . . . . . . . . . . . . . . . . . . . . . . . . . . . . . . . . 14
3. 3. Change LAN Settings . . . . . . . . . . . . . . . . . . . . . . . . . . . . . . . . . . . . . . . . . . . . . . . . . . . . . . 15
3. 4. Specify DHCP Server Settings . . . . . . . . . . . . . . . . . . . . . . . . . . . . . . . . . . . . . . . . . . . . . . 16
3. 5. Adjust Wi-Fi Coverage . . . . . . . . . . . . . . . . . . . . . . . . . . . . . . . . . . . . . . . . . . . . . . . . . . . . . 17
3. 6. Set Access Control. . . . . . . . . . . . . . . . . . . . . . . . . . . . . . . . . . . . . . . . . . . . . . . . . . . . . . . . . 17
Chapter 4. More Features of Your Extender . . . . . . . . . . . . . . . . . . . . . . . . 20
4. 1. Use Your Extender as a Wireless Adapter . . . . . . . . . . . . . . . . . . . . . . . . . . . . . . . . . . . 21
4. 2. Transform Your Existing Wired Network to a Wireless One. . . . . . . . . . . . . . . . . . . 21
4. 2. 1. To Set Up the Extender as an Access Point. . . . . . . . . . . . . . . . . . . . . . . . . . . . 21
4. 2. 2. To Connect Your Wireless Devices to the Extender via WPS. . . . . . . . . . . . 23
Chapter 5. Manage Your Extender . . . . . . . . . . . . . . . . . . . . . . . . . . . . . . . . 25
5. 1. Set Up System Time . . . . . . . . . . . . . . . . . . . . . . . . . . . . . . . . . . . . . . . . . . . . . . . . . . . . . . . 26
5. 2. Control LEDs . . . . . . . . . . . . . . . . . . . . . . . . . . . . . . . . . . . . . . . . . . . . . . . . . . . . . . . . . . . . . . 27
5. 3. Power Schedule . . . . . . . . . . . . . . . . . . . . . . . . . . . . . . . . . . . . . . . . . . . . . . . . . . . . . . . . . . . 27
5. 4. Upgrade the Firmware. . . . . . . . . . . . . . . . . . . . . . . . . . . . . . . . . . . . . . . . . . . . . . . . . . . . . 28
5. 5. Backup and Restore Configuration Settings . . . . . . . . . . . . . . . . . . . . . . . . . . . . . . . . 29
Downloaded from www.vandenborre.be

5. 6. Change Admin Account . . . . . . . . . . . . . . . . . . . . . . . . . . . . . . . . . . . . . . . . . . . . . . . . . . . 30
5. 7. System Log . . . . . . . . . . . . . . . . . . . . . . . . . . . . . . . . . . . . . . . . . . . . . . . . . . . . . . . . . . . . . . . 30
FAQ .....................................................................................................................32
Downloaded from www.vandenborre.be
1
About This Guide
This guide is a complementation of Quick Installation Guide. The Quick Installation
Guide instructs you on quick Internet setup, and this guide provides details of each
function and shows you the way to configure these functions appropriate to your
needs.
When using this guide, please notice that features of the extender may vary slightly
depending on the model and software version you have, and on your location, language,
and Internet service provider. All screenshots, images, parameters and descriptions
documented in this guide are used for demonstration only.
Conventions
In this guide the following conventions are used:
Convention Description
Blue Italic Hyperlinks are in blue italic. You can click to redirect to a website or a specific section.
Blue
Contents to be emphasized and texts on the web page are in blue, including the
menus, items, buttons, etc.
>
The menu structures to show the path to load the corresponding page. For example,
Advanced > Wireless > MAC Filtering means the MAC Filtering function page is under
the Wireless menu that is located in the Advanced tab.
Note:
Ignoring this type of note might result in a malfunction or damage to the device.
Tips:
Indicates important information that helps you make better use of your device.
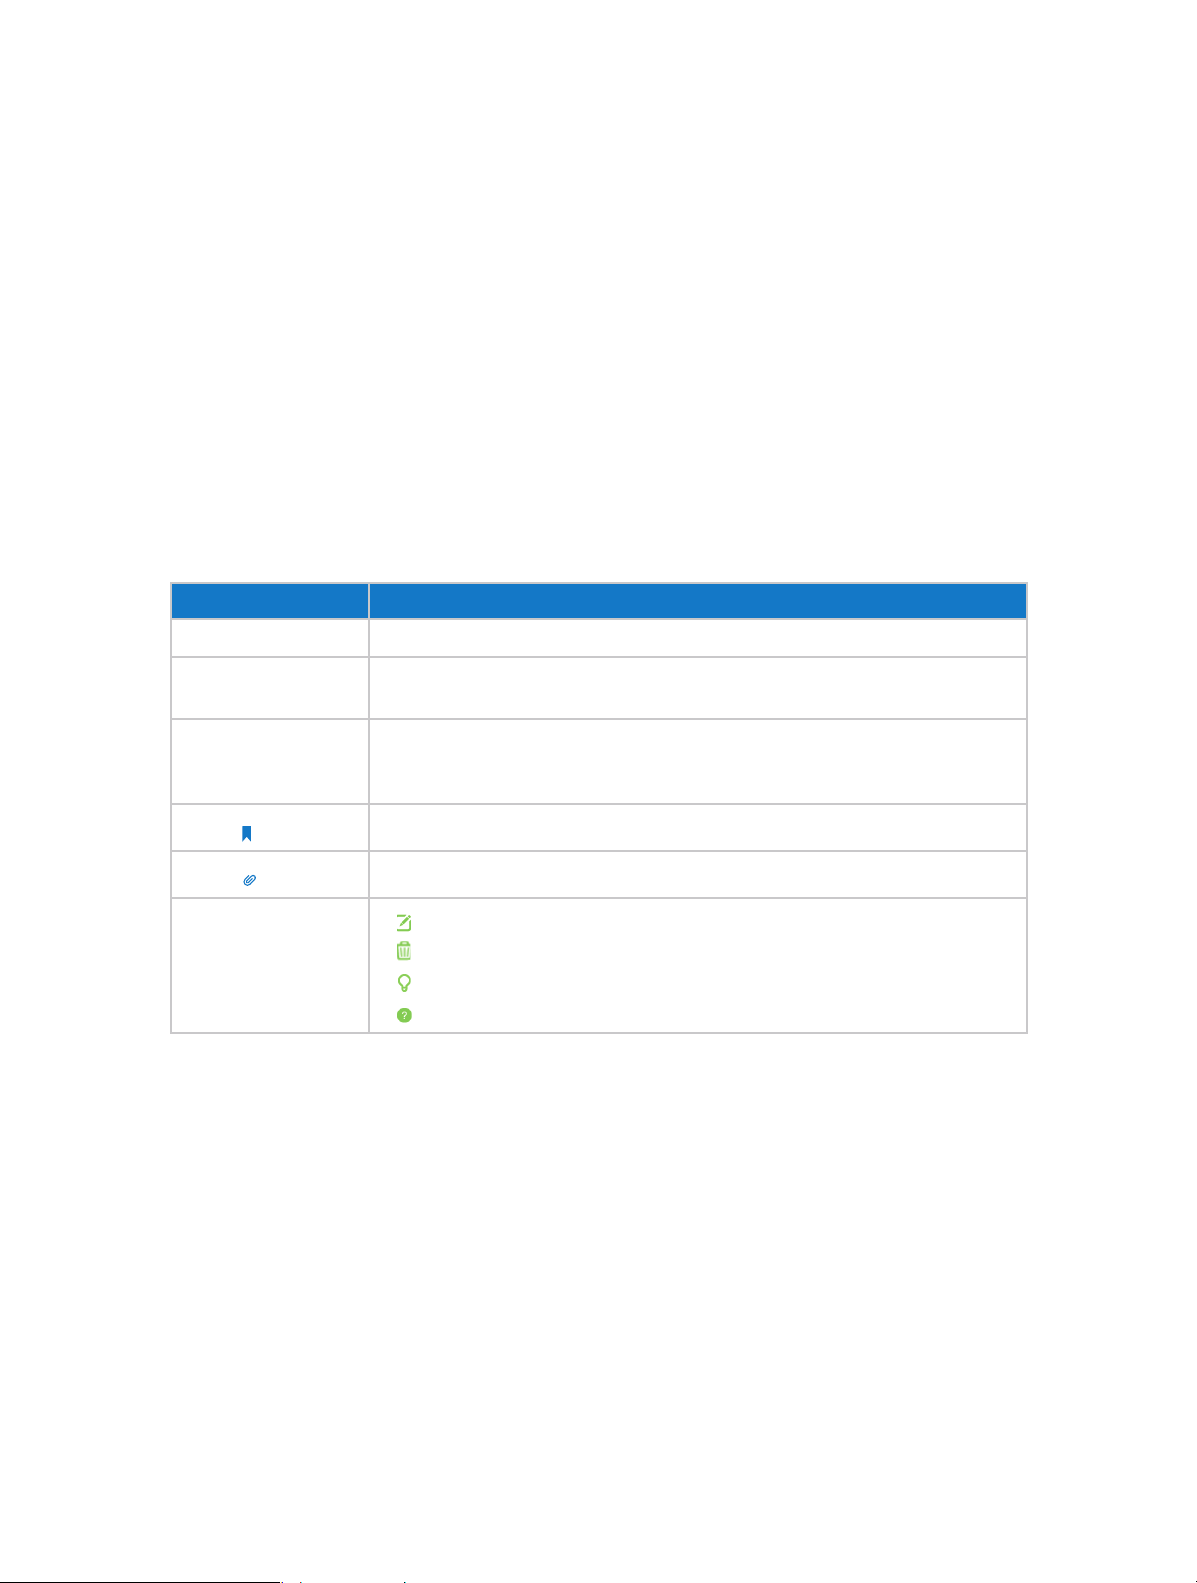
symbols on the web
page
• click to edit the corresponding entry.
• click to delete the corresponding entry.
• click to enable or disable the corresponding entry.
• click to view more information about items on the page.
More Info
The latest software, management app and utility can be found at Download Center at
www.tp-link.com/support.
The Quick Installation Guide can be found where you find this guide or inside the
package of the router.
Specifications can be found on the product page at http://www.tp-link.com.
A Technical Support Forum is provided for you to discuss our products at http://forum.
tp-link.com.
Our Technical Support contact information can be found at Contact Technical Support
page at www.tp-link.com/support.
Downloaded from www.vandenborre.be

Chapter 1
Get to Know About Your
Extender
This chapter introduces what the extender can do and its appearance.
This chapter contains the following sections:
• Product Overview
• Appearance
Downloaded from www.vandenborre.be
3
Chapter 1
Get to Know About Your Extender
1. 1. Product Overview
Bring Dead Zones Back to Life
Tired of Wi-Fi “dead zones”? The TP-LINK extender is connected to your router wirelessly,
strengthening and expanding its signal into areas it can’t reach on its own. The device
also reduces signal interference to ensure reliable Wi-Fi coverage throughout your
home or office.
Easy Installation & Quick Position
The extender works with any standard wireless router. Instantly connect the extender
to a router by pressing the router’s WPS button (if available) followed by the extender’s
RE/WPS button, or by following the step-by-step Quick Setup instructions of the
extender’s web management page.
Once the extender is connected to an existing router, you can take it to an ideal place,
no more further configurations. The Intelligent signal light can help to find the best
location.
Easy Management with the Tether APP
TP-LINK Tether provides a simple, intuitive way to access and manage your extender
with your smart devices.
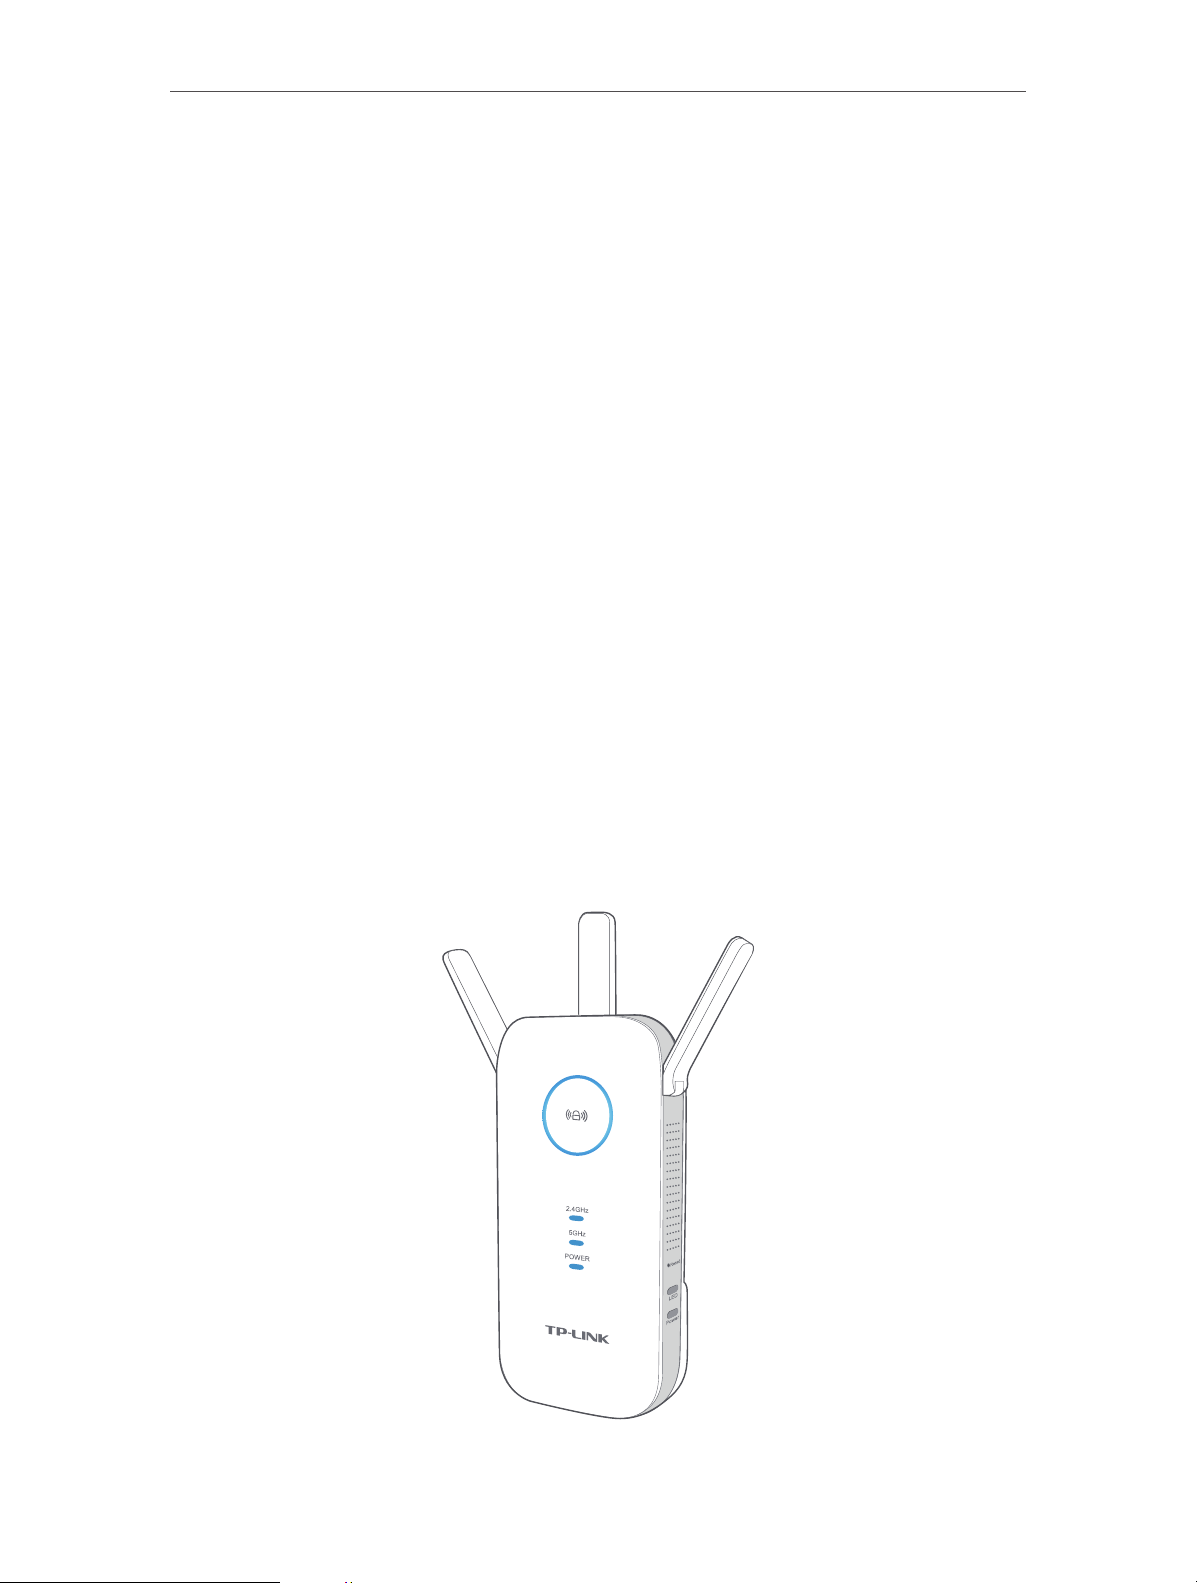
1. 2. Appearance
Downloaded from www.vandenborre.be
4
Chapter 1
Get to Know About Your Extender
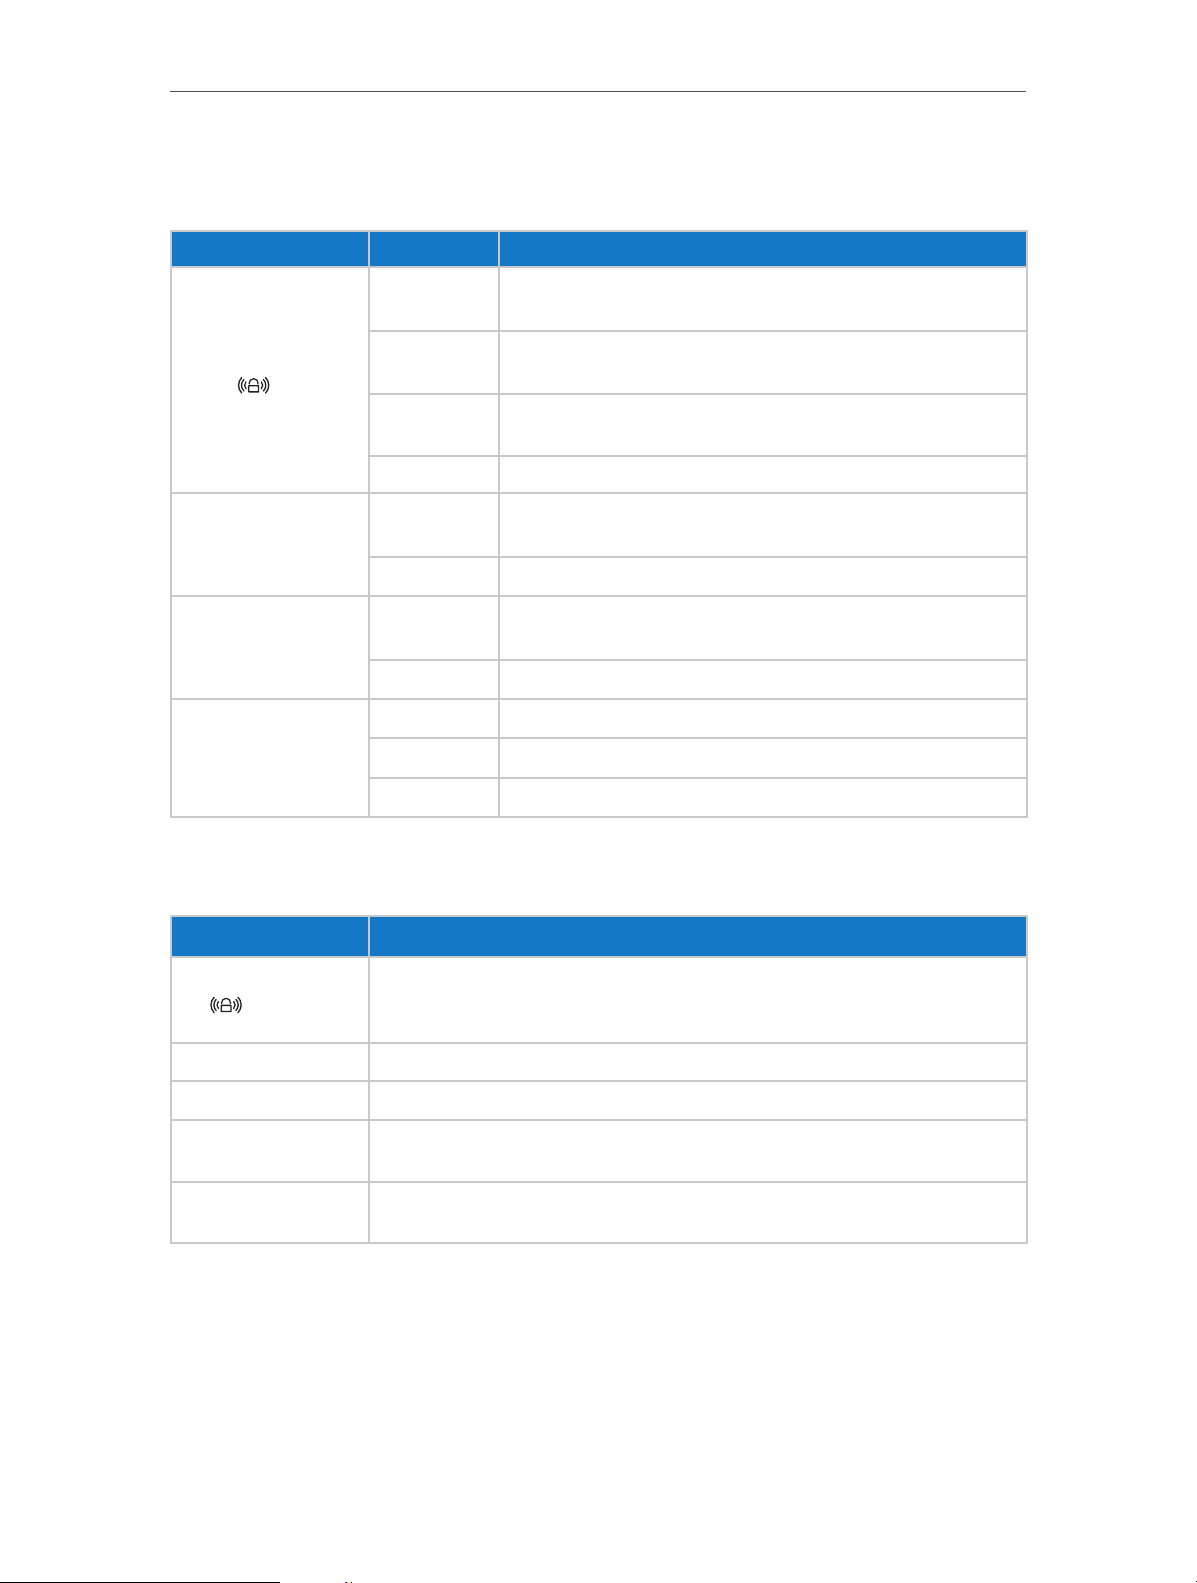
1. 2. 1. LED Explanation
You can check the extender’s working status by following the LED Explanation table.
Name Status Indication
(RE)
Solid Blue
The extender is connected to the router, and is in a good
location.
Solid Red
The extender is connected to the router, but is too far away
from the router.
Blinking
The extender is trying to connect to the network via WPS. This
process may take up to 2 minutes.
Off No active connection.
2.4GHz
On
The extender is connected to the 2.4GHz wireless network of
your host network
Off
No 2.4GHz wireless connection.
5GHz
On
The extender is connected to the 5GHz wireless network of
your host network
Off
No 5GHz wireless connection.
POWER
On
The extender is on.
Blinking
The extender is initializing.
Off
The extender is off.
1. 2. 2. Port and Button Description
Ports or Buttons Description
(RE Button)
Press the WPS button on your host router, and immediately press the RE button on
the extender. The RE LED of the extender should change from blinking to solid on,
indicating successful WPS connection.
LED Button To turn all LEDs on or off, press the LED button.
Power Button
To turn on or off the extender, press the Power button.
Reset Button (Hole)
Press and hold the Reset button until all the LEDs turn on momentarily to reset the
extender to its factory default settings.
Ethernet Port
Connect your Ethernet-only device to the Ethernet port of the extender to join the
Wi-Fi network.
Downloaded from www.vandenborre.be

Chapter 2
Set Up Internet Connection
This chapter introduces how to boost your host wireless coverage. Please follow the
step-by-step instructions to set up the Internet connection.
This chapter contains the following sections:
• Quick Setup
• Position Your extender
Downloaded from www.vandenborre.be
6
Chapter 2
Set Up Internet Connection
2. 1. Quick Setup
Power on
Plug the extender into an electrical outlet near your host router, and then wait until the
Power LED changes to solid blue.
Connect to the host network
There are two ways to connect to the host network: via the WPS button or via a web
browser. Using the WPS button is an easier way to extend your host network. We
recommend you to use this way if your router has a WPS button. The button might look
like one of these: | | .
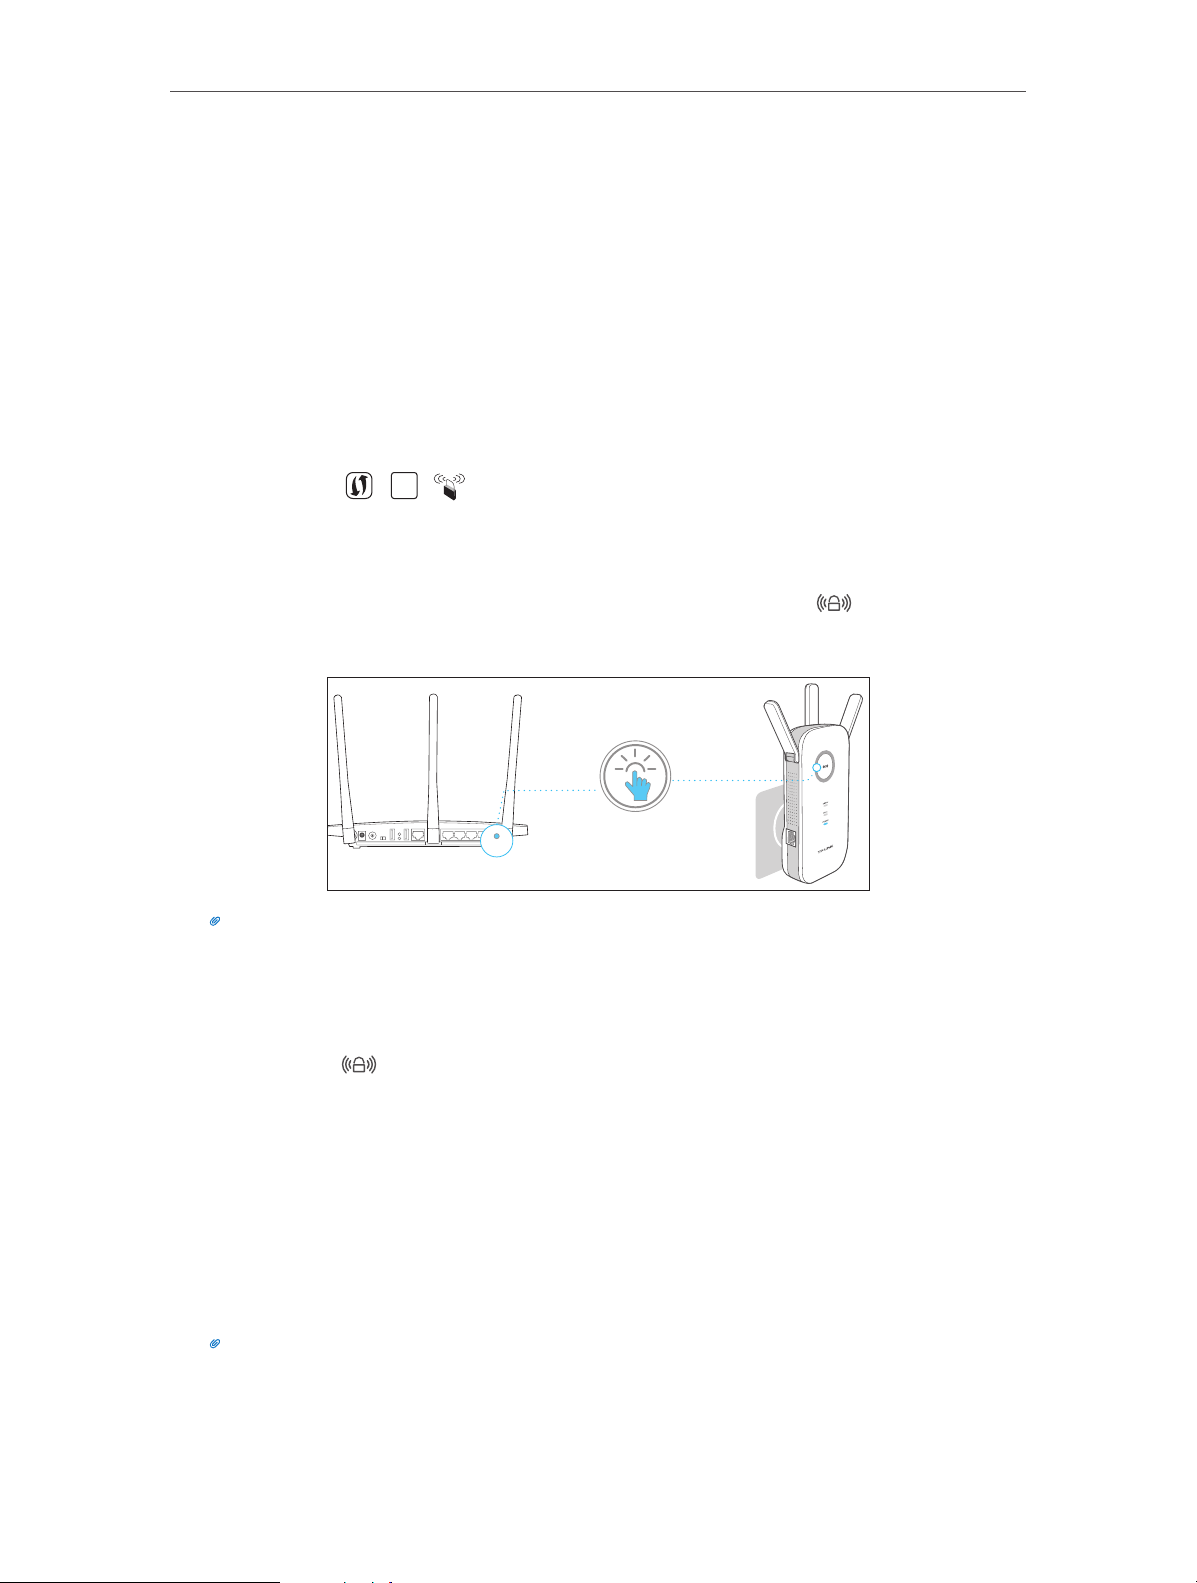
2. 1. 1. Method One: Via the WPS button
1. Press the WPS button on your host router, and then press the (WPS) button on
the extender within 2 minutes.
WPS
Press
Tips:
• Some ISP gateways disable the WPS function by default. If the WPS connection fails, please refer to Method
Two: Via a web browser.
• For more information about using WPS button on your host router, please refer to the router manufacturer’s
user guide.
2. Wait until the (WPS) LED changes from blinking to a solid status, which indicates
that the WPS connection is successful. If not, please refer to Method Two: Via a web
browser.
3. If you are connecting the extender to a dual-band router but only 2.4GHz or 5GHz
LED is on, repeat Step 1 and 2 to connect to the other band.
4. Enjoy! Connect to the extended network and enjoy the Internet. Both extended
networks share the same SSIDs (network names) and passwords as those of your
host networks.
Tips:
Since the performance of the extended networks will be affected by the distance between extender and host
router, we highly recommend you to relocate your extender referring to Position Your extender.
WPS
Downloaded from www.vandenborre.be
7
Chapter 2
Set Up Internet Connection
2. 1. 2. Method Two: Via a web browser
1. Connect your computer to the extender's wireless network.
Tips:
Before connecting, please find the SSID (network name) on the label of the extender.
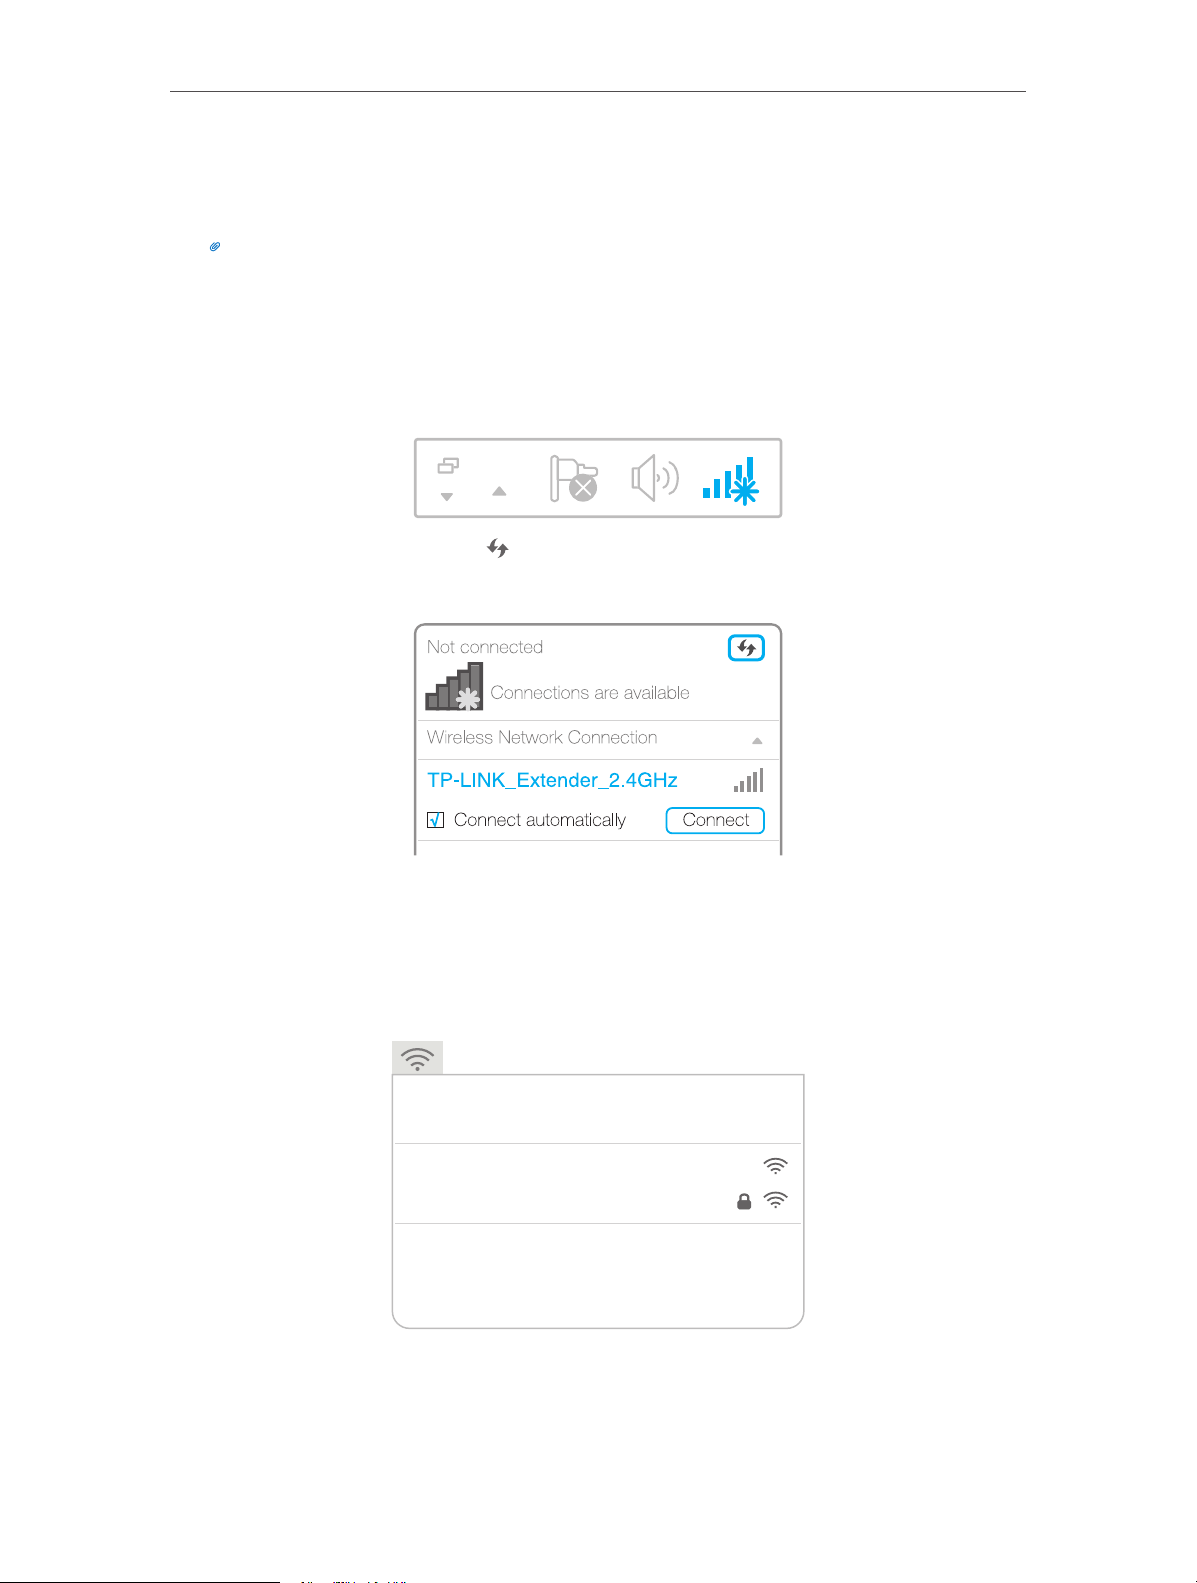
• For Windows Users
1 ) Unplug the Ethernet cable from your computer (if any).
2 ) Click the Wireless Network Connection icon on the taskbar.
3 ) Click the refresh icon and connect to the extender’s wireless network:
TP-LINK_Extender_2.4GHz or TP-LINK_Extender_5GHz.
• For Mac OS X Users
1 ) Unplug the Ethernet cable from your computer (if any).
2 ) Click the Wi-Fi icon in the top right corner of the screen, and connect to the
extender’s network: TP-LINK_Extender_2.4GHz or TP-LINK_Extender_5GHz.
Wi-Fi: O n
Turn Wi-Fi O ff
TP-LINK_Router
Join Other Network...
Create Network...
Open Network P references...
TP-LINK_Extender_2.4GHz
2. Follow the instructions of Quick Setup Wizard to connect the extender to your host
router.
Downloaded from www.vandenborre.be
8
Chapter 2
Set Up Internet Connection
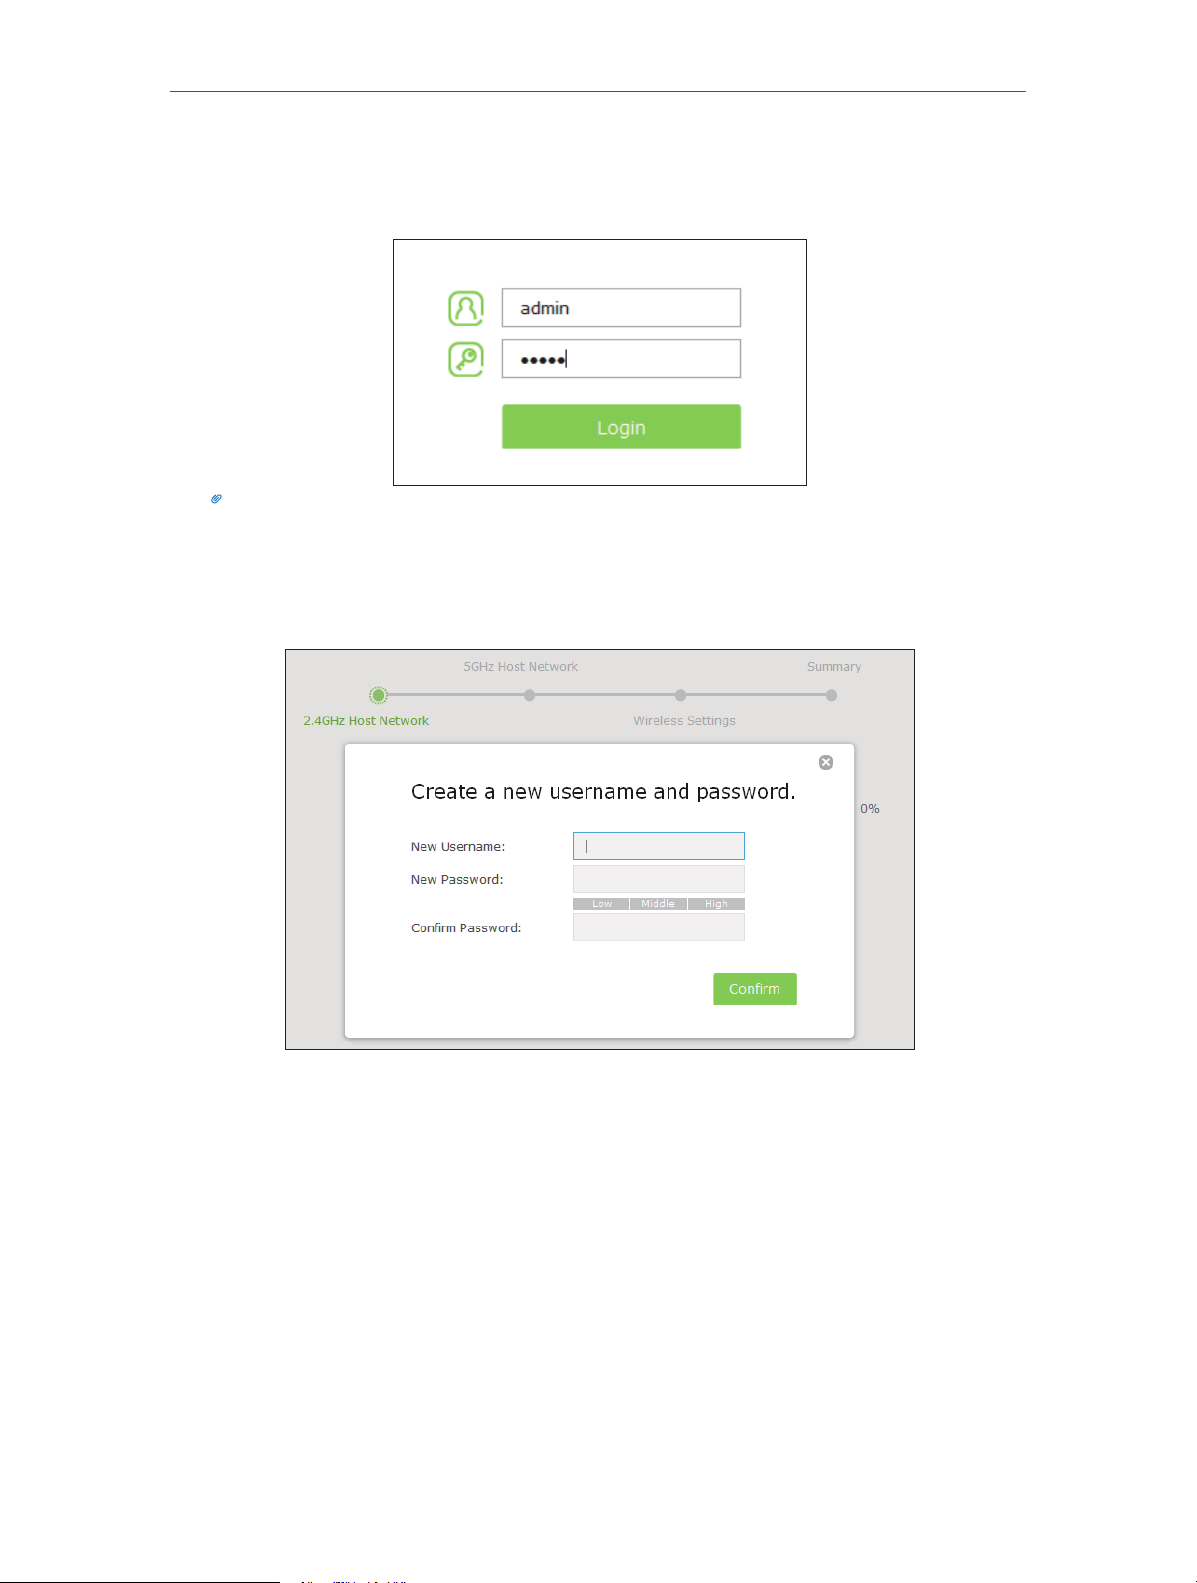
1 ) Launch a web browser and type http://tplinkrepeater.net in the address field.
Use admin (all lowercase) for both username and password to log in.
Tips:
If the login window does not pop up, please refer to the FAQ.
2 ) Create a new username and password for secure management purpose, and
then click Confirm.
3 ) Select your host router’s 2.4GHz SSID (network name), enter the password (NOT
the password you just created for management), and click Next.
Downloaded from www.vandenborre.be

9
Chapter 2
Set Up Internet Connection
4 ) Select your host router’s 5GHz SSID (network name), enter the password (NOT
the password you just created for management), and click Next.
Tips:
If your host router does not support 5GHz wireless network, please click Skip to continue.
5 ) Either keep the default SSIDs (network names) or customize them for the
extended networks, and then click Next.
Downloaded from www.vandenborre.be

10
Chapter 2
Set Up Internet Connection
6 ) Verify your wireless settings and click Save. The corresponding LED(s)(2.4GHz
or 5GHz) should turn on.
Downloaded from www.vandenborre.be
Loading...