

Page 1
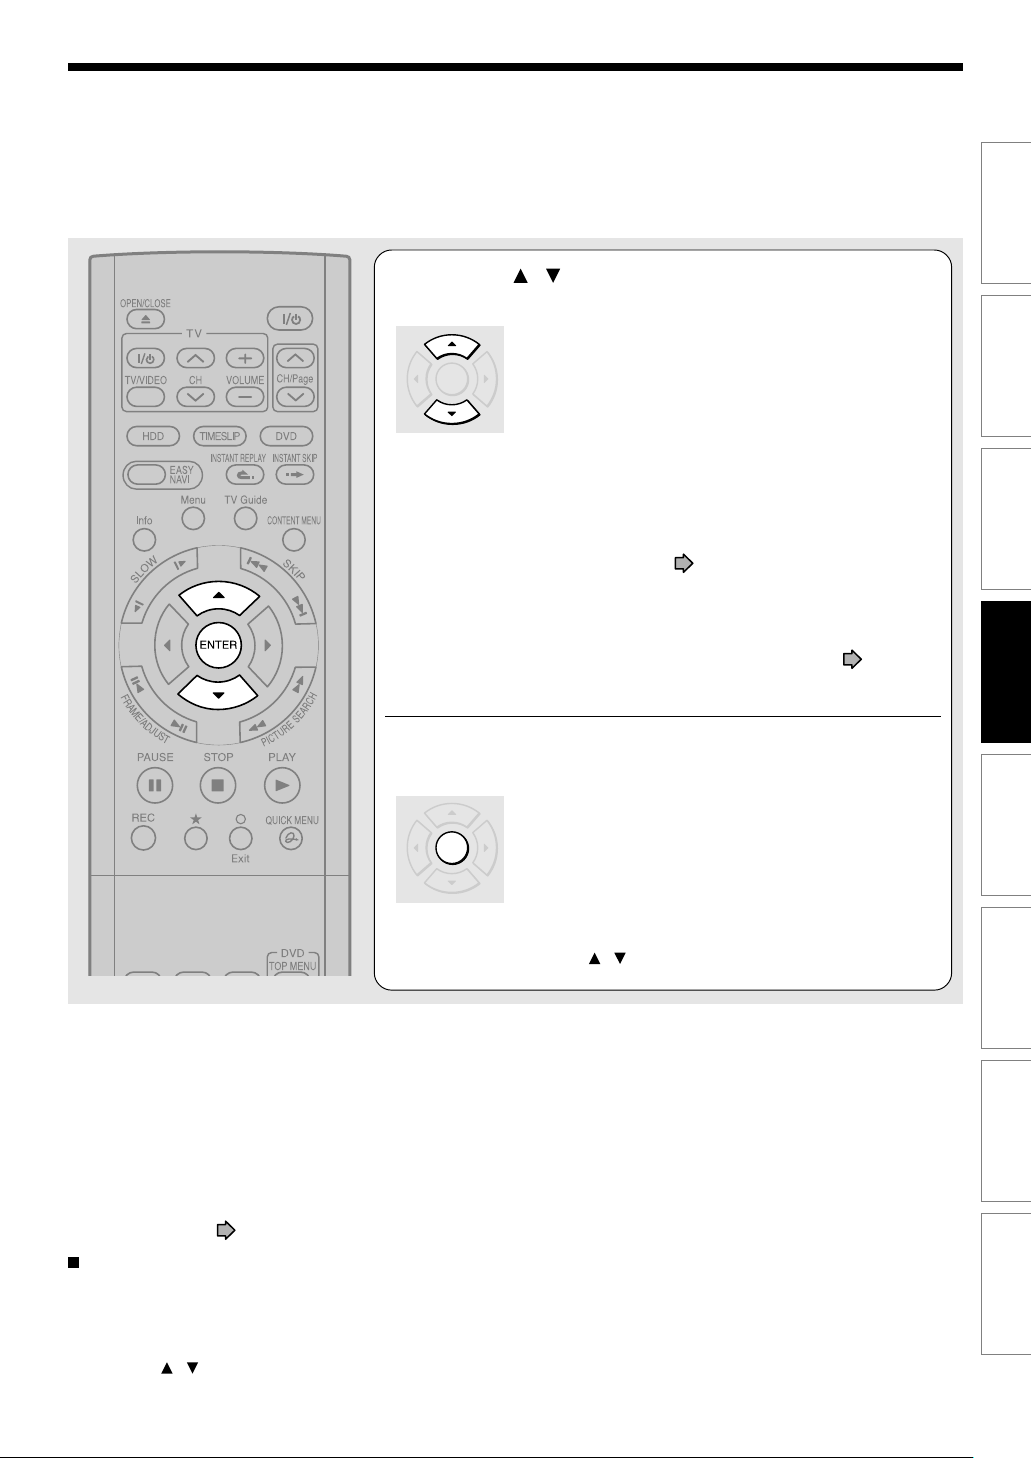
Press / to select “Copy”, “Move”, “Same
Disc” or “Network”.
4
ENTER
Copy:
After the operation is completed, a specified part will
remain on the disc where it was previously located.
Move:
A part will move to the opposite disc and will be erased
from the disc where it was previously located.
Same Disc:
A part will be copied to the same disc and the copied
part will become another title.
This operation is useful to change a Playlist to Original.
Network:
To copy to another TOSHIBA DVD recorder within the
same network.
See “Network Navi” (
“Copy” or “Move” is automatically selected in the
following cases.
Copy:
When a specified title (or chapter) is a Playlist.
When a specified title (or chapter) is locked ( page 56).
Move:
When a specified title (or chapter) is copy-protected.
page 141).
Introduction
Recording
Playback
Editing
Press ENTER.
5
Copying starts.
The job progress is displayed on the screen and the
ENTER
Notes
• A title or a chapter becomes a title by being copied.
•“Same Disc” job using a DVD-RAM disc will take a longer time.
•“Same Disc” is not available on DVD-R/RW.
•“Move” is not available between the HDD and DVD-R/RW.
• Some par ts in DVD-R/RW may be divided if dubbed.
• For a copy-once permitted content, only moving from the HDD to a DVD-RAM disc is available. Executing this will delete the
original content in the HDD, and the one moved to a DVD-RAM will not be able to moved or copied.
•“High speed dubbing” is not available between the HDD and DVD-R/RW recorded on other equipment.
• If you record a title directly onto a DVD-R/RW in the DVD-Video mode on this recorder and execute “High speed dubbing” on
the title to the HDD, the recorder may display a message to initialize the HDD. In this case, delete the title or execute “All
HDD titles delete” ( page 186).
To cancel copying halfway through the
operation
1) While copying, press QUICK MENU.
Quick Menu appears.
2) Press
press ENTER.
/ to select “Cancel dubbing”, then
front panel display.
When the job finishes, the graph disappears and the
buzzer sounds.
You can set the recorder to turn off automatically when
the job finishes.
(1) During the operation, press QUICK MENU button.
(2) Press
(3) Press ENTER button.
Notes
• Cancellation of a copying operation will result in deletion of
• Cancellation of a copying to a DVD-R cannot restore the
/ buttons to select “Auto power off”.
a portion of the title or chapter already copied.
disc space in the DVD-R.
101
Library
Network Navi
Function setup
Others
Page 2
Editing
Creating your own title – 4: Dubbing to save (Continued)
A: High speed dubbing (Dubbing specified parts together)
HDD
DVD-RAM
This section explains how to copy several specific titles or chapters. Assigned names of titles/chapters or other
information can also be copied. A title or chapter becomes a title by being copied.
DVD-RDVD-RW
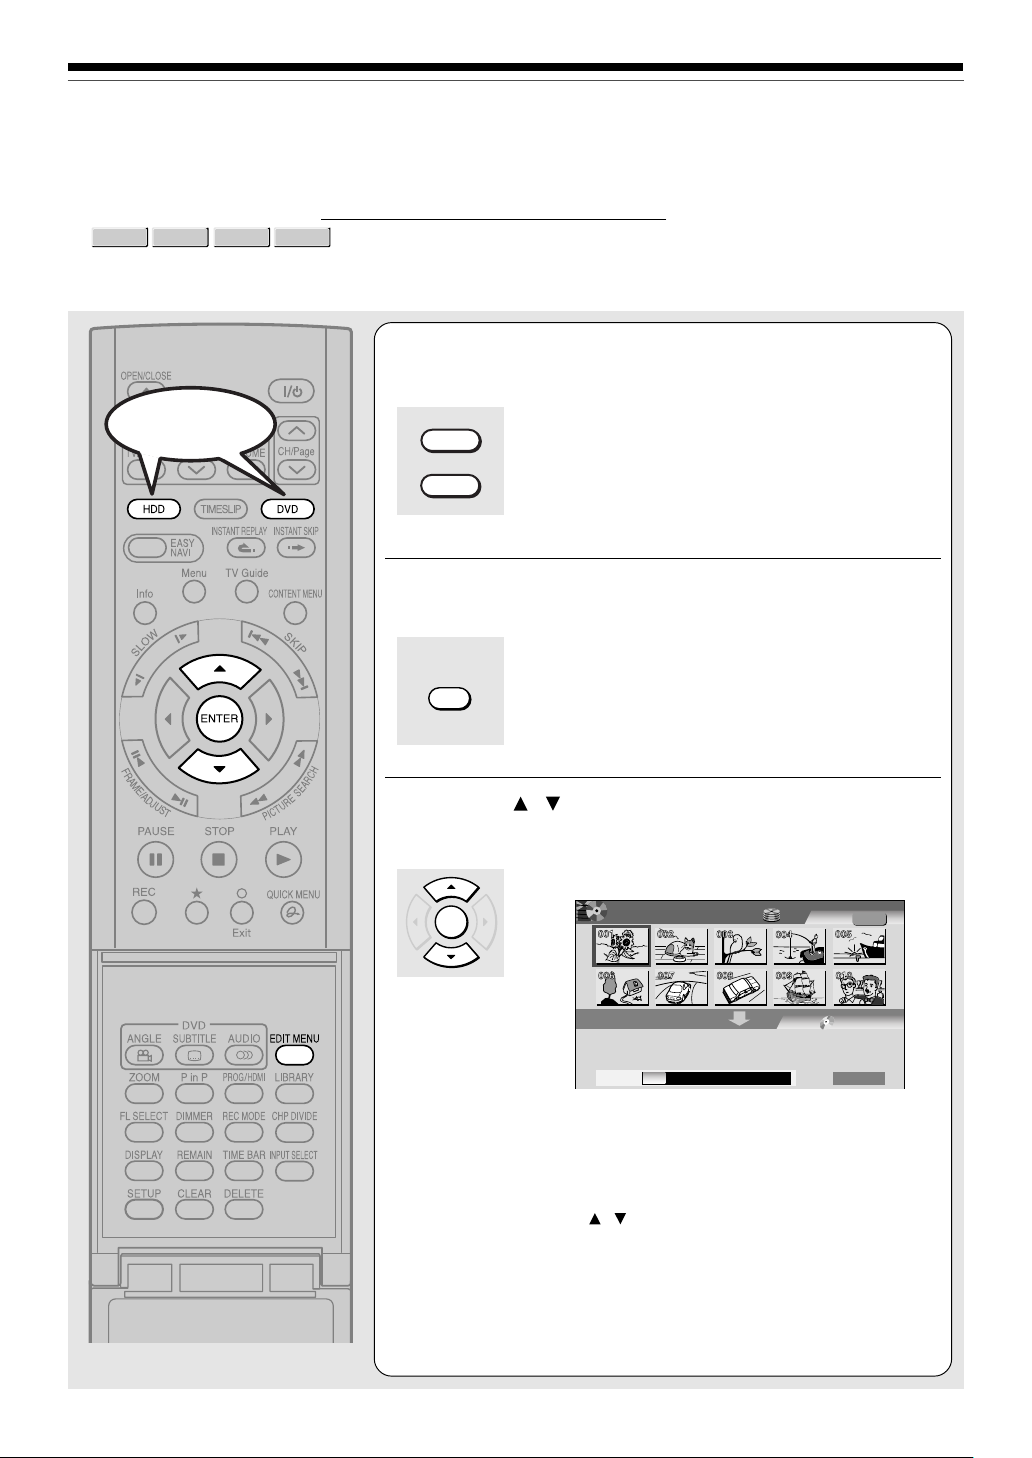
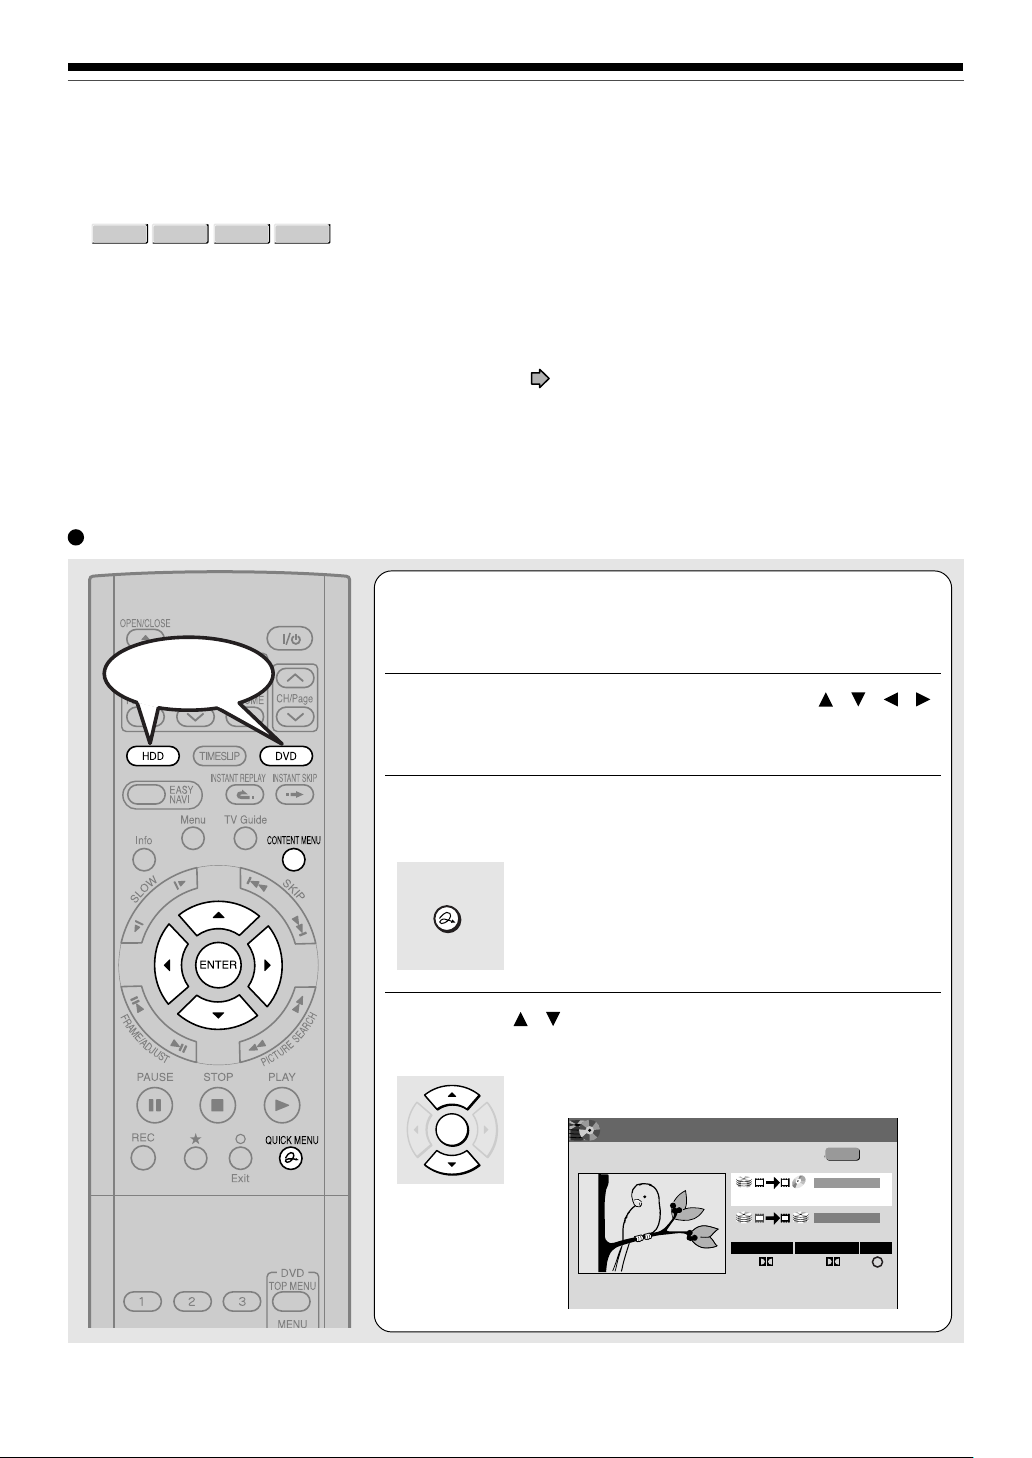
Press HDD or DVD to select a disc that
contains titles or chapters you want to copy.
1
Start
HDD
DVD
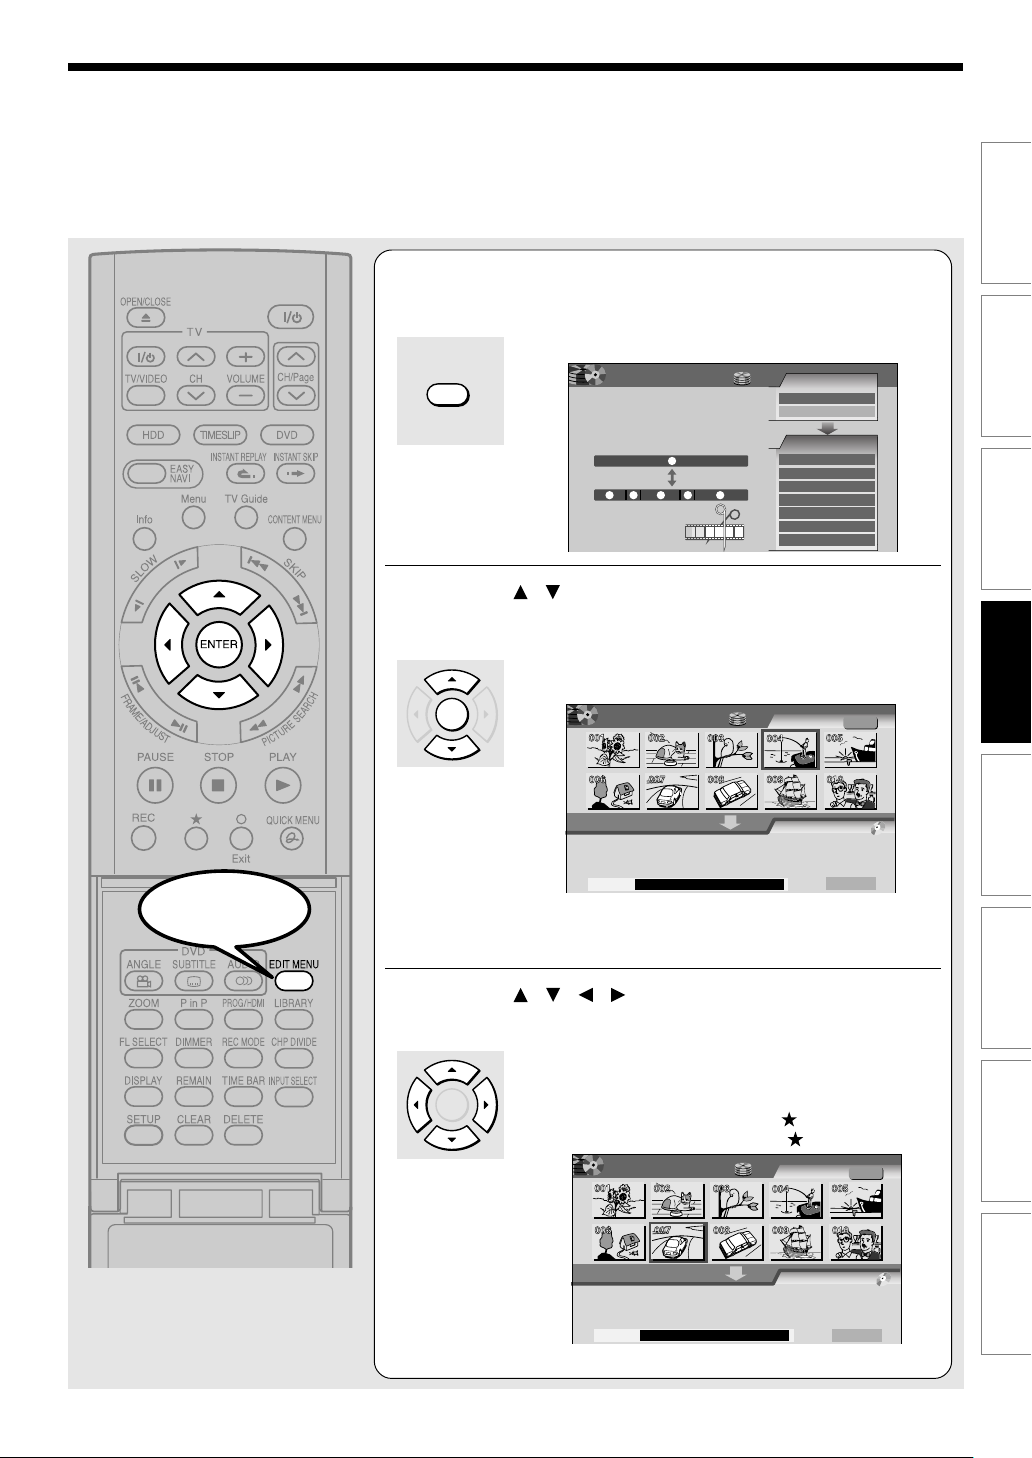
Press EDIT MENU.
2
EDIT MENU
Press / to select “Dub Selected Items”,
then press ENTER.
3
“EDIT MENU Dub Selected Items” appears.
ENTER
e.g.
EDIT
MENU
Dub Selected
Items
HDD
Title
Original
102
Source will be Title.
Capacity
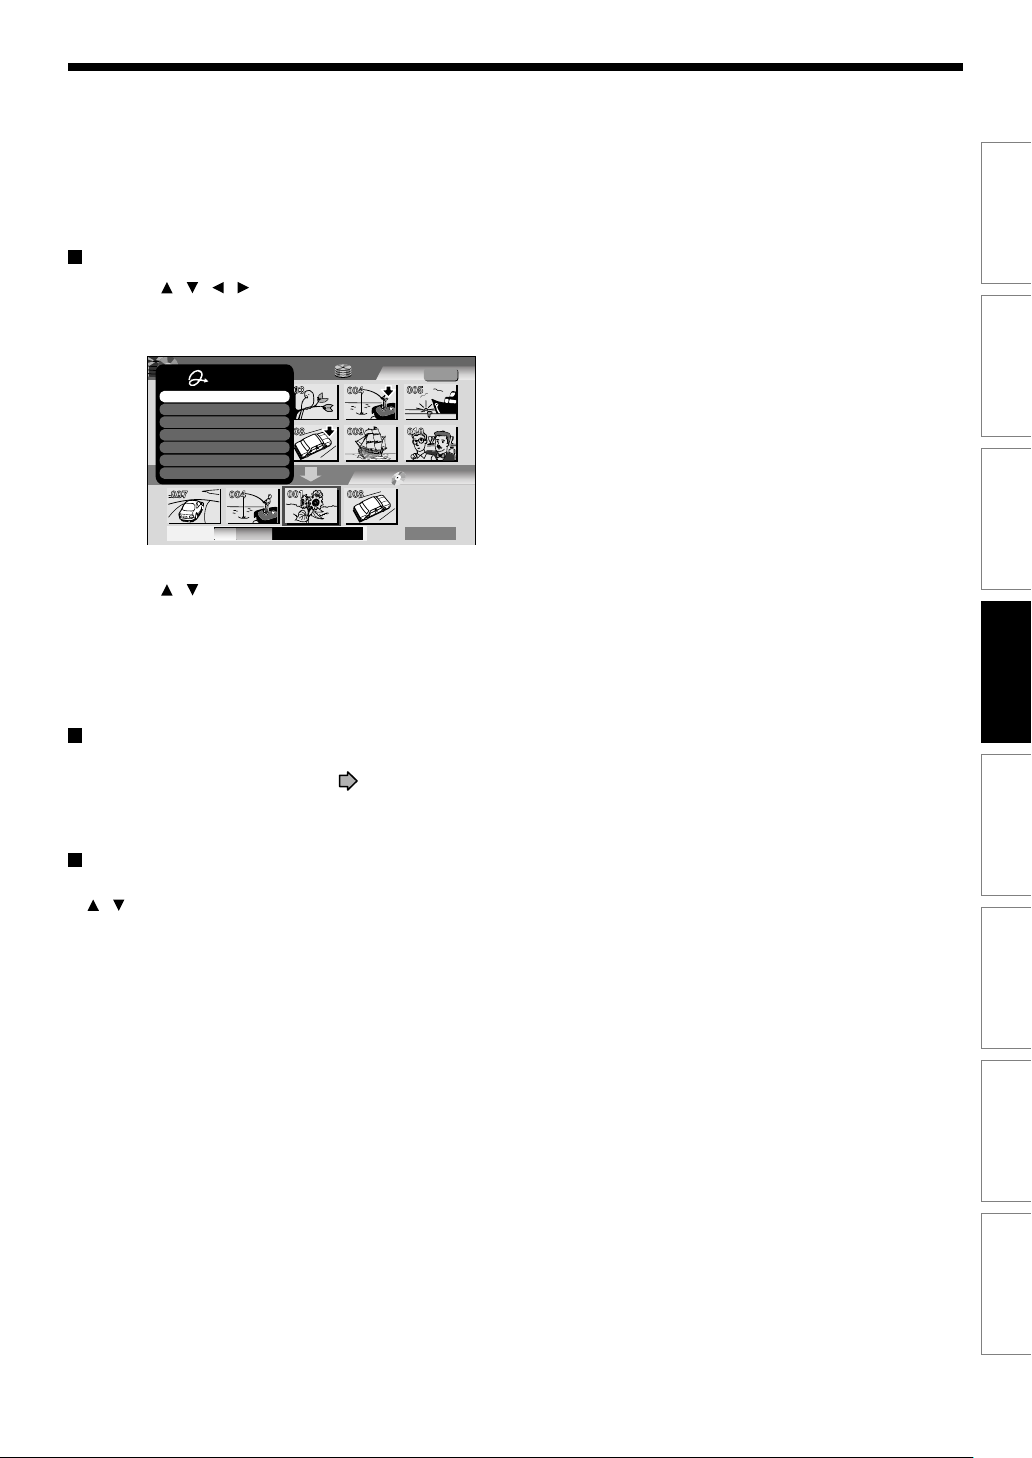
Thumbnails of the parts in the disc are displayed in the
upper area.
To change the dubbing destination:
1) Press QUICK MENU button.
2) Press
3) Press ENTER button.
/ buttons to select “Change media to HDD”
or “Change Media to DVD”.
Dub To: DVD
Start
Page 3
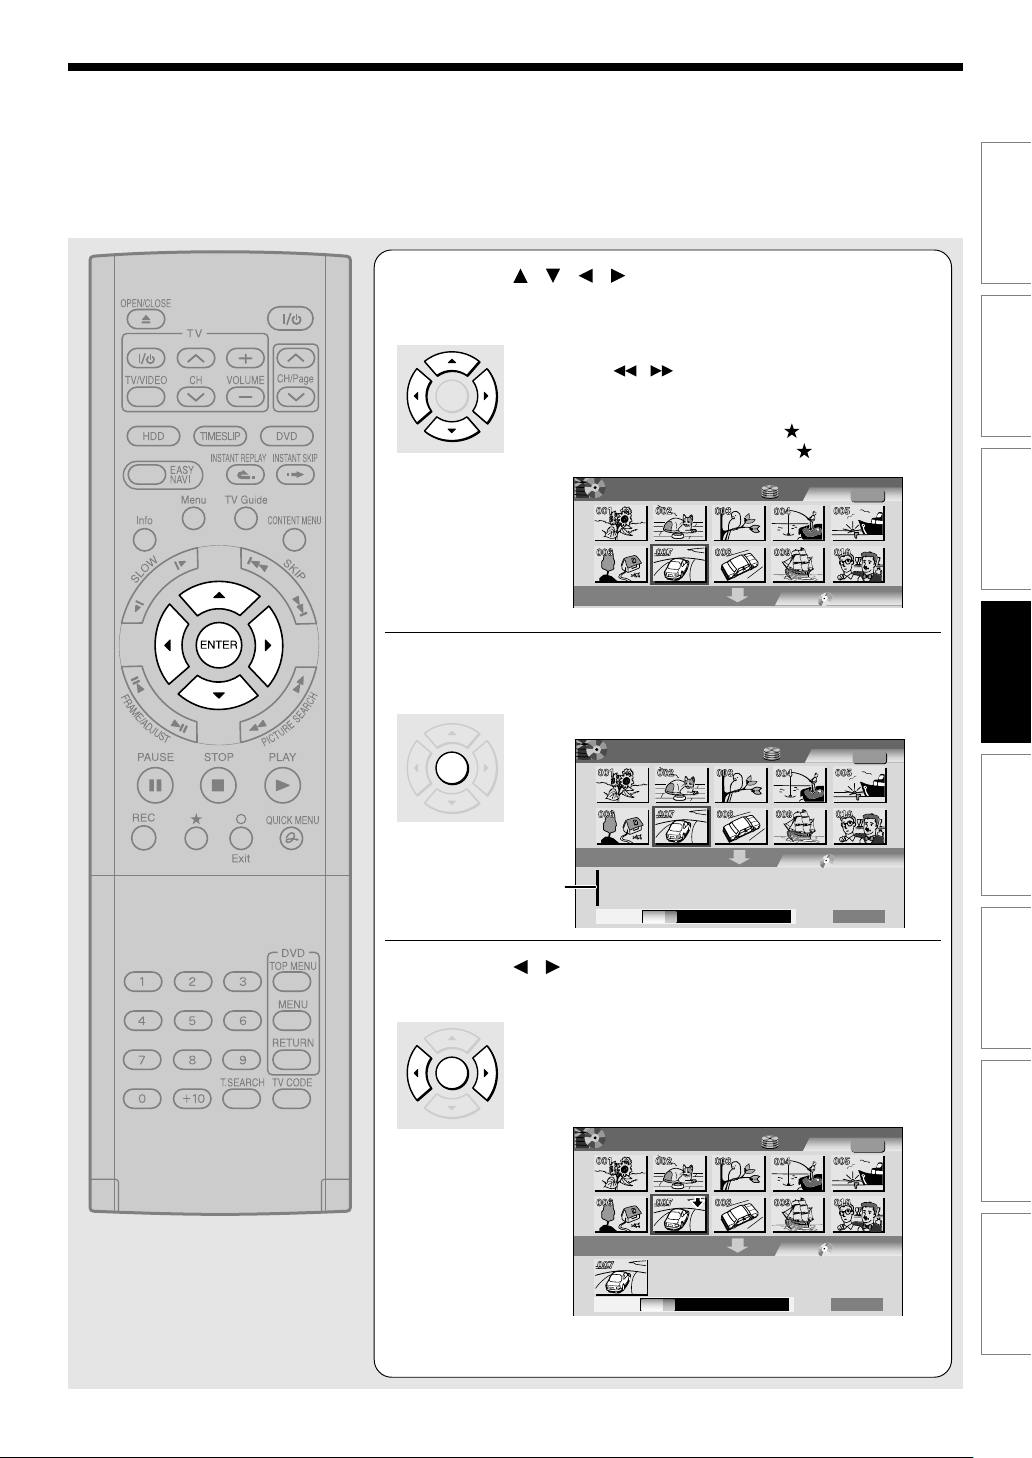
Press / / / to select a part (a title or
chapter) to copy.
4
• To go to the next or previous page, press PICTURE
SEARCH (
ENTER
• To select a chapter, first select the title that contains
the chapter you want, then press
To go back to the title display, press button again.
e.g.
EDIT
MENU
/ ) button.
Dub Selected
Items
button.
HDD
Title
Original
Introduction
Recording
Playback
Source will be Title.
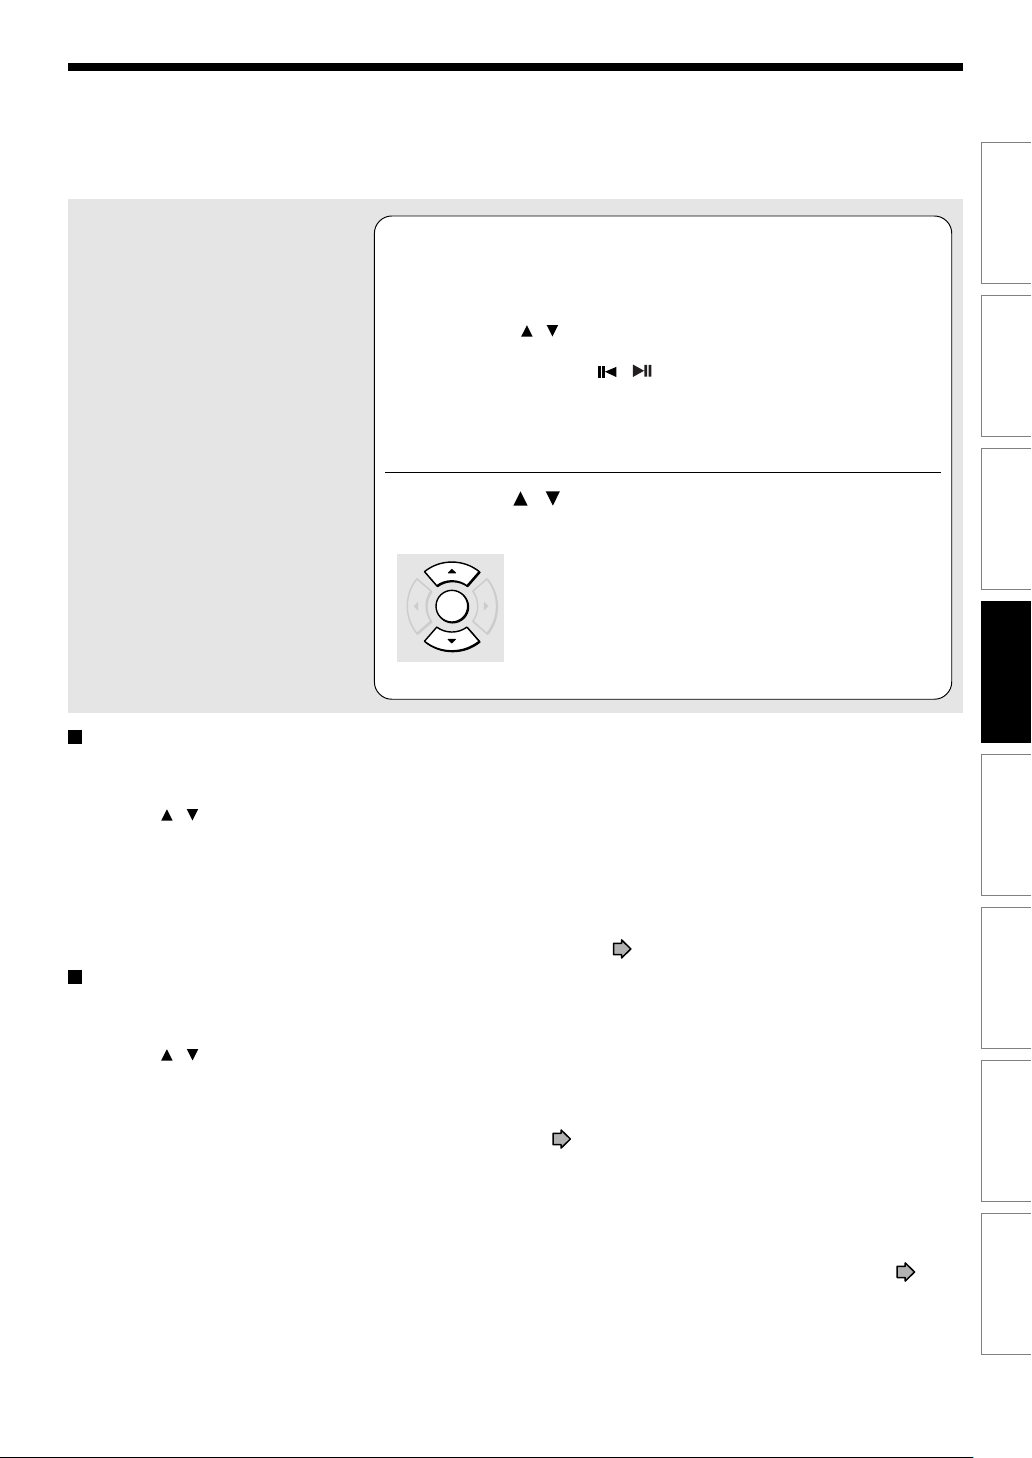
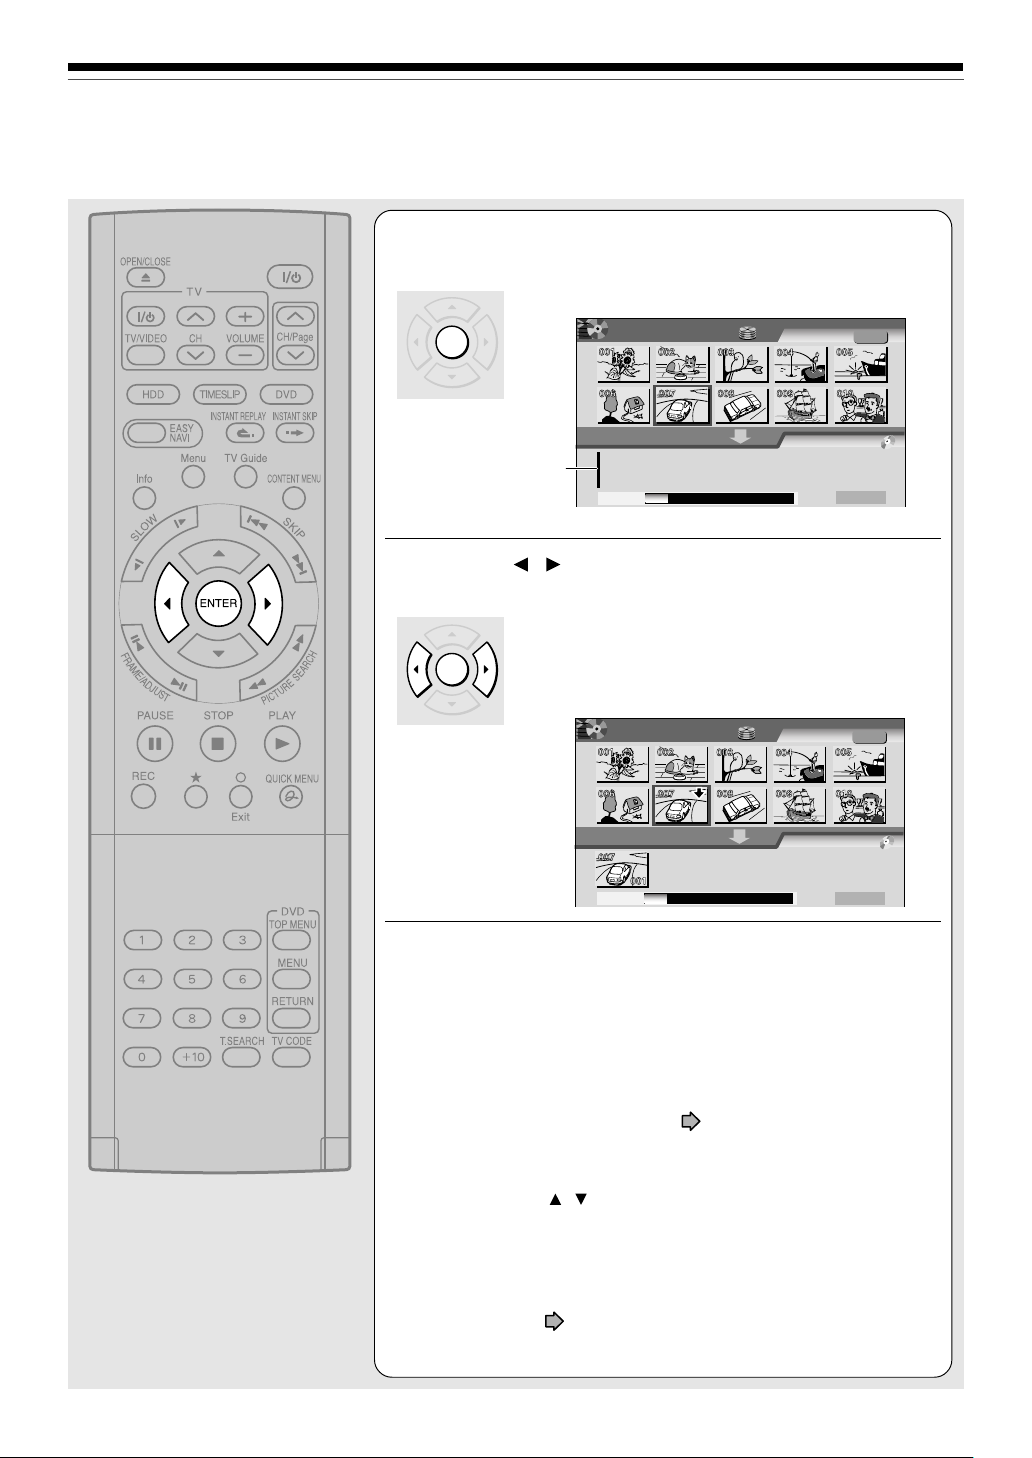
Press ENTER.
5
A cursor appears in the lower area (destination media).
e.g.
ENTER
Cursor
Press / to select a location to place the
selected part, then press ENTER.
6
If there are no parts in the lower area, leave the cursor
to the left and press ENTER button.
ENTER
The selected part is inserted into the location of the
cursor.
e.g.
Dub Selected
EDIT
Items
MENU
Source will be Title.
Capacity
Dub Selected
EDIT
Items
MENU
Dub To: DVD
HDD
Title
Dub To: DVD
HDD
Title
Original
Start
Original
Editing
Library
Network Navi
Function setup
Source will be Title.
Capacity
Dub To: DVD
Others
Start
(Continued)
103
Page 4
Editing
Creating your own title – 4: Dubbing to save (Continued)
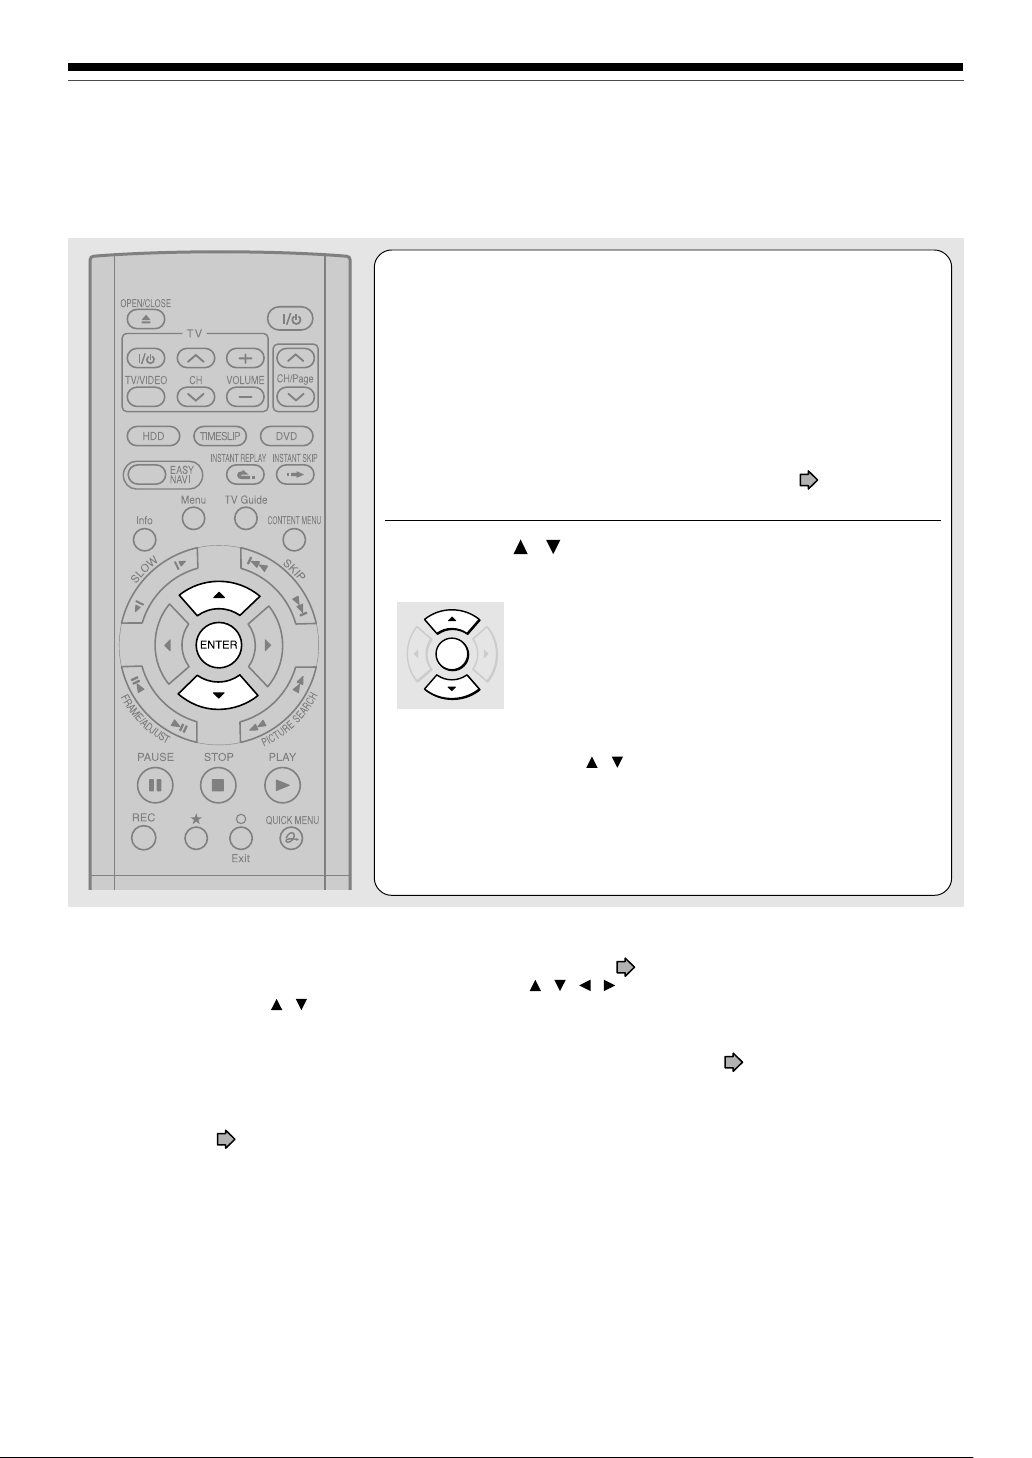
Repeat steps 4 to 6.
7
You can confirm the available space of the destination media via
the bar at the bottom of the display.
Each of the collected parts is recorded on the destination media
as a title.
• To cancel selection of an individual part, see
page 109.
Press / to select “Start”, press ENTER, and
select “Yes”, then press ENTER.
8
ENTER
Notes
• This procedure of “Dub Selected Items” of specified parts does not move them. If you do not want to leave the items on the
original disc, delete them in the procedure for “Deleting recorded contents” ( page 55).
• To confirm the contents of an item, first select the item by using / / / buttons and press QUICK MENU button to
display Quick Menu. Press / buttons to select “Preview” (or ”Title information”) then press ENTER button.
• Each par t, when selected, shows its name at the bottom of the menu for about 2 seconds.
•“High speed dubbing” is not available between the HDD and DVD-R/RW recorded on other equipment.
• Dubbing procedures to DVD-R/RW always comply with “Aspect ratio(Video mode)” setting ( page 184).
• Some par ts in DVD-R/RW may be divided if dubbed.
• If you record a title directly onto a DVD-R/RW in the DVD-Video mode on this recorder and execute “High speed dubbing” on
the title to the HDD, the recorder may display a message to initialize the HDD. In this case, delete the title or execute “All
HDD titles delete” ( page 186).
The broadcast picture appears and dubbing starts.
The progress for each title is displayed on the screen
and in the front panel display on the recorder. The
buzzer sounds when the operation is completed.
You can set the recorder to turn off automatically when
the job is completed.
1) During the job, press QUICK MENU button.
2) Press
3) Press ENTER button.
/ buttons to select “Auto power off”.
104
Page 5
Cancelling selection of an item
1) Press / / / to select an item then press
QUICK MENU.
Quick Menu appears.
e.g.
EDIT
Dub Selected Items
MENU
Quick Menu
Cancel selected title
Preview
Preview all selected items
Title information
Clear all selected items
Auto power off
Exit
HDD
Title
Dub To: DVD
Original
Introduction
Recording
Playback
2) Press
Capacity
AAA
B
B
/ to select “Cancel selected title” (or
Start
“All clear” for cancelling selection of multiple
items at a time).
3) Press ENTER.
Changing the position of an item
Follow the procedure above to cancel selection of the
item, then repeat steps 4 to 6 on
page 103 to
insert the item into its desired location.
Cancelling while dubbing
Press QUICK MENU to display Quick Menu. Press
/ to select “Cancel dubbing”, then press
ENTER.
Note
• This procedure copies items according to their order
indicated in the lower area. Therefore, there may be a case
that some items have already been copied at the time you
cancel dubbing.
Editing
Library
Network Navi
Function setup
105
Others
Page 6
Editing
Creating your own title – 4: Dubbing to save (Continued)
B: Rate conversion dubbing (Dubbing at a modified bit rate)
HDD
DVD-RAM
You can reduce the recorded picture or sound rate when copying. This procedure enables content originally
recorded onto the HDD at high rate setting to be dubbed onto a DVD-RAM disc at a reduced bit rate.
Use the Rate conversion dubbing when
• you recorded a lengthy content on the HDD using the manual high rate, and it is too large to dub onto the DVD-RAM
disc.
• you recorded a title with setting the “DVD compatible mode” (
DVD-R/RW disc for that title, or you used another recorder to record a title on a DVD-RAM disc, and you want to
create a DVD-R/RW disc for that title (Set “DVD compatible mode” to “Main” or “SAP” then execute this procedure).
The Rate conversion dubbing can be performed in two different ways: part by part or multiple parts in one time. (To
dub multiple parts in one time, the same rate is applied to all parts. You cannot set a different rate to each part.)
DVD-RDVD-RW
page 184) to “Off”, and you want to make a
Rate conversion dubbing for part by part
Press HDD or DVD to select a disc containing
the parts that you want to dub.
1
Start
Press CONTENT MENU, then press / / /
to select a title.
2
Press QUICK MENU.
3
Quick Menu appears.
QUICK MENU
Press / to select “Rate conversion
dubbing”, then press ENTER.
4
“CONTENT MENU Rate Conversion Dub” appears.
ENTER
e.g.
CONTENT
Rate conversion dubbing
MENU
2005/03/30 08:00pm TV:12
Select Quick Menu to modify bitrate.
Higher bitrate for copied media will not improve quality.
All chapter marks will be deleted.
(0:52:40)
(Saves Original)
(Saves Original)
Original Copy
D/M2
LP
2.0
LP
2.0
Original
Copy
Same Disc
D/M2
Result
106
Page 7

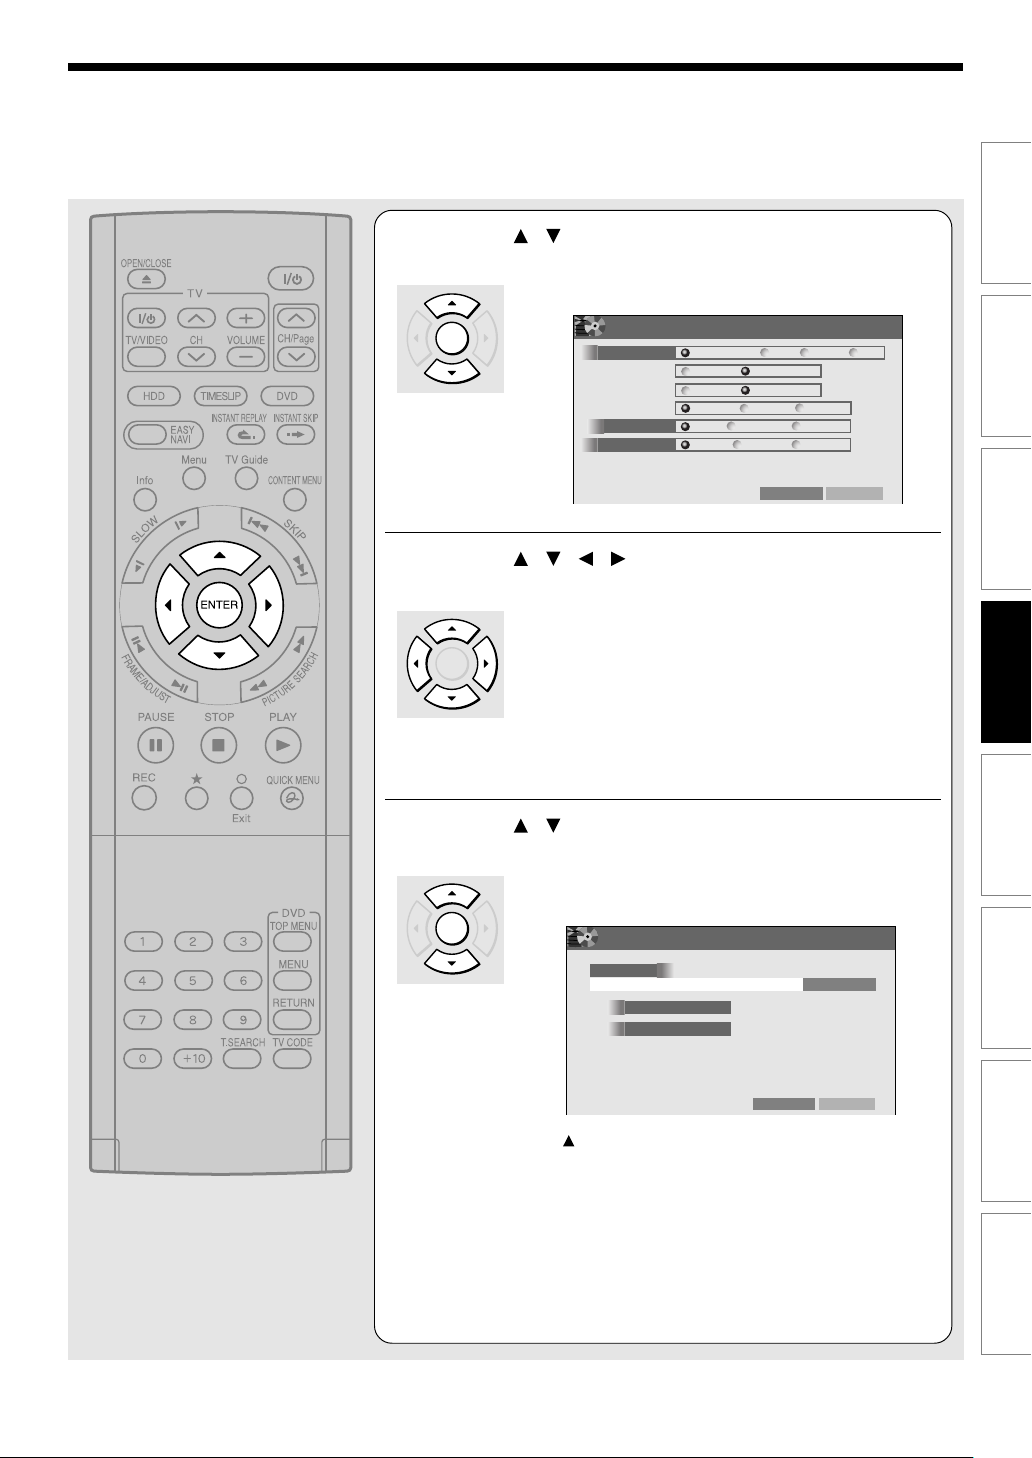
Press / to select “Copy” or “Same Disc”.
2004/06/11 08:00pm TV:12
Rate conversion dubbing
MENU
CONTENT
(0:52:40)
Original
(Saves Original)
(Saves Original)
Same Disc
Copy
e.g.
Quick Menu
User record quality
Auto rate selection
Auto power off
Exit
Introduction
5
Copy:
After the operation is completed, a specified part will
ENTER
remain on the disc where it was previously located.
Same Disc:
A part will be copied to the same disc and the copied
part will become another title.
Confirm picture and sound rates.
6
QUICK MENU
ENTER
To make changes, follow the procedure below.
1) Press QUICK MENU button to display Quick Menu.
2) Press
User record quality:
The current settings you have made (
listed. Press ADJUST (-/+) button to select a desired
setting.
Auto rate selection:
The recorder automatically selects the highest possible
rate, calculating from current unoccupied volume on the
disc. (This operation does not insure full recording of any
length program or whole use of unoccupied volume.)
/ buttons to select an item then press
ENTER button.
page 184) are
Recording
Playback
Editing
Library
Network Navi
Press ENTER.
7
ENTER
Copying starts.
To confirm the job progress, press TIME BAR button to
display the time bar. (The time bar cannot be copied.)
When copying is completed, the buzzer sounds and the
current broadcast picture appears.
Pictures and sounds displayed during copying are for
monitoring purposes only. Recorded picture quality may
vary.
Function setup
Others
107
Page 8

Editing
Creating your own title – 4: Dubbing to save (Continued)
Rate Conversion Dubbing for multiple parts
Press HDD or DVD to select a disc containing
the parts you want to dub.
1
Start
Press EDIT MENU.
2
“EDIT MENU Main Menu” appears.
EDIT MENU
Press / to select “Rate Conv. Items”, then
press ENTER.
3
“EDIT MENU Rate Conv. Items” appears.
e.g.
EDIT
Rate Conv. Items
ENTER
Collect parts to be dubbed, using steps 4 to 6
page 103.
on
4
MENU
HDD
Dub To: DVD
Title
Original
108
Each of the collected parts is recorded on the destination media
as a title.
You can cancel selection of an individual part.
1) Press
2) Press
3) Press ENTER button.
/ / / buttons to select an item then press QUICK
MENU button.
Quick Menu appears.
/ buttons to select “Cancel selected title” (or “All
clear” for cancelling selection of multiple items at a time).
Page 9
Check the rate for picture and sound quality.
5
To change the setting, perform the following steps.
1) Press QUICK MENU button to display Quick Menu.
2) Press
3) Press ADJUST (
When “Copy” on the bottom shows “X”, the selected parts are
beyond the disc capacity. Change the rate for picture and sound
quality or reduce parts to dub.
/ buttons to select “User record quality” and press
ENTER button.
/ ) button to select the setting number
and press ENTER button.
Press / to select “Start”, and select “Yes”,
then press ENTER.
6
ENTER
Copying starts.
To confirm the job progress, press TIME BAR button to
display the time bar. (The time bar cannot be copied.)
When copying is completed, the buzzer sounds and the
current broadcast picture appears.
Pictures and sounds displayed during copying are for
monitoring purposes only. Recorded picture quality may vary.
Introduction
Recording
Playback
Editing
Cancelling dubbing during rate conversion
dubbing
1) Press QUICK MENU.
2) Press
3) Press ENTER.
Note
• A portion of content from the start of recording to the
moment you cancel dubbing will be copied.
Turning off the power automatically after
dubbing
1) While dubbing, press QUICK MENU.
2) Press
3) Press ENTER.
Notes
• Unlike High speed dubbing, Rate conversion dubbing may
cause slight deterioration in picture and sound quality of
recorded content. The time required for dubbing is about
the same as the playback time of the content.
• Quality will not be improved even if you select a rate higher
than original content.
•
In Rate conversion dubbing from the HDD to a DVD-RAM
disc (a DVD-RAM disc to the HDD), the positions of chapter
marks copied on the DVD-RAM disc (the HDD) may be
slightly different in frame from the original positions.
• In Rate conversion dubbing from the HDD to a DVD-R/RW
disc, the positions of chapter marks copied on the DVD-R/
RW disc may be slightly different by the GOP (Groups Of
Pictures) from the original positions.
/ to select “Cancel dubbing”.
/ to select “Auto power off”.
• In Rate conversion dubbing from a DVD-R/RW disc to the
HDD, the positions of chapter marks are not copied on
the HDD.
• Rate conversion dubbing to the same DVD-RAM/R/RW
disc is not possible.
• The recorder automatically inserts a black picture for a
moment before and after the new title produced by this
recording process.
• You cannot use the Rate Conversion Dubbing for copying
from a DVD-RAM disc to another DVD-RAM disc.
• During Rate conversion dubbing, the relay recording
function ( page 185) is disabled even if “Relay
Recording” is set to “On”.
• During Rate conversion dubbing, switching the audio
channel is not possible.
• Audio processed under the Rate conversion dubbing is
recorded in stereo.
• When you record an SAP program and play it back, the
main and sub sound are output at the same time. Select
the sound by pressing AUDIO button.
• When you set “DVD compatible Mode” to “Main” or “SAP”
( page 184), only a selected sound (the main or sub
sound) of the SAP program is recorded. (Stereo
broadcasting is recorded as stereo).
• If you perform the Rate conversion dubbing for a Playlist,
containing a chapter that is the beginning of the Original
title at recording, one frame at the beginning will be
removed.
• During Rate conversion dubbing, P in P function (
page 70) is disabled.
• Rate conversion dubbing to DVD-R/RW selects aspect
ratio according to the first title of dubbed items.
• Each par t, when selected, shows its name at the bottom
of the menu for about 2 seconds.
109
Library
Network Navi
Function setup
Others
Page 10
DVD-RDVD-RW
HDD
DVD-RAM
Editing
Creating your own title – 4: Dubbing to save (Continued)
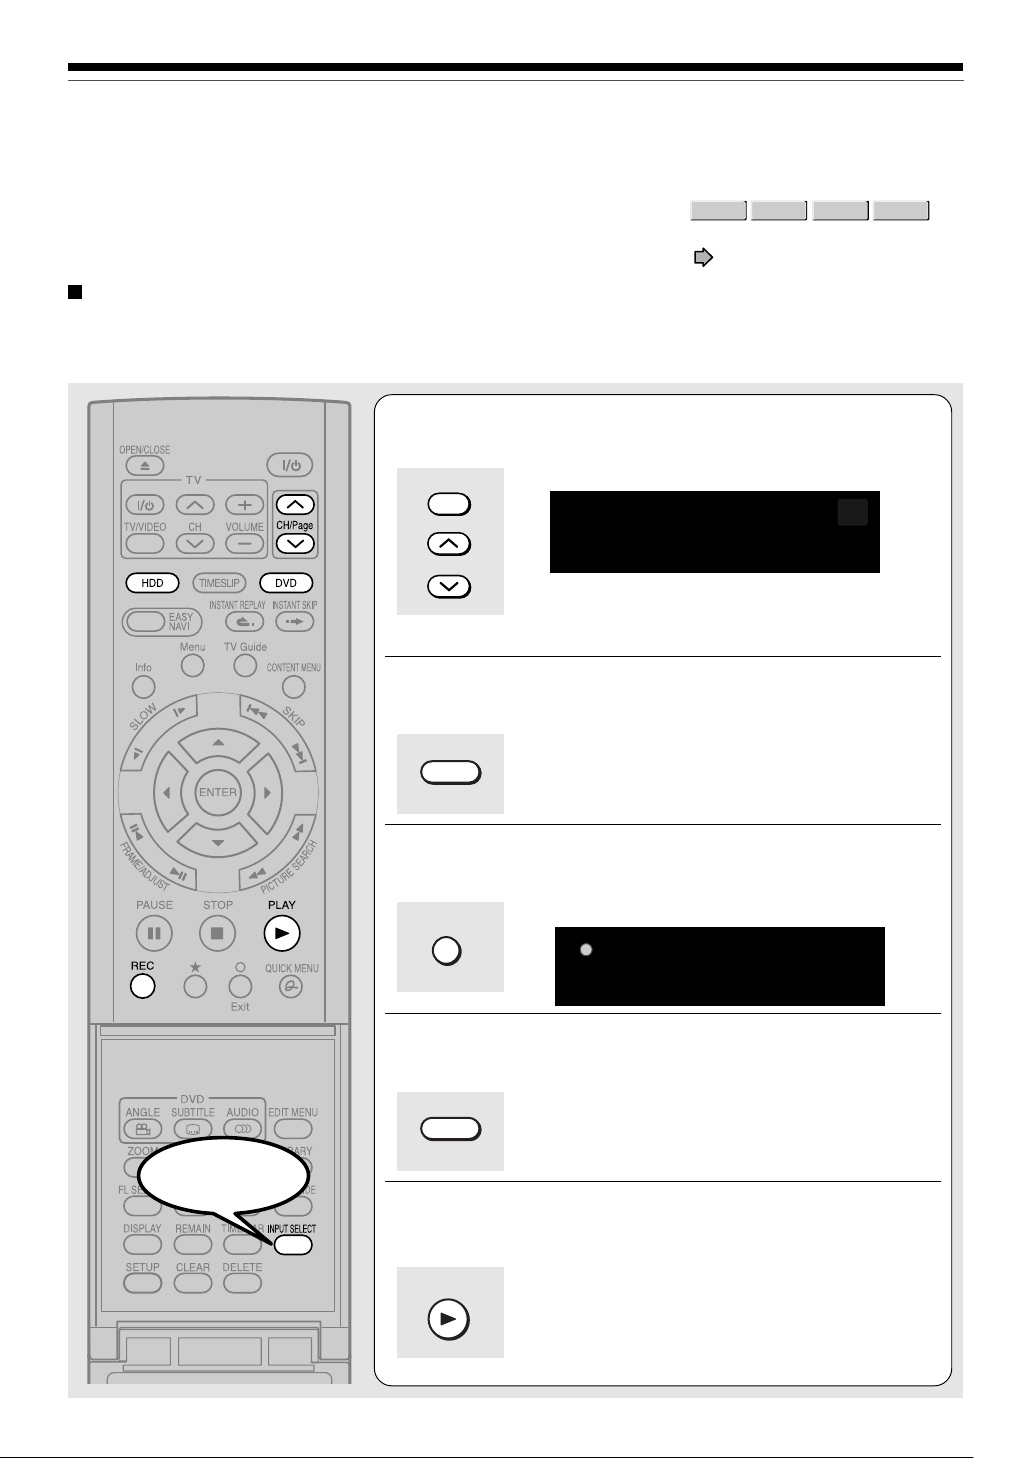
C: Line-U dubbing (Recording pictures while viewing them)
You can record the picture being played back in either disc, or to the other disc, if the content is not copy-protected.
This procedure can be used also to copy contents of a DVD-R/RW you created (
Preparation
• Make sure that the destination disc has adequate available remaining space.
• When you want to copy to the HDD, load a disc you want to play.
Example: To copy from a DVD-RAM disc to the HDD
Press INPUT SELECT or CH/Page repeatedly
to select “LineU.”
1
INPUT SELECT
CH/Page
A black screen appears.
page 112), back to the HDD.
Line U
Stereo
Start
Press HDD.
2
HDD
Press REC.
3
REC
Press DVD.
4
DVD
Start playing.
5
Recording starts.
110
PLAY
Page 11

When playback of contents you want to copy
is finished, press STOP.
6
Introduction
Recording
STOP
Playing stops, and a black screen returns.
Press HDD.
7
HDD
Press STOP.
8
Recording stops.
STOP
Notes
• The following combinations of a source and a destination disc are possible.
HDD to HDD, HDD to DVD-RAM, HDD to DVD-R/RW, DVD-RAM to HDD, DVD-R/RW to HDD
• A title dubbed by this procedure has black pictures at both the beginning and the end of the title. Therefore thumbnails in
CONTENT MENU may be black. If you change the thumbnail, see page 126.
• You can record still pictures and slow pictures during playback.
• Contents of DVD VIDEO, VIDEO CD and audio CD cannot be recorded with “Line-U dubbing”.
•“Line-U dubbing” may cause slight deterioration in picture and sound quality of contents.
• Screen menus such as CONTENT MENU or EDIT MENU cannot be recorded by “Line-U dubbing”.
•“Line-U dubbing” cannot be set as programme recording.
• When doing this procedure, programmed recording must not be initiated. If you display TV Guide On Screen, playback is
automatically canceled.
• When setting the input to Line-U, audio output is set to stereo automatically. You cannot switch the audio channel. During
“Line-U dubbing”, you can change the audio output.
• Accompanying audio content to be recorded with “Line-U dubbing” is always in stereo.
• During “Line-U dubbing”, the virtual surround function ( page 180) is disabled.
• Even if “Relay recording” is set to “On” ( page 185), the relay recording function is disabled during “Line-U dubbing”.
• For “Line-U dubbing”, a scene permitting copy-once cannot be copied.
• During Line-U dubbing, P in P function ( page 70) is disabled.
Playback
Editing
Library
Network Navi
Function setup
Others
111
Page 12

Editing
DVD-RW
DVD-R
Creating a DVD-Video using DVD-R/RW
Content stored on the HDD of the recorder can be edited and copied to a DVD-R/RW, a popular media for
distribution, and played on a compatible DVD video player.
Notice
• Beforehand confirm the contents of a disc.
If you use a DVD-R disc, prepare a new one. This DVD-Video creation procedure is possible only once per disc
on this recorder. Once you have copied to a DVD-R, you cannot redo, add, delete, or correct the copied contents
in the disc. If you start copying then cancel the job, you cannot re-use the DVD-R.
If you use a DVD-RW, be sure to confirm the contents in it. This procedure overwrites a whole disc, and all of the
contents in a DVD-RW will be lost. If you want to add contents to a DVD-RW, do not use this procedure. Record
directly or make a dubbing to the DVD-RW, then execute the finalization (
the finalizing process, and you will not be able to add, delete, or correct contents to a DVD-RW later, as it will
have been finalized. If a finalized DVD-RW has remaining space, you can add contents there if you cancel the
finalizing process of the DVD-RW (
• Do not start copying to a DVD-R/RW when programmed recording is scheduled to begin shortly.
Copying entirely to a DVD-R/RW will take 1 hour and a half (variable depending on the contents). (This does not
include time for “Writing Test”. This option requires more time. Actual time for “Writing Test” depends on the
contents to test, and may be longer than the playing time of the contents if the disc contains too little contents or
too many quality and picture settings, etc.)
If a start time of a programmed recording comes during this procedure, the recording is made onto the HDD.
However, while making a menu theme, the recording is not executed. Also, programmed recordings to DVD
media with “Off” setting of “Relay recording” (
If a programmed recording starts during this procedure, you cannot continue to make another disc after
completion of the first disc.
• Ensure the compatibility of a disc.
Refer to the
* Discs made by this procedure will comply with the DVD-Video standard. However, it is not guaranteed to play
properly on all DVD video players (including TOSHIBA products).
Depending on the disc, there may be a difference of data capacity between DVD-R and DVD-RW. It may be
possible that contents you have just recorded onto a DVD-R cannot be recorded onto a DVD-RW. (DVD-RW
capacity may be smaller.)
• Follow the instructions on handling of the disc.
page 9.
page 125).
page 185) are not executed.
page 122). This procedure includes
Preparation
• Record contents which you want to copy to DVD-R/RW disc to make DVD-Video, to the HDD with the following
settings:
- “DVD compatible mode” (
- Bit rate of 4.0 or more.
• Load a new DVD-R/RW disc. (Follow the instructions on handling of the disc.)
• Press HDD button to select the HDD mode.
Notes
• If you recorded a title while setting “DVD compatible mode” ( page 184) to “Off” or you used another recorder to record a
title in a DVD-RAM disc, and you want to copy such a title to a DVD-R/RW to create a DVD-Video, first set “DVD compatible
mode” to “Main” or “SAP” then execute the procedure of “Rate conversion dubbing for multiple parts” ( page 108).
• Depending on the disc, DVD-R 4x speed compatibility may be disabled.
page 184): “Main” or “SAP”.
112
Page 13
Press EDIT MENU.
Introduction
1
“EDIT MENU Main Menu” appears.
e.g.
EDIT MENU
Press / to select “DVD-Video Creation”,
then press ENTER.
2
ENTER
EDIT
Main Menu
MENU
Chapter Editing
Chapters can be divided on frame
basis. Chapters can be merged and
assigned names.
Title
1
Divide
1
Merge
HDD
5432
“EDIT MENU DVD-Video Create (Selected Items)”
appears.
e.g.
EDIT
MENU
DVD-Video Create
(Selected Items)
Capacity
HDD
Source
DV Recording
Chapter Editing
Edit Functions
Playlist Editing
Dub Selected Items
Rate Conv. Items
Combine ORG Title
DVD-Video Creation
DVD-Video Finalizing
Del Selected Items
Sourece: Title
Creating Media: DVD
Original
Next
Recording
Playback
Editing
Library
Start
Thumbnails of titles on the HDD are displayed in the
upper area.
Press / / / to select a part (a title or
chapter) to copy to a DVD-R/RW disc.
3
• To go to the preceding or following page, press
PICTURE SEARCH button.
ENTER
• To select a chapter, first select the title that contains
the chapter you want, then press
To return to the title display, press
e.g.
EDIT
MENU
DVD-Video Create
(Selected Items)
Capacity
HDD
button.
button again.
Sourece: Title
Creating Media: DVD
Original
Next
(Continued)
Network Navi
Function setup
Others
113
Page 14
Editing
Creating a DVD-Video using DVD-R/RW (Continued)
4
5
Press ENTER.
A cursor appears in the lower area (destination media).
ENTER
e.g.
Cursor
EDIT
MENU
DVD-Video Create
(Selected Items)
Capacity
HDD
Sourece: Title
Creating Media: DVD
Original
Next
Press / to select a location to place the
selected part, then press ENTER.
If there are no parts in the lower area, leave the cursor
to the left and press ENTER button.
ENTER
The selected part is inserted into the location of the
cursor.
e.g.
EDIT
MENU
DVD-Video Create
(Selected Items)
HDD
Sourece: Title
Original
114
Creating Media: DVD
Capacity
Repeat steps 3 to 5.
6
You can check the available volume of a DVD-R/RW on the bar at
the bottom of the menu.
Each of the assembled parts is recorded onto the destination
media as a title.
• To cancel selected parts see
• To change the title/chapter name or thumbnail before selecting:
1) Select the part that you want to change, and press QUICK
MENU button.
2) Press the
title thumbnail” to change the title, or “Edit chapter name” or
“Modify chapter thumbnail” to change the chapter, and press
ENTER button.
3) Use the entry screen to change the title or chapter name.
To change a title thumbnail or a chapter thumbnail, see the
steps on
/ buttons to select “Edit title name” or “Modify
page 126.
page 120.
Next
Page 15
Press / to select “Next”, then press
ENTER.
7
ENTER
A screen is displayed to select options.
e.g.
EDIT
DVD Video Creation(Option Settings)
MENU
Menu Create
Start Play
After play one title
After play final title
Writing Test
Set Aspect Ratio
Title+Chapter Title Chapter None
Menu
Menu
Menu
None Parts Test All Test
Original 4:3 fixed 16:9 fixed
Title 1
Next Title
Title 1
Introduction
Recording
Stop
AAA
B
B
Press / / / to set the items.
8
For the instruction of setting, see the description shown
at selection.
ENTER
Press / to select “Next”, then press
ENTER.
9
ENTER
• When you have selected “Parts Test” or “All Test” for
“Writing Test”, extra time is required for pre-writing
test. “All Test” requires more time than “Parts Test”.
If you select “None” for “Menu Create”:
The setting of “Start Play” and “Start after playing one
title” is skipped automatically.
A screen is displayed to confirm the information you are
going to write.
e.g.
EDIT
DVD Video Creation(Disc Information)
MENU
Disc name
Total title number
Total time
11
1 hour 24 min.
NextReturn
Edit Name
Playback
Editing
Library
Network Navi
NextReturn
Press
button to select “Edit Name” and press ENTER
button to go to the character entry screen. The number of
characters is limited for the disc name you can enter.
If you selected “None” for “Menu Create” at step 8,
select “Writing” on the bottom right corner, and press
ENTER button. Skip to step 14.
(Continued)
Function setup
Others
115
Page 16

Editing
Creating a DVD-Video using DVD-R/RW (Continued)
10
Press to select “Next”, then press ENTER.
A display of title menu selection appears if “Menu
Create” is set to “Title+Chapter” or “Title” at step 7.
ENTERENTER
To view your captured images (
next page.
e.g.
EDIT
DVD Video Creation(Title Menu Select)
MENU
MR. SATO, PLEASE JOIN US TO CREATE MANUALS
DO NOT
DO NOT
LEAVE HERE
DO NOT
LEAVE HERE
DO NOT
LEAVE HERE
Deep Blue Olive Sepia Light Blue
MR. SATO, PLEASE JOIN US TO CREATE MANUALS MR. SATO, PLEASE JOIN US TO CREATE MANUALSMR. SATO, PLEASE JOIN US TO CREATE MANUALSMR. SATO, PLEASE JOIN US TO CREATE MANUALS
DO NOT
LEAVE HERE
DO NOT
LEAVE HERE
DO NOT
LEAVE HERE
Orange Cyber Green Lavender Cyber Red
DO NOT
LEAVE HERE
DO NOT
LEAVE HERE
DO NOT
LEAVE HERE
DO NOT
LEAVE HERE
DO NOT
LEAVE HERE
DO NOT
LEAVE HERE
DO NOT
LEAVE HERE
LEAVE HERE
DO NOT
DO NOT
LEAVE HERE
LEAVE HERE
DO NOT
DO NOT
LEAVE HERE
LEAVE HERE
DO NOT
DO NOT
LEAVE HERE
LEAVE HERE
DO NOT
DO NOT
LEAVE HERE
LEAVE HERE
DO NOT
DO NOT
LEAVE HERE
LEAVE HERE
page 119), go to the
1/ 2
LEAVE HERE
LEAVE HERE
LEAVE HERE
LEAVE HERE
LEAVE HERE
LEAVE HERE
MR. SATO, PLEASE JOIN US TO CREATE MANUALSMR. SATO, PLEASE JOIN US TO CREATE MANUALSMR. SATO, PLEASE JOIN US TO CREATE MANUALS
DO NOT
DO NOT
LEAVE HERE
DO NOT
LEAVE HERE
DO NOT
LEAVE HERE
DO NOT
LEAVE HERE
DO NOT
LEAVE HERE
DO NOT
LEAVE HERE
DO NOT
LEAVE HERE
LEAVE HERE
DO NOT
DO NOT
LEAVE HERE
LEAVE HERE
DO NOT
DO NOT
LEAVE HERE
LEAVE HERE
DO NOT
DO NOT
LEAVE HERE
LEAVE HERE
DO NOT
DO NOT
LEAVE HERE
LEAVE HERE
DO NOT
DO NOT
LEAVE HERE
LEAVE HERE
DO NOT
DO NOT
DO NOT
DO NOT
DO NOT
DO NOT
If you press
button, you can preview the selected
menu. To return, press O button.
While displaying a preview screen of your captured
image, you can access the other menu to correct color
page 119) by pressing button.
(
Press / / / to select the menu, then
press ENTER.
11
If you have set “Menu Create” to “Title+Chapter” or
“Chapter” at step 7, a screen is displayed to select a
ENTER
chapter menu.
Press / / / to select the chapter menu.
12
The selected menu is set for all chapters.
You cannot set it for each chapter individually.
ENTER
If you press
button, you can preview the selected
menu. To return, press O button.
If you press
button to select “Return” while previewing
and press ENTER button, you will return to the preview
of the title menu. To go back to the chapter menu, press
/ / / button to select a number next to “Chapter
Menu” on the bottom center.
116
Page 17

Press ENTER on “EDIT MENU DVD-Video
Creation (Chapter Menu Select)” display.
13
Introduction
A confirmation message is displayed.
ENTER
Press / to select “Yes”, then press ENTER.
14
The current broadcast picture appears and dubbing
starts. The progress is displayed on the screen and in
ENTER
the front panel display on the recorder.
When copying is completed, a finalizing process follows.
This enables the disc to be played on a DVD video
player.
When the process is completed, a message “Create
another DVD-Video now?” appears (except when “Auto
power off” (see below) is set). If you select “Ye s ”, you
can make one more DVD-R/RW of the same content. If
you select “No”, you can complete creating the DVDVideo.
• You can set the recorder to turn off automatically when
the job finishes.
1) During the job, press QUICK MENU button.
2) Press
3) Press ENTER button.
/ buttons to select “Auto power off”.
Recording
Playback
Editing
Library
Network Navi
117
Function setup
Others
Page 18

Editing
Creating a DVD-Video using DVD-R/RW (Continued)
Notes
• The number of titles that you can write on a DVD-R/RW
disc is limited (99 titles. Each title should have 99 chapters
or less). If you have a large number of titles or chapters,
you may not be able to write due to the limitation of the
DVD specifications. Also, even if the number of titles and
chapters is within the limit, you may not be able to write if
you have a large number of menu items.
• Due to standard differences, the number of chapters and
their position may change slightly after DVD-Video
creation. (For chapters generated on a DVD-R/RW disc,
the same thumbnail for the Original chapter is displayed.)
• Due to standard limitation, a DVD-R/RW disc may contain
unnecessary scenes after creation.
• If you select items of various types of video outputs, aspect
ratios or other properties, or if you select an item recorded
with different settings, they may be divided into titles. (For
titles generated on a DVD-R/RW disc the same thumbnail
for the Original title is displayed).
• Content based on a complicated PlayList or composed of
too many items may not be copied properly.
• Copy-once permitted contents cannot be copied to a
DVD-R/RW disc, even if they are recorded onto the HDD
while “DVD compatible mode” is set to “Main” or “SAP” (
page 184).
• Content recorded on a recorder other than this recorder
(including TOSHIBA products) cannot be copied to a DVDR/RW disc using High Speed Dubbing. First set “DVD
compatible mode” to “Main” or “SAP” and record them onto
the HDD. Then perform “Rate conversion dubbing for
multiple parts” ( page 108) to copy to the HDD.
• When a content is recorded with manual rate 1.0 Mbps or
1.4 Mbps and is including a 16:9 picture shape scene, the
DVD creation of the content may fail. In this case, set “Set
Aspect Ratio” to “4:3 fixed” on the menu “(Option Settings)”.
• Even if the title is recorded with “DVD compatible mode” set
to “Main” or “SAP”, using a recorder other than this may
cause failure when recording to a DVD-R/RW disc.
• If the DVD-Video creating fails to be completed, most of the
discs cannot be used again.
• If an error occurs while a DVD-Video is created, the error
code “ERR-**” (** indicates the error code) is shown in
the front panel display of the recorder. ( page 193) To
clear this display, press DISPLAY button.
• There may be a difference between a specified thumbnail
of menu in the DVD-Video creation procedure and the one
on displayed in CONTENT MENU.
Selecting the items displayed on the menu
You can hide items on the menu if necessary.
To hide a disc name
Leave “Disc Name” blank. Display the on-screen
keyboard and press CLEAR button to delete letters,
then press
button to save.
To hide a page number
Leave “Disc Name” blank. Follow the above
method.
To hide a disc name and show a page number
Enter one more space in “Disc Name”.
To hide a title/chapter name
On CONTENT MENU or a display of item selection,
select a title/chapter and display the
on-screen keyboard from Quick Menu. Erase all
characters of the name.
You can hide a time also using the same manner.
•“Chapter 0001” . . . on CONTENT MENU means
that the chapter is given no characters as its
name. Such a chapter does not show the name
on the menu.
• A chapter menu shows the title name at the top
right corner. If you hide the title name, no
character appears in this area.
To hide a title/chapter name and show a time
Enter one more space and save it as the title/
chapter name.
Note
• You cannot hide items other than above.
118
Page 19

Introduction
Using a favorite scene as a menu
You can select favorite scenes from the recorded
contents and use them as menus of DVD-Video
Created (
page 116) DVD-R/RW.
1) Press CONTENT MENU.
2) Press
/ / / to select a title which
contains a scene to use as menus.
3) Press QUICK MENU.
4) Press
/ to select “Save captured images”.
5) Select a scene.
Locate a scene using the buttons such as PLAY,
SLOW, FRAME or PAUSE, etc.
6) Press
/ to select “Loading” and press
ENTER.
e.g.
EDIT
Save captures images
MENU
T001(00:00:23)
2005/03/30 05:09pm CH:3
Original
Aspect Ratio
00:00:00:03F
Location
Select back ground picture
Title: 002 Chapter: 0004
HDD
4:3
Loading
00:54:3000:00:00
Notes
• You cannot capture copy-protected contents.
• The maximum number of pictures which can be saved
varies depending on the data size.
To name a captured image
Press / / / to select an image to name then
press QUICK MENU. Press
/ to select “Enter
DVD-Video menu name” then press ENTER.
e.g.
EDIT
Save captures images
MENU
Quick Menu
Enter DVD-Video menu name
Delete name
Delete all menus
Exit
Title: 002 Chapter: 0004
2005/03/30 05:09pm CH:3
Original
Aspect Ratio
00:00:00:03F
Location
Select back ground picture
HDD
4:3
Loading
00:54:3000:00:00
To delete a captured image
Press
/ / / to select an image to delete then
press QUICK MENU. Press
/ to select “Delete
menu” then press ENTER. Follow the message to
operate.
To delete all captured images, select “Delete all
menus”.
Selecting color options on menus
Several options are available: a translucent
background for better legibility, character color and
cursor color selections.
1) At step 10 (
and select a captured image by
then press
page 116), go to the next page
/ / / ,
.
The preview screen appears.
2) Press
.
A color setting display appears.
e.g.
EDIT
DVD-Video Creation (color setting)
MENU
Back ground color
Permeation Ratio
Character
color
Selecting
color
Selected
color
3) Set each item by
On Off
White Black
Color
0.5 0.7 0.9
12
1110
987654321
Set up the disc name, the
title name or page numer
on upper side of the screen,
121110
987654321
OR the letter color of the
title name, the chapter
name and the time beside
121110
987654321
the thumbnail.
AAA
B
B
/ / / , referring to the
DO NOT
DO NOT
DO NOT
LEAVE HERE
LEAVE HERE
LEAVE HERE
DO NOT
DO NOT
DO NOT
LEAVE HERE
LEAVE HERE
LEAVE HERE
guidance on the right half of the display, finally
press
to exit.
The preview screen returns.
Recording
Playback
Editing
Library
Network Navi
Function setup
T001(00:00:23)
The on-screen keyboard appears.
Enter a name.
Others
119
Page 20

Editing
Creating a DVD-Video using DVD-R/RW (Continued)
To improve legibility of characters on menus
Press
/ / / to set “Back ground color” to
“On”. Then select “Color” (“White” or “Black”)
according to the menu’s tone, and set “Permeation
Ratio”, which sets the how translucent the selected
Back ground color is. The higher the ratio, the Back
ground color will be more translucent but the lower
legibility of characters.
To change the character color
Press / / / to select from 12 colors. When
you select “White” back ground color, dark color
should be a better choice.
To change the cursor color
“Selecting Color” is a color for the moving cursor.
“Selected Color” is one for the press of ENTER
button.
To preview your selections
Press O button to return to the preview screen. If
you correct your selections, repeat steps 2) and 3)
page 119).
(
Canceling selection of an item
1) Press / / / to select an item then press
QUICK MENU.
Quick Menu appears.
e.g.
2) Press
DVD-Video Create
EDIT
(Selected Items)
MENU
Quick Menu
Cancel selected title
Preview
Preview all selected items
Title information
Clear all selected items
Auto power off
Exit
Capacity
HDD
Sourece: Title
Creating Media: DVD
AAA
/ to select “Cancel selected title” (or
Original
Next
“Clear all selected items” for canceling
selection of all items at a time).
3) Press ENTER.
The selected item disappears.
Changing the location of an item
Follow the procedure above to cancel selection of the
item, then repeat steps 3 to 5 to re-insert the item in a
desired location (
page 113, 114).
120
Confirming the content in the lower area
Select an item and press QUICK MENU. Then press
/ to select “Preview” and press ENTER.
Notes
• Each time an item is selected, its name appears at the
bottom of the screen.
• You can also confirm the content by selecting “Title
information” from Quick Menu.
Canceling dubbing process
Press QUICK MENU to display the Quick Menu.
Press
/ to select “Stop creating DVD video”,
then press ENTER.
Notes
• If you cancel creating DVD-Video on a DVD-R disc, the
disc will become unusable in most cases.
• Canceling is not always possible.
Page 21

If a message appears while selecting a part
You may receive a message, such as “Selection of
Writing Test in the next option setting is recommended
to check whether Aspect Ratio coexists”. If a copyprohibited content is included, or if the aspect ratio is
changed meanwhile, cancel the selection. If you are
not sure, select Writing Test (“Parts Test” or “All Test”).
Note
• Depending on selection or condition of items, copying may
result in failure. If a message appears, be sure to, prior to
step 7, press QUICK MENU button. Then press /
buttons to select “Cancel selected title”, and press ENTER
button. If you do not do this and continue the copying
process, an error may occur and the disc will be rendered
useless.
Introduction
Recording
Playback
Playing a created DVD-Video
You can play the DVD-R/RW in the same manner as
you would play a DVD video disc.
page 66.
See
If you want to correct the contents of a DVD-RW
after the DVD-Video creation procedure
Cancel the finalization of the DVD-RW ( page 125).
It is possible only on DVD-RW recorded on this
recorder.
After canceling, you can delete titles. However, you
cannot re-use the whole disc, since only the last title
can restore the disc space.
If you want to delete all contents of a DVD-RW
after the DVD-Video creation procedure
Load the DVD-RW into the recorder and initialize it,
then execute the procedure of DVD-Video creation
page 112).
(
Editing
Library
Network Navi
Function setup
121
Others
Page 22

Editing
DVD-RW
DVD-R
DVD-Video finalizing process
The recorder processes recorded data in a DVD-R/RW disc so that it can be played on other compatible
devices.
Important
• You cannot rewrite data onto a disc after you execute the DVD-Video finalizing process. However, the disabled rewritability of
a DVD-RW disc can be restored by canceling the process of the disc ( page 125). On DVD-R discs, canceling of the DVDVideo finalizing process is not available.
Canceling of the DVD-Video finalizing process is available only on DVD-RW recorded or copied contents on this recorder.
Preparation
• Press DVD button to select the DVD mode.
• Load a DVD-R/RW disc you want to execute the finalizing process.
Press EDIT MENU.
1
“EDIT MENU Main Menu” appears.
EDIT MENU
Start
Press / to select “DVD-Video Finalizing”.
2
e.g.
ENTER
EDIT
Main Menu
MENU
DVD-Video Finalizing
Used to create compatibility between
the recorded DVD-R/-RW and
DVD Players. Also used for setting up
“menu picture”, etc.
Title
Title Title
321
1 2
Menu
321
1 2
DVD-R
321
Finalize
321
DVD-Video Finalizing
Press ENTER.
3
A display of option settings appears.
e.g.
EDIT
ENTER
DVD-Video Finalize(Option Settings)
MENU
Menu Create
Start Play
After play one title
After play final title
Writing Test
Set Aspect Ratio
Title+Chapter Title Chapter None
Menu
Menu
Menu
None Parts Test All Test
Original 4:3 fixed 16:9 fixed
Title 1
Next Title
Title 1
Source
DV Recording
Chapter Editing
Edit Functions
Playlist Editing
Dub Selected Items
Rate Conv. Items
Combine ORG Title
DVD-Video Creation
Del Selected Items
Stop
NextReturn
122
Page 23

Press / / / to select.
Introduction
4
As you select each item, its function is explained.
ENTER
Press / to select “Next”, then press
ENTER.
5
ENTER
When “Menu Create” is set to “None”:
“Start play” and “After play one title” are automatically
omitted.
Information on data to be processed appears.
e.g.
EDIT
DVD-Video Finalize(Disc Information)
MENU
Disc name
Total title number
Total time
If you press
button to select “Edit Name” then press
ENTER button, a keyboard appears so that you can
enter a title name.
When “Menu Create” is set to “None”:
Select “Writing” at the right bottom by
buttons and press ENTER button. Skip to step 10.
11
1 hour 24 min.
Edit Name
NextReturn
/ / /
Recording
Playback
Editing
Library
Press to select “Next”, then press ENTER.
6
When “Menu Create” is set to “Title+Chapter” or “Title”, a
display of title menu selection appears.
ENTERENTER
To view your captured images (
next page.
e.g.
EDIT
DVD-Video Finalize (Title Menu Select)
MENU
MR. SATO, PLEASE JOIN US TO CREATE MANUALS
DO NOT
LEAVE HERE
DO NOT
LEAVE HERE
DO NOT
LEAVE HERE
Deep Blue Olive Sepia Light Blue
MR. SATO, PLEASE JOIN US TO CREATE MANUALS MR. SATO, PLEASE JOIN US TO CREATE MANUALSMR. SATO, PLEASE JOIN US TO CREATE MANUALSMR. SATO, PLEASE JOIN US TO CREATE MANUALS
DO NOT DO NOT DO NOT DO NOT DO NOT DO NOT DO NOT DO NOT
DO NOT
DO NOT
LEAVE HERE
LEAVE HERE
DO NOT
DO NOT
LEAVE HERE
LEAVE HERE
DO NOT
DO NOT
LEAVE HERE
LEAVE HERE
If you press button, you can preview the selected
menu. To return, press O button.
While displaying a preview screen of your captured
image, you can access the other menu to correct color
page 119) by pressing button.
(
page 119), go to the
DO NOT
DO NOT
LEAVE HERE
LEAVE HERE
DO NOT
DO NOT
LEAVE HERE
LEAVE HERE
DO NOT
DO NOT
LEAVE HERE
LEAVE HERE
Network Navi
Function setup
1/ 2
MR. SATO, PLEASE JOIN US TO CREATE MANUALSMR. SATO, PLEASE JOIN US TO CREATE MANUALSMR. SATO, PLEASE JOIN US TO CREATE MANUALS
DO NOT
DO NOT
LEAVE HERE
DO NOT
LEAVE HERE
DO NOT
LEAVE HERE
DO NOT
LEAVE HERE
LEAVE HERE
DO NOT
DO NOT
LEAVE HERE
LEAVE HERE
DO NOT
DO NOT
LEAVE HERE
LEAVE HERE
Others
(Continued)
123
Page 24

Editing
DVD-Video finalizing process (Continued)
Press / / / to select the title menu, then
press ENTER.
7
A display of chapter menu selection appears if “Menu
Create” is set to “Tltle+Chapter” or `Chapter” at step 3.
ENTER
Press / / / to select the chapter menu.
8
A selected menu is applied to all chapters. You cannot
ENTER
allocate a menu to each chapter.
If you press
menu. To return, press O button.
If you press
then press ENTER button, you can go to the preview of
the selected title menu. To return to the preview of
chapter menu, press
number next to “Chapter Menu” then press ENTER
button.
button, you can preview the selected
button during preview, to select “Return”
/ / / buttons to select a
Press ENTER on “EDIT MENU DVD-Video
Finalize (Chapter Menu Select)” display, and
9
select “Yes ” by
A message appears to ask you if you want the power to
turn off automatically or not when the process is
ENTER
Press / to select “Yes ” or “No” then press
ENTER.
10
ENTER
completed.
A message disappears and the finalize process starts.
The progress is displayed on the screen and in the front
panel display on the recorder.
/ , then press ENTER.
124
Page 25

Notes
• DVD-R/RW discs recorded on this recorder may not be
recognized on other devices unless you execute DVDVideo finalizing process to them.
• You can record onto a DVD-R disc additionally to the limit
of the disc capacity, unless you execute the DVD-Video
finalizing process to it. Deleting of recorded titles is also
possible, however, the disc space cannot be restored.
• You can record additional content onto a DVD-RW disc
additionally to the limit of the disc capacity unless you
execute the DVD-Video finalizing process to it. Deleting of
recorded titles is also possible, however, the disc space
can be restored only by the volume of the title last
recorded.
• On DVD-RW discs, it is possible to cancel the DVD-Video
finalizing process or to initialize for a new use.
• If a start time of a programmed recording comes during a
finalizing process, the recording is made onto the HDD.
However, while making a menu, the recording is not
executed. Also, when “Relay recording” is set to “Off” the
recording will not start.
Introduction
Recording
Playback
Editing
To cancel the finalize process
DVD-RW
You can cancel the DVD-Video finalizing process
executed to a DVD-RW disc so that the disc can be
recordable again.
1) During stop, press QUICK MENU.
A quick menu appears.
2) Press
/ to select “Disc management” then
press ENTER.
3) Press
/ to select “Cancel finalization” then
press ENTER.
4) Read the message, and press
/ to select
“Yes”, then press ENTER.
The process starts.
Notes
• While the recorder is ready to start a programmed
recording, you cannot cancel the DVD-Video finalizing
process.
• You cannot cancel the DVD-Video finalizing process
executed on a DVD-RW disc recorded on other device.
• You cannot cancel the DVD-Video finalizing process
executed on a DVD-RW disc if the disc is protected.
• Canceling the DVD-Video finalizing process may shift the
thumbnails of titles/chapters.
Library
Network Navi
Function setup
Others
125
Page 26

DVD-RDVD-RW
HDD
DVD-RAM
Editing
Other editing functions
Changing the picture on CONTENT MENU
You can register your favorite scene as a thumbnail displayed on CONTENT MENU.
On a finalized DVD-R/RW disc, this feature is not available.
Press CONTENT MENU, then press / / /
to select a title.
1
Press QUICK MENU.
2
Quick Menu appears.
Start
QUICK MENU
e.g.
CONTENT
MENU
Title List Page
Quick Menu
HDD :
Title information
2004/06/08 07:00
Create thumbnail
am TV:4
High speed dubbing
Rate conversion dubbing
Chapter function
Edit functon
Special playback mode
Save captured images
Disc information
Display changeover
Specific page jump
Title delete
2004/06/12 09:00
pm TV:3
2004/07/12 11:00
pm TV:4
Exit
(0:53:45)
Original
(0:52:40)
Original
(0:30:08)
Original
1/ 2
HDD
2005/03/24 11:00
pm TV:6
(0:29:50)
Original
2005/04/07 07:00
am TV:8
(0:54:30)
Original
2005/04/08 09:00
pm TV:10
(0:51:28)
Original
Press / to select “Create thumbnail”
(or “Create CHP thumbnail” if selected a
3
chapter at step 1), then press ENTER.
“CONTENT MENU Create Thumbnail” appears.
e.g.
ENTER
CONTENT
MENU
00:00:00
Create Thumbnail
Title:002 Chapter:0001
2005/03/24 11:00pm Ch:6
Location
Select desired thumbnail image via
remote. To set, press enter.
HDD
(0:29:50)
Original
00:00:00:03F
00:54:30
126
Page 27

Press PLAY to start playback.
(
)
(
)
Introduction
4
PLAY
At the point where you want to capture a
thumbnail image, press PAUSE.
5
PAUSE
Press ENTER.
Locate a scene you want to capture as a thumbnail.
You can use the following buttons.
PICTURE SEARCH, FRAME, SLOW, SKIP, PAUSE, etc.
e.g.
CONTENT
MENU
00:00:00
Create Thumbnail
Title:002 Chapter:0001
2005/03/24 11:00pm Ch:6
Location
Select desired thumbnail image via
remote. To set, press enter.
6
CONTENT MENU returns. The selected scene is
displayed as a thumbnail.
ENTER
e.g.
CONTENT
Title List Page
MENU
HDD :
2005/03/24 07:00
am TV:4
2005/03/29 09:00
pm TV:3
2005/04/07 11:00
pm TV:4
(0:53:45)
Original
(0:52:40)
Original
0:30:08
1/ 2
Original
00:06:25:23F
2005/03/24 11:00
pm TV:6
2005/04/07 07:00
am TV:8
2005/04/08 09:00
pm TV:10
HDD
(0:29:50)
00:29:50
(0:29:50)
Original
(0:54:30)
Original
0:51:28
Recording
Playback
Editing
Library
HDD
Network Navi
Notes
• There may be a small difference between a thumbnail made on the Create Thumbnail display and that displayed in
CONTENT MENU. Operation with PICTURE SEARCH button may extend the difference.
• You cannot create thumbnails of chapters in a title that contains a still picture.
• If you create a chapter thumbnail, and then shift the chapter mark ( page 93) or record or edit the disc on other devices,
the chapter thumbnail may return to the top of the chapter.
127
Function setup
Others
Page 28

Editing
Other editing functions (Continued)
HDD
Combining two titles (Original) into one
Use this feature to combine two titles into one. The second title is deleted as the second title is added to the end of
the first title.
Press HDD or DVD to select a disc that
contains titles or chapters you want to merge.
1
DVD-RAM
Start
Press EDIT MENU.
2
“EDIT MENU Main Menu” appears.
EDIT MENU
Press / to select “Combine ORG Title”,
then press ENTER.
3
“EDIT MENU Combine ORG Title” appears.
e.g.
EDIT
Combine ORG Title
ENTER
Press / to select the first title to merge.
MENU
4
Press PICTURE SEARCH button to move to the
previous or next page.
ENTER
Press ENTER.
5
The cursor appears in the lower area of the screen (the
title to merge to).
ENTER
For source, only 2 titles (original)
Cursor
Title:
can be selected. After combined,
the second title is included into the
first one.
HDD
Title
Object :HDD
Object :HDD
Start combining
Original
128
Page 29

Press / to select the location to put the
part and press ENTER.
6
It is fixed at the left side at the beginning. Press ENTER
button. The selected part moved into the location of the
ENTER
cursor.
e.g.
EDIT
MENU
Combine ORG Title
HDD
Title
Introduction
Recording
Original
Playback
Object :HDD
Start combining
Title:
For source, only 2 titles (original)
can be selected. After combined,
the second title is included into the
first one.
Perform steps 4 to 6 and select the second
title.
7
You cannot select the same title.
To cancel the registered part:
1) Select the part that you want to cancel, and press QUICK
MENU button to display the Quick Menu.
2) Press / buttons to select “Cancel selected title” (or “Clear
all selected items” for cancelling the selection of multiple items
at a time).
3) Press ENTER button.
Press / to select “Start combining” and
press ENTER, then select “Yes” and press
8
ENTER.
The combining process starts.
ENTER
Editing
Library
Network Navi
Function setup
Notes
• You cannot stop the combining process after it has started.
• You cannot combine titles if their length will exceed 9 hours.
• You cannot combine a protected title or a title containing still pictures.
• The title name of the first title is given to the title after combining.
• The second title is combined into the first title, maintaining the chapter divisions and chapter names.
• Titles and chapters show their names for about 2 seconds at the bottom of the screen when they are selected.
Others
129
Page 30

Page 31

Library
To facilitate your collecting.
Using Library data
Searching for a desired title
Viewing Library data
Checking remaining space
Page 32

Library
HDD
DVD-RAM
Using Library data
The recorder has a “Library Management” database which memorizes various properties of recordings
made on this recorder, including date, media, title, genre, etc. Using this database, you can search for
desired or available discs.
You can utilize Library data as follows.
• To search for a DVD-RAM disc that contains a desired title.
• To check or change information of a title or disc.
• To check the remaining space of a DVD-RAM disc.
Basic operation of the Library system
Press LIBRARY.
1
“LIBRARY MENU Title Summary (All Titles)” appears.
LIBRARY
e.g.
Title Summary
LIBRARY
(All Titles)
MENU
No. Date Day Time CH Genre Title Name
2005/03/20
2005/03/19
2005/03/18
2005/03/17
Su
Sa
Fr
Th
11:00 pm
7:00 pm
9:00 pm
HDD
HDD
HDD
HDD
1/ 2
2005/03/20 07:00pm ...7:00 pm
5
2005/03/19 11:00pm ...
4
2005/03/18 07:00pm ...
3
2005/03/17 09:00pm ...
3
5/24 (Tu)
2:49 pm
Press QUICK MENU.
2
Quick Menu appears.
QUICK MENU
Start
Press / to select an item, then press
ENTER.
3
ENTER
Notes
• To cancel this procedure, press LIBRARY button.
• The Library system does not support DVD-R/RW discs.
• Selecting a title on “LIBRARY MENU Title Summary (All Titles)”, and pressing ENTER button begins playback of the title if
the disc containing the title is loaded.
• For proper function of the Library system, use DVD-RAM discs that shows a statement on its package such as “This disc can
copy images that permit copying once.” If you use a DVD-RAM disc without such a statement, and then operate it on other
device, the library data of the disc may not function properly.
• LIBRARY MENU may not display all characters of a registered name of a disc.
e.g.
Title Summary
LIBRARY
(All Titles)
MENU
Quick Menu
No. Date Day Time CH Genre Title Name
DVD space remaining
DVD all disc no.
2004/ 6/20
HDD
HDD
HDD
HDD
HDD
HDD
Library management
HDD
HDD
Su
Title information
2004/ 6/19
Sa
Arrange
2004/ 6/18
Fr
Narrowing
2004/ 6/17
Th
Jump
2004/ 6/13
Su
Disc information
2004/ 6/13
Su
Fr
Exit
2005/ 3/ 9
We
11:00 pm
7:00 pm
9:00 pm
11:00 pm
9:00 pm
9:00 pm
9:00 pm
5
4
3
3
2
4
L1
L1
1/ 2
2005/03/20 07:00pm ...7:00 pm
2005/03/19 11:00pm ...
2005/03/18 07:00pm ...
2005/03/17 09:00pm ...
2005/03/13 11:00pm ...
2005/03/13 09:00pm ...
2005/03/11 09:00pm ...2004/ 6/11
2005/03/ 9 09:00pm ...
5/24 (Tu)
2:49 pm
For details on each item, see from the next page.
132
Page 33

Library
Title Summary
(All Titles)
MENU
LIBRARY
1/ 2
HDD
2005/06/20 07:00pm ...7:00 pm
11:00 pm
7:00 pm
9:00 pm
11:00 pm
9:00 pm
9:00 pm
5
2005/03/20
HDD
2005/03/19 11:00pm ...
4
2005/03/19
HDD
2005/03/18 07:00pm ...
3
2005/03/18
HDD
2004/03/17 09:00pm ...
3
2005/03/17
HDD
2004/03/13 11:00pm ...
2
2005/03/13
HDD
2005/03/13 09:00pm ...
4
2005/03/13
HDD
2005/03/11 09:00pm ...2005/03/11
Su
Sa
Fr
Th
Su
Su
Fr
L1
e.g.
2:49 pm
5/24 (Tu)
No. Date Day Time CH Genre Title Name
Sort by disc(DVD)
Disc No.
0
0 1 –
HDD
DVD-RAM
Searching for a desired title
From the “LIBRARY MENU Title Summary (All Titles)”, you can select a title by using / buttons. If you
change the listing order or sort the titles, search may be easier.
Changing the listing order
Arrange
1) From Quick Menu, select “Arrange” by /
then press ENTER.
The submenu appears.
e.g.
2) Press
Title Summary
LIBRARY
(All Titles)
MENU
Quick Menu
No. Date Day Time CH Genre Title Name
DVD space remaining
DVD all disc no.
2004/ 6/20
HDD
Title information
2004/ 6/19
HDD
Arrange
2004/ 6/18
HDD
Narrowing
2004/ 6/17
HDD
Jump
2004/ 6/13
HDD
Disc information
2004/ 6/13
HDD
Library management
HDD
Exit
2005/ 03/ 9
HDD
2005/03/ 9
HDD
Su
Sa
Fr
Th
Su
Su
Fr
We
Tu
11:00 pm
7:00 pm
9:00 pm
11:00 pm
9:00 pm
9:00 pm
9:00 pm
10:27 pm
Arrange by title name
1/ 2
Arrange by disc no.
2004/06/20 07:00pm ...7:00 pm
5
Arrange by genre
2004/06/19 11:00pm ...
4
Arrange by week
2004/06/18 07:00pm ...
3
Arrange by date
2004/06/17 09:00pm ...
3
2005/03/13 11:00pm ...
2
2005/03/13 09:00pm ...
4
2005/03/11 09:00pm ...2004/ 6/11
L1
2005/03/ 9 09:00pm ...
L1
etc
2005/03/ 9 10:27pm ...
L2
...
5/24 (Tu)
2:49 pm
/ to select the listing order, then press
ENTER.
Titles are arranged in selected order.
Note
• If you repeat the selection of different types of the listing
order, the old one precedes the new one. For example,
when you select “Arrange by genre” then “Arrange by disc
no.”, the order of genre is produced in the order of disc
number.
Searching
Narrowing
1) From the Quick Menu, select “Narrowing” by /
then press ENTER.
The sub menu appears.
e.g.
Title Summary
LIBRARY
(All Titles)
MENU
Quick Menu
No. Date Day Time CH Genre Title Name
DVD space remaining
DVD all disc no.
2004/ 6/20
HDD
Title information
2004/ 6/19
HDD
Arrange
2004/ 6/18
HDD
Narrowing
2004/ 6/17
HDD
Jump
2004/ 6/13
HDD
Disc information
2004/ 6/13
HDD
Library management
HDD
Exit
2005/03/ 9
HDD
2005/03/ 9
HDD
Su
Sa
Fr
Th
Su
Su
Fr
We
Tu
11:00 pm
11:00 pm
10:27 pm
Sort by disc(DVD)
Sort by disc(HDD)
7:00 pm
9:00 pm
9:00 pm
9:00 pm
9:00 pm
Sort by genre
5
4
Sort by day
3
3
2
4
L1
L1
etc
L2
...
1/ 2
2004/06/20 07:00pm ...7:00 pm
2004/06/19 11:00pm ...
2004/06/18 07:00pm ...
2005/03/17 09:00pm ...
2005/03/13 11:00pm ...
2005/03/13 09:00pm ...
2005/03/11 09:00pm ...2004/ 6/11
2005/03/ 9 09:00pm ...
2005/03/ 9 10:27pm ...
5/24 (Tu)
2:49 pm
Sort by genre
The submenu appears.
/ buttons to select a genre, then press
Press
ENTER button.
Titles within the selected genre are sorted.
Sort by disc(DVD)
An input window appears.
Follow steps 1) and 2) below.
1) Press
ADJUST or
/ to select a location, then press
/ to enter the disc number.
2) Press ENTER.
Titles in the specified disc are sorted. For
example, if you enter “001-”, titles in discs 001,
001A and 001B are listed.
Sort by disc(HDD)
Titles in the HDD are sorted.
Sort by day
The submenu appears.
/ buttons to select the day, then press
Press
ENTER button.
Titles recorded on the selected day are listed.
Notes
• Press O button to go back to the display for the previous
narrowing condition.
• If you want to display all titles, press QUICK MENU
button, then press / buttons to select “Cancel
narrowings” and press ENTER button.
Introduction
Recording
Playback
Editing
Library
Network Navi
Function setup
2) Press
/ to select a narrowing condition, then
press ENTER.
Others
133
Page 34

Library
Title Summary
(All Titles)
MENU
LIBRARY
1/ 2
HDD
2005/03/20 07:00pm ...7:00 pm
11:00 pm
7:00 pm
9:00 pm
11:00 pm
9:00 pm
9:00 pm
9:00 pm
10:27 pm
5
2005/03/20
HDD
2005/03/19 11:00pm ...
4
2005/03/19
HDD
2005/03/18 07:00pm ...
3
2005/03/18
HDD
2004/03/17 09:00pm ...
3
2005/03/17
HDD
2004/03/13 11:00pm ...
2
2005/03/13
HDD
2005/03/13 09:00pm ...
4
2005/03/13
HDD
2005/03/11 09:00pm ...2005/03/11
HDD
2005/03/ 9 09:00pm ...
L1
2005/03/ 9
Su
Sa
Fr
Th
Su
Su
Fr
We
Tu
HDD
2005/03/ 9 10:27pm ...
L2
2005/03/ 8
L1
etc
...
e.g.
2:49 pm
5/24 (Tu)
No. Date Day Time CH Genre Title Name
Specific Disc No. Jump
Disc No.
0
0 1 –
Title Summary
(All Titles)
MENU
LIBRARY
1/ 2
HDD
2005/06/20 07:00pm ...7:00 pm
11:00 pm
7:00 pm
9:00 pm
11:00 pm
9:00 pm
9:00 pm
9:00 pm
10:27 pm
5
2005/03/20
HDD
2005/03/19 11:00pm ...
4
2005/03/19
HDD
2005/03/18 07:00pm ...
3
2005/03/18
HDD
2004/03/17 09:00pm ...
3
2005/03/17
HDD
2004/03/13 11:00pm ...
2
2005/03/13
HDD
2005/03/13 09:00pm ...
4
2005/03/13
HDD
2005/03/11 09:00pm ...2005/03/11
HDD
2005/03/ 9 09:00pm ...
L1
2005/03/ 9
Su
Sa
Fr
Th
Su
Su
Fr
We
Tu
HDD
2005/03/ 9 10:27pm ...
L2
2005/03/ 8
L1
etc
...
e.g.
2:49 pm
5/24 (Tu)
No. Date Day Time CH Genre Title Name
Specific Page Jump
Page Number
– – –
Searching for a desired title (Continued)
Jumping
Jump
1) From the Quick Menu, select “Jump” by /
then press ENTER.
The submenu appears.
e.g.
2) Press
press ENTER.
Appoint character
An input window appears.
e.g.
Title Summary
LIBRARY
(All Titles)
MENU
Quick Menu
No. Date Day Time CH Genre Title Name
DVD space remaining
DVD all disc no.
2004/ 6/20
HDD
HDD
HDD
HDD
HDD
HDD
Library management
HDD
HDD
HDD
Su
Title information
2004/ 6/19
Sa
Arrange
2004/ 6/18
Fr
Narrowing
2004/ 6/17
Th
Jump
2004/ 6/13
Su
Disc information
2004/ 6/13
Su
Fr
Exit
2005/03/ 9
We
2005/03/ 8
Tu
11:00 pm
7:00 pm
9:00 pm
11:00 pm
9:00 pm
9:00 pm
9:00 pm
10:27 pm
1/ 2
Appoint character
Appoint disc no.
2004/06/20 07:00pm ...7:00 pm
5
Specific page
2004/06/19 11:00pm ...
4
2005/03/18 07:00pm ...
3
2005/03/17 09:00pm ...
3
2005/03/13 11:00pm ...
2
2005/03/13 09:00pm ...
4
2005/03/11 09:00pm ...2004/ 6/11
L1
2005/03/ 9 09:00pm ...
L1
etc
2005/03/ 9 10:27pm ...
L2
...
5/24 (Tu)
/ to select the jump method, then
Title Summary
LIBRARY
(All Titles)
MENU
No. Date Day Time CH Genre Title Name
2005/03/20
HDD
HDD
HDD
HDD
HDD
HDD
HDD
HDD
HDD
Su
2005/03/19
Sa
2005/03/18
Fr
Specific Character Jump
2005/03/17
Th
Character String:
2005/03/13
Su
2005/03/13
Su
Fr
2005/03/ 9
We
2005/03/ 8
Tu
11:00 pm
7:00 pm
9:00 pm
11:00 pm
9:00 pm
9:00 pm
9:00 pm
10:27 pm
5
4
3
3
2
4
L1
L1
etc
L2
...
1/ 2
5/24 (Tu)
2005/03/20 07:00pm ...7:00 pm
2005/03/19 11:00pm ...
2005/03/18 07:00pm ...
2004/06/17 09:00pm ...
Jump
2004/06/13 11:00pm ...
2005/03/13 09:00pm ...
2005/03/11 09:00pm ...2005/03/11
2005/03/ 9 09:00pm ...
2005/03/ 9 10:27pm ...
2:49 pm
2:49 pm
Appoint disc no.
The on-screen keyboard appears.
Perform steps 1) and 2) below.
1) Press
press ADJUST or
/ to select the position to enter and
/ to enter the disc number.
Input 3 digits, and, if necessary A or B of disc. If
you input “–”, you can leave the digit and the lower
unspecified to search. For example, when “1 0 – –”
is input, titles of disc number such as 100, 100A,
102 are searched, and a title list starting from the
first found one appears. It is recommended that you
execute “Arrange by disc no.” beforehand.
2) Press ENTER.
The titles of the selected number disc are
displayed.
Specific page
An input window appears.
Perform steps 1) to 3) below.
1) Put the cursor on the input area and press
ENTER.
The on-screen keyboard appears.
2) Enter the first characters (up to three
characters) of the title you are looking for.
3) Press
to select “Jump” and press ENTER.
The title that starts with the specified characters is
selected.
Note
• The input window of “Specific Character Jump” can be
shifted by pressing / buttons.
134
Perform steps 1) and 2) below.
1) Press
/ or ADJUST to enter the page
number.
2) Press ENTER.
The selected page is displayed.
Page 35

Library
Disc information
Disc information
MENU
CONTENT
Disc Type Record Time (h:m)
Remain Time (h:m)
Edit Disc Number
Edit Disc Name
DVD-RAM
VR mode
4
1:51
0:10
0:05
0:10
0:22
0:07
0:15
D/M1:
L-PCM
:
D/M1:
D/M1:
D/M2:
D/M1:
SP
MN
SP
LP
MN
MN
4.6Mbps /
6.6Mbps /
4.6Mbps /
2.2Mbps /
6.0Mbps /
3.2Mbps /
(
Current
)
1
)
2
)
3
)
4
)
5
)
0
Normal
Lock Off
001
Writing Mode
Original Titles
Playlist Titles
Disc Status
Disc Lock
–
–
Finalize
Video Create
Possible
Increment Rec
e.g.
–
HDD
DVD-RAM
Viewing Library data
This section explains how to check and maintain the Library data.
Viewing title information
Title information
1) From Quick Menu, select “Title information” by
/ then press ENTER.
You can view information about the selected title.
e.g.
CONTENT
Title information
MENU
Title : 006
2005/03/13 10:00pm TV:3
DVD Mode :
Media :
Quality :
Mode :
Rate :
Audio :
XP
LP
2. 2
Off
3
CH
3/13(Su) 10:00 pm
2005
Documentary/Culture(General)
HDD
Original
D/ M1
Chapter :
You can do the following operations with Quick Menu.
(Press QUICK MENU button to display Quick Menu.
/ buttons to select an item and press
Press
ENTER.)
e.g.
CONTENT
Title information
MENU
Quick Menu
Title : 006
2004/07/11 10:00pm TV:3
Edit chapter name
Del chapter name
Record date & time
DVD Mode :
Edit title name
Lock
Genre
Media :
Exit
Mode :
LP
LP
Mode :
2. 2
Rate :
Audio :
Off
3
CH
3/13(Su) 10:00 pm
2005
Documentary/Culture(General)
HDD
Original
D/ M1
Chapter :
“Edit title name”:
The on-screen keyboard appears.
Following the procedure on
page 36, enter a new
name for the title.
“Edit chapter name”:
(Press PICTURE SEARCH (
/ ) button to display
the chapter that you want to put a name for, and select
the chapter.)
The on-screen keyboard appears.
Following the procedure on
page 36, enter a new
name for the chapter.
0001
0001
(2:06:32)
(0:04:15)
(2:06:32)
(0:04:15)
“Lock”
Set the protection for the currently selected title.
The protection icon “
“Genre”:
The submenu appears.
Press
/ buttons to select a genre, then press
ENTER button.
A name of the selected genre and the icon appear.
Note
• When you change settings of a DVD-RAM disc, load
the DVD-RAM disc.
Viewing disc information
1) From Quick Menu, select “Disc information” by
/ then press ENTER.
You can view information about the loaded disc.
To change the number or name of the DVD-RAM
disc:
1) Press
“Edit Disc Name”, then press ENTER button.
2) Following the procedure on
a new name for the disc.
To change the disc number, press ADJUST
button.
Introduction
” appears.
Recording
Playback
Editing
Library
Network Navi
/ to select “Edit Disc Number” or
page 36, enter
Function setup
“Del chapter name”:
(Press PICTURE SEARCH (
the chapter that you want to put a name for, and select
the chapter.)
“Record date & time”:
The cursor moves to the date so that you can correct
it.
/ ) button to display
Others
135
Page 36

Library
Viewing Library data (Continued)
Maintenance of Library data
The recorder usually controls the Library database
system automatically. However, in the following cases,
you must maintain and create data manually.
• When you want to add information about a title, (for
example when you use a DVD-RAM disc recorded
on another device, etc.), to the Library system of the
recorder.
→ “Registering a disc manually” (
• When the Library database memory is full. (Up to
3000 entries can be registered. When you reach this
limit, a message will appear and further additions to the
Library database will be rejected. Erase unnecessary
data to make space.)
→ “Erasing unnecessary data” (
• When you want to rearrange the whole Library
information from the beginning.
→ “Deleting all the Library information only” (
137).
•
When you save the Library data in another DVDRAM disc.
→ “Saving the Library data in a DVD-RAM disc” (
page 138).
• When you import saved Library data back into the
recorder.
→ “Re-installing the backup data” (
page 136).
page 137).
page
page 138).
Registering a disc manually
1) Load a DVD-RAM disc that contains information
you want to add.
2) Press LIBRARY.
3) Press QUICK MENU.
4) Press
/ to select “Library management”,
then press ENTER.
A submenu appears.
e.g.
5) Press
Title Summary
LIBRARY
(All tTitles)
MENU
Quick Menu
No. Date Day Time CH Genre Title Name
DVD space remaining
DVD all disc no.
2004/ 6/20
HDD
HDD
HDD
HDD
HDD
HDD
Library management
HDD
HDD
HDD
Su
Title information
2004/ 6/19
Sa
Arrange
2004/ 6/18
Fr
Narrowing
2004/ 6/17
Th
Jump
2004/ 6/13
Su
Disc information
2004/ 6/13
Su
Fr
Exit
2005/03/ 9
We
2005/03/ 8
Tu
11:00 pm
7:00 pm
9:00 pm
11:00 pm
9:00 pm
9:00 pm
9:00 pm
10:27 pm
1/ 2
5/24 (Tu)
Add disc
Del title information
2004/06/20 07:00pm ...7:00 pm
5
Del title information by disc
2004/06/19 11:00pm ...
4
Delete all DVD-RAM information
2004/06/18 07:00pm ...
3
Delete all library information
2004/06/17 09:00pm ...
3
Delete disc no. from library
2004/06/13 11:00pm ...
2
Create backup
2004/06/13 09:00pm ...
4
Re-inst all backup
2004/06/11 09:00pm ...2004/ 6/11
L1
2005/03/ 9 09:00pm ...
L1
etc
2005/03/ 9 10:27pm ...
L2
...
/ to select “Add disc”, then press
2:49 pm
ENTER.
6) Press
/ to select “Yes ”, then press ENTER.
To cancel, select “No”.
All title information is registered.
Note
• Save your Library data on a DVD-RAM disc. Importing
Library data replaces all current database information in
the recorder, including any data added after you saved the
data onto a DVD-RAM disc.
136
Notes
• To use title information in a DVD-RAM disc recorded on
another device, as the Library data of the recorder, be sure
to follow the procedure of “Registering a disc manually” to
add saved data to the Library system. This information
cannot be added automatically.
• If you record content on a DVD-RAM disc on the recorder
and edit the content on the other device, Library data of the
disc may be lost or the disc may not function properly.
• Unless a DVD-RAM disc is registered to the recorder,
information of current or future titles recorded on the disc,
will not registered.
• By registering a disc manually, several discs in same
number consequently may be registered. In this case, the
remaining time is displayed per disc or page. Execution of
“Edit Disc Number” ( page 135) is recommended.
Page 37

Introduction
Erasing unnecessary data
When the Library database is full (3000 entries).→
Select “Del title information”.
1) Press LIBRARY.
2) Press
3) Press QUICK MENU.
4) Press
then press ENTER.
5) Press
press ENTER.
6) Press
Library data of the title selected in step 2) is
erased.
To cancel, select “No”.
To delete information of all titles in the specified data
→ Select “Del title information by disc”.
1) Press LIBRARY.
2) Press
/ to select a title.
/ to select “Library management”
/ to select “Del title information”, then
/ to select “Yes ”, then press ENTER.
/ to select a title.
Deleting all the Library information only
Use this feature when you want to rearrange the whole
Library information from the beginning.
1) Press LIBRARY.
2) Press QUICK MENU.
3) Press
press ENTER.
4) Press
information” or “Delete all library information”.
Delete all DVD-RAM information:
Deletes all Library information from a DVD-RAM
disc, leaving the Library information on the HDD.
Delete all library information:
Deletes all Library information from the HDD and a
DVD-RAM disc.
5) Press ENTER.
6) Press
/ to select “Library management” and
/ to select “Delete All DVD-RAM
/ to select “Yes” and press ENTER.
Forced deletion of disc numbers
A number of an inactive disc can be deleted from the
Library Management, so that it can be assigned to a
new disc.
Recording
Playback
Editing
Library
3) Press QUICK MENU.
4) Press
then press ENTER.
5) Press
disc”, then press ENTER.
6) Press
Library data of all titles in the disc you selected in
step 2) is erased.
To cancel, select “No”.
/ to select “Library management”
/ to select “Del title information by
/ to select “Yes ”, then press ENTER.
1) Press LIBRARY.
2) Press QUICK MENU.
3) Press
then press ENTER.
4) Press
then press ENTER.
5) Press ADJUST to select a number to delete,
then press ENTER.
Note
• Deleting a disc number also deletes data of all titles in the
disc.
/ to select “Library management”,
/ to select “Del disc no. from Library”,
137
Network Navi
Function setup
Others
Page 38

Library
Viewing Library data (Continued)
Saving the Library data in a DVD-RAM disc
1) Load a DVD-RAM disc to save the Library data.
2) Press LIBRARY.
3) Press QUICK MENU.
4) Press
then press ENTER.
5) Press
press ENTER.
6) Press
To cancel, select “No”.
/ to select “Library management”,
/ to select “Create backup”, then
/ to select “Yes”, then press ENTER.
Re-installing the backup data
1) Load the DVD-RAM disc containing the Library
database.
2) Press LIBRARY.
3) Press QUICK MENU.
4) Press
then press ENTER.
5) Press
press ENTER.
6) Press
To cancel, select “No”.
/ to select “Library management”,
/ to select “Re-inst all backup”, then
/ to select “Yes”, then press ENTER.
Note
Do not use a DVD-RAM disc which contains Library
•
Management data registered to another recorder for
backup data storage. Library Management format may vary
depending on the model. Adding data of a new format onto
the saved disc may prevent the data of the older format
from being re-installed.
138
Page 39

Library
DVD space remaining
HDD
DVD-RAM
Checking remaining space
You can check the remaining space of each disc prior to recording.
Viewing a number and space of a disc
DVD all disc no.
1) From the Quick Menu, select “DVD all disc no.”
/ then press ENTER.
by
You can view numbers, names and estimated
remaining spaces about all the registered discs.
To recheck the remaining space for a different “User
record quality” setting
1) Press QUICK MENU.
Quick Menu appears.
2) Press
press ENTER.
e.g.
3) Press ADJUST and select the setting (
183).
4) Press ENTER.
/ to select “User record quality” then
LIBRARY
DVD All disc No. Summary
MENU
User record quality
Setting 1 – – –
No.
001
002
003
004
AV quality calculation can be changed from Quick Menu.
HDD
Disc Name
L-PCM
Manual
6.6
Custom setting
Setting
Mode
Manual1
2
SP
LP
3
Manual
4
Manual
5
Total recording time: approx. 71min.
(with 4.7 GB unused)
Rate
SP
6.6
4.6
2.2
6.0
3.2
1/ 2
Manual 6.6 L-PCMCurrent defaul.
DVD
4.6
Audio quality
6/22 (Tu)
L-PCM
D/M1
D/M1
D/M2
D/M1
Estimated
D/M1
20min.Spanish Conversation vol.1
10min.Spanish Conversation vol.2
2:49 pm
5min.Movie
2min.Live Concert
page
Viewing remaining space
1) From the Quick Menu, select “DVD space
remaining” by
You can view the recording titles and the estimated
space remaining per disc.
Note
• You can rearrange the list by selecting “Arrange”,
“Narrowing” or “Jump” from Quick Menu.
/ then press ENTER.
Introduction
Recording
Playback
Editing
Library
Note
• It is recommended that beforehand you select a desired
title or disc by “arrange” selection then execute “DVD
space remaining”, because the recorder lists the remaining
space from the specified disc or the one which contains the
specified title.
Network Navi
Function setup
Others
139
Page 40

Page 41

Network Navi
Operate the recorder with a PC.
What is Network Navi?
Preparation for Network Navi
1: Connection to a PC
2: Recorder’s setup
- Network Setting
3: Setting up the PC
4: Starting Network Navi
5: Network Navi settings
Network Navi features
Displaying thumbnails
(Title List)
Operating with the remote
control screen
Using Library information
(Library)
Setting for custom menu addition
(Custom Menu Editor)
Net Dubbing
Net Monitor
Setting a timer recording
using email
If you are having a difficulty
with Network Navi features...
Page 42

Network Navi
Network Navi
What is Network Navi?
Network Navi can operate and set the recorder using a web screen.
You need a PC that can be connected to the recorder with a Local Area Network (LAN).
If you have an always-on internet connection, you can use email to remotely set a timer recording.
Main features of Network Navi
Editing titles using a PC
As in the “CONTENT MENU” of the recorder, this
feature displays a list of content that were recorded on
the internal HDD and DVD-RAM/R/RW. You can
change general title information such as title names,
chapter names and genres. (However, the information
for a DVD-R/RW recorded by another device cannot
be displayed or changed. The information on a
finalized DVD-R/RW can be displayed but cannot be
changed.)
Checking the library using a PC
This feature displays and sorts the recorder‘s “Library”
information. It searches for a DVD-RAM which has
empty space or desired disc by using stored
information for each title such as disc number,
recorded time and date, title name, and genre.
Saving the DVD-Video menu background from a
PC
This feature allows you to save your favorite image
from a PC to the recorder and use it as the menu
background.
Setting a timer recording using email
This feature allows you to remotely set a timer
recording using email.
Operating the recorder from a PC
This feature allows operation of the recorder from a
PC.
Flow of Network Navi setting
e.g.: Using Network Navi and a PC with an always-on
internet connection (A connection of Network Navi to a
PC with an always-on internet connection is
recommended.)
Please read the information on operation,
restrictions, and the disclaimer. (
144)
You will need to understand the content and agree to
the terms.
You understood the content and agreed to the terms!
Setting up the Network Navi system.
• Connection to a PC (
• Recorder’s setup - Network Setting (
149)
• Starting Network Navi (
• Network Navi settings (
Use Network Navi ! ( page 154 - )
page 145 - 146)
page 152)
page 153)
page 143 -
page 147 -
Streaming content to the PC
(Net Monitor)
Dubbing content to another
Network Navi recorder on the network (Net Dubbing)
The unauthorized recording, use, distribution, or revision of television programs, videotapes, DVDs, and other
materials is prohibited under the Copyright Laws of the United States and other countries, and may subject
you to civil and criminal liability.
142
Page 43

Introduction
Operating environment
The recorder complies with the 802.3 standard of IEEE
(Institute of Electrical and Electronic Engineers). The
following environment is required to use the Network
Navi features. Please check these conditions before
connecting to a PC.
PC
OS: Windows® 2000/XP
Mac OS X (10.4)
Color monitor: 16-bit color or greater, 800 x 600
resolution or greater
Required device: LAN port (100 Base-TX/10 Base-T)
WWW browser
For Windows® : Internet Explorer 6.0
For Mac OS : Safari 2.0
Operation cannot be guaranteed for versions beyond
the above.
The installation of Java VM Ver. 1.5 (for Mac OS X:
1.4.2) is required to use Network Navi features.
To obtain the latest Java VM, check the website of
Sun Microsystems, Inc. at http://www.sun.com/ (as of
May 2005).
Network connection environment
Broadband always-on connection
Note
• Operating environment may change without advance
notice. In addition, all operations are not guaranteed.
Terminology and trademarks
• Microsoft, Windows, and the Internet Explorer logo are
registered trademarks and/or trademarks of Microsoft
Corporation in the U.S. and other countries.
Windows® 2000...Microsoft® Windows® 2000 Professional
operating system Service Pack3 (SP3)
Windows® XP...Microsoft® Windows® XP operating system
• The official name of Windows is Microsoft Windows
Operating System.
• Macintosh, Mac, and Safari are trademarks of Apple
Computer, Inc.
• The product names in this document may be used as
trademarks or registered trademarks by each company.
• Java and all Java related trademarks and logos are
registered trademarks or trademarks of Sun Microsystems,
Inc. in the U.S. and other countries.
Restrictions and disclaimers
Before using Network Navi, please read and understand
the important information in “Operating environment” and
“Restrictions and Disclaimers.”
Restrictions and Disclaimers
• Network Navi features can only be used when the recorder
is in an operational state (excluding the confirmation
feature of timer recording setting via email while in standby
mode). Network Navi features cannot be used to turn on
the power for the recorder (except when “timer recording
feature” and “Auto Power OFF” are set).
• Through connection to a PC, Network Navi features can be
used to edit text information such as title names, chapter
names, and program descriptions; change various settings;
display thumbnails; and load background data contained in
the DVD-Video menu. Obtaining, changing, and/or adding
other information to content cannot be done.
• Network Navi features, which are used through a
connected PC, are not for video replay and image and
audio data loading, editing, writing, and file transfer.
• The included LAN cable (crossover cable) can be used to
directly connect the recorder to a PC. For connection to a
hub or router, use a separate, commercially available LAN
cable (straight cable).
• Operating Environment
1. OS (operating system): Windows
OS X (10.4).
2. DOS/V compatible PC or Macintosh computer (LAN
connector required).
3. Internet browser: Internet Explorer (Windows
Safari (Mac OS).
• All of the following environmental conditions are
required for using “Timer recording setting using email”.
4. Always-on broadband internet connection.
5. Email account that can send and receive mail from
the installation location (using a POP server and
SMTP server).
6. Broadband router with hub (DHCP feature base is
recommended).
• The communication features of this recorder comply
with the Institute of Electrical and Electronic Engineers
(IEEE) 802.3.
• Certain factors including, without limitation, the
available bandwidth and quality of your internet
connection, and the connection between the recorder
and your PC, may cause a delay and/or error in the
displaying of content on your PC. Such delays and/or
errors, if any, may be more pronounced when the
recorder is connected via a wireless LAN.
• Some Network Navi features may not be usable due to
certain settings and/or restrictions set by the Internet
service provider (ISP) supplying your broadband
Internet connection.
®
2000/XP or Mac
®
) or
Recording
Playback
Editing
Library
Network Navi
Function setup
Others
(Continued)
143
Page 44

Network Navi
What is Network Navi? (Continued)
• Any fees charged by an ISP including, without
limitation, connection charges and email charges are
your responsibility.
• If the broadband internet connection device (such as a
Cable Modem or ADSL modem) specified by your ISP
does not have a 10Base-T or 100 Base-TX LAN port,
you will not be able to make a connection to the
recorder.
• An ADSL modem is required to use ADSL service and
a cable modem is required to use cable modem
service. Depending on the access method of and
subscriber agreement with your ISP, you may not be
able to use the Network Navi features contained in this
recorder or you may be limited to the number of
devices you can connect at the same time.
• The use of a “Router” may not be allowed or its usage
may be limited depending on the policies and
restrictions of your ISP. For details, contact your SP
directly.
• For “Timer recording setting using email” or "Timer
recording setting by cell phone email," a separate email
account is required that is connectable from your
home, and compatible with POP3 or APOP. An email
account that is not accessible from home, such as a
cell phone email address, cannot be used in
connection with this recorder and the aforementioned
Network Navi features.
• An always-on broadband internet connection is
necessary for the recorder to access the ISP's mail
server via the same network. It is not necessary for a
connected PC to be powered on for the recorder to be
able to connect to the mail server.
• In some cases, a connected PC may be set to
automatically receive email from a mail server and
delete such email on the server at the time of its
receipt, in which case, it is possible that a timer
recording set via email may be deleted before the
recorder receives it. In such case, it is recommended
that you make the appropriate setting changes so that
a copy of each incoming email remains on the server.
• To set a timer recording by email using a cellphone,
use internet email. Email systems between cellphones,
such as text messaging services, cannot be used to set
a timer recording on the recorder.
• A webmail or web portal (incompatible with POP3)
cannot be used to set a timer recording by email.
• Use a category 5, 10 Base-T/100 Base-TX LAN cable
when connecting to a PC with a broadband always-on
internet connection. Use the included crossover cable
when connecting the recorder directly to a PC.
• Depending on the security software installed on a
connected PC and the settings of such software,
certain features contained in this recorder may not be
usable.
Note: Toshiba is not responsible for any malfunction of
the recorder and/or the Network Navi features due to
communication errors/malfunctions associated with your
broadband internet connection and/or your PC, or other
connected equipment. In the event that any content
intended to be recorded fails to be recorded and/or any
content intended to be edited fails to be edited due to
any of the aforementioned reasons, please contact your
ISP and/or PC manufacturer.
144
Page 45

Network Navi
Preparation for Network Navi
Follow the procedures 1 to 4 to use Network Navi.
1: Connection to a PC
A PC with a LAN connection is required.
The main method for PC connection is either a direct connection or through a constant and continuous (“always-on”)
internet connection. Usable features differ depending on the connection method.
The features of “Network Navi” can be utilized fully only if the recorder is connected using a PC with an always-on
internet connection and router.
Introduction
Recording
Direct connection to a PC
The following can be done from the PC
• Editing the title information (Title Thumbnail
List)
• Checking the Library (Library)
• Setting the theme for menu screen (DVD-Video
Tool)
• Operating the recorder (Virtual Remote Control)
• Streaming content to the PC (Net Monitor)
The following settings are required.
• Connecting to the PC ( page 146)
• Setting up the Network Setting (
• Setting up the PC (
• Starting Network Navi (
page 151)
page 152)
page 147)
Always-on internet connection with a PC
Phone line
Broadband modem
The following can be done from the PC
• Editing the title information (Title Thumbnail
List)
• Checking the Library (Library)
• Setting the theme for menu screen (DVD-Video
Tool)
• Operating the recorder (Virtual Remote Control)
• Streaming content to the PC (Net Monitor)
The following settings are required.
• Connecting to the PC ( page 146)
• Setting up the Network Setting (
• Starting Network Navi (
• Network Navi Settings (
page 152)
page 153)
page 147)
Playback
Editing
Library
Network Navi
Function setup
(Continued)
145
Others
Page 46

Network Navi
Preparation for Network Navi (Continued)
Back view of the recorder
LAN(10/100)
Regarding the cable used:
• When connecting directly to this
recorder, use the included LAN
crossover cable.
• When connecting using a router,
use a commercially available LAN
straight cable (category 5/CAT5).
ADSL modem
(Router, internal type)
Phone line
To LAN (Ether) port
To LAN (Ether) port
To LAN(10/100) port
Straight cable
Direct connection to a PC
Crossover cable
To LAN (Ether) por t
Connecting to a PC using a router (e.g. ADSL)
Router
To LAN (Ether) port
ADSL modem
Phone line
To LAN (Ether) port
Caution
• When plugging or unplugging the LAN cable, switch off the power of the recorder
and the PC.
• When plugging or unplugging the LAN cable, hold the plug portion of the cable.
• When unplugging, do not pull on the LAN cable but unplug while pressing down on
the lock.
• Do not connect the modular phone cable to the LAN port.
• Since there are various connection configurations, please follow the specifications of
your telecommunication carrier or internet service provider.
146
While pressing down
Lock portion
Plug
Page 47

2: Recorder’s setup - Network Setting
guag
NetworkSetting
NetworkNavi Address/Proxy
RecorderName RD-XS
54
UserName
Password
Portnumber
80
MailSetting
NetworkNaviSettings
Introduction
While stopped, press SETUP.
1
SETUP
The setup screen will be displayed.
DVDplayersettings
DVDdiscmenulan
e English
Select “Management settings” by / , and
press ENTER.
2
ENTER
Managementsettings
NetworkSetting
Genresetting
FrontDisplay On
Select “Network Setting” by / , and press
ENTER.
3
ENTER
The “Network Setting” screen will be displayed.
Recording
Playback
Editing
Library
Start
Following the table on the next page, set each
items on the “Network Navi”, “Address/Proxy”
4
and “Mail Setting” screen.
“User Name” and “Password” must be entered to prevent
unauthorized access. The username and password should be
unique so that others cannot guess them easily. The setting
cannot be completed unless the username and password are
entered.
After the setting is completed, select “Save”
and press ENTER.
5
The settings will be stored.
Start the setup for the PC.
Select a tab to
change screens.
Network Navi
Function setup
Others
147
Page 48

Network Navi
Preparation for Network Navi (Continued)
Note: Toshiba recommends that you take the following minimum general security precautions in connection with choosing a User Name and
Password in connection with the Network Navi features of the recorder:
• Choose a unique User Name and Password that would be difficult for someone else to guess (e.g., do not use the same password that you
use for your email account, router, etc.).
• Do not share your User Name and Password with anyone.
Items for setting (Network Navi screen)
Network Navi Settings
Recorder Name
User Name
Password
Port Number
Up to 15 single-byte
alphanumeric characters or
symbols
Up to 16 single-byte
alphanumeric characters or
symbols
Up to 16 single-byte
alphanumeric characters or
symbols
80
Normally there is no need to change this setting. When multiple
units of the recorder are connected, make changes for each unit.
This is an ID to access the recorder from a PC.
Select a username that is unique and not known to or easily
guessed by others. (Example of usernames to avoid: your name or
your family’s name, telephone number, birth date, street number of
address, and car license plate numbers, as well as repetition of the
same number or symbol.)
This is a password to access the recorder from a PC.
Select a password that is unique and not known to or easily
guessed by others. (Example of passwords to avoid: your name or
your family’s name, telephone number, birth date, street number of
address, and car license plate numbers, as well as repetition of the
same number or symbol.)
When the password is entered, the characters are displayed as “ * ”.
If you forget the password, enter a new password.
Normally there is no need to change this setting. When the
connection cannot be made or a feature is not operating, change
the value to a number between 2000 and 10000.
Net Dubbing Settings
Request from another
device
Group Name
Group Password
Accept
Reject
e.g.: TOSHIBA
Select this setting when multiple Toshiba HDD & DVD video
recorders are connected to the network and dubbing is done to and
from various equipment.
This will not allow dubbing through the internet.
This sets the group name when multiple units are connected to the
network.
This sets the password when a group name is set.
Items for setting (Address/Proxy screen)
When directly connecting to a PC
DHCP
IP Address
Subnet Mask
Default Gateway
DNS
DNS Server
Proxy Server
Proxy Port
MAC Address
Connection Check*
*
When “Connection Check” is pressed, items that were changed on the “Address/Proxy” and “Mail Setting” screens will be saved,
Manual
If the IP address of the PC is
192.168.1.10.
e.g.: 192.168.1.15
e.g.: 255.255.255.0
e.g.: 192.168.1.1
Manual
e.g.:192.168.1.1
80
(Unable to set)
and you will not be able to return to the previous setting. Keeping a record of the setting is recommended as a precaution.
Note
• Private IP address can be set. (e.g.: 192.168.1.1-192.168.1.254)
When using a PC with an always-on internet connection and directly connecting via router
DHCP
IP Address
Subnet Mask
Auto
(Setting unnecessary)
(Setting unnecessary)
148
Network information will be manually set.
This sets a different address within the same subnet of the PC
connected to the recorder.
This sets the subnet mask of the network environment that will be
connected.
This is set when the recorder uses a gateway.
Fixed to “Manual” if “DHCP” is set to “Manual”.
Manually enter the DNS server address.
There is no need to set in this case.
There is no need to change in this case.
The MAC address that is established for each recorder is displayed.
It cannot be changed.
It checks the connection of the recorder and the PC.
Note: Please disregard the message regarding DNS server if it is
displayed after “Connection Check” is pressed.
This automatically obtains network information.
The IP address that is obtained from the DHCP server is displayed.
The subnet mask that is obtained from the DHCP server is displayed.
Page 49

Default Gateway
DNS, DNS Server
Proxy Server
Proxy Port
MAC Address
Connection Check*
(Setting unnecessary)
Auto
Manual
Up to 63 single-byte
alphanumeric characters or
symbols
80
(Unable to set)
The default gateway that is obtained from the DHCP server is
displayed.
When “Use” is selected, the DNS server address is automatically
obtained from the DHCP server.
Manually enter the DNS server address.
Enter the proxy server address when your provider requires proxy
setting.
Normally there is no need to change this setting.
When required, change the value to a number between 1 and 65535.
The MAC address that is established for each recorder is displayed.
It cannot be changed.
This checks the connection between the recorder and the router.
* When “Connection Check” is pressed, items that were changed on the “Address/Proxy” and “Mail Setting” screens will be
saved, and you will not be able to return to the previous setting. Keeping a record of the setting is recommended as a
precaution.
Note
• Please contact the router manufacturer when the router DHCP feature is not operating properly (in such a case, an error
will occur since the default gateway and the DNS server IP address cannot be obtained).
Introduction
Recording
Playback
Items for setting (Mail Setting screen)
Mail Function
Mail Keyword
POP3 Server Address
POP3 User Name
POP3 Password
APOP
Accept
From
Completion Notice
SMTP Server Address
Sender Address
Secondary Address
• Depending on the recorder’s operating mode, the timer recording setting may not be successful.
* APOP: Password encrypting POP. For details, consult your ISP.
** The address of “POP3 Server Address” will be copied if you leave here blank.
Disable
Enable
e.g.: rdstyle
e.g.: XXX.XXX.com
Enable
Disable
Only
All
e.g.:
XXXXX@XXX.XXX.com
Disable
Secondary Address
Return to sender
Secondary Address and
sender
e.g.: XXX.XXX.com
e.g.:
XXXXXXX@XXX.XXX.com
e.g.:
XXXXXXX@XXX.XXX.com
This will disable the use of the mail function.
This will enable the use of the mail function.
This sets 6-20 single-byte alphanumeric characters so that the email
for the mail function can be recognized. Symbols should not be
used since they will cause error and timer recording setting by email
will not be successful.
This sets the POP3 server address. (Enter up to 63 single-byte
alphanumeric characters.)
This sets the username for accessing the POP3 server. Enter up to
63 single-byte alphanumeric characters.
This sets the password for accessing the POP3 server. Enter up to
16 single-byte alphanumeric characters.
This enables the use of APOP (Authenticated POP*).
This disables the use of APOP (Authenticated POP*).
Only one email address is set as the sender.
No specific email address is set as the sender.
When “Accept” is set to “Only”, enter the email address of the
sender up to 63 single-byte alphanumeric characters.
Email notification is not sent when timer recording setting by email is
completed.
When timer recording setting by email is completed, notice is sent to
the completion-notice contact address.
When timer recording setting by email is completed, notice is sent to
the email sender’s address.
When timer recording setting by email function is completed, notice
is sent to both completion-notice contact address and the email
sender’s address.
This sets the SMTP server address.**
Enter up to 63 single-byte alphanumeric characters.
This sets the email address of your internet provider’s email service.
Enter up to 63 single-byte alphanumeric characters.
This sets the email address for sending notice when timer recording
setting by email is completed. Enter up to 63 single-byte
alphanumeric characters.
Editing
Library
Network Navi
Function setup
Others
149
Page 50

Network Navi
Preparation for Network Navi (Continued)
Setting example - Sender of timer recording setting mail and receiver of completion notice
e.g.
homeadd@yyy.zzz.com
e.g.
mobileadd@yyy.zzz.com
Timer recording
setting mail from:
Completion notice
received at:
Settings
Mail Function Enable abc1234Mail Keyword
POP3 Server Address yyy.zzz.com
POP3 User Name xxxx
Select “Return to sender”.
POP3 Password
Accept
Completion Notice
SMTP Server Address
Sender Address
Secondary Address Connection Check
Mail Function Enable abc1234Mail Keyword
POP3 Server Address yyy.zzz.com
POP3 User Name xxxx
Select “Secondary Address”.
POP3 Password
Accept
Completion Notice
SMTP Server Address
Sender Address
Secondary Address Connection Check
aaabbb
Only
Return to sender
yyy.zzz.com
homeadd@yyy.zzz.com
aaabbb
Only
Secondary Address
yyy.zzz.com
homeadd@yyy.zzz.com
mobileadd@yy...
APOP
homeadd@yyy.zzz.com
From
APOP
homeadd@yyy.zzz.com
From
Enable
Enable
150
Mail Function Enable abc1234Mail Keyword
POP3 Server Address yyy.zzz.com
POP3 User Name xxxx
Select “Secondary Address
POP3 Password
and Sender”.
Accept
Completion Notice
SMTP Server Address
Sender Address
Secondary Address Connection Check
aaabbb
Only
Secondary Address and Sender
yyy.zzz.com
homeadd@yyy.zzz.com
homeadd@yyy...
APOP
mobileadd@yyy.zzz.com
From
Enable
 Loading...