

Page 1
X25 APOLLO II QUICK START GUIDE
ISSUE A RDS PT NO. S/DC500-10- 1
Startup and Overview
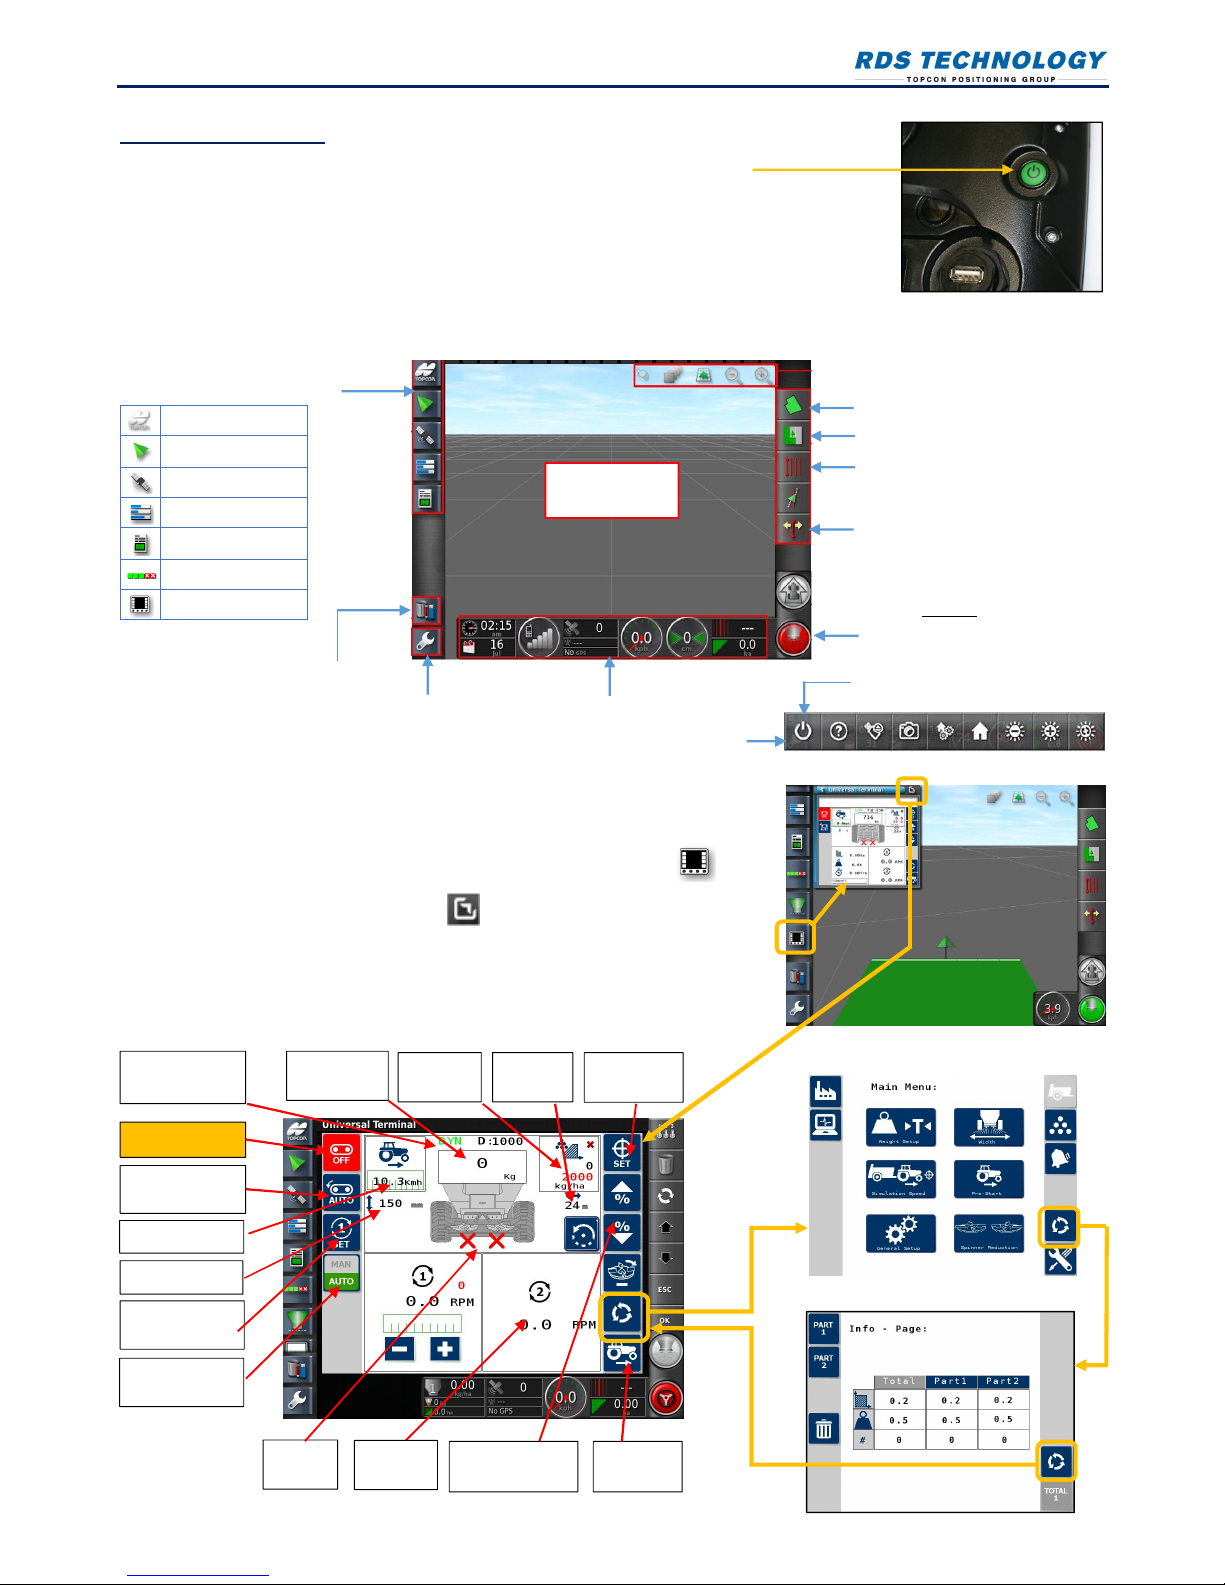
1. Press and Hold the Green button on the rear of the console for a few seconds.
2. Scroll to the base of the warning screen and if you agree, select ‘YES’.
NOTE: Selecting ‘Yes’ confirms your understanding and accepts your responsibility for liabilities
described in the Warning Screen.
3. The console then displays the X25 Home screen, indicating the position and direction of the
vehicle and its implement as a moving map display.
X25 Home screen
4 If the Apollo application was running when the console was last shut down, then
on startup the console will automatically default to the Universal Terminal (UT)
application window displaying the Apollo operating screen. Otherwise, swipe up
or down the navigation bar if necessary and select the ISOBUS UT icon .
5. The Apollo software is uploaded from the implement ECU, after which a mini-view
of the application is displayed. Touch or swipe the mini-view from left to right
to maximise the application window.
Apollo Home screen
System info
Guidance
GPS info
Diagnostics
Job info
Auto section control
UT (Apollo app)
UK847-020.PNG
UK854-030.PNG
NAVIGATION toolbar : Opens miniviews
to access further system options
e.g.
View controls
GUIDANCE toolbar: Provides
too
ls used to control guidance
Master Switch
Activates coverage on the
guidance screen. (NOTE: It does
not switch the spreader on /off)
Moving map
display
Dashboard: Provides selected information to
monitor system status / performance. Swipe
upwards to display the
CONSOLE toolbar
.
Setup menu
FIELD menu JOB menu
GUIDELINE
menu
NUDGE menu
Inventory Manager:
Manages data on
vehicles and jobs
UK847-015.PNG
Pre-Start
Master On-Off
Rate Control
mode
Target
Rate
Working
Width
Work
Status
Set Target
Rate
Gate Height
Forward Speed
Product
remaining
Vary application
rate
Spinner
Speed
Calibration
mode
Console Power Off
Totals
Settings
Set Spinner
Speed
Spinner Control
Mode
Page 2
X25 APOLLO II QUICK START GUIDE
ISSUE A RDS PT NO. S/DC500-10 2
Getting started
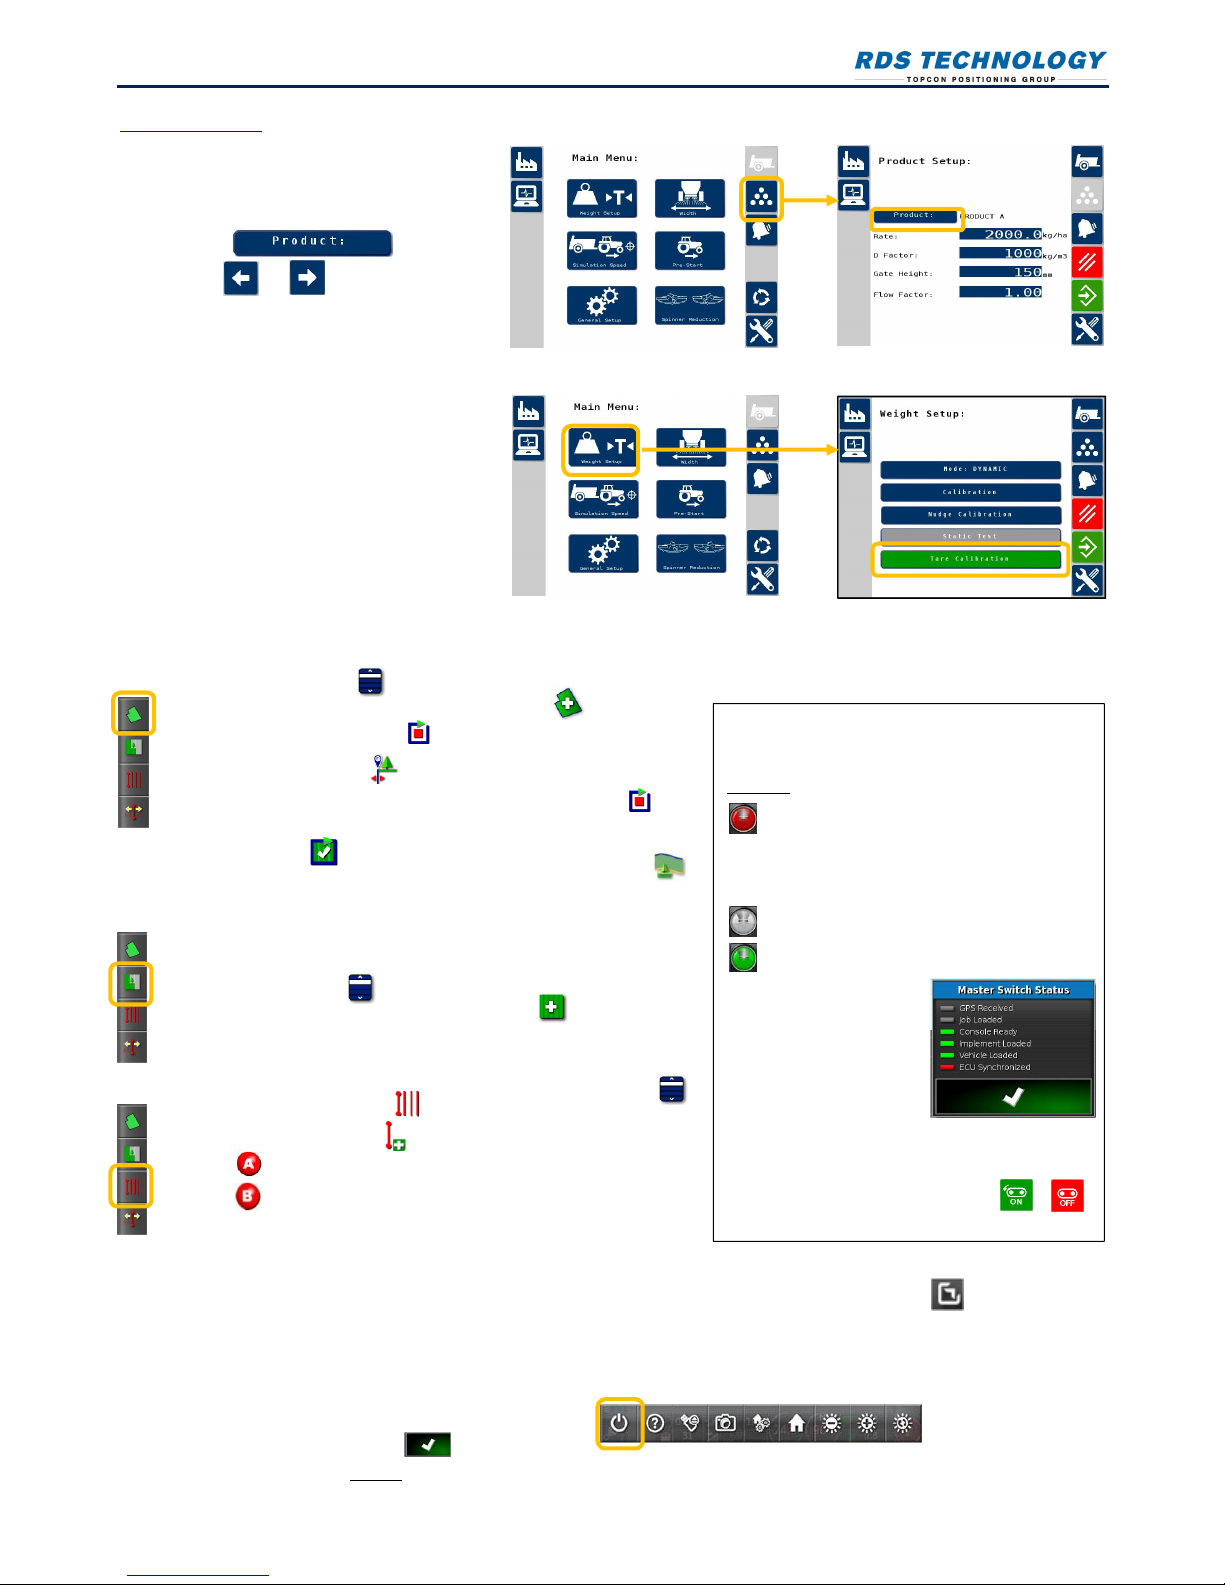
1. Product setup 2
The system can store 10 different products
with customizable names.
Press and
then or to select the product.
Touch the screen to edit the product name.
2. Add weight / Tare
The main screen displays the current weight
remaining in the hopper (for dynamic
calibration it is the actual weight
measurement from loadcells). The hopper
contents display will automatically refresh
with the current weight as product is
loaded.
In order to maintain correct angle
compensation, only perform the tare with
the spreader on level ground.
3. Select existing field / Setup field boundary / Manage headland
Select an existing field ( ) or create a new one ( ).
Optionally, record a boundary ( ) as follows:
1. Set your boundary offset ( ).
2. Position the vehicle at the start of the boundary, press Record ( ) and
drive along the boundary.
3. Press Complete ( ) when you want to close the boundary.
Optionally, manage the headland. Configure the headland options ( ).
This requires setting a boundary.
4. Select existing job / Create new job
Select an existing job ( ) or create a new one ( ).
5. Select existing guideline / Create new guideline
Select the type of guideline ( ), or select an existing guideline ( ),
or create a new guideline ( ).
Select to start recording a guideline.
Select to stop recording a guideline.
6. Switching between X25 and Apollo screens
To access other parts of the system, touch a key on the NAVIGATION toolbar to open a “mini-view”. Touch or swipe the mini-
view from left to right to maximise the window. You can swipe up or down the navigation bar to access the full range of functions.
7. Shutting down
Swipe upwards to display the CONSOLE toolbar and select , or briefly press the
green power button and select .
CAUTION: Pressing and holding the power button will reset the console. Resetting can result in data loss and should only be
performed if the console is not responding.
X25 master switch status
The Master Switch key activates / deactivates
coverage only, as indicated on the guidance screen.
Indicates that coverage is deactivated.
Coverage cannot be activated if one or more
parameters as shown by the “Master Switch Status”
window are not met (red).
Indicates coverage is ready to activate.
Indicates coverage is active
Coverage can be activated
when all the listed
parameters on the “Master
Switch Status” window are
met (green). The moving
map display will then show
the section and flow status.
The Master Switch does not switch the spreader in
or out of work.
The spreader is switched on/off by the
/
softkeys on the UT Apollo screen).
 Loading...