

Page 1
Butler 575
USER GUIDE
MANUAL
Page 2
!! Important !!
Before installing your Butler 575,
please contact your telephone provider to obtain
the CLIP subscription (display caller).
Without this subscription, the clip function
Antes de instalar su Butler 575, contacte con
su proveedor telefónico para obtener la suscripción al
Servicio de Información de Llamada Entrante.
¡Sin esta suscripción, el equipo no funcionará !
does not work !
!! Importante !!
Page 3

Butler 575
1 INSTALLATION 4
2 SYMBOLS 4
3 DESCRIPTION OF THE PHONE 6
3.1 HANDSET 6
3.2 BASE UNIT 6
4 OPERATION TELEPHONE 7
4.1 Answering Incoming Calls 7
4.2 Outgoing Calls 7
4.3 External Call Transfer 8
4.4 Pause 8
4.5 Call Duration 8
4.6 Mute 9
4.7 Paging 9
4.8 Activate a handset (power on) 9
4.9 Out of Range 9
4.10 Empty Battery 9
4.11 Handset Lock 10
4.12 CLIP Function 10
4.13 Memory numbers 10
5 FUNCTIONS 11
5.1 The Base station 11
5.2 Select a base station 12
5.3 Subscribing a handset to a base station 12
5.4 Desubscribing a Handset 13
5.5 Speaker volume 14
5.6 Ringing tones 14
5.7 Internal Ring Volume and Melody 15
5.8 Key click ON/OFF 15
5.9 Ring Melody Base unit 16
5.10 Ring Volume Base unit 16
5.11 Call Barring 16
5.12 Direct Call (Babycall) 17
5.13 Handset PIN code 18
5.14 The RFPI code 18
5.15 Change Master PIN Code (base station) 19
5.16 Base unit Reset 19
5.17 Reset Handset 20
6 WARRANTY 21
3
Page 4
Butler 575
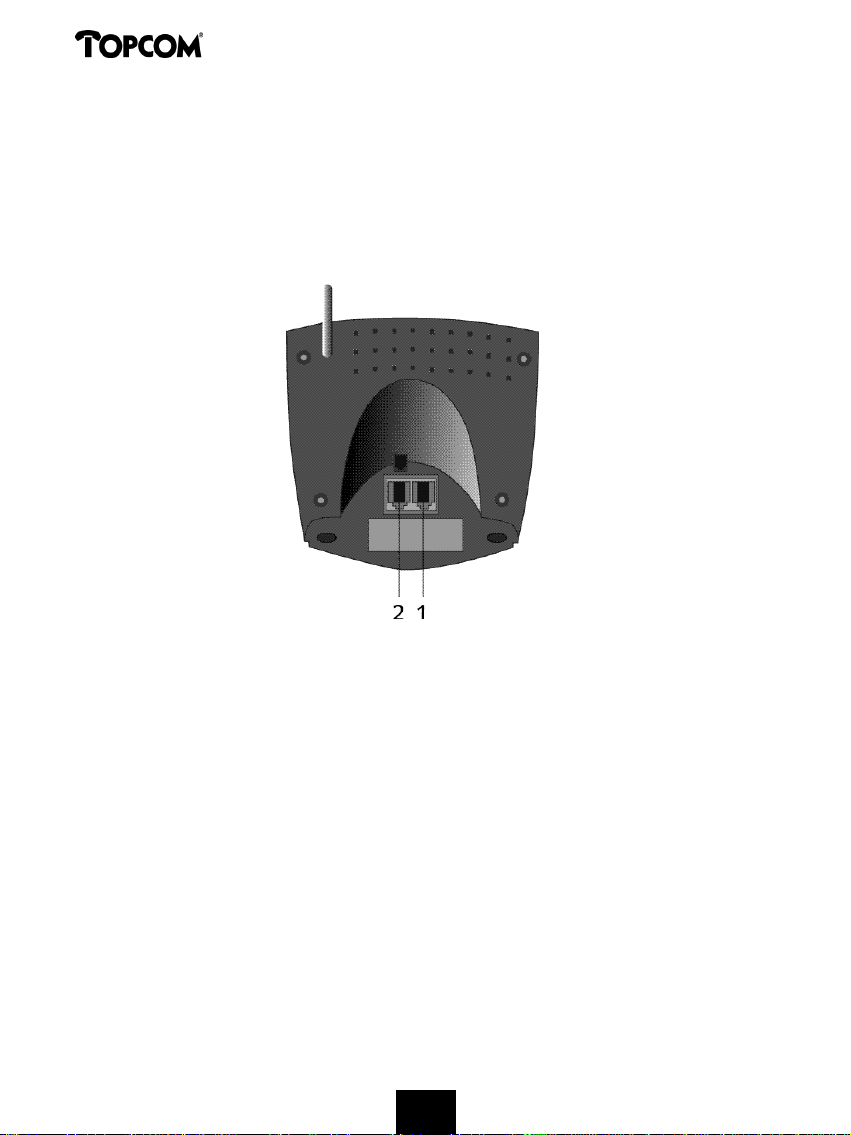
1 INSTALLATION
• Open the battery cover of the handset and insert 3 AAA NiNH batteries
• Connect one end of the adaptor cable to the electric socket and the other end to
the adapter connection PWR (1) at the bottom of the Butler 575.
• Plug one end of the phone cable into the telephone line wall socket and the other
end into the TEL (2) connection at the bottom of the unit.
Charging the Handset Battery
To charge the battery, position the handset on the base unit. Before you use the
phone for the first time, charge the batteries for 24 hours. If the battery is charged
correctly, you should hear a beep sound when placing the handset on the base unit.
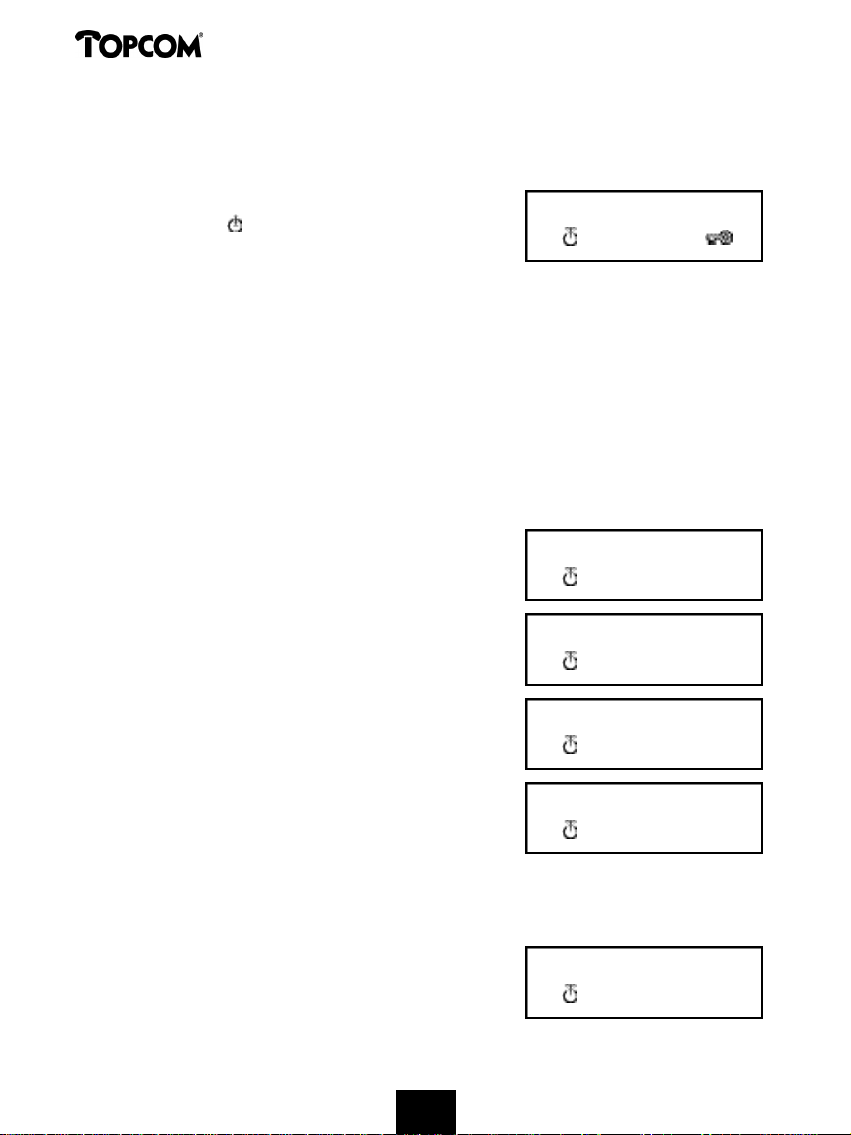
When the battery is almost empty, the battery symbol appears on the display.
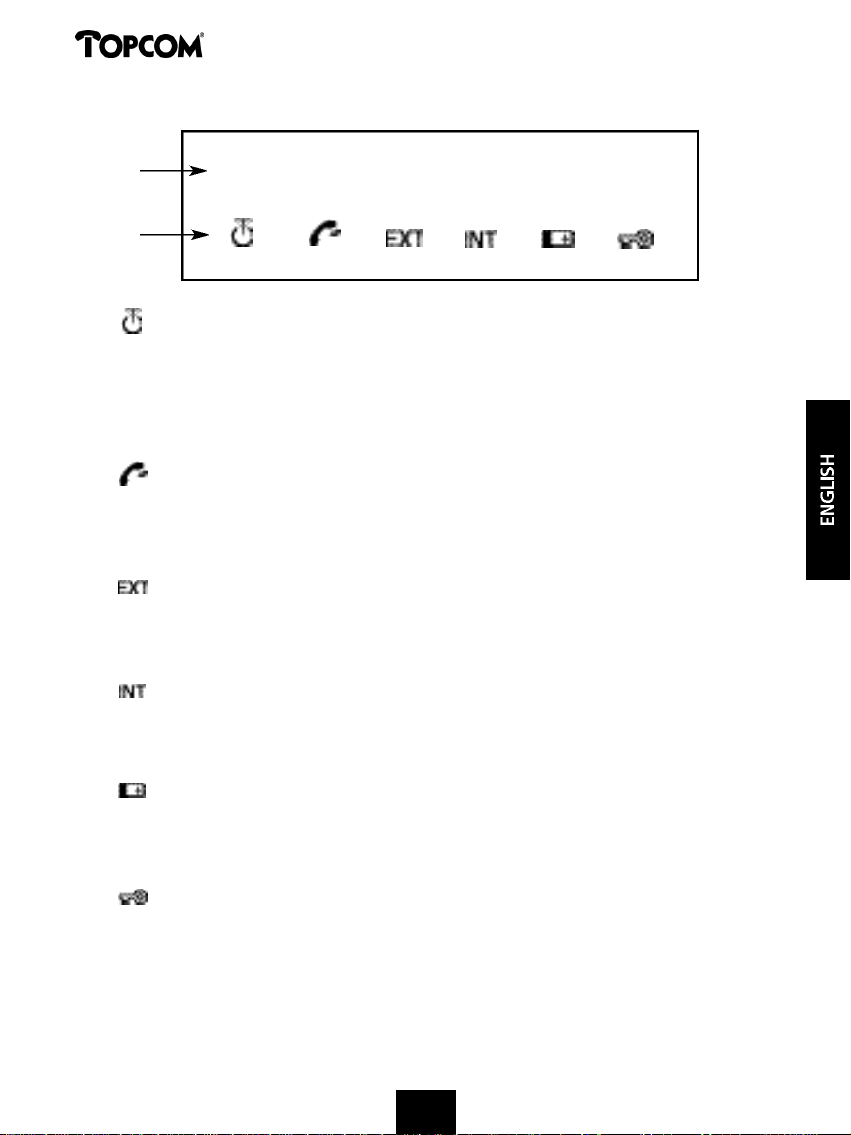
2 SYMBOLS
The first line of the display( 1 ) :
The first line of the display shows a maximum of 12 numbers or letters.
The second line of the display ( 2 ) :
On the second line of the display 6 symbols are displayed indicating the operation
status of handset.
4
Page 5
Butler 575
1
2
A N T E N N A
When the ANTENNA symbol appears on the display, this indicates that the
handset is located within the working range of the base unit. When the
handset is out of the working range of the base unit, “RANGE OUT” will be
visible on the display.
O F F H O O K
The OFFHOOK symbol appears when the hookswitch is pressed to call and
the handset and base unit are connected.
EXTERNAL CALL
The EXT symbol is used for external calls and is also displayed on all the
subscribed handsets.
0 0 0 0 0 0 0 0 0 0 0 0 0
INTERNAL CALL
The INT symbol is used for internal calls between handsets. It is displayed on
the corresponding handsets only.
B A T T E R Y
The BATTERY symbol is shown when the battery is almost empty and needs
to be recharged.
L O C K
The LOCK symbol is displayed when the handset is locked. The unit can only
receive incoming calls. All buttons are deactivated, except for the Power
button.
5
Page 6
Butler 575
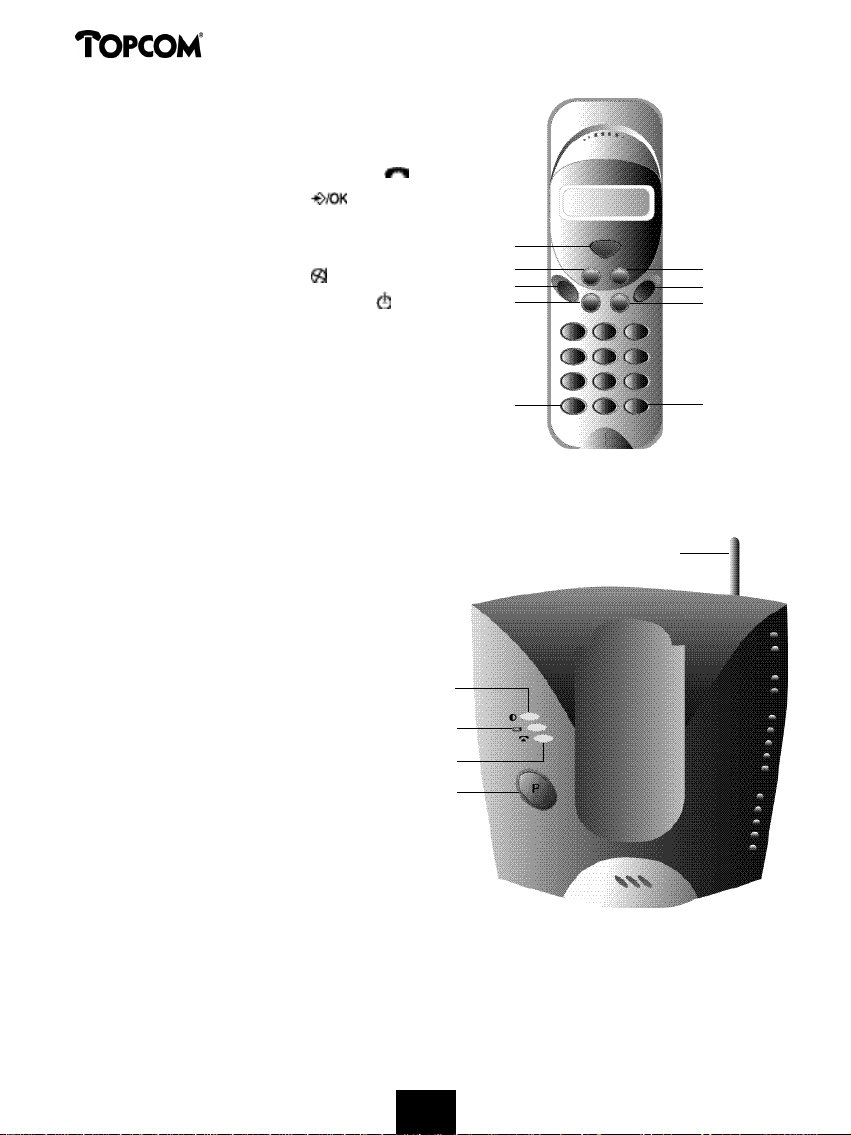
3 DESCRIPTION OF THE PHONE
3.1 Handset
1 Hookswitch / End Menu button
2 Memory / OK button
3 Function / Flash button [F/R]
4 Mute / Erase / Escape /
Memory Clear button
5 Power / Lock / Volume button
6 Handset Internal Call /
Call Transfer button [INT]
7 Redial / Pause button [R/P]
8*Asterisk button
9 # b u t t o n
1
2
3
4
8
7
6
5
9
3.2 Base unit
1 Power On LED
The base unit is activated (ON).
2 Battery LED
The Battery indicator burns
while it’s charging
3 In Use LED
When the Hookswitch button
is pressed to call, the In Use LED
is burning.
4 Paging button
To find the handsets connected to
your base unit, press the Paging
button on the base unit.
5 A n t e n n a
It improves the reception between
handset and base unit.
5
1
2
3
4
6
Page 7

Butler 575
4 OPERATION TELEPHONE
4.1 Answering Incoming Calls
The user can accept an incoming internal or external call by pressing the Hookswitch
button. The INT (internal incoming call) or the EXT (external incoming call) symbol
blinks on the display. As soon as the call is accepted, the symbol stabilizes on the
display. In the event of internal calls, only the called handset will ring and show a
flashing INT symbol. The number of the calling handset is displayed on the left hand
side of the display. In the case of an external call, all free handsets will ring and all
handsets (free or busy) will show a flashing EXT symbol.
4.2 Outgoing Calls
4.2.1 External outgoing calls
• When you want to make a phone call, press the Hookswitch button .
• The following symbol is displayed .
• You will hear the dial tone and “EXT“ appears on the display.
• Enter the telephone number. After 10 sec. the call duration is shown on the display.
• To end the call, press the Hookswitch button .
• After the call, the display shows the call duration for another two seconds.
4.2.2 External Call Setup with Dial Preparation
• Enter the desired telephone number.
• Press the Hookswitch button.
During the dialling, the number can be corrected by pressing the Erase button .
The maximum number of digits you can enter is 25. If the user tries to enter more
than 25 digits, an error tone is generated and the excessive digits are ignored.
4.2.3 Redial
The last three dialled numbers are saved in the Redial memory. They can be called
by pressing the Redial button [R/P].
• Press the Redial button repeatedly to step through the different numbers in the
Redial memory.
• Press the Hookswitch button .
The Redial button also functions as a Pause button (see 4.4 Pause).
7
Page 8

Butler 575
4.2.4 Internal Calls between Handsets
If you want to talk to another handset, take the following steps :
• Press the [INT] button.
• Enter the number of the desired handset.
• When the called handset starts to ring, the Hookswitch will be pressed to
answer the incoming internal call.
• Press the Hookswitch button when you want to terminate the internal call.
Note : When a handset is in communication with another handset, you will hear a busy tone when
you try to reach one of these handsets.
4.3 External Call Transfer
When you are in communication with an external caller and you want to transfer
this external call to another internal handset, take the following steps :
• Press the [INT] button, followed by the number of the desired handset.
• As soon as the called handset starts to ring, the Hookswitch will be pressed.
Both handsets are now connected.
• The first handset will connect the external call to the second handset by pressing
the Hookswitch.
If the second handset doesn’t answer, press the [INT] button again and the fir s t
handset will be connected to the external call again.
4.4 Pause
While entering a phone number you can add a pause to this number by pressing the
Pause button [R/P]. It should not be the first digit of a telephone number otherwise
the Pause button will be interpreted as a Redial button.
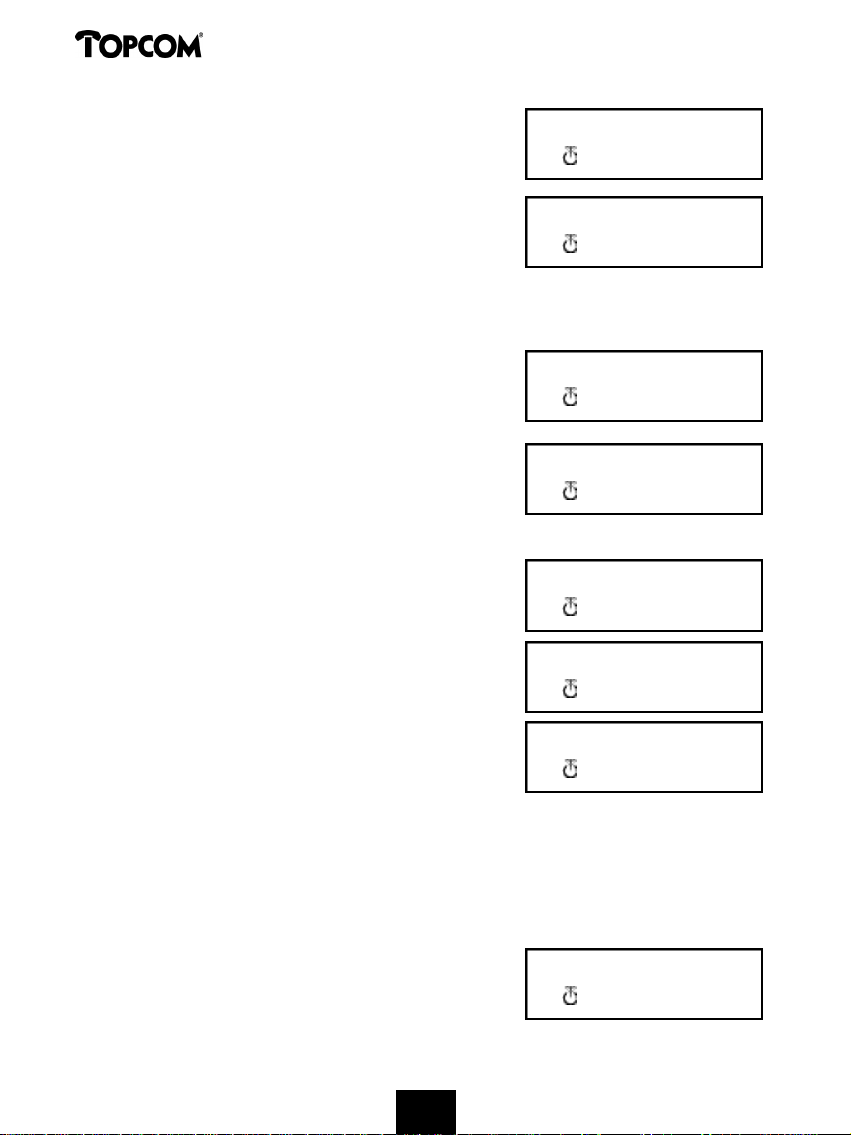
4.5 Call Duration
During and after an external call, the call duration is shown on the display.
• After picking up the handset, the call duration
appears after 10 seconds.
• When the call is finished, the call duration will be
visible for another 2 seconds.
The time is displayed in the following format : [mm : ss] (minutes : seconds).
8
2 3 : 4 5
Page 9

Butler 575
4.6 Mute
It is possible to deactivate the microphone during a conversation. Now you can talk
freely without being heard by your correspondent.
•Press and hold the Mute button for 1 second
during a conversation.
• “MUTED” is shown on the display.
• When you want to continue the conversation, press the Mute button again.
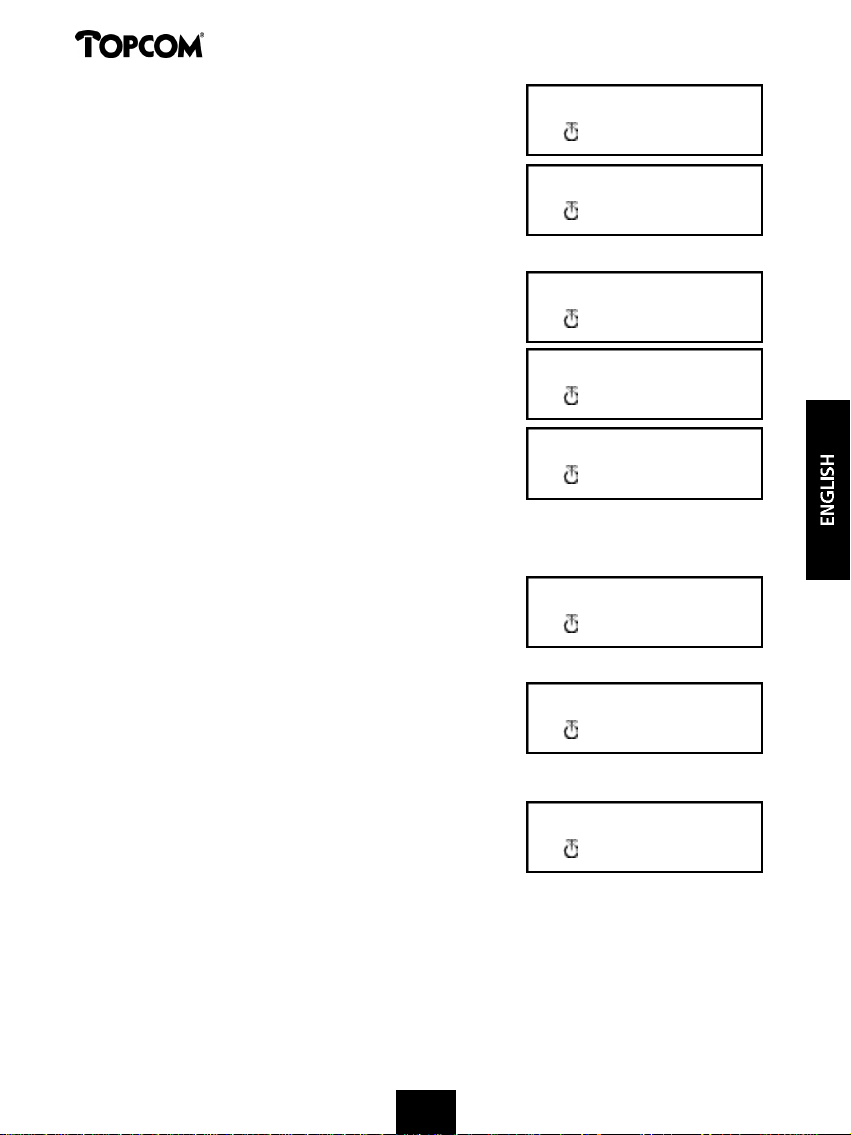
4.7 Paging
To find one or more lost handsets, press the Paging button on the base unit.
• All subscribed handsets will emit a signal and
“BASE->PAGING” is shown on the display.
• When you have retrieved the handset, press the
Hookswitch button to turn off the signal.
Paging a handset is not possible when the unit is in communication or is receiving
a phone call.
4.8 Activate a handset (power on)
• The handset can be activated/deactivated by
pressing the Power button .
• When you activate a handset, you will hear a
warning signal. The handset is looking for the base station.
MUTED
BASE --> PAGING
SEARCHING FP
4.9 Out of Range
• When the handset is out of the working range of
the base unit or when it’s not subscribed to the
base unit, it will emit a warning tone.
• You have to move closer towards the base unit or you have to subscribe the
handset to the base unit. (see 5.3 Subscribing a handset to a base station)
4.10 Empty Battery
• When the battery is almost empty, you will
hear a warning tone.
• The battery symbol is shown on the display.
9
RANGE OUT
MULTI 1
Page 10
Butler 575
4.11 Handset Lock
When the handset is locked, outgoing calls are no longer possible. Incoming calls
can still be received without any problem.
• If you want to lock a handset, press and hold the
Lock button for 1 second.
• To deactivate the handset lock, press the Lock
button briefly .
4.12 CLIP Function
When the unit receives a phone call, the caller’s phone number is shown on the
handset’s display.
4.13 Memory numbers
The handset is capable of storing 10 telephone numbers in the memory.
4.13.1 Programming memory numbers
A memory number can be programmed as follows:
• Enter the phone number.
• Press the Memory button. The letter “M” is
added to the end of the number in the display.
• Enter the desired memory location, for ex. 9.
LOCK
091120010M
MEM 9
• Two seconds later the telephone number
appears on the display again for 15 seconds
to confirm.
• The unit returns to idle mode.
4.13.2 Erasing a memory number
To erase a memory number, you have to do the following:
• Press the Memory button.
“MEM” appears on the display.
10
091120010
MULTI 1
MEM
Page 11

Butler 575
• Press the Erase button, “M_CLEAR” appears
on the display.
• Enter the memory location, for ex. 9.
• The memory location is empty again.
• The unit returns to idle mode.
4.13.3 Calling a memory number
• Press the Memory button.
“MEM” appears on the display .
• Enter the memory location, for ex. 9.
The programmed number appears on the display.
• Press the Hookswitch button. The number on the
display will be dialled.
You can also call a memory number as follows :
• Press the Hookswitch button.
• Press the Memory button.
• Enter the number of the memory location, for ex. 9.
• The number is shown on the display and is dialled.
M_CLEAR
EMPTY
MULTI 1
MEM
091120010
091120010
5 FUNCTIONS
5.1 The Base station
Handsets can be subscribed to 4 different base stations. When a handset is
subscribed to several base stations, you can choose which base station you want to
work with.
Note : When you select “BASE NO : AUTO”, the base unit is searched automatically. If there are
more than two base units, the handset selects an arbitrary base station. This is only possible when
the handset is subscribed to several base units.
11
Page 12
Butler 575
5.2 Select a base station
• Press the Function button until “SELECT BASE”
appears on the display.
• Press the OK button.
• The base number is shown on the display, for ex.
“BASE NO : 1”.
• Press the Function button.
• The base numbers appear on the display
“BASE NO : 1 ~ 4, AUTO”.
• When the desired base number is shown on the
display, for ex. “BASE NO : 2”, press the OK
button.
• Let’s assume that the handset was subscribed to
base unit 2 and that the handset number is now
“MULTI 1”. If you want to subscribe this handset
to base unit 2 again, select de base unit
“BASE NO: 2” and press the OK button. Display :“NEW BASE:2”
Note : If the handset was never subscribed to base station 2,
the following is displayed : “NOT SUB2”.
• On the display “BASE : 2” is shown.
• Press the OK button to subscribe the new base
s t a t i o n .
• The unit returns to idle mode, “MULTI 2” appears
on the display.
SELECT BASE
BASE NO: 1
BASE NO: 2
NEW BASE: 2
NOT SUB2
BASE: 2
MULTI 2
5.3 Subscribing a handset to a base station
To be able to make and receive telephone calls, the handset must be subscribed to
the base unit. A new handset can only be subscribed to the base unit when the
base unit is in subscription mode. Press and hold the Paging button for 15 secs until
you hear a beep tone. The base unit is now in subscription mode.
• Press the Function button until “H-REGISTER”
appears on the display.
• Press the OK button.
12
H--REGISTER
Page 13
Butler 575
• On the display “SEARCH BS 1” is shown.
• Press the Function button.
• The base number changes from 1 to 4.
• As soon as the handset has found the correct
base number, press the OK button.
• When the handset is looking for the base unit,
the RFPI Code is displayed. Every base unit has its
own code.
• When “PIN : “ is displayed, enter the PIN code of
the base unit.
• After entering the 4 digit PIN code, press the
OK button.
SEARCH BS 1
00004--00 :AB
PIN:
PIN: ++++
• The unit returns to the “H-REGISTER” menu.
5.4 Desubscribing a Handset
It is possible to terminate the subscription of a handset from the base unit. This is
done by entering the handset number.
• Press the Function button until “BASE SETTING”
is shown on the display.
• Press the OK button.
• Press the Function button until “HANDY DESUB”
is displayed.
• Press the OK button.
• The handset number appears on the display.
• Press the Function button and the handset
numbers from 2 to 5 are displayed.
• Press the OK button when the handset number,
that needs to be desubscribed, is shown on the
display, for ex. “HANDY NO : 2”.
Note : You can desubscribe each handset except the one you are descubscribing with and “Multi 1”.
For ex. handset number 3 (Multi 3) can’t desubscribe handset number 1 (Multi 1) nor itself (Multi 3).
You can desubscribe the other handsets.
H--REGISTER
BASE SETTING
HANDY DESUB
HANDY NO:2
13
Page 14

Butler 575
5.5 Speaker volume
The speaker volume can be adjusted. There are three volume levels :
low “VOL LOW”, medium “VOL MIDDLE” and high “VOL HIGH”. During a phone
conversation the volume can be adjusted temporarily by using the Volume button .
5.5.1 Adjusting the Speaker Volume
• Press the Function button until “EAR VOLUME”
is displayed.
• Press the OK button.
• Select the desired volume level, for ex.
“VOL MIDDLE”
• Press the OK button to confir m .
EAR VOLUME
VOL MIDDLE
EAR VOLUME
• The unit returns to the “EAR VOLUME” menu.
5.6 Ringing tones
The ring volume and melody can be selected independently for internal and external
calls. The external ringing tone is set up in menu “H-EXT RING”, the internal ringing
tone in menu “H-INT RING”. In both menus, first the ring melody can be selected,
then the ring volume. Nine melodies and nine volume levels are available.
5.6.1 External Ring Volume and Melody
M E L O D Y
• Press the Function button until “H-EXT RING” is
shown on the display.
• Press the OK button.
• When the menu “MELODY” is displayed, press
the OK button.
• The present melody “MELODY 1” is displayed.
• Press the Function button. The melody numbers
from 1 to 9 and OFF are shown on the display.
• Select the desired melody and press the OK
b u t t o n .
• The unit returns to the “H-EXT RING” menu.
14
H--EXT RING
M E L O D Y
MELODY 1
H--EXT RING
Page 15

Butler 575
V O L U M E
• Press the Function button until “H-EXT RING”
is shown on the display.
• Press the OK button.
•On the display “MELODY” is shown.
• Press the Function button.
H--EXT RING
M E L O D Y
• “VOLUME” appears on the display.
• Press the OK-button, the menu “VOLUME” is
s e l e c t e d .
• The present volume “VOLUME 1” is shown on
the display.
• Press the Function button. On the display the
volume levels 1 to 9 are shown.
• Select the desired volume level and press the
OK button.
• The unit returns to the “H-EXT RING” menu.
5.7 Internal Ring Volume and Melody
Setting the internal ring volume and melody has to be done the same way as
setting the external ring volume and melody. You only have to select the menu
“H-INT RING”.
5.8 Key click ON/OFF
It is possible to set the handset in such a way that you hear a tone every time a
button is pressed.
• Press the Function button until “H-KEY CLICK”
is shown on the display.
• Press the OK button.
• The present setting appears on the display.
• Press the Function button and select the desired
s e t t i n g .
• Press the OK button to confir m .
• The unit returns to the “H-KEY CLICK” menu.
V O L U M E
VOLUME 1
H--EXT RING
H--KEY CLICK
CLICK ON
H--KEY CLICK
15
Page 16

Butler 575
5.9 Ring Melody Base unit
The base unit has 9 melodies to choose from.
• Press the Function button until “BASE SETTING”
is displayed.
• Press the OK button.
• Press the Function button until “BASE MELODY”
is displayed.
• Press the OK button.
• The current melody is shown on the display, for
ex. “MELODY 1”.
• Press the Function button; the melody numbers
are displayed from 1 to 9 and OFF. You hear the different melodies.
• Select the desired melody and press the OK button.
• The unit returns to the “BASE MELODY” menu.
5.10 Ring Volume Base unit
The base unit has 9 volume levels to choose from.
• Press the Function button until “BASE SETTING”
is displayed.
• Press the OK button
• Press the Function button until “BASE VOLUME”
a p p e a r s .
• Press the OK button
• The current volume is displayed, for ex.
“VOLUME 1”.
• Press the Function button, the volume levels are
displayed from 1 to 9. You hear the volume from the base unit change.
• Select the desired volume level and press the OK button.
• The unit returns to the “BASE VOLUME” menu.
BASE SETTING
BASE MELODY
MELODY 1
BASE SETTING
BASE VOLUME
VOLUME 1
5.11 Call Barring
You can program a handset in such a way that certain telephone numbers can not
be called. Up to 5 numbers (of max. 5 digits) can be barred. To each number, up to
5 handsets can be selected.
16
Page 17

Butler 575
5.11.1 Activate Call Barring
• Press the Function button until “BASE SETTING”
is displayed.
• Press the OK button.
•Press the Function button until “BARRING”
is displayed.
• Press the OK button.
• On the display “FP PIN :” is shown (see 5.15
Change Master PIN code (base station)).
• Enter the PIN code and press the OK button.
The number that has already been registered
appears on the display : “NO 1 : 001”.
• If no number has been registered, “EMPTY”
is displayed.
• Enter the number and press the OK button. The number can be erased or
corrected by pressing the Erase button .
• When “HANDY : “ is displayed, enter the handset numbers one by one.
• Press the OK button and the unit returns to the “BARRING” menu.
5.12 Direct Call (Babycall)
This function allows you to program one specific number that will be dialled
automatically no matter what key has been pressed. One direct call number can be
programmed per handset. Incoming calls can still be answered without a problem.
BASE SETTING
B A R R I N G
FP PIN:
NO1: EMPTY
5.12.1 Activating a Direct Call number
• Press the Function button until “DIRECT CALL”
is shown on the display. Press the OK button.
• Enter the desired telephone number. The number
is shown on the display and can be corrected by
pressing the Erase button , if necessary.
• Press the OK button, this function is activated.
• When the number has not been entered,
”PHONE NUMBER” appears on the display.
• Enter the phone number, press the OK button
and you will be connected with this number.
17
DIRECT CALL
0 9 1 1 2 0 0 1 0
PHONE NUMBER
Page 18

Butler 575
5.12.2 Deactivating a Direct Call number
Press the Escape button twice rapidly to deactivate the Direct Call function.
5.13 Handset PIN code
The new handset PIN code will only replace the current one, if the new PIN code is
entered correctly twice and if the procedure is not interrupted. It is possible to reset
the handset PIN code to the factory setting : 1590.
5.13.1 Changing the Handset PIN code
• Press the Function button until “H-CHANGE PIN”
is displayed.
• Press the OK button.
H--CHANGE PIN
• “PP PIN :” is displayed.
• Enter the current PIN code and press the
OK button.
• When “NEW PIN” is displayed, enter the new
handset PIN Code and press the OK button.
• Then “RETYPE” is shown on the display.
• Enter the new PIN code once again.
• Press the OK button to confirm and the unit
returns to the “H-CHANGE PIN” menu.
5.14 The RFPI code
This function allows you to display the RFPI code. The RFPI code is the identification
code of the base unit to which the handset belongs.
• Press the Function button until “SHOW RFPI”
is displayed.
• Press the OK button.
• The RFPI Code is shown on the display.
• Press the OK button, the unit returns to the
“SHOW RFPI” menu.
PP PIN:
NEW PIN:
R E T Y P E :
H--CHANGE PIN
SHOW RFPI
00004--00 1AB
SHOW RFPI
181818
Page 19

Butler 575
5.15 Change Master PIN Code (base station)
The master PIN code is an essential part of the sytem. Therefore it should be
changed as soon as possible. The factory setting is 1590. The new master PIN code
will only replace the current one, if the PIN code is entered correctly twice and if
the below mentioned procedure is not interrupted.
• Press the Function button until “BASE SETTING”
is displayed.
• Press the OK button.
• Press the Function button until “B-CHANGE PIN”
is shown on the display.
• Press the OK button.
• On the display “FP PIN :” is shown.
• Enter the current PIN code and press the
OK button.
• “WAIT” is displayed for a moment. When “NEW
PIN” is displayed, enter the new Master PIN code.
• Press the OK button.
• On the display “RETYPE PIN :” is shown.
• Enter the new Master PIN code for the 2nd time.
• Press the OK button to confirm.
ATTENTION : Do not forget your personal PIN code !
BASE SETTING
B--CHANGE PIN
FP PIN:
NEW PIN:
RETYPE PIN:
5.16 Base unit Reset
The user can reset the base unit to default factory values. This reset also desubscribes
all connected handsets. There are two possibilities:
1: RESET ALL
Subscribed handsets No handsets subscribed
2: INITIALIZE
All default parameters have been reset.
Base unit ring volume Level #9
Base unit ring melody Melody #4
Master PIN code 1590
Call Barring All barred numbers and the assigned
handsets are cleared.
19
Page 20

Butler 575
5.16.1 To reset the default settings base unit
• Press the Function button until “BASE SETTING”
is displayed.
• Press the OK button.
• Press the Function button until “BASE RESET :”
is shown.
• Press the OK button and select the “INITIALIZE”
menu.
- When the OK button is pressed, all current
values are erased.
- When the Function button is pressed and the
“RESET ALL” menu is selected, all subscription
data will be erased after pressing the OK button.
• The handset returns to the “NOT SUB” menu and
needs to be subscribed again to a base unit
(see 5.3 Subscribing a handset to a base station).
5.17 Reset Handset
This function is used to reset the handset settings to default values.
There are two possibilities :
1: RESET ALL
The babycall (direct call) number and all the memory numbers are erased.
2: INITIALIZE
All default handset parameters have been reset.
Key click : on
Ring volume: level #9
External ring melody: melody #4
Internal ring melody: melody #7
Speaker Volume: Middle
BASE SETTING
BASE RESET
I N I T I A L I Z E
RESET ALL
NOT SUB
5.17.1 Resetting the handset
• Press the Function button until “H-RESET” is
shown on the display.
2020
H - - R E S E T
Page 21

Butler 575
PP PIN:
• Press the OK button.
• On the display “PP PIN :” is shown.
• Enter the PIN code and press the OK button.
• “RESET ALL” is displayed.
- If you want to erase all current values, press the
OK button.
- If you press the Function button “INITIALIZE”
is shown on the display. Press the OK button,
the default values have been reset.
• The unit returns to the “H-RESET” menu.
Note : To terminate the subscription of a handset, press the Power and the INT button at the same
time while the handset is deactivated. On the display “ F->CLEARSUBS” appears. Press the Function
button, the handset is no longer subscribed to the base unit. On the display “NOT SUB” appears.
6 WARRANTY
Warranty : 1 year
Ask your dealer for your free swop warranty.
Attention : Do not forget to include your purchase invoice when you return the
damaged device.
RESET ALL
I N I T I A L I Z E
H - - R E S E T
The equipment has been approved to 98/482/EG (TBR 21) for pan-European single terminal connection to the
Public Switched Telephone Network (PSTN). However, due to differences between the individual PSTNs provided
in different countries the approval does not, of itself, give an unconditional assurance of successful operation on
every PSTN network termination point. Should you have problems, contact your dealer.
This list will indicate the networks with which the equipment is designed to work and any notified networks with
which the equipment may have interworking difficulties.
N e t w o r k C o m p a t i b i l i t y N e t w o r k C o m p a t i b i l i t y
A u s t r i a A L u x e m b o u r g A
B e l g i u m A The Netherlands A
D e n m a r k A P o r t u g a l A
F i n l a n d A S p a i n A
F r a n c e A S w e d e n A
G e r m a n y A United Kingdom A
G r e e c e A N o r w a y A
I r e l a n d C S w i t z e r l a n d A
I t a l y A
A – equipment designed to work with country’s network
B – equipment may have interworking difficulties with country’s network
C – equipment not tested against compliance to country’s network
2121
Page 22

Butler 575
1 INSTALACIÓN 22
2 SÍMBOLOS 22
3 DESCRIPCIÓN DEL TELÉFONO 25
3.1 UNIDAD PORTÁTIL 25
3.2 UNIDAD BASE 25
4 FUNCIONAMIENTO TELÉFONO 26
4.1 Contestar las Llamadas Entrantes 26
4.2 Llamadas Salientes 26
4.3 Transferir Llamadas Externas 27
4.4 Pausa 27
4.5 Duración de la Llamada 27
4.6 Secreto 28
4.7 Buscar 28
4.8 Activar la unidad portátil (encender) 28
4.9 Fuera de Cobertura 28
4.10 Batería Agotada 29
4.11 Bloqueo de la Unidad Portátil 29
4.12 Función CLIP (Identificación de LLamadas Entrantes) 29
4.13 Números de las Memorias 29
5 FUNCIONES 31
5.1 Unidad Base 31
5.2 Seleccionar la Unidad Base 31
5.3 Asociar una unidad portátil a una base 32
5.4 Desasociar una Unidad Portátil 32
5.5 Volumen del Altavoz 33
5.6 Sonidos de Timbre 34
5.7 Volumen y Melodía del Timbre Interno 35
5.8 ACTIVAR/DESACTIVAR el sonido de las Teclas 35
5.9 Melodía del Timbre de la Unidad Base 35
5.10 Volumen del Timbre de la Unidad Base 36
5.11 Restricción de Llamadas 36
5.12 Llamada Directa (Babycall) 37
5.13 Código PIN de la Unidad Portátil 38
5.14 Código RFPI 38
5.15 Cambiar Código PIN Principal (unidad base) 39
5.16 Reinicio de la Unidad Base 39
5.17 Reinicio de la Unidad Portátil 40
22
Page 23

Butler 575
1 INSTALACIÓN
• Abra la tapa del compartimiento de baterías de la unidad portátil e introduzca
3 baterías NiMH tipo IEC R3
• Conecte un extremo del cable del alimentador a la red eléctrica y el otro al conector
i d e n t i ficado por PWR (1) en la cara inferior del Butler 575.
• Conecte un extremo del cable del teléfono al conector de la línea telefónica (roseta)
y el otro al conector identificado por TEL (2) en la cara inferior de la unidad.
Carga de la Batería de la Unidad Portátil
Para cargar la batería coloque la unidad portátil en la unidad base. Antes de usar
por primera vez el teléfono, deberá cargar las baterías durante 24 horas. Si la
batería se ha cargado correctamente se escuchará un pitido al colocar la unidad
portátil en la base. Cuando la batería está casi agotada aparece el símbolo de la
batería en la pantalla.
2 SÍMBOLOS
Primera fila de la pantalla ( 1 ) :
La primera fila de la pantalla puede mostrar hasta 12 números o letras.
Segunda fila de la pantalla ( 2 ) :
La segunda fila de la pantalla muestra 6 símbolos que indican el estado de
funcionamiento de la unidad portátil.
23232323
Page 24

Butler 575
1
2
A N T E N A
Cuando aparece el símbolo de la ANTENA en la pantalla significa que la
unidad portátil se encuentra dentro de la zona de cobertura de la base. Si la
unidad portátil está fuera de cobertura, aparecerá el mensaje “RANGE OUT”
en la pantalla.
D E S C O L G A D O
El símbolo DESCOLGADO aparece cuando se pulsa el botón Colgar/Descolgar
para llamar y se establece la conexión entre la unidad portátil y la base.
LLAMADA EXTERNA
El símbolo EXT indica llamadas externas y también aparece en todas unidades
portátiles asociadas.
0 0 0 0 0 0 0 0 0 0 0 0 0
LLAMADA INTERNA
Las letras INT indican llamadas internas entre unidades portátiles. Únicamente
aparece en las respectivas unidades portátiles.
B A T E R Í A
El símbolo BATERÍA aparece cuando ésta se encuentra casi agotada y necesita
recargarse.
B L O Q U E O
El símbolo LOCK (BLOQUEO) aparece cuando la unidad portátil se encuentra
bloqueada. En esta situación la unidad sólo puede recibir llamadas entrantes.
Todos los botones, excepto el de alimentación, permanecen desactivados.
24
Page 25

Butler 575
3 DESCRIPCIÓN DEL TELÉFONO
3.1 UNIDAD PORTÁTIL
1 Tecla Colgar/Descolgar / Botón Cerrar Menú
2 Memoria / Botón OK (aceptar)
3 Función / Botón Flash [F/R]
4 Secreto / Borrar / Escape (Salir) /
Botón Borrar Memorias
5 Alimentación / Bloqueo /
Botón Volumen
6 Llamada Interna de la Unidad Portátil /
Botón Transferir Llamada [INT]
7 Rellamada / Botón Pausa [R/P]
8*Botón Asterisco
9 Botón almohadilla #
3.2 UNIDAD BASE
1 Indicador de Alimentación
La unidad base está activada (ON).
2 Indicador de la Batería
El indicador de la batería se mantiene
iluminado durante la carga
3 Indicador de Unidad En Uso
Se ilumina cuando se pulsa el botón
Colgar/Descolgar para llamar.
4 Botón Buscar
Para localizar una unidad portátil
conectada a la unidad base, pulse
el botón Buscar (en la unidad base).
5 A n t e n a
Mejora la recepción entre la unidad
portátil y la base.
1
2
3
4
8
1
2
3
4
7
6
5
9
5
25
Page 26

Butler 575
4 FUNCIONAMIENTO DEL TELÉFONO
4.1 Contestar Llamadas Entrantes
El usuario puede aceptar una llamada entrante interna o externa pulsando el botón
Colgar/Descolgar. El símbolo INT (llamada interna entrante) o el símbolo EXT
(llamada externa entrante) lucirá intermitentemente en la pantalla y dejará de
parpadear tan pronto se acepte la llamada. En caso de llamadas internas únicamente
sonará el timbre de la unidad portátil a la que se llama, que mostrará el símbolo INT
intermitente. El número de la unidad portátil que realiza la llamada aparece en la
parte superior izquierda de la pantalla. Cuando se recibe una llamada externa suena
el timbre en todas las unidades portátiles que no se estén utilizando, pero en todas
ellas (tanto ocupadas como libres) aparece el símbolo EXT intermitente.
4.2 Llamadas Salientes
4.2.1 Llamadas Salientes Externas
• Para realizar una llamada, pulse el botón Colgar/Descolgar .
• Aparecerá el siguiente símbolo .
• Se escuchará el tono de invitación a marcar y aparecerá “EXT“en la pantalla.
• Marque el número de teléfono. Después de 10 segundos aparecerá en la pantalla
la duración de la llamada.
• Para terminar la llamada, pulse el botón Colgar/Descolgar . Una vez terminada
la llamada, aparecerá su duración en la pantalla durante otros dos segundos.
4.2.2 Preparación de la Llamada Externa
• Marque el número de teléfono.
• Pulse el botón Colgar/Descolgar. Para corregir el número durante la marcación,
pulse el botón Delete (Borrar). Se puede introducir hasta un máximo de
25 dígitos; si se intenta introducir más, se producirá un sonido de error y se
ignorarán los dígitos adicionales.
4.2.3 Rellamada
Los últimos tres números telefónicos marcados se guardan en la memoria de
Rellamada. Para volver a marcarlos, pulse el botón Rellamada [R/P]. Pulse varias veces
el botón Rellamada para ver los números almacenados en la memoria de R e l l a m a d a .
• Cuando encuentre el número deseado, pulse el botón Colgar/Descolgar.
El botón Rellamada también funciona como botón de Pausa (refiérase a 4.4 P a u s a )
26
Page 27

Butler 575
4.2.4 Llamadas Internas entre Unidades Portátiles
Para llamar a otra unidad portátil, siga estos pasos :
• Pulse el botón [INT].
• Marque el número de la unidad portátil que desea llamar.
• Cuando empiece a sonar el timbre de la unidad portátil deseada, se pulsará el
botón Colgar/Descolgar para contestar la llamada interna entrante.
• Para finalizar la llamada interna, pulse el botón Colgar/Descolgar.
Nota : Si intenta llamar a una unidad portátil que se encuentra en comunicación con otra unidad
portátil, recibirá el tono de comunicando al llamar a cualquiera de ellas.
4.3 Transferir una Llamada Externa
Si está conectado con una llamada externa y desea transferirla a una unidad portátil
interna, siga estos pasos :
• Pulse el botón [INT] y a continuación el número de la unidad portátil deseada.
• Tan pronto como empiece a sonar el timbre de la unidad portátil llamada, quien la
conteste deberá pulsar el botón Colgar/Descolgar. Las dos unidades portátiles
estarán ahora conectadas.
• La primera unidad portátil pasará la llamada externa a la segunda unidad portátil al
pulsar el botón Colgar/Descolgar. Si la segunda unidad portátil no contesta, pulse de
nuevo el botón [INT] para devolver la llamada externa a la primera unidad portátil.
4.4 Pausa
Se puede añadir una pausa a un número telefónico mientras se marca pulsando el
botón Pausa [R/P]. No coloque la pausa al principio de un número ya que entonces
será interpretada como el botón de Rellamada.
4.5 Duración de la llamada
Durante el transcurso y después de una llamada externa, la pantalla muestra su
duración. Tras descolgar la unidad portátil, la duración de la llamada aparece a los
10 segundos. Una vez terminada la llamada, este valor permanecerá visible otros 2
s e g u n d o s .
El tiempo se presenta en el siguiente formato :
[mm : ss] (minutos : segundos).
27
2 3 : 4 5
Page 28

Butler 575
4.6 Secreto
El micrófono se puede desactivar durante la conversación. Esto le permite hablar sin
que su corresponsal pueda oírle.
• Pulse y mantenga oprimido el botón Secreto
durante1segundo mientras habla
• El símbolo Secreto aparecerá en la pantalla.
• Vuelva a pulsar el botón Secreto cuando desee reanudar la conversación con su
interlocutor.
4.7 Buscar
Para localizar una o más unidades portátiles extraviadas, pulse el botón Buscar en la
unidad base.
• Todas las unidades portátiles asociadas emitirán
una señal y las palabras “BASE->PAGING”
(BASE->BUSCAR) aparecerán en la pantalla.
• Cuando haya localizado la unidad portátil, pulse el botón Colgar/Descolgar para
apagar la señal. No se puede buscar una unidad portátil mientras la misma se
encuentra en uso.
4.8 Activar una unidad portátil (encender)
• La unidad portátil se activa o desactiva pulsando
el botón Power.
• Cuando se activa una unidad portátil, se produce
un sonido de aviso mientras la unidad portátil
enlaza con la base.
MUTED
BASE --> PAGING
SEARCHING FP
4.9 Fuera de cobertura
• Cuando la unidad portátil está fuera de cobertura
o no está asociada a la base, emitirá un sonido
de aviso.
• Si esto ocurre, deberá acercarla o asociarla a la
base. (Refiérase a 5.3 Asociar la unidad portátil a
una unidad base).
28
RANGE OUT
Page 29

Butler 575
4.10 Batería Agotada
• Cuando la batería esté casi descargada se
escuchará un sonido de aviso y el
símbolo de la batería aparecerá en la pantalla.
4.11 Bloqueo de la Unidad Portátil
Cuando la unidad portátil está bloqueada no se pueden realizar llamadas salientes
pero sí recibir llamadas entrantes.
• Para bloquear una unidad portátil, pulse y
mantenga oprimido el botón Bloqueo durante
1 segundo.
• Para desactivar el bloqueo de la unidad portátil, pulse brevemente el botón
B l o q u e o .
4.12 Función CLIP (identificación de llamadas)
Cuando la unidad portátil recibe una llamada telefónica, la pantalla muestra el
número de teléfono del llamante.
4.13 Números de las Memorias
La unidad portátil puede almacenar 10 números telefónicos en las memorias.
LOCK
MULTI 1
4.13.1 Programación de los números de las memorias
Los números de las memorias se programan de la
siguiente forma :
• Marque el número de teléfono.
• Pulse el botón Memory. La letra “M” aparece
después del número en la pantalla.
• Marque el número de la memoria deseada,
por ej. 9.
• Dos segundos después el número de teléfono
aparecerá de nuevo en la pantalla durante
15 segundos para confirmar.
• La unidad regresa al estado de espera.
29
091120010M
MEM 9
091120010
MULTI 1
Page 30

Butler 575
4.13.2 Borrar números de las memorias
Para borrar un número de la memorias, realice lo siguiente:
• Pulse el botón Memory.
Aparecerá “MEM” en la pantalla.
•Pulse el botón Delete (borrar). Aparecerá
“M_CLEAR” en la pantalla.
• Pulse el número de la memoria, por ej. 9.
MEM
M_CLEAR
• La posición seleccionada de la memoria quedará
libre.
• La unidad regresa al estado de espera.
4.13.3 Llamar a un número telefónico almacenado en una memoria
• Pulse el botón Memory.
Aparece “MEM” en la pantalla
• Marque el número de la memoria deseada, por
ej. 9. El número programado aparecerá en la
pantalla.
• Pulse el botón Colgar/Descolgar para marcar
automáticamente el número que aparece en
la pantalla.
También se puede llamar al número de una memoria de la siguiente forma :
• Pulse el botón Colgar/Descolgar.
• Pulse el botón Memory.
• Marque el número de la memoria deseada, por ej. 9.
• El número aparecerá en la pantalla y se marcará automáticamente.
EMPTY
MULTI 1
MEM
091120010
091120010
30
Page 31

Butler 575
5 FUNCIONES
5.1 Unidad Base
Las unidades portátiles se pueden asociar a 4 unidades base diferentes. Cuando se
asocia una unidad portátil a varias unidades base, se puede seleccionar la base con
la que se desea trabajar.
Nota : Si selecciona “BASE NO : AUTO”, la unidad base se buscará automáticamente. Si existen más
de dos unidades base, la unidad portátil seleccionará una al azar. Esto sólo es posible cuando la
unidad portátil está asociada a todas las unidades base.
5.2 Seleccionar la unidad base
• Pulse el botón Función hasta que aparezca “SELECT BASE” (seleccionar la base)
en la pantalla.
• Pulse el botón OK.
• El número de la base aparecerá en la pantalla,
por ej. “BASE NO : 1”.
• Pulse el botón Función.
• Los números de la base aparecerán en la pantalla
“BASE NO : 1 ~ 4, AUTO”.
• Cuando aparezca el número de la base deseada,
por ej. “BASE NO : 2”, pulse el botón OK.
• Supongamos que la unidad portátil ha estado
alguna vez asociada a la unidad base 2 y que la
pantalla de la unidad portátil muestra “MULTI 1”.
Para volver a asociar esta unidad portátil a la
base 2, seleccione la unidad base “BASE NO: 2” y pulse el botón OK. La pantalla
mostrará :“NEW BASE : 2”
SELECT BASE
BASE NO: 1
BASE NO: 2
NEW BASE: 2
Nota : Si la unidad portátil nunca ha estado asociada a la
unidad base 2, aparecerá lo siguiente : “NOT SUB2”.
• La pantalla mostrará “BASE : 2”. Pulse el botón
OK para asociar la nueva unidad base.
• La unidad regresa al estado de espera y aparece
“MULTI 2” en la pantalla.
31
NOT SUB2
BASE: 2
MULTI 2
Page 32

Butler 575
5.3 Asociar la unidad portátil a una unidad base
Para poder hacer y recibir llamadas telefónicas, la unidad portátil tiene que estar
asociada a una unidad base. Sólo se puede asociar una nueva unidad portátil a una
base cuando esta última se encuentra en modo asociar. Pulse y mantenga oprimido
el botón Page (Buscar) durante 15 segundos hasta que escuche un pitido. Ahora la
unidad base se encuentra en el modo asociar.
• Pulse el botón Función hasta que aparezca
“H-REGISTER” en la pantalla.
• Pulse el botón OK.
• La pantalla mostrará “SEARCH BS 1”.
• Pulse el botón Función.
• El número de la base cambiará del 1 al 4.
• Pulse el botón OK cuando la unidad portátil
encuentre el número correcto de la base.
•Cuando la unidad portátil está intentando
localizar la base aparece el código RFPI.
Cada unidad portátil tiene su propio código.
•Cuando aparezca “PIN : “, marque el código PIN
de la unidad base.
H--REGISTER
SEARCH BS 1
00004--00 : AB
PIN:
PIN: ++++
• Pulse el botón OK después de introducir el código
PIN de 4 dígitos.
H--REGISTER
• Se regresa al menú “H-REGISTER”.
5.4 Desasociar una unidad portátil
Se puede deshacer la asociación de una unidad portátil con una base introduciendo
el número de la unidad portátil.
• Pulse el botón Función hasta que aparezca
“BASESET SETTING” en la pantalla.
• Pulse el botón OK.
32
BASE SETTING
Page 33

Butler 575
• Pulse el botón Función hasta que aparezca
“HANDY DESUB”.
• Pulse el botón OK.
• Aparecerá el número de la unidad portátil
en la pantalla.
• Pulse el botón Función y aparecerán los números
2 al 5 de la unidad portátil.
• Cuando el número de la unidad portátil que se va a
desasociar aparezca en la pantalla (por ej.“HANDY NO:2”),
pulse el botón OK.
Nota : Se pueden desasociar todas las unidades portátiles excepto la que está utilizando para desasociar y la
“Multi 1”. Por ej., la unidad portátil número 3 (Multi 3) no puede desasociar a la unidad portátil número 1
(Multi 1) ni a sí misma (Multi 3). Las demás unidades portátiles se pueden desasociar.
5.5 Volumen del altavoz
El volumen del altavoz es regulable. Existen tres niveles predeterminados :
bajo “VOL LOW”, mediano “VOL MIDDLE” y alto “VOL HIGH”. Durante una
conversación telefónica se puede ajustar provisionalmente el volumen con el botón
Volumen .
5.5.1 Ajustar el Volumen del altavoz
• Pulse el botón Función hasta que aparezca
“EAR VOLUMEN”.
• Pulse el botón OK.
HANDY DESUB
HANDY NO:2
EAR VOLUME
• Seleccione el volumen deseado, por ej.
“VOL MIDDLE”
• Pulse el botón OK para confir m a r .
• Se regresa al menú “EAR VOLUME”
(volumen del auricular).
VOL MIDDLE
EAR VOLUME
33
Page 34

Butler 575
5.6 Sonidos de timbre
Se puede seleccionar individualmente el volumen y la melodía del timbre de las
llamadas internas y externas. El de las externas se configura en el menú “H-EXT
RING” y el de las internas en el menú “H-INT RING”. En ambos se selecciona
primero la melodía del timbre y a continuación el volumen. Hay nueve melodías y
nueve niveles de volumen disponibles.
5.6.1 Volumen y Melodía del Timbre para las Llamadas Externas
M E L O D Í A
• Pulse el botón Función hasta que aparezca
“H-EXT RING” en la pantalla.
• Pulse el botón OK.
H--EXT RING
• Cuando aparezca el menú “MELODY”(melodía)
pulse el botón OK.
• La pantalla mostrará la melodía actual
“MELODY 1”.
• Pulse el botón Función. La pantalla mostrará los
números de las melodías desde el 1 al 9 y OFF
( d e s a c t i v a d a ) .
• Seleccione una melodía y pulse el botón OK.
• Se regresa al menú “H-EXT RING”.
V O L U M E N
• Pulse el botón Función hasta que aparezca
“H-EXT RING” en la pantalla.
• Pulse el botón OK.
• La pantalla mostrará “MELODY”.
• Pulse el botón Función.
• La pantalla mostrará “VOLUME”.
• Pulse el botón OK para seleccionar el
menú “VOLUME”.
M E L O D Y
MELODY 1
H--EXT RING
H--EXT RING
M E L O D Y
V O L U M E
34
Page 35

Butler 575
• El volumen actual, “VOLUMEN 1”, aparece en
la pantalla.
• Pulse el botón Función. La pantalla mostrará los
niveles de volumen del 1 al 9.
• Seleccione el nivel de volumen y pulse el
botón OK.
• Se regresa al menú “H-EXT RING”.
5.7 Volumen y Melodía del Timbre Interno
La configuración del volumen y la melodía del timbre de las llamadas internas se
realiza igual que el de las externas. Solamente hay que seleccionar el menú
“H-INT RING”.
5.8 Activar/Desactivar el sonido de las teclas
La unidad portátil se puede configurar para que se produzca un sonido cada vez
que se pulsa un botón.
• Pulse el botón Función hasta que aparezca
“H-KEY CLICK” (sonido de las teclas) en la
p a n t a l l a .
• Pulse el botón OK.
•La configuración actual aparecerá en la pantalla.
• Pulse el botón Función y seleccione una opción.
• Pulse el botón OK para confir m a r .
• Se regresa al menú “H-KEY CLICK”.
VOLUME 1
H--EXT RING
H--KEY CLICK
CLICK ON
H--KEY CLICK
5.9 Melodía del Timbre de la Unidad basen
La unidad base dispone de nueve melodías (1...9) seleccionables.
• Pulse el botón Función hasta que aparezca
“BASE SETTING” (configuración de la base).
• Pulse el botón OK.
• Pulse el botón Función hasta que aparezca
“BASE MELODY”.
• Pulse el botón OK,
35
BASE SETTING
BASE MELODY
Page 36

Butler 575
• La pantalla muestra la melodía actual, por ej.
“MELODY 1”.
• Pulse el botón Función; aparecerán los números
correspondientes a las melodías 1 a 9 y OFF.
Se escucharán las diferentes melodías.
• Seleccione una melodía y pulse el botón OK. Se regresa al menú “BASE MELODY”.
5.10 Volumen del Timbre de la Unidad base
La unidad base tiene 9 niveles de volumen seleccionables.
• Pulse el botón Función hasta que aparezca
“BASE SETTING”.
• Pulse el botón OK
• Pulse el botón Función hasta que
“BASE VOLUME” aparece.
• Pulse el botón OK
MELODY 1
BASE SETTING
BASE VOLUME
VOLUME 1
• La pantalla mostrará el volumen actual, p. ej.
“VOLUME 1”.
• Pulse el botón Función para mostrar los niveles del volumen del 1 al 9.
Se escuchará cambiar el volumen de la unidad base.
• Seleccione un nivel de volumen y pulse el botón OK.
Se regresa al menú “BASE VOLUME” Menú.
5.11 Restricción de llamadas
La unidad portátil se puede programar para impedir que se pueda llamar a ciertos
números telefónicos. Se pueden restringir hasta 5 números (con un máximo de
5 dígitos). Para cada número se pueden seleccionar hasta 5 unidades portátiles.
5.11.1 Activar la restricción de llamadas
• Pulse el botón Función hasta que aparezca
“BASE SETTING”.
• Pulse el botón OK.
36
BASE SETTING
Page 37

Butler 575
• Pulse el botón Función hasta que aparezca
“ B A R R I N G ” ( r e s t r i n g i r ) .
• Pulse el botón OK.
• La pantalla mostrará “FP PIN :” (refiérase a 5.15
Cambiar el Código PIN Principal (unidad base)).
• Marque el código PIN y pulse el botón OK.
Aparecerá en la pantalla el número que ya está
registrado : “NO 1 : 001”. Si no se ha registrado
ningún número, aparecerá “EMPTY”(vacío).
• Marque el número y pulse el botón OK.
El número se puede borrar o modificar pulsando el botón.
•Cuando aparezca “HANDY:“ introduzca los números de la unidad portátil
uno por uno.
• Pulse el botón OK. Se restablecerá el menú “BARRING”.
5.12 Llamada Directa (Babycall)
Esta función permite programar un número específico que se marcará automáticamente al pulsar cualquier tecla. Se puede programar un número de llamada directa
en cada unidad portátil. Las llamadas entrantes podrán seguir contestándose sin
problema.
5.12.1 Programar un número para Llamada directa
• Pulse el botón Función hasta que aparezca
“DIRECT CALL” en la pantalla.
• Pulse el botón OK.
• Marque el número de teléfono deseado, que
aparecerá en la pantalla y podrá
m o d i ficarlo pulsando el botón Borrar .
• Al pulsar el botón OK se activará esta función.
• Si no se ha introducido ningún número, aparecerá
”PHONE NUMBER” en la pantalla.
• Marque el número de teléfono, pulse el botón OK
y se conectará con este número de teléfono.
B A R R I N G
FP PIN:
NO1: EMPTY
DIRECT CALL
0 9 1 1 2 0 0 1 0
PHONE NUMBER
37
Page 38

Butler 575
5.12.2 Desactivar un número de Llamada Directa
Pulse dos veces la tecla Escape (Salir) para desactivar la función llamada directa.
5.13 Código PIN de la unidad portátil
El nuevo código PIN de la unidad portátil sólo sustituirá al actual, si se introduce
correctamente dos veces y no se interrumpe el procedimiento La unidad portátil se
puede reiniciar con el código PIN de origen : 1590.
5.13.1 Cambiar código PIN de la Unidad Portátil
• Pulse el botón Función hasta que aparezca
“H-CHANGE PIN”.
• Pulse el botón OK.
•La pantalla mostrará “PP PIN :”.
• Marque el código PIN y pulse el botón OK.
H--CHANGE PIN
PP PIN:
• Cuando aparezca “NEW PIN” marque el nuevo
código PIN de la unidad portátil y pulse el
botón OK.
• La pantalla mostrará “RETYPE” (repítalo).
• Introduzca otra vez el nuevo código PIN.
• Pulse el botón OK para confirmar y regresar al
menú “H-CHANGE PIN” (cambiar el PIN).
5.14 Código RFPI
Esta función permite ver el código RFPI. Este es el código de identificación de la
unidad base a la que pertenece la unidad portátil.
• Pulse el botón Función hasta que aparezca
“SHOW RFPI” (mostrar RFPI).
• Pulse el botón OK.
• La pantalla mostrará el Código RFPI.
• Pulse el botón OK para volver al menú
“SHOW RFPI”.
NEW PIN:
R E T Y P E :
H--CHANGE PIN
SHOW RFPI
00004--00 1AB
SHOW RFPI
38
Page 39

Butler 575
5.15 Cambiar el Código PIN Principal (unidad base)
El código PIN principal es una parte esencial del sistema y por ello deberá cambiarse
lo antes posible. El número predeterminado de origen es el 1590. El nuevo código
PIN principal sólo sustituirá al actual si se introduce correctamente dos veces y no
se interrumpe el procedimiento indicado.
• Pulse el botón Función hasta que aparezca
“BASE SETTING” (configuración de la base).
• Pulse el botón OK.
• Pulse el botón Función hasta que aparezca
“B-CHANGE PIN” (cambiar PIN de la base).
• Pulse el botón OK.
• La pantalla mostrará “FP PIN :”.
• Introduzca el código PIN actual y pulse el botón
OK. Durante unos instantes aparecerá la palabra
“WAIT” (esperar). Cuando aparezca “NEW PIN”
(nuevo PIN), marque el nuevo código PIN principal.
• Pulse el botón OK. La pantalla mostrará “RETYPE
PIN :” (vuelva a introducir el PIN). Marque el
nuevo código PIN principal por segunda vez.
• Pulse el botón OK para confirmar.
ATENCIÓN : ¡NO OLVIDE SU CÓDIGO PIN PERSONAL!
BASE SETTING
B--CHANGE PIN
FP PIN:
NEW PIN:
RETYPE PIN:
5.16 Reinicio de la Unidad base
La base se puede reiniciar con los valores originales. Al reiniciar la base también se
elimina la asociación de todas las unidades portátiles conectadas.
Existen dos posibilidades :
1: RESET ALL (reiniciar todo)
Unidades portátiles asociadas No hay unidades portátiles asociadas
2: INITIALIZE (inicializar)
Se han reiniciado todos los parámetros predeterminados.
Volumen del timbre de la base Nivel #9
Melodía de la unidad base Melodía #4
Código PIN principal 1590
Restricción de llamadas Se borran todos los números restringidos
y los de las unidades portátiles.
39
Page 40

Butler 575
5.16.1 Restablecer los valores originales de la unidad base
• Pulse el botón Función hasta que aparezca
“BASE SETTING”.
• Pulse el botón OK.
• Pulse el botón Función hasta que aparezca
“BASE RESET :” (reinicio de la base).
• Pulse el botón OK y seleccione el menú
“INITIALIZE”(inicializar).
- Al pulsar el botón OK se borran todos los
valores actuales.
- Al pulsar el botón Función con el menú “RESET
ALL” (reiniciar todo) se borrarán todos los datos
de asociación de unidades cuando se oprima el
botón OK.
•La unidad portátil volverá a mostrar el menú
“NOT SUB” (no asociada) y deberá asociarse de
nuevo a una unidad base (refiérase 5.3 Asociar
una unidad portátil a una unidad base).
5.17 Reinicio de la Unidad portátil
Esta función se usa para reiniciar la unidad portátil con los valores de origen.
Existen dos posibilidades :
BASE SETTING
BASE RESET
I N I T I A L I Z E
RESET ALL
NOT SUB
1: RESET ALL (reinicio total)
Se borra el número de la llamada directa (babycall) y todos los almacenados en
las memorias.
2: INITIALIZE (inicializar)
Se han restablecido todos los parámetros originales de la unidad portátil.
Button click (sonido al pulsar los botones): activado
Volumen del timbre: nivel Nº 9
Melodía del timbre (llamadas externas): melodía Nº 4
Melodía del timbre (llamadas internas): melodía Nº 7
Volumen del altavoz: Medio
40
Page 41

Butler 575
5.17.1 Reinicio de la unidad portátil
• Pulse el botón Función hasta que aparezca
“H-RESET” (reinicio de la unidad portátil) en
la pantalla.
• Pulse el botón OK.
H - - R E S E T
PP PIN:
• La pantalla mostrará “PP PIN :”.
• Marque el código PIN y pulse el botón OK.
• La pantalla mostrará “RESET ALL”
(reiniciarlo todo).
- Para borrar todos los valores, pulse el botón OK.
- Pulsando el botón Función, aparecerá
“INITIALIZE” en la pantalla.
Pulse el botón OK para restablecer los valores
de origen.
• Se volverá a visualizar el menú “H-RESET”.
Nota : Para eliminar la asociación de una unidad portátil, pulse los botones Power e INT a la vez
mientras se desactiva la unidad portátil. La pantalla mostrará “ F -> CLEARSUBS”. Pulse entonces el
botón Función y la unidad portátil dejará de estar asociada a la base. La pantalla indicará “NOT SUB”
(no asociada).
RESET ALL
I N I T I A L I Z E
H - - R E S E T
41
Page 42

Butler 575
Este equipo cumple con la normativa 98/482/EG (TBR 21) que define la conexión pan-europea de un único termi-
nal a la Red Telefónica Conmutada (PSTN). Sin embargo, debido a las diferencias existentes entre las RTC’s individ-
uales de los distintos países, este cumplimiento no significa por sí mismo una garantía incondicional de que vaya a
funcionar correctamente en todos los puntos de terminación de red de las RTC. En caso de problemas, consulte al
r e p r e s e n t a n t e .
La siguiente lista indica las redes telefónicas donde el equipo está diseñado para funcionar y aquellas donde el
equipo puede presentar dificultades de interconexión..
R e d C o m p a t i b i l i d a d R e d C o m p a t i b i l i d a d
A u s t r i a A L u x e m b u r g o A
B é l g i c a A Países Bajos A
D i n a m a r c a A P o r t u g a l A
F i n l a n d i a A E s p a ñ a A
F r a n c i a A S u e c i a A
A l e m a n i a A Reino Unido A
G r e c i a A N o r u e g a A
I r l a n d a C S u i z a A
I t a l i a A
A – el equipo está diseñado para funcionar en la red local
B – el equipo puede presentar dificultades de interconexión en la red local
C – no se ha comprobado la compatibilidad del equipo en la red local
42
Page 43

www.topcom.be
 Loading...