


DTH226

1
Table of contents
EN
Chapter 1: Connections and Setup
Some points to check before you connect ................2
Accessories provided ....................................................2
Inserting batteries in the remote control ..........2
Discs you can play..........................................................3
Basic connections (DVD player + TV) ........................4
Basic connections (DVD player + TV + video
recorder) ........................................................................4
Other connection options ............................................5
Video sockets and cables ........................................5
Audio sockets and cables........................................5
Front panel controls......................................................6
Front panel display ........................................................6
Operating the DVD player ..........................................7
Using the menus............................................................7
The remote control ......................................................8
Navigating through menus ......................................8
Functions in DVD mode ..........................................8
Functions in TV mode ..............................................9
Functions in VCR mode ..........................................9
Chapter 2: Playing discs
Compatible discs ........................................................10
Compatible formats....................................................10
Regional coding............................................................10
Basic playback operations ..........................................10
Playback ....................................................................10
Accelerated play......................................................10
Still image ..................................................................11
Frame advance ........................................................11
Variable slow motion ............................................11
Changing chapter ....................................................11
Zoom ........................................................................11
Scene replay..............................................................11
Info menu ....................................................................12
Direct access................................................................13
Title/Chapter / Track ..................................................13
Screen fit ......................................................................13
Subtitles........................................................................13
Audio ............................................................................14
Play mode ....................................................................14
Bookmark ....................................................................15
Camera angle ..............................................................15
PBC (PlayBack Control) ............................................15
Playing mp3 and WMA music files and displaying
JPEG files ......................................................................16
Displaying JPEG files or playing mp3 or WMA
files..............................................................................16
Playing JPEG and mp3 music files at the same
time ............................................................................17
Chapter 3: Menus
Player menus................................................................18
The Play Mode menu..................................................19
Start............................................................................19
Random play ............................................................19
Program play ............................................................19
AutoPlay....................................................................19
IntroScan ..................................................................19
The Parental Control menu ......................................20
Lock............................................................................20
Password ..................................................................20
Ratings limits ............................................................20
Unrated titles ..........................................................20
The Display menu ......................................................21
TV image ..................................................................21
Front Display............................................................21
PAL/NTSC ................................................................21
The Sound menu ........................................................22
Sound Logic ..............................................................22
Digital output ..........................................................22
Virtual Surround......................................................22
The Languages menu..................................................23
Player Menus............................................................23
Disc Menus ..............................................................23
Audio..........................................................................23
Subtitles ....................................................................23
Chapter 4:Additional Information
Tr oubleshooting ..........................................................24
Precautions ..................................................................25
Use..............................................................................25
Cleaning ....................................................................25
Handling and caring for discs ..............................26
Guarantee ................................................................26
Technical data..............................................................26
DVD copy protection
In accordance with the DVD standard, your DVD player is equipped with a Copy Protection system, which can be switched on
and off by the DVD disc itself, in order to make any recording of the relevant DVD disc onto a videotape of very poor picture
quality, or even impossible.“This product incorporates copyright protection technology that is protected by method claims of
certain U.S. patents and other intellectual property rights owned by Macrovision Corporation and other rights owners. Use of this
copyright protection technology must be authorized by Macrovision Corporation, and is intended for home use only unless
otherwise authorized by Macrovision Corporation. Reverse engineering or disassembly is prohibited.”
2
Chapter 1 Connections and Setup
EN
Some points to check before you connect
• Ensure that the mains supply in your house complies with that indicated on the identification
sticker located on the back of your appliance.
• Install your appliance horizontally, away from any source of heat (fireplace) or appliances
creating strong magnetic or electric fields.The components of this appliance are sensitive to
heat.The maximum ambient temperature should not exceed 35° Celsius.
• Leave sufficient space around the appliance to allow adequate ventilation: 10 cm on either side
and at the rear, as well as 7 cm above the top are ideal.
• The humidity of the room should not exceed 75%. If you have to use the appliance outdoors,
do not expose it to rain or splashing water.The apparatus should not be exposed to dripping
or splashing and no objects filled with liquids, such as vases, should be placed on the apparatus.
•Moving it from a cold environment to a warm one is likely to cause condensation on some
components inside the appliance. Let the condensation disappear of its own accord before
turning the appliance on again.
• Before moving the player, make sure the disc tray is empty.
Other important use and cleaning information at the end of the booklet.
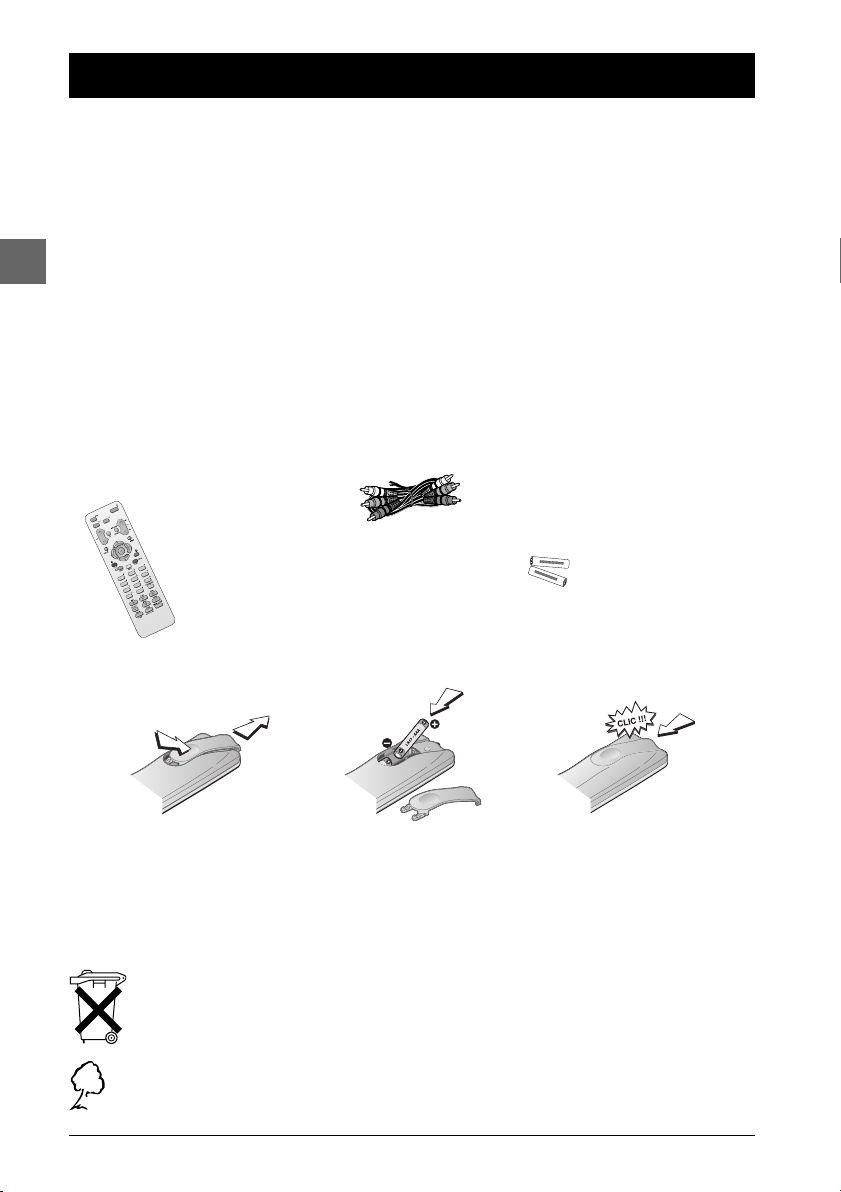
Accessories provided
Audio/video cable
Remote control 2 non-
rechargeable
batteries, type
AAA
Inserting batteries in the remote control
• Do not mix different types of batteries or new and old batteries. Do not use rechargeable
batteries.
• In order to avoid any risk of explosion, observe the polarities indicated inside the battery
compartment. Replace only with the type of batteries specified above. Do not dispose of them in a
fire or recharge them.
• If you are not using the remote control for a long period of time, remove the batteries.
• Please respect the environment and prevailing regulations. Before you dispose of
batteries or accumulators, ask your dealer whether they are subject to special
recycling and if they will accept them for disposal.
Out of consideration for the environment, we have printed this document on unbleached
recycled paper.
-
+
-
+
1
3
2
Connections and Setup
3
EN
Discs you can play
While advances have been made to ensure that your disc player is compatible with the largest number of discs
possible, it cannot be guaranteed that you will be able to play discs which might not be compliant with audio CD,
VCD and SVCD standards. In the case of writable and rewritable discs, compatibility with this player depends on the
DVD writer, the write software and the disc used.
DVD-Video
Digital video discs - 12 cm and 8 cm, single or double sided, single or dual layer. DVDs are high-density optical discs on
which high quality picture and audio are recorded by means of digital signals.
DVD-R, DVD-RW, DVD+R, DVD+RW
Most DVD-R and DVD+R (one recording only), DVD-RW and DVD+RW discs (rewritable). Depending on the
DVD writer and discs used. Recordings using DVD-R and DVD-RW discs must be made in Video DVD mode.
Recordings using DVD+RW discs must be made in accordance with the specifications for DVD+RW discs with a 4.7 GB capacity.
VCD - Video Compact Disc
CD on which you can record up to 74 min. of VHS-quality video associated with still images, audio tracks and
interactive menus.
SVCD - Super Video Compact Disc
Most SVCDs comply with the IEC62107 standard. SVCDs can be used to record up to 70 minutes of digital sound and images in
accordance with MPEG-2 standards for video and MPEG-1 standards for audio.
Audio CDs
Audio CDs (8 and 12 cm).
CD-R, CD-RW
Most CD-R (one recording only) and CD-RW discs (rewritable).
This player can play most CD-R discs. CD-Rs written during a multisession recording can also be played, provided that the
session has ended before the disc is played (depending on the write software). However, depending on the condition of the CD-
writer, computer and the disc used, you may find that not all discs will play successfully. When playing a CD-R disc, it is completely
normal for the unit to take up to 20 seconds to recognise the disc before starting to play. If the disc is not recognised after a
period of 20 seconds, remove the disc, and then insert it again.
• Irrespective of the actual recording capacity of the CD-R, do not use its full capacity. • CD-Rs should be preferably used instead
of CD-RWs (rewritable CDs) as, in certain cases, CD-RW playback may be faulty. • Use reliable, good-quality CD write software.
• Close all other applications on the computer to ensure reliable CD-R disc recording.
mp3 files
CD-R and CD-RW discs containing audio files in mp3 format. As for CD-R mp3 discs, please follow all the
recommendations for CD-R above, along with the comments below:
• Your mp3 files should be ISO 9660 or JOLIET format. ISO 9660 format and Joliet mp3 files are compatible with Microsoft’s DOS
and Windows, as well as with Apple Mac.These two formats are the most widely used. • mp3 filenames should not exceed 12
characters, and should end with the “.mp3” extension. General name format: Title.mp3. When composing your title ensure that you
use 8 characters or less, have no spaces in the name, and avoid the use of special characters including ( . , / , \ , = ,+).• Use a
decompression transfer rate of at least 128 kB/sec (kilobytes/second) when recording mp3 files. Sound quality with mp3 files
basically depends on the rate of compression/decompression you choose. Obtaining audio CD quality sound requires an
analog/digital sampling rate, that is conversion to mp3 format, of at least 128 kB/sec and up to 160 kB/sec. Choosing higher rates,
such as 192 kB/sec or more, only rarely produces even better sound quality. Conversely, files with sampling rates below 128 kB/sec
will not play properly. • Do not try recording copyright-protected mp3 files. “Securized” files are encrypted and code-protected to
prevent illegal copying.You must not copy such files.
Important:The above recommendations cannot be taken as a guarantee that the DVD player will play mp3
recordings, or as an assurance of sound quality.You should note that certain technologies and methods for mp3 file
recording on CD-Rs prevent optimal playback of these files on your DVD player (i.e. degraded sound quality and
even, in some cases, inability of the player to read the file).
JPEG files
CD-R and CD-RW with JPEG files. Certain JPEG files, including progressive JPEG files, cannot be read by this player.
WMA files
CD-R with WMA files.
NTSC playback on 60Hz PAL TV set
In addition to the PAL DVDs and VCDs, you can enjoy your NTSC films as well (a 60 Hz PAL compatible TV set is required).
DVD+Rewritable
Connections and Setup
4
EN
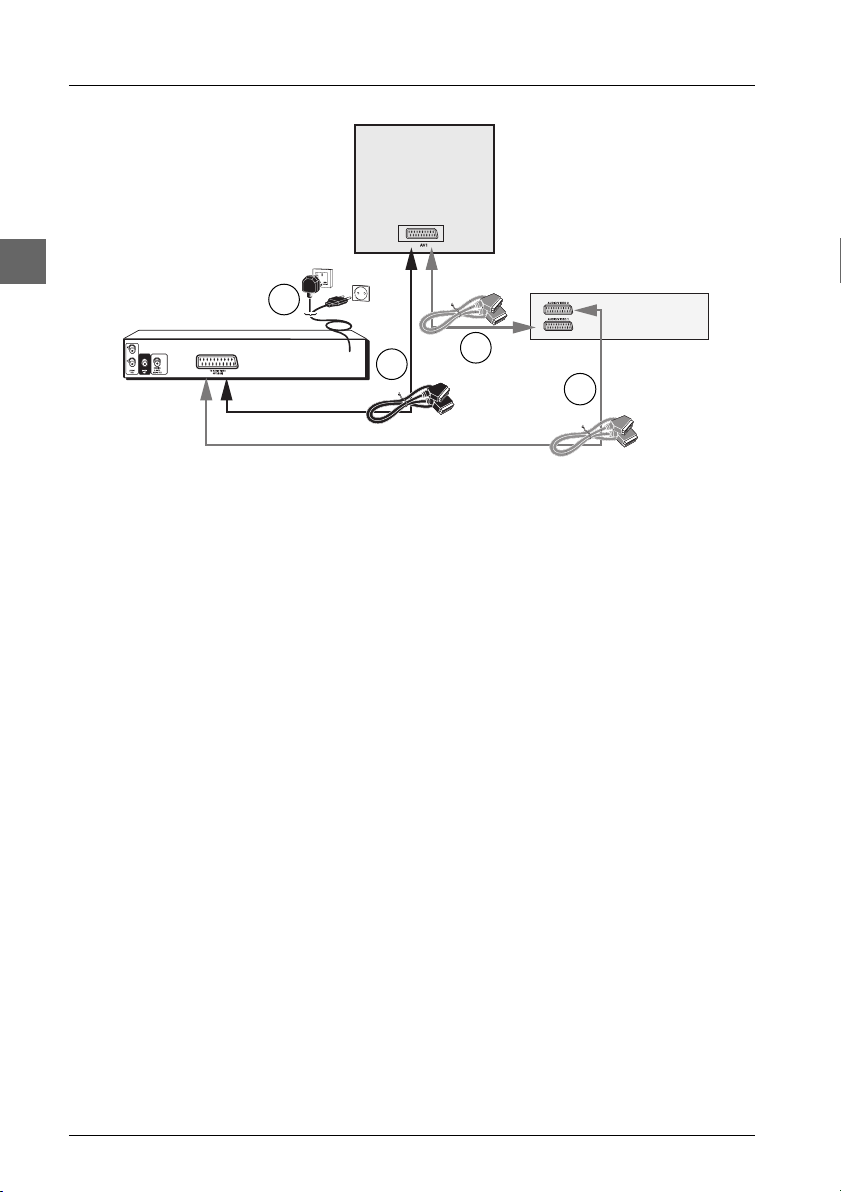
Basic connections (DVD player + TV)
1. Connect the DVD player’s Scart socket (TV AUDIO VIDEO OUT) to the television set’s
Scart socket (AV1 , EXT1, AUX1, according to the make) using a Scart lead (not provided).
2. Connect the DVD player to the mains socket using the mains lead.
Basic connections (DVD player + TV + video recorder)
1. Connect the DVD player to the television set:
1a. Connect the DVD player Scart socket (TV AUDIO VIDEO OUT) to the television
set’s Scart socket (AV1, EXT1, AUX1) using a Scart lead (not provided).
- OR -
1b. If your television set does not have two Scart sockets, connect the DVD player to the
video recorder’s AV2 socket using a Scart lead (not provided). If you have a satellite or
cable receiver you can also connect the DVD player to the receiver’s second Scart
socket.
Notes:
Depending on the video recorder or satellite or cable receiver, this type of connection may affect the quality
of the pictures produced by the DVD player.
If your video recorder only has one Scart socket, but has a modulator, use the aerial cable to connect the
video recorder to the television set, adjust the video recorder’s modulator, then connect the DVD player to the
video recorder’s Scart socket.
2. Connect the video recorder (or satellite receiver) to the television set as shown in the user
guide.
3. Connect the DVD player to the mains socket using the mains lead.
4. Switch on the devices.
Note: If one of the devices is not working, check that all the cables have been inserted properly into the
sockets which they should be connected to.
2
1a
1b
3
Television
set
Video recorder
DVD player
Scart leads not
provided
United Kingdom,
Ireland
Continental
Europe
Connections and Setup
5
EN
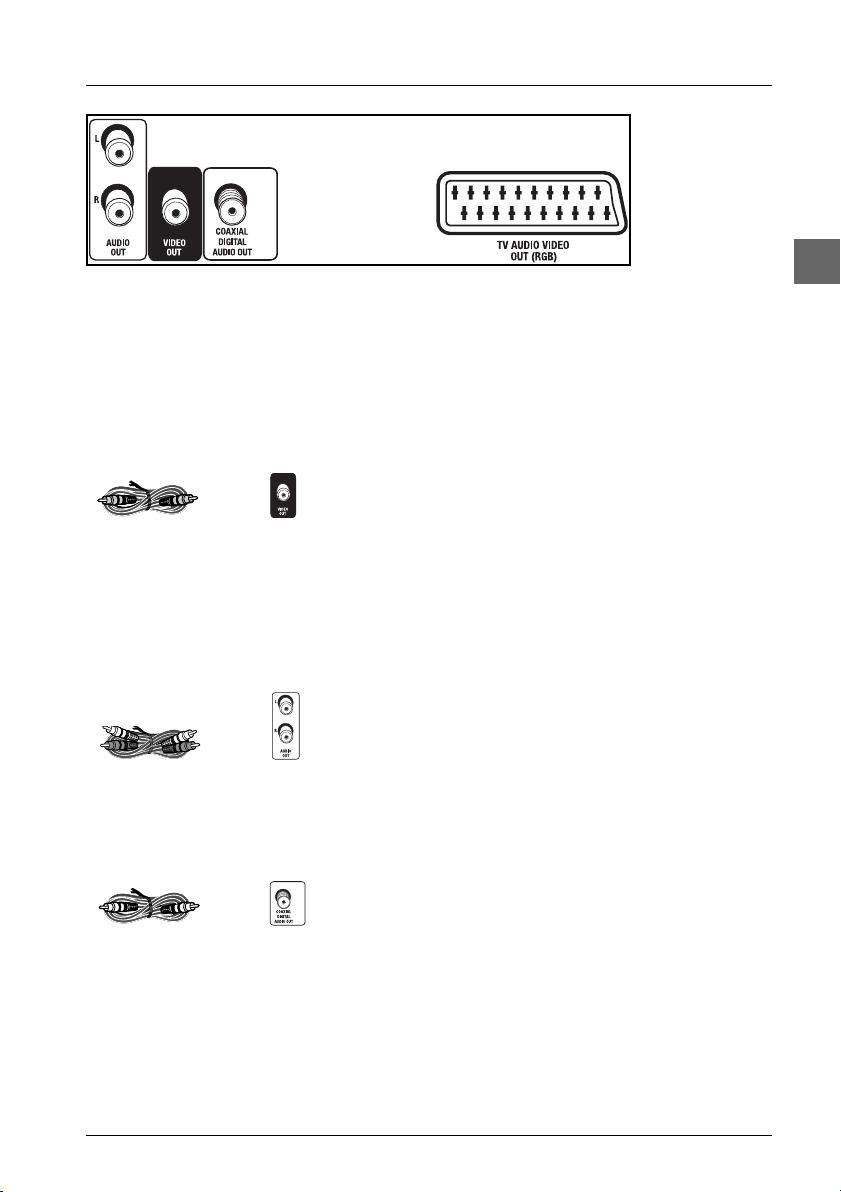
Video sockets and cables
VIDEO OUT socket
This socket (yellow) is also known as a composite video
socket.The video cable (provided) usually comes with
two audio cables (white and black).The picture quality
obtained using a video connection is poorer compared
to that obtained using a Scart connection.
Audio sockets and cables
AUDIO L (left) and AUDIO R (right) sockets
These are analogue audio output sockets.The AUDIO L
socket and cable are white, while the AUDIO R socket
and cable are red. Connect the DVD player’s AUDIO L
and R sockets to the television set’s AUDIO L and R
sockets using audio cables (provided).
Note: If your television set only has one audio socket connect
it to the DVD player’s left socket (white).
Coaxial digital audio output (COAXIAL DIGITAL AUDIO
OUT)
This socket offers a higher level of sound quality
compared to that provided using an analogue audio
connection.The coaxial cable is not supplied with the
device.
Other connection options
The basic connections (described on page 4) are for standard-quality sound and high-quality
picture reproduction. There are other connection options available, which can produce pictures
and sound of better or poorer quality:
Back of DVD
player
VIDEO OUT socketVideo cable (yellow)
Coaxial cable
Audio cables (red
and white)
AUDIO R and L
sockets
Coaxial digital
audio output
Connections and Setup
6
EN
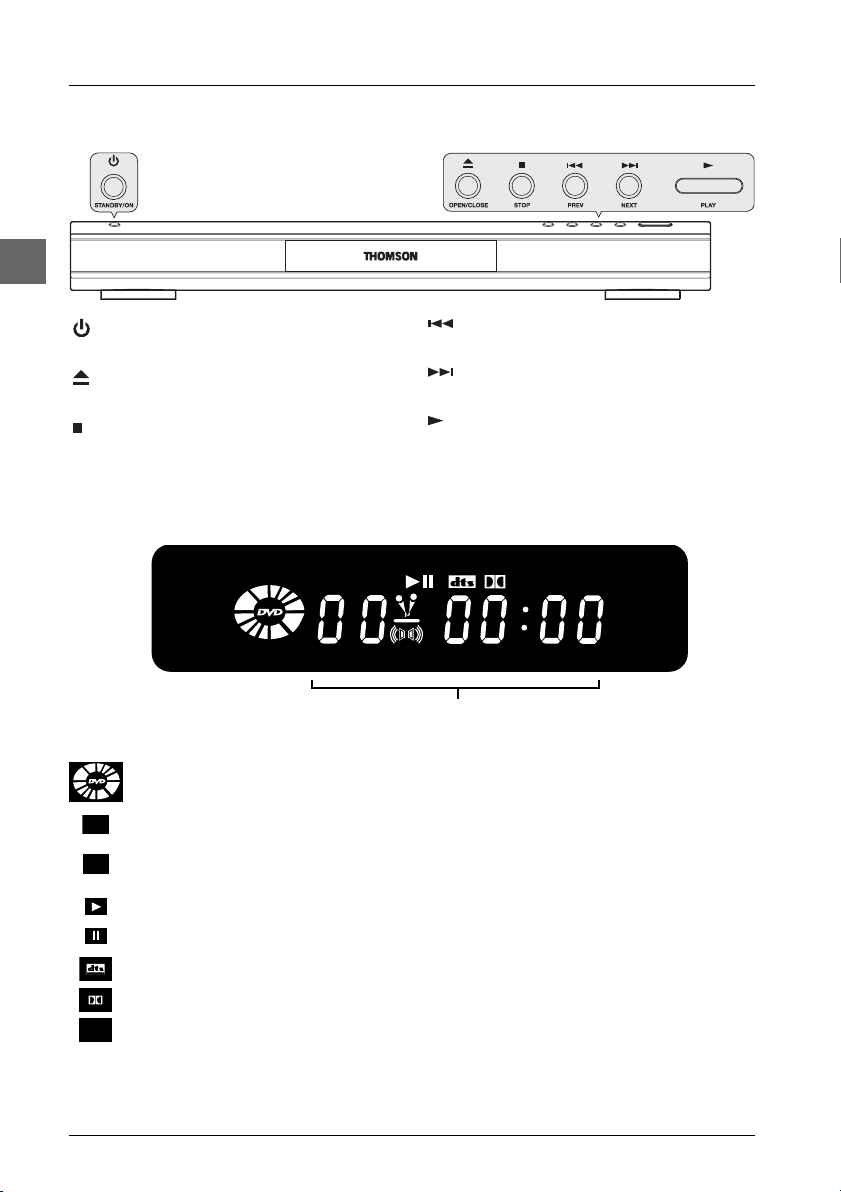
Front panel controls (buttons appear left to right below)
Front panel display
Elapsed time:
- DVD in hours, minutes, seconds
- audio CD in minutes and seconds.
Appears when a disc is loaded. The speed and direction show the play mode
of the disc.
Appears when a VCD with PlayBack Control is loaded.
Indicates the type of disc loaded: CD (audio CD),VCD (Video CD), SVCD
(Super Video CD).
Appears when a disc is being played.
Appears when a disc is in pause.
Appears when the sound is in DTS.
Appears when the sound is in Dolby Digital.
Appears when an mp3 disc is loaded.
PBC
SVCD
MP3
PBC
SVCD
MP3
STANDBY/ON - Switch the appliance on
and off.
OPEN/CLOSE - Open and close the
DVD player's disc tray.
STOP - Stop disc playback.
PREV - Start a reverse search for a
chapter or a track.
NEXT - Start a fast forward search for a
chapter or a track.
PLAY - Start playing a disc.

Connections and Setup
7
EN
Operating the DVD player
1. Switch on your television set.
2. Press the DVD button on the remote control. Press the button on the remote control or
the button located on the DVD player’s front panel.
3. When the player first comes on a menu appears
asking you to select the player menu language. Select
the language you want using the or button,
then press
ok.
Using the menus
• Disc menu – The appearance and contents of this menu vary according to the type of disc
you have inserted and are independent of the player’s menus.When the disc is playing press
the
MENU button to display and hide this menu.
• Info menu – The player’s Info menu appears as a bar at the top of the screen while the disc
is playing. During this time, press the
INFO button on the remote control to display and hide
the Info menu.
• Player menu – If no disc has been inserted the player menu appears automatically. If a disc is
being played press the
STOP button to access this menu.
Note: A function is only available if it features on the disc you have inserted. For instance, if you select the
Subtitles function from the Info menu subtitles will only appear if subtitles have actually been provided on
the disc. If a menu or icon appears greyed out this means that this menu or the associated function is not
available.
Select a menu language
Sélect. langue de menu
Seleccione idioma menu
Menüsprache auswählen
Selez. lingua dal menu
Välj ett menyspråk
English
Français
Español
Deutsch
Italiano
Svenska
Connections and Setup
8
EN
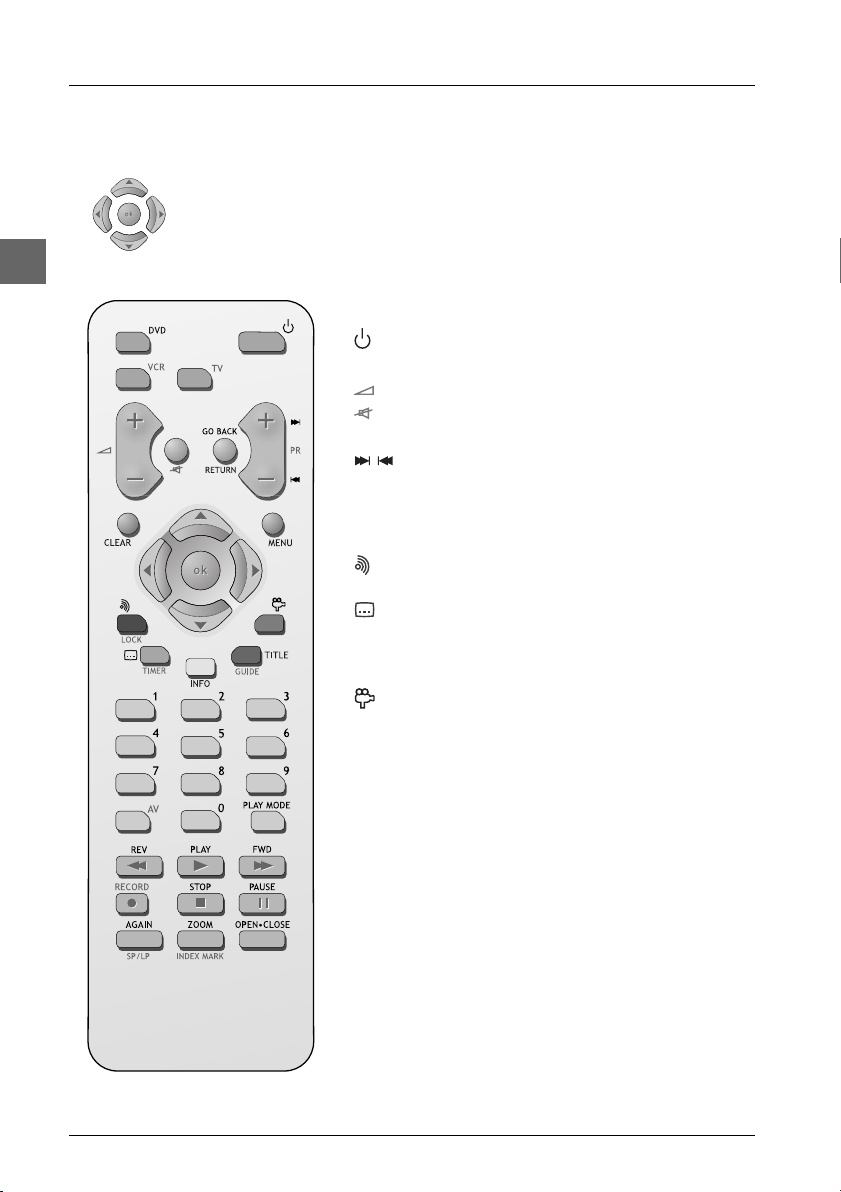
The remote control
Navigating through menus
Use the direction buttons to navigate through the menus. Press the ok button
on the remote control to confirm any selection you make.
Functions in DVD mode
Switch the appliance on and off.
DVD Select the DVD player.
Adjust the sound volume of the television set.
(mute) Mute and restore the sound of the television set.
GO BACK Return to the previous menu.
Directly access the next or previous chapter
(DVD) or track (CD).
CLEAR Hide the
Info
menu.
MENU Access the disc menu during play (if there is one)
or resume play.
(red) Access the audio function of the
Info
menu (see
page 14).
(green) Access the subtitle function of the
Info
menu
(see page 13).
INFO (yellow) Access the
Info
menu (see page 12).
TITLE (blue) Access the disc menu.
(purple) Access the camera angle function of the
Info
menu (see page 15).
0-9 Number entry.
PLAY MODE Access the play mode function of the
Info
menu
(see page 14).
REV Start fast reverse, reverse accelerated play or
reverse slow motion (see pages 10 and 11).
PLAY Start playing a disc.
FWD Start fast forward, forward accelerated play or
forward slow motion (see pages 10 and 11).
STOP Stop play, accelerated search or slow motion and
access the main menu.
PAUSE Freeze frame, frame advance or slow motion (see
page 11).
AGAIN Move backwards approximately 10 seconds
during disc playback (DVD).
ZOOM Access the Zoom function (see page 11).
OPEN
.
CLOSE Open and close the disc tray.
 Loading...