

Page 1
Page 2
BY THE EDITORS
OF
CONSUMER
GUIDE®
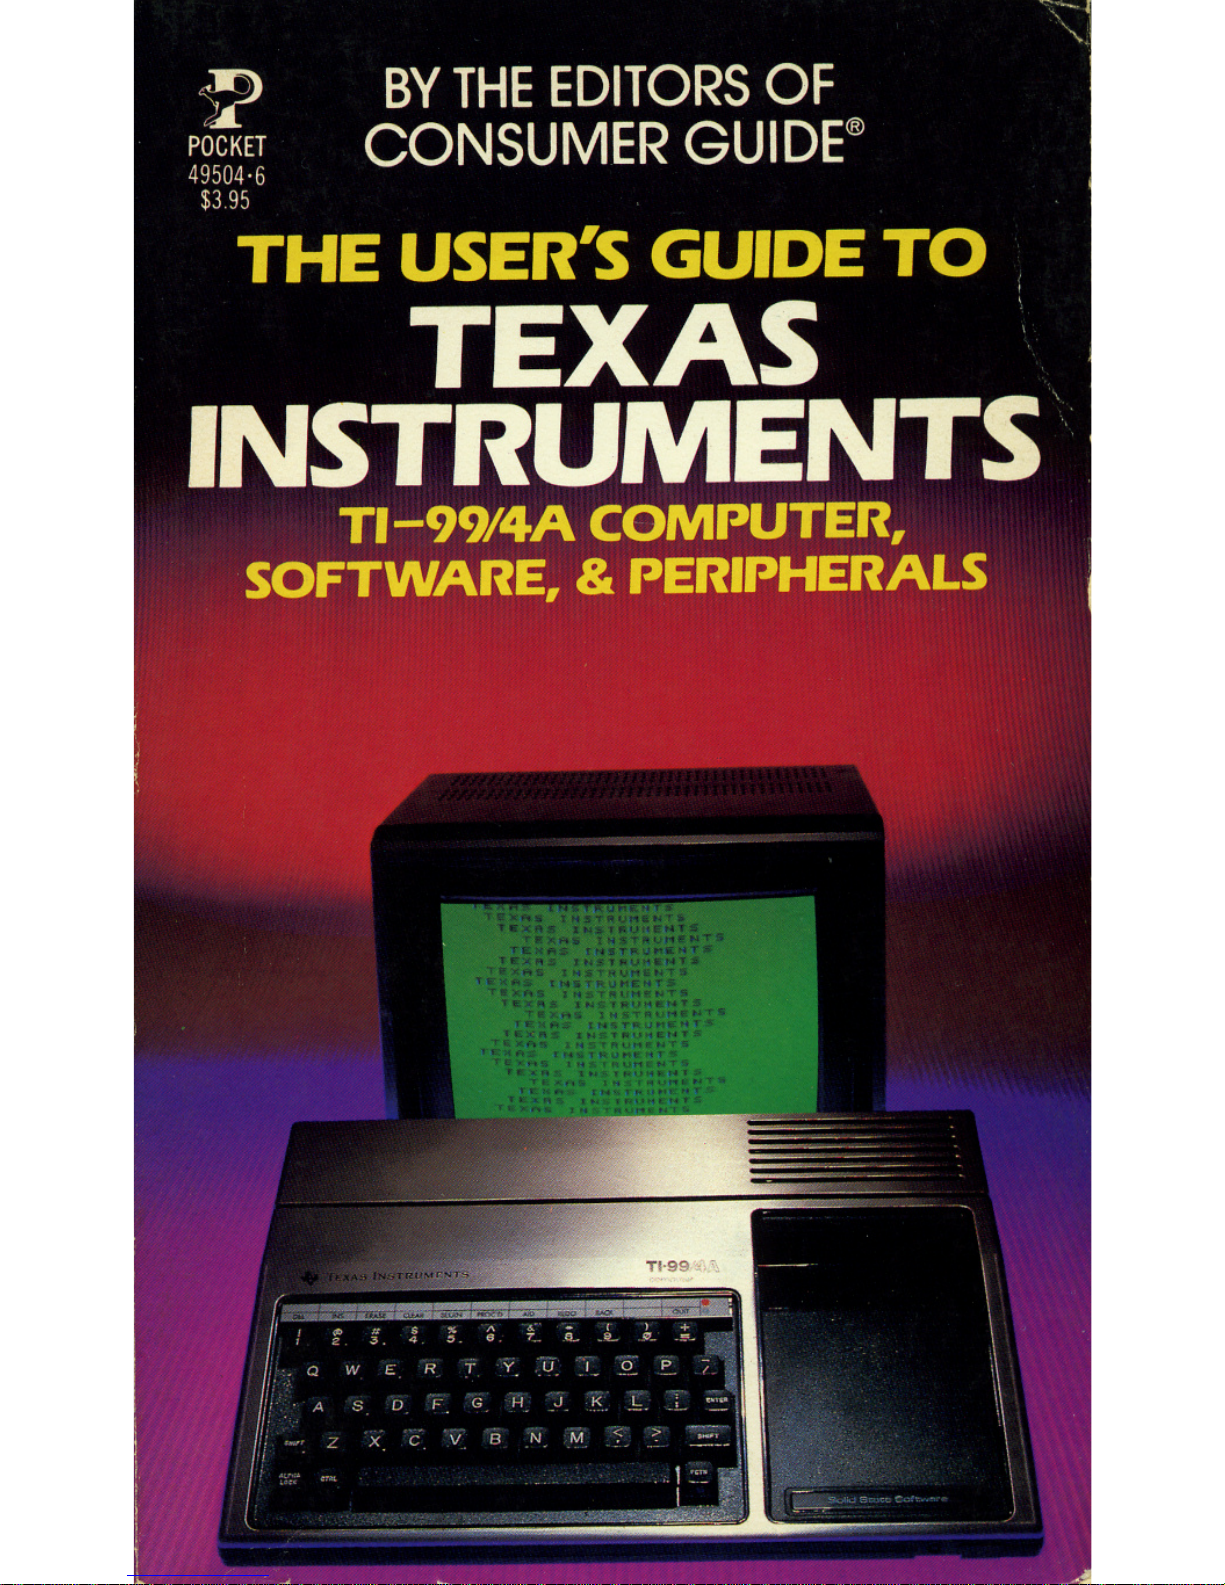
THE
USER'S
GUIDE
TO
TEXAS
INSTRUMENTS
TI-99/4A
COMPUTER,
SOFTWARE,
&
PERIPHERALS
Another Originalpublicationof POCKET BOOKS
4^^JJ
POCKET
BOOKS,
a
divisionofSimon
&
Schuster,
Inc.
j^^
1230
Avenueofthe
Americas
C^ML
New
York,
N.Y.
10020
Copyright © 1933by Publications International,
Ltd.
All rights reserved, including the right to reproduce
this
book
or
portions
thereofinany
form
whatsoever.
For
information
address
Pocket
Books,
1230
Avenue
of
the
Americas,
New
York,
N.Y.
10020
ISBN:
0-671-49504-6
First
Pocket
Books
printing
December,
1983
10
987654
3
21
POCKET
and
colophon
are registered trademarks
of
Simon
&
Schuster,
Inc.
Printed
in
the
U.S.A.
Page 3
CONTENTS
CHAPTER
1
WELCOME
TO
HOME
COMPUTING
4
Byusing this book to learn about your
system, you will be well on the way to
many happy hours of home computing.
CHAPTER
2
GETTING
STARTED
9
You'll
learn about
what
you need to
assemble your basic computer system.
Then you'll go step-by-step through the
details of setting it up.
• Troubleshooting Guide
CHAPTER
3
MEET
THE
KEYS
42
Each and every key on your keyboard
is presented here, complete with
exercises to teach you
how
the keys
work. Detailed photographs
show
you
how
your
screen will look as
you
work
through
the
exercises.
CHAPTER
4
PERIPHERALS-
EXPANDING
YOUR
SYSTEM
is?
So
you
want
your
new
system to do
even
more
for
you?
Here's
the
background information you need to
decide
what
additional equipment you
might
want
to buy.
Page 4
CHAPTER
5
SOFTWARE
177
Software programs also expand your
system's capabilities. Here are some
software packages you might use
for
various kinds
of
purposes.
CHAPTER
6
YOUR
COMPUTERS
NETWORK
221
Many
resources
are
available
to help
you get the most
from
your computer
system.
You
can
share
all
sorts
of
information
with
other
computer
users
and
with
national information
banks
as
well
Page 5
CHAPTER
1
WELCOME
TO
HOME
COMPUTING
Congratulations on owning your
new
Texas
In
struments TI-99/4A Home Computerl Ifthis is
your.first experience in
the
world of
home
com
puters, you willdiscoverthatyour computer
opens
a
new
world
of
entertainment
and
educa
tionto you. Ifyouare upgrading
fromaless
ex
pensive computer, you'll find
that
the
TI-99/4A
offersexpansion capabilities
that
willserve
the
needs of many home computer enthusiasts, from
the noviceto the advanced programmer.
You
will quickly notice
that
the
TI-99/4Ais
de
signedto be easy to
use.
Andyou'llundoubted
ly
find
manyusesforyourcomputer;
precisely
whatthose usesare
will
depend onyour inter
ests. Inlearningto useyour
TI-99/4A,
you'll be
come
familiar
with theuse ofyour computer in
particular,
and computers
in
general.
Becoming
familiar
withcomputers
(i.e.,
becoming
comput
er
literate)
isoneof the primarybenefits of
owningahome
computer.
Page 6
A littleof
the
basicshelps us begin to realize
just
howuseful computers canbe.A computer, after
all,
isan electronic device that has
the
abilityto
process
data.If"process
data"
soundstootech
nical,
think of it this way: each time
you
look up
anaddressand phone numberoradd
all
ofthe
month's
bills
together,you areprocessing data.
When you worry overyourtax
form
each
year,
you areprocessing data.When you type a term
paper
ora
letter
and
retype
itto
correct
mis
takes,you
are
processing
data
(processing
words,
specifically).
A computercanhelpyou
perform
all
of these tasks—and more.
With the ability to store and
recall
electronic
files,
you canuseyourcomputer
for
countless
household chores. Keepingclose track of med
ical,
dental, insurance,and automobile mainte
nance
records
arejust some ofthe possibilities
that
come
to
mind.
Tracking
home finances isone of the most pop
ularapplications forhome computers. Youcan
examine your
budget
planexpenses, and pro
jectyour
financial
future based on expected
salaryadjustments and inflation. Ifyou are con
sidering
the
costs
ofanew
home,
you
can
use
the computerto calculate
real
estate
financial
values and provide comparisons
between
hous
ing choices.Youcan alsocalculateexact pay
mentson loans, adjusting fordifferent interest
rates.
And
at
the
end
of
the
year, during
your
annual
income
tax
planning ritual,
you
can
use
your computer inthe roleof tax accountant
Page 7

Education isone of the most exciting areas
for
personal computer use, particularlyforyour
TI-99/4A. The educationalsoftware packages
available foryourcomputer number in
the
hun
dreds—at levels
from
preschool to college.
Programs
areavailable
for
spelling,
grammar,
reading concepts, mathematics, history,music,
foreign
languages, and other subjects. Much
of
the
educational
software
available
comes
in
a question-and-answer
drill
format:
you respond
to
questions
posed
on
the
screen,
and
the
com
puter monitors your answers. Some programs
take the formof interactive simulations:
you
are
placed in a situation
(say,
the Battleof Gettys
burg) so
that
you
can learn
about
the
event. The
wide
array
of
educational software
on
the
mar
ket
for
the TI-99/4Awillcontinue to grow asthe
popularity
of
educational
software
increases.
Games and hobbies alsoadapt to computeriza
tion. Inaddition to the video games you can
play
on
your
TI-99/4A,
there
are a
number
of
thinking games and simulation games. Sim
ulations
of
popularsports
such
as football
and
soccer, along
with
common board games such
aschess and checkers, can be played using
the
computer.
Page 8
Your
computer caneven expandyour horizons
bytapping into
information
networks—with
the use of atelephone. Information networks .
offer
the
latest
news,
stockexchange prices, air
line
schedules,
electronic classified ads,
and
national
restaurant
and
movie
reviews.
Some
servicesof this type even offer electronicshop
ping
and
banking.
With appropriate software and peripherals
(accessories), allof these applications are
now
available to you.
This
text providesthe informa
tionyou'll need to choose the rightsoftware
and
accessories for
whatever
you
want
to
do.
Many people areunder
the
impressionthatto
useahome
computer
they
have
to
become
pro
grammers,
but that is
far
from
the truth.
You'll
findthat using your computer iseasierthan
you
ever
dreamed.
For
example,
your
computer
uses
plug-incartridges asa
form
of software. Allyou
have
to
do is insert
the
cartridge into a slot,
and
thecomputer isreadyto perform.The software
iseasyto use because it presentsyou with a list
of
choices. By simply following
the
step-by-step
instructions outlined
on
the
screen,you'll find
that
commercial software packages require
no
programming
knowledge
at
all.
Page 9
Ifyou
want
to learn programming, you have
that
option, too. The programming language
called
BASIC
is built into
your
computer,
allow
ing you to write your
own
programs and save
them on cassette or floppy disk. The
16K
mem
ory
that
isa
standard
feature of
your
TI-99/4A
provides ample
storage
for
the
novice to inter
mediate programmer. And
your
computeris
capable of using many additional programming
languages, including Extended
BASIC,
Pascal,
Logo,
and
Assembly Language.
Whether
you
are a first-time
computer
owner
or
one
who
istrading up from a basic learning
computer,you'll find
that
you
have
a powerful,
expandable
home
computer
in
your
TI-99/4A.
The purpose of this text isto help you
get
max
imum use
out
ofyour
new
computer.
Page 10
CHAPTER
2
GETTING
STARTED
To
get
the
most fromyour
new
computersys
tem, you must take
the
time to become ac
quainted with itsparts.
Every
system includes
some basiccomponents: the computer, a moni
tor
or
television
set
to
connect
to
the
computer
as a means of display, and software to use with
the computer. Inaddition to these basic parts,
you mayhave purchasedsomeperipherals such
as a set ofjoysticks,a cassette recorder or disk
drive system, and the cables needed to connect
these
items
to
your
computer.
The heart ofyour computersystem is
the
TI-99/4A Home
Computer
Console, which
con
tains the keyboard, a slot forthe use of cartridge
software,
and
a built-in version of
the
BASIC
computer programming language. Inthe box
with your HomeComputerConsoleisthe Video
Modulator
(a TV
adapter
which
allows
you
to
connect
the
computerto a television set). Also
packed with your computershould be
two
books:
User's Reference Guide
and
Beginner's
BASIC
both supplied by
Texas
Instruments. A
separate Power Supply
that
connects to
the
computer completes
the
basic computersystem.
Beforeyou
set
up your computer, let's take a
tour.
Page 11
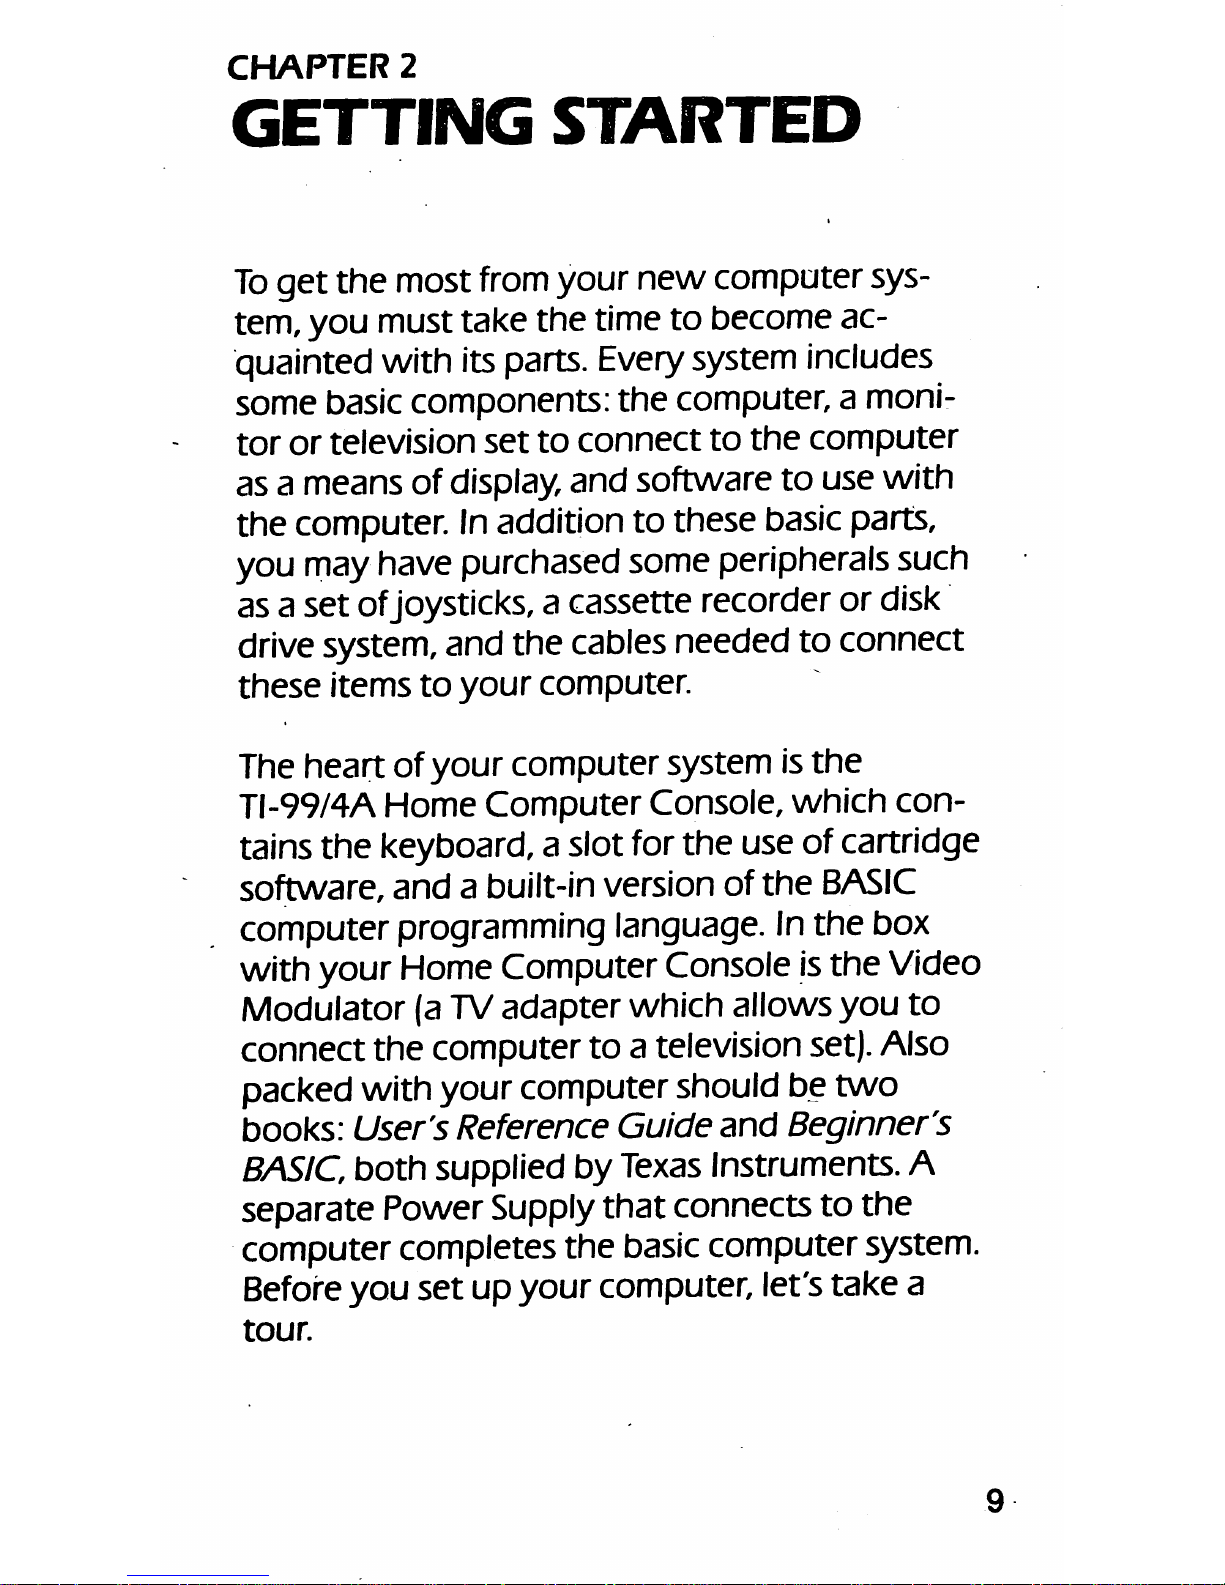
TI-99/4A
computer
(front
view)
On the front of the computer, at the right side,
are
the
Power
On
switch
and
the
Power
Indica
tor
Lamp. Sliding
the
Power
On
switch
to
the
right
turns
your
computer
on.
10
Page 12
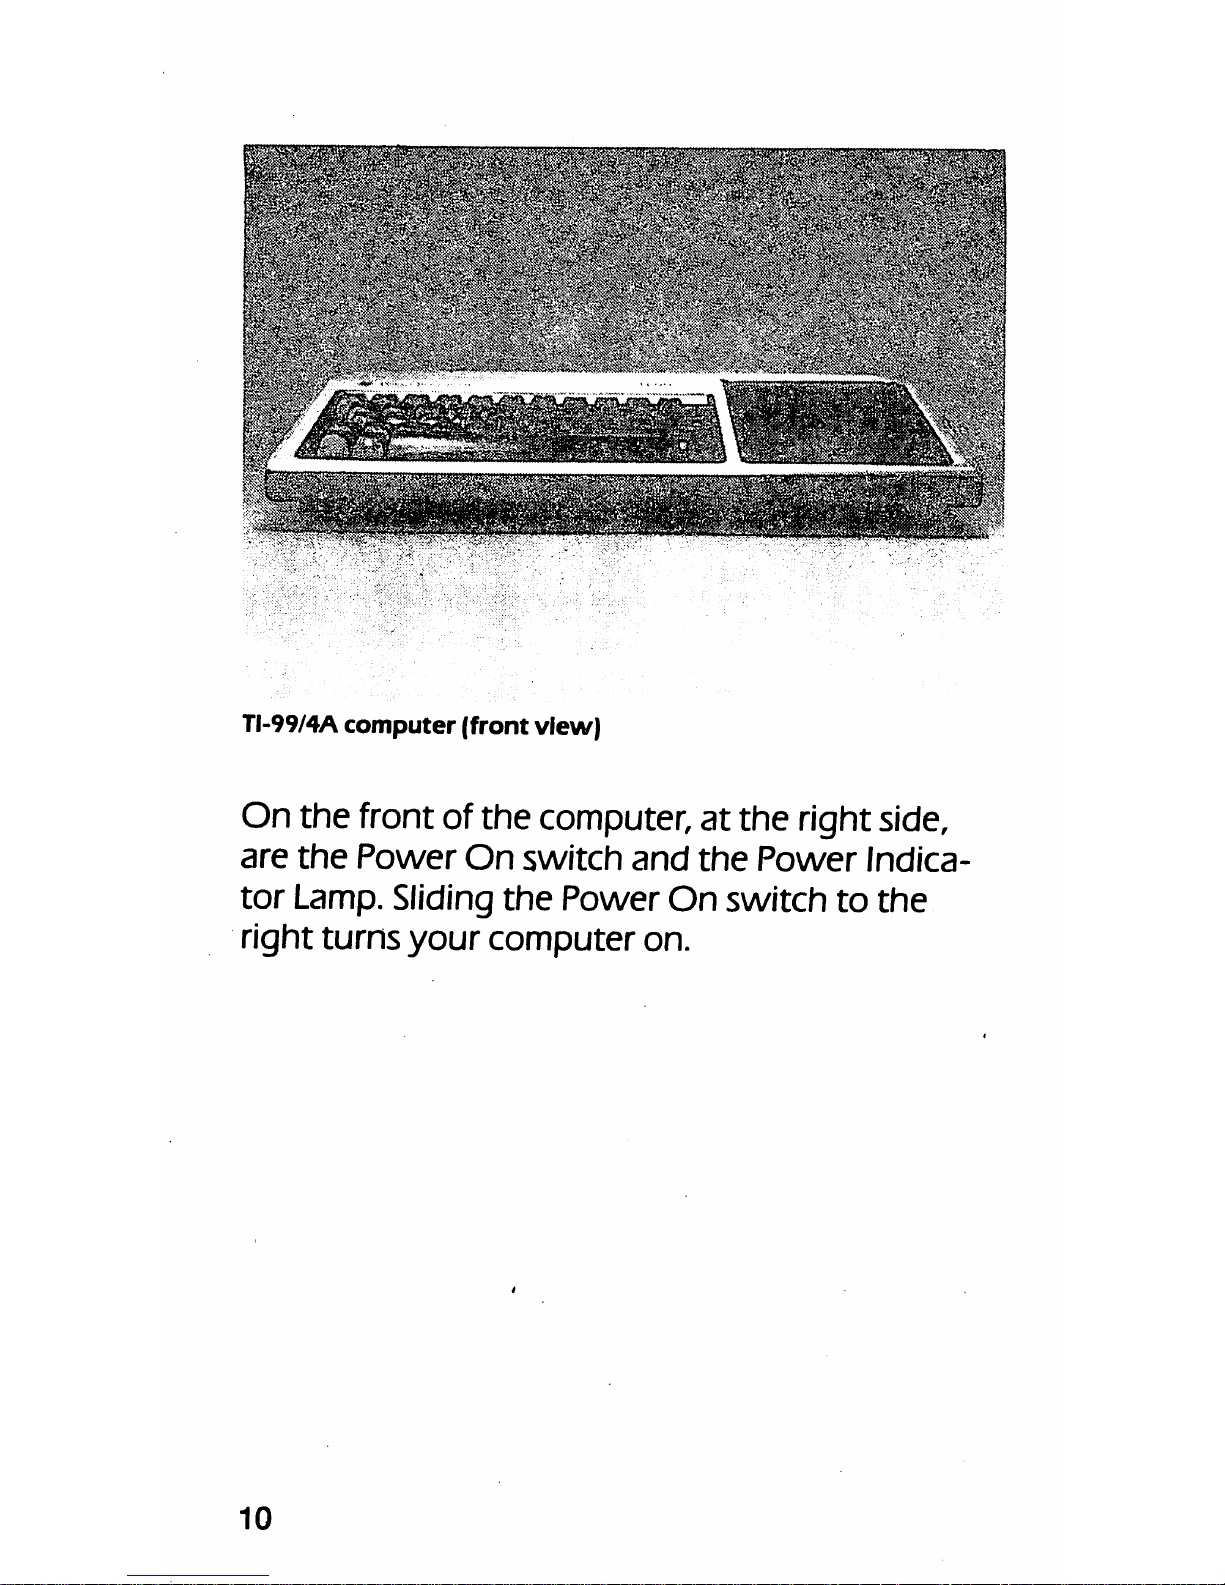
TI-99/4A
computer
(right
side
view)
On
the
right side of
the
computer isa slot
that
iscovered by a sliding door. Thisslot houses
the
Expansion Connector.
You'll
use this connector
to attach many peripherals (but more
about
that
later).The door
that
covers
the
Expansion Con
nector
should
remain
closed
when
the
connec
torisnot
in use. (And
you
should be careful
not
to
touch
the
metal pins
on
the
Expansion
Con
nector;
delicate
circuits
inside
the
computer
can
be
damaged
by static electricity if
you
touch
these
pins.)
11
Page 13
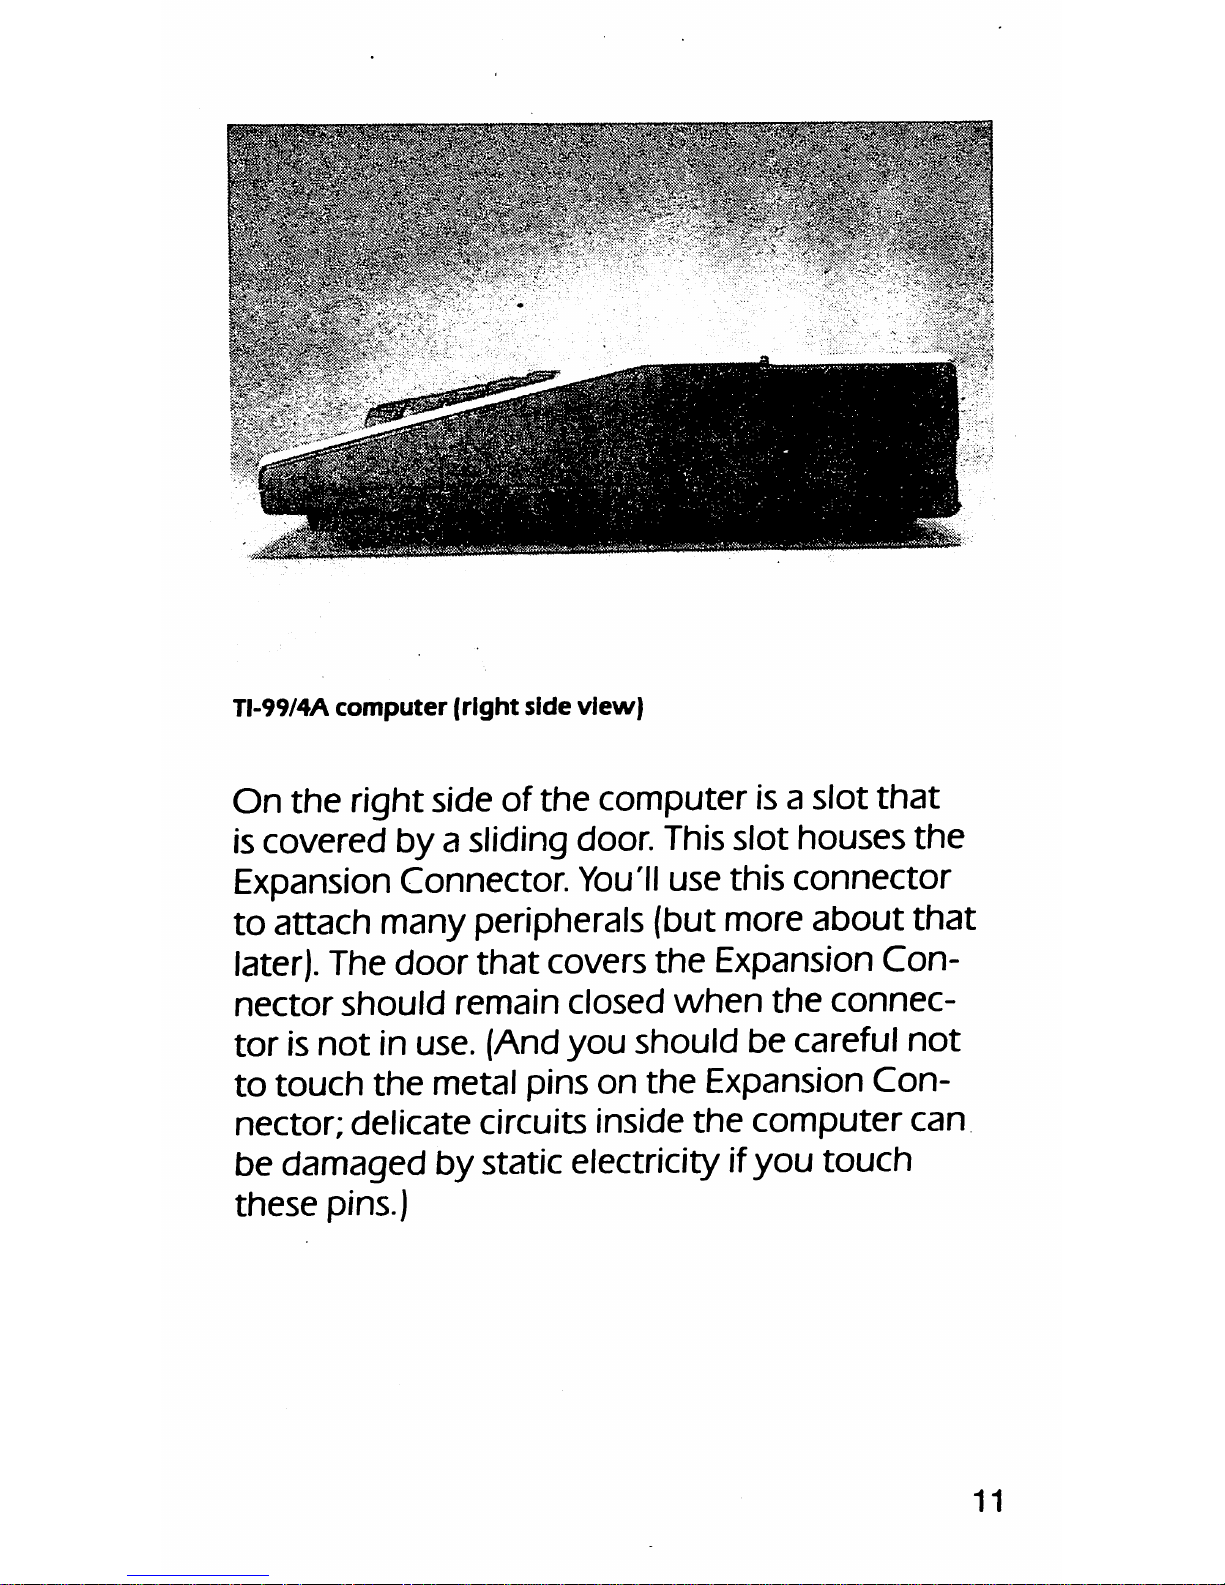
TI-99/4A
computer
(left
side
view)
On
the
left side of
the
computer is
the
Game
Controller Port;it has nine littlepins.
This
is
where
you
plug injoysticks
when
you
want
to
play
games.
12
Page 14

TI-99/4A
computer
(rear
view)
On
the
rear
of
the
computeryou'll find
three
more
connectors.
The
connector
on
the
left
rearof the computer, resemblingthe Game Con
troller Port, is
where
you
attach
the
Cassette
Recorder Interface Cable. Next,
to
the
right, is a
connector
with
four pins;here
you
plug in
the
Power Cord.
Finally,
on
the
right rearof
the
com
puterisa
circular
connector(with
five
pins).
This
iswhere you connect your video monitor or
television
set.
13
Page 15
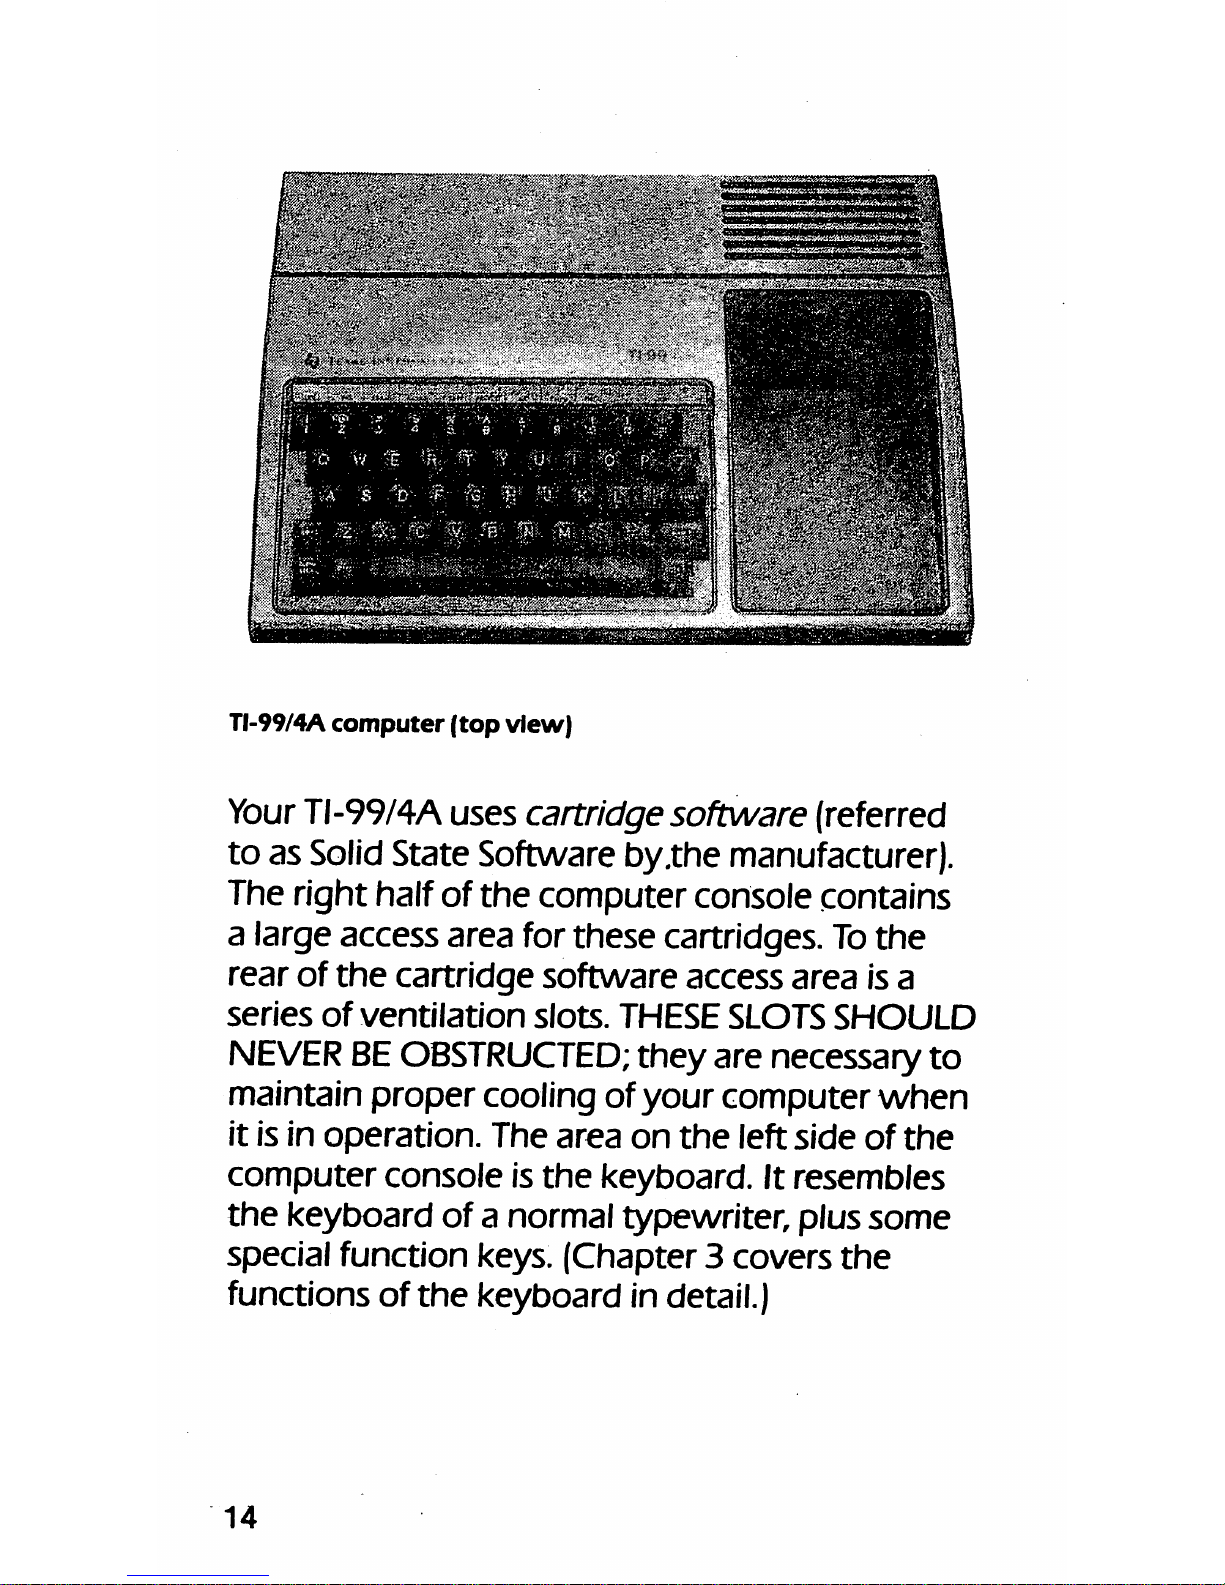
TI-99/4A
computer
(top
view)
Your
TI-99/4A uses cartridgesoftware (referred
to
as Solid
State
Software by.the manufacturer).
The right half of
the
computerconsole contains
a large access area forthese cartridges.
To
the
rear of
the
cartridge software access area is a
series
of
ventilation
slots.
THESE
SLOTS
SHOULD
NEVER
BE
OBSTRUCTED;
they
are necessary
to
maintain propercooling of
your
computer
when
it is in
operation.
The
area
on
the
left
side
of
the
computer
console
is
the
keyboard.
It resembles
the
keyboard
of a normal typewriter, plus
some
special function keys. (Chapter 3 covers
the
functions of
the
keyboard in detail.)
14
Page 16
Here
are
the
components
you
need
to
set
up
your
TI-99/4A
computer.
All
these
compo
nents
(except
the
television)
come
with
your
computer:
Video
modulator
Standard
home
color
(or
black-
and-white)
TV
Power
supply
15
Page 17
Place
the
computer
console
on
a firm
surface,
with
room for
any
accessories
that
you
may
have
purchased.Ifyou
are
using a television
set
as
a monitor,
you'll
need
a
screwdriver
to
con
nect
the
computer
to
it.
Unwrap
the
books
in
the
cellophane
wrapper.
Between
them
you'll
find
some
papers;you'll also find some strips of
plastic (gray on
the
front
and
black on
the
back).
These plastic strips are called overlays.
One
of
the
strips
has
some
writing
on
it; place
that
strip
on
the
computer
console in
the
angled
space
just
above
the
keyboard.
Pick
up
the
Power
Supply
that
was
packed
with
your
computer. Insert
the
four-pin plug
at
the
end
of
the
Power
Supply cable into
the
four-pin
connector
on
the
left rearof
the
computer. Plug
the
Power
Supply
intoastandard
115-voltAC
electrical outlet. As a safety precaution,
you
may
want
to
unplug
the
Power
Supply
when
you
fin
ish using
the
computer
(and replug it
the
next
time).
Tolink
your
computer
to
a television follow
these
steps:
16
Page 18
STEP
1
Turn
the
television
set
OFF.
Loosen
the
screws
on
the
VHF
antenna
terminals
on
your
television
set
and
remove
the
antenna
cable.
17
Page 19

STEP
2
Pick up
the
Video Modulator
that
was
provided
with
your
computer
system.
Connect
the
Video
Modulator
Television
Interface
Cable
to
the
VHF
antenna
terminals
on
the
TVset. Tighten
the
TV
set
antenna
screws.
18
Page 20

STEP
3
Connect
the
television
VHF
antenna
cable
to
the
Video
Modulator
antenna
terminals
and
tighten
the
screws.
19
Page 21
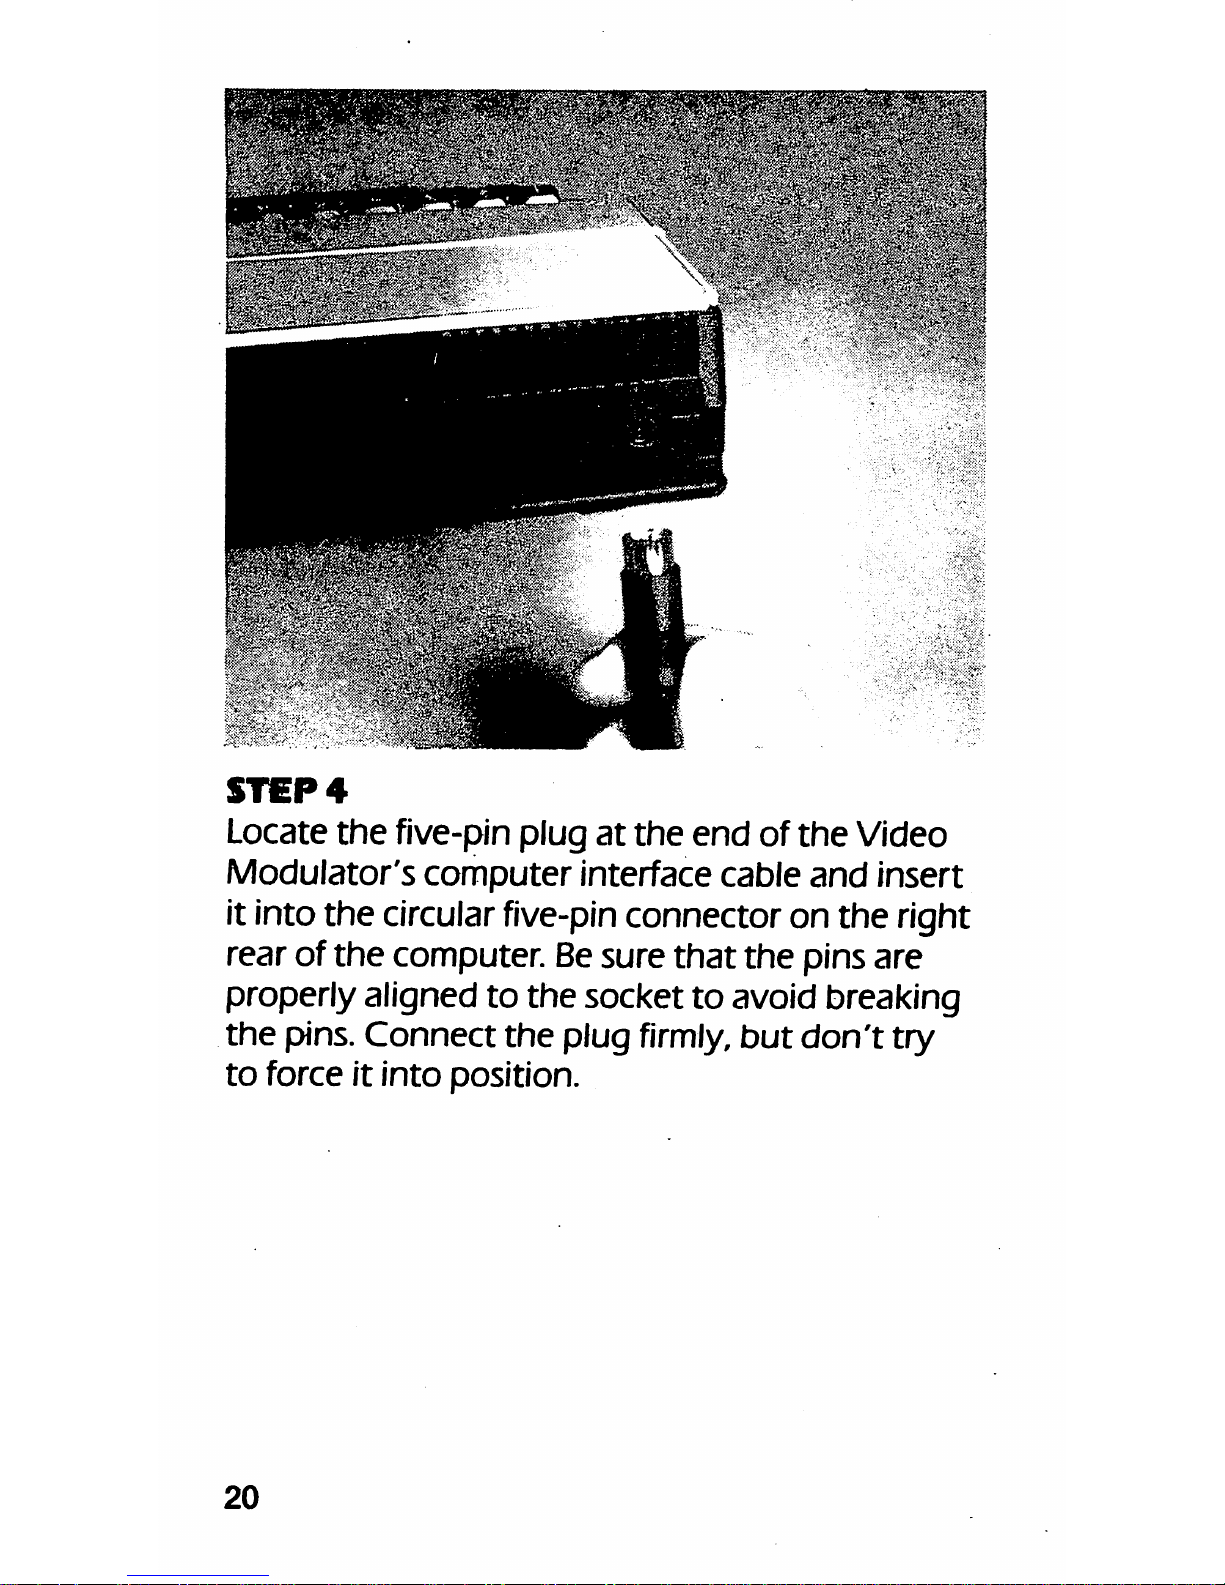
STEP
4
Locate
the
five-pin plug
at
the
end
of
the
Video
Modulator's
computer
interface
cable
and
insert
it into the circularfive-pin connector on the right
rear
of
the
computer. Besure
that
the
pins are
properlyaligned to
the
socketto avoid breaking
the
pins.
Connect
the
plug
firmly,
but
don't
try
to
force it
into
position.
20
Page 22
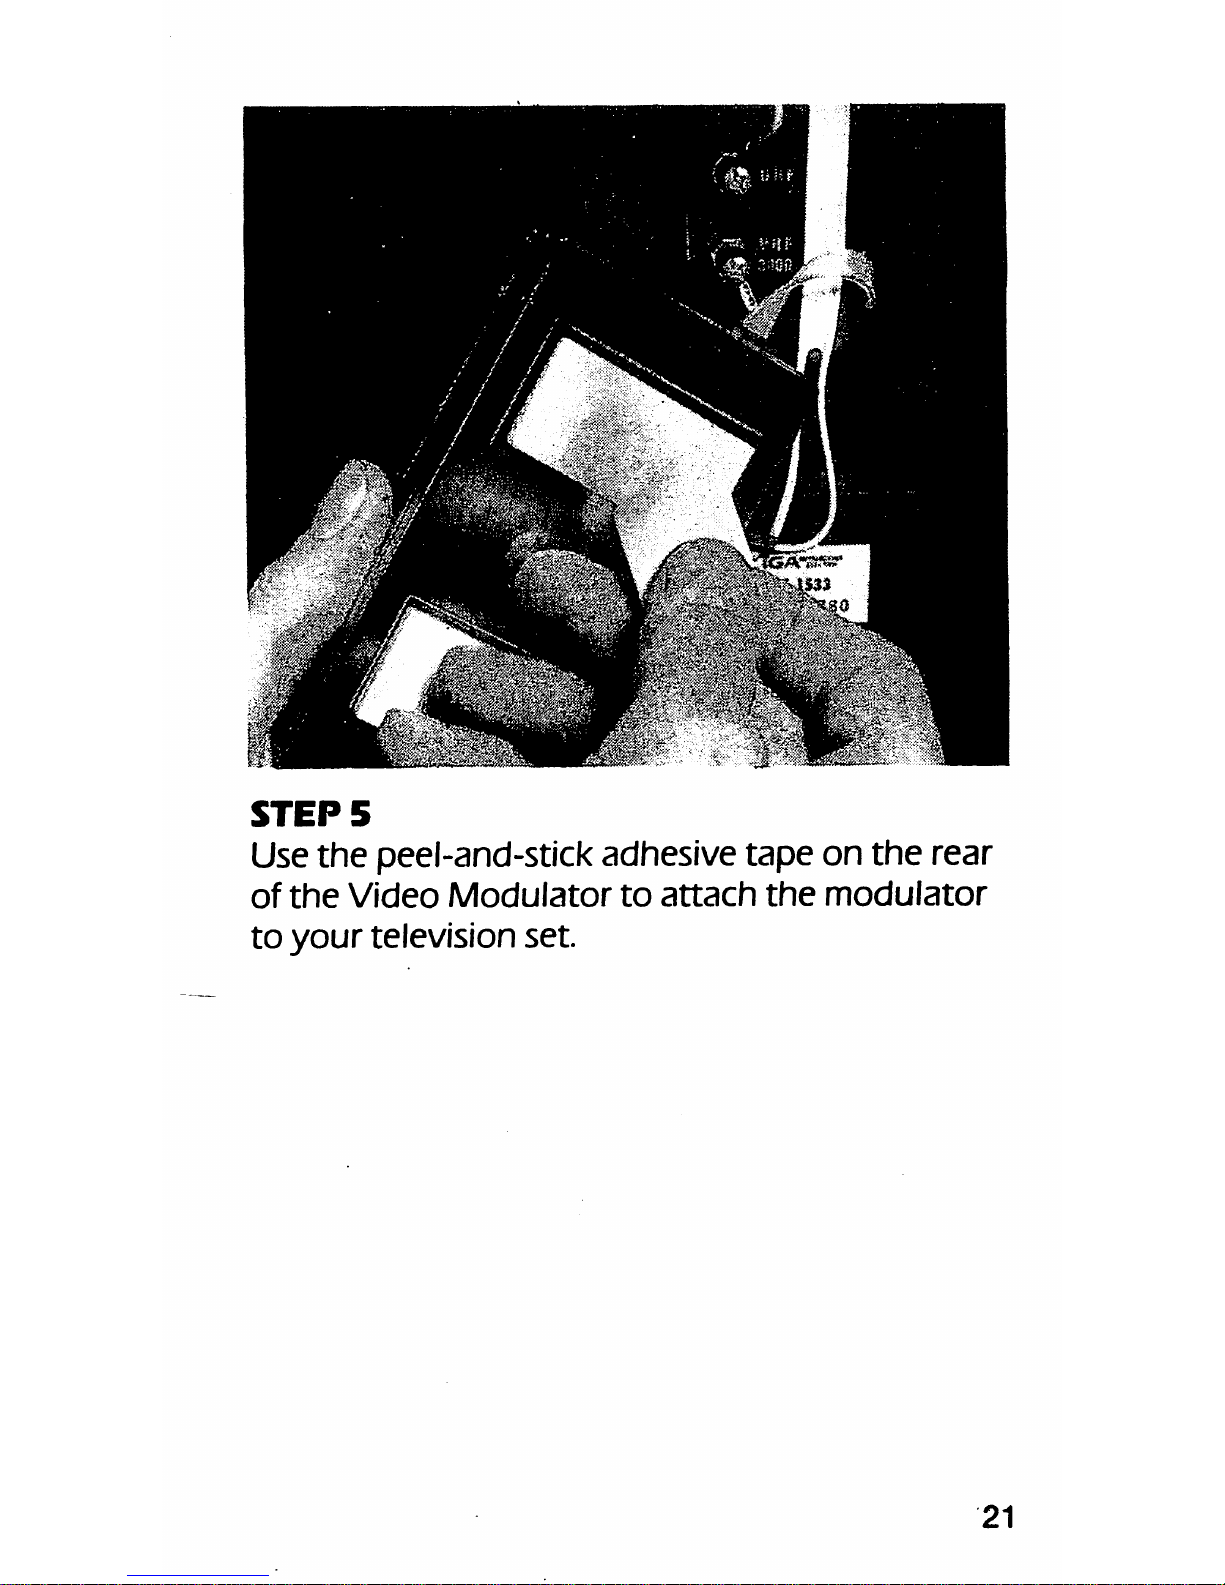
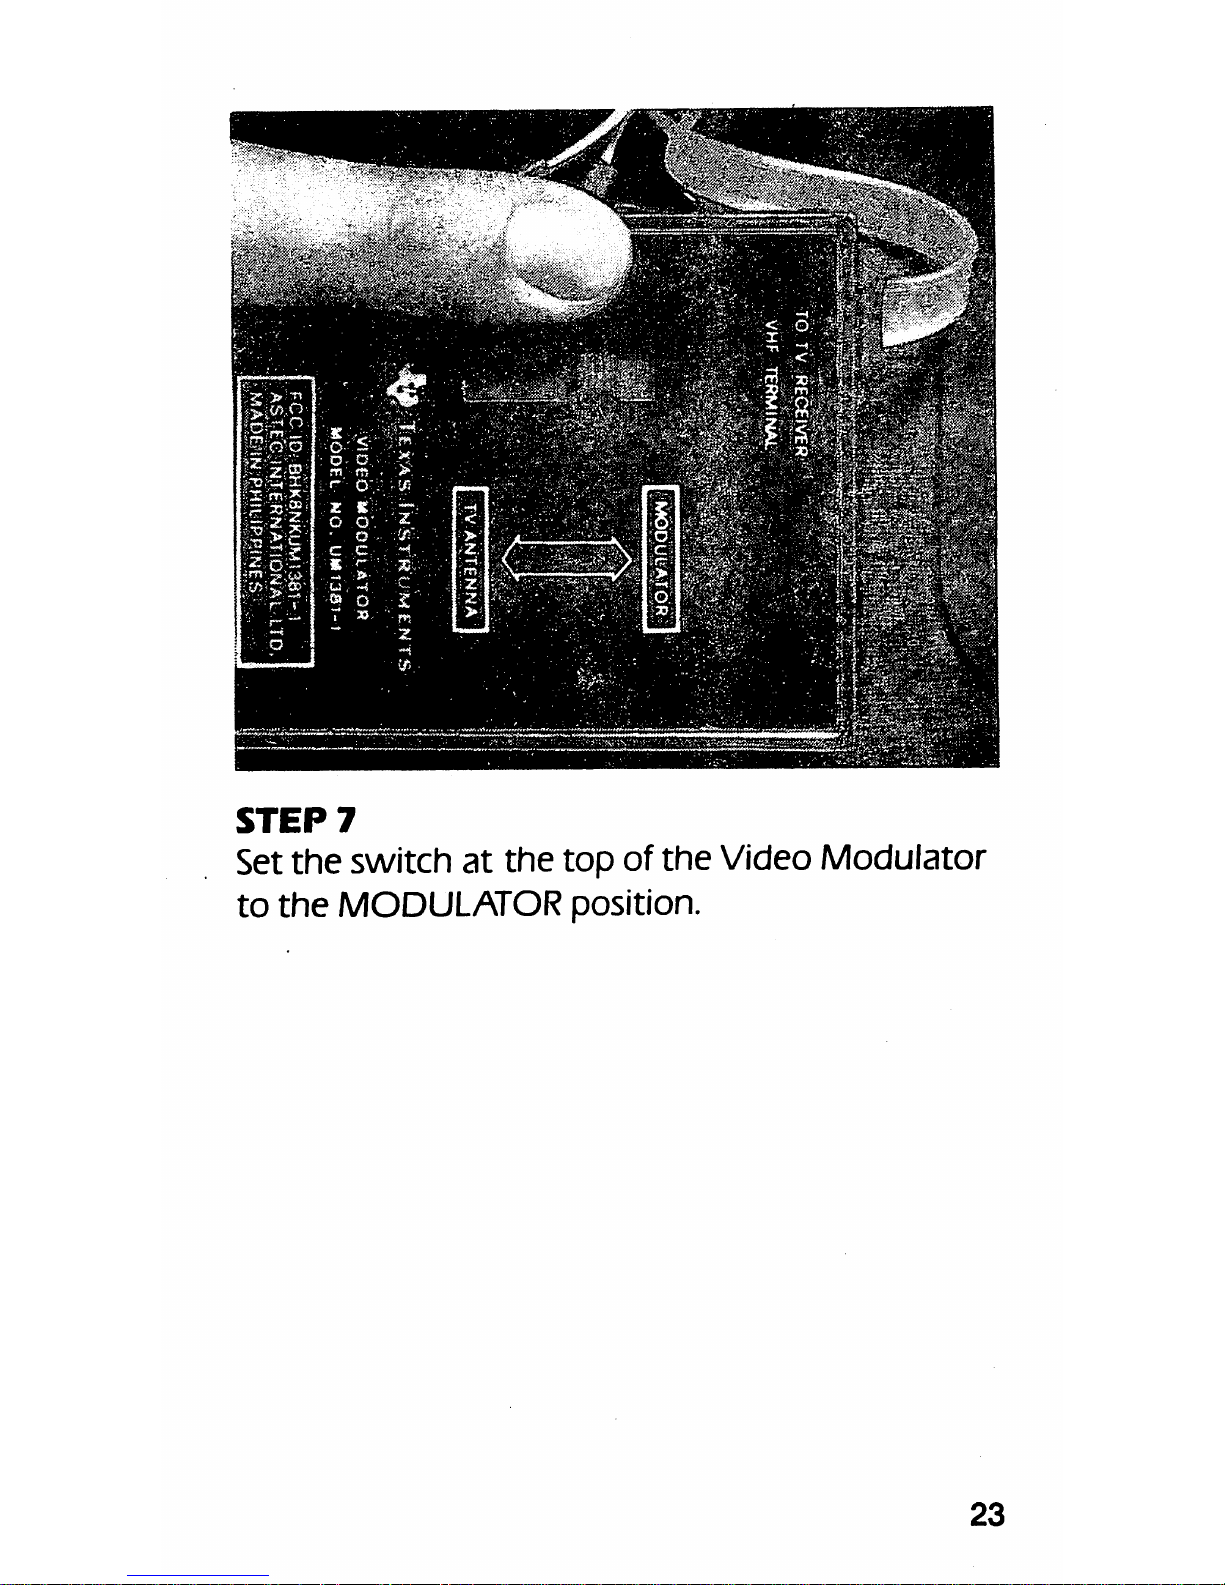
STEP
5
Use
the
peel-and-stick adhesive
tape
on
the
rear
of
the
Video
Modulator
to
attach
the
modulator
to
your
television set.
21
Page 23
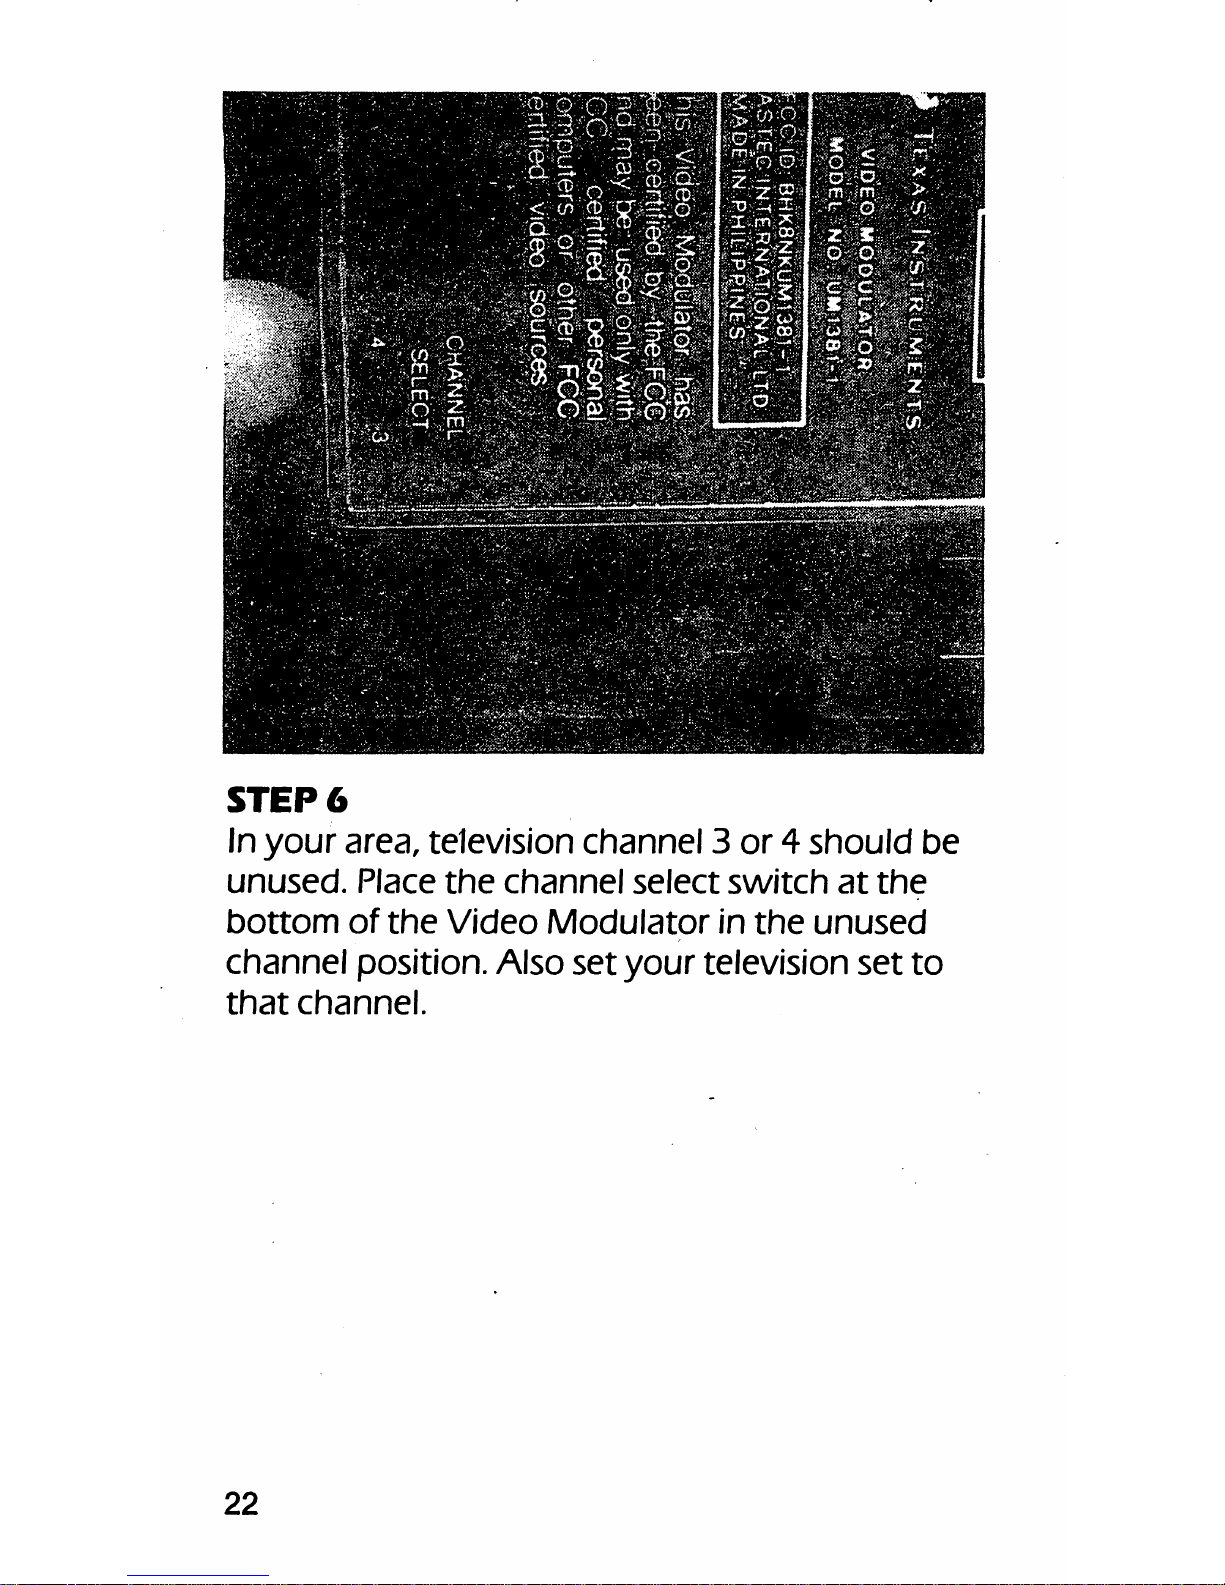
STEP
6
In
your
area, television
channel
3
or4should
be
unused.
Place
the
channel
select
switch
at
the
bottom
of
the
Video
Modulator
in
the
unused
channel
position. Also
set
your
television
set
to
that
channel.
22
Page 24
CO
CM
Page 25
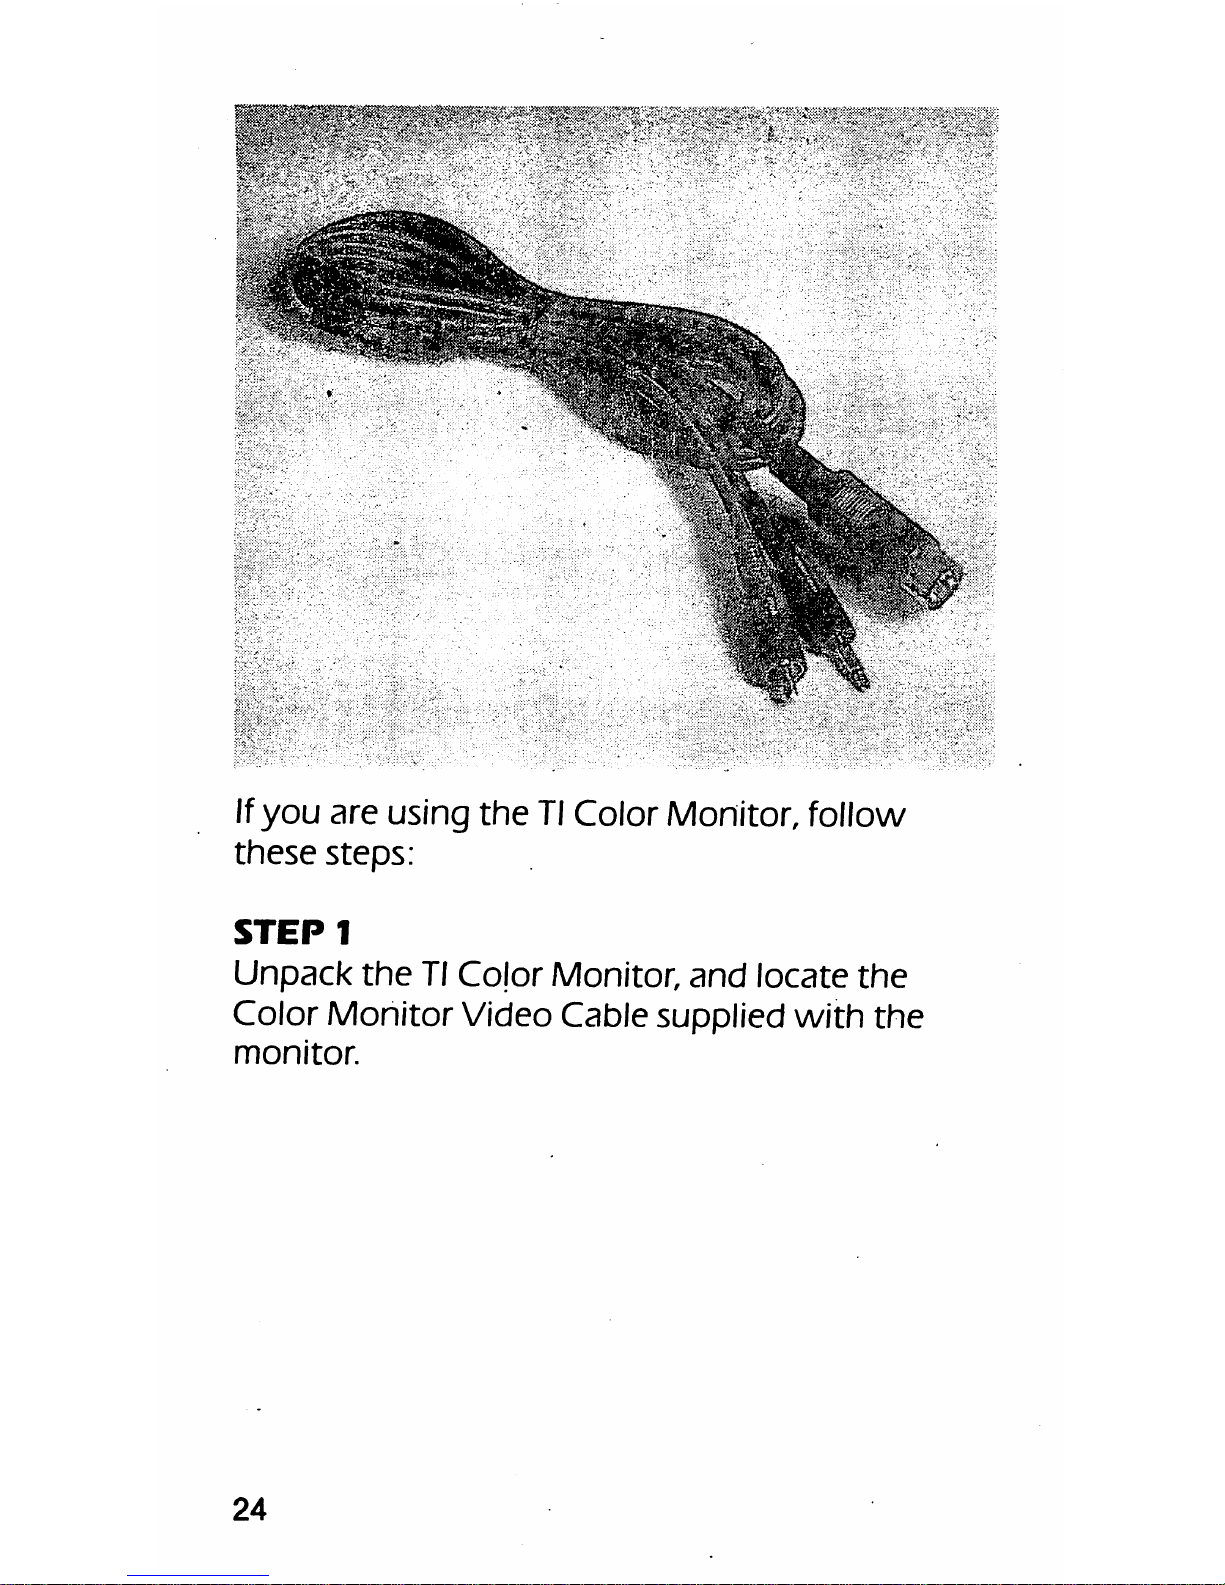
Jlgf^^
If
you
are using
the
TlColor Monitor, follow
these
steps:
STEP1
Unpack
the
Tl
Color
Monitor,
and
locate
the
Color
Monitor
Video Cable supplied
with
the
monitor.
24
Page 26
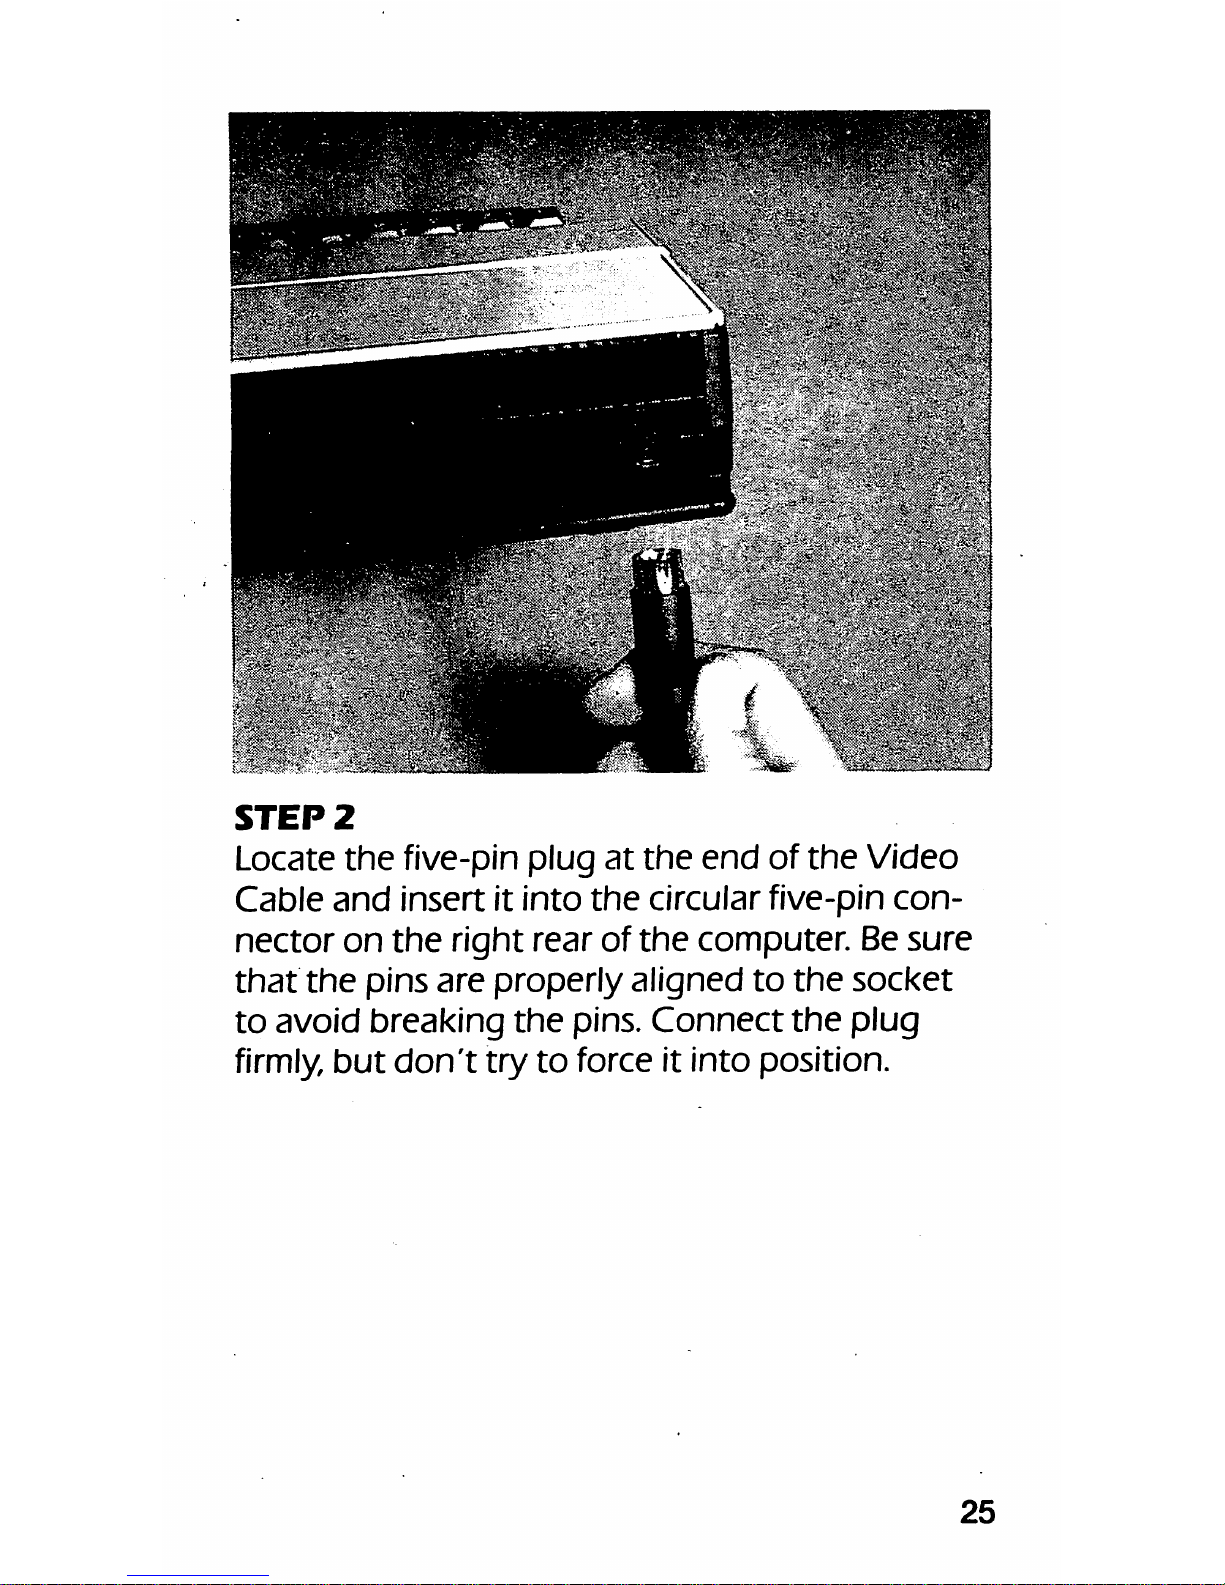
STEP
2
Locate
the
five-pin plug
at
the
end
of
the
Video
Cable
and
insertitinto
the
circular five-pin
con
nector
on
the
right rearof
the
computer. Be
sure
that
the
pins are
properly
aligned
to
the
socket
to
avoid
breaking
the
pins.
Connect
the
plug
firmly,
but
don't
try
to
force it into position.
25
Page 27
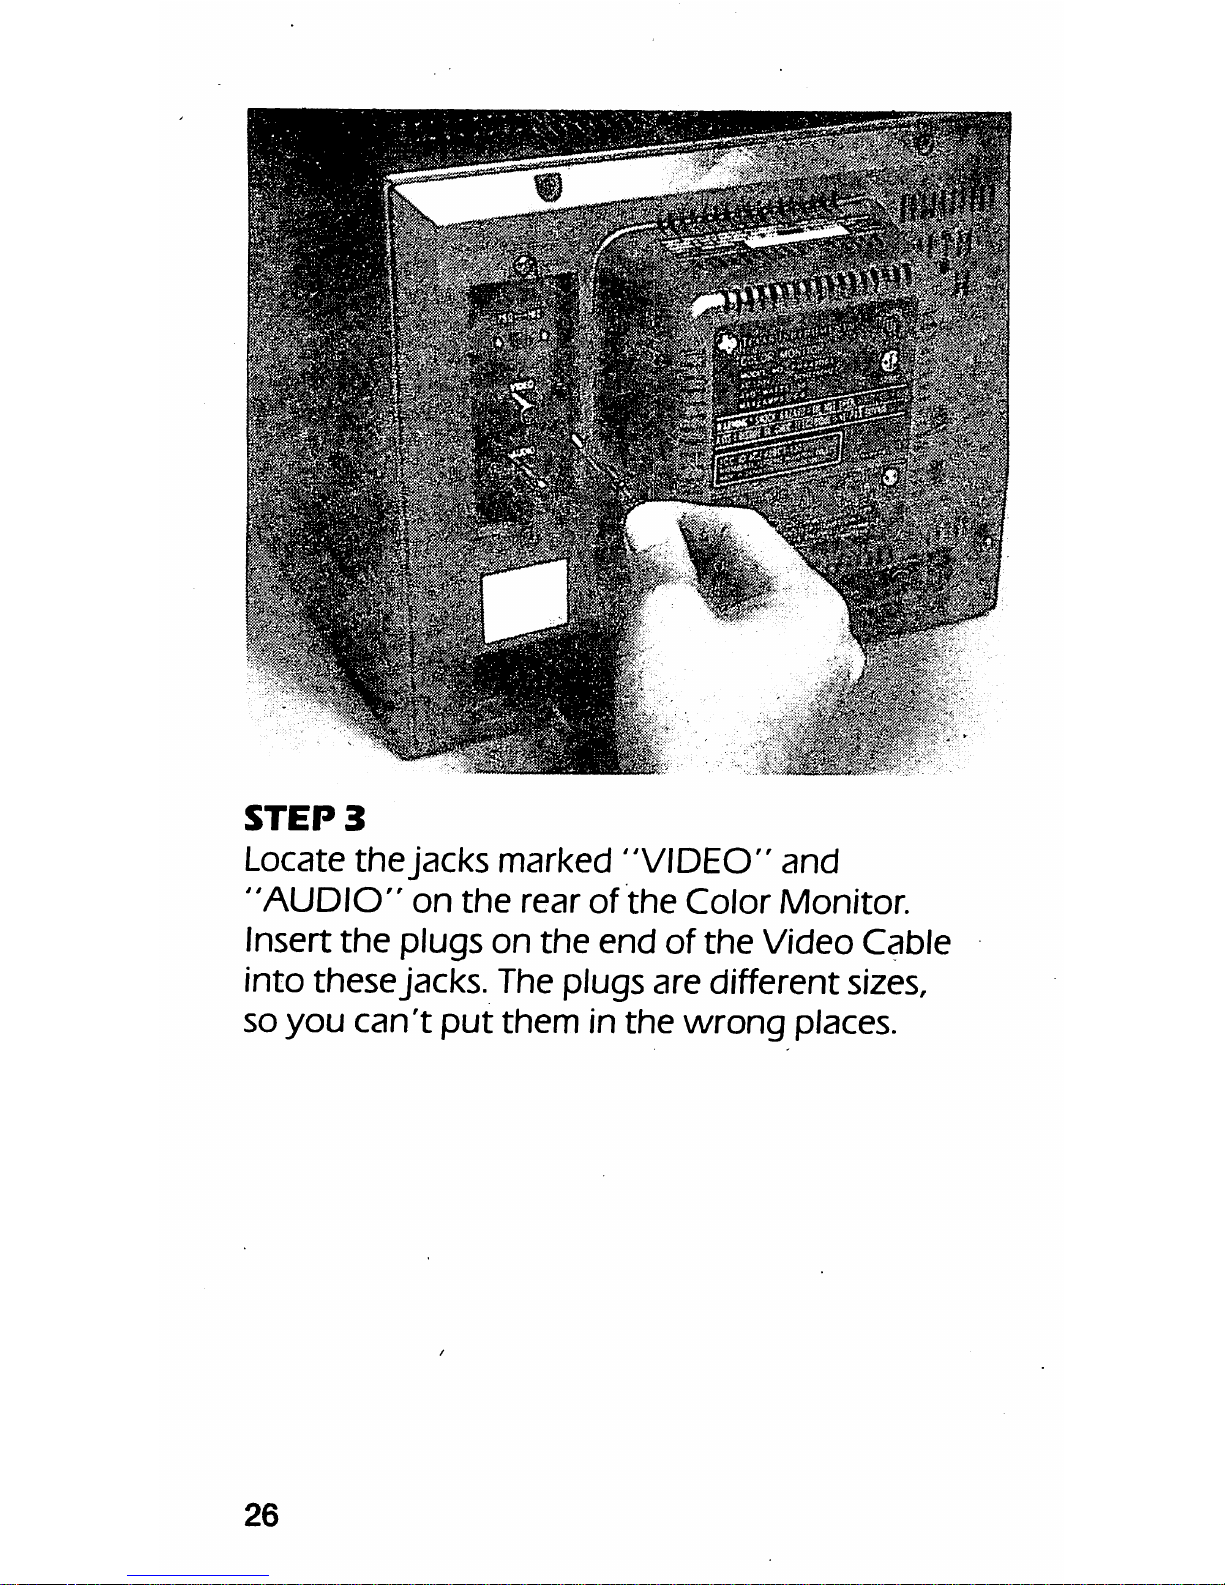
STEP
3
Locate
the
jacks
marked
"VIDEO"
and
"AUDIO"
on
the
rear
of
the
Color
Monitor.
Insert
the
plugs
on
the
end
of
the
Video
Cable
into
these
jacks. The plugs are differentsizes,
so
you
can't
put
them
in
the
wrong
places.
26
Page 28
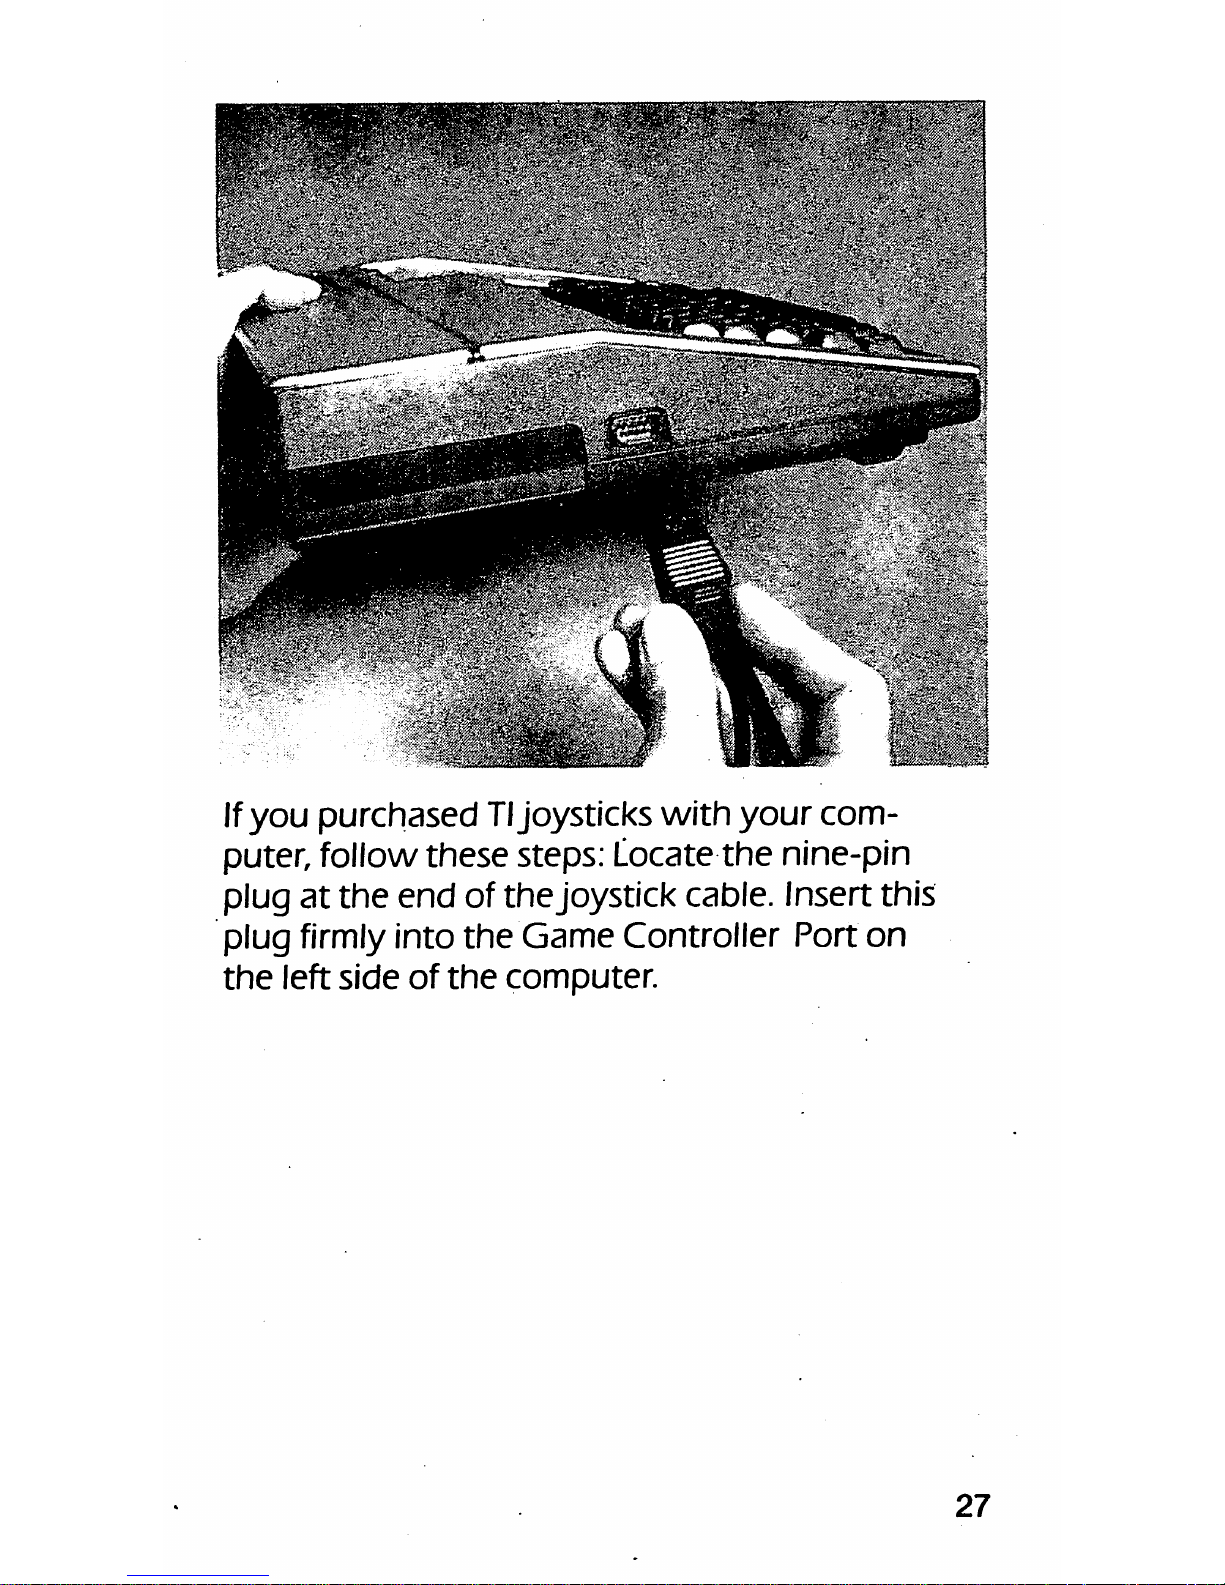
If
you
purchased
Tljoysticks
with
your
com
puter, follow
these
steps: Locate
the
nine-pin
plug
at
the
end
of
the
joystick cable. Insert this
plug firmly into
the
Game
Controller Port
on
the
left
side
of
the
computer.
27
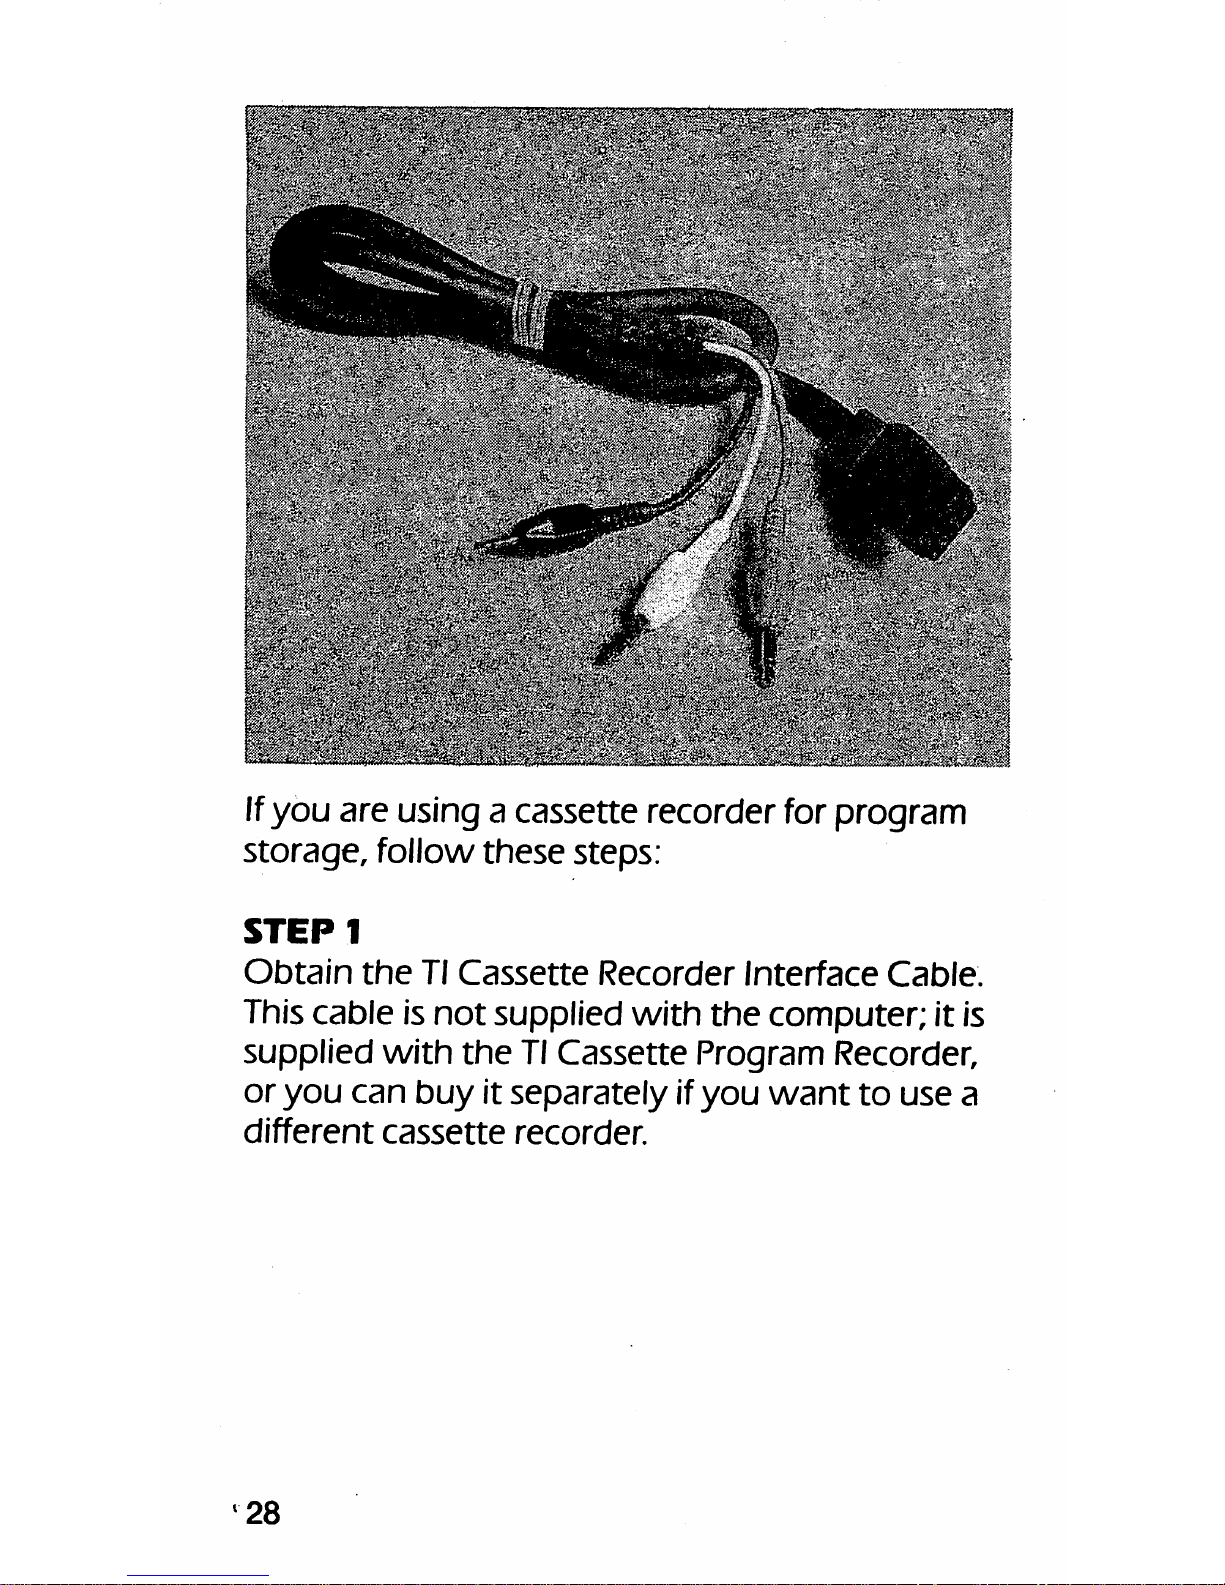
Page 29
Ifyou are using a cassette recorder for program
storage,
follow
these
steps:
STEP!
Obtain
the
Tl
Cassette
Recorder
Interface
Cable.
This
cable
is
not
supplied
with
the
computer;
it is
supplied
with
the
Tl
Cassette
Program Recorder,
or
you
can
buyitseparatelyifyou
want
to
use
a
different
cassette
recorder.
'28
Page 30
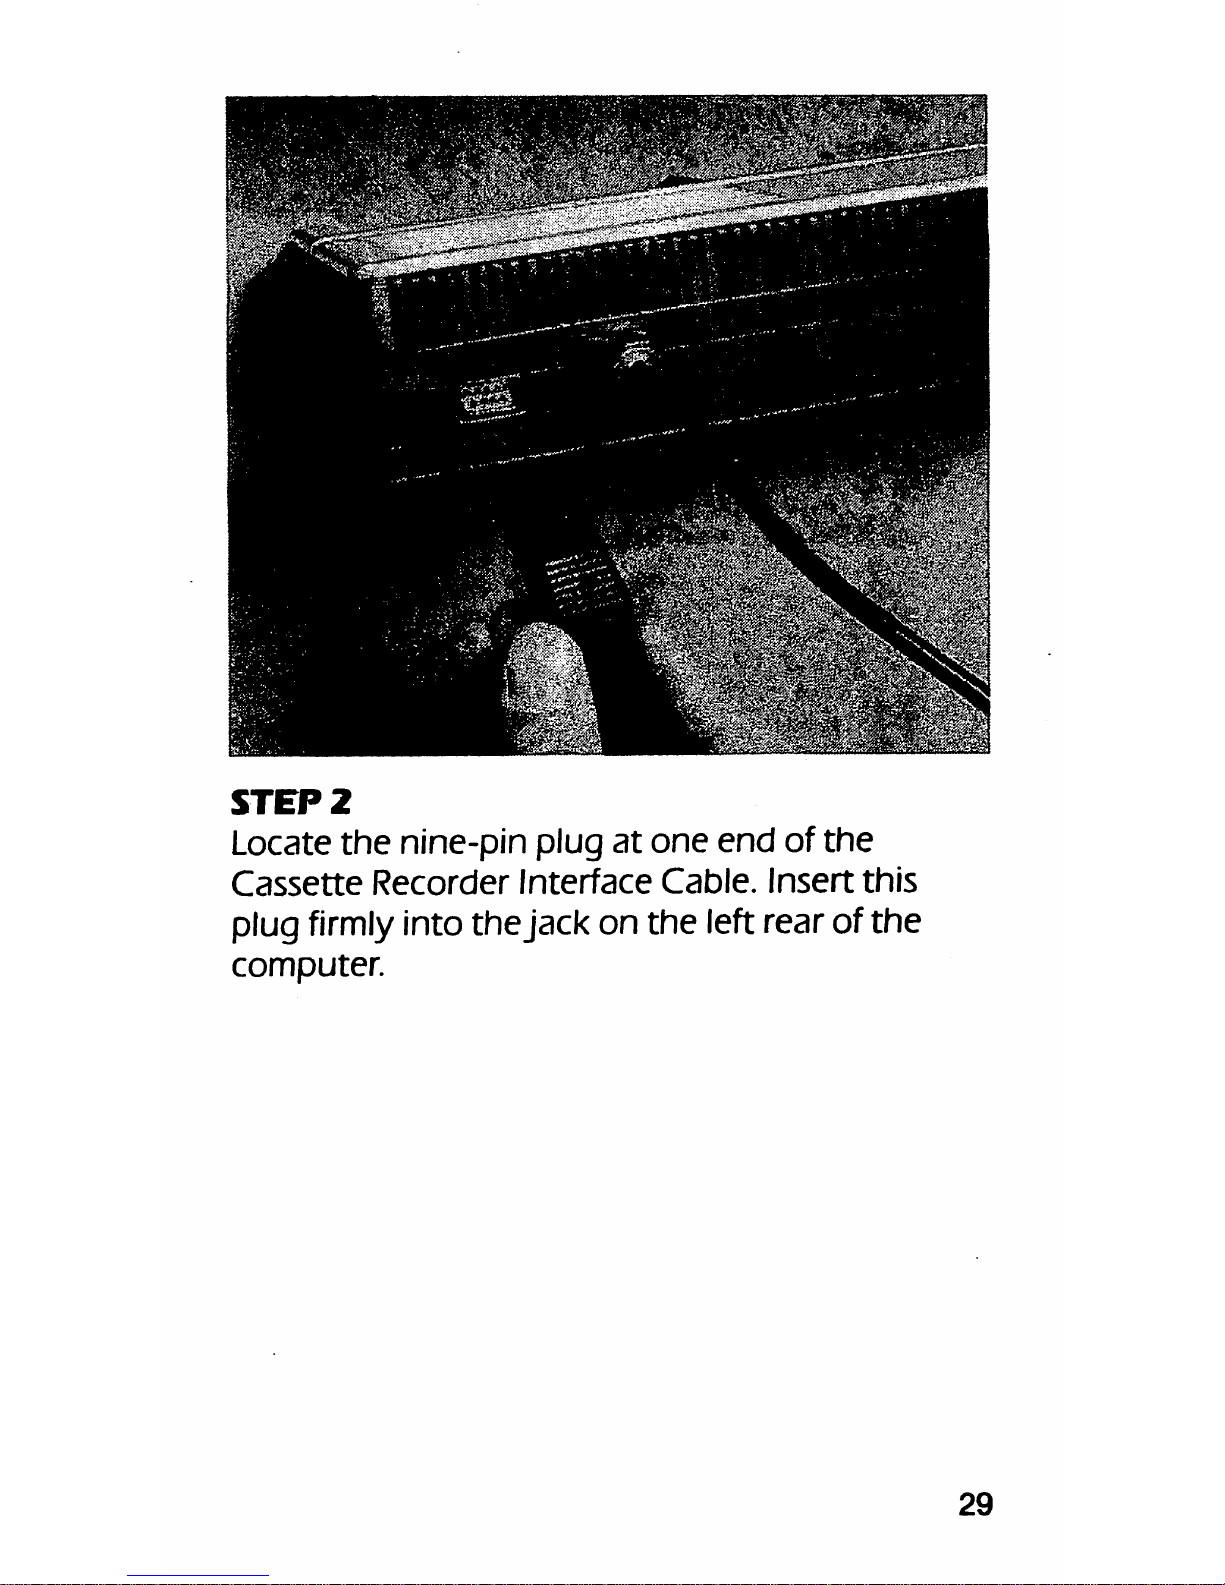
STEP
2
Locate
the
nine-pin plug
at
one
end
of
the
Cassette
Recorder
Interface
Cable.
Insert
this
plug
firmly
into the jack on the left
rear
of
the
computer.
29
Page 31

STEP
3
Locate
the
set
of
three
plugs
at
the
other
end
of
the
cable. The wires
that
lead to
these
plugs are
color-coded
(red, black,
and
white).
30
Page 32

STEP
4
Locate
the
jacks
labeled MIC,
EAR
(or ex
ternal
speaker),
and
REM
on
your
cassette
recorder.
31
Page 33

STEPS
Insert
the
plug
with
the
red wire into
the
record
er's
microphone
jack
(labeled MIC).
32
Page 34

STEP
6
Insert
the
plug with
the
white wire into
the
recorder'searphone
(or
externalspeaker)jack
(labeled EAR).
33
Page 35

STEP
7
Insert
the
plug
with
the
black
wire
into
the
recorder's
remote
jack
(labeled
REM).
34
Page 36

Now
you're
ready
to
turn
on
and
use
your
com
puter.
Turn
on the Power On switch
at
the front
of the computer. The red Power
On
lampshould
light.
(If
the red Power On lamp does not light,
check
the
PowerSupply cable connection
at
the
rear of
the
computer
and
make sure
that
the
PowerSupplyisplugged into a working outlet.)
Turnon
your
television
set
or TlColor Monitor.
Fine
tune
yourtelevision
set
for
the
bestpicture
possible. Ifthis image
shown
in
the
photograph
on
this
page
does
not
appear
on
your
screen,
check
the
cable
connections
between
the
com
puter
and
the
TV
set
or monitor.
Ifyou have purchased any software cartridges
with
your
computer, this isan excellent time
to
try
one
of
the
cartridges
with
your
new
com
puter. Insert
the
software cartridge into
the
car
tridge access slot on
the
right half of
the
com-,
puterconsole. Press the cartridge
firmly
and fully
into
the
access
slot.
The
screen
will
clear,
then
display
the
TlColor Pattern
and
the
words,
PRESS
ANY
KEY
TO
BEGIN.
35
Page 37

Tl
Color
Pattern
Press
any
key
on
the
keyboard.
A
menu
will
appear
on
the
screen, indicating
that
you
should
type
the
number
I
to
select
Tl
BASIC,
or
type
the
number2to
use
the
software
cartridge
that
you
have
inserted.
Your
screen
should
look
similar
to
this:
TEXAS
INSTRUMENTS
HOME
COMPUTER
PRESS
1
FOR
Tl
BASIC
2
FOR
THE
ATTACK
36
Page 38

GENERAL
PLACEMENT
AND
CARE
OF
YOUR
COMPUTER
Find a
convenient
location for
your
new
TI-99/
4A
computer
system. The
computer
console
should be placed on a desk, table, or
other
flat
surface
that
is
elevated
enough
so
that
you
can
rest
your
hands
comfortably
on
the
keyboard. To
provide
the
least
amount
of possible static inter
ference,
the
surface
that
you
place
the
com
puter
on
should
be nonmetallic. NEVERplace
the
computer
directly
on
top
of a television
set
or
video
monitor.
The
heat
generated
by
most
monitors
and
television
sets
could
damage
your
computer.
The ventilation slots
along
the
rear
and
at
the
top
of
the
computer
console
should
not
be
restricted
or
covered
when
the
computer
is
turned
on.
You
may
want
to
consider
obtaining
a
computer
desk
for
your
system.
Many
computer
owners
eventually
expand
theirsystems. If
you
decide
to
add
the
Peripheral Expansion System (described
in
Chapter
4),
you
will
need
an additional 12
inches
of
space
behind
the
computer.
You
may
also
need
space
for a printer,
should
you
decide
to
purchase
one.
CLEANING
Your
computer
does
not
require
any
special
cleaning.
When
you
want
to
clean
the
com
puter,
useadamp,
lint-free cloth.
Never
use
commercial
cleaners
or
other
formulas
on
the
computer
surface.
37
Page 39

TIPS
TO
REMEMBER
WHEN
YOUR
SYSTEM
LOCKS
UP
Ifyou useyour computer often,and particularly
ifyou learn to program, a time willcome
when
your
computer
appears
to
stop
functioning. Sud
denly
the
keyboard willappear to ignore your
requests for attention. But
don't
panic. Allcom
puters
lock
up
at
one
time
or
another.
If
you
area programmer, you will find
that
this
happens often, usually
due
to
errors
in
the
pro
gram.
What
has
happened
is
known
in
com
puter
lingo as a system crash, and it happens
occasionally to everyone
who
uses a personal
computer
often. The
best
plan of action to fol
low ifyour system crashes isto proceed slowly
while trying
to
find
the
cause.
A
system
crash
can
occur
for a
number
of
'
reasons. A firstcheck
that
you might
want
to
make
would
be
your
computer's
connections.
Are allof the cables tight? Ifyou were using
cartridge software, is
the
cartridge fully inserted?
If
you
were
using a command
that's
used
to
print information on a printer, it isalso a
poten
tial trouble point.
Your
computer
must
hear
a
series of signals fromyour printer as it isprinting.
Ifa cable isloose and these signals
aren't
heard,
the
computer
will
appear
to
lock up as a
result.
38
Page 40

Ifyour TI-99/4A isequipped with a diskdrive,it
can
beacause
of a system crash.
You
should sus
pect
this areaofyoursystem if
the
computer
went
haywire
the
momentyou used a command
to
load or
save
information using
the
disk drive.
The drive itself is
not
usually
the
cause of
the
problem;often, the floppydiskisdefectiveor is
the
victim
of
mishandling.
There are
some
tasks
that
you
can
perform
routinely to minimize
the
bad
effects of a system
crash. Ifyou are programming, you should use
the
SAVE
CS1
command (on a cassette system)
or
the
SAVE
command (on a disk system)
to
save
the
information
that
you're
using often. Doing
so
will minimize
the
amount
of
information
you
lose
when
system
crash
occurs.
If
your
computer
doesn't
appear
to
be
operat
ing normally,
the
following troubleshooting
guide may help you to isolate the cause of
the
problem. If
the
troubleshooting
guide
does
not
solve
the
problem,
contact
your
dealer for
assistance.
39
Page 41

TROUBLESHOOTING
GUIDE
Problem
Power
indicatorfails
to
light
when
the
power
switch
is
turned
on
Picture
and/or
sound
fails
Joysticks
do
not
operate
correctly
Cassette
recorder
does
not
operate
correctly
Computer
will
not
respond
to
input
at
the
key
board;
garbled
characters
or
other
erratic
symp
toms
are
present
40
Page 42

Correction
Make
sure
the
PowerSupply is
plugged
firmly
into
the
wall
outlet
and
the
Power
Supply
cord
is
firmly
connected to the plug
at
the
rear
of
the
computer.
Make
sure
the
computer
is
turned
on.
Make
sure
the
Video
Modulator
cables
are
properly
con
nected
and
the
TV
set
is
tuned
to
the
channel
selected
on
the
Video
Modulator.
Make
sure
the
ALPHA LOCK
key
is in
the
UN
LOCKED(or up) position
and
the
joystick
cable
is
connected
to
the
nine-pin
connector
on
the
LEFT
SIDEof
the
computer
(NOT
the
connector
on
the
rear).
Make
sure
the
Cassette
Recorder
Interface
Cable
is
connected
to
the
nine-pin
connector
on
the
REAR
of
the
computer
(NOT
the
connector
on
the
left side).
Turn
your
computer
OFF. Wait five
seconds
or
more.
Turn
the
computer
back
on.Ifthe
problem
persists,
contact
your
dealer
for assistance.
41
Page 43

CHAPTER
3
MEET
THE
KEYS
Turn
your computer on. And then turn on your
TVset. Tune
the
TV
set
to
the
proper
channel,
ifnecessary,
and
slide
the
switch
on
the
Video
Modulator
to
MODULATOR.
The
Tl
Color
Pattern
should
appear
on
the
screen.
SCREEN
1
Take a
good
look
at
the
keyboard. It resembles
the
keyboard
that
you
might
see
on
an ordi
nary typewriter,
with
one
key for
each
letter
of
the
alphabet
and
one
key for
each
numeral (0
through
9). There arealso keys with
punctua
tion marks
and
keys with
words
on
them
such
as
SHIFT
and
ENTER.
Inthis chapter, we'll explain
how
each
of
these
keys is used.
Press
any
key
on
the
keyboard
and
the
screen
will
change.
SCREEN
2
Press
the
number
1
key
and
the
screen
will
change
again.
SCREEN
3
42
Page 44

PROMPT
AND
CURSOR
On
the
screen,
below
the
words
Tl BASIC
READY,
you
see
an arrow-shaped character
and
a flashing block. These are
two
importantscreen
characters:
the
prompt
and
the
cursor. That
arrow-shaped character iscalledthepromptin
computer lingo. The prompt always
shows
you
on
what
line
the
letters or
numbers
you
type
will
appear. The flashing block isknown as
the
cur
sor.The cursor will always
show
you
where
the
very next character
that
you type willappear.
The cursor isimportant in
another
way, too; it
showsyou whenyour computer iswaiting for
you to provide some type of information. When
the
cursorison
the
screen
and
flashing,
your
computer isn't doing any work. It's
just
sitting
there, waiting for
you
to tell it
what
to
do
next.
NOTE: In
the
photographs
in this chapter,
the
cursor isa slightly lighter color
than
the
letters
and
numbers
shown
on
the
screen.
Because
the
cursor
blinks
on
and
off, it
appears
in a lighter
color in photographs.
On
your
TVor monitor
screen,
the
cursor
is
the
same
color
as
the
letters
and
numbers
whenever
it
blinks
on.
43
Page 45

SCREEN
1
The TlColor Pattern will appeareach
time
you
turn
your
computer
on.
TEXAS
lNS!r#ni|,#-
'time.;
-cowNj'if
fJM';
v
VlfVV"'r.;
SCREEN
2
This
screen
follows
the
Tl
Color
Pattern.
Press
the1key
to
use
Tl BASIC.
44
Page 46

Tl
MMK
fc€ftl«
SCREEN
3
Note
the
arrow-like prompt
and
the
flashing
cursoratthe
left
edge
of
the
screen.
45
Page 47

TYPE
AWAY
Now
let's
give
your
keyboard
a try. Type
any
words
or
sentences
you
wish
for a
few
mo
ments.
Keep
looking
at
your
computer's
screen
as
you
type.
What
happens
when
you
reach
the
edge
of
the
screen
and
continue
to
type?
Right! The letters
continue
on
the
very
next
line
on
the
screen.
SCREEN
1
Now,
press
any
letter
(or number) key
and
hold
it
down
for
several
seconds.
What
happens?
Right again! The
computer
printed
the
letter
(or
number)
over
and
over as long as
you
held
the
key
down.
This built-in
feature
of
your
computer
is
known
as
auto
repeat.
SCREEN
2
If
you
try
to
type
more
than
four lines, you'll
notice
that
any
more
letters
you
type
won't
appear,
and
the
cursor
won't
move
any
far
ther
on
the
screen.
SCREEN
3
To
make
the
cursor
move
farther,
you'll
need
to
learn
to
use
the
ENTER key.
46
Page 48

SCREEN
1
When
what
you
are
typingiscontinued
on
the
next
line,
thatIscalled
wraparound.
SCREEN
2
Holding
downakey
forseveral seconds
causes
the
auto
repeatofthe
character.
47
Page 49

SCREEN
3
When
you
get
to
the
end
of
four
lines
on
the
screen,
the
cursor will
stop.
48
Page 50

THE
ENTER
KEY
ENTER
key
The ENTER
keyislocated
on
the
right
edge,
halfway
down
the
keyboard.
You
use it
to
enter
information
into
the
part
of
the
computer
that
actually does the thinking (orcalculating). As
you
type, letters
and
numbers
appear
on
the
screen,
but
the
computer
doesn't
actuallythink
about
what
it
should
do
with
any
of
those
characters until
you
press
the
ENTER
key.
49
Page 51

Press
the
ENTER
key
now.
What
happened?
The
computer
beeped
at
you,
wrote
* INCORRECT
STATEMENT,
and
begananew
line (with a
prompt
at
the
left).
SCREEN
1
Next
type
in
about
twenty
letters—any
letters
you
want—but
do
not
put
any
spaces
between
the
letters. Press
the
ENTER
key
Your
computer
now
responds with a different message, BAD
NAME.
SCREEN
2
Now
try
typing
in an instruction
that
your
com
puter
can
follow. Type
CALL
CLEAR
but
don't
press
ENTERyet. (If
you
made
a mis
take, press
the
ENTER
key
and
try
again.)
Notice
that
the
computer
sits there,
with
the
flashing
cursor
at
the
end
of
the
line. The
computer
is
waiting
patientlyfor
you
to
tell it
to
get
started.
SCREEN
3
Now,
press
ENTER.
What
happened?
Surprise!
The
entire
screen
turns
blank,
and
the
cursor
appears
at
the
bottom
of
the
screen.
SCREEN
4
The
CALL
CLEAR
command
is
used
to
clear
the
screen.
But
the
computer
didn't
recognize
the
command
until
you
pressed
the
ENTER key.
50
Page 52

SCREEN
1
INCORRECT
STATEMENTisone
error
message
you
can
get
from
the
computer.
SCREEN
2
BAD
NAMEisanother
error
message.
51
Page 53

SCREEN
3
Until
you
press ENTER,
the
computer
will
not
act
on
your
command.
SCREEN
4
The
CALL CLEAR
command
producesablank
screen,
withaprompt
and
a flashing cursor.
52
Page 54

Thecomputer recognizes only a very specific
set
of
words.
You'lllearn
about
your
computer's
vocabulary ifyou delve into
BASIC
program
ming.
Fornow, remember thatyour computer's
ENTER
key always tells
the
computer
to
act
upon whatever information isinthe line
that
you
just
typed.
Evenifyou use a series of words or a command
that
is
not
in
the
computer's
vocabulary,
the
computer
won't
know anything iswrong until
you press
ENTER
and ittries to interpret those
words.
To
see
what
we
mean,
type
THIS
MAKES
NO
SENSE
AT
ALL
53
Page 55

The
sentence
appears
on
the
screen.
SCREEN
1
That sentence means nothing to
the
computer.
Still,
your computer doesn'tcare right now,
because
you
haven't
pressed
ENTER
yet. The
computer
won't
try
to
translate
those
words
into its
language
until
you
press
ENTER.
So, let's
press
ENTER!
Now,
the
computer
will
read
the
sentence
you
just
typed,
discover
that
none
of
those
words
are in its vocabulary,
and
print
out
the
message
* INCORRECT
STATEMENT,totell
you
thatitdoesn't
understand
what
you said.
SCREEN
2
Instead
of
INCORRECT STATEMENT,
the
com
puter
displays BADNAME if
you
type
ina word
that
has
more
than
fifteen
characters
and
then
press
ENTER.
Beforestarting the next exercise,type the words
CALL
CLEAR
and
press
ENTER
to
clear
the
screen.
54
Page 56

SCREEN
1
The
computer
won't
know
you've
made
a
mistake
until
you
press ENTER.
•
r24<:V^Vs^
;^$W^0¥^^v
-^-:^^^^t!J^?;J!^^^,3::?5
i
ir*;
«?&*?>,
SCREEN
2
After
you
press ENTER,
the
computerwill tell
youIfyou
madeamistake.
JWftT
55
Page 57

THE
SPACEBAR
SPACEBAR
The long rectangular key
at
the
very
bottom
of
the
keyboard iscalled
the
spacebar. If
you're
familiarwith typing, you already know
about
the
spacebar. It's used to
add
spaces
between
the
words
that
you type. Let's try
the
spacebar
with different words.
Type
the following sen
tence,
pressing
the
spacebar
once
after
each
word
to
leaveaspace:
THIS
IS
MY
COMPUTER.
56
Page 58

The
sentence
appears
on
the
screen.
SCREEN
1
Like
the
other
keys,
the
spacebar
is a
"repeat"
key.
Thismay come in
handy
at
times,
when
you
want
to
add
large spaces
between
words. Try
this now. Type
the
word
LARGE
The
word
appears
after
your
sentence.
SCREEN
2
Then hold
the
spacebar
down
for a
few
seconds.
When
the
cursor
gets
to
the
end
of
the
line, it
automatically wraps around to
the
beginning of
the
next
line
and
continues
on.
SCREEN
3
Now
type
the
word
SPACE
The large gap caused byyour holding
down
the
spacebar
may look strange in this case,
but
there
may
be
times
when
you'll
want
a large
space
between
words
on
the
screen.
SCREEN
4
Before
starting
the
nextexercise, press
ENTER,
type
the
words
CALL
CLEAR,
and
press ENTER
again
to
clear
the
screen.
57
Page 59

SCREEN
1
Pressing
the
spacebar
puts
spaces
between
iorwords
on
the
screen.
SCREEN
2
When
the
cursor
reaches
the
end
ofaline
on
the
screen...
58
Page 60

SCREEN
3
...it
wraps
around
to
the
next
line.
^^Mtfffl
>THXS
IS
HV
CCJHFU
TE«-*
' :
*-&&&&
SPACED
SCREEN
4
The
screen
display
will
leave
space
where
you
have
pressed
the
spacebar.
59
Page 61

THE
LETTER
KEYS
LETTER
keys
.60
Page 62

One keyforeach letter inthe alphabet islocated
onyour keyboard. Buttheyare not
laid
outin
alphabeticalorder. Instead,the locationofthe
keysfollowswhatisknown as the typewriter,or
"QWERTY," format. QWERTY
comes
from
the
first
sixkeyson the leftinthe top row of letters.
Ifyouare alreadyatypist, thenyou are
familiar
with
where
each of
the
keys islocated. If
you
are nota typist,you maywish to locate each let
ter
of
the
alphabeton
the
keyboard now.
First,
press each letter key intheorder they
appear on the keyboard,starting with the top
row.
SCREEN
1
Nowtry typing allthe letters inalphabetical
order.
SCREEN
2
Beforestarting
the
next exercise,press
ENTER,
type thewords
CALL
CLEAR,
and press
ENTER
again
to
clear
the
screen.
61
Page 63

SCREEN
1
The
letter
keys
on
the
keyboard
are
not
placed
in
alphabetical
order.
SCREEN
2
You
may
have
to
practicetobe
abletofind all
of
the
keysinalphabetical
order.
62
Page 64

THE
ALPHA
LOCK
KEY
ALPHA
LOCK
key
Your
computer
can
create
uppercase
(capital)
and
lowercase
(small) letters.
On
the
lower
left
side
of
the
keyboard,
locate
the
key
marked
ALPHA LOCK.
The
ALPHA LOCK
key
causes
all
of
the
letters
to
be
displayed
as
uppercase
letters.
The ALPHA LOCK
key
gets
its
name
from
the
fact
that
it
can
be
locked
in
the
down
position.
Let's
try
using
the
ALPHA LOCK key. Press
the
ALPHA LOCK
key
until it locks in
the
down
posi
tion.
Now,
type
a
few
words,
like this:
63
Page 65

A
FEW
WORDS
(Don't
worryifyou
make a mistake; we'll learn
how
to
fix mistakes a little later.) Your
words
appear
on
the
screen.
SCREEN
1
Press
the
ALPHALOCKkey
again
(to
"unlock"
it)
and
again
type
A
FEW
WORDS
See
the
difference?
SCREEN
2
The first A FEW WORDS
you
typed
(in
up
percase) is
about
twice as large as
the
second
(which
is in lowercase). The
lowercase
letters
on
the
screen
are
not
true
lowercase
letters.
The
TI-99/4A
always
representsalowercase
letter
by
displaying a
character
that
is roughly half
the
size of
the
uppercase
letter.
There
are
two
rules for using
the
ALPHA LOCK
key: 1)
when
you
use TlJoysticks
to
play games,
the
ALPHA LOCK
key
must
be
unlocked,
in
the
up
position,
and
2)
when
you
are
programming
in
BASIC,
leave
the
ALPHALOCK
key
locked, in
the
down
position
(because
some
commands
in
Tl
BASIC
require
the
use
of capital letters).
Before
starting
the
next
exercise, press
ENTER,
type
the
words
CALLCLEAR,
and
press
ENTER
again
to
clear
the
screen.
64
Page 66

SCREEN
1
Allofthe
letters displayed
on
the
screen
look
like
conventional
uppercase
letters.
mmmmmmmm
——
l>B
FEU UORBS «''FCtf
fii.kijR:i-a
SCREEN
2
Uppercase lettersare
about
twice
as tall as
lowercase
letters.
65
Page 67

THE
SHIFT
KEYS
SHIFT
keys
On
the
lower left and lower right sides
of
the
keyboard, locatethe
two
keys marked
SHIFT.
Like
the
ALPHA LOCK key,
the
SHIFT
keys
are
used
to
type
uppercase letters. The
SHIFT
keys
have
an
additional
function,
however—one
which
the
ALPHA LOCK
does
not
perform: for
every
key
on
the
keyboard which has
two
sym
bols on it (such as
the
key
with
the
number4
and
the
dollarsign),
the
SHIFT
key
gives
you
ac
cess
to
the
upper
symbol.
66
Page 68

Trytyping various keys
now
(letters, numbers,
or
other
symbols)
with
and
withoutaSHIFT
key
depressed,
and
notice
the
results.
First
type
all
the
letters in
the
top
row
of
the
keyboard
withoutusing a
SHIFT
key. Then
type
the
same
letters with a SHIFT
key
held
down.
SCREEN
1
Hold
down
the
spacebar
until
the
cursor
moves
to
the
beginning of
the
next line.
Now
type
all
the
number
keys withoutusing a SHIFTkey.
Then
type
the
same
keys with a
SHIFT
key
held
down.
SCREEN
2
Use
the
spacebar
to
move
the
cursor
to
the
next
line.
Now
typeafew
symbol keys withoutusing
a
SHIFT
key. Then
type
those
keys
again
witha
SHIFT
key
held
down.
SCREEN
3
Before
starting
the
next
exercise, press
ENTER,
type
the
words
CALL
CLEAR,
and
press
ENTER
again
to
clear
the
screen.
67
Page 69

>U%f
jgg;*?rT
%&£&¥;
\-QMgR'T, V U?<j
ff
SCREEN
1
Pressing
the
SHIFT
key
withaletter
key
creates
an
uppercase
letter.
IHilSlf|lf;|fil|.^l^p
v
SCREEN
2
Pressing
the
SHIFT
key
also
creates
the
sym
bols
on
the
upper
halfofthe
number
keys.
68
Page 70

1234567
890
!43#$3s'-&*0
SCREEN
3
Other
keys
have
two
symbols
on
them
as
well.
69
Page 71

THE
FUNCTION
KEY
FUNCTION
key
70
Page 72

At
the
bottom
of
the
rightside of
the
keyboard
isa key
marked
FCTN (with a
gray
dot
on
the
front). This is
your
FUNCTION key. The FUNC
TION
key
has
a special
purpose:
it
makes
other
keys
on
the
keyboard
perform
more
than
one
job.
Using
the
FUNCTION key issimilar
to
using
the
SHIFTkey;
you
hold it
down
while
you
press
another
key
By
doing
this,
what
happens
on
the
screen
is
the
result
of
the
function
of
the
key
you
typed
with
the
FUNCTION
key
The special
functions of
the
letter
keys are
indicated
on
the
fronts
of
the
keys.
Let's
try
this
to
see
how
it works. First,
hold
the
FUNCTION key
and
press
the
Ikey.
What
char
acter
appeared?
SCREEN
1
A
question
mark
just
appeared
on
the
screen.
Examine
the
front
of
theIkey
on
the
keyboard,
and
you
will
see
the
question
mark
symbol.
Now
while
you
hold
the
FUNCTION key press
the
Rkey
and
then
theTkey
The left
and
right
brackets
appear.
SCREEN
2
71
Page 73

SCREEN
1
Pressing
the
FUIMCTIOIM
key
with
theIkey
createsaquestion
mark
on
the
screen.
^P^i^
*'«&>-s~-a*--.'ir
"•-..,.
•?C3<
SCREEN
2
Pressing
the
FUIMCTIOIM
key
with
theRand
T
keys
creates
the
left
and
right
brackets.
72
Page 74

Now
hold
the
FUNCTION
key
and
press
the
P
key
to
getaquotation
mark.
SCREEN
1
Then hold
the
FUNCTION key
and
press
the
O
key
to
get
the
apostrophe.
SCREEN
2
In
each
case,
the
character
that's
on
the
front
of
the
key
appears
on
the
screen
when
you
press
the
FUNCTION key
with
the
letter key. In
this manner,
the
keyboard
of
your
TI-99/4A
can
create
many
more
characters
than
there
are
keys.
Most
of
the
characters
that
you
see
on
the
front
of
the
keys are used in special cases, such as in
typing a letter
when
using
word
processing soft
ware
with
your
TI-99/4A. The UP
and
DOWN
arrow
keys are
used
in
an
editing
mode
during
BASIC
programming;
that
isa
more
complex
pro
gramming function
that
isdetailed in
your
Tl
BASIC
Handbook.
You'll
need
these
keys
only
if
you
become
extensively involved in
BASIC
programming.
73
Page 75

The
special
functions ofthe keys inthe top row
areindicatedon the
plastic
overlay The
FUNC
TION
key
is like an "international translator"
who, when
called
intoaction, changesthe very
languageofyourkeyboard.
To
helpyou keep
trackof this
new
language, you have placedthe
strip
ofwords abovethe numberkeyson your
keyboard. Don't worry aboutjust
what
the
names thatmake up this
new
language mean
right now. We'll explainthese functions
when
we
discusseach of the number keys.
Beforestarting
the
nextexercise,press
ENTER,
type
the
words
CALL
CLEAR,
and
press ENTER
again
to
clear
the
screen.
74
Page 76

SCREEN
1
Pressing
the
FUNCTION
key
with
thePkey
createsaquotation
mark.
SCREEN
2
Pressing
the
FUNCTION
key
with
theOkey
creates
an
apostrophe.
75
Page 77

THE
LEFT
AND
RIGHT
ARROW
KEYS
LEFT
ARROW
and
RIGHT
ARROW
keys
When
you
use
the
spacebar,
the
cursor
moves
to
the
right. But
suppose
you
make a mistake or
want
to
add
a
letter
or
word
in
the
middle
of
a
sentence.
Perhaps
you
decide
you
want
to
erase
a
letter
or
an
entire
word.
You
can
add
and
erase
letters
and
words
with
your
computer. But
to
do
so,
you
must
first
be
at
the
place in
the
sentence
where
you
want
to
add
or
remove
characters.
Let's find
out
how
to
do
this. Type
the
sentence
76
Page 78

THIS
IS
MY
COMPUTER.
Right
now,
the
cursor
is near
the
end
of
the
line.
SCREEN
1
Look
at
theSkey
and
the
D
key
On
the
front
of
these
keys
you
see
arrows
that
point
to
the
left
and
to
the
right. These keys,
used
with
the
FUNCTION key,
move
the
cursor
back
and
forth. Let's
try
it!
Hold
the
FUNCTION
key
and
press
theSkey
nine
times. The
cursorisnow
on
top
of
the
let
ter
C in COMPUTER (if
you
hadaperiod
at
the
end
of
your
sentence).
SCREEN
2
Hold
the
FUNCTION
key
and
press
the
D
key
six times. Your
cursor
is
now
positioned
on
top
of
the
letter
E.
SCREEN
3
Byusing
the
Skey as a left
arrow
key
and
using
the
D
key
as a right
arrow
key,
you
can
move
the
cursor
to
any
spot
within
a line of typing.
You
can
think
of using
the
left
and
right
arrow
keys
to
move
the
cursoras
being
similar
to
lifting
a pencil from
one
place
onasheet
of
paper
and
placingitat
another
spot
on
that
same
sheet
of
paper.
Before
starting
the
next
exercise,
press
ENTER,
type
the
words
CALL
CLEAR,
and
press
ENTER
again
to
clear
the
screen.
77
Page 79

SCREEN
2
Using
the
FUNCTION
key
with
theSkey
moves
the
cursor
to
the
left.
78
Page 80

WV
CtiHPUTi«
SCREEN
3
Using
the
FUNCTION
key
with
theDkey
moves
the
cursortothe
right.
79
Page 81

THE
CONTROL
KEY
AND
NUMBER
KEYS
CONTROL
key
• NUMBER
keys
80
Page 82

THE
CONTROL
KEY
Thekey marked
CTRL,
to the leftofthe spacebar,
is
the
CONTROL
key
it
works
like
the
FUNCTION
key—youhold itdown with another keyon the
keyboard
and
the
combination tells
the
com
puterto do something special.Butthe control
functions
are
not
indicated
on
the
keyboard
because they change.
You'll
only use control
functions with special software programs,
and
the specific software program
will
provide in
structionsfor
their
use
(and usually a
handy
reference card to tellyou which keys do what).
THE
NUMBER
KEYS
Thenumber keysinthe top row operate a little
differentlyfrom the letter keys.There are no up
percasenumbers. Instead, each numberkey
contains
two
characters.
One
(in
the
lowercase
position)
isa
number,
and the other
(in
the up
percase
position)
isa
symbol
ofsomesort.
You
type the number keyaloneto produce the num
ber on
the
screen.
To
produce thesymbol
that
is
above
the
number,you hold the
SHIFT
key and
type
the
number
key.
Remember
how
this
works?
Hold
the
SHIFT
key
down, and type the number keys fromone
through nineand then zero.
Your
screen
will
showthe symbolson the upper part ofthe keys.
SCREEN
1
Beforestarting the next exercise,press
ENTER,
type the words
CALL
CLEAR,
and press
ENTER
again
to
clear
the
screen.
81
Page 83

SCREEN
1
Pressing
the
SHIFT
key
withanumber
key
createsasymbol
on
the
screen.
82
Page 84

THE
1/!
KEY-
DELETE
FUNCTION
1/1
key
The 1/!keyfsat
the leftend of
the
top
row
of
keys. If
you
simply
press
the
key, a
numeral
J
appears
on
the
screen.
Now
hold
the
SHIFT
key
and
press
the
1/!key. The exclamation mark -
appears
next
to
the
numeral.
SCREEN
1
The
special
function
of
the
I/!
keyisindicated
on
the
label
just
above
the
key
The letters DEL
stand
for
DELETE.
Byholding
down
the
FUNC-
83
Page 85

TION key
and
the
1/!key,youcan delete (re
move) characters
that
you
don't
want
ina line.
The
DELETE
key
operates
much like
an
eraser
on a
sheet
of paper. The
DELETE
key has some
advantages
over
a normal eraser,
however.
It's
much neater—in addition to not leavinga mess
after use,
the
DELETE
key
won't
leave blank
spaces
where
you've
erased
mistakes.
Let'stry using
the
DELETE
key.
Type
THIS
IS
MY
OLD
COMPUTER.
Your
sentence
appears.
SCREEN
2
Now
use the leftarrow keyto move the cursor
to
cover
the
letter
O
in
the
word
OLD.
SCREEN
3
Now,hold the
FUNCTION
keydown, and press
the
I/I
key
four times.
What
does
our
sentence
say
now?
SCREEN
4
Byusing
the
DELETE
key,
you've
deleted
the
word
OLD.Each timeyou press
DELETE,
the
character (orspace)onwhichthe cursorrestsis
erased, and allof the letters to
the
right of
the
cursor
move
to
the
left by
one
space. This
auto
maticallytakescare of
the
space
that
was
occu
pied
by
the
deleted
character.
Before
starting the next
exercise,
press
ENTER,
type the words
CALL
CLEAR,
and press
ENTER
again
to
clear
the
screen.
84
Page 86

'*-**V
V32
V7j'
- '-
SCREEN
1
Press
the
1/1
key
twice,
once
by
itself
and
once
with
the
SHIFT
key.
" v."~ 3 * -' :
%jr;.
~
'~~\'>'1?
"'-- :'~' -
-X*^.
THIS
IS
MY
PL.»
COMPUTER.
SCREEN
2
To
delete
the
word
OLD,
first
move
the
cursor
to
the
left...
85
Page 87

SCREEN
3
..
.so
that
it is
on
topofthe
O in OLD. Press
the
FUNCTION
and
1/1
keys
four
times.
SCREEN
4
This is
what
the
sentence
looks like
when
you
have
removed
the
word
OLD.
86
Page 88

THE
2/a
KEY-
INSERT
FUNCTION
2/@
key
The
2/@
key is located in
the
top
row
of keys,
just
to
the
right of
the
1/! key If
you
simply press
the
key, a numeral 2
appears
on
the
screen.
Now
hold
the
SHIFT
key
and
press
the
2/@
key
That strange-looking symbol
that
just
appeared
on
your
screen isan abbreviation for
the
word
AT
SCREEN
1
87
Page 89

Thespecialfunction ofthe 2/@ key isindicated
on
the
label
just
above
the
2/@
key.
The letters
INS
stand for
INSERT.
Holding down the
FUNC
TION
keywhiledepressingthe 2/@ keyturns
the 2/@ key into an
INSERT
key.
You'll
use the
FUNCTION
keyand the 2/@ key to insert
charactersintoa
line
that you have already
typed.
Let's give this a try!
Type
THIS
IS
MY
COMPUTER.
Your
sentence
appears on
the
screen.
SCREEN
2
Now
use
the
leftarrow key to move the cursor
to
cover
the
C in
the
word
COMPUTER.
SCREEN
3
88
Page 90

SCREEN
1
Press
the
2/@
key
twice,
once
by
itself
and
once
with
the
SHIFT
key.
.-•
J5^fSg!>^
&-**££*•*'
' ~~^
T&-*„T~i
L>2 @
THIS
t#
MY
COMPUTER.
SCREEN
2
To
Insertaword
between
MY
and
COM
PUTER,
move
the
cursor
left...
89
Page 91

SCREEN
3
...so
thatitcovers
theCin
COMPUTER.
90
Page 92

2/@
key
Now,
hold
the
FUNCTION
key
down
and
press
the
2/@
key
You
won't
see
any
difference
on
the
screen,
but
your
computer
is
now
in
the
in
sert
mode.
Type
the
word
NEW
and
press
the
spacebar
once.
What
does
the
sentence
say
now?
SCREEN
1
91
Page 93

Byusing
the
INSERT
key you Ve inserted
new
text into an existing
line.
Notice that asyou in
sert
the
new
text, existing words move to
the
right
to
create
room for
the
new
characters.
You
willstay in the insert mode untilyou use the
arrow
keys
to
move
your
cursor in
either
direc
tion.
To
see
how
this
works,
hold
the
FUNC
TIONkey down and pressthe left
arrow
key
until
the
cursor
is
over
the
letter
N in
the
word
NEW.
SCREEN
2
Now,
type
the
word
OLD.
Notice
what
happened! Sinceyou are
not
inthe
insert mode any longer, the word OLDwas
not
inserted between words. Instead,it
simply
re
placed
the
word
NEWasyou typed.
SCREEN
3
Remember,
once
you
are in
the
insert
mode,
the
characters thatyou type areaddedto your orig
inal text;
when
you
are
not
in
the
insertmode,
any
characters
that
you
type will replace
the
original text.
Beforestarting
the
next exercise, press
ENTER,
type
the
words
CALL
CLEAR,
and
press
ENTER
again
to
clear
the
screen.
92
Page 94

^.^sskrf*
SCREEN
1
The
FUIMCTION
and
2/@
keys
combined
allow
you
to
insert
words.
"
i^v
ii^-^^Tl
L> 2 #
THIS
%&
M Y
SCREEN
2
Moving
the
cursor
turns
off
the
Insert
mode.
*V-
-
-c^
f4%K
.
$ew
coHf*uref»*
93
Page 95

94
;:*m
)>2
g
THIS
IS
MY
OiPlCOW?FUTgft.
SCREEN
3
With
the
insert
mode
off,
any
new
characters
you
type
replace
whatever
was
there
before.
j
Page 96

THE
3/#
KEY-
ERASE
FUNCTION
3/#
key
The
3/#
key islocated in the top row of keys,
just
to
the
right of
the
2/@ key Ifyou simply
press
the
key,a numeral 3 appears on
the
screen.
Now
hold
the
SHIFT
key
and
press
the
3/#
key
Your
screen shows the # symbol (which
means
number).
SCREEN
1
95
Page 97

Thespecial function of the
3/#
key isindicated
on
the
label
just
above
the
3/#
key Since
the
DELETE
key can be thought of as an
eraser,
you
may
wonder
about
the
ERASE
function
of
the
3/#
key
Well,
the
3/#
key can also be likened
to
an eraser—it's
just
a much bigger eraser!
Want
to
see
what
we
mean?
Try
it on for size.Again, type in
the
sentence
THIS
IS
MY
COMPUTER.
SCREEN
2
Holdthe
FUNCTION
keydown, and press the
3/#
key
How
much
text
was
erased?
SCREEN
3
Imagine that! The entire
sentence
vanished,
and
the cursor issitting next to the prompt. The
ERASE
function
will
always
erase
anycharacters
that
you've
typed
on a line.
96
Page 98

SCREEN
1
Press
the
3/#
key
twice,
once
by
Itself
and
once
with
the
SHIFT
key.
SCREEN
2
When
you
press
the
FUIMCTIOIM
key
with
the
3/#key...
97
Page 99

SCREEN
3
...the
whole
line
disappears!
98
Page 100

THE
4/S
KEY-
CLEAR
FUIMCTION
4/$
key
The 4/S key is located in
the
top
row
of keys,
just
to
the
right
of
the
3/#
keyIfyou
simply
press
the
key
a
numeral
4
appears
on
the
screen.
Now
hold
the
SHIFT
key
and
press
the
4/S
key
Your
screen
shows
the
$symbol (which
means
dollars).
SCREEN
1
The special function of
the
4/S
keyisindicated
on
the
label
just
above
the
4/S
key
Byholding
99
 Loading...