

Page 1

DiSEqC
1.2
Integrated
video recorder
PVR
For the reception of free-to-air and encrypted programmes broadcast via satellite, (e.g.. VIACCESS,
IRDETO, SECA ,etc. )
Operating Manual
with integrated
Premiere decoding system
and PCMCIA interface for
a CI Module.
With integrated Premiere decoding system and
PCMCIA interface for installing a CI module.
Operating Manual
DigiCor der S1
Digital receiver
with
integr ated hard disk drive
Bed_anl_.qxd 20.02.04 16:28 Seite 1
Page 2

1 Contents
1 Contents . . . . . . . . . . . . . . . . . . . . .2
2 Illustrations . . . . . . . . . . . . . . . . . . .5
3 Please read this first . . . . . . . . . . .8
Safety notes . . . . . . . . . . . . . . . . . . . . . . . . .9
4 Connections . . . . . . . . . . . . . . . . .11
4.1 Mains power connection . . . . . . . . . . . . . .11
4.2 External unit . . . . . . . . . . . . . . . . . . . . . . . .11
4.3 Connecting to a television set . . . . . . . . . .11
4.4 Video cassette recorder (VCR) . . . . . . . . .12
4.5 HiFi amplifier . . . . . . . . . . . . . . . . . . . . . . .13
4.6 Unit with S-Video input (Hosiden) . . . . . . .13
4.7 Serial interface (RS 232) . . . . . . . . . . . . . .13
5 Initial installation . . . . . . . . . . . . .13
6 Settings . . . . . . . . . . . . . . . . . . . . .17
6.1 Language for display . . . . . . . . . . . . . . . . .17
6.2 Basic settings . . . . . . . . . . . . . . . . . . . . . . .17
6.2.1 Time difference to GMT (hours) . . . . . . . . .18
6.2.2 Country . . . . . . . . . . . . . . . . . . . . . . . . . . .18
6.2.3 Remote control code . . . . . . . . . . . . . . . . .18
6.2.4 Standby clock . . . . . . . . . . . . . . . . . . . . . . .18
6.3 Audio/Video settings . . . . . . . . . . . . . . . . .18
6.3.1 Picture format TV set . . . . . . . . . . . . . . . . .19
6.3.2 Language (Audio signal) . . . . . . . . . . . . . .19
6.3.3 Language (Sub-titles) . . . . . . . . . . . . . . . . .19
6.3.4 TV SCART mode . . . . . . . . . . . . . . . . . . . .19
6.3.5 Video system . . . . . . . . . . . . . . . . . . . . . . .19
6.3.6 Dolby Digital (AC3) . . . . . . . . . . . . . . . . . .19
6.3.7 UHF output channel . . . . . . . . . . . . . . . . . .20
6.4 Antenna setting . . . . . . . . . . . . . . . . . . . . .20
6.4.4 Rotating antenna . . . . . . . . . . . . . . . . . . . .23
7 Operation . . . . . . . . . . . . . . . . . . . .24
7.1 Switching on and off . . . . . . . . . . . . . . . . .24
7.2 Programme selection . . . . . . . . . . . . . . . . .24
7.3 Receiving encrypted programmes . . . . . . .26
7.3.1 Multifeed options . . . . . . . . . . . . . . . . . . . .27
7.3.2 Selecting a starting time . . . . . . . . . . . . . .27
7.4 Volume adjustment . . . . . . . . . . . . . . . . . .27
7.5 Selecting a different language . . . . . . . . . .28
7.5.1 Dolby Digital (AC3 mode) . . . . . . . . . . . . .28
7.6 TV/Radio selection/switching . . . . . . . . . . .28
7.7 Return to last programme selected. . . . . .29
7.8 Display time and programme info . . . . . . .29
7.9 Additional programme information . . . . . . .29
7.10 Transponder information . . . . . . . . . . . . . .29
2
Bed_anl_.qxd 20.02.04 16:28 Seite 2
Page 3

7.11 Freeze frame . . . . . . . . . . . . . . . . . . . . . . .30
7.12 Video text . . . . . . . . . . . . . . . . . . . . . . . . . .30
7.13 Sub-titles . . . . . . . . . . . . . . . . . . . . . . . . . .31
7.14 Electronic Programme Guide SFI . . . . . . .31
7.14.1 Downloading SFI data . . . . . . . . . . . . . . . .32
7.14.2 Interrupting the download procedure . . . . .32
7.14.3 Display Electronic Programme Guide . . . .32
7.14.4 Now (Table with current programme contents)
33
7.14.5 Next . . . . . . . . . . . . . . . . . . . . . . . . . . . . . .33
7.14.6 More . . . . . . . . . . . . . . . . . . . . . . . . . . . . . .33
7.14.7 SFI functions . . . . . . . . . . . . . . . . . . . . . . .34
7.14.7.1 SFI information . . . . . . . . . . . . . . . . . . . . .34
7.14.7.2 SFI timer programming . . . . . . . . . . . . . . .34
7.14.7.3 SFI programme overview . . . . . . . . . . . . . .35
7.14.7.4 SFI overview by programme type . . . . . . .36
7.14.8 End SFI . . . . . . . . . . . . . . . . . . . . . . . . . . .36
7.15 Hard drive operation . . . . . . . . . . .37
7.15.1 Record . . . . . . . . . . . . . . . . . . . . . . . . . . . .37
7.15.1.1 Instant Record . . . . . . . . . . . . . . . . . . . . . .37
7.15.1.2 Timer recordings . . . . . . . . . . . . . . . . . . . .39
Timeshift function . . . . . . . . . . . . . . . . . . . .42
7.15.2 Playback . . . . . . . . . . . . . . . . . . . .43
7.15.2.1 Play back hard drive recordings . . . . . . . .43
7.15.2.2 Pause/freeze frame . . . . . . . . . . . . . . . . . .44
7.15.2.3 Fast forward and revers . . . . . . . . . . . . . . . .44
7.15.2.4 End Playback . . . . . . . . . . . . . . . . . . . . . . .44
7.15.3 Managing the hard drive . . . . . . . .44
7.15.3.1 Managing recordings . . . . . . . . . . . . . . . . .45
7.15.3.2 Hard drive information . . . . . . . . . . . . . . . .46
7.15.3.3 Hard drive maintenance . . . . . . . . . . . . . . .46
7.16 Sleep timer . . . . . . . . . . . . . . . . . . . . . . . . .46
8 Changing basic programming . . . .47
8.1 Configure a Favourites list . . . . . . . . . . . . .47
8.1.1 Call up programme list administration . . . .47
8.1.2 Add programmes to Favourites list . . . . . .48
8.1.3 Delete programmes . . . . . . . . . . . . . . . . . .49
8.1.4 Sort programmes . . . . . . . . . . . . . . . . . . . .50
8.2 Programming the electronic programme guide
50
8.3 Parental control function . . . . . . . . . . . . . .53
8.4 Programme Search/Scan . . . . . . .55
8.5 Service settings . . . . . . . . . . . . . . . . . . . . .59
8.5.1 Activating default setting . . . . . . . . . . . . . .59
5
Bed_anl_.qxd 20.02.04 16:28 Seite 3
Page 4

8.5.2 Delete all programmes . . . . . . . . . . . . . . . .59
8.5.3 Updating software . . . . . . . . . . . . . . . . . . .60
8.5.4 Copying settings . . . . . . . . . . . . . . . . . . . .61
8.6 System configuration . . . . . . . . . . . . . . . . .61
8.7 Encryption system . . . . . . . . . . . . . . . . . . .61
9 Operating a rotating antenna
(DiSEqC 1.2) . . . . . . . . . . . . . . . . . .62
9.1 Eastern and Western limits . . . . . . . . . . . .62
9.1.1 Delete existing limit settings . . . . . . . . . . .62
9.1.2 Setting Eastern limit . . . . . . . . . . . . . . . . . .63
9.1.3 Setting Western limit . . . . . . . . . . . . . . . . .63
9.2 Geo-positioning . . . . . . . . . . . . . . . . . . . . .63
9.3 Setting satellite position . . . . . . . . . . . . . .64
9.3.1 Selecting satellite position . . . . . . . . . . . . .65
9.3.2 Adjusting the satellite antenna . . . . . . . . . .66
9.3.3 Saving a satellite position . . . . . . . . . . . . .67
9.4 Current satellite liste . . . . . . . . . . . . . . . . .67
9.4.1 Go to satellite position . . . . . . . . . . . . . . . .68
9.5 Delete satellite position . . . . . . . . . . . . . . .68
9.6 Reference position . . . . . . . . . . . . . . . . . . .68
10 Technical terms . . . . . . . . . . . . . .69
11 Technical data . . . . . . . . . . . . . . . .71
12 Trouble-shooting guide . . . . . . . . .75
13 Annexure . . . . . . . . . . . . . . . . . . . .77
6
Your unit carries the CE logo, and complies with all relevant EU standards.
Subject to change without notice, not responsible for printing errors. Correct as
at 11/03
TechniSat and DigiCorder S1 are registered trade-marks of
TechniSat Digital GmbH
P.O. Box 560
D-54541 Daun
Germany
www.technisat.de
Technische Hotline (in Germany)
0180/5005-911*
*Cost 0,12 EUR/Min. via the Deutsche Telekom AG network
Note !
If it should become necessary to return your unit to the manufacturer, please
use only the address below:
TechniSat Teledigital AG
Service-Center
Löderburger Str. 94
D-39418 Staßfurt
Germany
Bed_anl_.qxd 20.02.04 16:28 Seite 4
Page 5
3
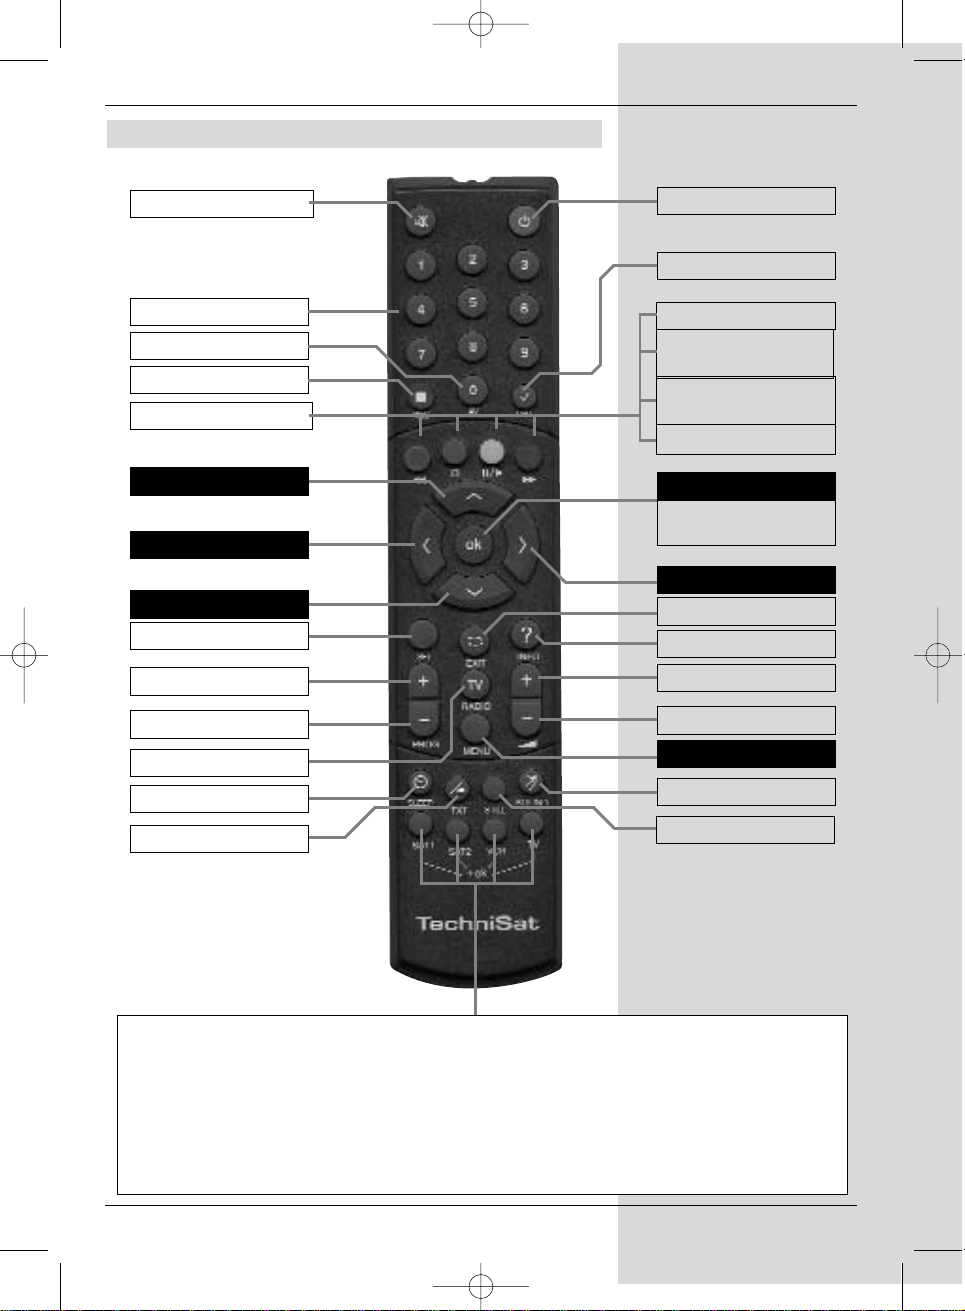
2 Illustrations
blue Fast forward
red Rewind
yellow:Pause, Play
green PVR-Navi-
gator, Stop
On/Standby
Programme list on/off
Back
Menu on/off
Sound on/off(mute)
Language select
Freeze frame
Option
Volume -
Programme +
Programme -
TV/Radio mode
Sleep Timer
Video text
SFI
Record
Multi-function keys
Numeric keys
0/AV
OK
Volume +
Info
Arrow key right
Arrow key left
Arrow key up
Arrow key down
Remote control option:
In order to operate 2 TechniSat receivers with identical coding, television sets as well as
an additional future option, (e.g. VCR).
Use these keys to select the remote control option Sat 1 and use this to operate your
digital receiver, if you have not set this differently as described in Point 6.2.3:
> Press the SAT1 and OK keys simultaneously!
Remote control unit
Bed_anl_.qxd 20.02.04 16:28 Seite 5
Page 6
Index . . . . . . . . . . . . . . . . . . . . . . .79
4
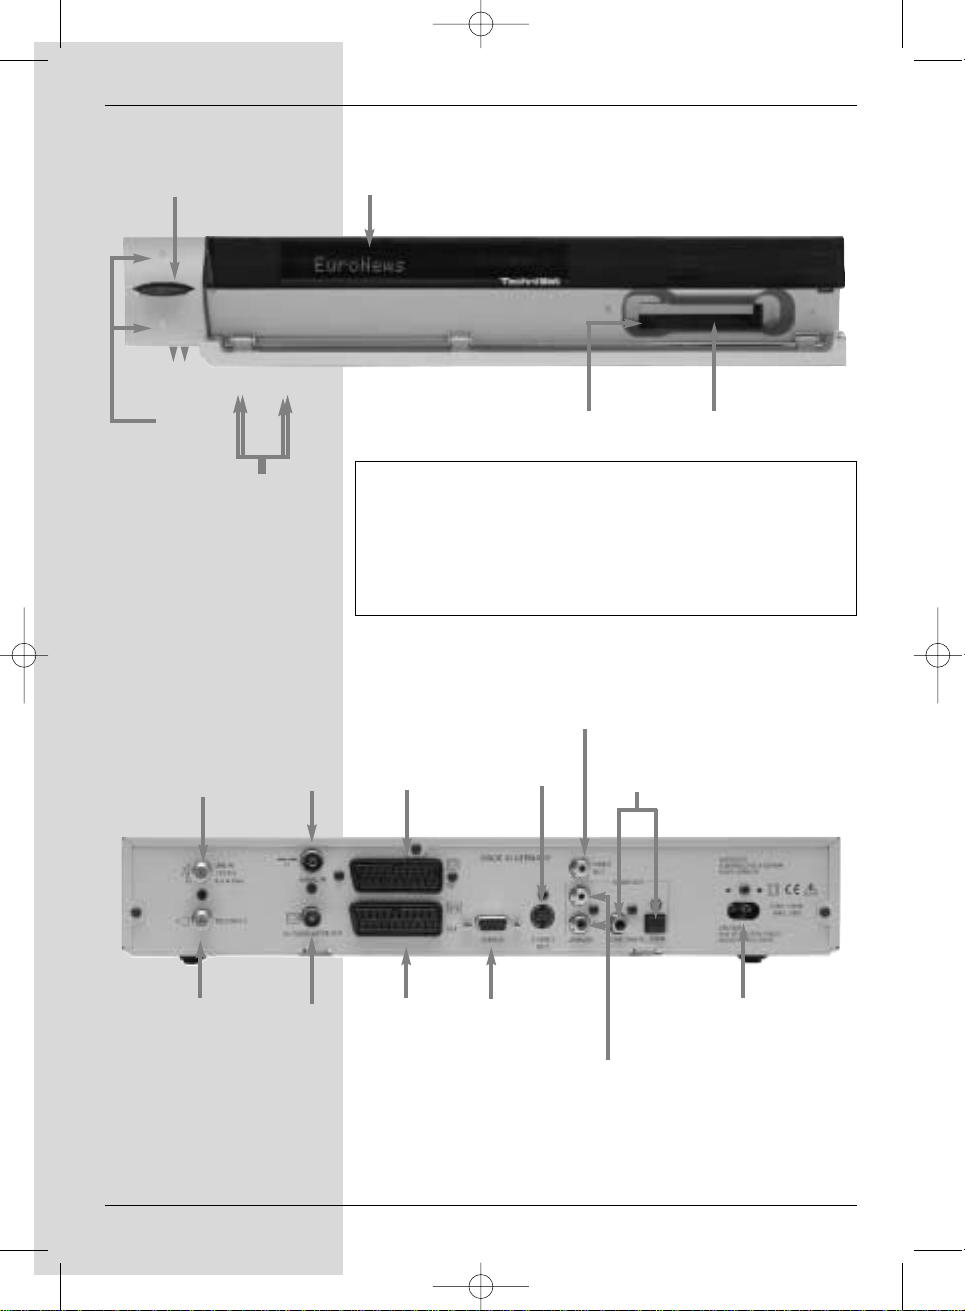
LNC
input
Input terrestrial
antenna
LNC out-
put
SCART socket
TV
Audio outputs
digital
SCART socket
VCR
Audio outputs
analogue
RS 232
interface
HF
output
Power socket
Inserting the CI module:
> Please note the manufacturer’s instructions for both the CI
module and card.
> Insert the appropriate smart card into the corresponding CI
module.
> Now insert the CI module carefully in the slot provided.
S-Video
output
Video
output
Ein/StandbyEin/Standby
LED display
Programme select
up/down
Slot for CI moduleEject button for CI
module
On/Standby
Alpha-numeric
display
Bed_anl_.qxd 20.02.04 16:28 Seite 6
Page 7

7
3 Please read this first
> Before operating your unit for the first time, please
check that you have received all the components. The
package should contain:
1 digital receiver, 1 mains power cable, 1 remote control, 1 operating manual, 1 guarantee card, 2 batteries
(1,5V microcell).
> Insert the batteries supplied in the battery compartment
of the remote control unit, taking care to observe the
correct polarity.
> Before connecting you digital receiver, please first read
the safety notes in Chapter 3.
> Chapters 4, 5 and 6 describe how you should con-
nect and adjust the digital receiver to the external unit
(antenna dish, LNC, ...), to the television set, VCR, etc.
These settings need only be made once, and would
only have to be updated if there is any change in your
external unit, or if additional pieces of equipment are to
be connected.
> Chapter 7 describes all the functions important in
everyday use, e.g. programme selection or operating
the hard drive.
> In Chapter 8 you will find information on how to set
new programmes, or how to change the order of programmes in the list.
> Chapter 9 describes the settings to be made when
operating a rotating antenna.
> Technical terms used in the operating manual are
explained in Chapter 10.
> Technical data is set out in Chapter 11.
> A brief troubleshooting guide can be found in Chapter
12.
Important notes on operating the unit
The implementation of an "On Screen Display" (text shown on
screen) helps to simplify thed operation of the digital receiver,
and also helps to reduce the number of kews required on the
remote control unit. All functions are indicated on the screen,
and can be implemented with a few keys. Related functions
are combined in a "MENU". The function selected will be marked and highlighted in a different colour. The bottom line of the
display shows colour bars in green, red, yellow and blue, corrresponding to the function keys in these colours. In the various
menus these colour bars represent different functions which
can be accessed by pressing the multi-function key of the
appropriate colour on the remote control unit. The function
keys are only active if a brief description appears in the appropriate field.
Key descriptions and other terms appearing in the OSD menu
Sehr geehrte Kundin, sehr geehr ter Kunde,
Bed_anl_.qxd 20.02.04 16:28 Seite 7
Page 8

are shown in emphasized letters in this operating manual.
Help:
Where available, press the blue function key to display help
texts, press again to disable the text display.
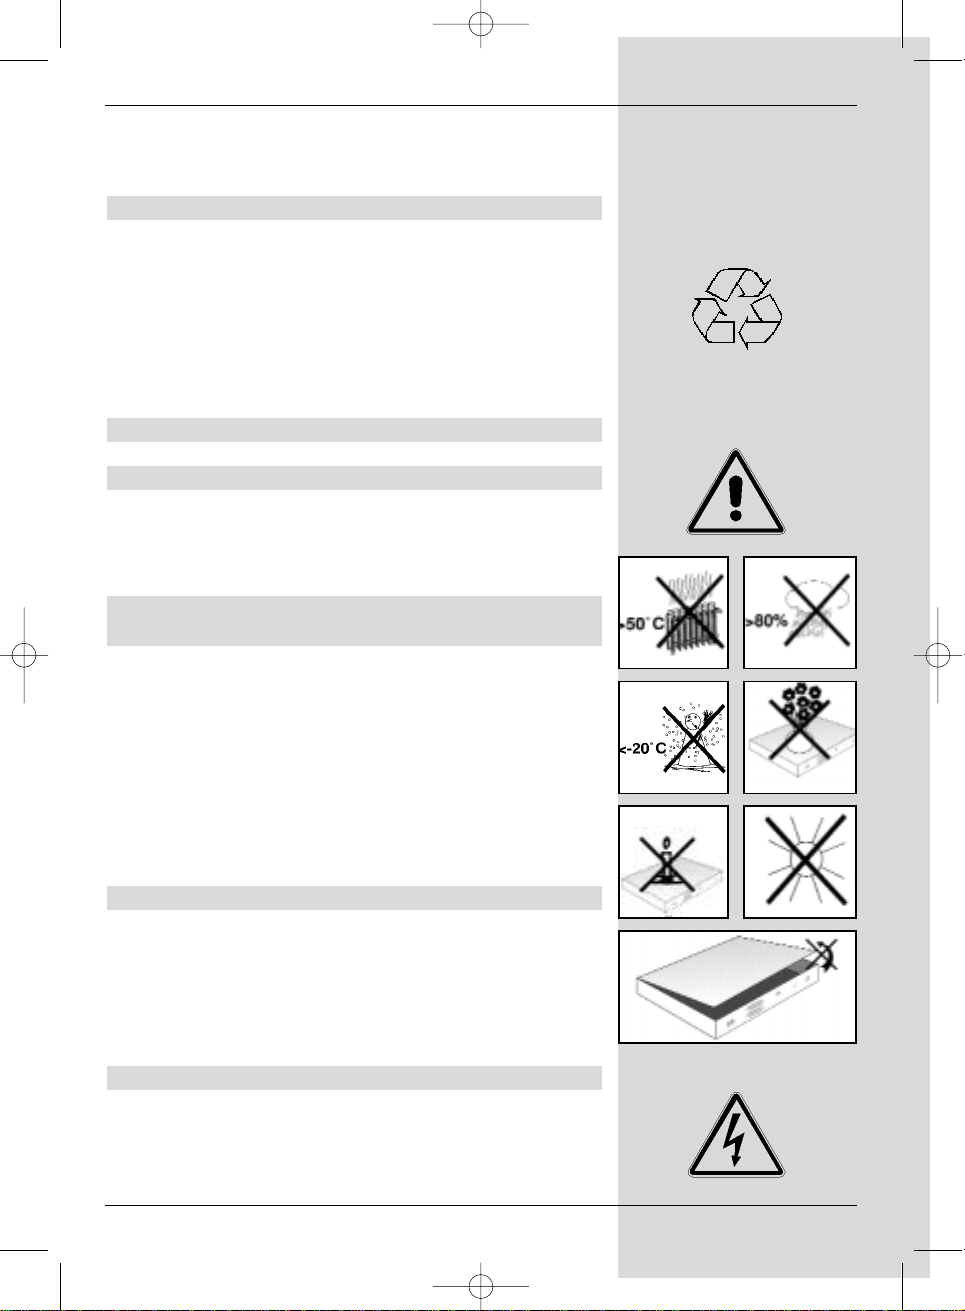
Disposal information
The packaging of this product consists entirely of recyclable
materials. Please separate the components accordingly, and
dispose of them via the “Dual System” or other local recycling
programmes.
Please ensure that discarded batteries from the remote control, as well as any other discarded electronic components,
are not disposed of in your regular household waste, but are
dsiposed of through the appropriate channels, either trough
your specialist retailer, or via the appropriate system of your
local authority).
Safety notes
For your own protection you should read the safety notes
carefully before operating your new unit for the first time.
The manufacturer accepts no responsibility for damage caused by inappropriate handling, or by ignoring the safety precautions in this manual.
> To ensure adequate ventilation, place the unit on a
smooth, even surface, and do not place any objects on
top of the unit. Ventilation slots located in the housing
are essential to conduct heat from the interior of the
unit.
> Do not place any burning objects, such as burning
candles, on the unit.
> Do not expose the unit to water (spray, drops), and do
not place any objects filled with liquid, e.g. vases, on
top of the unit.
> The unit should be operated only in a temperate clima-
te.
> Do not open the unit! You are in danger of experien-
cing an electrical shock. If it becomes necessary to
open the unit, this should be done only by trained personnel.
Disconnect the unit from the mains power supply and
call an authorised repair specialist if:
> the mains plug or the mains power cable are damaged
> the unit has been exposed to humidity, or liquid has
entered the unit
> in case of significant malfunction
> in case of signficant external damage
Temporary disconnection
In case of an electrical storm, or when you are away for an
extended period of time,e.g. while on holiday, you should
disconnect the unit from the mains power supply.
8
Bed_anl_.qxd 20.02.04 16:28 Seite 8
Page 9
4 Connections
The items a b c etc. mentioned below refer to the illustration
on page 10.
4.1 Mains power connection
The digital receiver should be connected to the mains power
supply only once all the other connections with other items of
equipment have been made. This will prevent damage to the
digital receiver or to other components.
a When you have made all the other connections. use
the mains power cable supplied to connect the receiver to a mains power supply providing 230 V/50-60
Hz.
4.2 External unit
4.2.1 Single unit operation
b Using a suitable co-axial cable, connect the LNC
input of the digital receiver with the LNC of your
external unit. Please also note Point 6 under
“Settings”.
4.2.2 Operating an additional receiver in a singlereceiver installation
c If you wish to operate an additional unit in a single-
receiver installation (e.g. an analogue receiver or an
ADR receiver), you can connect the LNC input of the
additional receiver with the LNC output of the DVB
receiver by means of a suitable co-axial cable. In
order for the satellite signal to be provided to the
additional receiver, your DVB receiver must be
operated in Standby mode. If your DVB receiver is
switched on, it will take over priority in controlling the
LNC.
4.3 Connection to a television set
When you have connected your digital receiver with
the television set as described in this chapter, it may be
necessary to adjust the digital receiver to the television standard of your television set.
To do this, please note Point 6.3.5 (Video system).
4.3.1 Via SCART cable
To ensure the best possible picture quality, use a SCART
cable to connect the digital receiver with the television set.
Proceed as follows:
d Connect the receiver (SCART socket TV) and the
9
Bed_anl_.qxd 20.02.04 16:28 Seite 9
Page 10
television set (SCART socket) by means of a SCART
10
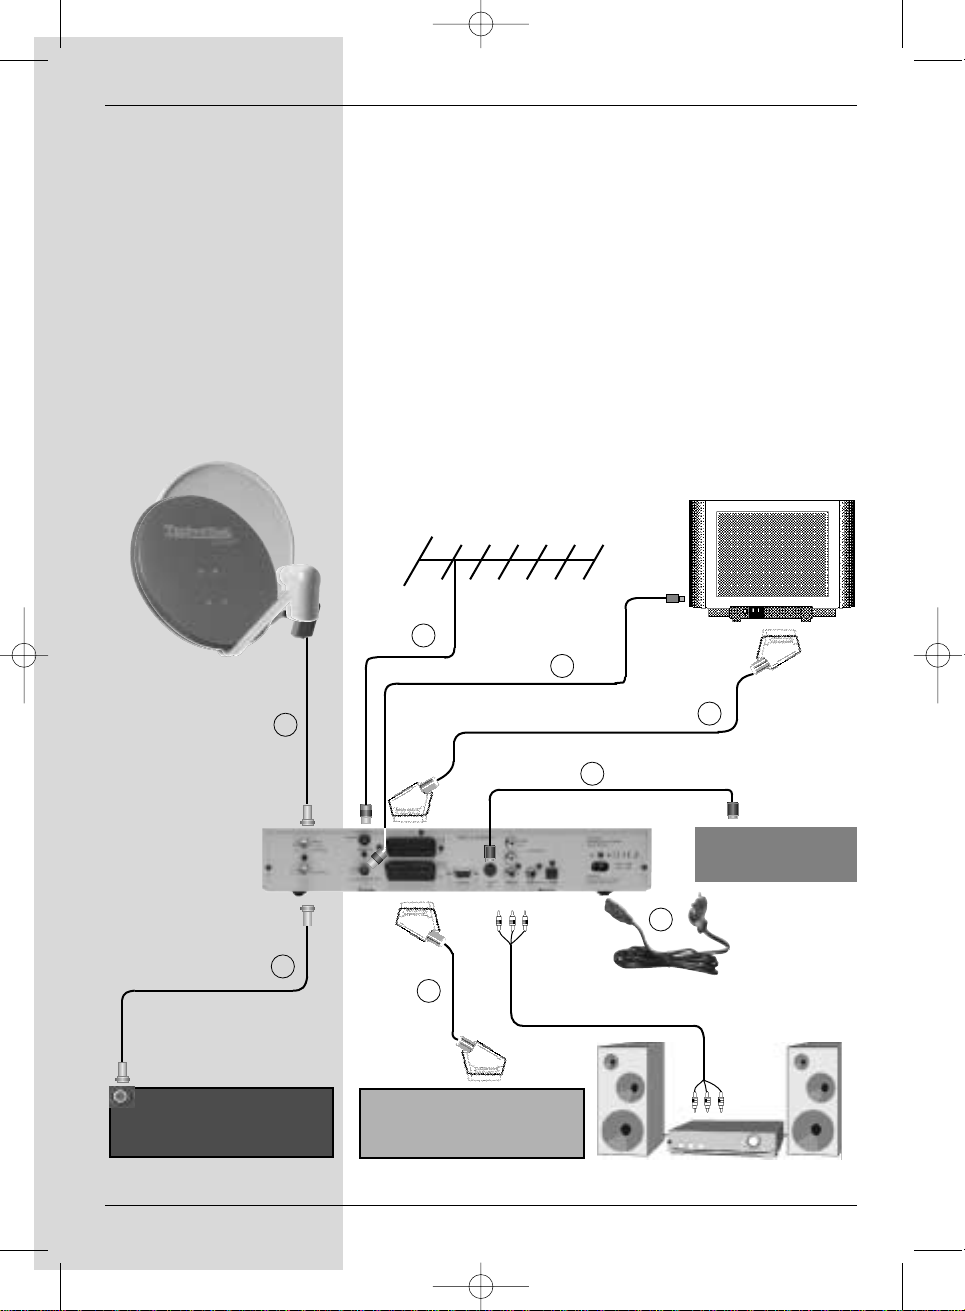
Connecting the DVB receiver to a satellite
installation
a. Mains power connection
b. Connection from the LNC to the LNC input(LNB IN) of
the DVB receiver.
c. Connection from the LNC output to the LNC input of an
analogue receiver.
d. Scart connection of the DVB receiver with the television
set.
e. Connection from the HF output mto the antenna input
socket of the television set.
f. Connection from a terrestrial antenna to the Terrest.
antenna input of the DVB receiver.
g. Scart connection from a video recorder to the VCR Scart
socket of the DVB receiver.
h. Connection from the S-Video output to the S-Video
input of another unit (e.g. beamer).
VCR
a
g
e
c
f
d
h
b
Analogue Receiver
e.g.
Beamer
Bed_anl_.qxd 20.02.04 16:28 Seite 10
Page 11

cable. If your television set is appropriately equipped,
it will switch automatically to AV when the digital receiver is switched on, and will provide satelliote reception.
4.3.2 Via HF cable
If your television set is not equipped with a SCART socket,
the digital receiver will have to be connected to the antenna
input socket of the television set. If this connection is used,
only mono sound reproduction is possible.
To make the connection, proceed as follows:
e Use a suitable TV connection cable to connect the
receiver (HF output) to the antenna input socket of
the television set.
f Connect the cable coming from the terrestrial antenna
to the Terrestrial antenna input of the digital
receiver.
You must now set your television set to the transmission (output) channel of the digital receiver. Select a free programme
slot on your television set, and tune it to Channel 38 (if
necessary, consult the operating manual of your television
set).
If you do not receive a clear picture on Channel 38, either
this channel or a neighbouring channel may already be tuned
to a programme being received via the antenna. You can
check on this by temporarily removing the antenna cable
from the Input terrestrial antenna socket of the digital
receiver. If you then temporarily receive a clear picture, you
should select a different channel on the digital receiver, in the
range 21 to 69.
Setting the UHF output channel
To set an optimum UHF output channel, please proceed as
described in 6.3, and go to the menu Audio/Video
Settings and mark the field UHF output channel. Then
proceed as described in 6.3.7.
4.4 Video cassette recorder (VCR)
g Connect the video recorder to the SCART socket mar-
ked VCR. In Playback mode, the video recorder will
supply a switching signal to the digital receiver. The
video recorder signal will be sent automatically to the
TV set.
If your video recorder does not supply the required
switching current, use the 0/AV key to switch your
digital receiver to the external input AV. Press this key
again to return to normal operation.
4.5 HiFi Amplifier
4.5.1 Analogue
11
Bed_anl_.qxd 20.02.04 16:28 Seite 11
Page 12

To achieve the best possible sound quality, you may connect
the digital receiver to a HiFi amplifier. To do this, use a suitable cable to connect the cinch sockets Audio R and Audio
L of the digital receiver with an input on your HiFi amplifier
(e.g. CD or AUX; please note that the Phono input is not suitable!).
4.5.2 Digital
Should your amplifier be equipped with an appropriate electrical or optical input, you may connect the sockets AUDIO
OUT DIGITAL elektrical resp.. AUDIO OUT DIGITAL
optical with the electrical resp. the optical input of your
amplifier.
Depending on the channel selected, sampling rates of 32,
44,1 and 48 kHz are available.
Where broadcast, the Dolby Digital-Signal (AC3) is also available at this output.
4.6 Unit with S-Video input (Hosiden)
h To connect the S-Video output with a unit equipped
with an S-Video input (e.g. beamer etc.).
4.7 Serial Interface (RS 232)
The RS 232 interface serves to carry out pre-programming
via a PC, and to update the operating software.
5 Initial installation
Once you have read the safety notes, and have connected
the unit as described in Chapter 4, you may switch on the unit
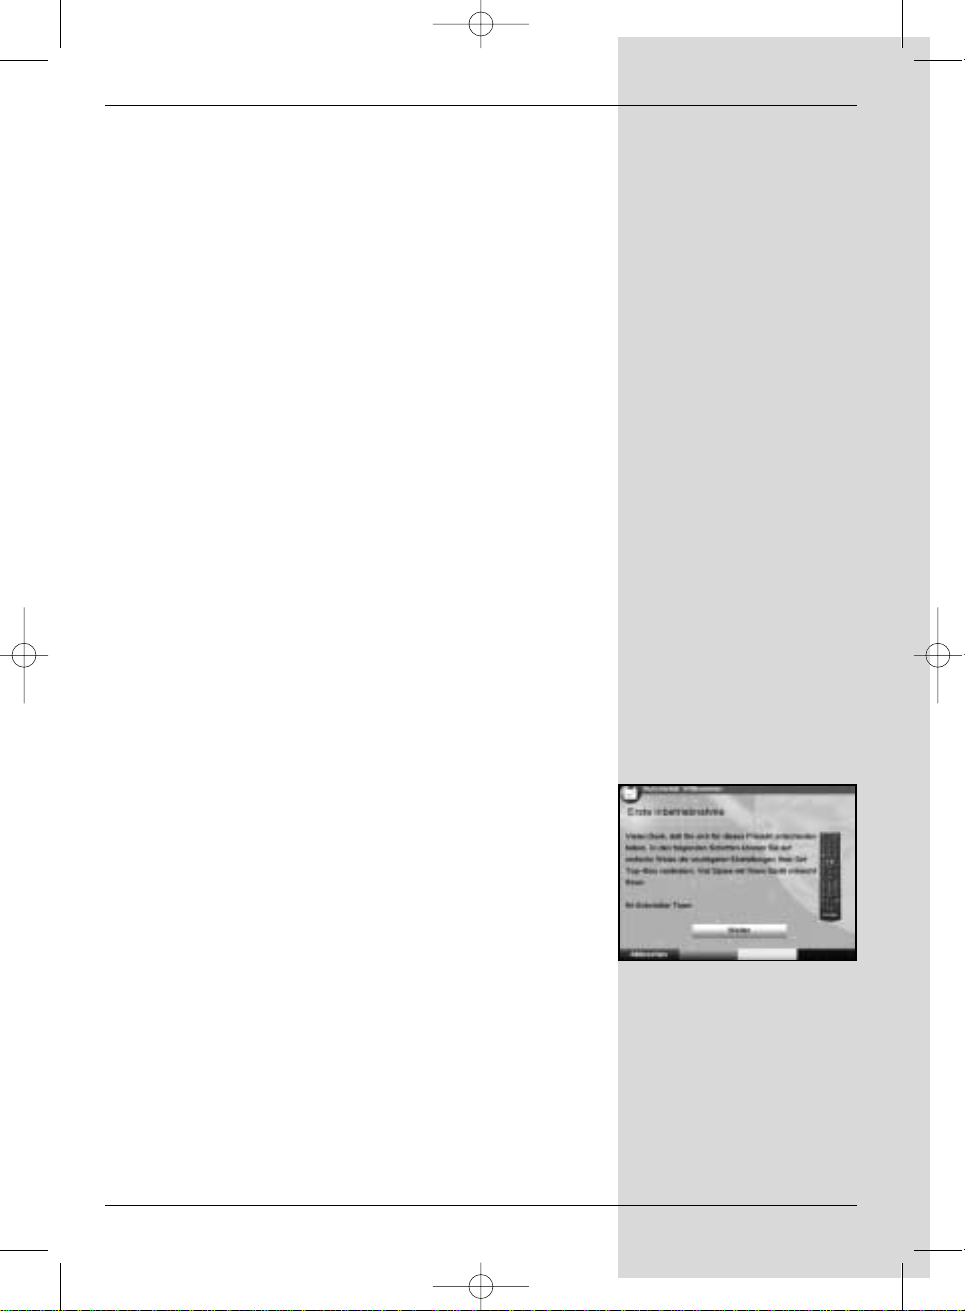
as described in Chapter 7. When the unit is switched on for
the first time, the start window of the installation assistant is
displayed: AutoInstall. (Fig. 5-1) The installation assistant
will help you to make the most important settings on your
digital receivers quickly and simply.
To make the adjustments in each step of the installation, the
remote control keys required are indicated.
You can exit from the initial installation procedure at any time
by pressing the red function key. Press the green function
key to return to the previous step of the installation. You can
thus correct any mistakes made at any time.
If the initial installation is not carried out, or is aborted before
completion, the unit will commence operation with a standard
pre-programmed configuration.
The initial installation described here serves only as an
example. The exact procedure of the intial installation will
depend on the settings you choose to make.
Please follow closely the instructions given on the screen.
12
Bed_anl_.qxd 20.02.04 16:28 Seite 12
Page 13
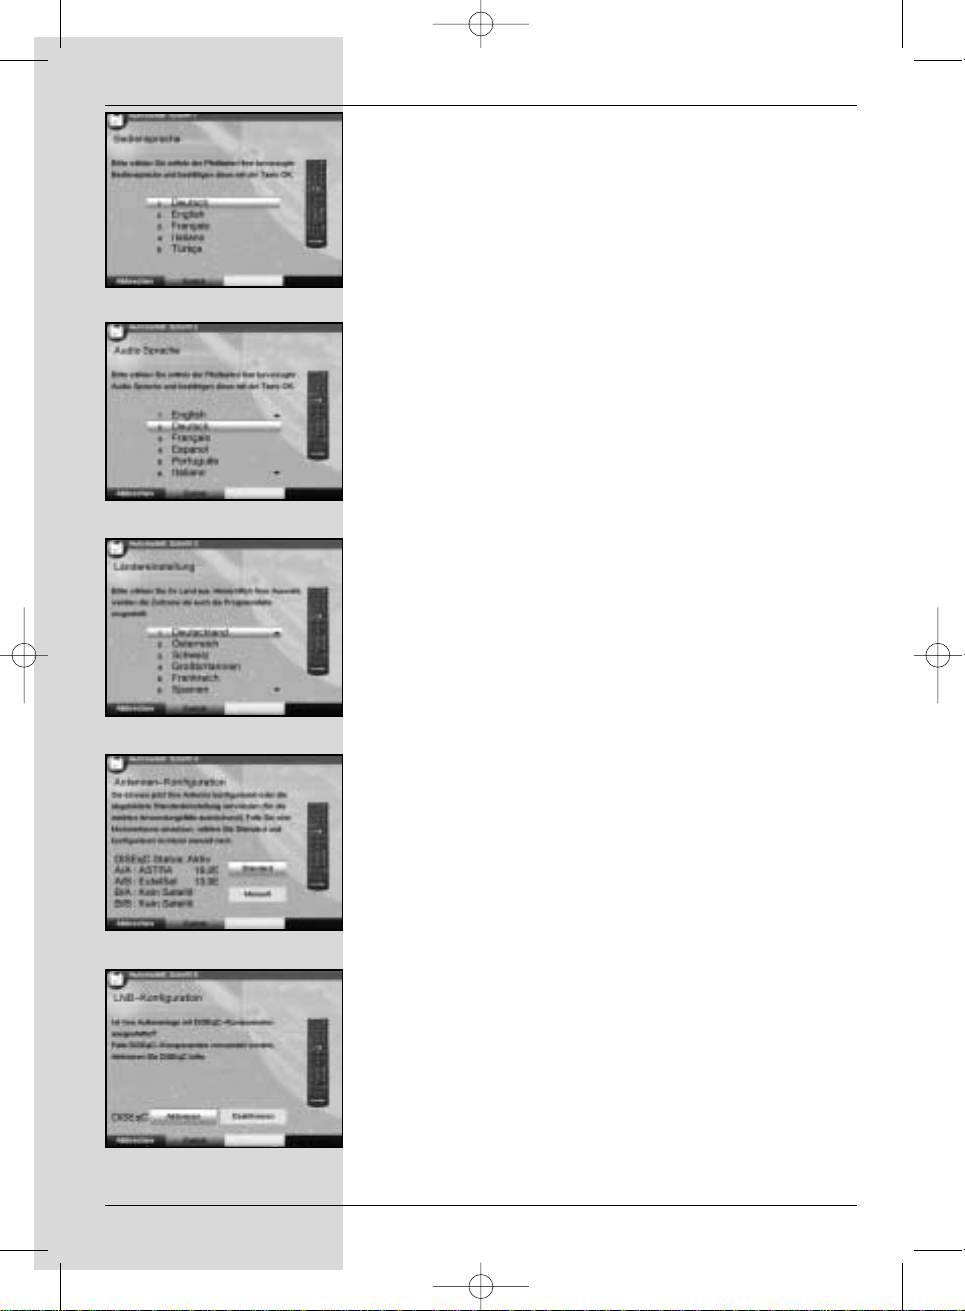
Operating language:
> Press OK to move to the selection window for the
operating (menu) language (Fig. 5-2)
> Use the up/down arrow keys to select the desired
operating language.
> Confirm by pressing OK.
Audio language
> Use the up/down arrow keys to select the prefer-
red audio language. (Fig. 5-3)
When the installation assistant has been completed,
the programmes in the Favourites list will be sorted
accordingly.
> Confirm by pressing OK, to accept this selection into
memory.
Country setting
> Use the up/down arrow keys to select the time
zone corresponding to your location. (Fig. 5-4)
The automatic clock setting will be made in accordan-
ce with your selection.
> Confirm by pressing OK, to accept the setting into
memory, and to move on to the antenna configuration.
Antenna configuration
This step of the installation procedure serves to adjust the
setting of your digital receiver to the configuration of your
antenna.
> If you wish to accept the standard antenna setting,
use the up/down arrow keys to mark the entry
Standard and confirm by pressing OK. (Fig. 5-5)
In this case you can proceed to the Point “Software
Updates”.
> If the configuration of your reception installation does
not correspond to the standard setting, mark the entry
Manual and confirm by pressing OK.
DiSEqC
> If your reception installation is equipped with DiSEqC
components, mark the field Activate and confirm by
pressing OK
(Fig. 5-6). (Additional information on DiSEqC can be
found in Chapter10, Technical Terms.)
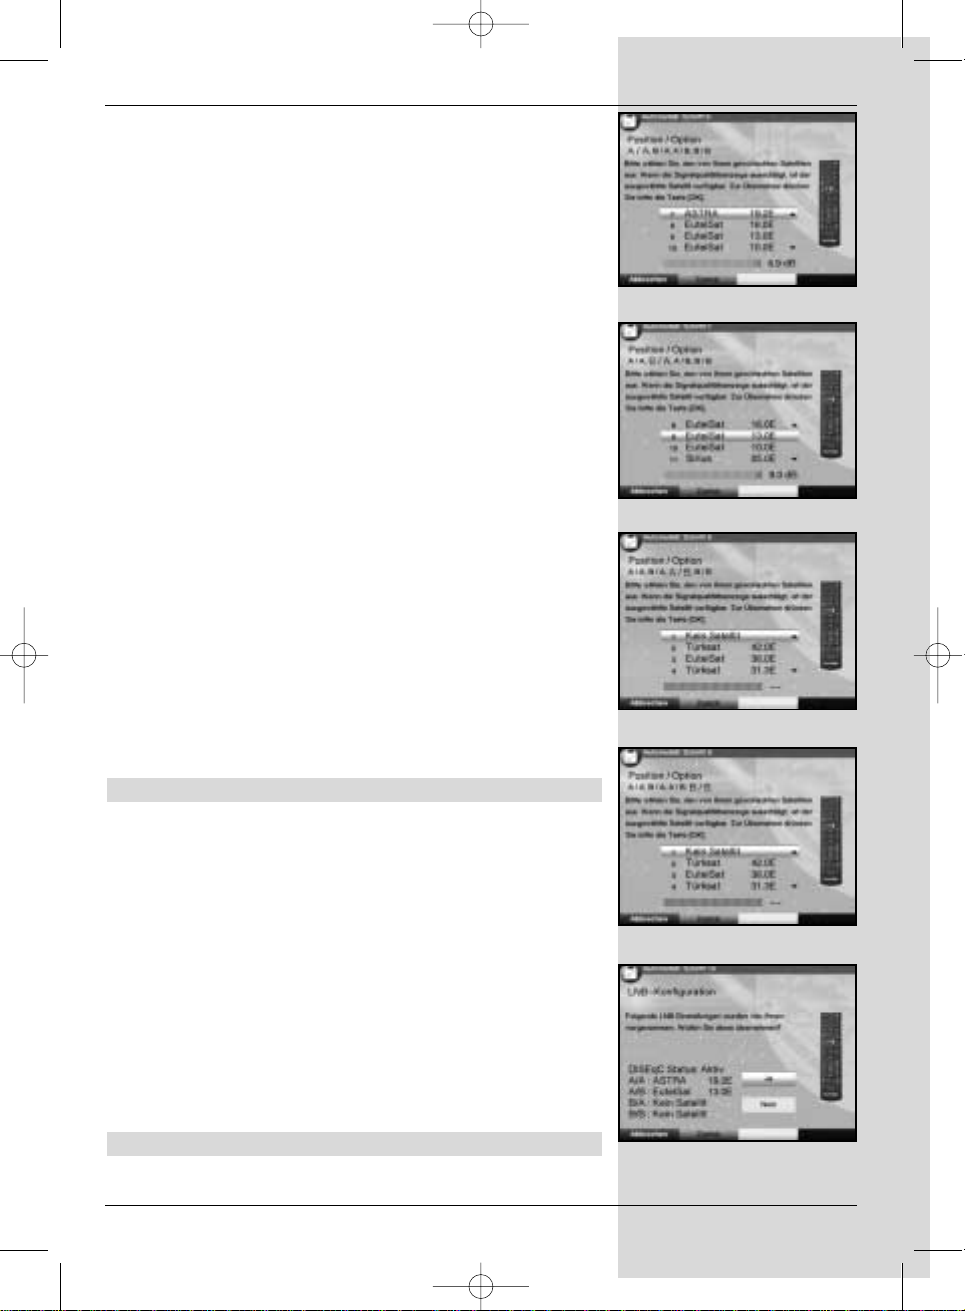
Position A/Option A
> Use the arr ow up/down keys to mark the satellite
you wish to receive at the DiSEqC setting Position
A/Option A, and confirm by pressing OK. (Fig. 5-7)
Position B/Option A
> Use the arr ow up/down keys to mark the satellite
13
(Fig. 5-1)
Bed_anl_.qxd 20.02.04 16:28 Seite 13
Page 14
you wish to receive at the DiSEqC setting Position
B/Option A, and confirm by pressing OK. (Fig. 5-8)
Position A/Option B
> Use the arrow up/down keys to mark the satellite
you wish to receive at the DiSEqC setting Position
A/Option B, and confirm by pressing OK. (Fig. 5-9)
Position B/Option B
> Use the arr ow up/down keys to mark the satellite
you wish to receive at the DiSEqC setting Position
B/Option B, and confirm by pressing OK. (Fig. 5-10)
As your next step, check again on the configuration of your
antenna.
> If you wish to accept this setting, use the arrow
up/down keys to mark the field Yes, and confirm by
pressing OK. (Fig. 5-11)
Updating software
When you have confirmed the antenna settings, the digital
receiver will automatically check whether a more up-to-date
version of the software for your unit is available via satellite. If
a new version of the software is available, you can perform
an automatic software update.
> Use the right/left arr ow keys to select the field
Update, and confirm by pressing OK. (Fig. 5-12)
The new software for your unit will now be downloa-
ded. This procedure may take several minutes.
Scanning for programmes
Once you have checked on the software version, and possibly downloaded an updated version, you can proceed to
searching for programmes.
> Use the up/down arrow keys to mark the field All
Channels, if you wish to scan for both encrypted and
free-to-air programmes, or select All Free-to-air
Channels if you wish to scan for only this type of
programme. (Fig. 5-13)
> Confirm your selection by pressing OK, the unit will
perform an automatic programme search. All the satel-
lites selected during the antenna configuration prove-
dure will be scanned for programmes. This procedure
may take several minutes. Please note any messages
displayed on screen.
When the scan is completed
When the scan has been completed, the number of transponders found, the number of programmes as well as the number of new programmes found will be displayed. In addition,
14
(Fig. 5-5)
(Fig. 5-6)
(Fig. 5-2)
(Fig. 5-3)
(Fig. 5-4)
Bed_anl_.qxd 20.02.04 16:28 Seite 14
Page 15
you will be prompted (Fig. 5-14) to decide whether you want
to automatically include the programmes found in the TV or
Radio lists. If you decide to include the programmes automatically, you can then decide whether they should be included
in the Favourites list in sorted or unsorted form.
If the programmes found are accepted in sorted form,these
are sorted into the Favourites list in accordance with a preprogrammed system. This means that the order in which the
programmes are included is primarily based on the audio
language, as selected in the installation step Audio
language. If German has been selected as the audio
language, the sorting order can be further differentiated in
terms of the country seleced in the installation step Country
(Germany, Austria or Switzerland).
If the new programmes are accepted in unsorted form,
then the newly found programmes are simply added in
unsorted order at the end of the Favourites list.
> Use the right/left arr ow to select the type of sor-
ting you prefer, and confirm by pressing OK.
Exiting from the installation assistant
> The installation assistant will display a final message
(Fig. 5-15) Confirm this by pressing OK, to return to
normal operation.
6 Settings
You have now connected your digital receiver, and commenced operating it. You can, if you wish, still optimize the settings of the digital receiver in accordance with your preferences.
6.1 Operating language
This menu item allows you to set the menu language in
accordance with your preferences.
To change the operating language, proceed as follows:
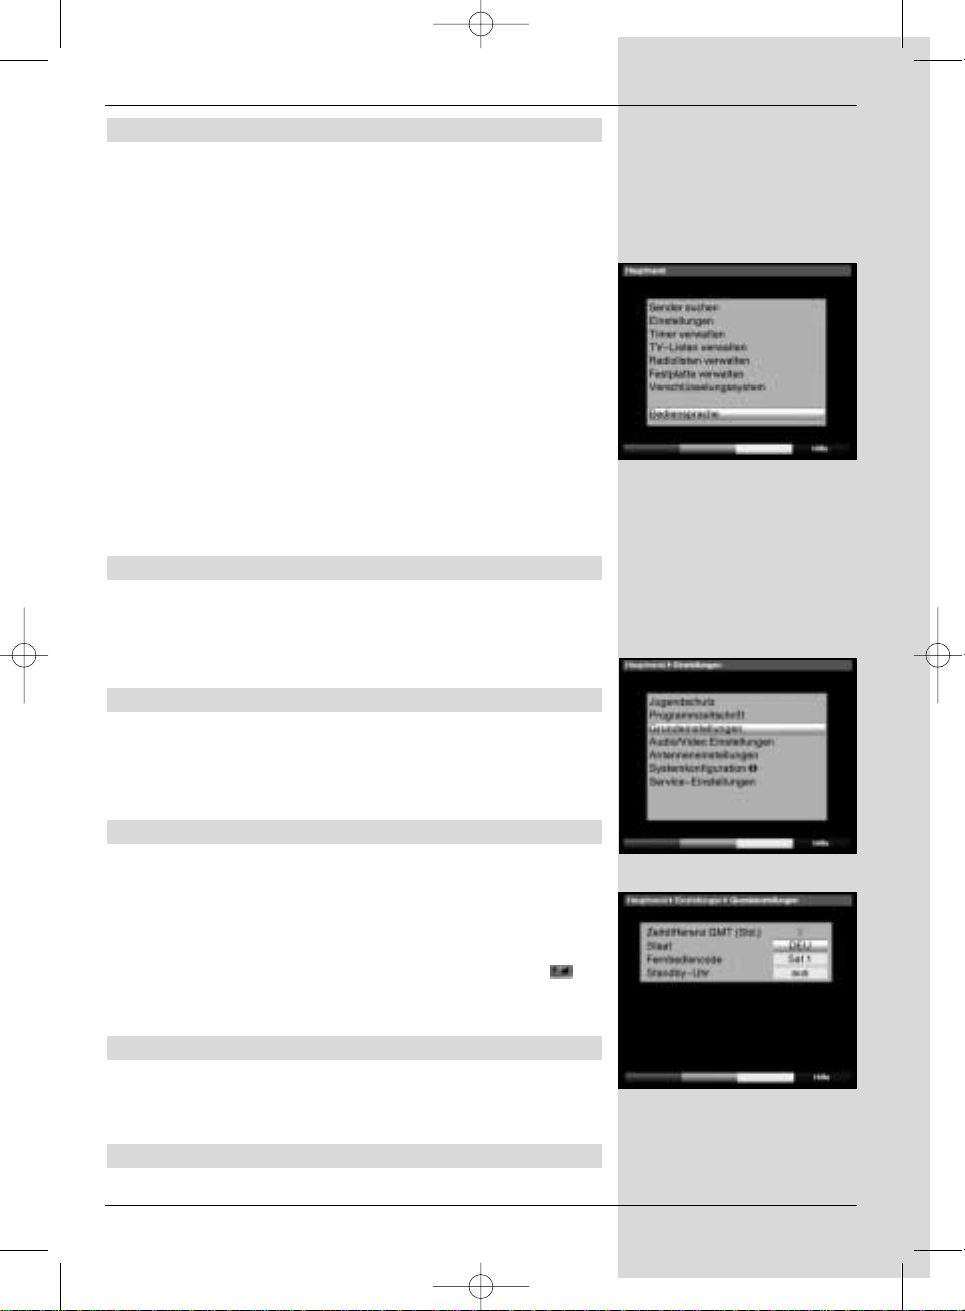
> Press the Menu key to display the Main Menu.
(Fig. 6-1)
> Now use the up/down arrow keys to mark the
menu line Operating language.
> Confirm by pressing OK.
The sub-menu Operating language will be
displayed.
> Use the up/down arrow keys to mark the preferred
language.
> Press OK to store this selection in memory.
> Press Back to return to the Main Menu.
6.2 Basic settings
To gain optimum enjoyment from your DVB receiver, you
15
(Fig. 5-7)
(Fig. 5-8)
(Fig. 5-9)
(Fig. 5-10)
(Fig. 5-11)
Bed_anl_.qxd 20.02.04 16:28 Seite 15
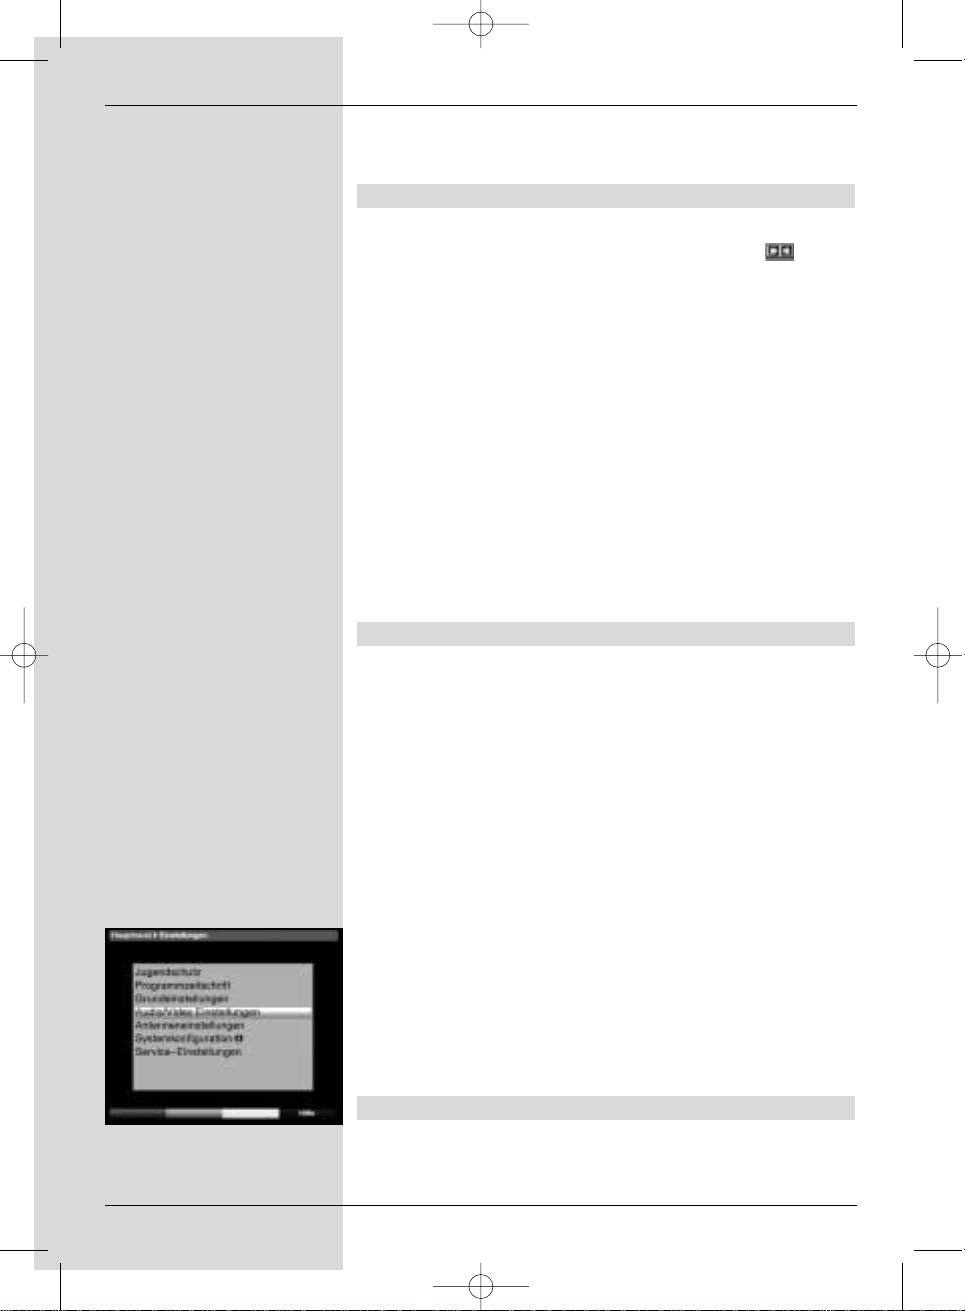
Page 16

should still make some settings related to your individual preferences.
> Press the Menu key to call up the Main Menu.
> Use the up/down arrow keys to mark the entry
Settings.
> Confirm by pressing OK. The sub-menu Settings
will be displayed. (Fig. 6-2)
> Now use the up/down arrow keys to mark the entry
Basic Settings.
> Confrim by pressing OK. The menu Basic Settings
will be displayed. (Fig. 6-3)
> Use the up/down arrow keys to move the marker
around within the menu, and to change any of the individual positions. When selecting a menu item, please
note any additional messages displayed on screen.
The following settings may be made:
6.2.1 Time difference GMT (hours)
Your unit is equipped with a clock. This is synchronized via
satellite with Greenwich Mean Time.
If you have selected the entry None under the heading
Country (Point 6.2.3), you can simply set the unit clock to
the correct local time by means of the right/left arrow
keys. For Germany, this difference is +1 hour on standard
time, and +2 hours during daylight savings time.
6.2.2 Country
This function provides for an automatic switch-over from standard to daylight savings time.
> Go to the entry Country and use the left/right
arrow keys to select you country of residence.
6.2.3 Remote control code
In this line you must decide whether your receiver should be
allocated the remote control option SAT1 or SAT2.
> To make the selection, press the SAT1 resp. SAT2
key and the OK key simultaneously.
Press the Back key to return to the menu Settings,
or press Menu to return to normal operation. The settings will be automatically stored in memory.
6.2.4 Standby clock
In this line you must decide whether the clock time should be
displayed when the unit is in standby mode.
> In this line, you can use the left/right arr ow keys to
set the standby clock mode to on or off einstellen.
> Press Back to return to the menu Settings, or press
Menu to return to normal operation. The settings will
be automatically stored in memory.
16
(Fig. 5-15)
(Fig. 5-13)
(Fig. 5-14)
(Fig. 5-12)
Bed_anl_.qxd 20.02.04 16:28 Seite 16
Page 17
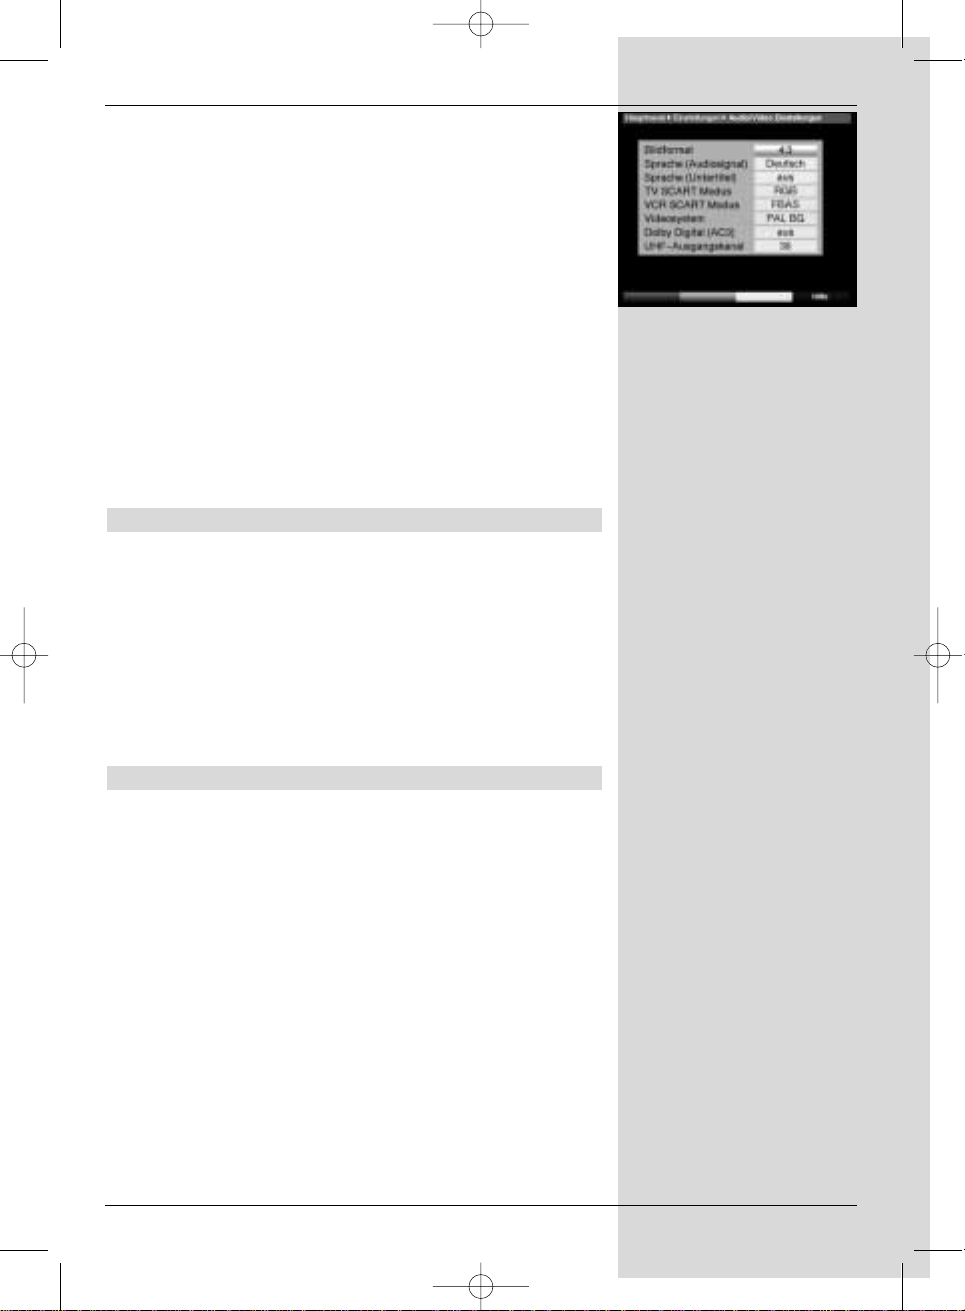
6.3 Audio/Video settings
To optimize your digital receiver in conjunction with your television set, you can make further settings in the menu Audio
/Video settings.
> Press the Menu key to display the Main Menu.
> Use the up/down arrow keys to mark the line
Settings.
> Confirm by pressing OK. The sub-menu Settings
will be displayed. (Fig. 6-4)
> Now use the up/down arrow settings to mark the line
Audio/Video settings .
> Confirm by pressing OK. The menu Audio/Video
settings will be displayed. (Fig. 6-5)
> Use the up/down arrow keys to move the marker
around within the menu, in order to change the set-
tings as indicated. Please also note the messages
displayed on screen in some cases.
The following adjustments may be made:
6.3.1 Picture format TV set
> Use the left/right arr ow keys to select the picture
format appropriate for your TV set, 4:3 or 16:9. This
function automatically adjusts the picture format for
your television set.
6.3.2 Language (Audio signal)
> In this line, use the left/right arr ow keys to select
your preferred language. This function will automati-
cally select the preferred language, where available,
after a programme scan.
6.3.3 Language (Sub-titles)
The DVB receiver is equipped to display sub-titles on screen.
These will be displayed automatically if the function Sub-titles
has been activated, and if the sub-titles are being broadcast
in the language selected.
If the function has not been activated, sub-titles can be activated manually. Sub-titles are indicated by the symbol in
the information box. Please also note Point 7.13 of the operating manual.
6.3.4 TV SCART mode
In this line, use the left/right arrow keys to select the
appropriate mode for your TV set, either FBAS or RGB. The
setting for standard sets is FBAS.
6.3.5 Video system
In this line you must set the appropriate television broadcast
17
(Fig. 6-1)
(Fig. 6-2)
(Fig. 6-3)
Bed_anl_.qxd 20.02.04 16:28 Seite 17
Page 18
standard for your television set. Use the left/right arrow
keys to select PAL BG, PAL I, PAL DK, SECAM BG or
SECAM DK.
6.3.6 Dolby Digital (AC3)
A number of movie films are broadcast in the Dolby Digital
format. This will be indicated by the dolby symbol ( ) in the
information window once you have saelected the programme.
If you have a Dolby Digital 5.1 channel amplifier, you can
enjoy the appropriate films in 5.1 channel Dolby-Digital
sound, where broadcast. The only pre-requisite is that the
Audio Out Digital output of your DVB receiver (see Point
4.5.2) must be connected to the digital input of your Dolby
Digital 5.1 channel amplifier.
Where a programme is being broadcast in Dolby Digital
sound, the Dolby logo will appear in the information window
when the programme is selected. If the function Dolby Digital
(AC3) has been activated (on), therse broadcasts will automatically be presented in Dolby Digital format.
If the function has not been activated (off), Dolby Digital
sound can also be selected manually. Please also note Point
7.5.1 of the operating manual.
6.3.7 UHF output channel
To set a suitable UHF channel, proceed as follows:
> On your television set, select a free (unallocated) UHF
channel in the range of 21 to 69.
> Now use the left/right arr ow keys to set the new
output channel of your digital receiver. The digital
receiver is now sending data on the UHF channel
shown in the display. Should reception not be satisfactory on this channel, repeat the procedure until you
find a satisfactory channel.
> When you have found an optimal UHF channel, please
remember to store this in the memory of your television set.
> If your television set is equipped only with an automa-
tic scan function, simply set any UHF channel on your
digital receiver, then start the automatic scan of your
television set. You may have to repeat this procedure
until you find a suitable output channel, which you
should then store in the memory of your television set.
> It may then be necessary to perform fine tuning on
your television set.
6.4 Antenna settings
When you have completed adjusting the settings of your digital receiver to your individual preferences, you can then, if
you like, adjust the antenna settings of your digital receiver.
18
(Fig. 6-4)
Bed_anl_.qxd 20.02.04 16:28 Seite 18
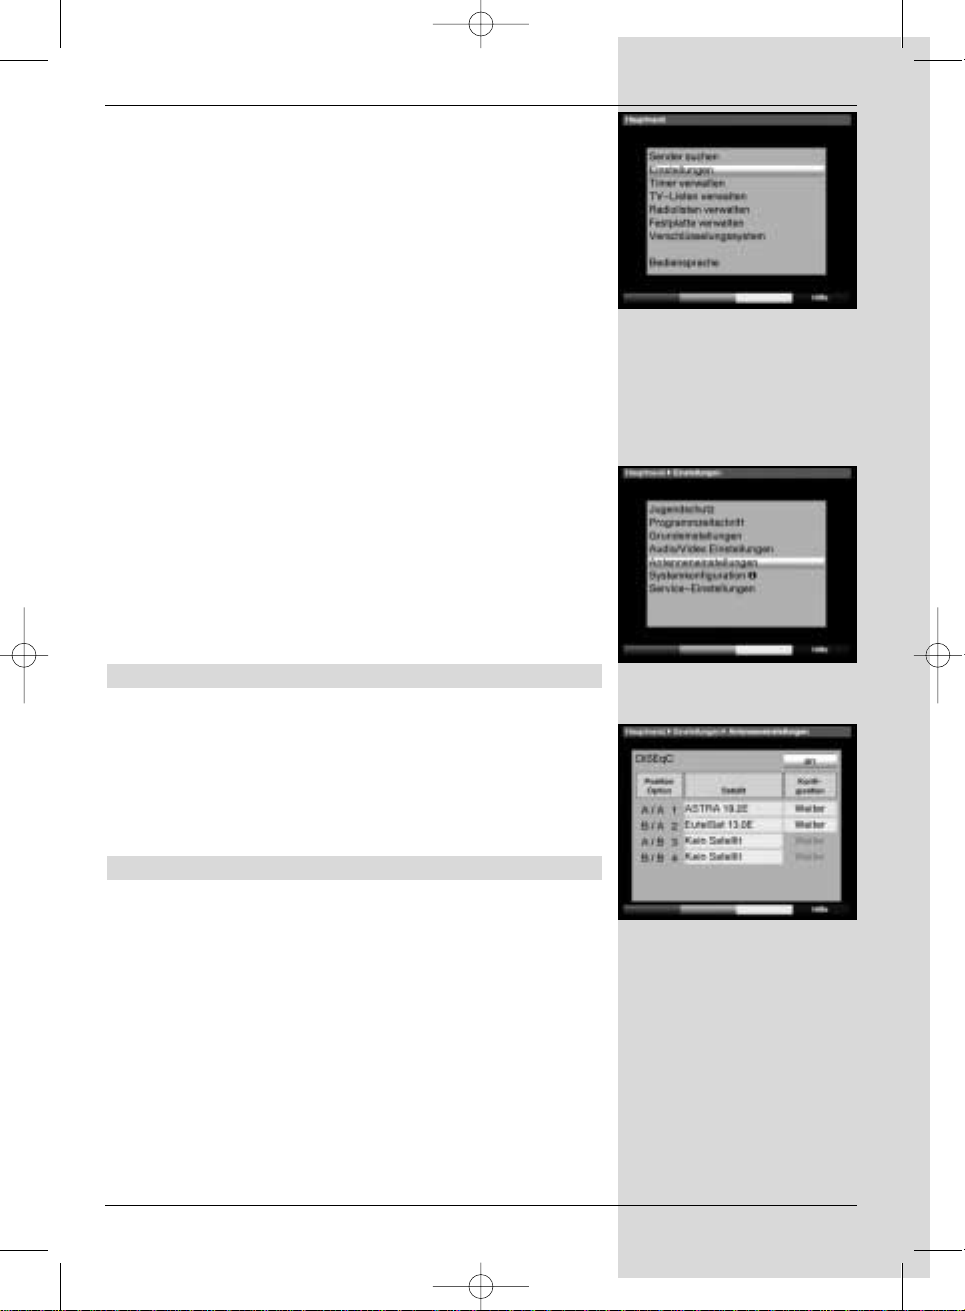
Page 19
The satellites selected by means of the installation assistant
will be displayed in the menu Antenna settings. If the
installation assistant was prematurely aborted, the satellite
positions ASTRA and EUTELSAT are pre-programmed ex
factory.
If you would also like to receive other satellites, or if you are
using a different type of LNC, you can make the appropriate
settings on your digital receiver as follows:
> Press Menu to call up the Main Menu. (Fig. 6-6)
> Use the up/down arrow keys to mark the item
Settings.
> Confirm by pressing OK.
The menu Settings will be displayed. (Fig. 6-7)
> Now use the up/down arrow keys to mark the item
Antenna settings.
> Confirm by pressing OK. The menu Antenna set-
tings will be displayed. (Fig. 6-8)
The following settings may be made in this sub-menu:
6.4.1 Switching DiSEqC on and off
DiSEqC (Digital Satelliten Equipment Control) is a digital
switching system used to control DiSEqC-compatible components via the antenna connection. If your external unit is
equipped with DiSEqC components, you must activate the
DiSEqC control function:
> In this line, use the OK key to switch DiSEqC on or
off.
As only a single LNC can be controlled when the
DiSEqC control function is switched off, the menu is
limited to the configuration of a single LNC.
6.4.2 Setting the switching matrix
The menu lists the four switching criteria of the DiSEqC control function. Your unit has been pre-programmed at the factory to receive ASTRA at the switching position A/A and
Eutelsat at the position B/A of a multi-switch. If the switching
matrix of your reception installation be set up differently, or if
it is set up to receive other satellites, you can adjust the settings of your digital receiver in accordance with the requirements of your reception installation as follows.
> Use the arrow keys to select the DiSEqC switch
position (1-4) to which you wish to allocate a satellite
(e.g.. A/B 3 No Satellite), by marking this line.
> Confirm by pressing OK.
A table showing a number of different satellites will be
displayed.
> Use the up/down arrow keys to mark the satellite
required.
Use the up/down arrow keys to move the marker
up or down one line at a time. Use the left/right
19
(Fig. 6-5)
Bed_anl_.qxd 20.02.04 16:28 Seite 19
Page 20

arrow keys to move forward or back one page at a
time.
If the satellite you are looking for is not shown in the
list, please select one of the reserve slots, marked
User 1 to User 14.
> Confirm by pressing OK. The selected satellite will
now be inserted at the previously selected position in
the menu Antenna settings.
Continue to work in the menu Antenna settings in this
manner until the settings in this menu correspond fully with
those of your reception installation. Select the option No
Satellite for any switching criteria not required.
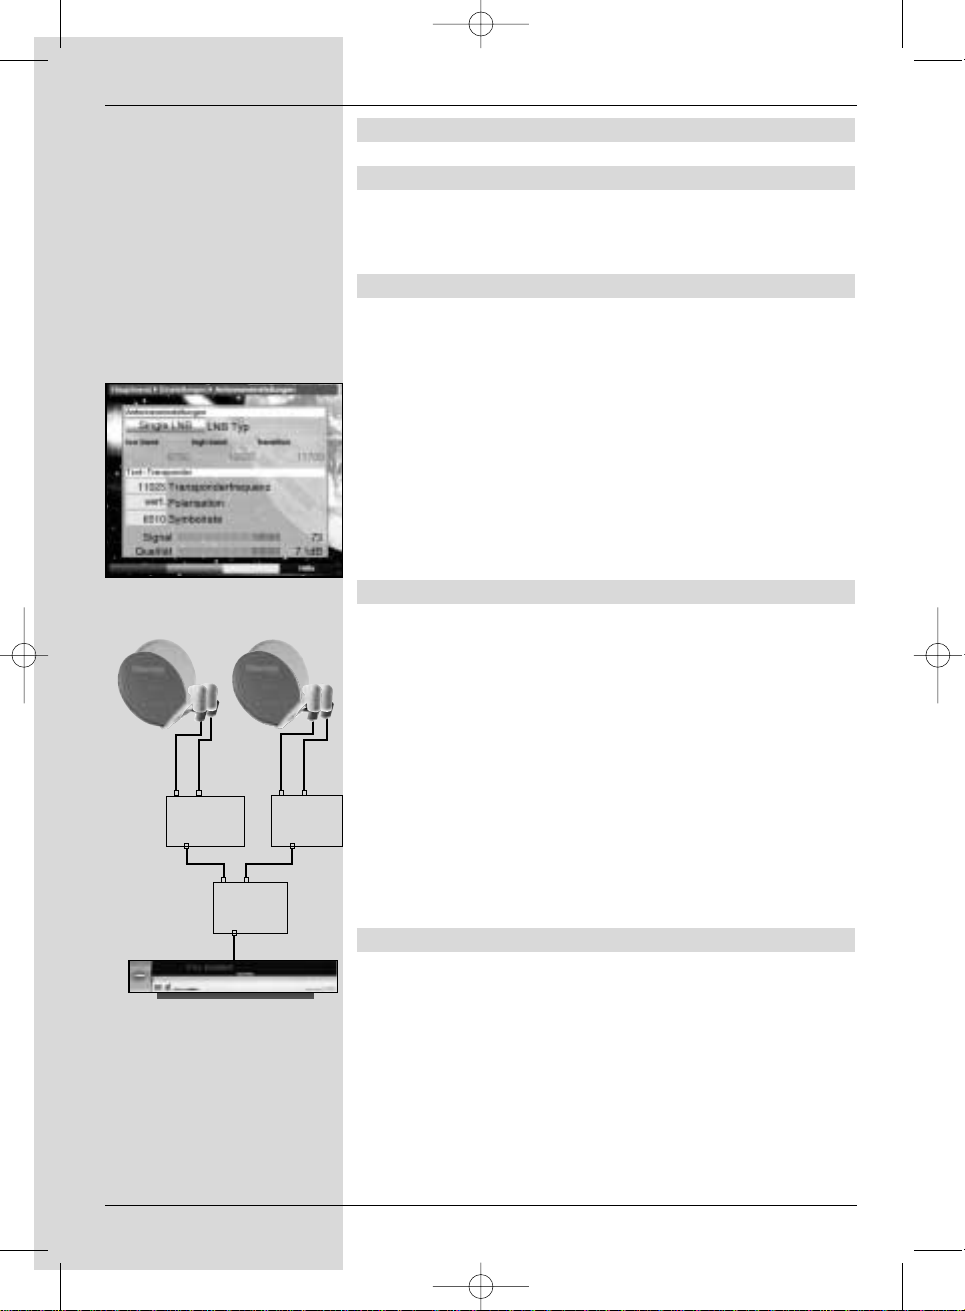
6.4.3 Additional settings/LNC characteristics
When you have completed adjsuting the switching matrix of
your DVB receiver to match the reception installation, you
should check the additional settings for your reception installation, and adjust them where necessary.
> Use the left/right arr ow keys to move the marker
to the column Configuration.
> Now use the up/down arrow keys in the line in
which you want to check or adjust the settings, and
press Next.
> Confirm by pressing OK.
A sub-menu will be displayed in which you can adjust
LNC settings, and set up a test transpon der. (Fig. 6-9)
The following adjustments may be made:
LNC type
> In this line use the left/right arrow keys to enter the
type of LNC you are using. You can choose from
Single LNC, Quatro LNC, DisiCon 1 LNC,
DisiCon 2 LNC, DisiCon 4 LNC, C-Band LNC
and a User LNC for manual entry of LNC data.
> Press OK to accept the setting into memory.
Test Tr ansponder
The following points of this menu need only be entered if you
wish to check the satellite signal of a particular satellite.
Transponder frequency
In this line, use the numeric keys to enter a frequency on
which digital programmes are broadcast.
Polarisation
Use the up/down arrow keys to select the appropriate
polarisation plane (horizontal or vertical).
Symbol rate
The symbol rate indicates the volume of data transmitted per
second. This could be, for instance, 27500 (27500 symbols
per second). Use the numeric keys to enter the appropriate
symbol rate.
20
Bed_anl_.qxd 20.02.04 16:28 Seite 20
Page 21
User LNC
If you have entered User LNC as the DiSEqC type, you can
make additional settings:
LOF low band
LOF (Local oscillator frequency) is the frequency at which the
LNC converts the frequency received into the so-called 1.
interim frequency, which can then be received by the digital
receiver. So-called Universal LNCs employ 2 LOFs to cover
the entire reception range from 10,7 to 11,8 GHz (low-band)
and 11,7 to 12,75 GHz (high-band).
> In this line, use the numeric keys to enter the LOF
of the low band of your LNC.
LOF high band
> In this line, use the numeric keys to enter the LOF
of the high band of your LNC.
Transition LOF low/high
> In this line, use the numeric keys to enter the
frequency at which your LNC switches from the low
band to the high band.
> Press OK to accept the settings into memory.
Signal/Quality
If you have entered the parameters of the test transponder
correctly, you will see in these lines indicators showing signal
strength and signal quality.
6.4.4 Rotary antenna
When operating the digital receiver in conjunction with a
rotary antenna equipped with a DiSEqC compatible motor
(Level 1.2), activate the DiSEqC control (Point 6.4.1) by
setting it to on and please note Point 9 of the operating
manual.
7 Operation
7.1 Switching on and off
> Switch the digital receiver on by pressing the
On/Standby key either on the unit or on the remote
control.
> Press the same key again, either on the unit or on the
remote control, to switch the receiver off.
> The receiver is now in standby mode. If this feature
has been activated (as described in Point 6.2.4) the
current time will be shown in the display.
If the current time is not shown, this must still be
downloaded to the receiver. To do this, switch the unit
on and switch to reception of a major channel, such
as ZDF, that broadcasts a time signal, for about 30
seconds, to acquire the current time automatically.
21
(Fig. 6-8)
(Fig. 6-6)
(Fig. 6-7)
Bed_anl_.qxd 20.02.04 16:28 Seite 21
Page 22
7.2 Programme selection
7.2.1 Using the programme up/down keys
> Use the progr amme up/down keys either on the
unit or on the remote control to move up or down by
one programme slot at a time.
7.2.2 Using the numeric keys
> Use the numeric keys to enter the desired program-
me number.
For example:
1 for programme slot 1
1, then 4 for programme slot 14
2, then 3, then 4for programme slot 234
When entering programme numbers of more than one digit,
you have approx. 3 seconds time after pressing a key to complete the entry.
If you wish to enter a number consisting of only one or two
digits, you can speed up the switching procedure by holding
down the key a little longer on the last digit.
7.2.3 Using the Navigator (Programme list)
> Press OK.
The programme list navigator will be displayed. In TV
mode, only TV programmes will be shown, while only
radio programmes will be shown while in Radio mode.
The currently selected programme will be highlighted.
(Fig. 7-1)
> Now, use the up/down arrow keys to mark the
selected programme.
> Press OK to switch reception to the desired program-
me.
> Use the up/down arrow keys to move around the
list one programme slot at a time.
> Use the left/right arr ow keys to move around the
list one page at a time.
7.2.3.1 Selecting a list
To facilitate the finding of programmes, your receiver is equipped with several programme lists. You have the choice of
selecting your Favourites list (see Point 8.1), or you can
use the alphabetically sorted Total list, or you can view a list
sorted by Providers.
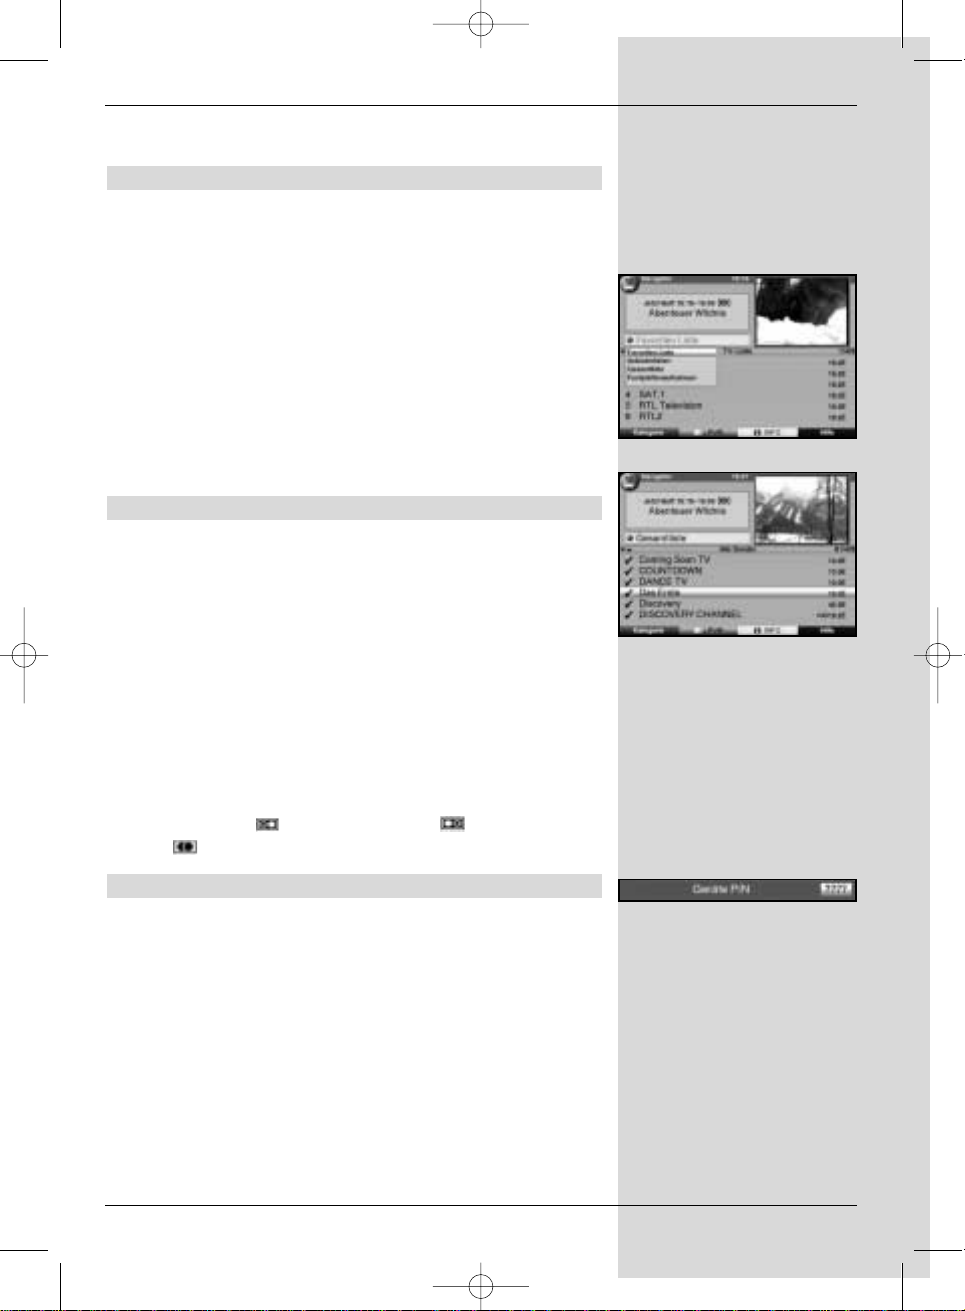
> Press OK. The active programme list will be display-
ed.
> Now use the red function key Category to open a
window displaying the programme list types
(Favourites list, Providers list and Total list).
The active type of programme list will be highlighted.
22
(Fig. 6-9)
A B
Position
Output
A B
Position
Output
A B
Option
Output
Example:
Bed_anl_.qxd 20.02.04 16:28 Seite 22
Page 23

(Fig. 7-2)
In addition, the entry Hard drive recordings will
be shown, allowing you to access the hard drive navigator (Point 7.15.2).
> Use the up/down arrow keys to select a program-
me list type, e.g. Total list.
> Confirm by pressing OK.
The alphabetically sorted total list will be displayed,
containing all programmes. (Fig. 7-3)
> Use the up/down arrow keys to select the pro-
gramme you wish to view or listen to.
> Confirm by pressing OK.
or
> Press the green function key PVR to go directly to
the hard drive navigator.
7.2.4 Accessing blocked programmes
If a programme is selected that is blocked by the parental
control function, the message Unit PIN will be displayed on
screen. (Fig. 7-4)
> Use the numeric keys to enter your PIN code. The
selected programme can now be viewed.
or
> Switch to a programme whose access is not blocked.
If you have selected the option on under Point 8.3.2, you will
always be prompted to enter the PIN code when switching to
a blocked programme. However, in order to make matters
more convenient for you, you need enter the PIN code only
once in each operating phase.
7.2.5 Information box
Each time you switch programmes, an information box (Fig.
7-5) will be displayed briefly, showing the programme number
and name of the selected programme. In addition, some programme characteristics will be indicated, for example for
Video text, for a 16/9 broadcast, for sub-titles,
for encrypted programmes. Also, where provided, the EPG
category and the FSK age restriction in Germany (Freiwillige
Selbstkontrolle der Filmwirtschaft) will be indicated.
7.3 Reception of encrypted programmes
Your receiver is equipped with a “Common Interface”. This
enables you to receive encrypted programmes. To do this,
you must first insert a CI module together with a valid smart
card into the slot provided:
> Insert the CI module into the slot.
> Insert the smart card into the card slot of the CI modu-
le. Note that the gold-coloured chip of the smart card
should be on the upper surface of the card, and poin-
23
Bed_anl_.qxd 20.02.04 16:28 Seite 23
Page 24

ting in the direction of insertion.
> If an encrypted programme is now selected, your digi-
tal receiver will automatically check the card slot, and
will display the programme in unencrypted form, provided a corresponding CI module and a valid smart card
for this programme have been inserted.
Special functions
Some programme slots, e.g. Premiere (can only be viewed
with a valid subscription!) offer certain special functions. For
instance, multifeed channels allow you to view sports events
transmitted from various locations (e.g. National League soccer), or you can select various sound channels (stadium/commentary), or you can select different camera perspectives
at a particular event (e.g. Formula 1 racing).
Also, some channels allow you to select a starting time for
particular films you may wish to view.
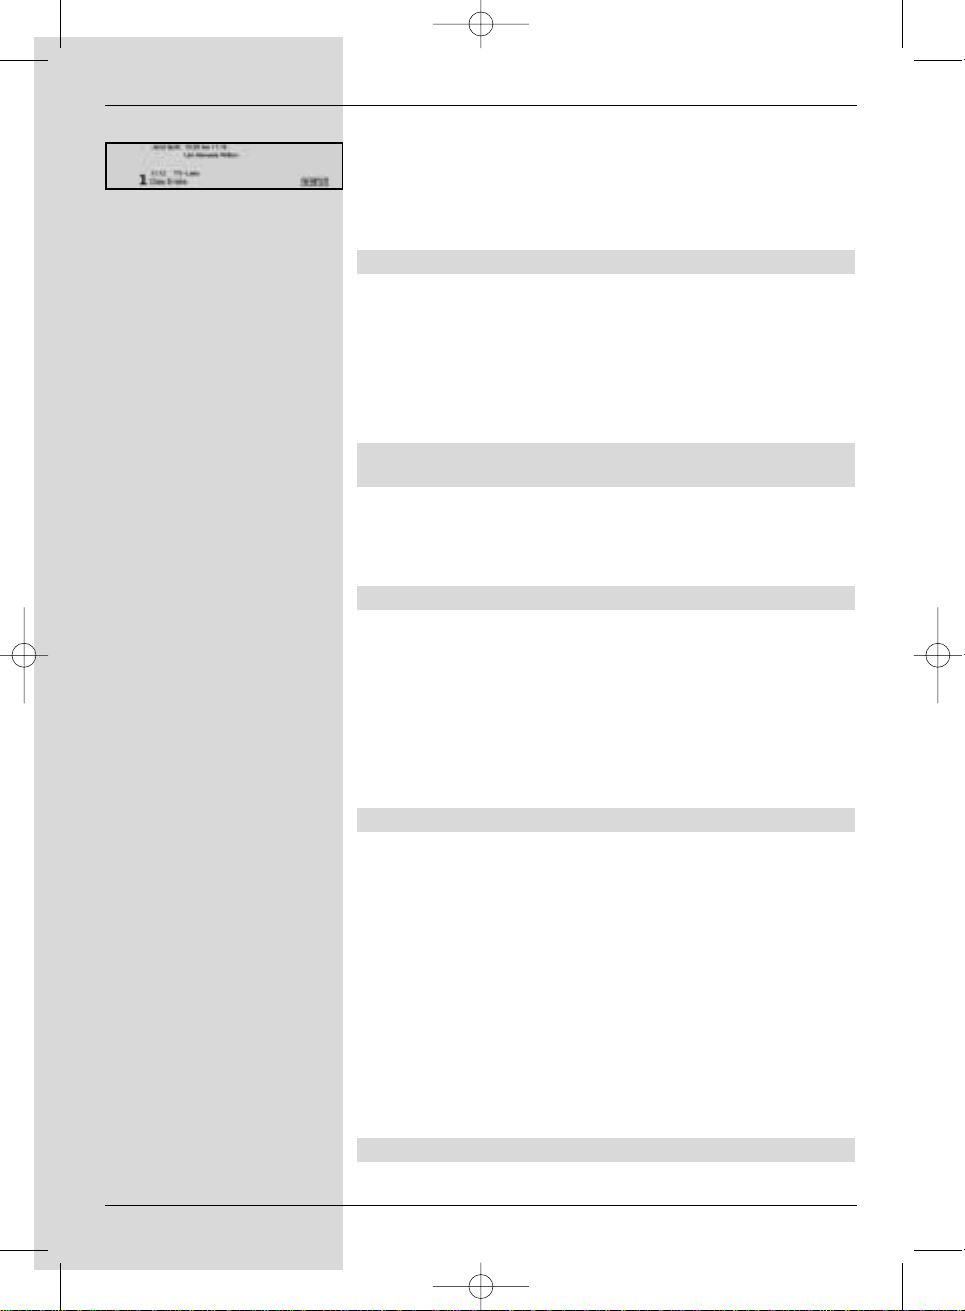
7.3.1 Multifeed options
Some programmes provide a multifeed option . This function
allows you to select from among several camera viewpoints in
the case of sports coverage (e.g. Formula 1), or of choosing
one of several sports locations (e.g. National League soccer).
Where a programme provides multifeed options, this is indicated on screen (Fig. 7-6).
> To select one of the options available, press the key
Option.
A window will be displayed, indicating the options available. (Fig. 7-7)
> Use the up/down arrow keys to select the preferred
option.
> Confirm by pressing OK.
Your digital receiver will now display the selected
option.
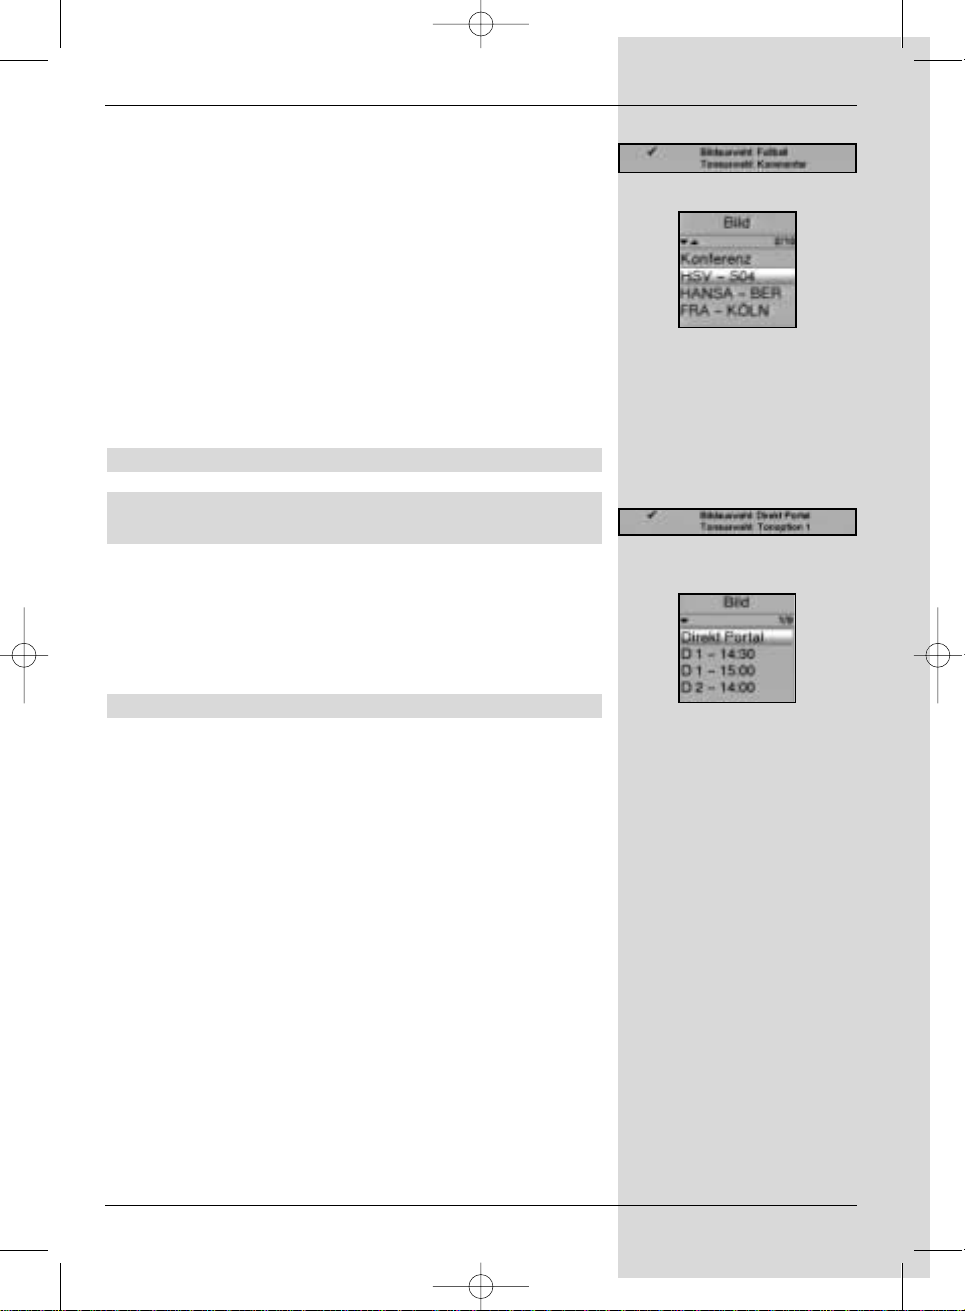
7.3.2 Selecting a starting time
Some channels provide the option of viewing movies at different starting times. These movies can thus be viewed around
the clock at different starting times, according to your preference.
Where a channel provides a choice of starting times, this will
be indicated on screen (Fig. 7-8).
> To select one of the starting times available, press the
key Option.
A window will be displayed, indicating the starting
times available (Fig. 7-9)
> Use the up/down arrow keys to select the preferred
starting time.
> Confirm by pressing OK.
Provided the movie has been authorised for the selec-
24
(Fig. 7-1)
Bed_anl_.qxd 20.02.04 16:28 Seite 24
Page 25
ted starting time, you can enjoy the programme at the
desired time.
7.4 Volume control
You have the option of adjusting the volume of your digital
receiver. This makes using your receiver even more convenient, since all important functions are combined on the receiver remote control, and you will only rarely need to use the
remote control of your television set. When you switch on the
digital receiver, the volume will be set to the level last selected.
> Adjust the volume of your receiver by using the keys
Volume + to increase the volume and Volume - to
reduce the volume.
> Press the key Sound on/off to switch off the sound
(mute), press the same key again to switch the sound
on again.
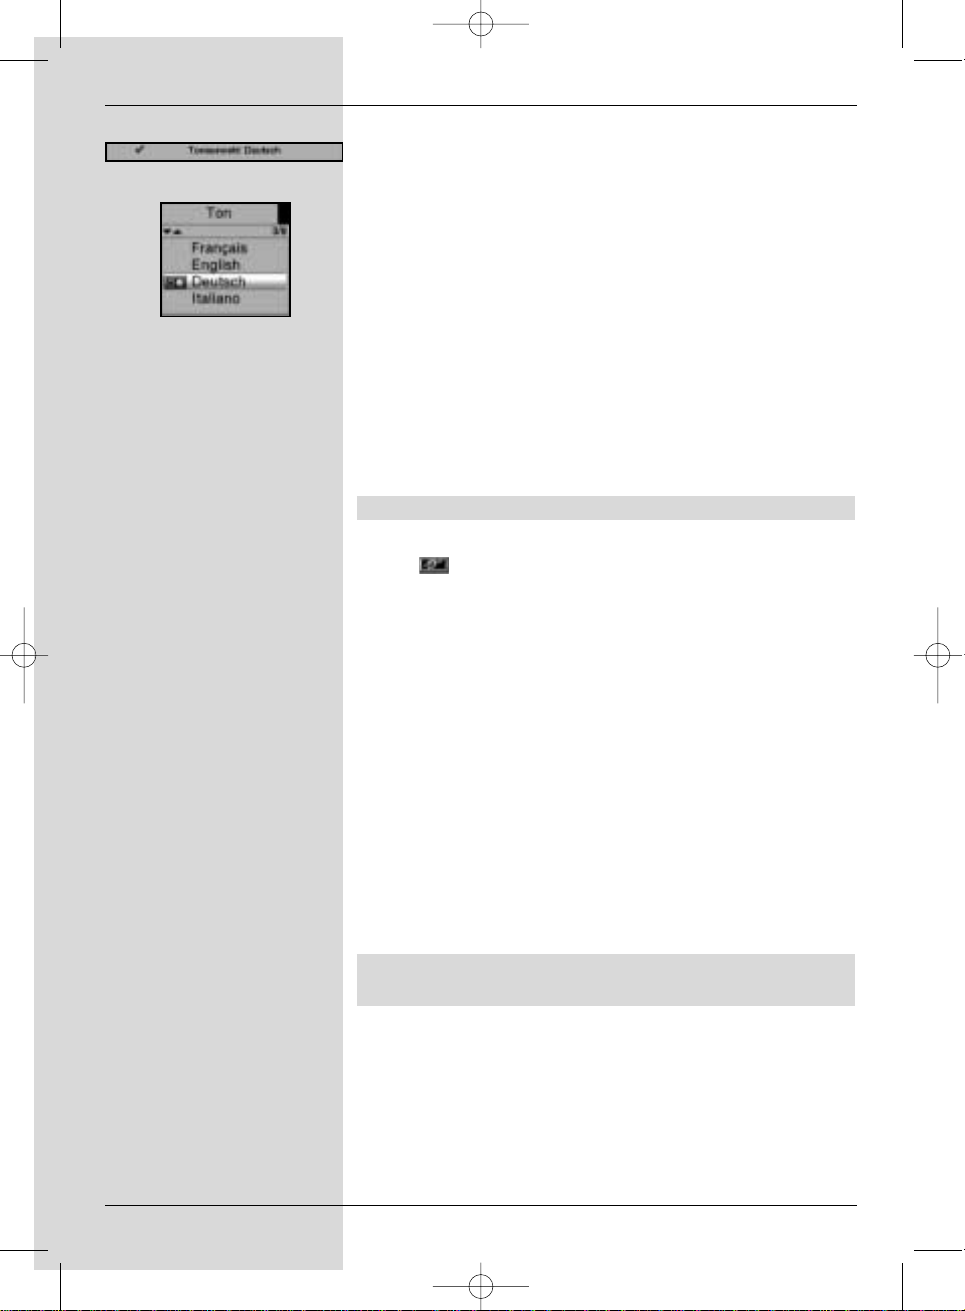
7.5 Selecting another language
Where a programme is broadcast in several languages, or
with several sound channels, this will be indicated on screen
(Fig. 7-10). You can then proceed as follows to select another
language or another sound channel:
> Press the key Language select. A list of the lang-
uages currently being broadcast will be displayed on
screen (Fig. 7-11).
> Use the up/down arrow keys to select the prefer-
red language, and confirm by pressing OK.
You can now listen to the programme in the desired language. Your digital receiver is also equipped to receive mono
broadcasts.
> Use the left/right arr ow keys to select from Mono
channel 1 ( ), Mono channel 2 ( ) and Stereo
().
7.5.1 Dolby Digital (AC3 mode)
Where a programme is broadcast in Dolby Digital sound, this
will be indicated by the Dolby logo in the information box
when you switch to the appropriate programme. If the function Dolby Digital (AC3) has been activated in accordance
with Point 6.3.6, the programme will automatically be presented in this format.
If you have not activated the function Dolby Digital (AC3),
you can set the unit to AC3 mode manually as follows:
> Press the Language Select key. Where available,
a list will now appear on screen showing the currently
available languages as well as Dolby Digital (AC
3).
> Use the up/down arrow keys to select the line
25
(Fig. 7-3)
(Fig. 7-4)
(Fig. 7-2)
Bed_anl_.qxd 20.02.04 16:28 Seite 25
Page 26
Dolby Digital.
> Confirm by pressing OK.
You can now enjoy the programme in Dolby Digital sound. If
you would like your receiver to present programmes in Dolby
Digital automatically, set the unit to automatic AC3 reproduction as described in Point 6.3.6.
7.6 TV/Radio switching
The pre-programming includes radio as well as TV programmes.
> Use the TV/Radio key to switch the digital receiver to
Radio mode. The receiver will switch to the radio pro-
gramme last selected.
> Press the TV/Radio key again to revert to the TV
programme last selected.
7.7 Revert to last programme selected
> Press the Back key on the remote control to view the
last programme viewed previously.
> Press the key again to revert to the programme selec-
ted b efore that, i.e. originally selected.
7.8 Display time and programme information
This function allows you to view programme information related to the programme currently being viewed.
> Press the Info key to display information related to
the current programme (Fig. 7-12).
The lower half of the screen will now show the current time,
the name of the channel selected, the name of the current
programme including the starting and ending time, where provided by the programme provider.
7.9 Additional programme information
Where broadcast, the function Programme Information allows
you to receive additional information related to the programme selected.
> Press the Info key twice to open an additional infor-
mation window (Fig. 7-13). More detailed information
related to the current programme will be displayed.
> You can scroll through lengthy texts by using the
left/right arrow keys to move the text one line at a
time.
> Where provided, pressing the Info key again will
display information related to the following programme.
> Press the Info key again to close the additional win-
dow.
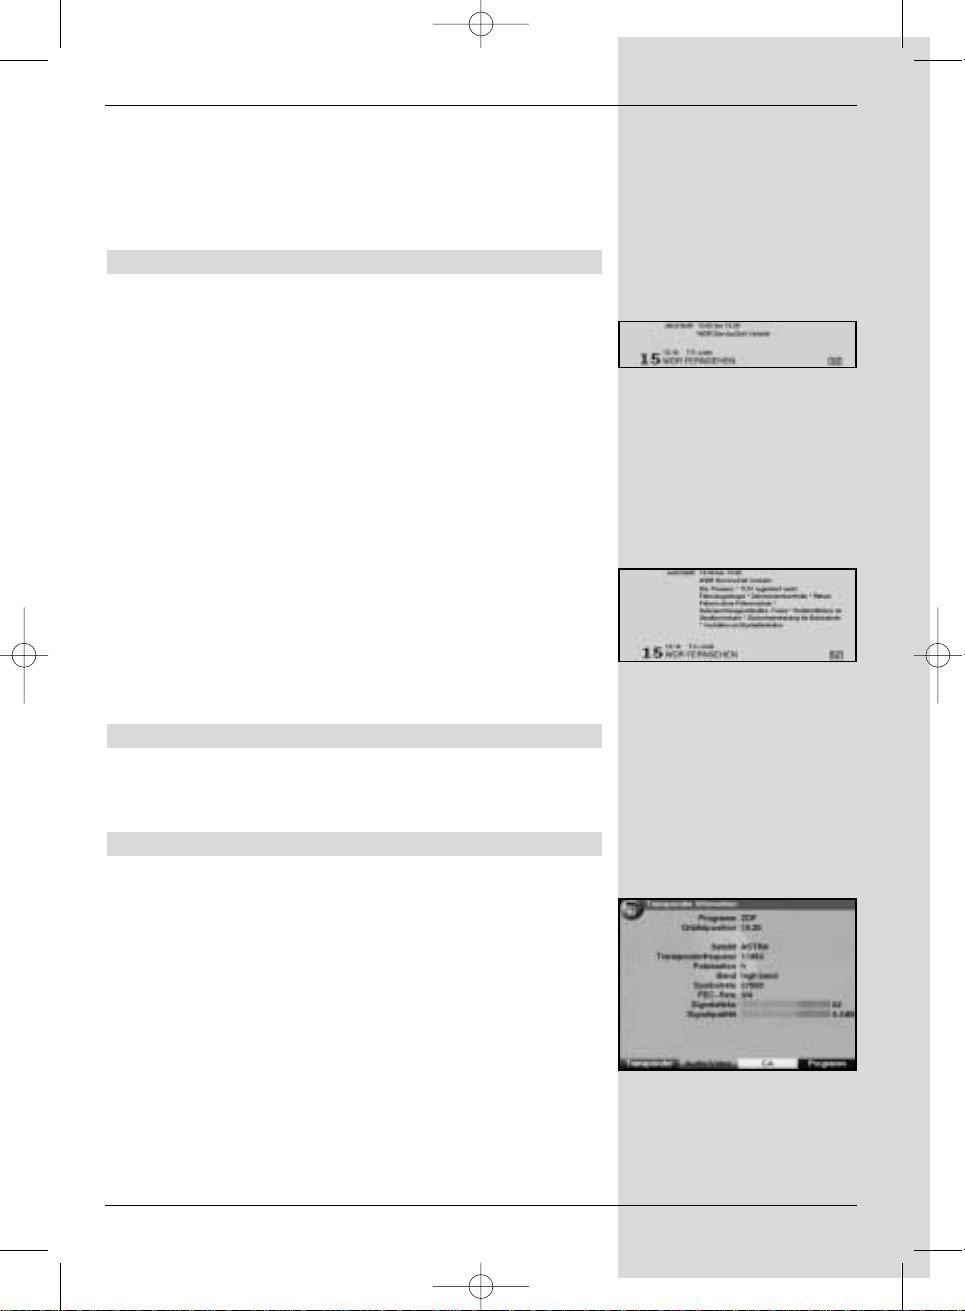
7.10 Transponder information
> Press OK to call up the navigator.
26
(Fig. 7-5)
Bed_anl_.qxd 20.02.04 16:28 Seite 26
Page 27
> Use the arrow keys to mark the programme for
which you wish to view the data.
> Press the Option key to display the data of the trans-
ponder selected (Fig. 7-14).
> Use the coloured function keys to also display
Audio/Video information, Programme information,
and, where appropriate, information on the encryp-
tion system used (CA).
> Press Menu to exit from this display.
7.11 Freeze frame
> Press the Freeze frame key to freeze the current
television picture.
> Press the same key again to revert to normal opera-
tion.
7.12 Video text
7.12.1 Using the video text decoder of your television set
Where broadcast, the video text is transmitted to your television set. To operate video text functions, use the remote control of your television set. If you experience problems on your
television set, e.g. an overlay of video text over the picture
content, you should change the setting of your digital receiver
to FBAS mode (Point 6.3.4).
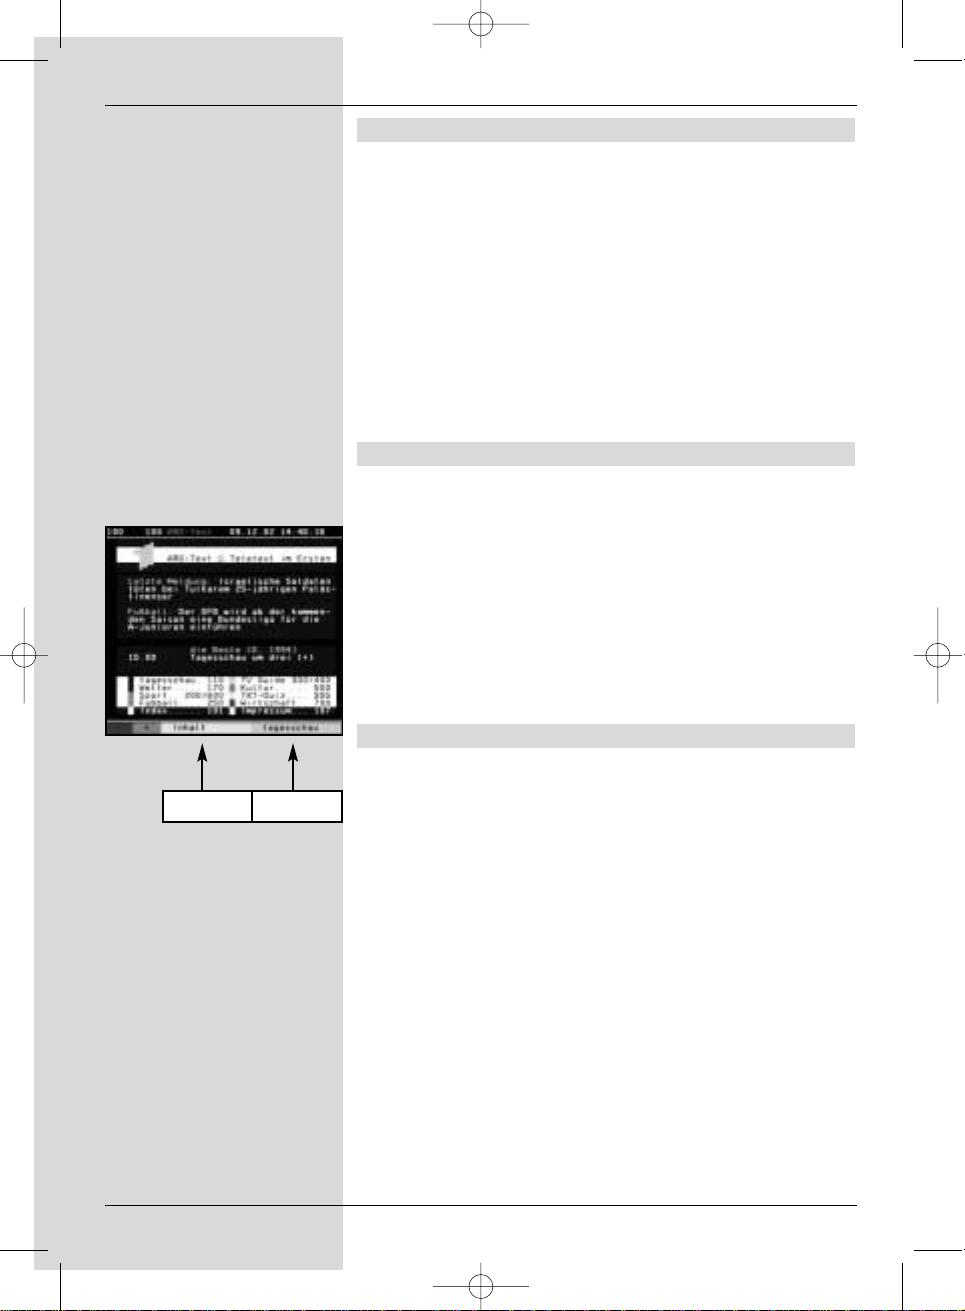
7.12.2 Using the internal video text decoder
Alternatively, you may use the integrated TOP video text
decoder to display the information. The TOP video text
system groups all text pages thematically in groups and
blocks, making use of the function more easy and convenient.
> Switch to the programme on which you wish to view
video text information.
> Display the video text by pressing the Videotext key
(Fig. 7-15).
> Use the numeric keys to enter the desired video text
page. Your selection will be displayed in the upper lefthand corner of the screen. When you have entered
the desired video text page number, your receiver will
search for this page.
As not all video text pages can be transmitted simultaneously, it may take a few seconds for the receiver to
find the page and display it on the screen.
All video text providers use page 100 to show their
index of contents.
> Use the red and green function keys respectively to
page forward or back one page at a time.
27
(Fig. 7-7)
(Fig. 7-8)
(Fig. 7-9)
(Fig. 7-6)
Bed_anl_.qxd 20.02.04 16:28 Seite 27
Page 28
> Press the yellow function key to display the video
text group indicated in the yellow field.
> Press the blue function key to display the video text
group indicated in the blue field.
Mixed mode
> Press the Videotext key again to switch to mixed
mode (simultaneous display of video text information
and TV picture).
> Press this key again to revert to normal operation.
Stop mode
> Press the Freeze frame key, and the message
“Stop” will appear in the upper left-hand corner of the
video text window. This stops the automatic paging
function of the video text sub-pages. Press ther
Freeze frame key again to remove the stop func-
tion.
> Press Back to revert to normal operation.
7.13 Sub-titles
Where sub-titles are broadcast, this will be indicated by the
symbol in the information window. If you have activated
the function Sub-titles (in accordance with Point 6.3), and if
they are being broadcast in the language selected, the subtitles will be displayed automatically.
If sub-titles are only being broadcast in other languages, or if
they are being broadcast only via video text, you can activate
the function manually as follows.
> Press the Option key (this may require repeated
pressing), until the heading Sub-titles shows a table
with the sub-title languages broadcast, and/or the
video text pages carrying sub-titles.
> Use the up/down arrow keys to mark the desired
language/video text page.
> Confirm by pressing OK. The sub-titles will now be
displayed.
Please note that these functions are only available when subtitles are actually being broadcast. This setting is not stored in
memory when programmes are switched.
7.14 Electronic Programme Guide SFI
(SSiehFFern IInfo)
Your digital receiver is equipped with an electronic programme guide. This allows you to access the programme information of one or more programmes and view them on screen.
You can very quickly obtain an overview of the programmes
currently available, the programmes of the day, or the programmes of the following days.
The SFI functions allow you to:
- display information on porogramme contents on
28
(Fig. 7-11)
(Fig. 7-10)
Bed_anl_.qxd 20.02.04 16:28 Seite 28
Page 29
screen
- mark selected programmes which will be switched on
automatically at the starting time
- programme timers
- search for programmes according to type (genre), and
to select them for viewing.
7.14.1 Downloading SFI data
The programme information is updated at the time set on
your receiver in accordance with Point 8.2 (SFI channel. This
can only take place when your unit is in standby mode.
The downloading procedure is indicated by the message
Load SFI in the display. If your receiver is in operating
mode at this time, the download function will not be carried
out.
You may also start the download procedure manually. First
switch off the receiver (display shows “Standby), then press
the SFI key. During the download procedure, the display will
show Load SFI, followed by an indicator of the SFI data
downloaded so far (e.g. 38%).
The duration of the download procedure depends on the
number of programmes available. Programmes can be
shown for up to seven days in advance. However, because of
the volume of data, this period is reduced the more porgrammes are included in the electronic programme guide.
You can decide for yourself, which programmes should be
included in the electronic programme guide. These can be
included as described under Point 8.1.5.
7.14.2 Interrupting download procedure
You can interrupt the download procedure by switching on
the digital receiver (On/Standby key). The data from the
previous SFI update will continue to be available.
7.14.3 Accessing electronic programme guide
> Switch on both the digital receiver and your television
set.
> Press the SFI key on the remote control of the digital
receiver.
The electronic programme guide will be displayed on
screen (Fig. 7-16). The display will show either the
current programmes of the channels selected by you,
or those included in the ex factory pre-programming
(see also Point 8.2). You can now use the SFI function to obtain information on the contents of various
programmes.
You can also use the SFI functions to select a programme for viewing, to mark a programme for later
viewing, or to include it in timer programming.
29
(Fig. 7-12)
(Fig. 7-13)
(Fig. 7-14)
Bed_anl_.qxd 20.02.04 16:28 Seite 29
Page 30
7.14.4 Now (table with current programme contents)
Initially, the SFI table “Now” (Fig. 7-16) will be displayed,
showing programmes currently being broadcast. The yellow
bar to the right of the programme name indicates the elapsed
broadcast time of the current programme. The programme
currently selected is highlighted.
> Use the up/down arrow keys to move the marker
one line at a time. Use the left/right arrow keys to
move the marker one page at a time (paging).
> You can now utilise the SFI functions (Point 7.14.3).
> Press the yellow function key to move to the SFI
table “Next” (See Point 7.14.5)
or
> press the TV/Radio key to revert to normal operation.
7.14.5 Next
> Use the yellow function key to display the table
"Next" (following programmes) (Fig. 7-17).
> All the SFI functions are available (Point 7.14.3).
> Press the yellow function key to move to the SFI
table “More” (Point 7.14.6)
or
> Press either the green function key or the Back key
to revert to the previous SFI table “Now”
or
> Press the TV/Radio key to revert to normal opera-
tion.
7.14.6 More
> By pressing the yellow function key again while the
SFI table “Next” is displayed you can move to the SFI
table “More”. (Fig. 7-18)
This table displays an additional time window in the
title line. This time window shows the current time of
the SFI table displayed.
> Press the yellow function key to page further through
the programme in the time steps indicated in the yel-
low colour bar.
> Keep the yellow function key pressed down to conti-
nue paging. A clock will be displayed to facilitate the
search.
Press the green function key to page backwards
through the tables.
The individual days of the week are shown along the
bottom of the screen. If information relating to the follo-
wing days is available, the appropriate fields will be
highlighted.
> To display a preview for a particular day, press the
appropriate numeric key.
30
(Fig. 7-15)
Bed_anl_.qxd 20.02.04 16:28 Seite 30
Page 31

or
> Press the numeric key “0” to go to the PVR navigator.
Press Back to return to the table “Next”.
7.14.7 SFI functions
To utilise the following SFI functions, call up the SFI as described in Point 7.14.3.
7.14.7.1 SFI Info
The function SFI Info allows you to display a biref information on the programme or channel selected. Where SFI infor-
mation is available, this will be indicated by the symbol
next to the appropriate programme.
> Use the arrow keys or the function keys to mark
the desired programme.
> Press SFI to display the information.
You can scroll or page through lengthy texts by means
of the arrow keys.
> Press Back to revert to the previous table.
7.14.7.2 SFI timer programming
The electronic programme guide SFI can be utilised to facilitate easy programming of timer events.
> Use the arrow or the function keys to mark the
desired programme.
> Press the Record key to programme a Hard drive
timer (see Point 7.15.1.2) for the selected program-
me.
or
> Press the red function key Timer to open a selection
window.
> Use the up/down arrow keys to select the desired
Timer type (see Point 7.15.1.2).
> Confirm by pressing OK.
For monitoring purposes, the menu Timer manage-
ment will be displayed, showing the data related to
the programme selected. Here you can enter any
changes, if required (see 7.15.1.2).
> Press Back to revert to the previous table.
The appropriate line has been marked. Depending on
the timer type, your receiver will now be switched on
at the starting time of the selected programme. If the
unit has been switched on by the PVR timer, this will
be indicated by
“! PVR Timer” shown in the display. Most of the
remote control functions are disabled to prevent an
accidental premature interruption of the recording.
When the unit is in standby mode, an active timer will
be indicated by a clock symbol shown next to the time
on the display.
31
Bed_anl_.qxd 20.02.04 16:28 Seite 31
Page 32

Deleting an SFI timer event
> If you wish to delete a timer event programmed via
SFI, proceed as described above to mark the selected
programme.
> Press the red function key Timer to open a selection
window.
> Use the up/down arrow keys to mark the line
Timer delete.
> Confirm by pressing OK.
> To delete an active timer, switch the digital receiver off
by pressing the On/Standby key.
> Press this key again to switch the receiver on, and
revert to normal operation.
7.14.7.3 SFI programme overview
Use the SFI programme overview to display a table showing
the current day’s programme for a single channel. Proceed as
follows:
> Press the SFI key.
The SFI table “Now” will be displayed.
> Press the blue function key SFI Menu to open a
selection window.
> Use the up/down arrow keys to mark the line
Programmes.
> Confirm by pressing OK. The current day’s overview
of the selected programme will be displayed. (Fig. 7-
19)
> Now use the arrow keys to move the marker to the
desired time or programme.
The individual days of the week are shown at the bot-
tom of the screen.
If information is available for the following days, the
corresponding fields will be highlighted.
> To display the programme content of a particular day,
use the numeric keys to select the corresponding
day.
Display SFI overview of other programmes
> Press the green function key Programmes.
A list of SFI programmes will be displayed.
(Fig. 7-20)
> Now use the arrow keys to mark the desired pro-
gramme.
> Press OK to display the SFI overview of the marked
programme.
7.14.7.4 SFI overview by programme type (genre)
If you are interested in particular types of programmes, you
can have the programme information displayed in certain programme categories (genres), such as news, movies, etc..
> Press the SFI key to display the SFI table “Now”.
32
(Fig. 7-16)
Bed_anl_.qxd 20.02.04 16:28 Seite 32
Page 33

> Press the blue function key SFI Menu to open a
selection window.
> Use the up/down arrow keys to mark the line
Genres.
> Confirm by pressing OK.
> Use the green function key Genres to open a win-
dow showing the available programme categories.
(Fig. 7-21)
> Use the arrow keys to select the desired programme
category, and confirm by pressing OK.
An overview of the day’s programmes will now be
displayed, showing only programmes of the selected
category. (Fig. 7-22)
> Use the up/down ar row keys to move the marker
to the desired programme.
> Use the left/right arr ow keys to move the marker
one page at a time.
The individual days of the week are displayed along
the bottom of the screen. If information is available for
the following days, the appropriate fields will be high-
lighted.
> To display the programme content of a specific day,
press the appropriate numeric key.
7.14.8 Exiting from SFI
> Press either the Menu key or TV/Radio o revert to
normal operation.
7.15 Hard drive operation
Your PVR receiver (PVR=Personal Video Recorder) is equipped with an integrated hard disk drive, so that you no longer
require an external medium (e.g. video recorder) to make
recordings. The recording capacity is dependent on the size
of the hard drive, as well as on the volume of data of the broadcast material.
7.15.1 Recording
Several recording modes are available to record broadcasts
on the hard drive.
1. Instant recording
Use this type of recording to immediately record the currently
selected programme at the touch of a key.
2. Timer-controlled recor ding
If this function is selected, the digital receiver will be switched
on resp. off for the selected programme, to record this on the
hard drive in your absence. You can programme the timer
manually, or you can do this automatically using the SFI function.
33
(Fig. 7-17)
(Fig. 7-18)
Bed_anl_.qxd 20.02.04 16:28 Seite 33
Page 34

7.15.1.1 Instant recording
Start and end recording manually
Option 1:
> Switch to the channel that carried the programme you
wish to record.
> Press the Record key to record the currently broad-
cast programme. You can continue to watch the programme on screen while the recording is in progress.
> To interrupt the viewing of the current programme at a
specific point, press the yellow function key
Play/Pause. The picture on the screen will be frozen,
while the recording will continue in the background.
> To resume viewing the programme from this point
onwards, again press the yellow function key
Play/Pause. You will now view the remainder of the
programme in a time-shifted mode compared to the
live broadcast, while the recording will continue in the
background (Timeshift).
> To stop recording, press the green function key Stop.
The following prompt will be displayed on screen:“Do
you wish to save the recording ?”.
> Use the left/right arr ow keys to select Yes if you
wish to save the recording on the hard drive, or No if
you do not wish to save the programme.
Option 2:
> If you have to interrupt viewing a programme, e.g.
because of a phone call or the like, you can press the
yellow function key Play/Pause to stop the playing
of this programme, and start recording the programme
at the same time. While the recording commences in
the background, a frozen picture will appear on the screen.
> To continue playing the programme from this point
onwards, again press the yelow function key
Play/Pause. You will now view the programme with a
time shift relative to the live broadcast, while the current programme will continue to be recorded in the
background (Timeshift).
> To stop recording, press the green function key
Stop.
A prompt will appear on screen “Do you wish to save
the recording ?”.
> Use the left/right arr ow keys to select either Yes,
in order to save the recording on the hard drive, or No
if you do not wish to save the recording.
Starting a recording manually and ending it automatically
34
Bed_anl_.qxd 20.02.04 16:28 Seite 34
Page 35

> Switch to the channel that will broadcast the program-
me you wish to record.
> Press the Record key to record the current program-
me. The programme will continue to be displayed on
the screen while the recording is running.
> Press the On/Standby key
A prompt will appear on screen, asking you whether
you wish to record the current programme to the end.
> Use the left/right arr ow keys to select Yes in
order to record the current programme to the end.
> Confirm by pressing OK.
The receiver will record the entire programme, and will
then remain in standby mode.
> If you switch on the receiver before the end of the
recording procedure, please note the messages
displayed on screen.
7.15.1.2 Timer recordings
You can use the hard drive timer to make recordings on the
integrated hard drive in your absence. In addition, your digital
receiver is equipped with a video recorder timer and a programme change timer. As far as the programming is concerned, the timer types differ only in their names.
You may programme the timers manually as described in this
chapter, or with the help of the SFI function as described in
Point 7.14.7.2.
1. Hard drive timer
This function will switch the digital receiver on and off for the
selected programme, so that this can be recorded on the
hard drive in your absence.
If the receiver was switched on by means of the hard drive
timer, this will be indicated by “! PVR Timer” being shown on
the display. Most of the remote control functions are disabled
in order to prevent an accidental premature interruption of the
recording. When the receiver is in standby mode, an active
timer will be indicated by a clock symbol shown on the
display.
2. Video recor der timer
Use the video recorder timer to switch the digital receiver on
and off for a particular programme, so that this can be recorded on an external recorder, such as a video recorder, in
your absence. Please note that you must programme your
video recorder to record the programme.
If the receiver was switched on by the video recorder timer,
this will be indicated by “! VCR Timer” being shown on the
display. Most of the remote control functions are disabled in
order to prevent an accidental premature interruption of the
recording. When the receiver is in standby mode, an active
timer will be indicated by a clock symbol shown on the
35
(Fig. 7-19)
Bed_anl_.qxd 20.02.04 16:28 Seite 35
Page 36

display.
3. Progr amme change timer
If your receiver is in normal operating mode, it will switch to
the pre-selected programme slot at the designated starting
time. In contrast to the hard drive or video recorder timers,
the full functionality of the unit is not restricted, and the unit
will not be switched off at the end of the programme.
Manual timer programming
> Press the Menu key to call up the Main Menu.
> Use the up/down arrow keys to mark the line
Timer management.
> Confirm by pressing OK.
The sub-menu Timer management will be displayed. (Fig. 7-23)
> Use the up/down arrow keys to select the type of
timer you wish to programme.
> Press OK. A new window will be displayed, allowing
you to enter the programming data for a new timer
event. (Fig. 7-24)
To prgramme an event proceed as follows:
Source
> Use the arrow keys to mark the column Source.
> Press OK.
> A selection window will be displayed. Use the
up/down arrow keys to select the desired source
(TV or Radio).
> Confirm by pressing OK.
Depending on the previous setting, either the TV or
the radio programme list will now be displayed.
> Use the arrow keys to mark the desired programme.
> Use the up/down arrow keys to move the marker
around the list one line at a time.
> Use the left/right arr ow keys to move back-ward or
forward in the list one page at a time.
> Press OK to accept the selected programme into the
timer.
Date
> Use the arrow keys to mark the column Date.
> Use the numeric keys to enter the date (4 digit form)
of the timer event.
Start
> Use the arrow keys to mark the column Start.
> In this line, use the numeric keys to enter the star-
ting time for the timer.
Stop
> Repeat the steps as set out under “Start” to enter the
stop, or ending time (except for programme change
36
(Fig. 7-21)
(Fig. 7-22)
(Fig. 7-20)
Bed_anl_.qxd 20.02.04 16:29 Seite 36
Page 37

timer).
Repeat
> Use the arrow keys to mark the column Rep.
> Press OK.
A selection window will be opened, showing various
suggestions for repeats.
1x Timer on once
T Daily repeat
1 W Repeat once a week
1-5 Repeat only on workdays
6-7 Repeat only on weekends
> Use the up/down arrow keys to select the desired
function.
> Press OK to accept the setting into memory.
Accepting data into memory
> When you have completed the programming, press
the yellow function key Accept, to accept the data
into memory.
If under the heading Programme you have selected
a programme that is blocked in terms of Point 8.3, you
will first have to enter the PIN code before the data
will be accepted into memory.
> Press the TV/Radio key to revert to normal opera-
tion.
Timer overview
The timer overview allows you to see at a glance all the timer
events already programmed.
> First call up the menu Timer management as des-
cribed above to go to the menu Timer overview.
> Use the up/down arrow keys to mark the line
Timer overview.
> Confirm by pressing OK.
If there are overlaps between timer events, these overlaps will be highlighted in red.
Changing timer programming
> To change an existing timer setting, use the up/down
arrow keys to mark the timer event you wish to
change.
> Press the yellow function key Change to go to the
settings of the marked timer. Proceed to make the
changes as set out in Point 7.15.1.2.
> When you have completed the programming, press
the yellow function key Accept to accept the data
into memory.
Deleting timer programming
> To delete an existing timer setting, use the up/down
arrow keys to mark the setting.
37
Bed_anl_.qxd 20.02.04 16:29 Seite 37
Page 38

> Press the green function key Delete.
A prompt will be displayed:”Do you really want to dele-
te this timer?”
> Use the left/right arr ow keys to select Yes.
> To delete the timer entry confirm by pressing OK.
Programming a new timer event
> To programme a new timer event, use the up/down
arrow keys to mark a free line in the menu Timer
overview.
> Press the yellow function key New to open a win-
dow for the programming of the new timer event. Now
enter the data as described in Point 7.15.1.2.
> Use the up/down arrow keys to mark the additional
field Type.
> Confirm by pressing OK. A window will be displayed,
showing the available timer types.
> Use the up/down arrow keys to select the desired
timer type.
> To accept the timer type into memory, confirm by pres-
sing OK.
> When you have completed the programming, press
the yellow function key Accept to accept the data
into memory.
Note!!!
Please ensure that the receiver has stored the current time in
memory. This will by shown on the display when the unit is in
standby mode. If this is not the case, switch your receiver on,
and leave it tuned to a major channel such as ZDF that carries a time signal for approx. 30 seconds, so that the current
time can be stored in memory.
If you have activated this function in terms of Point 6.2.4, the
receiver should now show the current time on the display
while in standby mode.
Timeshift function
The timeshift function provides the opportunity of simultaneous recording and playback. This means that you can now
enjoy timeshift television. Thus, you can view the beginning of a recording, and decide to skip certain parts, such as
advertising. At the same time the recording of the live signal
continues (see examples below)
38
Bed_anl_.qxd 20.02.04 16:29 Seite 38
Page 39

> To facilitate going to a specific point of a recording
in progress, you can use the functions Play,
Pause as well as Fast Search, as described under
Point 7.15.2.
> Press the Info key to display the information box,
showing a progress bar indicating the recording and
playing time.
7.15.2 Play
You can access your hard drive recordings via either the hard
drive or the PVR navigator.
7.15.2.1 Playing hard drive recordings
> While the receiver is in normal operating mode, press
the green function key to open the PVR navigator.
Depending on whether you are in TV or Radio mode,
a list will appear, showing either all the TV or all the
Radio recordings available on the hard drive (Fig. 7-
25). The marked recording will be played in the preview window.
> Use the up/down arrow keys to select the recording
you wish to play.
> Confirm by pressing OK to start the playback. The
message “Play "”will appear briefly.
7.15.2.2 Pause/Freeze frame
> To pause during the playback of a recording (freeze
frame), press the yellow function key while the unit is
in Play mode. The message “Pause "II”will appear.
> Press the yellow function key again to continue play-
ing the recording from the same position.
7.15.2.3 Fast forward and Reverse
39
Bed_anl_.qxd 20.02.04 16:29 Seite 39
Page 40

To locate a specific point in a recording, your PVR is equipped with functions for fast forward and reverse play.
> While in Play mode, press the blue function key
Forward or the red function key Reverse.
The message will be displayed, either “Spool for-
ward uu” or “Spool reverse tt”. The recording will
now by played at 4x speed in the direction indicated.
> If you press the red resp. blue function keys again,
the speed will be increased to 16x. The following
messages will be displayed, either “Spool forward
uuu” or “Spool reverse ttt”.
> If you press the red resp. blue function keys yet
again, the speed will be increased to 64x. The follo-
wing messages will be displayed, either “Spool for-
ward uuuu” or “Spool reverse tttt”.
> Pressing the red resp. blue function keys yet again
will allow you to spool forward or back in 10 minute
steps.
> Once you have found the desired place in the recor-
ding, press the yellow function key to revert to nor-
mal Play operation.
7.15.2.4 Ending Play
> If you wish to stop playing a recording, press the
green function key. The playback function is termina-
ted and your receiver reverts to normal operation.
7.15.3 Managing the hard drive
> Press the Menu key to display the Main Menu.
> Use the up/down arrow keys to mark the line
Manage hard drive.
> Confirm by pressing OK. The menu Manage hard
drive will be displayed. (Fig. 7-26)
> Use the up/down arrow keys to move the markers
around within the menu, and to change the various
positions.
7.15.3.1 Managing recordings
In this menu (Fig. 7-27) you have the opportunity to manage
your recordings.
> Press OK to go to the sub-menu Manage recor-
dings.
40
(Fig. 7-23)
(Fig. 7-24)
Bed_anl_.qxd 20.02.04 16:29 Seite 40
Page 41

A list will be displayed showing all the recordings on
the hard drive.
> Use the up/down arrow keys to mark the desired pro-
gramme.
Delete
> To delete the selected recording, press the red func-
tion key Delete.
> Confirm the following message by pressing OK, to
actually delete the recording.
Parental control
You can block access to recordings that are not suitable for
children or adolescents. These recordings can then be played back only after entry of the 4-digit unit PIN code. For the
parental control function to be active, it must be switched on
as described in Point 8.3.
> To block access to the marked recording, press the
green function key. The selected recording will then
be marked as blocked, indicated by the parental control symbol.
Editing
> Press the yellow function key Editing to go to the
menu related to editing of the marked hard drive
recording.
> Use the coloured keys to go directly to specific sec-
tions of the recording.
> Press the green function key to open a window sho-
wing the available functions.
> Use the up/down arrow keys to select the desired
function, and confirm by pressing OK.
At the time of going to press for this manual,the complete
range of functions in this menu was not yet finalised, it is therefore not possible to to go into more detail in this regard. An
updated version of this manual, reflecting the current functions, can be downloaded at a later stage from the Internet,
41
Bed_anl_.qxd 20.02.04 16:29 Seite 41
Page 42

at
www.technisat.de.
7.15.3.2Hard drive information
> Press OK to display a window showing information on
the integrated hard drive.
7.15.3.3 Hard drive management
> Press OK to display an overview of the number of
recordings made, and of the free space available. (Fig.
7-28)
Monitoring the hard drive
> To monitor the hard drive, use the left/right arrow
keys to mark the field Check.
> Press OK, then confirm the screen prompt displayed
by pressing OK again to start the checking procedure.
The status of the hard drive will now be checked, the result will be displayed on screen.
Formating the hard drive
When the hard drive is formatted, the data system is replaced. This may become necessary if checking the hard drive
reveals faults or problems.
Note!
The hard drive contents are deleted completely during formating, all existing recordings will be lost.
> To format the hard drive, use the left/right arrow keys
to mark the field Format.
> Press OK and confirm the following screen prompt by
pressing OK again in order to start the formating procedure.
Please note !
The receiver may be operated only with the built-in hard
drive. Any other drive may damage the unit.
You should therefore not open the unit case, and replacement
of the hard drive would invalidate all terms of the guarantee.
7.16 Sleep timer
> Press the Sleep timer key repeatedly to set the
switch-off time of the receiver from 30 minutes to 2
hours in 30 minute steps.
When the set time has elapsed the receiver will automatically switch to standby mode.
8 Changing basic programming
8.1 Configuring the Favourites list
42
Bed_anl_.qxd 20.02.04 16:29 Seite 42
Page 43

This chapter describes how you can change the pre-programming of your digital receiver, as well as the Favourites list in
line with your preferences. This function is also required to
sort newly found programmes into the list after a programme
scan.
You should note that your receiver is equipped with two programme lists, the Favourites list and the Total list. The
Favourites programme list includes all programmes you have
included in the list, following the procedure described below.
The Total list includes all programmes.
This chapter also describes how programmes can be deleted,
how access can be blocked by means of the parental control
function, and how programmes can be included in the EPG.
When calling up the programme list by means of the OK key
the Favourites programme list will be displayed.
8.1.1 Calling up programme list management
Proceed as follows to manage the Favourites list:
> Press the Menu key to call up the Main Menu. (Fig.
8-1)
> Use the up/down arrow keys to mark the line
Manage TV lists, if you wish to work on the TV list,
or Manage Radio lists, if you wish to work on the
Radio list.
> Confirm by pressing OK.
The programme list management will be displayed,
allowing you to work on either the TV or Radio
Favourites list. (Fig. 8-2)
The Favourites list will be displayed on the right half of
the screen This is active now that the currently selec-
ted programme has been marked. On the left side of
the screen you can see the alphabetically sorted Total
list.
This Total list includes all available programmes.
> Press the red function key to move the marker to the
Total list. This is now active.
> Press the red function key again to open a selection
window. Here you have the choice of sorting the Total
list according to various selection criteria (e.g. all pro-
grammes, only free-to-air, all found, all new, all
English-language, etc.) or you can sort it according to
Providers.
> Use the up/down arrow keys to select the desired
programme listing (e.g. Total list).
> Confirm by pressing OK.
An additional selection window will now be shown.
(Fig. 8-3)
> Now use the up/down arrow keys to select the
selection criterion according to which the Total list is to
be sorted. For instance, choose All Programmes, to
43
(Fig. 7-25)
Example: Timeshift playback
You have missed the start of the Formula 1 race - no problem!
The PVR will show you the race at a later time (timeshift), while continuing to record the event.
Time
Recording
by PVR
Playback
by PVR
14:00 15:00 16:00 17:00 18:00 19:00
Start / Formula 1 / Stop
Start / Formula 1 / Stop
Example: Skipping advertising blocks
SYou would like to view a programme without any irritating interruptions by advertising ?
The PVR allows you to simply skip any advertising blocks recorded.
Time
Recording by
PVR
Playback by
PVR
14:00 15:00 16:00 17:00 18:00 19:00
Sen-
dung
Programme
W
Prog
ram
Pro
gra
P
r
W
W
Advertising break
TV-Festplattenaufnahmen
Bed_anl_.qxd 20.02.04 16:29 Seite 43
Page 44

display all available programmes in the Total list, or
All new, to display only the new programmes found
during the last scan, or All English, to display only
English-language programmes.
> Confirm by pressing OK.
Now, depending on your selection, a programme list will be
displayed showing, for example, all programmes, all new or
all English-language programmes. Programmes that are already included in the Favourites list are indicated by a tick sign.
> Press either the red function key Programmes
resp. the green function key TV list to switch bet-
ween the Favourites list and the Total list.The currently
active list is indicated by the blue highlighting.
8.1.2 Adding programmes to the Favourites list
To include programmes shown on the Total list in the
Favourites list, proceed as described in Point 8.1.1 to call up
the programme list management, and move to the Total list.
> Press the blue function key Functions.
A selection window will be displayed, showing the
available functions. (Fig. 8-4)
> Use the up/down arrow keys to mark the line Add.
> Confirm by pressing OK.
> Use the up/down arrow keys to mark a programme
that you wish to include in the list.
> Press the yellow function key Add to add the mar-
ked programme to the Favourites list.
Marking blocks of programmes
To mark several programmes at a time, proceed as
follows:
> Press OK to go to selection mode.
The marked programme will be indicated by a cross
on the left-hand side.
> Use the up/down arrow keys to mark the following or
previous programmes as well.
> When you have completed marking the desired pro-
grammes, press the yellow function key Add to add
the marked programmes to the Favourites list.
8.1.3 Deleting programmes
8.1.3.1 Removing (deleting) from the Favourites list
To remove programmes from the Favourites list, call up the
programme list management as described in Point 8.1.1. The
Favourites list will be active.
> Press the blue function key Functions.
A selection window will be displayed, showing the
available functions. (Fig. 8-5)
> Use the up/down arrow keys to mark the line
Remove.
44
Bed_anl_.qxd 20.02.04 16:29 Seite 44
Page 45

> Confirm by pressing OK.
> Use the up/down arrow keys to mark a programme
that you wish to remove from the list.
> Press the yellow function key Remove.
The following prompt will be displayed on
screen:“Remove programme(s) from list?”.
> Use the left/right arr ow keys to select Yes or No.
> Confirm by pressing OK.
> To remove several programmes simultaneously, pro-
ceed as described in 8.1.2 (Marking blocks of pro-
grammes).
> When you have completed marking the desired pro-
grammes, press the yellow function key Remove.
The following prompt will be displayed on
screen:“Remove programme(s) from list?”.
> Use the left/right arr ow keys to select Yes or No.
> Confirm by pressing OK.
The programmes removed in this manner remain in the Total
list, and can be included in the Favourites list again at
any time.
8.1.3.2 Deleting from the Total list
To remove programmes from the Total list, proceed as described in Point 8.1.3.1. However, after calling up the programme
list management, press the red function key Programmes
first to go to the Total list, then select the function Delete.
8.1.4 Sorting programmes
To sort the order of programmes in the Favourites list according to your preferences, call up the programme list management as described in Point 8.1.1. You will find yourself in the
Favourites list.
> Press the blue function key Functions. A window
will be displayed showing the functions available. (Fig.
8-6)
> Use the up/down arrow keys to mark the line Sort.
> Confirm by pressing OK.
> Now use the up/down arrow keys to mark the pro-
gramme you would like to move to a different position
in the list.
> Now pres the yellow function key Sort. A double
arrow will be displayed next to the programme selec-
ted.
> Now use the up/down arrow keys and/or the
numeric keys to moved the selected programme to
the position in the programme list at which you would
like to place it.
> Press the yellow function key Sort to save the pro-
gramme at the new position.
> To sort several programmes simultaneously, mark
45
(Fig. 7-26)
(Fig. 7-27)
Bed_anl_.qxd 20.02.04 16:29 Seite 45
Page 46
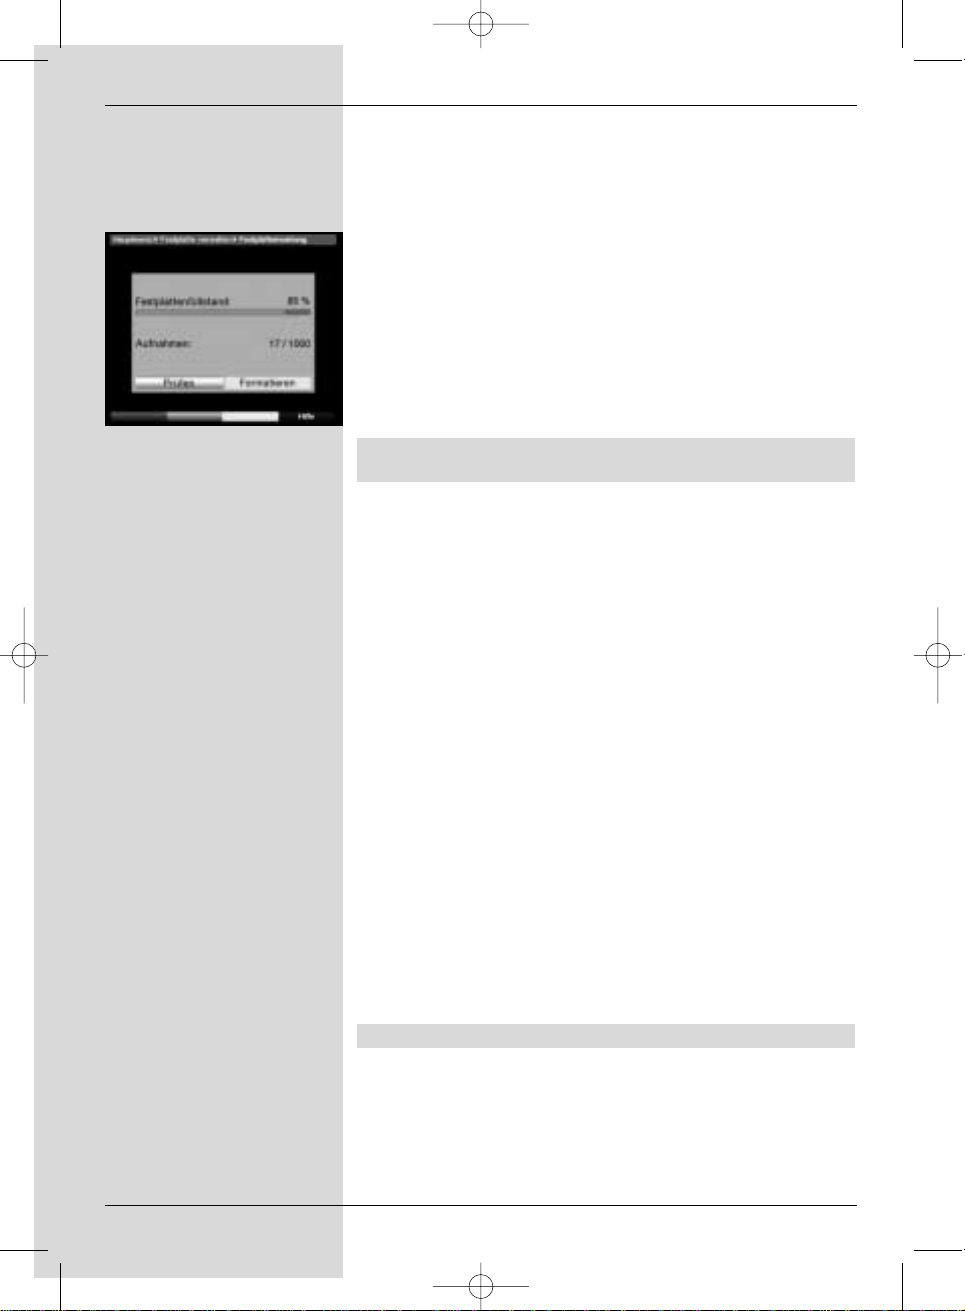
these as described in 8.1.2 (Marking blocks of programmes).
> Now press the yellow function key Sort. A double
arrow will be shown next to the programme block
selected.
> You can now use either the up/down arrow keys or
the numeric keys to move the marked block to the
desired position in the programme list at which you
wish to place it.
> Press the yellow function key Sort to move the pro-
gramme block to the new position, and store the position in memory.
> When you have completed configuring the programme
list according to your preferen ces, press the Menu
key to revert to normal operation.
8.2 Programming the electronic programme guide
To obtain a better overview, you can programme the electronic programme guide SFI in such a way that it contains only
your favourite programmes.
Please note:
The more programmes are included in the electronic programme guide, the longer it will take to download the SFI
data!
Also, the maximum possible programme preview of 7 days
can often not be covered by the electronic programme guide
if too many programmes are included.
> Press the Menu key to call up the Main Menu.
> Use the up/down arrow keys to mark the line
Settings.
> Confirm by pressing OK.
The sub-menu Settings will be displayed.
> Use the up/down arrow keys to mark the line
Programme guide.
> Confirm by pressing OK.
The menu Programme guide will be displayed.
(Fig. 8-7)
> Use the up/down arrow keys to move the marker
around the menu, and to change the individual positions as indicated. Please note any on-screen messages that may appear when certain menu items are
selected.
8.2.1 Selecting a programme
> Press OK. The Favourites list of the currently selected
mode (Radio or TV) will be displayed. The currently
selected programme is marked. (Fig. 8-8)
> Press the green function key to switch between the
TV and Radio lists.
> Press the red function key to open a selection win-
46
(Fig. 7-28)
Bed_anl_.qxd 20.02.04 16:29 Seite 46
Page 47
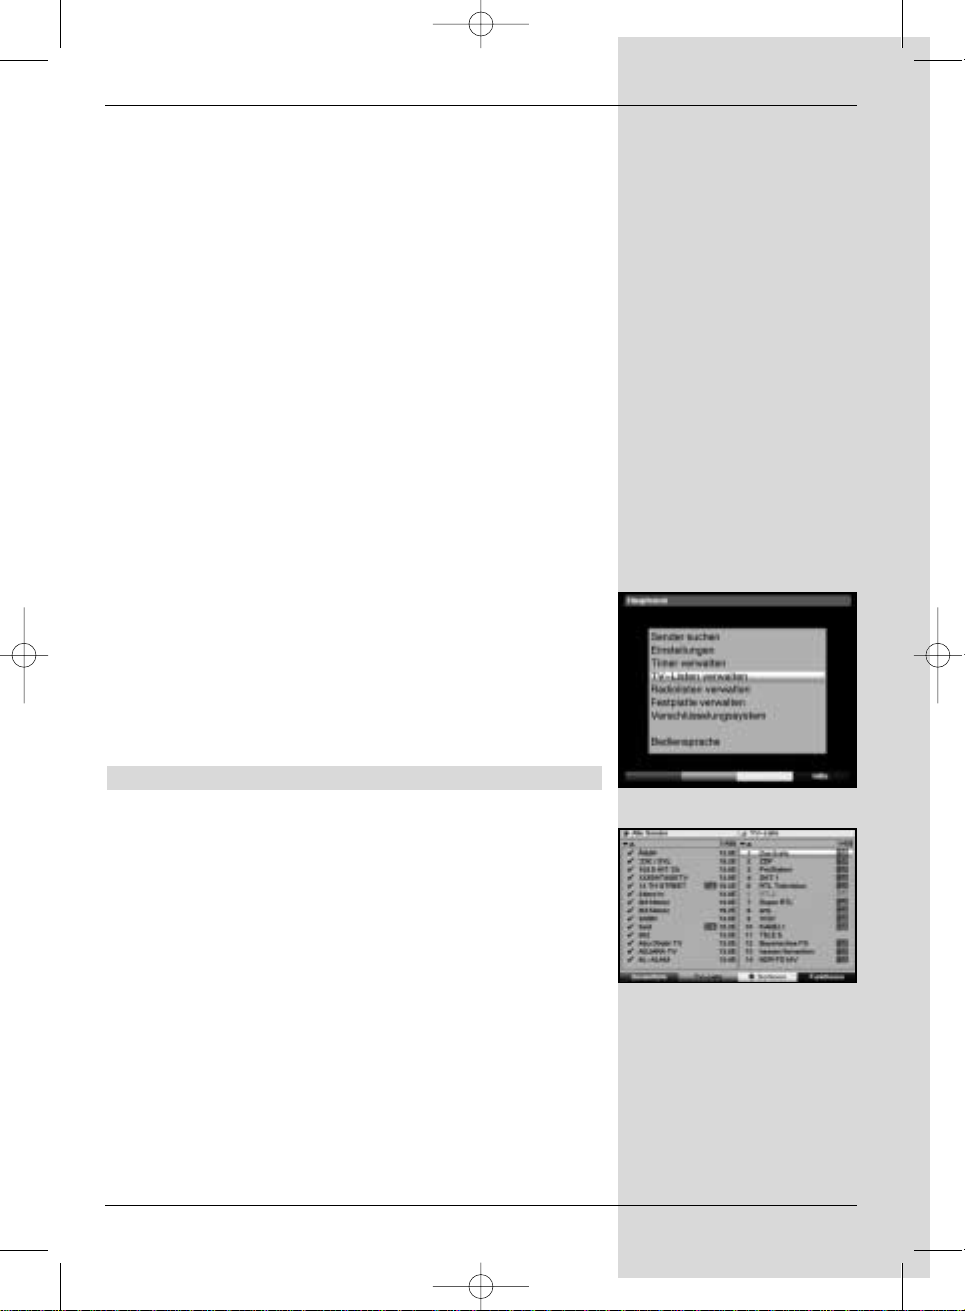
dow. Here you have the option of selecting the desired
programme list type.
> Use the up/down arrow keys to select the desired
programme list type (e.g. Favourites list).
> Confirm by pressing OK. The programme list selected
will be displayed.
> Use the arrow keys to mark a programme that you
wish to include in the electronic programme guide.
> Press the yellow function key SFI to include the
marked programme in the electronic programme
guide.
> To include several programmes in the electronic pro-
gramme guide simultaneously, mark these as descri-
bed in 8.1.2 (Marking blocks of programmes).
> When you have marked the desired programmes in
this manner, press the yellow function key SFI to
include the marked programmes in the electronic pro-
gramme guide.
> Press the Menu key to revert to normal operation.
You can now start the download procedure manually:
> Switch off the receiver, using the On/Standby key
(Standby).
> Now, while “Standby” appears in the display, press the
SFI key.
The receiver will now perform the download procedu-
re. This will be indicated on the display by the messa-
ge Load SFI followed by an indication of the SFI
data downloaded so far.
> The downloading procedure can be interrupted by
switching on the digital receiver (On/Standby key).
8.2.2 Start category
The electronic programme guide features several display
modes (categories).
Overview
This display mode provides a quick overview of all programmes included in the electronic programme guide.
Programmes
In this display mode, a table shows the current day’s programme of a single channel.
Genres
If you are interested in particular types or categories of programmes, you can have the programme information displayed according to various genres, e.g. news, movies, etc..
Last used
With this setting, when the SFI is called up it will always be
shown in the display mode last selected.
> In this line, use the left/right arr ow keys to set the
display mode you prefer when the electronic program-
47
(Fig. 8-1)
(Fig. 8-2)
Bed_anl_.qxd 20.02.04 16:29 Seite 47
Page 48

me guide is called up.
> If you select Genres, you can use the arrow keys to
additionally select your preferred genre (e.g.. movies,
news, shows, etc.).
8.2.3 SFI channel
Your receiver is equipped to receive a data channel with additional SFI data via the ASTRA satellite Systems (19° East).
These allow an SFI preview up to one week ahead.
> Press OK to call up the sub-menu SFI channel (Fig.
8-9).
> To receive the data channel, mark the line SFI upda-
te.
> Press OK to select On.
> In the line Update time use the numeric keys to
set the time at which the automatic download of SFI
data is to be carried out.
> To start the download of updated SFI data manually,
press the red function key Star t now.
If you do not wish to reeceive the additional data, or if you
cannot receive it because of your location, you can switch off
the data receiving function:
> Switch the item SFI update to off, to disable the
data reception. Only the programme information provi-
ded by the programme providers themselves will now
be available.
If the parameters of the data channel for downloading of the
SFI data should be altered, you can correct them in this
menu. The current transponder data can be obtained from
specialist retailers.In the normal course of events you would
not make any changes to this menu.
8.3 Parental control
Your unit is equipped with an access control function. This
allows you to block key functions (e.g. calling up the main
menu) from unauthorized access. In addition, programmes
and recordings that you have blocked can only be accessed
by means of a four-digit PIN code (unit PIN).
To configure the menu Parental control proceed as follows:
> Press Menu to display the Main Menu.
> Use the up/down arrow keys to mark the line
Settings.
> Confirm by pressing OK.
The sub-menu Settings will be displayed.
> Use the up/down arrow keys to mark the line
Parental control.
> Confirm by pressing OK.
The menu Parental control will be displayed. (Fig.
48
(Fig. 8-4)
(Fig. 8-3)
Bed_anl_.qxd 20.02.04 16:29 Seite 48
Page 49

8-10)
> Use the up/down arrow keys to move the marker
around within the menu, and change the individual
positions. When selecting a menu item please note
any additional messages displayed on screen.
8.3.1 Changing the unit PIN
The unit PIN code is set at the factory to 0000.
> Press OK to display the menu used to change the
unit PIN code. (Fig. 8-11)
> Now use the numeric keys to enter the current unit
PIN code (Default setting 0000).
> Using the numeric keys, enter the desired new unit
PIN code.
> Repeat the code entry.
> When you have completed changing the unit PIN
code in this manner you will automatically be taken
back to the Parental Control menu.
Note!
Do not forget your unit PIN code. If you should forget
it, please consult your specialist retailer!
8.3.2 Mode
> In this line, use the left/right arr ow keys to select
parental control on or off.
8.3.3 Selecting a programme
> Press OK. The Favourites list of the current mode (TV
or Radio) will be displayed. The currently selected pro-
gramme is marked. (Fig. 8-12)
> Press the green function key to switch between the
TV and Radio lists.
> Press the red function key to open a selection win-
dow. Here you have the choice of selecting the des-
ired programme list type.
> Use the up/down arrow keys to select the desired
programme type (e.g. Favourites list).
> Confirm by pressing OK. The programme list selected
will be displayed.
> Now use the arrow keys to mark the programme to
which you wish to block the access.
> Block the programme by pressing the yellow function
key. The parental control symbol will appear next
to the programme selected.
> To block several programmes simultaneously, mark
these as described in Point 8.1.2 (Marking blocks of
programmes) and block them by pressing the yel-
low function key.
> When you have completed configuring the programme
49
(Fig. 8-5)
Bed_anl_.qxd 20.02.04 16:29 Seite 49
Page 50

list according to your preferences, press the Menu
key to revert to normal operation.
> To reverse the blockage of individual programmes,
proceed as described above. Mark the appropriate
programme, and remove the parental lock symbol by
pressing the yellow function key.
8.4 Programme scan
As mentioned, your digital receiver has been pre-programmed for reception of the ASTRA and EUTELSAT satellites. To
receive new programmes, or those of other satellites, various
options are provided to preform a programme scan (search).
1. Automatic scan
Select this type of search mode to scan all satellites selected
in the menu LNC Settings (Point 6.4 and 8.4) for programmes.
2. Satellite scan
Select this search mode to scan a selected satellite for programmes.
3. Transponder scan
Select this search mode to scan a specific transponder of a
satellite for programmes.
4. Manual scan
Select this search mode to scan specifically for a particular
programme, using the programme-specific PID numbers.
When the scan has been completed, a message will appear
on screen indicating how many programmes your digital
receiver has found, how many of these are new, and how
many are encrypted. New programmes will be stored in the
Total list, from where they can be included in the Favourites
list, as per Point 8.1.
> To perform a programme scan, first call up the Main
Menu. (Fig. 8-13)
> Use the up/down arrow keys to mark the line
Scan.
> Confirm by pressing OK.
The sub-menu Scan will be displayed. (Fig. 8-14)
> Use the up/down arrow keys to select a search
mode, and confirm by pressing OK.
8.4.1 Automatic scan
When this search mode is used, all the available satellites
included in the menu LNC settings (Points 6.4 and 9.4) will be
automatically scanned for programmes. You can select whether you wish to scan for all programmes (encrypted and freeto-air), or only free-to-air programmes. (Fig. 8-15)
> Using the OK key, decide whether you wish to scan
only for free-to-air programmes (Free
50
(Fig. 8-6)
Bed_anl_.qxd 20.02.04 16:29 Seite 50
Page 51

programmes) or whether you want to include
encrypted programmes (All programmes).
> Confirm by pressing the red function key Start
scan.
The scan may take more than 15 minutes. Please
note any on-screen messages displayed.
8.4.2 Satellite scan
UTo scan a specific satellite for programmes, select the
option Satellite scan (Fig. 8-16). You can select whether
you wish to scan for all programmes (free-to-air and encrypted) or only for free-to-air programmes.
> Press the OK key again to open the selection table of
active satelites.
> Use the up/down arrow keys to mark the line All
satellites to scan all active satellites for program-
mes, or mark the desired satellite to scan only this for
programmes.
> Confirm by pressing OK.
> Use the up/down arrow keys to mark the field
Scan mode.
> Use the OK key to select whether you wish to scan
only for free-to-air programmes (Free
programmes) or whether you wish to include
encrypted programmes (All programmes).
> Press the red function key Start scan.
The scan will be started. Please note an y messages
displayed on screen.
> You can stop the scan at any time by pressing the
red function key.
8.4.3 Transponder scan
You may scan a specific transponder (see Point 10 Technical
terms) for programmes. To do this, you will have to enter the
transponder data (Fig. 8-17).
Satellite
In this line, select the satellite on which the desired transponder is located.
> Use the up/down arr ow keys to mark the line
Satellite.
> Press OK to display a table showing the active satelli-
tes.
> Now use the up/down arrow keys to mark the des-
ired satellite.
> Confirm by pressing OK.
The selected satellite will now be indicated in the line
Satellite.
Transponder frequency
> Use the up/down arrow keys to mark the line
51
(Fig. 8-8)
(Fig. 8-7)
Bed_anl_.qxd 20.02.04 16:29 Seite 51
Page 52

Transponder frequency.
> In this line, use the numeric keys to enter the appro-
priate frequency.
Symbol rate
The symbol rate indicates the volume of data transmitted per
second. A typical figure might be, for example, 27500 (27500
symbols per second).
> Use the up/down arrow keys to mark the line Symbol
rate.
> Use the numeric keys to enter the appropriate sym-
bol rate.
Polarisation
> Use the up/down arrow keys to mark the line
Polarisation.
> In this line, use the OK key to enter the polarisation
plane (horizontal or vertical) on which the desired
programme is broadcast.
Scan mode
> Use the up/down arrow keys to mark the line
Scan mode.
> Use the OK key to decide whether you wish to scan
only for free-to-air programmes (Free
programmes) or whether you wish to include
encrypted programmes (All programmes.
> Confirm by pressing the red function key Start
scan.
The scan will be started. Please note all messages
displayed on screen.
> You can terminate the scan by pressing the red func-
tion key again.
8.4.4 Manual scan
Should a programme not be found by an automatic scan or a
transponder scan, it may be necessary to enter additional,
programme-specific PID numbers for this programme. It may
be necessary to look up these numbers on the Internet, or to
obtain them directly from the appropriate programme provider.
The menu (Fig. 8-18) differs from the menu Transponder
scan only with regard to the menu items PCR-PID, AudioPID and Video-PID. There is no need to enter the scan
mode.
> Proceed as described for a transponder scan.
> Then, using the up/down arrow keys, mark the
lines PCR-PID, Audio-PID and Video-PID, and
use the numeric keys to enter the appropriate numbers.
8.4.5 After the scan
52
Bed_anl_.qxd 20.02.04 16:29 Seite 52
Page 53

While the scan is in progress, you can follow this on screen
as the various transponders are scanned. When the scan has
been completed, the number of transponders found, the number of programmes found as well as the number of new programmes found will be shown on screen. In addition, a
prompt will appear (Fig. 8-19), asking whether you wish to
include the programmes found automatically in the TV or
Radio list. If you want to include the programmes automatically, you can select whether to include them in the
Favourites list in sorted or unsorted order.
Sorted
The programmes found will be sorted into the Favourites list
in accordance with a pre-programmed list order. The order in
which programmes are sorted will depend on the audio
language was selected in Point 6.3.2 resp. on the country
selected in Point 6.2.2 and 6.2.3.
Unsorted
The newly found programmes are added to the end of the
Favourites list in unsorted order.
No
The newly found programmes will not be included in the
Favourites list, and will be added only to the Total list.
> Use the left/right arrow keys to select whether you
wish to include the programmes in sorted or
unsorted order.
> Confirm by pressing OK.
Please note any further messages displayed on
screen.
> Press the Menu key to revert to normal operation.
> Independently of whether you have chosen to include
the programmes found into the Favourites list, you
can also still include these in the Favourites list
manually, as described in Chapter 8.1.
8.5 Service settings
You can at all times revert to the default settings pre-programmed at the factory. Also, should the programme list be
outdated by virtue of the many changes effected by programme providers, you can delete the programme list completely,
to be followed by a new programme scan. Please note that, if
you have performed the delete function, you must then start
a programme scan, and must copy the desired programmes
from the Total list to the Favourites list.
> Use the Menu key to call up the Main Menu. (Fig.
8-20)
> Now use the up/down arrow keys to mark the
menu line Settings.
> Confirm by pressing OK.
The sub-menu Settings will be displayed.
53
(Fig. 8-10)
(Fig. 8-9)
Bed_anl_.qxd 20.02.04 16:29 Seite 53
Page 54

(Fig. 8-21)
> Use the up/down arrow keys to mark the menu line
Service settings.
> Confirm by pressing OK.
The sub-menu Service settings will be displayed.
(Fig. 8-22)
8.5.1 Activate default setting
When this function is selected, the default settings pre-programmed at the factory are activated again, your own settings
are deleted, and the installation assistant AutoInstall will
be started.
> Use the up/down arrow keys to mark the line
Activate default setting.
> Press OK.
The following prompt will appear: “Do you really want
to activate the default setting?”.
> Use the left/right arr ow keys to select Yes or
Abort.
> Confirm your selection by pressing OK.
8.5.2 Delete all programmes
This function will delete all programme memory.
> Use the up/down arrow keys to mark the line
Delete all programmes.
> Press OK.
The following prompt will appear:“Do you really want
to delete all programmes?”.
> Use the left/right arr ow keys to select Yes or
Abort.
> Confirm your selection by pressing OK.
8.5.3 Updating software
In addition, you have the option of updating the operating
system software of your digital receiver via satellite (ASTRA
19° East).
> Press OK to go to the sub-menu Software update
(Fig. 8-23).
To perform a software update, mark the line
Software update.
> Press the OK key to switch the software update func-
tion to On.
> In the line Update time use the numeric keys to
select the time at which the software update is to be
carried out.
> To start the updating of the operating software manual-
ly, press the red function key Test.
> Press the Menu key to revert to normal operation.
Should the parameters of the data channel used for downloading the software updates have changed, these may be cor-
54
(Fig. 8-12)
(Fig. 8-11)
Bed_anl_.qxd 20.02.04 16:29 Seite 54
Page 55

rected as described under Point 8.3.4 (manual programme
scan). The current transponder data may be obtained from
your specialist retailer. In the normal course of events you
should not make any changes to this menu.
Note:
This function should not be implemented if you
have made changes in the menues “Basic settings” or “LNC configuration”, as these settings
will revert to the factory default settings, and the
desired changes will have to be entered again.
For the new software to be downloaded automatically, the digital receiver must be in standby
mode. The download procedure will be indicated
on the display by “SAtL”. Do not interrupt this
procedure, e.g. by switching the receiver on or
off.
Independently of whether you have set the automatic software update function to On of Off, each time you switch on
the receiver the system will check whether a new version of
the operating system software for your digital receiver is available. If a new version of the operating software is available,
this will be indicated by a message shown on screen (Fig. 8-
24).
To start the update of your software, follow the instructions
displayed on your screen.
8.5.4 Copying the settings
You have the facility to copy all the settings of your digital
receiver (transmitter), such as programme lists, antenna settings, etc. to another digital receiver (receiver) of the same
type, and equipped with the same version of the operating
system software. (Fig. 8-25)
> To do this, connect the two units by means of a null
modem cable.
> Switch on the (receiving) receiver.
> To copy the settings, press any key on the (transmit-
ting) receiver.
The settings of the transmitting receiver will now be
transmitted to the receiving receiver. Please not any
messages displayed on screen.
8.6 System configuration
This menu item will show you the specific unit data, e.g. current software version.
> Use the up/down arrow keys to mark this line in
the sub-menu Settings.
> Confirm by pressing OK.
> Press the Menu key to revert to normal operation.
8.7 Encryption system
55
(Fig. 8-13)
(Fig. 8-14)
Bed_anl_.qxd 20.02.04 16:29 Seite 55
Page 56
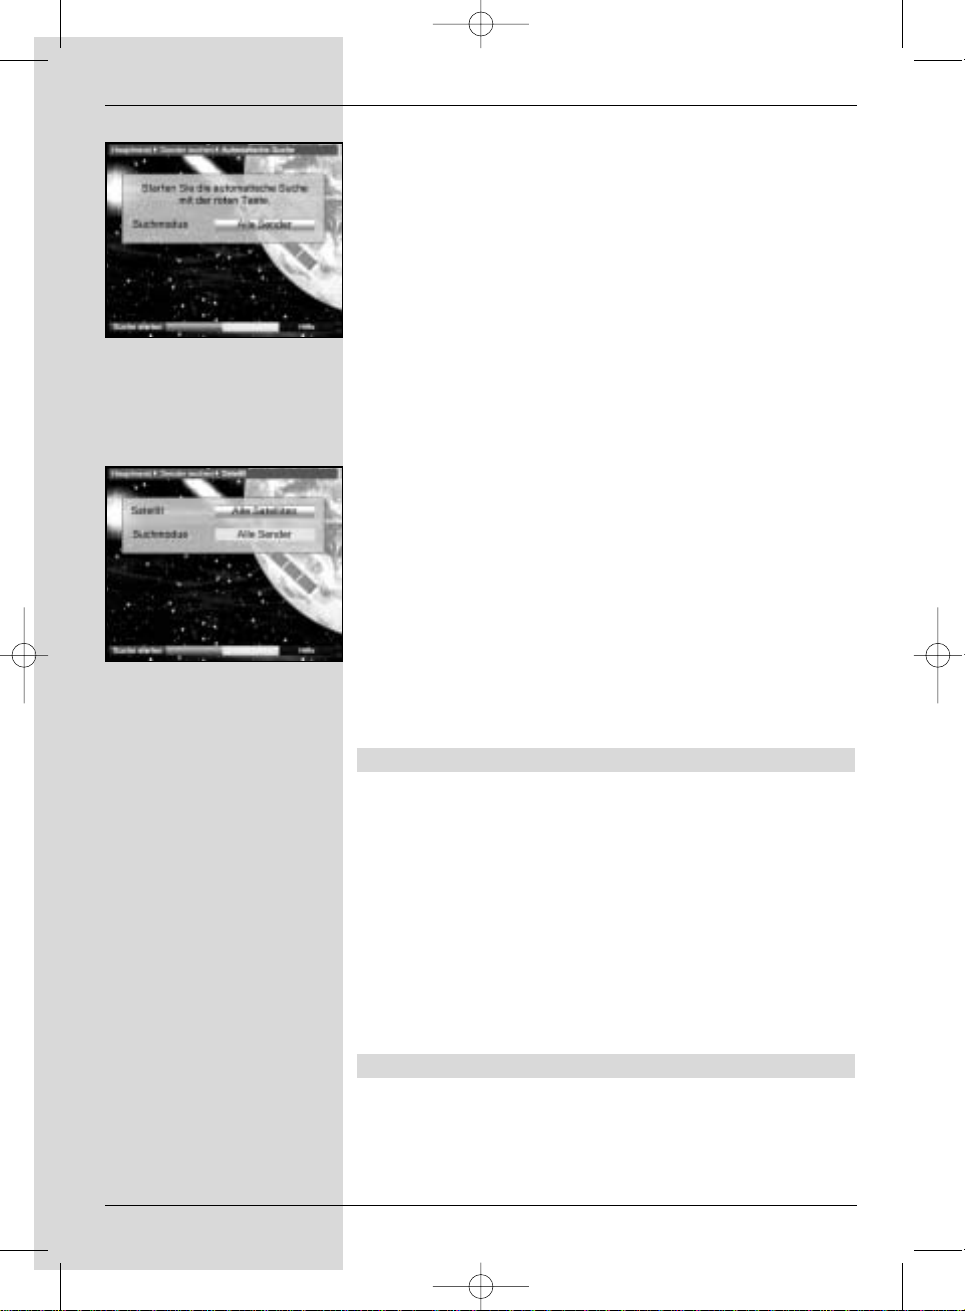
This menu item allows you to access the sub-menues of the
CI module inserted. By confirming with OK, you can display
information relating to the CI module inserted as well as to
the smart card being used.
Manual initialising of the CI module
> You can initialise the CI module manually by pressing
the red function key CI Reset.
9 Operating a rotary antenna installation
(DiSEqC 1.2)
Your digital receiver is ready to operate a motorised rotary
antenna installation The DiSEqC control function (DiSEqC
level 1.2) allows you to control a suitable motor via the coaxial cable.
> Call up the menu Antenna settings as described
under Point 6.4 (Fig. 9-1) and switch the DiSEqC
control (Point 6.4.1) to on.
> Now use the up/down arrow keys to select the
DiSEqC position (e.g. A/B 3) to which you wish to
allocate the motorised antenna.
> Press OK to open a window allowing you to select a
Satellite resp. the option Motor antenna. (Fig. 9-
2)
> Use the up/down arrow keys to select the line Motor
antenna and confirm by pressing OK.
> Confirm the screen prompt (Fig. 9-3) regarding the
setting or Eastern and Western limits by pressing OK.
9.1 Eastern and Western limits
To avoid potential mechanical damage to the dish antenna or
the LNC by any obstacles, you must first determine the
maximum range of movement/rotation in both an easterly and
westerly direction. If there are any obstacles within the
rotating range of the antenna, such as walls or
chimnies,these must definitely be considered when setting
the easterly and westerly limits.
If there are no obstacles within the rotating range of the dish,
then set the limits of the rotation in such a manner that the
dish can move a little further than is strictly speaking required
to receive signals from the most extremely positioned
satellites.
9.1.1 Deleting existing limits
You should first of all delete any existing limit settings.
> Use the left/right arr ow keys to mark the column
LNC test.
> In the line Motor antenna use the up/down
arrow keys to mark the field Continue.
56
(Fig. 8-16)
(Fig. 8-15)
Bed_anl_.qxd 20.02.04 16:29 Seite 56
Page 57

> Confirm by pressing OK.
The menu for setting the motorised antenna will now
be displayed. (Fig. 9-4)
> Press the yellow function key Actions to open an
additional window. (Fig. 9-5)
> Now use the up/down arrow keys to mark the line
Delete limits.
> Confirm by pressing OK to transfer the action
selected to the green function key.
> To delete the limits, press the green function key
Delete lim..
> Confirm the screen prompt by pressing OK (Fig. 9-6)
9.1.2 Set Eastern limit
> To enter the Eastern limit, first use the arrow keys to
mark the field Save.
> Now press the arr ow key right to turn the antenna
to the maximum Eastern position possible or
desirable
> Press the yellow function key Actions to display
the window listing the available actions.
> Now use the up/down arrow keys to mark the line
Set Eastern limit.
> Confirm by pressing OK.
> To set the Eastern limit, press the green key
(Eastern limit), then confirm the following prompt by
pressing OK (Fig. 9-7).
9.1.3 Setting Western limit
> To enter the Western limit, first use the arrow keys to
mark the field Save.
> Now press the arr ow key left to turn the antenna
to the maximum Western position possible or
desirable
> Press the yellow function key Actions to display
the window listing the available actions.
> Now use the up/down arrow keys to mark the line
Set Western limit.
> Confirm by pressing OK.
> To set the Western limit, press the green key
(Western limit), then confirm the following prompt by
pressing OK (Fig. 9-8).
9.2 Geo positioning
If you know the geographical co-ordinates of your location,
and are equipped with a suitable motor, this function will
facilitate the procedure of finding the various satellite
positions. The co-ordinates of some German cities can be
found in the Annexure (Point 13).
57
(Fig. 8-17)
Bed_anl_.qxd 20.02.04 16:29 Seite 57
Page 58

Note! You should only activate the geo-positioning
function if your DiSEqC motor supports this function.
> As described above, call up the menu for setting the
motorised antenna.
> Use the arrow keys to mark the field Geo.Pos.
> Confirm by pressing OK. A menu will b e displayed,
allowing you to enter your location. (Fig. 9-9)
> Use the OK key to select On or Off for the geo-
positioning function.
> Use the arrow keys to select the field for entering the
geographical longitude.
> Use the numeric keys to enter the geographical
longitude.
> Now press the arrow key left.
> In this field, use the OK key to indicate whether you
are referring to longitude East (East) or west (W).
> Now use the arrow keys to mark the field for entering
the geographical latitude.
> Use the numeric keys to enter the geographical
latitude.
> Now press the arrow key left.
> In this field, use the OK key to indicate whether you
are referring to latitude North (N) or South (S).
> Use the Back key to return to the LNC settings.
The data relating to your location must be entered as a
decimal figure, correct to one decimal point. As the coordinates are frequently stated in terms of degrees, minutes
and seconds, these must be converted to decimal values as
follows:
The full degree figures remain unchanged by the calculation.
The minutes are divided by 60, and rounded to one decimal
point. The result of this division is added to the degree figure.
The seconds are not considered at all, as they do not affect
the first decimal point.
Example: co-ordinates of Daun/Germany
Latitude 50° 11‘(45“) N
Longitude 06° 50‘ (10‘‘) E
Conversion of the latitude (Lat):
Lat = 50 + 11/60
Lat = 50 + 0,2 (rounded)
Lat = 50,2
In the menu you will enter the value, rounded to one decimal
point, for geographical latitude (50,2).
The decimal value for the longitude will be calculated in the
same way.
9.3 Setting a satellite position
For each satellite position to be included, work through the
procedures described in Points 9.3.1 to 9.3.3. When programming satellite positions, it is recommended that you begin
58
(Fig. 8-19)
(Fig. 8-18)
Bed_anl_.qxd 20.02.04 16:29 Seite 58
Page 59

with the most easterly satellite location. Then, continue by
adding the other satellite positions, working in a westerly
direction, until you have reached the most westerly satellite
position. Your digital receiver has been pre-programmed at
the factory for the most commonly used satellite positions. In
addition, you may enter and configure user-defined (User)
satellite positions (User 1 to User 14) for any orbital position.
9.3.1 Selecting a satellite position
9.3.1.1 Selecting a pre-programmed satellite
position
> To include a satellite position in the satellite list, use
the arrow keys to mark the field Sat new.
> Confirm by pressing OK.
A list showing the available satellite positions will be
displayed. (Fig. 9-10)
> Now use the up/down arrow keys to mark a
satellite position that you wish to include in the
satellite list.
> Press OK to accept the selection into memory.
If the geo-positioning function is active (Point 9.2)
the dish will now be rotated automatically to the programmed
satellite position. While the rotation is in progress, the display
“turn” will be shown, and will blink.
If the geo-positioning function is not active (Point
9.3.2.2) you must rotate the antenna manually to the desired
position.
9.3.1.2 Setting user-defined satellite positions (User
satellite)
> To include a user satellite position in the satellite list,
use the arrow keys to mark the field Sat new.
> Confirm by pressing OK.
The list of available satellite positions will be dis-
played. (Fig. 9-11)
> Now use the up/down arrow keys to mark a user
satellite position (User 1 to User 14).
> Press the OK key to display the menu used to set a
test transponder. In this menu, set the parameters of
the test transponder and of the LNC used as
described in Point 6.4.3.
> When you have completed setting the test trans-
ponder, press Back, to return to the menu for setting
the motorised antenna. The field for entering the
orbital position is active.
> Use the numeric keys to enter the orbital position of
the user satellite, and confirm by pressing OK.
> Now use the OK key to enter whether the orbital posi-
tion is a western (W) or eastern (E) position.
59
(Fig. 8-22)
(Fig. 8-21)
(Fig. 8-20)
Bed_anl_.qxd 20.02.04 16:29 Seite 59
Page 60
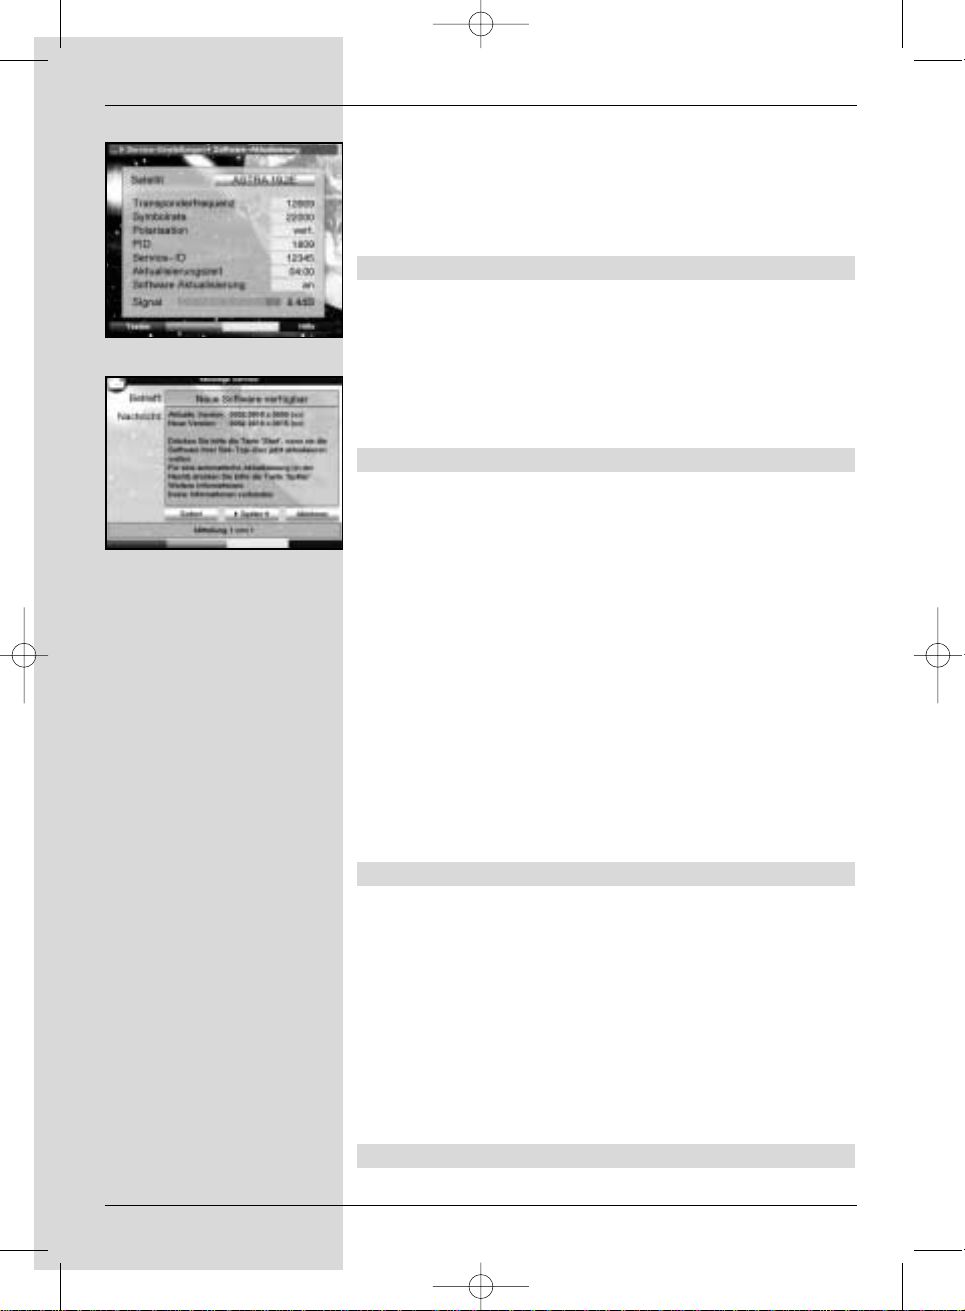
If the geo-positioning function is switched on (Point
9.2) you can now turn the antenna to the programmed user
satellite position using the function turn to Sat (Point 9.4.1).
If the geo-positioning function is switched off (Point
9.3.2.2) you must now turn the antenna manually to the
desired satellite position.
9.3.2 Adjusting the satellite antenna
To adjust the antenna for the desired satellite, or to determine
whether the desired satellite can be received at the set
position, a test transponder has been programmed for each
satellite.
The indicators for signal strength and signal quality provided
by this test transponder facilitate the exact positioning of the
antenna.
9.3.2.1 Test transponder/LNC configuration
To change the data of the respective test transponder, proceed as follows:
> Use the arrow keys to mark the field Current
satellite list.
> Press OK to display the satellite list.
> Use the up/down arrow keys to mark the satellite
position for which you wish to change the data.
> Confirm by pressing OK.
> Now use the arrow keys to mark the field LNC
config. and press OK.
The menu LNC settings will be displayed. (Fig. 9-
12)
> In this menu, enter the data relating to the test trans-
ponder as well as for the LNC used, as described in
Point 6.4.3.
> Press Back to return to the menu for adjusting the
motorised antenna.
9.3.2.2 Manual adjustment of antenna
The optimum adjustment for the desired position can be
made with the help of the displays for signal strength and signal quality. Adjust the antenna in such a way that both bars
indicated a maximum value.
> Use the up/down arrow keys to mark the field
Save.
> Now use the arr ow key right (field East is marked)
resp. left (field West is marked) to turn the antenna to
the desired position. In each case, hold the key
pressed down until the desired position has been
reached.
9.3.2.3 Automatic fine adjustment (Autofocus)
Before storing the satellite position in memory, you should
60
(Fig. 8-24)
(Fig. 8-23)
Bed_anl_.qxd 20.02.04 16:29 Seite 60
Page 61
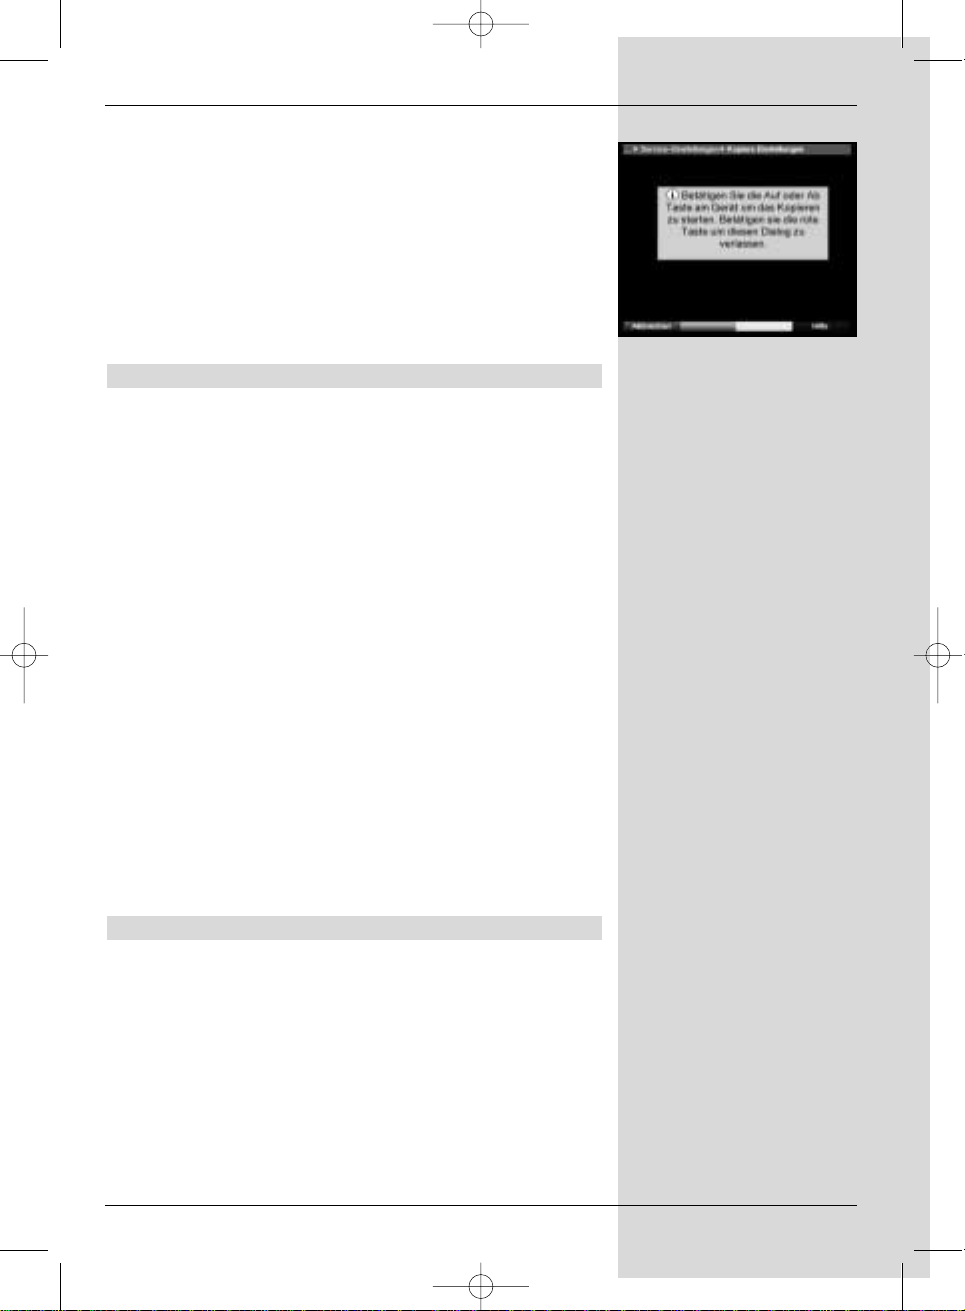
perform the automatic focussing function. This provides a fine
adjustment of the antenna to achieve optimum reception.
> Press the yellow function key Actions to open a
window displaying the actions available.
> Now use the up/down arrow keys to mark the line
Autofocus.
> Confirm by pressing OK.
> Press the green key (Autofocus) to start the auto-
focus procedure.
While the automatic adjustment is in progress, the
message Autofocus will be displayed. (Fig. 9-13)
9.3.3 Saving a satellite position
NWhen the Autofocus function has been completed, you can
proceed to save the satellite position in memory.
> Use the arrow keys to mark the field Save.
> Press OK.
Now the test transponder selected will check whether
a signal is being received at this position. At the same
time, the system will check whether the position to be
saved is one that is already included in the pre-pro-
gramming. (Fig. 9-14)
If this is the case, the message will be displayed:
Orbital position xx found. Save satellite ?
(Fig. 9-15)
> To save the satellite position in memory, use the
left/right arrow keys to mark the field Yes, and
confirm by pressing OK.
If the check carried out by the test transponder does
not recognise a position as being included in the pre-
programming, or if the signal is too weak, an appro-
priate message will be displayed on screen. (Figs. 9-
16 and 9-17)
> To save the satellite position in memory, use the
left/right arrow keys to mark the field Yes, and
confirm by pressing OK.
9.4 Current satellite list
The satellite positions that have been saved in memory can
be found in the satellite list. Positions that have not yet been
saved are indicated in the list by an “*”.
> To turn the antenna dish to a position in the satellite
list, use the arrow keys to mark the field Current
satellite list.
> Confirm by pressing OK.
> Use the up/down arrow keys to select the desired
position.
> Confirm by pressing OK.
The dish will now be turned to the selected position.
61
(Fig. 8-25)
Bed_anl_.qxd 20.02.04 16:29 Seite 61
Page 62

While the positioning procedure is in progress, the
blinking message “turn” will be displayed in the
menu.
9.4.1 Selecting a satellite position
In order to turn the dish antenna to the position specified in
the satellite list, your digital receiveris equipped with the
function tur n to Sat.
> Press the yellow function key Actions to open the
window displaying the actions available.
> Use the up/down arrow keys to mark the line turn
to Sat.
> Confirm by pressing OK.
> Press the green key (turn to Sat), the antenna will be
turned toward the satellite position selected.
9.5 Delete satellite position
To delete a satelite position from the satelite list, proceed as
follows:
> Use the arrow keys to mark the field Current
satellite list.
> Press OK to display the current satellite list.
> Use the up/down arrow keys to select the satellite
you wish to delete.
> Confirm by pressing OK.
> Use the arrow keys to mark the field Sat delete.
> To delete the selected satellite, press OK, then
confirm the screen prompt by pressing OK again.
9.6 Reference position
When installing the extern al installation, the rotary motor
must be in the reference position (0°). This allows you to
move the motor position back to this reference position (0°) at
any time by means of the command “Go to reference
position”..
> Press the red function key Ref.pos to rotate the
antenna automatically to the reference position.
10 Technical Terms
Antenna cable:
Connecting cable between the modulator of the satellite receiver and the antenna input of the television set. Used as an
alternative where no SCART socket is availabe
External installation:
Term used to describe the whole system mounted externally,
consisting of the parabolic or offset dish as well as one or
more LNCs, to provide reception from one or more satellites
AV: see SCART
62
(Fig. 9-4)
(Fig. 9-1)
(Fig. 9-2)
(Fig. 9-3)
Bed_anl_.qxd 20.02.04 16:29 Seite 62
Page 63

Data compression/MPEG1/MPEG2:
The current television standard (625 lines and 50 Hz picture
repeat frequency) provides a digital data volume of 216
MBit/s.
This would require bandwidths simply not available either terrestrially or via satellite. The data volume is thus reduced by
means of a data reduction system. For Europe, the internationally determined standard for data compression is MPEG-2.
MPEG-2 is an expanded version of MPEG-1
DiSEqC:
Digital Satellite Equipment Control: a digital control signal
used to control and switch DiSEqC compatible components
of the external installation via the antenna cable. An example
of how an installation consisting of DiSEqC components can
be configured is shown in (Fig. 10-1).
DVB:
Digital Video Broadcasting: A universal digital transmission
technology used to transmit pictures, graphics, sound and
text, as well as for data in every conceivable form and in
every possible, appropriate quality.
Frequency:
A physical unit of measurement, indicates the number of
oscillations per second, the unit of measurement is Hertz
(Hz)
Frequency range:
a) Satellite respectively LNC:
11 GHz range from 10,70 GHz - 11,70 GHz, 12 GHz range
from 11,70 GHz - 12,75 GHz
b) Receiver: interim frequency or 1.IF 950 tp 2150 MHz
Unit Name Oscillations per second
1 Hz 1 Hertz 1
1 kHz 1 Kilohertz 1.000
1 MHz 1 Megahertz 1.000.000
1 GHz 1 Gigahertz 1.000.000.000
Co-axial cable:
Connection cable between LNC and satellite receiver, used
to transmit the signals received and to supply power to the
LNC.
LNB/LNC (Low Noise block converter):
Reception unit located at the focal point of the parabolic dish
antenna. Converts the frequency range of the satellite to that
of the interim frequency of the digital receiver.
LOF:
Local oscillator frequency; stated in MHz or GHz; varies
depending on the LNC and the frequency range
Reception frequency of the digital receiver = Broadcasting
frequency of the satellite - LOF
22 KHz modulation:
This can be used to switch between 2 LNCs, in addition to
14/28 Volt switching. In Universal LNCs it serves to switch to
63
(Fig. 9-9)
(Fig. 9-8)
(Fig. 9-6)
(Fig. 9-7)
(Fig. 9-5)
Bed_anl_.qxd 20.02.04 16:29 Seite 63
Page 64

the High range
Modulator:
Switch in the satellite receiver or video recorder used to connect the television set via antenna cable
Parabolic dish:
Dish, made of metal or coated synthetics, with parabolic
shape, used to focus the electro-magnetic waves transmitted
by the satellite at a focal point.
Polarisation plane:
To better utilise the available frequency range, satellites transmit neighbouring programmes with opposite polarisation (horizontal and vertical or laevorotatory and dextrorotatory). In
order to receive the two polarisation planes either two single
LNCs or one V/H LNC are required.
Receiver: see satellite receiver
Satellite:
Description of the satellite, usually a combination of the name
with the orbital position,
ASTRA 19° East
EUTELSAT 13° East
Satellite receiver:
The signals received and converted by the LNC cannot be
processed by the television set. The signals are processed in
the satellite receiver so that modified audio and video (AV)
signals are available at the receiver outputs that can then be
processed by the television set.
SCART:
A standard plug-in connection used in satellite receivers,
video recorders, television sets and other home electronics
equipment to transmit audio (sound) and video (picture) signals (AV).
Software update:
Digital television is a new medium that provides improved picture and sound quality as well as the option of providing interactive services. These services are continually being developed and improved by programme providers. To utilise these
services it may be necessary to update the software of the
digital receiver occasionally.
Transponder:
Located on the satellite, used to process one or more programmes. In other words, it receives the signal from the
ground station, amplifies the signal and transmits it back to
earth.
Universal LNC:
Used to receive the FFS range (10,70 - 11,70 GHz), BBS
(11,70 - 12,50 GHz) and FFS High Band (12,50 - 12,75 GHz).
This entire range is divided into two bands:
Low Band: 10,70 - 11,80 GHz; LOF 9750 MHz
High Band 11,70 - 12,75 GHz ; LOF 10600 MHz
Service voltage:
64
Bed_anl_.qxd 20.02.04 16:29 Seite 64
Page 65

LNCs are supplied with power by means of the coaxial cable,
to achieve this the receiver supples either 14 or 18 volt power
Interim frequency:
The frequency range broadcast by the satellite cannot be
transmitted via a cable. Therefore the LNC converts the signal to the interim frequency range of 950 to 2150 MHz. This
makes it possible for the digital receiver to receive and process the signal.
1. IF = Interim frequency
11 Technical data
DBS tuner:
Input frequency range 950 .... 2150 MHz
Input level range - 65 dBm ... - 25 dBm
DBS tuner input F - connector
Input/output impedance 75 Ohms
Output for 1. IF 950 ... 2150 MHz (loop through)
AFC capture range +/- 3 MHz
Demodulation Shaped QPSK
Symbol rate 1 ... 45 Mbaud/s, SCPC/ MCPC
FEC Viterbi and Reed-Solomon
Viterbi rates 1/2, 2/3, 3/4, 5/6, 7/8, automatic
adaptation
Roll-off Factor 35 %
Demultiplexing: according to ISO 13818-1
Common Interface:
Type 1 Common Interface slot for CI
module
Power requirement max. 0,3A/5V
PLL modulator: UHF, Channel 21 ... 69
Antenna input 47 ... 862 MHz
Antenna output 47 ... 862 MHz
Video decoding:
Video compression MPEG-2 and MPEG-1 compatible
Up to MP@ML (main profile @
main level)
Video standard PAL / 25 Hz
Active image 720 Pixel x 576 lines
Picture format 4 : 3 / 16 : 9
Picture material 16:9 Automatic adaptation for 16:9 TV
sets (via SCART)
Letterbox filtering for 4:3 TV sets
Audio decoding:
Audio compression MPEG-1 & MPEG-2 Layer I and II
Audio Mode Dual (main/sub), Stereo
Sampling frequencies 32 kHz, 44.1 kHz, 48 kHz
Audio parameters:
Output analogue:
Output level L/R 0,5 V r.m.s. (nominal)
65
(Fig. 9-11)
(Fig. 9-10)
Bed_anl_.qxd 20.02.04 16:29 Seite 65
Page 66

Output impedance 600 Ohm
THD > 60 dB ( 1 kHz )
S/N > 60 dB
Crosstalk < - 65 dB
Input analogue:
Input level l/r 0,5 V r.m.s. (nominal)
Input impedance > 40 kOhm
Volume at switch-on Automatic use of last volume set-
ting
Output digital:
SP/DIF output electrical, cinch socket
optical, Toslink
Dolby Digital AC3
Video parameters:
Output:
Output level FBAS 1 Vs-s +/- 0.3 dB into 75 Ohms
Output level Y 1 Vs-s +/- 0.3 dB into 75 Ohms
Output level C 1 Vs-s +/- 0.3 dB into 75 Ohm
Output level RED 0,7 Vs-s +/- 0.1Vp-p into 75 Ohms
Output level GREEN0,7 Vs-s +/- 0.1Vp-p into 75 Ohms
Output level BLUE 0,7 Vs-s +/- 0.1Vp-p into 75 Ohms
S/N loaded > 60 dB
Video text
Teletext filtering corresponding to ETS 300 472
Standard
Download Teletext data (FBAS) corresponding to ITU-R
BT.653-2 lines: 6-22 and 320-335
Soft video text 800 pages memory
TV SCART:
Output: FBAS or RGB
VCR SCART:
Input: FBAS
Output: FBAS
Video Cinch:
Output FBAS
S-VHS Hosiden socket:
Output Y signal (luminance),
C signal (chrominance)
Hard drive:
Hard drive type 3,5 inch
Capacity 40 GB (Standard)
Hard drive control provided for 20 to 120 GB
No. of recordings 1000 (max.)
Display:
Vacuum fluorescence 16 digit, 5x7 point matrix, 7 mm
symbol height
Serial interface RS 232:
Type RS 232, bidirectional
Bit rate 115,2 kBit/s max.
Connection D-SUB socket, 9 pin
66
(Fig. 9-12)
Bed_anl_.qxd 20.02.04 16:29 Seite 66
Page 67

Function Update for operating software and pre-pro-
gramming
LNC power supply:
LNC power 400 mA max.; double insula
ted
LNC voltage vertical <14,0V no load, > 11,5 V at 400
mA
LNC voltage horizontal < 20 V no load, > 17,2 V at 400
mA
LNC switched off in standby mode
22 kHz modulation: 22 kHz, Amplitude 0.6 V +/- 0.2 V
Programme memory/satellite positions:
No. of programmes Favourites list TV:
999 TV programmes
No. of programmes Favourites list Radio:
999 Radio programmes
Number of programmes:
Total list TV/Radio: In total 6000 programmes can be
stored in the Total list
DiSEqC:
DiSEqC 1.0 and DiSEqC 1.2
SFI data:
SFI preview: maximum 7 days in advance
Timer:
Events: maximum 124 events, one year in advance
Remote control system: RC-5
Subsystem address 8 (SAT 1), 10 (SAT 2)
Modulation frequency 36 kHz
Infrared wavelength 950 nm
Power supply:
Mains adapter:
Power requirement:
10 W in standby mode
16 W in operation, excl. LNC
23 W recording mode, excl. LNC
32 W recording mode / 400mA LNC cur-
rent
Nominal voltage:
230 V / 50 Hz alternating current
Input voltage:
180 V.... 250 V / 50 Hz alternating current
General:
Dimensions (WxDxH): 370 mm x 220 mm x 65 mm
Weight: approx. 2,7 kg
12 Troubleshooting guide
13 Annexure
67
(Fig. 9-16)
(Fig. 9-17)
(Fig. 9-14)
(Fig. 9-15)
(Fig. 9-13)
Bed_anl_.qxd 20.02.04 16:30 Seite 67
Page 68

Index
AC3 . . . . . . . . . . . . . . . . . . . . . . . . . . . . . . .19, 28
Autofocus 67
Automatic scan . . . . . . . . . . . . . . . . . . . . . . . . . . . . . .56
Language, operating . . . . . . . . . . . . . . . . . . . . . . . . . .17
Service breaks . . . . . . . . . . . . . . . . . . . . . . . . . . . . . . .9
DiSEqC . . . . . . . . . . . . . . . . . . . . . . . . . . . . . . . . . .69
DiSEqC 1.2 . . . . . . . . . . . . . . . . . . . . . . . . . . . . . . . . .62
Dolby Digital . . . . . . . . . . . . . . . . . . . . . . . . . . . . .19, 28
Rotating antenna . . . . . . . . . . . . . . . . . . . . . . . . . . . . .62
Electronic Programme Guide . . . . . . . . . . . . . . . . . . .31
Disposal advice . . . . . . . . . . . . . . . . . . . . . . . . . . . . . . .9
Initial installation . . . . . . . . . . . . . . . . . . . . . . . . . . . . .13
Remote control code . . . . . . . . . . . . . . . . . . . . . . . . . .18
Hard drive operation . . . . . . . . . . . . . . . . . . . . . . . . . .37
Hard drive information . . . . . . . . . . . . . . . . . . . . . . . .46
Hard drive maintenance . . . . . . . . . . . . . . . . . . . . . . .46
Formating 46
Frequency 69
Type/Genre . . . . . . . . . . . . . . . . . . . . . . . . . . . . . . . . .36
Geo-positioning . . . . . . . . . . . . . . . . . . . . . . . . . . . . . .63
Unit PIN . . . . . . . . . . . . . . . . . . . . . . . . . . . . . . . . . .54
Infobox . . . . . . . . . . . . . . . . . . . . . . . . . . . . . . . . . .26
Age restrictions . . . . . . . . . . . . . . . . . . . . . . . . . . . . . .53
Parental control . . . . . . . . . . . . . . . . . . . . . . . . . . . . . .45
Volume control . . . . . . . . . . . . . . . . . . . . . . . . . . . . . .27
LNC . . . . . . . . . . . . . . . . . . . . . . . . . . . . . . . . . .70
LOF . . . . . . . . . . . . . . . . . . . . . . . . . . . . . . . . . .70
Manual scan . . . . . . . . . . . . . . . . . . . . . . . . . . . . . . . .57
Modulator 70
MPEG1 . . . . . . . . . . . . . . . . . . . . . . . . . . . . . . . . . .69
MPEG2 . . . . . . . . . . . . . . . . . . . . . . . . . . . . . . . . . .69
Multifeed . . . . . . . . . . . . . . . . . . . . . . . . . . . . . . . . . .27
Navigator 24
Pause . . . . . . . . . . . . . . . . . . . . . . . . . . . . . . . . . .44
Polarisation . . . . . . . . . . . . . . . . . . . . . . . . . . . . . . . . .22
Polarisation plane . . . . . . . . . . . . . . . . . . . . . . . . . . . .70
Delete programmes . . . . . . . . . . . . . . . . . . . . . . . . . .49
Sort programmes . . . . . . . . . . . . . . . . . . . . . . . . . . . .50
Programme information . . . . . . . . . . . . . . . . . . . . . . .29
Managing programme lists . . . . . . . . . . . . . . . . . . . . .47
Searching for programmes . . . . . . . . . . . . . . . . . . . . .55
PVR . . . . . . . . . . . . . . . . . . . . . . . . . . . . . . . . . .37
Reference position . . . . . . . . . . . . . . . . . . . . . . . . . . .68
RS 232 . . . . . . . . . . . . . . . . . . . . . . . . . . . . . . . . . .13
Setting satellite positions . . . . . . . . . . . . . . . . . . . . . .64
Scanning for satellites . . . . . . . . . . . . . . . . . . . . . . . . .56
SCART . . . . . . . . . . . . . . . . . . . . . . . . . . . . . . . . . .70
Serial interface . . . . . . . . . . . . . . . . . . . . . . . . . . . . . .13
68
Bed_anl_.qxd 20.02.04 16:30 Seite 68
Page 69

SFI . . . . . . . . . . . . . . . . . . . . . . . . . . . . . . . . . .31
SFI channel . . . . . . . . . . . . . . . . . . . . . . . . . . . . . . . . .52
Safety notes . . . . . . . . . . . . . . . . . . . . . . . . . . . . . . . . .9
Sleep timer . . . . . . . . . . . . . . . . . . . . . . . . . . . . . . . . .46
Updating software . . . . . . . . . . . . . . . . . . . . . . . . . . . .60
Special functions . . . . . . . . . . . . . . . . . . . . . . . . . . . . .26
Language . . . . . . . . . . . . . . . . . . . . . . . . . . . . . . . . . .28
Country . . . . . . . . . . . . . . . . . . . . . . . . . . . . . . . . . .18
Freeze frame . . . . . . . . . . . . . . . . . . . . . . . . . . . . .30,44
Select start time . . . . . . . . . . . . . . . . . . . . . . . . . . . . .27
Symbol rate . . . . . . . . . . . . . . . . . . . . . . . . . . . . . . . . .23
System configuration . . . . . . . . . . . . . . . . . . . . . . . . .61
Timer recording . . . . . . . . . . . . . . . . . . . . . . . . . . . . . .39
Timeshift 37-38,42
Transponder . . . . . . . . . . . . . . . . . . . . . . . . . . . . . . . .71
Transponderfrequency . . . . . . . . . . . . . . . . . . . . . . . .22
Transponder information . . . . . . . . . . . . . . . . . . . . . . .29
Scanning for transponders . . . . . . . . . . . . . . . . . . . . .56
Switching mode TV/Radio . . . . . . . . . . . . . . . . . . . . .28
UHF output channel . . . . . . . . . . . . . . . . . . . . . . . . . .20
Clock . . . . . . . . . . . . . . . . . . . . . . . . . . . . . . . . . .29
Universal LNC . . . . . . . . . . . . . . . . . . . . . . . . . . . . . . .71
Sub-titles . . . . . . . . . . . . . . . . . . . . . . . . . . . . . . . . . .31
Encryption system . . . . . . . . . . . . . . . . . . . . . . . . . . . .61
Video text 30
Notes
For everyday operation
Switching on and off
> Use the On/Standby key either on the unit or on the
remote control to switch on the digital receiver.
> Press the key again to switch the unit off.
> The unit is now in standby mode, and the current time
is shown on the display.
Programme selection
Using the programme up/down keys
> Use the progr amme up/down keys either on the
unit or on the remote control to move up or down the
list by one programme slot at a time.
Using the numeric keys
> Use the numeric keys to enter the required program-
me number.
For example
1 for programme slot 1
1, then 4 for programme slot 14
2, then 3, then 4 for programme slot 234
69
(Fig. 10-1)
A B
Position
Output
A B
Position
Output
A B
Option
Output
Example:
Bed_anl_.qxd 20.02.04 16:30 Seite 69
Page 70

When entering programme numnbers with more than one
digit, you have approx. 3 seconds time after pressing a key to
complete the entry.
If you wish to enter a number with only one or two digits, you
can speed up the switching process by keeping your finger
pressed down a little longer on the last digit.
Using the programme list:
> Press OK.
> You can now use the up/down arrow keys to mark
the programme you wish to view.
> Press OK to select the marked programme.
> Use the up/down arrow keys to move up or down
the list one line at a time.
> Use the left/right arr ow keys to move back or for-
ward in the list one page at a time.
Volume control
> You can adjust the volume of your digital receiver by
means of the keys Volume + for louder and Volume
- for softer volume.
> Press the key Sound on/off to switch the sound on
or off (mute function).
70
423_03 2233440001200342_03 2233440000800
Bed_anl_.qxd 20.02.04 16:30 Seite 70
Page 71

71
Bed_anl_.qxd 20.02.04 16:30 Seite 71
Page 72

72
Bed_anl_.qxd 20.02.04 16:30 Seite 72
Page 73

73
Bed_anl_.qxd 20.02.04 16:30 Seite 73
Page 74

74
Bed_anl_.qxd 20.02.04 16:30 Seite 74
Page 75

75
Problem Possible cause Solution
Various programmes not shown in
programme list
Wrong programme list selected Select different programme list (see
Point 7.2.3.1)
Sound OK, no TV picture Reception set to Radio mode Switch to TV mode
Programmes such as Pro 7, Sat 1,
TM3, Kabel 1, DSF and HOT
temporarily interrupted
Interference from DECT standard
cordless telephones
Increase distance between phone
base station and receiver
Unit controls cannot be operated Defective data flow-->unit blocked Disconnect mains plug for approx. 5
seconds, then switch unit on again
Remote control not working Batteries empty Change batteries
Temporary appearance of small
square blocks in picture, unit
temporarily freezes picture, no
sound. Screen temporarily black
with message “no signal”.
Heavy rain or snow Remove snow from dish
Antenna not correctly adjusted Adjust antenna position
Dish too small for location Fit larger antenna, adjust antenna
Obstruction between dish and
satellite, e.g. wall, tree
Mount antenna with free line of sight
No picture, no sound,
display active
Short circuit in LNC cable Switch off unit, fix short circuit,
switch unit on again
Defective or missing cable
connection
Check all cable connections
Faulty LNC Replace LNC
Incorrect reception unit set on
receiver
Adjust setting (see Point 6.4)
Antenna incorrectly adjusted Adjust antenna
No picture, no sound,
display not active
No mains power Check mains power cord and plug
No reception of programmes previously received
Antenna maladjusted or faulty Check antenna
Programme now broadcast on
another transponder
Perform scan (see Point 8.3)
Programme no longer being broadcast
None
Antenna will not turn Motor not DiSEqC 1.2 compatible Use compatible motor
Bed_anl_.qxd 20.02.04 16:30 Seite 75
Page 76

76
Problem Possible cause Solution
Current time not displayed while in
standby mode
Current time not downloaded Switch to major programme, e.g.
ZDF, for approx. 30 seconds.
Unit cannot be switched on, or can-
not be operated
Unit blocked Perform flash reset: Note! All perso-
nal settings are lost in this process.
> Disconnect mains power plug.
> Press Standby and Programme
Up keys on unit simultaneously, and keep them
pressed down.
> While Programme Up and
Standby keys are still pressed,
reconnect mains power plug.
> Keep keys pressed down for
approx. 5 secs. until Display
“FLAS” appears
Recording on hard drive no longer
possible
Hard drive is full
Delete existing recording(s)
Deleting hard drive recordings not
possible
File system of hard drive is damaged
Check hard drive (Point 7.15.3.3)
Bed_anl_.qxd 20.02.04 16:30 Seite 76
Page 77
77
Bed_anl_.qxd 20.02.04 16:30 Seite 77
Page 78
78
Solingen 7,1 51,2
Stuttgart 9,2 48,8
Trier 6,7 49,8
Ulm 10,0 48,4
Weimar 11,3 51,0
Wiesbaden 8,2 50,1
Wilhelmshaven 8,1 53,5
Wismar 11,5 53,9
Wuppertal 7,2 51,3
Würzburg 9,9 49,8
Zwickau 12,5 50,7
Bed_anl_.qxd 20.02.04 16:30 Seite 78
Page 79

79
Bed_anl_.qxd 20.02.04 16:30 Seite 79
Page 80

80
Bed_anl_.qxd 20.02.04 16:30 Seite 80
Page 81

81
Bed_anl_.qxd 20.02.04 16:30 Seite 81
Page 82

82
151203/201/1 2233430000100
Bed_anl_.qxd 20.02.04 16:30 Seite 82
Page 83

83
Bed_anl_.qxd 20.02.04 16:30 Seite 83
Page 84

84
Bed_anl_.qxd 20.02.04 16:30 Seite 84
Page 85

85
Bed_anl_.qxd 20.02.04 16:30 Seite 85
Page 86

86
Bed_anl_.qxd 20.02.04 16:30 Seite 86
Page 87

87
Bed_anl_.qxd 20.02.04 16:30 Seite 87
Page 88

88
Bed_anl_.qxd 20.02.04 16:30 Seite 88
Page 89

89
Bed_anl_.qxd 20.02.04 16:30 Seite 89
Page 90

90
Bed_anl_.qxd 20.02.04 16:30 Seite 90
Page 91

91
Bed_anl_.qxd 20.02.04 16:30 Seite 91
Page 92

92
Bed_anl_.qxd 20.02.04 16:30 Seite 92
Page 93

93
Bed_anl_.qxd 20.02.04 16:30 Seite 93
Page 94

94
Bed_anl_.qxd 20.02.04 16:30 Seite 94
Page 95

95
Bed_anl_.qxd 20.02.04 16:30 Seite 95
Page 96

96
Bed_anl_.qxd 20.02.04 16:30 Seite 96
Page 97

97
Bed_anl_.qxd 20.02.04 16:30 Seite 97
Page 98

98
Bed_anl_.qxd 20.02.04 16:30 Seite 98
Page 99

99
Bed_anl_.qxd 20.02.04 16:30 Seite 99
Page 100

100
Bed_anl_.qxd 20.02.04 16:30 Seite 100
 Loading...