

Teac R-H500 Owner's Manual
r-h500
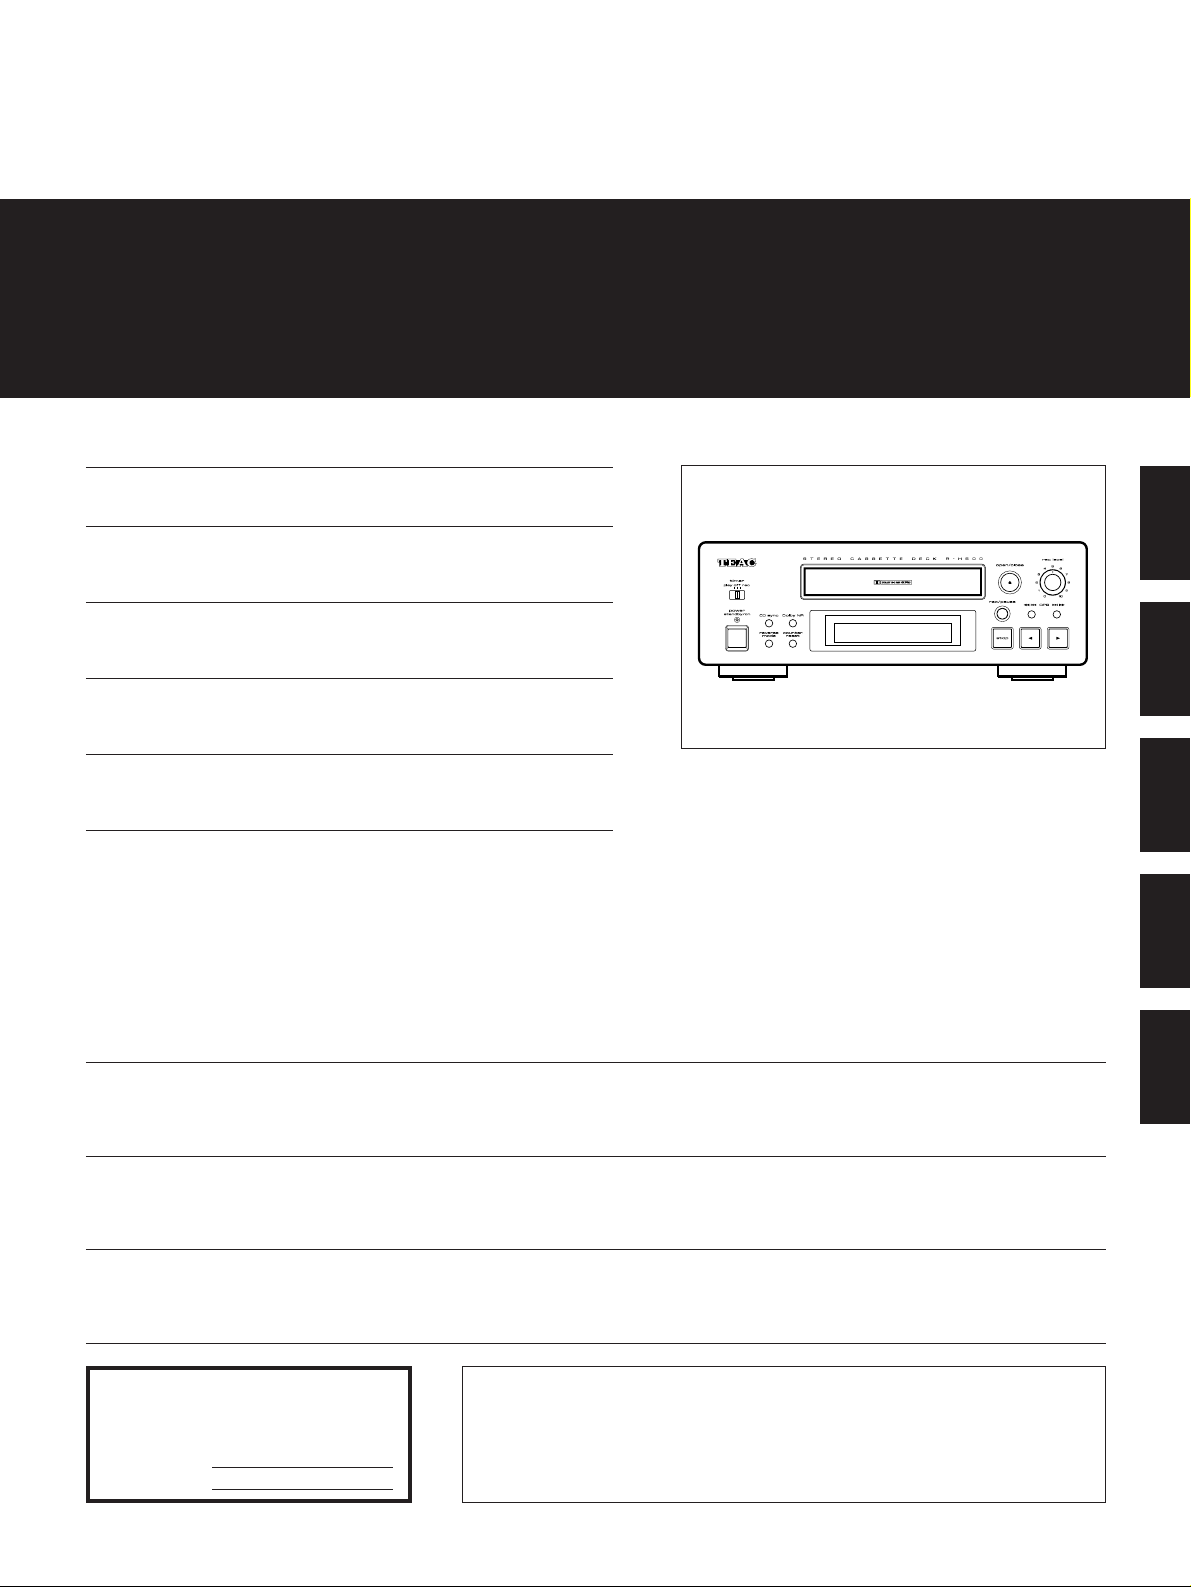
`
STEREO CASSETTE DECK
9A06054200
This appliance has a serial number located
on the rear panel. Please record the model
number and serial number and retain them
for your records.
Model number
Serial number
WARNING: TO PREVENT FIRE OR SHOCK
HAZARD, DO NOT EXPOSE THIS
APPLIANCE TO RAIN OR MOISTURE.
The exclamation point within an equilateral triangle is intended to alert the user to the
presence of important operating and maintenance (servicing) instructions in the literature
accompanying the appliance.
The lightning flash with arrowhead symbol, within equilateral triangle, is intended to alert
the user to the presence of uninsulated “dangerous voltage” within the product’s enclosure
that may be of sufficient magnitude to constitute a risk of electric shock to persons.
CAUTION: TO REDUCE THE RISK OF ELECTRIC SHOCK, DO NOT
REMOVE COVER (OR BACK). NO USER-SERVICEABLE PARTS INSIDE.
REFER SERVICING TO QUALIFIED SERVICE PERSONNEL.
Ü
ÿ
Ÿ
Thanks for buying a TEAC. Read this manual carefully to get the
best performance from this unit.
Nous vous remercions pour l’achat d’un appareil TEAC.
Lire ce manuel avec attention pour obtenir les meilleures
performances possibles de cet appareil.
Vielen Dank für den Kauf dieses TEAC-Geräts.
Bitte lesen Sie diese Anleitung sorgfältig durch, um die Leistungsfähigkeit dieses Geräts optimal nutzen zu können.
Grazie per aver acquistato un prodotto TEAC.
Leggere attentamente questo manuale per ottenere le migliori
prestazioni da questo apparecchio.
Enhorabuena por la adquisición de un TEAC.
Lea detenidamente este manual a fin de obtener el mejor
rendimiento de esta unidad.
OWNER’S MANUAL .................... 3
MANUEL DU PROPRIETAIRE ...... 10
BEDIENUNGSANLEITUNG........... 17
MANUALE DI ISTRUZIONI .......... 24
MANUAL DEL USUARIO ............. 30
ENGLISHFRANÇAISDEUTSCH
ITALIANO
ESPAÑOL
Important Safety Instructions
_2_
CAUTION:
••
Read all of these Instructions.
••
Save these Instructions for later use.
••
Follow all Warnings and Instructions marked on the audio
equipment.
1) Read Instructions
— All the safety and operating instructions
should be read before the product is operated.
2) Retain Instructions — The safety and operating instructions
should be retained for future reference.
3) Heed Warnings — All warnings on the product and in the
operating instructions should be adhered to.
4) Follow Instructions — All operating and use instructions should
be followed.
5) Cleaning — Unplug this product from the wall outlet before
cleaning. Do not use liquid cleaners or aerosol cleaners. Use a
damp cloth for cleaning.
6) Attachments — Do not use attachments not recommended by
the product manufacturer as they may cause hazards.
7) Water and Moisture — Do not use this product near water _for
example, near a bath tub, wash bowl, kitchen sink, or laundry tub; in
a wet basement; or near a swimming pool;and the like.
8) Accessories — Do not place this product on an unstable car t,
stand, tripod, bracket, or table.The product may fall, causing serious
injury to a child or adult, and serious damage to the product. Use
only with a cart, stand, tripod, bracket, or table recommended by the
manufacturer, or sold with the product. Any mounting of the product
should follow the manufacturer’s instructions, and should use a
mounting accessory recommended by the manufacturer.
9) A product and cart combination should be moved with care.
Quick stops, excessive force, and uneven surfaces may cause the
product and cart combination to overturn.
10) Ventilation — Slots and openings in the cabinet are provided
for ventilation and to ensure reliable operation of the product and to
protect it from overheating, and these openings must not be
blocked or covered. The openings should never be blocked by
placing the product on a bed, sofa, rug, or other similar surface.
This product should not be placed in a built-in installation such as a
bookcase or rack unless proper ventilation is provided or the
manufacturer’s instructions have been adhered to.
11) Power Sources — This product should be operated only from
the type of power source indicated on the marking label. If you are
not sure of the type of power supply to your home, consult your
product dealer or local power company. For products intended to
operate from battery power, or other sources, refer to the operating
instructions.
12) Grounding or Polarization — This product may be equipped
with a polarized alternating-current line plug (a plug having one
blade wider than the other). This plug will fit into the power outlet
only one way.This is a safety feature. If you are unable to insert the
plug fully into the outlet, try reversing the plug.If the plug should still
fail to fit, contact your electrician to replace your obsolete outlet.Do
not defeat the safety purpose of the polarized plug.
13) Power-Cord Protection — Power-supply cords should be
routed so that they are not likely to be walked on or pinched by
items placed upon or against them, paying particular attention to
cords at plugs, convenience receptacles, and the point where they
exit from the product.
14) Outdoor Antenna Grounding — If an outside antenna or
cable system is connected to the product, be sure the antenna or
cable system is grounded so as to provide some protection against
voltage surges and built-up static charges. Ar ticle 810 of the
National Electrical Code, ANSI/NFPA 70, provides information with
regard to proper grounding of the mast and supporting structure,
grounding of the lead-in wire to an antenna discharge unit, size of
grounding conductors, location of antenna-discharge unit,
connection to grounding electrodes, and requirements for the
grounding electrode.
"Note to CATV system installer:
This reminder is provided to call the CATV system installer’s
attention to Section 820-40 of the NEC which provides guidelines
for proper grounding and, in particular, specifies that the cable
ground shall be connected to the grounding system of the building,
as close to the point of cable entry as practical.
15) Lightning — For added protection for this product during a
lightning storm, or when it is left unattended and unused for long
periods of time, unplug it from the wall outlet and disconnect the
antenna or cable system. This will prevent damage to the product
due to lightning and power-line surges.
16) Power Lines — An outside antenna system should not be
located in the vicinity of overhead power lines or other electric light
or power circuits, or where it can fall into such power lines or
circuits. When installing an outside antenna system, extreme care
should be taken to keep from touching such power lines or circuits
as contact with them might be fatal.
17) Overloading — Do not overload wall outlets, extension cords,
or integral convenience receptacles as this can result in risk of fire
or electric shock.
18) Object and Liquid Entry — Never push objects of any kind into
this product through openings as they may touch dangerous voltage
points or short-out parts that could result in a fire or electr ic shock.
Never spill liquid of any kind on the product.
19) Servicing — Do not attempt to service this product yourself as
opening or removing covers may expose you to dangerous voltage
or other hazards.Refer all servicing to qualified service personnel.
20) Damage Requiring Ser vice — Unplug this product from the
wall outlet and refer servicing to qualified service personnel under
the following conditions:
a) when the power-supply cord or plug is damaged.
b) if liquid has been spilled, or objects have fallen into the product.
c) if the product has been exposed to rain or water.
d) if the product does not operate normally by following the
operating instructions. Adjust only those controls that are covered
by the operating instructions as an improper adjustment of other
controls may result in damage and will often require extensive work
by a qualified technician to restore the product to its normal
operation.
e) if the product has been dropped or damaged in any way.
f ) when the product exhibits a distinct change in performance
_
this indicates a need for service.
21) Replacement Parts — When replacement parts are required,
be sure the service technician has used replacement parts
specified by the manufacturer or have the same characteristics as
the original part. Unauthorized substitutions may result in fire,
electric shock, or other hazards.
22) Safety Check — Upon completion of any service or repairs to
this product, ask the service technician to perform safety checks to
determine that the product is in proper operating condition.
23) Wall or Ceiling Mounting — The product should be mounted
to a wall or ceiling only as recommended by the manufacturer.
24) Heat — The product should be situated away from heat sources
such as radiators, heat registers, stoves, or other products
(including amplifiers) that produce heat.
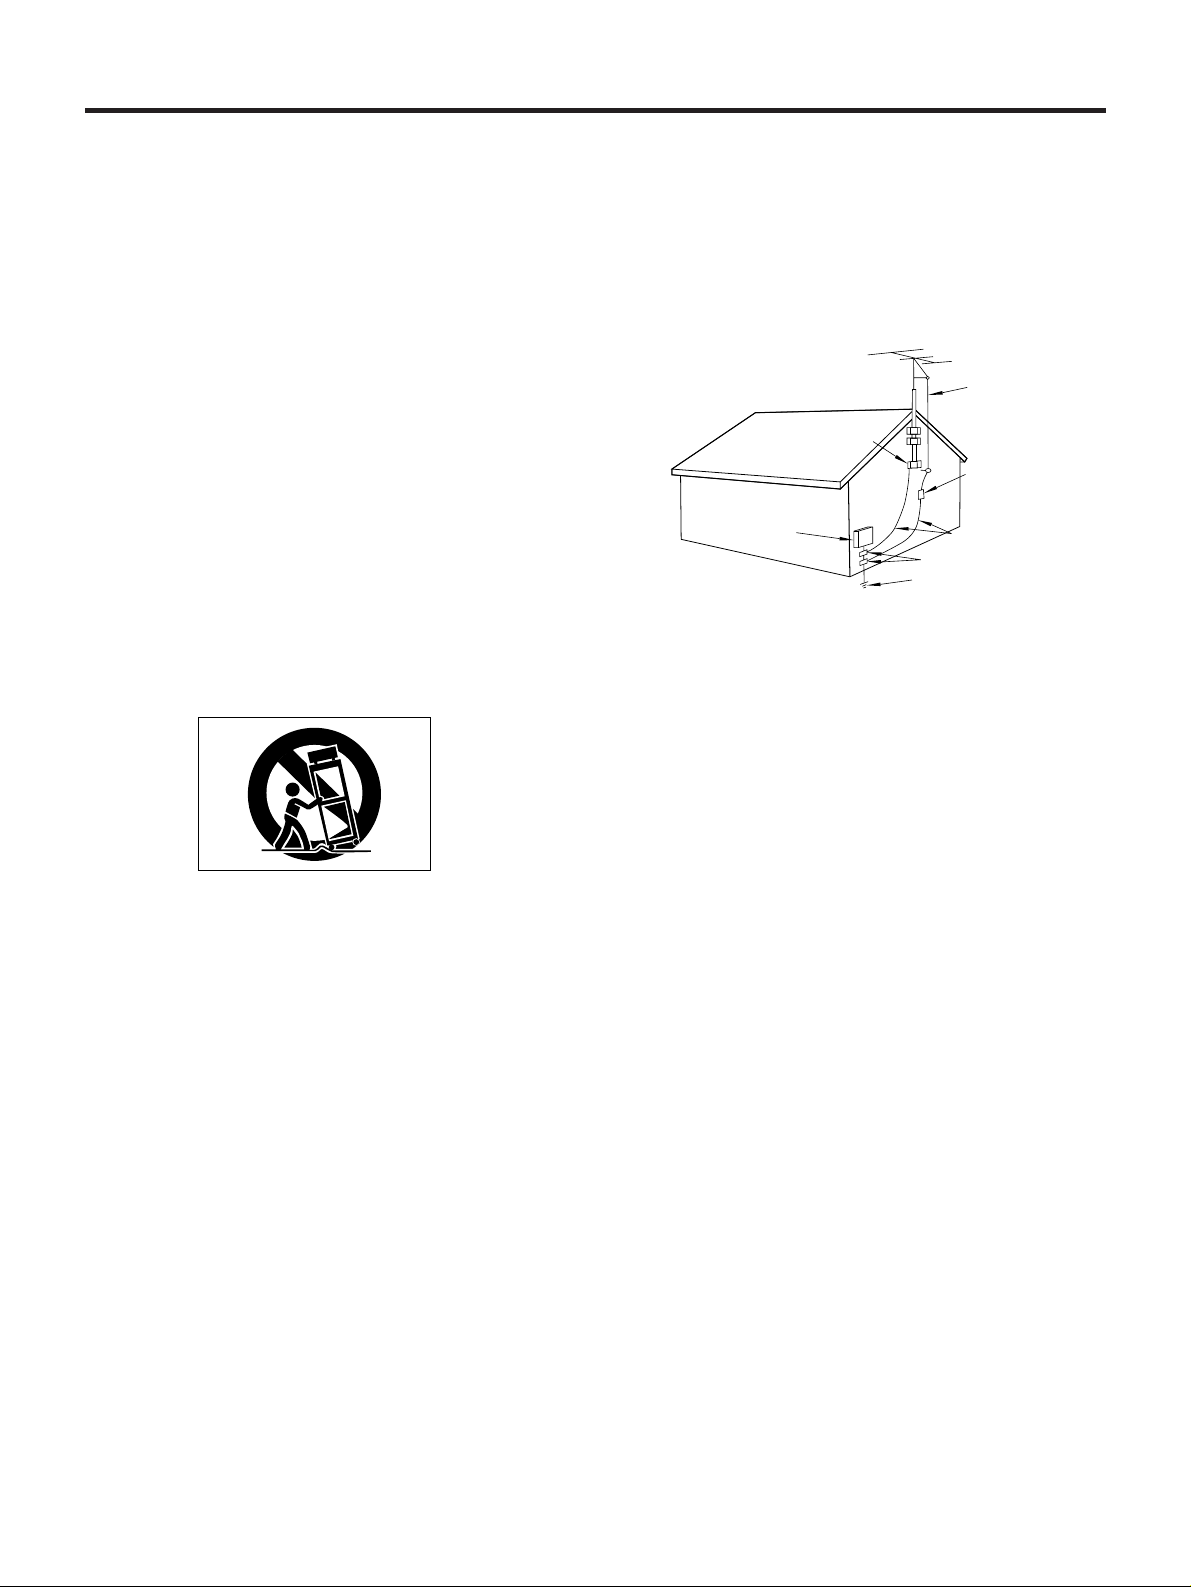
Example of Antenna Grounding as per
National Electrical Code, ANSI/NFPA 70
ANTENNA
LEAD IN
WIRE
GROUND
CLAMP
ANTENNA
DISCHARGE UNIT
(NEC SECTION 810-20)
ELECTRIC
SERVICE
EQUIPMENT
NEC - NATIONAL ELECTRICAL CODE
GROUNDING CONDUCTORS
(NEC SECTION 810-21)
GROUND CLAMPS
POWER SERVICE GROUNDING
ELECTRODE SYSTEM
(NEC ART 250. PART H)
ENGLISH
Before Use
_3_
Table of Contents
Connections and Rear Panel Overview .... 4
Front Panel Controls and Their
Functions..................................................... 5
Display............................................................ 5
Tape Playback ............................................... 6
Skip Play (CPS) Function ............................. 6
Recording....................................................... 7
Synchronous Recording.............................. 7
Timer-Controlled Recording/Playback ...... 8
HX Pro Headroom Extension &
Dolby Noise Reduction Unit..................... 8
AI Function..................................................... 8
Head Maintenance....................................... 8
Specifications................................................ 8
Troubleshooting ............................................ 9
Read This Before Operating
*Dolby noise reduction and HX Pro
headroom extension manufactured under
license from Dolby Laboratories
Licensing Corporation. HX Pro originated
by Bang & Olufsen.
"DOLBY", the double-D symbol
∂ and
"HX PRO" are trademarks of Dolby
Laboratories Licensing Corporation.
Environment
Avoid using the deck in the following
conditions:
● At high temperatures (near a heater,
exposed to direct sunlight, etc.).
● At extremely low temperatures.
● Where there is excessive humidity.
● In a dusty atmosphere.
● Where power line voltage fluctuations
are severe (in which case the use of a
voltage regulator may be advisable).
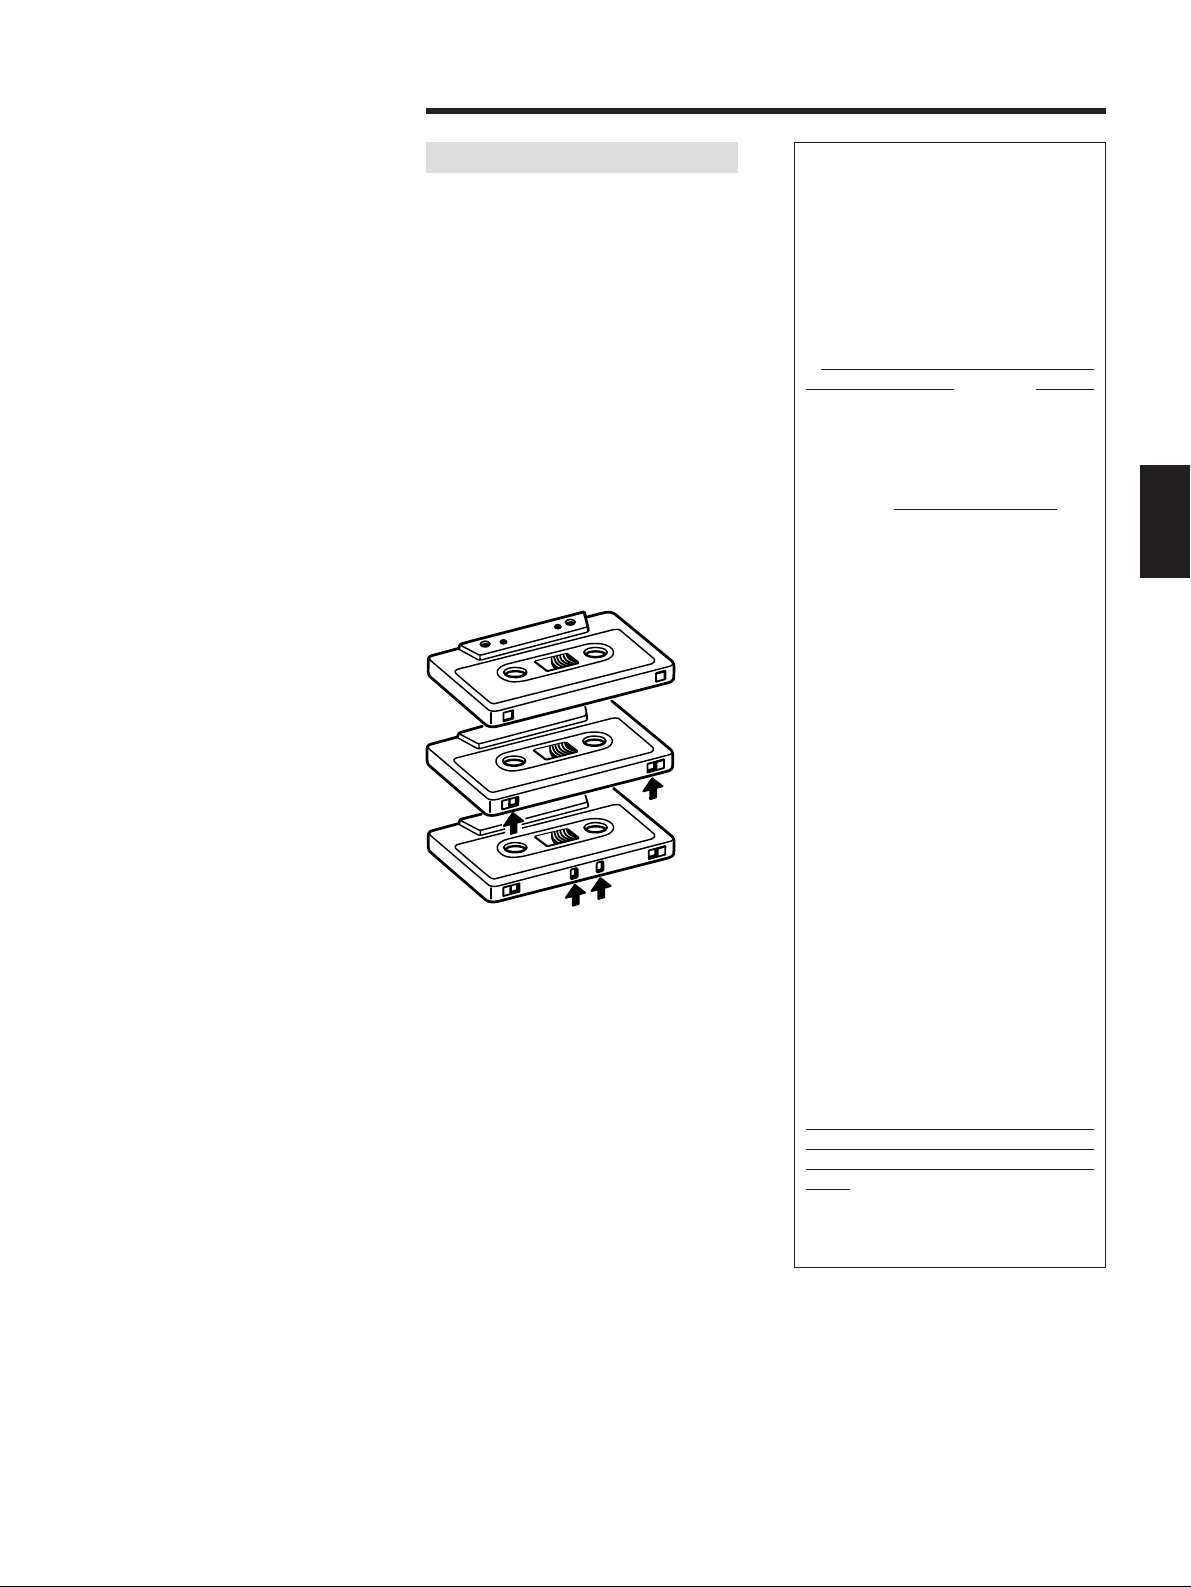
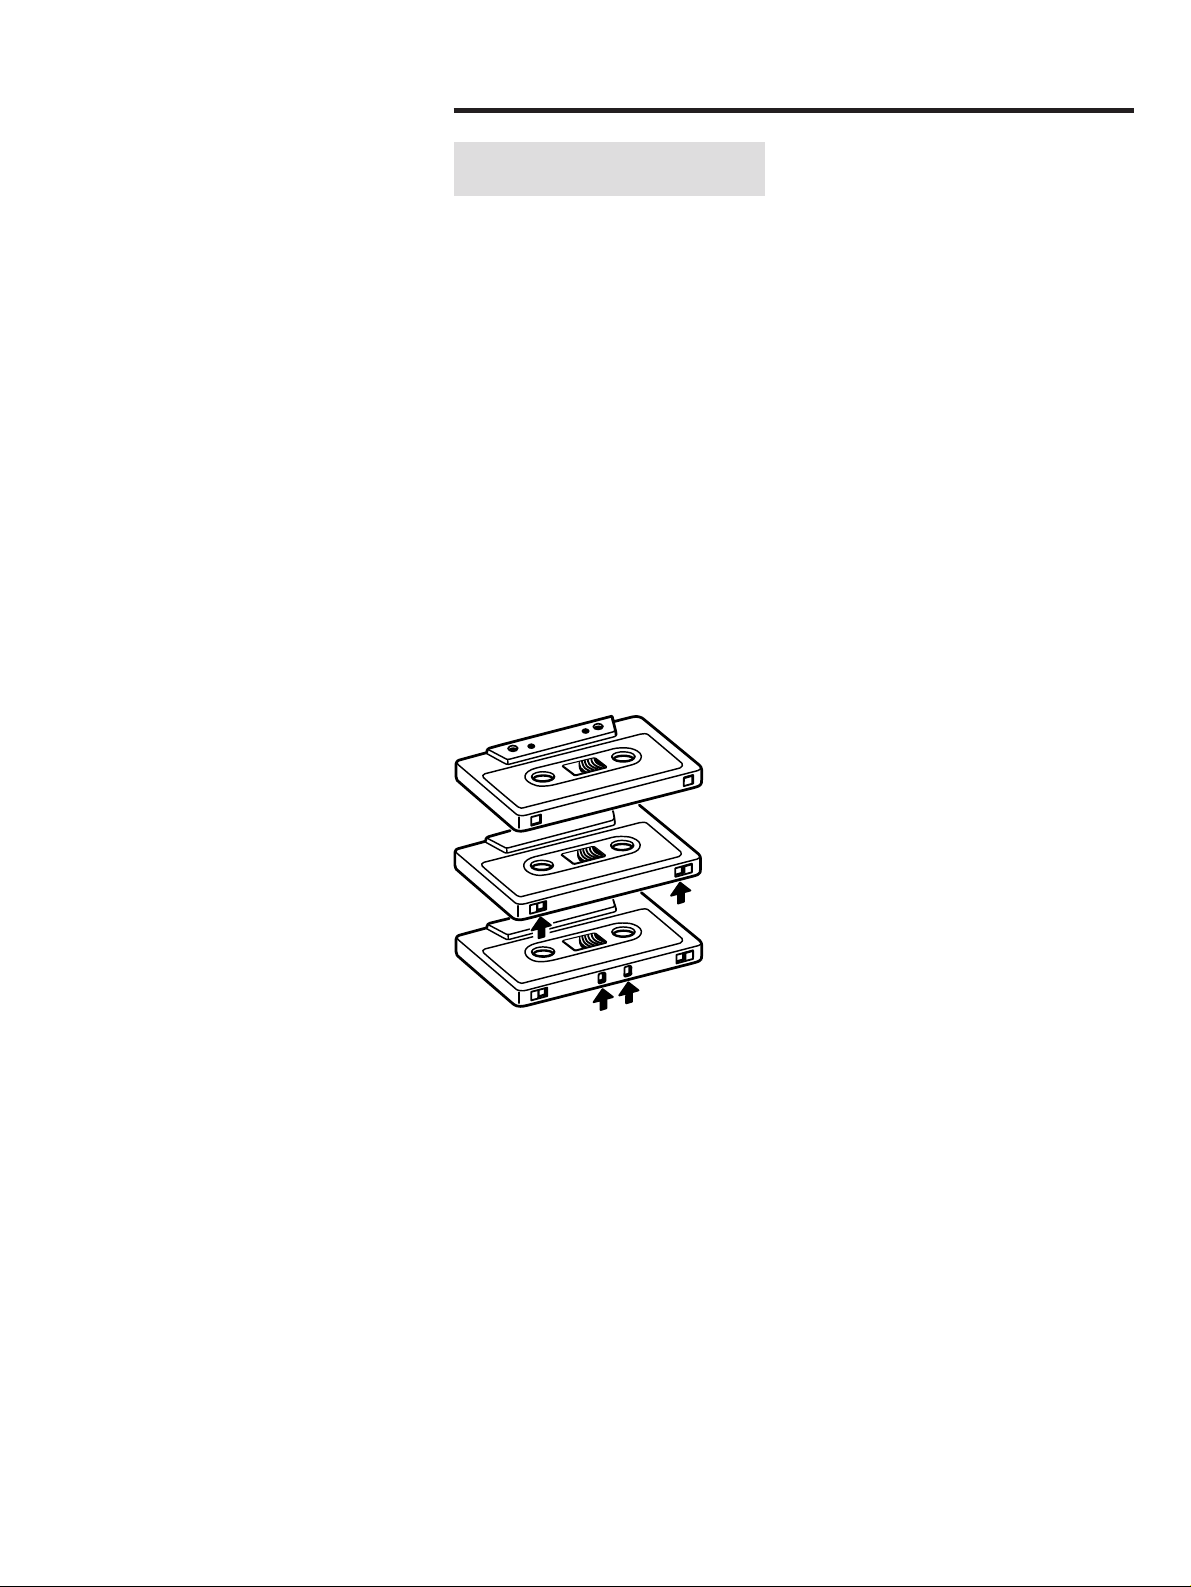
Cassette Tape
Tape Selection:
For the automatic tape select function to
work properly, metal and chrome (cobalt)
tapes must have identification holes.
Tape Handling:
Do not store tapes in the following places:
● On top of heaters, exposed to direct
sunlight or in any other places with high
temperatures.
● Near speakers, on TV sets or amplifiers
or where they would be exposed to
strong magnetic fields.
● Where humidity is high and in dirty,
dusty places.
● Avoid dropping or subjecting cassettes
to excessive shocks.
● As C-120 tapes are physically weak and
could twist or tangle around the capstan
and pinch roller, do not use them.
Normal
Tapes
Chrome
(Cobalt)
Tapes
Metal
Tapes
…Tape position identification holes.
IMPORTANT (for U.K. Customers)
DO NOT cut off the mains plug from this
equipment.
If the plug fitted is not
suitable for the power points in your
home or the cable is too short to reach
a power point, then obtain an
appropriate safety approved extension
lead or consult your dealer.
If nonetheless the mains plug is cut off,
remove the fuse and dispose of the plug
immediately, to avoid a possible shock
hazard by inadvertent connection to the
mains supply.
If this product is not provided with a
mains plug, or one has to be fitted,
then
follow the instructions given below:
IMPORTANT. DO NOT make any
connection to the larger terminal which
is marked with the letter E or by the
safety earth symbo
ç or coloured
GREEN or GREEN-and-YELLOW.
The wires in the mains lead on this
product are coloured in accordance
with the following code:
BLUE: NEUTRAL
BROWN: LIVE
As these colours may not correspond
with the coloured markings identifying
the terminals in your plug proceed as
follows:
The wire which is coloured BLUE must
be connected to the terminal which is
marked with the letter N or coloured
BLACK.
The wire which is coloured BROWN
must be connected to the terminal
which is marked with the letter L or
coloured RED.
When replacing the fuse only a
correctly rated approved type should
be used and be sure to re-fit the fuse
cover.
IF IN DOUBT — CONSULT A
COMPETENT ELECTRICIAN.
_4_
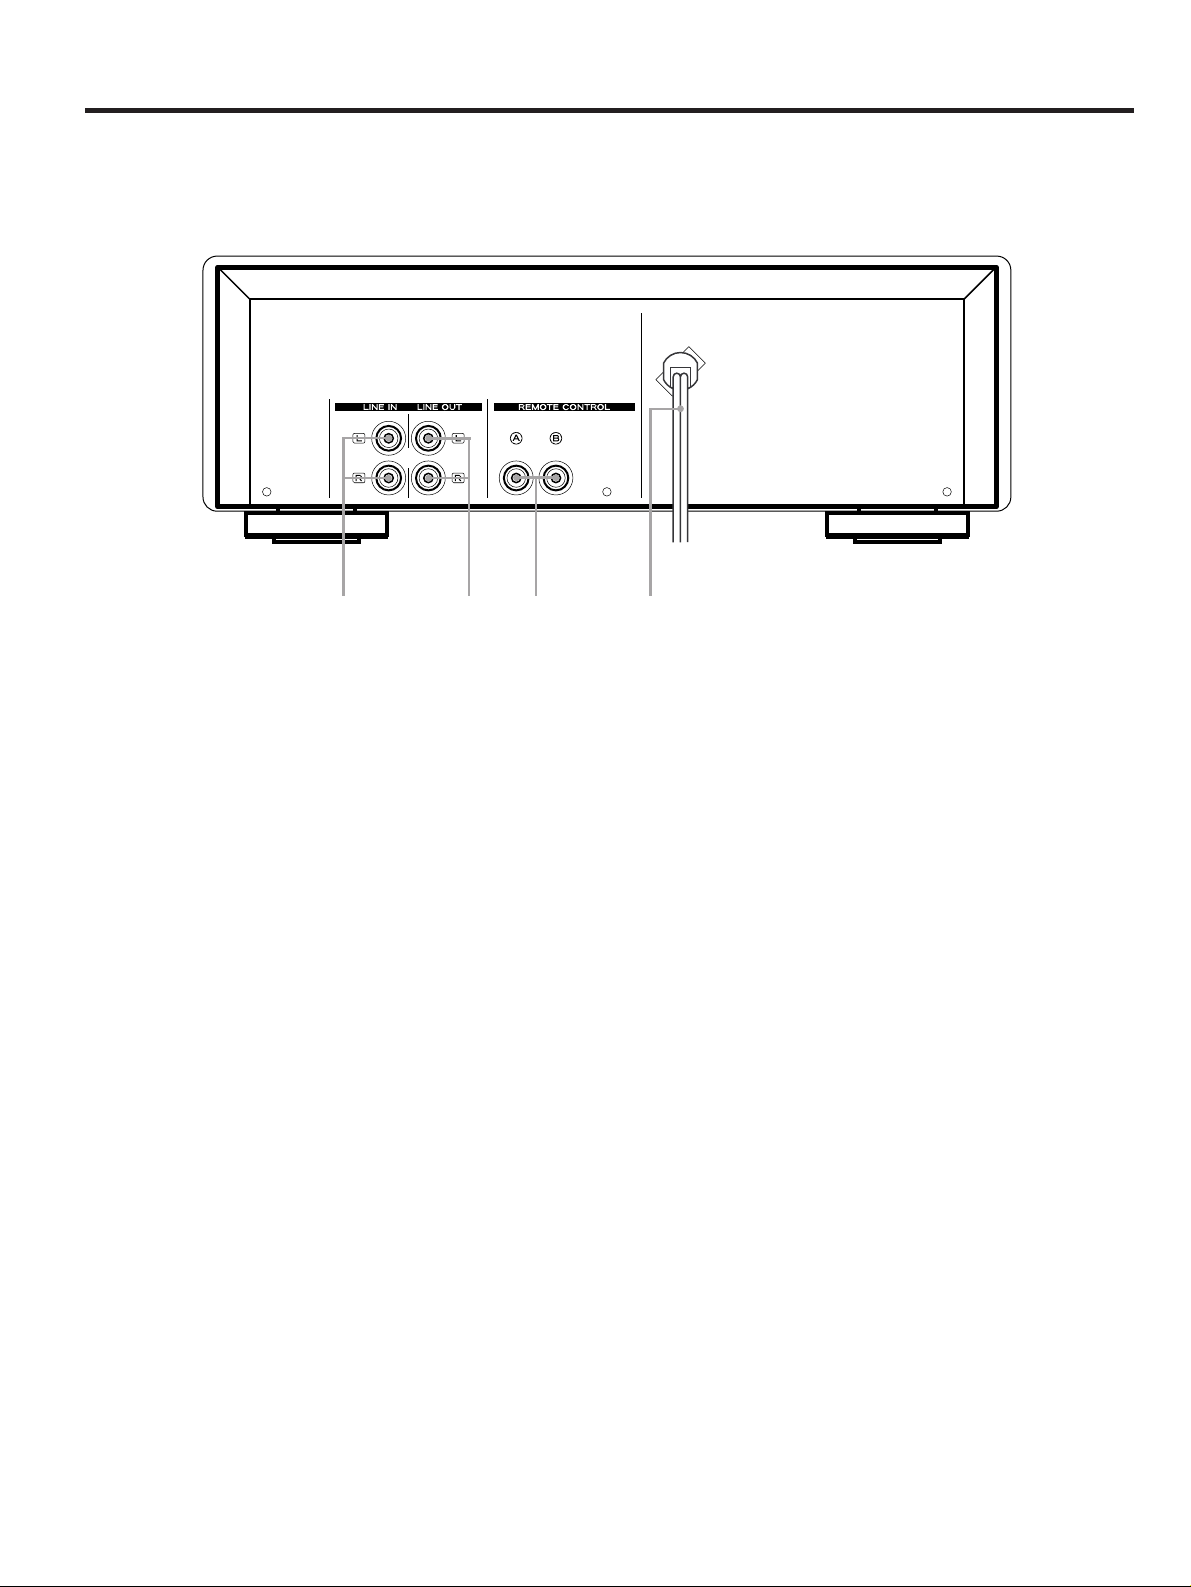
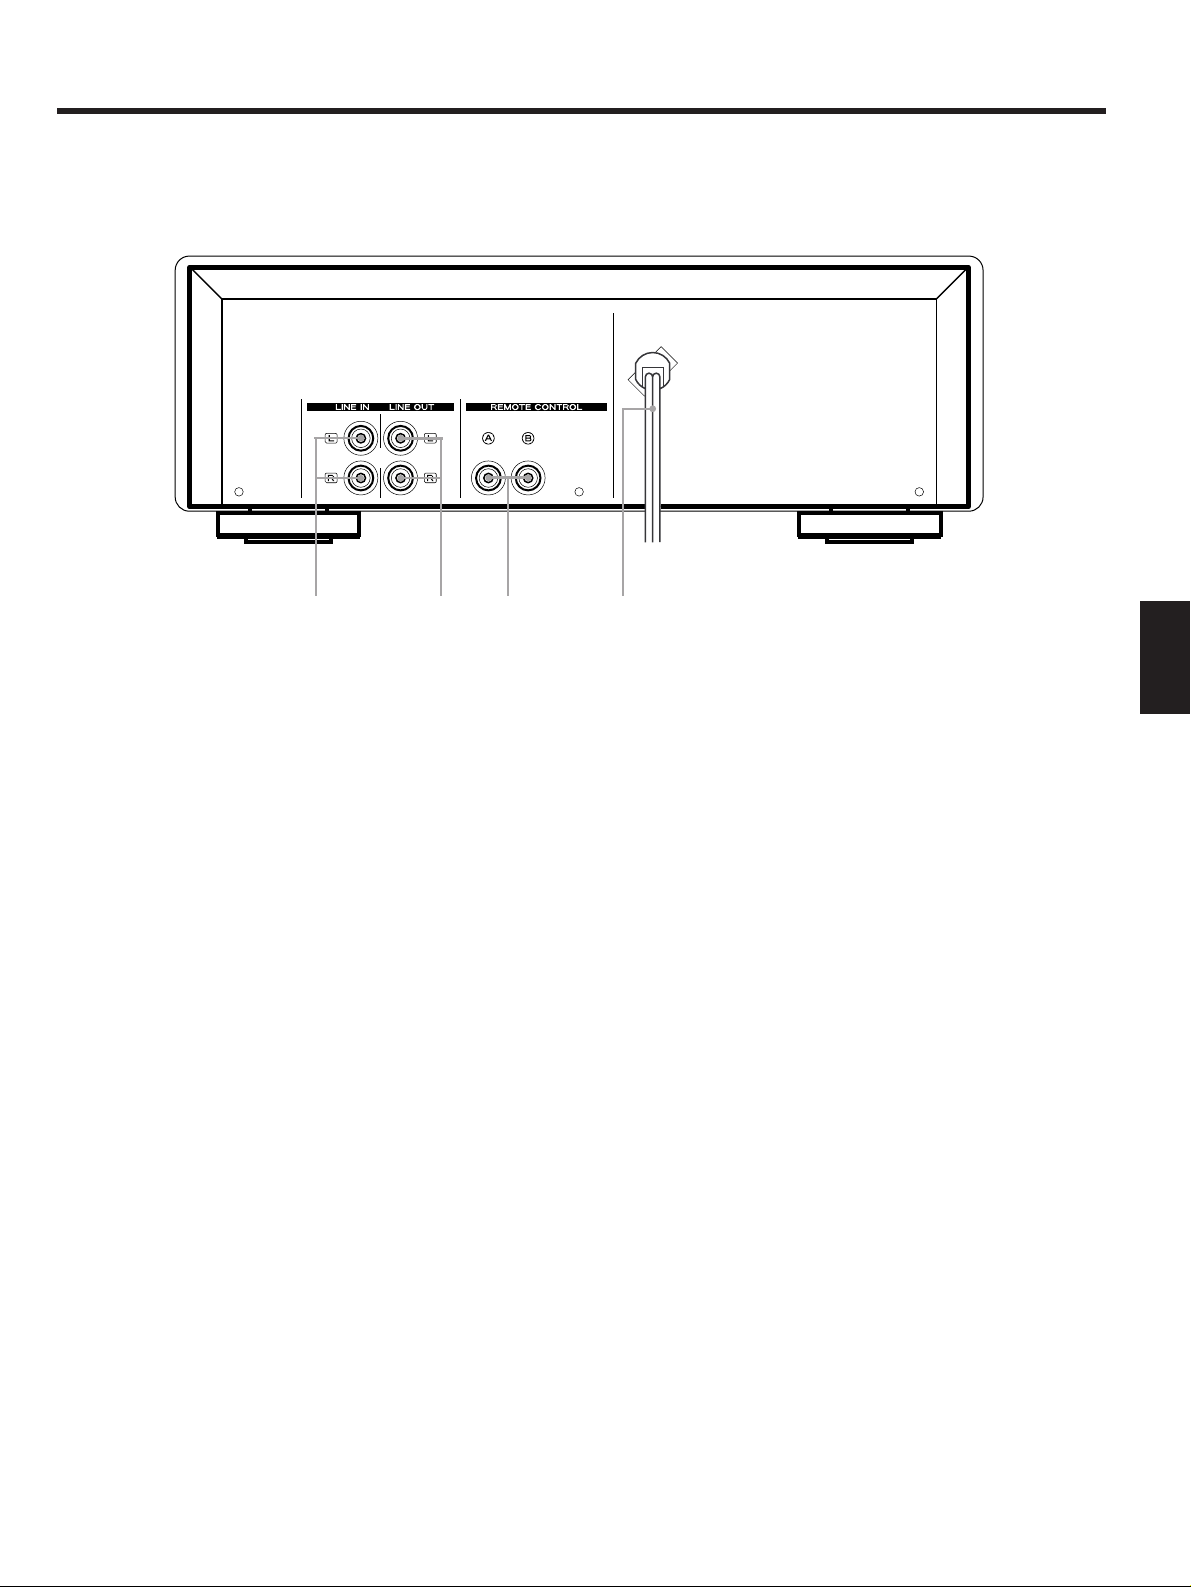
Connections and Rear Panel Overview
1REMOTE CONTROL jacks
These jacks are used for the connection of
the TEAC Mini Component system (T-H500,
A-H500, PD-H500) for the purpose of
operating it using the Remote Control unit
(RC-613 provided with the A-H500
amplifier) or system control signals.
2LINE OUT jacks
Connect these jacks to the TPAE 1 PLAY
jacks on the amplifier:
White pin-plug
T White jack (left)
Red pin-plug
T Red jack (right)
3LINE IN jacks
Connect these jacks to the TAPE 1 REC
jacks on the amplifier:
White pin-plug
T White jack (left)
Red pin-plug
T Red jack (right)
2314
4AC power cord
Plug this AC power cord into an AC wall
socket or AC OUTLETS on the amplifier.
Note:
The remote control unit is not provided
with this unit.
If hum or buzz takes place during play
OInstalling this unit right above the
amplifier may cause humming.
Therefore, install it beneath the amplifier
or where there is little humming.
ENGLISH
_5_
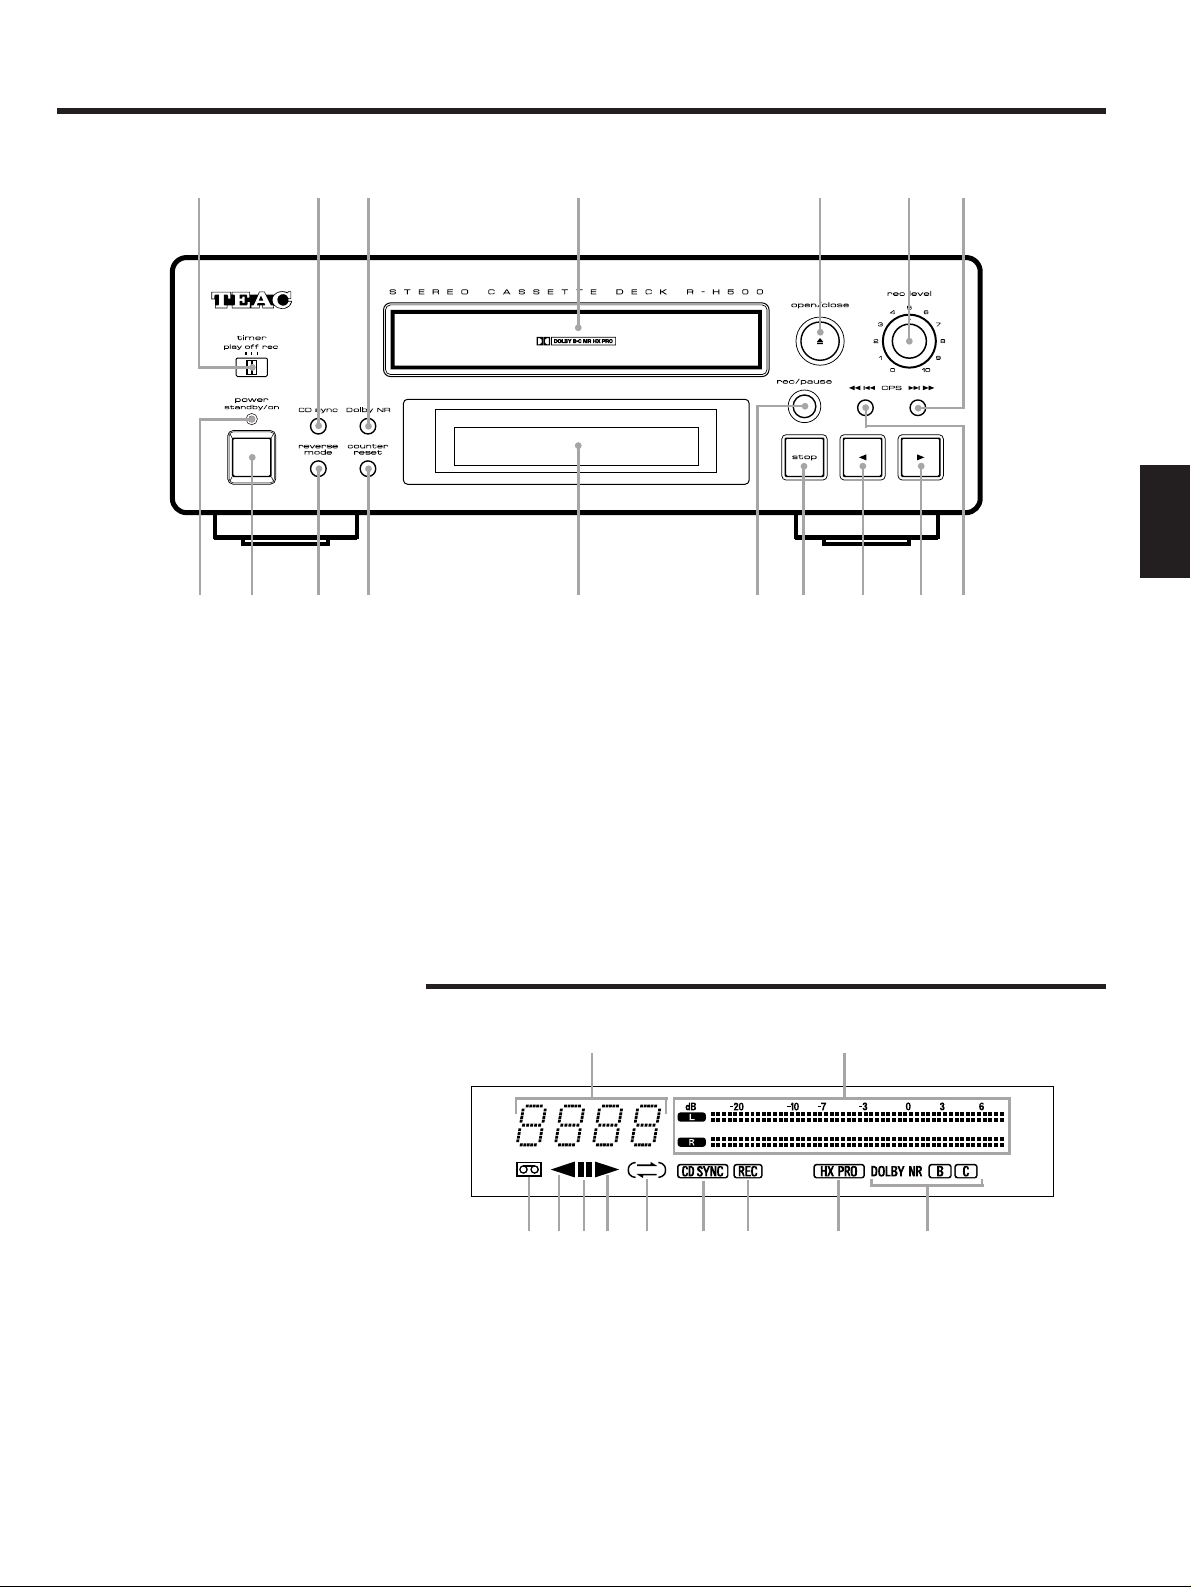
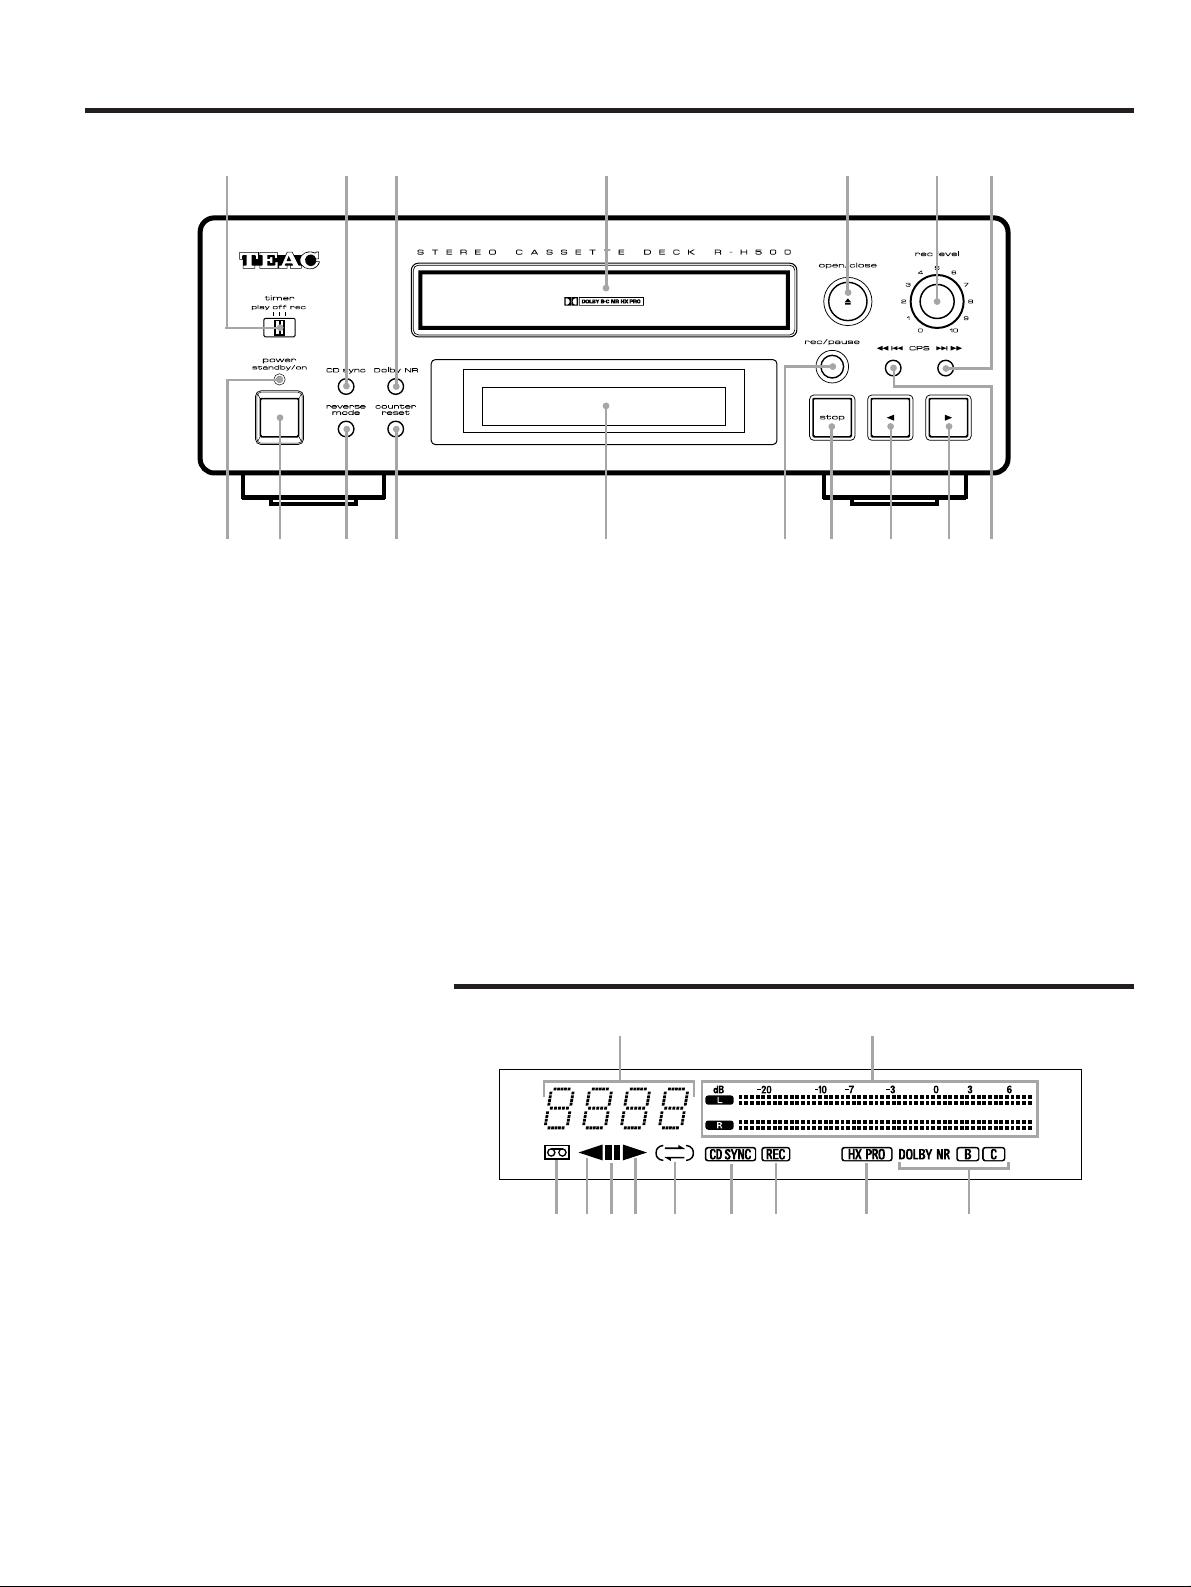
Front Panel Controls and Their Functions
Display
1power standby/on button
2power standby indicator
This indicator lights up in the power
standby mode; goes out when this unit is
turned on.
3timer switch (play/off/rec)
This switch is used for selecting the
operation mode of the timer start function
when the power is turned on. (See page 8.)
Note:
Set this switch to the off position when you
do not engage the timer start function.
4CD sync button
(See page 7.)
5Dolby NR system selector
button
(See pages 6 and 8.)
6Cassette Tray
Load a cassette tape here.
7open/close (∫) button
This button is used for opening or closing
the tray.
8rec level control
This volume control is used for adjusting
the recording input level.
9Fast forward (Ò)/CPS (Æ)
button
This button works as fast forward button in
the stop mode; forward skip button during
play. (See page 6.)
1 Digital tape counter
2 Level meter
3 Tape loading indicator
4 Reverse play indicator
5 Pause indicator
6 Forward play indicator
7 Play mode indicator
8 CD synchronous recording
indicator
9 Recording indicator
0 DOLBY HX PRO indicator
q DOLBY NR indicator
rrec/pause button
tDisplay
ycounter reset button
This button is used for resetting the digital
tape counter to 0000.
ureverse mode button
This button is used for selecting the
operating mode of the tape.
0Rewind ()/CPS (Ú) button
This button works as rewind button in the
stop mode; reverse skip button during play.
(See page 6.)
qForward play (∏) button
wReverse play (”) button
estop button
345 6 789
0qrt21 uy e w
3456 7 8 9 0 q
21
_6_
4 Select the correct DOLBY NR type
according to how the tape was
recorded.
Each time you press the Dolby NR
button, the Dolby NR type will change
and the corresponding indicator
appears on the display as follows:
DOLBY NR B
T C T disappears (off)
GV
O
DOLBY NR B: Select for the tape
recorded with DOLBY B NR.
O DOLBY NR C: Select for the tape
recorded with DOLBY C NR.
O OFF: Select for the tape recorded
without DOLBY NR.
5 Select the desired reverse mode.
Each time you press the button, the play
mode will change, and the
corresponding indicator will appear on
the display as follows:
Ù ∑ ù ∑ Ö
™≈
OÙ : Auto stop mode
Où : Auto reverse mode
OÖ: Continuous play mode
6 Press the play button (” or ∏).
O∏: For the forward play.
O”: For the reverse play.
The corresponding play direction
indicator (
” or ∏) will appear and play
will begin.
7 Press the stop button to stop playing.
Notes:
OThe cassette holder cannot be opened
during recording or record/pause.
OIf the power has been switched off
during play or recording, ejecting the
cassette may be impossible. In such a
case, switch the power on and press the
open/close button again.
While playing, you can skip to the desired
music item in either the forward or reverse
direction with this CPS (Computomatic
Program Search) function.
You can preset up to the 9th music item.
1 Press the play (” or ∏) button.
2 Press the CPS (/Ú or Æ/Ò)
button.
When pressing the Æ/Ò or
/Úbutton, the digital tape
counter display will be replaced by the
program display.
Press the button repeatedly until the
number of the program you want to
start playing is displayed.
Æ/Ò : When you press this
button, 1, 2, 3, etc. will be
displayed during forward
play; -1, -2, -3, etc. during
reverse play.
/Ú : When you press this
button, -1, -2, -3, etc. will be
displayed during forward
play; 1, 2, 3, etc. during
reverse play.
Note:
OIn the following cases, searching may
not work normally but it is not a failure.
1) The interval between the music items
on the cassette tape is too short (less
than about 4 seconds).
2) The running time of a music item is too
short (less than about 15 seconds).
3) There is an area of lower level or mute
in the middle of a music item.
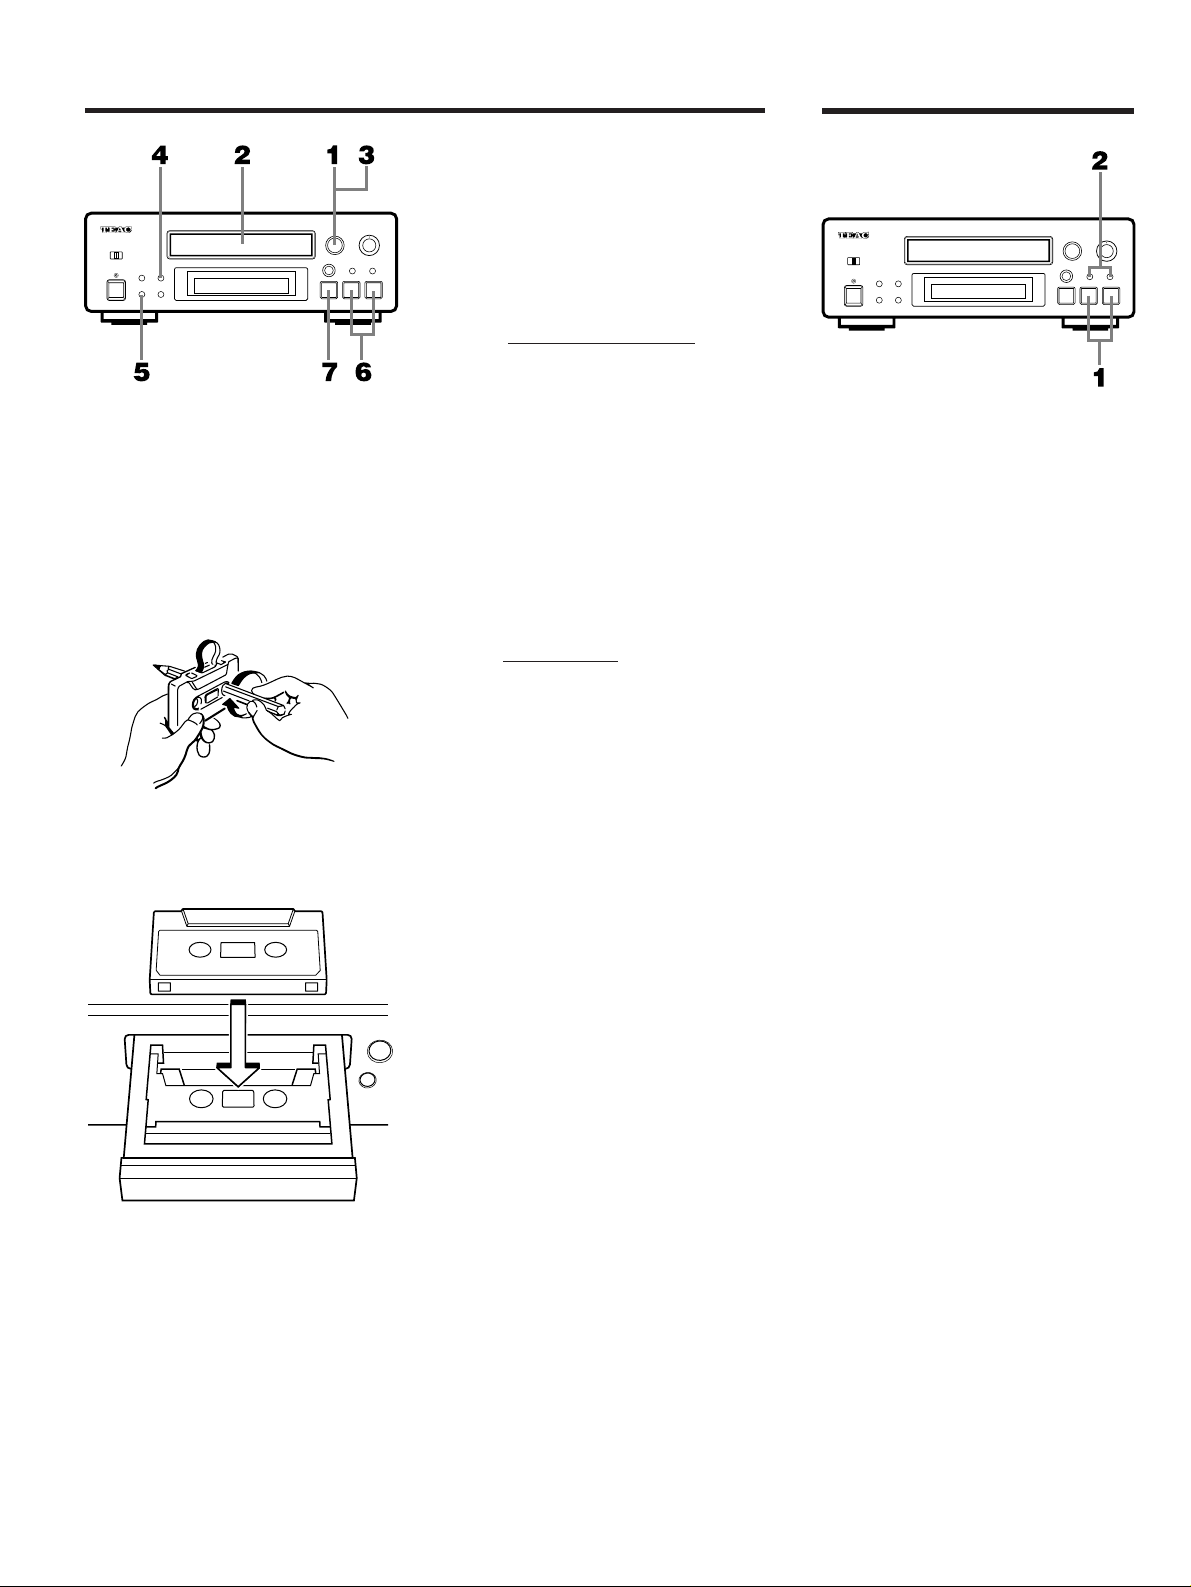
Tape Playback Skip Play (CPS) Function
1 Press the open/close (∫) button to
open the cassette tray and load a
cassette tape.
Notes:
OAvoid touching the tape. Fingerprints
attract dust and dirt.
OUse your finger or a pencil to turn the
cassette's hub and take up any slack
tape.
3 Close the cassette tray. Be careful not
to let your hand get trapped by the
closing tray.
2 Put the cassette tape on the cassette
tray with exposed part facing inward.
ENGLISH
_7_
6 Select the recording direction with the
play (
” or ∏) button.
Recording will start.
7 Press the stop button to stop recording.
Notes:
(1) If you press the rec/pause button during
recording, the unit will be set to the
recording pause mode in 4 seconds (no
sound is recorded for 4 seconds). To
continue recording, press the rec/pause
button on the unit or pause button on
the remote control.
(2) If you select the
ù, you must press the
forward play (
∏) button in order to
record both sides of a tape. If you press
the reverse play (
”) button, only the
back side will be recorded.
(3)If the record button on the remote
control is pressed during recording,
recording will stop.
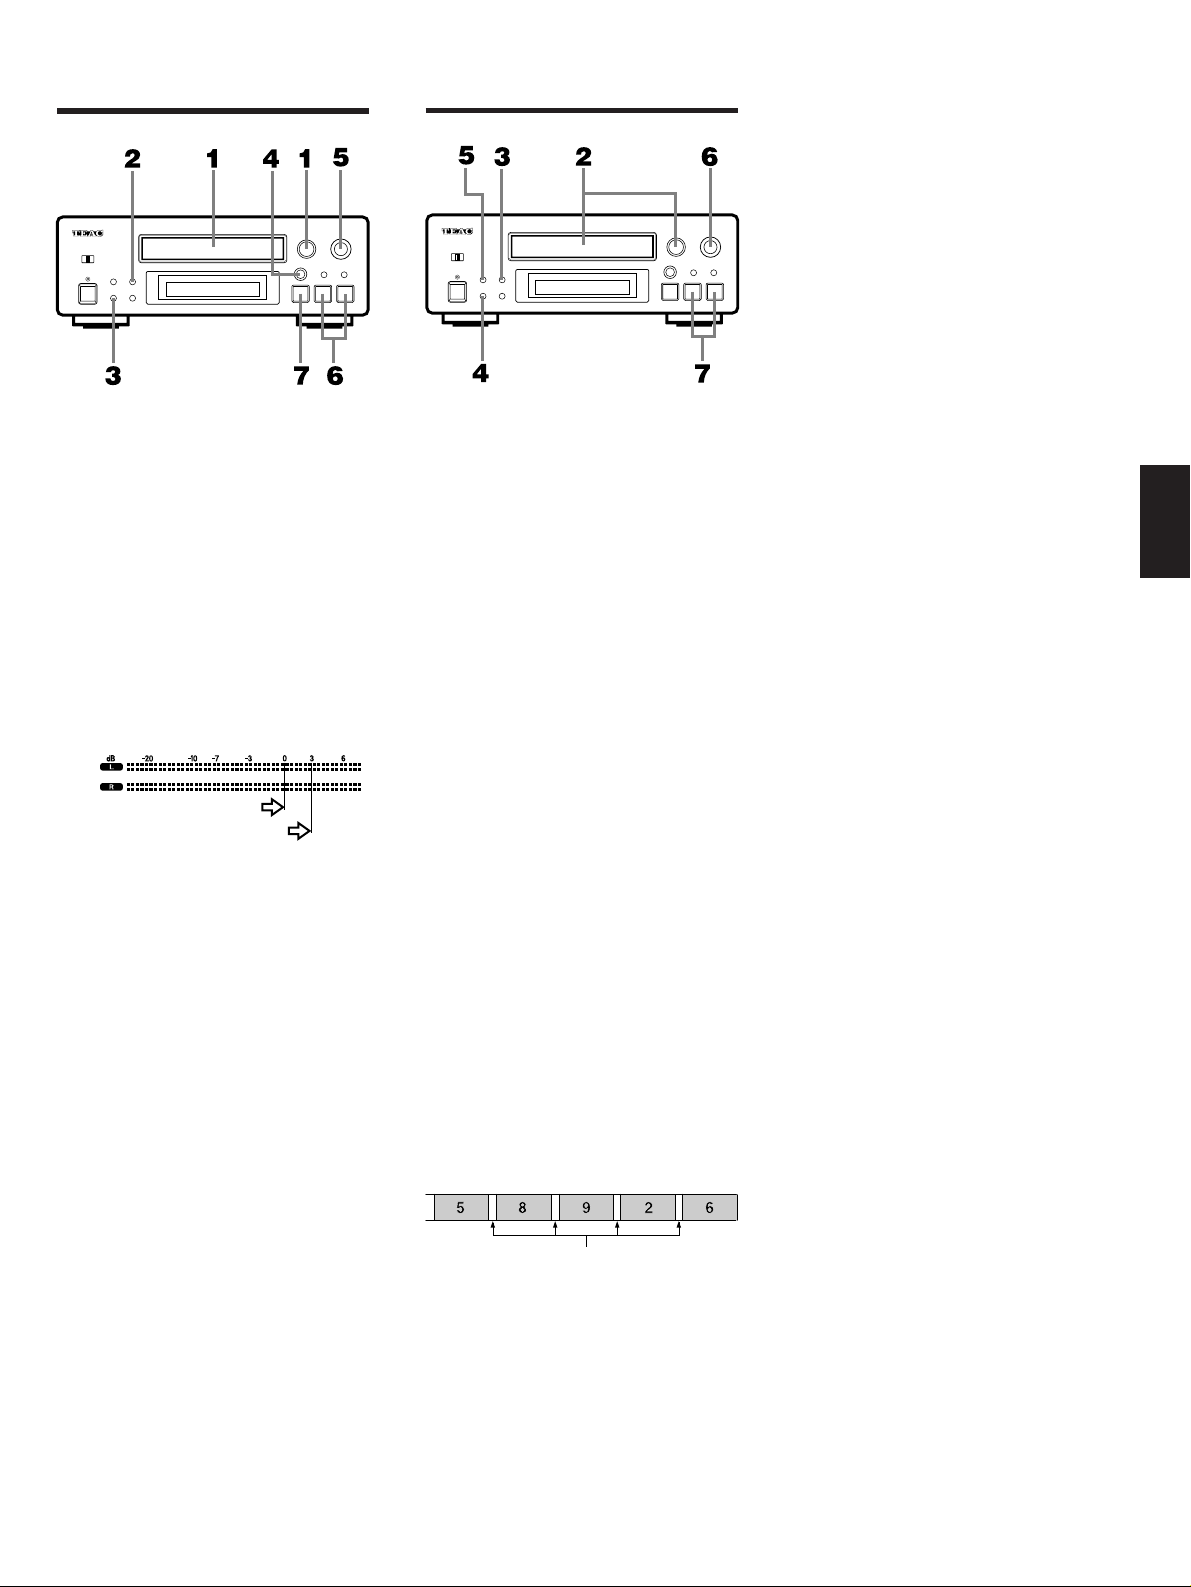
Recording
1 Load an unrecorded tape.
2 Select DOLBY NR type.
3 Select the desired reverse mode.
Ù : For auto stop.
ù: For auto reverse.
4 Press the rec/pause button on the deck
or record button on the remote control.
Then the direction indicator will blink
and "REC" will be shown on the display.
5 Adjust the recording level with the rec
level control.
Normal Tape, Chrome Tape
Metal Tape
When recording from a CD, use this
synchronous recording function to start
recording and CD play at the same time.
1 Program the music items on the CD in
your desired order.
2 Load a cassette tape.
3 Select DOLBY NR type.
4 Select the reverse mode.
5 Press the CD sync button.
(The input selector on the amplifier is
automatically set to "CD" and locked.)
The tape travel direction indicator
blinks and the CD SYNC, REC, and HX
PRO indicators light.
6 Adjust the recording level.
(Play the CD to adjust the recording
level.)
7 Press the play (” or ∏) button.
The CD will start playing in 4 seconds.
Notes:
(1) This synchronous recording function is
available only in combination with
TEAC's PD-H500 CD player.
(2) During synchronous recording, only the
stop button and the power button
operate on this unit and the CD player.
(3) In synchronous recording, 4-second
unrecorded portions will be inserted
between programmed tracks.
Synchronous Recording
4-second unrecorded portion
_8_
AI Function
This unit has the convenient and useful AI
direct play function, which operates with
TEAC amplifier A-H500.
OWhen you press the play (” or ∏)
button, the input selector on the
amplifier is set to "tape 1" automatically.
OWhen you select "tape 1" with the input
selector on the amplifier, the tape will be
played automatically.
Head Maintenance
The head and tape path should be cleaned
and demagnetized periodically.
OHow to use a head-cleaning tape
1. Load head-cleaning tape in the cassette
deck.
2. Press the play (
∏) button. Then the
surface of head will be cleaned in a
short time.
ODemagnetizing head
Be sure that the unit is turned off, then
demagnetize the head using a cassette
type demagnetizer. For details of its use,
read its instructions.
∑Basic description of Dolby NR
During low-level program material,
Dolby NR acts to boost high-frequency
signals. During playback, these signals
are restored to their original level. Any
noise introduced in between these
processes (during recording) will be
reduced in playback. Dolby NR also
employs the principle of least treatment,
leaving high-level signals unprocessed
since the louder program material
serves to effectively mask any tape hiss.
Dolby C NR employs increased noise
reduction action which covers a lower
frequency range than Dolby B NR. It
provides up to an additional 10 dB of
noise reduction action.
∑Basic description of DOLBY HX PRO
Dolby HX Pro headroom extension is a
program-adaptive biasing technique
which can significantly improve the
quality of cassette recordings. HX Pro
improves a tape's ability to accept
signals at high levels. High frequencies
in the signal being recorded act as
additional bias. The HX Pro circuit
monitors the signal being recorded and
adjusts the record's bias level to
maintain constant effective bias. This
results in optimum bias at each point in
time. The usual effects of tape
saturation, including high-frequency
losses and distortion are significantly
reduced. HX Pro works only during
recording and the improvements will be
realized when playing back on any
cassette machine.
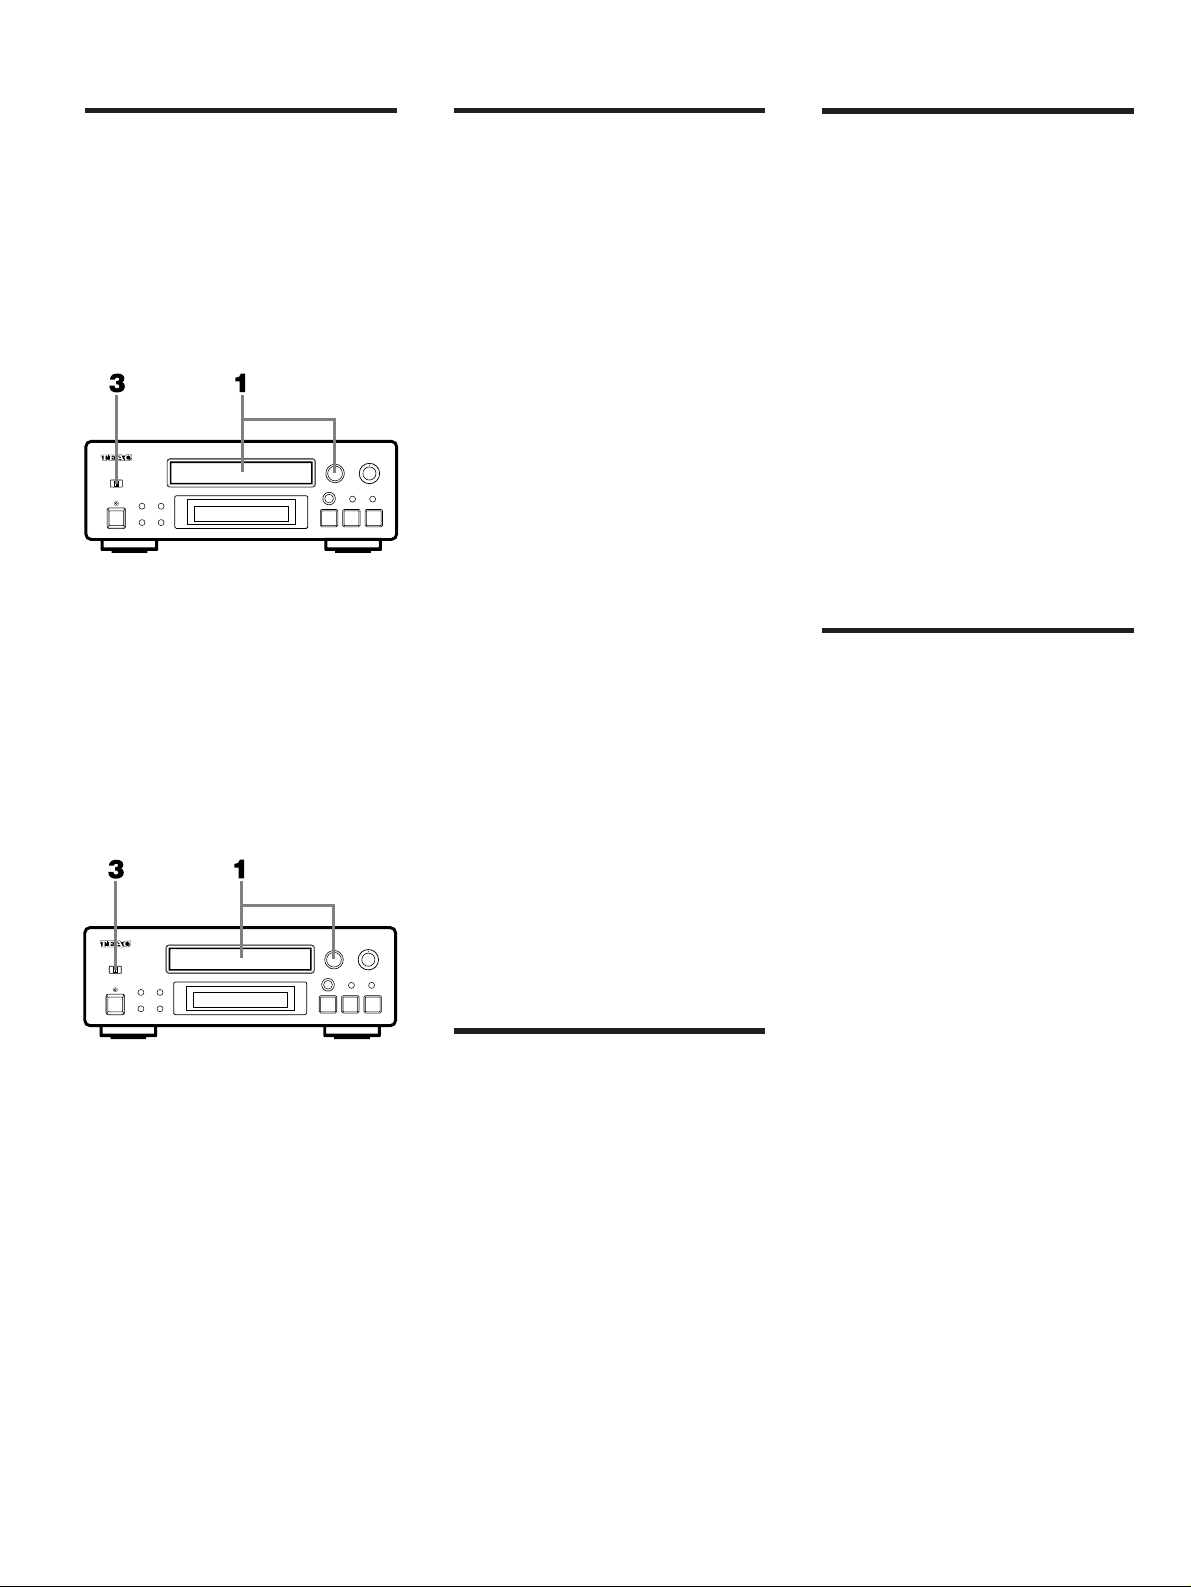
Timer-Controlled
Recording/Playback
HX Pro Headroom Extension &
Dolby Noise Reduction Unit
This unit has a built-in timer start function.
When used in combination with the timer
function on the tuner T-H500, recording or
play can be started automatically at any
programmed time.
Refer to the tuner's owner's manual for
operation details.
∑ Timer-controlled recording
1 Load a blank tape.
2 Prepare for recording.
(Adjusting the recording level, selecting
DOLBY NR type, setting the rec selector
and selecting the input source on the
amplifier, etc.)
3 Set the timer switch to the rec position.
∑ Timer-controlled playback
1 Load a tape to be played.
2 Prepare for playback.
(Selecting DOLBY NR type, selecting the
reverse mode, etc.)
3 Set the timer switch to the play
position.
Notes:
OAfter timer-controlled recording or
playback is finished, set the timer switch
to the off position before turning on the
unit. Otherwise, the unit will
automatically start playing or recording
when turned on.
ODo not forget to tune in the station that
you want to record with the tuner when
you want to record a radio broadcast.
OSet the volume control to the normal
listening level.
DECK (for recording/playback)
Track System :
4 track, 2-channel stereo
Recording System : AC bias
Erasing System : AC erasing
Tape Speed : 4.8 cm/sec
Motor : DC motor
Frequency Response
Normal: 40 - 14,000 Hz
CrO
2
: 40 - 15,000 Hz
Metal: 40 - 16,000 Hz
FF and REW time :
120 seconds (C-60 cassette tape)
Wow/Flutter : 0.15% (JIS, WRMS)
S/N Ratio
Dolby C NR ON: 75 dB (CCIR/ARM)
Dolby B NR ON: 65 dB (CCIR/ARM)
Dolby NR OFF: 55 dB (CCIR/ARM)
GENERAL
Power Consumption :
12 W
Power Supply : 230V, 50Hz
Dimensions (WxHxD) : 285 x 101 x 304 mm
Weight : 4 kg
Standard Accessories:
Audio signal cable x 2
Remote control connection cable x 1
OImprovements may result in specifi-
cation or feature changes without
notice.
OPhotos and illustrations may differ
slightly from production models.
Specifications

ENGLISH
_9_
Troubleshooting
Problem Probable cause(s) Suggested remedy
Tape moves but no sound is heard. The volume control of the stereo amplifier Adjust the volume control to the desired
is set to its minimum position. level.
The input selector of the stereo amplifier Set to the "tape 1" position.
is not set to the "tape 1" position.
Strange tone quality or ragged sound. The noise-reduction switch is not set to Set the switch to the position corresponding
the correct position. to the setting used for recording.
Playback sound is unclear or wavering The heads are dirty. There is foreign Clean the heads as described in the
and clear recordings can't be made. material on the pinch rollers or capstans. section "Head Maintenance".
Before calling for service, check through the chart below for probable causes of the problems you experience while using this unit.
_10_
Avant utilisation
Table des matières
Raccordements et description
du panneau arrière................................. 11
Commandes et fonctions du
panneau avant......................................... 12
Afficheur....................................................... 12
Lecture des cassettes................................ 13
Fonction saut de lecture (CPS)................. 13
Enregistrement............................................ 14
Enregistrement Synchrone ....................... 14
Enregistrement ou lecture
programmés............................................. 15
Module HX Pro d’extension de
la gamme dynamique et dispositif
Dolby NR de réduction de bruit................ 15
Fonction AI................................................... 15
Entretien de la tête de lecture.................. 15
Caractéristiques techniques..................... 15
Dépannage................................................... 16
Lire ceci avant de faire
fonctionner l’appareil
*Réduction de bruit Dolby et HX Pro
headroom extension fabriqués sous
license de Dolby Laboratories Licensing
Corporation. HX Pro est d'origine Bang &
Olufsen.
DOLBY, le symbole double-D
∂ et HX
PRO sont des marques de Dolby
Laboratories Licensing Corporation.
Environnement
Eviter d'utiliser l'appareil dans les
conditions suivantes:
● Température élevée (par exemple, un
radiateur, les rayons directs du soleil).
● Températures extrêmement basses.
● Humidité excessive.
● Atmosphère poussiéreuse.
● Dans les endroits où les fluctuations de
la tension de ligne d'alimentation sont
importantes (l'utilisation d'un régulateur
de tension est recommandée dans
certains cas).
Bandes
Sélection de bande:
Pour que la fonction de sélection
automatique de bande agisse
correctement, les bandes à formule métal
et chrome (cobalt) doivent posséder des
trous d'identification.
Manipulation des bandes
Ne pas entreposer des bandes dans les
endroits suivants:
● Sur des radiateurs, au soleil ou dans un
endroit où la température est élevée.
● Près de haut-parleurs, sur des
téléviseurs ou amplificateurs ou encore
près de champs magnétiques puissants.
● Dans des endroits où l'humidité est
élevée ou poussiéreux et sales.
● Eviter aux cassettes les chutes et les
chocs excessifs.
● Les bandes C-120 étant peu résistantes
et susceptibles de s’entortiller ou de
s’enrouler autour du cabestan et entre
les galets presseurs, il est recommandé
d’éviter d’en utiliser.
Bandes
normales
Bandes au
chrome
(cobalt)
Bandes
métal
…Trus d’identification de type de bande.
FRANÇAIS
_11_
Raccordements et description du panneau arrière
1Prises REMOTE CONTROL
(Télécommande)
Ces prises permettent de brancher des
éléments de la mini- chaîne TEAC (T-H500,
R-H500, A-H500), de façon à pouvoir la
commander à l’aide de la télécommande
(RC-613 fournie avec l’amplificateur AH500) ou des signaux de commande de la
chaîne.
2Connecteurs LINE OUT (sortie
analogique)
L = gauche, R = droit
Connectez ces prises sur les connecteurs
TAPE 1 PLAY sur l’Amplificateur:
Fiche blanche
T ( connecteur blanc (L)
Fiche rouge
T ( connecteur rouge (R)
3Connecteurs LINE IN (entrée
analogique)
Branchez ces prises sur les connecteurs
TAPE 1 REC situés sur l’Amplificateur:
Fiche blanche
T ( connecteur blanc (L)
Fiche rouge
T ( connecteur rouge (R)
4Cordon d’alimentation (CA)
Branchez ce cordon d’alimentation CA sur
une prise de courant CA murale ou sur les
connecteurs de sortie CA « AC OUTLETS »
de l’Amplificateur.
AVERTISSEMENT:
La télécommande n’est pas fournie avec
cet appareil.
2314
Si en cours de lecture vous percevez
un bourdonnement
OLe fait de placer l’appareil sur
l’Amplificateur peut provoquer ce
bourdonnement. Il est donc
recommandé d’installer l’appareil sous
l’amplificateur ou à un endroit où le
bourdonnement est réduit.
_12_
Commandes et fonctions du panneau avant
Afficheur
1Touche « power standby/on »
(Marche/arrêt -veille / sous
tension)
2Voyant « veille »
Ce voyant est allumé lorsque l’appareil est
en mode « veille »; il est éteint quand
l’appareil est sous tension.
3Commutateur de programmation
(« play/off/rec »)
(lecture/arrêt/enreg.)
Ce commutateur permet de sélectionner le
mode de fonctionnement de la fonction «
début de la temporisation » quand on met
l’appareil sous tension. (Voir page 15)
AVERTISSEMENT:
Placez cet interrupteur sur la position off
(arrêt) quand vous n’utilisez pas la fonction
« début de temporisation ».
4touche « CD sync » (synchro de
disque compact)
(voir page 14)
5Touche sélecteur de système de
réduction de bruit « Dolby NR »
(voir pages 13 et 15)
6Compartiment à cassette
Placer la cassette dans ce compartiment.
7Touche « open/close » (∫)
(ouvert/fermé)
Cette touche permet d’ouvrir ou de fermer
le compartiment cassette.
8Commande « rec level » (niveau
sonore d’enregistrement)
Cette commande permet de régler le
niveau sonore d’enregistrement.
9Touche Avance rapide (Ò)/
CPS avant(
Æ)
Cette touche sert de commande d’Avance
rapide en mode arrêt et de commande de
1 Compteur numérique de bande
2 Mesure du niveau
3 Voyant de chargement de
cassette
4 Voyant de lecture arrière
5 Voyant de pause (interruption
provisoire de lecture)
6 Voyant de lecture avant
7 Indicateur de mode de lecture
8 Voyant d’enregistrement
synchrone de disque compact
9 Voyant d’enregistrement
0 Voyant Dolby HX PRO
q Voyant DOLBY NR
rTouche « rec/pause » (enreg./
pause)
tAfficheur
yTouche « counter reset »
(remise à zéro de compteur)
Cette touche permet de remettre à 0000 le
compteur numérique de bande.
uTouche « reverse mode » (mode
inversion)
Cette touche sert à sélectionner le mode
de fonctionnement pour la cassette.
Saut de plage avant pendant la lecture.
(voir page 13)
0Touche Retour ()/CPS arrière
(
Ú)
Cette touche sert de commande de Retour
en mode arrêt et de commande de Saut de
plage arrière pendant la lecture. (voir page
13)
qTouche Lecture avant (∏)
wTouche Lecture arrière (”)
eTouche « stop » (arrêt)
345 6 789
0qrt21 uy e w
3456 7 8 9 0 q
21
 Loading...