

Page 1
Z
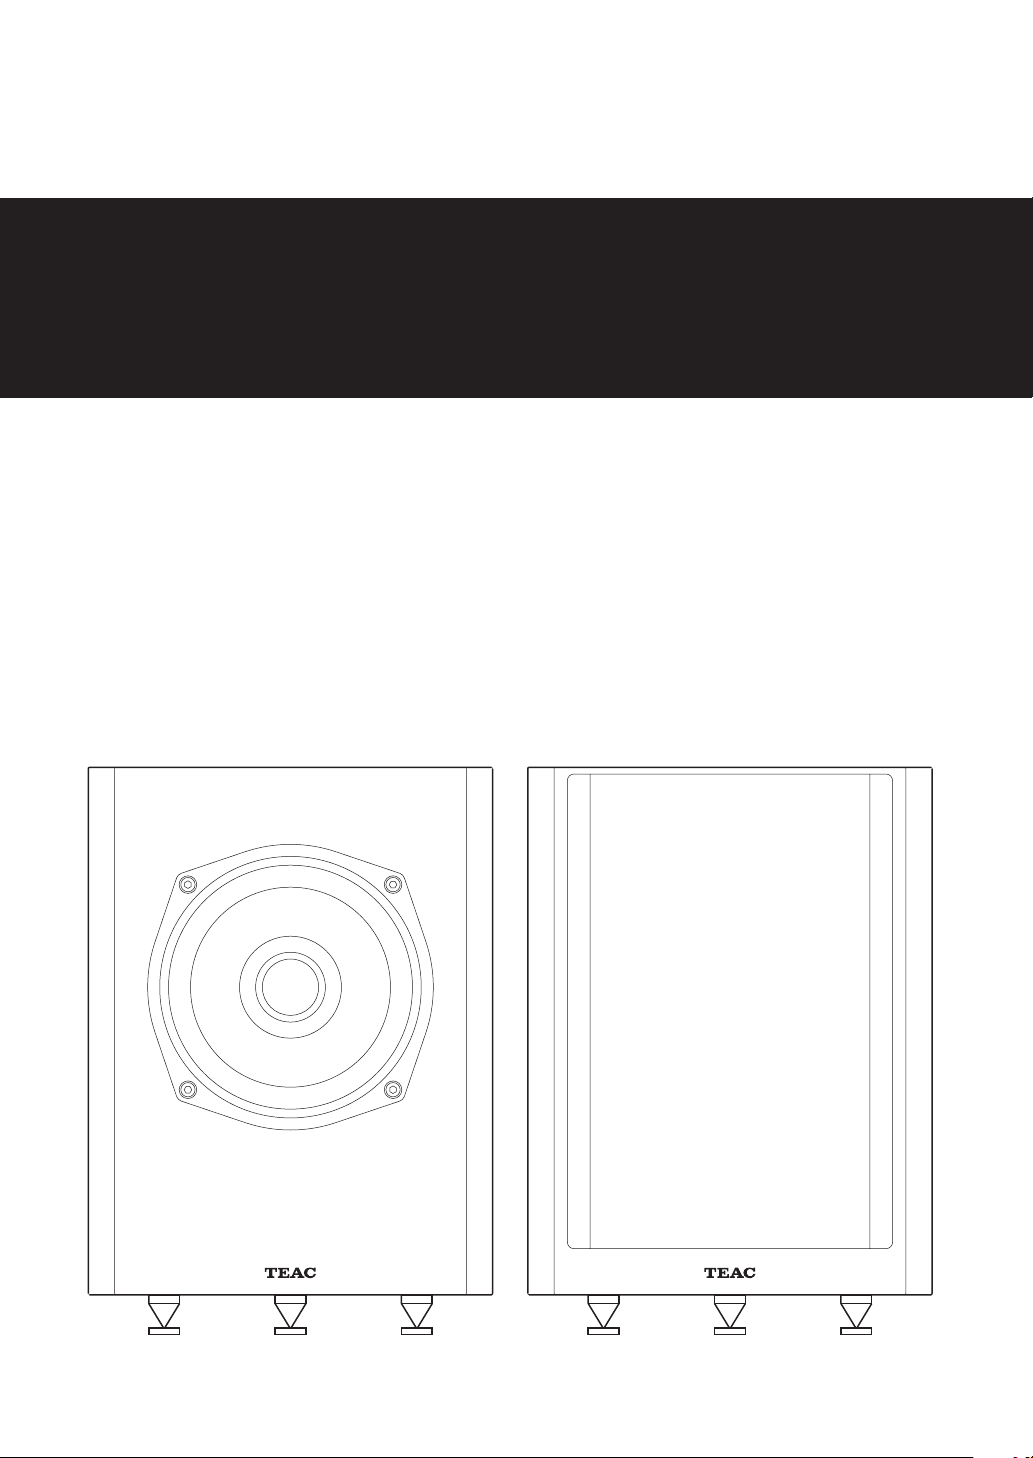
S-300NEO
3-530008-027242
Coaxial 2-Way Speaker System
OWNER'S MANUAL
Page 2
Before use
Thank you for choosing TEAC. Read this manual carefully to get the best performance from this unit.
Checking the included accessories
In the unlikely event that any of the following included
items is missing or damaged, please contact the store
where you purchased the product or our customer support (contact information on back cover).
Speaker cables (2 m) × 2
Screw spikes × 6
Washers × 6
Spike bases × 6
Cleaning cloth × 1
This Owner's Manual (including warranty) × 1
To use this product safely
Please read the following cautions carefully in order to prevent injury to yourself or others and damage to property.
V
Ignoring the following items and mishandling equipment
could result in electric shock or other accidents, leading to
injury or damage to nearby property.
Before connecting to an amplifier or similar equipment, turn off
the power, carefully read the manuals of the equipment that
you are connecting and follow their instructions.
Always use the specified cords to make connections.
CAUTION
Precautions for use
p Do not strike the enclosure (cabinet) or front surface
Saran Fiber with hard objects. Doing so could cause
scratching or damage the speaker units.
p Avoid contact with rubber and vinyl for long periods of
time, because it could damage the surface.
p This product has been designed to minimize magnetic
effects, but you should not place cards, tapes and discs
that use magnetic recording or other items that are
easily affected by magnetic force on top of it. Failure to
do so could result in data loss or damage.
p Listen within an appropriate input level range from the
amplifier. Excessive input could damage the speaker
units.
Moreover, even if the input level is less than the maximum, signals with a frequent clipping, for example, will
have a negative impact on the speaker units. Please be
careful to prevent distortion of the audio at the
amplifier.
Cleaning
p When the surface becomes dirty, wipe it with the
included cleaning cloth. Do not wipe it with finemeshed cleaning cloths, chemical cleaning cloths,
thinner, abrasives or similar materials. Doing so could
damage the surface.
p Use a clothing brush or a similar tool to remove dust
that sticks to the Saran Fiber.
Minimize the volume before turning the power on.
Failure to do so could cause sudden loud noises that might harm
your hearing or cause other trouble.
Do not install in an unstable location, such as on an unstable
stand or on a slope, or in a location with frequent vibrations.
It could fall down or fall over, causing injury.
Do not use for long periods of time to listen to distorted audio.
Doing so could cause the speaker units to generate heat, leading
to fire or injury.
Company names and product names in this document are
the trademarks or registered trademarks of their owners.
2
Page 3
Setting up the speakers
Listening position
e
Spike base
Precautions for installation
p Do not install in a location that becomes hot, including
places exposed to direct sunlight or near heating equipment. Doing so could cause damage.
p Do not install in a location that becomes humid, includ-
ing near humidifiers. Moreover, do not install in a
location that become smoky. Doing so could cause
damage.
p Do not install in an unstable location, such as on an
unstable stand or on a slope, or in a location that
vibrates. It could fall down or fall over, causing injury.
Moreover, be very careful to prevent the product from
falling over due to uneven leg heights, for example.
p This product has been designed to minimize magnetic
effects, but installation near a CRT television might
cause color inconsistencies to appear on the screen. If
this should occur, move the speakers and the television
far enough apart so that the inconsistencies disappear.
LCD televisions and plasma televisions are not affected
by magnetism.
p Do not place obstacles between the speakers and the
listening position. Obstacles block the direct sound,
which can change the sound quality.
p Ideally, no items that reflect sound or resonate should
be in the nearby environment. For example, glass doors
sometimes resonate. To prevent this, fix them securely
or use thick curtains or similar materials to absorb
sound.
In addition, parallel walls make it easy for standing
waves to occur, so place furniture to disrupt parallel surfaces and use thick curtains or similar materials to
absorb sound
Speaker placement
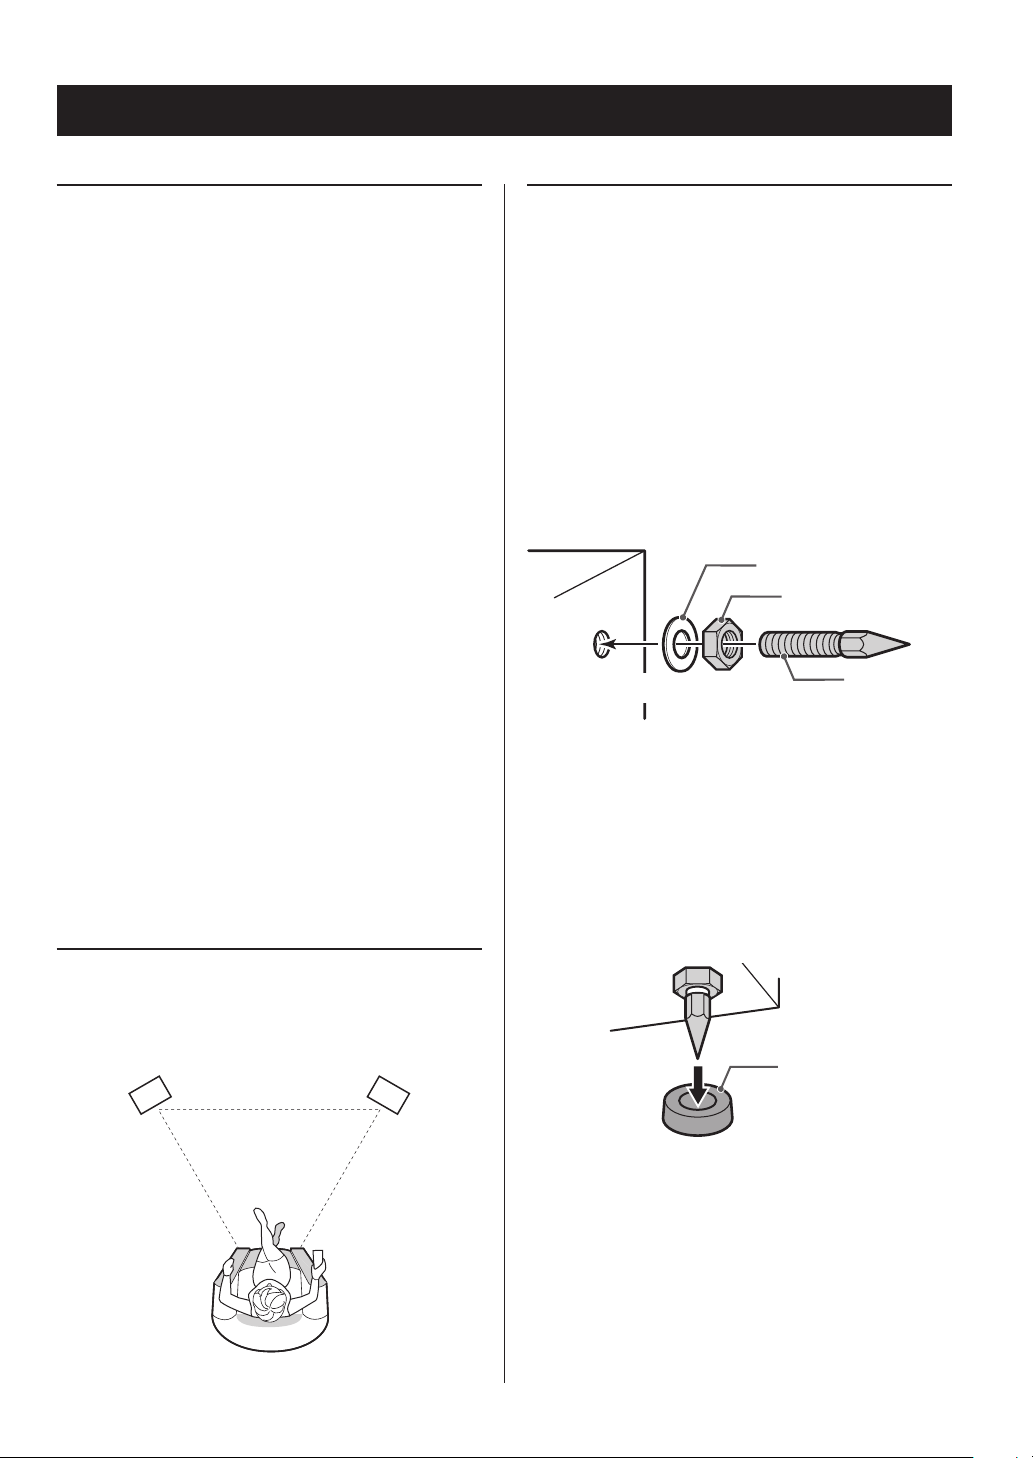
Using the screw spikes
Screw spikes and spike bases are included with these
speakers. Using these spikes might improve the clarity of
bass frequencies. Use them according to the compatibility
with the amplifier and the conditions of the room.
Since the spikes are pointed, they could damage surfaces
that they are placed on. Use the included spike bases if you
want to avoid this.
1 Spread a blanket or similar material on the work
surface and place the speakers on their sides.
2 Screw the spikes into the screw holes on the bot-
toms of the speakers, using the nuts to adjust
their heights.
Washer
Nut
Bottom of speaker
3 After attaching spikes in three places, place the
speaker where it will be used and adjust the
height of each spike so that the bottom is level,
and then tighten the nuts securely. When placing
the speaker on furniture or flooring, for example,
use the included spike bases to prevent damage.
Place the bases so that the tips of the spikes fill
their hollows.
Bottom of speaker
Screw spik
p For stereo playback, the left and right speakers should
usually be placed so that they form an equilateral or
isosceles triangle with the listener at the top corner.
V Be careful not to let the speakers fall over and cause
injury. They are more likely to fall over during earthquakes, in particular, so we encourage you to
consider this when you place them.
V The tips of the spikes are very sharp, so be very care-
ful not to injure your feet, hands or fingers.
3
Page 4
Connecting the speakers
Tightenthecap
Links (do not remove)
Speaker cables
p Use the included speaker cables or commercially-avail-
able cables designed for speakers.
p We recommend using the shortest speaker cables
possible.
p We recommend using left and right speaker cables of
the same length.
CAUTION
Before connecting
Always turn the amplifier's power OFF before connecting speakers.
After connecting
Turn the volume down completely before turning the
amplifier's power ON to prevent sudden loud noises.
Confirm that the speaker terminals have been connected correctly and that cables are not contacting
other terminals.
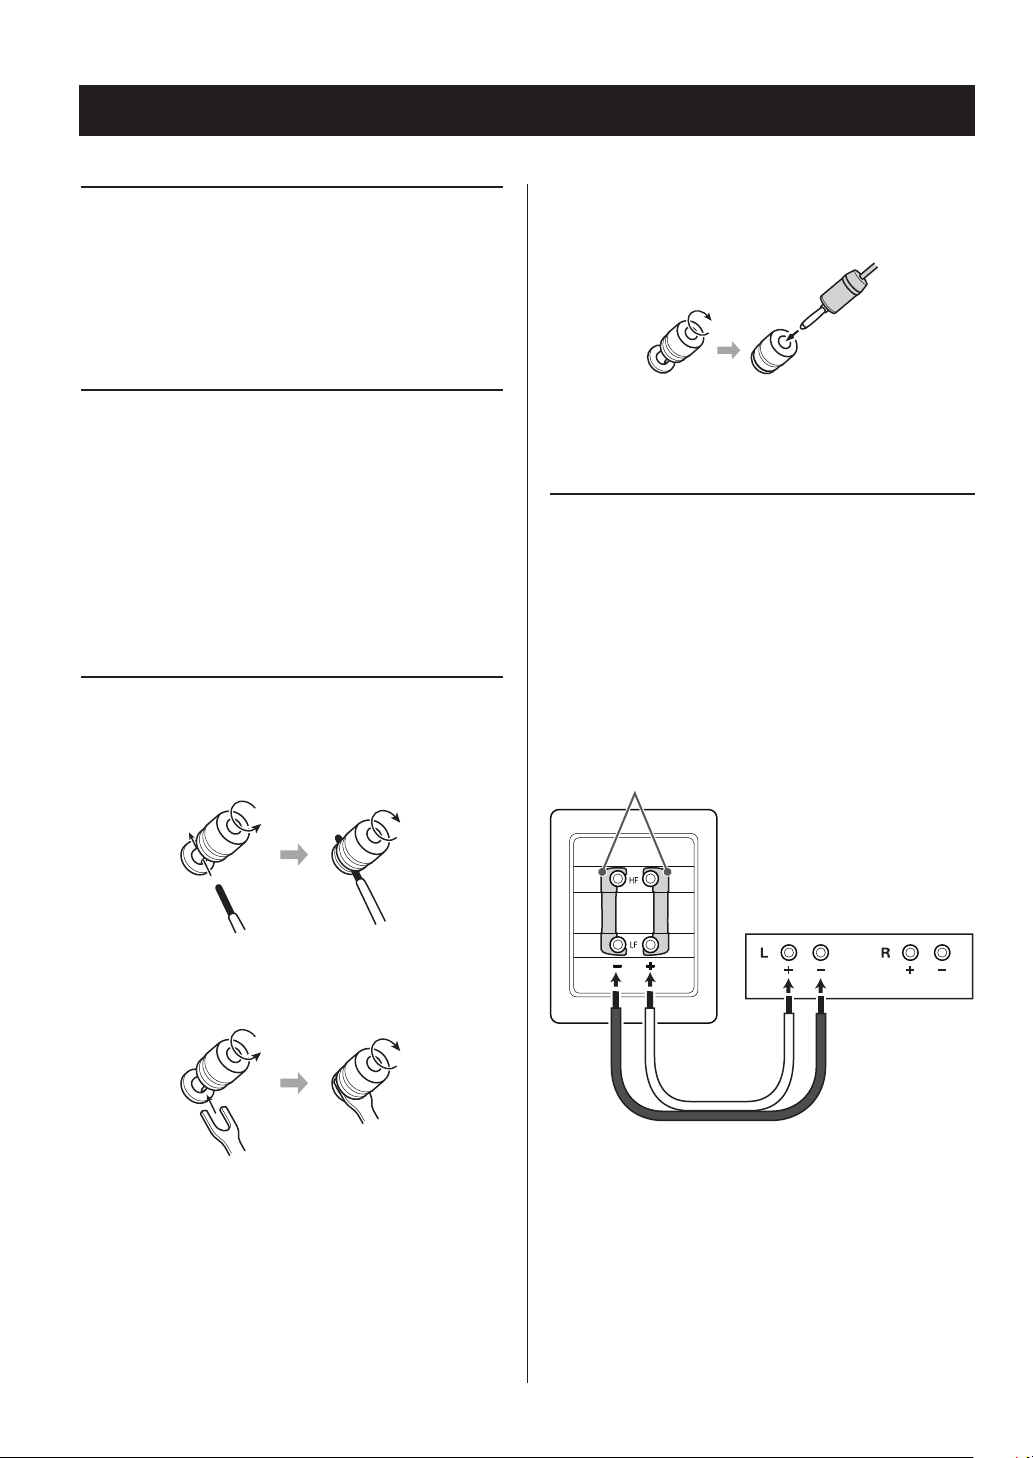
Connecting the cables
Bare/sleeved wire
Insert the core wire through the hole in the terminal completely and tighten the cap firmly.
Banana plugs
After connecting the banana plug to the speaker
cable, insert the plug into the terminal.
p Carefully read the instructions for the banana plugs that
you are using.
Normal connections
Leaving the links attached, connect the HF+ (high frequency +) terminals or LF+ (low frequency +) terminal to
the amplifier + terminal and connect the HF− (high frequency −) terminal or LF− (low-frequency −) to the
amplifier − terminal.
We recommend connecting the LF (low frequency) terminals with this unit.
Example of connecting LF (low frequency) terminals to an amplifier
Spade lugs
Place the spade around the terminal and tighten
the cap firmly.
p When using spade lugs to connect the speakers, they
should have an inside diameter of at least 8 mm.
4
Connect the right (R)
speaker in the same way.
Amplifier
p Do not remove the links that connect the two + termi-
nals together and the two − terminals together.
Page 5
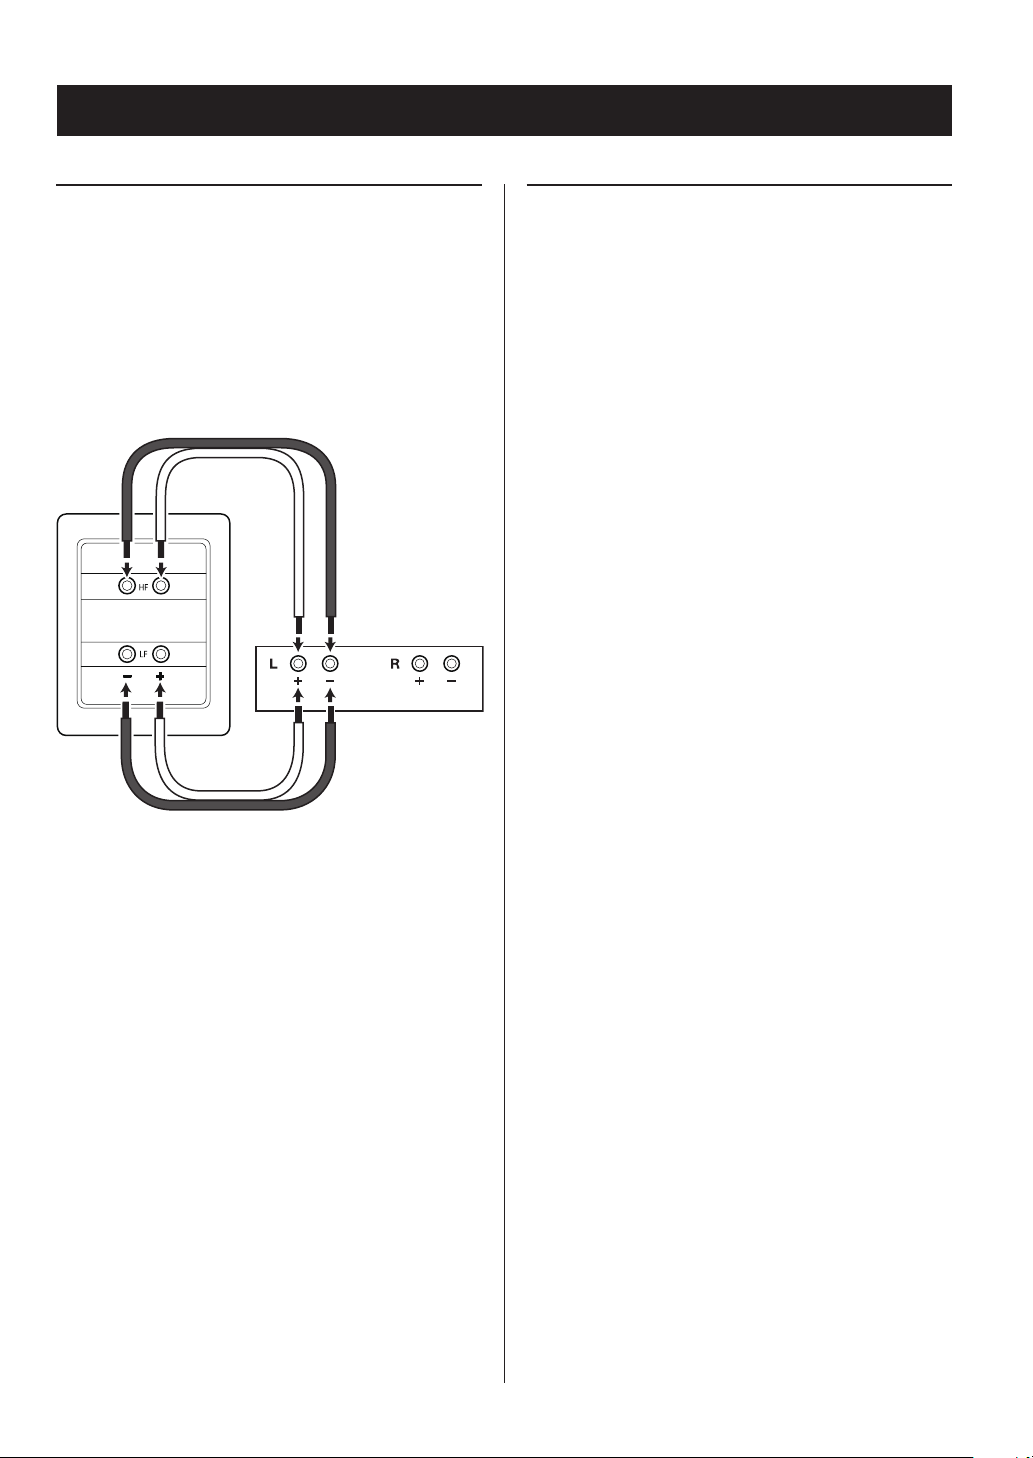
Connecting the speakers
Remove both links
Biwiring
These speakers support biwiring, allowing you to directly
connect the LF (low frequency) and HF (high frequency) for
each speaker. This connection method is intended to
achieve even better playback audio quality than normal
connections.
Use a pair of cables each for the LF (low frequency) and HF
(high frequency), and connect the + terminals to the
amplifier + terminal(s) and the − terminals to the amplifier
− terminal(s).
Connect the
right (R) speaker
in the same way.
Amplifier
Checking the phase
If the polarities (+/−) of the left and right speakers do
not match, they will be out of phase and good stereo
playback sound will not be possible.
To check the phase, play a mono audio recording that
has strong bass frequencies through one speaker and
then both speakers. If the bass frequencies sound is
weaker with both speakers, they are probably out of
phase.
If they are in phase, low-frequency sound should be rich
abundant and the stereo image should be placed in the
middle between the left and right speakers. If they are
out of phase, low frequencies will be missing and the
stereo image will be unclear. In this case, check the
polarities (+/−) of the connections between the speakers and the amplifier.
By reversing the polarity for one speaker, the phase can
be corrected. Speaker cables are connected to the input
terminals on the backs of the speakers. The red terminal
is positive (+) and the black terminal is negative (−).
Check these carefully when making connections.
p Use speaker cables of the same length for both the
high-frequency and low-frequency connections.
p Remove the links connecting the two + terminals
together and the two − terminals together.
5
Page 6
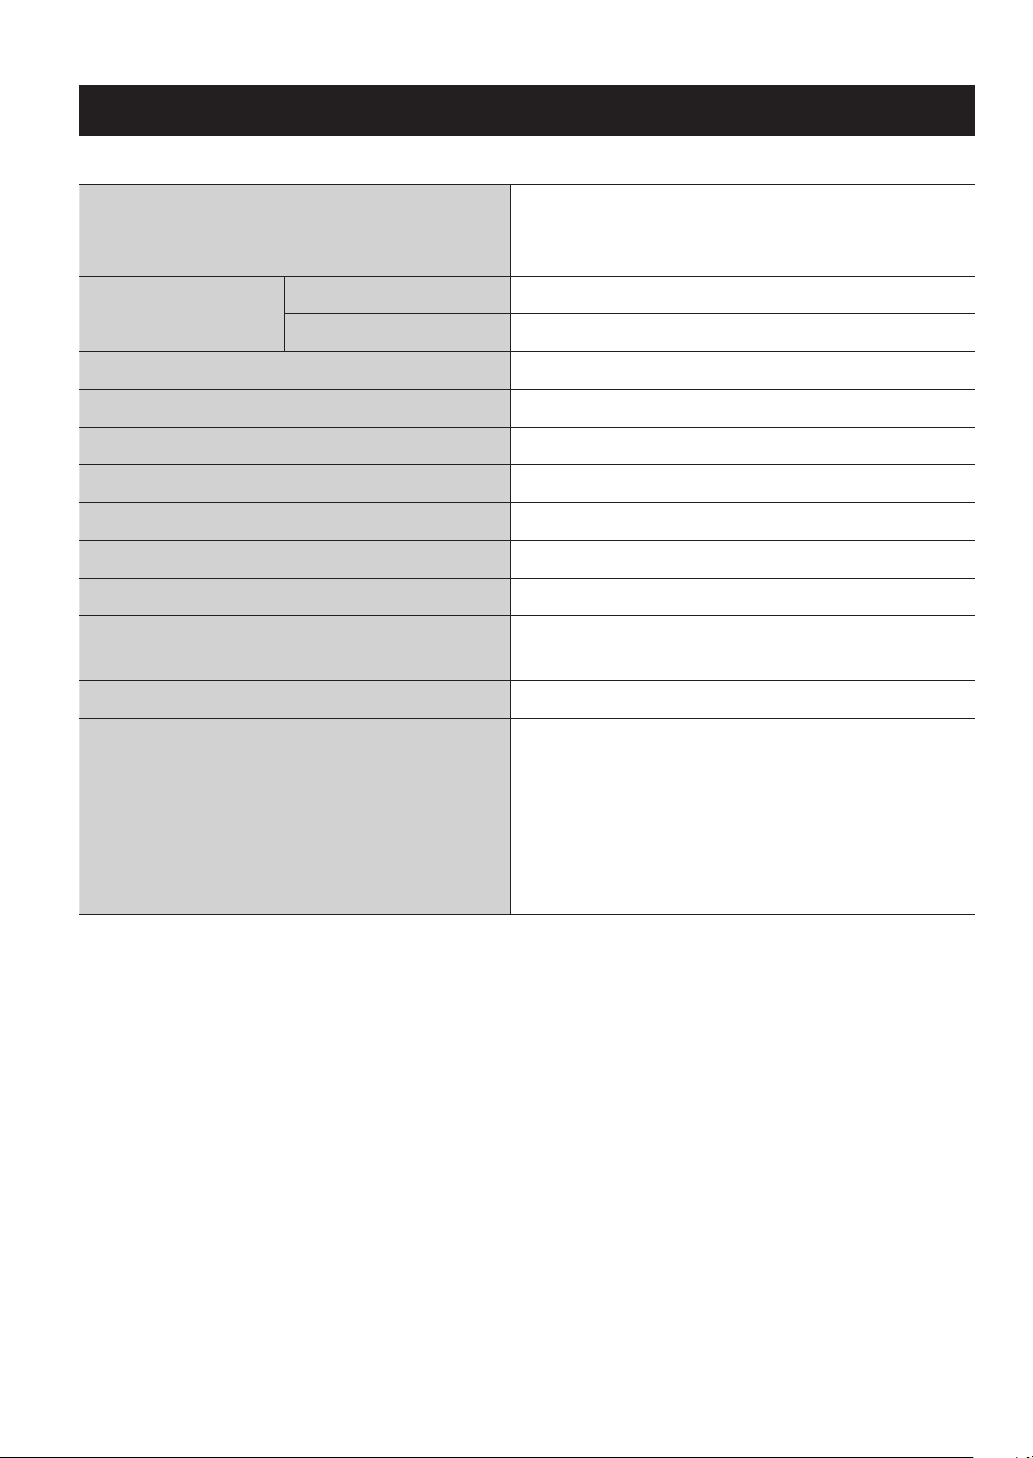
Format
Specifications
Coaxial two-way speakers
Bass reflex (rear ports)
Magnetically shielded
Loudspeaker units
Rated input 50 W
Maximum input 100 W
Impedance 6 Ω
Output sound pressure level 86 dB/W/m
Playback frequency range 55–33,000 Hz
Crossover frequency 3.5 kHz
Cabinet volume 5.7 liters
External dimensions (W × H × D)
Weight 4.3 kg/speaker
Included accessories
Low-frequency 13cm cone
High-frequency 2.5cm soft dome
184 × 240 × 229 mm
(not including terminal protrusions or spikes)
Speaker cables (2m) × 2
Screw spikes × 6
Washers × 6
Spike bases × 6
Cleaning cloth × 1
Owner's Manual (including warranty) (this document) × 1
p In order to improve the product, specifications and appearances might be changed without notice.
p Illustrations in this Owner's Manual might differ in part from the actual product.
6
Page 7

7
Page 8

Z
TEAC CORPORATION 1-47 Ochiai, Tama-shi, Tokyo 206-8530, Japan Phone: (042) 356-9156
TEAC AMERICA, INC. 7733 Telegraph Road, Montebello, California 90640 U.S.A. Phone: (323) 726-0303
TEAC MEXICO, S.A. de C.V. Río Churubusco 364, Colonia Del Carmen, Delegación Coyoacàn, CP 04100, México DF, México Phone: (5255)5010-6000
TEAC EUROPE GmbH Bahnstraße 12, D-65205 Wiesbaden-Erbenheim, Deutschland Phone: 0611-71580
This appliance has a serial number located on the rear panel. Please record the
model number and serial number and retain them for your records.
Model name: S-300NEO Serial number:
0912 MA-1878A
 Loading...