

Page 1

LCD2633A/LCD3233A
LCD3733A/LCD4233A
TEAC
Page 2

WARRANTY REGISTRATION
Please read this warranty card.
Keep your purchase receipt to enable you to proceed quickly in the event of a Warranty Service.
Warranty Terms & Conditions
1. TEAC warrants to the original retail purchaser only, that this product is free from defects in material and
workmanship under normal domestic use and authorises free service during the warranty period at any TEAC
Authorised Centre only. TEAC warranty only applies to products purchased, used and serviced in Australia.
2. Subject to the terms herein, this warranty effectively covers the equipment as specified in the Warranty Periods
Table from the date of purchase.
3. All parts, except the external cabinet, are warranted as specified in Warranty Periods Table, and will be repaired
or replaced at the sole judgement of TEAC.
4. Normal customer maintenance as described in the owner’s manual is not covered by this warranty (such as
cleaning VCR heads etc.)
5. This warranty does not apply to equipment showing abuse, damage or that it may have been tampered with,
altered or repaired outside any TEAC Authorised Service Centre. If so, the warranty will be void.
*Your nearest Authorised TEAC Service Centre is listed in your Owners Manual
6. In the event that this unit or any defective parts must be returned to TEAC Service Centres, a copy of this warranty
certificate and of your purchase receipt must be enclosed to be a valid warranty. Such equipment or parts must
be sent freight prepaid to the nearest authorised TEAC Service Centre. After the repair, the unit will be available
for collection by the owner or it will be returned to the owner. The warranty does not cover freight or insurance.
In all cases of in-transit damages or loss, a claim must be filed against the carrier by the purchaser.
7. In home service will only be provided as part of this warranty if all the following conditions are met;
a) The product is a Colour Television of 51cm screen size or over.
b) The product is within the warranty period.
C) The product is located within the normal service area of the local TEAC Service Provider.
In any other situation or circumstance, where an in home service call is made, a service fee will be charged by
the Service Provider.
8. TEAC National Service Centre in home service and installation is available at competitive rates.
9. No one is authorised to assume any liability on behalf of TEAC or impose any obligation on it, in connection with
the sale of any equipment other than as stated in this warranty and outlined above.
10. In no event will TEAC be responsible or liable for indirect or consequential damages from interrupted
operations or other causes.
11. Warranty is not transferable to any subsequent purchaser if the product is sold during the warranty period,
TEAC PRODUCT WARRANTY PERIOD
Televisions / Plasma 106 cm and
above
LCD televisions 56cm and above 1 Year (In-Home Service Included)
Televisions 51cm and above 1 Year (In-Home Service Included)
Televisions under 51 cm 1 Year (No In-Home Service)
Digital Set Top Boxes 1 Year (No In-Home Service)
VCR 1 Year (No In-Home Service)
DVD 1 Year (No In-Home Service)
DVD Recorder 1 Year (No In-Home Service)
Audio Systems 1 Year (No In-Home Service)
* Extended promotional warranty may apply to certain products (for more info
service@teac.com.au)
In home service administration fee is applied after 1st year of warranty.
1 Year (In-Home Service Included)
please contact:
Page 3

WARRANTY REGISTRATION
Please keep this information for your own records.
Please refer to the owner’s manual to ensure that you have followed the correct installation and operating procedures.
1. Read owner’s manual carefully
2. If you require Warranty Service, please contact the TEAC Service Centre
3. Please have your purchase receipt as your proof of purchase and the following details completed for a valid
Warranty.
Owner’s Name
Owner’s Address
Postcode
Model Name/No. Serial No.
Dealer’s Name
Dealer’s Address
Postcode
4 Please ensure that your product is packed appropriately upon return to the service centre..
If you have any other queries regarding service or warranty please contact the TEAC National Service Centre below.
service@teac.com.au
www.teac.com.au
1800 656 700
Page 4

Contents
Safety Precautions
Important Safety Instructions
Important User Guidance Information
Stand Uninstall
Accessory List
Overview of TV
i. Front Panel Description
ii.Back Panel Description
Remote Control Overview (All Functions Except Teletext)
Remote Control Overview (Teletext Functions)
Remote Control Operation
Connection
i. Antenna Connection
ii.YPbPr/YCbCr (component) Connection
iii.Rear S-Video and Video (Composite) Connection
iv.Side S-Video and Video (Composite) Connection
v. HDMI Connection
vi. VGA Connection
vii. AV Out Connection
Basic Operation
Button Instruction
1
2
4
5
6
7
8
10
11
12
13
14
15
15
16
17
17
18
19
Menu
i. Picture Menu
Ii. Sound Menu
iii. Channel Menu
iv. Window Menu
v. Setting Menu
Teletext
Troubleshooting And Maintenance
Display Mode
Specifications
21
21
22
25
25
27
28
29
30
Page 5

Safety Precautions
CAUTION
RISK OF ELECTRIC SHOCK
DO NOT OPEN
The lightning flash with arrowhead
symbol within an equilateral triangle is
intended to alert the user to the
presence of uninsulated "dangerous
voltage" within the unit's cabinet that
may be of sufficient magnitude to
constitute a risk of electric shock to
The exclamation point within an
equilateral triangle is intended to alert
the user to the presence of important
operating and maintenance (servicing)
instructions in the manual
accompanying the unit.
WARNING:
To prevent fire or electric shock, do not expose the
unit to rain or moisture. never attempt to open the
cabinet, dangerous high voltages are present in the
unit. refer servicing to qualified service personnel.
This equipment generates, uses and can radiate
radio frequency energy and, if not installed and
used in accordance with the instruction manual,
may cause harmful interference to radio
communications.However, there is no guarantee
that interference will not occur in a particular
installation. If this equipment does cause harmful
interference to radio or television reception, which
can be determined by turning the equipment off
and on, the user is encouraged to try to correct
the interference by one or more of the following
measures:
Reorient or relocate the receiving antenna.
!
Increase the separation between the
!
equipment and receiver.
!
Connect the equipment into an outlet on a
circuit different from that to which the receiver
is connected.
!
Consult the dealer or an experienced radio/TV
technician for help.
!
When in use, there must be a distance at least
5cm between the TV and some object front or
back of it, at least 1cm between the TV and
some object leftward or rightward of it .
CAUTION:
DON’T PLACE TO WET LOCATION
Apparatus shall not be exposed to dripping or
splashing with water, and do not place objects
filled with liquids on the apparatus, such as vases.
NOTE TO CABLE/TV INSTALLER:
This equipment has been tested and found to
comply . These limits
are designed to provide reasonable protection
against harmful interference when the equipment is
operated in a residential installation.
Australia regulation standard
Do not attempt to modify this product in any
way without written authorization from TEAC
Unauthorized modification, warranty will be
void.
RECORD YOUR MODEL NUMBER
(Do this now, while it is convenient)
The model and serial number of your Machine are
located on the back of the TV cabinet. For your
future convenience, we suggest that you record
these numbers here:
MODEL NO._____________________
SERIAL NO._____________________
-1-
Page 6

Important Safety Instructions
1.Read These Instructions
All the safety and operating instructions should be
read before the product is operated.
2.Keep These Instructions
The safety and operating instructions should be
retained for future reference.
3.Adhered to all warning
All warnings on the product and in the operating
instructions should be adhered to.
4.Follow All Instructions
All operating and use instructions should be
followed.
5.Do not use this product near water
Do not use this product near water for example,
near a bathtub, wash bowl, kitchen sink, or laundry
tub; in a wet basement; or near a swimming pool;
and the like.
6.Clean only with dry cloth
Unplug this product from the wall outlet before
cleaning. Do not use liquid cleaners or aerosol
cleaners. Use dry cloth for cleaning.
7.Do not block any ventilation openings. Install in
accordance with the manufacturer instructions.
8.Do not install near any heat sources such as
radiators, heat register, stoves, or other apparatus
(including amplifiers) that produce heat
12.Use only with the cart, stand, tripod, bracket,
or table specified by the manufacturer, or sold
with the apparatus. When a cart is used, please
take caution when moving the cart to avoid injury
from tip-cover.
13.Unplug this apparatus during lightning or
unused for a long period of time.
14.Refer all servicing to qualified service
personnel. Servicing is required when the
apparatus has been damaged in any way, such
as power-supply cord or plug is damaged, liquid
has been spilled or objects have fallen into the
apparatus, the apparatus has been exposed to
rain or moisture, does not operate normally, or
has been dropped.
9. Do not defeat the safety purpose of the polarized
or grounding-type plug. A polarized plug has two
blades ,one blade is wider than the other. A
grounding type plug has two blades and third
grounding prong. The wide blade or the third prong
are provided for your safety. If the provided plug
does not fit into your outlet, consult an electrician for
replacement of the obsolete outlet.
10.Protect the power cord from being walked on or
pinched particularly at plugs, convenience
receptacles, and the point where they exit from the
apparatus.
11.Only use attachments and accessories specified
by the manufacturer.
15.This product should be operated only from the
type of power source indicated on the marking
label. If you are not sure of the type of power
supply to your home, consult your product dealer
or local power company.
16.Protective Attachment Plug -The product is
equipped with an attachment plug having
overload protection. This is a safety feature. See
Instruction Manual for replacement or resetting of
protective device. If replacement of the plug is
required, be sure the service technician has used
a replacement plug specified by the manufacturer
that has the same overload protection as the
original plug.
-2-
Page 7

Important Safety Instructions
17.Power Lines
An outside antenna system should not be located
in the vicinity of overhead power lines or other
electric light or power circuits, or where it can fall
into such power lines or circuits. When installing an
outside antenna system, extreme care should be
taken to keep from touching such power lines or
circuits as contact with them might be fatal
.
18.Overloading
Do not overload wall outlets, extension cords, or
integral convenience receptacles as this can result
in a risk of fire or electric shock.
19.Object and Liquid Entry
Never push objects of any kind into this product
through openings as they may touch dangerous
voltage points or short-out parts that could result in
a fire or electric shock. Never spill any kind of liquid
on the product.
20.Replacement Parts
When replacement parts are required, be sure the
service technician has used replacement parts
specified by the manufacturer or have the same
characteristics as the original part. Unauthorized
substitutions may result in fire, electric shock, or
other hazards.
23.Outdoor Antenna Grounding
If an outside antenna or cable system is connected
to the product, be sure the antenna or cable
system is grounded so as to provide some
protection against voltage surges and built-up static
charges. Article 810 of the National Electrical Code,
ANSI/NFPA 70, provides information with regard to
proper grounding of the mast and supporting
structure, grounding of the lead-in wire to an
antenna discharge unit, size of grounding
conductors, location of antenna discharge unit,
connection to grounding electrodes, and
requirements for the grounding electrode. See
figure below.
21.Safety Check
Upon completion of any service or repairs to this
product, ask the service technician to perform
safety checks to determine that the product is in
proper operating condition.
22.Wall or Ceiling Mounting
The product should be mounted to a wall or ceiling
only as recommended by the manufacturer. Any
mounting of the product should follow the
manufacturer instructions, and should use a
mounting accessory recommended by the
manufacturer.
-3-
Page 8

Important User Guidance Information
In order to obtain maximum enjoyment from this TEAC LCD Display System, please first read this
information carefully. With the TEAC LCD, you can be assured of a high quality LCD Display System
with long-life and high reliability. To achieve images of exceptional quality, this TEAC LCD Display
System incorporates state-of-the-art design and construction, as well as very precise and highly
advanced technology.
Installation guidelines
The TEAC LCD Display System incorporates a very thin design. To ensure safety, please take the
proper measures to mount or install the LCD Display with the recommend mounting Base (on next page),
in order to prevent the unit from tipping over in the event of vibration or accidental movement. This
product should be installed by using only parts and optional accessories designed by TEAC. Use of
accessories other than the TEAC stand or installation wall bracket may result in instability, and could
cause injury. For custom installation, please consult the dealer or TEAC service centre. To ensure
correct installation, experienced and qualified experts must install the unit.
TEAC will not be held responsible for accident or damage caused by the use of parts and accessories
manufactured by other companies. To avoid malfunction and overheating, make sure that the vents
on the main unit are not blocked when installing to ensure proper heat emission:
• Distance the unit slightly from other equipment.
• Do not mount the unit flush against the walls, etc.As show below.
• Do not fit the unit inside narrow spaces where ventilation is poor.
• Do not cover with a cloth, etc.
• Clean the vents on the sides and rear of the unit to remove dust build-up, by using a vacuum cleaner
set to its lowest suction setting.
• Do not place the product on a carpet or blanket.
• Using the unit without proper ventilation may cause the internal temperature to rise, and could result
in possible malfunction. Any malfunction may occur due to:
an inappropriate installation site, improper assembly, installation, mounting. However, TEAC cannot
be held responsible for such accidents or malfunction.
• CAUTION regarding Placement
To maintain proper ventilation, be sure to leave a space around the unit (from the largest outer
dimensions including projections) equal to or greater than:
Left and right Panels : 10cm
Rear Panel : 5cm
Top Panel :10cm
The ventilation should not be impeded by covering the ventilation slots with items, such as newspapers,
table-cloths, curtains, etc.No naked flame sources, such as lighted candles, should be placed on the
apparatus.
-4-
Page 9

Stand Uninstall
Please follow the instructions given.
1.Lay the LCD TV/Monitor face-down on a flat surface with a cushion or other soft materials to
protect the screen.
2.Remove all cables connected on the TV/Monitor.
3.Remove the four screws and then remove the stand from the LCD TV/Monitor.
4.Now you are ready to install Wall mounting device (Optional).
-5-
Page 10

Accessory List
Please check the accessories and ask the local dealer for help when they are lost or damaged.
STANDBY
MUTE
SOURCE
LAST
SOURCE
OK
DISPLAY
MENU
EXIT
TXT/MIX
PICTURE SOUND
ASPECT
User's manual
SLEEP
1
2
3
LIST
4
6
5
FREEZE
78
9
VIDEOOFF
0
CH+
VOL
VOL
CH-
PAGE
Power Cord (×1)
User’s manual (×1)
Remote control (×1)
Note: Please use the power cord which includes the ground wire.
This TV set shall be connected to a main socket outlet with a protective grounded AC
power outlet.
Where to place the TV
1. Selecting where to place the TV.
2. Handling the TV.
2 inches
(5 cm)
or more
(Picture A)
(Picture B)
Caution:
• Select a place without direct sunlight or good ventilation
Picture A)
(
• Do not remove the stand from the display unless using a proper wall mount.
• Keep enough space above and behind the TV.
Picture B)
(
• The TV is heavy, make sure to move it safely.
-6-
Page 11

Front Panel Description
Overview of TV
1
3
2
4
1
Speaker
Remote control sensor
2
Standby indicator
3
SOURCE
4
Press it to display the menu of the available viewing source.
5
MENU
Press it to display the OSD menu.
6
CH+/-
Press it to choose the channel. The two buttons also act as direction buttons .
5 6
7
1
8
7
VOL+/-
Press it to adjust volume . The two buttons also act as direction buttons .
8
POWER
Power on/off the TV.
-7-
Page 12

Back Panel Description
Back Panel of models: LCD3233A/LCD3733A/LCD4233A
COMPONENTIN(HDTV/DVD)
PCAUDIO
EXT1 EXT2
DIGITAL AUDIO O UT
Pb/Cb Pr /CrY
IN
RGB
COAXIAL OPTIC AL
LR
VIDEO S-VIDEO
SERVICE
VIDEO
ANTENNA
ONLY
Rear interface
100-240V
~
50/60Hz
PCIN HDMI/DVIIN
Rear interface description
~-100 240V
50/60HZ
POWER AV OU T / AV-1 I N
Side interface:
Video input
Audio input
S-Video input
Headphone Output
COMPONENT IN (HDTV/DVD)
VGA
VGA AUDIO IN
()
OPTICAL
SERVICE
ONLY
SERVICE
ONLY
VGA
VGA HDMIANTENNA
Power Switch
-8-
Page 13

Back Panel Description
Back Panel of mode: LCD2633A
COMPONENTIN(HDTV/DVD)
PCAUDIO
EXT1 EXT2
DIGITAL AUDIO O UT
Pb/Cb Pr /CrY
IN
VIDEO S-VIDEO
RGB
LR
COAXIAL OPTIC AL
Rear interface
100-240V
~
50/60Hz
SERVICE
VIDEO
ANTENNA
ONLY
PCIN HDMI/DVIIN
SERVICE
ONLY
OPTICAL
AUDIO OUT
Rear interface description
~-100 240V
50/60HZ
POWER
Side interface:
Video input
Audio input
S-Video input
Headphone Output
Power Switch
COMPONENT IN (HDTV/DVD)AV OUT / AV-1 IN VGA AUDIO IN
ANTENNA
VGA SERVICE
ONLY
HDMI
OPTICAL
-9-
Page 14

Remote Control Overview (All Functions Except Teletext)
Standard Remote Control
STANDBY
Standby button
Main source
Last source
Display status
Enter OSD setup mode
Picture proportion
TO set sleep time
Channel list
Freeze
No- picture
SOURCE
LAST
SOURCE
DISPLAY
ASPECT
SLEEP
LIST
FREEZE
VIDEO OFF
OK
MENU
TXT/MIX
PICTURE SOUND
1
4
78
MUTE
Mute
Direction buttons
Enter
EXIT
Exit
Audio mode
Picture mode
2
3
6
5
9
0
Numerical buttons
Stereo/Mono sound selection
Return to previous channel
VOL
CH+
CH-
VOL
Next /Previous channel
Volume up/down
Hold
Subpage
Reveal
Subpage down
Subpage up
PAGE
Page up and down
Size
Note:
1.This remote control needs two pieces of batteries.
2.For details of the buttons operation, please refer to the Button Instruction (Page 19).""
-10-
Page 15

Remote Control Overview(Teletext Functions)
STANDBY
MUTE
Teletext Index
Teletext Page down
TXT/MIX channel
SOURCE
LAST
SOURCE
DISPLAY
ASPECT
SLEEP
LIST
FREEZE
VIDEO OFF
OK
MENU
TXT/MIX
PICTURE SOUND
1
2
4
5
78
0
EXIT
3
6
9
Teletext Pageup
Teletext Cancel
Teletext Sub page
Teletext Sub page up
VOL
CH+
CH-
-11-
VOL
Teletext Hold
Teletext Reveal
Teletext Sub page down
Teletext Size
PAGE
Page 16

Remote Control Operation
Batteries Installation
Push as the arrow shows
to take off the back cover.
Insert the batteries
with correct polarity.
Put the cover back as
the arrow shows.
Make sure there are no
objects between the
remote control and its
sensor.
Remote control direction
Point the remote control at the remote control sensor.
Don't place the remote control
near a heater or in a damp
place. A strong impact on
remote control may damage it.
30
30
STANDBY
MUTE
SOURCE
LAST
SOURCE
OK
DISPLAY
MENU
EXIT
TXT/MIX
PICTURE SOUND
ASPECT
SLEEP
1
2
3
LIST
4
6
5
FREEZE
78
9
VIDEOOFF
0
CH+
VOL
VOL
CH-
PAGE
Signal from the remote con trol may be disturbed by sun
light or other strong light. In
this case, darken the room.
TEAC
-12-
Page 17

Connection
Antenna Connection
Indoor Antenna Connection
Typical Wall antenna jack used in apartment buildings, connect the antenna cable as shown
below (Please use the correct type of antenna cable according to the type of wall antenna jack).
75 ohmRound Cable
Bronze Wire
300 ohmFlat Wire
Apartment buildings
Wall ConnectionJack
*If you have a 75 ohm round cable, insert the bronze wire and then tighten the connection nut.
*If you have a 300 ohm flat wire, connect the twisted wire to the antenna converter and then connect
the converter to the antenna jack on the TV.
*When using 75 ohm round cable, please do not bend the bronze wire, it may make the video
quality poor.
Antenna Converter
Outdoor Antenna Connection
This type of antenna is commonly used in a house.
75 ohmRound Cable
VHF Antenna
UHF Antenna
House
*In poor signal areas, to get better picture quality,
install the antenna as shown to the right.
optimum picture quality, adjust antenna direction.
*You can share the antenna signal with a signal
splitter for two TV sets.
75 ohmRound Cable
300 ohmFlat Wire
For
Antenna Converter
VHF
Signal
Amplifier
UHF
75 ohmRound Cable
-13-
Page 18

Connection
YPbPr/YCbCr (Component) Connection
DVD, etc
-
-
Y
Audio Cable
Component Video Cable
Pb Cb/
Pr Cr/
AUDIO(L) AUDIO(R)
Note:
Please refer to the illustration above to connect the TV with DVD player or other component signal sources.
Connect YPbPr/YCbCr Cable and Audio Cable to corresponding jacks of DVD player or other component
signal sources.
Please select "Component1" in the source menu when you connect component signal source.
There is only one "Component" for LCD2633A.
How to select the viewing source
Please press the "SOURCE" button, then use numerical buttons directly to select source item,
or use the direction key to select source.
For example:
select the "Component1" source .
Please press the "SOURCE" button, the source menu will display on the screen.
Select Source
1
TV AV1 AV2
4
Component1
7
HDMI
Please use numerical buttons directly to select source r use the direction to
2 3
5 6
Component2
VGA
"Component1", o bottons
select the desire signal and then press the "OK" button to confirm.
:There is only one Component for LCD2633A
"" .Note
-14-
Page 19

Connection
Rear S-Video and Video (Composite) Connection
S-Video or composite signal output
AV Cable
S-Video Cable (no S-Video terminal for LCD2633A)
POWER
VCR
AUDIO(L)AUDIO(R)
VIDEO
S-VIDEO
Note:
1.Please refer to the illustration above and to connect TV with S-Video or other composite signal sources.
Connect S-Video/composite video cable and audio cable to corresponding jacks of DVD player or
other composite signal sources. Please choose "AV1" in the source menu when you connect DVD
player or other source.
.2 When S-Video and composite video are connected at the same time, S-Video would be employed to
approach the best video effect. If composite video is necessary, please disconnect S-Video cable.
How to select ''AV1'' source
Please refer to page 14.
Side S-Video and Video (Composite) Connection
AV2 -I N
AV-3 I N
S-Video or composite signal output
AV Cable
S- Video Cable
VIDEO
POWER
AUDIO(L)
VCR
AUDIO(R)
S-VIDEO
Note:
1.Please refer to the illustration above to connect TV with S-Video or other composite signal sources.
Connect S-Video/composite video cable and audio cable to corresponding jacks of DVD player or
other composite signal sources. Please select "AV2" in the source menu when you connect DVD player
or other source.
2 When S-Video and composite video are connected at the same time, S-Video would be employed to
.
approach the best video effect. If composite video is necessary, please disconnect S-Video cable.
How to select ''AV2'' source
Please refer to page 14.
-15-
Page 20

Connection
HDMI Connection
Picture A
HDMI
DVD
HDMI
HDMI Cable
PictureB
VGA
HDMI
HDMI Cable
VGA Audio Cable
DVI
DVD
AUDIO(R)
AUDIO(L)
Connet TV with corresponding jacks on DVD or STB, and switch the source to HDMI in Source menu.
(Picture A B)/
1.If connecting with an HDMI cable, it is not necessary to connect an audio cable.
2.If connecting to equipment which has only a DVI output terminal, DVI or HDMI adapter cables and
an audio cable are necessary .(Picture B)
When connecting with HDMI, you can get better audio effect by connecting digital audio signal device to other
playing devices like a amplifier through Optical connector (Picture C)n.
VOLUME
INPUTSELECTOR
PROLOGIC
CHANNEL
TEST
MUTE
KARAOKE
MODE
3STEREO
BYPASS
MICVOL
211
2
DOWN UP
BASS
ECHO
MIC
TREBLE
EXCITE
DIGITAL OUT (HDMI)
POWER
MIC
OPTICAL
Optical Cable
(PictureC)
Note: Optional HDMI cable is not supplied, you can purchase from your local TEAC service center.
How to select viewing source(''HDMI’')
Please refer to page 14.
-16-
Page 21

Connection
VGA Connection
VGA
PC
AUDIO
VGA
VGA
VGA Cable
Audio Cable
Note:
1.Please refer to the illustration above on how to connect the LCD TV with PC or DVD player.Connect
VGA Cable and Audio Cable to the corresponding jacks of PC and select the signal source as "VGA".
2.If you connect VGACable to disc player or Set Top Box, please select "VGA" and set the output mode
as "VGA".Please choose "VGA" in the "Source menu" when you connect disc player or Set Top Box
with VGA source out.
How to select viewing source(''VGA'')
Please refer to page 14.
AV Out Connection
POWER
VCR
AUDIO(L)AUDIO(R)
VIDEO
AV Out Cable
Note:Please refer to the illustration above to connect the TV with other devices including a VCR and etc.
Connect audio and video output cable to the corresponding jacks of theseAV devices.
-17-
Page 22

Basic Operation
Power on / Power off
1.Plug the power cable into the power socket, make sure the output voltage and frequency of the
power is correct with this machine.
2.Turn on the main power switch on the right side, the red light on the front will be grown, then the TV
will be in standby mode. Press "STANDBY" button on remote control or "Power" button on the front
board, the TV will come on. And the indicator changes to green.
3.Press “STANDBY" button on the remote control to turn off the TV, and the TV will enter standby mode,
the indicator changes from green to red. Press the main power switch and it will stop working.
Note: Please remove the plug when the TV is not in use for a long time.
Channel Shift
CH+/-
CH+
CH-
In TV mode, press "CH+" button to select next channel, and press "CH-" button to
●
select previous channel.
Return to
previous channel
Press this button to toggle between current and previous channel.
●
Numerical Button
Number/Character
1
GHI JKL
4
PQRS TUV WXYZ
78
ABC DEF
23
5
0
MNO
6
9
Select a one-digit channel: Press 0-9 directly to select your desired channel.
●
Select two-digit channel: Press 1-9 to input the first digit and press 0-9 to
●
input the second digit.
Select three-digit channel: Press 1-9 to input the three digits in turn(100-199).
●
Volume Adjust
VOL+/-
VOL
+
VOL
-
Press "VOL+" button to increase the volume.
●
●
Press "VOL- " button to decrease the volume.
Note: It is the same way to increase and decrease the earphone volume when
the earphone is connected.
Sound Off
MUTE
Press this button to mute audio, press it again to resume.
●
Display Status
Display Status
Press the "DISPLAY" button, the screen will display the information of the
●
Current channel.
Volume
60
View Menu
MENU
Press "MENU" button on the remote control or
●
"MENU" button on the front board to display OSD
menu. Press"MENU" button continuously, it will
shift among Picture, Sound, Channel, Window
and Setting menu.
-18-
Picture Sound Window
Picture Mode
Brightness
Contrast
Color
Tint
Sharpness
Channel
Setting
User
Page 23

Button Instruction
Last Source
LAST SOURCE
Press this button to switch between the last signal source and the current one.
●
For example, when the signal source is TV, last source is VGA, press this button
to switch to VGAand press it again to return to TV.
Video Off
●
VIDEO OFF
Press this button to enjoy music without video. Press again to resume.
Sound Mode Adjustment
●
SOUND
Press "Sound" button on the remote control to enter the sound effect setting as
follows.
Sound Mode
Press '' / '' buttons or "Sound" button to select your favourite mode.
TXT/MIX
●
Press "TXT/MIX" button to display Teletext mode.
Note: How to set Teletext mode, please refer to page 27.
ASPECT
ASPECT
●
Press "ASPECT" button on the remote control, the following window will
display on the screen.
Standard
Aspect Ratio
Press '' / '' buttons or ''Aspect'' button to select your favourite mode.
(Full Screen/4:3/Wide/Subtitle/Standard/Zoom 14:9/Zoom 16:9.)
Image Effect Adjustment
●
PICTURE
Press "PICTURE" button the following window will
display on the screen.
Picture Mode
Press '' / '' buttons or "PICTURE" button to select your favorite mode.
Freeze Image
Press this button to freeze the current image, press it again to exit the freeze mode.
FREEZE
●
Stereo/Mono Sound
DUAL
When in TV mode, press this button on the remote control, you can select between
●
Stereo and Mono sound during stereo transmission.
Full Screen
on the remote control,
Bright
-19-
Page 24

Button Instruction
Browse The Channel List
LIST
Press "LIST" button, the channel list will display on the screen.
●
Use direction buttons to select specific channel. Use and
" button to switch the listing page. Press the "EXIT" button to quit.
Press ''OK'' button to watch the channel you have selected.
Rename Channel
LIST
●
You can rename the channel when you are browsing the channel list.
Press "LIST" button, the Channel list will display on screen.
Use direction buttons to select specific channel and press "OK" button to confirm.
●
Then press "OK" button again, the Rename Channel window will display on the
screen as below.
Channel list
0CCTV5
1CCTV1
2CCTV2
3CCTV3
4CCTV4
5CV
6CCT
7CC
8 CTV2
9CC3
""
"
Channel list
0CCTV5
1CCTV1
2CCTV2
3CCTV3
4CCTV4
Rename Channel
5CV
6CCT
7CC
8 CTV2
9CC3
Current Channel 4:
Note: You can input letters by numerical buttons on the remote control.
For example:
If you want enter "AV01", press twice, press four times continuously,
then enter the once & once . When finishing, you can press ''OK''
to save it.
Sleep Timer Set Up
Press "SLEEP" button to set the sleeping clock as below.
SLEEP
●
Press '' / '' buttons or "SLEEP'' button to set the sleep time.
Sleep Time
Channel Name:
Rename:
0
CCTV4
AV01
1
-20-
2
8
10 Minutes
Page 25

Menu
Picture Menu
You can adjust the Picture to get your desired picture effect.
1
Press the ''MENU'' button to enter Picture menu.
2
Press '' '' buttons to select ''Picture Mode''.
3
Press '' '' buttons to adjust the "Picture mode".
You can also set the image mode via ''PICTURE'' button
on the remote control:
Picture Sound Window
Picture Mode
Brightness
Contrast
Color
Tint
Sharpness
Channel
User
Setting
Picture Mode
Bright
Picture Mode
Press '' / '' buttons or "PICTURE" button to select your favourite mode.
Only i the
n ''User'' mode, you can adjust Brightness, Contrast, Color, Tint, Sharpness.
Press '' / '' buttons to select "Brightness/ Contrast /Color/ Tint/ Sharpness''.
A:
B: '' / ''
Press buttons to reach the desired setting.
C: Press ''EXIT'' button to quit.
Note:
1. "Color/ Tint" are not adjustable when the Input Source is VGA.
2. "Tint" is not adjustable in HDMI mode.
3. IN "TV/AV", "Tint" is adjustable only when receiving NTSC signal.
Sound Menu
You can use this function to get the perfect audio effect.
1
Press "MENU" button to select "Sound" menu.
Press " " buttons to select sub items.
2
3
Press " " buttons to change the setting.
Press ''EXIT '' button to quit.
Selected item
Bass
Treble
Balance
button
For weaker bass
For weaker treble
Decrease audio from
the right speaker
button
For stronger bass
For stronger treble
Decrease audio from
the left speaker
Picture Window
Sound
Sound Mode
Bass
Treble
Balance
Channel
Setting
User
Sound Mode:
Press " " buttons to sound mode.
change the (Five options: Standard/Soft/Music/Cinema/User)
In ''User '' mode , you can adjust Bass/Treble/Balance''.''
A: Press '' '' buttons to select Bass/Treble/Balance.
B: Press '' '' buttons to change the setting.
C: Press ''EXIT '' button to quit.
-21-
Page 26
Menu
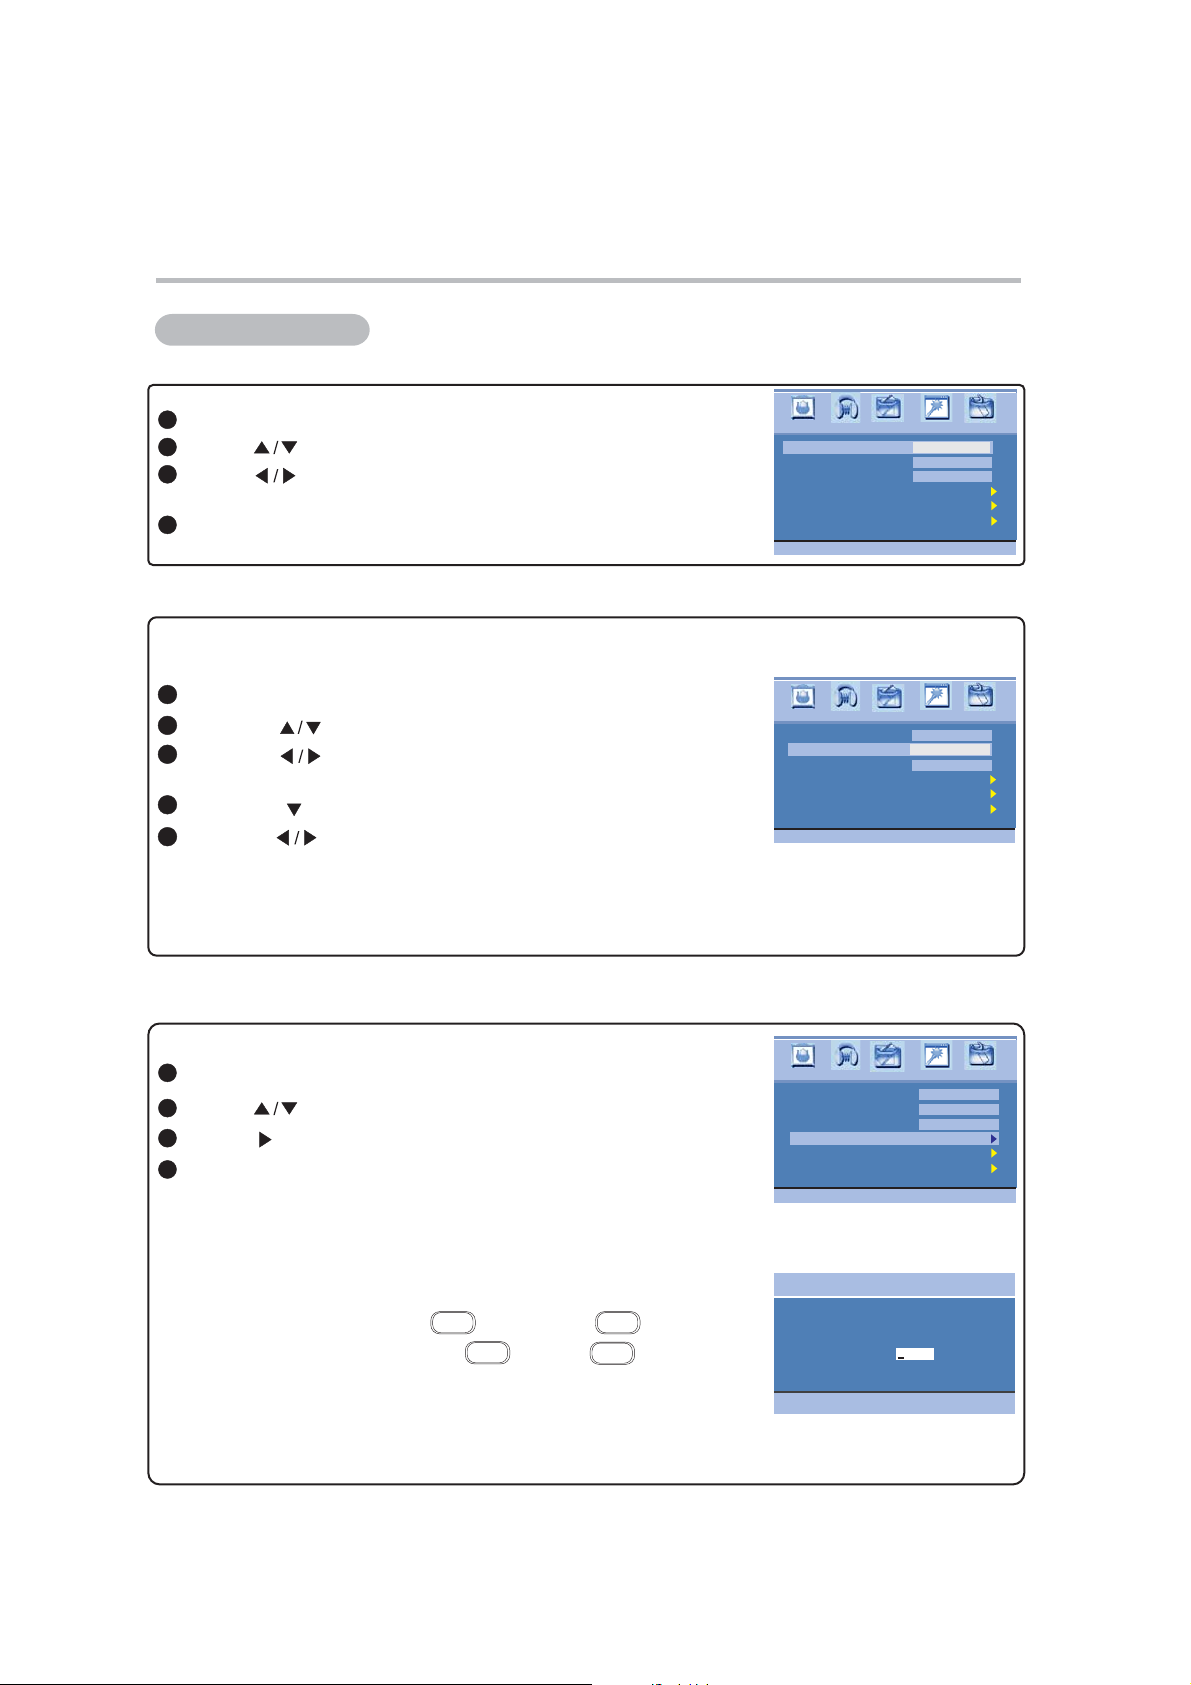
Channel Menu
Sound System
1
Press "MENU" button to select "Channel menu."
2
Press " " buttons to select " .Sound System''
3
Press " " buttons to select the suitable system for
local TV signal.
4
Press ''EXIT'' button to quit.
For Australia, sound system set to BG.Note:
Skip Channel
If you'd like to skip a channel automatically when you browse programs by pressing
"CH+/ -" button, please use this function.CH
1
Press the "MENU" button to select " '' .Channel menu
2
Press buttons to select " ".the '' '' Current Channel
3
Press to select the number of the
the '' '' buttons
channel to be skipped.
4
Press to select ''Skip Channel'' item.the " " button
5
Press to set
the " '' buttons ''On '' on the ''Skip Channel''
Then, the channel will be hidden when you select channel
item
with ''CH+/ -''. If you want to cancel it, please set '' ff '' on the ''Skip Channel'' item.
You can skip one channel or many channels at the same time, but you can still browse all channels
by using ''LIST'' button when ''Skip Channel'' is on.
CH O
Picture Sound Window
Sound System
Current Channel
Skip Channel
Rename Channel
Channel Preset
Picture Sound Window
Sound System
Current Channel
Skip Channel
Rename Channel
Channel Preset
Channel
ChannelExchange
Channel
ChannelExchange
Setting
BG
12
Off
Setting
BG
12
Off
Rename Channel
You can also rename the current channel.
1
Press "MENU" button to select "Channel menu."
2
Press " " buttons to select " ."Rename Channel
3
Press " " button to enter this menu.
4
Press EXIT button to quit.""
Note:
You can input letters by numerical buttons on the remote control.
For example:
If you want enter "AV01", press twice, press four
times continuously, then press the once & once .
2
0
8
1
When finishing, you can press ''OK'' to save it.
You can also rename the channel when you are browsing the
channel list, please refer to page 20.
-22-
Picture Sound Window
Sound System
Current Channel
Skip Channel
Rename Channel
Channel Preset
Rename Channel
Channel Name:
Rename:
Channel
ChannelExchange
Current Channel 12:
CCTV1
AV0 1
BG
12
Off
Setting
Page 27

Menu
Channel Menu
Exchange Channel
You can exchange the current channel with another channel, please refer to "Exchange Channel".
1
Press the "MENU" button to select "Channel" menu.
2
Press the " " buttons to select Exchange Channel .""
3
Press the " " button to enter this menu.
4
Input the Channel Exchange number (the maximum
number is 199), then press button to save your
""OK
setting.Then the two channel are exchanged.
Press "EXIT" button to exit "Channel Exchange" mode.
Picture Sound Window
Sound System
Current Channel
Skip Channel
Rename Channel
Channel Preset
Channel
ChannelExchange
BG
12
Off
Setting
For example:
If you want to exchange channel 12 with channel 1, move
to channel 12 at first. Input "1" with the numerical buttons
in "Channel Exchange" window. Press "OK” button to
confirm.
Auto Search
You can set TV program list with "Auto Searching function" quickly.
1
Press the "MENU" button to select "Channel" menu.
2
Press the " " buttons to select "Channel Preset".
3
Press the " " button to enter "Channel Preset".
4
Press the " " buttons to select "Auto Search".
Exchange Channel
12 1
Current Channel
Picture Sound Window
Sound System
Current Channel
Skip Channel
Rename Channel
ChannelExchange
Channel Preset
Channel Preset
Auto Search
Manual Search
Fine Tune
Exchange channel
Channel
BG
12
Off
Setting
Press" " button to enter ''Auto Search'', the TV will
5
Auto Search
search channels automatically.
All channels will be saved once searching finished.
Current Channel:
In the course of auto searching, you can press "EXIT" to
stop the searching process.
Note:
If the TV still can not display all channels, you can use this function to start the channel
searching again.
-23-
12
400 25MHz.
Page 28

Menu
Channel Menu
Manual Search
You can also set program list again step by step to "Manual Search"
function.
1
Press the MENU button to select ." " "Channel" menu
2
Press the " " buttons to select "Channel Preset".
Press the " " button to enter "Channel Preset".
3
Press the " " buttons to select "Manual Search".
4
5
Press the " "button to enter "Manual Search".
6
Press '' / '' buttons to search channels.When a channel is
found, the searching process will stop and ''Channel has been
searched'' will be displayed, the channel will be saved with
current channel number.If the program is not your expected
one, please press '' / '' buttons to continue the searching.
7
Press ''EXIT'' button to quit.
Picture Sound Window
Sound System
Current Channel
Skip Channel
Rename Channel
Channel Preset
Channel Preset
Auto Search
Manual Search
Fine Tune
Manual Search
Channel
ChannelExchange
Current Channel 1:
BG
12
Off
400 25MHz.
Setting
Fine tuning
"Fine tune" helps you adjust specific programs image and sound quality.
1
Press the "MENU" button to select "Channel" menu. Picture A)(
2
Press the " " buttons to select "Channel Preset".
3
Press the " " button to enter "Channel Preset". Picture B)(
4
Press the " " buttons to select "Fine Tune".
5
Press " " button to enter "Fine Tune".
Press " " to get satisfying effect
6
Press "EXIT" quit.
7
Channel Preset
button to
Auto Searching
Manual Searching
Fine Tune
Picture C)
(
.
-24-
Picture Sound Window
Sound System
Current Channel
Skip Channel
Rename Channel
Channel Preset
Channel
ChannelExchange
(Picture A)
Fine Tune
Current Channel:
12
(Picture C)(Picture B)
BG
12
Off
400 25MHz.
Setting
Page 29

Menu
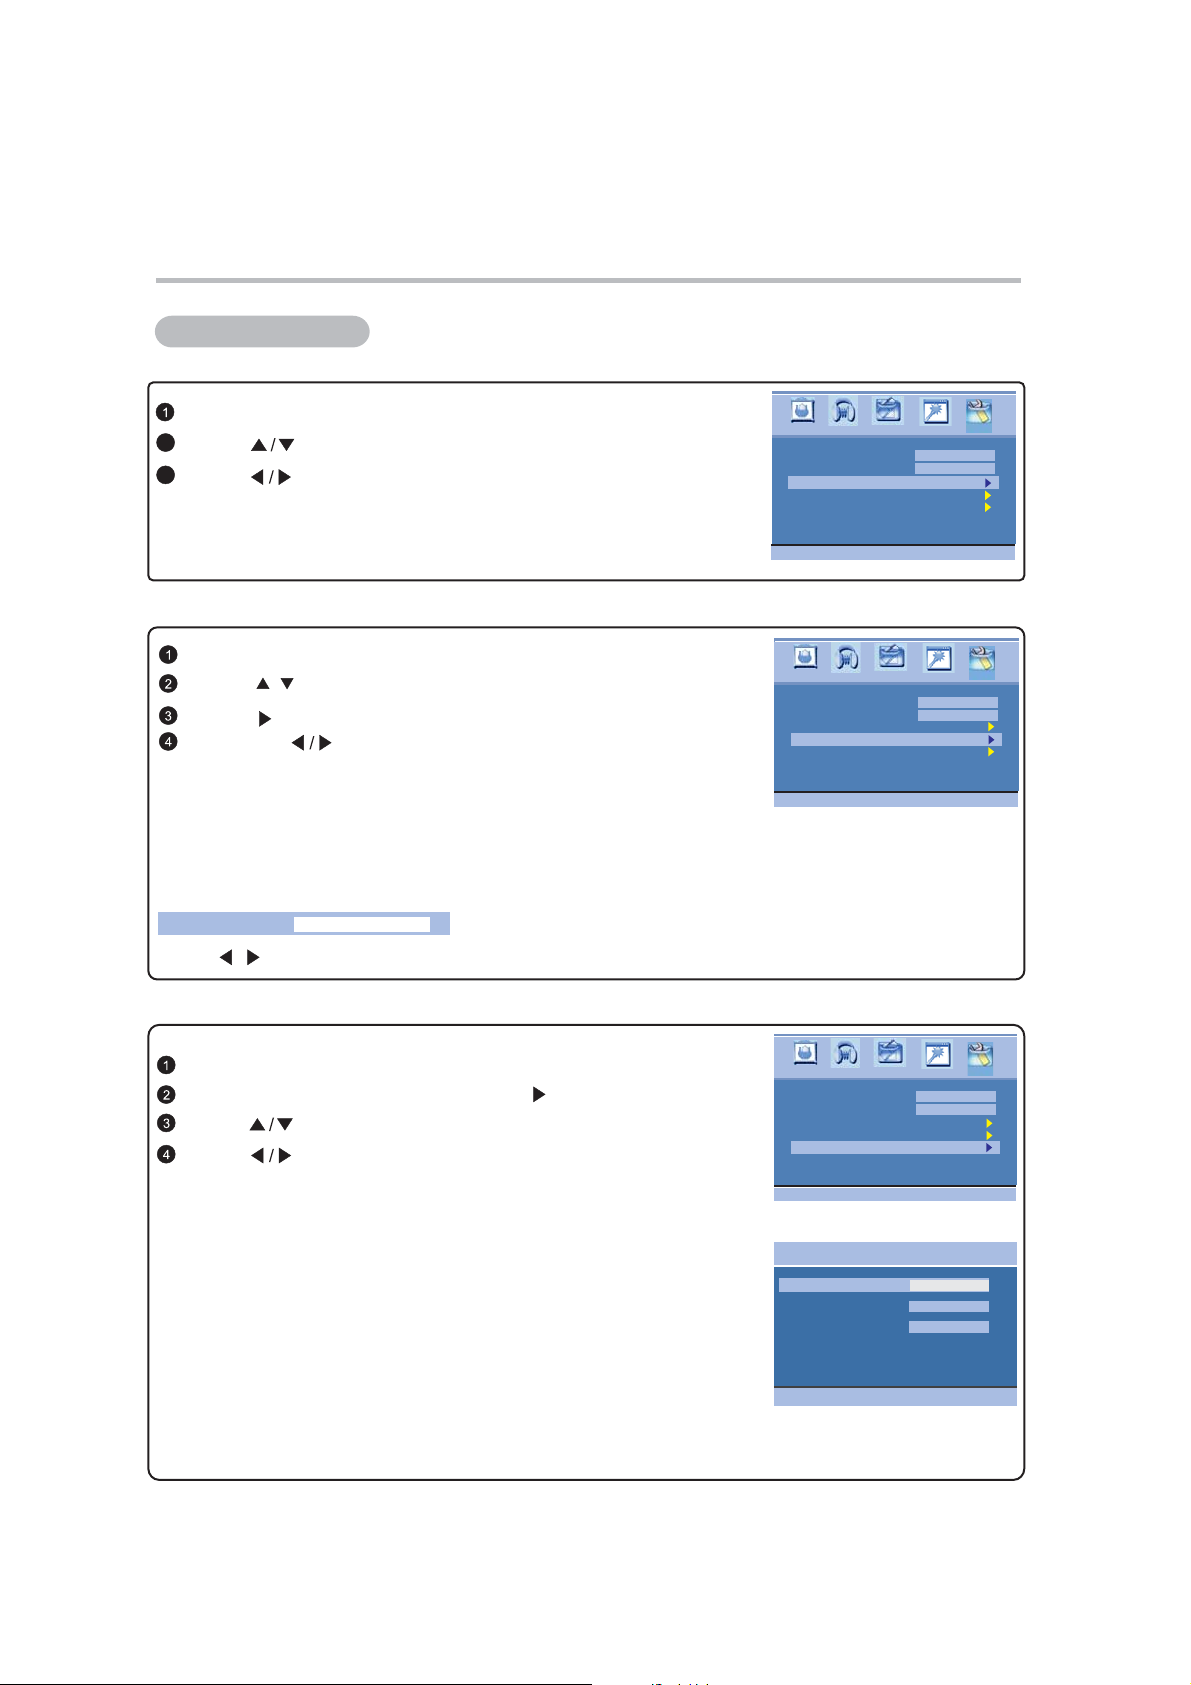
Window Menu
Aspect
You can adjust the aspect as your desired.
Press "MENU" button to select "Window" menu.
Press " " buttons to select '' ''.Aspect Ratio
Press " " buttons to change the setting.
You can also set the image mode via "Aspect"
Note:
button on the remote control, please refer to page 19.
VGA Window
Note: This function is only valid in PC mode.
Press "MENU" button to select "Window" mode.
Press " " buttons to s
Press" " button to enter.
Press " " buttons to select the sub items.
Press " " buttons to change the setting.
elect "VGA window".
Picture Sound
Aspect Ratio
VGA Window
Picture Sound
Aspect Ratio
VGA Window
Channel
Channel
Window
Full Screen
Window
Full Screen
Setting
Setting
H Position:
Press " " buttons to move the image left or right.
V Position:
Press " " buttons to move the image up or down.
Phase: To adjust the image phase.
Frequency: To adjust the horizontal frequency of the image.
Auto adjust:
To verify the H Position/V Position/Phase /Frequency automatically.
Setting Menu
OSD Language Setting
Press "MENU" button to select "Setting" menu.
Press " " buttons to select " ".OSD Language
Press " " buttons to change the setting.
Teletext Language
1
Press "MENU" button to select "Setting" menu.
2
Press " " buttons to select " ".Teletext Language
3
Press " " buttons to change the setting.
VGA Window
H Position
V Position
Phase
Frequency
Auto Adjust
Picture Sound
OSD Language
Teletext
Color
Temperature
Sleep Timer
Other
Setting
Picture Sound
OSD Language
Teletext
Color
Temperature
Sleep Timer
Other
Setting
Channel
Language
Channel
Language
Window
Setting
English
Western Europe
Window
Setting
English
Western Europe
-25-
Page 30
Menu
Setting Menu
Color Temperature
Press "MENU" button to select "Setting" menu.
2
Press " " buttons to select Color Temperature''.''
3
Press " " buttons to change the setting.
Sleep Timer
Press '' MENU'' button to select ''Setting’' menu.
Press '' '' buttons to select ''Sleep Timer ''.
/
Press '' '' button to enter the sub menu.
Press the '' '' buttons repeatedly to select the duration
from current to the time TV switching to standby automatically.
You can select 0/10/20/30/60/90/120/180/240 minutes.
For example: The current time is 8:25.You can set the timer
of 30 minutes. Then the TV will be switched to standby mode
in 8:55 automatically.
You can also set the sleeping time via "Sleep" button on remote control.
Sleep Timer
10 Minutes
Press '' / '' buttons or "SLEEP'' button to set the sleep time.
Picture Sound
OSD Language
Teletext
Color
Temperature
Sleep Timer
Other
Setting
Picture Sound
OSD Language
Tel et ex t
Color
Temperature
Sleep Timer
Other
Setting
Channel
Language
Channel
Language
Window
Setting
English
Western Europe
Window
Setting
English
Western Europe
Other Setting
Press "MENU" button to select "Setting" menu.
Select "Other Setting" item, then press" " button to enter.
Press " " buttons to select the sub item.
Press " " buttons to change the setting.
Two options of OSD Background:
Opaque / Translucent.
Nine options of OSD Position:
Upper Left / Upper Center / Upper Right / Middle Left /Center /
Middle Right / Lower Left / Lower Center / Lower Right.
Blue Screen
If you set the "Blue Screen" mode "On", a blue screen will be
displayed automatically when there is no TV signal. If you
switch the "Blue Screen" mode to "Off", the screen will display
noisy picture .
This function is only valid in TV mode.
-26-
Picture Sound
OSD Language
Teletext
Language
Color
Temperature
Sleep Timer
Other
Setting
Other Setting
OSD Background
OSD Position
Blue Screen
Channel
Window
Setting
English
Western Europe
Opaque
Center
Off
Page 31

Teletext
Teletext is an information system broadcast by certain channels which can be consulted like a
newspaper. It also offers access to subtitles for viewers with hearing problems or who are
not familiar with the transmission language (cable networks, satellite channels, etc.).
TXT/MIX
Press the TXT/Mix button to activate the Teletext mode. Press it again to view the TV program with
teletext page. You can return to normal viewing by pressing the TXT/MIX button for the third time.
SIZE
Repeatedly pressing the SIZE button doubles the character size in the following order:
Upper half of the page-> Lower half of the page-> Return to normal size.
REVEAL
Press the button once to reveal hidden information (solutions to puzzles, riddles, etc).
This button is applicable only to teletext page with puzzles, riddles, etc.)
SUBPAGE---Viewing of subpage.
Pressing the sub age button to enter the subpage mode. You can use subpage up/subpage down to
displayed subpage.
Press SUBPAGE button again to exit.
COLOUR BUTTONS
A red, green, yellow and cyan field are shown at the bottom of the screen.
HOLD
Press the button once to hold page and the second time to release holding of page.
Selecting a page by Numerical buttons directly
You can select a page by Numerical buttons directly in TXT/MIX mode.
PAGE DOWN/UP
OK
Use the direction buttons to page up/down.
Note:
The buttons for Teletext function are invalid when menu display. You can activate the teletext
function buttons by pressing the "TXT/MIX" button .
OK
-27-
Page 32

Troubleshooting And Maintenance
Troubleshooting
Please read this user's manual before using the TV set. If you have any troubles in using this
TV set, try to solve it by the suggestions mentioned below. If you can not remove the trouble
after adopting corresponding suggestions, please contact the service center or dealer
authorized by us. , please do not open the cover and repair it by yourself,
or it may cause further damage , electric shock or fire.
For your own safety
Q There is no sound but picture is normal ?:
Check and make sure the volume is not mute or turn down.
Q There is no picture or sound ?:
1.Ensure that the power cord is well connected and .the power switch is on
2.The contrast and the brightness are adjusted properly.
Q Picture is black and white or colorless ?:
Adjust the color setup and check whether the broadcast system selection is correct.
Q Picture is blurred or there is snowflake or noise ?:
1.Adjust direction and position of the right antenna.
2.The antenna is damaged or broken.
Q Sound and picture has disturbed ?:
Check whether the TV set is very near to other electrical appliance. If so, remove it away.
Q Picture is not stable and rolling in PC mode ?:
1.Check whether the display frequencies and bandwidth of PC or video source are compatible
formatwiththeTV.
2.Check the display setup of control panel in computer. If the setup is incorrect, change it by
computer programming tools.
Q Screen displays to check signal cords ?:
1.Check whether the signal cords are connected to PC or video source.
2.Check whether PC or video source is work.
Q Remote control is insensitive or does not work ?:
1.Check whether the batteries of the remote control are powerful and well conductive.
2.Direct the remote control to the IR sensor of the TV.
3.Check whether there are some obstacles between the remote control and IR sensor.
TEAC
Maintenance
Care for your TV
Careful and regular cleaning can extend the life of the TV.
Be sure to turn the power off and remove the plug before you begin any cleaning.
Screen Cleaning
1. Wet a soft cloth in a mixture of lukewarm water and a little fabric softener or dish washing detergent.
Wring the cloth until it is almost dry, and then use it to wipe the screen.
2. Make sure not to put excess water on the screen, let it air-dry before you turn on the TV.
Cabinet Cleaning
1. Use a soft cloth with a mild soap solution to wipe the cabinet
2. Let the cabinet air-dry before turning the TV on.
Extended Absence
If the TV is not in use for a long time (such as a vacation), please remove the plug to protect against
possible damage from lightning or power surges. If you use an antenna, you may also need to
disconnect it from the back of the TV before leaving.
-28-
Page 33

Display Mode
Both screen position and size will vary depending on the type of PC monitor and its resolution.
The table below shows all of the display modes that are supported:
VGA:
Resolution
640X480
640X480
640X480
640X480
800X600
800X600
800X600
1024X768
1024X768
1024X768
1152X864
1280X960
1280X1024
Horizontal Frequency
KHz()
37 7.
48 077.
31 5.
37 500.
37.9
46.9
35 1.
48.4
56 5.
60
67 500.
60 000.
63 981.
Vertical Frequency
Hz()
72 000.
72 188.
60 000.
75.000
60.000
75.000
56 000.
60 000.
70 000.
75 000.
75.000
60.000
60 020.
Sync Polarity
H/V()
1280X1024
79.976
75 024.
The interlace mode is not supported .
YPbPr/YCbCr:
480i 480P576i
HDMI:
480i 480P576i
576P 720P
576P 720P
1080i
1080P1080i
1080p
The set might operate abnormally if a non-standard video format is selected.
-29-
Page 34

Specifications
MODEL
Screen Size:
Native
Resolution:
Brightness:
Contrast Ratio:
Colour System:
Sound System:
Tuner:
Antenna:
Stereo:
VIDEO INPUT:
AV1 input
AV2 input
S-Video input
COMPONENT
Audio in
OTHERS:
VGA
HDMI
Audio in
TV SET OUT:
Audio/Video
Output
Speaker
Output
Power
Requirement
Power
Consumption
Dimensions
(mm)
Weight
Allowable temperature of operation environment 5 to 40
26-inch TFT LCD TV
1366 768 Pixels
500 cd/m2
800:1
PAL/NTSC
BG/I/DK/M
VHF/UHF:48.25~863.25MHz
75 VHF/UHF input
Ω
NICAM/A2
Video:1 Vp-p, negativesync,
Ω
75 input
Video:1 Vp-p, negativesync,
Ω
75 input
Y/C separate video signal
Y...1 Vp-p/negative sync/75 input
C...0.283 Vp-p/75 input(NTSC)
0.3 Vp-p/75 input(PAL)
RCA, 0.7 Vp-p/75 input
(480I/60Hz, 480P/60Hz,
576I/50Hz,576P/50Hz,
720P/50Hz,720P/60Hz,
1080I/50,1080I/60Hz)
RCA Stereo audio input
15 Pin ,Analog RGB signal,
0.7Vp-p, 75 input(VGA,
SVGA, XGA,WXGAcomputer
signal compatibility)
-VIDEO: 480i,480p,576i,576p,
-AUDIO: stereo PCM 32,44.1,
RCA Stereo audio input
monitor
10W+10W
AC 100 to 240V, 50/60Hz
130W
Unit dimension(Without stand):
512(H) ×699(W) ×98(D)mm
Unit dimension:
552(H) ×699(W) × 295(D)
Gross Weight: 17kg
Net Weight: 1
Ω
Ω
Ω
Ω
720p,1080i,1080p
48,96,192Hz
16,20 and 24 bit.
3.5kg
LCD3233ALCD2633A
32-inch TFT LCD TV
1366 768 Pixels 1366 768 Pixels
500 cd/m2
1200:1
PAL/NTSC
BG/I/DK/M
VHF/UHF:48.25~863.25MHz
75 VHF/UHF input
NICAM/A2
Video:1 Vp-p, negativesync,
Ω
75 input
Video:1 Vp-p, negativesync,
Ω
75 input
Y/C separate video signal
Ω
Y...1 Vp-p/negative sync/75 input
C...0.283 Vp-p/75 input(NTSC)
0.3 Vp-p/75 input(PAL)
RCA, 0.7 Vp-p/75 input
(480I/60Hz, 480P/60Hz,
576I/50Hz,576P/50Hz,
720P/50Hz,720P/60Hz,
1080I/50,1080I/60Hz)
RCA Stereo audio input
15 Pin ,Analog RGB signal,
0.7Vp-p, 75 input(VGA,
SVGA, XGA,WXGAcomputer
signal compatibility)
-VIDEO: 480i,480p,576i,576p,
-AUDIO: stereo PCM 32,44.1,
RCA Stereo audio input
monitor
10W+10W
AC 100 to 240V, 50/60Hz
150W
Unit dimension(Without stand):
586(H) ×825(W) ×102(D)mm
Unit dimension:
636(H) ×825(W) × 295(D)
Gross Weight: 23.5kg
Net Weight:
Ω
Ω
Ω
720p,1080i
48,96,192Hz
16,20 and 24 bit.
18.5kg
℃℃
Ω
Ω
Ω
,1080p
LCD3733A
37-inch TFT LCD TV
500 cd/m2
1000:1
PAL/NTSC
BG/I/DK/M
VHF/UHF:48.25~863.25MHz
75 VHF/UHF input
Ω
NICAM/A2
Video:1 Vp-p, negativesync,
Ω
75 input
Video:1 Vp-p, negativesync,
Ω
75 input
Y/C separate video signal
Y...1 Vp-p/negative sync/75 input
C...0.283 Vp-p/75 input(NTSC)
0.3 Vp-p/75 input(PAL)
RCA, 0.7 Vp-p/75 input
(480I/60Hz, 480P/60Hz,
576I/50Hz,576P/50Hz,
720P/50Hz,720P/60Hz,
1080I/50,1080I/60Hz)
RCA Stereo audio input
15 Pin ,Analog RGB signal,
0.7Vp-p, 75 input(VGA,
SVGA, XGA,WXGAcomputer
signal compatibility)
-VIDEO: 480i,480p,576i,576p,
-AUDIO: stereo PCM 32,44.1,
RCA Stereo audio input
monitor
10W+10W
AC 100 to 240V, 50/60Hz
180W
Unit Dimension(Without stand)
670(H) × 950(W) ×105(D)mm
Unit dimension:
730(H) ×950(W) × 340(D)
Gross Weight: 32kg
Net Weight:
Ω
Ω
720p,1080i
48,96,192Hz
16,20 and 24 bit.
25.5kg
Ω
Ω
Ω
,1080p
LCD4233A
42-inch TFT LCD TV
1920 1080 Pixels
550 cd/m2
1000:1
PAL/NTSC
BG/I/DK/M
VHF/UHF:48.25~863.25MHz
75 VHF/UHF input
Ω
NICAM/A2
Video:1 Vp-p, negativesync,
Ω
75 input
Video:1 Vp-p, negativesync,
Ω
75 input
Y/C separate video signal
Y...1 Vp-p/negative sync/75 input
C...0.283 Vp-p/75 input(NTSC)
0.3 Vp-p/75 input(PAL)
RCA, 0.7 Vp-p/75 input
(480I/60Hz, 480P/60Hz,
576I/50Hz,576P/50Hz,
720P/50Hz,720P/60Hz,
1080I/50,1080I/60Hz)
RCA Stereo audio input
15 Pin ,Analog RGB signal,
0.7Vp-p, 75 input(VGA,
SVGA, XGA,WXGAcomputer
signal compatibility)
-VIDEO: 480i,480p,576i,576p,
-AUDIO: stereo PCM 32,44.1,
RCA Stereo audio input
monitor
10W+10W
AC 100 to 240V, 50/60Hz
220W
Unit Dimension(Without stand)
:
768(H) ×1067(W) ×119(D)
Unit dimension:
823(H) ×1067(W) × 340(D)
Gross Weight: 36kg
Net Weight:
Ω
Ω
Ω
Ω
720p,1080i
48,96,192Hz
16,20 and 24 bit.
,1080p
29.5kg
Ω
:
Note: Specifications subject to change without pre-notice. Weight and dimensions are approximate.
-30-
Page 35

NATIONAL CUSTOMER SERVICE CENTRE (NCSC)
Free call: 1800 656 700
Between Monday to Friday EST 9AM to 5PM
TEAC CORPORATION
TEAC AUSTRALIA PTY.,LTD.
HEAD OFFICE
SERVICE DIVISION
MELBOURNE, VIC
SYDNEY, NSW
BRISBANE, QLD
PERTH, WA
ADELAIDE, SA
E-mail
Website
3-7-3, Nakacho, Musashino-shi, Tokyo 180-8550, Japan
A.B.N.: 11 113 998 048
30 Tullamarine Park Road, Tullamarine, VIC 3043
30 Tullamarine Park Road, Tullamarine, VIC 3043
Unit 8, 20-22 Foundry Rd., Seven Hills, NSW 2147.
335 Montague Road, West End, QLD 4101.
273 Great Eastern Highway, Belmont, WA 6104.
Cnr. Sir D. Bradman & Marion Roads, Cowandilla, SA 5033.
service@teac.com.au
http://www.teac.com.au
Phone: (0422) 52-5081
Phone : (03)8336 6500
Phone : (03)8336 6544
Phone : (02)8811 4000
Phone : (07)3010 0100
Phone : (08)9479 6522
Phone : (08)8234 1044
Page 36

This electrical and electronic equipment indicates that this product
shall not be treated as household wast. instead its shall be handed
over to applicable collection point for recycling of electrical and
electronic equipment. By ensuring this product is disposed of
correctly, you will help prevent potential negative consequences
for the environment and human health, which could otherwise be
cause by inappropriate waste handling.
6850 0002 3800
 Loading...