

Page 1
Z
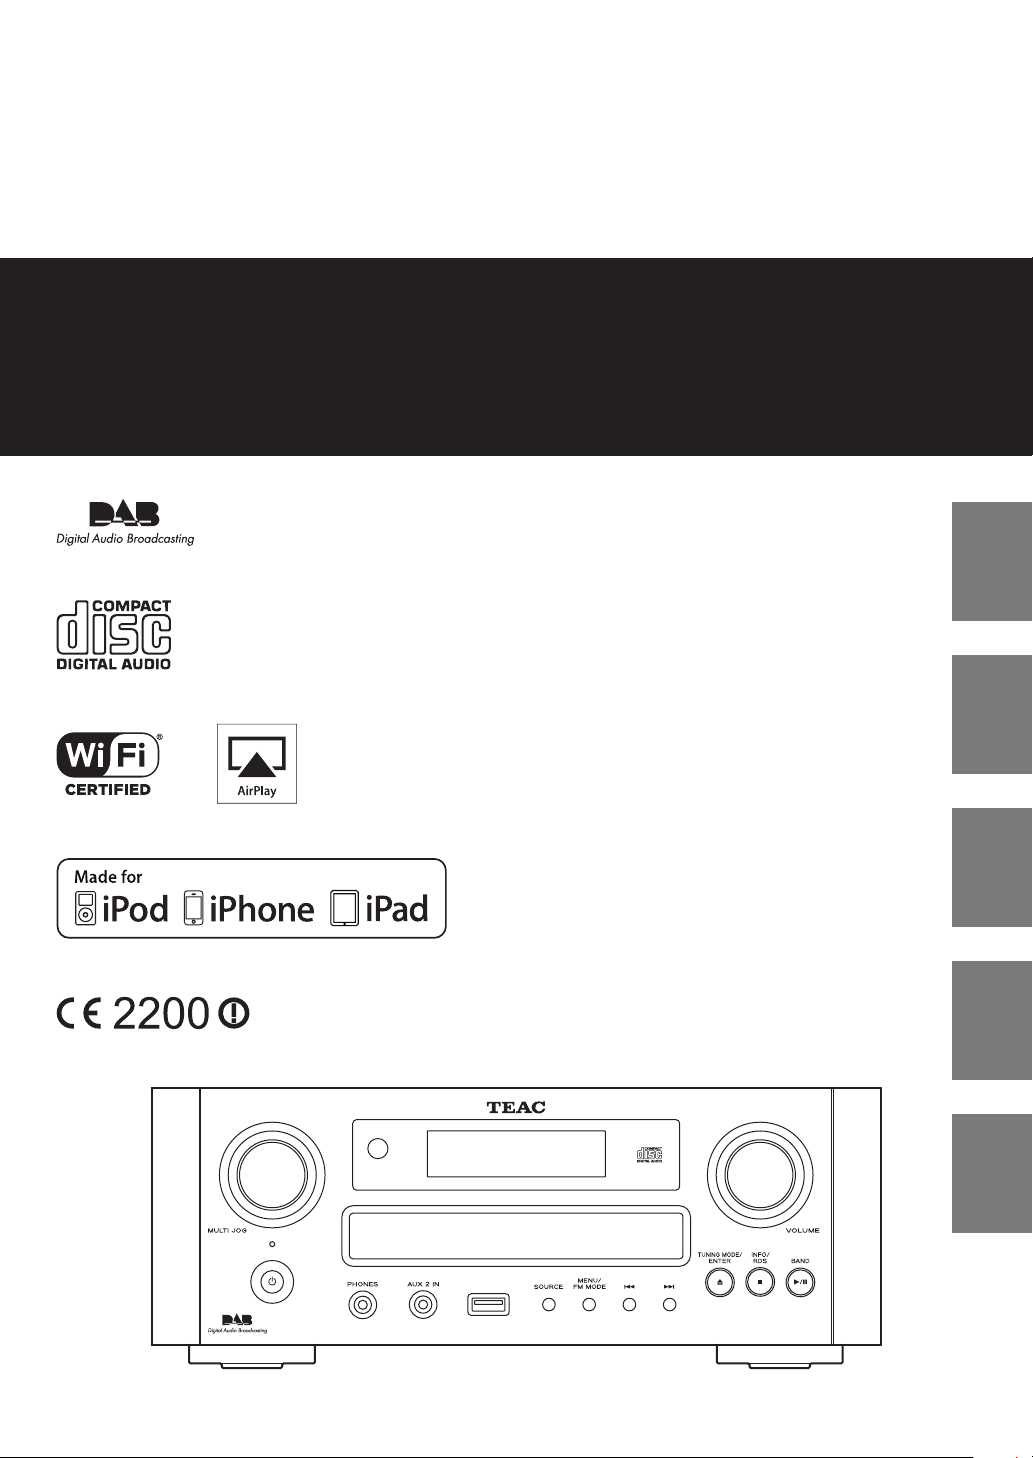
CR-H700DAB
CQX1A1635Y
DAB/AM/FM Stereo CD Receiver
OWNER’S MANUAL
MODE D’EMPLOI
MANUAL DEL USUARIO
BEDIENUNGSANLEITUNG
MANUALE DI ISTRUZIONI
ENGLISH FRANÇAIS ESPAÑOL
DEUTSCH ITALIANO
Page 2
CAUTION: TO REDUCE THE RISK OF ELECTRIC
SHOCK, DO NOT REMOVE COVER (OR BACK). NO
USER-SERVICEABLE PARTS INSIDE. REFER SERVICING
TO QUALIFIED SERVICE PERSONNEL.
The lightning flash with arrowhead
symbol, within an equilateral triangle, is
intended to alert the user to the presence
of uninsulated “dangerous voltage” within
the product’s enclosure that may be of
sufficient magnitude to constitute a risk of
electric shock to persons.
The exclamation point within an equilateral
triangle is intended to alert the user to
the presence of important operating and
maintenance (servicing) instructions in the
literature accompanying the appliance.
IMPORTANT SAFETY
10) Protect the power cord from being walked on
or pinched particularly at plugs, convenience
receptacles, and the point where they exit from the
apparatus.
11) Only use attachments/accessories specified by the
manufacturer.
12) Use only with the cart, stand,
tripod, bracket, or table specified
by the manufacturer, or sold with
the apparatus. When a cart is
used, use caution when moving
the cart/apparatus combination
to avoid injury from tip-over.
13) Unplug this apparatus during lightning storms or
when unused for long periods of time.
14) Refer all servicing to qualified service personnel.
Servicing is required when the apparatus has been
damaged in any way, such as power-supply cord or
plug is damaged, liquid has been spilled or objects
have fallen into the apparatus, the apparatus has
been exposed to rain or moisture, does not operate
normally, or has been dropped.
INSTRUCTIONS
1) Read these instructions.
2) Keep these instructions.
3) Heed all warnings.
4) Follow all instructions.
5) Do not use this apparatus near water.
6) Clean only with dry cloth.
7) Do not block any ventilation openings. Install in
accordance with the manufacturer’s instructions.
8) Do not install near any heat sources such as radiators,
heat registers, stoves, or other apparatus (including
amplifiers) that produce heat.
9) Do not defeat the safety purpose of the polarized
or grounding-type plug. A polarized plug has two
blades with one wider than the other. A grounding
type plug has two blades and a third grounding
prong. The wide blade or the third prong are
provided for your safety. If the provided plug does
not fit into your outlet, consult an electrician for
replacement of the obsolete outlet.
2
< Do not expose this apparatus to drips or splashes.
< Do not place any objects filled with liquids, such as
vases, on the apparatus.
< Do not install this apparatus in a confined space such
as a bookcase or similar unit.
< The apparatus draws nominal non-operating power
from the AC outlet with its POWER or STANDBY/ON
switch not in the ON position.
< The apparatus should be located close enough to the
AC outlet so that you can easily grasp the power cord
plug at any time.
< The mains plug is used as the disconnect device, the
disconnect device shall remain readily operable.
< Products with Class Ι construction are equipped with a
power supply cord that has a 3-prong grounding plug.
The cord of such a product must be plugged into an
AC outlet that has a protective grounding connection.
< If the product uses batteries (including a battery pack
or installed batteries), they should not be exposed to
sunshine, fire or excessive heat.
< CAUTION for products that use replaceable lithium
batteries: there is danger of explosion if a battery is
replaced with an incorrect type of battery. Replace
only with the same or equivalent type.
< Caution should be taken when using earphones or
headphones with the product because excessive
sound pressure (volume) from earphones or
headphones can cause hearing loss.
Page 3
WARNING: TO PREVENT FIRE OR
SHOCK HAZARD, DO NOT EXPOSE THIS
APPLIANCE TO RAIN OR MOISTURE.
CAUTION
< DO NOT REMOVE THE EXTERNAL CASES OR CABINETS
TO EXPOSE THE ELECTRONICS. NO USER SERVICEABLE
PARTS ARE WITHIN!
< IF YOU ARE EXPERIENCING PROBLEMS WITH THIS
PRODUCT, CONTACT TEAC FOR A SERVICE REFERRAL.
DO NOT USE THE PRODUCT UNTIL IT HAS BEEN
REPAIRED.
< USE OF CONTROLS OR ADJUSTMENTS OR
PERFORMANCE OF PROCEDURES OTHER THAN THOSE
SPECIFIED HEREIN MAY RESULT IN HAZARDOUS
RADIATION EXPOSURE.
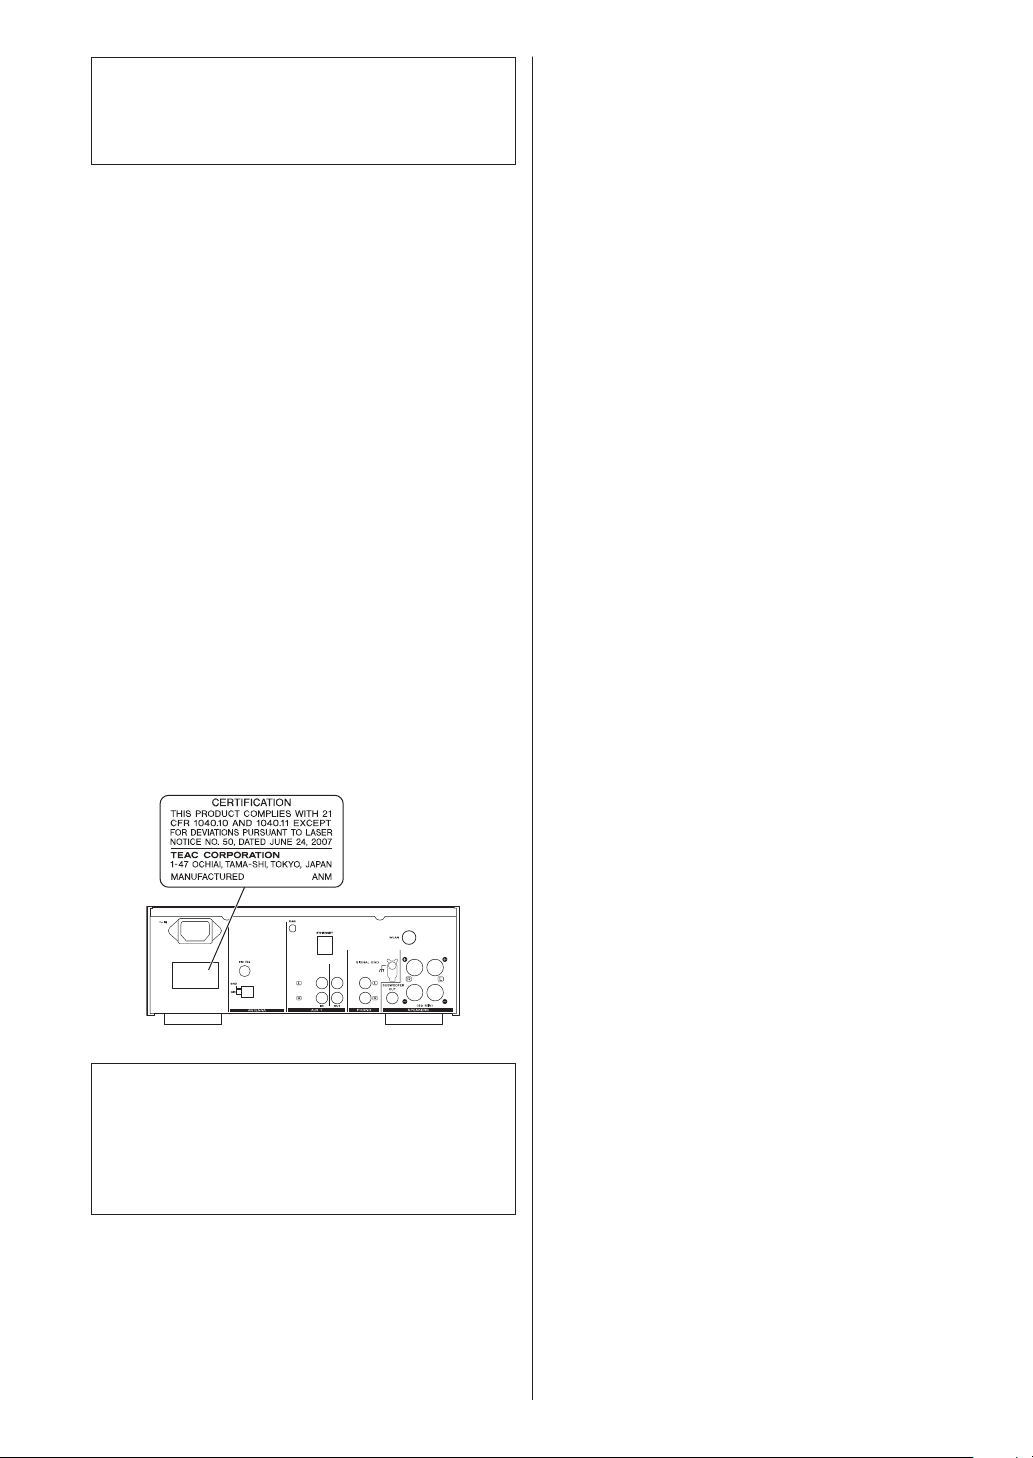
This product has been designed and manufactured
according to FDA regulations “title 21, CFR, chapter 1,
subchapter J, based on the Radiation Control for Health
and Safety Act of 1968“, and is classified as class 1 laser
product. There is not hazardous invisible laser radiation
during operation because invisible laser radiation emitted
inside of this product is completely confined in the
protective housings.
The label required in this regulation is shown as follows.
MPEG Layer-3 audio coding technology licensed from
Fraunhofer IIS and Thomson.
Supply of this product does not convey a license nor imply
any right to distribute MPEG Layer-3 compliant content
created with this product in revenue-generating broadcast
systems (terrestrial, satellite, cable and/or other distribution
channels), streaming applications (via Internet, intranets and/
or other networks), other content distribution systems (payaudio or audio-on-demand applications and the like) or
on physical media (compact discs, digital versatile discs,
semiconductor chips, hard drives, memory cards and the like).
An independent license for such use is required. For details,
please visit http://mp3licensing.com.
Wi-Fi is a registered mark of the Wi-Fi Alliance.
The Wi-Fi CERTIFIED Logo is a certification mark of the
Wi-Fi Alliance.
This product is protected by certain intellectual property
rights of Microsoft. Use or distribution of such technology
outside of this product is prohibited without a license from
Microsoft.
Windows, Windows Vista, Windows 7 and Windows Media
are either registered trademarks or trademarks of Microsoft
Corporation in the United States and/or other countries.
“Made for iPod,” “Made for iPhone,” and “Made for iPad” mean
that an electronic accessory has been designed to connect
specifically to iPod, iPhone, or iPad, respectively, and has
been certified by the developer to meet Apple performance
standards.
Apple is not responsible for the operation of this device or its
compliance with safety and regulatory standards.
Optical pickup :
Type : EP-C101
Manufacturer : Ever Bright Technology and
Science Electronical Co.,Ltd
Laser output : Less than 1mW on the objective lens
Wavelength : 790±25nm
Please note that the use of this accessory with iPod, iPhone, or
iPad may affect wireless performance.
Apple, AirPlay, the AirPlay logo, iPad, iPhone, iPod, iPod classic,
iPod nano, iPod shuffle, iPod touch and iTunes are trademarks
of Apple Inc., registered in the U.S. and other countries.
Other company names, product names and logos in this
document are the trademarks or registered trademarks of
their respective owners.
Copyrights or licenses regarding open sources are shown at
the end of this manual.
3
Page 4

Contents
Before Use
Thank you for choosing TEAC. Read this manual
carefully to get the best performance from this
unit.
Before Use .............................................4
Playable Discs/Files and iPod/iPhone/iPad Compatibility 5
Connecting Antennas (DAB) ............................7
Connecting Antennas (AM/FM) .........................8
Speaker Connections ...................................9
Connections ..........................................10
Part Names (main unit) ................................12
Part Names (remote control unit) ......................14
Remote Control Unit ..................................16
Basic Operation .......................................17
Disc Playback .........................................18
USB Playback. . . . . . . . . . . . . . . . . . . . . . . . . . . . . . . . . . . . . . . . . 20
General Playback (disc/USB) .......................... 20
Folder Search .........................................21
Programmed Playback ............................... 22
Shuffle Playback ......................................24
Repeat Playback ......................................24
Display ..............................................25
Listening to iPod ..................................... 25
DAB Basic Operations ................................ 28
Using DAB Menu ..................................... 29
Changing Display Settings for DAB ................... 34
Listening to FM/AM ...................................35
Preset Tuning ........................................ 36
RDS .................................................. 38
PTY Search ............................................39
Initial Network Setup ..................................41
Listening to Internet Radio ............................42
Radio Portal ...........................................45
Using AirPlay ..........................................45
Using Music Streaming ...............................46
Setting up Media Player ...............................47
Listening to Media Player ..............................51
Network Configuration ................................52
Setting the Clock. . . . . . . . . . . . . . . . . . . . . . . . . . . . . . . . . . . . . .53
Setting the Timer .................................... 54
Timer Operation ......................................55
Sleep Timer .......................................... 56
Listening to an External Source ....................... 56
Troubleshooting ......................................57
Specifications ........................................ 60
Features of CR-H700DAB
< USB port for iPod/iPhone/USB devices
< Internet Radio (page 42)
< Airplay (page 45)
< Music Streaming (page 46)
Music Streaming is a function for using audio/visual
devices, computers, or other information home
appliances together in a network.
< Media Player (page 51)
CR-H700DAB offers you “Multi-room and Multi-ControlSolution” by AirPlay, Music Streaming, and Media Player.
Read this before operations.
< When the unit is turned on, switching on the TV may
result in lines appearing on the TV screen, depending
on the condition of the electric waves of the TV
broadcast. This is not malfunction in the unit or the TV.
In this case, turn off the unit.
< As the unit may become warm during operation,
always leave sufficient space around the unit for
ventilation.
< The voltage supplied to the unit should match the
voltage as printed on the rear panel. If you are in any
doubt regarding this matter, consult an electrician.
< Choose the installation location of your unit carefully.
Avoid placing it in direct sunlight or close to a source
of heat. Also avoid locations subject to vibrations and
excessive dust, heat, cold or moisture.
< Do not place the unit on an amplifier/receiver.
< Do not open the cabinet as this might result in
damage to the circuitry or electrical shock. If a foreign
object should get into the set, contact your dealer or
service agency.
< When removing the power plug from the wall outlet,
always pull directly on the plug, never yank the cord.
< Do not attempt to clean the unit with chemical
solvents as this might damage the finish. Use a clean,
dry cloth.
< Keep this manual in a safe place for future reference.
< The operations are illustrated using the European
model for example in this manual.
DO NOT MOVE THE UNIT DURING PLAYBACK
During playback, the disc rotates at high speed. Do
NOT lift or move the unit during playback. Doing so
may damage the disc.
WHEN MOVING THIS UNIT
When changing places of installation or packing the
unit for moving, be sure to remove the disc and return
the disc table to its original position in the player.
Then, press the power switch to turn the power off,
and disconnect the power cord. Moving this unit with
the disc loaded may result in damage to this unit.
4
Page 5
Playable Discs/Files and iPod/iPhone/iPad Compatibility (1)
Playable Discs:
M Conventional audio CDs bearing the COMPACT DISC
DIGITAL AUDIO logo on the label.
M Properly finalized CD-R and CD-RW discs
M MP3/WMA CDs
Note:
< Depending on the quality of the disc and/or the
condition of the recording, some CD-R/CD-RW discs
may not be playable.
< Copy-protected discs and other discs which do
not conform to the CD standard may not play back
correctly in this player. If you use such discs in this
unit, TEAC Corporation and its subsidiaries cannot be
responsible for any consequences or guarantee the
quality of reproduction. If you experience problems
with such non-standard discs, you should contact the
producers of the disc.
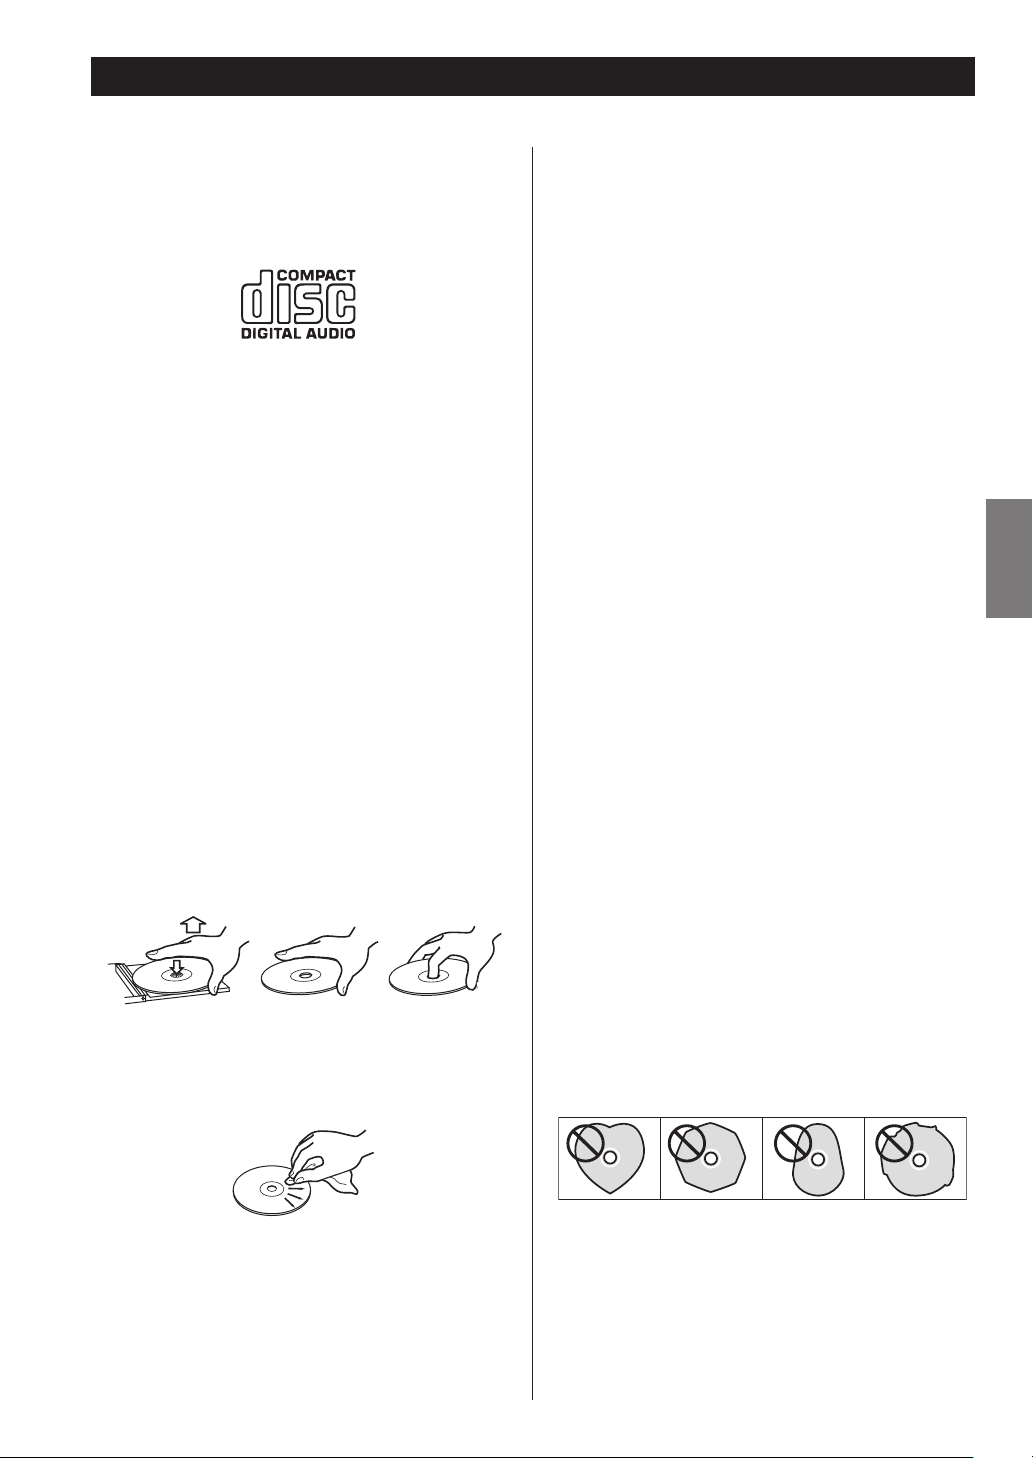
< Always place the disc on the disc tray with the label
side uppermost. (Compact discs can be played or
recorded only on one side.)
< To remove a disc from its storage case, press down on
the center of the case and lift the disc out, holding it
carefully by the edges.
< Discs should be returned to their cases after use to
avoid dust and scratches that could cause the laser
pickup to ”skip”.
< Do not expose discs to direct sunlight or high
humidity and temperature for extended periods. Long
exposure to high temperatures will warp the disc.
< Do not play any disc that is warped, deformed or
damaged. Playing such discs may cause irreparable
harm to the playing mechanisms.
< CD-R and CD-RW discs are more sensitive to the
effects of heat and ultraviolet rays than commercial
CDs. It is important that they are not stored in a
location where direct sunlight will fall on them, and
which is away from sources of heat such as radiators or
heat-generating electrical devices.
< While printable CD-R and CD-RW discs utilizing
modern printing technologies are generally
acceptable, older systems that use adhesives to
attach paper type labels to the disc surface are not
recommended.
< Do not stick papers or protective sheets on the discs
and do not use any protective coating spray.
< Use a soft oil-based felt-tipped pen to write the
information on the label side. Never use a ball-point
or hard-tipped pen, as this may cause damage to the
recorded side.
ENGLISH
< If the disc becomes dirty, wipe the surface radially
from the center hole outward towards the outer edge
with a soft and dry cloth.
< Never use such chemicals as record sprays, antistatic
sprays or fluid, or thinner to clean the discs. Such
chemicals will do irreparable damage to the disc’s
plastic surface.
< Never use a stabilizer. Using commercially available CD
stabilizers with this unit will damage the mechanisms
and cause them to malfunction.
< Do not use irregular shape CDs (octagonal, heart
shaped, business card size, etc.). CDs of this sort can
damage the unit.
< If you are in any doubt as to the care and handling of a
CD-R/CD-RW disc, read the precautions supplied with
the disc, or contact the disc manufacturer directly.
5
Page 6

Playable Discs/Files and iPod/iPhone/iPad Compatibility (2)
Playable Files:
< This unit can play various files recorded in various
external USB storage devices such as USB flash
memory, MP3 player or HDD.
USB storage devices must be formatted FAT 16 or FAT
32, but not NTFS.
< When more than 2000 files are recorded using the
USB memory, the unit might not be able to play them
correctly.
< File names should be alphanumeric characters. This
unit cannot display symbols and full-size or doublebyte characters (such as Japanese, Chinese, etc.)
correctly. Also, be sure to use the proper file extension.
< Audio encoded at 128 kbps should sound close to
regular audio CD quality. Although this player will play
lower bit-rate MP3 files, the sound quality becomes
noticeably worse at lower bit-rates.
The file formats that can be played back by each playback
source are as follows.
Media Player
Format CD USB
LPCM
WAV –
FLAC –
ALAC – –
MP3
OGG – –
WMA
AAC –
MP3
File extension: .mp3
Stream: MPEG-1/2 Layer III
Sampling Frequency: 8 to 48 kHz
Bit Rate: 8 to 320 kbps
LPCM (CD-DA)
Stream: LPCM
Sampling Frequency: 44.1 kHz
WAV
File extension: .wav
Stream: LPCM
Sampling Frequency: 8 to 48 kHz
ALAC
File extension: .m4a
Supported standard: Apple Lossless
Sampling Frequency: 44.1 kHz
– – –
WiFi
Ethernet
cable
FLAC
File extension: .flac
Stream: FLAC
Sampling Frequency: 8 to 48 kHz
Only 48kHz is supported with USB.
Ogg Vorbis
File extension: .ogg
Stream: Ogg
Sampling Frequency: 8 to 48 kHz
Bit Rate: 16 to 128 kbps
WMA
File extension: .asf/.wma
Stream: WMA2/7/8/9/10, WMA Pro, WMA Lossless
Sampling Frequency: 8 to 48 kHz
Bit Rate: 5 to 320 kbps
Note: WMA Pro and WMA Lossless formats are only
supported when the playback computer is using
Windows Media Player 12 or later. (Playback occurs
after transcoding.)
AAC
File e x te nsio n : .m 4 a/. aa c/.3gp/. 3 g 2
Stream: MPEG-4 AAC/MPEG-4 HE AAC (AAC Plus v1/2)
Sampling Frequency: 32 to 96 kHz
Bit Rate: 16 to 320 kbps
iPod/iPhone/iPad Compatibility
This unit can be connected to and used with the
following iPod models.
iPo d nano ( 2nd, 3rd, 4th, 5th, and 6th generation)
iPod touch (1st, 2nd, 3rd, and 4th generation)
iPhone 4, iPhone 3GS, iPhone 3G
iPad 2, iPad
< This unit cannot output video from a connected iPod/
iPhone/iPad.
< To connect an iPod/iPhone/iPad, use the USB cable
supplied with the iPod/iPhone/iPad.
Compatible iPod Software
In case your iPod will not work with the CR-H700DAB
or with the remote control unit, a software update
may solve the problem.
Visit the Apple website and download the latest iPod
software.
6
Page 7
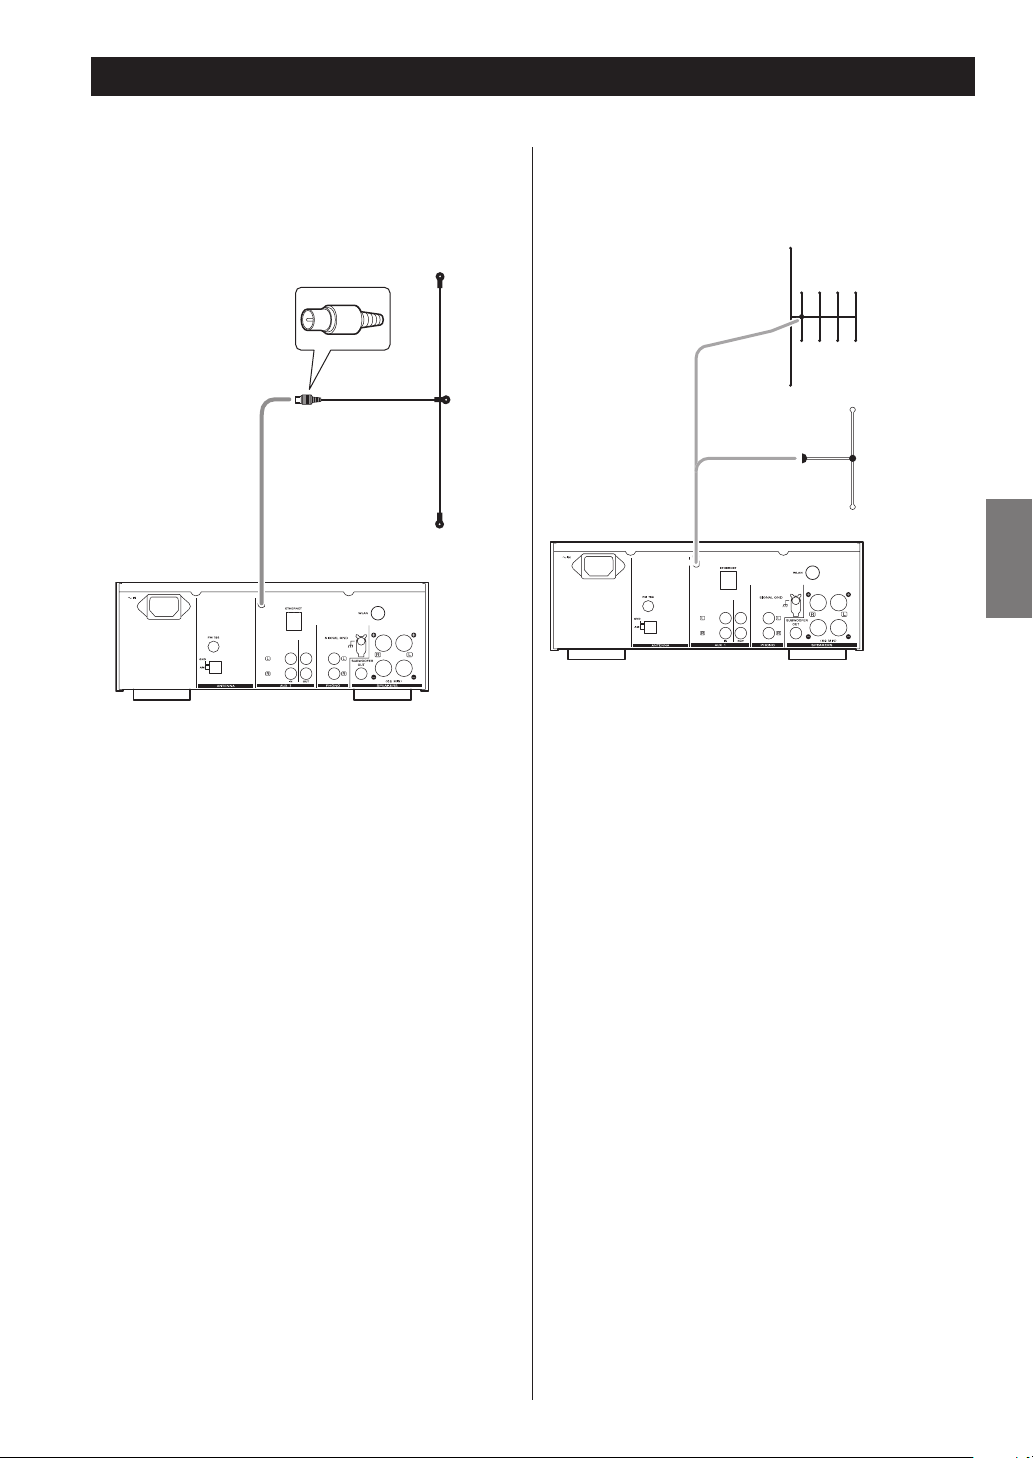
Connecting Antennas (DAB)
DAB Indoor Antenna
Connect the T-type DAB antenna to the DAB antenna
terminal. Extend the lead vertically and attach it to a
window frame or wall with thumbtacks or the like.
< You can adjust the antenna positioning for the best
reception by viewing the signal strength on the
display. See “Signal strength” in “Changing Display
Settings for DAB“ on page 34.
DAB Outdoor Antenna
In an area where DAB signals are weak, it will be
necessary to use an outdoor DAB antenna.
Multi-element
Dipole
ENGLISH
< It is possible to use a TV antenna or an FM antenna to
receive DAB signals. This may give a stronger signal
than a simple internal antenna.
You would need to change the plug on your TV/FM
antenna to an F type, and it may also be necessary to
use a signal booster to enhance the signal.
7
Page 8
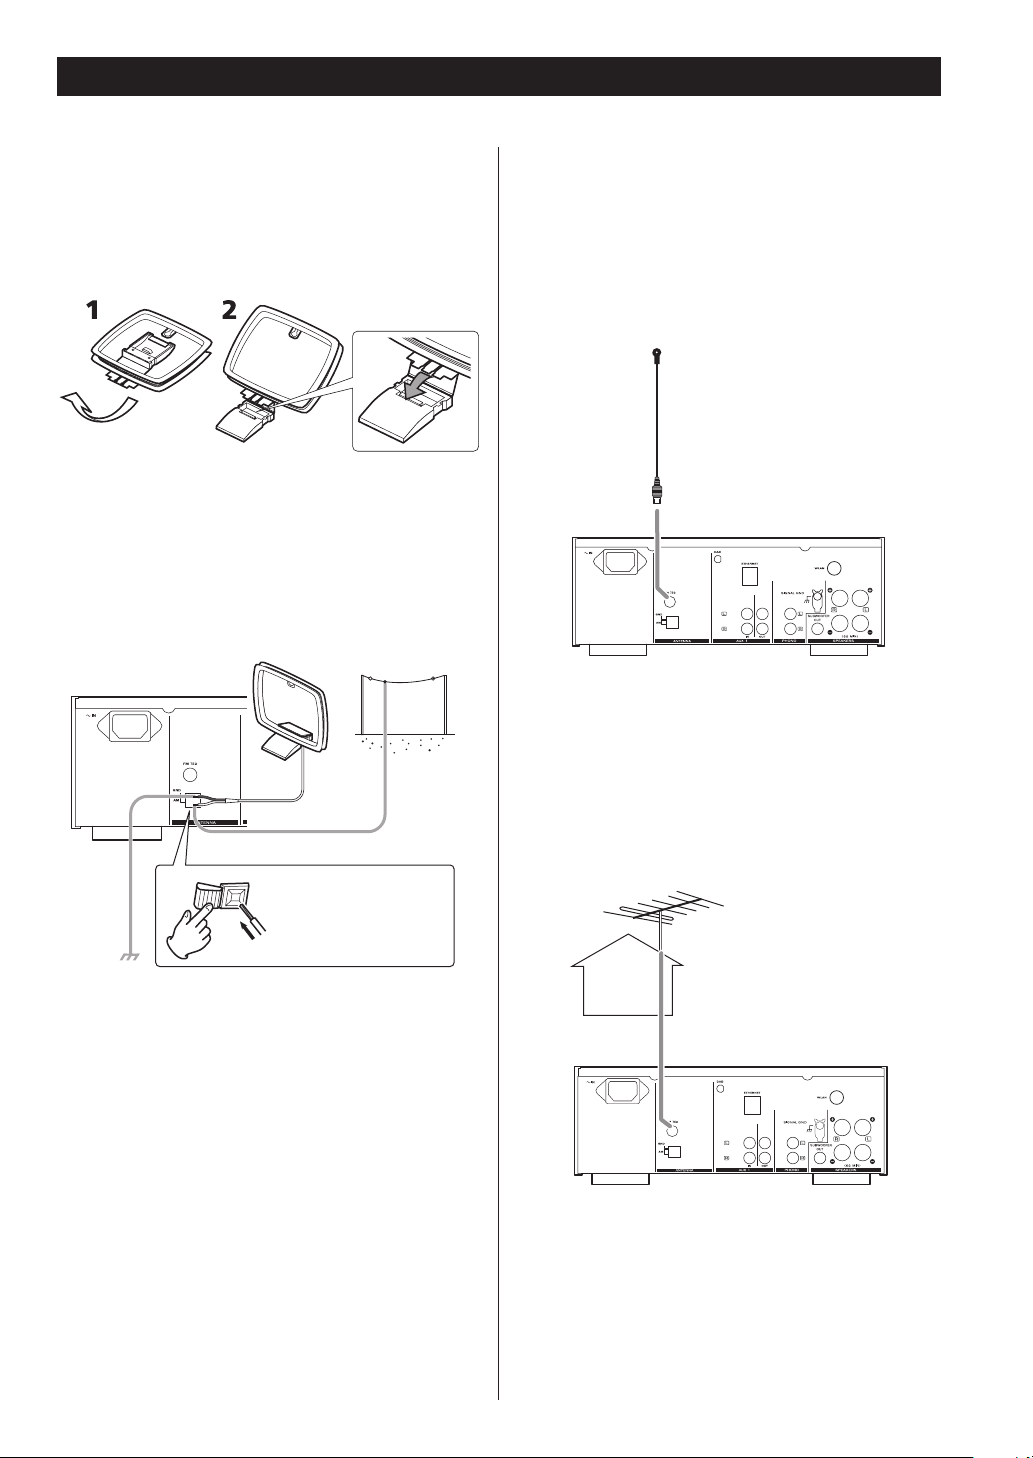
Connecting Antennas (AM/FM)
AM Indoor Loop Antenna
The high-performance AM loop antenna provided with
this unit is sufficient for good reception in most areas.
To stand the loop antenna on a surface, fix the claw to
the slot in the antenna base.
Connect the loop antenna’s wires to the AM antenna
terminals.
Place the antenna on a shelf or hang it on a window
frame, etc., in the direction which gives the best
reception. Keep all other wires such as power cords,
speaker wires or interconnect wires as far away as
possible from the antenna.
AM Outdoor
Antenna
FM Indoor Antenna
Connect the lead-type FM antenna to the FM 75Ω socket,
extend the lead and tune in your favourite station (see
page 35). Adjust the antenna in a suitable location like a
window frame or wall until the reception is best and then
affix the antenna in that position using thumb tacks, push
pins or any other suitable means.
FM Outdoor Antenna
In an area where FM signals are weak, it may be necessary
to use an FM outdoor antenna.
Generally, a 3-element antenna will be sufficient; if you
live in an area where the FM signals are particularly weak,
it may be necessary to use one with 5 or more elements.
Make sure to connect
the black wire to the
GND terminal.
< If the AM loop antenna provided does not deliver
sufficient reception (often due to being too far from
the transmitter or in a concrete building, etc.), it may
be necessary to use an AM outdoor antenna.
Use either a high quality commercially available AM
antenna or, if not available, an insulated wire more
than 5 m long. Strip one end, and connect this to the
terminal as shown.
The antenna wire should be fitted outdoors or indoors
near a window. For better reception, connect the GND
terminal to a reliable ground.
Note:
Even when using an AM outdoor antenna, do not
disconnect the AM loop antenna.
8
< Disconnect the FM indoor antenna when using an
outdoor antenna.
Page 9
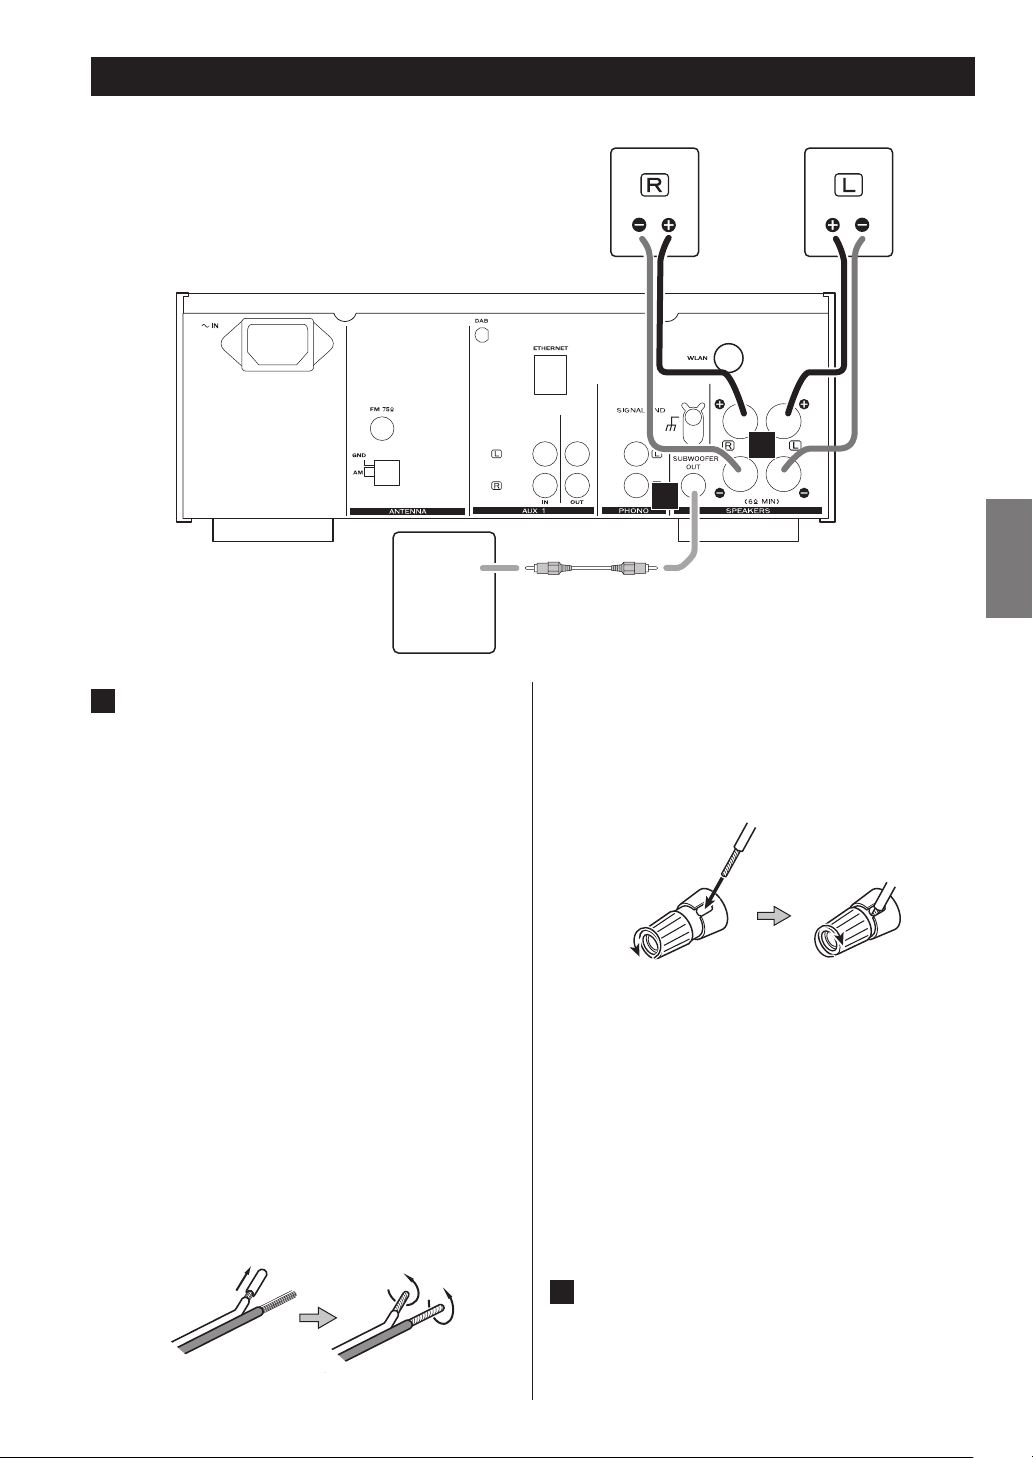
Speaker Connections
SPEAKER
A
LINE
SUBWOOFER
Speaker Connections
A
CR-H700DAB’s + (positive) terminals are red ( for the
right speaker) and white (for the left speaker.) The _
(negative) terminals are black.
The + side of the speaker cable is marked to make it
distinguishable from the negative side of the cable.
Connect this marked side to the red and white +
terminals and the unmarked side to the black _
terminals of CR-H700DAB and speakers.
CAUTION
< To avoid damaging the speakers with sudden high-
volume sound, be sure to switch the power off
before connecting the speakers.
< Check the impedance of your speakers. Connect
speakers with an impedance of 6 ohms or more.
< Prepare the speaker cables for connection by
stripping off approximately 10 mm (1/2 inch) or less
(no more as this could cause a short-circuit) of the
outer insulation. Twist the wires tightly together to
avoid tangles:
IN
B
ENGLISH
How to connect
1. Turn the terminal cap counter-clockwise to loosen it.
The speaker terminal caps cannot be fully removed
from the base.
2. Insert the wire into the terminal fully and turn the
terminal cap clockwise to securely connect it:
3. Make sure it is fastened firmly by pulling the cable
lightly.
For European customers
In accordance with European safety regulations, it
is not possible to connect banana plugs into the
speaker terminals on European models. The holes
into which banana plugs are inserted have been
covered with black caps. Connect the speakers
using spades or bare wires. If the black caps become
separated from the terminals, return them to their
original position.
B
SUBWOOFER OUT jack
Connect a commercially available powered
subwoofer.
9
Page 10
Connections
A
Cassette deck,
CD recorder, etc.
D
B
LINE
OUT
LRLR
LINE
IN
C
FE
Turntable
CAUTION
< Turn off the power of all the equipment before making connections.
< Read instructions of each component you intend to use with this unit.
< Be sure to insert each plug securely. To prevent hum and noise, do not bundle the connection cables with the power
cord or speaker cable.
10
Page 11
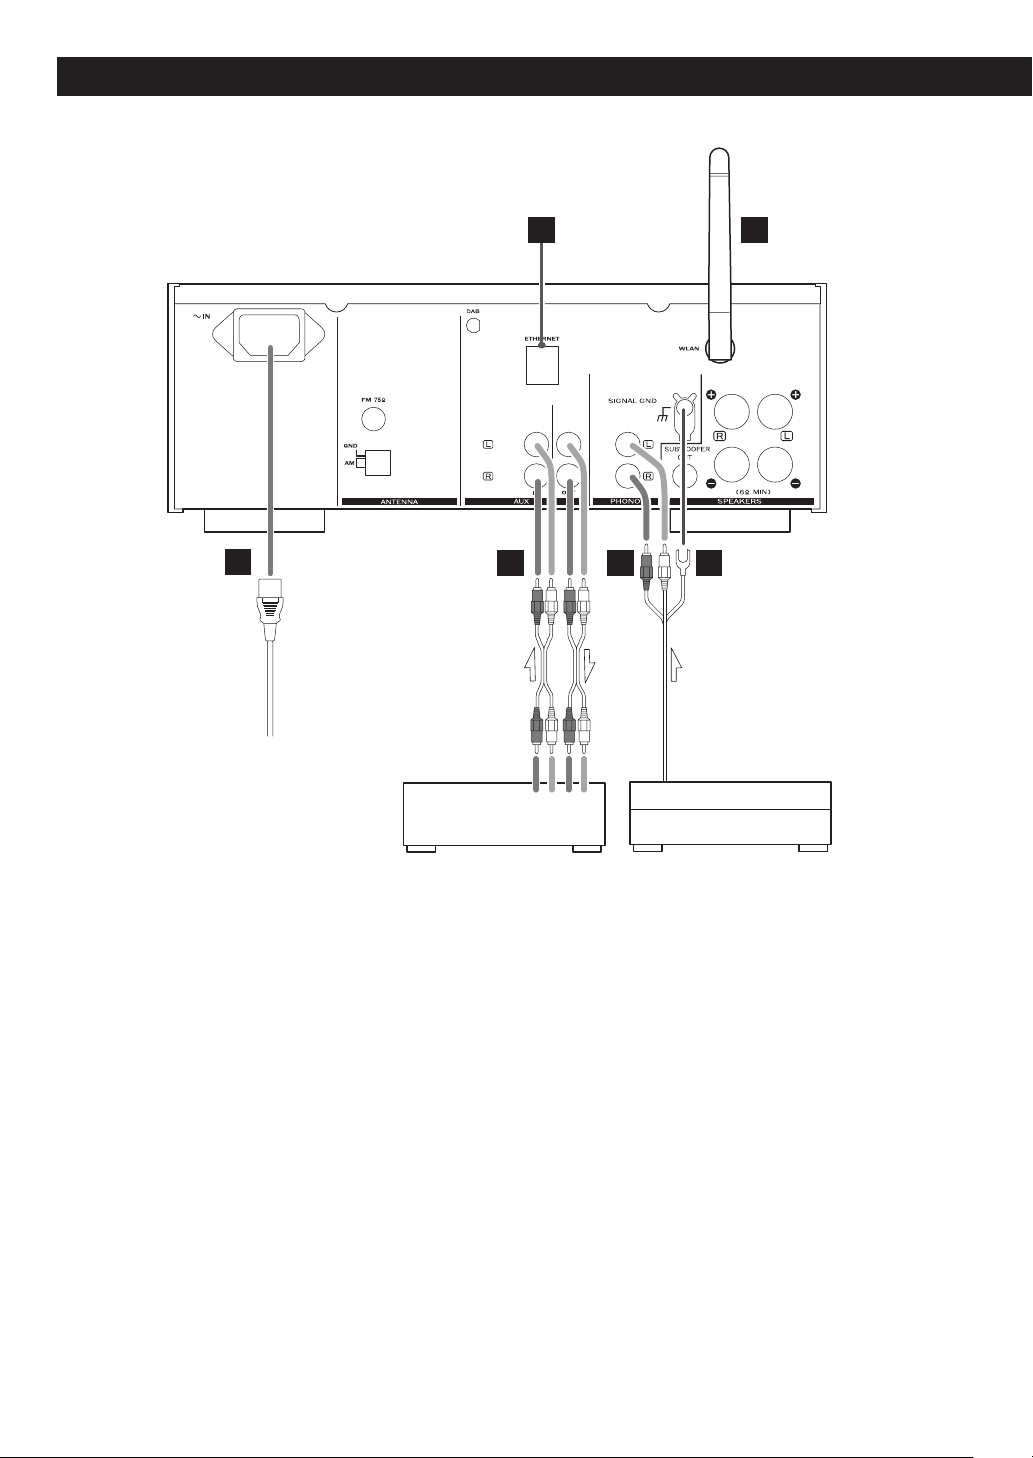
AC Power Cord
White (L)
White (L)
Red (R)
A
Plug this cord into an AC wall socket.
< Unplug the power cord when you are not going to
use the unit for long periods of time.
B
ETHERNET port
To use a wired Internet connection, connect the
ETHERNET port of this unit to the ethernet network
using a commercially available ethernet cable.
< If you connect or disconnect the ethernet cable
while the unit is turned on, turn the unit off and turn
it back on. See page 17 for how to turn the unit on or
off.
C
Wireless LAN antenna
If you can use a wireless LAN in your installation site,
the unit connects to the LAN using the wireless LAN
antenna. Stand the antenna up to use it.
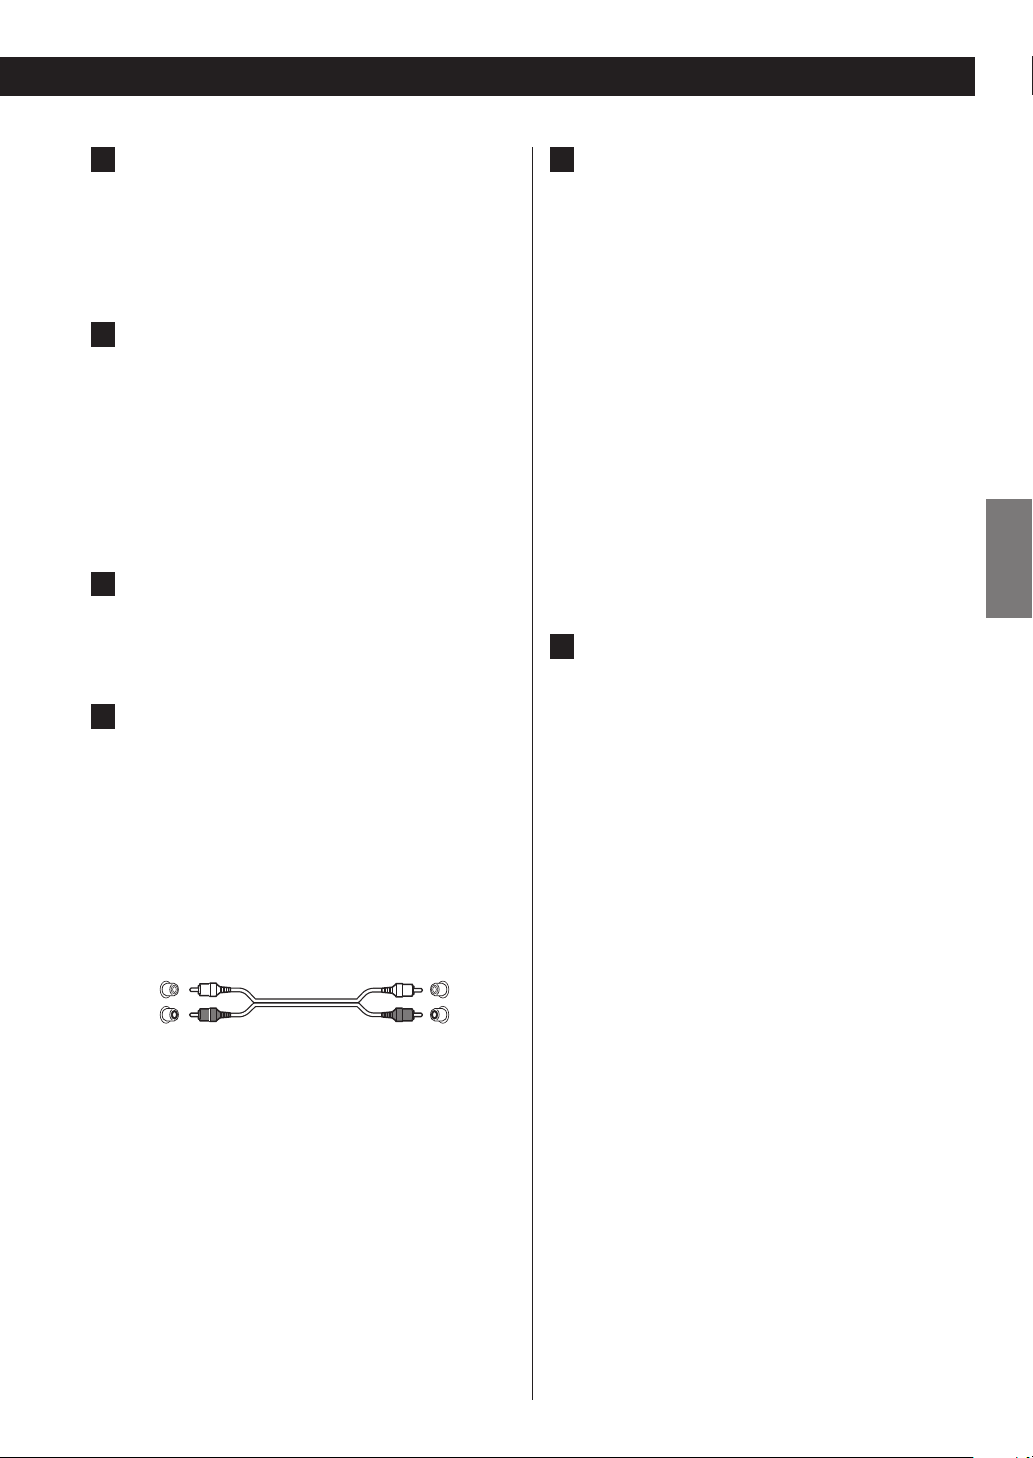
AUX 1 jacks
D
These jacks transmit an analog 2-channel audio
signal. Connect the components using commercially
available RCA pin cables.
Make sure to connect the cables as follows:
white plug w white jack
(L: left channel)
red plug w red jack
(R:right channel)
PHONO jacks
E
Connect the turntable’s RCA pin cable to the PHONO
jacks.
Make sure to connect the cables as follows:
white plug w white jack
(L: left channel)
red plug w red jack
(R:right channel)
< Be sure to insert each plug securely. To prevent
noise and humming, avoid bundling the signal
interconnection cables together with the AC power
cord or speaker cables.
< Moving Magnet (MM) cartridges can be used with
this unit.
F
SIGNAL GND
Connect the ground lead of the turntable to this
terminal.
< This is not a safety earth.
< If the turntable’s ground lead is not connected to
this terminal, hum noise may be heard.
ENGLISH
Red (R)
If you want to use a recorder (ex. a cassette deck or
a CD recorder, etc.) with the CR-H700DAB, connect
the output jacks of the recorder to the AUX 1 IN jacks
of the CR-H700DAB, connect the input jacks of the
recorder to the AUX 1 OUT jacks of the CR-H700DAB.
< Be sure to insert each plug securely. To prevent
noise and humming, avoid bundling the signal
interconnection cables together with the AC power
cord or speaker cables.
11
Page 12
Part Names (main unit)
A
B
E
C
D
F G H I J NMK L
12
Page 13
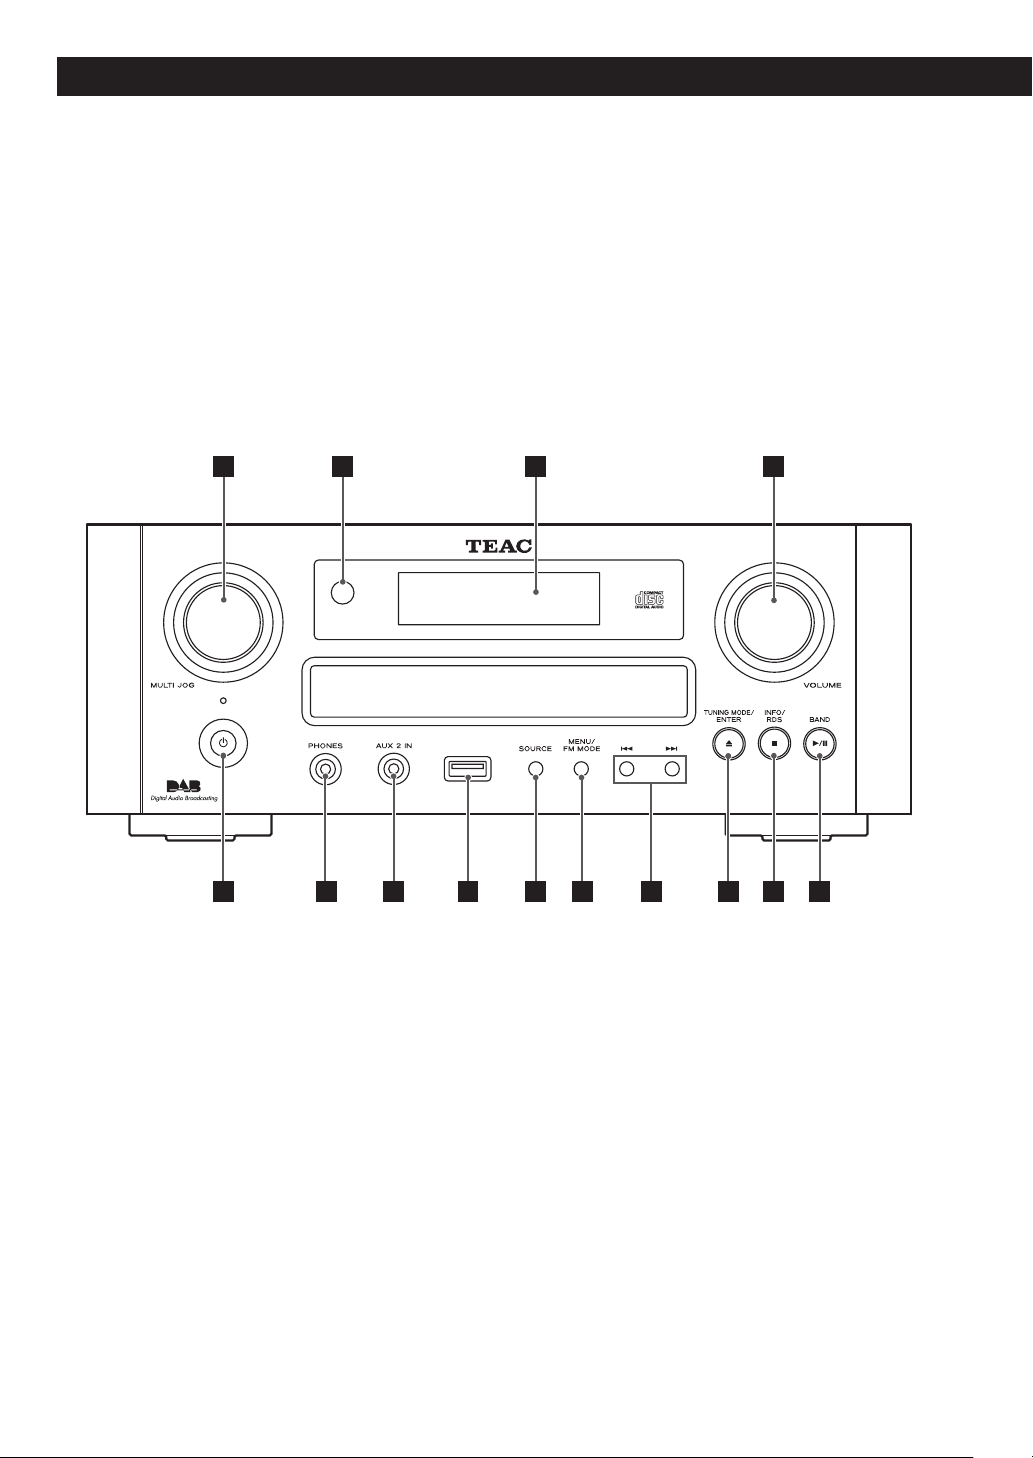
A
MULTI JOG
In TUNER mode, use this knob to tune in stations or
select the preset stations.
In iPod mode, use this knob to scroll up and down the
menu.
In CD/USB mode, use this knob for the following
purposes:
- to skip tracks/files during playback
- CD only: in the stop/pause mode, to select a track/
file to play (press the y/J button to start playback)
- USB only: to select a folder or a file to play (press the
y/J button or ENTER button to start playback)
After pressing the TIME SET button, use this knob to
specify the time to turn on/off the unit or to select the
source to play.
After pressing the TONE button, use this knob to
adjust the bass or treble.
B
Remote sensor
When operating the remote control unit, point it
towards the remote sensor.
C
Display
D
VOLUME
Turn this knob to adjust the volume.
< The volume level is memorized even if the unit turns
off.
E
Standby/On ( )
Press this button to turn the unit on or off. The
standby indicator turns orange when the unit is on
standby. When the unit is turned on, the indicator
turns from orange to blue.
< When the unit has not received a signal for over 1
hour, it turns off automatically (Auto power off
function).
F
PHONES
For private listening, insert the headphones plug
into this jack, and adjust the volume by turning the
VOLUME knob.
G
AUX 2 IN
Connect equipment such as a portable audio player
using a 3.5 mm stereo mini plug cable.
H
USB port
Connect an iPod or external USB storage device.
I
SOURCE
Use this button to select a listening source.
J
MENU/FM MODE
Use this button to go back to a previous menu of your
iPod. This button is equivalent to the MENU button on
your iPod.
While listening to the Internet Radio or Media Player,
use this button to switch between the Internet
Radio/Media Player mode and the setup menu of the
network.
In FM mode, use this button to select stereo or
monaural.
In DAB mode, use this button to open menus.
K
Skip (.//)
In CD/USB mode, use these buttons for the following
purposes:
- to skip tracks/files during playback
- in the stop/pause mode, to select a track/file to play
(press the y/J button to start playback)
- in the pause mode, to start playing back a file (USB
only)
- to move to the folder in the next/previous layer
when a folder is selected (USB only)
In iPod mode, use these buttons to skip songs during
playback or in pause mode of the iPod.
When performing settings, use the .button to
return to the previous menu.
L
TUNING MODE, ENTER, Open/Close (L)
In FM or AM mode, use this button to select the
tuning mode.
Use this button to set the time while setting the timer
or the clock.
While listening to the Internet Radio or Media Player,
use this button to select a station, directory, or file to
play.
In iPod mode, use this button to confirm selection in
menus.
In USB mode, use this button to select a directory or
file to play.
In CD mode, use this button to open and close the
disc tray.
M
INFO/RDS, Stop (H)
In FM mode, use this button to select an RDS mode.
In DAB mode or while listening to the Internet Radio
or Media Player, use this button to change the
information on the second line of the display.
In USB/CD mode, use this button to stop playback.
N
BAND, Play/Pause (y/J)
Use this button to select FM, AM or DAB.
In USB/iPod mode, use this button to start or pause
playback of the iPod or USB.
In CD mode, use this button to start or pause playback
of the CD.
ENGLISH
13
Page 14
Part Names (remote control unit)
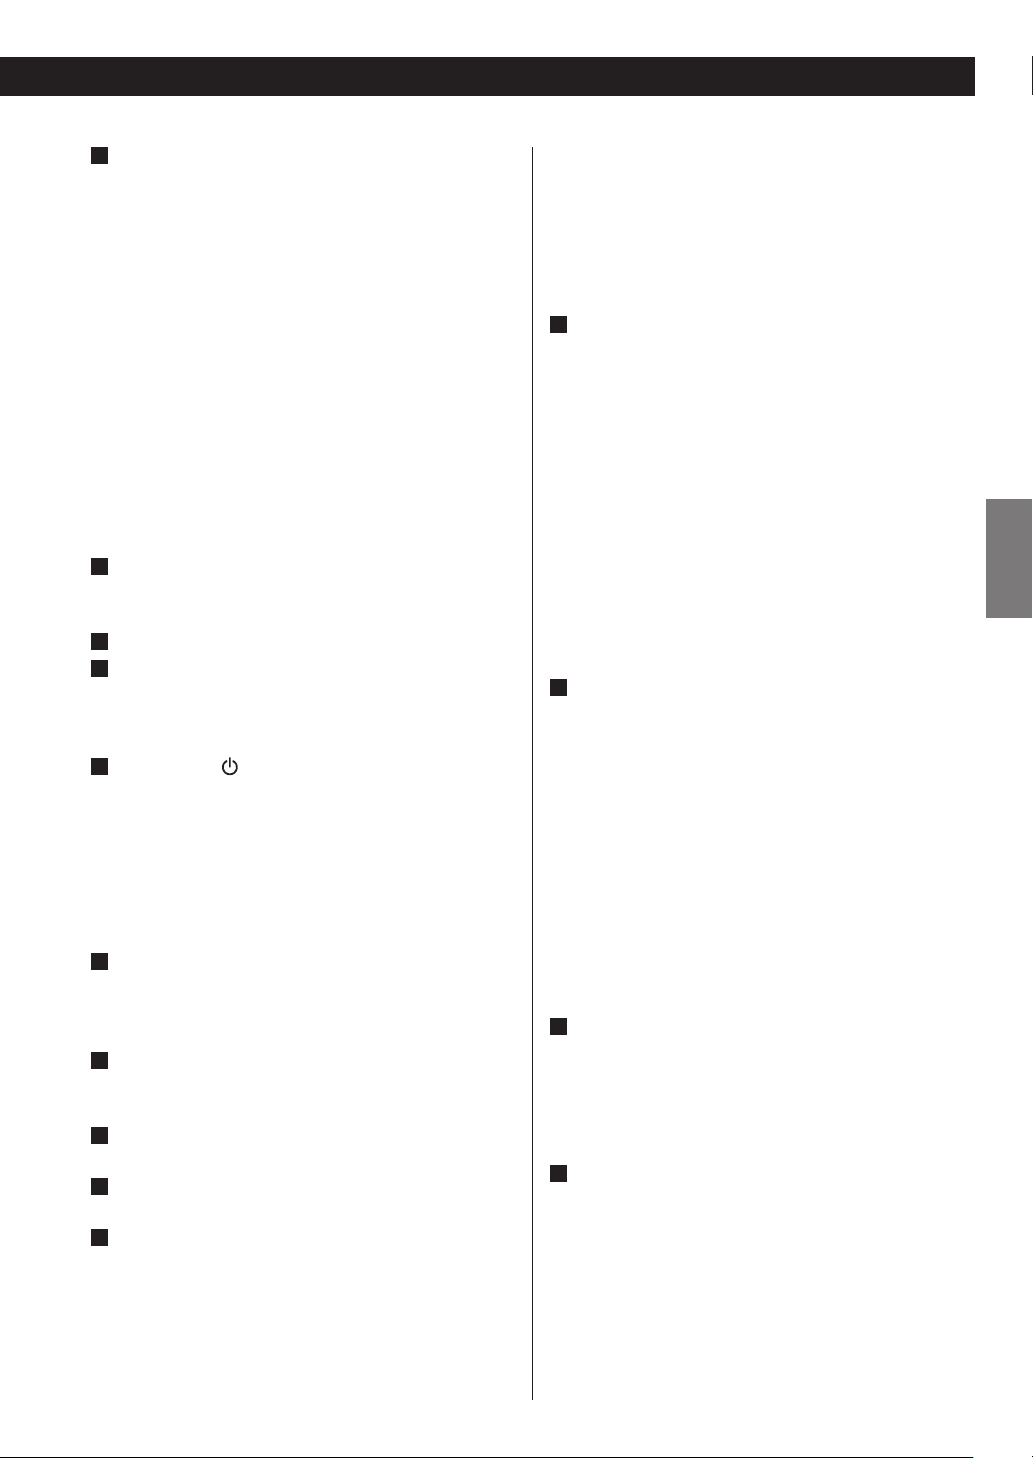
a
STANDBY/ON
a
p
b
q
c
r
d
e
s
f
g
h
i
j
k
l
t
u
v
m
w
n
o
Press this button to turn the unit on or standby.
When the unit is on standby, the Standby/On indicator
lights orange. When the unit is turned on, the
indicator turns from orange to blue.
b
TUNER, CD, iPod/USB, AUX 1/2, PHONO
Use these buttons to select a source.
c
TIME SET
Use this button to adjust the clock and to set a timer
(to specify the current time, the time to turn on/off the
unit, or to select the source to play).
d
TONE
Use this button to adjust the bass, treble, or sound
balance together with the scroll button. Use ˙ or ¥
to adjust the bass or treble and . or / to adjust
the sound balance.
e
TIMER
Use this button to select the timer function (“Timer
Daily”, “Timer Once”, or “Timer Off”).
f
FM MODE
In FM mode, use this button to select stereo or
monaural.
g
RE PEAT 1/ALL
In USB/iPod mode, use this button to set the repeat
playback of the iPod or USB.
In CD mode, use this button to set the repeat playback
of the CD.
h
SHUFFLE
In USB/iPod mode, use this button to start shuffle
playback of the iPod or USB.
In CD mode, use this button to start shuffle playback
of the CD.
i
Stop (H)
In USB mode, use this button to stop playback of the
USB.
In CD mode, use this button to stop playback of the
CD.
14
Page 15

j
PROGRAM
In CD mode, use this button to enter the programme
mode of the CD.
In programme mode, use this button to enter the
selection.
In TUNER mode, use this button to preset stations.
k
Play/Pause (y/J)
In USB/iPod mode, use this button to start or pause
playback of the iPod or USB.
In CD mode, use this button to start or pause playback
of the CD.
l
MUTING
Use this button to mute the sound.
m
MENU
Use this button to go back to previous menu of iPod.
This button is equivalent to the MENU button on your
iPod.
While listening to the Internet Radio or Media Player,
use this button to switch between the Internet
Radio/Media Player mode and the setup menu of the
network.
n
ENTER
Use this button to set the time while setting the timer
or the clock.
While listening to the Internet Radio or Media Player,
use this button to select a station, directory, or file to
play.
o
Skip (.//)
In CD/USB mode, use these buttons for the following
purposes:
- to skip tracks/files during playback
- in the stop/pause mode, to select a track/file to play
(press the y/J button to start playback)
- in the pause mode, to start playing back a file (USB
only)
- to move to the folder in the next/previous layer
when a folder is selected (USB only)
In iPod mode, use these buttons to skip songs during
playback or in pause mode of the iPod.
Use these buttons to adjust the bass or treble.
p
Eject (L)
Use this button to open/close the disc tray.
q
DIMMER
Use this button to dim the display.
r
SLEEP
Use this button to set sleep timer.
s
INFO/RDS
In FM mode, use this button to select an RDS mode.
In DAB mode or while listening to the Internet Radio
or Media Player, use this button to change the
information on the second line of the display.
t
DI SPLAY
Use this button to change what information is
displayed during CD/USB playback.
u
CLEAR
Use this button to clear tracks/files in programme
mode.
v
VOLUME
Use these buttons to adjust the volume level.
Scroll (˙/¥)
w
In USB/iPod mode, use these buttons to select a folder
or file of USB.
Or use these buttons to scroll the setup menu or the
menu of iPod.
After pressing the TONE button, these buttons are
used to adjust the bass or treble.
ENGLISH
15
Page 16
Remote Control Unit
The provided remote control unit allows the unit to be
operated from a distance.
When operating the remote control unit, point it towards
the remote sensor on the front panel of the unit.
< Even if the remote control unit is operated within the
effective range, remote control operation may be
impossible if there are any obstacles between the unit
and the remote control unit.
< If the remote control unit is operated near other
appliances which generate infrared rays, or if other
remote control devices using infrared rays are used
near the unit, it may operate incorrectly.
Conversely, the other appliances may operate
incorrectly.
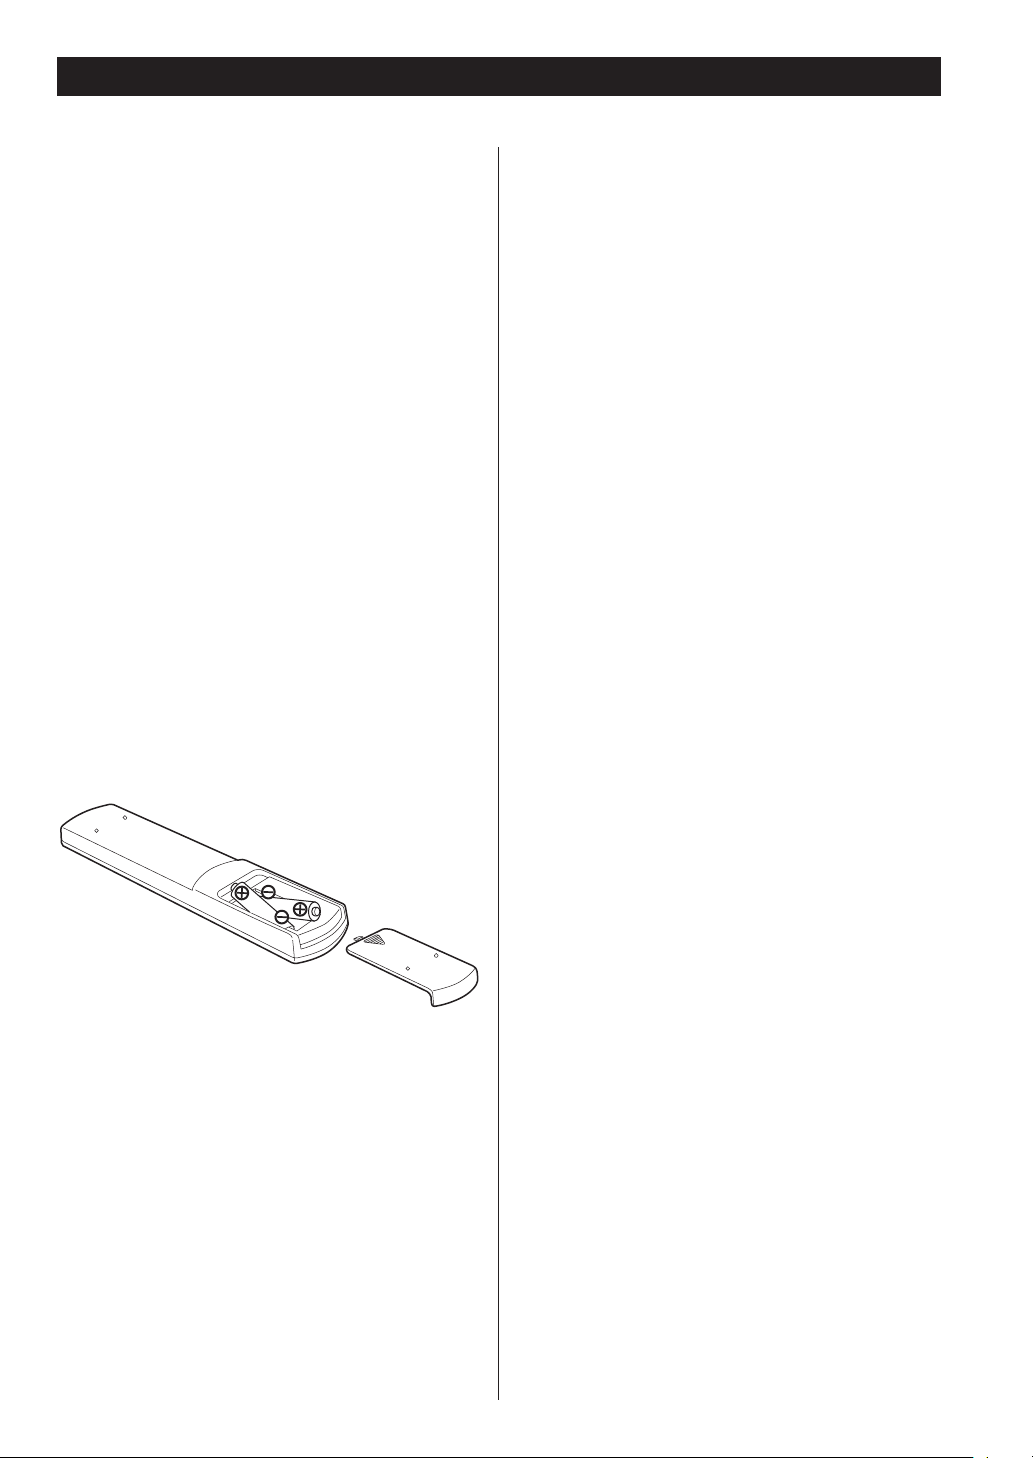
Battery Installation
1. Remove the battery compartment cover.
2. Insert two “AAA” dry batteries. Make sure that the
batteries are inserted with their positive “+ ” and
negative “_” poles positioned correctly.
3. Close the cover.
Precautions Concerning Batteries
< Be sure to insert the batteries with positive “+” and
negative “_” polarities positioned correctly.
< Use batteries of the same type. Never use different
types of batteries together.
< When the remote control unit is not to be used for a
long time (more than a month), remove the batteries
from the remote control unit to prevent them from
leaking.
< If the batteries leak, wipe away the liquid inside the
battery compartment and replace the batteries with
new ones.
< Do not use any other batteries not specified. Do not
mix new batteries with old ones or use different types
of batteries together.
< Do not heat or disassemble batteries and never throw
them in the fire or water.
< Do not carry or store batteries with other metallic
objects. The battery may short circuit, leak or explode.
< Never recharge a battery unless it is a verified
rechargeable type.
Battery Replacement
If the distance required between the remote control unit
and main unit decreases, the batteries are exhausted. In
this case replace the batteries with new ones.
< For more information about collection of batteries,
please contact your local municipality, your waste
disposal service or the point of sale where you
purchased the items.
16
Page 17
Basic Operation (1)
C
TUNER USB/iPod PHONO
CD AUX2 AUX1
Internet Radio
AMFM
Media Player
DAB
Or press the TUNER, iPod/USB, PHONO, AUX 1/2 or CD
button on the remote control unit to select the source
direc tly.
When TUNER is selected as the source, pressing the
TUNER button on the remote control unit, or the
BAND button on the unit repeatedly changes the
mode as follows:
A
A
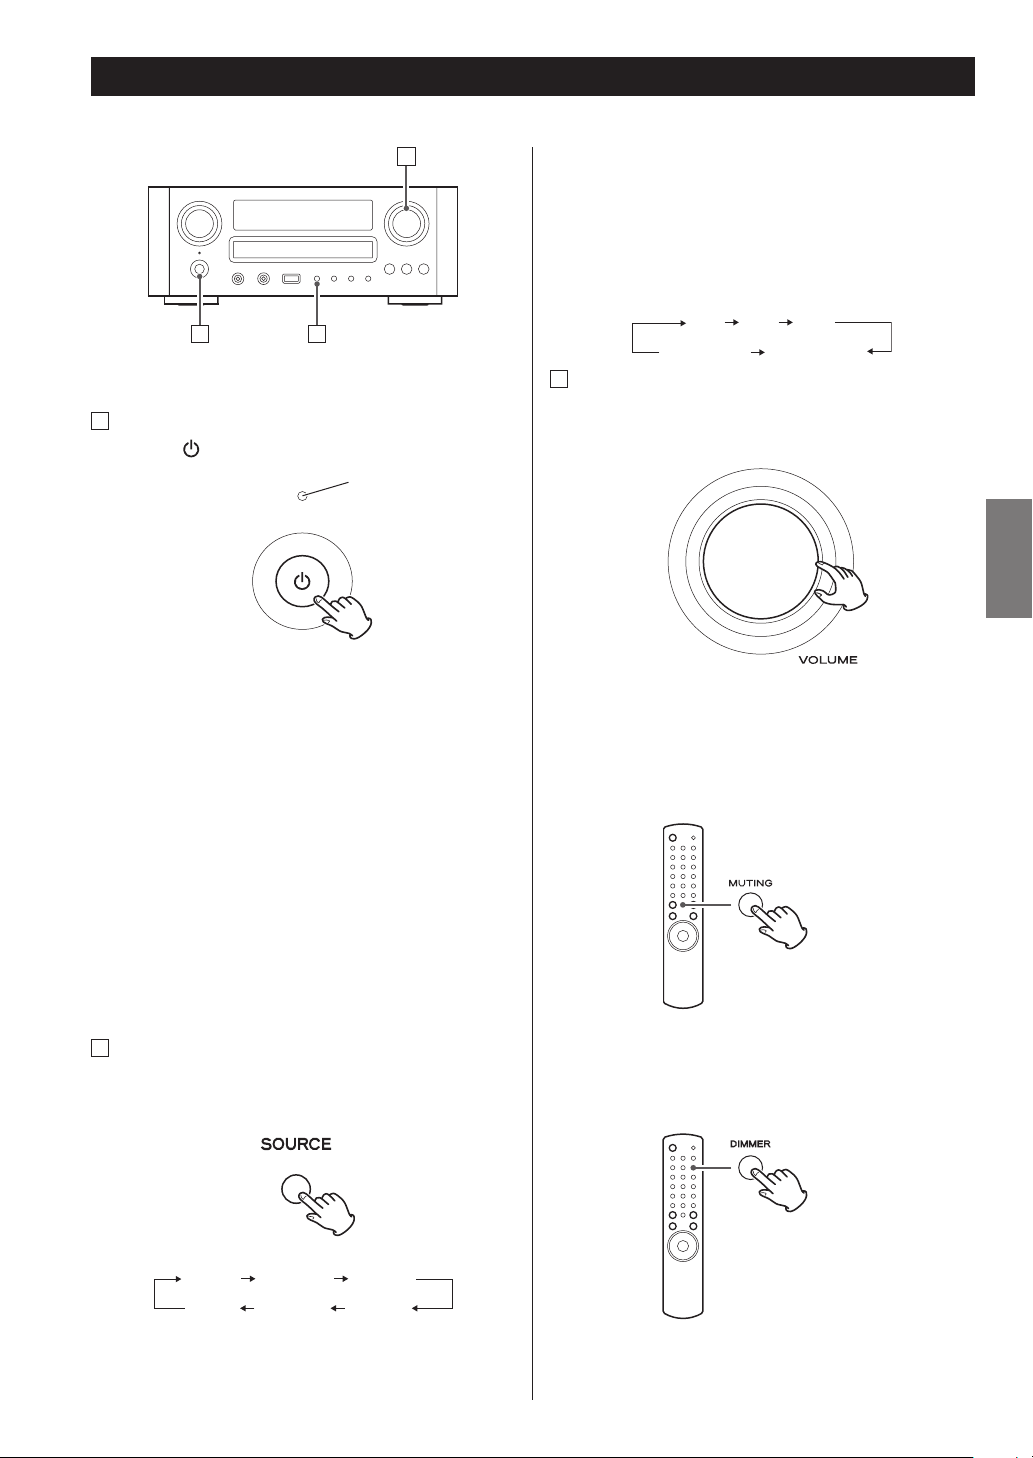
How to turn the unit on or off
Press the button to turn the unit on or off.
The Standby/On indicator turns blue when the unit is
turned on.
< If no operation is done for more than an hour, the unit
turns off automatically (Auto Power Off).
However, when “On” is selected for “Network standby
setting” (page 53), this function is not available. (The
default setting is “Off”.)
< When you turn on the unit, the selected source is the
same as the one selected the last time the unit was
turned off.
In CD/iPod mode, when you turn off the unit during
playback of a track/file, the track/file will be played
back automatically when you next turn on the unit.
B
Standby/On indicator
C
Adjust the volume
To protect the speakers from a sudden high-volume
sound, gradually turn up the volume to the required
level with the VOLUME knob.
Muting
To mute the sound temporarily, press the MUTING
button. To cancel muting, press the MUTING button
again or change the volume setting.
ENGLISH
B
How to select source
Every time the SOURCE button is pressed, the mode is
changed as follows:
Dimmer
Press the DIMMER button to dim the display.
Press the button again to cancel the dimmer function.
< This function will be cancelled when the unit is turned
off.
17
Page 18
4
Basic Operation (2)
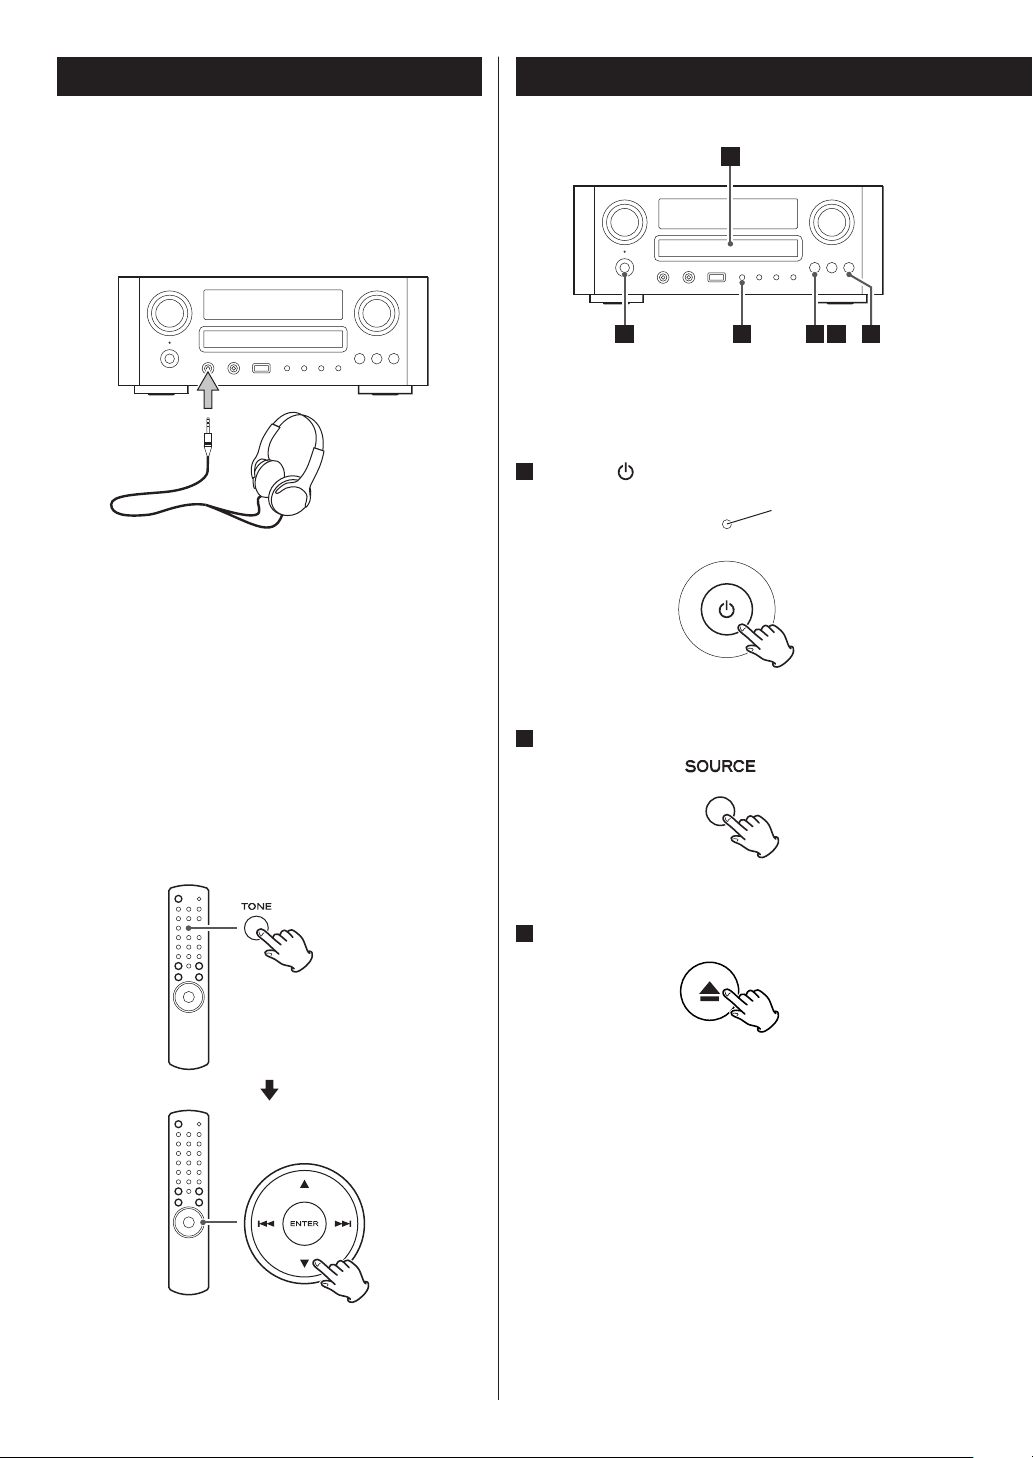
Listening through headphones
Insert the headphone plug into the PHONES jack,
and adjust the volume. The sound from speakers and
subwoofer will be cut off.
Disc Playback
How to adjust the bass/treble sound
and sound balance
You can change the bass and treble sound between
“-10” to “+10”. You can also change the sound balance
between the left/right speakers (The setting value is
between L (Left) +6 to R (Right) +6).
Press the TONE button repeatedly to select BASS,
TREBLE, or BALANCE CENTER. And then press the
scroll buttons (˙/¥) to adjust the bass or treble, or
press the skip/scan buttons (.//) to adjust the
balance within 3 seconds.
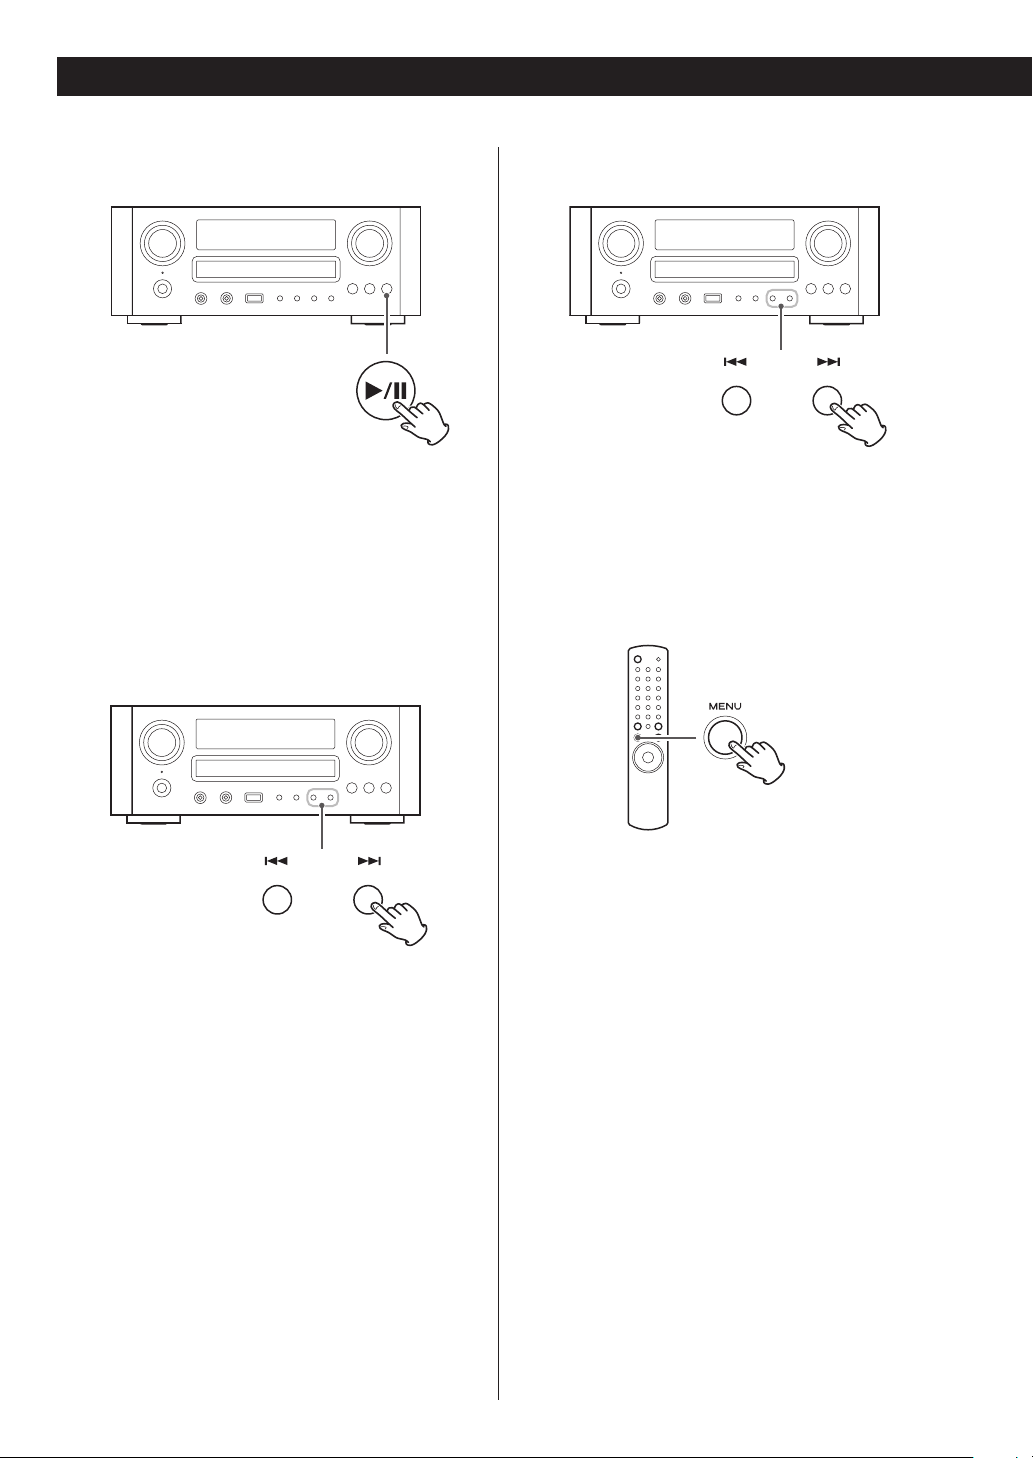
1
Playable disc/files of this unit are as follows:
Discs: CD-DA/CD-R/CD-RW
Files: MP3/WMA
1
Press the button to turn the unit on.
The Standby/On indicator turns from orange to blue.
2
Press SOURCE button to select “CD.”
“No Disc“ will be displayed if no disc has been inserted.
2
3 5
6
Standby/On indicator
You can use the MULTI JOG knob to adjust the bass or
treble.
18
3
Press the open/close button (L).
Page 19

4
Place a disc on the tray with the printed label
facing up.
Press the play/pause button (y/J ) to start
6
playback.
Disc playback starts from the first track/file.
Audio CD
< The disc must be loaded centrally into the disc tray. If
the disc is not correctly loaded, it may not be possible
to open the tray again once it has closed.
< Never place more than one disc on the tray.
< Do not stick labels or tapes on the disc.
< Do not use irregularly-shaped discs.
5
Press the open/close button (L) to close the
tray.
< Keep fingers clear of moving tray to avoid trapping
them.
< It takes a few seconds for the unit to load a disc. No
buttons will work during loading. Wait until the total
number of the tracks/files and the total play time of
the disc are displayed.
< “No Disc” will be displayed if no disc has been inserted.
CD/Play
T003 00:42
current track number elapsed time of the current track
MP3/WMA disc
CD/Play
T003 00:42 MP3
current file number
< MP3/WMA files recorded outside of folders are
automatically put in the “ROOT“ folder, and playback
starts from the first file of the ROOT folder.
< If there are folders that have no MP3/WMA file, this
unit skips them.
< During playback of MP3/WMA file, “title_artist_album“
is scrolled across the display.
< The unit stops automatically when playback of all the
tracks/files has finished.
ENGLISH
Audio CD
The total number of the tracks and total play time of
the disc are displayed.
CD/Stop
T016 72:00
MP3/WMA disc
The total number of files on the disc is displayed.
CD/Stop
Total File 010
< If you load a disc, and then press the play/pause
button (y/J) (or the SHUFFLE button of the remote
control unit) without having first closed the disc tray,
the disc tray closes and playback starts.
19
Page 20
1
3
AC B
D
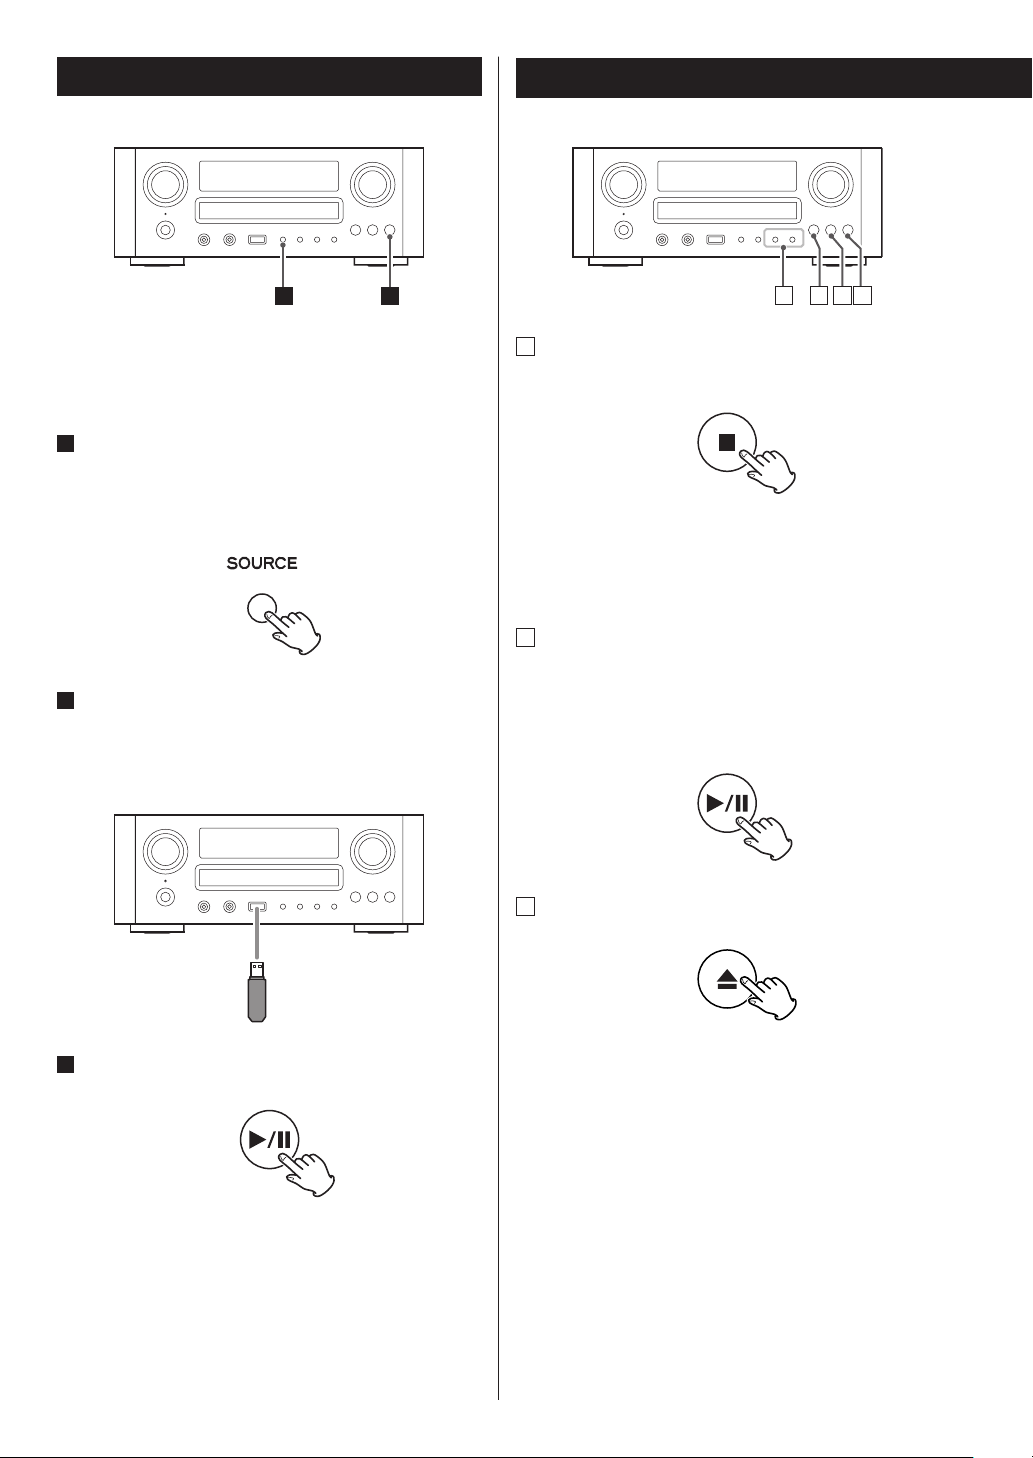
USB Playback
You can play MP3/WMA files by connecting various
external USB storage devices such as USB flash memory.
For details on playable files, see “Playable Files” on page 6.
1
Press the SOURCE button repeatedly to select
“USB/iPod”.
“Not Connected” will be displayed if no USB device is
connected.
2
Connect the external USB storage device to the
unit.
When an HDD device is connected to this unit, it may
take several minutes to display the number of files.
General Playback (disc/USB)
A
To stop playback
Press the stop button (H) to stop playback.
To start playback again, press the play/pause button
(y/J).
Playback starts from the first track/file.
B
To suspend playback temporarily (pause mode)
Press the play/pause button (y/J) during playback.
Playback stops at the current position.
To resume playback, press the play/pause button
(y/J).
3
Press the play/pause button (y/J).
20
C
To eject the disc
When the open/close button (L) is pressed, playback
stops and the tray will open.
After the disc is ejected, close the tray by pressing the
open/close button (L).
< When CD is selected as the source, you can eject the
disc.
Page 21
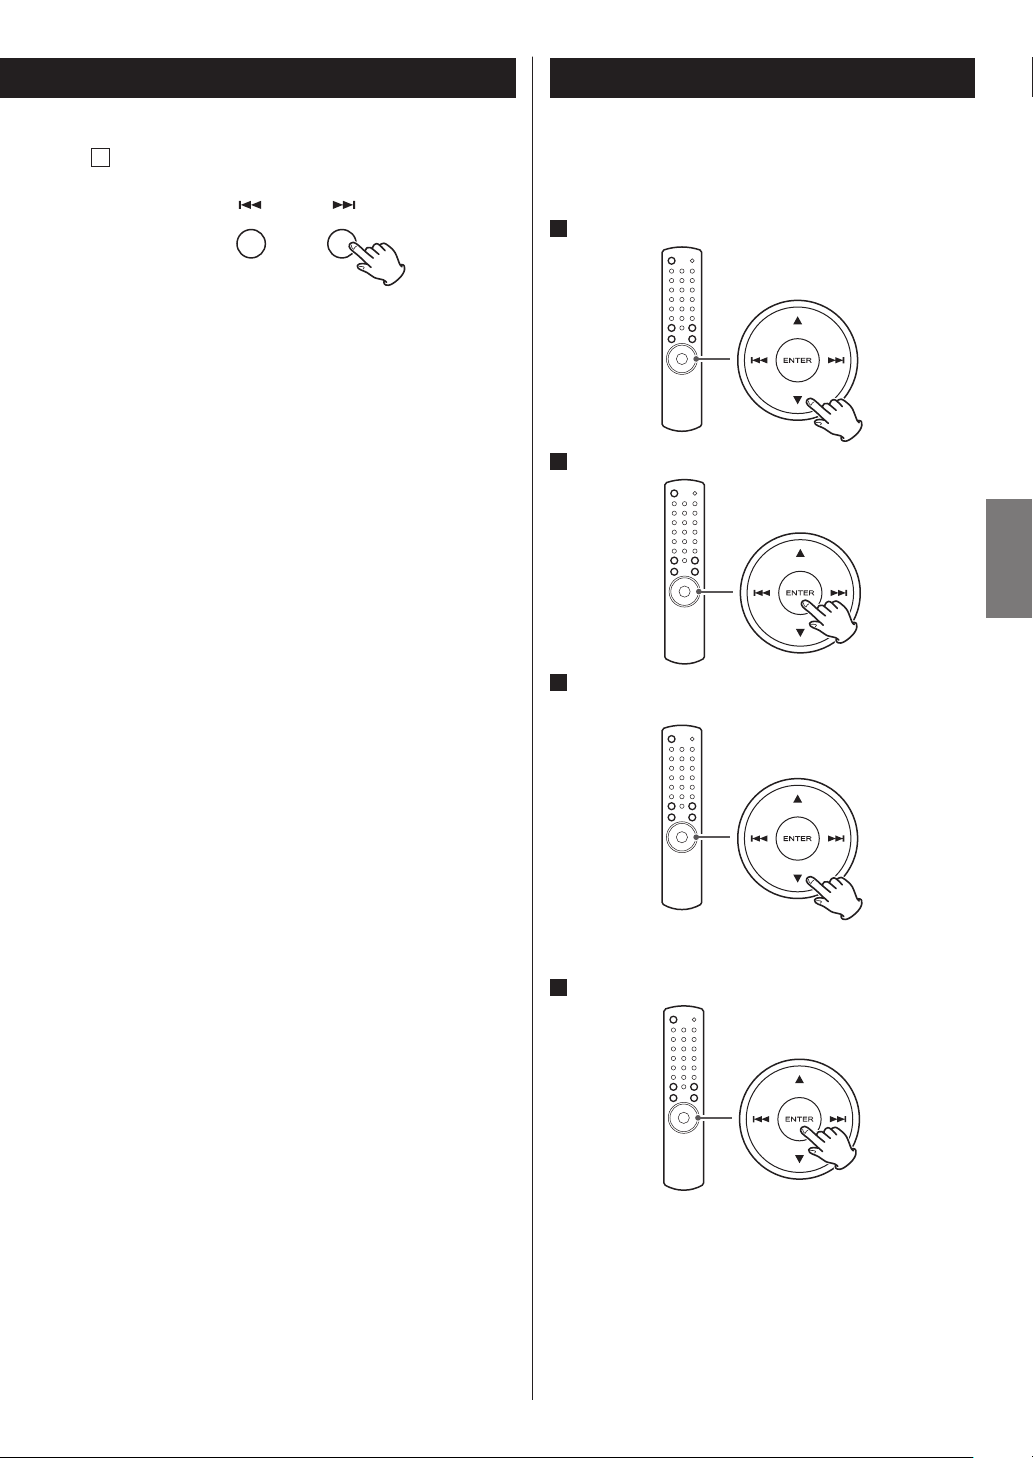
Folder Search
D
To skip to the next or a previous track/file
During playback, press the skip/scan buttons
(.//) repeatedly until the desired track/file is
found. The selected track/file will be played from the
beginning.
On the remote control unit use the skip buttons
(.//).
In CD mode, press the skip/scan buttons (.//)
repeatedly until the track/file you want to listen to is
found in the stop or pause mode. Press the play/pause
button (y/J ) to start playing back the selected
track/file.
< When the .button is pressed during playback,
the track/file being played will be played from the
beginning. To return to the beginning of the previous
track/file, press the . button twice.
You can select a folder and a file during playback or when
stopped.
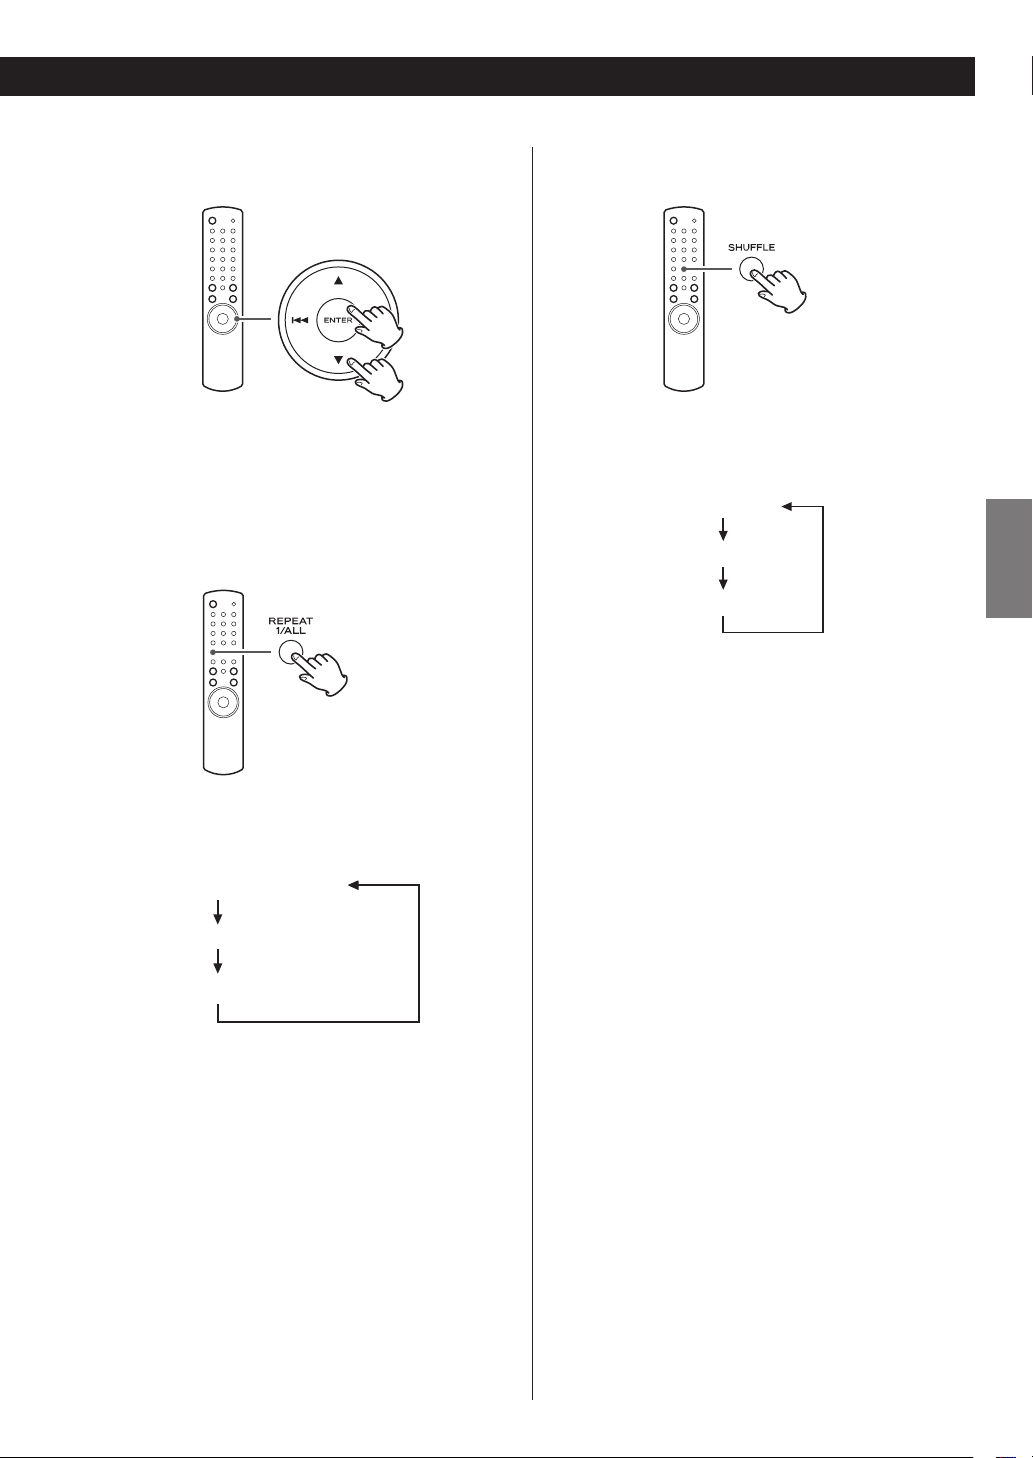
1
Press the scroll buttons (˙/¥) to select a folder.
2
Press the ENTER button.
3
If you want to select a file, press the scroll
buttons (˙/¥).
ENGLISH
< During programmed playback, the next or previous
track/file in the program is played.
< In CD mode, the track/file goes back to the first track/
file when you press the / button during playback
of the last track/file.
< In USB mode, playback stops when you press the /
button while playing back the last track/file.
< The selection moves within the folder.
4
Press the ENTER button.
Playback starts from the selected file.
< To go back to the folder in the previous layer:
Press the MENU button in CD mode.
Press the . button in USB mode.
21
Page 22
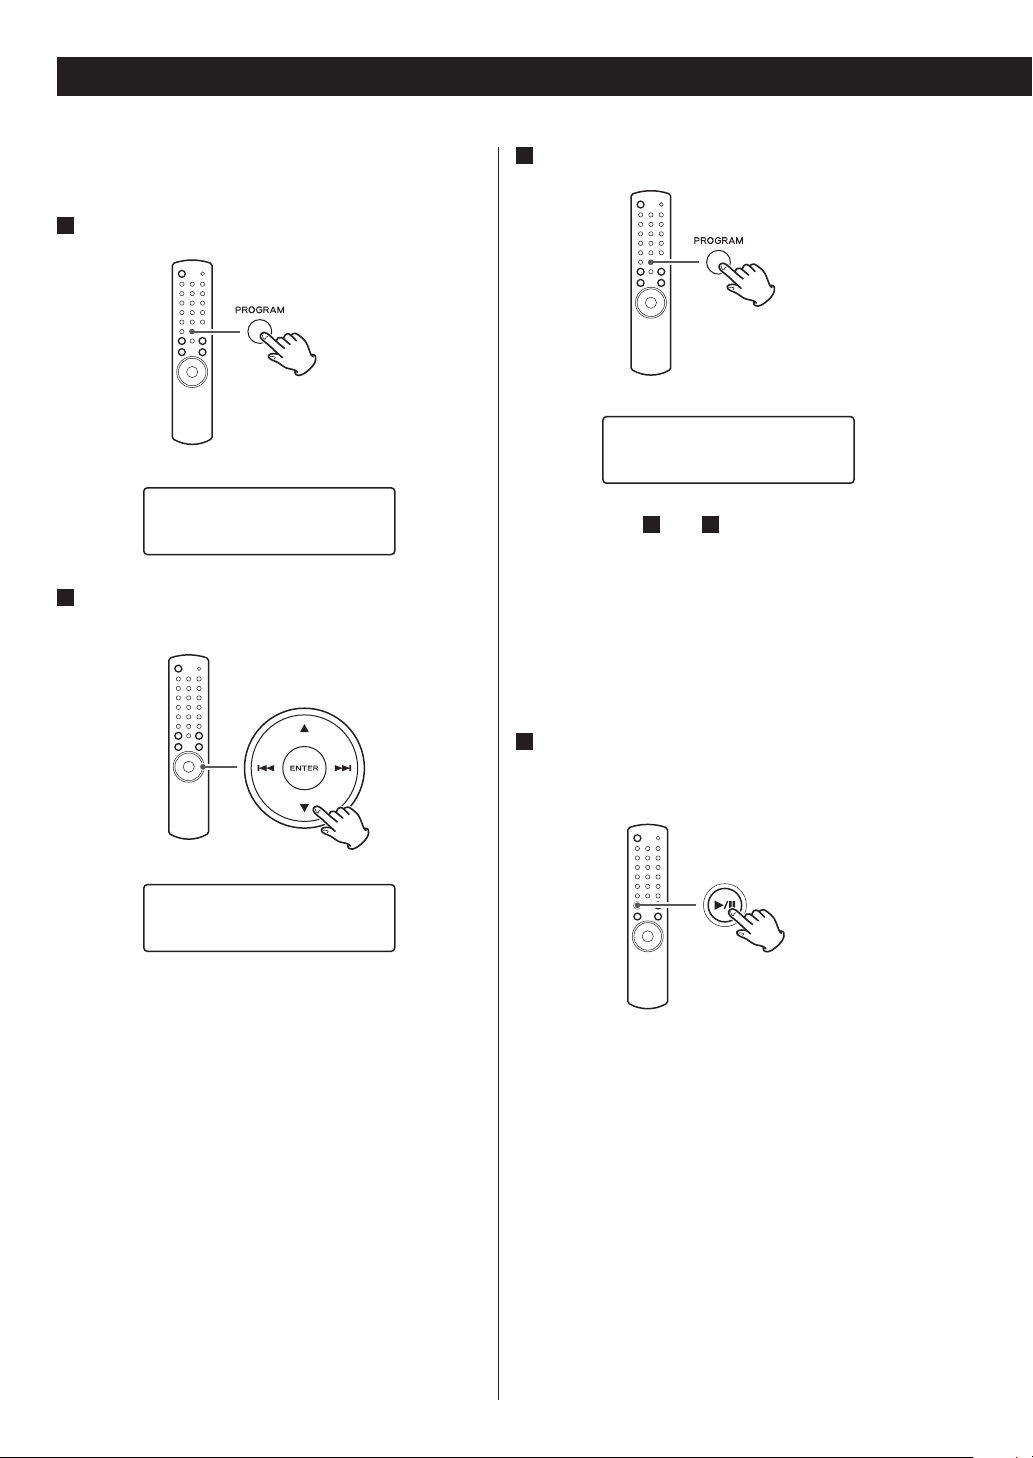
Programmed Playback
When CD is selected as the source, up to 32 tracks/files
can be programmed in the desired order.
1
Press the PROGRAM button in the stop mode.
P-00 T000
T016 72:00
Press the scroll buttons (˙/¥) to select a track/
2
file.
3
Within 5 seconds, press the PROGRAM button.
P-01 T012
T016 72:00
< Repeat steps 2 and 3 to programme more tracks/
files.
< If you made a mistake, press the CLEAR button.
The last programmed number will be deleted.
< Up to 32 tracks/files can be programmed. If you
attempt to programme more than 32 tracks/files,
“P-FULL (Programme is full)” is displayed and no more
tracks/files can be programmed.
P-01 T002
T016 72:00
4
When programming has finished, press the
play/pause button (y/J) to start programmed
playback.
When the playback of all the programmed tracks/files
has finished, or if the stop button (H) or the STANDBY/
ON button is pressed, the programme mode will be
cancelled.
< If the unit is disconnected from the power supply, the
programmed contents will be erased.
22
Page 23
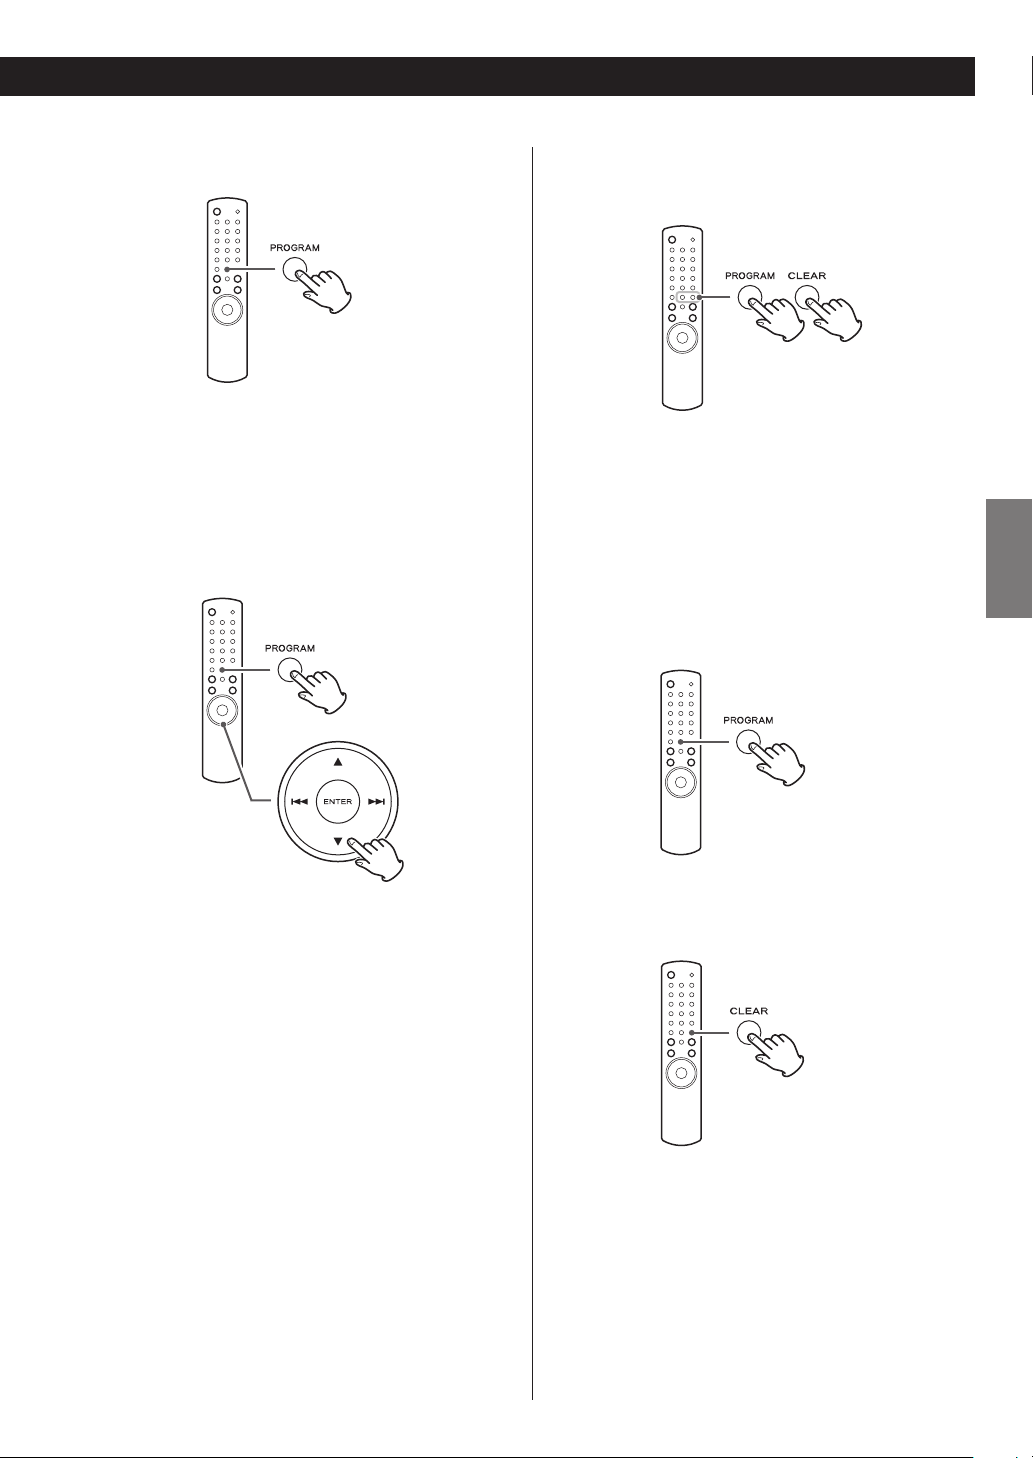
To check the programmed order
In the stop mode, press the PROGRAM button
repeatedly. The track/file number and programme
number will be shown on the display.
To change or add a track/file to the
programme
To delete a track/file from the
programme
In the stop mode, press the PROGRAM button
repeatedly until the programme number of the file to
be deleted appears on the display, and then press the
CLEAR button. The selected track/file is deleted from
the programme.
To clear the programme
1. In the stop mode, press the PROGRAM button.
ENGLISH
In the stop mode, press the PROGRAM button
repeatedly until the program number that contains
the track/file you want to change appears on the
display. Then select a track/file using the scroll buttons
(5/b). The previous track/file is replaced with the
newly selected one.
If you want to add a track/file to the end of the
programme, press the PROGRAM button repeatedly
until “P-END” briefly appears on the display. Then
select a track/file using the scroll buttons (5/b). The
track/file is added to the programme.
2. Hold down the CLEAR button for more than 4
seconds.
< In the following cases, the programmed contents will
also be cleared:
pressing the STANDBY/ON button
opening the disc tray
disconnecting the AC power cord
23
Page 24
Shuffle Playback
RPT 1 (repeat one track/le)
(repeat all tracks/les in the f
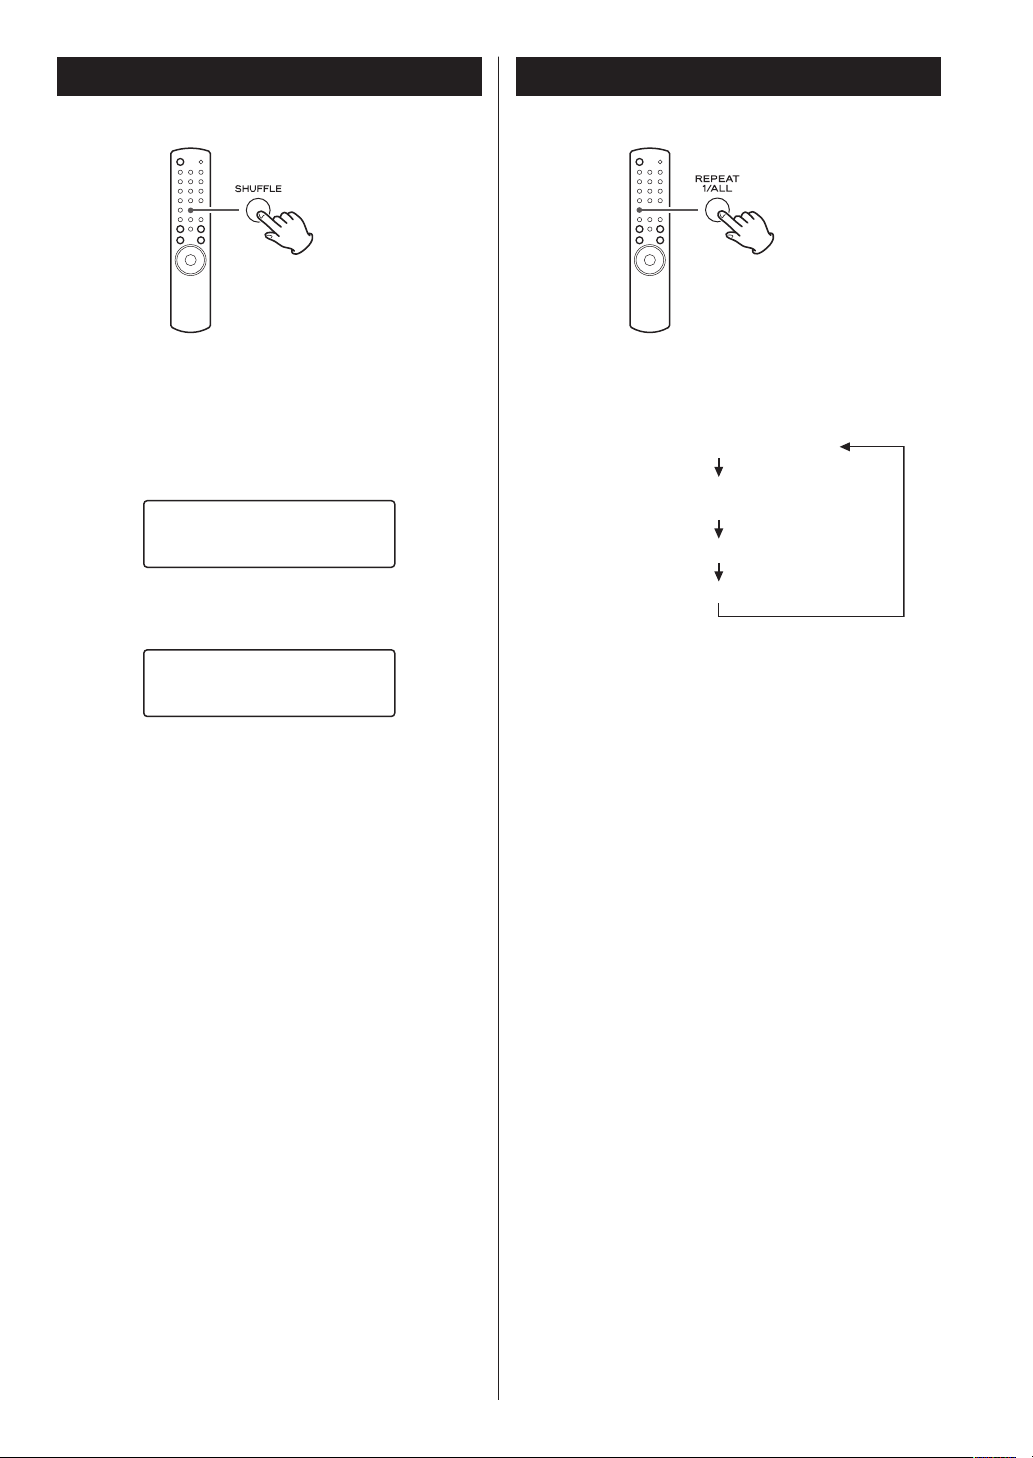
Repeat Playback
When the SHUFFLE button is pressed, the tracks/files on
the disc or USB device will be played randomly.
When CD is selected
CD/Random
T003 00:07
When USB is selected
86%5DQGRP
:0$
< If you press the / button during shuffle playback,
the next track/file will be randomly selected and
played. If you press the . button, the currently
played track/file will be played from the beginning.
< To cancel shuffle playback, press the SHUFFLE button.
< To stop shuffle playback, press the stop button (H).
< When USB is selected, the tracks/files in the folder
currently selected are played back randomly.
Every time the REPEAT 1/ALL button is pressed, the mode
is changed as follows:
RPT Folder
older: CD mode only)
RPT ALL
(Repeat O)
< When the stop button (H) is pressed the repeat mode
is cancelled.
Repeat One Track/File (RPT 1)
The track/file being played will be played repeatedly.
If you select another track/file in “RPT 1” mode, the
track/file you selected will be played repeatedly.
In CD mode, if you select “RPT 1” mode in the stop
mode and select a track/file, the selected track/file
will be played repeatedly.
Repeat Folder (RPT Folder: CD mode only)
All the files in the folder will be played repeatedly.
(MP3/WMA files only)
< During repeat playback, press the skip buttons
(.//) to move to another folder. The files in the
folder will be played back repeatedly.
24
Repeat All (RPT ALL)
In CD mode, all the tracks/files will be played
repeatedly. In USB mode, all the tracks/files in the
folder will be played repeatedly.
< In the program mode, the programmed contents are
played repeatedly.
Page 25

Default display (scrolling)
Cu
Default display (elapsed time)
Display
During playback, press the DISPLAY button repeatedly to
change the information on the display.
Audio CD:
Display changes as follows:
current track number and elapsed time of the current
track
CD/Play
T003 00:42
current track number and remaining time of the current
track
CD/Play
T003 -03:02
Listening to iPod (1)
1
Press the SOURCE button repeatedly to select
“USB/iPod”.
2
Connect your iPod using the USB cable supplied
with iPod.
The iPod automatically turns on and starts playback
from the iPod music list.
When the iPod is connected while the CR-H700DAB
is set to another listening source, the iPod will turn on
and enter the pause mode.
ENGLISH
MP3/WMA files:
Display changes as follows:
While a file on a CD is played back:
rrent le number and elapsed time
While a file on a USB storage device is played back:
File Name
Title
Artist Name
Artist Name
Track Name
Album Name
< The iPod battery will be fully recharged when the iPod
is docked and the CR-H700DAB is on.
< When the iPod is connected to the CR-H700DAB,
the headphones jack of the iPod can not output the
sound.
If you want to listen to the sound from your
headphones, connect your headphones to the
CR-H700DAB’s PHONES jack.
25
Page 26
Listening to iPod (2)
To pause playback
During playback, press the play/pause button
(G/ J ) to pause playback. Playback stops at the
current position.
To resume playback, press the play/pause button
(G/J) again.
To skip to the next or a previous song
Search for a part of a song
During playback, hold down the skip buttons
(.//) and release it when the part you want to
listen to is found.
To go back to the previous menu
During playback or in pause mode, press the skip
buttons (.//) repeatedly until the desired song
is found.
< When the . button is pressed during playback, the
song being played will be played from the beginning.
If you want to play the previous songs, press the .
button twice or more.
26
Press the MENU button to go back to the previous
menu.
This button is equivalent to the MENU button on your
iPod.
Page 27
Select the menu item
RDM o
RDM Songs
RDM Album
Shuffle playback
Press the scroll buttons (˙/¥) of the remote control
unit to scroll to the menu item you want, and then
press the ENTER button.
Repeat playback
Every time the REPEAT 1/ALL button is pressed, the
mode is changed as follows:
Play (normal playback)
RPT 1 (repeat 1 song)
RPT ALL (repeat all the songs in the list)
During playback, press the SHUFFLE button to change
the shuffle mode.
ENGLISH
When you select “RDM Songs”, the iPod shuffles songs
within the list you choose to play.
When you select “RDM Album”, the iPod plays all
the songs on an album in order, and then randomly
selects another album in the list and plays through it
in order.
27
Page 28
1
DAB Basic Operations
2
Setting up your DAB Tuner
The first time you select DAB as the source, the unit will
scan for DAB channels and build a channel list.
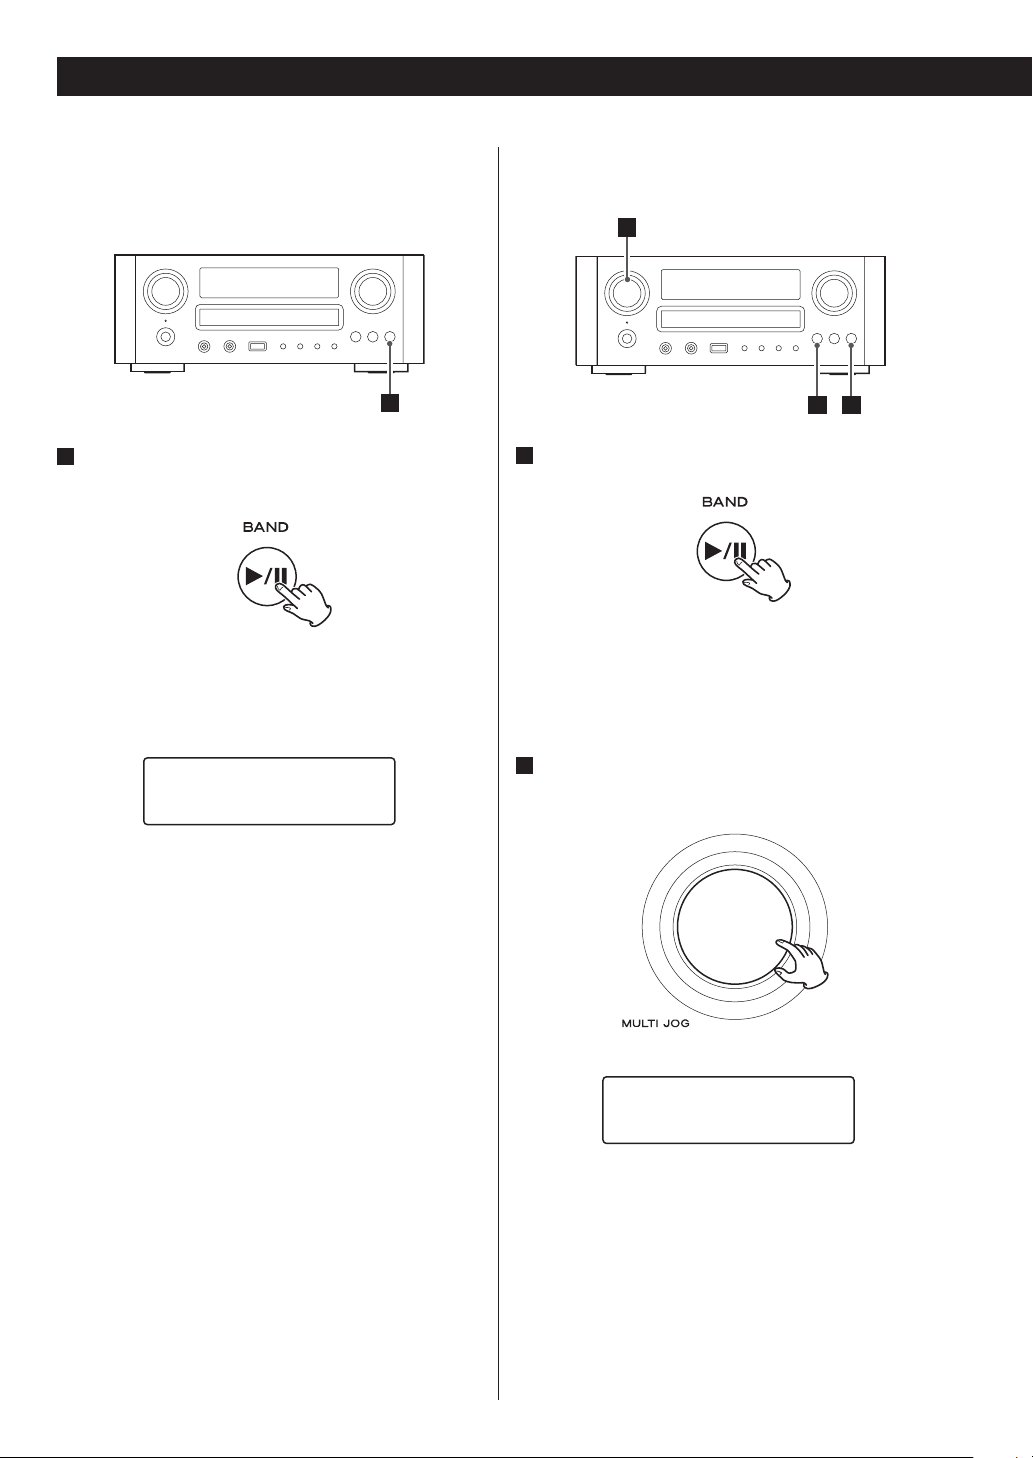
1
Select DAB by pressing the BAND button
repeatedly.
The unit will scan for ensembles broadcast in the
local area and add them to the channel list as they are
found. The scan should take about 20 seconds.
Using the Channel List
3 1
1
Select DAB by pressing the BAND button
repeatedly.
The list of available channels is displayed.
< If the channel list is not displayed, turn the MULTI JOG
knob.
Scanning...
209.93MHz
After broadcast services have been found, the
channels are listed in alphanumeric order.
< If no broadcast services are found, please check that
the antenna is correctly connected to the unit.
2
Scroll through the channels in the channel list.
Turn the MULTI JOG knob.
∏
BBC Radio 1
BBC Radio 1Xtra
28
Page 29
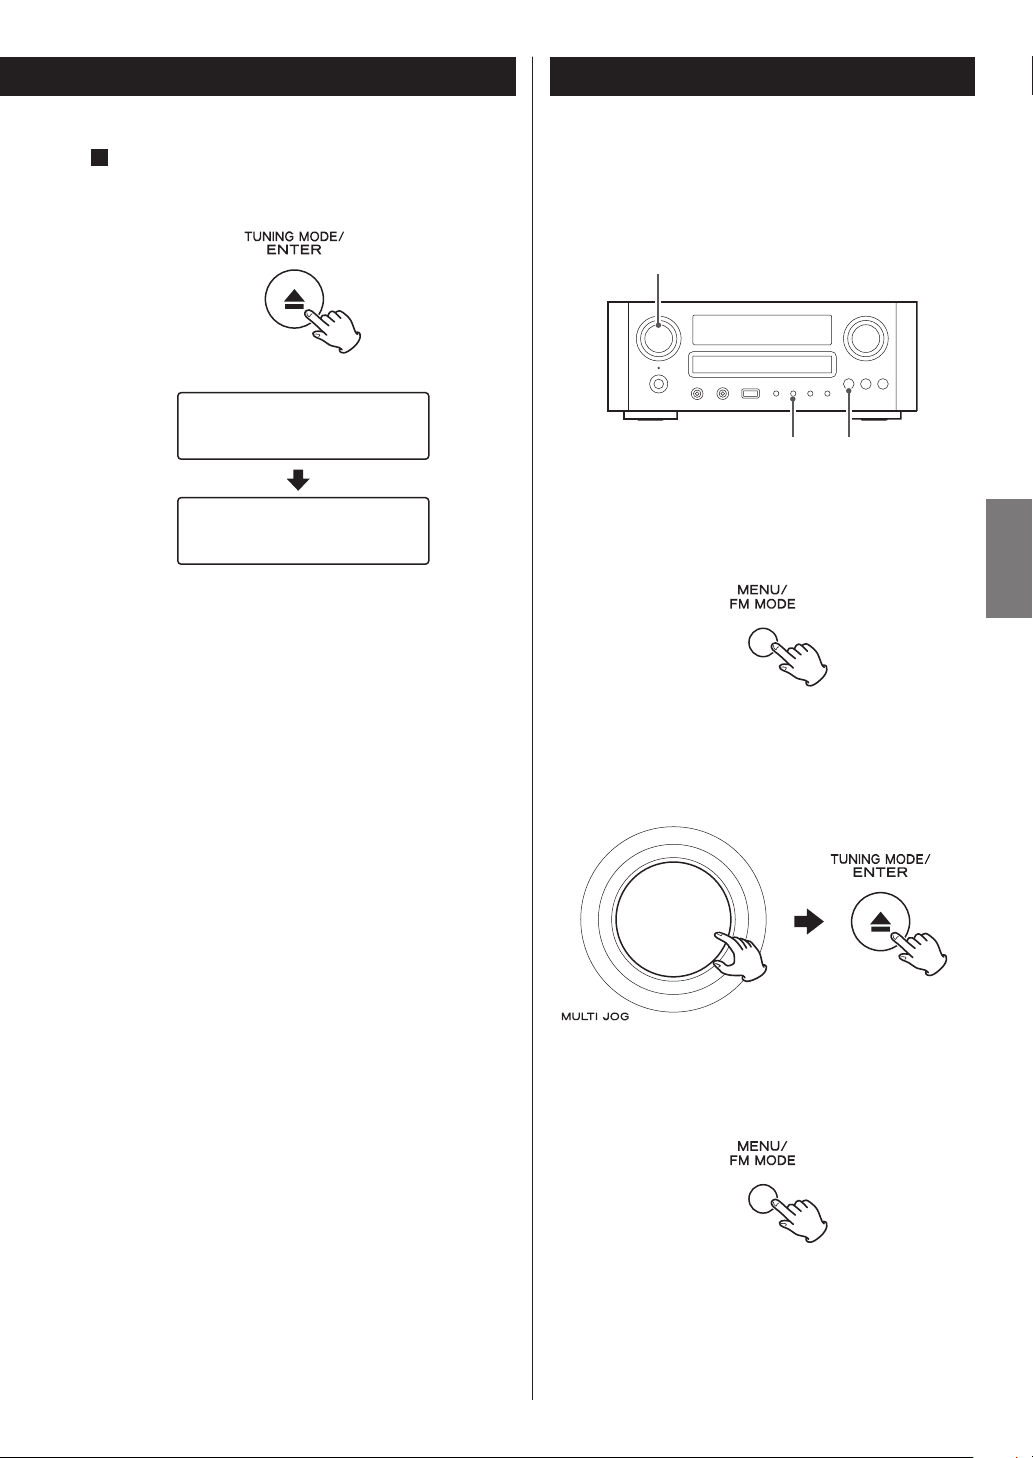
3
MENU ENTER
MULTI JOG
When you have found the channel that you want
to listen to, press the ENTER button.
Selecting...
Using DAB Menu (1)
DAB menu operations
In DAB mode, use DAB menu to access various functions.
There are 8 options in the DAB menu.
BBC 6
Jazz festival on
The channel is tuned in and channel information is
displayed.
Note
< To display the channel list while listening to a DAB
channel, turn the MULTI JOG knob.
< Channels are displayed in alphanumeric order in the
channel list, with numbers coming first.
< If a channel is no longer broadcasting or the unit is
moved out of the area of a broadcast channel, the
unit will no longer be able to tune in the channel. If
the channel cannot be tuned in, a question mark “?”
is displayed in front of the channel name. If you select
this channel to tune in by pressing the ENTER button,
“No stations Available” is displayed.
< You can move the channel that is no longer available
to the end of the channel list. See “Station order” on
page 32.
To open DAB menu
Press the MENU button while DAB is selected as the
source.
To select the menu item
Turn the MULTI JOG knob to scroll to the menu item
you want, and then press the ENTER button.
To go back to the previous screen
Press the MENU button.
ENGLISH
29
Page 30
Using DAB Menu (2)
DAB menu items
Station List
See “Using the Channel List” on page 28.
Local Scan
See “Channel Scan” below.
Full Scan
See “Channel Scan” below.
Manual Tune
See “Manual Tune” on the right column.
Preset Tune
See “Preset Tune” on page 31.
DRC
See “DRC value” on page 32.
Station Order
See “Station order” on page 32.
Main Menu
See “Main Menu” on page 33.
Channel Scan
If you move the unit to a new area or you want to check
to see if there are new channels available in your area,
you can scan DAB bands to find new channels.
1
Open the DAB menu.
Press the MENU button while DAB is selected as the
source.
Local Scan
The unit will scan the DAB bands between 10A and
13F and add the channels found to the channel list.
Full Scan
The unit will scan all the DAB bands and add the
channels found to the channel list. Try this if “Local
Scan” does not find the channels you want.
Manual Tune
1
Open the DAB menu.
Press the MENU button while DAB is selected as the
source.
›Station List
Local Scan
2
Select “Manual Tune”.
Turn the MULTI JOG knob to select the item, and then
press the ENTER button.
›Station List
Local Scan
2
Select “Local Scan” or “Full Scan”.
Turn the MULTI JOG knob to select the item, and then
press the ENTER button.
30
Full Scan
›Manual Tune
Page 31

3
Select the channel you want to tune in.
2
Select “Preset Tune”.
Turn the MULTI JOG knob to select the item, and then
press the ENTER button.
BBC Radio 5 Live
BBC National DAB
If you tune into a vacant frequency, “No service” will
be displayed.
Preset Tune
Use this to select the DAB preset station.
< See page 36 for the procedure of presetting DAB
stations.
Turn the MULTI JOG knob to select the item, and then
press the ENTER button.
Manual Tune
›Preset Tune
3
Select the desired preset station.
Turn the MULTI JOG knob to select the item, and then
press the ENTER button.
ENGLISH
1
Open the DAB menu.
Press the MENU button while DAB is selected as the
source.
›Station List
Local Scan
31
Page 32

Using DAB Menu (3)
DRC value
This option sets the Dynamic Range Control (DRC)
value to be applied to received broadcasts. DRC is
used to reduce the range between high and low
volumes of audio and is sometimes applied at the
broadcast source. Pop music may have a high value of
DRC applied, appropriate for constantly high listening
levels, while classical music broadcasts may have
no DRC applied to allow the listener to hear the full
dynamic range of the source volume.
1
Open the DAB menu.
Press the MENU button while DAB is selected as the
source.
›Station List
Local Scan
3
Select the desired level of DRC.
Turn the MULTI JOG knob to select the item, and then
press the ENTER button.
DRC high *
›DRC low
DRC off No DRC is applied.
DRC low Medium.
DRC high Maximum.
< Current setting is marked with “*”.
2
Select “DRC”.
Turn the MULTI JOG knob to select the item, and then
press the ENTER button.
Preset Tune
›DRC
Station order
You can select the order in which stations are listed.
1
Open the DAB menu.
Press the MENU button while DAB is selected as the
source.
›Station List
Local Scan
32
Page 33

2
Select “Station Order”.
Turn the MULTI JOG knob to select the item, and then
press the ENTER button.
DRC
›Station Order
3
Select the desired option.
Turn the MULTI JOG knob to select the item, and then
press the ENTER button.
1
Open the DAB menu.
Press the MENU button while DAB is selected as the
source.
›Station List
Local Scan
2
Select “Main Menu”.
Turn the MULTI JOG knob to select the item, and then
press the ENTER button.
ENGLISH
Alphanumeric *
›Ensemble
Alphanumeric
This is the default order. Channels are listed by name
with numbers first and then alphabetically by letters
in the channel name.
Ensemble
Channels are listed by ensemble name.
Valid
This option will list active stations at the top of the
channel list, and channels that are in the list but have
no service in your area at the end.
< Current setting is marked with “*”.
Main Menu
You can initialize the setting of DAB tuner and confirm
the version of the DAB tuner.
Station Order
›Main Menu
3
Select the desired option.
Turn the MULTI JOG knob to select the item, and then
press the ENTER button.
System Setup
›Info
System Setup
To initialize the setting of the DAB tuner, select this.
Info
Displays the version of the software of the DAB tuner.
33
Page 34

Changing Display Settings for DAB
You can choose the type of information displayed in
the second line of the display while listening to a DAB
channel.
Each time the INFO button is pressed, the information
is displayed as follows.
DLS
Programme type
Ensemble name
Channel and frequency
Ensemble name
This displays the name of the ensemble that is
broadcasting the programme.
BBC Radio 5 Live
BBC National DAB
Channel and frequency
This displays the channel and frequency of the current
playing broadcast.
BBC Radio 5 Live
11C 220.35MHz
Bitrate mode
This displays the bitrate of the current playing
broadcast.
BBC Radio 5 Live
192kbps Stereo
Bitrate mode
Time & Date
Signal strength
DLS
The Dynamic Label Segment (DLS) is the scrolling
text label supplied by the radio station. It may be
information on music titles or details regarding the
programme or station.
BBC Radio 5 Live
WEEKDAY NEWS & D
Programme type
This is a description of the type of broadcast supplied
by the radio station such as Pop, Rock or Classical
music.
BBC Radio 5 Live
Drama
Time & Date
This displays the current time and date, which is
supplied by the radio station and should always be
accurate.
BBC Radio 5 Live
10:03 19-04-2009
Signal strength
This displays the signal strength of current ensemble.
BBC Radio 5 Live
Signal Str 215
< While viewing the indicator, adjust or reposition the
antenna until the best reception is indicated.
34
Page 35

Listening to FM/AM (1)
Manual Tune
4
1
Press the SOURCE button repeatedly to select
TUNER mode.
2
Select FM or AM by pressing the BAND button
repeatedly.
3
Select the desired tuning mode.
Each time the TUNING MODE button is pressed, the
tuning mode changes as follows:
1
Select the station you want to listen to.
4
Manual tuning mode
Turn the MULTI JOG knob until the station you want to
listen to is found.
On the remote control, press the scroll buttons (˙/¥)
repeatedly.
The frequency changes by a fixed step (FM: 50 kHz
steps, AM: 9 kHz steps).
Auto tuning mode
Turn the MULTI JOG knob to start auto tuning.
When a station is found, the unit tunes in the station
automatically. Repeat this step until the station you
want to listen to is found.
< Press the ENTER button to stop the auto tuning.
23
ENGLISH
Auto Tune
Preset Tune
Preset tuning mode
Turn the MULTI JOG knob to select a preset channel.
On the remote control, press the skip buttons
(.//) repeatedly.
The selected preset channel is tuned in.
35
Page 36

Listening to FM/AM (2)
Preset Tuning
FM Mode
You can select between Stereo and Mono by pressing
the FM MODE button when a stereo FM program is
tuned in.
Stereo:
FM stereo broadcasts are received in stereo and “ST” is
displayed.
FM/ST 10:00
108.00MHz
Presetting manually (DAB/AM/FM)
You can store up to 30 FM, 30 AM and 30 DAB stations.
1
Select DAB, AM or FM by pressing the TUNER
button repeatedly.
2
Tune in the station you want to store.
See page 28 or 35 for the procedure of tuning.
3
Press the PROGRAM button.
Mono:
Select this mode when the signal is weak. Reception
will be changed to monaural, reducing unwanted
noise.
FM
10:00
CH__ 108.00MHz
4
Within 4 seconds, select the preset number for
this station.
Press the scroll buttons (5/b).
FM
10:00
CH12 108.00MHz
36
Page 37

5
Within 4 seconds, press the PROGRAM button.
The station is stored.
< To store more stations, repeat steps 2 to 5 .
Presetting Automatically (FM/AM
only)
1
Select FM or AM by pressing the TUNER button
repeatedly.
< If you do not press the PROGRAM button within 4
seconds after selecting the preset number, presetting
will be cancelled.
2
Hold down the PROGRAM button for more than
3 seconds.
Up to 30 of the best received stations in your area will
be stored automatically.
ENGLISHENGLISH
37
Page 38

RDS
The Radio Data System (RDS) is a broadcasting service
which allows stations to send additional information
along with the regular radio programme signal.
RDS works on the FM waveband in Europe only.
1
Tune in an FM station (see page 35).
2
Press the RDS button.
Each time the RDS button is pressed, the RDS mode is
changed as follows:
PROGRAM SERVICE
When you select “PROGRAM SERVICE”, “PROGRAM
SERVICE” will blink for about 3 seconds and then the
programme service name or a station’s name will be
displayed. If there is no programme service data, the
frequency will be displayed.
PROGRAM TYPE
When you select “PROGRAM TYPE”, “PROGRAM
TYPE” will blink for about 3 seconds and then the
programme type will be displayed.
CLOCK TIME
Displays the information about times provided from
the station.
When you select “CLOCK TIME”, “RDS CLOCK TIME” will
blink for about 3 seconds and then the clock time will
be displayed.
RADIO TEXT
When you select “RADIO TEXT”, “RDS RADIO TEXT”
will blink for about 3 seconds and then the news
of stations composed of up to 64 symbols will be
displayed.
If there is no radio text data, RDS mode will be
automatically switched to PROGRAM SERVICE mode.
38
Page 39

TRAFFIC ANNOUNCE
RADIO
PROGRAM SERVICE
PROGRAM
CL
FREQUENCY MODE
T
When you select “TRAFFIC ANNOUNCE”, “TRAFFIC
ANNOUNCE” will blink for 3 seconds and then the unit
searches for a traffic announcement.
< When a traffic programme is found, the TRAFFIC
ANNOUNCE mode is switched to PROGRAM SERVICE
mode.
If the station currently selected is transmitting
a traffic programme signal, the unit searches for a
traffic announcement and selects the next station
transmitting a traffic programme signal.
FREQUENCY MODE
Each time you press the TUNING MODE button, the
frequency tuning mode changes.
You can also switch between STEREO and MONO by
pressing the FM MODE button.
For detailed information about the frequency tuning
mode setting, see pages 35-36.
TYPE
The clock setting of this unit is automatically adjusted
according to the CLOCK TIME (CT) data.
If you tune in an RDS station broadcasting incorrect
CT data, the clock might be wrongly adjusted, and
that may eventually affect the timer operation.
When you do not want the clock of this unit to be
set according to the CT data, turn off the auto clock
adjustment.
< No matter which RDS mode is selected, the unit
receives CT data and adjusts the clock.
To turn off the auto clock adjustment, hold
down the RDS button for more than 8 seconds.
ENGLISH
OCK TIME
TEXT
RAFFIC ANNOUNCE
< To turn on the auto clock adjustment again, hold
down the RDS button for more than 8 seconds.
< When the auto clock adjustment is turned off,
CLOCK TIME is not displayed.
39
Page 40

PTY Search
3
142
3
You can search for stations by programme type.
This function is available only on RDS services of FM
waveband in Europe.
1
Select FM by pressing the BAND button
repeatedly.
2
Hold down the RDS button for more than 3
seconds.
3
Select the desired programme type (PTY).
Turn the MULTI JOG knob to select an item, and then
press the ENTER button.
4
Turn the MULTI JOG knob within 3 seconds to
start searching.
< When the broadcast whose programme type you
have selected is found, searching stops and the
programme type will be displayed.
< If a broadcast of the selected programme type is not
found during PTY Search, it will stop at the very first
frequency.
< To stop searching, press the RDS button.
Select your desired one from among 31 kinds of PTY
programmes.
The programme type will blink.
40
Page 41

News:
brief announcements, events, public opinion, reports,
actual situations.
Current Affairs:
a kind of suggestion including practical
announcements other than news, documents,
discussion, analysis and so on.
Information:
daily information or reference such as weather
forecast, consumer guide, medical assistance and so
on.
Sport:
sports related programmes.
Education:
educational and cultural information.
Drama:
all kinds of radio concert and serial drama.
Cultures:
all aspects of national or local culture including
religious events, philosophy, social science, language,
theatre, and so on.
Science:
programmes on natural science and technology.
Varied Speech:
popular programmes such as quiz, entertainment,
private interview, comedy, satire and so on.
Pop Music:
programme on commercial, practical and popular
songs, and sale volume of discs, etc.
Rock Music:
practical modern music generally composed and
played by young musicians.
Easy Listening:
popular music usually lasting for less than 5 minutes.
Finance:
financial reports, commerce, trading.
Children’s Progs:
children’s programmes.
Social Affairs:
social affairs.
Religion:
religious programmes.
Phone In:
programme in which the public expresses its view by
phone.
Travel & Touring:
travel reports.
Leisure & Hobby:
programmes concerning recreational activities.
Jazz Music:
jazz music.
Country Music:
country music.
National Music:
national music.
Oldies Music:
music from the so-called golden age of popular music.
Folk Music:
folk music.
Documentary:
documentaries.
Alarm Test
Alarm-Alarm!:
a programme notifying an emergency or a natural
disaster.
ENGLISH
Light Classics M:
classical music, instrumental music, chorus, and light
music favoured by non-professionals.
Serious Classics:
orchestra including great operas, symphony, chamber
music and so on.
Other Music:
other music styles (Rhythm & Blues, Reggae, etc.).
Weather & Meter:
weather reports, forecast.
41
Page 42

Initial Network Setup
3 4
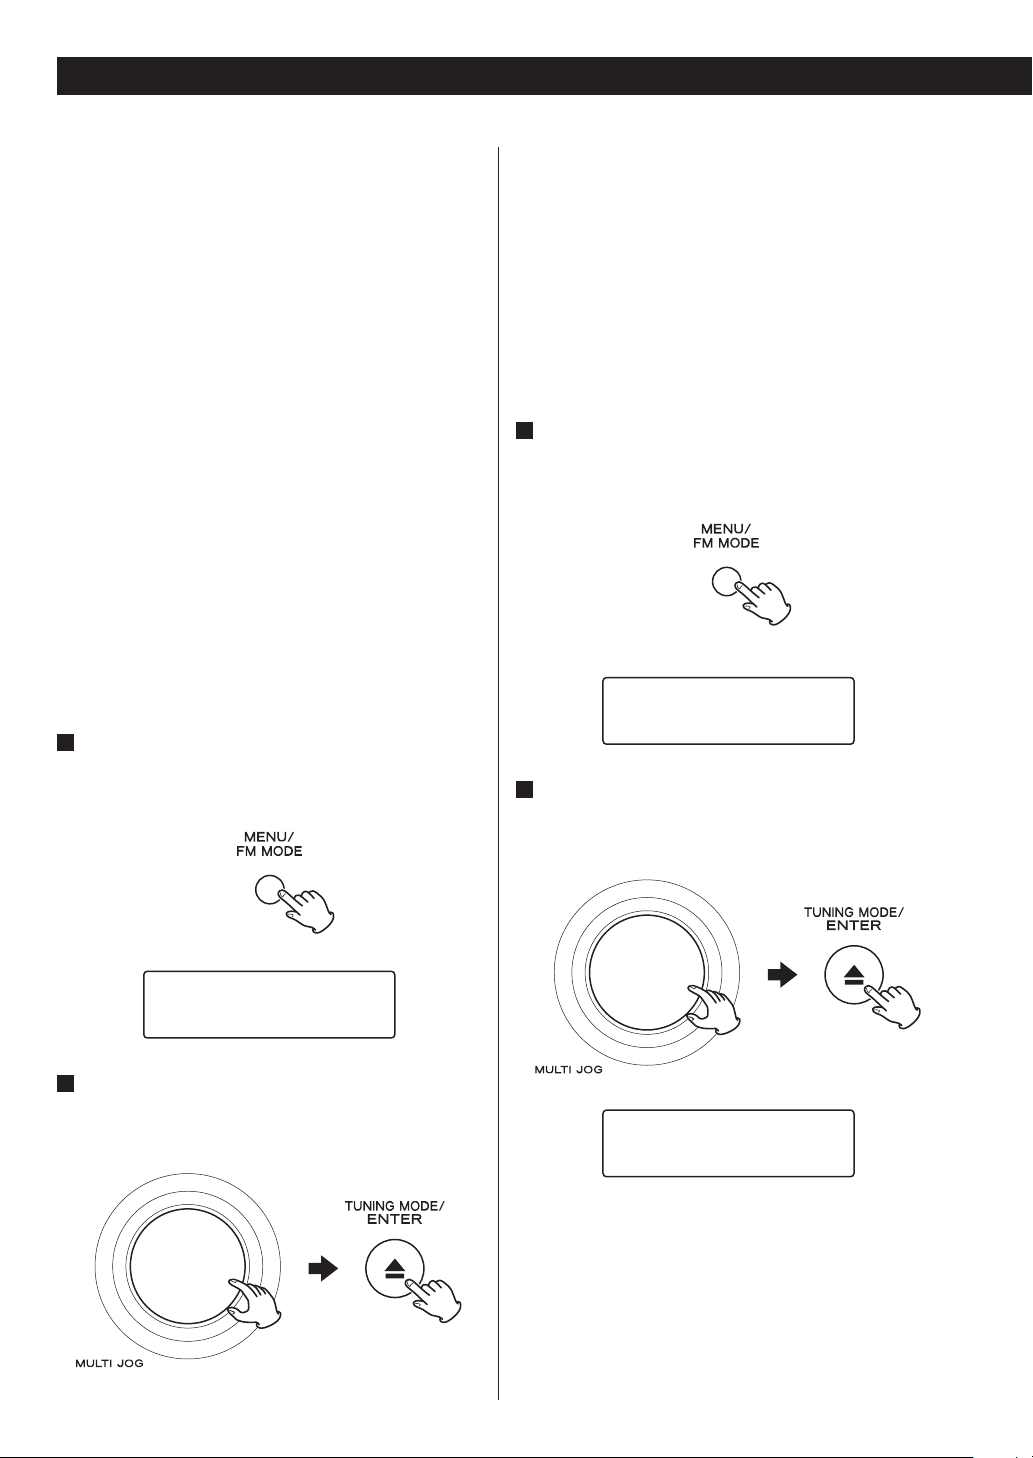
3
Display the network setup menu.
Press the MENU/FM MODE button to display “Setup
Menu”, turn the MULTI JOG knob to select “Network”,
and then press the ENTER button.
1 3
When you use the network function for the first time, the
unit starts an initial setup procedure to connect to the
Internet.
1
Press the SOURCE button repeatedly to select
TUNER mode.
2
Select “Internet Radio” by pressing the BAND
button repeatedly.
Initial setup wizard starts.
3 4
2
< To go back to the previous screen, press the
.button.
42
Page 43

Select a network method you want to use.
./
ENTER
MULTI J
O
G
4
Turn the MULTI JOG knob to select “Wired” or
“Wireless”, and then press the ENTER button.
How to input characters
1. Turn the MULTI JOG knob to select a set of
characters.
< When you select “Wired”:
Use the MULTI JOG knob and the ENTER button to
adjust “DHCP” and “Proxy Setting”.
Make sure that the unit is connected to the network
using a LAN cable.
< When you select “Wireless”:
1. Turn the MULTI JOG knob to select “Search AP”,
and then press the ENTER button.
2. Turn the MULTI JOG knob to select the access
point to connect, and then press the ENTER
button.
3. Turn the MULTI JOG knob to select characters to
input.
See “How to input characters”.
4. Use the skip (.//) button to move the
cursor.
5. Press the ENTER button when you finished
inputting characters.
When the unit has been connected to the access
point, press the MENU/FM MODE button to display
“Save”, turn the MULTI JOG knob to select “Yes”, and
then press the ENTER button.
Make sure that the unit is not connected to the
network using the LAN cable.
2. When you select the character to input, move
the cursor by pressing /button to input the
next character.
Press the .button to move the cursor to the
previous character.
3. When you finished inputting the characters,
make sure that the cursor is on the last
character, then press the ENTER button.
Repeat steps 1 to 3 to input next characters.
Characters you can input
0123456789
ABCDEFGHIJKLMNOPQRSTUVWXYZ
abcdefghijklmnopqrstuvwxyz
(space)!”#¤%&’()*+,-./:;<=>?@[\]–_||`{|}¯
ENGLISH
Now the unit starts to connect to the Internet.
When connection is established successfully, the
internet radio menu is displayed. See the next page to
select a station.
< If you have a problem connecting to the Internet, see
page 61.
43
Page 44

33 44
5
Listening to Internet Radio
5
33 44 2
1
Listening to an internet radio
station/a podcast
1
Press the SOURCE button repeatedly to select
TUNER mode.
2
Select “Internet Radio” by pressing the BAND
button repeatedly.
3
Select a search method.
Turn the MULTI JOG knob to select the item, and then
press the ENTER button.
The following search methods are available.
Favorites:
List of stations/Podcast you stored as favourite is
displayed. Select a station/Podcast you want to listen
to. Favourites are stored on the internet radio portal.
See page 46.
Added Stations:
Even though the station list contains thousands of
stations, you may want to listen to stations not listed.
You can add your own stations via the internet radio
portal. See page 46.
Location:
Search by the location of the broadcaster.
Genre:
Search by the genre of music played on the station/
Podcast.
Podcasts By Location:
Search by the Podcast’s location.
Podcasts By Genre:
Search by the Podcast’s genre.
New Stations:
Select from a list of recently added stations.
Most Popular Stations:
Select from a list of popular stations.
Recently Played:
You can select the station/Podcast from the ones
you listened to recently.
44
Page 45

4
Elapsed time and File Format
If you have selected “Location”, “Genre”
“Podcasts By Location”, or “Podcasts By Genre”,
in step 3, search for the channel you want.
Turn the MULTI JOG knob to select the item, and then
press the ENTER button.
5
Select a station or a Podcast you want to listen
to.
Turn the MULTI JOG knob to select the item, and then
press the ENTER button.
Changing the displayed information
Each time the INFO button is pressed, information on
the second line of the display changes.
Station
Track
Album
ENGLISH
< The types of information displayed may vary
depending on the stations/Podcasts.
,QWHUQHW5DGLR
,QWHUQHW5DGLR
,QWHUQHW5DGLR
03
45
Page 46

Radio Portal
Using AirPlay
Internet radio portal
Access the radio portal on the Internet using your
computer to fully enjoy the internet radio function of this
unit.
< You can create a list of your favourite stations/
Podcasts on the portal. This list can be viewed from
your unit, making it easier for you to find your usual
programmes.
You can see the list of your favourite stations from
“Favorites” in the internet radio menu.
< If the station/Podcast you want to listen to is not in
the channel list, you can create your own list.
You can see the list of your added stations from
“Added Stations” in the internet radio menu.
Accessing the radio portal
1
Open your Internet browser and access
http://teac.vtuner.com/.
You can change the language by clicking each
nation’s flag icon on the top.
2
Input your e-mail address and password to
register.
3
Input the MAC address of the unit.
You can confirm the MAC address from “Setup Menu”
w “Information” w “MAC Address”.
When you input the MAC address, do not input “:”
between the alphanumeric characters.
4
Select a genre from the list.
5
Select a station to add to your favourite list.
Click the button to add the station, then a dialog
box appears.
This unit is compatible with AirPlay. You can play back
audio files on your computer with iTunes 10 or later or
iPhone/iPod touch/iPad with iOS 4.2.1 or later through
AirPlay.
From your iPhone/iPod touch/iPad:
< Before using AirPlay, perform setup for the Internet
connection. For details, see “Initial Network Setup” on
page 42.
1
Press the button to turn the unit on.
Standby/On indicator
2
Turn your iPhone/iPod touch/iPad on.
3
Connect your iPhone/iPod touch/iPad to the
network.
4
Start up iPod on your iPhone/iPod touch/iPad.
5
Tap the (AirPlay) icon.
The available device list is displayed.
6
Select “CR-H700” from the list.
7
Start playing back a file from your iPhone/iPod
touch/iPad.
It takes several seconds to start playing back a file.
o If you do not select another source after AirPlay has
been stopped, the message “AirPlay Playing” will not
disappear from the display.
o If the unit is connected to the USB port, AirPlay cannot
be used.
6
Input a group name in the dialog box to make a
group, then click the button.
The group name is added to “My Favourite Groups”.
You can access the group from “Favourites” in the
Internet Radio menu.
46
Page 47

Using Music Streaming
From your Computer:
< Before using AirPlay, perform setup for the Internet
connection. For details, see “Initial Network Setup” on
page 42.
1
Press the button to turn the unit on.
Standby/On indicator
2
Turn your computer on.
3
Connect your computer to the network.
4
Start up iTunes on your computer.
5
Click the (AirPlay) icon.
The available device list is displayed.
6
Select the “CR-H700” from the list.
7
Start playing back a file from iTunes.
It takes several seconds to start playing back a file.
You can play back audio files on the server connected to
the network from your computer or mobile device.
< Before using Music Streaming, perform setup for the
Internet connection. For details, see “Initial Network
Setup” on page 42.
< When you use Music Streaming, make sure that DLNA
application is installed on your computer or mobile
device.
< Prepare a NAS (Network Attached Storage) server
compatible with DLNA.
1
Press the button to turn the unit on.
Standby/On indicator
2
Turn your computer or mobile device on.
3
Connect a NAS (Network Attached Storage)
server to the network.
For details on how to connect, refer to the server’s
instructions.
4
Connect your computer or mobile device to the
unit and the server using the DLNA application.
ENGLISH
5
Start playing back a file from your computer or
mobile device.
47
Page 48

Setting up Media Player (1)
About the Media Player function
Using the Media Player function, you can play back the
music files in your computers through the LAN.
There are two ways of connecting to the computer:
using media sharing and using folder sharing.
Media sharing
Media sharing allows this unit to play back a shared
media library on the computer, as well as browsing
the tracks using tag items such as artist names, genres
and album names.
You need a PC running on Windows XP, Windows
Vista, or Windows 7 and Windows Media Player 11 or
later on it.
Folder sharing
To use file sharing method, you need to configure
your music files open to access, so that other
computers or CR-H700DAB can read those files.
Preparations for Shared Media
(Windows Media Player 12)
5
Click “Turn on media streaming”.
6
On Windows Media Player, open “Stream”, then
“More streaming options...”.
7
Select “CR-H700” from the list, then click
“Customize...“.
1
Connect your computer to the LAN.
2
Connect CR-H700DAB to the LAN. (page 10)
< If you have a problem connecting to the LAN, see
page 61.
3
If the files you want to share are not yet added
to the media library of Windows Media Player,
add them to the media library.
< Refer to the manual of Windows Media Player for
details.
4
On Windows Media Player, open “Stream”, then
“Turn on media streaming”.
8
Configure detailed sharing settings, then click
“O K“.
< To listen to music files regardless of their rating, set
“Choose star ratings” to “All ratings”.
< Ensure that “Music” is checked.
9
Click “OK“.
For the procedure of playback, see “Listening to Media
Player”. (page 52)
48
Page 49

Preparations for Shared Media
(Windows Media Player 11)
1
Connect your computer to the LAN.
2
Connect CR-H700DAB to the LAN. (page 10)
< If you have a problem connecting to the LAN, see
page 61.
3
If the files you want to share are not yet added
to the media library of Windows Media Player,
add them to the media library.
< Refer to the manual of Windows Media Player for
details.
4
On Windows Media Player, open “Library”, then
“Media Sharing...”.
7
Click on “Settings...”, and configure detailed
sharing settings.
< To listen to music files regardless of their rating, set
“Star ratings” to “All ratings”.
< Ensure that “Music” is checked under the “Media
types” setting.
For the procedure of playback, see “Listening to Media
Player”. (page 52)
ENGLISH
Media Sharing window opens.
5
Activate “Share my media to:”.
“CR-H700” appears in the device list.
6
Select “CR-H700” and click “Allow”.
The CR-H700DAB can now access to the shared library.
Preparations for Shared Folders
(Windows XP)
1
Check the name of the Domain or the
“Workgroup” your computer belongs to.
To enable Shared Folders, your computer needs to be
a member of a Domain or a “Workgroup”.
Usually, your computer belongs to a “Workgroup”
by default. To see the name of the Domain or the
“Workgroup” your computer belongs to, check the PC
setting as follows:
Control Panel w System w Computer Name
2
Check the user account name and its password.
To access the computer from CR-H700DAB, you need
the user account name and the password of the
computer.
49
Page 50

Setting up Media Player (2)
Copy files to the “Shared Music” folder in
3
“Shared Documents”.
You cannot play back files in the folder other than
the “Shared Music” folder on this unit. You need to
perform settings for the shared folder to play back
files.
Right-click on the folder which contains the
4
music files you want to share, and select
“Sharing and Security”.
Preparations for Shared Folders
(Windows Vista)
1
Check the name of the Domain or the
“Workgroup” your computer belongs to.
To enable Shared Folders, your computer needs to be
a member of a Domain or a “Workgroup”.
Usually, your computer belongs to a “Workgroup”
by default. To see the name of the Domain or the
“Workgroup” your computer belongs to, check the PC
setting as follows:
Control Panel w System and Maintenance w System
Check the user account name and its password.
2
To access the computer from CR-H700DAB, you need
the user account name and the password of the
computer.
Open “Control Panel”, “Network and Internet”,
3
then “Network and Sharing Center”.
Set “Public folder sharing” to “On (read only)”.
4
In the “Sharing” tab, check “Share this folder”.
5
Add files in the “Shared Music” folder to “Media
6
Library” on Windows Media Player.
If “Media Player” is selected as the current source,
select “Media Player” again by pressing the “TUNER”
button on the remote control repeatedly.
50
Set “Password protected sharing” to “On”.
5
Page 51

6
Copy the music files you want to enjoy on
CR-H700DAB into the “Public Music” folder in
the “Public” folder.
Preparations for Shared Folders
(Windows 7)
1
Check the name of the Domain or the
“Workgroup” your computer belongs to.
To enable Shared Folders, your computer needs to be
a member of a Domain or a “Workgroup”.
Usually, your computer belongs to a “Workgroup”
by default. To see the name of the Domain or the
“Workgroup” your computer belongs to, check the PC
setting as follows:
Control Panel w System and Security w System
Check the user account name and its password.
2
To access the computer from CR-H700DAB, you need
the user account name and the password of the
computer.
Open “Control Panel”, “Network and Security”,
3
then “Network and Sharing Center”.
Select “Turn on sharing so anyone with network
5
access can read and write files in the Public
folders” for “Public folder sharing”.
Click “Save changes”.
6
7
Copy the music files you want to enjoy on
CR-H700DAB into the “Public Music” folder in
the “Public” folder.
ENGLISH
Click “Change advanced sharing setting”.
4
51
Page 52

Listening to Media Player
< Before listening to Media Player, perform setup for the
Internet connection. For details, see “Initial Network
Setup” on page 42.
1
Press the button to turn the unit on.
Standby/On indicator
Select a file to play back.
6
Turn the MULTI JOG knob to select the item, and then
press the ENTER button.
2
Connect the unit and the computer or NAS
(Network Attached Storage) server to the
network.
3
Press the SOURCE button repeatedly to select
TUNER mode.
4
Select “Media Player” by pressing the BAND
button repeatedly.
Select a computer or a server to use.
5
Turn the MULTI JOG knob to select the item, and then
press the ENTER button.
This unit can display only single-byte alphanumeric
characters. If a file includes double-byte characters (such
as Japanese, Chinese, etc.), they cannot be displayed
correctly. However, it does not affect file playback.
52
Page 53

Network Configuration
Network standby setting
If you select “On“ for this setting, the unit turns on
and starts playback automatically when it detects an
AirPlay or DLNA signal.
Follow the menu items as follows:
”Setup Menu” w ”Network” w ”Wireless” w “Wired”
w ”Standby (Off)”, and then select “On”.
< If “ON” is selected for this setting, the auto power off
function is not available.
Searching an access point
If you have moved or modified your network
environment, or if you have a problem connecting
to the Internet, perform the initial network setup to
establish the Internet connection again.
Follow the menu items as follows:
”Setup Menu” w ”Network” w ”Wireless” w ”Search
AP”
Manual Internet setup
You can check and modify detailed settings of the
Internet connection.
Follow the menu items as follows:
Using iPod Wi-Fi login sharing
Using this function, you can send the Wi-Fi setting on your
iPod/iPhone/iPad to the CR-H700DAB. If you have already
finished the Wi-Fi setting for the CR-H700DAB, you do not
need to follow the steps below.
This function is supported by the iPod/iPhone/iPad with
iOS 5.x or later only.
The following explanations refer to an iPod, but they also
apply to use with an iPhone or iPad.
1
Connect your iPod to a Wi-Fi network.
2
Turn the unit on.
o DO NOT connect a LAN cable to the unit.
3
Repeatedly press the SOURCE button to select
TUNER mode.
If the unit cannot be connected to a Wi-Fi network by
using “Internet Radio” or “Media Player”, the message
“Network problem” appears on the unit’s display.
Move on to the next step.
ENGLISH
To check the current network settings
”Setup Menu” w ”Information”
To configure Wired LAN settings
Select “Setup Menu” w “Network” w “Wired”, and
then adjust “DHCP” and “Proxy Setting”.
To configure Wireless LAN settings
Select “Setup Menu” w “Network” w “Wireless”,
and then adjust “DHCP”, “SSID”, “Security”, “Key”, and
“Proxy Setting”.
To check the Radio ID of your unit
The Radio ID may be required when you contact our
customer support.
Follow the menu items as follows:
”Setup Menu” w ”Information” w ”MAC Address”
4
Repeatedly press the SOURCE button on the unit
or the iPod/USB button on the remote control to
select iPod/USB as the source.
5
Connect the iPod to the unit’s USB port using
the USB cable that was supplied with your iPod.
6
Press and hold the MENU button on the unit for
about 3 seconds.
7
The buttons “Allow” and “Ignore” appear on the
iPod. Select “Allow”.
The message “Wi-Fi Sharing connecting.” appears on
the unit’s display.
When the setting process is completed, the message
“Wi-Fi Sharing Success” will appear on the display.
8
After the message “Wi-Fi Sharing Success”
disappears, turn the unit off and then on.
53
Page 54

Setting the Clock
The clock setting of this unit is automatically adjusted
according to the CLOCK TIME data of an RDS broadcast.
If you adjust the clock manually, follow the following
steps.
1
Press the TIME SET button.
Each time the TIME SET button is pressed, the mode is
changed as follows.
Current Time
On Time
O Time
3
Press the ENTER button.
The “minute” value blinks.
4
Press the scroll buttons (˙/¥) to set the current
minute.
Source Select
< For Europe, the unit uses the 24-hour “military” clock.
For North America, the unit uses the 12-hour clock.
< When no action is taken for 10 seconds, the time
adjust mode will be cancelled.
< Press the stop button (H) to cancel the time setting.
2
Press the scroll buttons (˙/¥) to set the current
hour.
5
Press the ENTER button.
The clock starts from 00 seconds.
< The clock setting will not be saved when the AC
power cord is pulled out.
54
Page 55

Setting the Timer
< Adjust the clock before setting the timer.
1
Press the TIME SET button repeatedly until “On
Time” is displayed.
“On Time” appears on the display, and the “hour” value
blinks.
2
Press the scroll buttons (˙/¥) to set the hour
value, and press the ENTER button.
3
Press the scroll buttons (˙/¥) to set the minute
value, and press the TIME SET button.
“Off Time” appears on the display, and the “hour” value
blinks.
ENGLISH
The “minute” value blinks.
4
Repeat step 2 and 3 to set the Off time.
“Source Select” appears on the display.
< When you select “TUNER“ as the source, the band
is fixed as FM. The station selected when the timer
activates is the one selected last.
< You cannot select “USB/iPod“ as the source.
5
Press the scroll buttons (˙/¥) to select the
source, and press the ENTER button.
Now the timer setting is stored in memory.
55
Page 56

Timer Off
Timer Operation
Every time you press the TIMER button on the
remote control unit, the timer mode changes as
follows.
Timer Daily
Timer Once
Timer Playback (for daily playback)
1
Select “Timer Daily” by pressing the TIMER
button on the remote control unit.
The timer indicator “ ” lights on the display.
Timer Playback (for playback once)
1
Select “Timer Once” by pressing the TIMER
button on the remote control unit.
The timer indicator “ ” lights on the display.
2
Prepare for the timer playback.
Adjust the volume, tune in a station, etc.
3
Press the STANDBY/ON button to put the unit in
standby mode.
When the On time is reached, the unit will turn on and
start playback, and when the Off time is reached the
unit will return to standby.
Timer off
When not using the timer, press the TIMER button
on the remote control unit to select “Timer Off”.
The timer indicator “ ” disappears from the display.
2
Prepare for the timer playback.
Adjust the volume, tune in a station, etc.
3
Press the STANDBY/ON button to put the unit in
standby mode.
Everyday when the On time is reached, the unit will
turn on and start playback, and when the Off time is
reached the unit will return to standby.
56
Page 57

Sleep Timer
The power can be switched off after a specified amount
of time.
Press the SLEEP button repeatedly until desired time
appears on the display.
SLEEP-90 (80, 70 ... 10)
The power will be switched off 90 (80, 70 ... 10)
minutes later.
Listening to an External Source
You can listen to the sound from the external component
connected to the PHONO, AUX 1 IN, or AUX 2 IN jacks.
1
Press the SOURCE button to select “PHONO”,
“AUX 1” or “AUX 2”.
ENGLISH
SLEEP OFF
The sleep timer is off.
< The display is dimmed when you set the sleep timer.
< If you want to check the remaining time, press the
SLEEP button once. The remaining time will be
displayed for 3 seconds, and return to the normal
display.
2
Start playback on the external component.
3
Adjust the volume.
Turn the VOLUME knob to adjust the volume.
57
Page 58

Updating the firmware (1)
Updating the firmware using a LAN
Using the latest firmware file that is available on the
internet, you can update this unit’s firmware (built-in
program that controls the unit).
We recommend that you use the unit with the latest
firmware because updating the firmware to the latest
version can add more functions to or improve the stability
of the unit.
Downloading the latest firmware
You can download the latest version of the firmware
from the CR-H700DAB product information page of TEAC
website.
http://www.teac.eu/
o If there is no firmware update, no firmware files will be
available on the website.
1
Connect the unit to your LAN through a wireless
or wired connection.
For detailed information, see the sections
“Connections” and “Network Configuration”.
2
Press the SOURCE button repeatedly to select
TUNER mode.
3
Select “Internet Radio” or “Media Player” by
repeatedly pressing the BAND button on the
unit or the TUNER button on the remote control.
4
Press the MENU button on the unit. Select
“Software Update”, and then select “Webpage”.
o The unit will restart automatically.
o The unit’s IP address will appear on the unit’s
display after the unit restarts.
5
Start your web browser, and then enter the
unit’s IP address.
or
hub or rooter
6
Click Browse..., and then select the desired
firmware file (.fw).
58
Page 59

7
Click Upload.
If the following message appears, click OK, and then
return to Step 5 again.
CAUTION
o If the following window is displayed on the screen
during the update process, the unit’s firmware is being
updated. Please wait.
o During the update process, do not turn off the power
of the CR-H700DAB, the computer or any network
peripherals (access point, router, splitter, repeater,
etc.) involved in the data transmission and do not
disconnect their power plugs.
ENGLISH
8
Click OK to start the firmware update.
When the update starts, the following message
appears.
o The update status is also displayed on the unit.
WARNING
Unplugging the mains cord as well as power outage
may interrupt the update process and may result in
permanent damage to the unit.
o If the following message appears, do not click OK until
the unit restarts.
If you click OK by mistake before the unit restarts, the
webpage will not appear.
o When the firmware update is completed, the unit will
restart automatically.
59
Page 60

Updating the firmware (2)
Updating the firmware via the
Internet
The software of the unit can be updated via the Internet
connection, so that you are able to use the latest features
of the unit. Regularly check for updates.
1
Press the SOURCE button repeatedly to select
TUNER mode.
2
Select “Internet Radio” by pressing the BAND
button repeatedly.
3
Open “Setup Menu”.
Press the MENU/FM MODE button.
4
Select “Software Update” from “Setup Menu”.
Turn the MULTI JOG knob to select the item, and then
press the ENTER button.
Setup Menu
›Software Update
When “Software Update” is displayed, press the ENTER
button. Turn the MULTI JOG knob to select “USB” or
“Internet”, then press the ENTER button. When you
select “USB”, insert a USB memory into the USB port on
the unit in advance.
If an update is available, the unit automatically starts
download and installation of the new software.
< You can check the current software version of your
unit using “Setup Menu”. Follow the menu items as
follows:
“Setup Menu” w “Information” w “Firmware Version”
6HWXS0HQX
¹'HYLFH1DPH(GLW
60
Page 61

Troubleshooting (1)
In case of trouble with the unit, please take the time
to look through this chart and see if you can solve the
problem yourself before you call your dealer or TEAC
service center.
Amplifier
No power.
e Check the connection to the AC power supply.
No sound from speakers.
e Check the connection to the speakers.
e Adjust the volume.
e Select proper source.
e Pull out the headphones plug from PHONES jack.
e If muting is on, press the MUTING button.
The sound is noisy.
e The unit is too close to a TV set or similar appliances.
Install the unit apart from them, or turn them off.
Remote Control Unit
Remote control unit does not work.
e If the batteries are exhausted, change the batteries.
e Use remote control unit within the range (5 m/16 ft.)
and point at the front panel.
e Clear obstacles between the remote control unit and
the main unit.
e If a fluorescent light is near the unit, turn it off.
DAB tuner
No sound.
e Ensure that the unit has been able to locate DAB
stations.
“NO stations Available” appears on the display.
e Check that the DAB antenna is connected (see page
7).
e Ensure that DAB broadcast covers your area.
Cannot access secondary services.
e Not all services are accompanied by secondary
services. If a secondary service is available, the
secondary indicator (“>>”) is displayed next to the
station name.
Display goes out or “service off air” is displayed.
e This may occur if a broadcaster changes the label
of a service or removes the label whilst you are
listening to it. The unit will try to retune to this
station. If the problem persists, follow the procedure
for channel scan on page 30.
A burbling sound is heard on some stations.
e DAB system is able to produce quality audio from a
low level signal, but when the signal level is too low,
a “burbling” sound might be heard. To reduce this,
try repositioning your antenna to gain maximum
signal strength.
ENGLISH
Tuner
Cannot listen to any station, or signal is too weak.
e Tune in the station properly.
e If a TV set is near the unit, turn it off.
e Install the antenna again after locating the best
reception position.
e An external antenna is recommended.
Though the broadcast is stereo, it sounds monaural.
e Press the FM MODE button.
Network
Cannot connect to the Internet.
e Check if your computer can connect to the Internet
using the same network.
e Enter a correct pass key to the network.
e Check the settings of your network’s firewall. The
unit needs access to the following UDP and TCP
ports as a minimum: 80, 554, 1755, 5000 and 7070.
Cannot listen to a station/Podcast.
e The broadcaster has a temporary problem with
Internet connection.
e Check if your Internet connection is not temporarily
disconnected or disturbed.
61
Page 62

Troubleshooting (2)
Cannot find a station/Podcast in the station list.
e The station/Podcast may not be broadcast at the
moment.
e The link of the station/Podcast may be out of date.
e The allowed number of simultaneous listeners of
station/Podcast might have reached the maximum.
e The internet connection speed is too slow.
e Add the station/Podcast to your own station list by
accessing the internet radio portal.
Cannot use Airplay.
e Check if you selected the unit as the device for
Airplay.
Cannot use Music Streaming.
e Check if you selected the unit as the device for Music
Streaming.
Media Player
Cannot connect to the LAN.
e Check the settings of your network’s firewall. The
unit needs access to the following UDP and TCP
ports as a minimum: 80, 554, 1755, 5000 and 7070.
e Check if your computer can connect to the Internet
using the same network.
e Enter a correct password to the network.
e Check if the computer is not shut down or in the
sleep mode. Set up the computer not to shut down
or turn into the sleep mode automatically.
e There may be a problem with the network
authentication. Press the SOURCE button or BAND
button to select the Media Player again.
CD Player
Will not play.
e Load a disc with label side up.
e If the disc is dirty, clean the surface of the disc.
e A blank disc has been loaded. Load a prerecorded
disc.
e Depending on the disc, etc. it may not be possible
to play back CD-R/RW discs. Try again with another
disc.
e You cannot play back unfinalized CD-R/RW discs.
Finalize such a disc in a CD recorder and try again.
Sound skips.
e Place the unit on a stable place to avoid vibration
and shock.
e If the disc is dirty, clean the surface of the disc.
e Do not use scratched, damaged or warped discs.
iPod Player
Will not play.
e Remove the iPod from the USB jack, wait a few
seconds, and insert it again.
e Software update may solve the problem. Visit
the Apple website and download the latest iPod
software.
Cannot operate the iPod.
e Make sure the HOLD switch of the iPod is not set to
HOLD.
Cannot find a track. (Shared Media)
e Add the track to the media library of Windows Media
Player.
e Select “CR-H700“ from the list (Windows 7) or select
“Allow” for “CR-H700” (Windows Vista) (page 50 to
51).
e Check the file format. Playable formats are MP3 and
WMA.
e If you have antivirus security software enabled on
your computer, the unit may fail to connect.
Cannot find a folder/file. (Shared Folders)
e Configure the folder/file sharing setting. (page 48 to
49)
e Add the file to the shared folder.
e Enter a correct password of the user account.
e Check the file format. Playable formats are MP3 and
WMA.
e If you have antivirus security software enabled on
your computer, the unit may fail to connect.
62
Page 63

Audio Files
There is no sound even if the play/pause button
(y/J) is pressed.
e Check if there are playable files on the USB device.
e Non-playable file formats (e.g MPEG 1 LAYER 2 file)
cannot be played.
“Artist:[ ]”, “Title:[ ]”, and “Album:[ ]” appears
on the display.
e There is no ID3 tag information for the music file.
Edit the title, artist, and album information of the
song on a PC using an MP3 or WMA file editing
application.
Some unknown characters are displayed on the
display panel.
e This unit cannot display symbols and full-size or
double-byte characters (such as Japanese, Chinese,
etc.) correctly. File name of MP3 or WMA should be
alphanumeric characters.
If normal operation cannot be recovered, unplug
the power cord from the outlet and plug it again.
Maintenance
If the surface of the unit gets dirty, wipe with a soft cloth
or use diluted neutral cleaning liquid. Be sure to remove
any fluid completely. Do not use thinner or alcohol as
they may damage the surface of the unit.
Restoring factory settings
If the power supply is interrupted for 14 days or longer, all
the settings kept in memory (such as preset stations and
timer settings) will be erased.
It will take more than 3 days after plugging the power
cord into the outlet to charge enough electricity for the
memory backup function.
If you want to manually initialize the settings, hold
down the SOURCE button and play/pause button
(y/J) for more than 4 seconds in standby mode.
ENGLISH
The unit will be turned on, and all the settings are reset to
the default settings.
After that, turn off the unit, unplug the power cord from
the outlet, then plug it again.
63
Page 64

Specifications
AMPLIFIER Section
Output Power .... 40 W + 40 W (6 ohms, 0.5 %, 1 kHz)
Input Sensitivity ................ PHONO: 2.5 mV 47 kΩ
AUX1, AUX2: 200 mV 47 kΩ
Frequency Response .... 20 Hz to 60,000 Hz (+1/–3 dB)
Subwoofer pre-out .................... 10 Hz to 35 kHz
TUNER Section
FM Section
Tuning Range ............... 87.50 MHz to 108.00 MHz
Signal-to-Noise Ratio ................... 65 dB (Mono)
60 dB (Stereo)
AM Section
Tuning Range ....................522 kHz to 1,629 kHz
Signal-to-Noise Ratio ............................35 dB
DAB Tuner
Tuning range ............ Band 3, 174 MHz to 240 MHz
Input ............................ 75 ohms, unbalance
Max signal ............................... –5 dBm typ
Sensitivity .............................. –97 dBm typ
Adjacent Channel Rejection ................ 35 dB typ
USB Section
Supply current of the USB port .............. 2100 mA
Playback
Format .............. LPCM,WAV,FLAC,MP3,WMA,AAC
Frequency Response ....... 20 Hz to 20,000 Hz (±2 dB)
Signal-to-Noise Ratio ................ more than 85 dB
GENERAL
Power Requirements .................. AC 230 V, 50 Hz
Power Consumption ........................... 120 W
0.5 W (standby)
Dimension (W x H x D) ........... 290 x 113 x 340 mm
Weight ........................................ 5.8 kg
Standard Accessories
Power Cord x 1
Remote Control Unit (RC-1286) x 1
Batteries (AAA) x 2
AM Loop Antenna x 1
FM Lead-type Antenna x 1
DAB antenna x 1
Owner’s Manual x 1
Warranty Card x 1
< Design and specifications are subject to change
without notice.
< Weight and dimensions are approximate.
< Illustrations may differ slightly from production
models.
Internet Radio
Format ......... WAV,FLAC,ALAC,MP3,OGG,WMA,AAC
Internet connection
LAN terminal ........................... 10/10 0 BASE-T
Wireless LAN ........................... IEEE 802.11b/g
Security .................... WEP, WPA-PSK, WPA2-PSK
64
Page 65

For European Customers
Pb, Hg, Cd
Disposal of electrical and electronic equipment
(a) All electrical and electronic equipment should be disposed
of separately from the municipal waste stream via collection
facilities designated by the government or local authorities.
(b) By disposing of electrical and electronic equipment correctly,
you will help save valuable resources and prevent any potential
negative effects on human health and the environment.
(c) Improper disposal of waste electrical and electronic equipment
can have serious effects on the environment and human health
because of the presence of hazardous substances in the
equipment.
(d) The Waste Electrical and Electronic Equipment (WEEE)
symbol, which shows a wheeled bin that has been
crossed out, indicates that electrical and electronic
equipment must be collected and disposed of
separately from household waste.
(e) Return and collection systems are available to end users. For
more detailed information about the disposal of old electrical
and electronic equipment, please contact your city office,
waste disposal service or the shop where you purchased the
equipment.
Disposal of batteries and/or accumulators
(a) Waste batteries and/or accumulators should be disposed of
separately from the municipal waste stream via collection
facilities designated by the government or local authorities.
(b) By disposing of waste batteries and/or accumulators correctly,
you will help save valuable resources and prevent any potential
negative effects on human health and the environment.
(c) Improper disposal of waste batteries and/or accumulators can
have serious effects on the environment and human health
because of the presence of hazardous substances in them.
(d) The WEEE symbol, which shows a wheeled bin that
has been crossed out, indicates that batteries and/
or accumulators must be collected and disposed of
separately from household waste.
If a battery or accumulator contains more than the
specified values of lead (Pb), mercury (Hg), and/or cadmium
(Cd) as defined in the Battery Directive (2006/66/EC), then the
chemical symbols for those elements will be indicated beneath
the WEEE symbol.
(e) Return and collection systems are available to end users.
For more detailed information about the disposal of waste
batteries and/or accumulators, please contact your city office,
waste disposal service or the shop where you purchased them.
ENGLISH
65
Page 66

Sommaire
Avant Utilisation
Nous vous remercions pour l’achat d’un appareil
TEAC. Lire ce manuel avec attention pour obtenir
les meilleures performances possibles de cet
appareil.
Avant Utilisation ............................................66
Fichiers et disques lisibles et compatibilité iPod/iPhone/iPad ..67
Raccordement des antennes (DAB) ..........................69
Raccordement des antennes (AM/FM) .......................70
Raccordement des enceintes ................................71
Connexions .................................................72
Noms des commandes (appareil principal) ...................74
Noms des commandes (télécommande) .....................76
Boîtier de télécommande ...................................78
Fonctionnement de base. . . . . . . . . . . . . . . . . . . . . . . . . . . . . . . . . . . .79
Lecture de disque ...........................................80
Lecture USB .................................................82
Lecture générale (disque/USB) ...............................82
Recherche de dossier .......................................83
Lecture programmée .......................................84
Lecture aléatoire ............................................86
Lecture répétée .............................................86
Affichage ...................................................87
Écoute de iPod ..............................................87
Fonctionnement de base DAB ...............................90
Utilisation du menu DAB ....................................91
Changement des réglages d’affichage pour DAB .............96
Écoute d’une émission FM/AM ...............................97
Sélection d’un préréglage ...................................98
RDS ........................................................100
Recherche par types de programme ........................102
Réglage initial du réseau ...................................104
Écouter la radio Internet ....................................106
Portail radio ................................................108
Avec AirPlay. . . . . . . . . . . . . . . . . . . . . . . . . . . . . . . . . . . . . . . . . . . . . . . .108
Utilisation de la lecture de musique en transit ...............109
Paramétrage du lecteur multimédia ........................110
Écouter le lecteur multimédia ..............................114
Configuration du réseau ....................................115
Réglage de l’horloge .......................................116
Réglage de la minuterie ....................................117
Exécution de la minuterie ..................................118
Minuterie d’arrêt ...........................................119
Écoute d’une source extérieure .............................119
Mise à jour du firmware ....................................120
Résolution des problèmes ..................................123
Spécifications ..............................................126
66
Caractéristiques du CR-H700DAB
< Prise USB pour iPod/iPhones/appareil USB
< Radio Internet (page 104)
< Airplay (page 107)
< Lecture de musique en transit (page 108)
La lecture de musique en transit est une fonction
d’utilisation des appareils audiovisuels, des ordinateurs
ou d’autres dispositifs domestiques d’information dans
un réseau.
< Lecteur multimédia (page 113)
CR-H700DAB vous offre “une solution multi-pièces et
multi-commande” par AirPlay, lecture de musique en
transit et lecteur multimédia.
Lisez ce qui suit avant d’utiliser l’appareil.
< Quand l’appareil est sous tension, mettre le téléviseur
sous tension peut entraîner l’apparition de ligne sur
l’écran du téléviseur, selon les conditions des ondes
électriques de la télédiffusion. Ce n’est pas un mauvais
fonctionnement de l’appareil ou du téléviseur. Dans ce
cas, mettez l’appareil hors tension.
< L’appareil pouvant dégager de la chaleur lorsqu’il
fonctionne, laissez un dégagement suffisant autour de
l’appareil afin de permettre une ventilation naturelle.
< La tension d’alimentation de l’appareil doit
correspondre à celle indiquée à l’arrière de l’appareil.
En cas de doute, contactez un électricien.
< Choisissez avec soin l’endroit où vous placerez votre
appareil. Évitez de le placer directement au soleil ou
près d’une source de chaleur. Évitez aussi les endroits
sujets à des vibrations, à de la poussière excessive, à la
chaleur, au froid ou à l’humidité.
< Ne placez pas l’appareil sur un amplificateur/récepteur.
< N’ouvrez pas le coffret car ceci risquerait de provoquer
des dommages aux circuits ou des chocs électriques.
Si un objet étranger pénétrait dans l’appareil, contactez
votre revendeur ou un centre de service.
< Lors du débranchement du cordon d’alimentation de
la prise murale, tirez toujours sur la fiche et non pas sur
le cordon.
< N’essayez pas de nettoyer l’appareil avec des solvants
chimiques car ceci pourrait endommager la finition de
l’appareil. Utilisez un chiffon propre et sec.
< Gardez soigneusement ce manuel d’instructions pour
une référence future.
< Les opérations dans ce manuel sont illustrées, à titre
d’exemple, à l’aide du modèle pour l’Europe.
NE DÉPLACEZ PAS L’APPAREIL PENDANT LA
LECTURE.
Pendant la lecture, le disque tourne à grande vitesse.
NE soulevez pas cet appareil et ne le déplacez pendant
la lecture. Vous risqueriez d’endommager le disque.
LORS DU DÉPLACEMENT DE L’APPAREIL
Lorsque vous changez de lieu d’installation ou lorsque
vous emballez cet appareil pour le déplacer, n’oubliez
pas de retirer le disque et de ramener le plateau à
disque à sa position d’origine dans ce lecteur.
Ensuite, appuyez sur l’interrupteur d’alimentation pour
mettre l’appareil hors tension et débranchez le cordon
d’alimentation. Si vous déplacez cet appareil alors qu’il
contient un disque, vous risquez de l’endommager.
Page 67

Fichiers et disques lisibles et compatibilité iPod/iPhone/iPad (1)
Disques Lisibles :
M CD audio conventionnels portant le logo COMPACT
DISC DIGITAL AUDIO sur leur étiquette.
M Disques CD-R/CD-RW correctement finalisés
M CD MP3 ou WMA
Note:
< Selon la qualité du disque et/ou la qualité de
l’enregistrement, certains disques CD-R/CD-RW
risquent de ne pas pouvoir être lus.
< Les disques protégés contre la reproduction, ainsi que
les disques non-conformes à la norme CD risquent de
ne pas pouvoir être lus correctement par cet appareil.
TEAC Corporation et ses filiales ne peuvent être tenus
responsable en cas de dommages provoqués par la
lecture de disques de ce type et pour la qualité sonore
résultante. Si vous rencontrez des difficultés avec
des disques non standard, contactez directement les
producteurs du disque.
< Placez toujours le disque sur le plateau à disque avec
l’étiquette dirigée vers le haut. (Les disques compacts
ne peuvent être reproduits ou enregistrés que sur une
seule face.)
< Pour sortir un disque de son emballage, appuyez sur la
partie centrale de l’étui et sortir le disque en veillant à
bien le tenir par les bords.
< Rangez les disques dans leur boîtier après utilisation
afin d’éviter la poussière ou les rayures qui feraient
“sauter” le lecteur laser.
< N’exposez pas les disques à la lumière directe du soleil,
à une température élevée ou à une humidité excessive
pendant une période prolongée. Une exposition
prolongée à une température élevée peut gondoler le
disque.
< Ne reproduisez pas un disque qui est gondolé,
déformé ou endommagé. Reproduire un tel disque
peut causer des dégâts irréparables au mécanisme de
lecture.
< Les disques CD-R et CD-RW sont plus sensibles
aux effets de la chaleur et aux rayons ultraviolets
que les disques compacts ordinaires. Il est donc
particulièrement important de les ranger dans un
endroit à l’abri de la lumière directe du soleil et de
toute source de chaleur, telle que des radiateurs ou
des appareils électriques, susceptibles de dégager de
la chaleur.
FRANÇAIS
< Les disques CD-R et CD-RW sont plus sensibles aux
effets de la chaleur et aux rayons ultraviolets que les
disques compacts ordinaires.
< Ne collez jamais d’étiquette ou de feuille de protection
sur le disque; n’utilisez pas de spray destiné à déposer
sur le disque une couche de protection.
< Utilisez, pour écrire des informations sur la face
portant l’étiquette, un feutre utilisant une encre à
base d’huile. N’utilisez jamais un stylo bille ou de
stylo à pointe dure, qui risquerait d’abîmer la surface
enregistrée du disque.
< Si le disque devient sale, essuyez sa surface
radialement (du centre vers la périphérie) avec un
chiffon doux et sec.
< N’utilisez jamais de produits chimiques, tels que des
sprays, des liquides antistatiques, ou des diluants pour
nettoyer les disques. Ces produits chimiques risquent
de provoquer des dégâts irréparables sur la surface en
plastique du disque.
< N’utilisez jamais de stabilisateurs. L’utilisation, avec cet
appareil, de stabilisateurs pour CD disponibles dans le
commerce, pourrait endommager les mécanismes de
l’appareil et provoquer un mauvais fonctionnement.
< N’utilisez pas de CD à forme irrégulière (octogonal, en
forme de cœur, de la taille d’une carte de visite, etc.).
De tels CD peuvent endommager l’appareil.
< En cas de doute quant à la manipulation des CD-R ou
CD-RW, lisez les instructions fournies avec le disque ou
contactez directement le fabricant du disque.
67
Page 68

Fichiers et disques lisibles et compatibilité iPod/iPhone/iPad (2)
Fichiers Lisibles:
< Cet appareil peut lire les fichiers MP3 enregistrés sur
divers dispositifs de mémoire USB tels qu’un mémoire
flash USB, un lecteur MP3 ou un disque dur.
Le disque dur doit être formaté en FAT 16 ou FAT 32,
mais pas en NTFS.
< Si plus de 2000 fichiers sont enregistrés sur la mémoire
USB, il se peut que l’appareil ne puisse pas les lire
correctement.
< Les noms de fichier ne doivent contenir que des
caractères alphanumériques. Cet appareil ne peut pas
afficher correctement les symboles et les caractères
grand format ou à deux octets (tels que les caractères
japonais, chinois, etc.). Assurez-vous aussi d’utiliser
l’extension de fichier correcte.
< Les fichiers sonores codés en 128 Kbps sont d’une
qualité proche de celle d’un CD audio ordinaire. Bien
que ce lecteur puisse reproduire les fichiers MP3 de
débit binaire inférieur, la qualité sonore peut être
détériorée si le débit binaire est faible.
Les formats de fichier lisibles par chaque source de
lecture sont les suivants.
Lecteur de média
Format CD USB
LPCM
WAV –
FLAC –
ALAC – –
MP3
OGG – –
WMA
AAC –
MP3
Extension de fichier: .mp3
Flux: MPEG-1/2 Layer III
Fréquence d’échantillonnage: 8 à 48 kHz
Débit: 8 à 320 kbps
LPCM(CD-DA)
Flux: LPCM
Fréquence d’échantillonnage: 44.1 kHz
WAV
Extension de fichier: .wav
Flux: LPCM
Fréquence d’échantillonnage: 8 à 48 kHz
ALAC
Extension de fichier: .m4a
Norme acceptée : Apple Lossless
Fréquence d’échantillonnage : 44.1 kHz
– – –
WiFi
Câble
Ethernet
FLAC
Extension de fichier : .flac
Flux : FLAC
Fréquence d’échantillonnage: 8 à 48 kHz
Avec l’USB, seul le 48 kHz est pris en charge.
Ogg Vorbis
Extension de fichier : .ogg
Flux : Ogg
Fréquence d’échantillonnage : 8 à 48 kHz
Débit : 16 à 128 kbps
WMA
Extension de fichier: .asf/.wma
Flux: WMA2/7/8/9/10, WMA Pro, WMA Lossless
Fréquence d’échantillonnage: 8 à 48 kHz
Débit: 5 à 320 kbps
Note : les formats WMA Pro et WMA Lossless ne
sont pris en charge que si l’ordinateur de lecture
utilise le lecteur Windows Media version 12 ou
ultérieure (la lecture se fait après transcodage).
AAC
Ex te n s i o n d e fi c hie r : . m 4a /.aac /. 3gp /. 3g2
Flux: MPEG-4 AAC/MPEG-4 HE AAC (AAC Plus v1/2)
Fréquence d’échantillonnage: 32 à 96 kHz
Débit: 16 à 320 kbps
Compatibilité iPod/iPhone/iPad
Cet appareil peut être raccordé et utilisé avec les modèles
d’iPod suivants.
iPod nano (2e, 3e, 4e, 5e et 6e génération)
iPod touch (1e, 2e, 3e et 4e génération)
iPhone 4, iPhone 3GS, iPhone 3G
iPad 2, iPad
< Cet appareil ne peut pas afficher de vidéo provenant
d’un iPod/iPhone/iPad connecté.
< Pour connecter un iPod/iPhone/iPad, utilisez le câble
USB fourni avec l’iPod/iPhone/iPad.
Logiciel iPod Compatible
Si votre iPod ne fonctionne pas avec le CR-H700DAB
ou avec la télécommande, mettre à jour le logiciel
peut résoudre le problème.
Consultez le site Web Apple et téléchargez le dernier
logiciel pour iPod.
68
Page 69

Raccordement des antennes (DAB)
Antenne DAB intérieure
Connectez l’antenne DAB de type T à la prise d’antenne
DAB. Étendez la fil verticalement et attachez-le au
cadre d’une fenêtre ou à un mur avec des punaises ou
des accessoires similaires.
< Vous pouvez ajuster la position de l’antenne pour
obtenir la meilleure réception en vérifiant la force du
signal sur l’affichage. Reportez-vous à “Force du signal”
dans “Changement des réglages d’affichage pour
DAB” à la page 96.
Antenne DAB extérieure
Dans les zones où les signaux DAB sont faibles, il sera
nécessaire d’utiliser une antenne DAB extérieure.
Multi-élément
Dipôle
FRANÇAIS
< Il est possible d’utiliser une antenne de télévision
ou une antenne FM pour recevoir les signaux DAB.
Cela peut permettre d’obtenir un signal plus puissant
qu’une simple antenne intérieure.
Vous pouvez aussi avoir besoin de changer la fiche de
votre antenne de télévision/FM pour un type F, et aussi
d’utiliser un amplificateur de signal pour améliorer le
signal.
69
Page 70

Raccordement des antennes (AM/FM)
Antenne cadre AM intérieure
L’antenne cadre AM à haute performance fournie avec
l’appareil est suffisante pour une bonne réception dans la
plupart des régions.
Pour faire tenir l’antenne droite, fixez la griffe sur la fente à
la base de l’antenne.
Branchez les extrémités de l’antenne cadre aux prises
d’antenne AM.
Placez l’antenne sur une étagère ou suspendez la dans
un encadrement de fenêtre, etc. et orientez la dans la
direction qui donne la meilleure réception. Éloignez
autant que possible tous les fils tels que cordons secteur,
les câbles d’enceinte ou d’interconnexion de l’antenne.
Antenne AM
Extérieure
Antenne FM intérieure
Connectez l’antenne FM filaire à la prise FM 75 Ω,
déployez la et accordez vous sur votre station préférée
(voir page 97). Positionnez l’antenne à un endroit
approprié tel qu’un encadrement de fenêtre ou mur afin
d’obtenir la meilleure réception puis fixez-la en utilisant
des punaises, épingles ou tout autre toute autre fixation
appropriée.
Assurez-vous de
brancher le câble noir
au terminal GND.
< Si l’antenne cadre fournie ne permet pas une réception
satisfaisante (souvent en raison de l’éloignement de
l’émetteur, ou dans un immeuble en béton, etc.), il
peut être nécessaire d’utiliser une antenne AM
extérieure.
Utilisez une antenne AM haute qualité en vente dans
le commerce, ou sinon un fil isolé de plus de 5 m de
long. Dénudez une extrémité du cordon et raccordezle à l’entrée comme indiqué.
L’antenne filaire doit être fixée à l’extérieur ou
à l’intérieur près d’une fenêtre. Pour une meilleure
réception, raccordez la borne GND à une terre fiable.
Note:
Même quand vous utilisez une antenne AM extérieure, ne
déconnectez pas l’antenne cadre.
70
Antenne FM extérieure
Dans les zones où les signaux FM sont faibles, il peut être
nécessaire d’utiliser une antenne extérieure.
En général une antenne à 3 éléments suffira; si vous résidez
à un endroit où les signaux FM sont particulièrement
faibles il peut être nécessaire d’utiliser une antenne à 5
éléments ou plus.
< Débranchez l’antenne intérieure lorsque vous utilisez
une antenne extérieure.
Page 71

Raccordement des enceintes
CAISSON DE BASSES
ENCEINTE
A
B
LINE
IN
Raccordement des enceintes
A
Les prises + (positives) du CR-H700DAB sont rouge
(pour l’enceinte droite) et blanche (pour l’enceinte
gauche). Les prises _ (négatives) sont noires.
L’e xtrém i té + du câble de l’enceinte est marquée
pour la distinguer de l’extrémité négative du câble.
Connectez ce côté marqué aux prises + rouge et
blanche et le côté sans marque aux prises _ noires
du CR-H700DAB et des enceintes.
ATTENTION
< Pour éviter d’endommager les enceintes par l’entrée
soudaine d’un son de niveau élevé, assurez-vous de
mettre l’appareil hors tension avec de raccorder les
enceintes.
< Vérifiez l’impédance de vos enceintes. Raccordez des
enceintes dont l’impédance est d’au moins 6 ohms.
< Préparez les câbles des enceintes au raccordement
en enlevant environ 10 mm ou moins (pas plus car
cela pourrait causer un court-circuit) de l’isolation
externe. Entortillez les câbles en les serrant pour
éviter les enchevêtrements :
FRANÇAIS
Comment raccorder
1. Dévissez la prise en la tournant dans le sens inverse
des aiguilles d’une montre. Il n’est pas possible de la
retirer complètement.
2. Insérez entièrement le fil dans la prise et revissezla en la tournant dans le sens des aiguilles d’une
montre afin que le fil soit bien branché:
3. Assurez-vous que le fil est fixé solidement en le tirant
légèrement.
Pour les utilisateurs en Europe
Conformément aux règlements européen de
sécurité, il n’est pas possible de connecter des
fiches banane aux prises d’enceinte sur les modèles
européens. Les trous dans lesquels les fiches banane
devraient être insérées ont été recouverts de
capuchons noirs. Connectez les enceintes en utilisant
des cosses ou des fils dénudés. Si les capuchons
noirs se détachaient des prises, remettez-les dans
leur position d’origine.
B
Prise SUBWOOFER OUT
Connectez un caisson de basses en vente dans le
commerce à cette prise.
71
Page 72

Connexions
A
D
Platine cassette,
enregistreur de CD, etc.
B
LINE
OUT
LRLR
LINE
IN
C
FE
Tourne-disque
ATTENTION
< Mettez hors tension tous les appareils avant de faire les raccordements.
< Lisez attentivement le mode d’emploi de chacun des composantes que vous souhaitez utiliser avec cet appareil.
< Assurez vous que chaque fiche est bien enfoncée. Pour éviter tout ronflement ou bruit parasite, ne regroupez pas les
câbles avec le cordon d’alimentation secteur ou les câbles d’enceinte.
72
Page 73

Cordon d’alimentation CA
Blanc (L)
Rouge (R)
Blanc (L)
Rouge (R)
A
Reliez ce cordon à une prise électrique murale.
< Débranchez le cordon d’alimentation quand vous
n’avez pas l’intention d’utiliser l’appareil pendant une
période prolongée.
Prises PHONO
E
Connectez la fiche Cinch du tourne-disque à la prise
PHONO.
Assurez-vous de connecter les câbles de la façon
suivante:
B
Prise ETHERNET
Pour utiliser une connexion Internet câblée,
connectez la prise ETHERNET de cet appareil au
réseau Ethernet en utilisant un câble Ethernet en
vente dans le commerce.
< Si vous connecté ou déconnectez le câble ethernet
pendant que l’appareil est sous tension, mettez
l’appareil hors tension puis de nouveau sous tension.
Reportez-vous à la page 79 pour savoir comment
mettre l’appareil sous ou hors tension.
C
Antenne réseau sans fil
Si l’endroit où vous installez l’appareil est équipé
d’un réseau local sans fil, l’appareil s’y connecte à
l’aide de l’antenne réseau sans fil. Relevez l’antenne
pour l’utiliser.
Prises AUX 1
D
Ces prises transmettent les signaux audio analogique
à 2 canaux. Raccordez les appareils à l’aide de câbles
Cinch (RCA) en vente dans le commerce.
Assurez-vous de connecter les câbles de la façon
suivante:
Fiche blanche w prise blanche
(L: canal gauche)
Fiche rouge w prise rouge
(R: canal droit)
Fiche blanche w prise blanche
(L: canal gauche)
Fiche rouge w prise rouge
(R: canal droit)
< Assurez vous que chaque fiche est bien enfoncée.
Pour éviter tout ronflement ou bruit parasite, ne
regroupez pas les câbles de signal avec le cordon
d’alimentation secteur ou les câbles d’enceinte.
< Des cellules à aimant mobile peuvent être utilisées
avec cet appareil.
F
SIGNAL GND
Connectez le fil de terre du tourne-disque à cette
prise.
< Ce n’est pas une terre sécurisée.
< Si le fil de terre du tourne-disque n’est pas connecté
à cette prise, un ronflement peut se faire entendre.
FRANÇAIS
Si vous voulez utiliser un appareil d’enregistrement
(p. ex. un magnétophone ou un enregistreur de
CD, etc.) avec le CR-H700DAB, connectez les prises
de sortie de l’enregistreur aux prises AUX 1 IN du
CR-H700DAB, connectez les prises d’entrée de
l’enregistreur aux prises AUX 1 OUT du CR-H700DAB.
< Assurez vous que chaque fiche est bien enfoncée.
Pour éviter tout ronflement ou bruit parasite, ne
regroupez pas les câbles de signal avec le cordon
d’alimentation secteur ou les câbles d’enceinte.
73
Page 74

Noms des commandes (appareil principal)
A
B
E
C
D
F G H I J NMK L
74
Page 75

A
MULTI JOG
En mode TUNER, utilisez ce bouton pour syntoniser
une station ou sélectionner une station préréglée.
En mode iPod, utilisez ce bouton pour faire défiler le
menu vers le haut ou le bas.
En mode CD/USB, utilisez ce bouton pour les buts
suivants:
- pour sauter des plages/fichiers pendant la lecture
- CD uniquement: en mode d’arrêt/pause, pour
sélectionner une plage/fichier à lire (appuyez sur la
touche y/J pour démarrer la lecture)
- USB uniquement: pour sélectionner un dossier ou
un fichier à lire (appuyez sur la touche y/J ou ENTER
pour démarrer la lecture)
Après avoir appuyé sur la touche TIME SET, utilisez
ce bouton pour spécifier l’heure de mise sous/hors
tension de l’appareil ou pour sélectionner la source de
lecture.
Après avoir appuyé sur la touche TONE, tournez ce
bouton pour ajuster les graves ou les aigus.
B
Capteur de télécommande
Lors de l’utilisation de la télécommander, dirigez-la
vers le capteur de télécommande.
C
Affichage
D
VOLUME
Tournez ce bouton pour régler le volume.
< Le niveau du volume est est mémorisé même si
l’appareil s’éteint.
E
Standby/On ( )
Appuyez sur cette touche pour mettre l’appareil sous
tension ou hors tension. L’indicateur de veille devient
orange quand l’appareil est en veille. Quand l’unité
est mise sous tension, l’indicateur passe de l’orange
au bleu.
< Quand l’appareil ne reçoit pas de signaux pendant
plus d’une heure, il se met automatiquement hors
tension (fonction de mise hors tension automatique).
F
PHONES
Pour bénéficier d’une écoute privée, insérez la fiche
d’un casque d’écoute dans cette prise et réglez le
volume en tournant le bouton VOLUME.
G
AUX 2 IN
Connectez un appareil tel qu’un lecteur audio portable
en utilisant un câble stéréo à fiche min de 3,5 mm.
H
Prise USB
Connectez un iPod ou un périphérique USB à mémoire
extérieur à cette prise.
I
SOURCE
Utilisez cette touche pour sélectionner une source.
J
MENU/FM MODE
Utilisez cette touche pour retourner au menu
précédent de votre iPod. Cette touche est équivalente
à la touche MENU de votre iPod.
Lors de l’écoute de la Radio Internet ou du Lecteur
Média, utilisez cette touche pour commuter entre le
mode Radio Internet/Lecteur Média et le menu de
réglage du réseau.
En mode FM, utilisez cette touche pour sélectionner
l’effet stéréo ou monaural.
En mode DAB, utilisez cette touche pour ouvrir les
menus.
K
Saut (.//)
En mode CD/USB, utilisez ces touches pour les buts
suivants:
- pour sauter des plages/fichiers pendant la lecture
- en mode d’arrêt/pause, pour sélectionner une
plage/fichier à lire (appuyez sur la touche y/J pour
démarrer la lecture)
- en mode de pause, pour démarrer la lecture d’un
fichier (USB uniquement)
- pour se déplacer au dossier du niveau suivant/
précédent quand un dossier est sélectionné (USB
uniquement)
En mode iPod, utilisez ces touches pour sauter des
morceaux d’un iPod pendant la lecture ou en mode
pause.
Lors des réglages, utilisez la touche . pour
retourner au menu précédent.
L
TUNING MODE, ENTER, ouverture/fermeture (L)
En mode FM ou AM, utilisez cette touche pour
sélectionner le mode de syntonisation.
Utilisez cette touche pour régler l’heure pendant le
réglage de la minuterie ou de l’horloge.
Pendant l’écoute de la Radio Internet ou du Lecteur
Média, utilisez cette touche pour sélectionner une
station, un répertoire ou un fichier à lire.
En mode iPod, utilisez cette touche pour valider une
sélection dans un menu.
En mode USB, utilisez cette touche pour sélectionner
un répertoire ou un fichier à lire.
En mode CD, utilisez cette touche pour ouvrir ou
fermer le plateau à disque.
M
INFO/RDS, arrêt (H)
En mode FM, utilisez cette touche pour sélectionner le
mode RDS.
En mode DAB, lors de l’écoute de la radio Internet
ou du lecteur multimédia, utilisez cette touche
pour changer l’information de la deuxième ligne de
l’affichage.
En mode USB/CD, utilisez cette touche pour arrêter la
lecture.
N
BAND, lecture/pause (y/J)
Utilisez cette touche pour sélectionner FM, AM ou
DAB.
En mode USB/iPod, utilisez cette touche pour démarrer
ou suspendre temporairement la lecture sur l’iPod ou
le périphérique USB.
En mode CD, utilisez cette touche pour démarrer ou
suspendre temporairement la lecture d’un CD.
FRANÇAIS
75
Page 76

Noms des commandes (télécommande)
a
STANDBY/ON
a
p
b
q
c
r
d
e
s
f
g
h
i
j
k
l
t
u
v
m
w
n
o
Appuyez sur cette touche pour mettre l’appareil sous
tension ou en veille.
Quand l’appareil est en veille, l’indicateur de veille/
sous tension s’allume en orange. Quand l’unité est
mise sous tension, l’indicateur passe de l’orange au
bleu.
b
TUNER, CD, iPod/USB, AUX 1/2, PHONO
Utilisez ces touches pour sélectionner une source.
c
TIME SET
Utilisez cette touche pour ajuster l’horloge et pour
régler une minuterie (pour spécifier l’heure actuelle,
l’heure de mise sous/hors tension de l’appareil ou pour
sélectionner la source de lecture).
d
TONE
Utilisez cette touche conjointement avec la touche
de défilement pour régler les graves, les aigus ou
la balance sonore. Utilisez ˙ ou ¥ pour ajuster les
graves ou les aigus et . ou / pour ajuster la
balance sonore.
e
TIMER
Utilisez cette touche pour sélectionner la fonction de
minuterie (“Timer Daily”, “Timer Once” ou “Timer Off”).
f
FM MODE
En mode FM, utilisez cette touche pour sélectionner
l’effet stéréo ou monaural.
g
RE PEAT 1/ALL
En mode USB/iPod, utilisez cette touche pour régler la
lecture répétée sur l’iPod ou le périphérique USB.
En mode CD, utilisez cette touche pour régler la
lecture répétée sur le CD.
h
SHUFFLE
En mode USB/iPod, utilisez cette touche pour démarrer
la lecture aléatoire sur l’iPod ou le périphérique USB.
En mode CD, utilisez cette touche pour démarrer la
lecture aléatoire d’un CD.
i
Arrêt (H)
En mode USB, utilisez cette touche pour arrêter la
lecture du périphérique USB.
En mode CD, utilisez cette touche pour arrêter la
lecture du CD.
76
Page 77

j
PROGRAM
En mode CD, utilisez cette touche pour entrer en
mode de lecture programmée du CD.
En mode de lecture programmée, utilisez cette touche
pour entrer une sélection.
En mode TUNER, utilisez cette touche pour prérégler
des stations.
k
Lecture/pause (y/J)
En mode USB/iPod, utilisez cette touche pour démarrer
ou suspendre temporairement la lecture sur l’iPod ou
le périphérique USB.
En mode CD, utilisez cette touche pour démarrer ou
suspendre temporairement la lecture d’un CD.
l
MUTING
Utilisez cette touche pour couper le son.
m
MENU
Utilisez cette touche pour retourner au menu
précédent de votre iPod. Cette touche est équivalente
à la touche MENU de votre iPod.
Lors de l’écoute de la Radio Internet ou du Lecteur
Média, utilisez cette touche pour commuter entre le
mode Radio Internet/Lecteur Média et le menu de
réglage du réseau.
n
ENTER
Utilisez cette touche pour régler l’heure pendant le
réglage de la minuterie ou de l’horloge.
Pendant l’écoute de la Radio Internet ou du Lecteur
Média, utilisez cette touche pour sélectionner une
station, un répertoire ou un fichier à lire.
o
Saut (.//)
En mode CD/USB, utilisez ces touches pour les buts
suivants:
- pour sauter des plages/fichiers pendant la lecture
- en mode d’arrêt/pause, pour sélectionner une
plage/fichier à lire (appuyez sur la touche y/J pour
démarrer la lecture)
- en mode de pause, pour démarrer la lecture d’un
fichier (USB uniquement)
- pour se déplacer au dossier du niveau suivant/
précédent quand un dossier est sélectionné (USB
uniquement)
En mode iPod, utilisez ces touches pour sauter des
morceaux d’un iPod pendant la lecture ou en mode
pause.
Utilisez ces touches pour régler les graves ou les aigus.
p
Eject (L)
Utilisez sur cette touche pour ouvrir ou fermer le
plateau à disque.
q
DIMMER
Utilisez cette touche pour changer la luminosité de
l’affichage.
r
SLEEP
Appuyez sur cette touche pour ajuster la minuterie
d’arrêt.
s
INFO/RDS
En mode FM, utilisez cette touche pour sélectionner le
mode RDS.
En mode DAB, lors de l’écoute de la radio Internet
ou du lecteur multimédia, utilisez cette touche
pour changer l’information de la deuxième ligne de
l’affichage.
t
DI SPLAY
Utilisez cette touche pour changer l’information
affichée pendant la lecture de CD/USB.
u
CLEAR
Utilisez cette touche pour annuler des plages/fichiers
en mode de lecture programmée.
v
VOLUME
Utilisez ces touches pour régler le volume.
Défilement (˙/¥)
w
En mode USB/iPod, utilisez ces touches pour
sélectionner un dossier ou un fichier sur le support
USB.
Ou utilisez ces touches pour faire défiler le menu de
réglage ou le menu de l’iPod.
Après pression du bouton TONE, ces touches sont
utilisées pour ajuster les aigus ou les basses.
FRANÇAIS
77
Page 78

Boîtier de télécommande
La télécommande fournie permet la commande à
distance de l’appareil.
Pour utiliser le boîtier de télécommande, dirigez-le vers
le capteur de télécommande du panneau avant de
l’appareil.
< Même si la télécommande est utilisée à l’intérieur de
sa zone de fonctionnement, toute opération peut être
impossible s’il y a des obstacles entre le lecteur et la
télécommande.
< Si le boîtier de télécommande fonctionne dans le
voisinage d’autres appareils générant des rayons
infrarouges, ou si d’autres télécommandes utilisant
des rayons infrarouges sont utilisées près du lecteur,
l’appareil peut de ne pas bien fonctionner.
Inversement, les autres appareils peuvent ne pas
fonctionner correctement.
Mise en place des piles
1. Retirez le couvercle du compartiment des piles.
2. Insérez deux piles “AAA”. Assurez vous que les pôles
positif “+” et négatif “_” des piles soient positionnés
correctement lors de l’insertion.
3. Refermez le couvercle.
Précautions à observer concernant les
piles
< Assurez-vous d’insérer les piles en respectant les
polarités plus “+” et moins “_”.
< Utilisez des piles du même type. N’essayez jamais
d’utiliser en même temps des types de pile différents.
< Si le boîtier de télécommande n’est pas utilisé pendant
une longue période (plus d’un mois), retirer les piles de
la télécommande pour éviter des fuites des piles.
< Si les piles fuient, essuyez le liquide dans le
compartiment des piles et remplacez les piles par des
neuves.
< N’utilisez pas d’autres piles que les piles spécifiées.
Ne mélangez pas des piles neuves avec des vieilles
piles, ni n’utilisez des piles de type différent en même
temps.
< Ne chauffez pas ni ne démontez les piles, et ne les
jetez jamais dans le feu ou dans l’eau.
< Ne transportez pas ni ne rangez les piles avec des
objets métalliques. La pile pourrait être court-circuitée,
fuir ou exploser.
< Ne rechargez jamais une pile à moins que ce soit
vraiment un type de pile rechargeable.
Remplacement des piles
Si la distance de commande nécessaire entre la
télécommande et l’appareil diminue, c’est que les piles
sont usées. Dans ce cas, remplacez les piles par des
neuves.
< Pour en savoir plus sur le ramassage et le recyclage
des piles, veuillez contacter votre municipalité, votre
service d’évacuation des déchets ou l’endroit où vous
les avez achetées.
78
Page 79

A
B
C
TUNER USB/iPod PHONO
CD AUX2 AUX1
Fonctionnement de base (1)
Internet Radio
AMFM
Media Player
DAB
A
Pour mettre l’appareil sous tension ou hors
tension.
Appuyez sur la touche pour mettre l’appareil sous
tension ou hors tension.
Indicateur de veille/
sous tension
Ou vous pouvez appuyer sur les boutons TUNER, iPod/
USB, PHONO, AUX 1/2 ou CD de la télécommande
pour sélectionner la source directement.
Si le TUNER est sélectionné comme source, appuyer
plusieurs fois sur la touche TUNER de la télécommande
ou le bouton BAND de l’appareil cange le mode
comme suit :
C
Réglage du volume
Pour protéger les enceintes et éviter qu’elles ne
reçoivent brusquement un son de volume élevé,
augmenter progressivement le volume jusqu’à ce
que vous atteigniez le niveau désiré avec le bouton
VOLUME.
L’indicateur de veille/sous tension devient bleu quand
l’appareil est sous tension.
< Si aucune opération n’est faite pendant plus
d’une heure, l’appareil se met automatiquement
hors tension (Mise hors tension automatique).
Cependant, quand “On” est sélectionné pour “Réglage
du mode d’attente de réseau” (page 115), cette
fonction n’est pas disponible. (Le réglage par défaut
est “O f f ”.)
< Quand vous mettez l’appareil sous tension, la source
sélectionnée est la même que celle sélectionnée la
dernière fois que l’appareil a été mis hors tension.
En mode CD/iPod, quand vous mettez l’appareil hors
tension pendant la lecture d’une plage/fichier, la
plage/fichier est lue automatiquement la prochaine
fois que vous mettez l’appareil sous tension.
B
Comment sélectionner une source
Chaque fois que vous appuyez sur la touche SOURCE,
le mode change comme suit :
FRANÇAIS
Coupure du son
Pour couper le son provisoirement, appuyez sur la
touche MUTING. Pour annuler la coupure du son,
appuyez de nouveau sur la touche MUTING ou
changez le réglage du volume.
Gradateur
Appuyez sur la touche DIMMER pour changer la
luminosité de l’affichage.
Appuyez de nouveau sur cette touche pour annuler la
fonction de gradateur.
< Cette fonction est annulée quand l’appareil est mis
hors tension.
79
Page 80

4
Fonctionnement de base (2)
Écoute au casque
Introduisez la fiche du casque dans la prise PHONES, et
ajustez le volume. Le son sortant des enceintes et du
caisson de basses est coupé.
Lecture de disque
Comment ajuster les basses, les aigus
et la balance sonore.
Vous pouvez faire varier le son des basses et des aigus
entre “-10” et “+10”. Vous pouvez également changer la
balance des cons entre les enceinte gauche et droite
(la valeur du réglage est entre L (gauche) +6 et R
(droite) +6).
Appuyez plusieurs fois sur la touche TONE pour
sélectionner BASS, TREBLE ou BALANCE CENTER. Puis
appuyez sur les touches de défilement (˙/¥) pour
ajuster les basses ou les aigus, ou appuyez sur les
touches de saut/balayage (.//) pour ajuster la
balance avant 3 secondes.
1
Les disques et fichiers que cet appareil est capable de
lire qont :
Disques : CD-DA/CD-R/CD-RW
Fichiers : MP3/WMA
1
Appuyez sur le bouton pour mettre l’appareil
sous tension.
L’indicateur de veille/sous tension passe de l’orange
au bleu.
2
Appuyez sur la touche SOURCE pour sélectionner
“CD ”.
2
3 5
6
Indicateur de veille/
sous tension
Vous pouvez utiliser le bouton MULTI JOG pour ajuster
les aigus ou les basses.
80
“No Disc” apparaît si aucune disque n’a été inséré.
3
Appuyez sur la touche d’ouverture/fermeture
(L).
Page 81

4
Placez un disque sur le plateau avec la face de
l’étiquette dirigée vers le haut.
< Le disque doit être placé au centre du plateau. Si
le disque n’est pas placé correcte, il se peut que le
plateau ne puisse pas s’ouvrir une fois qu’il a été fermé.
Appuyez sur la touche lecture/pause (y/J) pour
6
démarrer la lecture.
La lecture du disque commence par la première
plage/fichier.
CD audio
CD/Play
T003 00:42
< Ne placez jamais plus d’un disque sur le plateau.
< Ne collez pas d’étiquettes ni de ruban adhésif sur le
disque.
< N’utilisez pas des disques avec des formes irrégulières.
5
Appuyez sur le bouton d’ouverture/fermeture
(L) pour fermer le plateau.
< Tenez vos doigts à l’écart du plateau à disque quand il
bouge pour éviter de vous les faire coincer.
< Il faut quelques secondes à l’appareil pour charger
un disque. Aucun bouton ne marche pendant le
chargement. Attendez que le nombre total de
plages/fichiers et la durée totale de lecture du disque
apparaissent.
< “No Disc” apparaît si aucune disque n’a été inséré.
CD audio
Le nombre total de plages et la durée totale de lecture
du disque apparaissent.
CD/Stop
T016 72:00
numéro de la plage
actuelle
Disque MP3/WMA
durée écoulée de la plage
actuelle
CD/Play
T003 00:42 MP3
numéro du fichier actuel
< Les fichiers MP3/WMA enregistrés en dehors des
dossiers sont mis automatiquement dans le dossier
“ROOT”, et la lecture démarre à partir du premier
fichier du dossier ROOT.
< S’il y a des dossiers qui ne contiennent pas de fichier
MP3/WMA, cet appareil les saute.
< Pendant la lecture du fichier MP3/WMA, “title_artist_
album” défile sur l’affichage.
< L’appareil s’arrête automatiquement quand la lecture
de toutes les plages/fichiers est terminée.
< Si vous changez un disque puis appuyez sur la touche
lecture/pause (y/J) (ou sur la touche SHUFFLE de la
télécommande) sans avoir d’abord fermé le plateau à
disque, le plateau à disque se ferme automatiquement
et la lecture démarre.
FRANÇAIS
Disque MP3/WMA
Le nombre total de fichiers sur le disque s’affiche.
CD/Stop
Total File 010
81
Page 82

1
3
AC B
D
Lecture USB
Vous pouvez reproduire des fichiers MP3/WMA en
connectant divers périphériques de stockage USB tels
qu’une mémoire flash USB.
Pour des détails sur les fichiers lisibles, consultez “Fichiers
lisibles” page 68.
1
Appuyez plusieurs fois sur la touche SOURCE
pour sélectionner “USB/iPod”.
“Not Connected” est affiché si aucun périphérique USB
n’est connecté.
2
Connectez le périphérique USB de stockage
externe à l’appareil.
Quand un périphérique à disque dur est connecté à
cet appareil, l’affichage du nombre de fichiers peut
prendre plusieurs minutes.
Lecture générale (disque/USB)
A
Pour arrêter la lecture
Appuyez sur le bouton stop (H) pour arrêter la lecture.
Pour reprendre la lecture, appuyez sur la touche de
lecture/pause (y/J).
La lecture commence par la première plage/fichier.
B
Pour arrêter provisoirement la lecture (mode de
pause)
Appuyez sur la touche lecture/pause (y/J) pendant
la lecture. La lecture est interrompue à la position
actuelle.
Pour reprendre la lecture, appuyez sur la touche de
lecture/pause (y/J).
3
Appuyez sur la touche de lecture/pause (y/J).
82
C
Pour éjecter le disque
Quand vous appuyez sur la touche d’ouverture/
fermeture (L), la lecture s’arrête et le plateau s’ouvre.
Après l’éjection du disque, fermez le plateau en
appuyant sur la touche d’ouverture/fermeture (L).
< Quand CD est sélectionné comme source, il est
possible d’éjecter le disque.
Page 83

Recherche de dossier
D
Pour passer directement à la plage ou au fichier
suivant ou précédent
Pendant la lecture, appuyez répétitivement sur les
touches de saut/balayage (.//) jusqu’à ce que
la plage/fichier désiré soit trouvé. La plage ou le fichier
sélectionné est reproduit à partir du début.
Sur la télécommande, utilisez les touches de saut
(.//).
En mode CD, appuyez répétitivement sur les touches
de saut/balayage (.//) jusqu’à ce que vous
trouviez la plage/fichier que vous souhaitez écouter
en mode d’arrêt ou de pause. Appuyez sur la touche
lecture/pause (y/J) pour démarrer la lecture de la
plage/fichier sélectionné.
< Si vous appuyez sur la touche . pendant la lecture,
la plage/fichier en cours de lecture est reproduite de
nouveau à partir du début. Pour revenir au début de
la plage/fichier, précédent, appuyez deux fois sur la
touche ..
Vous pouvez sélectionner un dossier et fichier pendant la
lecture ou à l’arrêt.
1
Appuyez sur les touches de défilement (˙/¥)
pour sélectionner un dossier.
2
Appuyez sur la touche ENTER.
3
Si vous souhaitez choisir un fichier, appuyez sur
les touches de défilement (˙/¥).
FRANÇAIS
< Pendant la lecture programmée, la plage/fichier
suivant ou précédent du programme est lu.
< En mode CD, la plage/fichier revient à la première
plage/fichier quand vous appuyez sur la touche /
pendant la lecture de la dernière plage/fichier.
< En mode USB, la lecture s’arrête quand vous appuyez
sur la touche / pendant la lecture de la dernière
plage/dernier fichier.
< La sélection se déplace dans le dossier.
4
Appuyez sur la touche ENTER.
La lecture commence à partir du fichier sélectionné.
< Pour retourner au dossier du niveau précédent.
Appuyez sur la touche MENU en mode CD.
Appuyez sur la touche . en mode USB.
83
Page 84

Lecture programmée
Si la source sélectionnée est le CD, vous pouvez
programmer jusqu’à 32 pistes/fichiers dans l’ordre de
votre choix.
1
Appuyez sur la touche PROGRAM en mode
d’arrêt.
P-00 T000
T016 72:00
Appuyez sur les touches de défilement (˙/¥)
2
pour sélectionner une plage ou un fichier.
3
Avant 5 secondes, appuyez sur la touche
PROGRAM.
P-01 T012
T016 72:00
< Répétez les étapes 2 et 3 pour programmer d’autres
plages ou fichiers.
< Si vous faites une erreur, appuyez sur la touche CLEAR.
Le dernier numéro programmé sera effacé.
< Un maximum de 32 plages/fichiers peuvent être
programmées. Si vous essayez de programmer plus
de 32 plages/fichiers, “P-FULL” (le programme est
complet) est affiché pour indiquer que plus aucune
plage/fichier ne peut être programmée.
P-01 T002
T016 72:00
4
Quand vous avez terminé votre programmation,
appuyez sur la touche lecture/pause (y/J) pour
démarrer la lecture programmée.
Quand la lecture de toutes les plages/fichiers
programmées est terminée, ou si vous appuyez sur la
touche d’arrêt (H) ou la touche STANDBY/ON, le mode
de lecture programmée est annulé.
< Si l’appareil est déconnecté de son alimentation, le
contenu de la programmation est effacé.
84
Page 85

Pour vérifier l’ordre du programme
En mode d’arrêt, appuyez plusieurs fois sur la touche
PROGRAM. Le numéro de plage/fichier et le numéro
d’ordre du programme apparaissent sur l’affichage.
Pour changer ou ajouter une plage/
fichier au programme
Pour supprimer une plage/fichier du
programme
En mode d’arrêt, appurez plusieurs fois sur la touche
PROGRAM jusqu’à ce que le numéro de programme du
fichier à effacer apparaisse sur l’affichage, et appluyez
sur la touche CLEAR. La plage ou le fichier sélectionné
est supprimé du programme.
Pour effacer le programme
1. En mode d’arrêt, appuyez sur la touche PROGRAM.
FRANÇAIS
En mode d’arrêt, appuyez plusieurs fois sur la touche
PROGRAM jusqu’à ce que le numéro d’ordre du
programme qui contient la plage/fichier que vous
voulez modifier apparaisse sur l’affichage. Puis,
sélectionnez une plage/fichier en utilisant les touches
de défilement (5/b). La plage/fichier précédente est
remplacée par la nouvelle plage/fichier sélectionnée.
Si vous souhaitez ajouter une plage/fichier à la fin
du programme, appuyez plusieurs fois sur la touche
PROGRAM jusqu’à ce que “P-END” apparaisse
brièvement sur l’affichage. Puis, sélectionnez une
plage/fichier en utilisant les touches de défilement
(5/b). La plage ou le fichier est ajouté au programme.
2. Maintenez pressée la touche CLEAR pendant plus de
4 secondes.
< Dans les cas suivants, le contenu programmé est aussi
annulé:
appuyer sur la touche STANDBY/ON
ouvrir le plateau à disque
déconnecter le cordon d’alimentation
85
Page 86

Lecture aléatoire
RPT 1 (répétition d’une plage ou d’un chier)
Lecture répétée
Quand vous appuyez sur la touche SHUFFLE, les plages/
fichiers du disque ou du périphérique USB sont reproduits
aléatoirement.
Quand CD est sélectionné
CD/Random
T003 00:07
Quand USB est sélectionné
86%5DQGRP
:0$
< Si vous appuyez sur la touche / pendant la lecture
aléatoire, la plage/fichier suivant est sélectionné de
façon aléatoire et reproduite. Si vous appuyez sur la
touche ., la plage ou le fichier en cours de lecture
est reproduit de nouveau à partir du début.
< Pour annuler la lecture aléatoire, appuyez sur la touche
SHUFFLE.
Chaque fois que vous appuyez sur la touche REPEAT1/
ALL, le mode change comme suit :
RPT Folder
(répétition de toutes les plages/chiers dans
un dossier: Mode CD uniquement)
RPT ALL
(Répétition désactivée)
< Quand vous appuyez sur la touche stop (H) le mode
de lecture répétée est annulé.
Répétition d’une plage/fichier (RPT1)
La plage ou le fichier en cours de lecture est reproduit
de façon répétée. Si vous sélectionner une autre plage
ou un autre fichier en mode “RPT 1”, la plage ou le
fichier sélectionné est lu plusieurs fois.
En mode CD, si vous sélectionnez le mode “RPT 1”
pendant le mode d’arrêt puis que vous sélectionnez
une plage/fichier, la plage/fichier sélectionné est lue
répétitivement.
< Pour arrêter la lecture aléatoire, appuyez sur la touche
d’arrêt (H).
< Quand USB est sélectionné, les plages/fichiers dans
le dossier actuellement sélectionné sont reproduites
aléatoirement.
86
Répétition de dossier (RPT Folder: Mode CD
uniquement)
Tous les fichiers du dossier sont reproduits
répétitivement. (Fichiers MP3/WMA uniquement)
< Pendant la lecture répétée, appuyez sur les touches
de saut (.//) pour aller à un autre dossier. Les
fichiers du dossier sont reproduits répétitivement.
Répétition de tous les morceaux (RPT ALL)
En mode CD, toutes les plages/fichiers sont lus
répétitivement. En mode USB, toutes les plages/
fichiers du dossier sont lus répétitivement.
< En mode de lecture programmée, le contenu du
programme est reproduit de façon répétée.
Page 87

Achage par défaut (délement)
Numéro du chier a
Achage par défaut (durée écoulée)
Affichage
Pendant la lecture, appuyez répétitivement sur la touche
DISPLAY pour changer les informations sur l’affichage.
CD audio:
L’affichage change comme suit:
Écoute de iPod (1)
1
Appuyez plusieurs fois sur la touche SOURCE
pour sélectionner “USB/iPod”.
le numéro de la plage actuelle et la durée écoulée de la
plage actuelle
CD/Play
T003 00:42
le numéro de la plage actuelle et la durée restante de la
plage actuelle
CD/Play
T003 -03:02
Fichiers MP3/WMA:
L’affichage change comme suit:
Pendant qu’un fichier sur un CD est lu:
Pendant qu’un fichier sur un périphérique de stockage
USB est lu:
Nom de l’artiste
Nom de la plage
ctuel et durée de lecture écoulée
Nom du chier
Titre
Nom de l’artiste
2
Connectez votre iPod au moyen du câble USB
fourni avec l’iPod.
l’iPod se met automatiquement sous tension et
démarre la lecture à partir de la liste de musique de
l’iPod.
Quand un iPod est inséré pendant que le CR-H700DAB
est réglé sur une autre source d’écoute, l’iPod se met
sous tension et passe en mode de pause.
< La batterie de l’iPod est complètement chargée quand
l’iPod est insérée sur le Dock et que le CR-H700DAB est
sous tension.
< Quand l’iPod est connecté au CR-H700DAB, la prise
casque de l’iPod ne peut émettre de son.
Si vous souhaitez écouter avec votre casque,
connectez-le à la prise PHONES du CR-H700DAB.
FRANÇAIS
Nom de l’album
87
Page 88

Écoute de iPod (2)
Pour mettre la lecture en pause
Pendant la lecture, appuyez sur la touche de lecture/
pause (G/J) pour mettre la lecture en pause. La
lecture est interrompue à la position actuelle.
Pour reprendre la lecture, appuyez de nouveau sur la
touche de lecture/pause (y/J).
Pour sauter au morceau suivant ou
précédent
Recherche d’un passage sur un
morceau
Pendant la lecture, maintenez la touche de saut
(.//) puis la relâcher lorsque vous avez atteint
l’enfroit que vous vouliez écouter.
Pour retourner au menu précédent
Pendant la lecture ou en mode de pause, appuyez
plusieurs fois sur les touches de saut (.//)
jusqu’à ce que le morceau désiré soit trouvé.
< Si vous appuyez sur la touche . pendant la lecture,
le morceau en cours de lecture est reproduit de
nouveau à partir du début. Si vous voulez lire les
morceaux précédents, appuyez deux fois ou plus sur la
touche ..
88
Appuyez sur la touche MENU pour retourner au menu
précédent.
Cette touche est équivalente à la touche MENU de
votre iPod.
Page 89

Sélection d’un article de menu
RDM o
RDM Songs
RDM Album
Lecture aléatoire
Appuyez sur la touche de défilement (˙/¥) de la
télécommande pour faire défiler le menu jusqu’à
l’élément souhaité, puis appuyez sur la touche ENTER.
Lecture répétée
Chaque fois que vous appuyez sur la touche REPEAT
1/ALL, le mode change comme suit :
Lecture (lecture normale)
RPT 1 (répétition d’un morceau)
RPT ALL (répétition de tous
les morceaux de la liste)
Pendant la lecture, appuyez sur la touche SHUFFLE
pour changer le mode de lecture aléatoire.
FRANÇAIS
Quand vous sélectionnez “RDM Songs”, l’iPod mélange
les morceaux de la liste que vous avez choisi de lire.
Quand vous sélectionnez “RDM Album”, le iPod lit tous
les morceaux d’un album dans l’ordre, puis sélectionne
aléatoirement un autre album dans la liste et lit ses
morceaux dans l’ordre.
89
Page 90

1
Fonctionnement de base DAB
2
Réglage de votre tuner DAB
La première fois que vous sélectionnez DAB comme
source, l’appareil recherche les canaux DAB et crée une
liste de canaux.
1
Sélectionnez DAB en appuyant répétitivement
sur la touche BAND.
L’appareil recherche les ensembles localement et les
ajoute à la liste des canaux au fur et à mesure qu’ils
sont trouvés. La recherche doit prendre environ 20
secondes.
Utilisation de la liste des canaux
3 1
1
Sélectionnez DAB en appuyant répétitivement
sur la touche BAND.
La liste des canaux disponibles apparaît.
< Si la liste des chaînes ne s’affiche pas, tournez le
bouton MULTI JOG.
2
Faites défiler les canaux de la liste des canaux.
Tournez le bouton MULTI JOG.
Scanning...
209.93MHz
Une fois que les services diffusés ont été trouvés,
les canaux apparaissent dans la liste par ordre
alphanumérique.
< Si aucun service diffusé est trouvé, veuillez vérifier que
l’antenne est correctement connectée à l’appareil.
∏
BBC Radio 1
BBC Radio 1Xtra
90
Page 91

3
MENU ENTER
MULTI JOG
Quand vous avez trouvé le canal que vous
souhaitez écouter, appuyez sur la touche ENTER.
Selecting...
BBC 6
Jazz festival on
Le canal est syntonisé et l’information du canal est
affichée.
Note
< Pour afficher la liste des canaux pendant l’écoute d’un
canal DAB, tournez le bouton MULTI JOG.
< Les canaux sont affichés dans un ordre
alphanumérique dans la liste des canaux, avec les
nombres apparaissant en premier.
Utilisation du menu DAB (1)
Utilisation du menu DAB
En mode DAB, utilisez le menu DAB pour accéder à
diverses fonctions. Il y a 8 options dans le menu DAB.
Pour ouvrir le menu DAB
Appuyez sur la touche MENU pendant que DAB est
sélectionné comme source.
FRANÇAIS
Pour sélectionner une option de menu
Tournez le bouton MULTI JOG pour faire défiler l’option
de menu souhaitée, puis appuyez sur la touche ENTER.
< Si un canal n’est plus diffusé ou si l’appareil est déplacé
dans une région où ce canal n’est pas diffusé, l’appareil
ne pourra plus syntoniser ce canal. Si le canal ne peut
pas être syntonisé, un point d’interrogation “?” est
affiché devant le nom du canal. Si vous essayez de
syntoniser ce canal en appuyant sur la touche ENTER,
“No stations Available” est affiché.
< Vous pouvez déplacer le canal qui n’est plus
disponible à la fin de la liste des canaux. Reportezvous à “Station order” à la page 94.
Pour retourner à l’écran précédent
Appuyez sur la touche MENU.
91
Page 92

Utilisation du menu DAB (2)
Options du menu DAB
Station List
Reportez-vous à “Utilisation de la liste des canaux” à
la page 90.
Local Scan
Reportez-vous à “Channel Scan” ci-dessous.
Full Scan
Reportez-vous à “Channel Scan” ci-dessous.
Manual Tune
Reportez-vous à “Manual Tune” sur la colonne de
droite.
Preset Tune
Reportez-vous à “Preset Tune” à la page 93.
DRC
Reportez-vous à “DRC value” à la page 94.
Station Order
Reportez-vous à “Station order” à la page 94.
Main Menu
Reportez-vous à “Main Menu” à la page 95.
Channel Scan
Si vous déplacer l’appareil dans une nouvelle région ou
si vous souhaitez vérifier s’il y a de nouveaux canaux
disponibles dans votre région, vous pouvez faire un
balayage des bandes DAB pour trouver de nouveaux
canaux.
1
Ouvrez le menu DAB.
Appuyez sur la touche MENU pendant que DAB est
sélectionné comme source.
Local Scan (recherche locale)
L’appareil balaie les bandes DAB entre 10A et 13F et
ajoute les canaux trouvés à la liste des canaux.
Full Scan
L’appareil balaie toutes les bandes DAB et ajoute
les canaux trouvés à la liste de canaux. Essayez ceci
si “Local Scan” ne permet pas de trouver les canaux
souhaités.
Manual Tune
1
Ouvrez le menu DAB.
Appuyez sur la touche MENU pendant que DAB est
sélectionné comme source.
›Station List
Local Scan
2
Sélectionnez “Manual Tune”.
Tournez le bouton MULTI JOG pour sélectionner
l’élément et appuyez sur la touche ENTER.
›Station List
Local Scan
2
Sélectionnez “Local Scan” ou “Full Scan”.
Tournez le bouton MULTI JOG pour sélectionner
l’élément et appuyez sur la touche ENTER.
92
Full Scan
›Manual Tune
Page 93

3
Sélectionnez le canal que vous souhaitez
syntoniser.
Tournez le bouton MULTI JOG pour sélectionner
l’élément et appuyez sur la touche ENTER.
BBC Radio 5 Live
BBC National DAB
Si vous syntonisez une fréquence inoccupée, “No
service” est affiché.
Preset Tune
Cette fonction vous permet de sélectionner une station
DAB prédéfinie.
2
Sélectionnez “Preset Tune”.
Tournez le bouton MULTI JOG pour sélectionner
l’élément et appuyez sur la touche ENTER.
Manual Tune
›Preset Tune
3
Sélectionnez la station préréglée souhaitée.
Tournez le bouton MULTI JOG pour sélectionner
l’élément et appuyez sur la touche ENTER.
FRANÇAIS
< Reportez-vous à la page 98 pour savoir comment
prédéfinir les stations DAB.
1
Ouvrez le menu DAB.
Appuyez sur la touche MENU pendant que DAB est
sélectionné comme source.
›Station List
Local Scan
93
Page 94

Utilisation du menu DAB (3)
DRC value
Cette option règle la valeur de la commande de la
plage dynamique (DRC) qui doit être appliquée aux
émissions reçues. La commande DRC est utilisée pour
réduire la plage entre les volumes élevés et les volumes
faibles et qui est parfois appliquées à source de
l’émission. La musique pop peut avoir une valeur DRC
élevée, appropriée pour augmenter en permanence
les niveaux d’écoute, alors que la musique classique
peut ne pas avoir de commande DRC appliquée afin
de permettre à l’auditeur d’entendre toute la plage
dynamique du volume source.
1
Ouvrez le menu DAB.
Appuyez sur la touche MENU pendant que DAB est
sélectionné comme source.
›Station List
Local Scan
3
Sélectionnez le niveau souhaité pour DRC.
Tournez le bouton MULTI JOG pour sélectionner
l’élément et appuyez sur la touche ENTER.
DRC high *
›DRC low
DRC off L’effet DRC n’est pas appliqué.
DRC low Moyen.
DRC high Maximum.
< Le réglage actuel est marqué avec “*”.
2
Sélectionnez “DRC”.
Tournez le bouton MULTI JOG pour sélectionner
l’élément et appuyez sur la touche ENTER.
Preset Tune
›DRC
Station order
Vous pouvez sélectionner l’ordre dans lequel les stations
apparaissent dans la liste.
1
Ouvrez le menu DAB.
Appuyez sur la touche MENU pendant que DAB est
sélectionné comme source.
›Station List
Local Scan
94
Page 95

2
Sélectionnez “Station Order”.
Tournez le bouton MULTI JOG pour sélectionner
l’élément et appuyez sur la touche ENTER.
DRC
›Station Order
3
Sélectionnez l’option souhaitée.
Tournez le bouton MULTI JOG pour sélectionner
l’élément et appuyez sur la touche ENTER.
1
Ouvrez le menu DAB.
Appuyez sur la touche MENU pendant que DAB est
sélectionné comme source.
›Station List
Local Scan
2
Sélectionnez “Main Menu”.
Tournez le bouton MULTI JOG pour sélectionner
l’élément et appuyez sur la touche ENTER.
FRANÇAIS
Alphanumeric *
›Ensemble
Alphanumeric
C’est l’ordre par défaut. Les canaux apparaissent
dans la liste avec d’abord les noms débutant par des
chiffres, puis avec dans un ordre alphabétique avec
les lettres des noms des canaux.
Ensemble
Les canaux apparaissent dans la liste par nom
d’ensemble.
Valid
Cette option fait la liste des stations active en haut
de la liste de canaux et les canaux qui ne sont pas
en service dans votre région apparaissent en bas de
la liste.
< Le réglage actuel est marqué avec “*”.
Main Menu
Vous pouvez initialiser le réglage d’un tuner DAB et
vérifier la version du tuner DAB.
Station Order
›Main Menu
3
Sélectionnez l’option souhaitée.
Tournez le bouton MULTI JOG pour sélectionner
l’élément et appuyez sur la touche ENTER.
System Setup
›Info
System Setup
Pour initialiser le réglage du tuner DAB, sélectionner
ce réglage.
Info
Affiche la version du logiciel du tuner DAB.
95
Page 96

Changement des réglages d’affichage pour DAB
Vous pouvez choisir le type d’information afficher sur la
deuxième ligne de l’affichage, lors de l’écoute d’un canal
DAB.
Chaque fois que vous appuyez sur la touche INFO,
l’information est affichée comme suit.
DLS
Type de programme
Nom de l’ensemble
Canal et fréquence
Débit binaire
Heure et date
Force du signal
Nom de l’ensemble
C’est le nom de l’ensemble qui diffuse le programme.
BBC Radio 5 Live
BBC National DAB
Canal et fréquence
Affiche le canal et la fréquence de l’émission
actuellement diffusée.
BBC Radio 5 Live
11C 220.35MHz
Débit binaire
Affiche le débit binaire de l’émission actuellement
diffusée.
BBC Radio 5 Live
192kbps Stereo
Heure et date
Affiche l’heure et la date actuelles, fournies par la
station radio et qui devraient être toujours êexactes.
BBC Radio 5 Live
10:03 19-04-2009
DLS
Le segment d’étiquette dynamique (DLS) est l’étiquette
de texte défilant envoyée par la station radio. Cela
peut être une information sur les titres de la musique
ou des détails concernant le programme ou la station.
BBC Radio 5 Live
WEEKDAY NEWS & D
Type de programme
C’est une description du type d’émission diffusée
par la station radio telle que Musique pop, rock ou
classique.
BBC Radio 5 Live
Drama
96
Force du signal
Cela permet d’afficher la force d’affichage de
l’ensemble actuel.
BBC Radio 5 Live
Signal Str 215
< Tout en regardant l’indicateur, ajustez ou changez
la position de l’antenne jusqu’à ce que la meilleure
position possible apparaisse.
Page 97

Écoute d’une émission FM/AM (1)
Syntonisation manuelle
Auto
4
1
Appuyez plusieurs fois sur la touche SOURCE
pour sélectionner le mode TUNER.
2
Sélectionnez FM ou AM en appuyant
répétitivement sur la touche BAND.
3
Sélectionnez le mode de syntonisation souhaité.
Chaque fois que vous appuyez sur la touche TUNING
MODE, le mode de syntonisation change comme suit:
1
Sélectionnez la station que vous souhaitez
4
écouter.
Mode de syntonisation manuelle
Tournez le bouton MULTIJOG jusqu’à ce que vous
trouviez la station de votre choix.
Sur la télécommande, appuyez plusieurs fois sur les
touches de défilement (˙/¥).
La fréquence change par un pas fixé (FM: pas de
50 kHz, AM: paliers de 9 kHz).
Mode de syntonisation automatique
Tournez le bouton MULTI JOG pour démarrer la
syntonisation automatique.
Dès qu’une station est trouvée, l’appareil accorde la
station automatiquement. Répétez cette étape jusqu’à
ce que vous ayez trouvé la station souhaitée.
23
FRANÇAIS
Tune (syntonisation automatique)
Sélection d’un préréglage
< Appuyez sur la touche ENTER pour arrêter la
syntonisation automatique.
Mode de syntonisation préréglée
Tournez le bouton MULTI JOG pour sélectionner un
canal préréglé.
Sur la télécommande, appuyez plusieurs fois les
touches de saut (.//).
Le canal préréglé sélectionné est syntonisé.
97
Page 98

Écoute d’une émission FM/AM (2)
Sélection d’un préréglage
Mode FM
Vous pouvez sélectionner Stéréo ou Mono en
appuyant sur la touche FM MODE quand un
programme FM stéré est syntonisé.
Stéréo:
Les émissions stéréo FM sont reçues en stéréo et “ST”
est affiché.
FM/ST 10:00
108.00MHz
Préréglage manuel (DAB/AM/FM)
Vous pouvez mémoriser un maximum de 30 stations FM
et de 30 stations AM et 30 stations DAB.
1
Sélectionnez DAB, AM ou FM en appuyant
plusieurs fois sur la touche TUNER.
2
Syntonisez la station que vous souhaitez
mémoriser.
Reportez-vous à la page 90 ou 97 pour la procédure
de syntonisation.
3
Appuyez sur la touche PROGRAM.
Mono:
Sélectionnez ce mode quand le signal est faible. La
réception est changée en son monophonique, ce qui
réduit le bruit parasite.
FM
10:00
CH__ 108.00MHz
4
Avant 4 secondes, sélectionnez le numéro de
préréglage pour cette stations.
Appuyez sur les touches de défilement (5/b).
98
FM
10:00
CH12 108.00MHz
Page 99

5
Avant 4 secondes, appuyez sur la touche
PROGRAM.
La station est mémorisée.
< Pour mémoriser d’autres stations, répétez les étapes 2
à 5 .
< Si vous n’appuyez pas sur la touche PROGRAM avant
4 secondes après avoir sélectionné le numéro de
préréglage, le préréglage est annulé.
Préréglage automatique (FM/AM
uniquement)
1
Sélectionnez FM ou AM en appuyant plusieurs
fois sur la touche TUNER.
2
Maintenez la touche PROGRAM pressée pendant
plus de 3 secondes.
FRANÇAIS
Un maximum de 30 stations parmi les mieux captées
de votre région sont mémorisées automatiquement.
99
Page 100

RDS
Le Radio Data System (RDS) est un service radio qui
permet aux stations émettrices de diffuser des
informations complémentaires parallèlement à l’émission
radio elle-même.
Le système RDS fonctionne uniquement sur la bande FM
en Europe.
1
Syntonisez une station FM (voir page 97).
2
Appuyez sur la touche RDS.
Chaque fois que vous appuyez brièvement sur la
touche RDS, le mode RDS change comme suit.
PROGRAM SERVICE
Quand vous sélectionnez “PROGRAM SERVICE”,
“PROGRAM SERVICE” clignote pendant environ 3
secondes, puis le nom du service de programmes
ou le nom de la station est affiché. S’il n’y a pas de
données de service de programmes, la fréquence de
la station est affichée.
PROGRAM TYPE
Quand vous sélectionnez “PROGRAM TYPE”, “PROGRAM
TYPE” clignote pendant environ 3 secondes et le type
de programme est affiché.
CLOCK TIME
Affiche les informations de l’heure fournies par la
station.
Quand vous sélectionnez “CLOCK TIME”, “RDS CLOCK
TIME” clignote pendant environ 3 secondes et l’heure
est affichée.
RADIO TEXT
Quand vous sélectionnez “RADIO TEXT”, “RDS RADIO
TEXT” clignote pendant environ 3 secondes puis des
informations envoyées par la station et composées de
64 symboles maximum sont affichées.
S’il n’y a pas de données de radiotexte, le mode RDS
commute automatiquement sur le mode PROGRAM
SERVICE.
TRAFFIC ANNOUNCE
Quand vous sélectionnez “TRAFFIC ANNOUNCE”,
“TRAFFIC ANNOUNCE” clignote pendant 3 secondes
et l’appareil recherche une annonce d’informations
routières.
< Si un programme d’informations routières est trouvé,
le mode TRAFFIC ANNOUNCE commute sur le mode
PROGRAM SERVICE.
Si la station sélectionnée transmet un signal de
programme de trafic, l’appareil passe du mode RDS
au mode PROGRAM SERVICE sans recherche d’un
programme de trafic.
100
 Loading...