

Taylor Nylon Series NS24CE, Nylon NS24e, Nylon NS64CE Supplementary Manual
Changing Nylon Strings the (new, improved) Taylor Way
s more and more Taylor players succumb to the allure of our Nylon Series guitars,
calls from owners inquiring about the “proper” method of string-changing are
A
increasing. That’s as it should be; changing nylon strings differs considerably from
the process used for steel-string guitars, and there are right and wrong ways to do it.
Never fear — the procedure isn’t rocket science, and you don’t need to be a Sea Scout
with an advanced repertoire of sailing knots to pull it off with aplomb.
Let’s start with the basics. Classical and flamenco guitars are strung with
nylon strings that tie onto the bridge. This ancient system originally was
designed for “gut” strings, and there are a number of ways to tie them, some
more effective than others. Master repairman Tim Luranc and his colleagues at
Taylor have developed an outstanding protocol for this simple but often misunderstood procedure.
For best results, it’s important to understand how the strings hold onto
the bridge: the strings are looped around themselves, and the final loop must
pass “around the corner” of the back of the bridge. Now, let’s outline the
methodology in simple steps.
by Anthony Adams / photos by Rita Funk-Hoffman
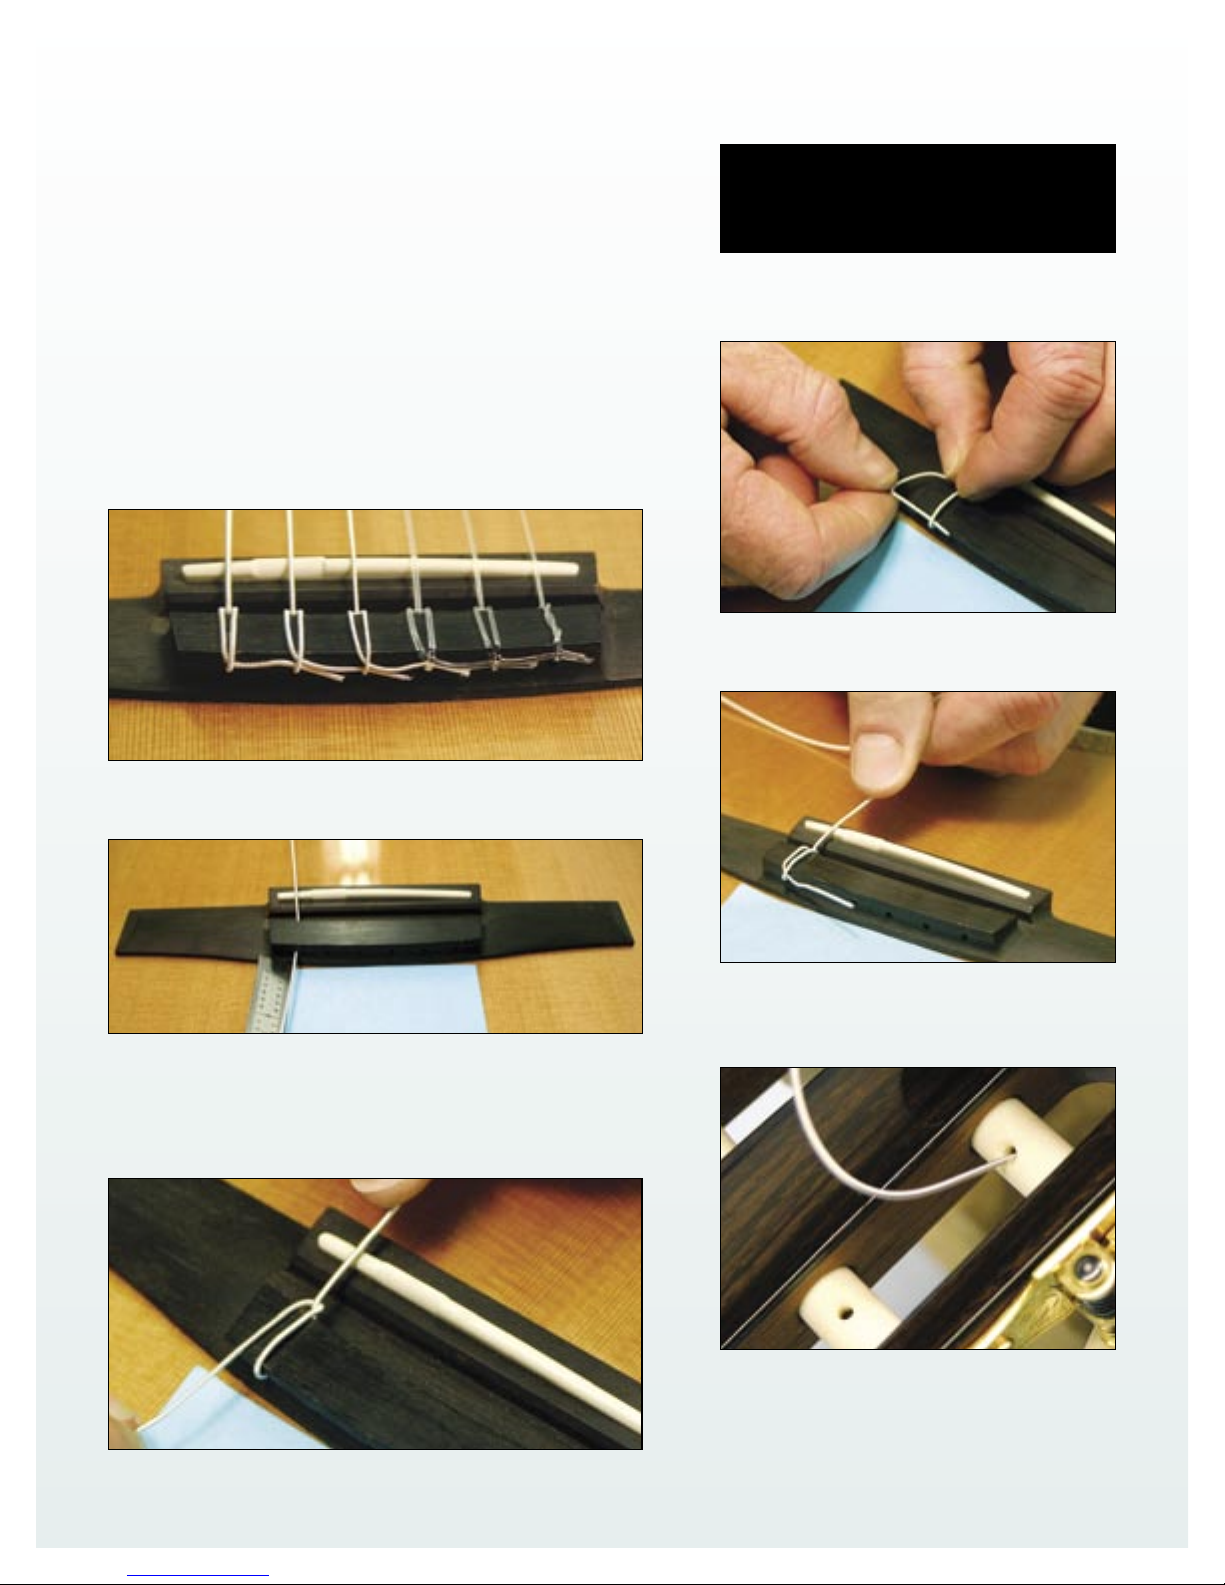
4. Pass the free end under the loop, below the back corner
of the bridge, creating a second bend in the string.
1. Here’s an example of a properly strung bridge. The string ends are looped under
to create a finished look.
2. Before putting on your new strings, we suggest that you place a Post-It note on top of
the guitar, behind the bridge, to prevent possible damage to the top while changing the
strings. Nylon strings often have one end loosely wound for greater flexibility. This
is the end that ties onto the bridge. Leave about three inches of string sticking out
behind the bridge.
5. Hold the free end down so it won’t climb up over the corner, and pull the string tight to lock it in place. Leave approximately one inch of string pulled tight behind the bridge.
3. Loop the free end under the string (from the treble side) just behind the saddle,
and pull it back toward the end of the guitar, creating a bend in the string.
6. Pass the free end of the string toward the peghead, all the
way through the tuner hole, from the top down, leaving a little
slack. Make sure the top side of the tuner hole is pointed at a
slight upward angle, toward the peghead.
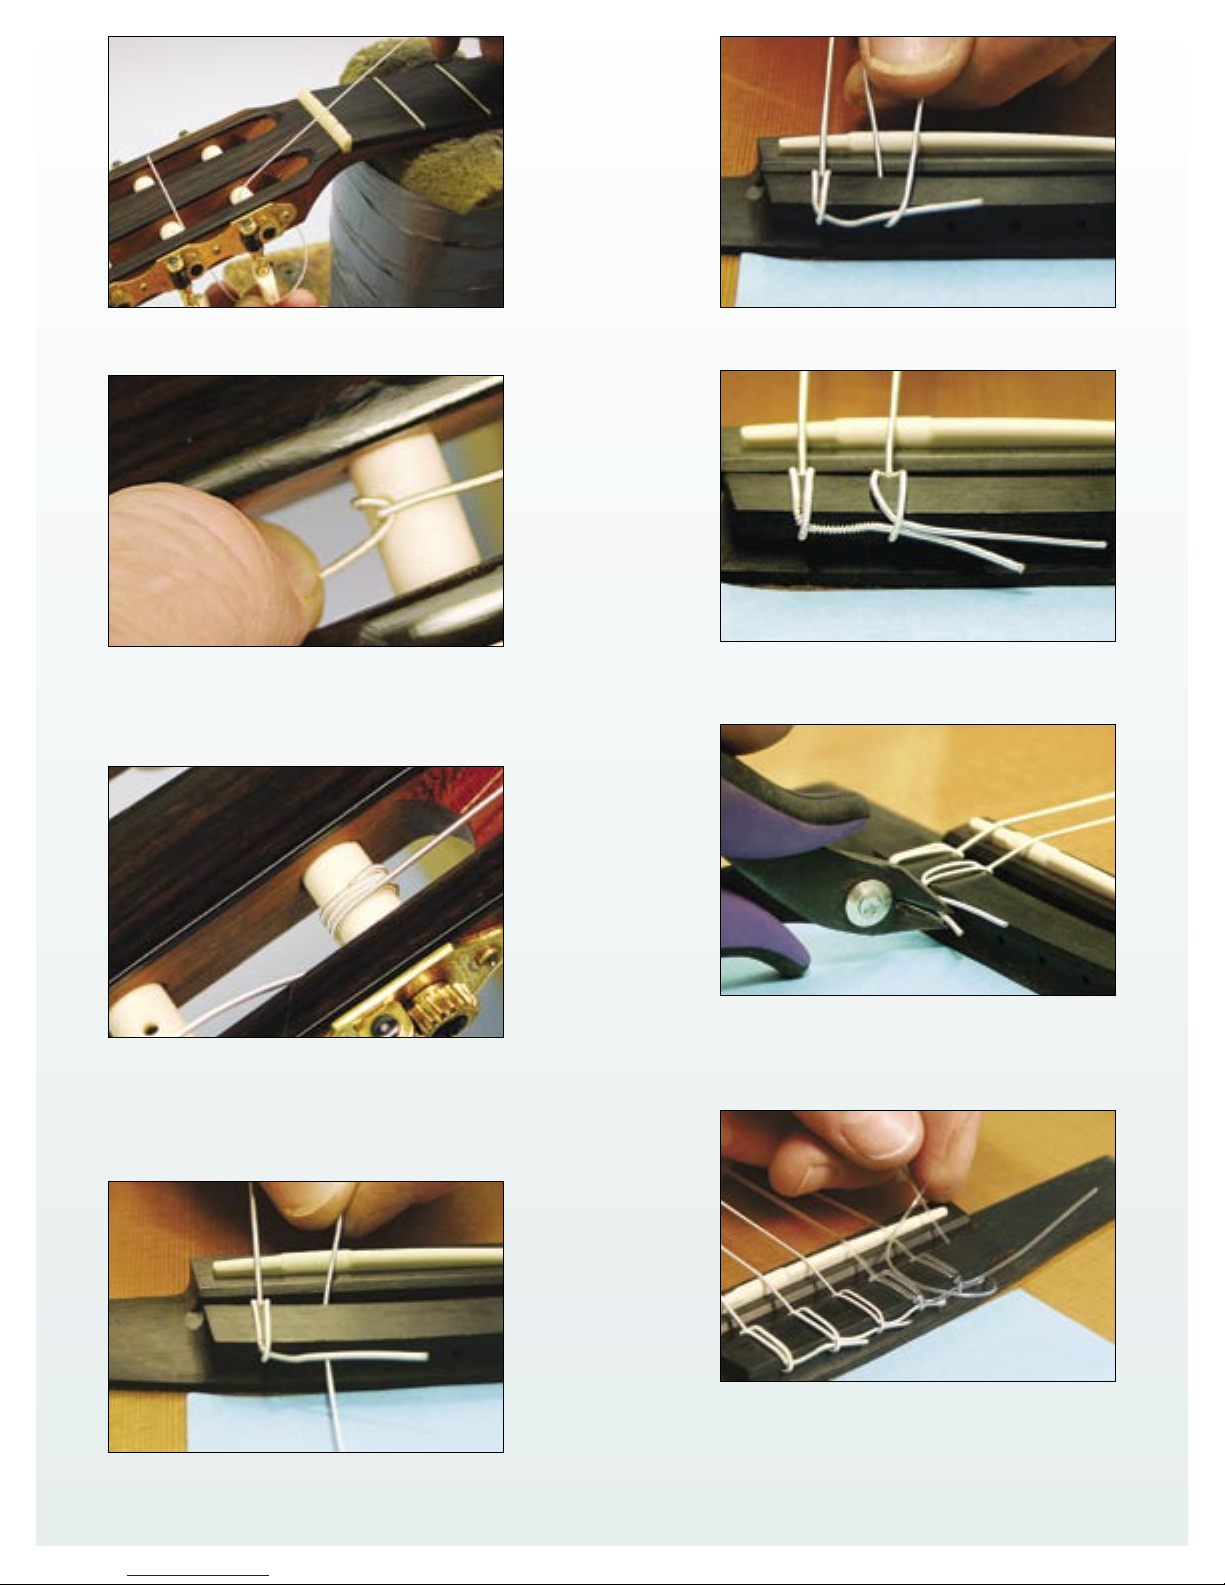
7. Loop the free end of the string up and around the top of
the tuner roller and pass it under itself.
11. Loop the free end of the A string over the untrimmed end
of the low-E string to hold it neatly in position.
8. Hold a little tension on the string with your upright right
fist (to create the correct amount of slack) as you pull the loop
tight against the roller with your left hand. The bend should be
in the top of the tuner hole to lock the string in position.
9. Tighten the string, winding it toward the outside of the
rollers, over the tail of the string. Guide the string so that it is
neatly coiled and doesn’t rub on the edges of the peghead. Tune
to pitch. For best tuning, use a maximum of 4-6 wraps, and then
snip the excess string end.
12. Loop the free end under the string just behind the
saddle and pull it back toward the end of the guitar, creating a
bend in the string, as in Step 3.
13. Snip the excess from the 6th (E) string, making sure the
remainder of the string is a little shorter than the distance to
the next hole. Next, put on the 4th (D) string, using the same
method as with the 6th and 5th strings.
10. Pull the A (5th) string into position.
14. The slippery treble strings require a bit more care to
keep them tight, but the technique is substantially the same.
You can insert the string either way through the holes in the
bridge. The high-E (treble) string has an additional loop to
avoid slippage. Begin by looping the string under itself.
 Loading...