

Page 1
»
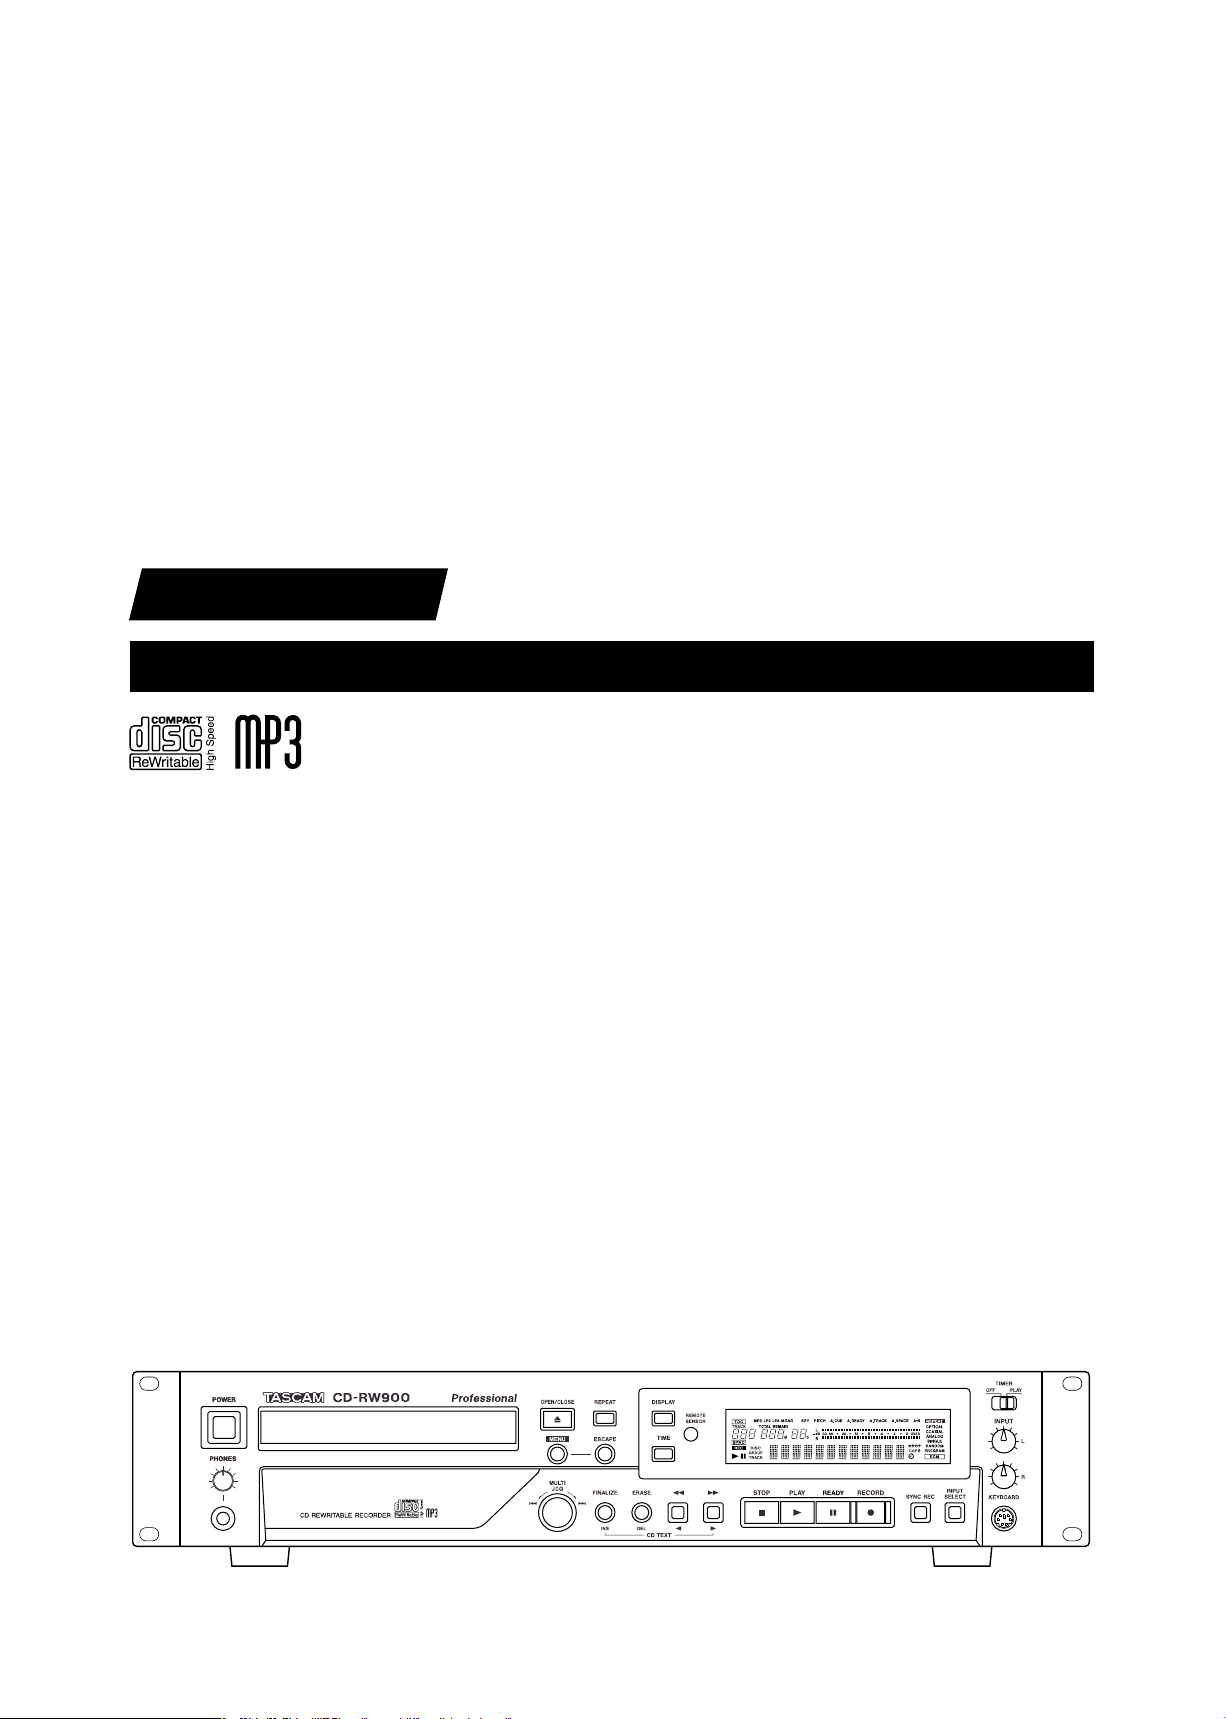
Professional
CD-RW900
CD Rewritable Recorder
OWNER'S MANUAL
D00892620A
Page 2
1-Introduction
2 TASCAM CD-RW900
Important Safety Precautions
CAUTION: TO REDUCE THE RISK OF ELECTRIC SHOCK, DO NOT REMOVE
COVER (OR BACK). NO USER-SERVICEABLE PARTS INSIDE. REFER SERVICING
TO QUALIFIED SERVICE PERSONNEL.
The lightning flash with arrowhead symbol, within equilateral triangle, is intended
to alert the user to the presence of uninsulated “dangerous voltage” within the
product’s enclosure that may be of sufficient magnitude to constitute a risk of
electric shock to persons.
The exclamation point within an equilateral triangle is intended to alert the user to
the presence of important operating and maintenance (servicing) instructions in the
literature accompanying the appliance.
This appliance has a serial number
located on the rear panel. Please record
the model number and serial number and
retain them for your records.
Model number
Serial number
WARNING: TO PREVENT FIRE OR SHOCK
APPLIANCE TO RAIN OR MOISTURE.
For U.S.A.
TO THE USER
This equipment has been tested and found to comply
with the limits for a Class A digital device, pursuant to
Part 15 of the FCC Rules. These limits are designed
to p ro vide reasonable protec tion again st harmful
interference when t he equipm ent is operated in a
commercial environment. This equipment generates,
uses, and can radiate radio frequency energy and,
if not ins tall ed a nd u sed in a ccordan ce w ith the
instruction manual, may cause harmful interference to
radio communications.
Operation of this equipment in a residential area is
likely to cause harmful interference in which case the
user will be required to correct the interference at his
own expense.
CAUTION
Ch ange s or mo difi cati ons to this equ ipme nt n ot
expressly ap prove d b y TEAC CORP ORATION for
compliance could void the user's authority to operate
this equipment.
HAZARD, DO NOT EXPOSE THIS
For the customers in Europe
WARNING
This is a Class A product. In a domestic environment,
this product may cause radio interference in which
ca se the use r m ay be required to t ake adequa te
measures.
Pour les utilisateurs en Europe
AVERTISSEMENT
I l s ' ag i t d 'u n p r od u it de Cl a ss e A . D a n s u n
environnem e n t d o m es t i q u e, c e t a p p ar e i l p e u t
pr ovoq uer d es in terfé ren c es r a dio, dans ce c as
l'utilisateur peut être amené à prendre des mesures
appropriées.
Für Kunden in Europa
Warnung
Dies i st eine Einrichtung, welche die Funk-Entstö
rung nach Klasse A besitzt. Diese Einrichtung kann
im Wohnberei ch Fu nkstörungen versur sache n; in
diese m F all ka nn vom Betrieber verla ng werden,
angemessene Maßnahmen durchzuführen und dafür
aufzukommen.
CE Marking Information
a) Applicable electromagnetic environment: E4
b) Peak inrush current: 12.5 A
Page 3

1-Introduction
TASCAM CD-RW900 3
Important Safety Instructions
1 Read these instructions.
2 Keep these instructions.
3 Heed all warnings.
4 Follow all instructions.
5 Do not use this apparatus near water.
6 Clean only with dry cloth.
7 Do not blo ck a ny v enti lation openings. Inst all in
accordance with the manufacturer's instructions.
8 Do n o t in s t al l ne a r a ny h e a t sourc e s s uch a s
radiators, heat registers, stoves, or other apparatus
(including ampliers) that produce heat.
9 Do not defeat the safety purpose of the polarized or
grounding-type plug. A polarized plug has two blades
with one wider than the other. A grounding type plug
has two blades and a third grounding prong. The wide
blade or the third prong are provided for your safety. If
the provided plug does not t into your outlet, consult
an electrician for replacement of the obsolete outlet.
• Do not expose this apparatus to drips or splashes.
• Do not place any objects filled with liquids, such as
vases, on the apparatus.
• Do not install this apparatus in a confined space such
as a book case or similar unit.
• The apparatus draws nominal non-operating power
from the AC outlet with its POWER switch in the off
position.
• The apparatus should be located close enough to the
AC outlet so that you can easily grasp the power cord
plug at any time.
• An apparatus with Class I construction shall be
connected to an AC outlet with a protective grounding
connection.
10 P ro t e c t th e po w e r c o rd f r o m b ei n g w a lk e d o n
or pi n c h e d p ar t i cu l ar l y a t p l ug s , c o nv e ni e n ce
receptacles, and the point where they exit from the
apparatus.
11 Only use attachments/accessories specied by the
manufacturer.
12 Use only wit h t he car t, sta nd, tr ipo d, bra cke t, or
table specied by the manufacturer, or sold with the
apparatus. When a cart is used, use caution when
moving the cart/apparatus combination to avoid injury
from tip-over.
13 Unplug t his apparat us durin g lightning storms or
when unused for long periods of time.
14 Refer all servicing to quali fied service perso nnel.
Servicing is required when the apparatus has been
damaged in any way, such as power-supply cord or
plug is damaged, liquid has been spilled or objects
have fallen into the apparatus, the apparatus has
been exposed to rain or moisture, does not operate
normally, or has been dropped.
Page 4
1-Introduction
4 TASCAM CD-RW900
�
1
For USA
Safety Information
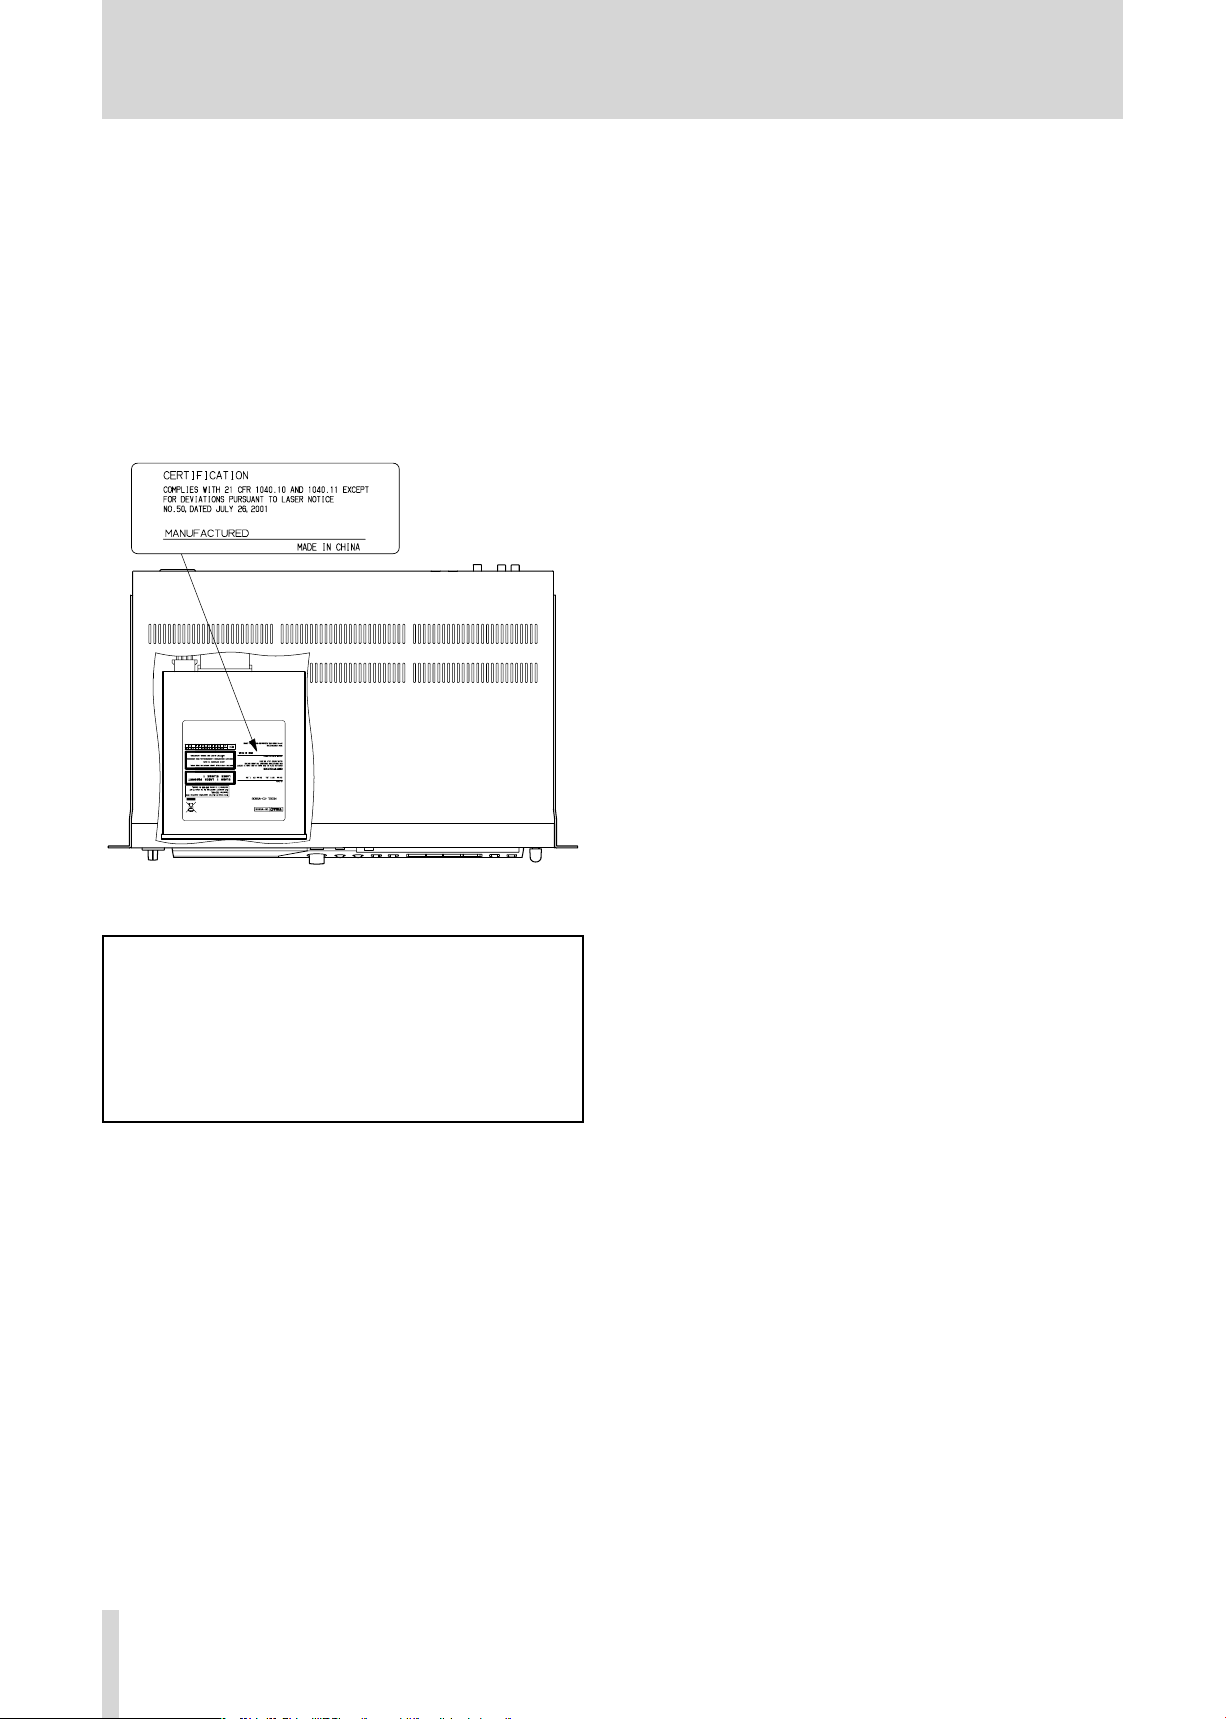
This product has been designed and manufactured
according to FDA regulations "title 21, CFR, chapter
1, subchapter J, based on the Radiation Control for
Health and Safety Act of 1968", and is c lassified
as a class 1 laser product. There is no hazardous
invisible laser radiation during operation because
invisible laser radiation emitted inside of this product
is completely confined in the protective housings.
The label required in this regulation is shown 1.
CAUTION
• DO NOT REMOVE THE PROTECTIVE HOUSING
USING A SCREWDRIVER.
• USE O F C ON TR OL S OR A DJ US TM EN TS O R
PERFORMANCE OF PROCEDURES OTHER THAN
THOSE S P EC I FI ED HE R EI N M AY RES U LT IN
HAZARDOUS RADIATION EXPOSURE.
• I F T H I S P R O D U C T D E V E L O P S T R O U B L E ,
CONTACT YOUR NEAREST QUALIFIED SERVICE
PERSONNEL, AND DO NOT USE THE PRODUCT
IN ITS DAMAGED STATE.
Optical pickup:
Type: SF-W37SFT
Manufacturer: Sanyo Electric Co,Ltd.
Laser output: Less than 0.7 mW on the objective
lens (record)
Wavelength: 760 to 800 nm
Page 5

1-Introduction
TASCAM CD-RW900 5
Contents
1 − Introduction
About this manual .................................................. 6
Supplied accessories
Rack-mounting the unit ......................................... 6
About CD-R abd CD-RW discs.............................. 7
Finalizing
“Recordable” discs................................................. 7
Environmental considerations ............................... 8
Handling of compact discs ..................................... 8
Never use a stabilizer or printable discs
Beware of condensation......................................... 9
Use of the remote control unit
Batteries................................................................. 9
Inserting batteries ................................................. 9
Connections
.................................................................
...........................................................
.............................................
..................
...............................
2 − Features of the CD-RW900
Front panel............................................................. 10
Rear panel.............................................................. 11
RC-RW900 Remote control unit ........................... 12
3 − Menu operation
Menu conguration ............................................... 13
Operation basics
...................................................
13
4 − Playback operations
Discs for playback................................................. 15
Simple playback operations
Track selection ...................................................... 15
Using the skip function
Selecting by track number.................................... 16
Track search .......................................................... 16
Normal search...................................................... 16
Direct search
Operation variations............................................ 16
Playback modes
Continuous playback............................................ 17
Single-track playback ........................................... 17
Program playback
Random playback ................................................18
Time display switching
Timer playback ..................................................... 18
Repeat playback .................................................. 18
A to B repeat playback......................................... 19
Pitch control function........................................... 19
Key control function ............................................. 19
Playingback MP3 les .......................................... 20
About MP3 track data ........................................ 20
Directory playback setting
........................................................
...................................................
................................................
.................................
.........................................
.........................................
....................................
15
15
16
17
17
18
20
5 − Recording
Input selection ...................................................... 21
6
7
9
9
9
Input monitoring ................................................... 21
Frequency conversion
Basic recording .................................................... 22
Time display while recording
Full disc................................................................ 22
Advanced recording ............................................. 23
Fade-in and fade-out recording ............................ 23
Synchronized recording
Sync recording ..................................................... 23
Automatic track division
Manually divide track ............................................ 25
Rec mute function
..........................................
.................................
........................................
......................................
................................................
21
22
23
24
25
6 − After recording
Finalizing ............................................................... 26
Unnalizing CD-RW discs ..................................... 26
Erasing .................................................................. 27
Erasing tracks ...................................................... 27
Erasing a whole disc............................................. 27
Refreshing a disc.................................................. 27
7 − Titling
Title input operation
Disc title input....................................................... 28
Track title input ..................................................... 28
Keyboard type setting.......................................... 29
Title input by keyboard .........................................29
Other keyboard operations
.............................................
...................................
28
29
8 − Reference and specications
Error messages .................................................... 30
Messages during operations ............................... 30
Troubleshooting
Specications ....................................................... 31
Dimensional drawing............................................ 31
....................................................
30
Page 6
6 TASCAM CD-RW900
NOTE
1 − Introduction
Th a nk you for y our pu rchas e of t he TASC AM CDRW900 CD rewritable recorder.
Before connecting and using the unit, please take time
to read this manual thoroughly to ensure you understand how to properly set up and connect the CDRW900, as well as the operation of its many useful and
convenient functions. After you have nished reading
this manual, please keep it in a safe place for future reference.
About this manual
In this manual, we use the following conventions:
The names of keys and controls are given in the
≠
following typeface: ERASE.
When the alphanumeric portion of the display shows
≠
a message, this is shown in the following typeface:
Welcome
.
This product is designed to help you record and reproduce sound works to which you own the copyright, or
where you have obtained permission from the copyright
holder or the rightful licensor. Unless you own the copyright, or have obtained the appropriate permission from
the copyright holder or the rightful licensor, your unauthorized recording, reproduction or distribution thereof
may result in severe criminal penalties under copyright
laws and international copyright treaties. If you are uncertain about your rights, contact your legal advisor.
Under no circumstances will TEAC Corporation be responsible for the consequences of any illegal copying
performed using the CD-RW900.
If a pres et indicator in the display (i.e. one wh ich
≠
cannot change, but is either on or off) is shown, this is
shown as follows:
Selectable value (i.e. values of dB) or ON and OFF
≠
se lect ion (i.e. SRC >XXX ) is show n in the followin g
typface: XXX.
RANDOM
.
Supplied accessories
In addition to this manual, the CD-RW900 has been
packed with the following:
RC-RW900 remote control unit................................. 1
≠
AC power cable ........................................................ 1
≠
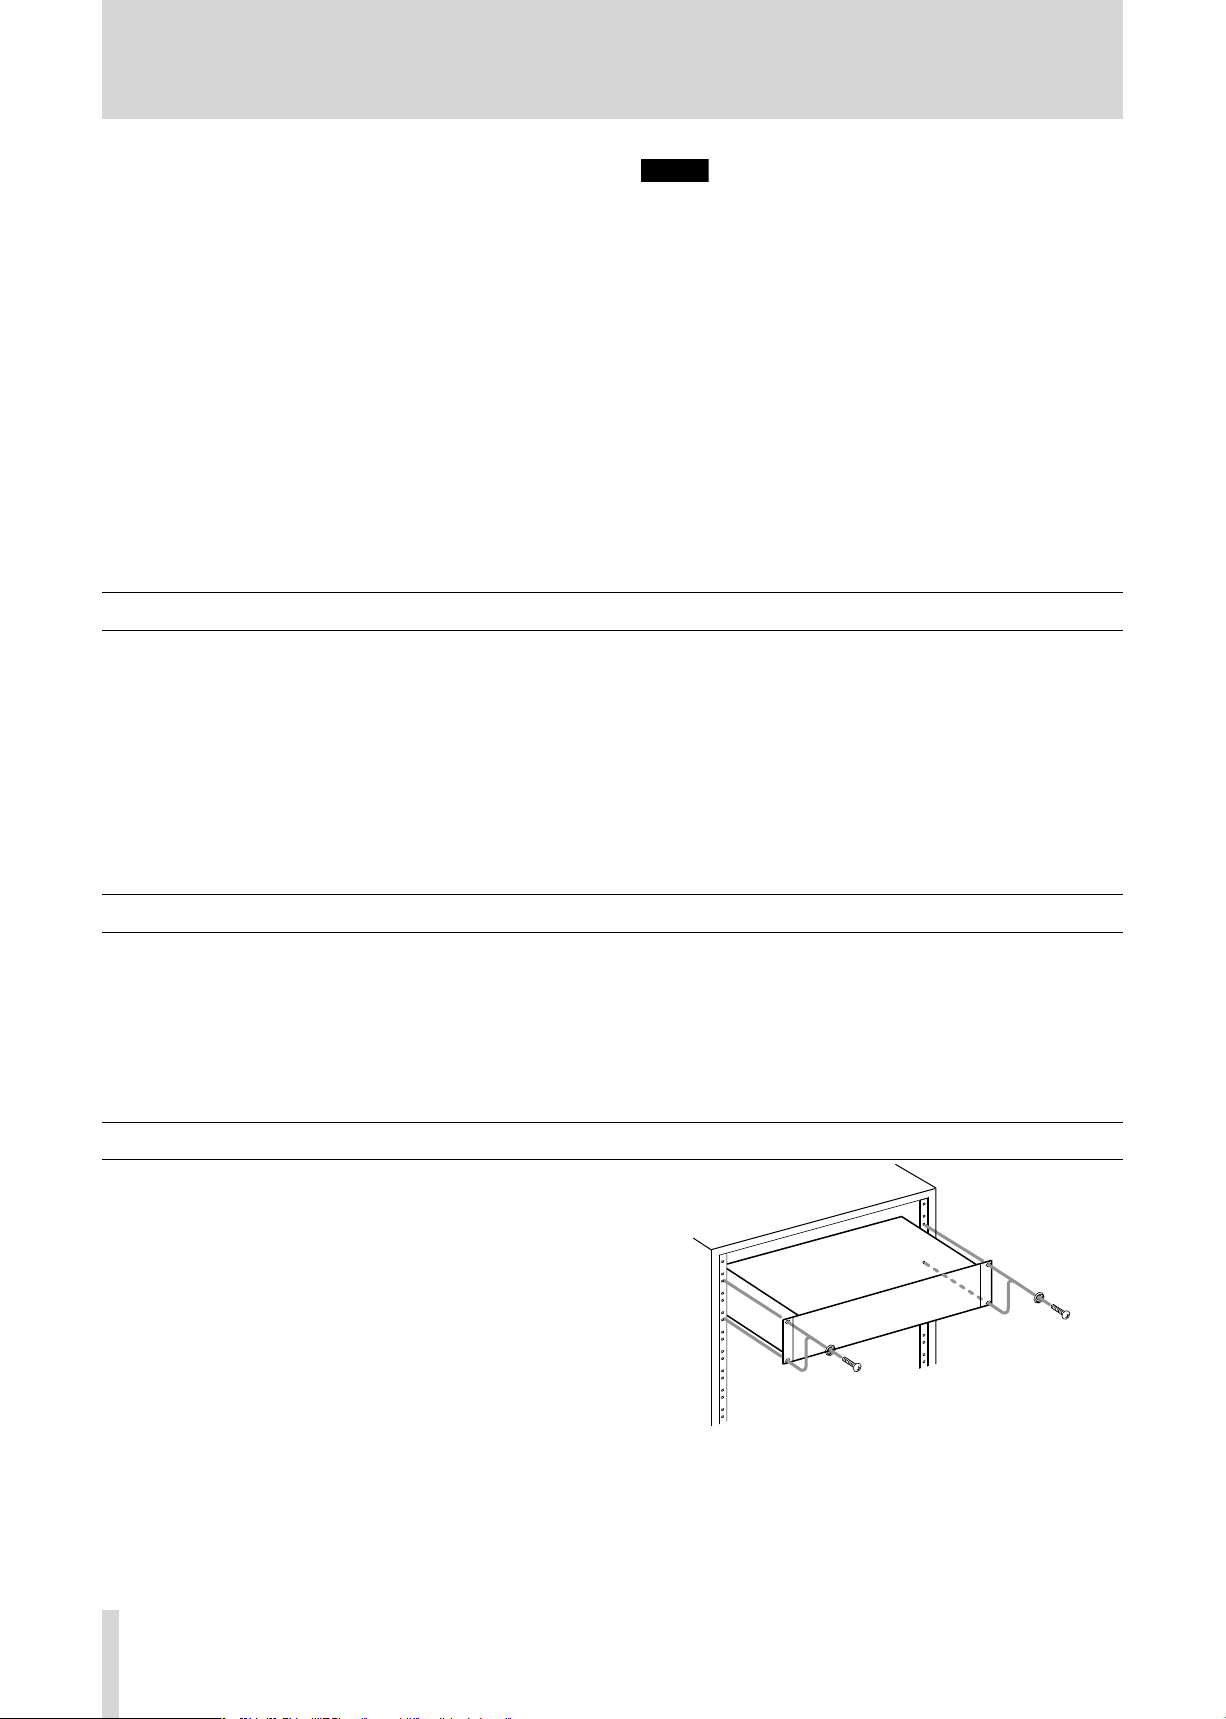
Rack-mounting the unit
If you are mounting the unit in a rack, leave 1U of space
above it and 4 inch (10cm) or more of space at the rear.
Use the rack-mounting kit to mount the unit in a standard 19-inch equipment rack, as shown in this section.
Remove the feet of the unit before mounting.
AAA batteries for the remote control unit................... 2
≠
A rack-mounting screw kit (screws and washers)...... 1
≠
Contact your TASCAM supplier if any of these items are
missing.
Page 7
TASCAM CD-RW900 7
About CD-R and CD-RW discs
High Speed
1 − Introduction
CD-R discs can be recorded once only. Once they have
been used for recording, they cannot be erased or rerecorded. However, if space is available on the disc,
additional material can be recorded. The pack-aging of
CD-R discs will include one of the following logos:
By contrast, a CD-RW disc can be used in much the
same way as a CD-R disc, but the last track or tracks
recorded c an be eras ed be fore the disc has be en
“nalized”, and the space on the disc can be re- used
for other recordings. The packaging of CD-RW discs
will include the logo one of the following logos:
H o w e v e r, y o u s h o u l d n ot e th at a n au d i o C D
created using a CD-RW900 disc may not play back
satisfactorily on every audio CD player. It will, naturally,
be playable on the CD-RW900. This is in no way a
limitation of the CD-RW900 itself, but of the difference
between the different types of media and the methods
used to read them.
CD-R and CD-RW discs are sensitive to the effects
≠
of heat and ultraviolet rays. It is important that they
are not stored in a location where direct sunlight
will fall on them, and which is away from sources of
heat such as radiators or heat-generating electrical
devices.
Always store CD-R and CD-RW discs in their cases
≠
to avoid dirt and dust accumulating on their surfaces.
When labeling CD-R and CD-RW discs, always use a
≠
soft oil-based felt-tipped pen to write the information.
Never use a ball-point or hard-tipped pen, as this
may cause damage to the recorded side.
Always keep the recording sides of the discs away
≠
from grime and dust to avoid a reduction in sound
quality. To clean a disc, wipe gently with a soft dry
cloth from the center towards the outside edge. Do
not use thinner, gasoline, benzene or LP cleaning
uid, as these will damage the disc and cause the
disc unplayable.
Do not put labels or protective sheets on the discs
≠
and do not use any protective coating spray.
If you are in any doubt as to the care and handling of
≠
a CD-R disc, read the precautions supplied with the
disc, or contact the disc manufacturer directly.
Th e re are precautio ns that you sh ould ta ke when
handling CD-R and CD-RW discs.
Avoid touching the recording (non-label) side of a
≠
disc on which you will be recording. Recording on
a disc requires a cleaner surface than playing back,
and ngerprints, grease, etc. can cause errors in the
recording process.
Finalizing
Although audio data may be written on a CD-R or CDRW disc, a standard CD player will not be able to read
the data (i.e. play back the audio) until a nal *TOC has
been written at the start of the disc.
*TOC=Table of contents:
information of recorded data, which contains titles, starting
and ending addresses, and etc..
The process of writing this table of contents is known
as “nalizing”. Once this has been done, no further data
can be written to the disc. See “Finalizing” on page 25
for details.
“Recordable” discs
In this maanual, we use the term “recordable” disc to
describe a CD-R or CD-RW disc that has not been
nalized, i.e. further recording is possible on the disc.
In the case of a CD-RW disc which has been nalized,
the whole of the disc may be erased, or the disc may
be “refreshed”, and the disc re-used.
In addit ion, a CD-R W disc that has b een nalize d
may be “unnalized”, i.e. only the TOC is removed.
This allows further tracks to be recorded to the disc,
provided that there is space on the disc.
Page 8
1-Introduction
8 TASCAM CD-RW900
NOTE
1 − Introduction
Environmental considerations
The CD-RW900 may be used in most areas, but to
maintain top performance, and prolong operating life,
observe the following environmental conditions:
The nominal temperature should be between 5°C
≠
and 35°C (41°F and 95°F).
Relative humidity should be 30 to 90 degrees non-
≠
condensing.
As the unit may become hot during operation, always
≠
leave sufcient space above the unit for ventilation.
Do not install this unit in a conned space such as
a book case or similar product, and do not put any
material goods on the unit.
Handling of compact discs
The CD-RW900 has been designed for the playback of
CD-DA format discs and MP3 files recorded in ISO9660
format: In addition to ordinary 5-inch and 3-inch CDs,
it can also play properly recorded CD-R and CD-RW
discs.
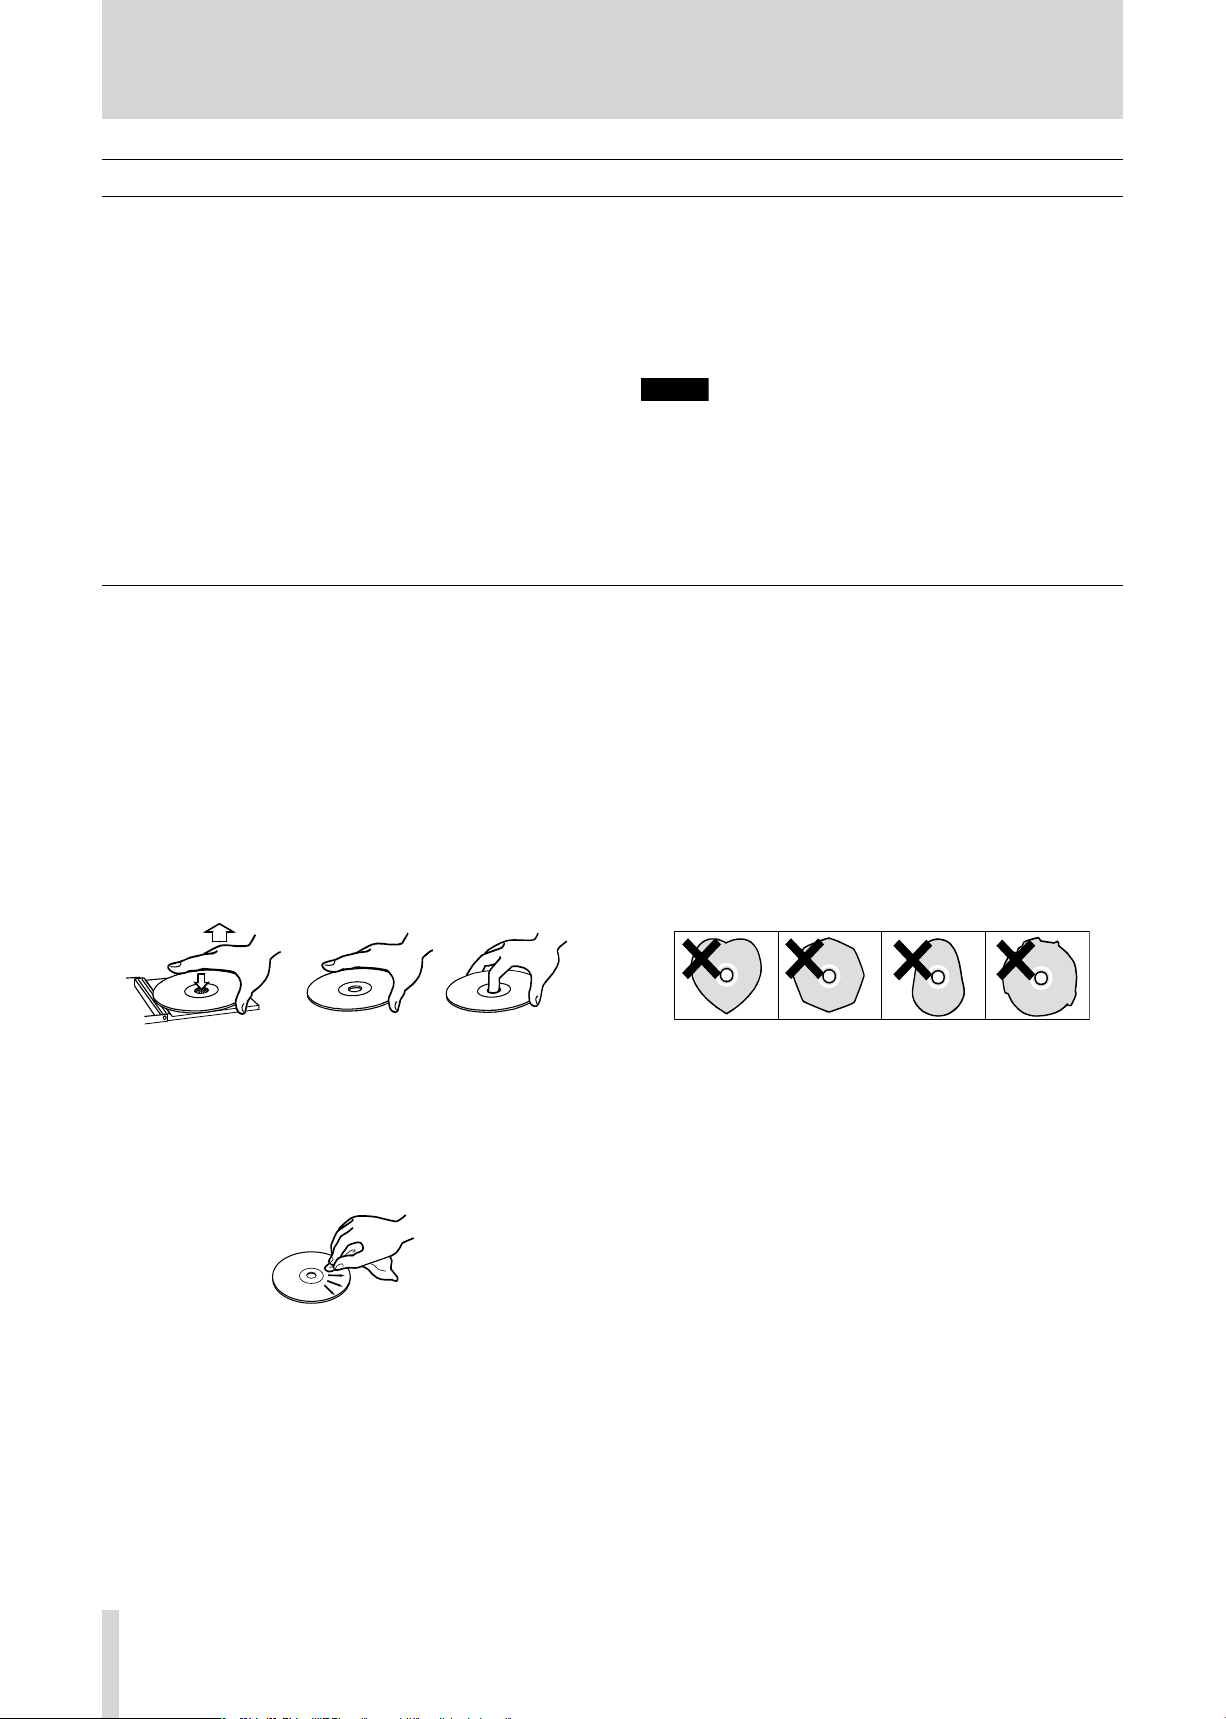
≠ Always place the compact discs in the trays with
their label facing upward.
≠ To remove a disc from its case, press down on the
center of the disc holder, then lift the disc out, holding it carefully by the edges.
Avoid installing this apparatus on top of any heat-
≠
generating electrical device such as a power amplier.
Make sure that the unit is mounted in a level position
≠
for correct operation.
The voltage supplied to the unit should match the voltage as printed on the rear panel. If you are in any doubt
regarding this matter, consult an electrician.
≠ Do not affix any labels or stickers to the label side
of the disc. Do not write on the disc with a ballpoint
pen.
≠ Do not insert discs that have adhesive remaining
from tape or stickers that have been removed. If they
are inserted into the player, they could stick to the
internal mechanism, requiring removal by a technician.
≠ Do not use cracked discs.
≠ Only use circular compact discs. Avoid using non-
circular promotional, etc. discs.
≠ Avoid getting fingerprints on the signal side (opposite
the label side). Grime and dust may cause skipping,
so keep discs clean and store them in their cases
when not being played. To clean the signal side of a
disc, wipe gently with a soft dry cloth from the center
towards the outside edge.
≠ Do not use any record spray, anti-static solutions,
benzene, paint thinner or other chemical agents to
clean CDs as they could damage the delicate playing
surface. It may cause CDs unplayable.
≠ Discs should be returned to their cases after use to
avoid serious scratches that could cause the laser
pickup to “skip”.
≠ Keep discs away from direct sunlight, and places of
high heat and humidity. If left in such places, warping
could result.
≠ The CD-RW900 cannot play unfinalized CD-R/RW
discs.
Music discs with
≠
protection system, have been released form several
record companies aiming to protect the copyright.
Since some of these discs do not comply with the
CD specifications, they may not be playable on the
CD-RW900.
copy control, a compact disc copy-
Page 9
1-Introduction
TASCAM CD-RW900 9
Never use a stabilizer or printable discs
NOTE
Using commercially available CD stabilizers or printable
recordable discs with this player will damage the mechanism and cause it to malfunction.
Beware of condensation
If the unit (or a compact disc) is moved from a cold
to a warm place, or used after a sudden temperature
change, there is a danger of condensation; vapor in the
air could condense on the internal mechanism, making
Use of the remote control unit
1 − Introduction
Never use a disc that has had a stabilizer mounted to it.
The residual adhesive may cause the disc to stick to the
turntable of the CD-RW900. If it sticks to the turntable,
you will need a technician to get it out.
correct operation impossible. To prevent this, or if this
occurs, leave the player for one or two hours with the
power turned on, then turn the power off and on again.
Do not expose the light-receptive spot to the direct
≠
sunlight or intense lights of an illumination for extended periods. Long exposure to the lights may result a
failure of the unit functions.
When the remote control will not be used over one
≠
month, please remove the batteries to prevent the
possibility of battery acid leakage which could damage the unit. Should lea kage occur, remove an d
discard the batteries, and wipe the battery case thoroughly with a cloth. Avoid getting the battery liquid
on the skin. After cleaning, replace with new batteries.
Batteries
If batteries are used improperly, or if leakage or breakage occurs, the unit will not function. Please observe
the cautions indicated on the batteries and their packaging to ensure proper usage.
Conrm + and − polarity and follow the indications
≠
when inserting new batteries into the remote control.
Do not use old and new batteries together.
≠
Even if the battery is the same size, the voltage may
≠
differ. Do not use batteries of different specications
together.
Do not attempt to recharge batteries that are non-
≠
rechargeable.
Do not open or disassemble batteries, throw them
≠
into a re or put them in water.
The remote control functions by using an infrared
≠
light signal. When using the unit to control the CDRW900, other devices that are turned on could be
operated by its signal.
If the range of remote operation becomes smaller, or
≠
commands do not always function properly, the batteries have become weak and should be replaced.
Always replace both batteries with new batteries of
the same type.
Point the remote control to the remote sensor on the
≠
main unit. Do not obstruct the path between the remote control and the remote sensor.
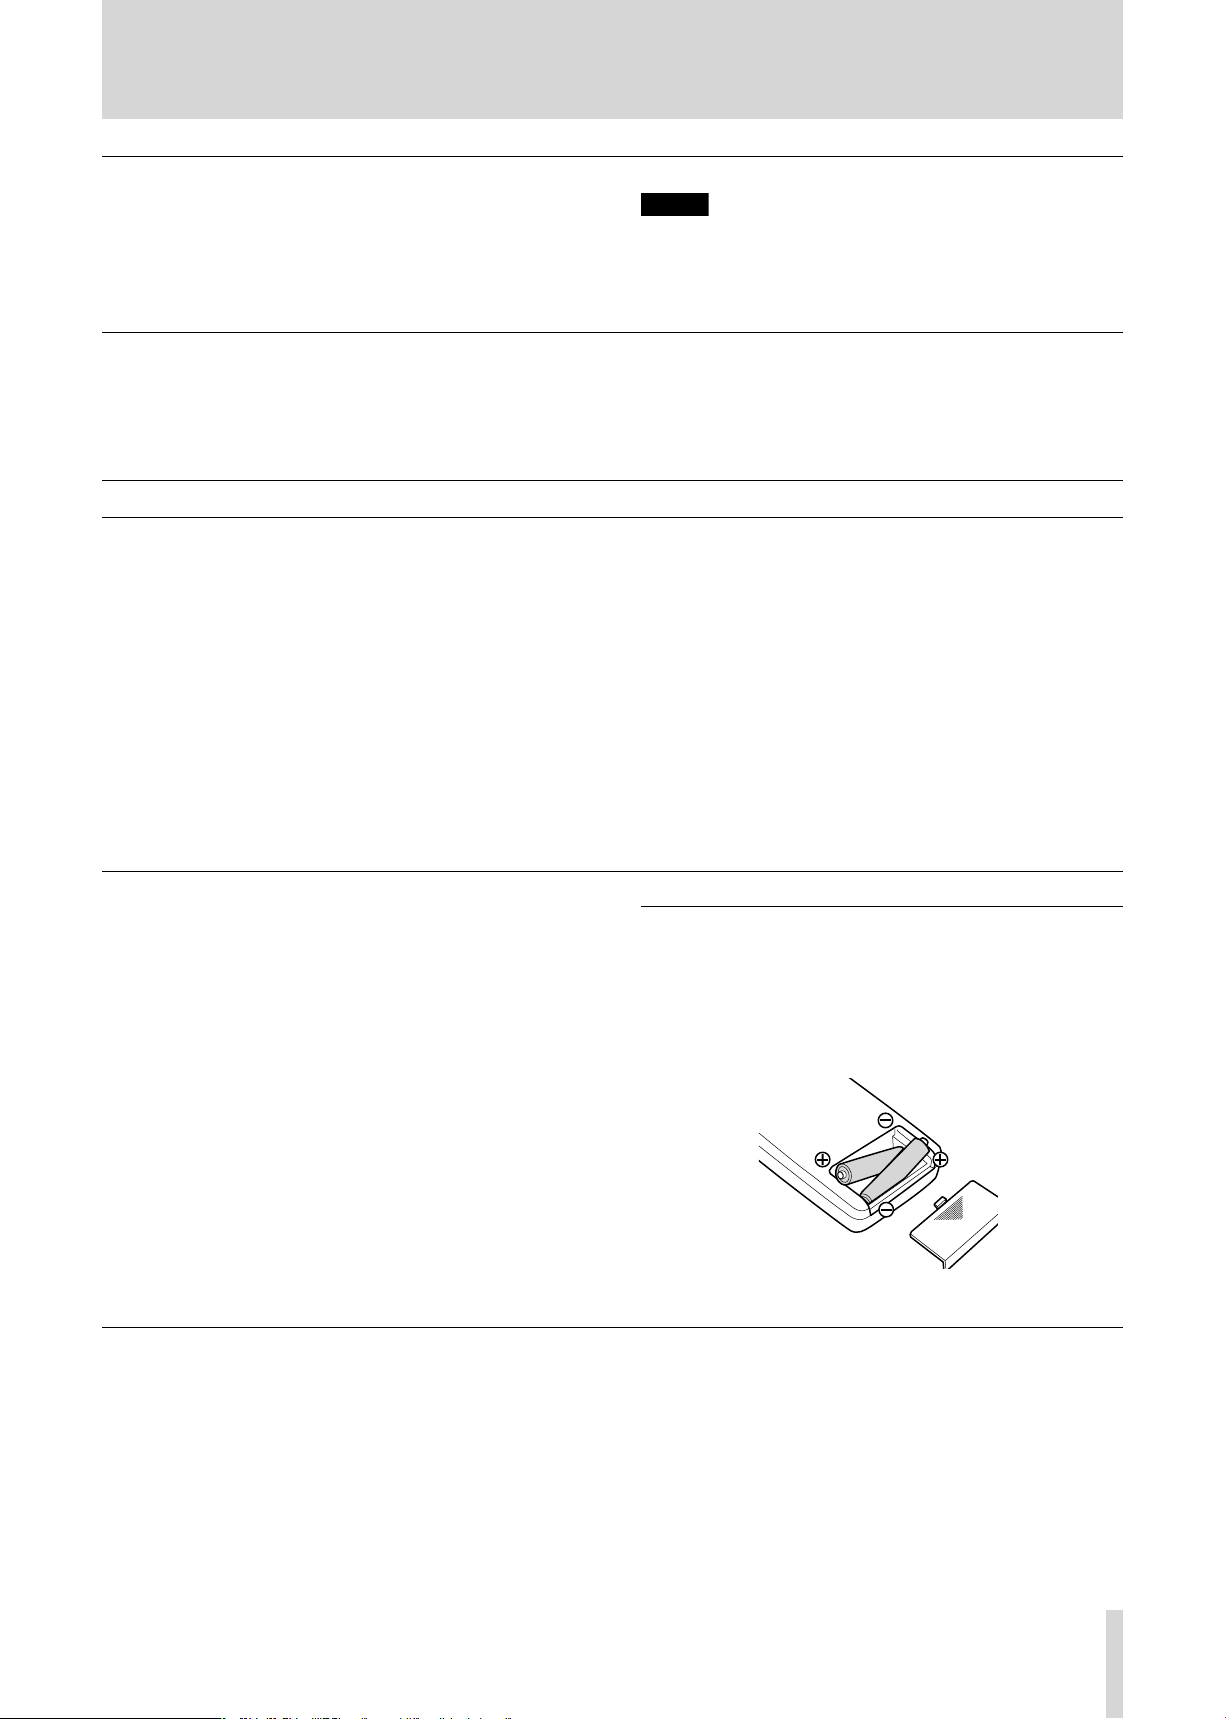
Inserting batteries
1. Open the lid.
2. Conrm +/- polarity, and insert two AAA batteries.
3. Close the lid.
Connections
The following should be noted when you connect the
unit to other equipment.
It is possible to connect the unit’s DIGITAL COAXIAL
IN , DIGITAL OP TICAL I N and A NALOG UNBALANCED INs (L, R) to other equipment at the same
time. However, the unit can receive signals from only
one digital input at a time.
Currently selected input jack is shown on the display.
Audio signals output from the unit are output from the
analog ANALOG OUT jacks, as well as from the DIGI-
TAL COAXIAL OUT jack and DIGITAL OPTICAL OUT
connector simultaneously (but not from the digital outputs in stop mode).
Page 10
10 TASCAM CD-RW900
2
4
3
5
7
8
0
q
w6
9
1
e r t y u i o p a s d f g
2 − Features of the CD-RW900
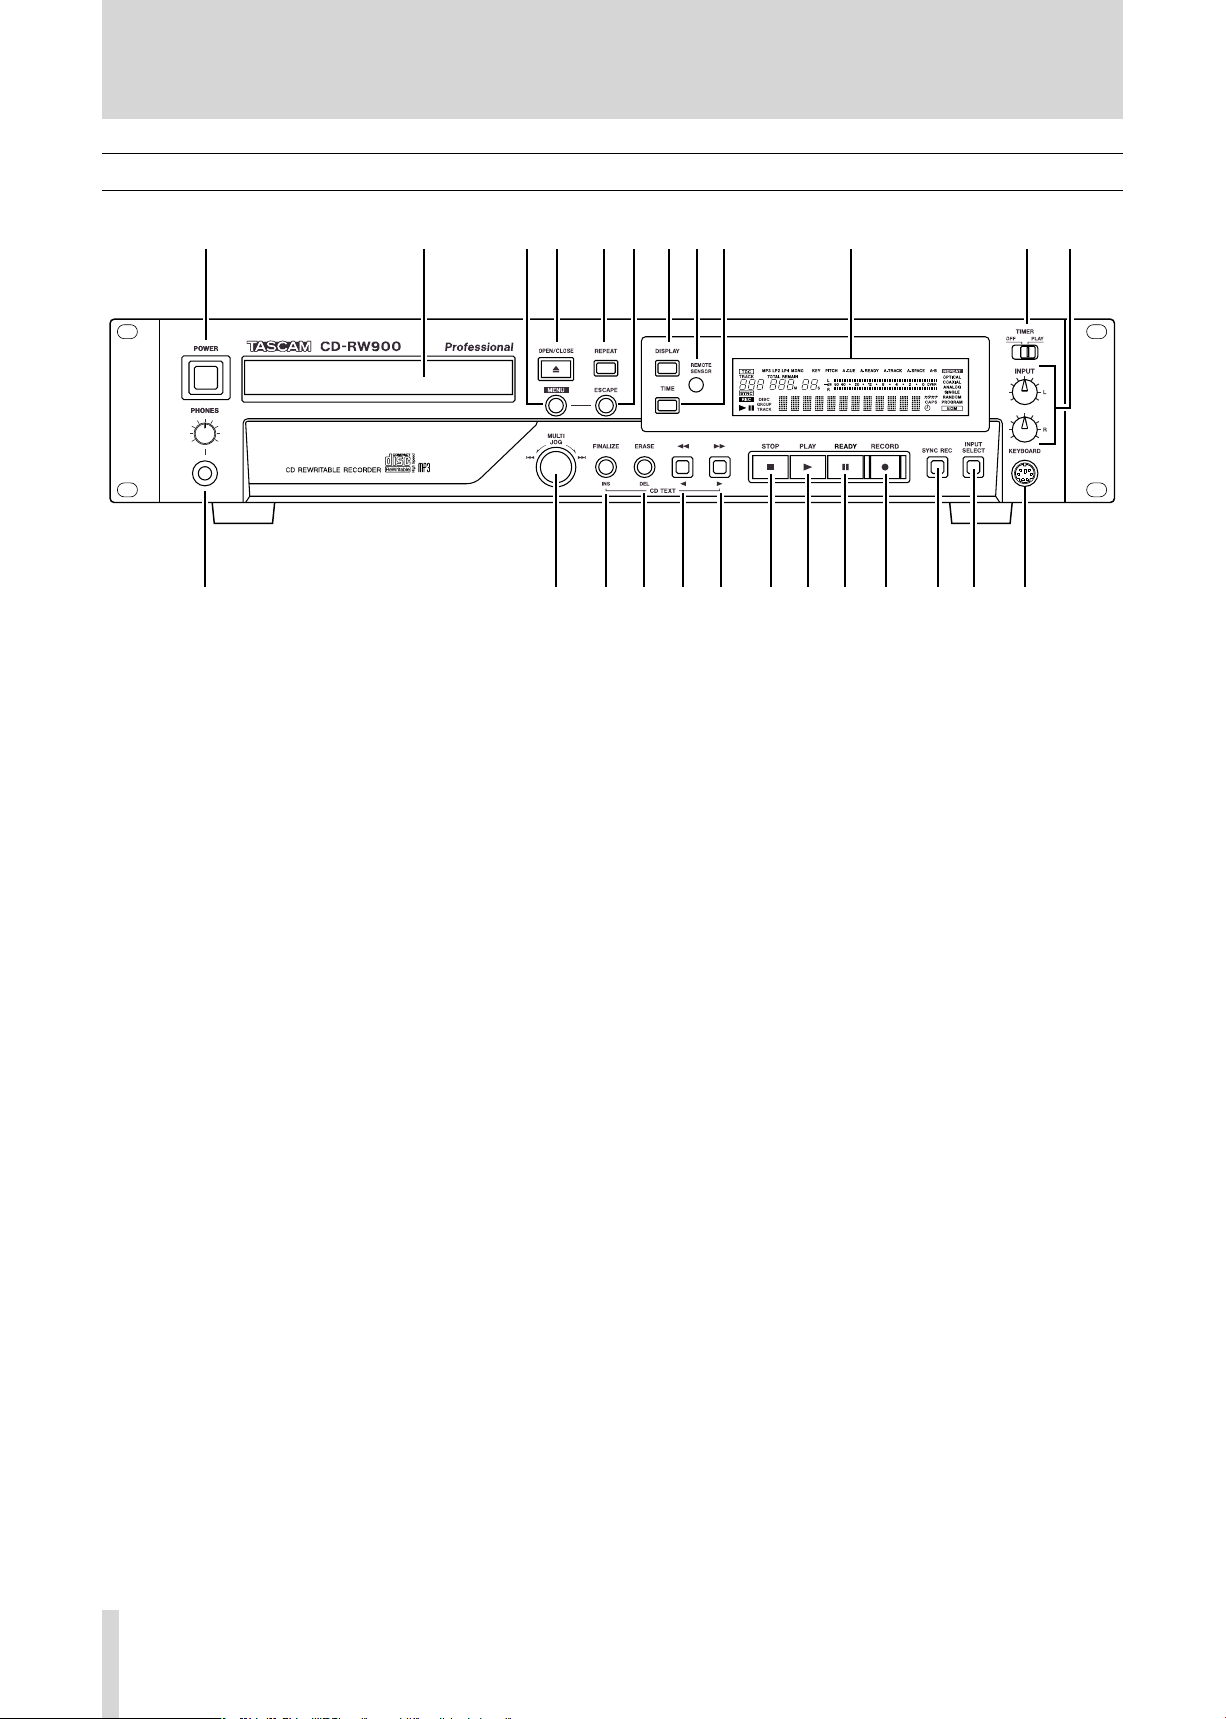
Front panel
1
POWER switch The power switch is used to switch
the unit on and off.
2
Disc tray Discs should be placed label side up-
wards in the disc tray. When a disc is loaded into
the unit, the display period following the word TOC
Reading as the unit determines the contents of the
disc.
3
MENU key Use this key to call up the menu options
(see “Operation basics” on page 14).
4
OPEN/CLOSE key Use this key to open and close
the disc tray. The display shows
is opening and
5
REPEAT key Use this key to set the repeat play-
back mode on and off.
Close
when the tray is closing.
Open
when the tray
w
e
r
page 18 for details.
INPUT (L,R) controls Use these concentric con-
trols to adjust the level of the analog audio signals
received at the ANALOG IN jacks.
PHONES jack and the level control Use a stan-
dard pair of stereo headphones, equipped with a
1/4-inch plug, with this jack.
Adjust the volume from the jack with the level control
(turn clockwise for higher volume).
MULTI JOG dial Use this dial to select tracks for
playback, to set parameter values.
In addition, pushing the dial acts like an ENTER key,
i.e. the currently-displayed value or setting is conrmed.
6
ESCAPE key When in a menu mode, this key can-
cels the menu item selected.
7
DISPLAY key Use this key to see the current disc
tittle when a disc is stopping. To display the current
track tittle, press this key while playback or ready
mode.
8
REMOTE SENSOR This is not a control, but the
sensor for the remote control unit. When using the
remote control unit, make sure that there is a clear
path from the remote control unit to the sensor.
9
TIME key Use this key to cycle through the time
modes appear on the display (see “Time display
switching” on page 18).
0
Display The display is used to show the current
status of the unit, as well as the current menu settings.
q
TIMER switch (PLAY, OFF) Using this key switches
Timer play on and off . See “Timer play back” on
t
FINALIZE/INS key Use this key to nalize record-
able discs. (see “Finalizing” on page 25 for details).
It also acts like a space key when entering TEXT
data (see “Title input operation” on page 28).
y
ERASE/DEL key Use this key (with CD-RW discs
only) to erase tracks, or a whole disc, or to refresh
a “bad” disc, or to unnalize a nalized disc. See
“Erasing” on page 26 for details.
It also acts like a delete key when entering TEXT
data (see “Title input operation” on page 28).
u∆/˙
(search) while playback or ready mode.
When Directory search is on, and when stop, using
this key selects the directory.
It also moves the cursor in the left direction when
entering TEXT data.
key Use this key to operate review playback
Page 11

1-Introduction
TASCAM CD-RW900 11
;
l
k
j
h
2 − Features of the CD-RW900
i ˚/¥
(search) while playback or ready mode.
When Directoy search is on, and when stop, using
this key selects the drectory.
It also moves the cursor in the right direction when
entering TEXT data.
o
STOP key Use this key to stop playback or record-
ing.
p
PLAY key Use this key to start or resume playback
or recording.
a
READY key Use this key to stands by playback or
recording.
s
RECORD key Use this key to enter record ready
mode (see “Recording”on page 21 for details) and
also to enter manual track divisions (see “Manual
track division” on page 25).
d
SYNC REC key Use this key to turn synchronized
key Use this key to operate cue playback
Rear panel
recording on and off before starting to record (see
“Synchronized recording” on page 23 for details).
f
INPUT SELECT Use this key to select the different
audio inputs and the input combinations (see “Input
selection” on page 21 for full details).
g
KEYBOARD jack An IBM PC-compatible keyboard
with PS/2 interface can be connected to this terminal to enable certain operations of the CD-RW900
with the keyboard. Title input operations, in particular, can be performed with greater efciency.
h
ANALOG INPUT (L, R) These RCA jacks accept
analog audio signals from suitably-equipped units
(−10 dBV, unbalanced).
j
ANALOG OUT (L, R) These RCA jacks output ana-
log audio signals (at −10 dBV levels, unbalanced) to
suitably-equipped units).
k
DIGITAL COAXIAL (IN, OUT) These two RCA jacks
accept and output digital audio in standard consumer format (SPDIF).
l
DIGITAL OPTICAL (IN, OUT) These two TOSLINK
optical connectors accept and output digital audio
using optical ber connectors.
;
AC IN jack Connects the power cable supplied.
Page 12

1-Introduction
12 TASCAM CD-RW900
3
4
5
7
8
0
6
e
t
y
u
i
r
o
p
w
a
s
q
9
2
1
d
RC-RW900 Remote control unit
2 − Features of the CD-RW900
0
STOP key Use this key to stop playback or recording.
q
READY key Use this key to stands by playback or
recording.
w
SYNC REC key Use this key to turn synchronized
recording on and off (see “Synchronized recording”
on page 23 for details).
e
OPEN/CLOSE key Opens and closes the disc tray.
r
Number keys (0 through 9) Use these keys for
direct entry of track numbers when playing back, or
making a programmed play list.
t
CLEAR key Clears a mistaken entry made with the
number keys.
In the program mode, pressing this key cancels the
program entered at the last.
It also acts like the ESCAPE key in the Menu mode.
1
TIME key Press this key to cycle through the time
display modes.
2
DISPLAY key Press this key to see the current disc
tittle when a disc is stopping, or the current track
tittle while playback or ready mode.
When entering TEXT data, using this key switches
the text characters.
3
REPEAT key Changes between the various repeat
modes when playing back (see “Repeat playback”
on page 18).
4
A-B key Sets the A-B repeat points and playback
mode (see “A-B repeat mode” on page 19).
5
DIRECTORY key Use this key to switch MP3 le
directory playback on and off.
6
PITCH key Switches pitch control on and off.
7
FADER key Use this key to start fade-in recordings
or to start a fade-out when recording (see “Fade-out
and fade-in recording” on page 23 for details).
8
RECORD key Use this key to enter record ready
mode.
9
SEARCH keys (∆/˚) Use these keys to move
the playback position inside a track.
y
ENTER key Pressing this key is equivalent to pressing the MULTI JOG dial to conrm an entry.
u
MENU key Switches the menu mode on or off.
i
PLAY MODE key Use this key to choose between
the different playback modes (single play, continue
play, etc.).
o
ERASE key Erases tracks (CD-RW discs only), or a
whole disc, or to refresh a “bad” disc, or to unnalize
a nalized disc (see “Erasing” on page 26 for details).
p
FINALIZE key Finalizes recordable discs. See “Finalizing” on page 25 for details.
a
REC MUTE key Use this key when recording, to
mute the input signal for about four seconds and
then to enter record ready mode (see “Rec mute
function” on page 25).
s
SKIP (
Â/¯
tween tracks when playing back (equivalent to rotating the MULTI JOG dial).
d
PLAY key Use this key to start playback, or enter
record mode from record ready mode.
) keys Use these keys to move be-
Page 13

1-Introduction
TASCAM CD-RW900 13
3 − Menu operation
NOTE
The various settings and editing operations possible
with the CD-RW900 are performed through menu options shown on the display. Among the many menu set-
ting options, some may be made directly using the keys
on the remote control.
Menu configuration
The menus are congured as shown below. Please see the reference page for more details of each menu.
Menu option Sub-Menu option Function Reference page
PLAY MODE Playback mode settings P17 (“Playback modes”)
PITCH Pitch control mode on/off P19 (“Pitch control”)
PITCH CONT Pitch control setting P19 (“Pitch control”)
PLAY
REC
PITCH STEP Pitch control variable pitch setting P19 (“Pitch control”)
KEY Key control mode on/off P19 (“Key control function”)
KEY LEVEL Key control level setting P19 (“Key control function”)
DIRECTORY MP3 disc directory mode on/off P20 (“Playback MP3 les”)
VOLUME Input level setting P21 (“Input selection”)
FADE IN Fade-in operation time setting P23 (“Fade-in and fade-out recording”)
FADE OUT Fade-out operation time setting P23 (“Fade-in and fade-out recording”)
SRC Sampling rate converter on/off P21 (“Frequency conversion”)
SYNC LEVEL Operation level of Sync recording P23(“Sync recording”)
A_TRK Auto track mode setting P24 (“Automatic track division”)
A_TRK LEVEL Auto track operation level P24 (“Automatic track division”)
TEXT TEXT EDIT Text setting P28 (“Title input”)
KEYBOARD Setting for keyboard type P29 (“Keyboard setting”)
SYSTEM
PLAY TIME Conrming total playing time P18 (“Time display switching”)
REC TIME Conrming total recording time P22 (“Time display while recording”)
Operation basics
1 Select the desired menu option
Press the MENU key on the front panel or remote
control to call up the desired menu. The PLAY option
in the PLAY sub-menu will be shown on the display
at rst.
Front panel operation: Rotate the MULTI JOG dial
to select the desired menu option, then push the dial
to conrm.
Remote control operation: Use the SKIP key to
cycle through the different menu options, then press
the ENTER key to conrm.
The sub-menu option screen of the selected menu will
be displayed.
If the PLAY option is selected, the sub-menu option
shows up like this:
Return to the menu option selection screen, press the
ESCAPE key on the front panel or the CLEAR key on
the remote control.
2 Select the desired sub-menu
Front panel operation: Rotate the MULTI JOG dial
to select the desired sub-menu, then push the dial
to enter the selection.
Remote control operation: Use the SKIP key to
select, then press the ENTER key.
The menu item screen of the selected su-menu will
Page 14

14 TASCAM CD-RW900
3−Menu operation
NOTE
NOTE
NOTE
appear. If the sub-menu PLAY MODE is selected, the
menu item shows up like this:
Return to the sub-menu option selection screen, press
the ESCAPE key on the front panel or the CLEAR key
on the remote control.
3 Setting the desired menu item or value
Front panel operation: Use the MULTI JOG dial to
select the desired menu item or value. Pushing the
dial enters and exits menu mode.
Remote control operation: Use the SKIP key to
select. Pressing the ENTER key conrms and exits
menu mode.
Some menu options exist for conrmation purposes
only, and setting cannot be performed.
4 How to exit menu mode after setting (or conr-
mation), during menu option display.
As well as pushing the MULTI JOG dial or pressing
the ENTER key, you can use the MENU key to exit
menu mode.
The selected menu mode remains after power is turned
off, except the TEXT menu.
Page 15

TASCAM CD-RW900 15
4−Playback operations
WARNING
NOTE
The CD-RW900 can be used to play back CDs (including CD-R and CD-RW discs that have been recorded
and nalized on other types of recorder), as well as
CD-R discs and CD-RW discs that have been recorded
on the unit.
Discs for playback
The CD discs in the CD-RW900 can play back the
types of discs listed below.
Commercial pre-recorded CDs recorded in CD-DA
≠
format.
CD-R and CD-RW discs that have been recorded
≠
in CD-DA format and nalized properly.
Simple playback operations
1 Press the POWER switch to turn on the unit.
2 Press the OPEN/CLOSE key to open the disc tray.
The display shows Open. Insert a disc in the tray
with the label side up.
3 Press the OPEN/CLOSE key to close the tray. The
display shows
unit, then
ashing.
When the TOC has been read, the display shows the
number of tracks and total running time of the disc.
Close
when a disc is loaded into the
TOC Reading.
Disc type
will appear, with the period
Audio les in MP3 format on CD-ROM, CD-R and CDRW are also playable on the unit.
MP3 les recorded in ISO9660 level 1 and level 2
≠
format on CD-R and CD-RW discs, and properly
nalized. MP3 les recorded in the format which
adheres to Joliet, are also playable.
4 Press the PLAY key to start playback.
Adjust the connected monitor system, or the level
control for the PHONES on the unit to set the listening level you desire.
If you monitoring using headphones, adjust the level
control to low on the unit, then connect to the PHONES
jack before playing back. This will prevent any possible
damage for your hearing.
5 To stop playback, press the STOP key.
Tempora r ily sto p playb a ck and e nter pl ayback
standby mode, press the READY key. To resume
playback, press the PLAY key again.
Total running timeTotal number of tracks
The CD-RW900 also shows one of the following:
TOC
A disc nalized
MP3
A disc contains MP3 les
Track selection
Using the skip function
Skipping track numbers backward or forward.
1 Select desired tracks for playback with the MULTI
JOG dial on the front panel. Turning clockwise skips
the track number backward and counterclockwise
skips forward.
Or, pres s the SK I P key on the re mote con t rol.
Pressing
and
Â
key skips the track number backward
¯
key skips forward.
The explanation in this manual will assume the user is
starting from the normal Continuous mode.
2 Press the PLAY key to start playback.
Or, press the READY key to cue the track and enter
playback standby mode after moving to the head
of the selected track. To start playback, press the
PLAY key.
Page 16

16 TASCAM CD-RW900
NOTE
NOTE
NOTE
NOTE
NOTE
4−Playback operations
NOTE
Selecting by track number
Using the number keys on the remote control, the number of the desired track can be entered directory. Even
numbers with two or three digits can be entered easily.
For example:
Track 9: press ‘9’ and 009 will be displayed.
Track 12: press ‘1’ and ‘2’ and 012 will be displayed.
Track 103: press ‘1’ and ‘0’ and ‘3’ and 103 will be
displayed.
Track search
Normal search
1 Press the
front panel, or the SEARCH
remote control.
∆ / ˚
search key continuously on the
∆ / ˚
key on the
After input, press the PLAY key to start playback. Or,
the READY key to cue the track at its head position
and enter playback standby mode.
You can also enter the track number and start playback
by pushing the MULTI JOG dial or using the ENTER
key.
This function cannot be used in Program or Random
mode.
2 To s top the s earch fu nction, s imply re lease the
∆ / ˚
The search function does not operate with MP3 discs.
or the SEARCH key.
Direct search
By specifying time from the start of a certain track, you
can start playback from a specified point of a specified
track.
Basic operation
1 During stop, play or playback standby modes, use
the number keys on the remote control to input the
three-digit track number (such as 002 for track 2),
then the desired elapsed time (***min **sec) from the
start of that track.
Example: To specify 1 min 30 sec from the start of
track 2, input “002 001 30”.
During input, the counter in the display will flash.
Pressing the CLEAR key cancels the input at any
stage during input.
Regardless of the time display mode (refer to “Time display switching on page 18), the time from the start of
the specified track is displayed.
During stop or playback modes, when the final digit
is entered, the desired position is automatically located and playback will begin from the desired point.
During playback standby mode, at the desired point
the unit will enter playback standby mode.
≠ The direct search function cannot be used in pro-
gram or random mode.
≠ For MP3 discs, time cannot be specified within a
track. However, if you input the three-digit track
number, playback will begin from the start of that
track.
Operation variations
Even if the final second is not input, playback will begin
from the selected point after pressing the ENTER or
PLAY key. Or, if you press the READY key, the unit will
enter the playback standby mode at the selected point.
Specifying a track number only
After inputting the track number, press the ENTER
or PLAY key to begin playback of that track, or the
READY key to cue the track and enter playback
standby mode.
Instead of inputting the three-digit track number, you
can input only the desired track number.
Example: To specify track 3, input only “3”.
Specifying to the minute
After inputting the three-digit track number and the
number of minutes after the start of the track, press
the ENTER or PLAY key to begin playback of that
track, or the READY key to cue the track and enter
playback standby mode.
Example: To specify 1 min 00 sec from the start of
track 2, input “002 001”
≠ If a point which does not exist is entered, setting op-
eration will be cancelled.
Following the above example, if “0021” is input, the
same position will be located.
Page 17

1-Introduction
TASCAM CD-RW900 17
Playback modes
NOTE
NOTE
NOTE
There are four different playback modes. The selected
mode will be indicated on the left of the display.
Continuous playback mode (default setting): no indi-
≠
cation lamp
Single playback mode:
≠
Program playback mode:
≠
Random playback mode:
≠
SINGLE
PROGRAM
RANDOM
lamp is lit
red lamp is lit
red lamp is lit
4−Playback operations
tion basics” on page 14). Turning the MULTI JOG dial
clockwise changes the playback mode shown on the
display in the following order:
Mode>Cont®Mode>Single®Mode>Program
Mode>Random
Pressing the MENU key or pushing the MULTI JOG
dial returns to normal mode from the menu mode.
®
The playback mode can be selected using the PLAY
MODE key on the remote control unit. Pressing the key
changes the playback mode on the display in the following order:
Continue®Single®Program®Random
You can also select the playback mode using the PLAY
MODE option in the PLAY sub-menu (refer to “Opera-
Continuous playback
Programing is cancelled, and playback continuous in
the normal order.
1 During stop, set the
mode.
Continue
or the
Mode>Cont
Single-track playback
This function enables playback of just a single track.
1 During stop, set the
mode.
2 U se th e SK IP key or the numb er ke ys ( 0~9) on
the remo t e control to s elect t he desi red tr a ck.
Single
or the
Mode>Single
While the mode can be changed from any playback
mode, the explanation in this manual will assume the
user is starting from the Continuous mode.
The selected playback mode remains after power is
turned off. However, the setting of program playback
mode will be deleted when power is turned off.
2 Press the PLAY key to begin playback in order of
the track number.
Th e MU LTI JOG dial can be u sed to select the
track also.
3 Press the PLAY key to begin playback.
After the selected track nishes, playback stops.
Program playback
This function enables playback of selected tracks in any
desired order. Up to 99 tracks can be selected for program playback.
1 During stop, set the
mode.
2 Use the number keys (0~9) on the remote control
unit to select each desired track for program playback, then press the ENTER key.
You can also rotate the MULTI JOG dial to select
the track number and push to enter.
The track number will be entered into the program.
Repeat the above step 2 until the desired program is
completed. As the program is being created, the program number and total program playing time is revised
on the display.
If the CLEAR key is pressed, the programmed track will
be deleted from the last.
Program
Mode>Program
or the
3 W hen progra m sett ing i s comp leted , press th e
PLAY key to begin playback of the tracks in the pro-
grammed order.
If the STOP key is pressed without rst pressing the
≠
PLAY key, all the program data will be erased.
During stop, if the playback mode is switched to an-
≠
other, all the program data will be erased.
The programmed play order is not memorized when
≠
power is turned off.
In this mode, if any track is not programed, the CD-
≠
RW900 will not start playback.
If an attempt is made to enter more than 100 pro-
≠
gram steps, the message
display.
If the total program playing time exceeds 999 min 59
≠
sec, --- : -- appears on the display.
PGM Full!
appears on the
Page 18

18 TASCAM CD-RW900
NOTE
NOTE
NOTE
NOTE
4−Playback operations
Random playback
In this mode, the unit will play back all the tracks on the
disc in completely random order, regardless of track
number.
Even when power is turned off, the unit will remain in
Random mode.
1 During stop, set the
mode.
2 Press the PLAY key and random playback will be-
gin.
Program
Mode>Random
or the
Time display switching
When the TIME key on the front panel or the remote
control is pressed, the time display will switch through
several modes on the display.
Elapsed track time (no display light indication)
≠
Remaining track time (
≠
Elapsed disc time (
≠
Remaining disc time (
≠
the display)
When stopped, the total recording time is shown, regardless of the status of the
cators.
REMAIN
TOTAL
TOTAL
is lit in the display)
is lit in the display)
REMAIN
and
TOTAL
and
REMAIN
are lit in
indi-
Timer playback
By using an external timer, you can set the CD-RW900
to play the loaded disc automatically when the unit is
turned on by the timer.
In program mode, pressing the TIME key displays
≠
the elapsed and the remaining time of the whole
program.
When playing an MP3 disc, elapsed track time is al-
≠
ways displayed, and the TIME key cannot be used.
For details on time display during recording, please
≠
refer to “Time display while recording” in “Recording”
section on page 22.
Even when power is turned off, the time display
≠
mode setting is retained.
The indicator ashes when a disc is not loaded into the
unit.
1 First, plug the power cord of the CD-RW900 into the
power outlet of the timer.
2 Load a disc into the unit.
3 Switch the TIMER switch on PLAY to enable timer
function on for the desired deck.
When Timer playback has been turned on, the timer
icon lights up in the display.
Timer indicator
Repeat playback
1 Press the REPEAT key to turn on the repeat mode.
In this mode, all the tracks on the disc are played
.
Repeat ON
and the
continuously. The display shows
indicator lights up
During playback, if the repeat mode is turned on,
playback continues as before, and when the last
track nishes, playback resumes from the rst track.
If the repeat mode is turned on when the deck is
stopped, press the PLAY key to begin operation.
REPEAT
4 Set the timer to the desired time. Consult the timer’
s operation manual for details. At the set time, the
power to the CD-RW900 will be turned on, and
playback will automatically begin.
2 Press the REPEAT key again to turn off the repeat
mode.
turns off.
Combining the repeat mode with the program, Sin-
≠
gle-track playback and Random playback functions
will enable Program repeat, Single-track repeat and
Random repeat operations, respectively.
Settings of the repeat playback mode remain after
≠
power is turned off, except the specied A-B section
(see “A-B repeat playback” on page 19).
Repeat OFF
appears then
REPEAT
indicator
Page 19

TASCAM CD-RW900 19
A to B repeat playback
NOTE
NOTE
NOTE
NOTE
NOTE
If a specic portion between two points on the disc is
specied, that portion can be played back repeatedly.
1 During playback, press the A-B key on the remote
control at the beginning of the desired portion on the
disc.
REPEAT
indicator will ashes.
2 At the end of the desired portion on the disc, press
the A-B key again.
Then,
play, and the desired A-B section will be played back
repeatedly.
indicator lights up in the display and the
REPEAT
and
A-B
indicator light up in the dis-
A-
Pitch control function
4−Playback operations
You can also operate this function during playback
standby.
3 To cancel the A-B repeat mode and resume normal
playback, press the A-B key once again.
REPEAT
A-B repeat mode cannot function For MP3 discs.
≠
In Random and Program modes, A-B repeat cannot
≠
function when the specied A-B section spans more
than one track, and does not function for MP3 discs.
When the STOP key is pressed, the specied A-B
≠
section is cancelled.
and
A-B
indicator will turn off.
When playing back an audio CD, the pitch (or speed)
of the playback can be varied. Pitch can be varied +/-
16%.
1 During stop, press the PITCH key on the remote
control to turn on the Pitch control function.
Or, use the PITCH option in the PLAY sub-menu to
turn on (refer to “Operation basics” on page 14)
The current pitch value appears on the display for
seconds and the
2 Press the MENU key and select the PITCH CONT
option in the PLAY sub-menu to set the desired
value and push the MULTI JOG dial to enter.
Pitch>XXX
Then, rotate the MULTI JOG dial to set the desired
value.
Use the PITCH STEP option in the PLAY sub-menu to
PITCH
indicator will light up.
will appear on the dispaly.
Key control function
The key of the music can be changed during stop, playback or playback standby mode. However, please note
that this feature does not operate with MP3 discs.
1 Press the MENU key to select the KEY option in the
PLAY sub-menu (refer to “Operation basics” on page
14) to enter the function.
KEY
The
2 C all up the KEY L EVEL option in the PLAY sub-
menu to adjust the playback key level.
The playback key can be raised or lowered 1/2 octave in half-tone increments. Selection values: 0 (no
change), â1 to â6, ã1 to ã6.
3 Rotate the MULTI JOG dial to select the desired key
level and push to enter.
indicator will light up.
adjust the pitch value steps from 0.1% to 1.0% in 0.1%
increments (default: 0.1%)
3 Press the MENU key or push the MULTI JOG dial to
enter and return to normal mode.
During playback, the pitch control playback can be
off temporally. Press the PITCH key on the remote
control or use the PITCH option in the PLAY submenu to turn the function off.
Pitch>OFF
control playback will be off temporally, until the function is re-set again.
To resume the pitch control playback, press the
PITCH key again or use the PITCH option.
When turning the pitch control on and off during
≠
playback, sound output is cut for a short instant.
Pitch control cannot be applied for MP3 discs.
≠
In this condition, when a CD is played back, the key
≠
of the music is changed while the speed of the music remains the same.
Even when the power is turned off, the key change
≠
setting is retained.
When the Key control function is o n, even if the
≠
Pitch control function is used to change the playback speed, the key of playback will remain xed at
the preset key {even if the key level is 0 (zero)}, the
Key control function can be turned on.
Wh e n usin g the key con trol f unctio n , play back
≠
sound may occasionally sound as vibrating. This is
a result of a special process applied to CD playback
sound and is normal.
appears on the display and the pitch
Page 20

20 TASCAM CD-RW900
mp3. 1
mp3. 2
mp3. 3
mp3. 4
mp3. 5
mp3. 6
mp3. 7
mp3. 8
mp3. 9
NOTE
NOTE
NOTE
4−Playback operations
Playing back MP3 files
MP3 les recorded onto a CD are handled the same
way as les are handled in an ordinary PC, with some
MP3 les held within a directory. In addition, several
directories can be combined into one directory. This results in multiple layers of directories and les.
When the Directory mode is on, only those les within a
selected directory are available for playback.
When the directory mode is off, the directory cong-uration is ignored, and all MP3 les recorded on the disc
are available for playback. Please note that Pro-gram
playback and Repeat playback only function within directories.
Each MP3 le is handled as a track.
Directories which do not contain MP3 les directly under them cannot be selected for playback. For example,
in the diagram below, under directory A are directory B
and directory C. If there are MP3 les in both directory
B and C, directory A cannot be selected for playback,
but directory B and C can be selected for playback.
MP3 les are played in the following order
DISC
Directory A
Directory B
MP3 les
Directory C
Directory D
The CD-RW900 can play back MP3 les recorded in
formats which conforam to ISO9660 level 1, level 2,
formats which conrm to ISO9660 level 1, level 2, or
Joliet. Discs recorded in multiple sessions may also be
played back.
For MP3 CDs to be played by the CD-RW900, the following limitations have been placed on the number of
MP3 les and directories.
Maximum number of directories: 255
Maximum number of hierarchical structures: 8
Maximum number of MP3 les: 999
Maximum title size of MP3 les and directories: 255
Directory playback setting
1 Press the DIRECTORY key on the remote control.
Or, use the DIRECTORY option in the PLAY submenu to turn this mode on or off (refer to “Operation
basics” on page 14).
Pressing the MENU key or pushing the MULTI JOG
dial exits to normal mode.
In this manner, playback is performed from the top level
directories.
About MP3 track data
During playback, titles are displayed in the following order of priority:
ID3v2 > ID3v1 > le title
During stop mode, the le title is displayed.
2 During stop, use the MULTI JOG dial or SKIP key to
select desired directory for playback.
3 Press the PLAY key to start playback in the direc-
tory.
Program or Repeat playback can be operated in the
selected directory also.
All MP3 les in a disc can be played back when directory playback mode is off. The indicator
and only the total number of track will be shown.
Total number of tracks
MP3
lights up
During stop, pressing the ENTER key shows current
≠
directory name.
During pla ybac k or sta ndby mod e, p ushing the
≠
MULTI JOG dial shows the MP3 le name currently
played back.
MP3 le formatted at 44,1 kHz sampling rate and
≠
128 kbps or higher is required to play back, otherwise, MP3 le cannot be played back.
Page 21

1-Introduction
TASCAM CD-RW900 21
NOTE
5−Recording
Before you start recording using the CD-RW900, make
sure that you understand the following key points:
Once you have recorded on a CD-R disc, the data
≠
cannot be erased from it.
Input selection
To select the input to be recorded, press the INPUT
SELECT key on the main unit.
Repeated presses of the key cycle through the following options:
ANALOG Analog
OPTICAL Optical digital in
COAXIAL Coaxial digital in
In the case of either the coaxial or optical inputs being
selected, the appropriate indicator:
CAL
, lights on the right of the screen.
If the analog signal is selected, the
lights on the right of the screen.
Analog recording level The level of the analog signals
received at the ANALOG IN jacks are controlled with
the INPUT controls.
When recording analog signals, set the digital volume to
0 dB.
COAXIAL
ANALOG
OPTI-
or
indicator
You can add tracks to an unnalized recordable
≠
disc. Once naliz ed, a CD-R disc is “xed” a nd
behaves in the same way as a pre-recorded disc.
Finalized CD-RW discs, however, can be erased, refreshed and re-recorded.
Digital recording level The level of the digital signal
may be controlled using the digital volume menu, as described below.
1 Call up the
(refer to “Operation basics” on page 14).
Push the MULTI JOG dial to enter the function on.
2 Rotate the MULTI JOG dial to adjust the input vol-
ume between -54dB and +18 dB (relative to the
original input level).
There is also a -‹ setting which represents a complete signal cut. The display shows
the -‹ setting.
3 Press the MENU key or push the MULTI JOG dial to
enter the setting and return to normal mode.
VOLUME
option in the REC sub-menu
Vol> ---dB
for
Input monitoring
When the unit is in record ready, or record mode, the
input signal is output from the OUT jacks (digital and
analog), allowing you to hear the input signal.
1 Press the RECORD key on the front panel or the re-
mote control when a recordable disc is not inserted.
Frequency conversion
The sampling frequency for CDs is 44.1 kHz. The CDRW900 will always record (and play back) CDs at this
frequency.
However, if recording through a d igital connection
(either coaxial or optical) and the source has been recorded at a frequency other than 44.1 kHz, or is being
played back at a non-standard speed using a varispeed
unit (more than 1% away from the standard), the CDRW900’s internal frequency converter: SRC (Sampling
rate convertor) will automatically convert the incoming
frequency to 44.1 kHz.
To set the SRC
Press the MENU key and select the SRC? option in
the REC sub-menu (refer to “Operation basics” on
The word
that the output signal is an echo of the input signal(s).
2 Exit the monitor mode by using the STOP key.
page 14).
Rotate the MULTI JOG dial and select ON.
Press the MENU key or push the MULTI JOG dial to
enter and return to normal mode.
When the SRC function is off, receiving digital signals,
the display shows the REC indicator ashing while recording or recording standby mode.
The digital signals other than 44.1kHz cannot be record e d when SRC is o f f . The error m e s s age
Fs44.1k!
Monitor
will appear on the display.
appears on the display to show
Not
Page 22

1-Introduction
22 TASCAM CD-RW900
NOTE
NOTE
NOTE
CAUTION
5−Recording
Basic recording
1 Load a recordable disc into the unit. As the disc
loaded, the display shows
period ashing.
2 Press the INPUT SELECT key to select a recording
source (see “Input selection” on page 21).
If a digital source is selected, and the connection or
the signal are improper, the error message
LOCK!
will appear on the display.
3 P res s the RECOR D key. The unit enters record
ready mode, as shown by the
cators on the display.
As the unit enters reco rd ready mode , the display
shows the
sionally, as the unit prepares to record on the disc.
To adjust the level of the source, following the guide-
lines in “Input selection” on page 21.
The red
light. Unlike analog equipment, digital audio units produce extremely unpleasant sounds when distorted, and
there is no “headroom” after the 0 mark. If recording
digitally from a commercially-produced CD, the volume
set in the menu should be 0 dB. This will maintain all the
dynamic range of the source CD without clipping. Only
boost the signal if the source is exceptionally quiet.
An analog signal input at nominal level, with no cut or
boost from the volume controls, is equivalent to a reading of −16 dB on the meters.
Now OPC
OVER
indicators on the meters should never
(Optimum Power Control) occa-
TOC Reading.
REC
and
READY
, with the
D-IN UN-
indi-
4 Press the PLAY key to start recording.
Pressing the READY key stands by recording tem-
porarily. To restart recording, press the READY key
or PLAY key again.
5 Press the STOP key to stop recording.
When rec ord ing stops, the display shows
Writing
seconds as the unit writes to the disc.
During the
≠
be used.
To conrm the total recording time, use the REC
≠
TIME opyion in the SYSTEM sub-menu (refer to “Operation basics” on page 14).
Do not vibrate the unit or turn off the power when the
unit writes to the disc, otherwise, recording fails.
(Program Memory Area) ashing for a few
PMA Writing
is shown, any key cannot
PMA
Time display while recording
When in record or record ready mode, repeated presses of the TIME key cycle through four different time
modes:
Elapsed track time (no display light indication)
≠
Remaining track time (
≠
REMAIN
is lit in the display)
Full disc
If recording a long program, when there is no space
remaining on the disc for recording, as shown by the
above time display, just before the end of the disc is
reached, the unit starts a fade-out over four seconds
(the display shows
When the fade-out has nished, the display shows
. Press the STOP key to exit.
Full!
Fade Out
).
Disc
Elapsed disc time (
≠
Remaining disc time (
≠
the display)
If the disc is a CD-RW, the nal track can be erased, if
required (see “Erasing” on page 26) and the disc then
nalized. If the disc is a CD-R, it must be nalized prior
to use (see “Finalizing” on page 25).
TOTAL
TOTAL
is lit in the display)
REMAIN
and
are lit in
Page 23

1-Introduction
TASCAM CD-RW900 23
Advanced recording
NOTE
NOTE
S_LVL
Fade-in and fade-out recording
5−Recording
At the beginning and end of recording, fade-in and
fade-out effects can be performed.
1 During stop or recording standby mode, set the op-
eration using the following menu options on the REC
sub-menu (refer to “Operation basics” on page 14).
FADE IN?
The length of the fade in to the normal level can be
set between 1 and 30 seconds in 1-second increments (default setting: 3 seconds).
FADE OUT?
The length of the fade out into complete silence
can be set between 1 and 30 seconds in 1-second
incre-ments (default setting: 3 seconds).
The display shows
Fade Out>XXs
Fade In>XXs
or
.
Synchronaized recording
Synchronized recording basically means that recording
will begin automatically when a signal is received, and
will stop when the signal ends.
Use the SYNC REC key to select the synchronization
mode. The synchronization mode determines the automated start and stopping of recording when a signal is
received.
Du ring stop or reco rding st ancby mod e, repea ted
presses of this key cycle through the fol-lowing modes:
2 In recording standby mode, press the FADER key
on the remote control.
Recording begins and the sound fades in. After the
preset fade-in time, the sound is at normal level.
3 During recording, press the FADER key on the re-
mote control when you wish to fade-out the sound.
Fade-out begins with
play then the unit enters recording standby mode.
4 Press the STOP key and the PMA writing will begin.
Fade- in or f ade-out functi on can be oper ated on ly
pressing the FADER key on the remote control unit.
After the synchronization mode is selected, the record
ready mode must then be entered (you cannot reverse
the order of these steps).
Starting playback of the source automatically starts recording on the CD-RW900 if Sync ALL or Sync 1 has
been selected (see “Sync recording” below) and manual
record start is disabled. If Sync OFF is selected, the recording must be started manually.
Fade Out
ashing on the dis-
Sync ALL: The
≠
Sync 1: The unit stops when a selected track is n-
≠
ished and the
Sync OFF: Turns Sync recording function off
≠
SYNC
indicator lights up.
SYNC
indicator ashes
Sync recording
1 While recording standby mode, press the SYNC
REC key repeatedly to select Sync ALL or Sync 1.
2 Set the signal detection threshold level. Use the
SYNC LEVEL option in the REC sub-menu (refer to
“Operation basics” on page 14).
Rotate the MULTI JOG dial to adjust the level. The
level can be set from -72 dB to -24 dB in 6 dB increments. The default setting is -24 dB.
Press the MENU key or push the MULTI JOG dial to
enter and return to recording standby mode.
3 Input the source signal.
Recording begins automatically when the source
signal is detected. The source signal should be higher than the adjusted threshold level.
level
Noise level
After the mode is set, more than o ne second of
≠
signal under the adjusted threshold level is required
to start recording automatically, otherwise, the unit
does not begin recording even it detects the signals.
Start of recording
time
Page 24

1-Introduction
24 TASCAM CD-RW900
NOTE
NOTE
A_LVL
S_LVL
S_LVL
S_LVL
5−Recording
When audio signal is not detected more than ve seconds, the CD-RW900 automatically will stop recording
and enters record standby mode.
level
Five seconds
REC ready
time
In the Sync 1 mode, if the unit detects the signal which
is under the adjusted level over ve secondsd, the Sync
recording mode will be canceled.
3 To ca n cel th e Sync recording mo de, press th e
SYNC REC key and select the Sync OFF. Record-
ing returns to normal and continues till you press the
STOP key or the source signal stops.
Pressin g the S TOP ke y stops reco rdin g . Once
stopped, the selected mode will be canceled.
When the Sync ALL is on, and the READY key is
≠
pressed, the unit enters recording standby mode
with remaining the Sync recording setting.
If you set the value only high-level signals trigger re-
≠
cording, remember that this will not record the start
of a piece:
level
T h i s p a r t o f
th e tra c k is not
recorded
Also remember that when recording from an analog
≠
Recordsing starts
time
source, the threshold should be set so that it is higher than the “noise oor”. If the “noise oor” is higher
than the threshold, a false start will occur:
level
Start of track is not registered
Wh e n the S ync 1 i s on, a nd the READY k ey is
≠
pressed, Sync recording stops and the setting will
be canceled.
Automatic track division
The trigger level can also be used to divide tracks if the
A_TRACK (auto track) function is enabled.
When this function is enabled, the unit automatically inserts a track division in the recorded material.
To enable or disable automatic track division:
1 Use A_TRK option in the REC sub-menu to set the
mode on. The
the display lights.
2 Rotate and push the MULTI JOG dial to select and
enter the modes following:
Level
≠
When the sou n d l e v e l h a s d ropped below the
threshold for more than two seconds, and sound
has re-started, the track will be divided.
Use A_TRK LEVEL option in the REC sub-menu.
The trigger level is set to -24dB to -72 dB.
level
A.TRACK
indicator at the top right of
At least
2 seconds
Track increment
Noi s e i s higher
than threshold
time
DD (digital direct)
≠
When recording digitally from MD, CD or DAT, this
mode detects a track bo undary and divides the
track.
However, when the DD mode is on, and if the analog
source or non-DAT/CD/MD digital connections are
detected, the track number will be increased by the
setting level that you set in the Level mode.
time
Page 25

1-Introduction
TASCAM CD-RW900 25
NOTE
Manually divide track
NOTE
While recording is taking place, press the RECORD key.
The current track number is incremented by one.
For details of automatic track division while record-ing,
see “Automatic track division” on page 24.
Rec mute function
The Rec mute function allows instant cut-off of the input
signal, and records four seconds of silence on the disc.
While recording is in progress, press the REC MUTE
key on the remote contorl.
5− Advanced Recording
According to the “Red Book” (the specication for
≠
audio CDs), a track cannot be less than four seconds in length, and there can be a maximum of 99
tracks on an audio CD. Bear these limitations in
mind when adding track divisions.
This operation can not be applied during recording
≠
the track 99.
This function is only available from the remote control
unit.
The display shows the
stop displaying the current level and the monitored
sound is cut.
After about four seconds, the unit enters record ready
mode.
Rec Mute
ashing, the meters
Page 26

26 TASCAM CD-RW900
6-After recording
NOTE
This section deals with the actions taken after recording: nalizing for CD-R and CD-RW discs, and erase
operations for CD-RW discs.
Once nalized, CD-R discs are truly nal—no more can
be recorded on them. By contrast, CD-RW discs
Finalizing
As has been explained earlier (“Finalizing” on page 7), in
order for a disc to become a standard CD, it must have
a Table of Contents (TOC) written to it. This process is
known as nalizing.
An unnalized disc can always be distinguished on the
CD-RW900 by the
the display being un-lit when the disc is inserted.
To nalize a disc:
1 Load the unnalized disc, and the unit in stop mode,
press the FINALIZE key.
The display shows
If you do not want to proceed with the nalizing
process, press the FINALIZE/INS key on the front
panel or the FINALIZE key on the remote control.
TOC
indicator under the disc type on
FINALIZE?
can be “unnalized” using the CD-RW900, i.e. their
TOC can be deleted, and if there is space, further material can be recorded on them. Even if the disc is full,
tracks can be erased following the unnalize process,
and new material can be recorded.
If you do not want to proceed with the nalizing process, press the STOP key.
3 W hen nalizati on has been c hose n, the displa y
shows the
unit starts counting down from a time shown on the
display.
4 When nalization has been nished successfully,
Complete
display.
During the process of nalizing, any key operation is not
accepted.
TOC
ashing and the remaining time. The
appears and the
TOC
will be lit on the
2 To start the nalizing process, push the MULTI JOG
dial or press the ENTER key on the remote control.
The display shows
Sure?
Unfinalizing CD-RW discs
If a CD-RW disc has been nalized, it is possible to
erase the Table of Contents in the following way:
1 With the nalized disc loaded and the unit in stop
mode, press the ERASE/DEL key on the front panel
or the ERASE key on the remote control.
Rortate the MULTI JOG dial or press the SKIP keys
on the remote control to select
the MULTI JOG dial or press the ENTER key to
conrm.
If you do not want to proceed with the unnalizing
process, press the ERASE/DEL key on the front
panel or the SKIP keys on the remote control.
2 The display shows
If you do not want to proceed with the unnalizing
process, press the STOP key.
Sure?
UNFINALIZE?
. Push
3 To start the unnalizing process, press the MULTI
JOG dial or the ENTER key again.
When unnalization has been chosen, the display
shows the
The unit starts counting down from a time shown on
the display.
4 When nalization has been nished successfully,
Complete
go off.
Erase
ashing and the remaining time.
appears on the display, yet the
TOC
will
Page 27

TASCAM CD-RW900 27
NOTE
NOTE
Erasing
Erasing tracks
This operation erases the specied track and all subsequent tracks from a recorded CD-RW disc.
1 During stop, press the ERASE/DEL key on the front
panel or the ERASE key on the remote control. Select the
dial or pressing the SKIP keys on the remote control.
To c ance l th e op eration at this point, press the
ERASE/DELor the ERASE key again.
2 Push the MULTI JOG dial or press the ENTER key
to enter the function.
The display shows Erase XX-XX (the number of the
rst track and last track to be erased).
Rotate the MULTI JOG dial or press the SKIP key to
change the track numbers you desire to erase.
To c ance l th e op eration at this point, press the
ERASE/DELor the ERASE key again.
ERASE TRACK?
rotating the MULTI JOG
6-After recording
3 Push the MULTI JOG dial or press the ENTER key
to operate the function.
The display shows
To c ance l th e op eration at this point, press the
STOP key.
4 Push the MULTI JOG dial or press the ENTER key
again to proceed the operation.
The display shows the
maining time. The unit starts counting down from a
time shown on the display.
Once the operation is proceeded, the STOP key cannot
function. Please conrm before the operation.
5 When the tracks have been erased,
appears on the display.
Sure?
Erase
ashing and the re-
Complete
will
Erasing a whole disc
When you want to erase a whole disc (all the tracks on
a disc), follow the procedure below:
1 During stop, press the ERASE/DEL key on the front
panel or the ERASE key on the remote control. Select the
or pressing the SKIP keys on the remote control.
To c ance l th e op eration at this point, press the
ERASE/DEL or the ERASE key again.
2 Push the MULTI JOG dial or press the ENTER key
to enter the function.
The display shows
To c ance l th e op eration at this point, press the
STOP key.
ERASE DISC?
Sure?
rotating the MULTI JOG dial
.
Refreshing a disc
Refreshing the disc makes a disc usable again. This operation destroys all data on the disc.
1 Load the disc, and the unit in stop mode, press the
ERASE/DEL key on the front panel or the ERASE
key on the remote control. Select the
rotating the MULTI JOG dial or pressing the SKIP
keys on the remote control.
To c ance l th e op eration at this point, press the
ERASE/DEL or the ERASE key again.
REFRESH?
3 Push the MULTI JOG dial or press the ENTER key
again to proceed the operation.
The display shows the
maining time. The unit starts counting down from a
time shown on the display.
Once the operation is proceeded, the STOP key cannot
function. Please conrm before the operation.
4 When the disc has been erased,
Blank Disc
then
To c ance l th e op eration at this point, press the
STOP key.
3 Push the MULTI JOG dial or press the ENTER key
again to proceed the operation.
The display shows the
maining time. The unit starts counting down from a
time shown on the display.
4 When the disc has been refreshed,
appear on the display, and
will appear on the display.
Erase
ashing and the re-
Complete
Erase
ashing and the re-
Complete
Blank disc
shows up.
appears
will
2 Push the MULTI JOG dial or press the ENTER key
on the remote control to enter the function.
The display shows
Sure?
Page 28

28 TASCAM CD-RW900
NOTE
NOTE
7−Titling
Titles can be given to the disc and the tracks on the
disc, using the TEXT EDIT option on the TEXT submenu.
Title input operation
After the title is selected and entered on the disc, and
TOC lights up on the dis-play, if the power is turned off,
the TOC will not be recorded onto the disc, and the
titles will not be added.
Follow the guidelines below to input titles on the screen.
Operate them when in the text edit mode.
It is more efcient to connect a keyboard for title input (
refer to “Title input by keyboard” on page 29).
Select the type of character for input
≠
Press the DISPLAY key on the unit or the remote
control to select from two different types of characters.
≠
≠
Lower case letters/code: no indication
Capital letters/code: CAPS
Input procedure
Rotate the MULTI JOG dial or the SKIP keys on the
remote control to get the desired characters on the
display.
Push the MULTI JOG dial or press the ENTER key
on the remote control to enter.
To move the cursor position
Use the ∆/ ˙ key and the ˚/ ¥ key on the front
panel, or the SEARCH key on the remote control.
To insert characters
≠
Move the cursor to the location where you wish to
insert a character, and press the FINALIZE/INS key
on the front panel or the FINALIZE key on the remote control.
To change a character
≠
Place the cursor on the character to be changed,
then input the desired character.
As with the TEXT menu, after the name is set, if
≠
the disc is tried to eject without writing TOC on the
disc, the display will show
to eject the disc without TOC writing, press OPEN/
CLOSE key during the
display. The text that have been edited or entered
will be erased.
The disc or track title of the fainalized disc cannot be
≠
edited. Unnalizing (CD-RW only) is needed to operate the title input function.
Sure? Text!
Sure? Text!
. If you want
is shown on the
To delete characters
≠
Place the cursor on the character, then press the
ERASE/DEL key on the front pane, or the ERASE
key on the remote control.
Disc title input
1 D uring stop, select the TE XT EDIT option in the
TEXT sub-menu (refer to “Operation basic” on page
14).
Text> Disc
2 Press the MULTI JOG dial or the ENTER key on the
remote control.
Now, you can input or edit the disc title following the
guidelines above.
3 Press the MENU key to enter.
If you want to cancel, press the STOP key.
will appear.
Track title input
1 D uring stop, select the TE XT EDIT option in the
TEXT sub-menu (refer to “Operation basic” on page
14).
2 Rotate the MULTI JOG dial or repeatedly press the
SKIP keys on the remote control to select the track
number you desire to title.
3 Push the MULTI JOG dial or press the ENTER key
on the remote control.
Now, you can input or edit the track title following
the guidelines above.
4 Press the MENU key to enter.
If you want to cancel, press the STOP key.
Page 29

TASCAM CD-RW900 29
7−Titling
A computer keyboard can be connected to the IBM PC
compatible PS/2 interface on the front panel to operate
Keyboard type setting
The CD-RW900 must be set for the type of keyboard
being connected.
Set the type using the sub-menu KEYBOARD option
Title input by keyboard
Titles can be input just like typing on a PC.
To enter the Title Edit menu
≠
Press SHIFT + F8 to enter the Disc/Track Title Edit
Menu.
To select the type of characters for input
≠
Press CAPS to select or cancel upper case letters
To input characters
≠
Character input is performed directly with the letter
and number keys.
To move the cursor
≠
Use the cursor arrow keys
certain functions of the CD-RW900. It is particularly efcient for title input.
on the SYSTEM sub-menu. Select US for an Englishlanguage keyboard, or JP for a Japanese-language
keyboard.
To delete characters
≠
Delete key: deletes the character in the cursor position
Back space key: deletes the character before the
cursor position
To insert a character
≠
Use the Insert key.
To change a character
≠
Put the cursor on its position and input the desired
character.
Other keyboard operations
The keyboard can be used not only for title input, but
also to control the deck transports, perform editing
functions and other operations. The list below shows
the keys that perform various operations.
Keyboard key Operation
F1 same as pressing the
F2 same as pressing the
F3 operates the Key control on or off
F4 same as pressing the STOP key
F5 same as pressing the PLAY key
F6 same as pressing the READY key
F7
F8 same as pressing the RECORD key
F9
F10 same as pressing the REPEAT key
F11 same as pressing the PLAY MODE key
F12 same as pressing the PITCH key
SHIFT + F1 direct to the “
SHIFT + F2 direct to the “
SHIFT + F3 direct to the “
SHIFT + F4
SHIFT + F5
SHIFT + F6
SHIFT + F7
SHIFT + F8 direct to the “
SHIFT + F9
SHIFT + F10
SHIFT + F11 direct to the “
SHIFT + F12 direct to the “
ERASE TRACK?
ERASE DISC?
REFRESH?
TEXT EDIT?
UNFINALIZE?
FINALIZE?
µ
≤
”
”
key
key
”
”
”
”
CTRL + F1 Direct track search TRACK 1
CTRL + F2 Direct track search TRACK 2
CTRL + F3 Direct track search TRACK 3
CTRL + F4 Direct track search TRACK 4
CTRL + F5 Direct track search TRACK 5
CTRL + F6 Direct track search TRACK 6
CTRL + F7 Direct track search TRACK 7
CTRL + F8 Direct track search TRACK 8
CTRL + F9 Direct track search TRACK 9
CTRL + F10 Direct track search TRACK 10
CTRL + F11 Direct track search TRACK 11
CTRL + F12 Direct track search TRACK 12
CAPS select or cancel upper case letters
å/œ
Delete Same as the DEL/CLR key
Back space deletes the character before the cursor
Insert same as the FINALIZE/INS key
ESC cancel edit or title edit and nish Menu
Enter same as theENTER key
to move the cursor
mode
Page 30

30 TASCAM CD-RW900
8-Reference and specifications
Error messages
Message Details / response
Can’t Rec!
Disc Error!
Disc Full!
Text Full!
Sure? Text!
Drive Error!
D-IN UNLOCK!
Not Audio!
Erase Error!
Not Fs44.1k!
PGM Empty!
PGM Full!
Can’t Edit!
Can’t sel!
Rec Error!
No DIR!
Decode Err!
Format Err!
Cannot record. Either erase the contents of the disc (for a CD-RW), or use a different recordable disc.
The disc has malfunctioned. Please replace with a new disc.
No recording time remaining, or no recordable track is left on the disc.
No space to input the letters.
The text data is not written on the disc yet. Open the tray to cancel the text you enter or operate nalization to write the data on the disc.
There is a problem in the drive.
The digital input is not connected. Turn on the power of the equipment connected to DIGITAL IN.
There is no audio signal from DIGITAL IN.
An error occurred while erasing.
The sampling frequency of the digital input is not 44.1 kHz. Please turn the SRC on.
There is no program.
Now new programs can be created.
Editing cannot be performed due to operational restrictions.
Menu selection cannot be performed due to selection prohibitions.
There was an error during recording. Please re-record.
There is no directory that contains a le.
The MP3 le cannot be played back.
The disc has been formatted that the CD-RW900 cannot read.
Messages during operations
Message Statement
Blank Disc A blank recordable disc has been inserted.
Complete An operation such as nalize or erase has been successfully completed.
Now OPC
(OPC=Optium power Control)
Disc Repair The disc failed to write PMA is being repaired, and this operation will be a long-
PMA Writing
(PMA=Program memory Area)
TOC reading The table of contents data is being read.
Calibration is being performed to operate recording properly.
running. Please do not turn off the power of the CD-RW900 during this operation.
The recorded content is being written to the disc.
Troublshooting
Symptom Possible cause and remedy
There is no power to the unit. Please check the power cord is properly plugged in.
“Disc Error!” is displayed. The disc may be dirty. Please replace the disc.
Playback is not possible. This may be due to condensation. In this case, remove the disc, turn the
power on and wit a few hours, then try again.
No sound is output. Conrm the connections with the audio system.
Check the volume level, and proper amplier operation.
Recording is not possible. Conrm the connections with the audio system.
Adjust the recording level.
The disc may be for playback only. Please replace with a recordable disc.
Noise or static can be heard. Please re-position the unit away from strong source of magnetism such as a
television.
The CD-RW900 does not retain
settings.
While settings are retained each time they are made, in some cases they will
not be retained when the power is turned off too soon. To prevent this from
happening, do not turn off the power right after making a setting.
Page 31

TASCAM CD-RW900 31
8-Reference and specifications
76.2mm(30.0")
88.0mm(34.7")
94.0mm(37.0")
6.0mm(2.4")
16.6mm(6.5")
284.6mm(112.1")
307.6mm(121.1")
6.4mm(2.5")
435.0mm(171.3")
482.6mm(190.1")
465.6mm(183.3")
Specifications
Recordable discs CD-R, CD-R-DA, CD-RW, CD-RW-DA (High speed CD-RW is supported)
Quantization bit depth 16 bit
Sampling frequency 44.1 kHz
Frequency response 20 Hz~20 KHz
S/N 95 dB
90 dB
Dynamic range 95 dB
90 dB
Distortion 0.006 %
0.008 %
Channel separation 90 dB
80 dB
Wow and utter (0.001 %)
Analog inputs Unbalanced input RCA pin
level -10 dBV
Minimum input level -19 dBV
Input impedance 22 kØ ±10 %
Analog outputs Unbalanced output RCA pin
level -10 dBV
Maximum output level +6 dBV 2 dB
Output impedance 600 Ø ±10%
Phones output Stereo (6.3)
20 mW
32
Ø
Digital input Coaxial RCA pin jack (IEC-60958 Consumer use)
Optical TOSLINK (IEC-60958 Consumer use)
Digital output Coaxial RCA pin jack (IEC-60958 Consumer use)
Optical TOSLINK (IEC-60958 Consumer use)
Keyboard Mini DIN 6 pin
Power U.S.A./Canada 120VAC, 60Hz
U.K./Erope 230VAC, 50Hz
Australia 240VAC, 50Hz
Power consumption 16 W
Dimensions w x h x d 482.6 x 94 x 307.6 (mm)
Weight 4.9 kg (10.8 lb)
Dimensional drawing
Page 32

»
CD-RW900
TEAC CORPORATION
Phone: +81-422-52-5082 www.tascam .com
3-7-3, Nakacho, Musashino-shi, Tokyo 180-8550, Japan
TEAC AMERICA, INC.
Phone: +1-323-726-0303 www.tascam.com
7733 Telegraph Road, Montebello, California 90640
TEAC CANADA LTD.
Phone: +1905-890-8008 Facsimile: +1905-890-9888 www.tascam.com
5939 Wallace Street, Mississauga, Ontario L4Z 1Z8, Canada
TEAC MEXICO, S.A. De C.V
Phone: +52-555-581-5500 www.tascam.com
Campesinos No. 184, Colonia Granjes Esmeralda, Delegaacion Iztapalapa CP 09810, Mexico DF
TEAC UK LIMITED
Phone: +44-8451-302511 www.tascam.co.uk
Unit 19 & 20, The Courtyards Hatters Lane Watford, Hertfordshire. WD18 8TE, U.K.
TEAC EUROPE GmbH
Phone: +49-611-71580 www.tascam.de
Bahnstrasse 12, 65205 Wiesbaden-Erbenheim, Germany
TEAC ITALIANA S.p.A.
Phone: +39-02-66010500 www.teac.it
Via C. Cantu 11, 20092 Cinisello Balsamo, Milano, Italy
Printed in China
 Loading...