


Hello
TAOTRONICS WIRELESS 2-IN-1 ADAPTER
User Guide
TT-BA12
www.taotronics.com
NORTH AMERICA
E-mail: support@taotronics.com (US) support.ca@taotronics.com(CA)
Tel: 1-888-456-8468 (Monday-Friday: 9:00 – 17:00 PST) Address: 46724 Lakeview Blvd, Fremont, CA 94538
EUROPE
E-mail: support.uk@taotronics.com (UK) support.de@taotronics.com (DE) support.fr@taotronics.com (FR) support.es@taotronics.com (ES) support.it@taotronics.com (IT)
EU Importer: ZBT International Trading GmbH, Halstenbeker Weg 98C, 25462 Rellingen, Deutschland
ASIA PACIFIC
E-mail: support.jp@taotronics.com (JP)
MANUFACTURER
Shenzhen NearbyExpress Technology Development Company Limited
Address: 333 Bulong Road, Jialianda Industrial Park, Building 1,Bantian, Longgang District, Shenzhen,
China, 518129
Learn more about the EU Declaration of Conformity: https://www.taotronics.com/down- loads-TT-BA12-CE-Cert.html
MADE IN CHINA
CONTENTS
English 01/04
Deutsch 05/08
Français 09/12
Español 13/17
Italiano 18/21
22/25

|
|
TX/RX |
|
|
|
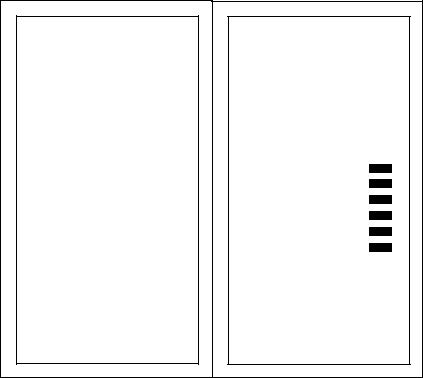
Product Diagram |
|
|
1. Multifunction Button |
|
|
2. LED Indicator/Microphone |
|
|
3. Charging Port |
|
|
4. 3.5mm Audio Port |
|
|
5.Transmitter (TX) / Receiver (RX) Mode Switch |
|
|
DE |
|
|
Produktschema |
|
|
1.Multifunktionstaste
2.LED-Anzeige/Mikrofon
3.Au adebuchse
4.3,5mm Audio-Anschluss
5.Transmitter (TX) / Receiver (RX) Modus-Schalter
FR
Schéma du Produit
1.Bouton Multifonction
2.Voyant à LED/Microphone
3.Port de Recharge
4.Port Audio 3.5mm
5.Sélecteur de Mode Transmetteur (TX) / Récepteur (RX)
ES
Diagrama del Producto
1.Botón Multifunción
2.Indicador LED / Micrófono
3.Puerto de Carga
4.Puerto de Audio de 3.5 mm
5.Transmisor (TX) / Receptor (RX) para Cambiar de Modo
IT
Schema del Prodotto
1.Tasto Multifunzione
2.Indicatore LED/Microfono
3.Porta di Ricarica
4.Porta Audio da 3.5mm
5.Tasto Modalità Trasmettitore (TX) / Ricevitore (RX)
JP
2.LED /
4.3.5mm
5. TX / RX

EN
Package Contents
·1 x TaoTronics Wireless 2-in-1 Adapter (TT-BA12)
·1 x 3.5mm Audio Cable
·1 x 3.5mm Female to 2RCA Male Cable
·1 x USB Charging Cable
·1 x User Guide
Function and Operation |
|
|
|
Function |
Operation |
Power On / Off |
Press and hold the Multifunction |
|
Button for 3 seconds |
|
|
Pairing |
When powered on, press the |
|
Multifunction Button twice to |
|
start pairing |
|
|
Mode Switch |
Slide the Mode Switch to and |
|
from TX and RX |
|
|
Play / Pause |
In RX mode, press the |
|
Multifunction Button once to |
|
play / pause music |
|
|
Note:
·The mode can only be successfully switched after the adapter is turned off for 5 seconds.After the switch, the pairing history will be cleared.
·If the TT-BA12 cannot pair with your Bluetooth device, please turn the adapter off for 5 seconds and then switch it from TX (RX) mode to RX (TX) mode.Then turn on and turn off the unit again and after 5 seconds,
switch it back to TX (RX) mode. Now, the adapter has been reset and you can restart the adapter to pair again.
LED Indicators |
|
|
|
LED Indicator |
Status |
Solid Red LED |
Charging |
LED Off |
Fully charged |
Flashing Red and Blue |
Pairing in TX / RX mode |
Flashing Red |
Low battery |
Solid Blue LED |
Successfully paired |
Flashing Blue |
Power on but not paired with |
|
Bluetooth R devices |
How to Use |
|
Charging |
|
1.Use a micro-USB cable and USB charging adapter on any active USB port (DC 5V).
2.The LED indicator will turn red when charging. It will automatically turn off when fully charged.
Note:
·You can use the adapter while it is being charged.
·We recommend charging the unit for at least 2 hours before using it for the rst time.
·Make sure the battery is fully charged before putting the adapter away for storage. Charge at least once every 3 months when not using for a long time.
Pairing
Pair in TX mode:
1.Set the TT-BA12 to TX mode and connect it to your Non-Bluetooth audio transmitting device.
2.Place your Bluetooth® audio receiving device like earphones / speakers within a 3 feet / 1 meter range
01/02

and set it to pairing mode.
3.Turn on the TT-BA12 and tap the Multifunction Button twice to enter pairing mode.After approximately 10 seconds, pairing will be completed.
Pair in RX mode:
1.Set the TT-BA12 to RX mode and connect it to your Non-Bluetooth audio receiving device.
2.Turn on the TT-BA12 and tap the Multifunction Button twice to enter pairing mode.
3.Activate Bluetooth® on your transmitting device (phone / tablet) and search for nearby BluetoothR connections.
4.Find the “TaoTronics TT-BA12” in the search results and tap to connect. Once connected, the LED indicator will turn solid blue.
Note:
·The adapter will enter pairing mode automatically when powered on for the rst time.
·The original pairing history will be cleared after a mode switch. It will automatically start pairing each time it’s powered on.
·The adapter can remember previously paired devices and will attempt to pair with devices automatically without going into pairing mode.
Pair with two devices at the same time
In TX mode:
In TX mode, the adapter is able to pair with two Bluetooth® stereo earphones / speakers at the same time.
1.Follow the previous instructions in the “Pairing” section to pair the TT-BA12 with your rst device.
2.Turn off BluetoothR on your rst device, tap the Multifunction Button twice to pair and connect to your second device.
3.Turn on Bluetooth R on your rst device. In approximately 10 seconds, the rst device will automatically connect in.
Note:
·When you pair with two devices, both can play music at the same time.
·The adapter will automatically re-pair when powered on.
In RX mode:
In RX mode, the adapter is able to pair with two BluetoothR devices at the same time.
1.Follow previous instructions in the “Pairing” section to pair the TT-BA12 with your rst device. Disable the BluetoothR function on your rst device.Tap the Multifunction Button twice to pair with the second device.
2.Activate BluetoothR on the rst device, now the TT-BA12 adapter is successfully paired with both devices.
Note:
·Only one device can play music at any time.You have to stop the music on one device to play on the other.
·The adapter will automatically re-pair when powered on.
03/04

DE
Lieferumfang
·1 x TaoTronics Wireless 2-in-1 Adapter (TT-BA12)
·1 x 3,5mm Audiokabel
·1 x 3,5mm 2RCA-Verbindungskabel
·1 x USB-Au adekabel
·1 x Benutzerhandbuch
Bedienelemente |
|
|
|
Funktion |
Bedienung |
Ein- / Ausschalten |
Die Multifunktionstaste für 3 |
|
Sekunden gedrückt halten |
|
|
Pairing |
Wenn das Gerät an ist, drücken |
|
Sie die Multifunktionstaste |
|
zweimal um das Pairing zu |
|
beginnen |
|
|
Moduswechsel |
Schalten Sie mit dem |
|
Modus-Schalter zwischen TX und |
|
RX um |
|
|
Abspielen / Pause |
Im RX-Modus die |
|
Multifunktionstaste einmal |
|
drücken, um Musik abzuspielen |
|
oder zu pausieren |
|
|
Achtung: |
|
·Der Modus kann nur gewechselt werden, nachdem der Adapter mindestens 5 Sekunden aus ist. Nach dem Moduswechsel ist das Gerät von allen anderen Geräten erneut abgekoppelt.
·Wenn der TT-BA12 nicht mit Ihrem Bluetooth-Gerät gekoppelt werden kann, machen Sie den Adapter bitte für 5 Sekunden aus und wechseln Sie dann vom TX (RX)
Modus in den RX (TX) Modus. Schalten Sie ihn dann wieder an und erneut aus, wechseln Sie dann nach 5 Sekunden zurück in den TX (RX) Modus. Der Adapter wurde jetzt vollständig zurückgesetzt und Sie können ihn erneut anmachen, um Ihr Gerät zu verbinden.
LED-Anzeigen
LED-Anzeige |
Status |
Dauerhafte, rote LED |
Au aden |
LED aus |
Aufgeladen |
Blinkt rot und blau |
Pairing im TX / RX Modus |
Blinkt rot |
Niedriger Akku |
Dauerhafte, blaue LED |
Erfolgreich gekoppelt |
Blinkt blau |
Ist angeschaltet, aber nicht mit |
|
einem BluetoothR Gerät |
|
verbunden |
Anleitung
Laden
1. Nutzen Sie ein Micro-USB-Kabel und einen USB-Ladeadapter an jedem aktiven USB-Anschluss (DC 5V).
2. Die LED-Anzeige ist während des Au adens rot. Sie schaltet sich automatisch aus, wenn das Gerät vollständig geladen ist.
Achtung:
·Sie können den Adapter nutzen während des Ladungsvorgang.
·Wir empfehlen, den Adapter mindestens zwei Stunden aufzuladen, bevor Sie ihn zum ersten Mal benutzen.
·Stellen Sie sicher, dass das Akku vollständig aufgeladen ist, bevor Sie den Adapter lagern. Laden Sie ihn mindestens alle drei Monate, wenn Sie ihn für längere Zeit nicht benutzen.
05/06
 Loading...