

Page 1
Page 2
Quick Installation Steps
For more informati
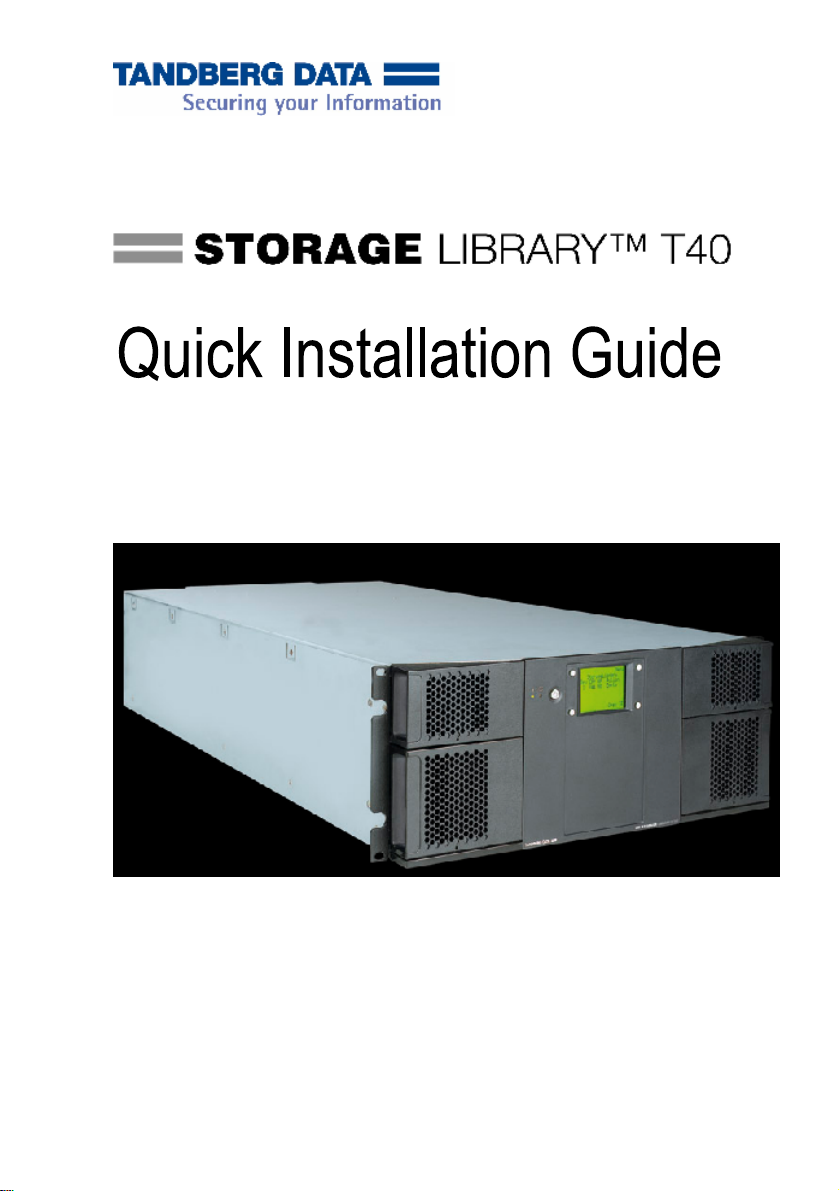
Tandberg StorageLibraryTM T40
Caution
Caution
When following
illustrations.
1
2
If the library is a rack mount version
the locking scre
library in a rack.
locking screws mounted and
instructions, see
User
Guide
If your
library includes SCSI tape drives c
to the
connectors on the drive sled. See the Installation and User
Guide for installation requirements when using more than 2 SCSI
drives.
a.
C
onnect a jumper cable between
t
he bottom drive
above it. Repeat this step for all drives on the SCSI bus.
Secure the cable with the thumbscrews on the connectors.
b. Terminate the last device on the SCSI bus with the
appropriate SCSI terminator.
c.
C
onnect a cable between the
the host.
SCSI cable.
not exceed 9 meters / 30 feet.
on and complete step-by-step instructions, see
Installation and
The Tandberg StorageLibraryTM T40 could be lifted by
one person if drives, power supply, and magazines are
removed. However, for absolute s
recommended that two people lift the Tandberg
StorageLibraryTM T40. Full library weight = 38 kg / 84 lbs
(2 FH drives). Empty library weight = 23.6 kg / 52 lbs
(does not include drives, magazines or power supply).
The transport lock
the
Tandberg StorageLibraryTM T40
normally.
the
steps
ws and install the rack mount ears. Install the
If the library is a tabletop version,
Tandberg StorageLibraryTM T40
.
Note that there are limitations to the length of the
In a typical installation, the cable length should
ing screws must be removed before
below
, see corresponding numbers on
, power on the unit to remove
install the tabletop kit. For
the top SCSI connector
and the bottom SCSI connector
first
drive on the SCSI bus and
User
Guide.
afety, it is
can operate
keep the
Installation and
onnect the SCSI cables
of
the drive
the
of
2
Page 3

3
If your library includes fibre channe
cables to the tape drives
a. Attach one end of the fibre cable to the fibre port on each
drive. Attach the other
hub
.
:
end of the cable to the host,
l tape drives c
onnect the
switch
fibre
or
4
Connect your Ethernet cable to the Ethernet port on the rear of
th
e library. The Ethernet connection allows use of the Web
Client
.
5
Con
nect a power cord to the
library.
6
Power on the library by t
7
If the l
locking screws are present.
panel display to remove the magazines to get access to the
screws. Remove the screws and reinsert the magazines. The
library will no
8
Power up the host syst
9
Verify
drives.
10 Configure your library using th
US and EU power cords are supplied with the library.
ibrary is a tabletop version,
w continue its power-on sequence.
that each host can
power connector on the rear of the
urn
ing on the rear power switch.
the library detects that the
Follow the instructions on the front
em.
communica
e library’s operator panel.
te with the library’s tape
3
Page 4

Table: Power Requirements
Power Requirements
Input Voltag
Input Frequency
Inrush Current (Cold Start)
Power Consumption Average
Power Consumption Peak*
*
Maximum peak length, less than 10ms.
e 100 –
Values
50 –- 60 Hz
Less than 15 A, 115 VAC
Less than 30 A, 230 VAC
70 W
120 W*
240 VAC
4
Page 5

International Headquarter
T
andb
erg Data ASA, Kjelsåsveien 161
P.O. Box 134 Kjelsås, N-0411 Oslo, Norway
Tel: +47 22 18 90 90,
www.tandberg.com
Fax: +47 22 18 95 50
Worldwide subsidiaries
Tandberg Data Corp.,
Tel: 858-726-1800. Fax: 858-726-1801
Tandberg Data GmbH, Feldstrasse 81, D-44141 Dortmund, Germany.
Tel: +49 231 5436 0. Fax: +49 231 5436 111
Tandberg Data S.A.S., 16/18 Ave. Morane-Saulnier, F-78941 Vélizy Cedex, France.
Tel: +33 1 39 26 01 01/00800Fax: +33 1 34 65 02 89 (for tec
Tandberg Data (Asia) Pte. Ltd, 20 Bendemeer Road, #04-05 Cyberhub, Singapore
339914, Tel: +65 6396 0786.
Tandberg Data (Japan) Inc., Eitaibashi Eco-Piazza Bldg
chome, Chuo-ku Tokyo 104-033, Japan
Tel: +81 3 5566 2871. Fax: +81 3 5566 2875
Tandberg Data Ltd.,
Oxfordshire, OX15 4FF, United Kingdom
Tel: +44 (0) 8450706916.
12860 Danielson Court, Poway
82632374.
hnical support: 00800-07867243)
Fax: +65 6396 0787
Bloxham Mill Business Centre, Barford Road, Bloxham, Banbury,
, U.
S.A.
. 8th floor 29-13, Shinkawa 1
-
Specifications subject to change without notice. All trademarks are the property of
their respective owners.
©2006 Tandberg Data ASA. All Rights reserved.
Part No.
433559-01, June 2006
5
 Loading...