

Page 1
BREADMAKER
USER
MANUAL WITH RECIPES
MÁQUINA PARA
H
ANUAL DE INSTRUCCIONES CON RECETAS
M
ACER PAN
Model/Modelo
5890
Page 2
CONGRATULATIONS!
You are the owner of a SUNBEAM®Breadmaker.
Please read all of the instructions in this manual carefully before you
begin to use this appliance.
Proper care and maintenance will ensure the
long life of this appliance and its trouble-free operation.
Save these
instructions and refer to them often for cleaning and care tips.
SPECIAL CORD SET INSTRUCTIONS
1. A short power supply cord is provided to reduce the hazards resulting
from becoming entangled in or tripping over a longer cord.
2. An extension cord may be purchased and used if care is exercised
in its use.
3. If an extension cord is used, the marked electrical rating of the
extension cord must be at least 10 amps and 120 volts. The resulting
extended cord must be arranged so that it will not drape over the
countertop or tabletop where it can be pulled on by children
or tripped over accidentally.
This appliance has a polarized plug (one blade is wider than the
other). To reduce the risk of electric shock, this plug will fit in a
polarized outlet only one way. If the plug does not fit fully in the
outlet, reverse the plug. If it still does not fit, contact a qualified
electrician. Do not modify the plug in any way.
THIS BREADMAKER IS FOR HOUSEHOLD USE ONLY
Page 3

Table of Contents
Congratulations . . . . . . . . . . . . . . . . . . . . . . . . . . . . . . . . . . 2
Special Cord Set Instructions . . . . . . . . . . . . . . . . . . . . . . . . 2
Table of Contents . . . . . . . . . . . . . . . . . . . . . . . . . . . . . . . . . 3
Important Safeguards. . . . . . . . . . . . . . . . . . . . . . . . . . . . . . 4
Getting Started. . . . . . . . . . . . . . . . . . . . . . . . . . . . . . . . . . . 6
Let’s Bake Bread . . . . . . . . . . . . . . . . . . . . . . . . . . . . . . . . . . 7
Bread Machine Stages. . . . . . . . . . . . . . . . . . . . . . . . . . . . . . 10
Overview of Breadmaker Features . . . . . . . . . . . . . . . . . . . . 11
™
ExpressBake
Using the Delay Timer. . . . . . . . . . . . . . . . . . . . . . . . . . . . . . 18
Tips and Hints . . . . . . . . . . . . . . . . . . . . . . . . . . . . . . . . . . . . 19
Baking at High Altitudes. . . . . . . . . . . . . . . . . . . . . . . . . . . . 21
Measurement Equivalency Chart . . . . . . . . . . . . . . . . . . . . . 22
Taking Care of Your Bread Machine. . . . . . . . . . . . . . . . . . . 23
Troubleshooting . . . . . . . . . . . . . . . . . . . . . . . . . . . . . . . . . . 24
Setting: Baking Bread In Under 1 Hour . . . . . 14
Recipes . . . . . . . . . . . . . . . . . . . . . . . . . . . . . . . . . . . . . . . . . 27
Basic . . . . . . . . . . . . . . . . . . . . . . . . . . . . . . . . . . . . . . . . 28
Whole Wheat. . . . . . . . . . . . . . . . . . . . . . . . . . . . . . . . 30
French . . . . . . . . . . . . . . . . . . . . . . . . . . . . . . . . . . . . . 31
Sweet . . . . . . . . . . . . . . . . . . . . . . . . . . . . . . . . . . . . . . 32
™
ExpressBake
Quick Bread . . . . . . . . . . . . . . . . . . . . . . . . . . . . . . . . . 34
Dough . . . . . . . . . . . . . . . . . . . . . . . . . . . . . . . . . . . . . 35
Jam. . . . . . . . . . . . . . . . . . . . . . . . . . . . . . . . . . . . . . . . 38
Glazes. . . . . . . . . . . . . . . . . . . . . . . . . . . . . . . . . . . . . . 39
Butters and Spreads. . . . . . . . . . . . . . . . . . . . . . . . . . . 40
Recipe Index . . . . . . . . . . . . . . . . . . . . . . . . . . . . . . . . . . . . 42
Warranty Information. . . . . . . . . . . . . . . . . . . . . . . . . . . . . 43
Setting . . . . . . . . . . . . . . . . . . . . . . . . . . 33
32
Page 4

4
IMPORTANT SAFEGUARDS
When using electrical appliances, to reduce the risk of fire, electric shock,
and/or injury to persons, basic safety precautions should always be followed,
including the following:
❑ READ ALL INSTRUCTIONS, PRODUCT LABELS AND WARNINGS BEFORE
USING THE BREADMAKER.
❑ Do not touch hot surfaces. Always use oven mitts when handling hot
materials, and allow metal parts to cool before cleaning. Allow the
breadmaker to cool thoroughly before putting in or taking off parts.
❑ When unit is not in use and before cleaning, unplug the breadmaker
from wall outlet.
❑ To protect against risk of electrical shock, do not immerse the
appliance or plugs in water or other liquids.
❑ Close supervision is always necessary when this or any appliance
is used by or near children, or incapacitated persons.
❑ Do not allow anything to rest on the power cord. Do not plug in cord
where people may walk or trip on it.
❑ Do not operate this or any appliance with a frayed or damaged cord,
or plug, or after the appliance malfunctions or is dropped or has been
damaged in any manner. Take appliance to the nearest Authorized
Service Facility for examination, repair or electrical or mechanical
adjustment.
❑ Do not let the cord dangle over the edge of a table or counter or
touch hot surfaces. Do not place on an unsteady or cloth-covered
surface.
Page 5

❑ Avoid contact with moving parts.
❑ Do not use attachments not recommended by the manufacturer;
they may cause fire, electric shock or injury.
❑ Do not use outdoors or for commercial purposes.
❑ Do not place the appliance near a hot gas or electric burner,
or in a heated oven.
❑
To unplug, press the “STOP” button, grip plug and pull from wall outlet.
Never pull on the cord.
❑ Use of extension cords: A short power supply cord has been provided
to reduce the risk of injury resulting from becoming entangled in
or tripping over a longer cord. Extension cords are available from
hardware stores and may be used with care. The cord should be
arranged so that it will not drape over the counter or table top
where it can be pulled by children or tripped over accidentally.
If the appliance is of the grounded type, the extension cord
should be grounding-type 3-wire cord.
❑ Electrical Power: If electric circuit is overloaded with other appliances,
your breadmaker may not operate properly. The breadmaker should
be operated on a separate electrical circuit from other operating
appliances.
SAVE THESE INSTRUCTIONS
5
Page 6
6
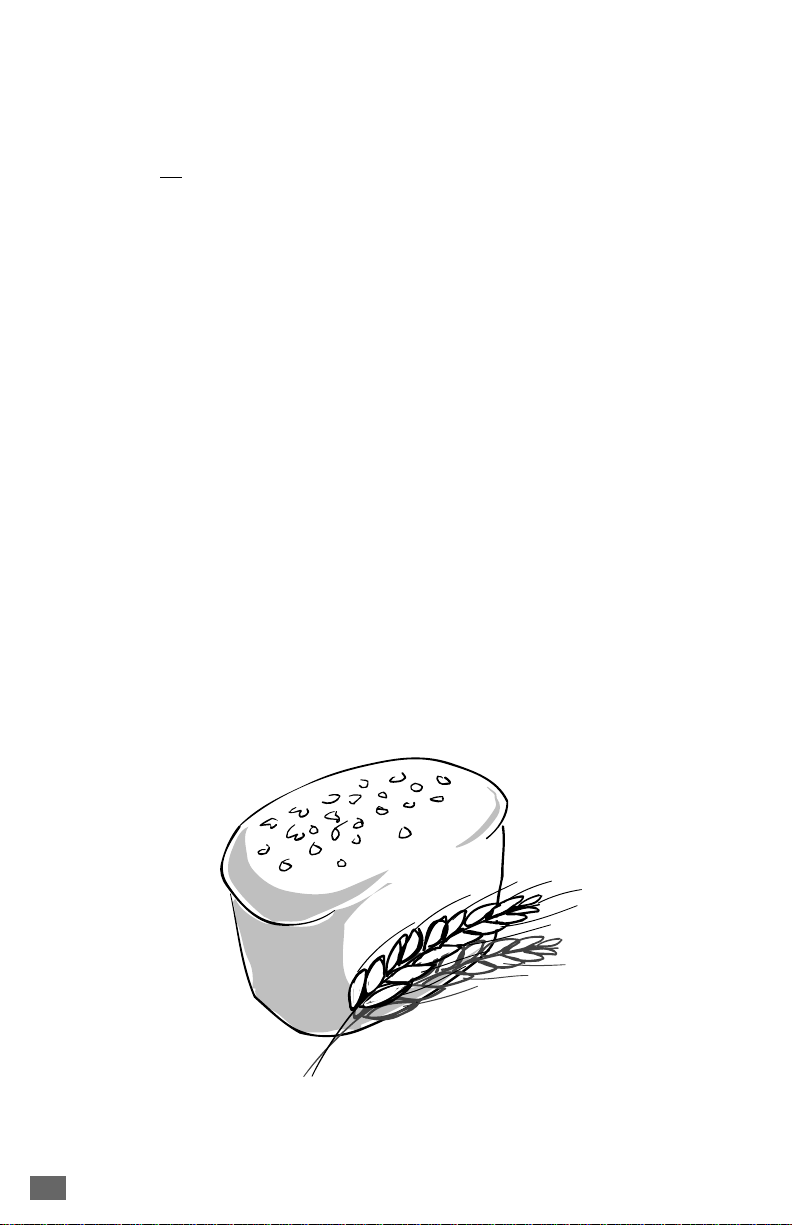
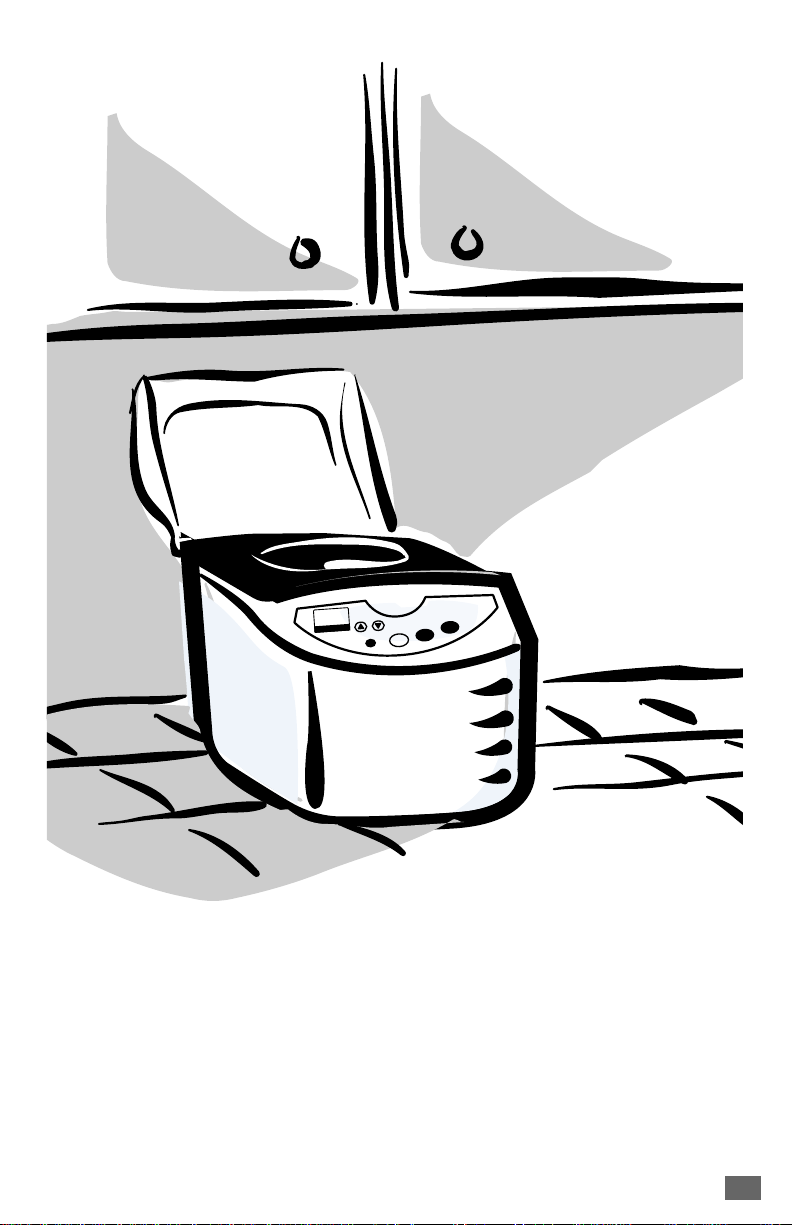
Getting Started
11
11
Place the breadmaker on a counter
where the plug will reach an
outlet. DO NOT yet plug the
machine into the wall outlet.
You will be shown later when
to do this.
Make sure you can open
the breadmaker top without
hitting the top of kitchen cabinets.
22
22
Open the lid and remove the
baking pan. To do this, simply
grasp the handle of the pan
and pull straight up. Use a gentle,
non-abrasive soap and wash,
rinse and dry the pan thoroughly.
33
33
Attach the kneading blade
to the baking pan, as shown.
You will find the kneading blade
in a small plastic wrap attached
to the power cord.
44
44
Set the pan aside. Do not yet
place the pan into the breadmaker.
You’re ready to start!
1B
a
s
i
c
2W
h
o
l
e
W
h
e
a
t
3F
r
e
n
c
h
4S
w
e
e
t
5E
x
p
r
e
s
s
B
a
k
e
™
1
.
0
l
b
.
1
.
5
l
b
.
6
Q
u
i
c
k
7
D
o
u
g
h
8
B
a
g
e
l
D
o
u
g
h
9
E
u
r
o
p
e
a
n
1
0
J
a
m
1
1
B
a
k
e
M
e
n
u
T
i
m
e
r
C
ru
s
t
C
o
lo
r
S
ta
rt
S
to
p
L
o
a
f
L
i
g
h
t
M
e
d
i
u
m
D
a
r
k
Page 7
Let’s Bake Bread
The simplest way to learn how to bake bread is to follow a basic recipe.
The following recipe is easy and the bread is delicious.
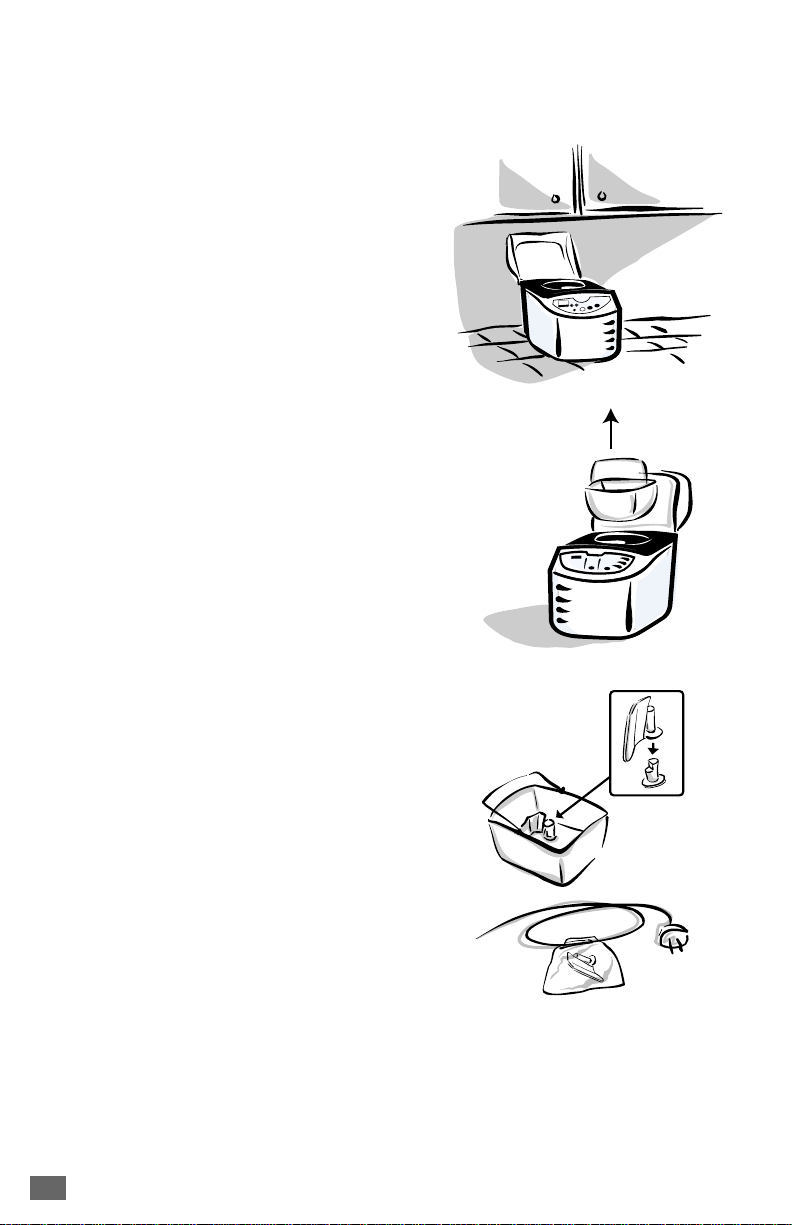
Before You Begin:
• Be sure to start with fresh ingredients.
• Be sure to have the following measuring equipment:
— Liquid measuring cup
— Dry measuring cups
— Measuring spoons
• You will need the following ingredients:
— Water
— Salt
— Butter/Margarine
Bread flour is specifically formulated and
is preferred for electric bread machines.
— “Non-fat dry milk powder”
— Sugar
— Active, bread machine yeast
Flour
Measuring
The most important secret of making bread: “Exact measurements.”
That’s the key to successfully baking bread. “Exact measurements.”
With wet ingredients, use ONLY measuring cups with the cups/ounces
marked clearly on the side. After filling the
measuring cup, place it on a flat surface and
view it at eye level to make sure the amount
of liquid is exact. Then, double check.
With dry ingredients, use a spoon to place
ingredients into the measuring cup then “level off”
the measurement with the back of a knife or
spatula to make sure the measurement is exact.
Another helpful tip is to never use the cup
to scoop the ingredients (for example, flour).
By scooping, you could add up to one Tbsp.
of extra ingredients. Fill the measuring cup
with a spoon before leveling off.
7
Page 8

8
The SECOND most important secret of making bread:
Add ingredients into the bread pan in the exact order given in the recipe.
This means:
— FIRST, liquid ingredients
— SECOND, dry ingredients
— LAST, yeast
Also, make sure ingredients are at room temperature, unless otherwise
noted (that is, between 75°–85°F or 24°–30°C). Temperatures too cool
or too high can affect the way the bread rises and bakes.
Last, it’s a good idea to start with fresh ingredients (especially fresh flour
and yeast).
Now, let’s try a simple (but really good) recipe.
11
11
Attach the kneading blade in the bread pan.
22
22
Place ingredients into the bread pan in the following order: water,
butter or margarine, sugar, milk powder, salt and flour.
33
33
With finger, make a small indentation
on one side of the flour. Add yeast to
indentation, making sure it does not come
into contact with the liquid ingredients.
44
44
Carefully insert bread pan into breadmaker and gently close the lid.
55
55
Plug the power cord into a wall outlet.
1 cup + 2 Tbsp. water
(75°–85°F or 24°–30°C)
1 Tbsp. butter or
margarine, softened
2 Tbsp. sugar
1 Tbsp. non-fat dry
milk powder
1-1/2 tsp. salt
3 cups bread flour
2-1/2 tsp. breadmachine
yeast
Homestyle White Bread
1.5-Pound Loaf
Page 9

Press the Menu button until the “Basic” program is selected.
66
66
Press the Crust Color button for the desired crust color.
77
77
Depending on the crust color you select, the display will read as follows:
Light: L Medium: P Dark: H
Press the “Crust Color” button until “P” (medium) appears in the display window.
Press the Loaf button to select the desired size loaf
88
88
(1-pound or 1.5-pound loaf).
Press the Start button.
99
99
When the baking cycle is complete, press the stop button.
00
111100
Open the lid and while using oven mitts, firmly grasp the
11
111111
bread pan handle and gently pull the pan straight up
and out of the machine.
C
☞
111122
111133
111144
111155
111166
❃
AUTION
Unplug the breadmaker and let bread cool before removing
22
from baking pan.
After the bread machine and bread pan has cooled down
33
Use non-stick spatula to gently loosen the sides of the bread from
44
the pan.
Turn bread pan upside down onto a wire cooling rack or clean
55
cooking surface and gently shake until bread falls out onto rack.
Turn bread right side up and cool for about 20 minutes
66
before slicing.
IMPORTANT:
until it has cooled down
:
The breadmaker and pan may be very hot!
Always handle with care.
After a baking cycle, the bread machine will not operate
.
9
Page 10

❃
I
MPORTANT
:
Use the “Timer” button to delay the baking of your
bread. You may delay the start time up to 13 hours.
❃
I
MPORTANT
:
Press the “Start/Stop” button and your machine will start
making bread. If delay bake is selected, the remaining time will count
down in one-minute increments.
❃
I
MPORTANT
:
The breadmaker has an automatic “keep warm” setting
that will keep your bread warm for up to one hour. To turn warmer
off, press the “Start/Stop” button and hold until you hear a beep.
❃
IMPORTANT:Do NOT press the “Start/Stop” button while the breadmaker
is making bread. This will cause the machine will turn off and you
will need to start over again, from scratch.
❃
I
MPORTANT
:
You should not raise the lid for this recipe. (For other
recipes you try later, you will need to raise the lid to add nuts, fruits,
or other ingredients.)
☞
C
AUTION
:
The breadmaker is very hot. Do not handle the machine
while it is operating. Do NOT lift the lid while the
breadmaker is baking bread.
Bread Machine Stages
It’s fun to watch your bread being made through the viewing window.
For the basic cycle, you can expect the following things to happen
as the timer counts down to zero.
At 3:00 The dough is kneaded for the first time. (10 minutes)
At 2:50 The dough begins to rise. (20 minutes)
At 2:30 The dough is kneaded for the second time. (15 minutes)
At 2:15 The dough continues to rise. (20 minutes)
At 1:55 The dough is “punched down.” (30 seconds)
At 1:55 The dough rises for the final time. (55 minutes)
At 1:00 The bread begins to bake. (50 minutes)
At 0:00 The bread is finished.
☞
C
AUTION
:
Do not put your face near the lid when you open the
breadmaker. Hot steam may escape that could burn you.
❃
I
MPORTANT
:
The breadmaker has an automatic “keep warm”
setting that will keep your bread warm for up to one hour.
We recommend removing the bread from the breadmaker
right away to preserve its freshness.
1 Basic
2 Whole Wheat
3 French
4 Sweet
5 ExpressBake™
1.0 lb.
1.5 lb.
6 Quick
7 Dough
8 Bagel Dough
9 European
10 Jam
11 Bake
Menu
Timer
Crust
Color
Start
Stop
Loaf
Light Medium Dark
Page 11
1 Basic
2 Whole Wheat
3 French
4 Sweet
5 ExpressBake™
1.0 lb.
1.5 lb.
6 Quick
7 Dough
8 Bagel Dough
9 European
10 Jam
11 Bake
Menu
Timer
Crust
Color
Start
Stop
Loaf
Light Medium Dark
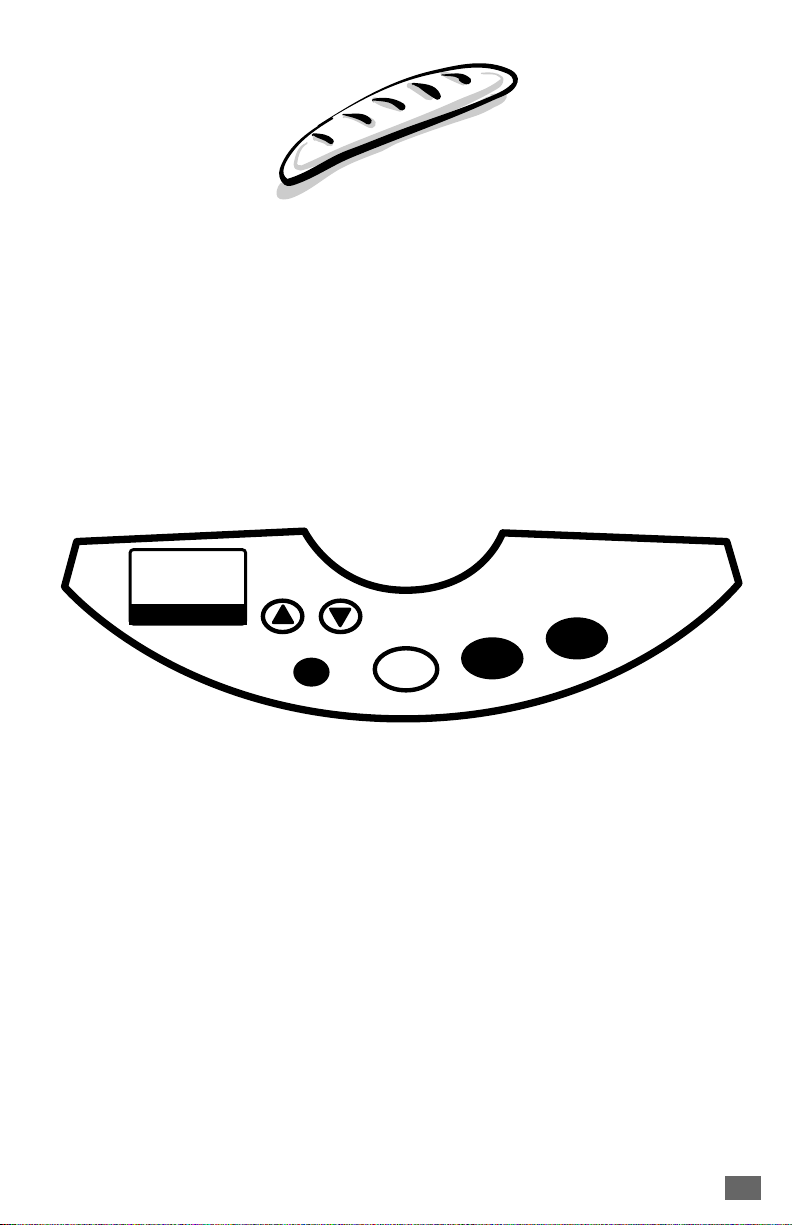
Overview of Breadmaker Features
1 Menu
Press this button to select the kind of bread you want to make.
Each time you press the button you will hear a beep. The display shows
a number for each setting. For example, Basic is 1, Whole Wheat is 2,
French is 3, etc.
2 Crust Color Button
The Crust Color button allows you to choose how light or dark to make
the crust of the bread. Each time you press the Crust Color button the
display will change as follows:
L-Light = L
P-Medium = P
In addition, the display will show the cycle number before the crust
H-Dark = H
color setting. For example, the Basic with a Medium crust reads “1P.”
Or the French bread setting with a dark crust reads “3H.”
1110
Page 12

12
3 Display
The Display shows the following settings:
• The number of the bread setting cycle
• The crust color setting
• The time remaining while your bread is kneading or baking
Once you press the “Start/Stop” button to begin, the display will show
the remaining time until your bread is baked. When the display reads
“0:00” the bread is baked.
4 Timer Set Buttons
Press these buttons to delay the time for your breadmaker to start.
For example, you can time your bread to be ready for dinner,
or to bake while you are sleeping. You may delay up to 18 hours.
5 Start/Stop Button
Press this button to start and stop your breadmaker or begin countdown
for delayed baking bread.
❃
I
MPORTANT
:
Do not press “Stop” when making bread because this
will cancel the entire cycle and you will need to start from scratch.
Breadmaker Settings
Your breadmaker can bake almost any kind of bread.
The recipes we provided clearly show you which setting you should use.
1 Basic (Time: 3 hours)
2 Whole Wheat ( Time: 4 hours, 10 minutes)
3 French (Time: 3 hours, 50 minutes)
4 Sweet (Time: 2 hours, 50 minutes)
5 ExpressBake™ (Time: 58 minutes)
6 Quick (TIme: 1 hour, 43 minutes)
7 Dough (Time: 1 hour, 30 minutes)
8 Bagel Dough (Time: 1 hour, 50 minutes)
9 European (Time: 3 hours, 30 minutes)
10 Jam (Time: 1 hour, 5 minutes)
11 Bake (Time: 1 hour)
Page 13

1 Basic
This setting is probably used more than any other because it gives you
the best results with just about any recipe.
2 Whole Wheat
The whole wheat setting offers a longer rise time for breads that contain
more then 50% whole wheat flour.
3 French
Use this setting for making French breads. French bread takes longer
to knead, rise and bake, providing a heartier crust.
4 Sweet
The sweet setting is for baking breads with high amounts of sugar,
fats and proteins, all of which tend to increase browning.
5 ExpressBake
Use this setting for baking bread in under 1 hour; this setting will
only bake 1.5-lb. size loaves.
™
(58 Minutes)
6 Quick
Use this setting for recipes that contain baking powder or baking soda
rather than yeast to make bread or cake rise; only specially designed
recipes are to be used for this setting.
7 Dough
This setting lets you prepare dough for rolls, specialty breads, pizza, etc.,
which you shape by hand, allow to rise, then bake in a conventional oven.
8 Bagel Dough
This setting will only make bagel dough and will not bake the final bread.
9 European
This setting makes European breads such as Russian Black Bread,
Pumpernickel, etc.
10 Jam
This setting makes jam from fresh fruit.
11 Bake
This setting is for baking dough that you may have prepared without
using the previous settings.
13
Page 14

14
ExpressBake™Setting: Making Bread
In Under 1 Hour
Your SUNBEAM®breadmaker can
bake great bread in under 1 hour.
This is called the “ExpressBake™” setting.
ExpressBake™loaves
are a little different
from loaves baked on other settings.
ExpressBake™Setting:
• This setting can bake bread in 58 minutes. The bread is a little more
dense in texture with this setting.
• The ExpressBake™setting will only make a 1.5-lb. loaf.
There are a few things you should know about the ExpressBake™settings
that are different than the other settings.
➢
ExpressBake™breads tend to have a darker, thicker crust
than other kinds of bread. Sometimes there will be a crack in
the top of the crust. This is because baking is done at higher
temperatures. They also tend to be shorter, denser loaves.
➢
You CANNOT use the Delay Timer for the ExpressBake™settings.
This would cool the liquid ingredients and affect the way that
the bread rises.
➢
You CANNOT use the ”Crust Color” option for ExpressBake™breads.
➢
DO NOT open the cover while making ExpressBake™breads.
➢
If the loaf is hard to remove from the pan, let it sit for about
5 minutes to cool. Gently shake the bread out of the pan and
wait for 15 minutes before slicing.
➢
If you wish to bake another loaf of bread, you must let
the breadmaker cool for 20 minutes with the cover open.
➢
YOU CAN use standard bread mixes for ExpressBake™breads,
but the results may not be as good as the results when using
the recipe within this booklet.
Bread
Machine
Flour
115°F
–
125°F
(46°–52°C)
1 Basic
2 Whole Wheat
3 French
4 Sweet
5ExpressBake™
6 Quick
7 Dough
8 Bagel Dough
9 European
10 Jam
11 Bake
Menu
Page 15
ExpressBake™Setting Tips and Hints
Bread
Machine
Flour
115°F
–
125°F
(46°–52°C)
1 Basic
2 Whole Wheat
3 French
4 Sweet
5ExpressBake™
6 Quick
7 Dough
8 Bagel Dough
9 European
10 Jam
11 Bake
Menu
Yeast
Always use a fast-rising yeast. DO NOT use
active dry yeast for ExpressBake™settings
because the loaves will be much shorter
when baked.
Liquids
Always use hot water in the range of 115°–125°F/46°–52°C.
You must use a cooking thermometer to gauge the temperature;
hotter water can kill the yeast while cooler water may not activate it.
Salt
As a rule, you should use LESS salt for ExpressBake™breads.
Less salt provides you with a higher loaf. Make sure to follow
the recipe suggestions in this booklet for best results.
Other Ingredients
Make sure all other ingredients (like flour, sugar, dry milk, butter, etc.)
are at room temperature.
Always use bread flour for the ExpressBake™settings.
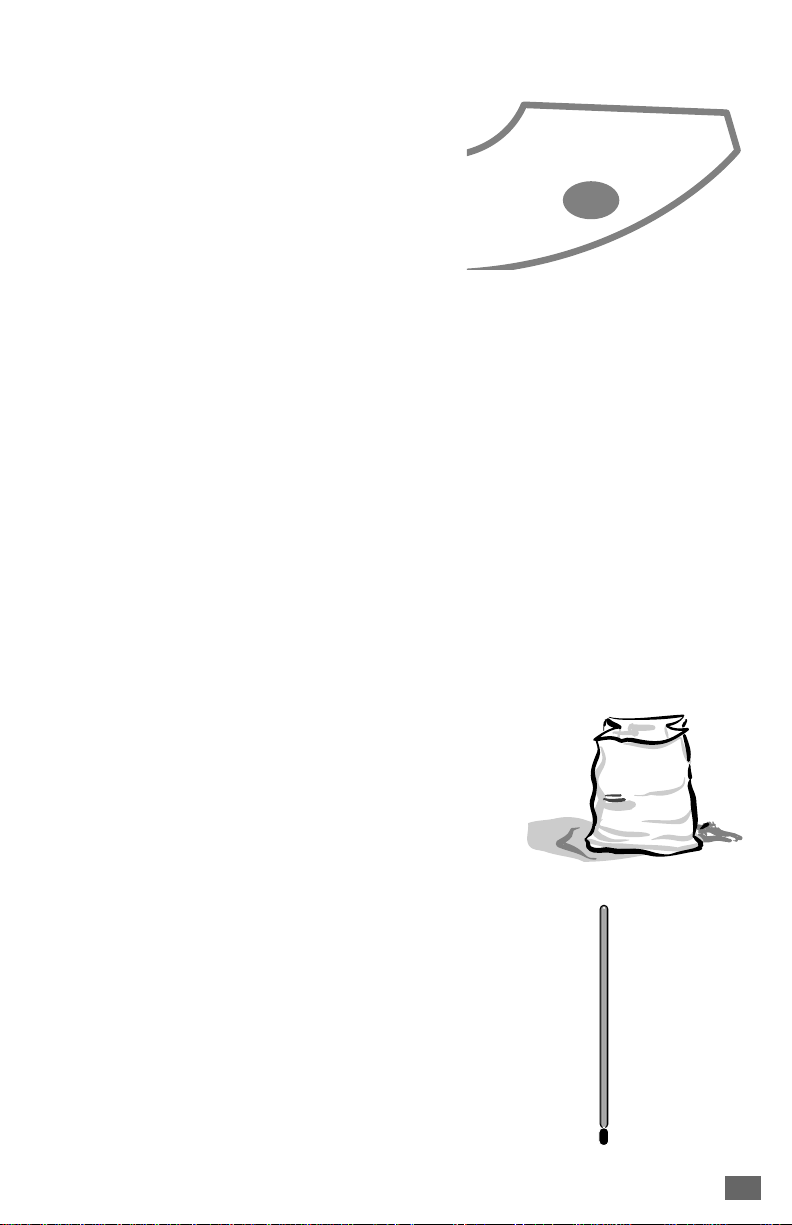
Things You May Need to Buy
You should only use “Bread Machine” flour
➢
for the ExpressBake™recipes.
You may need a cooking thermometer
➢
to measure the temperature of the water
you use in these recipes. You should only
use hot water (between 115°F and 125°F
or 46°C and 52°C) for ExpressBake™recipes.
Although baking ExpressBake™bread is a
little different, the results and convenience
are well worth it.
The following recipe is a great one
to try for your first ExpressBake™loaf.
15
Page 16
16
11
11
Attach the kneading blade in the bread pan.
22
22
Place ingredients into the bread pan in the following order:
water, oil, sugar, salt and flour.
33
33
With finger, make a small indentation
on one side of the flour. Add yeast to
indentation, making sure it does not come
into contact with the liquid ingredients.
44
44
Carefully insert bread pan into breadmaker and gently close the lid.
55
55
Plug the power cord into a wall outlet.
66
66
Press the Menu button until the “ExpressBake™” program
is selected.
77
77
Press the Start button.
88
88
When the baking cycle is complete, press the stop button.
1 cup and 2 tablespoons
(9 ounces total) of hot water
(115°–125°F or 46°–52°C)
2 tablespoons canola or
vegetable oil
2 tablespoons sugar
1 teaspoon salt
3 cups bread machine flour
5 teaspoons bread machine
yeast
ExpressBake
™
Traditional-Style White Bread
1.5-Pound Loaf
Page 17

99
99
☞
00
111100
11
111111
22
111122
33
111133
Open the lid and while using oven mitts, firmly grasp the bread pan
handle and gently pull the pan straight up and out of the machine.
C
AUTION
Unplug the breadmaker and let bread cool before removing
from baking pan.
If necessary, use non-stick spatula to gently loosen the sides
of the bread from the pan.
Turn bread pan upside down onto a wire cooling rack or clean
cooking surface and gently shake until bread falls out onto rack.
Turn bread right side up and cool for about 20 minutes
before slicing.
:
The breadmaker and pan may be very hot!
Always handle with care.
AUTION
☞
❃
After the ExpressBake™Bread Is Baked
☞
❃
C
IMPORTANT:
is making bread. This will cause the machine will turn off and you
will need to start over again, from scratch.
C
AUTION
I
MPORTANT
that will keep your bread warm for up to 1 hour. However,
we recommend removing the bread from the machine right away
to preserve its freshness.
:
Do NOT raise the lid when using the ExpressBake
setting. Doing so can affect the rising of the dough.
The breadmaker is very hot, right from the beginning
of
the cycle. Do not handle the machine while
it’s operating.
Do NOT press the “Start/Stop” button while the breadmaker
:
Do not put your face near the lid when you open the
breadmaker. Hot steam may escape that could burn you.
:
The breadmaker has an automatic “keep warm” setting
™
17
Page 18

18
Using the Delay Timer
You can delay the time your breadmaker starts to have fresh bread ready
when you get up in the morning or when you come from work.
We recommend that before you use the Delay Timer, you try out a few
recipes. Use recipes that have produced good results for you in the past.
❃
I
MPORTANT
:
You cannot use the Delay Timer for ExpressBake™settings
(bread in under 1 hour). Before using the Delay Timer:
11
11
Add all recipe ingredients to the bread pan.
22
22
Select the correct setting for the kind of bread you are making
(French, Sweet, etc.).
33
33
Select the crust color.
☞
C
AUTION
:
Do not use recipes with ingredients that can spoil
like eggs or milk.
To Use the Delay Timer:
11
11
Figure out how many hours and minutes there are between now
and when you want final, baked bread. For example, if it is 8:00 A.M.
and you want bread ready for dinner at 6:00 P.M., that is 10 hours.
22
22
Use the “Timer Up” button to advance the time in 10 minute
increments. In our example, you will do this until the timer reads
“10:00.” If necessary, use the “Timer Down” button to decrease
the time. (To advance the time quickly, simply press and hold down
the “Timer Up/Down” buttons.)
❃
I
MPORTANT
:
If you make a mistake or wish to start over, press and hold
down the “Start/Stop” button until you hear a beep. The display will
show the original setting and cycle time. The Delay Timer is canceled
and you can start again.
33
33
When the Delay Timer is set where you want it, make sure to press
the “Start/Stop” button. The colon (:)will flash and your bread
will be ready when you planned.
❃
I
MPORTANT
:
When using the Delay Timer during times of hot weather,
you may wish to reduce the liquid in your recipe by 1 or 2 tablespoons.
This is to prevent the dough from rising too much. You may also
reduce the salt by 1/8 or 1/4 teaspoon and try cutting the amount
of sugar you use by 1/4 teaspoon at a time.
Page 19

Tips and Hints
Experienced cooks consider breadmaking to be as much art as science.
Keep in mind that some recipes may require a little experimentation
before they are exactly the way you want them. Just don’t give up.
Still, there are special hints to ensuring quality bread almost every time.
Use Exact Measurements
We’ve already mentioned how important it is
to use exact measurements when baking bread,
but it should be said again. Level off all dry
ingredients and make sure that all liquid
ingredients are measured in a glass cup with
the markings clearly labeled on the side.
Use Fresh Ingredients
You should always use fresh ingredients. The reasons are :
Flour. If you have stored your flour for a long time, it may have
➢
become wet from absorbing moisture, or dry, depending on the
area of the country in which you live. We recommend using fresh
bread flour.
Yeast. Fresh yeast is probably the most important ingredient
➢
in baking bread. If the yeast is not fresh, your bread may not rise.
It is better to buy new yeast than to take a chance on yeast that
has been stored for a long time.
You can test the freshness of your yeast. Simply fill a cup with warm water,
then add and stir in 2 tsp. of sugar.
Sprinkle a few tsp. of yeast on the surface of the water and wait.
After 15 minutes, the yeast should foam and there should be distinct odor.
If neither reaction happens, the yeast is old and should be thrown away.
Add Ingredients in the order given according to the recipe.
Read all recipes from top to bottom, and remember:
— FIRST : liquid ingredients
— SECOND : dry ingredients
— LAST : yeast
19
Page 20

20
Check the Doughball
This is a secret well known to people who make bread the old-fashioned
way. While hand kneading the mixture, they adjust the consistency of
the dough by adding a little flour or a little water until the doughball
is just right.
Although the breadmaker kneads the dough for you, this secret is still true.
Here’s what you should do:
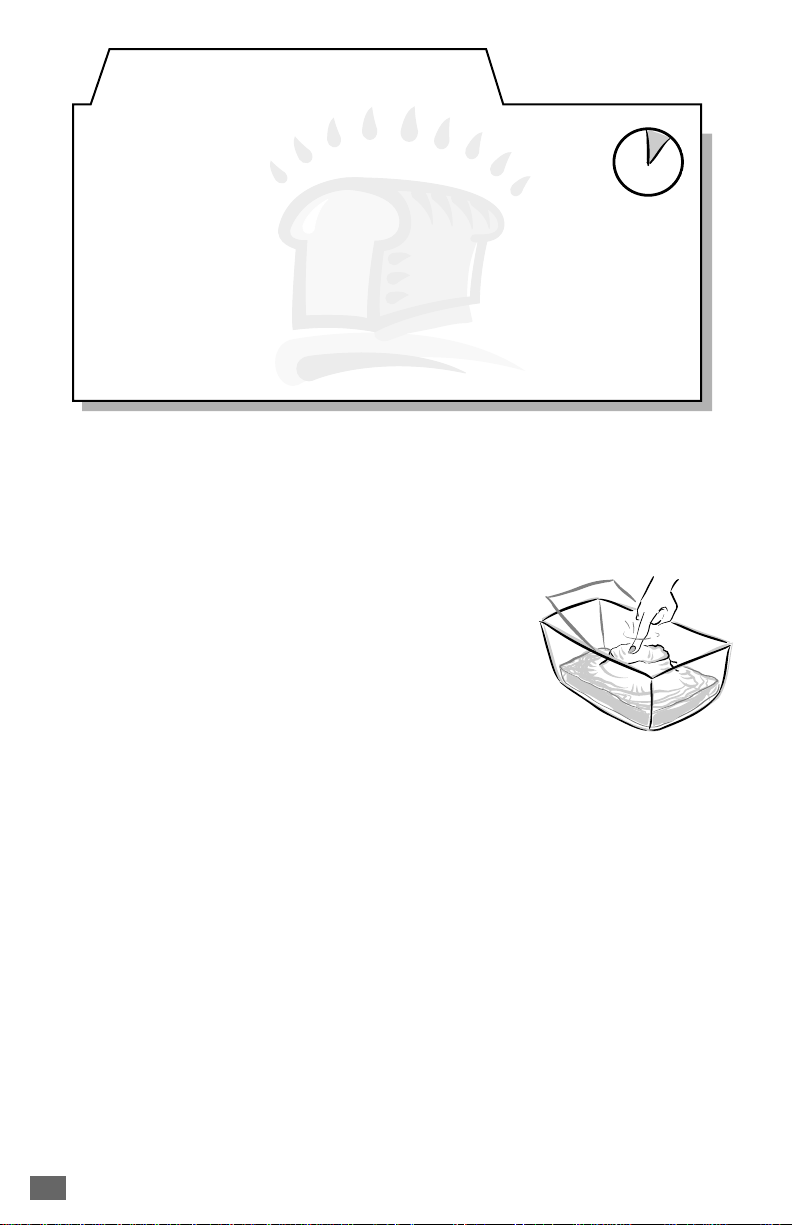
If the Doughball Is Too Wet
During the second kneading cycle, check the
consistency of the doughball. If the doughball
appears sticky or wet, like pancake batter,
sprinkle in flour, a Tbsp. at a time, until the
doughball appears smooth, round and dry,
and circles nicely in the pan. Sprinkle a little
more flour if needed.
If the Doughball Is Too Dry
If the doughball appears flaky, or you hear your
breadmaker begin to make “knocking” sounds,
the dough ball is too dry. To correct this
problem, simply sprinkle in water a tsp. at a
time, until the doughball appears smooth,
round and dry, and circles nicely in the pan.
Be careful not to add too much water.
Page 21

For Baking at High Altitudes
If you live above 3000 feet, you probably already know how to adjust
other recipes like cakes and muffins. Higher altitudes tend to:
make dough rise faster
➢
make flour drier
➢
To compensate for high altitude baking, we recommend the following:
If the Dough Is Too Dry
increase the amount of water to the recipe, sometimes as much
➢
as 2 – 4 Tbsp. per cup.
If the Bread Rises Too High
reduce the amount of yeast. For each tsp. of yeast,
➢
try reducing the yeast by 1/8 to 1/4 tsp.
reduce the amount of sugar. For each Tbsp. of sugar,
➢
reduce the amount by 1 to 2 tsp.
21
Page 22

The following chart will help you convert measurements
used in the recipes.
For example: 1/2 Tbsp. = 1-1/2 tsp.
Fluid Ounce(s) Cup Tablespoon(s) Teaspoons
8=1=16=48
7 = 7/8 = 14 = 42
6 = 3/4 = 12 = 36
5 = 5/8 = 10 = 30
4 = 1/2 = 8 = 24
3 = 3/8 = 6 = 18
2 = 1/4 = 4 = 12
1 = 1/8 = 2 = 6
1=3
1/2 = 1-1/2
Measurement Equivalency Chart
Page 23

Taking Care of Your Bread Machine
C
☞
Use only a mild, non-abrasive cleanser
to clean the breadmaker.
General Cleaning
1
2
Cleaning the Baking Pan and Kneading Blade
1
2
Caring for Your Breadmaker
AUTION
Remove all bread crumbs by wiping them away with a slightly
damp cloth.
DO NOT bend the heating element which is located on the inside
of the breadmaker.
Wipe the baking pan and kneading blade with a damp cloth
and dry completely.
DO NOT wash the pan or parts in the dishwasher. Surely this
will damage the finish of the pan and the other parts.
:
Do not put the breadmaker
in water or in a dishwasher.
Do not use benzene, scrubbing
brushes or chemical cleaners as
these will damage the machine.
Keep your breadmaker clean at all times.
1
C
☞
2
3
Storing Your Breadmaker
1
2
3
4
AUTION
Don’t worry if the color of the bread pan changes over time. The color
change is a result of steam and other moisture and does not affect the
machine’s performance.
If you have trouble removing the kneading blade, place warm water
in the bread pan for 10 –15 minutes and this will loosen the blade.
Make sure the machine is clean and dry before storing.
Store the breadmaker with the lid closed.
Do not place heavy objects on the lid.
Remove the kneading blade and place inside the bread pan.
:
Do not use metal utensils with the breadmaker.
This will damage the non-stick pan and other parts.
2322
Page 24

Troubleshooting
If you experience difficulties when operating the breadmaker, review the
troubleshooting information in this section to find a solution. If you are
unable to find a solution, please call our Consumer Relations Department
at 1-800-458-8407.
If you have a power outage:
If the power goes out while you are using your breadmaker for not
less than 30 minutes, your machine will resume its cycle when power
is restored.
Troubleshooting Breadmaker Problems
If the breadmaker does not function as you think it should, review
the chart below for some possible solutions.
Troubleshooting Baking Problems
If the bread does not turn out the way you expected or has some
characteristic you don’t care for, review the chart below for some
possible solutions.
Ingredients have spilled out of the
bread pan and into the machine
itself. Stop the breadmaker and
allow it to cool off. Clean the
breadmaker before using it again.
Make sure the baking pan and
kneading blade are properly
installed in the machine.
You see smoke or smell a
burning odor from the back
of the machine.
The dough does not mix.
B
READMAKER PROBLEM SOLUTION
Page 25

AKING PROBLEM SOLUTION
B
The bread has a floured top.
This is usually a result of using
too much flour or not enough
water. Try using less flour (a tsp.
less at a time), or try using more
water (1/4 tsp. more at a time).
The bread is too brown.
The bread is not brown
enough.
B
AKINGPROBLEM
The sides of the bread collapse
and the bottom of the bread
is damp.
This is usually the result of
adding too much sugar to the
recipe. Try using less sugar
(1 Tbsp. at a time). You can
also try selecting a lighter
crust color selection.
This is usually the result of
repeatedly lifting the lid of the
bread machine or leaving the
lid open while the bread is
baking. Be sure the lid is shut
while the breadmaker is in
operation. You can also try
selecting a darker crust color
selection.
S
OLUTION
There are several possible
solutions. The bread may have
been left in the bread pan too
long after baking. Remove the
bread from the pan sooner and
allow it to cool. Try using more
flour (a tsp. at a time), or less
yeast (1/4 tsp. at a time), or less
water or liquid (a tsp. at a time).
This could also be the result
of forgetting to add salt
to the recipe.
2524
Page 26

26
1B
a
s
i
c
2W
h
o
l
e
W
h
e
a
t
3F
r
e
n
c
h
4S
w
e
e
t
5E
x
p
r
e
s
s
B
a
k
e
™
1
.
0
l
b
.
1
.
5
l
b
.
6
Q
u
ic
k
7
D
o
u
g
h
8
B
a
g
e
l
D
o
u
g
h
9
E
u
r
o
p
e
a
n
1
0
J
a
m
1
1
B
a
k
e
Menu
Tim
e
r
Crust
Color
Start
Stop
L
o
a
f
L
i
g
h
t
M
e
d
i
u
m
D
a
r
k
Try using less flour (a tsp. at a
time),
or more yeast (1/4 tsp.
at a time).
This could also be the result of
using old flour or the wrong type
of flour for the recipe.
Try using more flour (a tsp. more
at a time), or less water or liquid
(a tsp. less at a time). Do not lift
the lid too often during baking.
This is usually the result of
forgetting to add salt to
the recipe.
Try using less yeast (1/4 tsp. less
at a time). This could also be the
result of forgetting to add salt
to the recipe or forgetting to put
the kneading blade into the
baking pan.
There are several possible
solutions. Try using less flour
(a tsp. less at a time), more yeast
(1/4 tsp. more at a time), or less
water (a tsp. less at a time).
This could also be the result of:
•forgetting to add salt to
the recipe,
•using old flour or the wrong
kind of flour for the recipe,
•using old yeast,
•or using water that is too hot
(except otherwise noted in the
recipes and for ExpressBake™
setting recipes).
The bread has a heavy,
thick texture.
The bread is not baked
completely in the center.
The bread has a coarse texture.
The bread rose too much.
The bread did not rise enough.
B
AKINGPROBLEM
S
OLUTION
Page 27
1B
a
s
i
c
2W
h
o
l
e
W
h
e
a
t
3F
r
e
n
c
h
4S
w
e
e
t
5E
x
p
r
e
s
s
B
a
k
e
™
1
.
0
l
b
.
1
.
5
l
b
.
6
Q
u
ic
k
7
D
o
u
g
h
8
B
a
g
e
l
D
o
u
g
h
9
E
u
r
o
p
e
a
n
1
0
J
a
m
1
1
B
a
k
e
Menu
Tim
e
r
Crust
Color
Start
Stop
L
o
a
f
L
i
g
h
t
M
e
d
i
u
m
D
a
r
k
Recipes
27
Page 28

Recipes
BASIC SETTING RECIPES
Homestyle White Bread
1 P
OUND LOAF INGREDIENTS 1.5-POUND LOAF
2/3 cup Water (75°–85°F or 24°–30°C) 1 cup + 2 Tbsp.
2 tsp. Butter or margarine, softened 1 Tbsp.
1 Tbsp. Sugar 2 Tbsp.
2 tsp. Non-fat dry milk powder 1 Tbsp.
1 tsp. Salt 1-1/2
2 cups Bread flour 3 cups
1-1/4 Bread machine yeast 2-1/2 tsp.
Flour
Salt
Dry
Milk
Sugar
Page 29

1
Attach the kneading blade in the bread pan.
2
Place ingredients into the bread pan in the following order:
water, butter or margarine, sugar, milk powder, salt and flour.
3
With finger, make a small indentation on one side of the flour.
Add yeast to indentation, making sure it does not come into contact
with the liquid ingredients.
4
Carefully insert bread pan into breadmaker and gently close the lid.
5
Plug the power cord into a wall outlet.
6
Press the Menu button until the “Basic” program is selected.
7
Press the Crust Color button for the desired crust color.
8
Press the Loaf button to select the desired size loaf
(1-pound or 1.5-pound loaf).
9
Press the Start button.
10
When the baking cycle is complete, press the stop button.
11
Open the lid and while using oven mitts, firmly grasp the bread pan
handle and gently pull the pan straight up and out of the machine.
AUTION
☞
12
13
14
15
16
❃
C
Unplug the breadmaker and let bread cool before removing
from baking pan.
After the bread machine and bread pan has cooled down
Use non-stick spatula to gently loosen the sides of the bread from
the pan.
Turn bread pan upside down onto a wire cooling rack or clean
cooking surface and gently shake until bread falls out onto rack.
Turn bread right side up and cool for about 20 minutes
before slicing.
Important:
until it has cooled down
:
The breadmaker and pan may be very hot!
Always handle with care.
After a baking cycle, the bread machine will not operate
.
➩
2928
Page 30

Whole Wheat Setting Recipe
Whole Wheat Bread
1.5-P
OUND
L
OAFINGREDIENTS
1 P
OUND
L
OAF
1 cup + 2 Tbsp. Water
(75°–85°F or 24°–30°C)
1 cup minus 1 Tbsp.
1 Tbsp. + 1-1/2 tsp. Butter or margarine, softened 1 Tbsp.
1/4 cup Firmly packed light brown sugar 2 Tbsp. + 1-1/2 tsp.
1-1/4 tsp. Salt 1/2 tsp.
3-1/2 cups Whole wheat flour 2-1/3 cups
2-1/4 tsp. Bread machine yeast 1-1/2 tsp.
1
Attach the kneading blade in the bread pan.
2
Place ingredients into the bread pan in the following order:
water, butter, sugar, salt and flour.
3
With finger, make a small indentation on one side of the flour.
Add yeast to indentation, making sure it does not come in contact
with the liquid ingredients.
4
Carefully insert bread pan into breadmaker and gently close lid.
5
Plug the power cord into a wall outlet.
6
Press the Menu button until the “Whole Wheat” program is selected.
7
Press the Crust Color button for the desired crust color.
8
Press the Loaf button to select the desired size loaf
(1 or 1.5 lb. loaf)
.
9
Press the Start button.
10
When the baking cycle is complete, press the stop button.
11
Open the lid and while using oven mitts firmly grasp the bread-pan
handle and gently pull the pan straight up and out of the machine.
☞
C
AUTION
:
The breadmaker and pan may be very hot!
Always handle with care.
12
Unplug the breadmaker and let bread cool before removing from
baking pan.
13
Use a nonstick spatula to gently loosen the sides of the bread from
the pan; turn bread pan upside down onto a wire cooling rack or
clean cooking surface and gently shake until bread falls out onto rack.
14
Turn bread right-side up and cool for about 20 minutes before slicing.
MAKES 1 LOAF
Page 31

French Setting Recipe
Classic French Bread
1.5-P
OUND
1 cup + 2 Tbsp. Water
2 tsp. Butter or margarine, softened 1 tsp.
3-1/4 cups Bread flour 2 cups
1 Tbsp. Sugar 2 tsp.
1-1/2 tsp. Salt 1 tsp.
2-1/2 tsp. Bread machine yeast 2 tsp.
1
Attach the kneading blade in the bread pan.
2
Place ingredients into the bread pan in the following order: water,
butter, bread flour, sugar and salt.
3
With finger, make a small indentation on one side of the flour.
Add yeast to indentation, making sure it does not come in contact
with the liquid ingredients.
4
Carefully insert bread pan into breadmaker and gently close lid.
5
Plug the power cord into a wall outlet.
6
Press the Menu button until the “French Bread” program is selected.
7
Press the Crust Color button for the desired crust color;
8
Press the Loaf button to select the desired size loaf
L
OAF
I
NGREDIENTS
(75°–85°F or 24°–30°C)
1 P
OUND
L
3/4 cup
(1 or 1.5 lb. loaf)
OAF
.
9
Press the Start button.
10
When the baking cycle is complete, press the stop button.
11
Open the lid and, using oven mitts, firmly grasp the bread-pan
handle and gently pull the pan straight up and out of the machine.
C
☞
12
13
14
AUTION
Unplug the breadmaker and let bread cool before removing from
baking pan.
Use a nonstick spatula to gently loosen the sides of the bread
from the pan; turn bread pan upside down onto a wire cooling rack
and gently shake until bread falls out onto rack.
Turn bread right-side up and cool for about 20 minutes before slicing.
:
The breadmaker and pan may be very hot!
Always handle with care.
MAKES 1 LOAF
3130
Page 32

Sweet Setting Recipe
Banana-Pecan Bread
1.5-P
OUNDLOAFINGREDIENTS
1 P
OUNDLOAF
2/3 cup Water
(75°–85°F or 24°–30°C)
1/2 cup
3/4 cup Mashed ripe banana 1/3 cup
2 Tbsp. Butter or margarine, softened 1 Tbsp.
1 large Egg, lightly beaten 1 medium
3-1/4 cups Bread flour 2 cups
3 Tbsp. Sugar 2 Tbsp.
1-1/4 Salt 1/2 tsp.
2-1/2 tsp. Bread machine yeast 1-1/2 tsp.
1/2 cup Chopped pecans 1/3 cup
1
Attach the kneading blade in the bread pan.
2
Place ingredients into the bread pan in the following order:
water, banana, butter, egg, flour, sugar, and salt.
3
With finger, make a small indentation on one side of the flour.
Add yeast to indentation, making sure it does not come in contact
with the liquid ingredients.
4
Sprinkle nuts onto flour.
5
Carefully insert bread pan into breadmaker and gently close lid.
6
Plug the power cord into a wall outlet.
7
Press the Menu button until the “Sweet Bread” program is selected.
8
Press the Crust Color button for the desired crust color.
9
Press the Loaf button to select the desired size loaf
(1 or 1.5-lb. loaf)
.
10
Press the Start button.
11
When baking cycle is complete, press the stop button.
12
Open the lid and, using oven mitts, firmly grasp the bread-pan
handle and gently pull the pan straight up and out of the machine.
☞
C
AUTION
:
The breadmaker and pan may be very hot!
Always handle with care.
13
Unplug the breadmaker and let bread cool before removing from
baking pan.
14
Use a nonstick spatula to gently loosen the sides of the bread
from the pan; turn bread pan upside down onto a wire cooling rack
and gently shake until bread falls out onto rack.
15
Turn bread right-side up and cool for about 20 minutes before slicing.
MAKES 1 LOAF
Page 33

ExpressBake™Setting Recipe
ExpressBake™Traditional-Style White Bread
1 cup + 2 Tbsp. hot water (115°-125°F)
2 Tbsp. canola or vegetable oil
2 Tbsp. sugar
1 tsp. salt
3 cups bread flour
5 tsp. bread machine yeast
1
Attach the kneading blade in the bread pan.
2
Place ingredients into the bread pan in the following order:
water, oil, sugar, salt and flour.
3
With finger, make a small indentation on one side of the flour.
Add yeast to indentation, making sure it does not come in contact
with the liquid ingredients.
4
Carefully insert bread pan into breadmaker and gently close lid.
5
Plug the power cord into a wall outlet.
6
Press the Menu button until the “ExpressBake™“ program is selected.
7
Press the Start button.
8
When the baking cycle is complete, press the stop button.
9
Open the lid and while using oven mitts, firmly grasp the bread pan
handle and gently pull the pan straight up and out of the machine.
C
☞
10
11
12
13
AUTION
Unplug the breadmaker and let bread cool before removing
from baking pan.
If needed, use a nonstick spatula to gently loosen the sides of the
bread from the pan.
Turn bread pan upside down onto a wire cooling rack or clean
cooking surface and gently shake until bread falls out onto rack.
Turn bread right-side and cool for about 20 minutes before slicing.
:
The breadmaker and pan may be very hot!
Always handle with care.
MAKES 1.5-POUND LOAF
3332
Page 34

Quick Breads Setting Recipe
Chock Full o’ Chocolate Walnut-Zucchini Bread
1
In a small bowl, combine walnuts and chocolate pieces;
add 2 Tbsp. of the flour and toss well; set aside.
2
Spray the bread pan and kneading blade with nonstick cooking spray.
3
Attach the kneading blade in the bread pan.
4
Place ingredients into the bread pan in the following order: eggs, oil,
the remaining flour, baking powder, baking soda, sugar, cinnamon,
orange zest, salt and allspice. Add zucchini, then the floured walnuts
and chocolate pieces along with any flour remaining in the bowl.
5
Carefully insert bread pan into breadmaker and gently close lid.
6
Plug the power cord into a wall outlet.
7
Press the Menu button until the “Quickbread” program is selected.
8
Press the Start button.
9
When the baking cycle is complete, press the stop button.
10
Open the lid and, using oven mitts, firmly grasp the bread-pan
handle and gently pull the pan straight up and out of the machine.
☞
C
AUTION
:
The breadmaker and pan may be very hot!
Always handle with care.
11
Unplug the breadmaker and let bread cool before removing from
baking pan.
12
Use a nonstick spatula to gently loosen the sides of the bread from
the pan; turn bread pan upside down onto a wire cooling rack or
clean cooking surface and gently shake until bread falls out onto rack.
13
Turn bread right-side up and cool for about 20 minutes before slicing.
MAKES 1 LOAF
1/2 cup chopped walnuts
1/2 cup semi-sweet chocolate pieces
2 cups all-purpose flour, divided
3 large eggs, lightly beaten
1/3 cup canola or other vegetable oil
2 tsp. baking powder
1 tsp. baking soda
3/4 cup sugar
1 tsp. ground cinnamon
1 tsp. grated orange zest
1/2 tsp. salt
1/2 tsp. ground allspice
2-1/2 cups shredded zucchini,
about 2 medium zucchini
Page 35

Dough Setting Recipe
Orange-Anise Braided Ring
1/3 cup water
1/3 cup whole milk
3 eggs, lightly beaten
1/2 cup (1 stick) butter or margarine,
softened and cut into 6 pieces
Grated zest of 1 orange
1/2 cup sugar
1
Attach the kneading blade in the bread pan.
2
Place ingredients into the bread pan in the following order: water,
milk, eggs, butter, orange zest, sugar, flour, anise, salt and nutmeg.
3
With finger, make a small indentation on one side of the flour.
Add yeast to indentation, making sure it does not come in contact
with the liquid ingredients.
4
Carefully insert bread pan into breadmaker and gently close lid.
5
Plug the power cord into a wall outlet.
6
Press the Menu button until the “Dough” program is selected.
7
Press the Start button.
8
When the dough cycle is complete
9
Open the lid and, firmly grasp the bread-pan handle and gently pull
the pan straight up and out of the machine.
10
Unplug the breadmaker.
11
Preheat oven to 350°F.
12
Spray a large baking sheet with nonstick cooking spray.
13
Remove dough from bread pan to a clean, lightly floured surface.
Divide dough into 2 equal pieces.
14
With hands, lightly roll each piece into a 24-inch rope. Place ropes
on prepared baking sheet. Twist ropes loosely together and form
into a circle. Place a clean towel over ring and let rise in a warm,
draft-free place until doubled in size.
15
Using a pastry brush, lightly brush ring with egg wash.
16
Bake 30-35 minutes or until bread is golden brown.
17
Remove from baking sheet to wire cooling rack or clean cooking surface.
18
Allow to cool for about 20 minutes before slicing.
(75°–85°F or 24°–30°C)
4 cups bread flour
1-1/2 tsp. anise seeds, crushed
1 tsp. salt
1/2 tsp. ground nutmeg
2-1/2 tsp. bread machine yeast
Egg wash (1 egg, lightly beaten
with 1 Tbsp. water)
➩
MAKES 1 RING
3534
Page 36

Bagel Dough Setting Recipes
Honey-Whole Wheat Bagels
1 cup water (75°-85°F) 1 cup whole wheat flour
1-1/2 Tbsp. honey 1-1/2 tsp. salt
2 cups bread flour 1-1/2 tsp. bread machine yeast
1
Attach the kneading blade in the bread pan.
2
Place ingredients into the bread pan in the following order:
water and honey, then bread flour, wheat flour and salt.
3
With your finger, make a small indentation on one side of the flour.
Add yeast to indentation, making sure it does not come in contact
with the liquid ingredients.
4
Carefully insert bread pan into breadmaker; gently close lid.
5
Plug the power cord into a wall outlet.
6
Press the Menu button until the “Bagel” program is selected.
7
Press the Start button.
8
Preheat oven to 375°F. Spray a baking sheet with nonstick cooking
spray; set aside.
9
When the dough cycle is complete
➩
10
Open the lid and remove bread pan with dough from breadmaker
to a lightly floured surface.
11
Unplug breadmaker.
12
Divide dough into 12 equal pieces.
13
With fingers of both hands, lightly roll each piece into an 8-inch long
rope; form each rope into a circle and pinch ends together to seal.
14
Place dough circles on prepared baking sheet.
15
Cover bagels with a cloth and let rise 20 minutes.
16
In a nonstick skillet, boil 3-inches of water.
17
Gently submerge 3 to 4 bagels at a time into water and cook about
30 seconds on each side.
18
Remove bagels to paper towels to drain, then place on baking sheet.
19
Bake 20-25 minutes until bagels are lightly browned and surface
is shiny; remove from baking sheet to wire rack to cool.
MAKES 12 BAGELS
Page 37

European Bread Setting Recipe
Russian Black Bread
1.5-P
OUNDLOAF
1 cup Water
1/3 cup Prepared strong coffee (75°-85°F) 1/4 cup
3 Tbsp. Unsulphured molasses 2 Tbsp.
2 Tbsp. Butter or margarine, softened 1 Tbsp.
2-2/3 cups Bread machine flour 2 cups
1-1/3 cups Rye flour 1 cup
3 Tbsp. Unsweetened cocoa powder 2 Tbsp.
1 tsp. Salt 3/4 tsp.
1 tsp. Caraway seeds 3/4 tsp.
1/2 tsp. Fennel seeds, lightly crushed 1/4 tsp.
1-1/2 tsp. Bread machine yeast 1-1/4 tsp.
1
Attach kneading blade in the bread pan.
2
Place ingredients into the bread pan in the following order:
water, coffee, molasses and butter, then add the bread flour,
rye flour, cocoa powder, salt, caraway and fennel seeds.
3
With finger, make a small indentation on one side of the flour.
Add yeast to indentation, making sure it does not come in contact
with the liquid ingredients.
4
Carefully insert bread pan into breadmaker and gently close lid.
5
Plug the power cord into a wall outlet.
6
Press the Menu button until the “European Bread” program is
selected.
7
Press the Loaf button to select the desired size loaf
8
Press the Start button
9
When the baking cycle is complete, press the stop button.
10
Open the lid and, using oven mitts, firmly grasp the bread-pan
handle and gently pull the pan straight up and out of the machine.
C
☞
11
12
13
14
*On this program, the crust color is automatically set for Medium.
AUTION
Unplug the breadmaker and let bread cool before removing from
baking pan.
After the bread machine and bread pan has cooled down
Use a nonstick spatula to gently loosen the sides of the bread from
the pan; turn bread pan upside down onto a wire cooling rack
and gently shake until bread falls out onto rack.
Turn bread right-side up and cool for about 20 minutes before slicing.
I
NGREDIENTS
(75°–85°F or 24°–30°C)
(1 or 1.5 lb. loaf)
:
The breadmaker and pan may be very hot!
Always handle with care.
1 P
OUNDLOAF
3/4 cup
➩
MAKES 1LOAF
.
3736
Page 38

Jam Setting Recipe
Year ‘Round Spiced Peach Jam
1 cup sugar
1 Tbsp. low-sugar fruit pectin
2 cups thawed frozen sliced peaches
1/2 tsp. ground cloves
1/4 tsp. ground nutmeg
2 tsp. lemon juice
1
Attach kneading blade in the bread pan.
2
Place ingredients into the bread pan in the following order:
sugar, pectin, peaches, cloves, nutmeg and lemon juice.
3
Carefully insert bread pan into breadmaker and gently close lid.
4
Plug the power cord into a wall outlet.
5
Press the Menu button until the “Jam” program is selected.
6
Press the Start button.
7
When the Jam cycle is complete.
8
Open the lid and, using oven mitts, firmly grasp the bread-pan
handle and gently pull the pan straight up and out of the machine.
☞
C
AUTION
:
The breadmaker and pan may be very hot!
Always handle with care.
9
Unplug the breadmaker and let jam cool.
10
Using oven mitts, carefully pour the jam into a glass or metal
container.
11
Cover and refrigerate to set.
12
Jam will keep, stored in refrigerator, 2-3 weeks.
MAKES ABOUT 1-1/2 CUPS
Jam
Page 39

Glazes
After rolls rise, just before baking, gently apply
desired glaze with a pastry brush. Bake as
directed in the recipe.
• For a shiny golden crust, use Egg Glaze or
Egg Yolk Glaze.
• For a shiny chewy crust, use Egg White Glaze
(crust will be lighter in color)
Egg Glaze
Mix 1 slightly beaten egg with 2 Tbsp. water or milk.
Egg Yolk Glaze
Mix 1 slightly beaten egg yolk with 1 Tbsp. water or milk.
Egg White Glaze
Mix 1 slightly beaten egg white with 1 Tbsp. water.
Note: To keep unused egg yolk fresh for several days, cover with cold
water and store in refrigerator in a covered container.
.
Browned Butter Glaze
2 Tbsp. margarine or butter
2/3 cup powdered sugar
1/2 tsp. vanilla
4 tsp. milk
Heat margarine in a 1-quart saucepan over medium heat until light brown
cool. Stir in powdered sugar and vanilla. Stir in milk until smooth and
thin enough to drizzle.
Cinnamon Glaze
Mix until thin enough to drizzle:
1/2 cup powdered sugar
1/4 tsp. ground cinnamon
2 tsp. water
3938
;
Page 40

40 41
Citrus Glaze
Mix until thin enough to drizzle:
1/2 cup powdered sugar
1 tsp. grated lemon or orange peel
2 tsp. lemon or orange juice
Creamy Vanilla Glaze
Mix until thin enough to drizzle:
1/2 cup powdered sugar
1/4 tsp. vanilla
2 tsp. milk
Garlic Butter
Mix: 1/4 cup margarine or butter, softened
1/8 tsp. garlic powder
Herb-Cheese Butter
Mix: 1/4 cup margarine or butter, softened
1 Tbsp. grated Parmesan cheese
1 tsp. chopped fresh parsley
1/4 tsp. dried oregano leaves
Dash of garlic salt
Italian Herb Butter
Mix: 1/4 cup margarine or butter, softened
1/2 tsp. Italian seasoning
Dash of salt
Page 41

Choco-Banana Spread
Mix: 1/3 cup mashed ripe banana
1/2 cup semi-sweet chocolate chips, melted
Ham and Swiss Spread
Mix: 1 package (3 oz.) cream cheese, softened
2 Tbsp. finely chopped, fully cooked, smoked ham
1 Tbsp. shredded Swiss cheese
1/2 tsp. prepared mustard
Herb-Cream Cheese Spread
Mix: 1 container (4 oz.) whipped cream cheese
1 tsp. chopped fresh or 1/2 tsp. dried dillweed
1 small clove garlic, finely chopped
Honey-Walnut Spread
Mix: 1 package (3 oz.) cream cheese, softened
1 Tbsp. chopped walnuts
2 tsp. honey
Ripe Olive Spread
Cover and mix in food processor or blender until slightly coarse:
1-1/2 cups pitted, ripe olives
3 Tbsp. olive oil
3 Tbsp. capers, drained
3 flat anchovy fillets, drained
1 tsp. Italian seasoning
2 garlic cloves
Page 42

PAGE
Homestyle White Bread . . . . . . . . . . . . . . . . . . . . . . . . . . . 8
ExpressBake™Traditional-Style White Bread . . . . . . . . . . . . . 16
Whole Wheat Bread . . . . . . . . . . . . . . . . . . . . . . . . . . . . . . . . 30
Classic French Bread . . . . . . . . . . . . . . . . . . . . . . . . . . . . . . . . 31
Banana-Pecan Bread . . . . . . . . . . . . . . . . . . . . . . . . . . . . . . . . 32
ExpressBake
™
Traditional-Style White Bread . . . . . . . . . . . . . 33
Chock Full o’ Chocolate Walnut-Zucchini Bread . . . . . . . . . . . 34
Orange-Anise Braided Ring . . . . . . . . . . . . . . . . . . . . . . . . . . . 35
Honey-Whole Wheat Bagels . . . . . . . . . . . . . . . . . . . . . . . . . . 36
Russian Black Bread . . . . . . . . . . . . . . . . . . . . . . . . . . . . . . . . . 37
Year-Round Spiced Peach Jam . . . . . . . . . . . . . . . . . . . . . . . . 38
Egg Glaze . . . . . . . . . . . . . . . . . . . . . . . . . . . . . . . . . . . . . . . . 39
Egg Yolk Glaze . . . . . . . . . . . . . . . . . . . . . . . . . . . . . . . . . . . . 39
Egg White Glaze . . . . . . . . . . . . . . . . . . . . . . . . . . . . . . . . . . . 39
Browned Butter Glaze . . . . . . . . . . . . . . . . . . . . . . . . . . . . . . . 39
Cinnamon Glaze . . . . . . . . . . . . . . . . . . . . . . . . . . . . . . . . . . . 39
Citrus Glaze . . . . . . . . . . . . . . . . . . . . . . . . . . . . . . . . . . . . . . . 40
Creamy Vanilla Glaze . . . . . . . . . . . . . . . . . . . . . . . . . . . . . . . 40
Garlic Butter . . . . . . . . . . . . . . . . . . . . . . . . . . . . . . . . . . . . . . 40
Herb-Cheese Butter . . . . . . . . . . . . . . . . . . . . . . . . . . . . . . . . . 40
Italian Herb Butter . . . . . . . . . . . . . . . . . . . . . . . . . . . . . . . . . 40
Choco-Banana Spread . . . . . . . . . . . . . . . . . . . . . . . . . . . . . . . 41
Ham and Swiss Spread . . . . . . . . . . . . . . . . . . . . . . . . . . . . . . 41
Herb-Cream Cheese Spread . . . . . . . . . . . . . . . . . . . . . . . . . . . 41
Honey-Walnut Spread . . . . . . . . . . . . . . . . . . . . . . . . . . . . . . . 41
Ripe Olive Spread . . . . . . . . . . . . . . . . . . . . . . . . . . . . . . . . . . 41
Recipe Index
Page 43

1-YEAR LIMITED WARRANTY
Sunbeam Products, Inc. (“Sunbeam”) warrants that for a period of ONE year from
the date of purchase, this product will be free from defects in material and
workmanship. Sunbeam, at its option, will repair or replace this product or any
component of the product found to be defective during this warranty period.
Replacement will be made with a new or remanufactured product or component.
If the product is no longer available, replacement may be made with a similar
product of equal or greater value. This is your exclusive warranty.
This warranty is valid for the original retail purchaser from the date of initial
retail purchase and is not transferable. Keep the original sales receipt. Proof of
purchase is required to obtain warranty performance. Sunbeam dealers, service
centers or retail stores selling Sunbeam products do not have the right to alter,
modify or any way change the terms and conditions of this warranty.
This warranty does not cover normal wear of parts or damage resulting from any
of the following: negligent use or misuse of the product, use on improper voltage
or current, use contrary to the operating instructions, disassembly, repair or alteration
by anyone other than Sunbeam or an Authorized Sunbeam Service Center.
Further, the warranty does not cover Acts of God, such as fire, flood, hurricanes
and tornadoes.
Sunbeam shall not be liable for any incidental or consequential damages caused
by the breach of any express or implied warranty. Except to the extent prohibited
by applicable law, any implied warranty of merchantability or fitness for a
particular purpose is limited in duration to the duration of the above warranty.
Some states, provinces or jurisdictions do not allow the exclusion or limitation
of incidental or consequential damages or limitations on how long an implied
warranty lasts, so the above exclusion or limitations may not apply to you.
This warranty gives you specific legal rights and you may have the rights
that vary by state, province and/or jurisdiction.
How to Obtain Warranty Service
Please, DO NOT RETURN THIS PRODUCT TO THE PLACE OF PURCHASE. Take the
product to an authorized Sunbeam service center. You can find the nearest
Authorized Sunbeam Service Center by calling 1 800 458-8407, or by visiting
our website at www.sunbeam.com. If an Authorized Sunbeam Service Center
is not conveniently located, attach a tag to the product that includes your name,
address, daytime telephone number and description of the problem. Include a
copy of the original sales receipt. Carefully package the tagged product with
the sales receipt and send either by UPS or Parcel Post with shipping and
insurance prepaid to the Authorized Sunbeam Service Center address.
4342
Page 44

44 45
¡FELICITACIONES!
Es usted el dueño de una Máquina para Hacer Pan
SUNBEAM
®
.
Por favor sírvase leer cuidadosamente todas las instrucciones en este manual,
antes de que inicie a utilizar este electrodoméstico. Los cuidados y el
mantenimiento adecuado, asegurarán una larga vida útil a este aparato
y una operación libre de complicaciones. Guarde estas instrucciones
y consulte con frecuencia las sugerencias de cuidado y limpieza.
INSTRUCCIONES PARA CABLE ESPECIAL
1. El aparato está equipado con un cable eléctrico corto como medida
de seguridad para reducir el riesgo de tropezar, tirar o enredarse
con un cable más largo.
2.
Puede comprar y usar cables de extensión, si se observan las precauciones
adecuadas al usarlos.
3. Si utiliza un cable de extensión, la capacidad nominal eléctrica del
cable de extensión debe ser al menos de 10 amperios y 120 voltios.
El cable de extensión debe colocarlo de manera que no cuelgue sobre
el borde del mostrador o mesa donde pueda tirarlo un niño o pueda
tropezar con él accidentalmente.
Para reducir el riesgo de descargas eléctricas, este aparato cuenta
con una clavija polarizada (una cuchilla es más ancha que otra).
Como medida de seguridad, esta clavija entra sólo de una manera
en un enchufe polarizado. Si la clavija no encaja en el enchufe
simplemente colóquela al revés. Si aún así no encaja llame a un
electricista calificado. De ninguna manera intente modificar esta
medida de seguridad.
ESTA MÁQUINA PARA HACER PAN
ES SÓLO PARA USO DOMÉSTICO
Page 45

Índice
Felicitaciones . . . . . . . . . . . . . . . . . . . . . . . . . . . . . . . . . . . . . . . . . . . . . . 44
Insrrucciones par Cable Especial . . . . . . . . . . . . . . . . . . . . . . . . . . . . . . . 44
Índice . . . . . . . . . . . . . . . . . . . . . . . . . . . . . . . . . . . . . . . . . . . . . . . . . . . . 45
Precauciones Importantes . . . . . . . . . . . . . . . . . . . . . . . . . . . . . . . . . . . . 46
Comenzando48
Empecemos a Hornear Pan . . . . . . . . . . . . . . . . . . . . . . . . . . . . . . . . . . . 49
Las Funciones da la Máquina para Hacer Pan . . . . . . . . . . . . . . . . . . . . . 53
Función ExpressBake™: Preparando Pan en Menos de 1 Hora . . . . . . . . . 56
Después que Ha Horneado el Pan . . . . . . . . . . . . . . . . . . . . . . . . . . . . . . 59
Para Retrasar el Cronómetro . . . . . . . . . . . . . . . . . . . . . . . . . . . . . . . . . . 60
Consejos y Sugerencias . . . . . . . . . . . . . . . . . . . . . . . . . . . . . . . . . . . . . . 61
Horneando Pan en Regiones de Mayor Altitud . . . . . . . . . . . . . . . . . . . . 63
Cuadro con Equivalencia de Medidas . . . . . . . . . . . . . . . . . . . . . . . . . . . 64
Cómo Cuidar Su Máquina par Hacer Pan . . . . . . . . . . . . . . . . . . . . . . . . 65
Solución de Problemas que Puedan Presentarse . . . . . . . . . . . . . . . . . . . 66
Recetas. . . . . . . . . . . . . . . . . . . . . . . . . . . . . . . . . . . . . . . . . . . . . . . . . . . 69
Básica. . . . . . . . . . . . . . . . . . . . . . . . . . . . . . . . . . . . . . . . . . . . . . 70
Trigo Entero. . . . . . . . . . . . . . . . . . . . . . . . . . . . . . . . . . . . . . . . . 72
Pan Francés . . . . . . . . . . . . . . . . . . . . . . . . . . . . . . . . . . . . . . . . . 73
Pan Dulce. . . . . . . . . . . . . . . . . . . . . . . . . . . . . . . . . . . . . . . . . . . 74
™
Función ExpressBake
Basa . . . . . . . . . . . . . . . . . . . . . . . . . . . . . . . . . . . . . . . . . . . . . . . 77
Jaleas . . . . . . . . . . . . . . . . . . . . . . . . . . . . . . . . . . . . . . . . . . . . . . 80
Glasees. . . . . . . . . . . . . . . . . . . . . . . . . . . . . . . . . . . . . . . . . . . . . 81
Mantequilla y Crema . . . . . . . . . . . . . . . . . . . . . . . . . . . . . . . . . . 82
Índice de la Recetas . . . . . . . . . . . . . . . . . . . . . . . . . . . . . . . . . . . . . . . . . 84
Información de la Garantía . . . . . . . . . . . . . . . . . . . . . . . . . . . . . . . . . . . 85
. . . . . . . . . . . . . . . . . . . . . . . . . . . . . . . . . 75
Page 46

46
PRECAUCIONES IMPORTANTES
Cuando use aparatos eléctricos, para reducir el riesgo de incendio,
descargas eléctricas, y/o lesiones personales, algunas precauciones de
seguridad básicas siempre deben de seguirse, incluyendo las siguientes:
❑
LEA TODAS LAS INSTRUCCIONES, ETIQUETAS EN EL PRODUCTO Y
ADVERTENCIAS ANTES DE UTILIZAR LA MÁQUINA PARA HACER PAN.
❑ No toque las superficies calientes. Siempre utilice guantes de cocina
cuando maneje materiales calientes, y permita que las partes
metálicas se enfríen antes de limpiarlas. Permita que la Máquina para
Hacer Pan se enfríe completamente antes de poner o quitar partes.
❑ Desconéctela de la toma de corriente cuando la Máquina para
Hacer Pan no esté en uso y antes de limpiarla.
❑ Para protegerse contra riesgo de descargas eléctricas, no sumerja el
electrodoméstico o los enchufes en agua o en ningún otro líquido.
❑ Supervisión cercana es necesaria cuando éste o cualquier otro aparato
electrodoméstico sea usado por o cerca de los niños o personas
incapacitadas.
❑ No permita que nada se encuentre sobre el cable eléctrico.
No enchufe el cable en lugares donde se corra el riesgo de que
alguna persona camine o tropiece con él.
❑ No opere este o ningún otro aparato electrodoméstico si el cable o
la clavija están dañados o después de que el aparato ha funcionado
inadecuadamente, se ha caído o tenga algún daño cualquiera que
éste sea. Lleve el aparato a una estación de servicio autorizada para
su revisión, reparación o ajuste mecánico o eléctrico.
❑ No permita que el cable eléctrico cuelgue del borde del mostrador
o de la mesa ni toque superficies calientes. No coloque el aparato
sobre una superficie inestable o que esté cubierta con un mantel.
Page 47

❑ Evite el contacto con las partes en movimiento.
❑ El uso de accesorios o aditamentos no recomendados por el
fabricante pueden causar incendios, descargas eléctricas o lesiones.
❑ No se use en exteriores o para propósitos comerciales.
❑ No coloque el electrodoméstico sobre o cerca de la flama de
una estufa de gas, eléctrica o dentro de un horno caliente.
❑ Para desconectar, presione el botón para detener “STOP”,
tome en enchufe y jálelo, sacándolo de la toma de corriente.
Nunca jale del cable.
❑ Uso de cables de extensión: el aparato está equipado con un cable
eléctrico corto como medida de seguridad para reducir el riesgo de
tropezar, tirar o enredarse con un cable más largo. Los cables de
extensión están disponibles en ferreterías y pueden usarse siempre
que tenga cuidado. El cable de extensión debe colocarlo de manera
que no cuelgue sobre el borde del mostrador o mesa donde pueda
tirarlo un niño o pueda tropezar con él accidentalmente. Si el aparato
es del tipo que tiene una conexión a tierra, el cable de extensión
debe ser del tipo que tiene 3 alambres.
❑ Potencia Eléctrica: Si el circuito eléctrico está sobrecargado con otros
aparatos, su Máquina para Hacer Pan no funcionará adecuadamente.
La Máquina para Hacer Pan debe ponerse en funcionamiento en un
circuito eléctrico por separado, donde no haya otros aparatos conectados.
GUARDE ESTAS INSTRUCCIONES
47
Page 48

Comenzando
11
11
Coloque la Máquina para Hacer Pan
sobre un mostrador donde tenga
al alcance una toma de corriente
eléctrica. NO lo enchufe todavía.
Más a delante se le indicará la
manera en que debe hacerlo.
Verifique que pueda abrir la tapa
de la Máquina para Hacer Pan,
sin golpear los gabinetes superiores
de la cocina.
22
22
Abra la tapa y saque el recipiente para
hornear. Para hacer esto, simplemente
tome el asa del recipiente y jale hacia
arriba verticalmente. Para lavarlo,
utilice un jabón suave, no abrasivo.
Lave el recipiente, enjuague y séquelo
completamente.
33
33
Coloque la cuchilla amasadora dentro
del recipiente para hornear, tal como
se muestra. Usted encontrará la
cuchilla amasadora dentro de una
envoltura pequeña de plástico,
pegada al cable eléctrico.
44
44
Coloque el recipiente al lado.
Todavía no lo coloque dentro
de la Máquina para Hacer Pan.
¡Está listo para comenzar!
¡Usted es listo al comenzar!
1B
a
s
i
c
2W
h
o
l
e
W
h
e
a
t
3F
r
e
n
c
h
4S
w
e
e
t
5E
x
p
r
e
s
s
B
a
k
e
™
1
.
0
l
b
.
1
.
5
l
b
.
6
Q
u
i
c
k
7
D
o
u
g
h
8
B
a
g
e
l
D
o
u
g
h
9
E
u
r
o
p
e
a
n
1
0
J
a
m
1
1
B
a
k
e
M
e
n
u
T
i
m
e
r
C
ru
s
t
C
o
lo
r
S
ta
r
t
S
to
p
L
o
a
f
L
i
g
h
t
M
e
d
i
u
m
D
a
r
k
Page 49

Empecemos a Hornear Pan
La manera más simple de aprender a hornear pan es seguir la receta
básica. La siguiente receta es fácil y el panes delicioso.
Antes de Comenzar:
• Verifique que va a utilizar ingredientes frescos.
• Revise que tenga el siguiente equipo de medición:
— Taza para medir ingredientes líquidos
— Tazas para medir ingredientes secos
— Cucharas medidoras
• Usted necesitará los siguientes ingredientes:
—Agua
— Sal
— Mantequilla o margarina
La harina para preparar pan está específicamente
formulada y es la mejor para usar en máquinas
eléctricas para hacer pan.
— “Leche descremada en polvo”
— Azúcar
—
Levadura activa para pan, para usar en máquina para preparar pan
Medición
El secreto más importante para preparara pan es: “Medidas exactas.”
Esta es la clave para hornear pan y obtener excelentes resultados.
“Medidas exactas.”
Mida los ingredientes líquidos ÚNICAMENTE con tazas medidoras que
tengan las tazas/onzas marcadas claramente en los lados. Después de
llenar la taza medidora, colóquela sobre
una superficie plana y observe el nivel para
verificar que la cantidad de líquido es
exacta. Después, revise una vez más.
Mida los ingredientes secos, usando una
cuchara para colocarlos dentro de la taza
medidora, después “nivele” la medida con la parte
posterior de un cuchillo o espátula para verificar
que la medida es exacta. Otra sugerencia que
puede ayudarle es, el nunca usar la taza medidora
para extraer los ingredientes del contenedor
(por ejemplo la harina). Al sacar los ingredientes
del contenedor con la taza medidora, puede
agregar hasta una cucharada de más. Llene
la taza medidora con una cuchara antes
de nivelar el contenido.
Harina
4948
Page 50

50 51
1
taza + 2 Cucharadas de agua
(75°- 85°F ó 24°- 30°C)
1 Cucharada de mantequilla
o margarina, suave
2 Cucharadas de azúcar
1 Cucharada de leche
descremada en polvo
1-1/2 cucharadita de sal
3 tazas de harina para
preparar pan
2-1/2 cucharaditas de
levadura para preparar
pan en máquina
Pan Blanco Estilo Casero
Pieza de Pan de 1.5 lb.
El SEGUNDO secreto más importante para preparar pan es:
Añada los ingredientes en el recipiente para preparar pan, en el orden
exacto en el que se indican en la receta. Esto significa:
— PRIMERO, los ingredientes líquidos
— SEGUNDO, los ingredientes secos
— POR ÚLTIMO, la levadura
Asegúrese también de que los ingredientes estén a temperatura ambiente,
a menos que la receta indique lo contrario (es decir a 75°- 85°F ó 24°- 30°C).
Las temperaturas demasiado altas o demasiado bajas pueden afectar la
forma en la que el pan se eleva y se hornea.
Por último, se recomienda comenzar con ingredientes frescos
(especialmente la harina y la lavadura).
Ahora, probemos una receta simple (pero deliciosa).
11
11
Coloque la cuchilla amasadora dentro del recipiente para pan.
22
22
Coloque los ingredientes dentro del recipiente para pan en
el siguiente orden: agua, mantequilla o margarina, azúcar,
leche en polvo, sal y harina.
33
33
Con el dedo, haga un pequeño orificio en
un lado de la harina. Añada la levadura
dentro del orificio, verifique que no entre
en contacto con los ingredientes líquidos.
44
44
Inserte cuidadosamente el recipiente para hornear
el pan dentro del aparato y cierre lentamente la tapa.
55
55
Conecte el cable eléctrico en una toma de corriente.
Page 51

Presione el botón de Menú hasta que el programa básico “Basic”
66
66
sea seleccionado.
Presione el botón de color de la corteza “Crust Color” para
77
77
seleccionar el nivel de dorado deseado.
Dependiendo del color de la corteza que usted seleccione,
la pantalla indicará los siguiente:
Claro:
Presione el botón de color de la corteza “Crust Color” hasta
que aparezca una “P” (medio) en la ventana de la pantalla.
Presione el botón de tamaño de pieza de pan “Loaf” para
88
88
seleccionar el tamaño del pan que va a preparar (1 ó 1.5 libras).
Presione el botón de inicio “Start”.
99
99
Deje que el ciclo de horneado se complete, presione el botón
00
111100
111111
☞
111122
111133
111144
detener “Stop”.
Abra la tapa, póngase guantes protectores, tome el asa del
11
recipiente para preparar pan y jale el recipiente suavemente
hacia arriba fuera de la máquina.
C
UIDADO
Desconecte la máquina para hacer pan y deje que el pan
22
se enfríe antes de sacarlo del recipiente donde fue horneado.
Después que el aparato y el pan se hayan enfriado
33
Utilice una espátula para aflojar suavemente los lados del pan
44
del recipiente.
L
:
¡La máquina y el pan pueden estar muy calientes!
Siempre manéjelos con cuidado.
Medio:
P
Oscuro:
H
111155
111166
❃
metálica o sobre una superficie limpia y agítelo suavemente hasta
que el pan caiga sobre la rejilla.
Voltee el pan hacia arriba y enfríe durante 20 minutos antes
66
de rebanarlo.
I
MPORTANTE
pan no podrá operar hasta que se haya enfriado completamente.
:
Después del ciclo de horneado, la máquina para hacer
Voltee el recipiente hacia abajo colocándolo sobre una rejilla
55
Page 52

❃
I
MPORTANTE
:
Use el botón de cronómetro “Timer” para retrasar el
horneado de su pan. Usted puede retrasar el inicio del horneado
hasta por 13 horas.
❃
I
MPORTANTE
:
Presione el botón de iniciar/detener “Start/Stop” y su
máquina iniciará a preparar el pan. Si usted ha seleccionado el retraso
del horneado, iniciará la cuenta regresiva del tiempo remanente,
en decrementos de un minuto para iniciar el horneado.
❃
I
MPORTANTE
:
La máquina para hacer pan tiene la función automática
“keep warm”, esta función mantendrá su pan caliente hasta por una
hora. Para apagar el calentador, presione el botón de iniciar/detener
“Start/Stop”, y manténgalo presionado hasta que escuche un beep.
❃
I
MPORTANTE
:
NO presione el botón de iniciar/detener “Start/Stop”
mientras que la máquina para preparar pan se encuentre en
funcionamiento. Esto causará que el aparato se apague y necesitará
comenzar de nuevo.
❃
I
MPORTANTE
:
Usted no debe levantar la tapa durante la preparación
de esta receta. (Para otras recetas que pruebe más adelante, usted necesitará
levantar la tapa para agregar nueces, frutas u otros ingredientes.)
☞
C
UIDADO
:
El aparato está muy caliente. No toque la máquina mientras
se encuentre en operación. NO levante la tapa mientras
la máquina para hacer pan esté horneando pan.
Etapas de la Máquina para Hacer Pan
Es interesante ver cómo se prepara su pan a través de la ventana de
visibilidad. Para el ciclo básico, usted puede esperar que lo siguiente suceda
a medida que el cronómetro lleva la cuenta regresiva hasta el cero.
A 3:00 Los ingredientes se amasan por primera vez. (10 minutos)
A 2:50 La masa comienza a elevarse. (20 minutos)
A 2:30 Se amasa por segunda vez. (15 minutos)
A 2:15 La masa continua elevándose. (20 minutos)
A 1:55 La masa se “comprime”. (30 segundos)
A 1:55 La masa se eleva por última vez. (55 minutos)
A 1:00 El pan se empieza a hornear. (50 minutos)
A 0:00 El pan está listo.
☞
C
UIDADO
:
No coloque su rostro cerca de la tapa cuando abra la
máquina. Puede salir vapor muy caliente y quemarlo.
❃
I
MPORTANTE
:
La máquina para hacer pan tiene la función automática
“keep warm” para mantener caliente su pan hasta por una hora.
Recomendamos sacar el pan de la máquina inmediatamente para
conservarlo fresco.
1 Basic
2 Whole Wheat
3 French
4 Sweet
5 ExpressBake™
1.0 lb.
1.5 lb.
6 Quick
7 Dough
8 Bagel Dough
9 European
10 Jam
11 Bake
Menu
Timer
Crust
Color
Start
Stop
Loaf
Light Medium Dark
Page 53

1 Basic
2 Whole Wheat
3 French
4 Sweet
5 ExpressBake™
1.0 lb.
1.5 lb.
6 Quick
7 Dough
8 Bagel Dough
9 European
10 Jam
11 Bake
Menu
Timer
Crust
Color
Start
Stop
Loaf
Light Medium Dark
Las Funciones de la Máquina para Hacer Pan
1 Menú
Presione este botón para seleccionar el tipo de pan que desea preparar.
Cada vez que presione el botón, escuchara un beep. La pantalla muestra
un número para cada tipo de pan. Por ejemplo, Básico es 1, Trigo Entero
es 2, Francés es 3, etc.
2 Botón del Color de la Corteza
El botón del color de la corteza le permite seleccionar qué tan dorado o
claro desea su pan. Cada vez que usted presione el botón del color de la
corteza, la pantalla cambiará de la siguiente forma:
L-Claro = L
P-Medio = P
Además, la pantalla mostrará el número del ciclo antes del color
seleccionado. Por ejemplo, el pan Básico con una corteza media se indica,
“1P.” O el pan Francés con una corteza oscura se indica, “3H.”
H-Oscuro = H
5352
Page 54

54
3 Pantalla
La pantalla muestra lo siguiente:
• El número del ciclo de pan seleccionado
• El color de la corteza seleccionado
• El tiempo remanente mientras su pan se está amasando y horneando
Una vez que presione el botón de iniciar/detener “Start/Stop” para comenzar,
la pantalla mostrará el tiempo que queda hasta que su pan se hornee.
Cuando la pantalla indique “0:00”, el pan está listo.
4 Botones para el Cronómetro
Presione estos botones para retrasar el tiempo en el que su máquina
comenzará la operación. Por ejemplo, usted puede programar la
preparación de su pan para que esté listo para la hora de la cena,
o para que se hornee durante la noche.
5 Botón de Iniciar/Detener
Presione este botón para poner en operación y detener su máquina
o para iniciar la cuenta regresiva al retrasar el horneado del pan.
❃
I
MPORTANTE
:
No presione el botón para detener “Stop” cuando
prepare pan, ya que esto causará que el ciclo entero se cancele
y usted deberá comenzar desde el principio.
Funciones de la Máquina para Hacer Pan
Su máquina para hacer pan puede hornear casi cualquier tipo de pan. Las
recetas que proporcionamos indican claramente cuál función debe utilizar.
1 Básico (Tiempo: 3 horas)
2 Trigo Entero ( Tiempo: 4 horas, 10 minutos)
3 Francés (Tiempo: 3 horas, 50 minutos)
4 Dulce(Tiempo: 2 horas, 50 minutos)
5 Expreso ExpressBake™ (Tiempo: 58 minutos)
6 Rápido (Tiempo: 1 hora, 43 minutos)
7 Masa (Tiempo: 1 hora, 30 minutos)
8 Masa para Bagel (Tiempo: 1 hora, 50 minutos)
9 Europeo (Tiempo: 3 horas, 30 minutos)
10 Jalea (Tiempo: 1 hora, 5 minutos)
11 Hornear (Tiempo: 1 hora)
Page 55

1Básico
Esta función es probablemente la que se usa más que cualquiera de las
otras, ya que le ofrece los mejores resultados para casi cualquier receta.
2 Trigo Entero
La función de trigo entero le ofrece un tiempo más largo de elevación
para masas que contengan más del 50% de harina de trigo entero.
3 Francés
Utilice esta función para preparar panes franceses. El pan Francés se toma
más tiempo para amasarse, elevarse, y hornearse, obteniendo una corteza
más robusta.
4 Dulce
La función para hacer pan dulce es para hornear panes con cantidades
elevadas de azúcar, grasas y proteínas, las cuales tienden a incrementar
el dorado del pan.
5 Expreso ExpressBake
Utilice esta función para hornear panes en menos de 1 hora;
esta función solamente horneará piezas de pan de 1.5 libras.
™
(58 Minutos)
6Rápido
Utilice esta función para hornear rápidamente recetas que contengan
polvo para hornear o bicarbonato de sodio en lugar de levadura para
hacer que el pan o el pastel se esponje; para esta función, use solamente
recetas especialmente diseñadas.
7 Masa
Esta función le permite preparar masa para roles, panes especiales, pizza,
etc., los cuales puede usted darles forma a mano, permitiendo así que
se eleven y después hornear en un horno convencional.
8 Masa para Bagel
Esta función solamente preparará masa para bagels y no horneará el pan.
9 Europeo
Esta función prepara panes estilo Europeo como Pan Negro, Pumpernickel, etc.
10 Jalea
Esta función prepara jalea de fruta fresca.
11 Hornear
Para hornear masa que haya preparado previamente sin utilizar las
funciones anteriores.
55
Page 56

5656
Función ExpressBake™:
Preparando Pan en Menos de 1 Hora
Su máquina para hacer pan SUNBEAM®,
puede hornear un excelente pan en menos
de 1 hora. A esta función se le llama la
función “ExpressBake™”. Las piezas de pan
preparadas con la función ExpressBake
™
son un poco diferentes de aquellas horneadas
en una función que no sea ExpressBake™.
Función ExpressBake™:
• Esta función puede preparar pan en 58 minutos. El pan es un poco
más denso en textura al usar esta función.
•
La función ExpressBake™solamente prepara piezas de pan de 1.5 libras.
Existen varias cosas que debe saber acerca de la función ExpressBake
™
que son diferentes a las otras funciones.
➢
Los panes preparados con la función ExpressBake™tienen una corteza
más oscura y gruesa, que las de otros tipos de pan. Algunas veces
puede haber grietas en la parte superior de la corteza. Esto se debe
a que el horneado se hace a temperaturas más altas. También estos
panes tienden a ser más cortos y gruesos.
➢
Usted NO PUEDE usar la función para Retrasar el Horneado
“Delay Timer” con la función ExpressBake™. Esto enfriaría los
ingredientes líquidos y afectaría la forma en la que el pan se eleva.
➢
Usted NO PUEDE usar los botones para seleccionar el dorado
“Crust Color” junto con la función ExpressBake™.
➢
NO abra la tapa del aparato mientras prepara panes con la función
ExpressBake™.
➢
Si el pan es dificil de quitar del recipiente, déjela se sientan por
cerca de 5 minutos para refrescarse. Sacudara suavemente el pan
fuera del recipiente y espere 15 minutos antes de rebanar.
➢
Si es difícil sacar la pieza de pan del recipiente para hornear, deje
enfriar el aparato durante 20 minutos, dejando la tapa abierta.
➢
USTED PUEDE utilizar mezclas preparadas para máquina para hacer pan,
y hornear el pan con la función ExpressBake™, pero los resultados
pueden no ser tan buenos como cuando utiliza las recetas que se
ofrecen en este instructivo.
Harina
para
Preparar
Pan
115°F
–
125°F
(46°–52°C)
1 Basic
2 Whole Wheat
3 French
4 Sweet
5ExpressBake™
6 Quick
7 Dough
8 Bagel Dough
9 European
10 Jam
11 Bake
Menu
Page 57

Los y Sugerencias para la Función ExpressBake™
Harina
para
Preparar
Pan
115°F
–
125°F
(46°–52°C)
1 Basic
2 Whole Wheat
3 French
4 Sweet
5ExpressBake™
6 Quick
7 Dough
8 Bagel Dough
9 European
10 Jam
11 Bake
Menu
Levadura
Siempre utilice una levadura de acción rápida.
NO use la levadura seca activa con la función
de ExpressBake™, ya que las piezas de pan
serán mucho más cortas cuando se horneen.
Líquidos
Siempre use agua caliente a una temperatura de entre 115°-125°F/
46°-52°C. Usted debe utilizar un termómetro para cocinar y medir
la temperatura; el agua a una temperatura más alta puede matar
la levadura, mientras que el agua fría no la activará.
Sal
Como regla, debe usar MENOS sal para preparar pan con la función
ExpressBake™. Una cantidad menor de sal le resultará en una pieza de
pan más grande. Verifique que siga las sugerencias de la receta en este
instructivo para que así obtenga mejores resultados.
Otros Ingredientes
Verifique que todos los ingredientes (como harina, azúcar, leche en polvo,
mantequilla, etc.) se encuentren a temperatura ambiente.
Siemp
re use harina para preparar pan si va a usar la función ExpressBake™.
Algunas Cosas que Necesita Comprar
Para las recetas en las que se utiliza la
➢
función ExpressBake™, usted debe usar
solamente harina para “Máquina para
Hacer Pan”.
Para las recetas en las que se utiliza la
➢
función ExpressBake™, usted necesitará
un termómetro para cocinar y medir la
temperatura del agua que usará en sus
recetas. Usted debe usar agua caliente
únicamente (que se encuentre entre
115°F y 125°F ó 46° y 52°C).
Aunque la preparación de pan utilizando la
función ExpressBake™es un poco diferente, los
resultados y la conveniencia bien valen la pena.
La siguiente receta es excelente para que la
pruebe con su primera pieza de pan preparada
con ExpressBake™.
57
Page 58
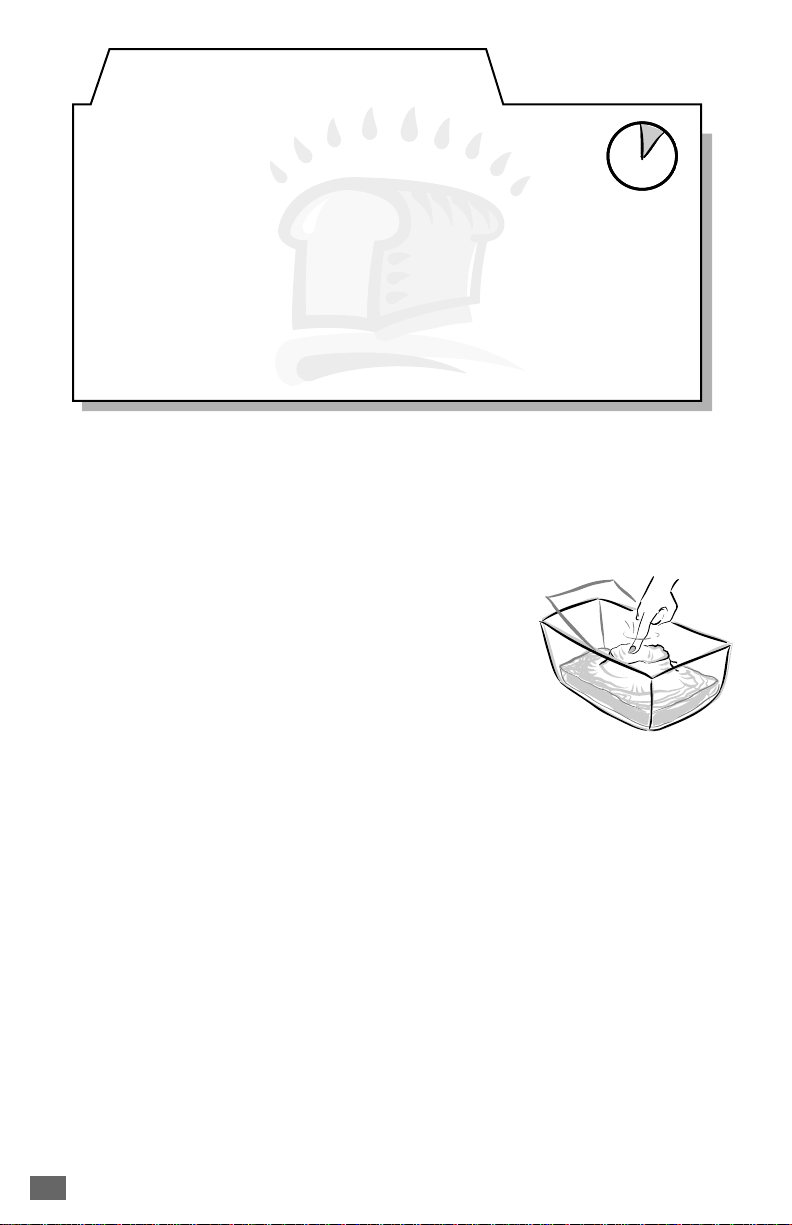
58
11
11
Coloque la cuchilla amasadora dentro del recipiente para pan.
22
22
Coloque los ingredientes dentro del recipiente para pan en el
siguiente orden: agua, aceite, azúcar, sal y harina.
33
33
Con el dedo, haga un pequeño orificio en
un lado de la harina. Añada la levadura
dentro del orificio, verifique que no entre
en contacto con los ingredientes líquidos.
44
44
Inserte cuidadosamente el recipiente para hornear el pan dentro del
aparato y cierre lentamente la tapa.
55
55
Conecte el cable eléctrico en una toma de corriente.
66
66
Presione el botón de Menú hasta que el programa “ExpressBake™”
sea seleccionado.
77
77
Presione el botón de inicio “Start”.
88
88
Deje que el ciclo de horneado se complete, presione el botón
detener “Stop”.
1 taza y 2 Cucharadas
(total 9 onzas)
de agua caliente (115°–125°F
or 46°–52°F)
2 Cucharadas de aceite vegetal
o de canola
2 Cucharadas de azúcar
1 cucharadita de sal
3 tazas de harina para preparar
pan en máquina
5 cucharaditas de levadura para
preparar pan en máquina
ExpressBake
™
Pan Blanco Tradicional
Pieza de Pan de 1.5 lb.
Page 59

Abra la tapa, póngase guantes protectores, tome el asa del recipiente
99
99
para preparar pan y jale el recipiente suavemente hacia arriba
fuera de la máquina.
☞
111100
111111
111122
111133
☞
❃
CUIDADO: ¡La máquina y el pan pueden estar muy calientes!
Siempre manéjelos con cuidado.
Desconecte la máquina para hacer pan y deje que el pan
00
se enfríe antes de sacarlo del recipiente para pan.
Si es necesario, utilice una espátula antiadherente para aflojar
11
suavemente los lados del pan del recipiente.
Voltee el recipiente hacia abajo colocándolo sobre una rejilla
22
metálica o sobre una superficie limpia y agítelo suavemente
hasta que el pan caiga sobre la rejilla.
Voltee el pan con el lado superior hacia arriba y enfríe
33
durante 20 minutos antes de rebanarlo.
UIDADO:
C
IMPORTANTE:
mientras que la máquina para preparar pan se encuentre en
funcionamiento. Esto causará que el aparato se apague
y necesitará comenzar de nuevo.
NO levante la tapa del aparato cuando utilice la
función ExpressBake™. Si lo hace puede afectar la
elevación de la masa. La máquina para hacer pan está
muy caliente, desde el principio del ciclo. No mueva o
toque la máquina mientras se encuentra en operación.
NO presione el botón de iniciar/detener “Start/Stop”
Después que Ha Horneado el Pan con la
Función ExpressBake
☞
❃
CUIDADO: No coloque su rostro cerca de la tapa cuando abra el
aparato. Puede salir vapor muy caliente y quemarlo.
IMPORTANTE:
“keep warm”, esta función mantendrá su pan caliente hasta por una
hora. Sin embargo, recomendamos sacar el pan de la máquina
inmediatamente para conservarlo fresco.
La máquina para hacer pan tiene la función automática
™
59
Page 60

60
Para Retrasar el Cronómetro
Usted puede retrasar el tiempo en el que el aparato comienza a operar,
para tener pan fresco cuando usted despierta en las mañanas o cuando
regresa del trabajo.
Nosotros recomendamos que antes de seleccionar la función para retrasar
el horneado “Delay Timer”, usted pruebe algunas recetas. Utilice recetas
que le hayan dado buenos resultados anteriormente.
❃
I
MPORTANTE
:
Usted no puede usar la función “Delay Timer” junto con
la función ExpressBake™ (preparación de pan en menos de 1 hora).
Antes de usar la función para retrasar el horneado “Delay Timer”:
11
11
Añada todos los ingredientes de la receta dentro del recipiente
para hornear pan.
22
22
Seleccione el tipo de pan que va a preparar (Francés, Dulce, etc.).
33
33
Seleccione el color de la corteza del pan.
☞
CUIDADO: No use ingredientes que puedan deteriorarse, como
huevos o leche.
Para Usar la Función para Retrasar el Hor neado “Delay Timer”:
11
11
Calcule cuántas horas y minutos hay entre este momento y cuando
desee tener su pan recién horneado. Por ejemplo, si son las 8:00 a.m.
y usted desea que el pan esté listo para la cena a las 6:00 p.m.,
quiere decir que deben transcurrir 10 horas.
22
22
Utilice el botón “Timer Up” para avanzar el tiempo en incrementos
de 10 minutos. En nuestro ejemplo, usted hará esto hasta que el
cronómetro indique “10:00.” Si es necesario, use el botón “Timer
Down” para disminuir el tiempo. (Para avanzar el tiempo
rápidamente, simplemente presione y mantenga presionado los
botones “Timer Up/Down”.)
❃
I
MPORTANTE
:
Si usted comete un error o desea comenzar de nuevo,
presione y mantenga presionado el botón para iniciar/detener “Start/Stop”,
hasta que escuche un beep. La pantalla mostrará la función original y el
tiempo que dura el ciclo. La función para retrasar el horneado “Delay
Timer” es cancelada y usted puede iniciar nuevamente.
33
33
Cuando esté programada la función para retrasar el horneado
“Delay Timer”, verifique que haya presionado el botón para iniciar/
detener “Start/Stop”. Los dos puntos (:) aparecerán intermitentemente
y su pan estará listo para cuando usted lo planeó.
❃
I
MPORTANTE
:
Cuando utilice la función para retrasar el horneado
“Delay Timer”, durante las temporadas de clima caluroso, usted debe
reducir el líquido en su receta en 1 ó 2 cucharadas. Esto es para
prevenir que la masa se eleve demasiado. Usted también debe reducir
la cantidad de sal en 1/8 ó 1/4 de cucharadita e intente disminuir la
cantidad de azúcar que use en 1/4 de cucharadita a la vez.
Page 61

Consejos y Sugerencias
Los expertos de la cocina consideran que el hacer pan es un arte y una
ciencia. Tenga en mente que algunas recetas pueden requerir un poco de
experimentación antes de que resulten exactamente como usted desea.
No se rinda. Es más, existen algunos consejos que aseguran casi siempre
un pan de excelente calidad.
Use Medidas Exactas
Ya hemos mencionado qué importante es medir
los ingredientes con exactitud cuando hornea el
pan, pero debemos repetirlo. Nivele todos los
ingredientes secos y verifique que todos los
ingredientes líquidos sean medidos en tazas
medidoras hechas de vidrio, con las medidas
claramente marcadas en los lados.
Utilice Ingredientes Frescos
Siempre debe usar ingredientes frescos. Esto porque:
Harina. Si usted ha almacenado la harina durante un periodo largo
➢
de tiempo, ésta se pudo haber mojado al absorber humedad,
o secado, dependiendo del área del país donde usted vive.
Recomendamos que use harina fresca para hacer pan.
Levadura. La levadura fresca es probablemente el ingrediente más
➢
importante al hornear pan. Si la levadura no está fresca, su pan no
se elevará. Es mejor comprar levadura nueva que arriesgarse a usar
levadura que ha estado almacenada durante un largo tiempo.
Usted puede probar la frescura de su levadura. Simplemente llene una
taza con agua tibia, después agregue 2 cucharaditas de azúcar y revuelva.
Espolvoree un cucharadita de levadura en la superficie del agua y espere.
Después de 15 minutos, la levadura formará espuma y emitirá un olor
característico. Si no sucede nada de esto, la levadura ya está vieja y debe
tirarse a la basura.
Añada los ingredientes en el orden que se indican en la receta.
Lea todas las recetas de inicio a fin y recuerde:
— PRIMERO, los ingredientes líquidos
— SEGUNDO, los ingredientes secos
— POR ÚLTIMO, la levadura
61
Page 62
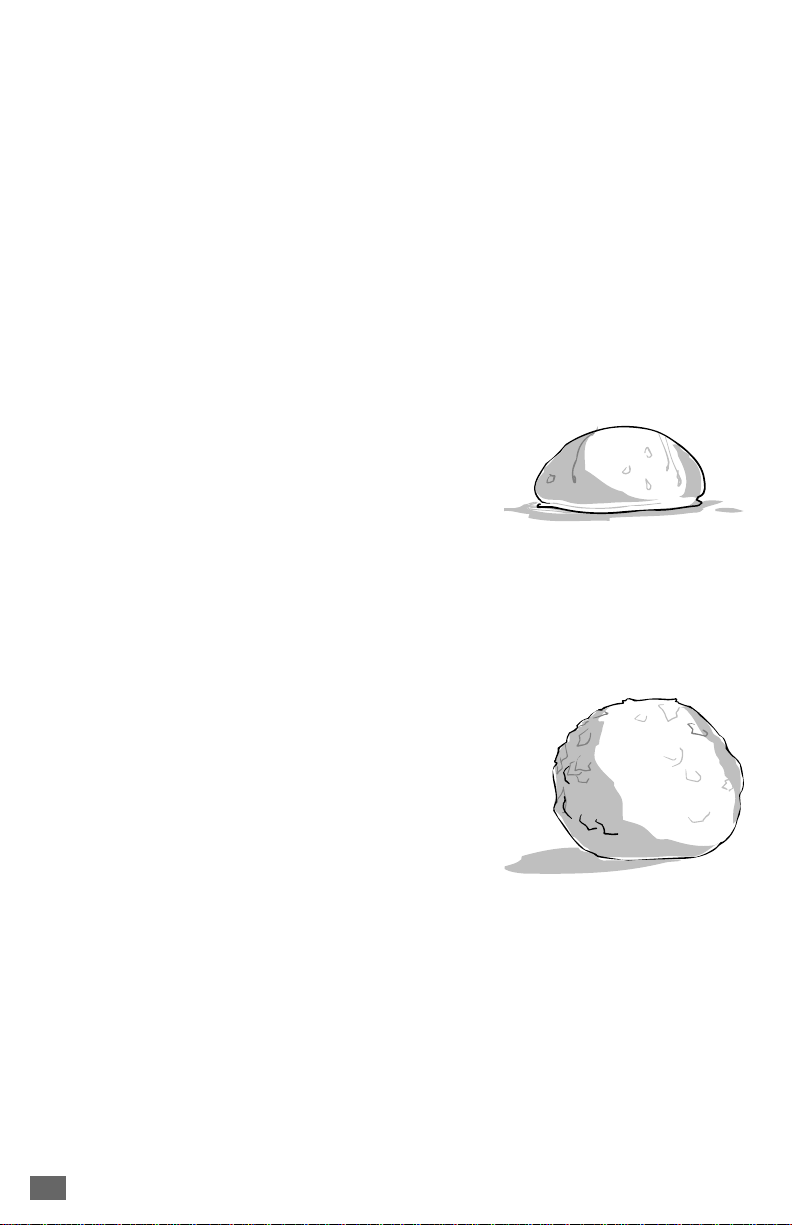
Revise la Bola de Masa
Este es el secreto de la gente que sabe de hacer pan. Cuando amasan
manualmente la mezcla, ellos ajustan la consistencia de la masa al añadir
un poco de harina o agua hasta que la bola de masa tenga la consistencia
correcta.
Aunque la máquina para hacer pan lo hace por usted, este secreto
es verdadero. Aquí está lo que debe hacer.
Si la Masa Está Demasiado Húmeda
Durante el segundo ciclo de amasado, revise
la consistencia de la masa. Si ésta tiene una
consistencia húmeda o pegajosa, como masa
para hot cakes, espolvoree una cucharada
de harina a la vez, hasta que la masa tenga
una consistencia suave, redonda y seca,
y ruede correctamente dentro del recipiente.
Espolvoree un poco de más harina si lo necesita.
Si la Masa Está Demasiado Seca
Si la masa tiene consistencia de hojuelas,
o escucha que el aparato comienza a hacer un
sonido de golpeteo, la masa está demasiado
seca. Para corregir este problema, simplemente
rocíe una cucharadita de agua a la vez, hasta
que la masa tenga una consistencia suave,
redonda y seca, y ruede correctamente dentro
del recipiente. Tenga cuidado de no agregar
demasiada agua.
Page 63

Horneando Pan en Regiones de Mayor Altitud
Si usted vive en una región con una altura mayor de 3000 pies, usted
probablemente ya sabe cómo ajustar otras recetas como las de pasteles
o panqués. Las altitudes elevadas tienden a:
Hacer que la masa se eleve más rápidamente
➢
Hacer la harina más seca
➢
Para compensar lo anterior al hornear en estas regiones, recomendamos
lo siguiente:
Si la Masa Está Demasiado Seca
Incremente la cantidad de agua en la receta, algunas veces tanto
➢
como de 2 a 4 Cucharadas por taza.
Si el Pan Se Eleva Demasiado
Reduzca la cantidad de levadura. Para cada cucharadita de levadura,
➢
reduzca la levadura en 1/8 a 1/4 de cucharadita.
Reduzca la cantidad de azúcar. Para cada cucharada de azúcar,
➢
reduzca la cantidad en 1 a 2 cucharaditas.
6362
Page 64

El siguiente cuadro le ayudará a convertir las medidas usadas
en las recetas.
Por ejemplo: 1/2 Cucharada = 1-1/2 cucharadita
Onza(s) Fluida(s) Taza Cucharada(s) Cucharaditas
8=1=16=48
7 = 7/8 = 14 = 42
6 = 3/4 = 12 = 36
5 = 5/8 = 10 = 30
4 = 1/2 = 8 = 24
3 = 3/8 = 6 = 18
2 = 1/4 = 4 = 12
1 = 1/8 = 2 = 6
1=3
1/2 = 1-1/2
Cuadro con Equivalencia de Medidas
Page 65

Cómo Cuidar Su Máquina para Hacer Pan
C
☞
Use solamente un limpiador suave y no abrasivo para limpiar el aparato.
Limpieza General
1
2
Limpieza del Recipiente para Pan y de la Cuchilla Amasadora
1
2
Ya que esto daña el acabado del recipiente o de las otras partes.
UIDADO
Limpie todas las migas y limpie las con un paño ligeramente húmedo.
NO doble elemento calefactor, localizado en el interior del aparato.
Limpie el recipiente para hornear y la cuchilla amasadora con un paño
húmedo y séquelos completamente.
NO lave el recipiente para hornear o cualquier otra parte del aparato
en la lavadora de platos.
:
No coloque su Máquina para
Hacer Pan en el agua o dentro de
la lavadora de platos. No utilice
cepillos, limpiadores o químicos
abrasivos para limpiar su
electrodoméstico, ya que pueden
dañar el aparato.
Cuidados para su Máquina para Hacer Pan
Mantenga su electrodoméstico limpio en todo momento.
1
☞
2
3
Almacenando su Máquina para Hacer Pan
1
2
3
4
CUIDADO: No use utensilios metálicos con su Máquina para Hacer
Pan. Esto puede dañar el acabado antiadherente del
recipiente o de las otras partes.
No se preocupe si el color del recipiente para hornear pan cambia
con el paso del tiempo. El cambio de color es resultado del vapor
y de humedad y no afecta el desempeño del aparato.
Si usted tiene problemas para remover la cuchilla amasadora,
añada agua caliente al recipiente, déjelo remojar durante 10
a 15 minutos y esto aflojará la cuchilla.
Revise que el aparato esté limpio y seco antes de almacenarlo.
Almacene el aparato con la tapa cerrada.
No coloque objetos pesados sobre la tapa.
Quite la cuchilla amasadora y colóquela en el interior del recipiente.
6564
Page 66

Solución de Problemas que Puedan Presentarse
Si usted tiene dificultades cuando ponga en operación su Máquina para
Hacer Pan, revise la información en esta sección de solución de problemas.
Si usted no pueden encontrar una solución, por favor llame a nuestro
Departamento de Relaciones con el Cliente al 1-800-458-8407.
Si sufre una interrupción en la electricidad:
Si ocurre una interrupción en la electricidad mientras usted está utilizando
su máquina para hacer pan y esta interrupción no dura más de 30 minutos,
su electrodoméstico continuará su ciclo cuando la energía sea restablecida.
Solución de Problemas
Si su máquina para preparar pan no funciona como usted considera que
debe hacerlo, revise el cuadro que a continuación se presenta, para
encontrar posibles soluciones.
Solución de Problemas con el Horneado
Si el pan no resulta como usted lo esperaba o presenta algunas
características que usted no desea, consulte el cuadro a continuación para
encontrar posibles soluciones.
Se han derramado ingredientes
fuera del recipiente para hornear
pan y dentro de la máquina en sí.
Detenga la operación del aparato
y permita que se enfrié. Límpielo
antes de utilizarlo nuevamente.
Verifique que el recipiente para
hornear y la cuchilla amasadora
estén instalados correctamente
en la máquina.
Huele a humo o ve que sale humo
de la parte trasera del aparato.
La masa no se mezcla bien.
P
ROBLEMAS CON LA MÁQUINA SOLUCIÓNES
Page 67

PROBLEMAS CON EL HORNEADO SOLUCIÓNES
El pan tiene harina en la parte superior.
El pan está demasiado dorado.
El pan no está demasiado dorado.
Éste es generalmente el resultado de
usar demasiada harina y no suficiente
agua. Use menos harina (una cuta.
menos a la vez), o use más agua
(1/4 de cuta. más a la vez).
Éste es el resultado de añadir
demasiada azúcar a la receta.
Utilice menos azúcar (1 Cu. a la vez).
Usted también puede seleccionar
un dorado menos oscuro.
Éste es el resultado de levantar
demasiadas veces la tapa del aparato
o de dejar la tapa abierta mientras
el pan se está horneando. Verifique
que la tapa esté cerrada mientras el
aparato se encuentra en operación.
Usted también puede seleccionar
un dorado menos oscuro.
ROBLEMA CON EL
P
Los lados del pan se doblan y la parte
inferior del pan está húmeda.
HORNEADO S
OLUCIÓN
Existen varias soluciones posibles.
El pan puede haberse dejado dentro
del recipiente demasiado tiempo
después de que se horneó. Saque el
pan del recipiente más rápidamente
y permita que se enfrié. Utilice más
harina (una cucharadita a la vez),
o menos levadura (1/4 de cucharadita
a la vez), o menos agua o líquidos
(una cucharadita a la vez). Esto puede
también ser el resultado de haber
olvidado agregar sal a la receta.
6766
Page 68

1B
a
s
i
c
2W
h
o
l
e
W
h
e
a
t
3F
r
e
n
c
h
4S
w
e
e
t
5E
x
p
r
e
s
s
B
a
k
e
™
1
.
0
l
b
.
1
.
5
l
b
.
6
Q
u
ic
k
7
D
o
u
g
h
8
B
a
g
e
l
D
o
u
g
h
9
E
u
r
o
p
e
a
n
1
0
J
a
m
1
1
B
a
k
e
Menu
Tim
e
r
Crust
Color
Start
Stop
L
o
a
f
L
i
g
h
t
M
e
d
i
u
m
D
a
r
k
Utilice menos harina (una cuta. a la vez),
o más levadura (1/4 de cuta. a la vez).
Esto también puede ser el resultado
de usar harina que no esté fresca o el
tipo incorrecto de harina en la receta.
Use más harina (una cuta. a la vez),
o menos agua o líquido (una cuta. a
la vez). No levante la tapa demasiadas
veces durante el horneado.
Esto puede también ser el resultado de
haber olvidado agregar sal a la receta.
Utilice menos levadura (1/4 de cuta.
a la vez). Esto puede también ser el
resultado de haber olvidado agregar
sal a la receta o el no poner la cuchilla
amasadora dentro del recipiente
para hornear.
Hay varias soluciones posibles. Utilice
menos harina (una cuta. a la vez),
o más levadura (1/4 de cuta. a la vez),
o menos agua (una cuta. a la vez).
Esto también puede ser el resultado de:
• haber olvidado agregar sal
a la receta
• haber usado harina que no esté
fresca o el tipo incorrecto de harina
en la receta,
• haber usado levadura que
no esté fresca,
• o haber usado agua demasiado
caliente (a excepción de que así
lo haya indicado la receta para
preparar panes con la función
ExpressBake™).
El pan tiene una textura
pesada y espesa.
El pan no se horneó
completamente y
el centro está crudo.
El pan tiene una textura
gruesa.
La masa se elevó demasiado
La masa no se elevó
lo suficiente.
PROBLEMAS SOLUCIÓNES
Page 69

1B
a
s
i
c
2W
h
o
l
e
W
h
e
a
t
3F
r
e
n
c
h
4S
w
e
e
t
5E
x
p
r
e
s
s
B
a
k
e
™
1
.
0
l
b
.
1
.
5
l
b
.
6
Q
u
ic
k
7
D
o
u
g
h
8
B
a
g
e
l
D
o
u
g
h
9
E
u
r
o
p
e
a
n
1
0
J
a
m
1
1
B
a
k
e
Menu
Tim
e
r
Crust
Color
Start
Stop
L
o
a
f
L
i
g
h
t
M
e
d
i
u
m
D
a
r
k
Recetas
6968
Page 70

Harina
Sal
Leche
en
Polvo
Azúcar
Recetas
R
ECETAS PARA LAFUNCIÓN
B
ÁSICA
“B
ASIC
”
Pan Blanco Estilo Casero
I
NGREDIENTES DE PIEZA DE PAN DE 1 LB.PIEZA DE 1.5 LB.
2/3 taza de agua (75°– 85°F ó 24°–30°C) 1 taza de agua + 2 Cu.
2 cuta. de mantequilla o margarina, suave 1 Cu.
1 Cu. de azúcar 2 Cu.
2 cuta. de leche descremada en polvo 1 Cu.
1 cuta. de sal 1-1/2 cuta.
2 tazas de harina para preparar pan 3 tazas
1-1/4 cuta. de levadura para preparar 2-1/2 cuta.
pan en máquina
Page 71

1
Coloque la cuchilla amasadora dentro del recipiente para pan.
2
Coloque los ingredientes dentro del recipiente para pan en el
siguiente orden: agua, mantequilla o margarina, azúcar,
leche en polvo, sal y harina.
3
Con el dedo, haga un pequeño orificio en un lado de la harina.
Añada la levadura dentro del orificio, verifique que no entre
en contacto con los ingredientes líquidos.
4
Inserte cuidadosamente el recipiente para hornear el pan dentro
del aparato y cierre lentamente la tapa.
5
Conecte el cable eléctrico en una toma de corriente.
6
Presione el botón de Menú hasta que el programa básico “Basic”
sea seleccionado.
7
Presione el botón de color de la corteza “Crust Color” para seleccionar
el nivel de dorado deseado.
8
Presione el botón de tamaño de pieza de pan “Loaf” para seleccionar
el tamaño del pan que va a preparar (pieza de 1 ó 1.5 libras).
9
Presione el botón de inicio “Start”.
10
Deje que el ciclo de horneado se complete, presione el botón detener
“Stop”.
11
Abra la tapa, póngase guantes protectores, tome el asa del recipiente
para hornear pan y jale el recipiente suavemente hacia arriba fuera
de la máquina.
C
☞
12
13
14
15
16
❃
Importante:
pan no podrá operar hasta que se haya enfriado completamente.
UIDADO
Desconecte la máquina para hacer pan y deje que el pan se enfríe
antes de sacarlo del recipiente donde fue horneado.
Después que el aparato y el recipiente para hornear pan se hayan
enfriado
Utilice una espátula antiadherente para aflojar suavemente los lados
del pan del recipiente.
Voltee el recipiente hacia abajo colocándolo sobre una rejilla metálica
o sobre una superficie limpia y agítelo suavemente hasta que el pan
caiga sobre la rejilla.
Voltee el pan hacia arriba y enfríe durante 20 minutos antes
de rebanarlo.
:
¡La máquina y el recipiente para hornear pan pueden
estar muy calientes! Siempre manéjelos con cuidado.
➩
Después del ciclo de horneado, la máquina para hacer
7170
Page 72

RECETAS PARA LA FUNCIÓNDE
TRIGO ENTERO “WHOLE WHEAT”
Pan de Trigo Entero
INGREDIENTES DE PIEZA DE PAN DE 1.5 LB.PIEZA DE 1 LB.
1 taza + 2 Cu. de agua (75°–85°F ó 24°–30°C) 1 taza meno 1 Cu. de agua
1 Cu. + 1-1/2 cuta. de mantequilla o margarina, suave 1 Cu.
1/4 taza de azúcar morena, comprimida 2 Cu. + 1-1/2 cdita.
1-1/4 cuta. de sal 1/2 cuta.
3-1/2 tazas de harina de trigo entero 2-1/3 tazas
2-1/4 cuta. de levadura para preparar pan en máquina 1-1/2 cuta.
1
Coloque la cuchilla amasadora dentro del recipiente para pan.
2
Coloque los ingredientes dentro del recipiente para pan en el siguiente
orden: agua, mantequilla o margarina, azúcar, sal y harina.
3
Con el dedo, haga un pequeño orificio en un lado de la harina.
Añada la levadura dentro del orificio, verifique que no entre en contacto
con los ingredientes líquidos.
4
Inserte cuidadosamente el recipiente para hornear el pan dentro
del aparato y cierre lentamente la tapa.
5
Conecte el cable eléctrico en una toma de corriente.
6
Presione el botón de Menú hasta que el programa de trigo entero
“Whole Wheat” sea seleccionado.
7
Presione el botón de color de la corteza “Crust Color” para seleccionar
el nivel de dorado deseado.
8
Presione el botón de tamaño de pieza de pan “Loaf” para seleccionar
el tamaño del pan que va a preparar (pieza de 1 ó 1.5 libras).
9
Presione el botón de inicio “Start”.
10
Deje que el ciclo de horneado se complete, presione el botón detener “Stop”.
11
Abra la tapa, póngase guantes protectores, tome el asa del recipiente para
hornear pan y jale el recipiente suavemente hacia arriba fuera de la máquina.
☞
C
UIDADO
:
¡La máquina y el recipiente para hornear pan pueden estar
muy calientes! Siempre manéjelos con cuidado.
12
Desconecte la máquina para hacer pan y deje que el pan se enfríe
antes de sacarlo del recipiente donde fue horneado.
13
Utilice una espátula antiadherente para aflojar suavemente los lados
del pan del recipiente. Voltee el recipiente hacia abajo colocándolo
sobre una rejilla metálica o sobre una superficie limpia y agítelo suavemente
hasta que el pan caiga sobre la rejilla.
14
Voltee el pan hacia arriba y enfríe durante 20 minutos antes de rebanarlo.
RINDE 1 PIEZA DE PAN
Page 73

RECETAS PARA LA FUNCIÓNDE
PAN FRANCÉS “FRENCH BREAD”
Pan Francés Clásico
INGREDIENTES DE PIEZA DE PAN DE 1.5 LB.PIEZA DE 1 LB.
1 taza + 2 Cu. de agua (75°–85°F ó 24°–30°C) 3/4 taza
2 cuta. de mantequilla o margarina, suave 1 cuta.
3-1/4 tazas de harina para pan 2 tazas
1 Cu. de azúcar 2 cuta.
1-1/2 cuta. de sal 1 cuta.
2-1/2 cuta. de levadura para preparar pan en máquina 2 cuta.
1
Coloque la cuchilla amasadora dentro del recipiente para pan.
2
Coloque los ingredientes dentro del recipiente para pan en el siguiente
orden: agua, mantequilla o margarina, harina, azúcar y sal.
3
Con el dedo, haga un pequeño orificio en un lado de la harina.
Añada la levadura dentro del orificio, verifique que no entre en contacto
con los ingredientes líquidos.
4
Inserte cuidadosamente el recipiente para hornear el pan dentro del
aparato y cierre lentamente la tapa.
5
Conecte el cable eléctrico en una toma de corriente.
6
Presione el botón de Menú hasta que el programa de pan francés
“French Bread” sea seleccionado.
7
Presione el botón de color de la corteza “Crust Color” para seleccionar
el nivel de dorado deseado.
8
Presione el botón de tamaño de pieza de pan “Loaf” para seleccionar
el tamaño del pan que va a preparar (pieza de 1 ó 1.5 libras).
9
Presione el botón de inicio “Start”.
10
Deje que el ciclo de horneado se complete, presione el botón detener “Stop”.
11
Abra la tapa, póngase guantes protectores, tome el asa del recipiente para
hornear pan y jale el recipiente suavemente hacia arriba fuera de la máquina.
C
☞
12
13
14
UIDADO
Desconecte la máquina para hacer pan y deje que el pan se enfríe antes
de sacarlo del recipiente donde fue horneado.
Utilice una espátula antiadherente para aflojar suavemente los lados
del pan del recipiente. Voltee el recipiente hacia abajo colocándolo
sobre una rejilla metálica o sobre una superficie limpia y agítelo
suavemente hasta que el pan caiga sobre la rejilla.
Voltee el pan hacia arriba y enfríe durante 20 minutos antes de rebanarlo.
:
¡La máquina y el recipiente para hornear pan pueden
estar muy calientes! Siempre manéjelos con cuidado.
R
INDE 1 PIEZA DE PAN
7372
Page 74

RECETAS PARA LA FUNCIÓN
DE PAN DULCE “SWEET”
Pan de Nueces y Plátano
INGREDIENTES DE PIEZA DE PAN DE 1.5 LB.PIEZA DE 1 LB.
2/3 taza de agua (75°–85°F ó 24°–30°C) 1/2 taza
3/4 taza de plátanos maduros hechos puré 1/3 taza
2 Cu. de mantequilla o margarina, suave 1 Cu.
1 huevo grande ligeramente batido 1 huevo mediano
3-1/4 tazas de harina para pan 2 tazas
3 Cu. de azúcar 2 Cu.
1-1/4 cuta. de sal 1/2 cuta.
2-1/2 cuta. de levadura para preparar pan en máquina 1-1/2 cuta.
1/2 taza de nueces picadas 1/3 taza
1
Coloque la cuchilla amasadora dentro del recipiente para pan.
2
Coloque los ingredientes dentro del recipiente para pan en el siguiente
orden: agua, plátano, mantequilla o margarina, huevo, harina, azúcar y sal.
3
Con el dedo, haga un pequeño orificio en un lado de la harina.
Añada la levadura dentro del orificio, verifique que no entre en contacto
con los ingredientes líquidos.
4
Espolvoreé las nueces sobre la harina.
5
Inserte cuidadosamente el recipiente para hornear el pan dentro del aparat
o
y cierre lentamente la tapa.
6
Conecte el cable eléctrico en una toma de corriente.
7
Presione el botón de Menú hasta que el programa de pan dulce
“Sweet Bread” sea seleccionado.
8
Presione el botón de color de la corteza “Crust Color” para seleccionar
el nivel de dorado deseado.
9
Presione el botón de tamaño de pieza de pan “Loaf” para seleccionar
el tamaño del pan que va a preparar (pieza de 1 ó 1.5 libras).
10
Presione el botón de inicio “Start”.
11
Deje que el ciclo de horneado se complete, presione el botón detener “Stop”.
12
Abra la tapa, póngase guantes protectores, tome el asa del recipiente para
hornear pan y jale el recipiente suavemente hacia arriba fuera de la máquina.
☞
C
UIDADO
:
¡La máquina y el recipiente para hornear pan pueden estar
muy calientes! Siempre manéjelos con cuidado.
13
Desconecte la máquina para hacer pan y deje que el pan se enfríe antes
de sácarlo del recipiente donde fue horneado.
14
Utilice una espátula antiadherente para aflojar suavemente los lados
del pan del recipiente. Voltee el recipiente hacia abajo colocándolo
sobre una rejilla metálica o sobre una superficie limpia y agítelo
suavemente hasta que el pan caiga sobre la rejilla.
15
Voltee el pan hacia arriba y enfríe durante 20 minutos antes de rebanarlo.
R
INDE 1 PIEZA DE PAN
Page 75

RECETAS PARA LA FUNCIÓN
DE
PAN EXPRESSBAKE
Pan Blanco Estilo Tradicional ExpressBake
1 taza + 2 Cu. de agua caliente (115°–125°F)
2 Cu. de aceite vegetal o de canola
2 Cu. de azúcar
1 cuta. de sal
3 tazas de harina para preparar pan
5 cuta. de levadura para preparar pan en máquina
1
Coloque la cuchilla amasadora dentro del recipiente para pan.
2
Coloque los ingredientes dentro del recipiente para pan en el siguiente orden:
agua, aceite, azúcar, sal y harina.
3
Con el dedo, haga un pequeño orificio en un lado de la harina.
Añada la levadura dentro del orificio, verifique que no entre en contacto
con los ingredientes líquidos.
4
Inserte cuidadosamente el recipiente para hornear el pan dentro del aparato
y cierre lentamente la tapa.
5
Conecte el cable eléctrico en una toma de corriente.
6
Presione el botón de Menú hasta que el programa “ExpressBake™”
sea seleccionado.
7
Presione el botón de inicio “Start”.
8
Deje que el ciclo de horneado se complete, presione el botón detener “Stop”.
9
Abra la tapa, póngase guantes protectores, tome el asa del recipiente para
hornear pan y jale el recipiente suavemente hacia arriba fuera de la máquina.
C
☞
10
11
12
13
UIDADO
Desconecte la máquina para hacer pan y deje que el pan se enfríe antes
de sacarlo del recipiente para pan.
Si es necesario, utilice una espátula antiadherente antiadherente para
aflojar suavemente los lados del pan del recipiente.
Voltee el recipiente hacia abajo colocándolo sobre una rejilla metálica o
sobre una superficie limpia y agítelo suavemente hasta que el pan caiga
sobre la rejilla.
Voltee el pan con el lado superior hacia arriba y enfríe durante 20 minutos
antes de rebanarlo.
:
¡La máquina y el recipiente para hornear pan pueden estar
muy calientes! Siempre manéjelos con cuidado.
RINDE 1 PIEZA DE PAN DE 1.5 LIBRAS
™
™
7574
Page 76

RECETA PARA LA FUNCIÓNDE
PANES RÁPIDOS “QUICKBREAD”
Pan de Chocolate y Nuez
1
En un tazón pequeño, combine las nueces, el chocolate y 2 Cu. de harina,
mezcle bien y coloque a un lado.
2
Rocíe el recipiente para hornear pan y la cuchilla amasadora con rocío
antiadherente para cocinar.
3
Coloque la cuchilla amasadora dentro del recipiente para pan.
4
Coloque los ingredientes dentro del recipiente para pan en el siguiente orden:
huevos, aceite, el sobrante de la harina, polvo para hornear, bicarbonato de
sodio, azúcar, canela, naranja, sal, y pimienta inglesa. Añada los calabacines
y después la nuez y chocolate enharinados junto con la harina sobrante
del tazón.
5
Inserte cuidadosamente el recipiente para hornear el pan dentro del aparato
y cierre lentamente la tapa.
6
Conecte el cable eléctrico en una toma de corriente.
7
Presione el botón de Menú hasta que el programa de pan rápido “Quickbread”
sea seleccionado.
8
Presione el botón de inicio “Start”.
9
Deje que el ciclo de horneado se complete, presione el botón detener “Stop”.
10
Abra la tapa, póngase guantes protectores, tome el asa del recipiente para
hornear pan y jale el recipiente suavemente hacia arriba fuera de la máquina.
☞
C
UIDADO
:
¡La máquina y el recipiente para hornear pan pueden estar
muy calientes! Siempre manéjelos con cuidado.
11
Desconecte la máquina para hacer pan y deje que el pan se enfríe antes
de sacarlo del recipiente donde fue horneado.
12
Utilice una espátula antiadherente para aflojar suavemente los lados del
pan del recipiente. Voltee el recipiente hacia abajo colocándolo sobre una
rejilla metálica o sobre una superficie limpia y agítelo suavemente hasta
que el pan caiga sobre la rejilla.
13
Voltee el pan hacia arriba y enfríe durante 20 minutos antes de rebanarlo.
RINDE 1 PIEZA DE PAN
1/2 taza de nueces picadas
1/2 taza de piezas de chocolate semi amargo
2 tazas de harina, divididas
3 huevos grandes, ligeramente batidos
1/3 taza de aceite vegetal o de canola
2 cuta. de polvo para hornear
1 cuta. de bicarbonato de sodio
3/4 taza de azúcar
1 cuta. de canela molida
1 cuta. de ralladura de cáscara de naranja
1/2 cuta. de sal
1/2 cuta. de pimienta inglesa
2-1/2 tazas de calabacines rayados,
aproximadamente 2 calabacines medianos
Page 77

RECETA PARA LA FUNCIÓNDE
PREPARAR BASA “DOUGH”
Rosca Trenzada de Naranja y Anís
1/3 taza de agua
1/3 taza de leche entera
3 huevos, ligeramente batidos
1/2 taza (1 barra) de mantequilla o
margarina, suave y cortada e 6 piezas
Ralladura de la cáscara de 1 naranja
1/2 taza de azúcar
4 tazas de harina para preparar pan
1
Coloque la cuchilla amasadora dentro del recipiente para pan.
2
Coloque los ingredientes dentro del recipiente para pan en el siguiente
orden: agua, leche, huevos, mantequilla, naranja, azúcar, harina, anís,
sal y nuez moscada.
3
Con el dedo, haga un pequeño orificio en un lado de la harina.
Añada la levadura dentro del orificio, verifique que no entre en contacto
con los ingredientes líquidos.
4
Inserte cuidadosamente el recipiente para hornear el pan dentro del aparato
y cierre lentamente la tapa.
5
Conecte el cable eléctrico en una toma de corriente.
6
Presione el botón de Menú hasta que el programa de masa “Dough“
sea seleccionado.
7
Presione el botón de inicio “Start”.
8
Deje que el ciclo de amasado se complete
9
Abra la tapa, póngase guantes protectores, tome el asa del recipiente para
hornear pan y jale el recipiente suavemente hacia arriba fuera de la máquina.
10
Desconecte el aparato.
11
Caliente previamente el horno convencional a 350°F.
12
Rocíe una bandeja para grande para hornear con rocío antiadherente
para cocinar.
13
Saque la masa del recipiente para pan y coloque sobre una superficie
limpia, ligeramente enharinada. Divida la masa en dos piezas iguales.
14
Con las manos, ruede ligeramente cada pieza formando un tira de 24 pulgadas.
Colóquelas sobre la bandeja para hornear. Enróllelas ligeramente formando
un circulo trenzado. Coloque una toalla limpia sobre la rosca y deje que la
masa se eleve colocando la bandeja en una lugar caliente sin corrientes de
aire, hasta que haya doblado su tamaño.
15
Usando un pincel de repostería, unte la rosca con la mezcla de huevo y agua.
16
Horneé durante 30 a 35 minutos o hasta que el pan esté dorado.
17
Saque de la bandeja para hornear y coloque sobre una rejilla de alambre
o sobre una superficie limpia.
18
Enfríe durante 20 minutos antes de rebanarla.
(75°–85°F or 24°–30°C)
1-1/2 cuta. de semillas de anís, molidas
1 cuta. de sal
1/2 cuta. de nuez moscada molida
2-1/2 cuta. de levadura para preparar
pan en máquina
Mezcla de huevo y agua (1 huevo,
ligeramente batidos con 1 Cu. de agua)
➩
RINDE 1 ROSCA DE PAN
7776
Page 78

RECETAS PARA LA FUNCIÓN
DE
BAGEL “BAGEL”
Bagels de Miel y Trigo Entero
1 taza de agua
(75°–85°F or 24°– 30°C)
1 taza de harina de trigo entero
1-1/2 Cu. de miel 1-1/2 cuta. de sal
2 tazas de harina para preparar pan 1-1/2 cuta. de levadura para preparar pan en máquina
1 Coloque la cuchilla amasadora dentro del recipiente para pan.
2 Coloque los ingredientes dentro del recipiente para pan en el siguiente
orden: agua, miel, harina para pan, harina de trigo y sal.
3 Con el dedo, haga un pequeño orificio en un lado de la harina.
Añada la levadura dentro del orificio, verifique que no entre en contacto
con los ingredientes líquidos.
4
Inserte cuidadosamente el recipiente para hornear el pan dentro del aparato
y cierre lentamente la tapa.
5 Conecte el cable eléctrico en una toma de corriente.
6 Presione el botón de Menú hasta que el programa de bagel “Bagel”
sea seleccionado.
7 Presione el botón de inicio “Start”.
8 Caliente previamente el horno a 375°F. Rocíe una bandeja para grande
para hornear con rocío antiadherente para cocinar, colóquela a un lado.
9 Deje que el ciclo de amasado se complete
➩
10 Abra la tapa, póngase guantes protectores, tome el asa del recipiente para
hornear pan y jale el recipiente suavemente hacia arriba fuera de la máquina.
Coloque sobre una superficie enharinada.
11 Desconecte el aparato.
12 Divida la masa en 12 piezas iguales.
13 Con los dedos de ambas manos, ruede ligeramente cada pieza formando
un tira de 8 pulgadas de largo; cierre las tiras formando círculos y junte
los extremos para que cierren.
14 Coloque los círculos de masa sobre la bandeja preparada.
15
Cubra los bagels con un paño y deje que la masa se eleve durante 20 minutos.
16 En un sartén antiaherente, hierva 3 pulgadas de agua.
17 Lentamente sumerja de 3 a 4 bagels a la vez y cocine durante 30 segundos
por cada lado.
18 Saque los bagels y colóquelos sobre toallas de papel para escurrirlos,
después colóquelos sobre la bandeja para hornear.
19 Hornee durante 20 a 25 minutos hasta que los bagels estén ligeramente
dorados y la superficie brillante, sáquelos de la bandeja para hornear y
coloque sobre una rejilla de alambre para enfriar.
RINDE 12 BAGELS
Page 79

R
E
STILO
ECETA PARA LA
E
UROPEO
F
UNCIÓNDEPAN
“E
UROPEAN
B
READ
”
Pan Negro
INGREDIENTES DE
1 taza de agua (75°- 85°F ó 24°- 30°C) 3/4 taza
1/3 taza de café preparado (sabor fuerte) (75°- 85°F ó 24°- 30°C) 1/4 taza
3 Cu. de melazas sin sulfurar 2 Cu.
2 Cu. de mantequilla o margarina, suave 1 Cu.
2-2/3 tazas de harina para pan en máquina 2 tazas
1-1/3 tazas de harina de centeno 1 taza
3 Cu. de cacao en polvo sin azúcar 2 Cu.
1 cuta. de sal 3/4 cuta.
1 cuta. de semillas de carvi 3/4 cuta.
1/2 cuta. de semillas de hinojo, ligeramente molidas 1/4 cuta.
1-1/2 cuta. de levadura para preparar pan en máquina 1-1/4 cuta.
1
Coloque la cuchilla amasadora dentro del recipiente para pan.
2
Coloque los ingredientes dentro del recipiente para pan en el siguiente orden:
agua, café, melazas y mantequilla o margarina, después añada la harina
para pan, la harina de centeno, el cacao en polvo, sal y las semillas de carvi
e hinojo.
3
Con el dedo, haga un pequeño orificio en un lado de la harina.
Añada la levadura dentro del orificio, verifique que no entre en contacto
con los ingredientes líquidos.
4
Inserte cuidadosamente el recipiente para hornear el pan dentro del aparato
y cierre lentamente la tapa.
5
Conecte el cable eléctrico en una toma de corriente.
6
Presione el botón de Menú hasta que el programa de pan estilo europeo
“European Bread” sea seleccionado.
7
Presione el botón de tamaño de Pieza de Pan “Loaf” para seleccionar el tamaño
del pan que va a preparar (pieza de 1 ó 1.5 libras).
8
Presione el botón de inicio “Start”.
9
Deje que el ciclo de horneado se complete, presione el botón detener “Stop”.
10
Abra la tapa, póngase guantes protectores, tome el asa del recipiente para
hornear pan y jale el recipiente suavemente hacia arriba fuera de la máquina.
C
☞
11
12
13
14
* En este programa el color del pan automáticamente se fija en medio “Medium”.
UIDADO
Desconecte la máquina para hacer pan y deje que el pan se enfríe antes
de sacarlo del recipiente donde fue horneado.
Una vez que la máquina y el recipiente para hornear pan se han enfriado
Utilice una espátula antiadherente para aflojar suavemente los lados del
pan del recipiente. Voltee el recipiente hacia abajo colocándolo sobre una
rejilla metálica o sobre una superficie limpia y agítelo suavemente hasta
que el pan caiga sobre la rejilla.
Voltee el pan hacia arriba y enfríe durante 20 minutos antes de rebanarlo.
PIEZA DE PAN DE
:
¡La máquina y el recipiente para hornear pan pueden estar
muy calientes! Siempre manéjelos con cuidado.
1.5 LB.PIEZA DE 1 LB.
➩
RINDE 1 PIEZA DE PAN
7978
Page 80

Mermelada
Recetas para la Función
de Jaleas “Jam”
Jalea de Durazno o Melocotón
1 taza de azúcar
1 Cu. de pectina de fruta baja en azúcar
2 Cu. de duraznos o melocotones congelados
y rebanados, descongele antes
1/2 cuta. de clavo molido
1/4 cuta. de nuez moscada
2 cuta. de jugo de limón
1
Coloque la cuchilla amasadora dentro del recipiente para pan.
2
Coloque los ingredientes dentro del recipiente para pan en el
siguiente orden: agua, pectina, duraznos, clavo, nuez moscada
y jugo de limón.
3 I
nserte cuidadosamente el recipiente para hornear el pan dentro
del aparato y cierre lentamente la tapa.
4
Conecte el cable eléctrico en una toma de corriente.
5
Presione el botón de Menú hasta que el programa de jaleas “Jam”
sea seleccionado.
6
Presione el botón de inicio “Start”.
7
Deje que el ciclo de preparación de jalea se complete.
8
Abra la tapa, póngase guantes protectores, tome el asa del recipiente
para hornear pan y jale el recipiente suavemente hacia arriba fuera
de la máquina.
☞
C
UIDADO
:
¡La máquina y el recipiente pueden estar muy calientes!
Siempre manéjelos con cuidado.
9
Desconecte la máquina para hacer pan y deje que la jalea se enfríe.
10
Usando guantes protectores, vierta cuidadosamente la jalea dentro
de un contenedor metálico o de vidrio.
11
Cubra y refrigere.
12
La jalea se conservará almacenada en el refrigerador de 2 a 3 semanas.
RINDE APROXIMADAMENTE 1-1/2 TAZAS
Page 81

Glasees
Una vez que la masa de los rollos o panqués se leve,
justo antes de hornear, aplique ligeramente el
glaseado que desee utilizando un pincel de
repostería. Hornee como lo indica la receta.
• Para un glaseado dorado brilloso, use un
glaseado de huevo o de yema de huevo.
• Para un glaseado brilloso y crujiente,
use glaseado de clara de huevo
(el glaseado tendrá de un color más claro).
Glaseado de Huevo
Mezcle 1 huevo ligeramente batido con 2 Cu. de agua o leche.
Glaseado de Yema de Huevo
Mezcle 1 yema de huevo ligeramente batida con 1 Cu. de agua o leche.
Glaseado de Clara de Huevo
Mezcle 1 clara de huevo ligeramente batida con 1 Cu. de agua.
NOTA:
que no utilice, colóquela en un recipiente, cúbrala con agua fría,
tape el recipiente y almacene en el refrigerador.
Para mantener fresca durante varios días la yema de huevo
Glaseado de Mantequilla Dorada
2 Cu. de margarina o mantequilla
2/3 taza de azúcar en polvo
1/2 cuta. de vainilla
4 cuta. de leche
Caliente a temperatura media la margarina en un sartén de 1 cuarto de
capacidad hasta que esté ligeramente dorada; enfríe. Agregue la vainilla
y azúcar. Añada la leche hasta que tenga una consistencia suave y ligera
como para rociar.
Glaseado de Canela
Mezcle hasta que tenga una consistencia lo suficientemente ligera como
para rociar:
1/2 taza de azúcar en polvo
1/4 cuta. de canela en polvo
2 cuta. de agua
8180
Page 82

Glaseado de Cítricos
Mezcle hasta que tenga una consistencia lo suficientemente ligera como
para rociar:
1/2 taza de azúcar en polvo
1 cuta. de ralladura de cáscara de limón o naranja
2 cuta. de jugo de limón o naranja
Glaseado Cremoso de Vainilla
Mezcle hasta que tenga una consistencia lo suficientemente ligera como
para rociar:
1/2 taza de azúcar en polvo
1/4 cuta. de vainilla
2 cuta. de leche
Mantequilla de Ajo
Mezcle: 1/4 taza de mantequilla o margarina, suave
1/8 cuta. de ajo en polvo
Mantequilla de Hierbas y Queso
Mezcle: 1/4 taza de mantequilla o margarina, suave
1 Cu. de queso Parmesano
1 cuta. de perejil fresco picado
1/4 cuta. de hojas secas de orégano
una pizca de sal de ajo
Mantequilla con Hiervas Italianas
Mezcle: 1/4 taza de mantequilla o margarina, suave
1/2 cuta. de sazonador estilo italiano
una pizca de sal
Page 83

Crema de Chocolate y Plátano para Untar
Mezcle: 1/3 taza de plátano maduro hecho puré
1/2 taza de chispas de chocolate semi amargo, derretidas
Crema de Jamón y Queso para Untar
Mezcle: 1 paquete (3 onzas) de queso crema, suave
2 Cu. de jamón ahumado finamente picado
y completamente cocido
1 Cu. de queso suizo rayado
1/2 cuta. de mostaza preparada
Crema de Queso y Hierbas para Untar
Mezcle: 1 contenedor (4 onzas) de queso crema batido
1 cuta. de hiervas de eneldo fresco o 1/2 cuta. de eneldo seco
1 diente pequeño de ajo, finamente picado
Crema de Miel y Nuez para Untar
Mezcle: 1 paquete (3 onzas) de queso crema, suave
1 Cu. de nueces picadas
2 cuta. de miel
Crema de Aceitunas para Untar
Mezcle en el procesador de alimentos hasta que tenga una consistencia
media:
1-1/2 taza de aceitunas sin hueso
3 Cu. de aceite de oliva
3 Cu. de alcaparras, escurridas
3 filetes planos de anchoas, escurridas
1 cuta. de sazonador estilo italiano
2 dientes de ajo
8382
Page 84

Índice de la Recetas
PÁGINA
Pan Blanco Estilo Casero . . . . . . . . . . . . . . . . . . . . . . . . . . . 50
ExpressBake™Pan Blanco Tradicional . . . . . . . . . . . . . . 58
Pan de Trigo Entero . . . . . . . . . . . . . . . . . . . . . . . . . . . . 72
Pan Francés Clásico . . . . . . . . . . . . . . . . . . . . . . . . . . . . 73
Pan de Nueces y Plátano . . . . . . . . . . . . . . . . . . . . . . . . 74
Pan Blanco Estilo Tradicional ExpressBake
™
. . . . . . . . . 75
Pan de Chocolate y Nuez . . . . . . . . . . . . . . . . . . . . . . . . 76
Rosca Trenzada de Naranja y Anís . . . . . . . . . . . . . . . . 77
Bagels de Miel y Trigo Entero . . . . . . . . . . . . . . . . . . . . 78
Pan Negro . . . . . . . . . . . . . . . . . . . . . . . . . . . . . . . . . . . 79
Jalea de Durazno o Melocotón . . . . . . . . . . . . . . . . . . . 80
Glaseado de Huevo . . . . . . . . . . . . . . . . . . . . . . . . . . . . 81
Glaseado de Yema de Huevo . . . . . . . . . . . . . . . . . . . . . 81
Glaseado de Clara de Huevo . . . . . . . . . . . . . . . . . . . . . 81
Glaseado de Mantequilla Dorada . . . . . . . . . . . . . . . . . 81
Glaseado de Canela . . . . . . . . . . . . . . . . . . . . . . . . . . . . 81
Glaseado de Cítricos . . . . . . . . . . . . . . . . . . . . . . . . . . . . 82
Glaseado Cremoso de Vainilla . . . . . . . . . . . . . . . . . . . .82
Mantequilla de Ajo . . . . . . . . . . . . . . . . . . . . . . . . . . . . 82
Mantequilla de Hierbas y Queso . . . . . . . . . . . . . . . . . . 82
Mantequilla con Hiervas Italianas . . . . . . . . . . . . . . . . . 82
Crema de Chocolate y Plátano para Untar . . . . . . . . . . 83
Crema de Jamón y Queso para Untar . . . . . . . . . . . . . . 83
Crema de Queso y Hierbas para Untar . . . . . . . . . . . . . 83
Crema de Miel y Nuez para Untar . . . . . . . . . . . . . . . . .83
Crema de Aceitunas para Untar . . . . . . . . . . . . . . . . . . 83
Page 85

GARANTÍA LIMITADA DE 1 AÑO
Sunbeam Products Inc. (“Sunbeam”) garantiza que, por un período de UN año
a partir de la fecha de compra,
material y en su fabricación. Bajo la opinión de Sunbeam,
este producto o cualquier componente del mismo si se encuentra defectuoso
durante
un componente nuevo o refabricado.
la reposición se hará con un producto similar de igual o mayor valor.
Esta es su garantía exclusiva.
Esta garantía es válida para el comprador original a partir de la fecha de compra
inicial y no es transferible.
compra es requerida para obtener los servicios de garantía.
productos Sunbeam, los centros de servicio o tiendas que vendan productos
Sunbeam
cambio a los términos y condiciones de
Esta garantía no cubre el desgaste por uso normal o daños de partes como resultado
de lo siguiente: uso negligente o mala utilización del producto, uso con una
corriente eléctrica o un voltaje inadecuados, uso contrario a las instrucciones de
operación, desensambles, reparaciones o alteraciones que no sean hechas por
Sunbeam o por un Centro de Servicio Autorizado Sunbeam. Además, la garantía
no cubre desastres naturales tales como incendios, inundaciones, huracanes
y tornados.
Sunbeam Products Inc. no se hace responsable por ningún daño emergente o
incidental causado por el rompimiento de cualquier garantía expresa o implícita.
Excepto al alcance prohibido por la ley aplicable, cualquier garantía implícita de
comercialización o arreglo para un propósito particular, está limitada en duración
de la garantía antes mencionada. Algunos estados, provincias o jurisdicciones
no permiten
o limitaciones en la duración de una garantía
limitaciones pueden no ser aplicables para usted. Esta garantia le da a usted
derechos legales específicos y puede tener otros derechos que varían por estado,
provincia y/o jurisdicción.
Cómo Obtener los Servicios de la Garantía
Favor, NO REGRESE ESTE PRODUCTO AL LUGAR DE COMPRA. Lleve este producto
a un Centro de Servicio Autorizado Sunbeam. Usted puede encontrar el Centro
de Servicio Autorizado Sunbeam más cercano llamando al 1 800 458-8407, o visita
el nuestro website a www.sunbeam.com. Si un centro de servicio no se encuentra
convenientemente localizado cerca de usted, pegue una etiqueta al producto
que incluya su nombre, dirección, teléfono donde se encuentra durante el día
y descripción del problema. Incluya una copia del recibo original de compra.
Empaque cuidadosamente el producto etiquetado con el precio e incluya el recibo
de compra. Envíelo ya sea por el servicio de paquetería UPS o por correo,
con los gastos de envío y seguro prepagados, a la dirección del Centro
de Servicio Autorizado Sunbeam.
el periodo de garantía. La reposición se hará con un producto o
no tienen el derecho de alterar, modificar o realizar ningún otro
la exclusión o limitación de daños emergentes o incidentales,
este producto estará libre de defectos en el
reparará o repondrá
Si el producto ya no está disponible,
Guarde el recibo de compra original. La prueba de
Los vendedores de
esta garantía.
implícita, así que la exclusión o
8584
Page 86

More Recipes / Más Recetas More Recipes / Más Recetas
Page 87

8786
Page 88

©2001 Sunbeam Products, Inc. All rights reserved.
SUNBEAM®is a registered trademark of Sunbeam Products, Inc.
ExpressBake™is a trademark of Sunbeam Products, Inc.
Distributed by Sunbeam Products, Inc., Boca Raton, Florida 33431.
©2001 Sunbeam Products, Inc. Todos los derechos reservados.
SUNBEAM®es una marca registrada de Sunbeam Inc.
ExpressBake™es una marca comercial de Sunbeam Products, Inc.
Distribuido por Sunbeam Products, Inc., Boca Raton, Florida 33431.
P.N. 108308
 Loading...