

Operation Manual

Operation manual for version 2 by Dimi Popow
Edited for version 2.5 by C. Bachmann, H. Bischoff, S. Pfeifer, C. Schomburg
The information in this document is subject to change without notice and does not represent a commitment on the part of Steinberg Media Technologies AG. The software
described by this document is subject to a License Agreement and may not be copied
to other media except as specifically allowed in the License Agreement. No part of this
publication may be copied, reproduced or otherwise transmitted or recorded, for any
purpose, without prior written permission by Steinberg Media Technologies AG.
All product and company names are ™ or ® trademarks of their respective owners.
Windows 98, Windows ME, Windows 2000 and Windows XP are trademarks of
Microsoft Corporation.
© Steinberg Media Technologies AG, 2002.
All rights reserved.

Table of Contents

7 Introduction
8 Welcome!
8 WaveLab Lite features
9 Background
information
10 Why you should read this
chapter
10 Program settings
11 Multitasking
12 Audio – Quality, formats and
sound card limitations
13 Available disk space
13 About the Undo function
14 Automatically created files
15 Basic methods
16 Why you should read this
chapter
16 Getting help
17 Working with windows
20 Control bars
22 The status bar
22 Speed menus
23 Units of time and level
24 Setting values
27 Presets
29 About non-modal dialogs
30 Using the computer
keyboard
31 The Wave window –
Basic operations
32 Opening Waves
33 Setting the zoom factor
37 Navigating through the file
37 Setting the ruler start
position
37 Working with a meter based
display
38 Setting the wave cursor
position
39 Selecting
43 Basic editing commands
51 Playback and
Recording
52 Playing back
55 Recording
61 Document and file
handling
62 About file formats
62 Creating new empty
documents
62 Opening Waves
64 Importing Audio CD tracks
67 The Import Audio CD
Tracks dialog functions
68 Saving
71 Editing properties and
showing info
72 Revert to saved
WaveLab Lite
4 Table of Contents

73 Off-line processing
111 Customizing
74 Introduction
74 Applying processing
75 Normalize
76 Change gain
77 Invert phase
77 Eliminate DC offset
78 Fade In/Out
79 Crossfade
81 Dynamics
84 Reverse
85 Harmonization
86 Hi-fi Chorus
87 EQ
88 Convert sample rate
88 3D Frequency analysis
91 The Master Section
92 Introduction
93 The Master Section window
94 The signal path
95 The Master level pane
98 The Effects pane
102 Rendering
106 The Monitor window
112 What is Customizing?
112 Preferences
113 Saving the window layout
114 Styling Wave windows
117 Index
Table of Contents 5
WaveLab Lite

WaveLab Lite
6 Table of Contents

1
Introduction

Welcome!
Congratulations on your choice of WaveLab Lite! Digital audio editing
– an area previously reserved for professionals – has now been
opened up to anyone involved in music or multimedia! WaveLab Lite
makes audio editing even easier, by combining a very quick and user
friendly interface with many professional features. We hope you will
enjoy working with WaveLab Lite!
Your Steinberg Team.
WaveLab Lite features
WaveLab Lite contains many of the features that can also be found in
its professional “big brother” WaveLab. Using WaveLab Lite, you can:
• Record audio.
• Edit audio.
• Import tracks from Audio CDs.
• Save audio in the formats Wave and AIFF.
• Use Plug-in effects in real-time during playback or while saving.
WaveLab Lite
1 – 8 Introduction

2
Background information
Why you should read this chapter
In this chapter you will get general information about how WaveLab Lite
integrates with your computer system. Read this chapter to get a better
understanding of how to make the most of your system.
Program settings
Before you start working with the program you should make the following settings.
Audio card settings
You need to “inform” WaveLab Lite of the audio card you intend to use:
1.
Select “Preferences” from the Options menu.
2.
Click on the “Audio Card” tab.
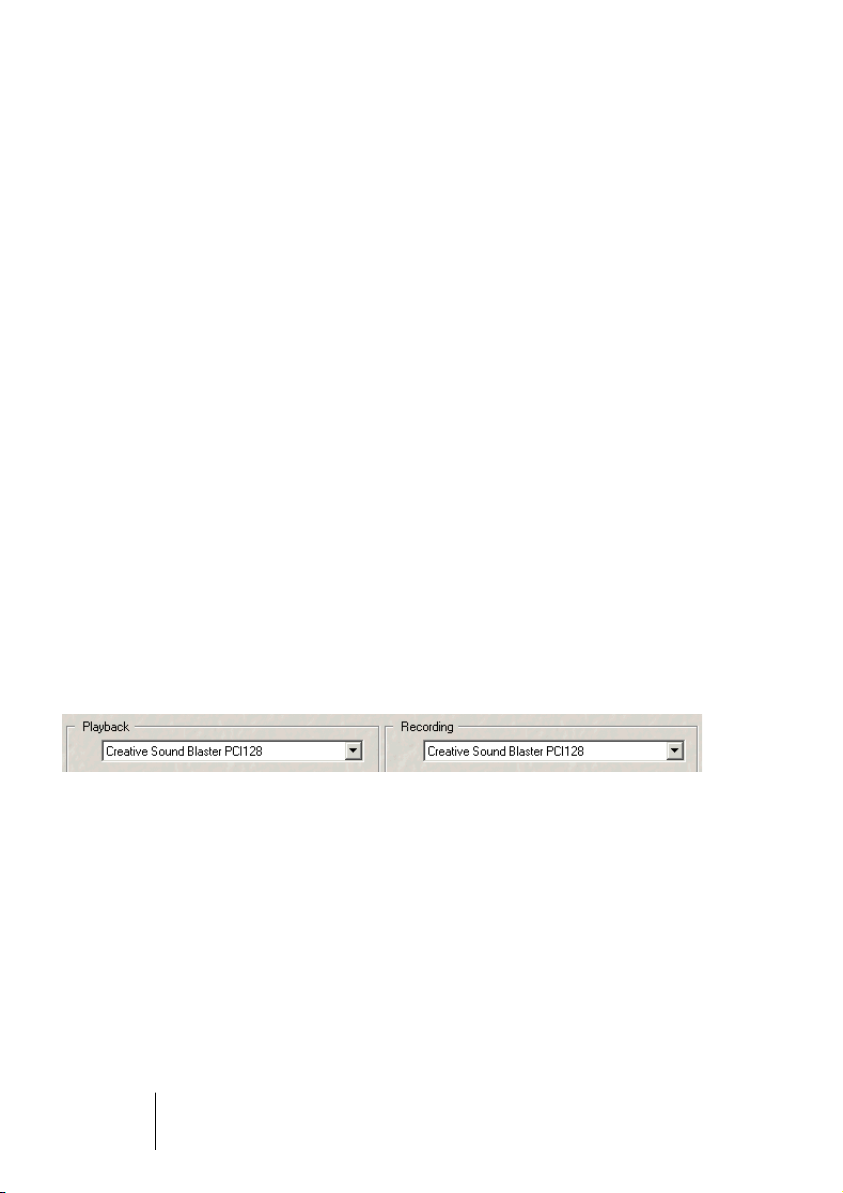
3.
Select the audio card you want to use for recording and playback,
from the pop-ups.
If you only have one audio card you can possibly also select the “Microsoft Sound
Mapper” options, (the sound mapper is a “virtual audio card” which “maps” all audio to
your real card). However this does not let you take full advantage of the card’s driver
when recording audio and is therefore not recommended.
4.
Choose your “Preferred Playback Resolution”.
Normally this will be 16 bits.
WaveLab Lite
2 – 10 Background information

Temporary files
You also need to specify where WaveLab Lite should store temporary
files. Temporary files are used for certain operations, such as WaveLab
Lite’s extensive Undo function (see page 13).
1.
In Windows, create a separate folder in which to store your »temp« files.
❐
This folder should be on your fastest hard disk and you should make
sure you have plenty of space available on that hard disk (or partition).
Putting the temporary files on a separate hard disk (that is, not the same
disk as your regular files) will speed up file operations considerably.
2.
In the Preferences dialog, click the File tab.
3.
Either type in the path to the directory or click the Browse button to locate and select the folder.
Save the Preferences
To make permanent the settings you just made, proceed as follows:
1.
Click on the General tab in the Preferences dialog.
2.
Activate the “Save preferences on exit” option.
3.
Close the Preferences dialog.
Multitasking
WaveLab Lite is a truly multitasking program, i.e. different processes
can occur simultaneously. Below follow some examples:
• Adjusting of start and end points for the wave during playback.
• Processing a wave while it is being played back, even in Loop mode.
As soon as the processing is finished, you will hear the altered wave instead of the
original.
• Apply processing from the Master Section to one or more files, while other
files are being played back.
• Cut, copy and paste into a wave while it is being played.
• Undo and Redo (see page 13) during playback.
Together with Loop mode this allows you to try out the effect of some processing.
• Play, stop, undo and redo even if the active window is a dialog box.
WaveLab Lite
Background information 2 – 11

Audio – Quality, formats and sound card limitations
Audio quality
The recording and playback audio quality in WaveLab Lite is determined by the quality of your sound card, not by WaveLab Lite. WaveLab Lite always works with 32 bit internal processing to ensure pristine
audio quality during all editing processes.
The sampling frequency and bit resolution settings greatly affect the
audio quality of the resulting files.
Bit resolution
A file can be recorded in the formats 8, 16, 20 or 24 bit and 24 bit alt.
Higher bit resolutions lead to bigger files and require more disk space. If
you run into problems you may want to lower the settings for the recording formats. The following table lists the most frequent bit resolutions:
Bit resolution Description
8 bit Used for audio in many games and multimedia applications.
16 bit The most common format, used in CDs and DATs.
24 bit alt. If the Audio Properties window is opened from within the Record dia-
log, the last Bit Resolution option is named “24-bit Alt”. This is an alternate way of transmitting 24-bit audio, used by a lot of audio hardware
(and often the recommended choice). For more information see the
documentation for your audio hardware.
Sample rate
You can choose a sample rate between 11 and 96kHz. The higher the
sample rate, the better the audio quality. The most common sample
rate is 44.1kHz. It is used by CDs, some DAT recorders and professional audio devices and is supported by most audio cards. 22kHz is
used for audio in many computer games and multimedia applications.
WaveLab Lite
2 – 12 Background information
Available disk space
The available disk space for recording and Undo is limited by the size
of the disk where you store your temporary files.
•
To find out how much disk space you have available on each of your
drives, select “Free disk space…” from the Help menu.
About the Undo function
WaveLab Lite has an extensive Undo function which makes to undo
as many steps back as you like:
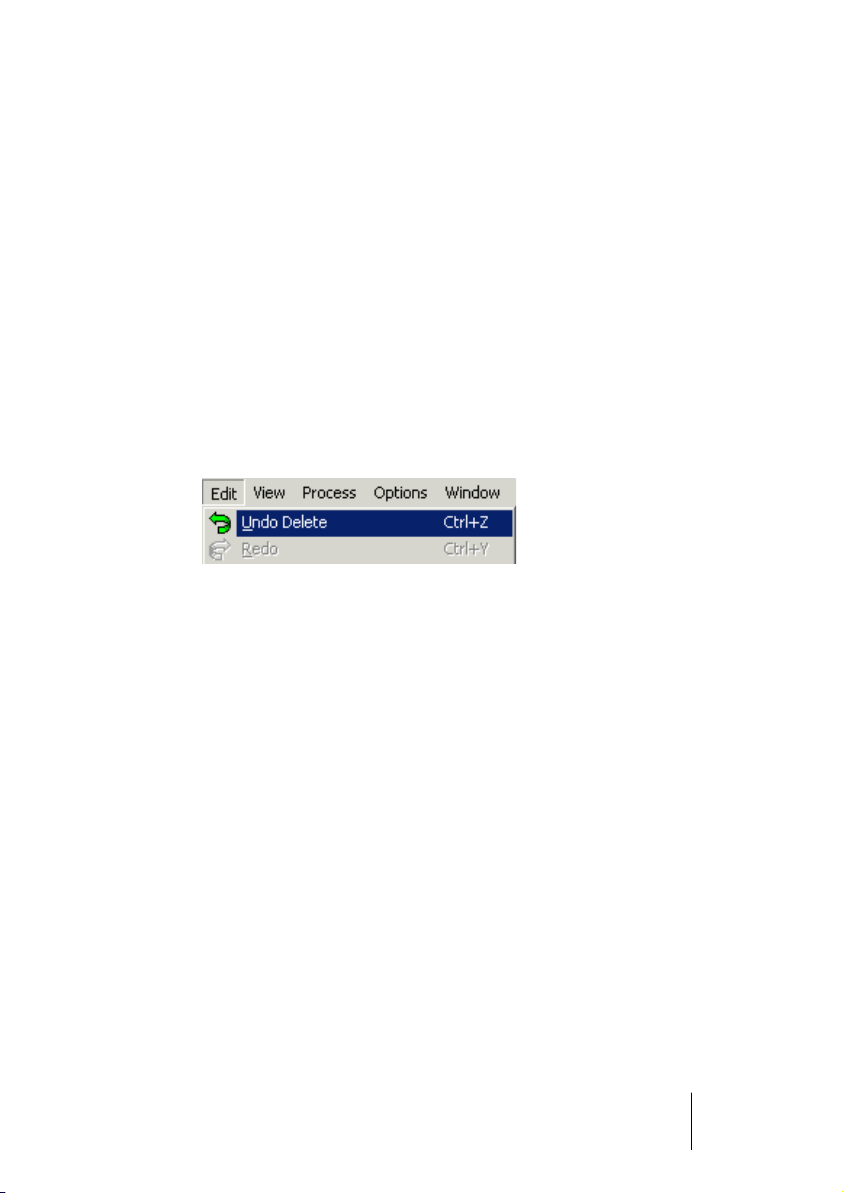
•
Open the Edit menu. The first menu item shows what you can undo.
The Redo function below allows you to undo the undo function. Experiment with the Undo and Redo function to get a feeling for what they do.
WaveLab Lite
Background information 2 – 13

Automatically created files
WaveLab Lite creates two types of files automatically.
Temporary files
These have the extension “$$$” and are stored in the temporary files
folder you have specified. These files are automatically deleted when
you quit WaveLab Lite. If you find any such files when you are not running WaveLab Lite, you can delete them. In case you experience a
computer crash, you may restore some of your work by opening any
stray “$$$” files on your hard disk(s).
Waveform overview files
When you open or record larger files, a file for speeding up waveform
drawing is created (see page 32 for more on opening files). This file has
the same name as the wave file, but with the extension “GPK”. It is
stored in the same folder as the wave and is not automatically deleted,
since it is used each time you open the wave file. You can delete “GPK”
files, but they will be created anew next time you open the wave file.
Keeping waveform overview files up to date
Normally, WaveLab Lite can detect whether a file has been edited in
another program since you last opened it in WaveLab Lite (it does this
by checking the date of the file). It will then automatically update the
waveform overview (GPK) file.
However, it is theoretically possible that the date has not been updated correctly by the other program and the overview file will then be
“out of sync” with the real audio file. If this happens, close the audio
file, delete the “GPK” file and open the audio file again. A new overview file will be created.
WaveLab Lite
2 – 14 Background information

3
Basic methods

Why you should read this chapter
This chapter describes the basic methods when working with WaveLab Lite.
Getting help
There are several ways to invoke the help system:
• By selecting “Help Topics” from the Help menu.
This takes you to the Help system’s “Table Of Contents”. From there you can move to
the Index and Find Tabs.
• By clicking on a Help button in a dialog or pressing [F1].
This gives you context-sensitive help about that dialog.
• By clicking with the right mouse button on an item in a dialog.
This option is not available for all elements.
WaveLab Lite
3 – 16 Basic methods
Working with windows
Basic window handling
WaveLab Lite follows the basic guidelines for the Windows interface,
which means standard “Windows procedures” apply.
Quick switching
•
You can switch between the two last active windows by pressing [F2]
repeatedly. This allows you to quickly move back and forth between
two windows.
•
To “cycle” between all the open windows, press [Ctrl]+[Tab].
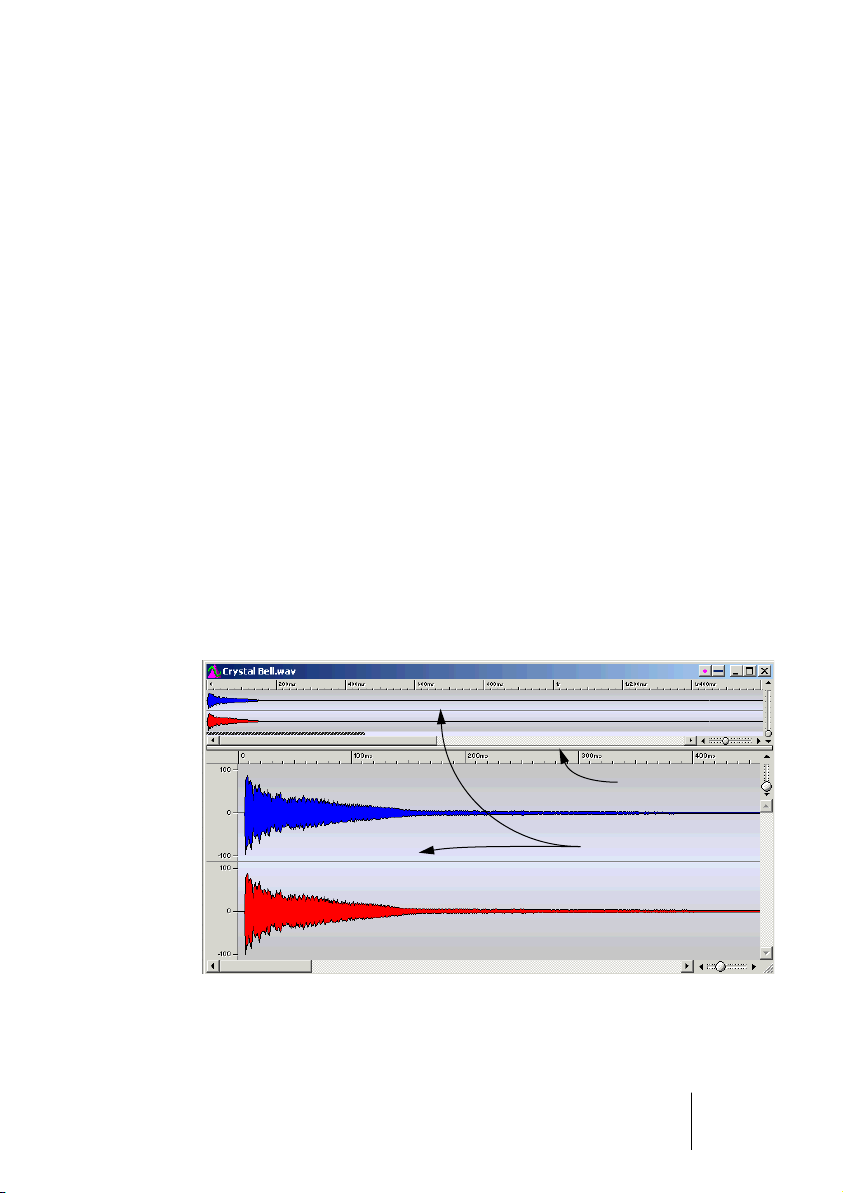
Panes
The wave window is divided into two panes: the overview and the main
view. These are separated by the divider. In the main view you can select wave sections, use the tools, drag and drop etc. The overview is
used to navigate through the files.
Divider
Panes
The panes and divider in a wave window.
• If you want to adjust the size of the panes, drag the divider upwards/downwards with the mouse.
WaveLab Lite
Basic methods 3 – 17
• If you want to hide a pane, drag the border between the two panes all the way
up or double click anywhere on it.
• To show the pane again, drag the miniature divider symbol down or doubleclick on it.
The miniature divider symbol
• If you want to hide/show the overview pane in the wave window, press [O] on
the computer keyboard.
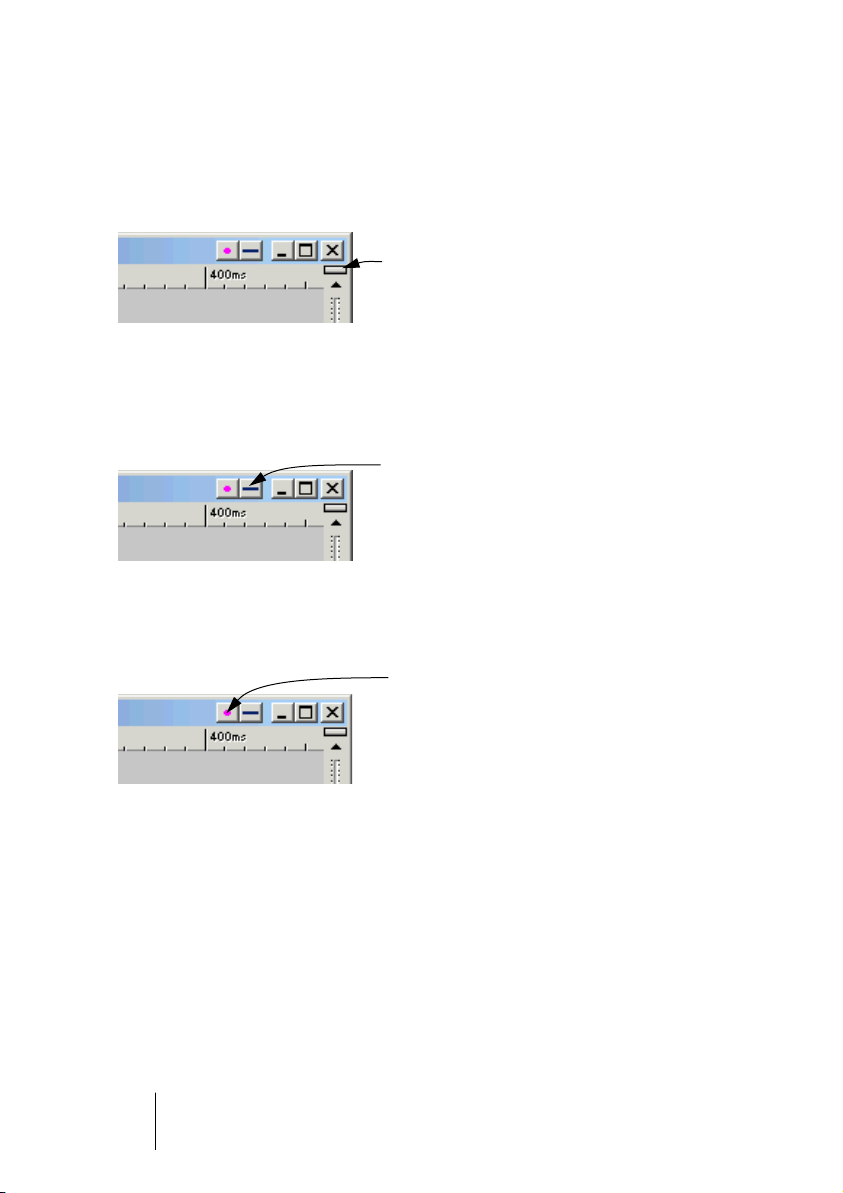
• If a window takes up too much screen space, you can “fold it in” to temporarily
by clicking the fold-in icon on the title bar.
The fold-in icon
• To return to normal size, just click the icon again.
• If you want to open a copy of the opened wave file, drag the drag icon on an
empty area.
The drag icon
WaveLab Lite
3 – 18 Basic methods
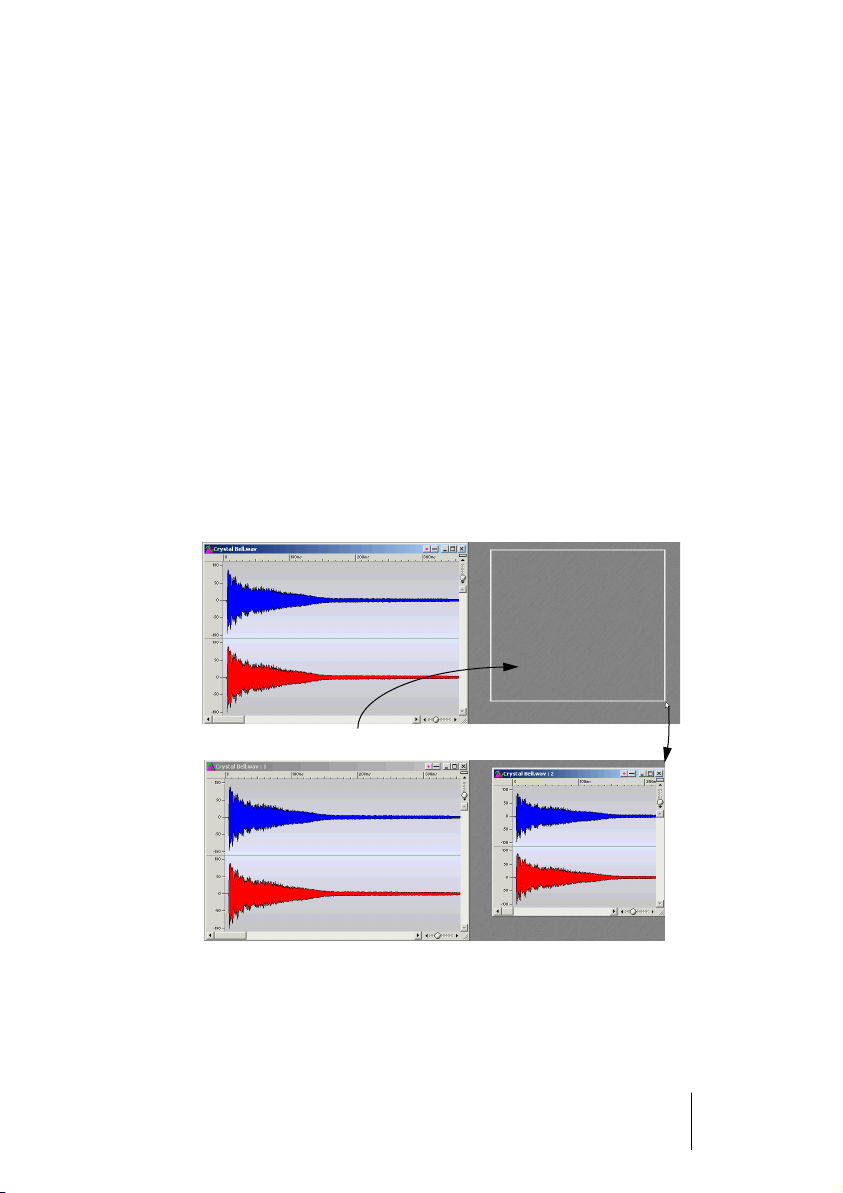
Working with multiple windows
Working with multiple windows allows you to work e.g. on the start
and the end of a wave file, without scrolling back and forth.
Creating a second window using menus
1.
Activate the desired window.
2.
Select Duplicate view from the View menu.
Creating a Second window by dragging
1.
Activate “Create window using mouse” on the Display tab of the Preferences dialog.
2.
Click and drag a rectangle in an empty area of the WaveLab Lite
desktop.
If you do not get a new window, try again with a bigger rectangle.
Dragging a box like this, to get a new window for the same file.
The two windows are actually views of exactly the same data, i.e. any
change you make in one window is immediately apparent in the other.
WaveLab Lite
Basic methods 3 – 19
Control bars
Various tools, shortcuts and commands are gathered on control bars
(strips with symbols). These can be used either as palettes (separate
windows) or you can “dock” them to the window edges. The following
control bars are available:
• The Standard commands
• The Toolbox
• The Transport bar
Docking a control bar
Use one of the following methods to dock a control bar:
• Drag the control bar (by its title bar) to any of the sides of the application window and release the mouse button.
The outline shows you the shape of the control bar at the docked position.
• Double click on the title bar of a control bar window.
It will return to its last docked position.
Please note that you can stack control bars and put them side by side,
to create any type of layout you desire.
• You can display a control bar as a separate window by dragging it out
from the docked position or by double-clicking its handle.
Control bar windows are moved by dragging the title bar. If you want to drag a control
bar to the rim of the application window, without docking it, hold down [Ctrl] when
dragging.
Showing/Hiding a control bar
• Pull down the View menu, select Control bars, and from the menu that appears,
select the desired option.
• You can of course hide a control bar by clicking its close box.
WaveLab Lite
3 – 20 Basic methods
Changing the appearance of a control bar
• To change the shape of a control bar to either horizontal, square or vertical,
drag the right or bottom edge as when resizing any other window.
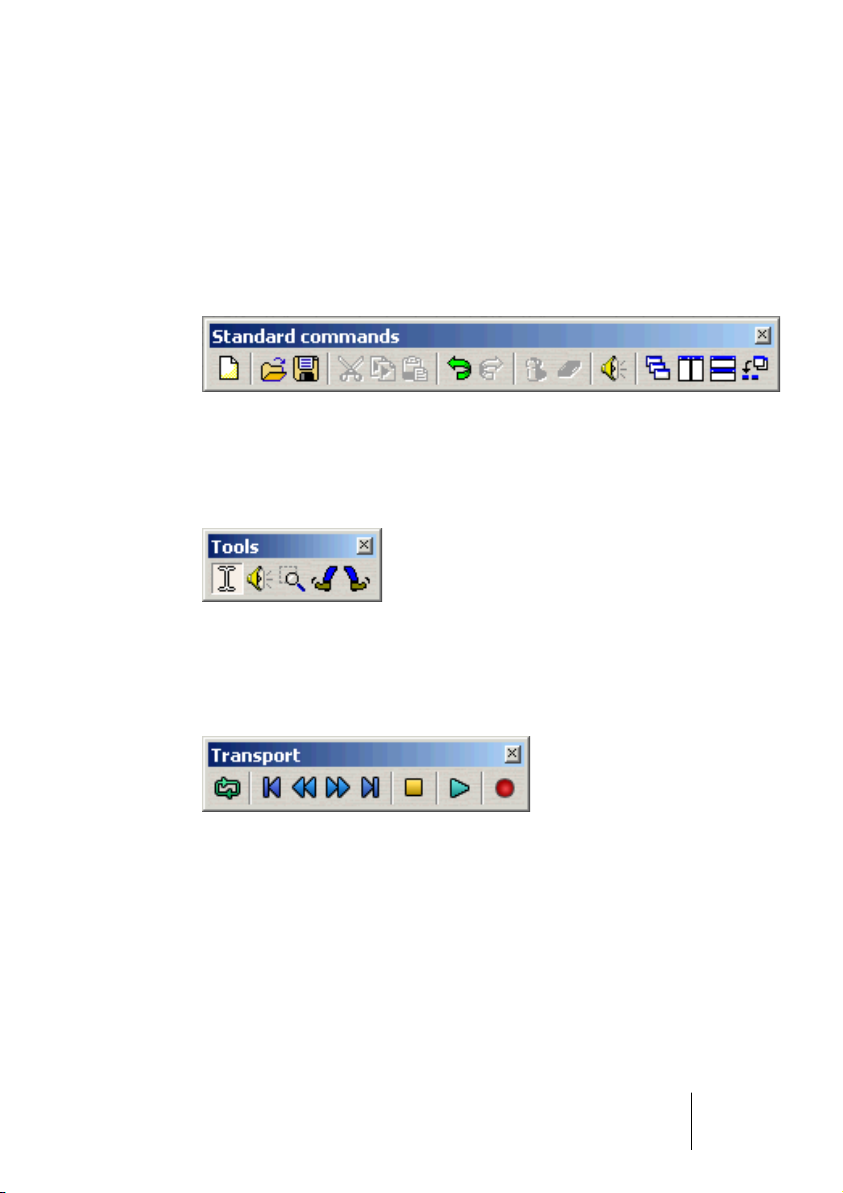
The various control bars
The Standard commands
The Control bar supplies shortcuts for the most commonly used menu
items, as well as some unique functions.
The Tool box
The tools are used to perform various operations on the data in the
window, like selecting, playing etc.
The Transport bar
The Transport bar is used for various playback commands, as
described on page 53.
WaveLab Lite
Basic methods 3 – 21
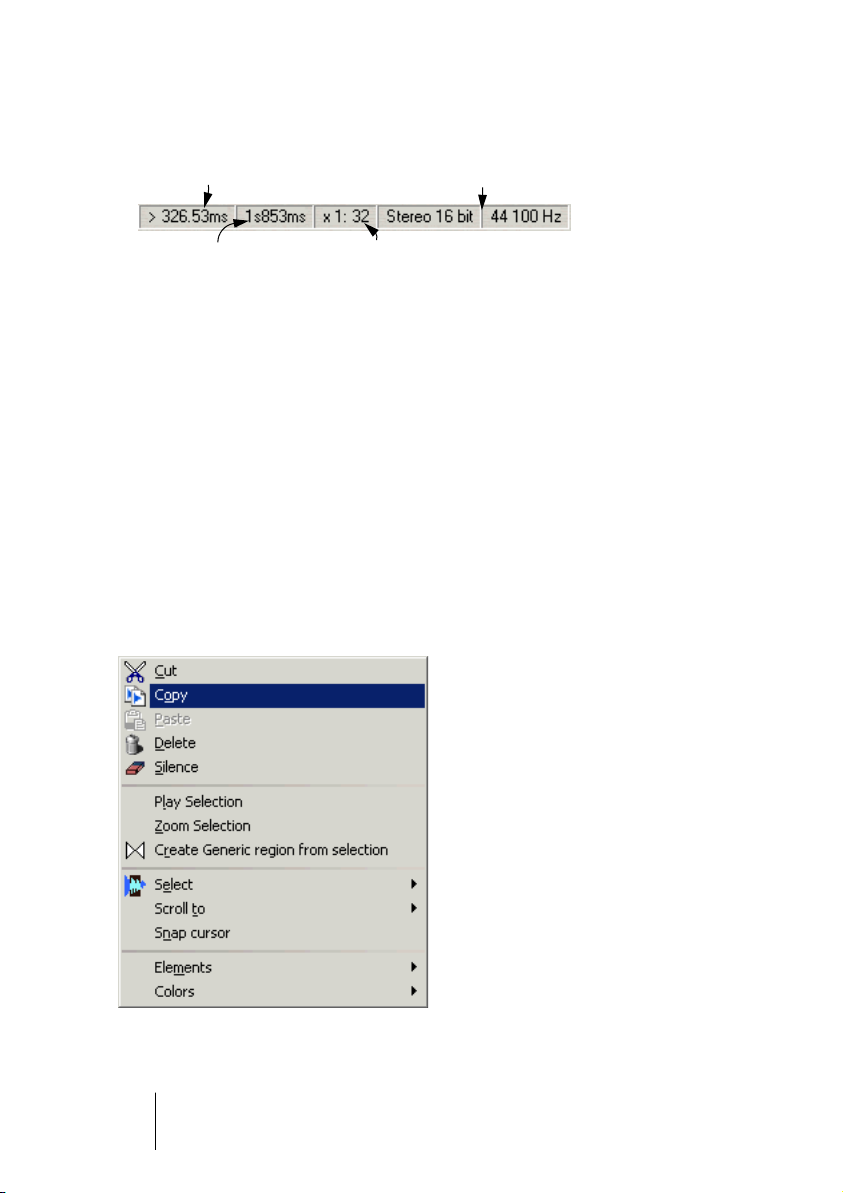
The status bar
Wave cursor position Wave details
Zoom factorWave selection length
The status bar is normally displayed at the bottom of the screen and
contains information about the active window, e.g. about the file. You
can also click on some fields to perform an operation related to that
field. The status bar also indicates the progress of operations that
take some time to finish.
Speed menus
Many sections have speed menus associated with them.
•
To bring up a speed menu, click with the right mouse button in the desired area.
In the Wave windows e.g. there is one speed menu for the level ruler,
one for each time ruler and one for each waveform display.
The main view “speed menu”.
WaveLab Lite
3 – 22 Basic methods

The Speed menus double up for the main menus, but some speed
menus also contain unique items.
❐
When searching for a function, don’t forget to check the speed menus in
the window in which you are working!
Units of time and level
For rulers
You can specify the time and level (amplitude) formats for each ruler in
each window, by right-clicking on the ruler and selecting a format from
the speed menu that appears.
Time formats
Menu name Description
Time Positions are shown as hours, minutes, seconds and milliseconds. At
large magnification factors, hundredths of milliseconds are shown.
Samples Positions are shown as number of samples. How many samples there
are to a second depends on the sample rate of the wave. For 44.1 kHz
for example, there are 44100 samples for each second.
Time Code Also called SMPTE. Positions are shown in the format:
“hours:minutes:seconds:frames”.
The number of frames per second is set in the Preferences dialog on
the “Tempo/Time code” tab.
Meter Positions are shown as bars, beats and ticks, as specified in the Prefer-
ences dialog on the “Tempo/Time code” tab.
File size Positions are shown in file size units, MegaBytes, where the decimals
represent kiloBytes.
WaveLab Lite
Basic methods 3 – 23
Level formats
Menu name Description
% Amplitude (level) is shown as a percentage of full level.
dB Amplitude is shown in decibels, a logarithmic scale used in audio engi-
neering.
Decimal This is the actual value of the amplitude as stored in computer memory
(always displayed as 16 bits). The range is from negative to positive
with “0” representing “no signal”.
Setting values
In dialog boxes, you will find yourself adjusting values. The following
techniques apply:
Typing values
As in most other Windows programs you can “tab to” or click directly
on a value and type in a new one.
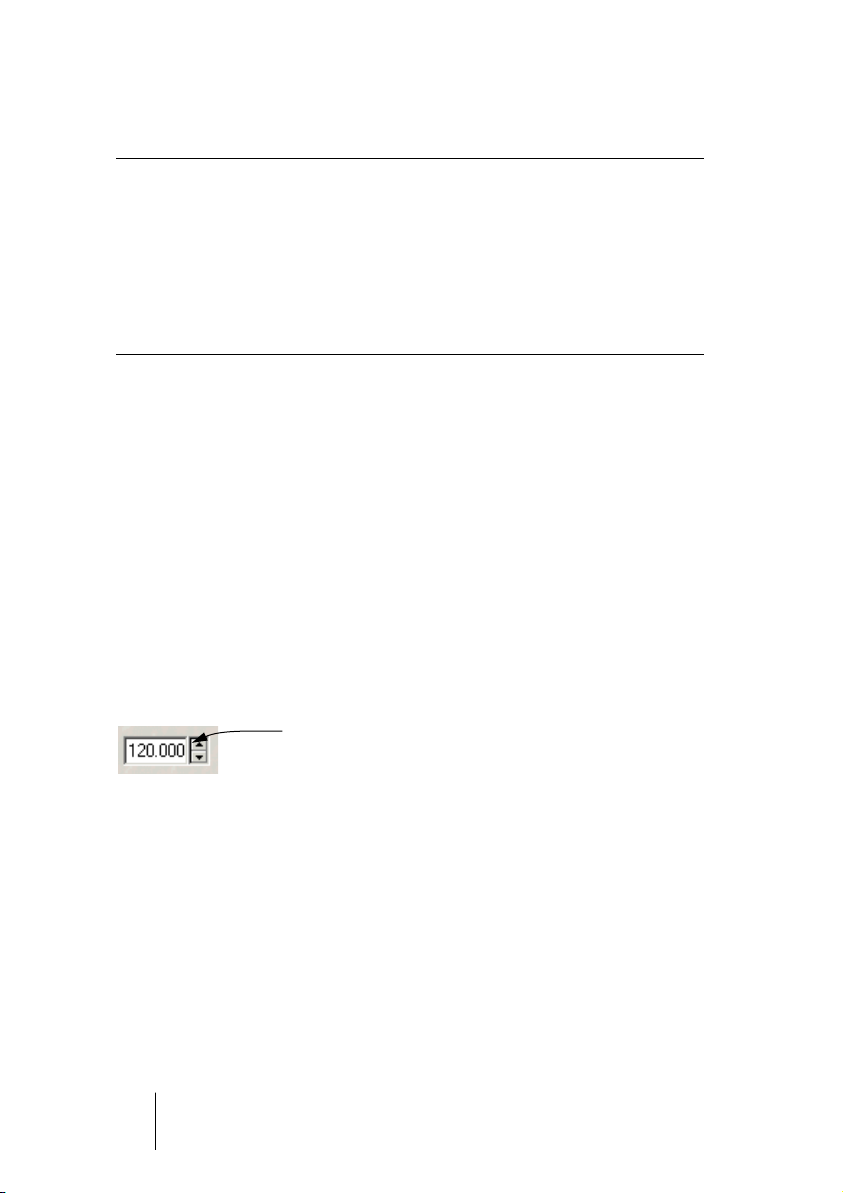
Using the spin controls
All values can be set using the spin controls – two arrows pointing up/
down.
The spin controls.
• Clicking either arrow raises/lowers the value.
• Keeping the mouse button pressed over an arrow makes the value “scroll”.
• Holding down [Ctrl] makes the value change in larger steps.
• Holding down [Ctrl]+[Shift] changes the value to its minimum/maximum.
• The last adjusted control can be changed using the [↑] and [↓] keys, also in
combination with [Ctrl] or [Ctrl]+[Shift] as described above.
WaveLab Lite
3 – 24 Basic methods

Using sliders and pop-ups
Many times, the most convenient way of changing a value is using
WaveLab Lite’s proprietary sliders and pop-ups:
1. Click with the right mouse button on the spin control.
2. If a pop-up menu appears, select one of the options on it.
3. If one or more sliders appear, drag the handle(s) or click the arrows to
set the value.
The setting is shown in the value box.
In this case, four faders appear,
one for the integer and three for
the decimals.
The value gets updated when you
move the sliders.
4. When you have finished, click outside the slider window.
• If the value is “segmented” (e.g. divided into minutes and seconds etc.), more
than one slider will appear, each used for adjusting one of the “segments”.
• The slider window can be dragged to any position on the screen, using the
“title bar” at the top.
• The last-used slider can also be adjusted using the computer keyboard:
These keys Move the slider handle
[↑] and [↓] One step up/down.
[Page Up] and [Page Down] A few steps up/down.
[Home] and [End] To the top/bottom.
In effect processor panels
In the Master section you will find effect panels which resemble the
appearance of physical effect processors. In these panels, values are
adjusted using special methods described on page 98.
WaveLab Lite
Basic methods 3 – 25

Using a wheel mouse
If you are using a mouse with a scroll wheel or similar, you can take
advantage of the wheel for various operations WaveLab Lite:
Scrolling
• If you point at a waveform, the wheel scrolls the view horizontally.
Zooming
• If you hold down [Ctrl] and point at a waveform, the wheel zooms the view horizontally.
• If you hold down [Ctrl] and [Shift] and point at a waveform, the wheel zooms
the view vertically.
Changing values
• If you point at an edit field in a dialog, the wheel can be used to adjust the value.
• If you also hold down [Ctrl], the value changes in bigger steps and if you hold
down [Ctrl] and [Shift] it jumps to the bottom/top values.
Master Section
• When working in the Master Section window, the wheel can be used to adjust
the master volume. If you hold down [Shift] the value changes in steps of 6dB
(rather than 1dB).
• If you hold down [Alt] you can change the Master Section volume, regardless of
which window is active. This can be combined with [Shift] as described above.
WaveLab Lite
3 – 26 Basic methods

Presets
Many dialogs in WaveLab Lite have presets. If you think of the dialogs
as forms, presets allow those forms to be filled out automatically. WaveLab Lite comes with a selection of presets for each dialog, but the real
power of presets becomes evident when you start creating your own!
A number of presets in the Harmonization dialog.
Loading presets
1. Open the dialog you wish to use and click on its Presets tab.
2. Select the preset you want to use and click the Load button (or double-
click on the preset).
• A quick way to load a preset is to right-click on the Preset tab and select
a preset from the menu that appears.
WaveLab Lite
Basic methods 3 – 27

Creating a preset
1. Open the Processing dialog you wish to use and set up the dialog as
desired.
2. Click on the Presets tab.
3. Click on the name line and type in a name for the preset.
4. Click the Add button.
Modifying a preset
1. Select and load the preset as described above.
2. Click the other tab(s) and modify the settings.
3. Click the Preset tab.
4. Select the preset you want to overwrite with the new settings.
If this is the same preset as the original, you can skip this step, since that preset is
already selected.
5. Click the Update button.
Deleting a preset
1. In the Presets tab, click on the preset you want to delete.
2. Click the Delete button.
How presets are saved
The presets are automatically saved when you quit the program. Next
time you load the program, the presets are ready and waiting, just as
you left them. Furthermore the presets are “global” to all files. No matter
which file you are working on, you still have access to all your presets.
WaveLab Lite
3 – 28 Basic methods

About non-modal dialogs
Many of the dialog boxes in WaveLab Lite are “non-modal”, i.e. the
window behind the dialog can be operated even though the dialog box
is still up on the screen. This allows you to e.g. perform the following
operations without closing the dialog:
• Play back the wave to hear the effect of any applied processing.
• Adjust the selection before re-processing.
• Use the menu to undo the last processing.
Keyboard commands
Windows normally does not allow you to select from menus and use
keyboard accelerators when a dialog box is the active window. However, we have provided a few special key shortcuts for the most crucial commands:
Key Command
[F3] Undo
[F4] Redo
[F6] Play Selection
[Shift]+[F6] Activate Loop and Play Selection
[F7] Stop
[F8] Play
WaveLab Lite
Basic methods 3 – 29

Using the computer keyboard
When you are working with WaveLab Lite, the computer keyboard
has several different uses:
Transport Controls
The Transport functions (Play, Stop, Record, etc.) can all be managed
from the computer keyboard. The keyboard commands for these functions are located on the numeric key pad, to the right of the computer
keyboard. See page 53.
Keyboard shortcuts
Shortcuts for menus
Many functions in WaveLab Lite have a computer keyboard equivalent,
an “accelerator”, listed on the menu. Some abbreviations might need
an explanation:
Abbreviation Explanation
KP The numeric key pad. “KP 2” for example means the “2” key on the
numeric key pad.
BkSp The Backspace key.
F1 to F12 The Function keys.
Additional shortcuts
In addition to the above, there are keyboard commands that are not
listed on the menus or in this manual. Check the online help for a full list.
WaveLab Lite
3 – 30 Basic methods
 Loading...