

Operation Manual

Cristina Bachmann, Heiko Bischoff, Christina Kaboth, Insa Mingers, Sabine Pfeifer,
Quarshie, Benjamin Schütte
Kevin
This PDF provides improved access for vision-impaired users. Please note that due to the
complexity and number of images in this document, it is not possible to include text
descriptions of images.
The information in this document is subject to change without notice and does not represent
a commitment on the part of Steinberg Media Technologies GmbH. The software described
by this document is subject to a License Agreement and may not be copied to other media
except as specifically allowed in the License Agreement. No part of this publication may be
copied, reproduced, or otherwise transmitted or recorded, for any purpose, without prior
written permission by Steinberg Media Technologies GmbH. Registered licensees of the
product described herein may print one copy of this document for their personal use.
All product and company names are ™ or ® trademarks of their respective holders. For more
information, please visit www.steinberg.net/trademarks.
© Steinberg Media Technologies GmbH, 2014.
All rights reserved.

Table of Contents
7 Introduction
7 The Help System
8 About the Program Versions
8 Typographical Conventions
9 How You Can Reach Us
10 Setting Up Your System
10 Connecting Audio
10 About Audio Cards and Background
Playback
10 About Latency
11 Defining VST Audio Connections
14 CD/DVD Recorders
15 Remote Devices
26 WaveLab Concepts
26 General Editing Rules
27 Startup Screen
28 Basic Window Handling
31 Selecting Audio
38 Sliders
38 Renaming Items in Tables
39 File Browser
40 Tab Groups
42 Peak Files
42 Companion Files
43 EBU Loudness Standard R-128
45 Program Overview
45 Command Bars
46 Status Bar
47 Context Menus
48 Time Ruler and Level Ruler
54 Value Editing
54 Drag Operations
56 Undoing and Redoing
58 Zooming
65 Managing Tabs
66 Presets
68 Saving a Picture of the Active Window
69 Log Window
71 File Operations
71 List of All Open Files Throughout the
Application Dialog
72 Recently Used Files
73 Favorite Files
75 Save and Save As
77 Templates
80 File Renaming
82 Deleting Files
82 Special Menu
83 Temporary Files
83 Work Folders vs. Document Folders
86 Uploading to SoundCloud
86 Copying Audio Information to the Clipboard
87 Setting the Focus on the Current File
88 About Workspaces
89 Audio Files Workspace
89 Audio Montage Workspace
90 Batch Processors Workspace
90 Podcast Workspace
90 Control Window
91 Creating an Empty Workspace
92 New Workspace Dialog
93 Opening Files in a Workspace
93 Organizing Workspace Windows
94 Saving a Workspace Layout
94 About Tool Windows
98 Playback
98 Transport Bar
112 Playing Back Only One Channel
112 Starting Playback From the Ruler
113 Using the Play Tool
113 Playback Scrubbing
114 Timecode Window
115 Jog/Shuttle Function
116 Scroll During Playback
117 About Playback in the Audio Montage
Workspace
118 Speaker Configuration
3

120 Audio File Editing
120 Wave Window
129 File Handling in the Audio Files Workspace
153 Changing the Audio Properties
154 Meta-Data
160 Silence Generator Dialog
162 Waveform Restoration with the Pen Tool
164 Audio Analysis
164 Error Detection and Correction
171 Global Analysis
181 Audio File Comparator
183 3D Frequency Analysis
186 Offline Processing
186 Applying Processing
186 Gain Dialog
187 Normalize Level Dialog
188 Loudness Normalizer
190 Pan Normalizer Dialog
191 Envelope Dialog
192 Fades in Audio Files
194 Crossfades
195 Inverting the Audio Phase
195 Reversing Audio
195 DC Offset
196 Time Stretching
199 Pitch Shift
201 Pitch Quantize Dialog
202 Pitch Bend
204 Resample
205 Effect Morphing
208 Audio Montage
209 Montage Window
211 Signal Flow in the Audio Montage
212 Creating a New Audio Montage
214 Creating an Audio Montage from an Audio
File
214 Import Options for Audio Montages
216 Missing Files in Audio Montage Dialog
217 Assembling the Audio Montage
228 Rearranging Clips
235 Clip Editing
263 Audio Montages Within Audio Montages
269 Managing Source Files of Clips
274 Track Activity Indicator
274 Envelopes for Clips
283 Fades and Crossfades in the Audio
Montage
295 Clip Time Stretching
296 Clip Pitch Shifting
296 Effects for Tracks, Clips, and the Master
Output
311 About the CD Window
320 About Cloning Audio Montages
324 Snapshots
327 Mixing Down - The Render Function
328 Loudness Meta Normalizer
331 Navigator Window
331 Notes Window
332 About Groups
334 Backing Up Audio Montages
335 Multichannel Operations in the Audio
Montage
347 XML Export and Import of Audio Montages
348 AES-31 Files Export and Import
352 Recording
352 Setting Up the Recording Dialog
353 Dropping Markers During Recording
354 Recording Dialog
361 Recording in the Audio Montage
Workspace
362 Master Section
363 Master Section Window
380 Rendering
389 Record From an ASIO Input
390 Smart Bypass
392 Saving a Master Section Preset
397 About Monitoring Background Tasks
398 About Dropouts
4

399 Markers
401 Markers Window
405 About Creating Markers
410 Deleting Markers
412 Moving Markers
412 Moving Multiple Markers
414 Navigating to Markers
414 Hiding Markers of a Certain Type
414 Converting Marker Types
416 Renaming Markers
417 About Selecting Markers
417 Selecting the Audio Between Markers
417 Binding Markers to Clips in the Audio
Montage
418 Exporting the Markers List as Text
419 How Marker Information is Stored
420 Metering
420 Metering Window
420 Real Time vs. Non-Real Time
421 Metering Monitor Modes
422 About Meter Settings
422 Multichannel Metering
422 Resetting the Meters
423 Using Presets in the Meter Windows
423 Level Meter
427 Loudness Meter
431 Phasescope
433 Spectroscope
433 Spectrometer
436 Bit Meter
438 Oscilloscope
438 Wavescope
440 Basic Audio CD
441 Basic Audio CD Window
444 About CD Markers
444 Preparing a Basic Audio CD
446 Opening CD Tracks for Editing
447 About Playing Back Files in the Track List
448 Saving Basic Audio CD Tracks as Separate
Files
448 Saving Basic Audio CD Tracks as One File
449 DVD-Audio
449 Structure of a DVD-Audio Project
450 DVD-Audio Formats
450 DVD-Audio Format Considerations
451 DVD-Audio Window
454 Preparing a DVD-Audio
455 Opening Audio Montages for Editing
455 Checking the DVD-Audio Conformity
456 Writing Operations
456 Write Audio CD or DDP Dialog
458 Erase Optical Media Dialog
459 About Writing Audio Files
462 About Writing Audio Montages
477 Write DVD-Audio Function
481 Data CD/DVD Projects
485 About Audio CD Formats
489 Spectrum Editing
489 Spectrum Display
491 Surgical Processing
493 Master Section Processing
494 Spectrum Editor Window
500 Defining a Region for Spectrum Editing
501 Processing Frequency Ranges via the
Master Section
502 Auto Split
502 Auto Split in Audio Files
506 Auto Split in Audio Montages
509 Loops
509 Basic Looping
510 About Refining Loops
518 About Looping Seemingly Unloopable
Audio
522 About Sample Attributes
524 Generating Signals
524 Signal Generator
528 DTMF Generator
531 Importing Audio CD Tracks
531 Import Audio CD Dialog
535 Importing Audio CD Tracks
536 Searching Track Names on the Internet
536 Submitting Track Names to the Internet
537 About Ultra-Safe Mode
537 Converting Audio CD Tracks to an Audio
Montage
538 Converting Audio CD Tracks to a Basic
Audio CD
539 Batch Processing
541 Overview of the Batch Processors
Workspace
547 About Off-Line Processors
549 Working with the Batch Processors
Workspace
559 Watch Folders
575 XML Files in Batch Processing
583 Batch Conversion
583 Batch Conversion Dialog
584 Batch Converting Files
5

585 Batch Renaming
585 Batch Renaming Dialogs
585 Batch Renaming Files
587 Batch Renaming Markers
589 Batch Renaming Clips
590 Renaming Operation Categories and Types
595 List of Renaming Operations
595 Preview Section
596 Range Parameters
597 Previewing and Performing All Renaming
Operations
598 About Regular Expressions
602 Podcasts
603 Podcast Workspace
607 Global Podcast Options
607 Creating a Podcast
608 Setting Up a FTP for Podcast Publishing
608 Publishing a Podcast
609 FTP Site Dialog
610 Checking the Podcast
611 Master Projects
611 Setting Up a Master Project
612 Saving a Master Project
612 Writing Files of a Master Project to Data
CD/DVD
613 Master Project Window
615 Customizing
615 Window Layout
620 Customizing the Wave Window and the
Montage Window
628 About Customizing Shortcuts
635 Plug-ins Organization
643 Variables and Text Snippets
645 About Scripting
666 Configuring the Software
666 About Global Preferences
675 Audio File Editing Preferences Dialog
680 Audio Montage Preferences Dialog
682 Settings Management
683 Multi-User Settings
684 About External Tools
688 Plug-in Reference
688 Built-in Plug-ins
692 Steinberg VST 3 Plug-ins
748 Sonnox Restoration Toolkit
755 Legacy Plug-ins
755 Dithering Plug-ins
758 ASIO Plug-ins
760 Batch Processing Plug-ins
769 Index
6

The Help System
The detailed help system of WaveLab makes it easy to look up interface features
and get information from within the program.
Three main types of help are available:
• The help provides detailed information on the features and functionality of
WaveLab. You can set bookmarks, and use the search function and index to
quickly find information.
• “What’s This” tooltips give detailed information on the functionality of a
specific user interface element.
Introduction
• The status bar at the bottom of each workspace window gives detailed
information on menu items when moving the mouse over an item.
• In the Audio Montage workspace, the status bar shows what kind of editing
can be performed when using the mouse and modifier keys.
Accessing the Help System
There are several ways of accessing the help system.
• To open the WaveLab help, select Help > Contents.
• To open the manual in PDF format, browse to the installation folder. The
documents are located in the Documentation folder.
• To show tooltips, move the mouse over an interface icon.
• To open the help for the active dialog, click the question mark icon on the title
bar (Windows) or in the dialog (Mac OS) to show the Help button, and then
click the Help button, or press [F1] (Windows) or [Command]-[?] (Mac OS).
• To use the menu help, move the mouse over a menu item. The help text is
displayed on the status bar at the bottom of the workspace window.
• To see information on what kind of editing can be performed when using the
mouse and modifier keys in the audio montage window, move the mouse over
the montage window. The help text is displayed on the status bar at the
bottom of the workspace window.
7

Introduction
NOTE
About the Program Versions
• To activate/deactivate the help texts on the status bar, select Options
(WaveLab menu on Mac) > Global preferences > Display tab, and in the
Workspaces section, select Display status bar.
To open the “What’s This” help, you have the following possibilities:
• In any workspace, press [Shift]-[F1], and move the mouse over an interface
item, or select Help > What is this?.
• In a dialog, select the question mark icon on any title bar (Windows) or in the
dialog (Mac OS), and move the mouse over an interface item or a menu
option.
• Some “What’s this” tooltips have a different background color to indicate that
a dedicated help topic is available in the WaveLab help. Click the link in the
tooltip to open the corresponding information in the help.
About the Program Versions
The documentation covers two different operating systems, Windows and Mac OS
X. Some features and settings are specific to one of the operation systems.
This is clearly stated in the applicable cases. If nothing else is said, all descriptions
and procedures in the documentation are valid for all WaveLab versions for both
Windows and Mac OS X.
The screenshots are taken from the English Windows version of WaveLab.
Typographical Conventions
Many of the default key commands in WaveLab use modifier keys, some of which
are different depending on the operating system. For example, the default key
command for Undo is [Ctrl]-[Z] on Windows and [Command]-[Z] on Mac OS X.
When key commands with modifier keys are described in this manual, they are
shown with the Windows modifier key first, in the following way:
• [Win modifier key]/[Mac modifier key]-[key]
For example, [Ctrl]/[Command]-[Z] means “press [Ctrl] on Windows or [Command]
on Mac OS X, then press [Z]”.
Similarly, [Alt]/[Option]-[X] means “press [Alt] on Windows or [Option] on Mac OS
X, then press [X]”.
This manual often refers to right-clicking, for example, to open context menus. If you
are using a Mac with a single-button mouse, hold down [Ctrl] and click.
8

Introduction
How You Can Reach Us
How You Can Reach Us
On the Help menu in WaveLab, you find items linking to additional information.
The menu contains links to various Steinberg web pages. Selecting a menu item
automatically launches your browser and opens the page. On these pages, you can
find support and compatibility information, answers to frequently asked questions,
information about updates and other Steinberg products, etc. This requires that you
have a web browser installed on your computer, and a working internet connection.
9

Setting Up Your System
IMPORTANTIMPORTANTIMPORTANTIMPORTANT
Before you start working, you need to make some settings.
Make sure that all equipment is turned off before making any connections.
Connecting Audio
Your system setup depends on many different factors, for example, the kind of
project that you want to create, the external equipment that you want to use, or the
computer hardware available to you.
About Audio Cards and Background Playback
When you activate playback or recording in WaveLab, other applications cannot
access the audio card. Likewise, if another application uses the audio card,
WaveLab is unable to play back. The Windows MME driver is an exception from
this.
You can run WaveLab together with other applications and always give the active
application access to the audio card.
To do so, select Options > VST Audio Connections, and on the Options tab,
activate Release driver when WaveLab is in background.
About Latency
Latency is the delay between when audio is sent from the program and when you
actually hear it. While a very low latency can be crucial in a real-time DAW
application such as Steinberg Nuendo or Cubase, this is not strictly the case with
WaveLab.
When working with WaveLab, the important issues are optimum and stable
playback and editing precision. You should not try to reach the lowest possible
latency figures.
10

Setting Up Your System
PROCEDURE
Defining VST Audio Connections
The latency in an audio system depends on the audio hardware, its drivers, and
settings. In case of dropouts, crackles, or glitches during playback, raise the Buffer
Number setting on the VST Audio Connections dialog, or increase the buffer size
in the ASIO control panel, specific to the audio card.
Defining VST Audio Connections
To be able to play back and record audio in WaveLab, you must specify how the
internal input and output channels in WaveLab are connected to your sound card
and which device you intend to use for audio playback and recording.
You can define the buffer settings for your device as well as set up connections to
external gear, such as external effects units. You should select at least two channels
for stereo playback and recording.
If you have no third-party audio card, you can select the Windows MME driver or
Built-in Audio (Mac) options. You can also use MME with most third party audio
cards, with the advantage that you can record and play at different sample rates.
However, Windows MME drivers do not allow audio monitoring in the Recording
dialog or multichannel operation, and other drivers generally offer better sound
quality and performance.
Selecting an ASIO Driver
Audio Stream Input/Output (ASIO) is a computer device driver protocol for digital
audio specified by Steinberg. It provides a low-latency and high fidelity interface
between a software application and the soundcard of a computer.
1. In any workspace, except the Podcast workspace, select Options > VST
Audio Connections.
2. From the Audio Device menu, select your ASIO driver.
The ASIO plug-ins tab and the Control panel button are activated.
3. Optional: Click the Control panel button and make your settings.
4. On the ASIO plug-ins tab, select the audio ports that are used for recording
and monitor input of the ASIO plug-ins.
5. Click OK.
11

Setting Up Your System
PROCEDURE
Defining VST Audio Connections
Selecting a Windows MME Driver
1. In any workspace, except the Podcast workspace, select Options > VST
Audio Connections.
2. From the Audio Device menu, select the Windows MME driver.
3. On the Playback tab, select the audio ports that are used for playback.
4. On the Recording tab, select the audio ports that used for recording and
monitor input.
5. Click OK.
VST Audio Connections Dialog
This dialog allows you to specify how the internal input and output channels in
WaveLab are connected to your sound card and which device you want to use for
audio playback and recording.
Global Settings
In any workspace, except the Podcast workspace, select Options > VST Audio
Connections.
Audio device
Here, select the audio device that you want to use for playback and recording
audio. If you do not have a third-party audio card, you can select the Windows
MME driver or Built-in Audio (Mac) options.
Control panel
When you select an ASIO driver, the Control panel button is activated. Click
the button to open the settings application of your sound card, which is
usually installed with the sound card. Depending on your sound card and
driver, this provides settings for buffer size, digital formats, additional I/O
connections, etc.
Refresh
This button causes audio devices to be evaluated again to reflect device
changes.
12
Setting Up Your System
Defining VST Audio Connections
Playback Tab
This tab allows you to select and name audio ports that are used for playback. If you
are monitoring on a surround system, specify your surround speaker outputs here.
Furthermore, you can rename the channels and set up the Speaker configuration
to be able to switch between different speakers.
Recording Tab
External Gear Tab
This tab allows you to select and name your audio ports that are used for recording
and input monitoring. The inputs that you define here are then available in the
Recording dialog. Furthermore, you can rename the channels and select the
Speaker configuration.
13

Setting Up Your System
CD/DVD Recorders
Options Tab
This tab allows you to select inputs from and outputs to external audio processing
equipment. The name of this tab corresponds to the installed driver, for example,
ASIO plug-ins.
This tab allows you to specify the number of buffers and the control driver
functionality.
Buffer Number
Increasing this value improves the elasticity of audio streaming to avoid
dropouts.
MME Specific - Buffer size
Increasing this value improves the elasticity of audio streaming to avoid
dropouts. This is only available when an MME driver is selected.
Initialize streaming engine at first use
Initializes the audio streaming engine when playback or recording are used for
the first time. If this option is deactivated, the audio streaming engine is
initialized at program startup.
Reset driver when changing sample rate
Resets the driver when sample rate is changed. When playback or recording
must be set to a new sample rate, certain audio device drivers must be fully
reset to work properly. This operation takes some time.
Perform short fade-in/out when starting/stopping playback
Performs a short fade-in when starting playback and a short fade-out when
stopping playback. This avoids clicks that are caused by waveforms that are
not starting on a zero-crossing point.
Release driver when WaveLab is in background
Closes the audio device when WaveLab is no longer the front application.
This allows other audio applications to use the same audio device.
CD/DVD Recorders
For general instructions on installing internal or connecting external recorders via
USB or Firewire, please refer to the instruction manual for your computer or your
recorder.
Make sure to have the latest firmware version installed on your recorder unit. For CD
recorders, the existing firmware must support disc-at-once mode. In addition,
running a unit with older firmware can prevent you from writing sub-index markers
into the tracks, for example.
14
Setting Up Your System
Remote Devices
Remote Devices
You can use remote devices to remote-control WaveLab.
Several commands can be controlled with knobs and sliders of your remote control
device. For all commands that can be assigned to a keyboard shortcut, a MIDI
trigger can also be assigned.
Remote Devices Dialog
This dialog allows you to select a device to remote-control WaveLab, and see and
edit the control map of MIDI control devices.
In any workspace, except the Podcast workspace, select Options > Remote
devices.
Device Editing Tab
This tab lets you select a MIDI control device, see the control map, assign WaveLab
commands to MIDI controls, and import/export control assignments.
15

Setting Up Your System
Remote Devices
Device menu
Select the MIDI device to edit. Select MIDI shortcuts for menus to define
the MIDI input port that is used for MIDI shortcuts. The shortcuts can then be
assigned in the Customize commands dialog.
Select MIDI Control Device #1 - #10 to select a slot for a connected MIDI
control device. You can then assign a device by selecting a MIDI input port
and output port.
Active
Activates the selected device and scans the MIDI ports.
In-Port/Out-Port
Select the MIDI input/output ports of the device that you want to use.
Edit map
Activates the edit mode of the MIDI control map for the selected device. To
leave the edit mode, click again.
Save
Saves the modifications that have been made to the MIDI control map.
Undo
Undoes the modifications that have been made to the MIDI control map.
Reset
If the map has a factory preset, clicking Reset resets all changes that have
been made to the map. If the map has no factory preset, the map is cleared.
Import
Opens the file browser where you can select a map definition file (XML file).
This kind of file can be supplied by a MIDI device manufacturer or another
WaveLab user, for example.
Export
Lets you export a map definition file (XML file). This file can be sent to another
WaveLab user, for example.
Name
Lets you enter a map name.
Only display assignments
If this option is activated, the control map only displays the parameters that
are associated with a remote control.
Expand/Collapse
Expands/collapses the folder tree of the control map.
WaveLab action list
This folder tree lists the parameters that you can remote-control. The top
folder represent contexts. The related parameters can only be controlled if the
context is active. For example, if an audio file is active.
16

Setting Up Your System
Remote Devices
A remote control can be used in several contexts if these are exclusive. For
example, parameters that can be used for an active audio file or an active
audio montage.
The Global folder contain the parameters that can always be controlled.
Control editor - Save
If a control has been created or modified, click this button to save it.
Control editor - Undo
If a control has been modified, click this button to undo the changes.
Control editor - Clear
Erases the selected control’s definition.
Control name
Lets you enter a name for the control. Each control must have a name.
Type
In the Type section, you can edit the type of the selected control.
When more than one type of control can be assigned to a parameter, you can
select a type from the first pop-up menu. You can choose between relative
and absolute editing for certain parameters. For example, a master section
slider can be associated to a remote motorized fader (absolute editing), or to
an infinite knob (relative editing).
Several protocols are supported to interpret the MIDI messages. You can
select the protocol that you want to use from the second menu. The MIDI
learn function can automatically change this protocol, according to the
received MIDI messages.
Remote controls send messages but can also receive messages from
Wave Lab, to light up a butt on or mov e a motorized fader, for example. You can
select the mode to use from the third menu.
Message
Activates the MIDI learn function. When activated, you can use the control
(knob, fader, etc.) on your MIDI controller. When MIDI messages are received,
they are analyzed after the MIDI activity stops for several milliseconds. The
result is displayed in the Message field. This is then used by WaveLab as the
control identifier.
Clear
Erases the MIDI event that identifies the control.
Conditions
A modifier is a WaveLab parameter that can be activated by a MIDI control
(for example, a foot switch) or a computer key ([Ctrl]/[Command], [Shift], etc.).
By associating a remote control with one or two modifiers, you can use a
single remote control to edit different parameters.
17

Setting Up Your System
PROCEDURE
PROCEDURE
Remote Devices
Options Tab
This tab lets you use the MIDI Learn function to assign a control of a MIDI remote
control device to a function.
Emulate mouse wheel
If this option is activated, the AI knob acts as a mouse wheel in the WaveLab
user interface, except for plug-ins.
Edit focused numeric field
If this option is activated, the AI knob can be used to edit the focused numeric
field that you find in many WaveLab windows and dialogs.
Selecting a MIDI Remote Control Device
PREREQUISITE
The MIDI remote control device is connected to your PC/Mac.
1. In any workspace, except the Podcast workspace, select Options > Remote
devices.
2. On the Device editing tab, select one of the MIDI control device slots or the
MIDI shortcuts for menus option from the pop-up menu at the top.
3. Select Active to activate the selected device.
4. From the In-Port and Out-Port menus, select a MIDI input port and output
port.
Assigning a MIDI Controller to a Parameter
If you are using a Steinberg remote control device, for example, the CC121, the
controls are already assigned to parameters. You can customize these default
settings.
PREREQUISITE
You have set up your MIDI remote control device.
1. In any workspace, except the Podcast workspace, select Options > Remote
devices.
2. From the pop-up menu at the top of the dialog, select your MIDI control
device.
3. On the Device editing tab, click the Edit map button.
4. In the tree structure, click the parameter that you want to remote-control.
5. In the Control editor section, enter a name in the Control name field.
18
Setting Up Your System
PROCEDURE
Remote Devices
6. Select the type of control.
Depending on the type of control on the MIDI remote control device, you must select
a control with relative values (knob), trigger values (button), or absolute values (fader).
7. Click in the Message field, and on your MIDI remote control device, move the
control that you want to assign.
The name of the controller is displayed in the Message field.
8. Click the Save button to the right of the This control is modified message.
9. Click the Save button to the right of the Edit map button.
RESULT
The MIDI controller is now assigned to the function.
Assigning Custom Parameters to Plug-ins
You can assign custom parameters to many VST 3 plug-ins.
PREREQUISITE
In the Remote devices dialog, assign the controls of your MIDI controller to the
plug-in custom parameters. If you are using the Steinberg CC121 controller, the
parameters are assigned by default.
1. From the Master Section or the Effects window, open the plug-in that you
want to control with the MIDI remote control device.
2. [Ctrl]/[Command]-click the circle icon at the top of the plug-in window to
enter the Edit mode.
3. Click OK.
The circle icon turns into a tool icon to indicate that you are in MIDI learn mode.
19

Setting Up Your System
Remote Devices
4. Move the mouse over a plug-in parameter, and move the MIDI control that you
want to assign.
Repeat this for all the parameters and controls that you want to assign.
5. When finished, click the tool icon to exit Edit mode, and click OK.
RESULT
The assignment is saved. You can now control the assigned parameters with your
MIDI remote control device. A plug-in can be controlled via the custom parameter
if the Remote control mode is activated and only one plug-in can be activated at
a time.
When a plug-in is activated for remote control, it also has precedence over other
application settings that are controlled by the same parameter.
To remove all remote control assignments on the plug-in, hold [Ctrl]/[Command]
and [Shift], and click the Remote control mode button.
Importing and Exporting Remote Control Definition Files
Map definition files are XML files, containing control assignments for your remote
devices. You can exchange them with other users or save a backup copy.
Select Options > Remote devices, and open the Device editing tab.
• To import a map definition file, click the Import button, browse to the location
of the map definition file, and select the file.
• To export a map definition file, click the Export button, and browse to the
location where you want to save the file.
Editing Changes in the Remote Control Devices Settings
Changes that have been made to the map, for example, changing the name of a
control, can be saved, reset, undone, and removed.
• To save any changes that you have made, click Save.
• To restore the factory preset of a MIDI remote control device, click Reset. If
the control device does not have factory presets, the map is cleared.
• To undo your last action, click Undo.
• To remove the control definition of the selected control or to unassign the
selected control, click Clear.
20

Setting Up Your System
Remote Devices
Using Modifiers for Remote Controlling Parameters
You can use the same controller for controlling different parameters, using one or
two modifiers. A modifier can be a MIDI control (for example, a foot switch) or a
modifier key on your computer keyboard (for example, [Shift] and/or
[Ctrl]/[Command]).
To determine one or two modifiers, open the Remote devices dialog, and when
editing a parameter, select the modifiers from the Conditions section.
You can use the [Shift] and [Alt]/[Option] modifiers to alter the edit steps of infinite
knob controls as follows:
• Press [Shift] to edit values in small steps.
• Press [Alt]/[Option] to edit values in bigger steps.
CC121 Advanced Integration Controller
Channel Section
You can use Steinberg's CC121 Advanced Integration Controller to control
WaveLab.
This section describes the WaveLab factory preset for the CC121. For detailed
information on how to use the controller, refer to the manual that came with the
CC121. Note that the CC121 was originally designed for Cubase. The following
mapping combines the WaveLab functionality with the CC121 controls. The
controls that are not listed in the following paragraph are not assigned to a
parameter.
You can use all controls of the CC121 channel section, except the fader, to control
the elements of the selected track in a WaveLab audio montage. You can use the
fader for the Master Section.
Fader
Controls the Master Section fader.
PAN knob
Controls the gain of the selected track.
Mute
Mutes/unmutes the selected track.
Solo
Activates/deactivates solo for the selected track.
CHANNEL SELECT
Selects the previous/next track in the audio montage.
21

Setting Up Your System
Remote Devices
EQ Section
To move the cursor to the previous/next clip edge in the audio montage, hold
[Alt]/[Option]. To move the cursor to the previous/next region edge, hold
[Shift]. To move the cursor to the previous/next marker in the Audio Files
workspace, hold [Ctrl]/[Command].
With the EQ section you can easily control the Steinberg Studio EQ plug-in.
If the EQ TYPE button is activated on the CC121, you can adjust the parameters
of the focused Studio-EQ. All necessary EQ parameters, such as Q/F/G of each
band, EQ TYPE selection, and ALL BYPASS on/off can be set. You can switch to
WaveLab navigation mode by turning off the EQ TYPE button. In WaveLab
navigation mode, you get access to alternative functions, such as scrolling,
zooming, and switching between workspaces.
EQ Type activated:
Bandwidth knobs (Q)
Adjusts the Q (bandwidth) of each EQ band.
Frequency knobs (F)
Adjusts the center frequency of each EQ band.
Gain knobs (G)
Adjusts the gain of each EQ band.
ON
Activates/deactivates the EQ bands.
ALL BYPASS
Activates/deactivates bypass for all plug-ins in the Master Section.
EQ Type deactivated:
LOW ON
Opens the Audio Files workspace.
LOW-MID ON
Opens the Audio Montage workspace.
HIGH-MID ON
Opens the Batch Processors workspace.
HIGH ON
Opens the Control Window.
EQ-1 knob for the EQ Gain (G)
Scrolls left/right on the timeline.
EQ-2 knob for the EQ Gain (G)
Adjusts the horizontal zoom on the timeline.
22

Setting Up Your System
Remote Devices
EQ-3 knob for the EQ Gain (G)
Adjusts the vertical zoom on the timeline.
EQ-4 knob for the EQ Gain (G)
Scrolls tracks on the Audio Montage workspace or scrolls vertically on the
Audio Files workspace.
EQ-1 knob for the EQ Frequency (F)
Scrolls left/right on the overview timeline of the Audio Files workspace.
EQ-2 knob for the EQ Frequency (F)
Horizontally zooms in/out on the overview timeline of the Audio Files
workspace.
EQ-3 knob for the EQ Frequency (F)
Vertically zooms in/out on the overview timeline of the Audio Files workspace.
EQ-4 knob for the EQ Frequency (F)
Vertically scrolls on the overview timeline of the Audio Files workspace.
Transport Section
In this section you can control the transport functions of WaveLab.
Previous button
Moves the cursor position to the beginning of the project.
Rewind button
Rewind
Forward button
Forward
Next button
Moves the cursor position to the end of the project.
Cycle button
Activates/deactivates Cycle mode.
Stop button
Stops playback. Press again to move the cursor to the previous start position.
Press a third time to move the cursor to the beginning of the project.
Play button
Starts playback.
Record button
Press once to open the Recording window. Press again to start the
recording. Press a third time to stop recording. The recorded file opens in the
Audio Files workspace.
23

Setting Up Your System
NOTE
Remote Devices
Function Section
In this section, you can adjust certain functions, such as fades and envelope level,
by using the VALUE knob.
VALUE knob/button
Rotate this knob to adjust the assigned function. Press the knob to reset the
parameter to its default value.
FUNCTION button 1
Adjusts the fade-in settings of the focused clip.
FUNCTION button 2
Adjusts the fade-out settings of the focused clip.
FUNCTION button 3
Adjusts the envelope level of the focused clip.
FUNCTION button 4
The element clicked last on the Edit > Nudge menu in the Audio Montage
workspace is assigned to this button.
AI Knob Section
WaveLab can be controlled with the AI knob of Steinberg’s CC121, CI2+, and
CMC-AI controllers. With the AI knob, you can control the parameter that the
mouse points to.
The AI knob only works on parameters that are automatable.
In this section you can control parameters via the AI knob.
AI KNOB
Controls the VST 3plug-in parameters, emulates the mouse wheel, for
example, for scrolling, and lets you edit a focused numeric field. To control a
parameter with the AI knob, move the mouse cursor over the parameter that
you want to control, and move the AI knob. You can activate/deactivate the
emulation of the mouse wheel and the editing of the focused numeric field in
the Options tab.
LOCK
When the mouse cursor points to a parameter, press LOCK to control this
parameter regardless of the position of the mouse cursor.
JOG
Activates Jog mode. While Jog mode is activated, press LOCK to enter
shuttle mode.
24

Setting Up Your System
Remote Devices
CUBASE READY Indicator
The CUBASE READY indicator has no function in WaveLab.
Foot Switch Section
The foot switch has the same function as [Shift]. Press and hold the foot switch
while turning the AI knob to fine tune parameters.
25

This chapter describes general concepts that you will use when working with
NOTE
WaveLab. Getting accustomed with these procedures allows you to work more
effectively with the program.
General Editing Rules
The common editing operations can be used in any Steinberg product.
• To select and move interface items, and to select ranges, click and drag with
the mouse.
WaveLab Concepts
• Use the keys of your computer keyboard to enter numeric values and text, to
navigate lists and other selectable interface items, and to control the transport
functions.
• Common operations like cut, copy, paste, or the selection of multiple items
can be performed using standard keyboard shortcuts.
The behavior of your product is also governed by your preference settings.
RELATED LINKS
Global Preferences Dialog on page 666
26
WaveLab Concepts
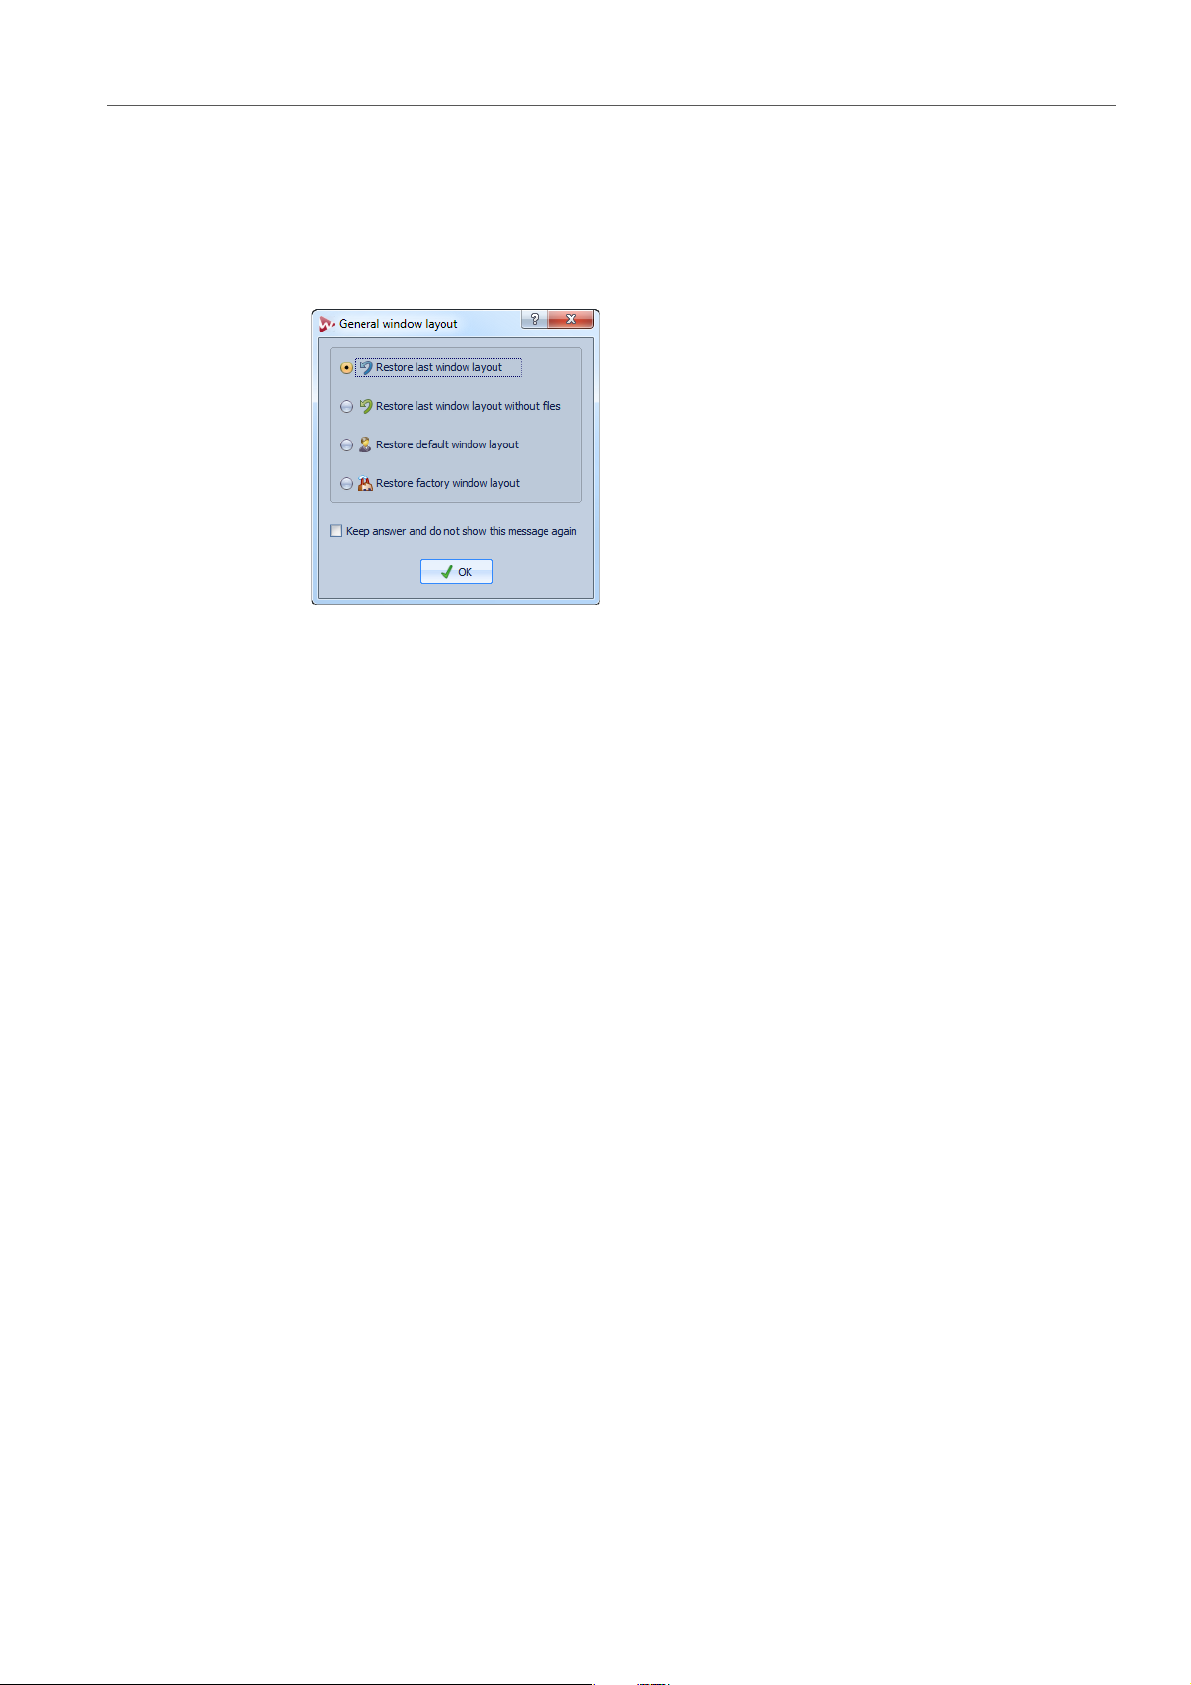
Startup Screen
Startup Screen
When WaveLab starts, a startup screen opens where you can select which window
layout you want to use.
Restore last window layout
Restores the window layout that you last used in WaveLab, including all files
that were open.
Restore last window layout without files
Restores the same window layout that you last used in WaveLab without
opening any files.
Restore default window layout
Restores the default window layout without opening any files.
Restore factory window layout
Restores the factory window layout without opening any files.
Keep answer and do not show this message again
If this option is activated, the option that you select is used from now on and
the startup screen does not open anymore. To display the General window
layout dialog, even if this option has been activated, press [Ctrl]/[Command]
when starting WaveLab.
RELATED LINKS
Window Layout on page 615
27

WaveLab Concepts
Basic Window Handling
Basic Window Handling
WaveLab follows the basic guidelines for the Windows/Mac OS interface, which
means that Windows/Mac OS standard procedures apply.
Closing Windows
• To close a tabbed window, click the “X” button of the corresponding tab or
press [Ctrl]/[Command]-[W].
• To close a tabbed window without saving your changes, hold
[Ctrl]/[Command]-[Shift], and click the “X” button. This avoids having to
confirm a warning message whenever you want to close an unsaved window.
• To close all tabbed windows at once, right-click a tab, and select Close all.
• To close all tabbed windows but the selected tabbed window, right-click a
tab, and select Close all but this one.
• To individually select the tabbed windows that you want to close, right-click a
tab, and select Select files to close. This opens the Files to close dialog,
where you can select the files that you want to close.
RELATED LINKS
Files to Close Dialog on page 66
Managing Tabs on page 65
Switching Between Files
You can have multiple files open and switch between them.
• To bring a file to the front, click the corresponding tab.
• To cycle between all open files in a workspace, hold [Ctrl]/[Command], and
press [Tab] continuously.
• To cycle back and forth between the last two active files, press
[Ctrl]/[Command]-[Tab]. Between each step you have to release all keys.
• To cycle backwards, press [Ctrl]/[Command]-[Shift]-[Tab].
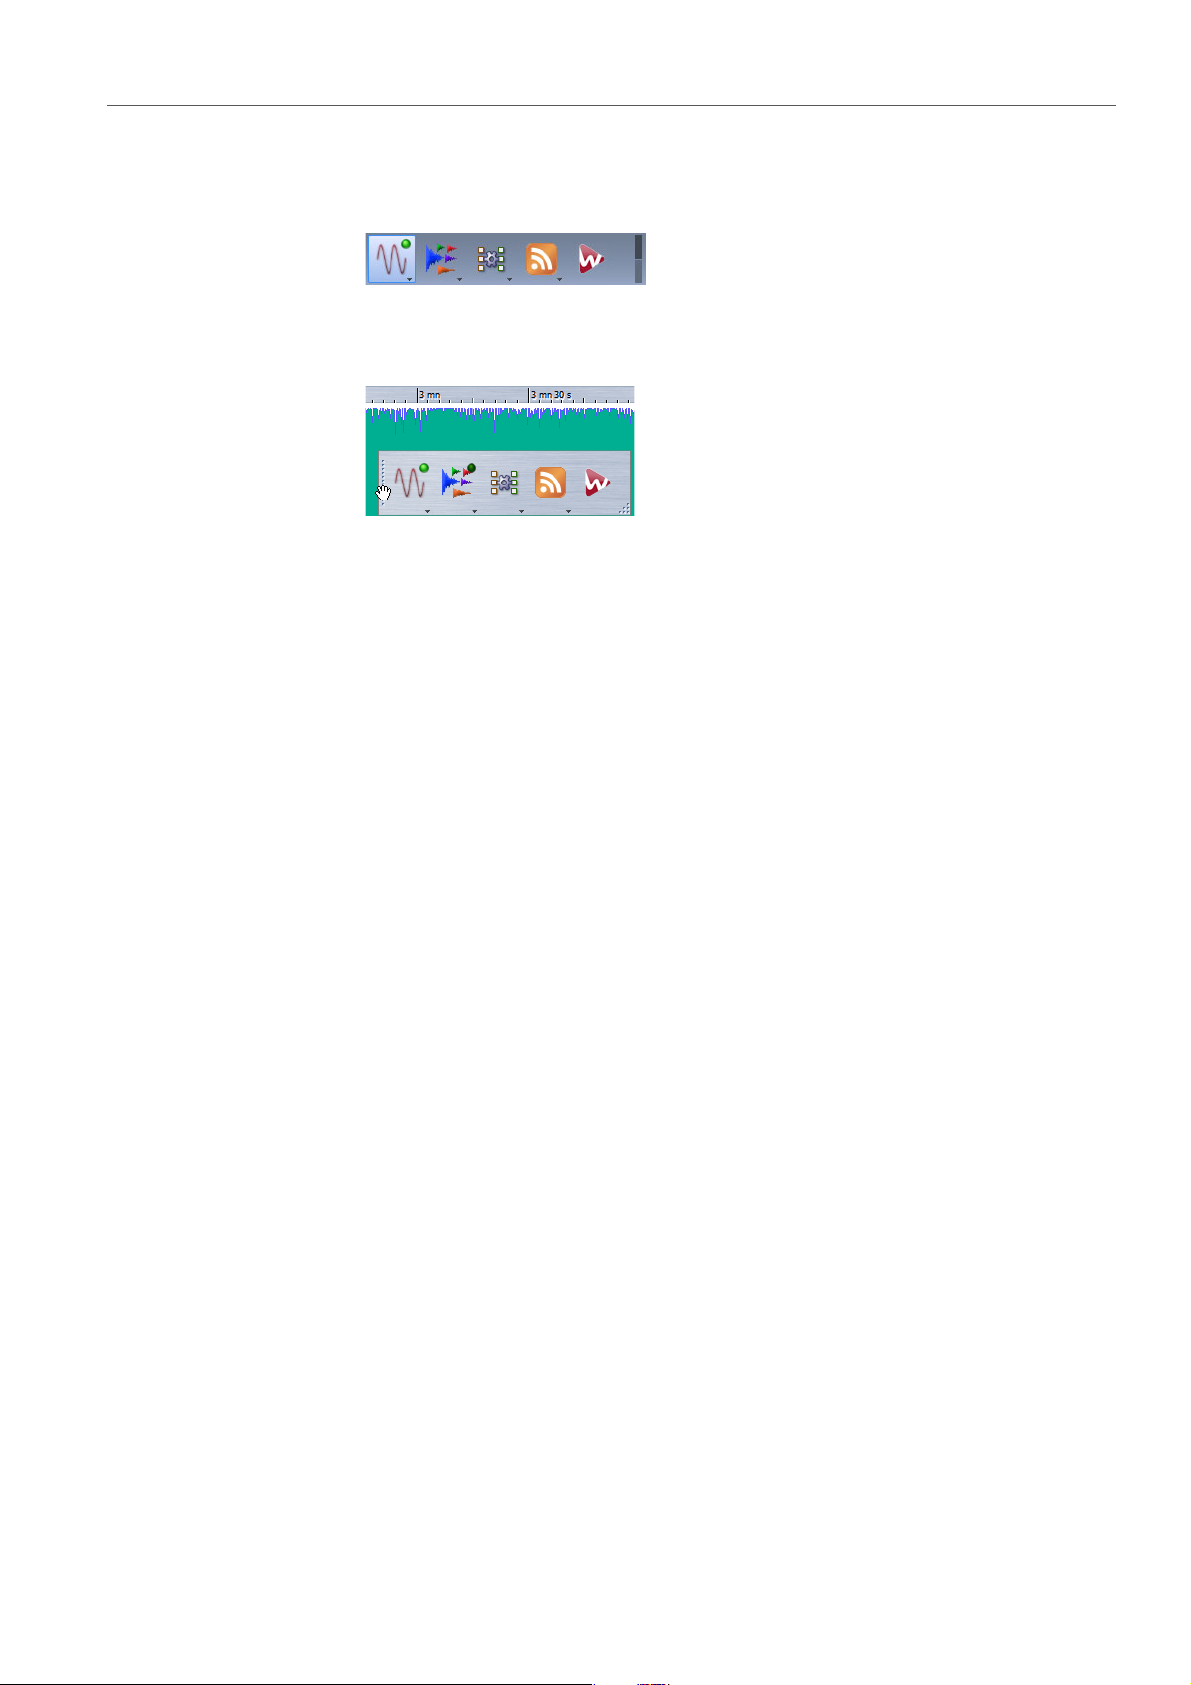
Window Switcher
The window switchers let you easily switch between workspaces, create new
workspaces, or open existing projects. There are two types of window switchers:
The central switcher bar and the floating window switcher.
The floating window switcher behaves like the central switcher bar, but takes less
room and floats above other windows.
28
WaveLab Concepts
Basic Window Handling
• To activate/deactivate the central switcher bar, in the Audio Files workspace
or the Audio Montage workspace, select Workspace > Command bars >
Central switcher bar.
• To activate/deactivate the floating window switcher, in any workspace, select
Options (WaveLab menu on Mac) > Global preferences, and on the
Display tab, activate Use Floating Window Switcher.
Using the Window Switcher
You can use the floating window switcher and the central switcher bar to navigate
through your workspaces.
• To switch between workspaces, click a workspace button. If several
workspaces of the same type are open, [Alt]/[Option]-click the workspace
button to cycle between the workspaces. If the workspace is not yet open, a
pop-up menu opens from which you can open a new workspace.
• To copy a file from one workspace to another, drag it to the button of the
workspace that you want to open, wait until the workspace becomes active,
and release the file where you want.
• To create a new file in any workspace, press [Ctrl]/[Command], and click a
workspace button.
• To open the Open window to select a file, press [Shift], and click a workspace
button.
• To display a menu listing the files that have recently been used in a particular
workspace, right-click any workspace icon.
• To create a new file or open a file, right-click any workspace icon, and select
New or Open. While left-clicking activates a workspace, right-clicking does
not activate a workspace.
29
WaveLab Concepts
PROCEDURE
Basic Window Handling
Customizing the Central Switcher Bar
You can customize the central switcher bar using the settings menu.
To open the settings menu, right-click an empty part of the central switcher bar.
Hide
Hides the central switcher bar.
Fold
Minimizes the central switcher bar to a thin line. To unfold the bar, click the
thin line.
Left side/Top/Right side/Bottom
Determines the location of the central switcher bar.
Large/Medium/Small size
Determines the size of the central switcher bar.
Workspace buttons
Determines which workspace buttons are visible on the central switcher bar.
Extra buttons
Determines whether to show or hide the extra buttons that some workspaces
offer.
Customizing the Floating Window Switcher
You can set up the floating window switcher to your liking.
1. In any workspace, select Options (WaveLab menu on Mac) > Global
preferences.
2. On the Display tab, make sure that Use Floating Window Switcher is
activated.
30
 Loading...