

Page 1
Page 2

Contents
Preface 3
1 Overview 5
1.1 Quick Guide . . . . . . . . . . . . . . . . . . . . . . . . . . 5
1.2 Cubase / Nuendo Setup . . . . . . . . . . . . . . . . . . . 6
2 VST Connect 8
2.1 User Interface Overview . . . . . . . . . . . . . . . . . . . 8
2.2 Connection . . . . . . . . . . . . . . . . . . . . . . . . . . 9
2.2.1 MySteinberg . . . . . . . . . . . . . . . . . . . . . 9
2.2.2 Key . . . . . . . . . . . . . . . . . . . . . . . . . . 10
2.2.3 LAN . . . . . . . . . . . . . . . . . . . . . . . . . . 10
2.3 Network . . . . . . . . . . . . . . . . . . . . . . . . . . . . 11
2.3.1 Find User Tab . . . . . . . . . . . . . . . . . . . . . 12
2.3.2 Friends Tab . . . . . . . . . . . . . . . . . . . . . . 13
2.3.3 Icons . . . . . . . . . . . . . . . . . . . . . . . . . 13
2.4 Control Room . . . . . . . . . . . . . . . . . . . . . . . . . 14
2.5 Talkback . . . . . . . . . . . . . . . . . . . . . . . . . . . . 16
2.6 Mixer . . . . . . . . . . . . . . . . . . . . . . . . . . . . . . 17
2.6.1 Performer Monitor (Headphone) Mix . . . . . . . . 17
2.6.2 Recording Mix . . . . . . . . . . . . . . . . . . . . 18
2.7 VST Cloud Menu . . . . . . . . . . . . . . . . . . . . . . . 19
2.8 Event Monitor . . . . . . . . . . . . . . . . . . . . . . . . . 20
2.9 Setup Tabs . . . . . . . . . . . . . . . . . . . . . . . . . . 21
2.9.1 Configuration . . . . . . . . . . . . . . . . . . . . . 21
2.9.2 Performer . . . . . . . . . . . . . . . . . . . . . . . 23
2.9.3 Manager . . . . . . . . . . . . . . . . . . . . . . . 24
2.9.4 Recordings . . . . . . . . . . . . . . . . . . . . . . 26
2.10 Toolbox Items . . . . . . . . . . . . . . . . . . . . . . . . . 26
Page 3

2.11 Status and File Transfer . . . . . . . . . . . . . . . . . . . 27
3 VST Connect Monitor 28
4 VST Connect Performer 29
4.1 User Interface Overview . . . . . . . . . . . . . . . . . . . 29
4.2 Connection . . . . . . . . . . . . . . . . . . . . . . . . . . 30
4.2.1 MySteinberg . . . . . . . . . . . . . . . . . . . . . 30
4.2.2 Key . . . . . . . . . . . . . . . . . . . . . . . . . . 31
4.3 Performer Monitor (Headphone) Mix . . . . . . . . . . . . 32
4.4 Effects . . . . . . . . . . . . . . . . . . . . . . . . . . . . . 34
4.4.1 Reverb . . . . . . . . . . . . . . . . . . . . . . . . 34
4.4.2 EQ . . . . . . . . . . . . . . . . . . . . . . . . . . . 34
4.4.3 Compressor . . . . . . . . . . . . . . . . . . . . . . 35
4.4.4 Inserts . . . . . . . . . . . . . . . . . . . . . . . . . 35
4.5 Toolbox Items . . . . . . . . . . . . . . . . . . . . . . . . . 36
4.6 Status and File Transfer . . . . . . . . . . . . . . . . . . . 37
4.7 Settings . . . . . . . . . . . . . . . . . . . . . . . . . . . . 37
4.8 Plug-In Manager . . . . . . . . . . . . . . . . . . . . . . . 39
4.9 Using a VST Instrument . . . . . . . . . . . . . . . . . . . 39
5 Troubleshooting 40
5.1 Connection . . . . . . . . . . . . . . . . . . . . . . . . . . 40
5.2 Server Not Responding . . . . . . . . . . . . . . . . . . . 40
5.3 Avoid Audio Dropouts . . . . . . . . . . . . . . . . . . . . 41
5.4 Avoid Feedback . . . . . . . . . . . . . . . . . . . . . . . . 41
5.5 More ... . . . . . . . . . . . . . . . . . . . . . . . . . . . . 41
2
Page 4

Preface
Welcome to VST Connect! We are very proud to present this exciting
new version of VST Connect, which features an all new user interface
and mixer, significantly simplified setup for the engineer, and many more
new features and improvements.
VST Connect has been used by skilled and professional producers all
over the world to record artists from all over the world conveniently and
with highest audio quality standards using the affordable PRO version.
And hobbyists and serious amateurs have recorded friends and colleagues with the SE version coming for free with the latest Cubase and
Nuendo versions.
With VST Connect an engineer can connect to a remote artist and create a situation, which is entirely similar to recording somebody next door,
including video to see each other through the virtual Control Room window. The artist does not have to do anything but perform, just like in
a professional studio. All that is required on his or her end is a decent
microphone, headphones, and audio interface. The artist doesn’t need
any DAW, but simply downloads and installs the freely available "VST
Connect Performer" application from the Steinberg website, available for
Apple OSX, Windows, and iOS (iPad). Once installed, it is sufficient to
start this application and connect to the studio; everything else, even
including setup of the audio and video devices and connections, can
be remote-controlled by the connected studio engineer. This allows for
artists and talents to concentrate on their job and use this new technology even when they are not technically skilled.
With this third iteration of VST Connect also comes an incredibly simplified setup procedure for the studio engineer. From Cubase 8 and
Nuendo 7 on, there is a menu allowing to incorporate the entire setup
for VST Connect in one single step, either from an empty project, or an
already elaborated production. It also utilizes the built-in Cue Mix and
Control Room features of Cubase / Nuendo in exactly the same way as
they are being used in the room-to-room studio! Using the PRO version, high resolution ("HD") and glitch-free audio files recorded on the
Performer end can be transferred after the job. So now, the recording
situation is entirely transparent, whether the artist is located next room,
or on the other side of our precious planet.
We have been working on connecting musicians and talents over the
Page 5

Internet for more than 10 years now. Having come a long way from the
early 80s, when Internet wasn’t yet a word and we just started to send
our first e-mails to those "chosen few" who even knew that remote communication was applicable, it is truly exciting for me to see how far it has
come, and I’m particularly amazed to be part of this process.
There are too many colleagues at Steinberg and elsewhere to mention,
who have helped to make this dream come true, so I hope they don’t
mind if I express my gratitude to all of them here. In particular, I would
like to thank Michael Spork who has provided at least as much of the
programming work as myself, and my very long term friend and partner
Manfred Rï¿
1
rup, with whom I am happy to still share the experience of
2
these amazing developments of our brave new world.
October 2014
4
Page 6

1 Overview
1.1 Quick Guide
VST Connect is used by two people, the artist or talent performing vocals or other instrument, and an engineer in a studio using Cubase /
Nuendo along with the VST Connect components. The artist downloads
and installs the VST Connect Performer application or app. The Apple
OSX and Microsoft Windows versions are freely downloadable from the
Steinberg website, the iPad IOS version is very affordable. Everything
else that is required on the artist side is a microphone, headphone, and
audio interface along with a suitable driver. For a test, even the built-in
hardware can be used, but for reasonable quality recordings, a good audio interface like the Steinberg UR22 is recommended..
For a quick start, and also for explaining some of the new features of this
version, we will start by describing the steps necessary on the Cubase
/ Nuendo end, assuming the artist is ready to go and has installed and
launched the VST Connect Performer application (or app).
For the impatient, and those already familiar with previous versions of
VST Connect, here is a super-quick rundown how to start remote recording instantly:
PROCEDURE
1. Create a new Cubase / Nuendo project or use an existing one.
2. Access the VST Cloud menu and choose "Create VST Connect".
3. If not already present, create a Talkback channel using "Add
Talkback" in the same menu.
4. If the VST Connect Editor is not already visible, choose "Open
VST Connect Editor".
5. Enter your MySteinberg name and password in the according
fields at the top right and click the "Login" button (see Connec-
tion). Open the Net view by clicking the bottom leftmost icon to
find and invite friends. Have the Performer open the Performer
app or application and find and accept you (with your VST Cloud
name). Now either side can connect by double-clicking in the
friend view, provided the friend is online (blue light).
Page 7

RESULT
You can see, hear, and immediately record the artist now, just like you
would record yourself or somebody else next door!
1.2 Cubase / Nuendo Setup
With version 4 of VST Connect comes an all new menu in Cubase /
Nuendo. It is called VST Cloud. To begin with, let’s assume that you
start from scratch, so the first step is to launch Cubase / Nuendo and
PROCEDURE
1. Create a new empty project, using either the "Empty", "Default",
2. Select "Create VST Connect" from the VST Cloud menu. De-
or your preferred default project template. To set up a VST Connect session, all you have to do is to
pending on whether you are using the built-in VST Connect SE,
or have purchased the VST Connect PRO version, you will find
this in the accordingly labeled menu. This will create an Input
channel with the VST Connect plug-in, possibly (if not existing
already) create a Cue Mix Channel in the Control Room Mixer,
install the VST Connect Cue plug-in in that channel, install the
VST Connect Monitor plugin after the main output, and create an
audio track in the arrangement, which is readily set up to record
and chat with a remote artist.
3. You can create more such audio tracks from the VST Connect
menu ("Create Performer Track"), or right click and choose "Duplicate Track" if you need several recording tracks like for doubletracking, two-part guitars, choir, or various versions etc. This is
similar to creating a new Audio Track and select "VST Connect"
as its input audio source.
The only thing that is left to do, if you haven’t already done so is
to create a Talkback setup. You have to do this only once. For
convenience, there is an entry in the VST Connect menu labeled
"Create Talkback" which you should select now.
4. Then make sure that the Talkback channel of the Control Room
is assigned an audio input with your Talkback (abbreviated: TB)
microphone attached. This is done in the "Devices" menu of
Cubase / Nuendo
5. Select "VST Connections" (not to be confused with "VST Connect") in the "Devices" menu and then, access the rightmost tab
labeled "Studio". You should see the "Talkback" row; assign the
according audio port to which your TB microphone is connected
(you may have to click the "+" plus icon to open up the connec-
6
Page 8

tions row). This is the same procedure as assigning audio ports
in the "Inputs" tab of the VST Connections panel. It is a good
idea to save the Studio (Control Room) settings once all works
as desired.
Note
If you have never recorded an artist or yourself in your studio
using the Control Room, you might consider having look around
the Control Room and its settings in the "Studio" tab and/or refer to the Control Room section of the Cubase / Nuendo manual.
There are many useful functions available there that relate to professional studio recording and monitoring.
To access the Control Room Mixer, use the "Devices" menu and
there choose "Control Room Mixer". You can also use the top
left control in the MixConsole window to show the Control Room
mixer on the right hand side of Cubase / Nuendos’ mixer window.
For more details on this, again refer to the related sections in the
Cubase / Nuendo manual.
7
Page 9
2 VST Connect
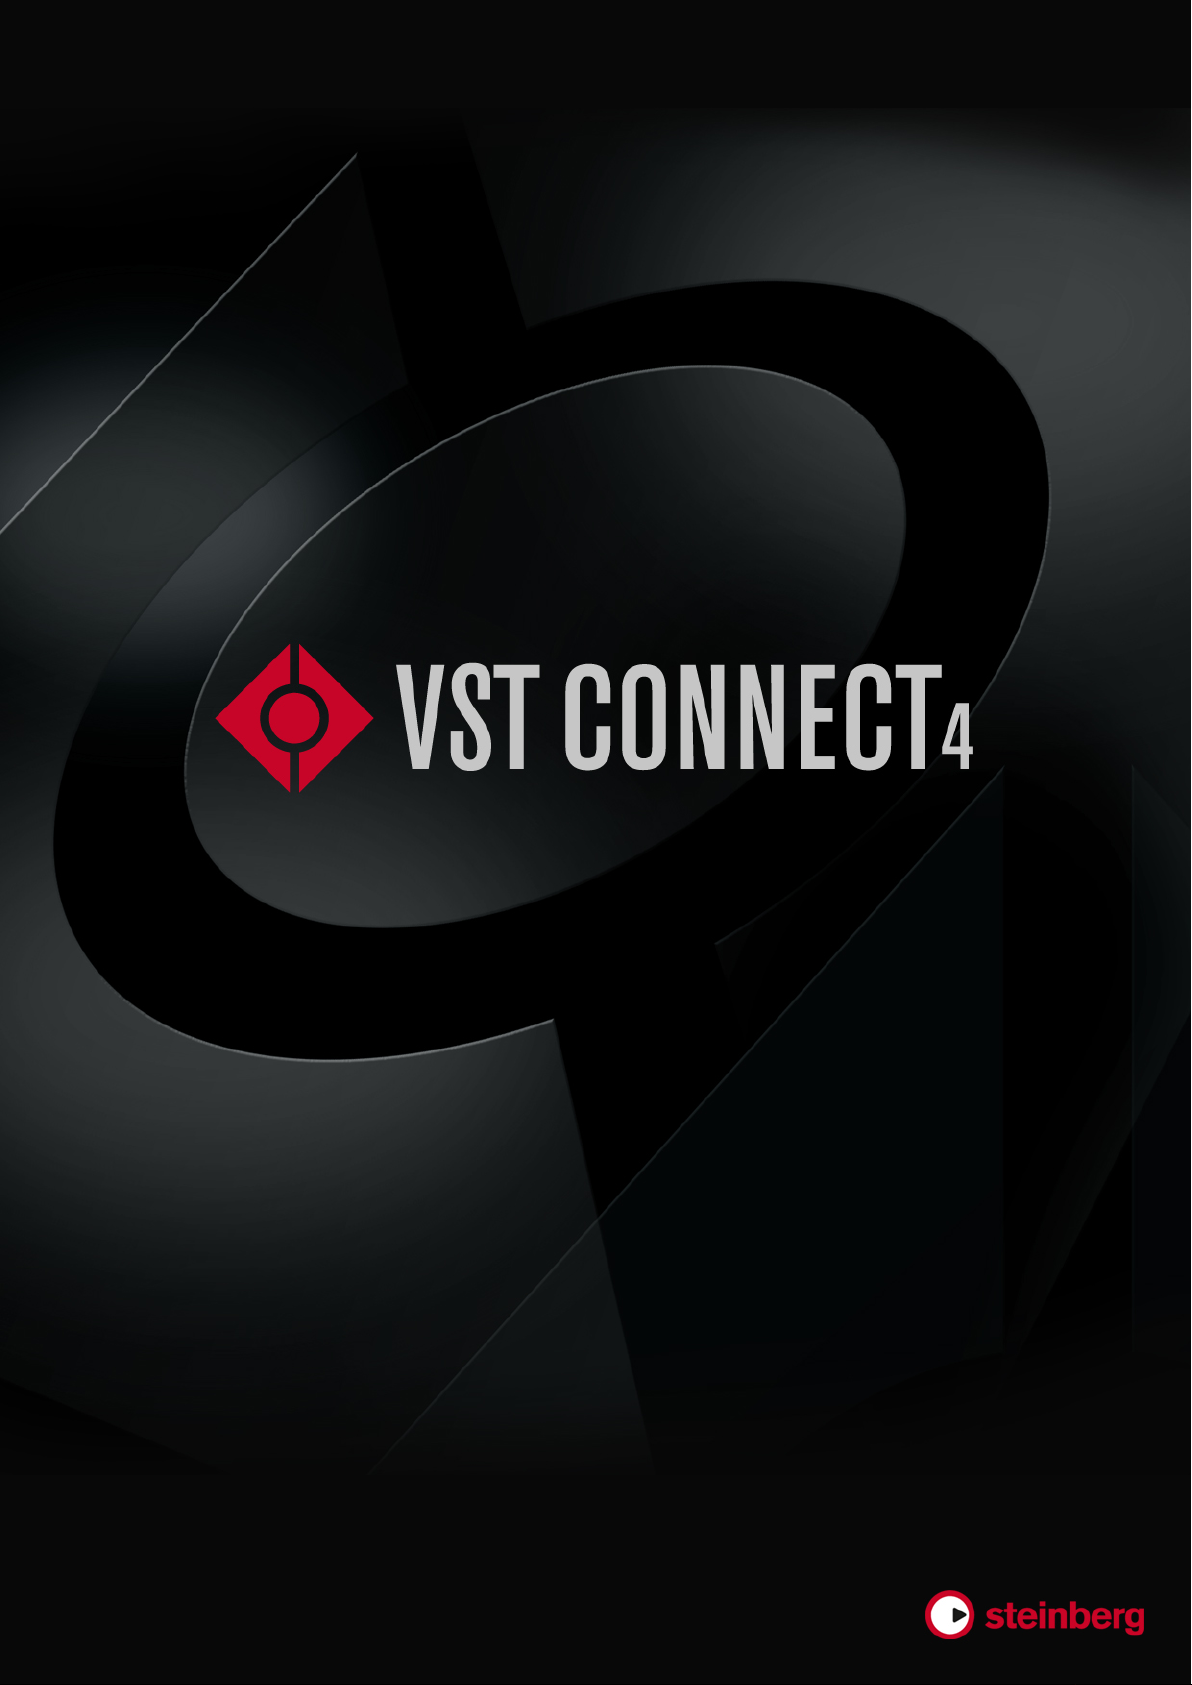
2.1 User Interface Overview
• On the top left, Talkback can be controlled. These controls are linked
to the according controls in the Cubase / Nuendo Control Room Mixer.
See Talkback how to use this.
• The top middle section shows status information, none of these can be
changed, they are for informational purpose only. See Event Monitor.
• The top right section is where you connect to the artist. See Connec-
tion for further details
• To the middle left, usually the Performer video is displayed, but depending on other settings, also the large mixer view or settings pages
can be seen. See Setup Tabs section for more information on this.
• To the right, the Monitor Mixer is shown. See Mixer section for details.
Page 10
2.2 Connection
2.2.1 MySteinberg
Now you are ready to record the remote artist. You should see the VST
Connect plug-in user interface; if that window has been closed accidentally, you can re-open it by selecting Open Editor in the Cubase / Nuendo
"Project/VST Connect" menu.
The connection procedure has changed since version 4. With the new
connection procedure, both the Studio and the Performer can initiate a
connection and it is no longer required to exchange a key number. To
be able to use VST Connect, you need a MySteinberg account. Both
Performer and Studio need to be registered with MySteinberg.
Use the "Id" button to toggle between the MySteinberg and the classic
"Key" connection page.
If you run VST Connect PRO, you can also connect locally. Note this
only works if the PRO version is started in Cubase / Nuendo.
All three available connection methods are described in the following
sections.
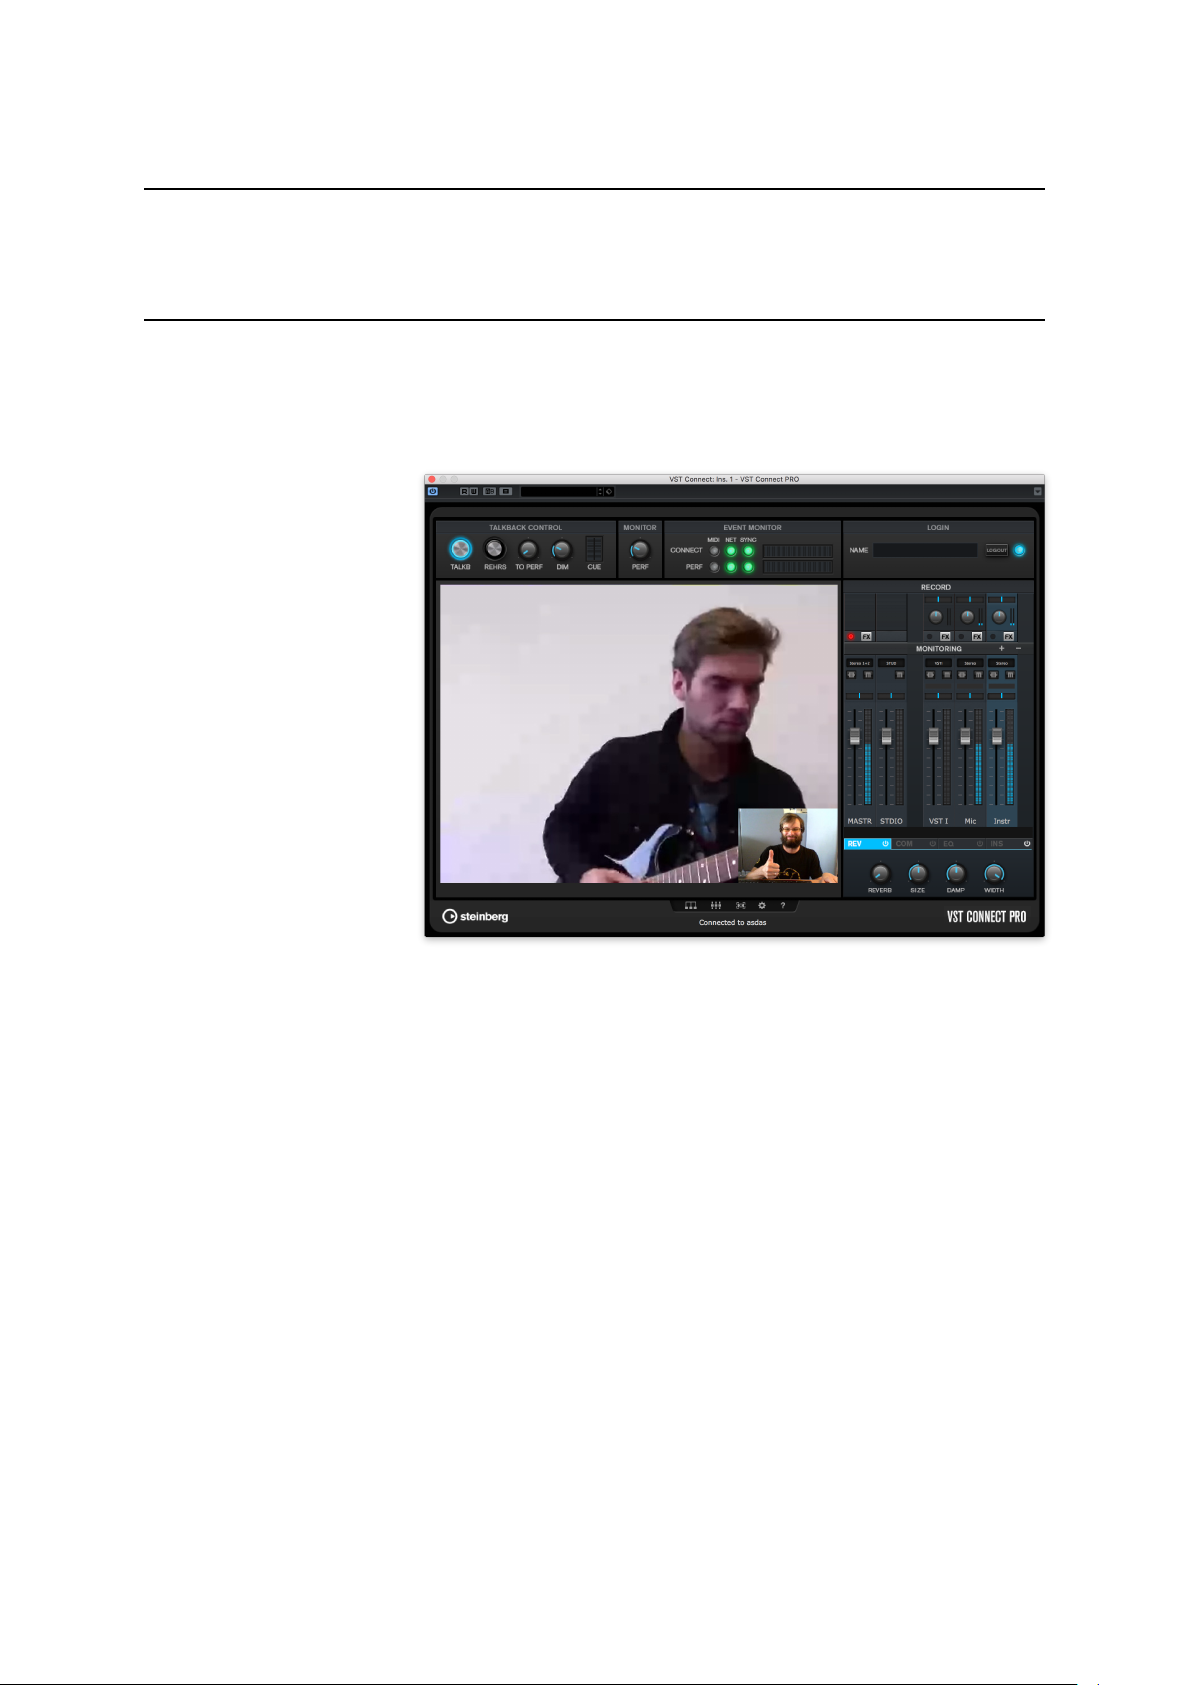
PROCEDURE
1. On the top right of the VST Connect and Performer user interface
you will find the login section.
2. Fill in your credentials (MySteinberg email address and pass-
word) and
3. Click the "Login" button.
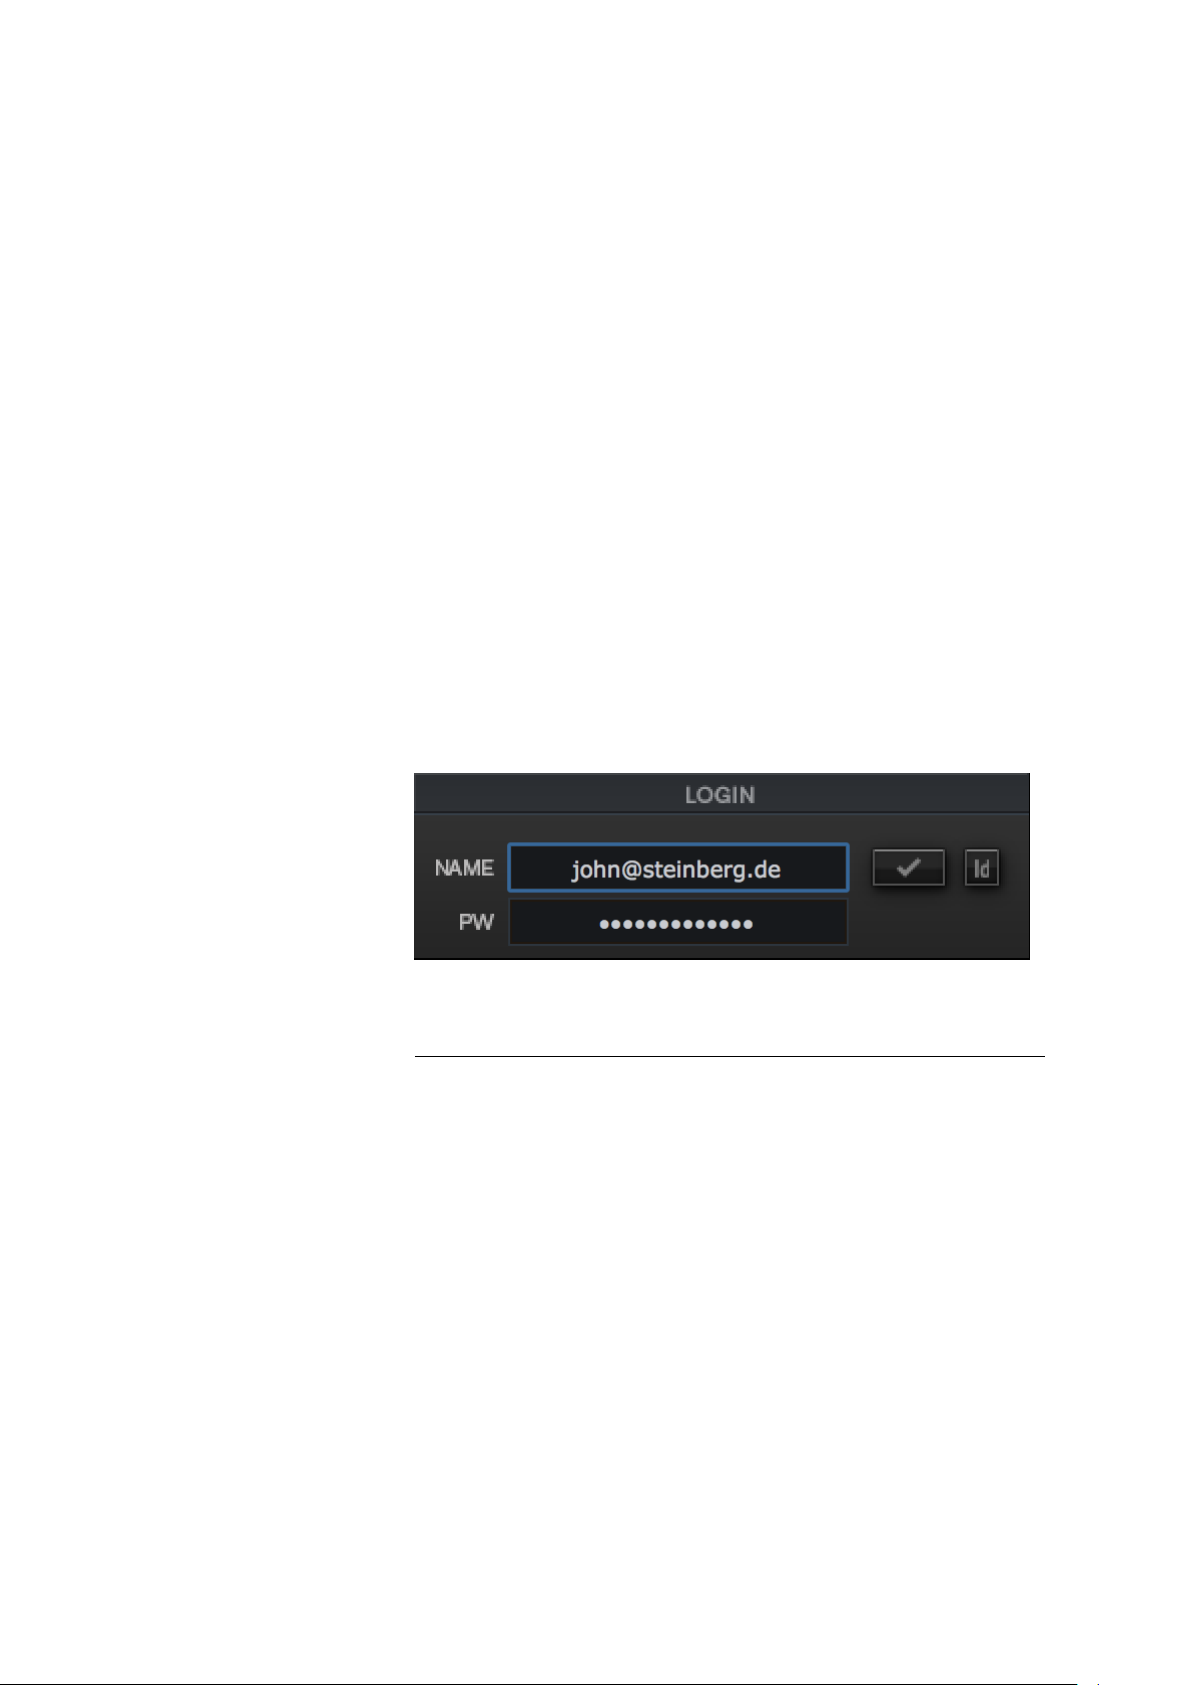
4. If you do this for the first time and you have not yet provided a
VST Cloud user name (for instance with VST Transit), you will
have to do so now. Choose a name that can be easily recognised, because this is the name that your friends may be searching for, using the search function described below. You will need
to do this only once. Note that a VST Cloud user name can not
be changed later.
9
Page 11
2.2.2 Key
5. After successful login, the Network page opens automatically on
the Friends tab.
Note
If you don’t have an account, please go to the MySteinberg Website to create an account free of charge.
2.2.3 LAN
PROCEDURE
1. If you haven’t done so yet, type your name in the "Name" field
in the top right "Network login" section. This can be your real
name, or a nickname that the artist will see.
2. Click on the "Login" button right to the name field. A two-part
number ("Key") will appear in the second field below the name,
provided you are connected to the Internet. Communicate this
number to the artist, for instance via SMS, email, or phone.
3. Ask the artist to start the Performer application and enter a name
in the "Name" field in top right section, also labeled "Network
Login", and to enter the "Key" number into the according field.
Make sure that there is a blank (space) between the two groups
of numbers.
4. Ask the artist to click the "Connect" button.
If the Performer should be connected in your Local Area Network (LAN),
and provided that you are running the PRO version of VST Connect,
the LAN button in the Performer application is lit. The artist can then
click this to see and select your computer to connect as is described
10
Page 12

in the Performer documentation. You should now see the artist in the
VST Connect plug-in window, provided he or she has a webcam connected and installed, and hear his or her voice provided he or she has
connected a microphone via an audio interface to the computer. It is not
necessary or even recommended that the Performer Track in Cubase /
Nuendo is in Monitor mode (the yellow speaker icon should not be lit) to
be able to hear the artist’s microphone signal, because you can hear the
Performer at any time thru the VST Connect Monitor plugin which is inserted after the Main Output ("Monitor") in the Control Room. Otherwise
you may experience undesired delays. If this is the first time, you may
have to help the artist assigning the correct video and/or audio device
and connections:
PROCEDURE
1. Click the "gearwheel" item on the lower right of the VST Connect
editor window and select the "Performer" tab. In the "Audio Device" item, choose an audio device of the Performer’s computer
from the list.
2. If you cannot hear the artist yet, click the toolbox icon again to
close the settings page, and choose his or her microphone’s port
on top of the "Mic" channel in the VST Connect mixer.
2.3 Network
3. For the artist to hear his or her monitoring (headphone) signals,
you may also have to choose the correct output ports above the
"MASTER" channel found in the Monitor mixer all to the left.
RESULT
You are now ready to record the artist just like with any other recording
you are used to! You will probably want to import some playback audio
file for the artist etc. Just use Cubase / Nuendo the same way you would
if you were recording yourself or somebody else.
After successful login, the Network page opens automatically on the
Friends tab. You can also access the Network page at any time by clicking the network icon on the bottom of the toolbox item. The Network
page features two tabs: "Find User" and "Friends" Tab.
11
Page 13
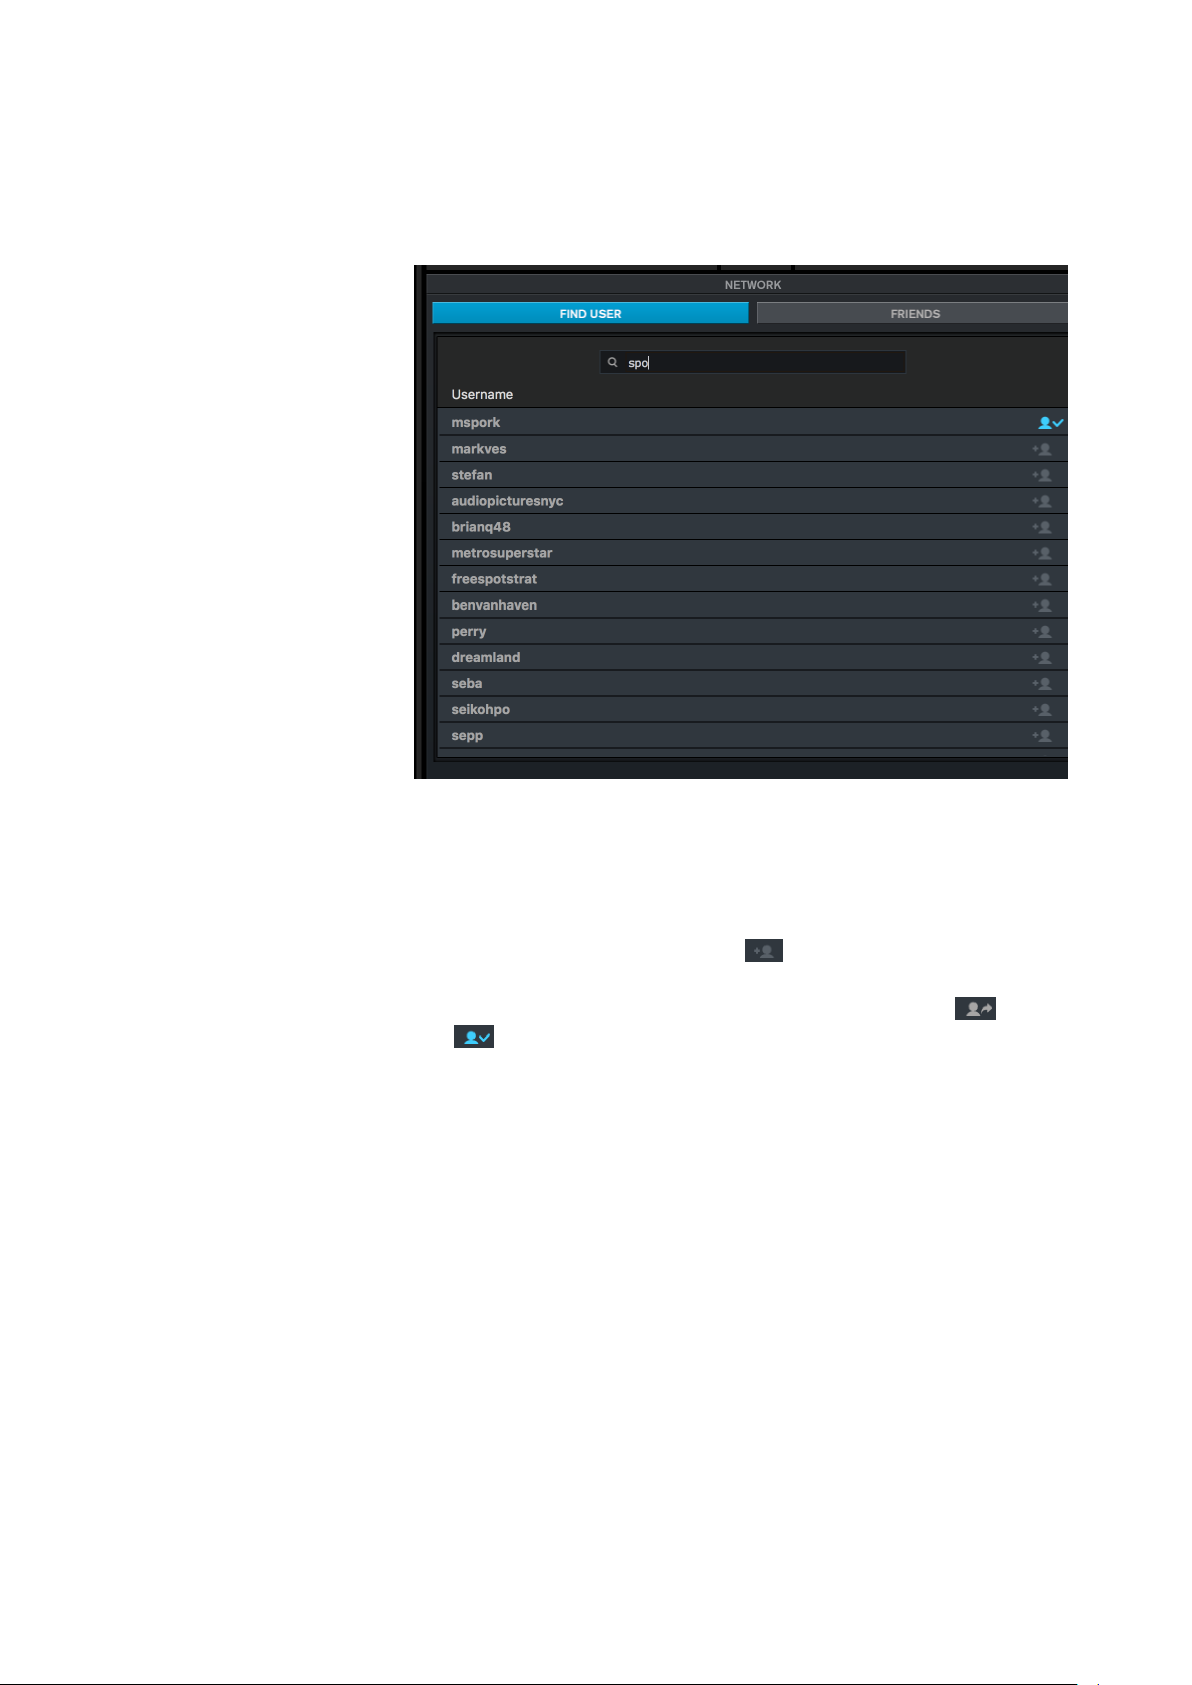
2.3.1 Find User Tab
This network tab allows you to search the VST Cloud for your partner.
Type his or her VST Cloud name to find it in the list. To send a friendship,
select the user and double press the request button. You also can
send a request if you start the context menu with a right click to the user.
The selected user receives the request and needs to confirm .
The symbol shows you that the user is your friend.
12
Page 14

2.3.2 Friends Tab
2.3.3 Icons
This network tab shows all friends. It also shows all users with a friendship request or waiting to be confirmed as a friend. To accept
a friendship double-click to the accept button.
Note
To connect to a friend select the friend and double click to the
connect button. The friend needs to be online.
Send user a friendship request.
A friendship request has been sent to an user.
The user is a friend.
Accept a friendship request.
An friend is offline
An friend is online
13
Page 15

2.4 Control Room
The artist will hear whatever you send via the Control Room Cue Mix
channel. Playback and review channels (tracks on which you already
recorded a performance of the artist) are sent to the Performer application via the VST Connect Cue Channel. Each channel in the Cubase
/ Nuendo MixConsole has a "CUES" mix level control (use "Racks" on
the mixer header and enable "Cue Sends", should it not show up), which
14
Page 16
determines how much of that channel is audible on the artist side. This
can be set pre or post fader like other channel sends, and also features
a pan control.
Note
You may find further details about Cue Sends in the Cubase /
Nuendo manual.
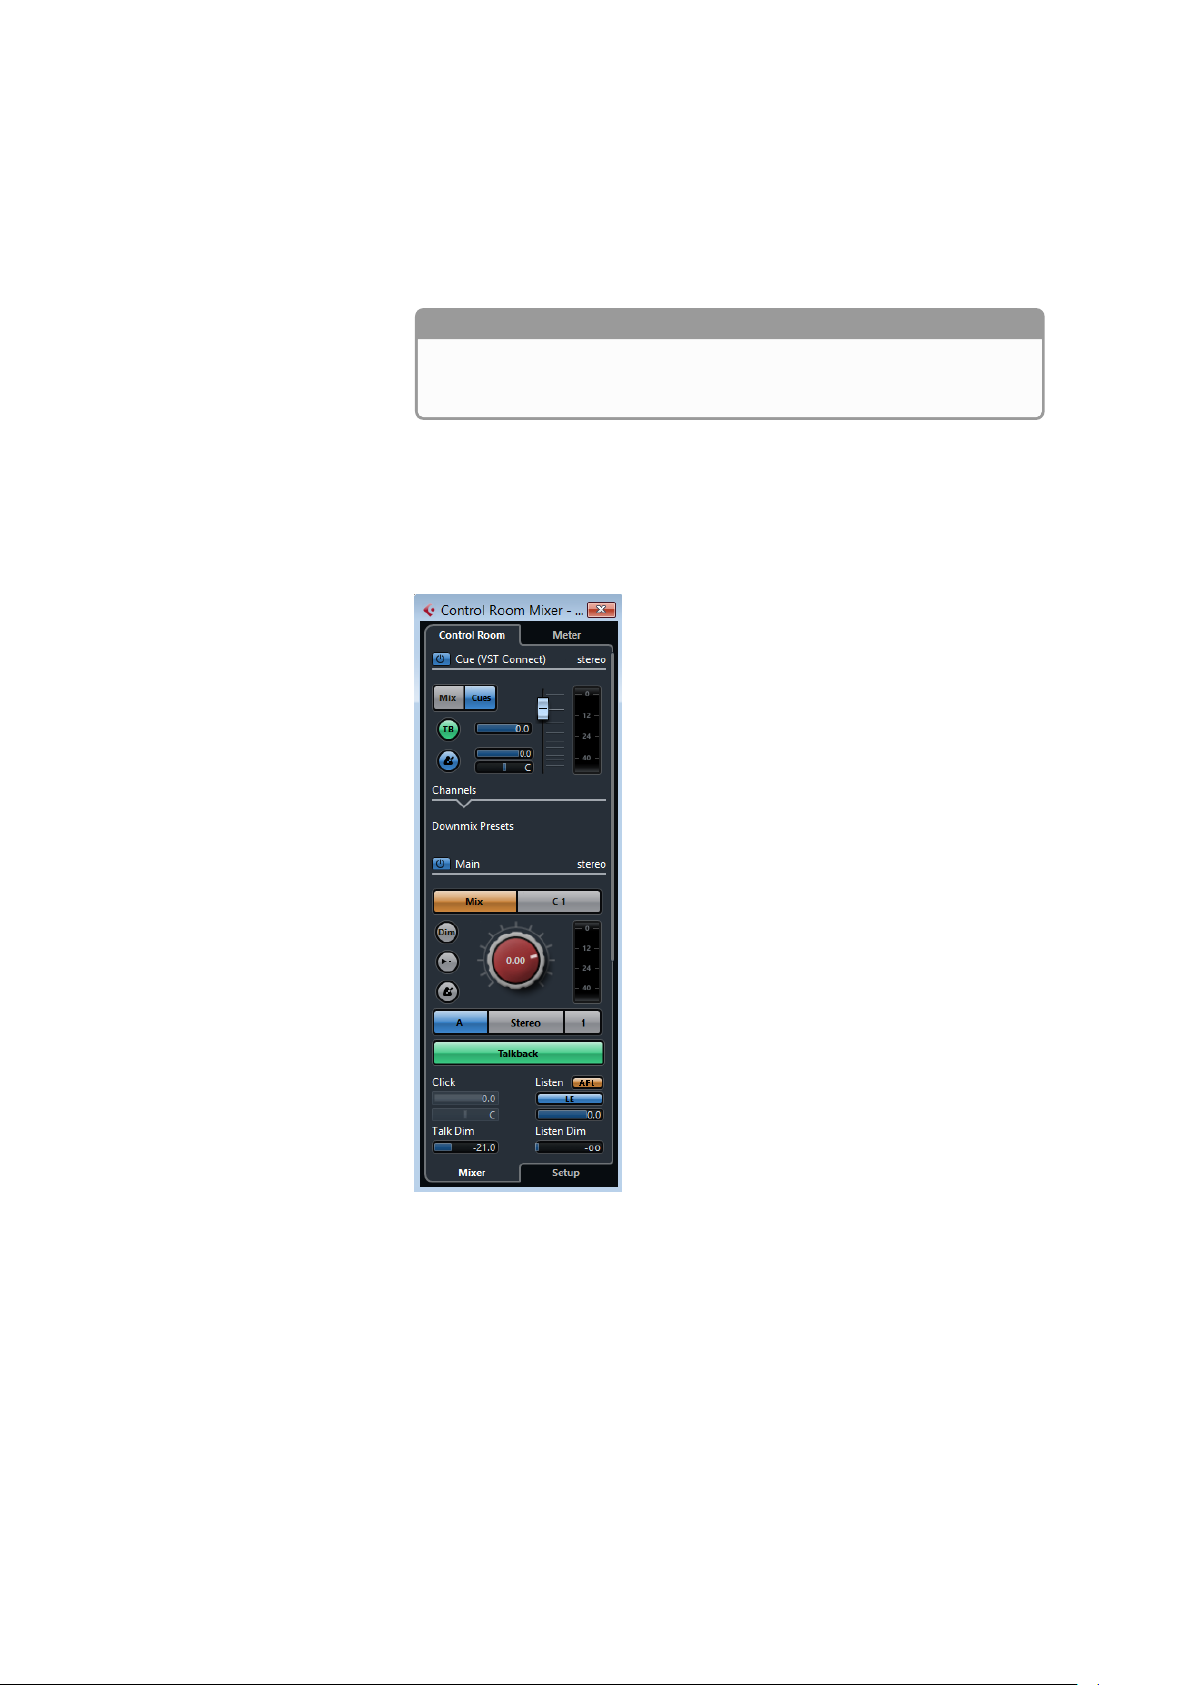
Make sure Control Room settings are visible so you can control what the
artist hears ("Devices/Control Room"):
The Control Room VST Connect Cue Channel allows you to control precisely what the artist should hear on his/her headphones:
• Choose between main mix ("Mix") and "Cues" mix for the artist to hear.
If you have configured external inputs such as CD player in the "Devices/Vst Connections/Studio" tab, you can also choose to have the
artist listen to that as desired.
15
Page 17

• Use the "Talkback" button to switch TB on and off. You can also for
instance assign a key (like "t") on the computer keyboard to instantly
switch TB in the "File/Keyboard Shortcuts" menu ("Control Room" section). The TB button is linked to the top left button in the VST Connect
Window.
• Adjust TB level (this is also linked to the matching control in the VST
Connect editor window).
• Adjust "Dim" to adjust dimming the artist cue mix while TB is active.
• Switch and adjust the metronome click and its level.
Note
There is more to explore when you use the Control Room mixer.
See the according sections in the Cubase / Nuendo manual.
The great news is that all those professional features that have
been used by numerous engineers and performers for decades
now can be used entirely transparently when recording a remote
artist!
2.5 Talkback
The Talkback (TB) controls of the VST Connect plug-in are linked to the
according Cubase / Nuendo Control Room controls where applicable.
This section features
• a Talkback enable button. This switches TB on or off and is linked
to the Talkback button in the "Main" section of the Cubase / Nuendo
Control Room mixer. Note that this button is automatically disabled as
soon as playback or recording is started in Cubase / Nuendo. While
transport is running, you may override this by clicking it again, but
your signal will be delayed on the Performer end during playback
or recording. It is also possible to assign a keyboard shortcut to
the Cubase / Nuendo Talkback function ("File/Key Commands/Control
Room") which then also switches this as desired.
16
Page 18

• a "rehearse" button. When this is activated, TB continues to be active
even when playback or recording are running. You can use this to
talk to the artist while playback is running so to coach him or her or
discuss other aspects of the production. When recording, you must
not enable the Rehearsal function, as your microphone signal may
confuse the artist and also the Performer signal is no more in sync.
The basic idea is that the Studio side (producer) can sing along to the
playback for the artist to hear, but the Performer signal will be delayed
in respect to what the studio side hears. VST Connect is not designed
for jamming (playing together in realtime), if talkback or rehearsal are
engaged during playback, one side will hear the other with a delay.
However the studio can record its own signal along with and in perfect
sync to the artist, only the artist can (and should) not hear the studio
during playback/recording to avoid confusing delays.
• a Talkback level rotary control. This is linked to the Control Room VST
Connect Cue mix channel’s Level control, so you can operate either
one to adjust the overall TB level.
• a DIM control. This is linked to the Control Room VST Connect "Talk
Dim" control.
Note
Note that when you engage Talkback during playback or recording, the Control Room also features a "Dim" function in the "Main"
section that you can use to control how much the playback is
"dimmed" (lowered) so to not have it obscure the TB microphone
signal.
2.6 Mixer
Once connected, the VST Connect mixer will show up in the VST Connect editor window. The upper part is used to set up the stereo mix that
you (the engineer) hear and record. This upper part (with the "RECORDING" header) is not visible in the Performer application.
2.6.1 Performer Monitor (Headphone) Mix
The lower part (with the "MONITOR" header) merely controls the headphone monitor mix that the artist hears in his or her Performer application. This is simply remote-controlling the Performer mixer which can
also be operated by the artist; the idea is, that the engineer can operate it so that the artist stays hands-free and also does not have to have
a deeper technical understanding as the engineer does - so it’s all like
in the professional recording studio where the artist can concentrate on
his or her performance. In particular this also means that nothing that
17
Page 19

2.6.2 Recording Mix
the engineer does in this area has any influence on the sound that he
receives and records from the artist. Because these controls affect the
Performer application, the details are described in the VST Connect Per-
former chapter, in the Mixer section.
Note
Note the plus and minus buttons which are available only with
the VST Connect PRO version. With this, you can add up to 16
channels for recording, for instance a drum set with individual full
quality tracks for each instrument!
The top row of the VST Connect mixer (with the "RECORDING" header)
is only visible and accessible to the engineer in Cubase / Nuendo. If
you don’t see the mixer, you are possibly currently accessing the setup
pages; click the gearwheel icon on the lower right corner again so to get
back to the mixer panel. This row of controls determines what is audible
and recorded on the stereo recording track(s) which have VST Connect
as their source ("Performer Track", as can be created using the Cubase
/ Nuendo "Project/VST Connect/Create Performer Track" menu). The
"MASTER" and "STUDIO" channels don’t feature these, as they are only
controlling the artist monitoring signal.
: Level
This rotary knob sets the level of the signal of this channel that is
added to the overall recording mix
: Meter
Shows the the individual channel’s recorded signal level
: Pan
Determines where in the stereo panorama this channel’s signal is
placed in the record mix
18
Page 20

: Record Button
There is also a record button per channel with the PRO version of
VST Connect. With this, each channel can be recorded individually by the Performer application on the artist’s computer, and later
transfered in full resolution for single or multi-track recordings. The
stereo mix can also be recorded in HD by enabling the according
record enable button in the MASTER channel. Individual tracks
can only be recorded with the PRO version. More on this, and
how full resolution ("HD") files can be transfered from the artist’s
computer, can be found in the MANAGER section.
: FX button
The buttons controls if the signal will be recorded wet or dry. If the
Performer has inserted plugins in a channel to be recorded, this
switch determines if the recorded signal includes those inserts or
not. The Performer will hear the insert effects in any case.
RESULT
So as an example, you could record a singer/songwriter by assigning
his Mic and guitar signals as mentioned in an earlier example, using the
pan and level controls for a nice stereo image that you use for recording.
Using the PRO version, you could get the individual full resolution audio
files on separate tracks in Cubase / Nuendo.
2.7 VST Cloud Menu
In the Cubase / Nuendo "VST Cloud" Menu you will find the "VST Connect" Sub-Menu. If you have purchased the VST Connect PRO version,
you will find two sub-menus labeled "SE" and "PRO", each of which features the following entries:
: Create VST Connect
This will create an Input channel with the VST Connect plug-in,
possibly (if not existing already) create a Cue Channel in the Control Room Mixer, install the VST Connect Cue plug-in in that channel, and create an audio track in the arrangement which is readily
set up to record a remote artist
: Remove VST Connect
Removes the Input channel with the VST Connect SE or VST Connect PRO plug-in and removes the Control Room Cue Mix channel
with the VST Connect Cue plug-in.
: Open VST Connect Editor
Opens the editor of the VST Connect SE or PRO plug-in. This
is the same as accessing it in the Cubase / Nuendo MixConsole,
where the Input channel with the VST Connect SE or PRO plug-in
is located in the insert slot, which you can double-click to open its
editor window.
19
Page 21
: Add Talkback Channel
Adds a TB channel to the Control Room ("Studio" tab in Cubase /
Nuendo "Devices/VST Connections" menu). You may have to assign an audio input in the aforementioned VST Connections "Studio" entry where your TB microphone is connected.
: Open Performer Video
Opens a window with the performer video feed (if applicable). This
is the same signal as in the VST Connect plug-in window, but can
be sized or moved to another monitor or projector etc. Once everything is set up for recording, you may not need to have the VST
Connect editor window open, but still want to see the artist’s video
feed (i.e. webcam). The same function can be accessed via the
"Performer Video" icon in the VST Connect editor window.
: Create Performer Track
Creates an audio track in Cubase / Nuendo with the VST Connect
Input channel as its source, and sets it to record and monitor to
have it ready for immediate recording and chatting. You can of
course create several such tracks.
Note that when you set any Performer Track to monitor mode, its
cue send will be disabled automatically. Otherwise, the artist would
experience an annoying echo effect, as his own delayed signal
would be fed back to his headphone monitor.
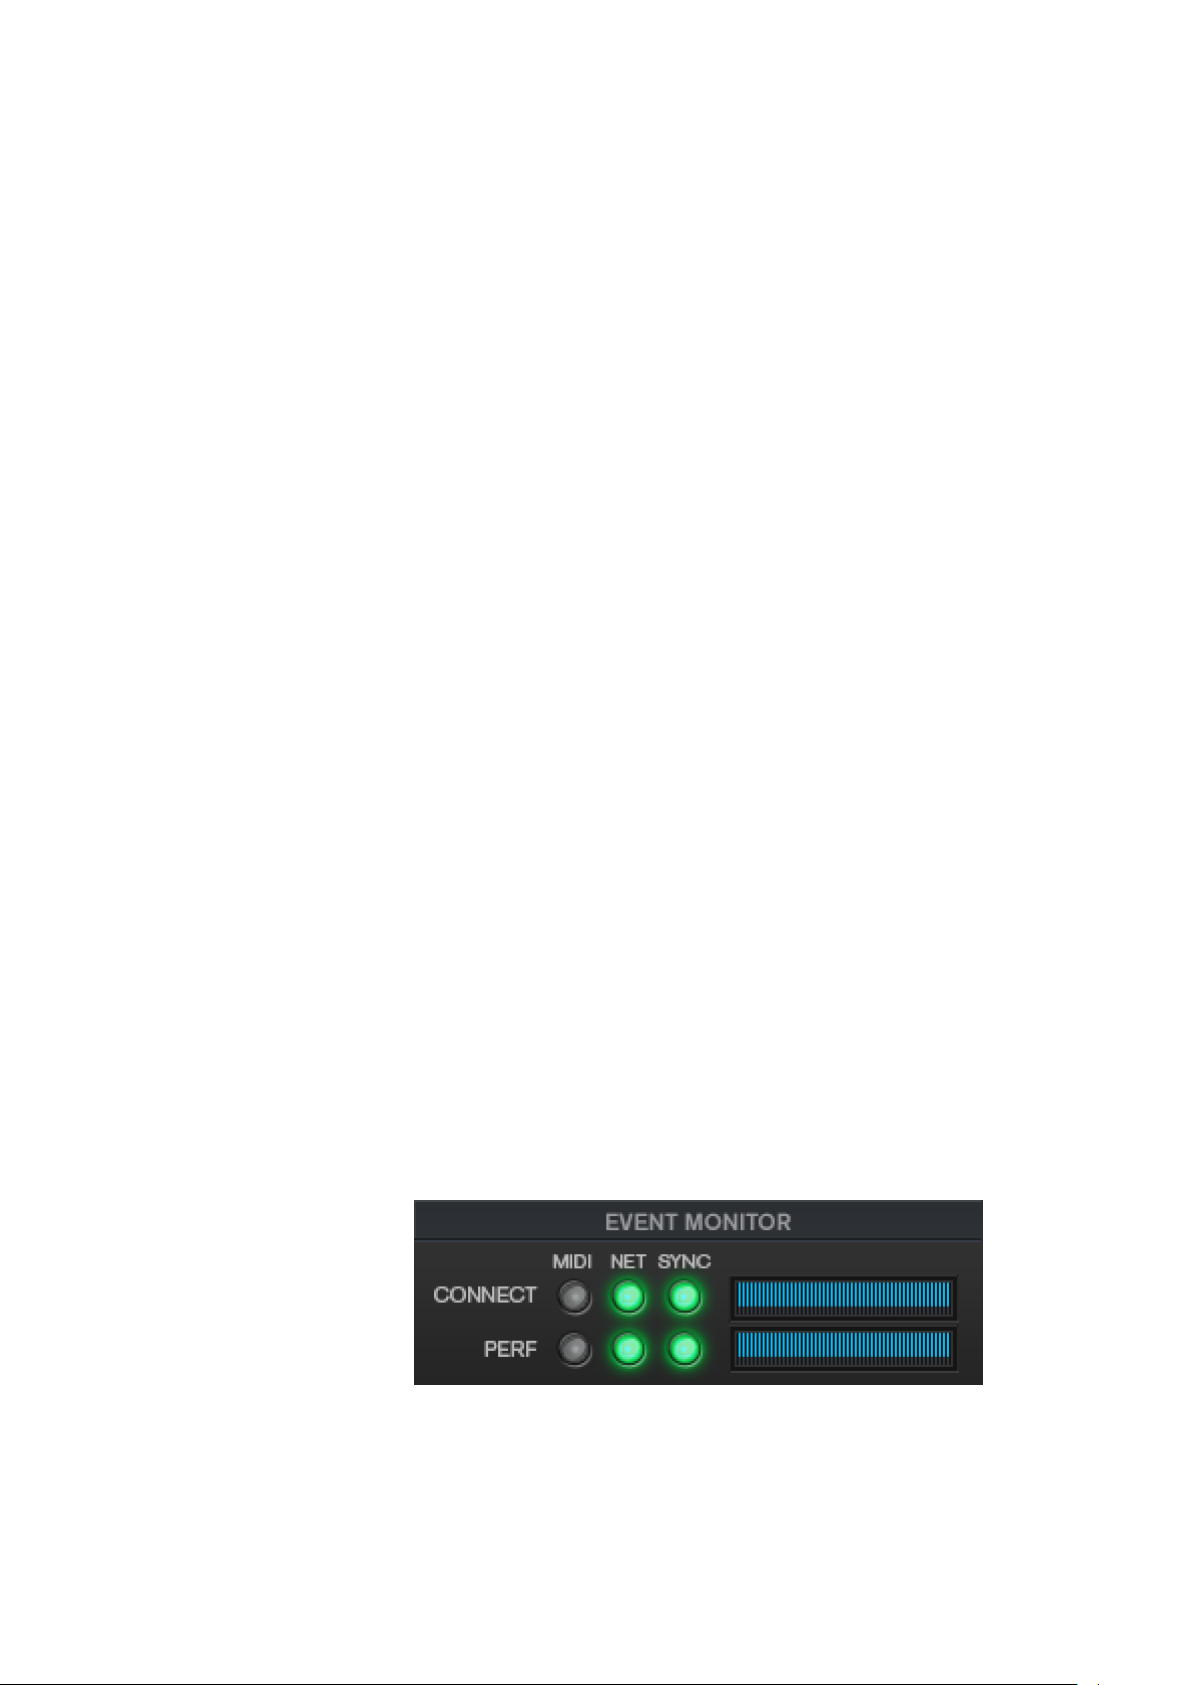
2.8 Event Monitor
: Check and Repair Configuration
Checks if an Input channel with the VST Connect SE or PRO plugin is present and installs one if not, and checks if a Control Room
Cue Channel is available with the VST Connect Cue mix plug-in
and installs one if not. Possibly creates a Performer Track (see
above) if none is present as well. So basically it’s the same as
"Create VST Connect" and useful should you have accidentally
removed one or the other component.
The event monitor section is located on the top middle of the VST Con-
20
Page 22

nect plug-in. It displays several LEDs which indicate the connection quality for the studio and the performer side. The two rightmost LEDs should
always be green to indicate that data is received, sent, and that both
sides of the connection are in sync. It is normal, however, for the sync
indicators to light up red during transport operations like start, stop, and
locate.
The two bar graphs show how well the two partners are synchronized
during playback and recording. You can see how much audio data is
available per half second on either end. If either of these meters show
too small a value or drain entirely, dropouts in audio are to be expected.
In this case you are advised to increase the "Remote Latency" setting
and/or audio and video upstream settings as described in the CONFIGURATION section.
Note
The MIDI indicators show MIDI activity on either side.
2.9 Setup Tabs
2.9.1 Configuration
You access the Setup Tabs by clicking the gearwheel icon on the lower
right of the VST Connect edit window.
This tab controls settings for the VST Connect plug-in on the Cubase /
Nuendo engineer side:
21
Page 23

: Audio Upstream
Open this pop-up menu and select the audio upstream rate for the
signal sent to the performer (shown in kilobits per second). The
higher the rate, the better the audio quality for the playback that is
being sent to the artist, but of course there has to be sufficient
bandwidth within the connection to provide the goods. Usually
lower rates are sufficient here, as this setting has no influence on
the recorded audio.
: Video Upstream
Open this pop-up menu and select the video upstream rate for the
signal sent to the performer. The same rules apply.
: Video Mirror
Sometimes it is useful to mirror the incoming video display. This
option allows for a horizontally mirrored Performer video display.
: Chat Latency
Allows you to determine the latency (delay) of the Talkback signal
while neither playback nor recording are active. In Auto mode, the
ideal latency is processed. This latency is dynamic. However, you
can select a fixed latency here, but this may fail to enable chatting
altogether, so if there is no need or you don’t quite understand this
setting, you are advised to keep the default "Auto" setting.
: Remote Delay Seconds
When the transport in Cubase / Nuendo is started, VST Connect
delays playback by the time you specify here. During this delay,
playback is started internally, and the cue mix is transferred to the
22
Page 24

performer via the Control Room VST Connect Cue Mix channel.
The performer performs in sync to this playback and the result
is sent back to Cubase / Nuendo so that when playback actually
starts to become audible there, the artist’s audio signal has arrived
for listening and recording in perfect sync to the project timeline.
You can enter a value between 0.5 and 5 seconds. Usable delay
times should be between 0.75 and about 1.5 seconds. The more
time VST Connect is given to manage the data, the more reliably
the system works. This greatly depends on the quality of the Internet connection. If the sync LED in the diagnostics section lights up
during playback often, consider increasing this delay time.
: Encryption
This is only available with the PRO version of VST Connect. Allows
you to encrypt the transmission of audio and video data in both
directions.
: HD Recording Bits
This is only available with the PRO version of VST Connect. Set
the audio quality (16 or 24 bits) of HD files recorded by the Performer application when HD recording is enabled.
2.9.2 Performer
These settings do not have any influence on the Cubase / Nuendo VST
Connect plug-ins but merely remote control configuration settings in the
Performer application. Of course, you have to be connected; then, you
can help the artist to set up his system via this panel. These controls
can also be accessed by the artist in the Performer application at any
time; this is why the detailed explanation of these items is to be found in
the Performer section.
23
Page 25

2.9.3 Manager
Here, you organize and manage availability of HD recordings that have
been recorded on the Performers’ computer, and are informed about
correct placement of VST Connect components in Cubase / Nuendo. If
for instance the VST Connect cue mix plug-in is missing in the Control
Room mixer, the Manager informs about that. The VST Connect menu
then offers a way to solve this.
The main task of the Manager however is to manage and organize available recordings. As soon as an audio track in Cubase / Nuendo is connected to the VST Connect Input bus, this is visualized in the Manager.
So you can see for instance whether it is a Mono or Stereo track, whether
it is record enabled, and its name.
But it also offers some additional information: as soon as a recording
has taken place with the artist, the Manager tags this recording as a
remote recording ("net"). This recording can then be converted to HD
quality, provided the according channels in the VST Connect Mixer had
been set to record enable. In that case, VST Connect Performer stores
these recordings locally with a resolution as set in the VST Connect PRO
plug-in settings (16 or 24 bits).
As soon as an HD file is being requested and transfer begins, a progress
bar is being displayed on the bottom of both the VST Connect PRO plug-
24
Page 26

in window and the VST Connect Performer application window. When
transfer is finished, those files are automatically replaced in the Cubase
/ Nuendo arrangement, and tagged with "HD" in the Manager. Also, the
recording title in Cubase / Nuendo is changed accordingly.
Often several takes were recorded. In this case, the engineer is offered
the option to replace specific recordings by their HD equivalent. This is
accomplished by right-clicking the file on its display in the Manager. "Get
HD Files", in contrast, will fetch all recordings and replace if necessary.
Transfer of several files may take quite a while, and Studio and Performer
need to stay connected during this period. That’s why the Manager also
offers to transfer files from a local directory ("Get Local Files"). So the
files can be transferred from the Performer’s computer to yours by any
preferred method and offline (FTP, Dropbox or the like). On the artist’s
computer, where the Performer application works, these files are stored
in the following folder:
OSX : /Users/YourUserName/Documents/VSTConnectPerformer
Windows: C:/Users/YourUserName/Documents/VSTConnectPerformer
Where "user" is to be replaced with the Performer’s name on his computer, and with Windows, the system drive is assumed to be C:
With "Get Local Files", you are asked for the location of these files for
local transfer. Information about HD recordings is stored on both machines. Of course that also means that only existing files can be transferred and converted.
In the VSTConnectPerformer folder, there may exists several project
files. You may want to look for the date of the audio files (in the "audio"
folder) in order to transfer only those that are required for a particular
project.
Note
This section is only available with the PRO version of VST Connect.
25
Page 27
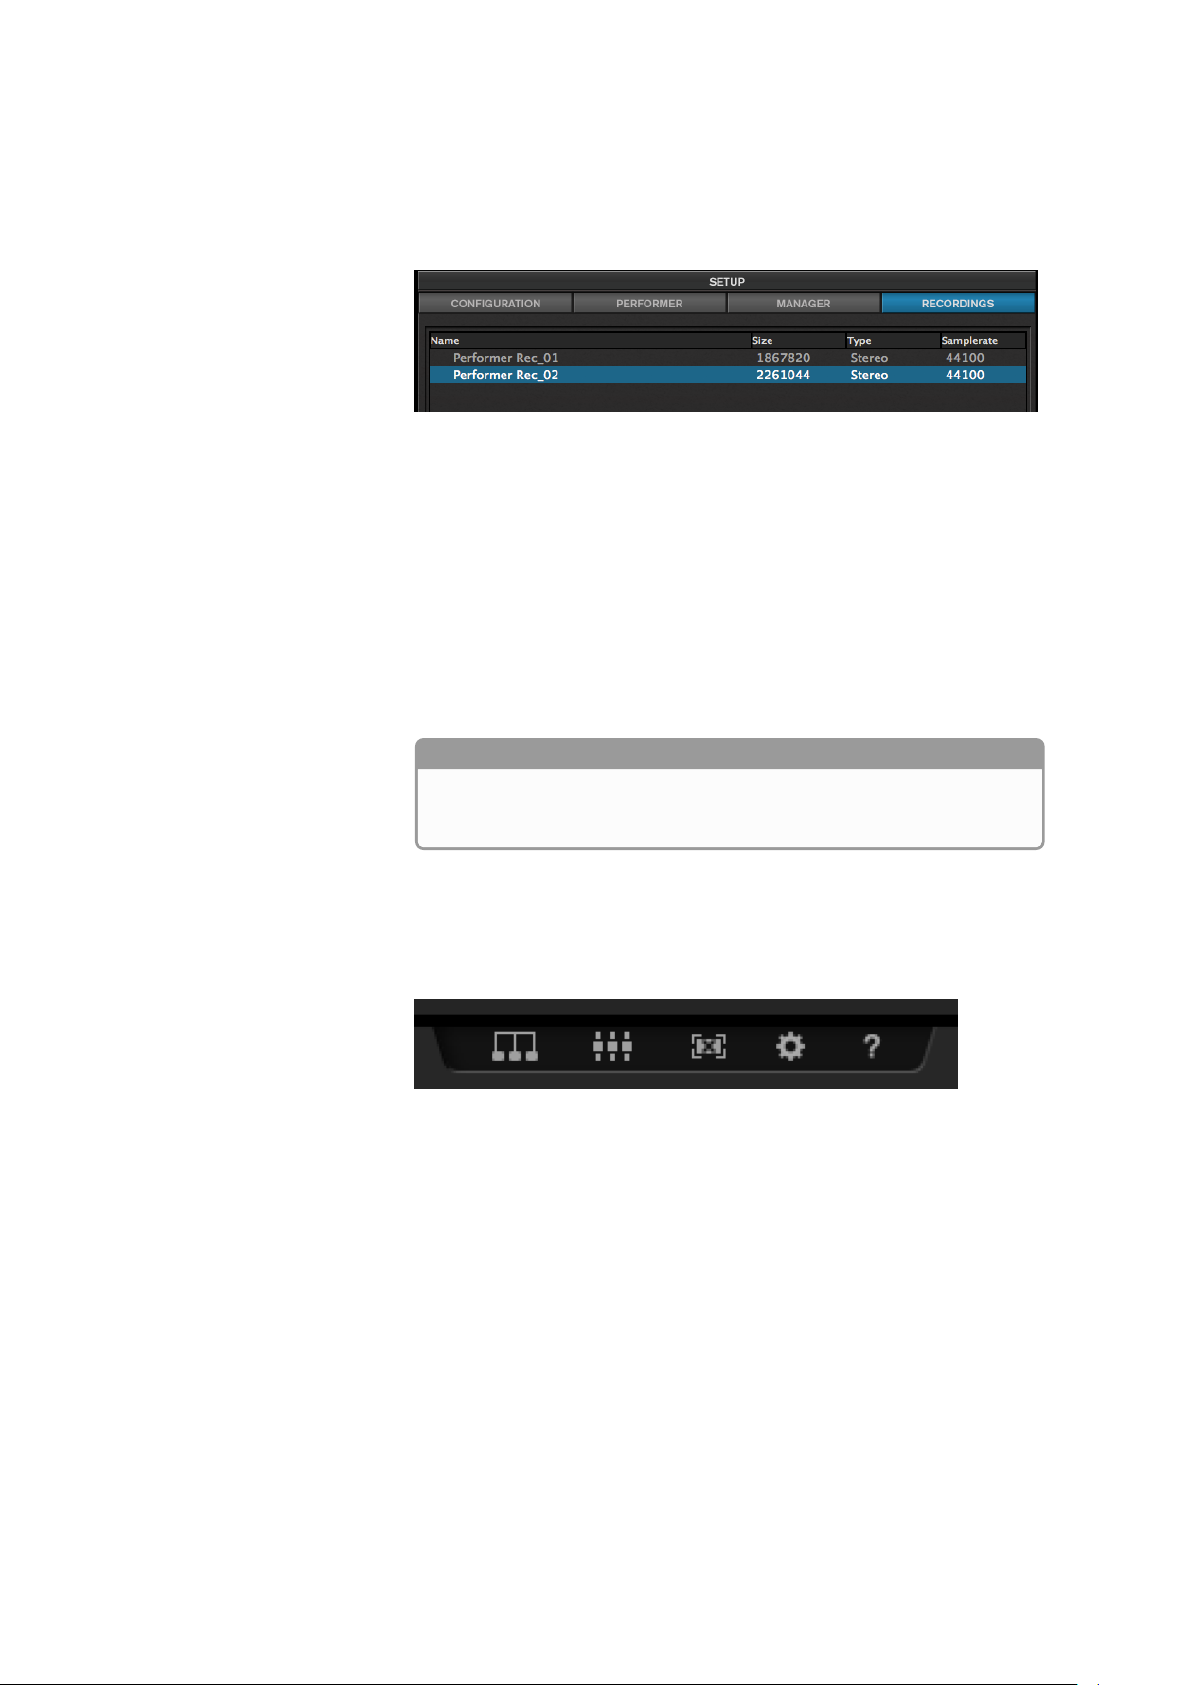
2.9.4 Recordings
It allows you to manage all audio files recorded on the computer of the
artist using the VST Connect Performer application. To display single
files of which the take consists, click on the take’s name. For example,
you can easily delete any file you do not need anymore easily. If you
have recorded in HD, but decide to only transmit the stereo mix, you can
delete the HD files for single tracks that are saved on the Performer side.
Note
2.10 Toolbox Items
This section is also only available with the PRO version of VST
Connect.
On the bottom of the VST Connect plug-in, you will find five small icons
which provide the following functions:
: Network
Lets you access the Network pages to find, manage and connect
to other VST Connect users. You only can use this page when
have logged in with your MySteinberg account.
: Large Mixer
Opens a larger view of the VST Connect mixer. This is mostly
useful with the PRO version of VST Connect, where you can have
up to 16 channels for recording and get a full overview and access
to all channels at once. The channel controls are the same as with
26
Page 28

the smaller default mixer view; the effects sections get a larger
display and effects can all be seen at once, as opposed to the
smaller view where you have to select which controls are visible.
The controls work the same way as in the smaller version as well.
: Video Window
This feature allows you to open the video sent from the artists’ Performer application in a separate window. It shows the same content as with the video display in the VST Connect editor window.
It can be arbitrarily sized or set to full screen. This is very useful
when you don’t need the VST Connect plug-in editor window anymore as all is set up already for recording, and when you want to
see the artist in a separate window, monitor, or even projector.
: Toolbox
Lets you access the Setup Tabs outlined before.
: Help
Opens the Help Document.
2.11 Status and File Transfer
The status text field to the lower left displays useful information about
the current status of VST Connect.
Below the status text, a file transfer progress bar is shown once an HD
file transfer is started. This is only available with the PRO version of
VST Connect. It shows the progress of currently transfered HD files as
described with the Manager Tab before.
27
Page 29
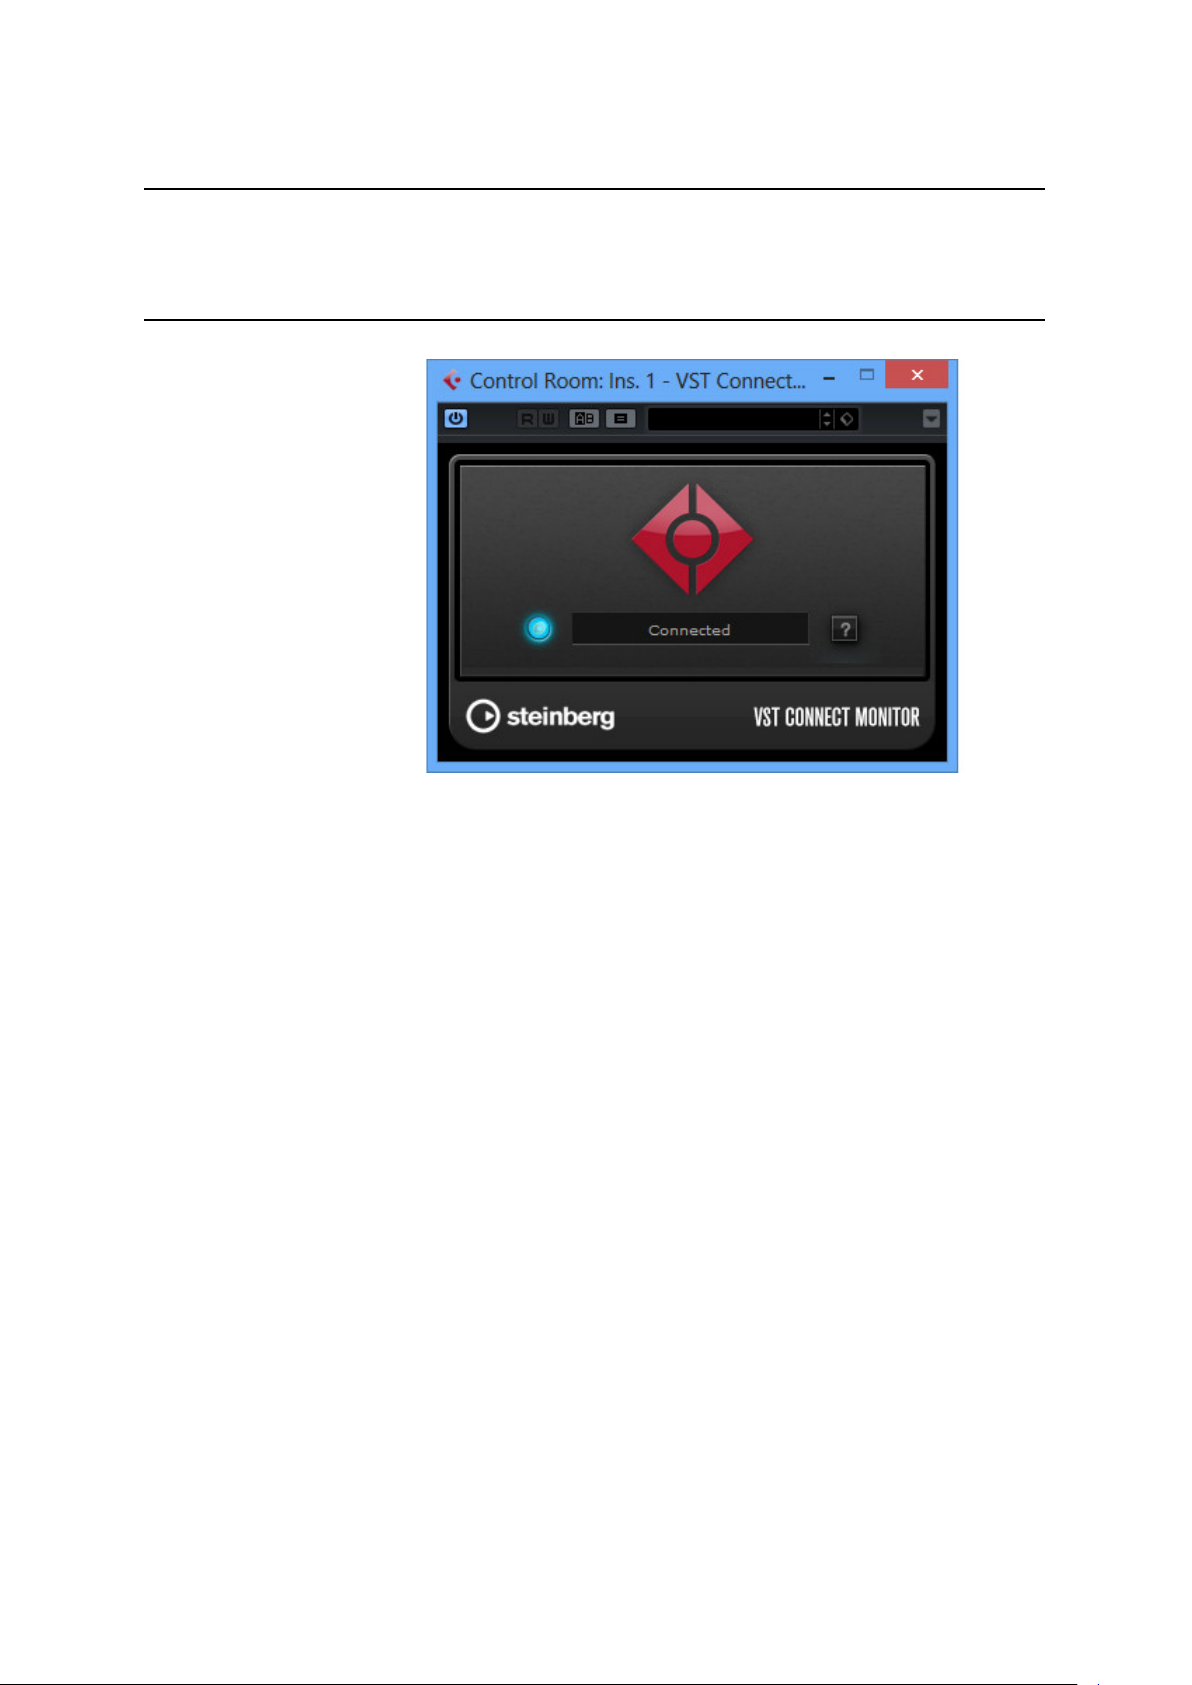
3 VST Connect Monitor
When you configure VST Connect using the Cubase / Nuendo Project
/ VST Connect Menu item "Create VST Connect", not only will an Input
Channel be created with the VST Connect plug-in, and a Control Room
Cuemix channel with the VST Connect Cuemix plug-in, but also the VST
Connect Monitor plug-in will be added to the main Control Room Output.
This allows you to listen to the Performer signal while chatting and during
recording or playback. The delay compensation system in Cubase /
Nuendo will apply a delay when you set a VST Connect Performer Track
to input monitor, which is confusing, so you are advised to avoid that.
The VST Connect Monitor plug-in allows you to listen to the Performer
at any time, thus making it unnecessary to switch any Performer Track
to input monitor. You may want to open "File/Prefences" and set the
"Auto Monitoring" in the VSTsection to "Manual" so to avoid automatic
switching of Performer Input Monitor.
Page 30
4 VST Connect Performer
VST Connect Performer is available as an application for Windows and
Mac OSX, as well as an app for the iPad (iOS). The desktop version can
be freely downloaded from the Steinberg website, the affordable iPad
version is available in the Apple appstore. The artist does not have to
own any DAW (Digital Audio Workstation) software, and should not start
any. In fact you are advised to close all applications that connect to the
Internet, use audio or video hardware, or are heavy on the CPU.
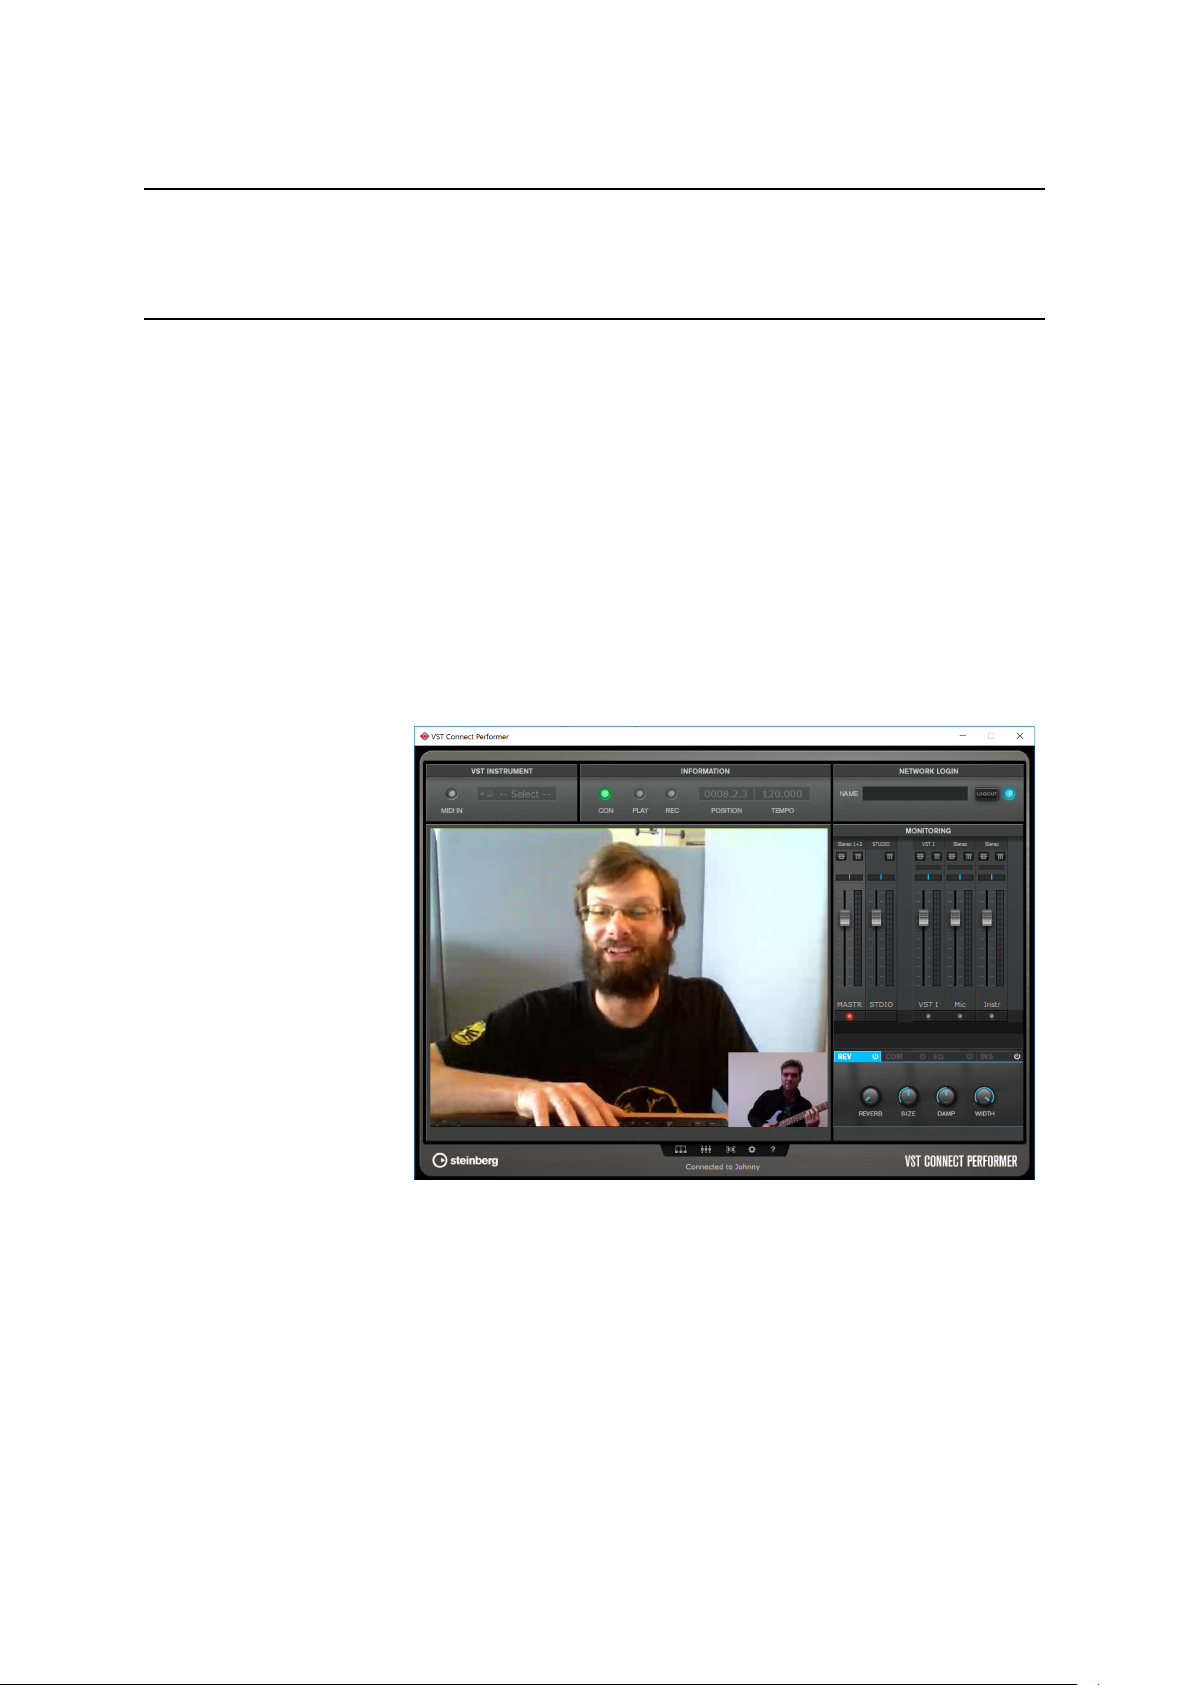
4.1 User Interface Overview
• On the top left you can select a VST Instrument. See Using a VST
Instrument on how to use this.
• The top middle section shows connection status, and transport status,
as well as the Bars and Beats Position and the Tempo as set by the
studio when you are connected. None of these can be changed, they
are for informational purpose only.
• The top right section is where you connect to the studio. See Connec-
tion for further details.
Page 31
4.2 Connection
• To the middle left, usually the studio video is displayed, but depending
on other settings, also the large mixer view or settings pages may be
seen. See Toolbox tems for more information on this.
• To the right, the Monitor Mixer is shown. See Performer Monitor
(Headphone) Mix section for details.
Of course, you must be connected to the Internet. A good and reliable
Internet connection is vital to the quality of both sound and video; WiFi
connections may work, but it is always a good idea to connect to the
router with a solid Ethernet network cable.
There are three ways to establish a connection: LAN, mySteinberg, or
key exchange.
If the connection is to be established in a local network, the "LAN" button
will light up whenever one or more computers in the local network are
running Cubase / Nuendo with the VST Connect PRO plug-in installed.
Note that this is only possible with the PRO version of VST Connect (the
Performer application or app runs against both of the SE and PRO versions). Click the lit LAN button to obtain a list of computers that you can
connect to, and choose the desired name and local IP address entry.
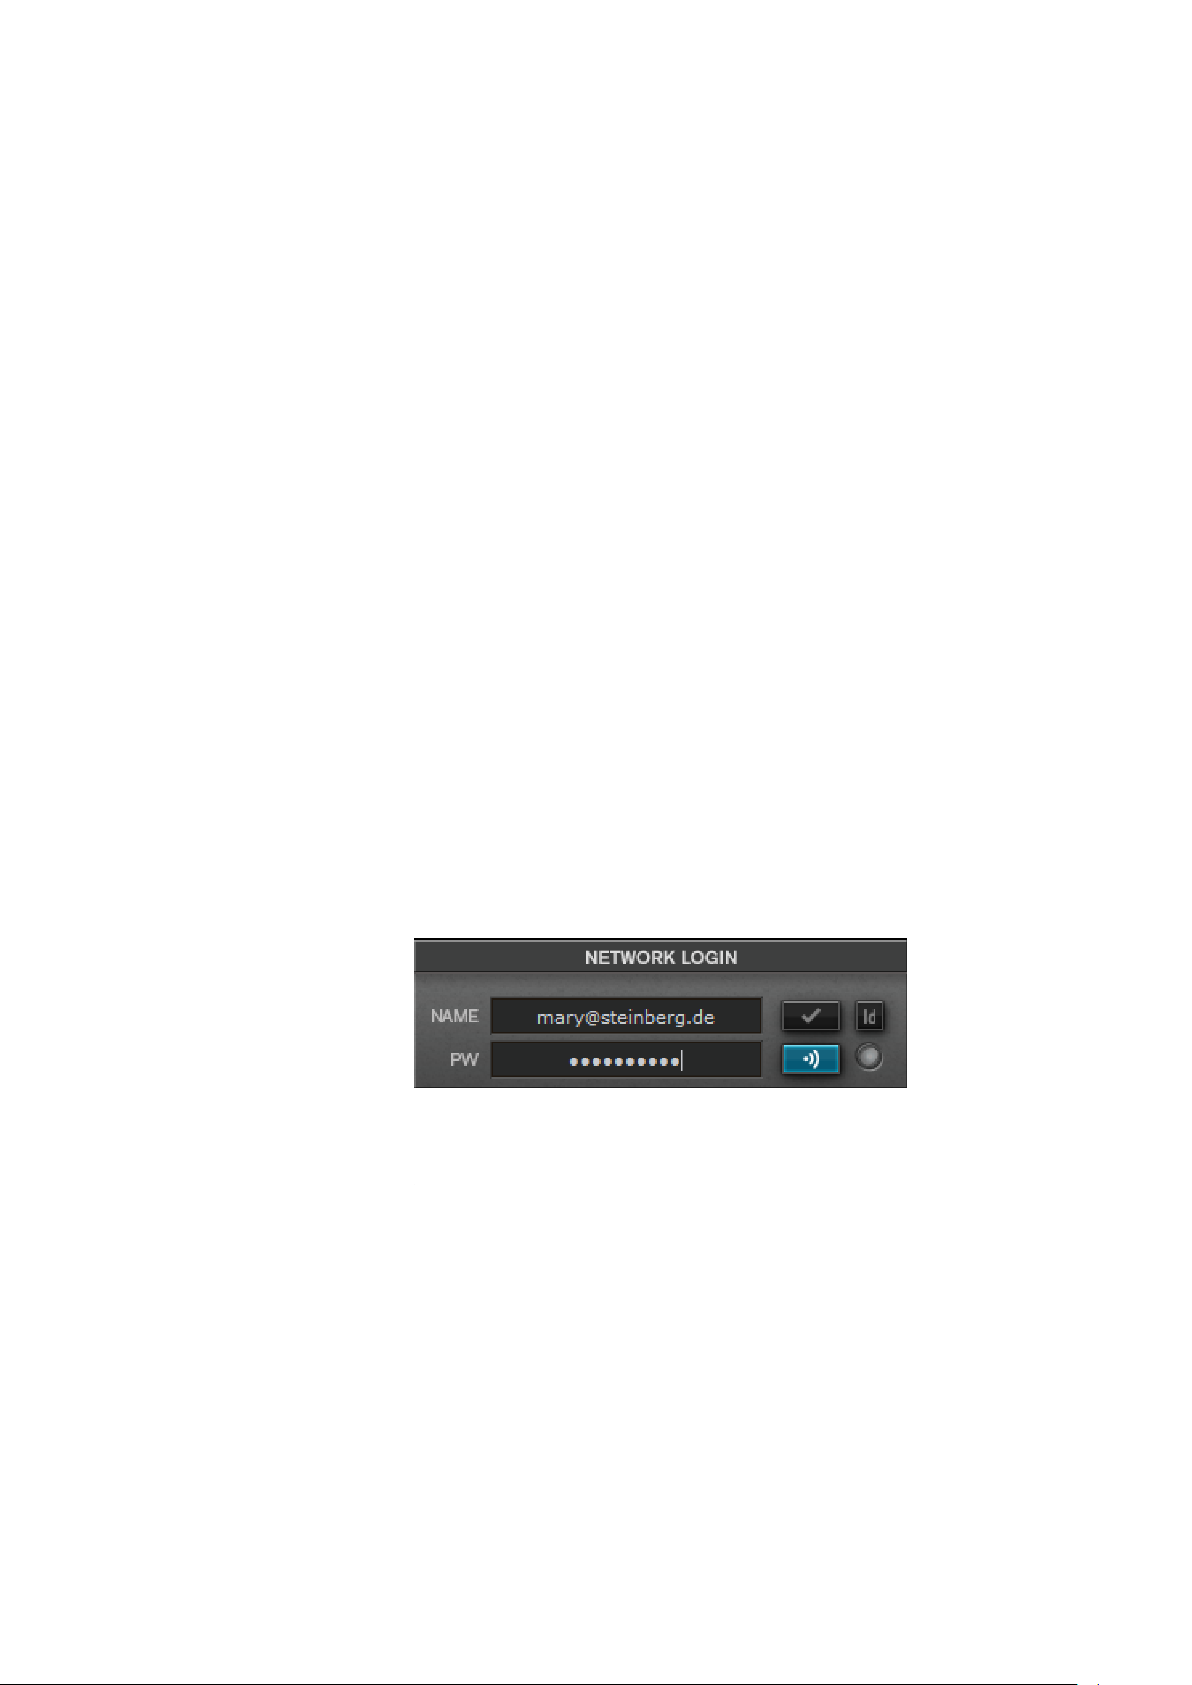
4.2.1 MySteinberg
PROCEDURE
1. On the top right of the VST Connect and Performer user interface
you will find the login section.
2. Fill in your credentials (MySteinberg email address and pass-
word) and
3. click the "Login" button.
4. If you do this for the first time and you have not yet provided a
VST Cloud user name (for instance with VST Transit), you will
30
Page 32

4.2.2 Key
have to do so now. Choose a name that can be easily recognised, because this is the name that your friends may be searching for, using the search function described below. You will need
to do this only once. Note that a VST Cloud user name can not
be changed later.
5. After successful login, the Network page opens automatically on
the Friends tab.
Note
If you don’t have an account, please go to the MySteinberg Website to create an account free of charge.
On the top right, enter your name or a nickname; this is what the engineer will see when the connection is established. You will then have to
get the key number from the studio engineer who uses VST Connect in
Cubase / Nuendo and enter it into the "Key" field. Note that this number
always consists of two groups of numbers separated by a blank (space).
Then, click the connect button on the top right.
31
Page 33

4.3 Performer Monitor (Headphone) Mix
The Performer Mixer controls the monitor mix for the artist. This part is
visible and accessible in both the Performer application or app, and the
VST Connect plug-in in Cubase / Nuendo. It means the engineer too
can remote control the artists’ headphone mix, namely:
• The "MASTR" (Master) channel, which controls the overall listening
level for the artist. On top of this channel, select which outputs of
the Performer audio interface should provide the entire monitor (headphone) mix.
• The "STDIO" (Studio) channel, where the Cubase / Nuendo Control
Room Cue Mix (including Talkback) signal appears.
• The "VST I" channel, which controls the VST Instrument settings. A
VST Instrument can be set up by the artist in the Performer’s top left
corner.
• The "Mic" and "Instr" (Instrument) channels, as well as other audio
channels that can be created when the engineer uses the PRO version
of VST Connect. These channels control signals from audio sources
which can be selected on top of the according channel. So you could
32
Page 34

for instance use the "Mic" channel for the artist to chat and sing, and
the "Instr" channel to record a guitar signal fed into another audio input
of the artists’ audio interface at the same time.
Each of these channels features
: Volume
A slider to control its individual level.
: Signal
A Signal meter.
: Mute
A button to disable audio of this channel altogether.
: Pan/Balance
A setting to determine where the signal appears between the left
and right output channels.
: Insert
A button to bypass any installed inserts.
: Send
A level to send part of the channel signal to the built-in Reverb described below (not available on the MASTER and STUDIO channels).
: EQ (Equalizer)
As described below.
: Compressor
Also described below.
: Input Bus
An menu to select the audio input for this channel where applicable
(mic, instrument, and audio channels). For the Master channel,
select the stereo (headphone) output for your mix here.
Note
Again, don’t forget that nothing of this affects what the engineer
hears or records, it is merely controlling the artist’s listening signal. The reason for the built-in eq (equalizer) and fx (effects) is
that there is a significant delay between the studio and the artist
during playback and recording; so if the engineer was to use effects on the artists’ signals at the studio, and provide that back to
the artist, there would be a large and confusing echo effect along
with it.
33
Page 35

4.4 Effects
4.4.1 Reverb
As explained before, the Performer application features built-in effects
for the artists’ monitoring. These can be recorded in Cubase / Nuendo,
or, when fx record is off, are only audible by the artist. As with all other
Monitor mixer controls, they can be accessed by both the artist and the
engineer remotely. If the artist knows how to deal with the mixer, he
or she can of course set up their own listening experience, but the good
news is that this task can also be left to the engineer like in a professional
recording room-to-room situation.
The Reverb is fed by the send controls of each channel in the Performer
Monitor mixer. Those sends are not useful, and thus not available for the
MASTER and STUDIO channels. Reverb is the only effect global to all
channels, other fx are available per channel.
: On/Off
Sets the Reverb active or inactive.
: Reverb
Sets the Reverb volume (the "wet" portion of the reverberation signal).
4.4.2 EQ
: Size
Sets the size of the reverberation room, and thus the length (duration) of reverberation.
: Damp
Sets how fast the reverb signal is loosing high frequency content
during its lifetime (how fast it is becoming "dull").
: Width
Sets the stereo width of the reverberation signal. Higher values
increase the stereo with.
: On/Off
Sets the EQ active or inactive.
: Bass
Sets the amount of low frequency (80 Hz) increase (rotary knob
right to 12 o’clock position) or decrease (rotary knob left to 12
o’clock position).
: Mid
Sets the amount of mid frequency (as set by "Mid Freq") increase
or decrease.
34
Page 36

4.4.3 Compressor
: Mid Freq
Sets the center frequency (250 Hz to 5 kHz) for "Mid".
: High
Sets the amount of high frequency (6 kHz) increase or decrease.
The Compressor of each channel smoothes out dynamic changes of
the signal so to make it more consistent (simplified, lower signals become louder, while louder signals become lower). A compressor is a
somewhat complex device, we don’t give advice here how to operate it.
Access one of the numerous sources in the internet to learn compressors, or look at descriptions of the similar effect available in Cubase /
Nuendo. Compressors are often used for vocals so to get them more "in
the face".
: On/Off
Sets the Compressor active or inactive.
: Thresh (Threshold)
Sets the signal level at which compression starts. Set to lower
values (left to 12 o’clock) for more compression.
4.4.4 Inserts
: Att (Attack)
Sets the amount of time that the compressor waits after a signal
has crossed the threshold level until it starts compression.
: Rel (Release)
Sets the amount of time where the compressor gradually reduces
compression when the signal falls below the threshold level.
: Gain
A compressor actually only ever decreases the level of the incoming signal. To compensate for the overall signal loss, this gain control can be used to increase the resulting level after compression
(also called "makeup gain"). Thus, this also controls the overall
level of the channel.
: GR (Gain Reduction) meter
Shows how much the compressor reduces the gain due to compression action. The more this meter shows activity (from right to
left, as opposed to meters you are otherwise used to), the more
the compressor reduces the gain of the channels’ signal.
Each Performer Monitor channel features a set of four Insert slots that
can be used to apply VST2 and/or VST3 plug-ins to that channel. There
are countless VST plug-in effects on the market that can be applied here.
35
Page 37

4.5 Toolbox Items
Plug ins to be used must of course be installed on the artists’ computer
or device where the VST Connect Performer application or app runs.
: On/Off
Sets all four insert plug-ins active or inactive
: Slots 1-4
• On/Off - Activate or deactivate this slots Insert effect
• e - Show or hide the editor of the Insert effect.
• Menu - Select an Insert plugging here, or remove an installed
one via the "Remove Insert" entry
To the bottom of the Performer application or app, you will find five small
icons which provide the following functions:
: Network
Lets you access the network pages to find and connect to other
VST Connect users. You only can use this page when have logged
in with your MySteinberg account.
: Large Mixer
Opens a larger view of the VST Connect mixer. This is mostly useful when connected to the PRO version of VST Connect, where you
can have up to 16 channels for recording and get a full overview
and access to all channels at once. The channel controls are the
same as with the smaller default mixer view; the effects sections
get a larger display and effects can all be seen at once, as opposed
to the smaller view where you have to select which controls are visible. The controls work the same way as in the smaller version as
well.
: Video Window
This feature allows you to open the video sent from the studio in
a separate window. It shows the same content as with the video
display in the VST Performer window. It can be arbitrarily sized or
set to full screen.
: Toolbox
Lets you access the Setup Tabs outlined before.
36
Page 38

: Help
4.6 Status and File Transfer
The status text field to the lower left displays useful information about
the current status of VST Connect.
Below the status text, a file transfer progress bar is shown once an HD
file transfer is started. This is only available when connected to the PRO
version of VST Connect. It shows the progress of currently transfered
HD files as described with the Manager Tab before.
4.7 Settings
Opens the Help Document.
These settings are also accessible by the VST Connect plug-in in Cubase
/ Nuendo when a connection has been established. Ask the engineer to
set this up for you if you are less experienced or interested in dealing
with these technical details.
: Audio Device
Open this pop-up menu to select the driver for the audio hardware that is installed on the performer’s computer. For Microsoft
Windows systems, the free ASIO4ALL driver or the Generic Low
Latency driver from Steinberg has proven to work well with most
standard audio hardware. If your device features a dedicated ASIO
driver, you should use that instead.
37
Page 39

: Buffer Size (Mac only)
Sets the size of the audio buffers. The lower the buffer size, the
lower the latency, but the higher the CPU load and risk of dropouts.
: Audio Upstream
Open this pop-up menu and select the audio upstream rate for the
signal sent to the studio (shown in kilobits per second). The higher
the rate, the better the audio quality for the signal that is being sent
to the studio, but of course there has to be sufficient bandwidth
within the connection to provide the goods. This setting determines
quality of the recorded realtime audio in the studio, but has no
influence on HD recordings (only applicable when connected to
the PRO version).
: Video Upstream
Open this pop-up menu and select the video upstream rate for the
signal sent to Cubase / Nuendo. The same rules apply.
: Video Device
Open this pop-up menu and select the video device to use for communication with the engineer. You can send any video signal that
is provided by the operating system.
: MIDI Input
Allows you to select the hardware MIDI input device and port.
: MIDI Output
Allows you to select the hardware MIDI output device and port.
: MTC Output
The Performer application can send MIDI Time Code (MTC) via a
MIDI output port selected here. For MTC to be active, the MTC
Frame Rate must be set as well.
: MTC Frame Rate
Defines the frame rate for MTC (MIDI Time Code) to be sent, or
switches MTC output off. A MIDI port for MTC must also be set
with the MTC Output setting for MTC to work.
: Auto save
Set the time for the new auto-save feature. When connected, the
mixer and recorded HD audio files information is always stored
along with the Cubase / Nuendo project on the other side. You can
also transfer the Performer project along with the HD audio files as
you like (Dropbox, FTP, mail etc) and import it in Cubase / Nuendo
manually when you are off-line. HD recording is only available
when the VST Connect PRO plug-in is used. Usually, the project
is saved when the connection is closed. Auto-save makes sure that
the project is saved regularly so to help should the system crash.
When not connected, local settings (like faders, input and output
buses etc) are also saved on the artists’ computer such that they
38
Page 40

4.8 Plug-In Manager
can be restored the next time the Performer application is opened.
This section provides an overview of VST Instruments and VST effects
plug-ins which are installed on the Performer’s system. The Plug-in Manager supports VST 2 and VST 3 plug-ins, but it does not support so
called "Bridging". You can only use either 64 bit plug-ins.
Plug-in support is initially switched off and can be individually activated
for VST 2 and/or VST 3. To activate VST 2 support, the Plugging Manager requires a path to the directory, where VST 2 plug-ins are installed.
For VST 3, this path is standardized and does not need to be set explicitly.
If a plugging type is activated, an additional window showing information
about validation of the plug-ins is displayed. After validation, that window is automatically closed and all supported plug-ins are being listed.
The list shows Name, Category, and Type of plug-in (type being either
VST 2 or VST 3). All listed plug-ins can immediately be used within VST
Connect Performer.
The Manager also features to possibly exclude plug-ins from the popupmenu lists in VST Connect Performer. This can be useful should there
be many plug-ins, but only some are to be used. Each column features
a check box to indicate plug-ins that appear in the lists.
4.9 Using a VST Instrument
A VST Instrument plug-in can be loaded in the according slot to the top
left of the VST Connect Performer application. When you click here, a
list of available VST Instruments is displayed, one of which you can select to use it. Availability of VST Instruments is configured in the Plug-in
Manager described before.
When an Instrument is loaded, its editor window is opened automatically. This window can be opened again clicking the "Edit" button next to
the VST Instrument slot.
Note
Furthermore, there is a MIDI activity LED in this section.
39
Page 41

5 Troubleshooting
5.1 Connection
There is usually no need for so called port forwarding, but it may help to
improve connection quality. If you know how to do so, you may instruct
your router and firewall to open (forward) UDP ports 51111 through
51113. If you think it is required to do this but don’t know how, please re-
fer to various games sites where you can find instructions of how to configure your router and/or firewall. Unfortunately these settings are very
different for the numerous router devices on the market, but the games
people often run servers for collaborating on games and are quite experienced in this. But again, VST Connect uses very advanced server
technology which in almost all cases allows connections without such
action. Within restricted networks such as company networks, ask the
network administrator to open the aforementioned ports should you encounter connection issues.
It cannot be stressed enough that a reliable Internet connection is essential. A cable is much more likely to provide good results than any form
of wireless connection. A wireless connection may work, but dropouts
or long delays may occur at any time. We recommend to always use
hardware cable connections directly to routers and modems.
There are many factors outside Cubase / Nuendo and VST Connect that
determine the quality of the connection. You can improve it by making
sure that your internal network is not used by other people and by closing all network-intensive applications, such as browsers. This applies to
both partners.
5.2 Server Not Responding
When engineer or performer get the message "Server not responding",
there are two likely causes: either there is no connection to the Internet
at all, or the local firewall settings are too restrictive.
First of all, try to access the Internet via a browser. Next, check your
firewall settings. Configure your router/firewall to allow incoming information for UDP ports 51111 through 51113, or ask your administrator to
do it for you.
Page 42

5.3 Avoid Audio Dropouts
If the values set for Audio Upstream and Video Upstream in the configuration settings for the performer and/or engineer exceed approx. 80 %
of what the respective Internet Provider (IP) delivers as upstream rate,
dropouts will occur. For example, if your provider guarantees only 384
kBit/s upstream, you should set both the audio upstream and video upstream parameters to 128 kBit/s. This gives you sufficient headroom for
reliable network operation without dropouts.
You may also consider setting the video upstream value to a lower value,
and the audio upstream correspondingly to a higher value, since the
video image quality is not as important as the transmitted audio quality.
5.4 Avoid Feedback
The connection between engineer and performer can cause feedback
loops between the engineer’s microphone and speakers on one side
and the performer’s microphone and speakers on the other. To avoid
damage to your equipment, the performer should use headphones instead of speakers. This is generally advisable, as otherwise the artist’s
speaker signal will be audible with recordings.
5.5 More ...
If you run into problems, please also try to make sure that you have
applied the following settings:
1. Constrain Latency compensation (top left of Arrangement Window)
must be switched off
2. Devices/Device Setup/VST Audio System/ASIO Guard may cause
problems, try to switch it off
3. Devices/Device Setup/VST Audio System/Direct monitoring should
be off
4. Devices/Device Setup/VST Audio System/Record Shift should be 0
(zero)
5. Devices/Device Setup/VST Audio System/Adjust for record Latency
should be on (activated, ticked)
6. Make sure that Cycle (Loop) is off in the Transport Panel
7. Count in doesn’t work with VST Connect, it will be out of sync
8. Don’t start from position zero or negative positions, we always need
a bit of head for sync.
41
 Loading...