

Page 1

Score Layout and Printing
Page 2

The Steinberg Documentation Team: Cristina Bachmann, Martina Becker, Heiko Bischoff, Lillie Harris, Christina
Kaboth, Insa Mingers, Matthias Obrecht, Sabine Pfeifer, Benjamin Schütte
Translation: Ability InterBusiness Solutions (AIBS), Moon Chen, Jérémie Dal Santo, Rosa Freitag, Josep Llodra
Grimalt, Vadim Kupriianov, Filippo Manfredi, Roland Münchow, Boris Rogowski, Sergey Tamarovsky
This document provides improved access for people who are blind or have low vision. Please note that due to the
complexity and number of images in this document, it is not possible to include text descriptions of images.
The information in this document is subject to change without notice and does not represent a commitment on
the part of Steinberg Media Technologies GmbH. The software described by this document is subject to a License
Agreement and may not be copied to other media except as
No part of this publication may be copied, reproduced, or otherwise transmitted or recorded, for any purpose,
without prior written permission by Steinberg Media Technologies GmbH. Registered licensees of the product
described herein may print one copy of this document for their personal use.
All product and company names are ™ or ® trademarks of their respective owners. For more information, please
visit www.steinberg.net/trademarks.
© Steinberg Media Technologies GmbH, 2022.
All rights reserved.
Cubase Pro_12.0.20_en-US_2022-04-27
specically allowed in the License Agreement.
Page 3
Table of Contents
5 Score Editor
7 Score Editor Toolbar
13 Score Display
14 Page Mode
14 Status Line
15 Info Line
15 Extended Toolbar
16 Filters
17 Left Zone
20 Right Zone
21 Inspector Settings Dialog
23 Ruler
23 Position Info Window
24 Zooming in the Score Editor
27 Score Editor Basics
27 MIDI Notes vs. Score Notes
28 Setting up a Display Quantize Note Value
28 Preparing Scores
29 Activating a Staff
30 Setting up the Page
30 Clef, Key, and Time Signature Settings
41 Setting up Note Names
42 Transposing Instruments
43 Printing from the Score Editor
44 Exporting Entire Scores as Image Files
45 Transcribing MIDI Recordings
45 Preparing Recorded Parts
45 Display Quantize Exceptions
48 Resolving Parts That Contain Mixed Notes and
Triplets
49 Converting MIDI Notes to Match the Score
49 Adjusting Rests
50 Adjusting Note Lengths
51 Entering and Editing Notes
51 Snap
52 Acoustic Feedback
52 Lock Layers
53 Setting up the Staff
54 Note Values and Positions
56 Note Input
58 Note Selection
60 Editing Note Positions
61 Editing Note Pitches
62 Moving Notes across Staves
63 Duplicating Notes
63 Cut, Copy, and Paste
64 Note Editing Overlay
65 Further Note Length Adjustment Methods
68 Splitting Notes
68 Deleting Notes
68 Setting up a Split Staff
69 Multiple Staves
70 Inserting Clefs, Keys, or Time Signatures
71 Troubleshooting for Note Display
73 Score Settings Dialog
74 Score Settings – Project Tab
89 Score Settings – Layout Tab
92 Score Settings – Staff Tab
103 Score Settings – Text Tab
106 Polyphonic Voicing
106 Setting up Polyphonic Voices
108 Activating Voices and Entering Notes
110 Inserting Display Quantize Changes for Active
Voices
110 Creating Crossed Voicings
111 Merging Polyphonic Voices
112 Converting Voices to Tracks – Extract Voices
114 Additional Note and Rest Formatting
114 Note Stems
117 Set Note Info Dialog
119 Note Event Properties
123 Setting up Accidental Options
124 Changing the Enharmonic Spelling
124 Changing the Notehead Shape
125 Colorizing Noteheads
125 Copying Settings Between Notes
126 Beams
132 Tied Notes
133 Moving Notes Graphically
134 Moving Rests
134 Displaying Cue Notes for Voices
135 Converting Notes to Cue Notes
135 Creating Grace Notes
136 Editing Grace Notes
136 Converting Grace Notes to Regular Notes
137 Building Tuplets
137 Quantizing the Display to Show Tuplets
138 Tuplets Dialog
139 Working with Symbols
139 Layers
142 Symbol Details
164 Inserting Note Symbols
165 Inserting Note-Dependent Symbols
165 Symbol Handles
166 Moving Notes and Symbols
167 Copying Notes and Symbols between Bars
169 Resizing Symbols
170 Resizing Note Symbols and Dynamics
170 Aligning Symbols
171 Aligning Dynamics
172 Working with Chord Symbols
172 Inserting Chord Symbols
176 Creating Chord Symbols from a Recording
177 Displaying Chord Symbols from the Chord
Track
178 Working with Text
178 Text
179 Lyrics
3
Cubase Pro 12.0.20
Page 4

Table of Contents
181 Block Text
182 Layout Text
183 Page Text
185 Words
187 Text Attribute Sets
188 Context Menu Options
188 Setting up the Text Font
189 Setting up the Font for Other Elements
190 Finding and Replacing Text
191 Editing Staff Names
195 Melisma Lines
196 Setting up Bar Numbers
200 Working with Layouts
200 Extracting Musical Parts from Full Scores
201 Open Layout Dialog
202 Importing Symbols from Another Layout
202 Removing Layouts
203 Showing Markers in Layouts
203 Exporting Layouts
204 Working with MusicXML
204 MusicXML vs. MIDI
205 Imported/Exported Parameters
209 Additional Techniques for Designing Your
Score
209 Auto Layout Dialog
211 Reset Layout Dialog
212 Adjusting the Staff Size
212 Setting the Staff Size for All Staves
213 Barline Dialog
214 Barline Properties
215 Editing Barlines
216 Moving Barlines
216 Breaking Barlines
218 Adding Brackets and Braces
218 Setting the Default Number of Bars per Staff
220 Setting the Distance Between Staves
220 Inserting Page Breaks
221 Hidden Objects
223 Multi-Bar Rests
225 Creating Pick-Up Bars
226 Creating Pick-Up Bars by Hiding Rests
227 Scoring for Drums
227 Setting up Drum Maps
230 Setting up a Staff for Drum Scoring
231 Drum Note Editing
231 Setting up a Single Line Drum Staff
232 Tablature
232 Creating Tablature from Scratch
233 Showing Staff Notation in Tablature
234 Changing Noteheads to Numbers
235 Setting up the Tablature Font
235 Changing Note Pitches
235 Moving Notes to Another String
237 Rhythmic Notation
238 Showing Staff Notation as Rhythmic Notation
238 Showing Rhythmic Notation as Regular
Notation
239 Rhythmic Bar Indicators
239 Hiding Notes and Rests in Bars
240 Replacing Notation with Repeat Bar Signs
241 Playback
241 Playing Back Repeats and Project Symbols
241 Mapped Dynamics
245 Index
4
Cubase Pro 12.0.20
Page 5
Score Editor
The Score Editor window shows MIDI notes as a musical score. It is divided into several sections.
To open a MIDI part in the Score Editor, do one of the following:
● Select one or several MIDI parts in the Project window and select Scores> Open Score
Editor.
●
Select one or several MIDI parts in the Project window and press Ctrl/Cmd - R.
NOTE
If you select parts on several tracks, one staff for each track is displayed. The staves are tied
together by barlines and placed in the order of the tracks in the Project window. You can split a
staff in two when scoring for piano, for example.
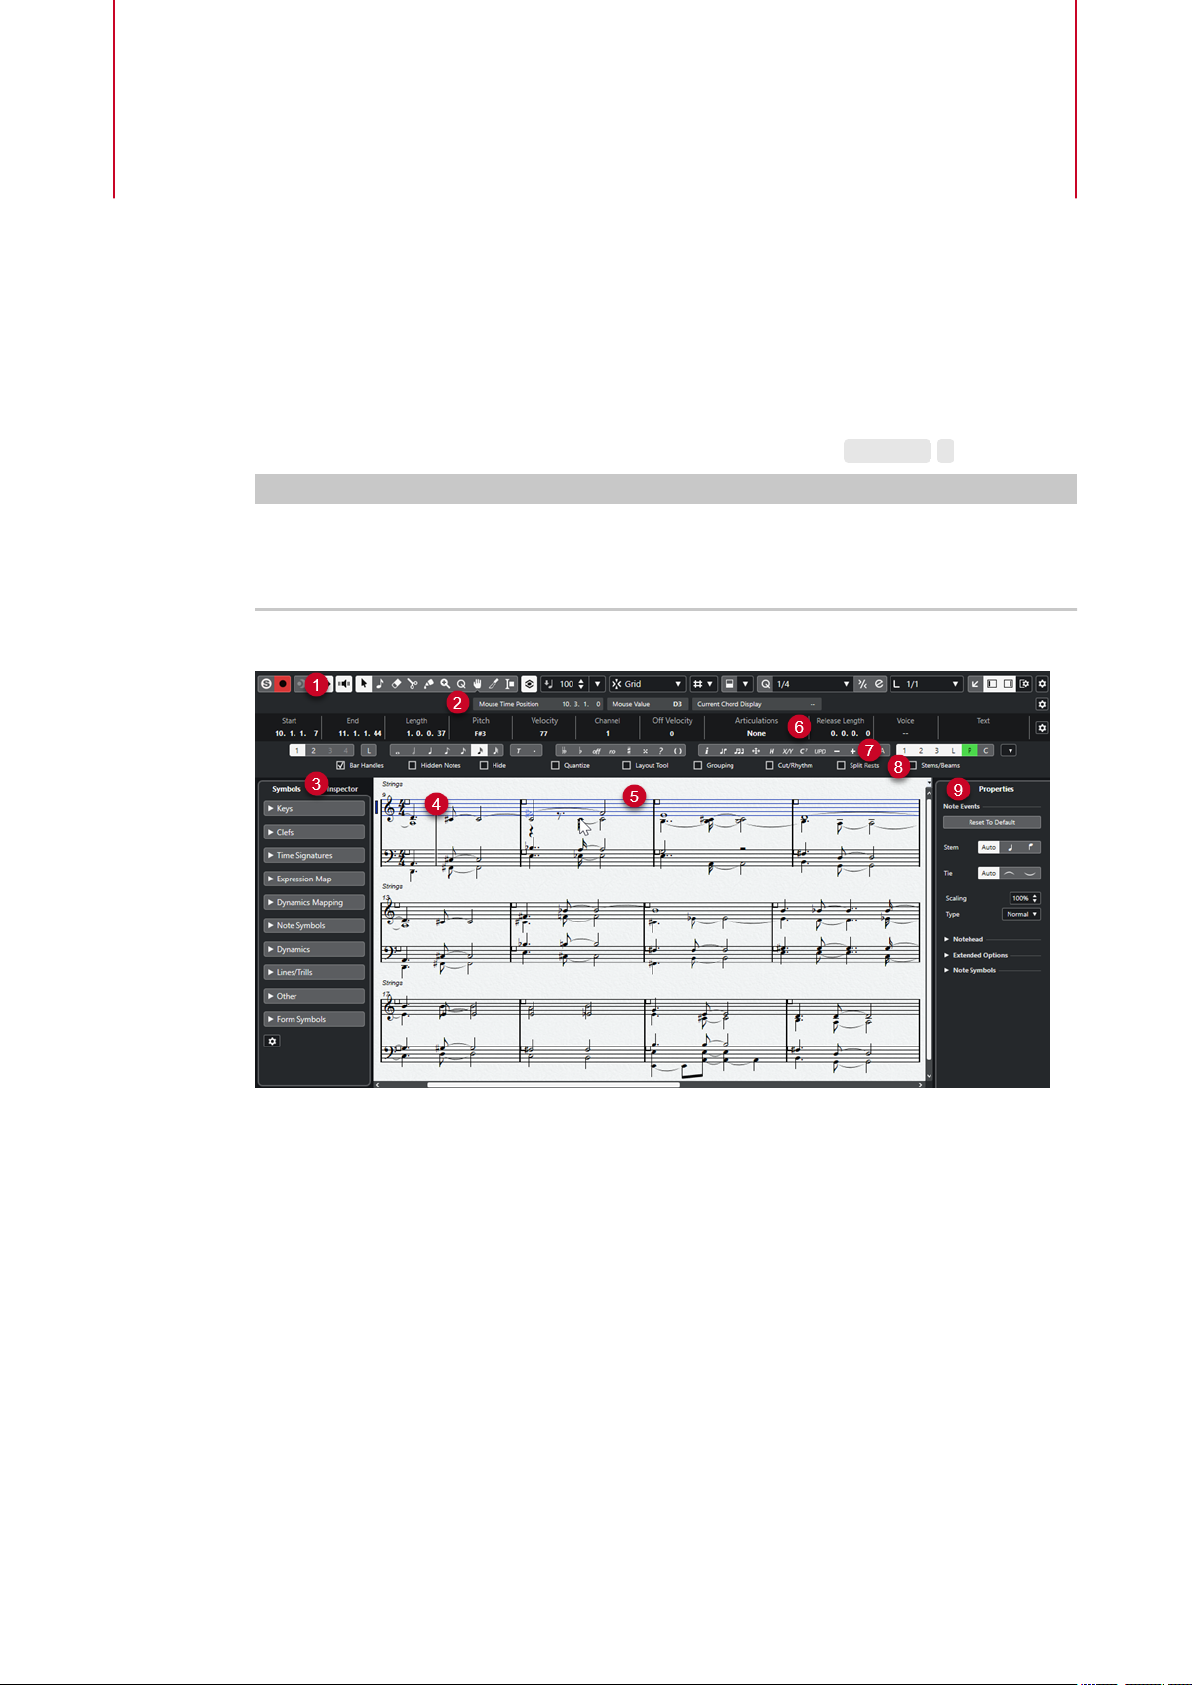
The Score Editor window:
The Score Editor is divided into several sections:
1 Toolbar
Contains tools and settings.
Status Line
2
Shows the mouse time position, the mouse value, and the current chord.
Left Zone
3
The left zone features the following tabs:
● The Symbols tab contains symbols that you can add to the score.
● The Inspector tab contains settings for working with MIDI tracks.
Project cursor
4
When you open the Score Editor, the view is automatically scrolled so that the project cursor
is visible in the window.
5
Cubase Pro 12.0.20
Page 6
Score Editor
● You can change the position of the project cursor by holding down Alt - Shift and
clicking in the score.
5 Score Display
Shows the notes in the edited parts on one or several staves. Parts on different tracks are
shown on different staves.
6 Info Line
Displays information about the selected note.
7 Tools/Extended toolbar/Command bar
Contains note value buttons and enharmonic shift buttons.
8
Filters
Allows you to lter out indicators, handles, and other non-printed elements from the score.
9
Right Zone
Allows you to display the Properties tab that shows options and settings for the elements
that you select in the score display.
NOTE
The right zone is only available if you open the Score Editor in a separate window. It is not
available in the lower zone of the Project window.
NOTE
You can activate/deactivate the status line, the info line, the tools, the lters, and the right zone
by clicking Set up Window Layout on the toolbar and activating/deactivating the corresponding
options.
You can open the Score Editor in a separate window or in the lower zone of the Project window.
Opening the
Score Editor in the lower zone of the Project window is useful if you want to access
the Score Editor functions from within a xed zone of the Project window.
NOTE
If you select MIDI> Set up Editor Preferences, the Preferences dialog opens on the Editors
page. Make your changes to specify if you want editors to open in a separate window or in the
lower zone of the
Project window.
RELATED LINKS
Score Editor Toolbar on page 7
Score Display on page 13
Status Line on page 14
Info Line on page 15
Extended Toolbar on page 15
Filters on page 16
Symbols on page 18
Inspector on page 19
Ruler on page 23
Left Zone on page 17
Right Zone on page 20
6
Cubase Pro 12.0.20
Page 7
Score Editor
Score Editor Toolbar
Score Editor Toolbar
The toolbar contains tools and various settings for the Score Editor.
● To show or hide the toolbar elements, right-click the toolbar and activate/deactivate the
elements.
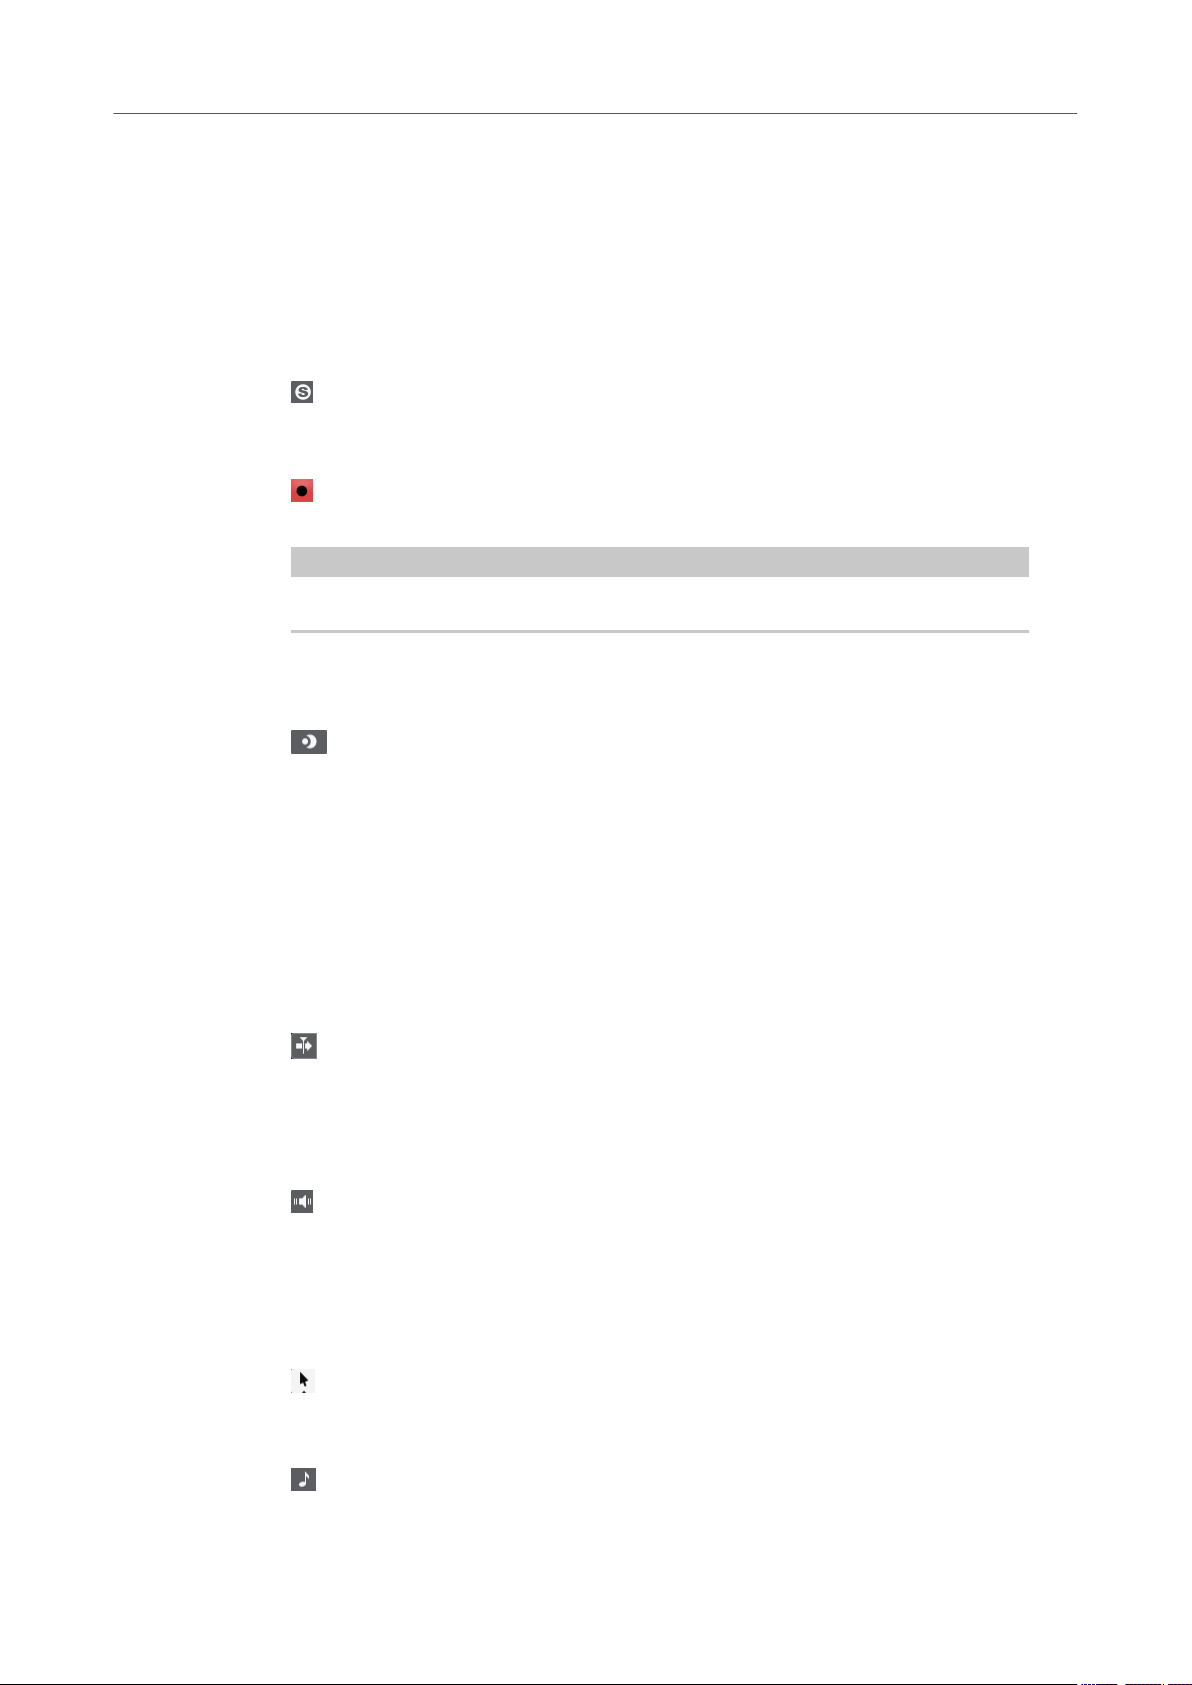
Edit Solo
Solo Editor
Solos the editor during playback if the editor has the focus.
Record in Editor
Enables the recording of MIDI data in the editor if the editor has the focus.
NOTE
This only works if MIDI Record Mode is set to Merge or Replace.
Retrospective Record
Insert MIDI Retrospective Recording in Editor
Allows you to recover MIDI notes that you played in stop mode or during playback.
Left Divider
Left Divider
Allows you to use the left divider. Tools that are placed to the left of the divider are
always shown.
Auto-Scroll
Auto-Scroll
Keeps the project cursor visible during playback.
Acoustic Feedback
Acoustic Feedback
Automatically plays back events when you move or transpose them, or when you
create them by drawing.
Tool Buttons
Object Selection
Selects events and parts.
Insert Note
7
Cubase Pro 12.0.20
Page 8
Score Editor
Score Editor Toolbar
Erase
Split
Glue
Zoom
Display Quantize
Inserts notes.
Deletes events.
Splits events.
Glues together events of the same pitch.
Zooms in. Hold Alt/Opt and click to zoom out.
Allows you to insert different staff settings for specic sections of the track.
Layout
NOTE
This works only in Page Mode.
Move Single Object allows you to move an object without affecting the score or
playback in any way.
Move Notes and Context allows you to move a note and have other score objects
move accordingly.
Cut Notes
Cuts notes.
Select Export Range
Allows you to export a specic part of a page.
NOTE
This works only in Page Mode.
Arranger
Previous Chain Step
Navigates to the previous entry in the current arranger chain list.
Next Chain Step
Navigates to the next entry in the current arranger chain list.
8
Cubase Pro 12.0.20
Page 9
Score Editor
Score Editor Toolbar
First Repeat of Current Chain Step
Activate Arranger Mode
Nudge Palette
Move Left
Move Right
Nudge End Left
Navigates to the rst repeat of the current entry in the current arranger chain list.
Navigates to the last repeat of the current entry in the current arranger chain list.
Moves the selected event to the left.
Moves the selected event to the right.
Decreases the duration of the selected event by moving its end to the left.
Nudge End Right
Increases the duration of the selected event by moving its end to the right.
Transpose Palette
Move Up
Transposes the selected event up by a half note.
Move Down
Transposes the selected event down by a half note.
Move Up More
Transposes the selected event up by an octave.
Move Down More
Transposes the selected event down by an octave.
Display Transpose
Display Transpose
Allows you to enable/disable display transpose. This function can be useful if you work
with transposing instruments and want to show the concert key and not the scored
key.
9
Cubase Pro 12.0.20
Page 10

Score Editor
Score Editor Toolbar
Insert Velocity
Note Insert Velocity
Snap
Snap Type
Event Movement Restrictions
Event Movement Restrictions
Allows you to specify a velocity value for new notes. You can also open the Set up
Insert Velocities pop-up menu to select a velocity value.
Allows you to select one of the following snap types:
●
Grid snaps events to the grid that is selected in the Quantize Presets pop-up
menu.
●
Grid Relative keeps the relative positions when snapping events to the grid.
Allows you to restrict the movement when editing or inserting events:
● Keep Notes within Key restricts the movement of notes to the current key.
● Snap Slurs to Notes restricts the movement of slurs to the start and end of notes.
● Keep Crescendo Symbols Horizontal keeps crescendo and diminuendo symbols
horizontal.
● Snap Rests and Repeats Vertically restricts the movement of rests and repeats to
system and note lines.
Note Editing Overlay
Note Editing Overlay On/Off
Activates/Deactivates an overlay that helps you to edit note durations, note time
positions, display durations, and note velocities in a similar way as in the
Options
● Colorize Overlaid Noteheads colorizes the heads of the notes for which the
overlay is shown.
Part Colors shows the notes and velocities in the overlay in the part colors.
●
Channel Colors shows the notes and velocities in the overlay in the channel colors.
●
Pitch Colors shows the notes and velocities in the overlay in the pitch colors.
●
Velocity Colors shows the notes and velocities in the overlay in the velocity colors.
●
Color Setup opens a dialog that allows you to set up the channel, pitch, or velocity
●
colors. This is not available for Part Colors.
Key Editor.
Quantize
Apply Quantize
10
Cubase Pro 12.0.20
Page 11
Score Editor
Score Editor Toolbar
Quantize Presets
Soft Quantize On/Off
Open Quantize Panel
Length Quantize
Length Quantize
Applies the quantize settings.
Allows you to select a quantize or a groove preset.
Activates/Deactivates soft quantize.
Opens the Quantize Panel.
Allows you to set a value for quantizing event lengths.
Step/MIDI Input
Set up Computer Keyboard Input
Allows you to set up the options for the computer keyboard input:
● Require ALT Key requires that you hold down Alt/Opt when you insert notes.
● Legato changes the length of the previous note when you insert notes.
● Use On-Screen Keyboard Keys allows you to insert notes by pressing the keys
that correspond to the note on the On-Screen Keyboard (qwerty).
Computer Keyboard Input
Activates/Deactivates computer keyboard input.
Step Input
Activates/Deactivates MIDI step input.
MIDI Input
Activates/Deactivates MIDI input.
Move Insert Mode
Moves all note events to the right of the step input position to the right to make room
for the inserted event when you insert notes.
NOTE
This only works if Step Input is activated.
Record Pitch
Includes the pitch when you insert notes.
11
Cubase Pro 12.0.20
Page 12
Score Editor
Score Editor Toolbar
Record NoteOn Velocity
Record NoteOff Velocity
Event Colors
Event Colors
Hide Colors
Dark Mode
Includes the NoteOn velocity when you insert notes.
Includes the NoteOff velocity when you insert notes.
Allows you to colorize noteheads.
Allows you to temporarily hide notehead colors.
Inverses the score display mode from black on white to white on black. This is useful if
you work at night or in a dim environment.
Paper Background
Background Texture
Allows you to specify different background textures for the score.
NOTE
The background texture only affects the display and is not used for printing.
Insert Layer
Insert Layer
Allows you to select the insert layer. You can insert score objects on the note layer, the
project layer, and the layout layer.
Right Divider
Right Divider
Allows you to use the right divider. Tools that are placed to the right of the divider are
always shown.
Window Zone Controls
Open in Separate Window
This button is available in the lower zone editor. It opens the editor in a separate
window.
12
Cubase Pro 12.0.20
Page 13
Score Editor
Score Display
Open in Lower Zone
This button is available in the editor window. It opens the editor in the lower zone of
the Project window.
Show/Hide Left Zone
Shows/Hides the left zone.
Set up Window Layout
Allows you to set up the window layout.
Set up Toolbar
Opens a pop-up menu where you can set up which toolbar elements are visible.
Score Display
The main area of the Score Editor window shows the notes in the edited parts on one or several
staves. Parts on different tracks are shown on different staves.
● If you are editing one or several parts on the same track, as much of them as possible is
shown on several staves, comparable with a score on paper.
● If you are editing parts on several tracks, they are put on a grand staff. A grand staff is
composed of multiple staves that are tied together by barlines.
● The number of bars that are displayed on the screen depends on the size of the window and
the number of notes in each bar.
● The end of the last part is indicated by a double barline.
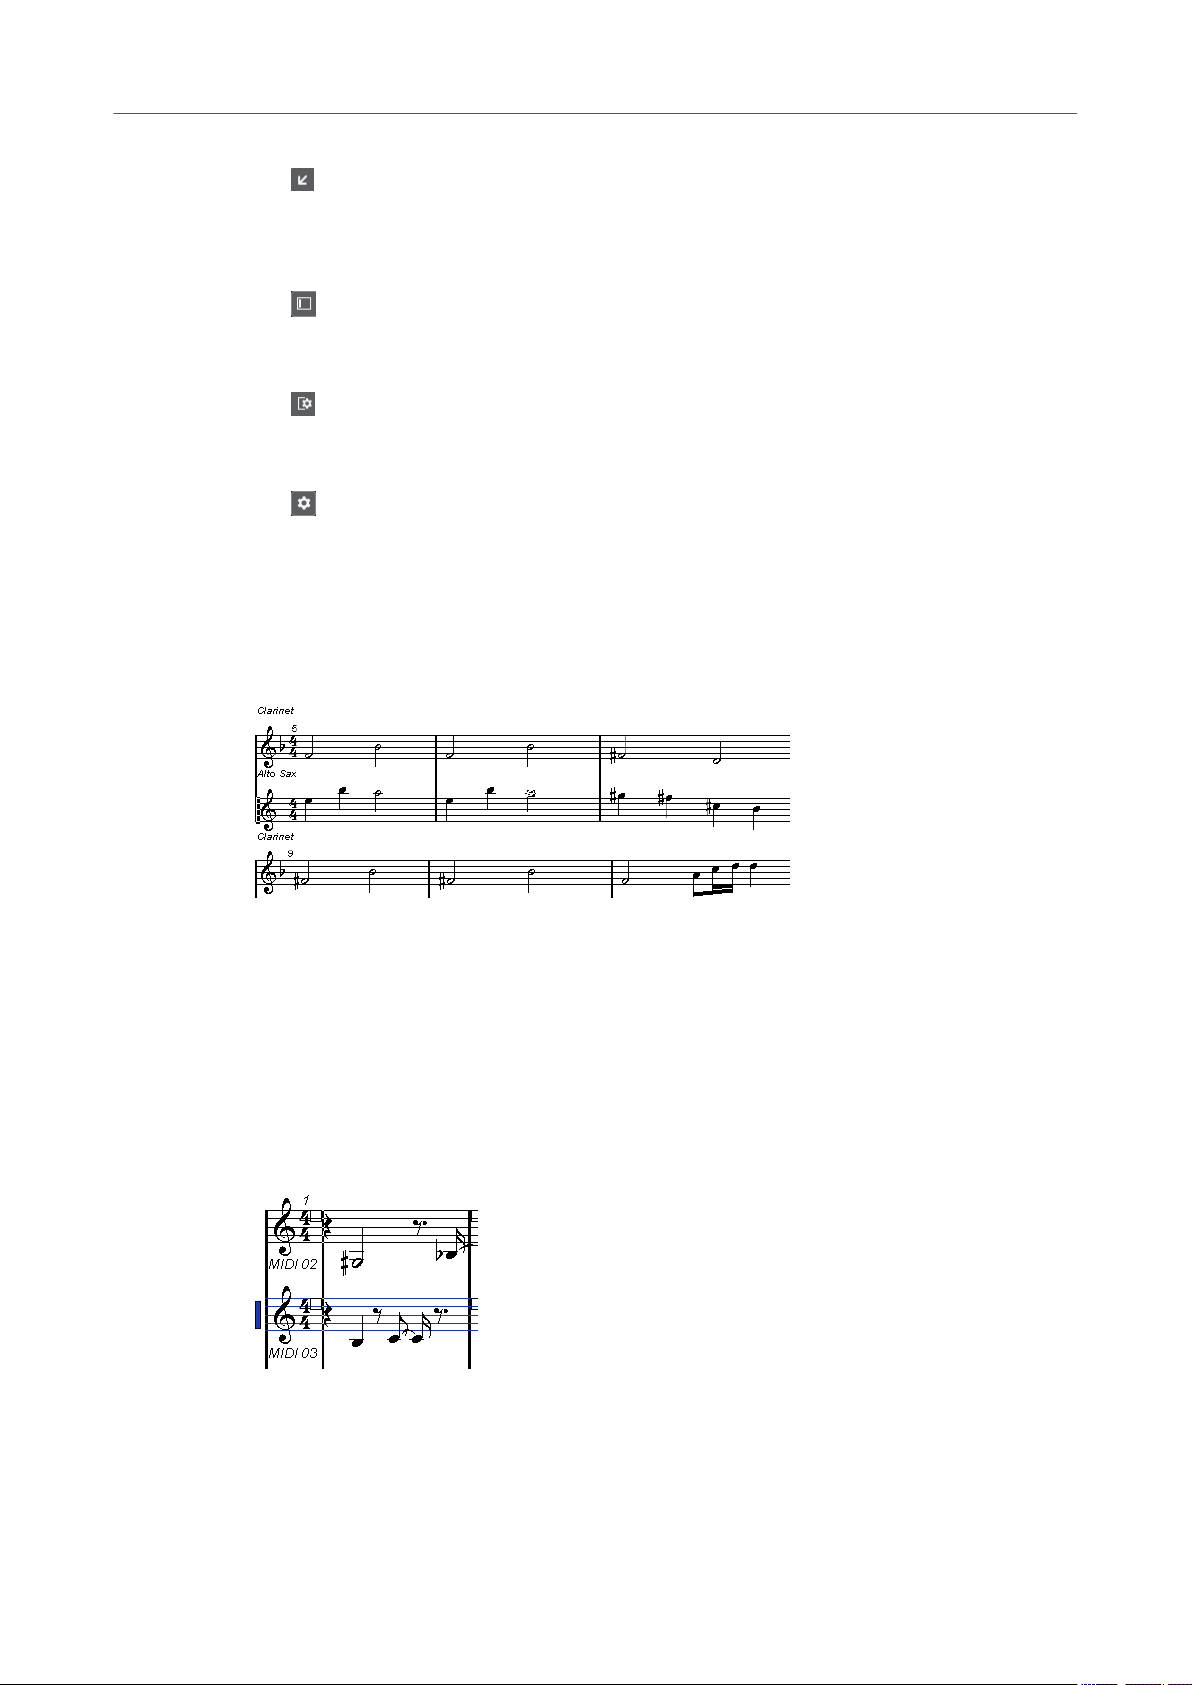
All MIDI input is directed to one of the tracks, which is called the active staff. The active staff is
indicated by a rectangle to the left of the clef symbol.
To change the active staff, click on the staff that you want to activate.
●
RELATED LINKS
Score Editor on page 5
Activating a Staff on page 29
13
Cubase Pro 12.0.20
Page 14
Score Editor
Page Mode
Page Mode
The Score Editor has two different modes: Page Mode and edit mode. Page Mode offers
additional features which are directly related to how the score is displayed and printed.
NOTE
Page Mode is not available in the lower zone editor.
● To activate Page Mode, select Scores, and enable Page Mode.
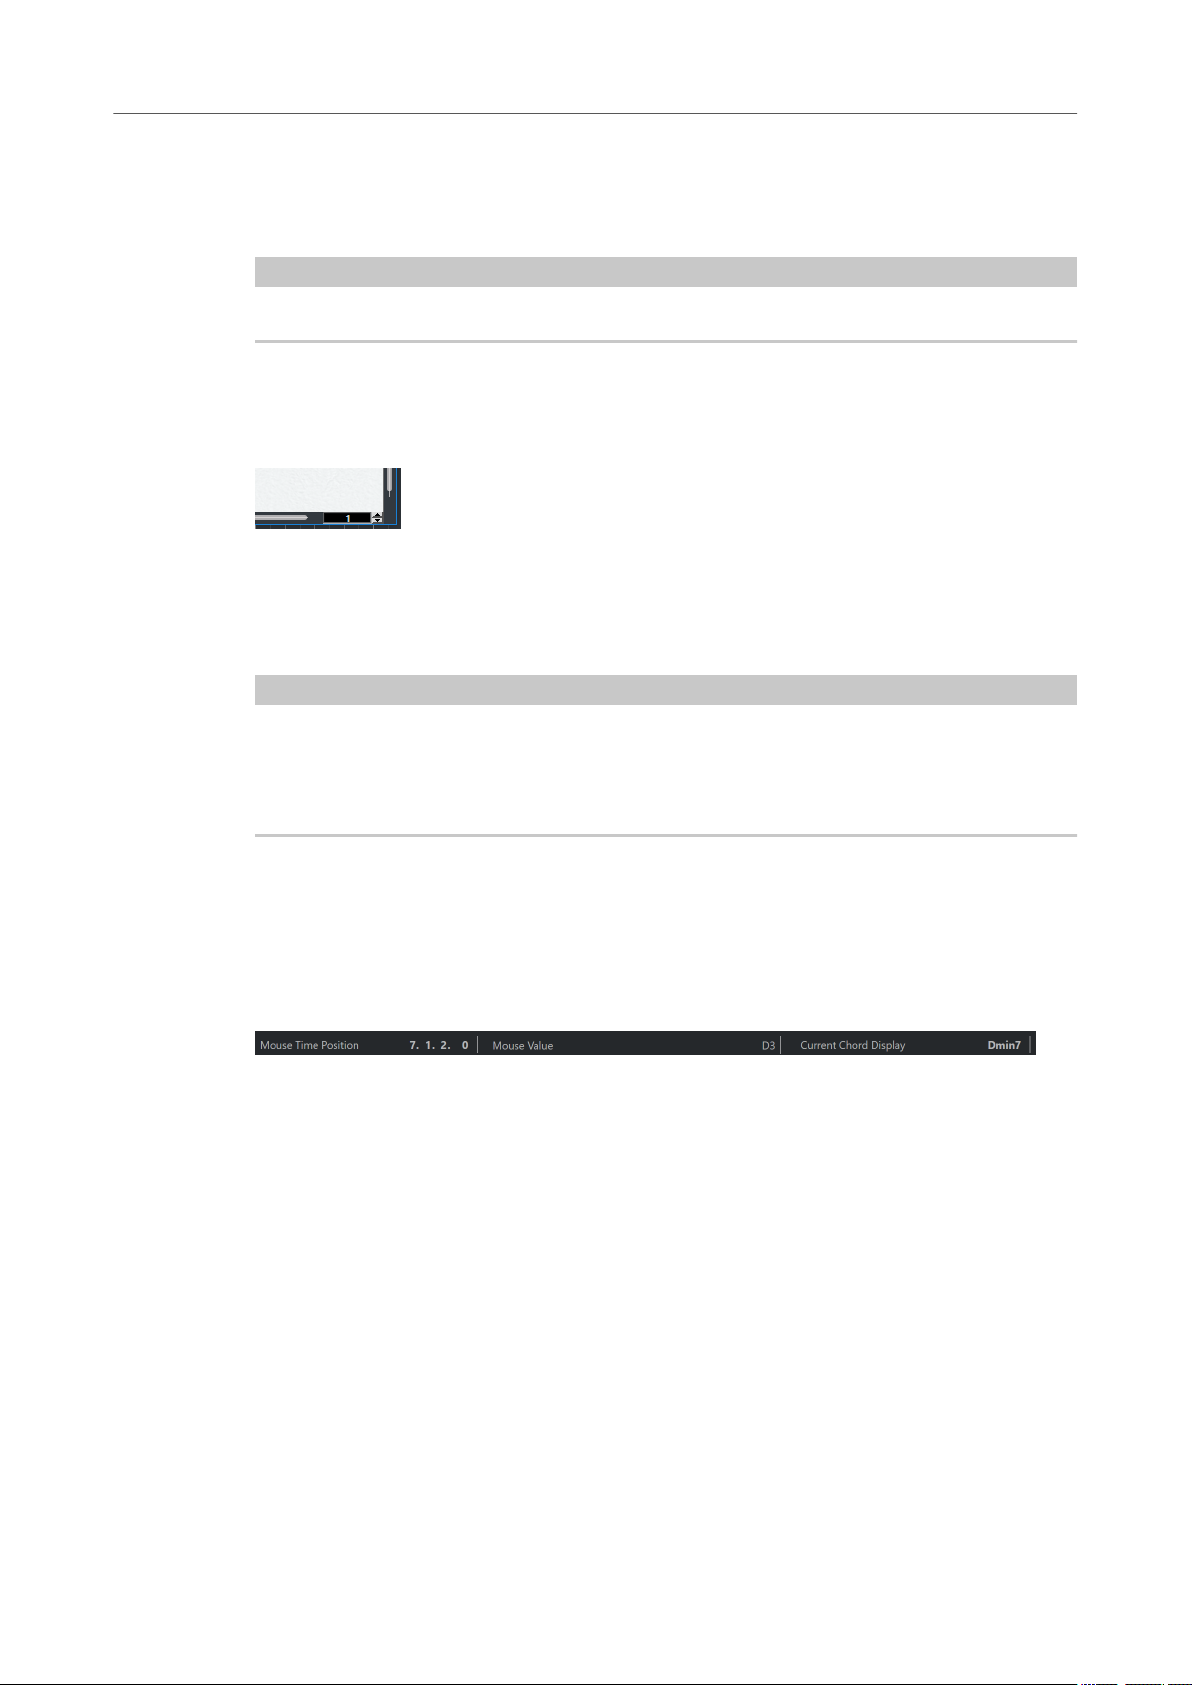
In Page Mode, a page number indicator is shown in the lower right corner. This allows you to
move to another page in your score.
In Page Mode, the score display follows the project cursor position if Auto-Scroll is activated on
the toolbar.
When you view a single part in Page Mode, the bars before and after the part are shown as
empty bars in the Score Editor.
NOTE
If you want to view and print a part without any surrounding empty bars, activate Unlock Layout
When Editing Single Parts in the Preferences dialog (Scores–Editing page). Make sure that you
do not adjust the layout when editing the part in this mode as this would erase the layout for the
whole track.
Status Line
The status line shows the mouse time position, the mouse value, and the current chord.
● To show the status line, click Set up Window Layout on the toolbar and activate Status
Mouse Time Position
Mouse Value
Current Chord Display
Line.
Shows the musical position in bars, beats, sixteenth notes, and ticks.
Shows the pitch according to the vertical position of the pointer in a staff.
Shows the current chord at the position of the project cursor.
RELATED LINKS
Score Editor on page 5
Set up Window Layout on page 13
Cubase Pro 12.0.20
14
Page 15
Score Editor
Info Line
Info Line
The info line shows information about the selected note.
● To show the info line, click Set up Window Layout on the toolbar and activate Info Line.
RELATED LINKS
Score Editor on page 5
Set up Window Layout on page 13
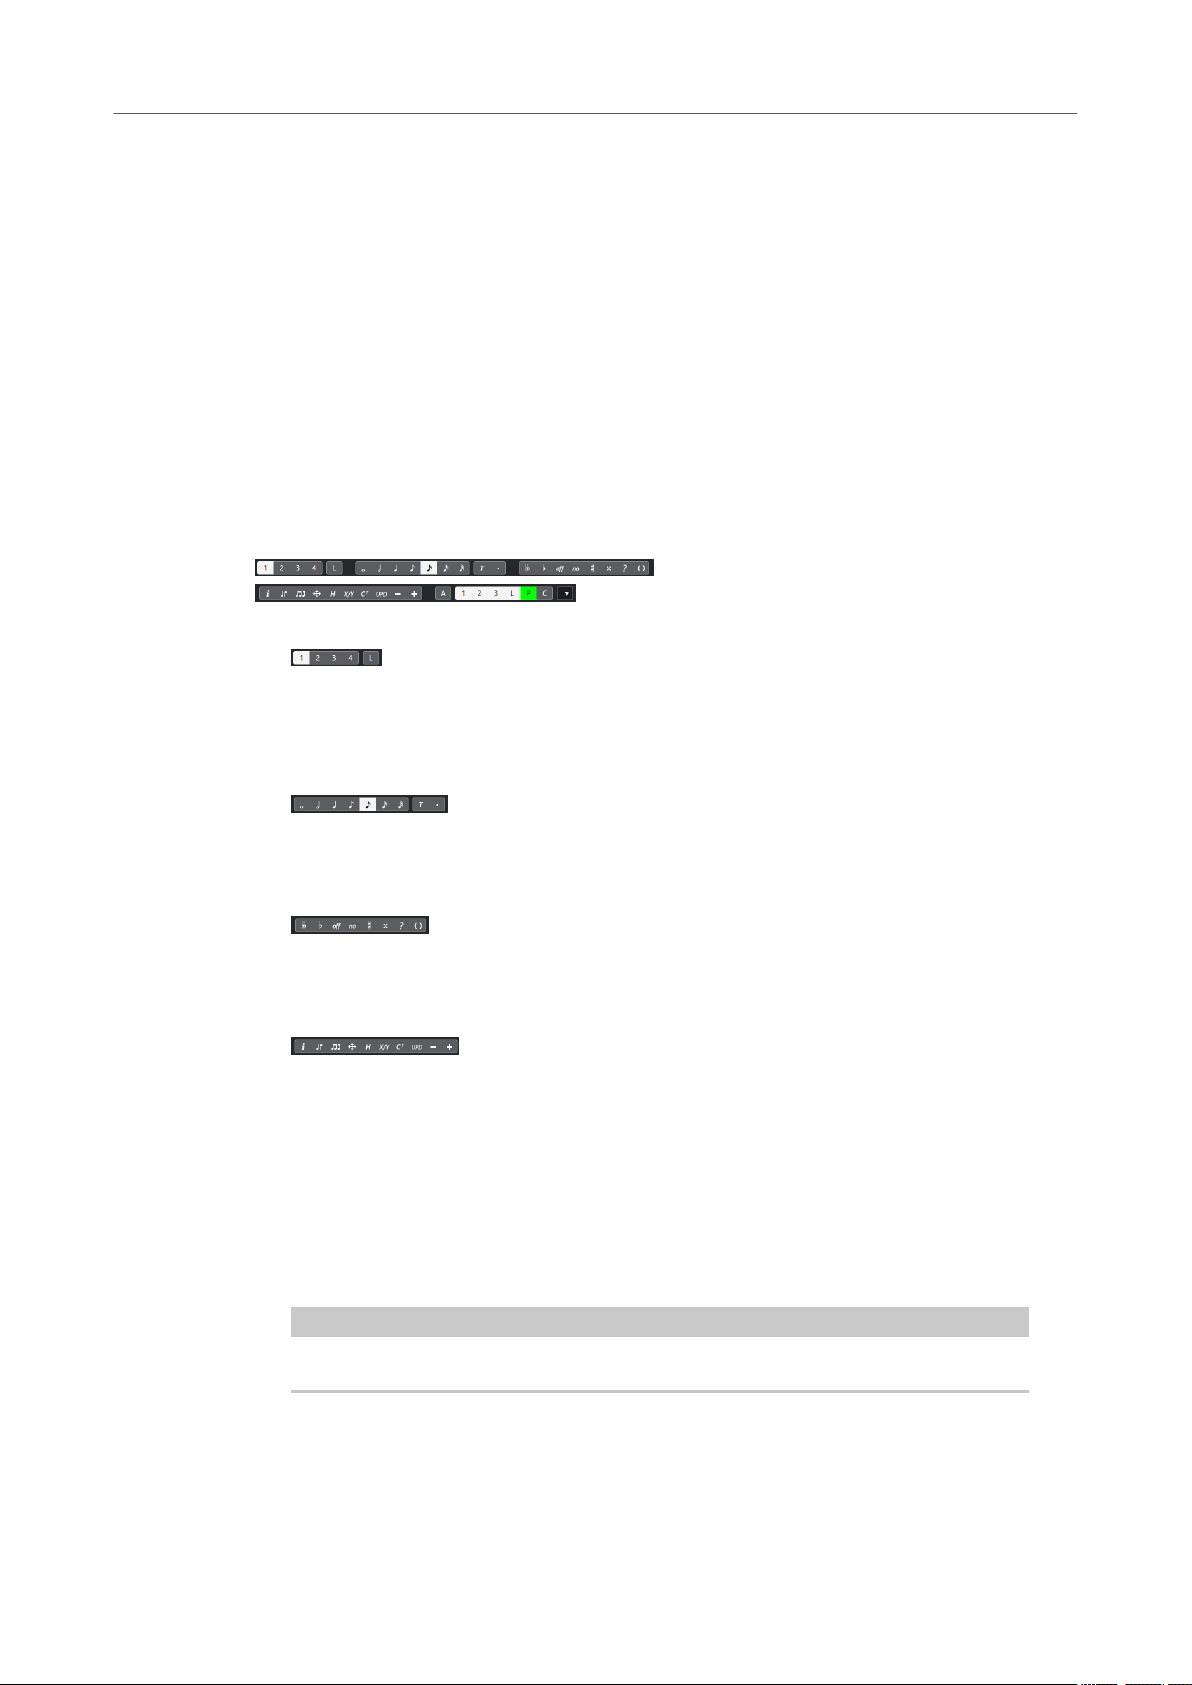
Extended Toolbar
The extended toolbar contains additional tools for your score.
●
To show the extended toolbar, click Set up Window Layout on the toolbar, and activate
Tools.
Insert to Voice buttons
Shows the voices of the active staff. Activate a voice button to insert notes into that
voice. Activate Lock Insert Staff to lock the movement of notes and other objects
between staves.
Note Value buttons
Shows the note values for note input, as well as options for triplet and dotted note
values. Activate a note value button to insert notes of that value.
Enharmonic Shift buttons
Activate a button to change the display of the selected note. Off resets the notes to
original display.
Functions buttons
Get Info opens the Set Note Info dialog for the selected note.
Flip ips the stem of the selected note.
Group Notes groups the selected notes under a beam.
Auto Layout opens the Auto Layout dialog that allows you to adjust such as bar
widths and staff distances.
Hide hides the selected notes and objects.
Position Panel opens the Position Info window that allows you to view and adjust
object positions in the ruler display format.
No shows no accidentals, regardless of the pitch.
NOTE
In Page Mode, you can also open the Position Info window by clicking in the ruler.
Make Chord Symbols analyzes the selected notes and creates a chord symbol. For this
to work, all selected notes must be located in the same MIDI part.
Force Update forces a redraw of the whole page.
15
Cubase Pro 12.0.20
Page 16
Score Editor
Filters
One down allows you to select the next lower dynamics symbol.
One up allows you to select the next higher dynamics symbol.
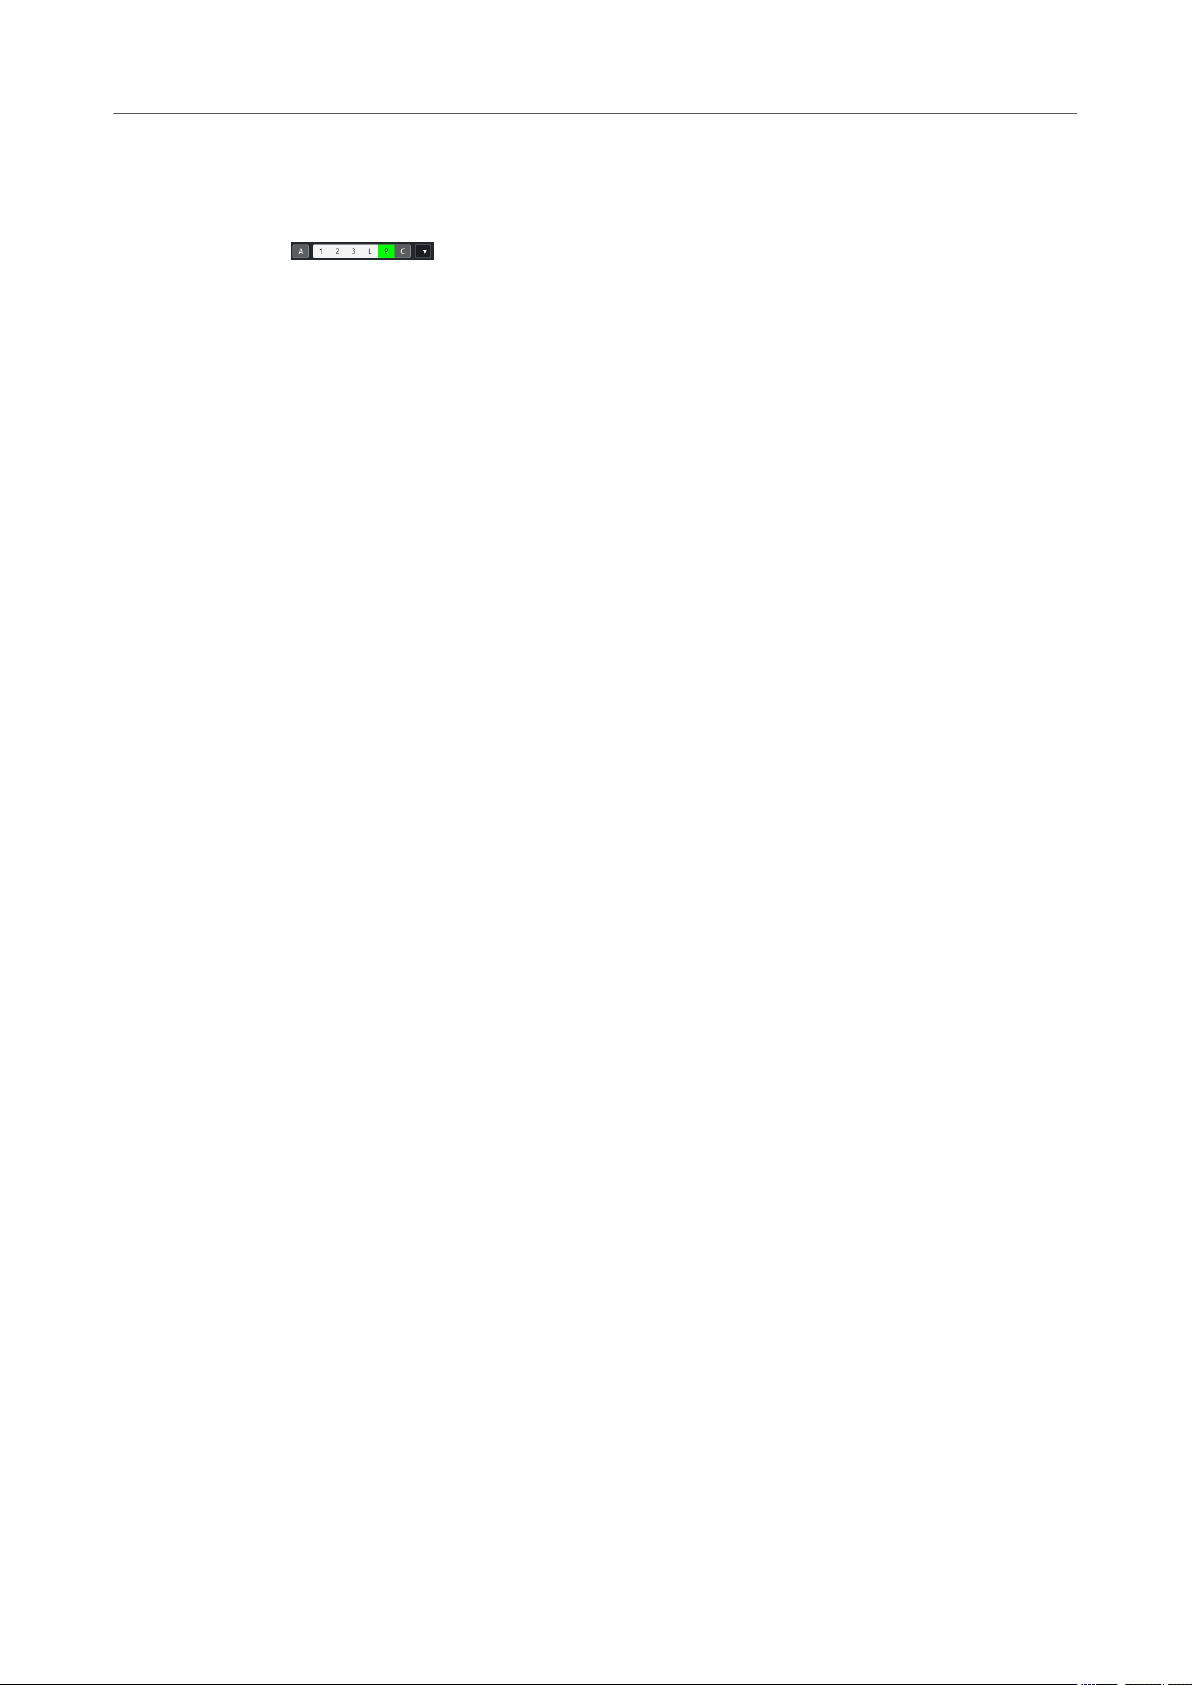
Layer buttons
Activate a layer button to unlock this layer and display the score objects that are
assigned to that layer.
Toggle All Layers toggles the lock state of all layers.
Layer 1, Layer 2, and Layer 3 contains the score objects that you assigned to the
corresponding note layers.
Layout Layer contains all the score objects that are associated with the layout layer.
Project Layer contains all the score objects that are associated with the project layer.
Colorize Layer displays the score objects in different colors, where each color stands
for a specic type of layer.
Set Up Score Lock Layers allows you to set up which object types are associated with
that layer.
RELATED LINKS
Score Editor on page 5
Set up Window Layout on page 13
Note Layer Symbols on page 139
Layout Layer Symbols on page 140
Project Layer Symbols on page 140
Lock Layers on page 52
Filters
The lters bar allows you to lter out indicators, handles, and other non-printed elements from
the score.
● To show the lters bar, click Set up Window Layout on the toolbar and activate Filters.
The following elements in the score are not printed and only serve as indicators for layout
changes. They can be hidden or shown:
Bar Handles
Shows/Hides bar handles that can be used for copying bars.
Hidden Notes
Shows/Hides any notes you might have hidden.
Hide
Shows/Hides markers in the score for hidden element, except notes.
Quantize
Shows/Hides markers at positions where you have used the Display Quantize tool.
Layout Tool
Shows/Hides markers where you have made adjustments with the Layout tool.
Grouping
Shows/Hides markers where you have made beam groupings.
16
Cubase Pro 12.0.20
Page 17

Score Editor
Left Zone
Cut/Rhythm
Shows/Hides markers where you have cut events or where rhythmic notation is shown
instead of regular notation.
Split Rests
Shows/Hides markers where you have split multiple rests.
Stems/Beams
Shows/Hides markers where you have made stem or beam adjustments.
RELATED LINKS
Symbol Handles on page 165
Hiding Objects on page 221
Inserting Display Quantize Exceptions on page 46
Moving Notes Graphically on page 133
Beams on page 126
Cutting Notes Manually on page 133
Rhythmic Bar Indicators on page 239
Splitting Multiple Rests on page 225
Flipping Note Stems on page 115
Adjusting Beam Slants on page 131
Score Editor on page 5
Set up Window Layout on page 13
Left Zone
The left zone of the Score Editor allows you to display the Inspector and the Symbols tab.
To show/hide the left zone, click Show/Hide Left Zone on the Score Editor window toolbar.
The top of the left zone features the following tabs:
● Inspector
● Symbols
17
Cubase Pro 12.0.20
Page 18

Score Editor
Left Zone
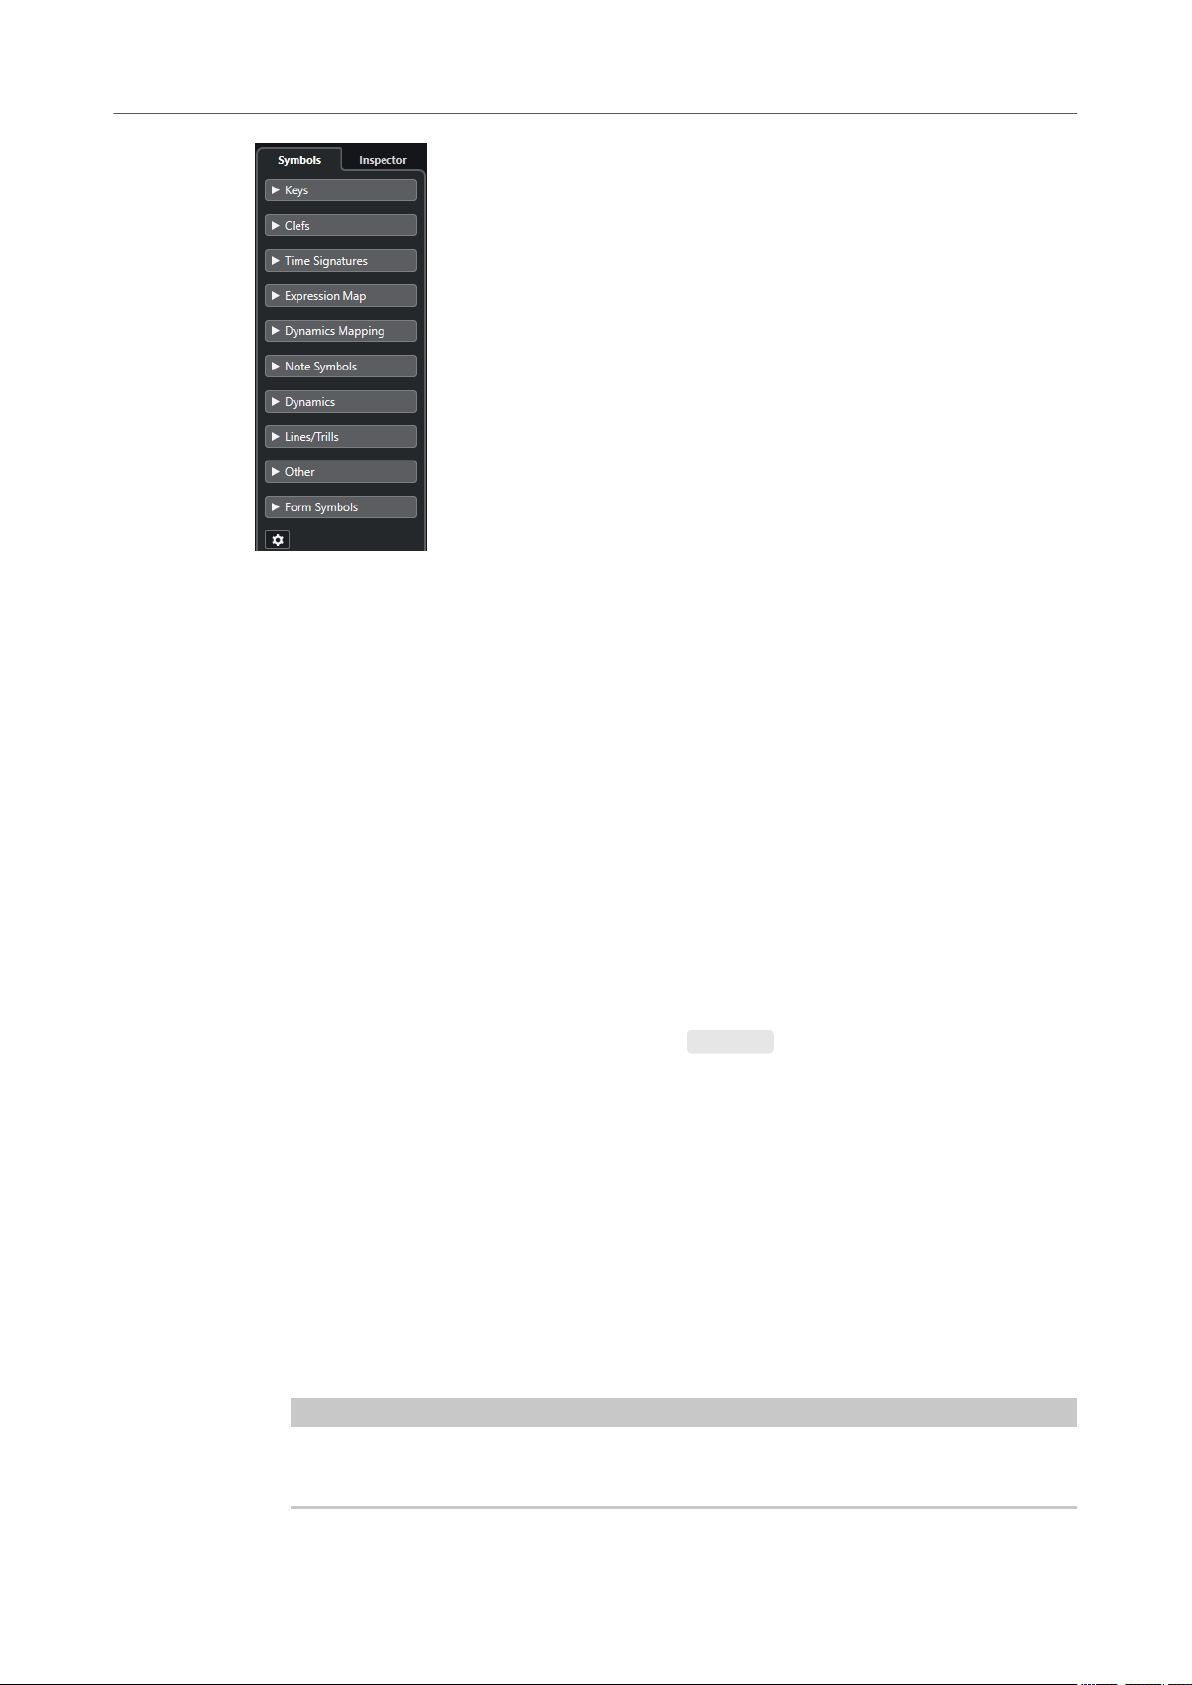
Symbols
RELATED LINKS
Score Editor on page 5
Symbols on page 18
Inspector on page 19
Right Zone on page 20
The Symbols tab in the left zone of the Score Editor contains symbols that you can add to the
score.
● In the Score Editor window, you can show/hide the left zone by clicking Show/Hide Left
Zone on the toolbar.
NOTE
In the lower zone editor, the left zone is shown in the left zone of the Project window.
18
Cubase Pro 12.0.20
Page 19
Score Editor
Left Zone
●
To open/close a section, click its name.
●
To open a section as a palette, open the section, right-click any of its symbols, and select
Open as Palette.
RELATED LINKS
Inspector Settings Dialog on page 21
Working with Symbols on page 139
Symbol Palettes on page 19
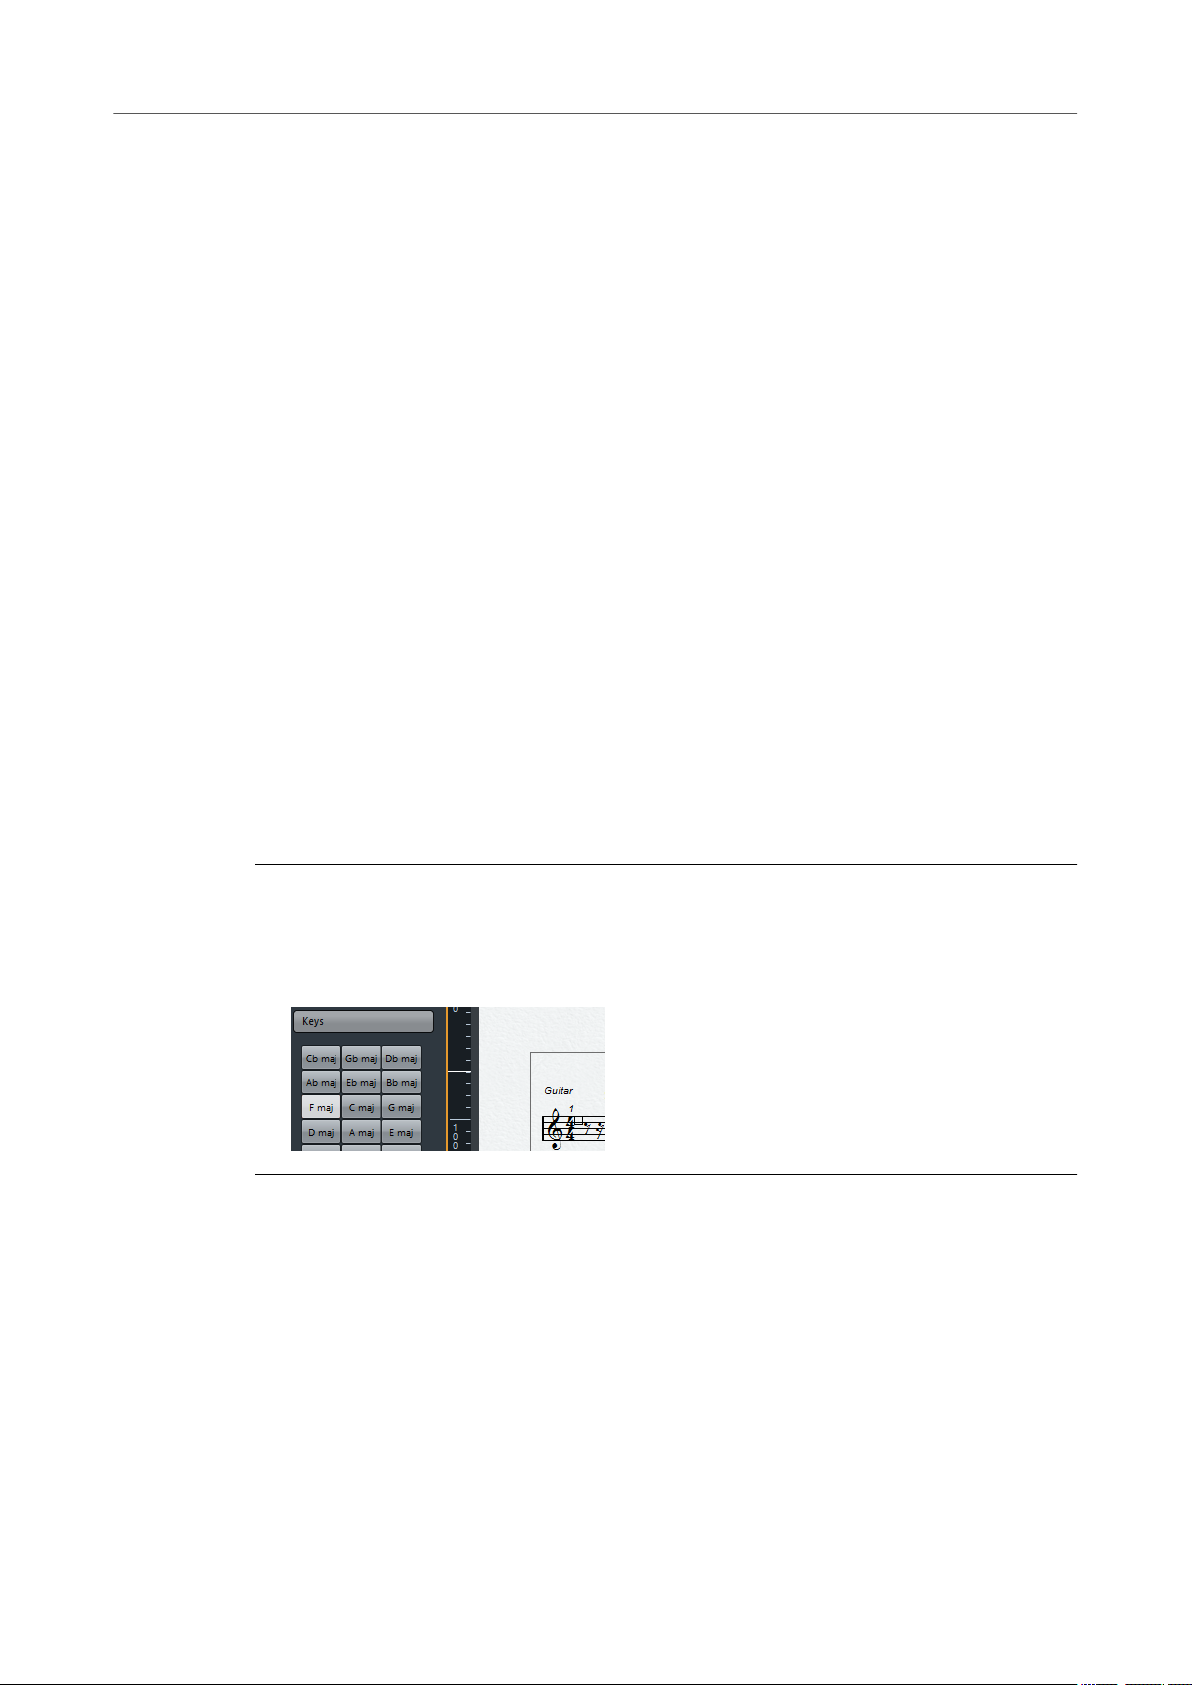
Symbol Palettes
You can open a section of the Symbols tab as a palette. This allows you to move the symbol
palette on the screen.
● To switch between a vertical or horizontal view of the palette, right-click any symbol, and
● To bring up another palette instead of the current one, right-click any symbol, and select one
● To open a palette in a new window, hold down Ctrl/Cmd while right-clicking any symbol,
● To close a symbol palette, click the close button.
RELATED LINKS
Working with Symbols on page 139
Symbols on page 18
select Toggle.
of the palettes from the context menu.
and select the palette from the context menu.
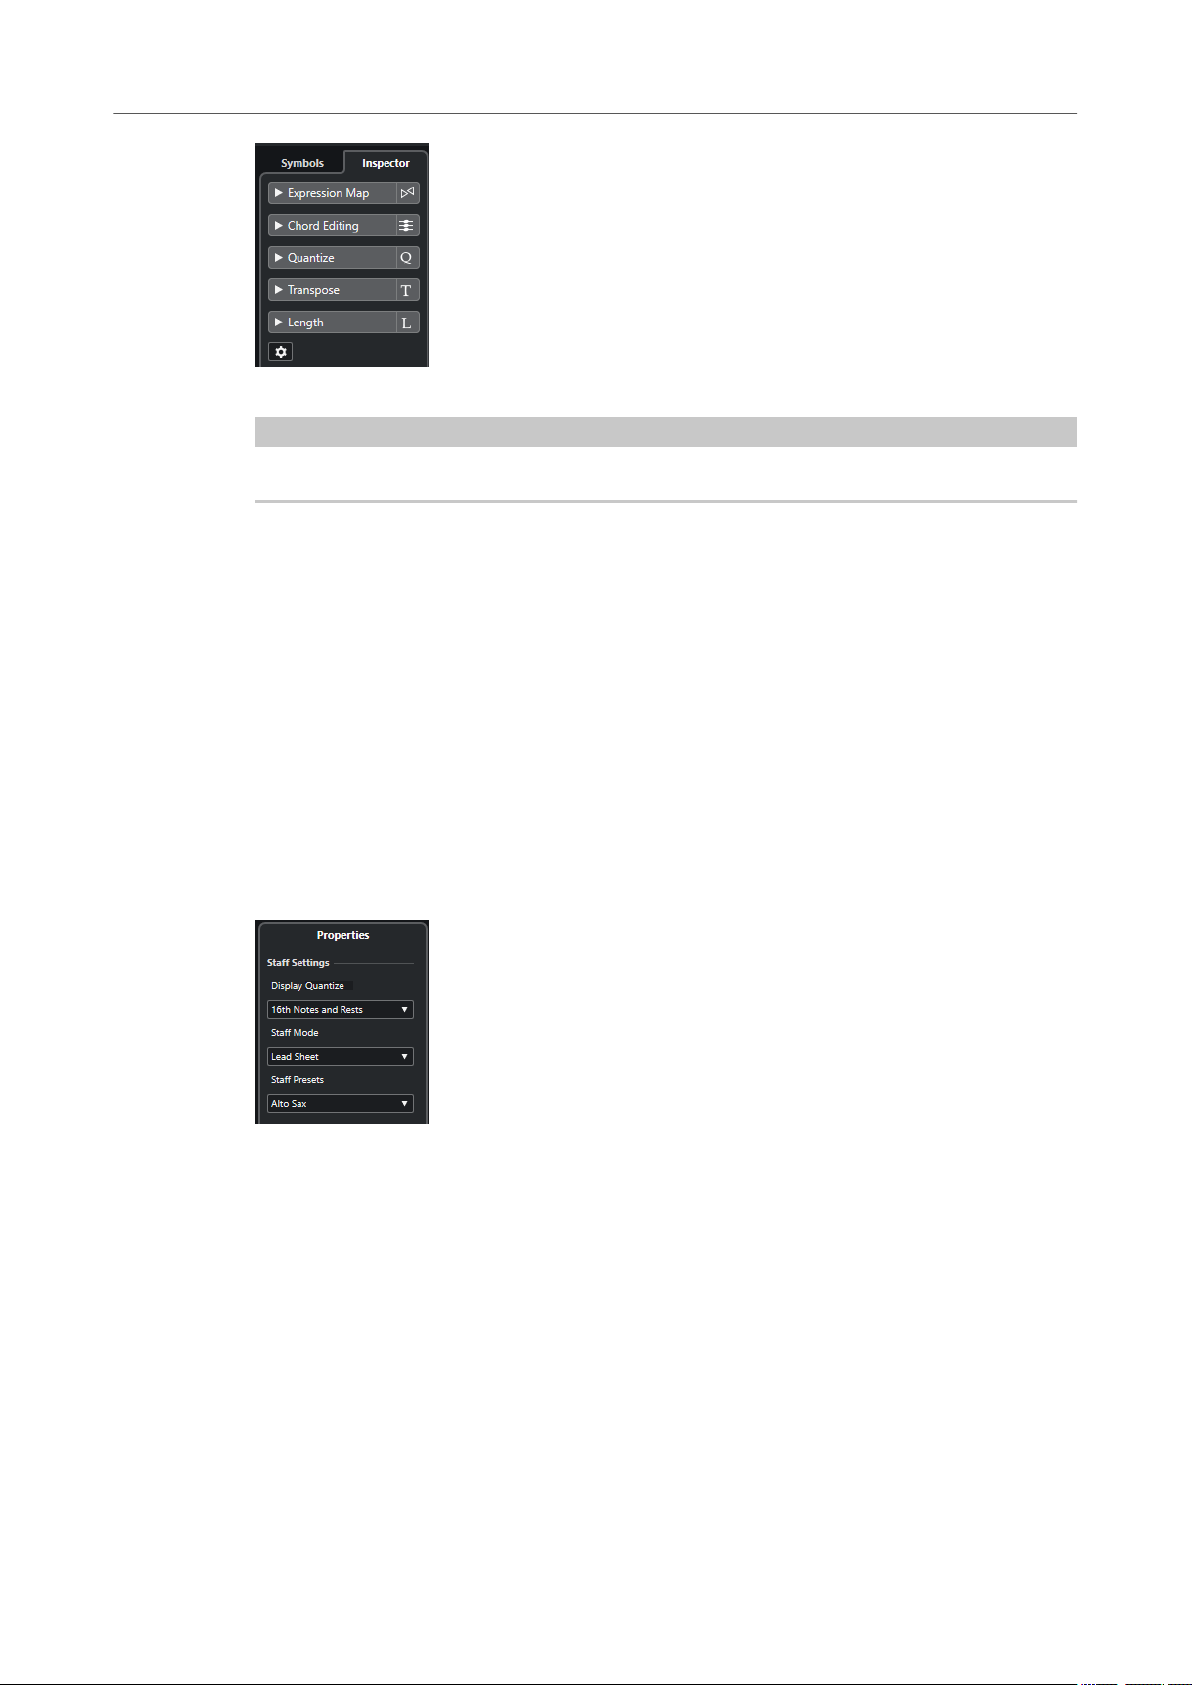
Inspector
The Inspector provides settings for working with MIDI tracks.
In the Score Editor window, you can show/hide the Inspector by clicking Set up Window
●
Layout on the toolbar and activating/deactivating Inspector.
NOTE
In the lower zone editor, the Inspector is always shown in the left zone of the Project
window.
19
Cubase Pro 12.0.20
Page 20
Score Editor
Right Zone
● To open/close a section, click its name.
NOTE
For a description of the Inspector sections for MIDI tracks, refer to the Operation Manual.
RELATED LINKS
Score Editor on page 5
Symbols on page 18
Inspector Settings Dialog on page 21
Right Zone
The right zone of the Score Editor allows you to display the Properties tab that shows options
and settings for the elements that you select in the score display. This gives you context-related
access to settings and editing options for the selected element.
To show/hide the Properties tab in the right zone, do one of the following:
● Click Show/Hide Right Zone on the Score Editor window toolbar.
● Click Set up Window Layout on the toolbar and activate Right Zone.
RELATED LINKS
Score Editor on page 5
Left Zone on page 17
Staff Properties on page 21
Note Event Properties on page 119
Barline Properties on page 214
Bar Number Properties on page 197
Clef Properties on page 34
Key Properties on page 38
Staff Name Properties on page 192
Chord Symbol Properties on page 173
Bar Handle Properties on page 168
Multi-Bar Rest Properties on page 223
Gradual Dynamic Properties on page 154
20
Cubase Pro 12.0.20
Page 21
Score Editor
Inspector Settings Dialog
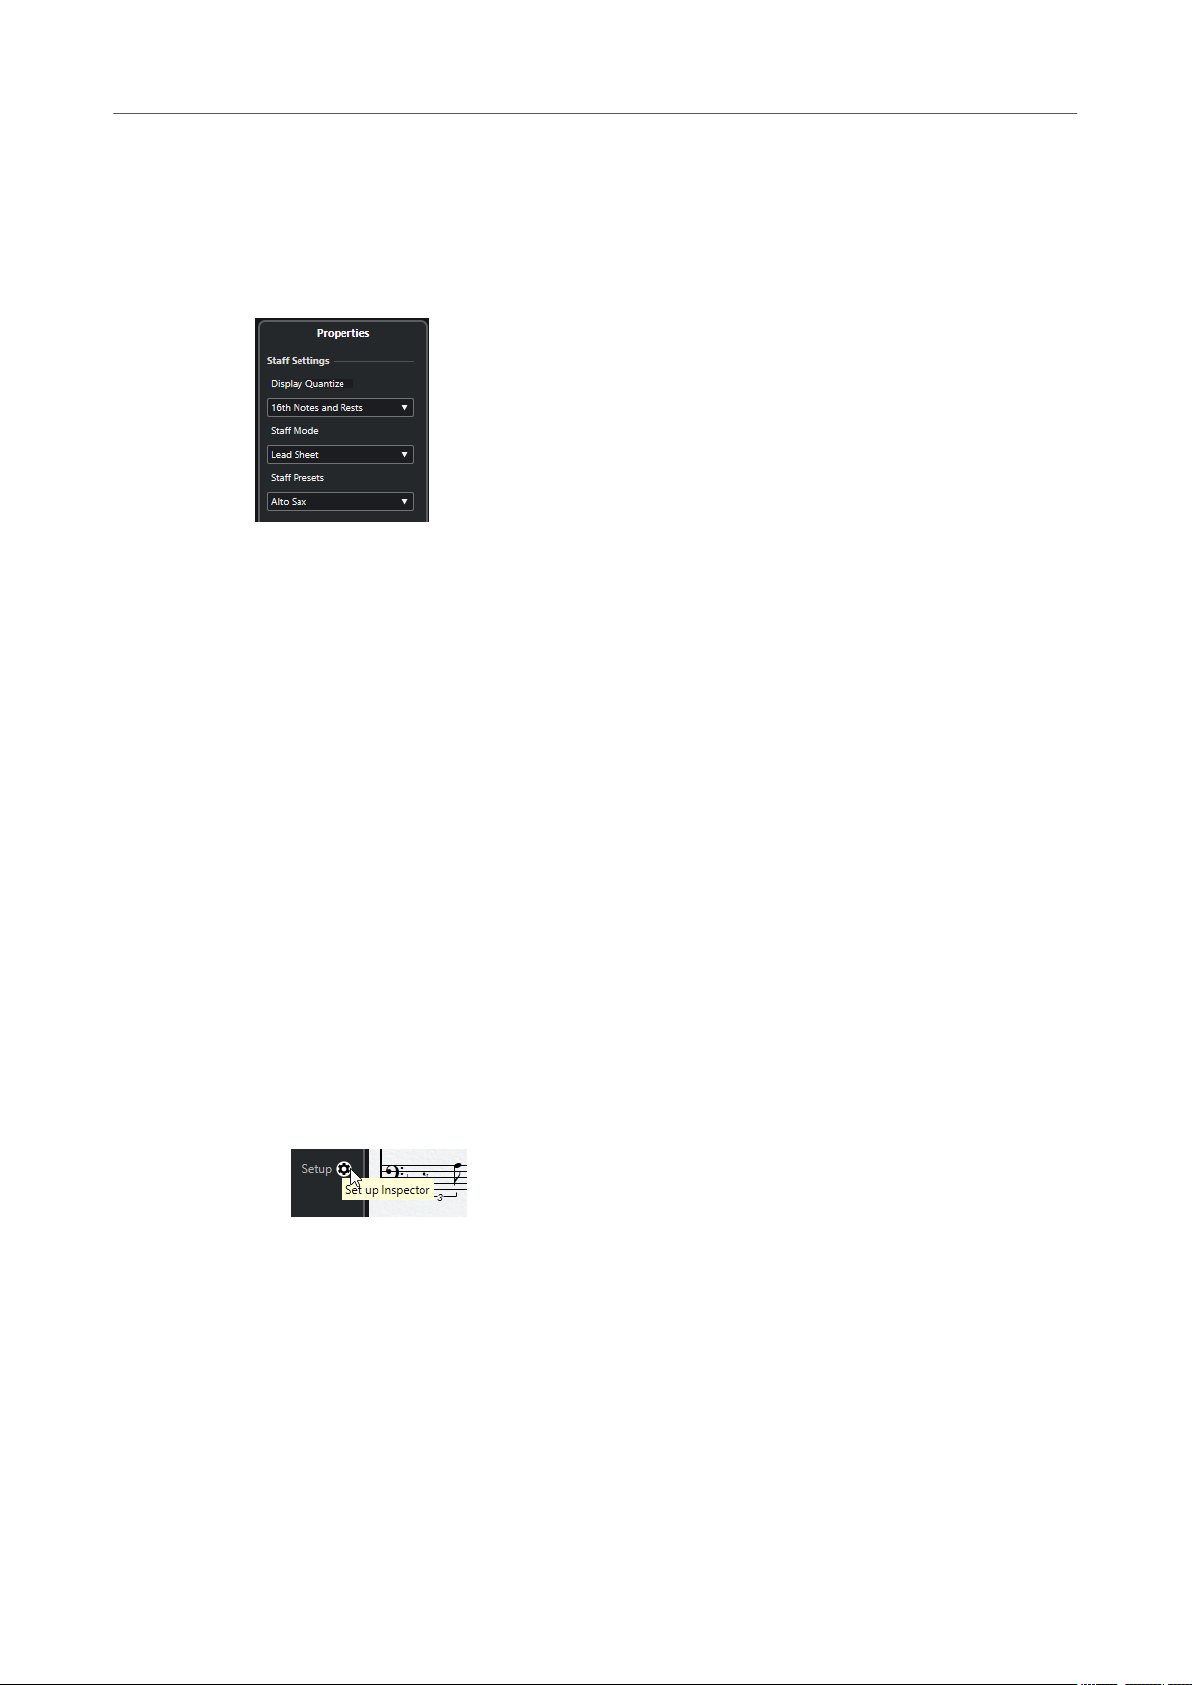
Staff Properties
The Properties tab for staves in the right zone of the Score Editor allows you quick access to
general
They are available in the right zone of the Score Editor if nothing is selected in the score display.
These options affect the active staff.
Staff Settings Section
Display Quantize
Allows you to set up display quantize values for your score.
score-specic settings.
Staff Mode
Allows you to set up the voices.
Staff Presets
Allows you to select a staff preset.
RELATED LINKS
Right Zone on page 20
Staff – Main Tab on page 93
Setting up Polyphonic Voices on page 106
Saving Staff Presets on page 93
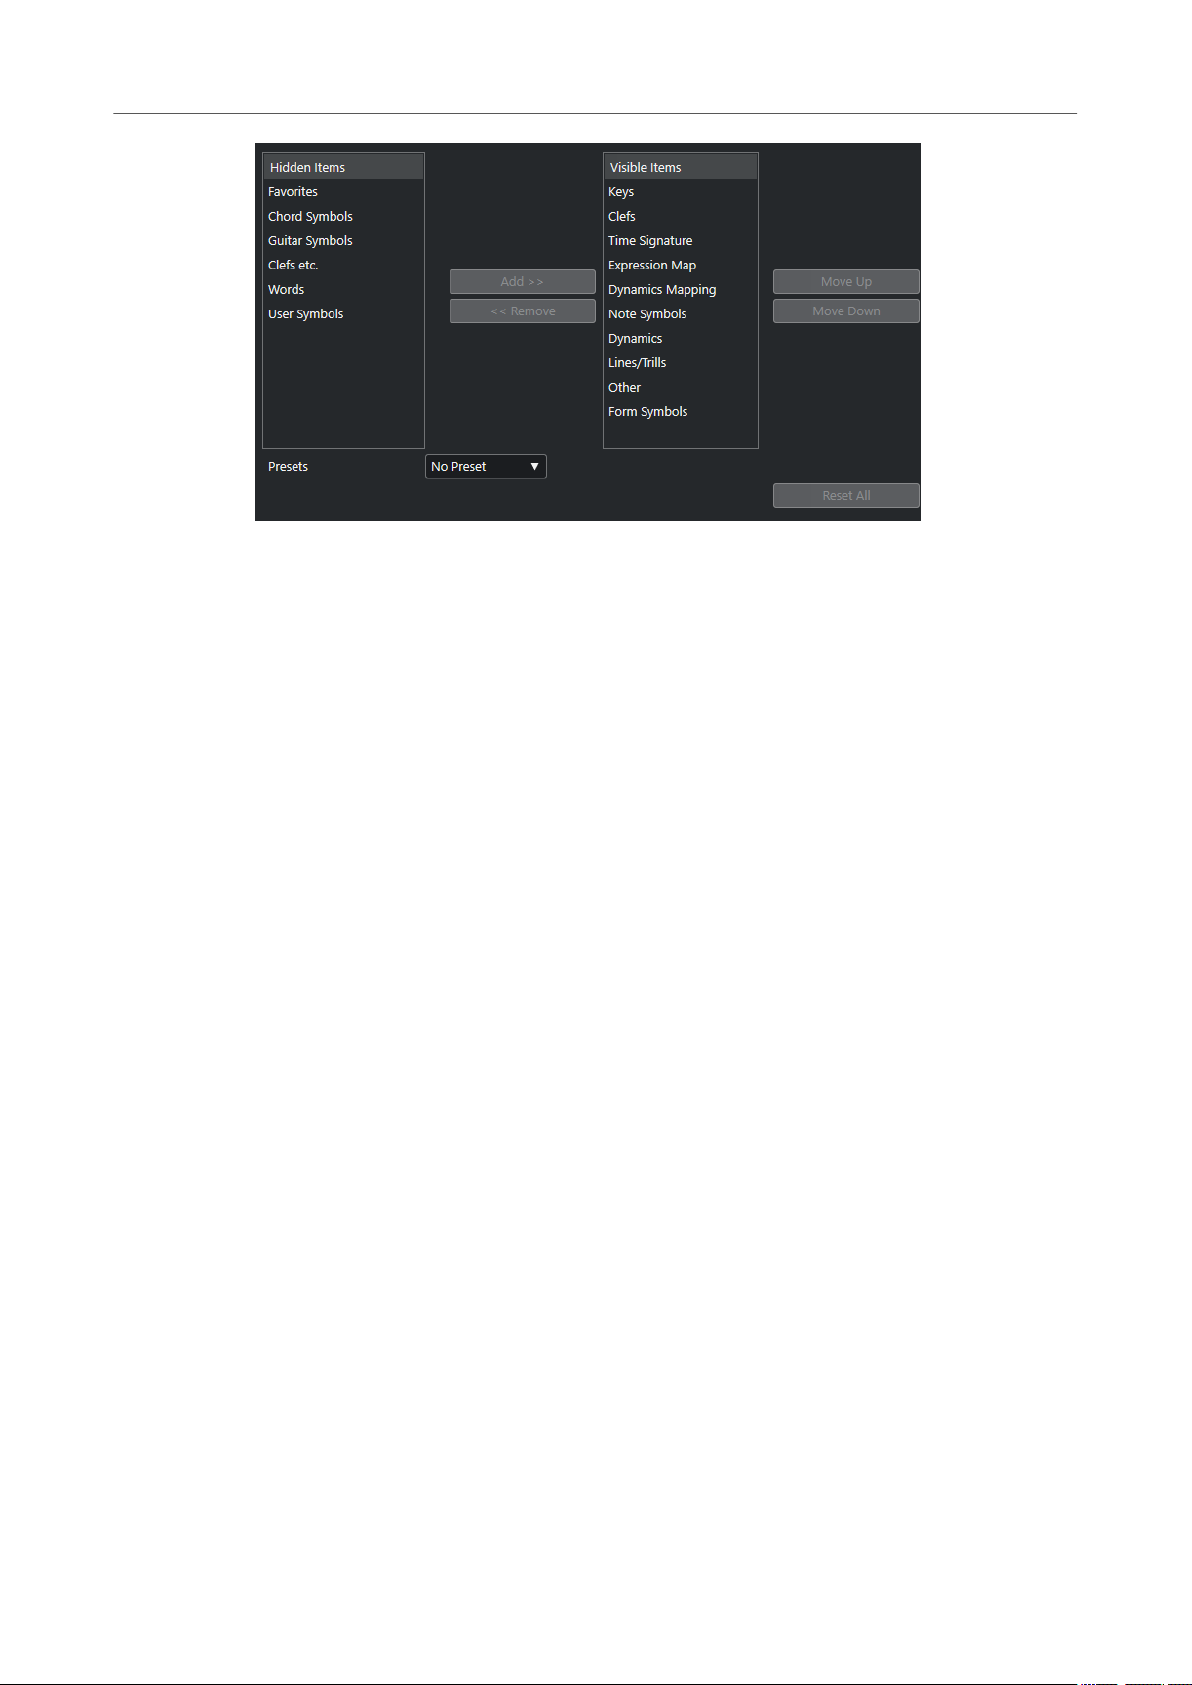
Inspector Settings Dialog
You can congure which Inspector sections are shown. You can also specify the order of the
sections.
● To open the Inspector Settings dialog, click Set up Inspector, and select Setup from the
pop-up menu.
21
Cubase Pro 12.0.20
Page 22
Score Editor
Inspector Settings Dialog
Hidden Items
Displays sections that are hidden in the Inspector.
Visible Items
Displays sections that are visible in the Inspector.
Pin
Activate Pin by clicking the column for a section to exclude this section from being
closed automatically.
Add
Allows you to move an item selected in the Hidden Items list to the list of visible
sections.
Remove
Allows you to move an item selected in the Visible Items list to the list of hidden
sections.
Move Up/Move Down
Allows you to change the position of an item in the list of visible sections.
Presets
Allows you to save Inspector settings as presets.
Reset All
Allows you to restore the default Inspector settings.
RELATED LINKS
Inspector on page 19
22
Cubase Pro 12.0.20
Page 23

Score Editor
Ruler
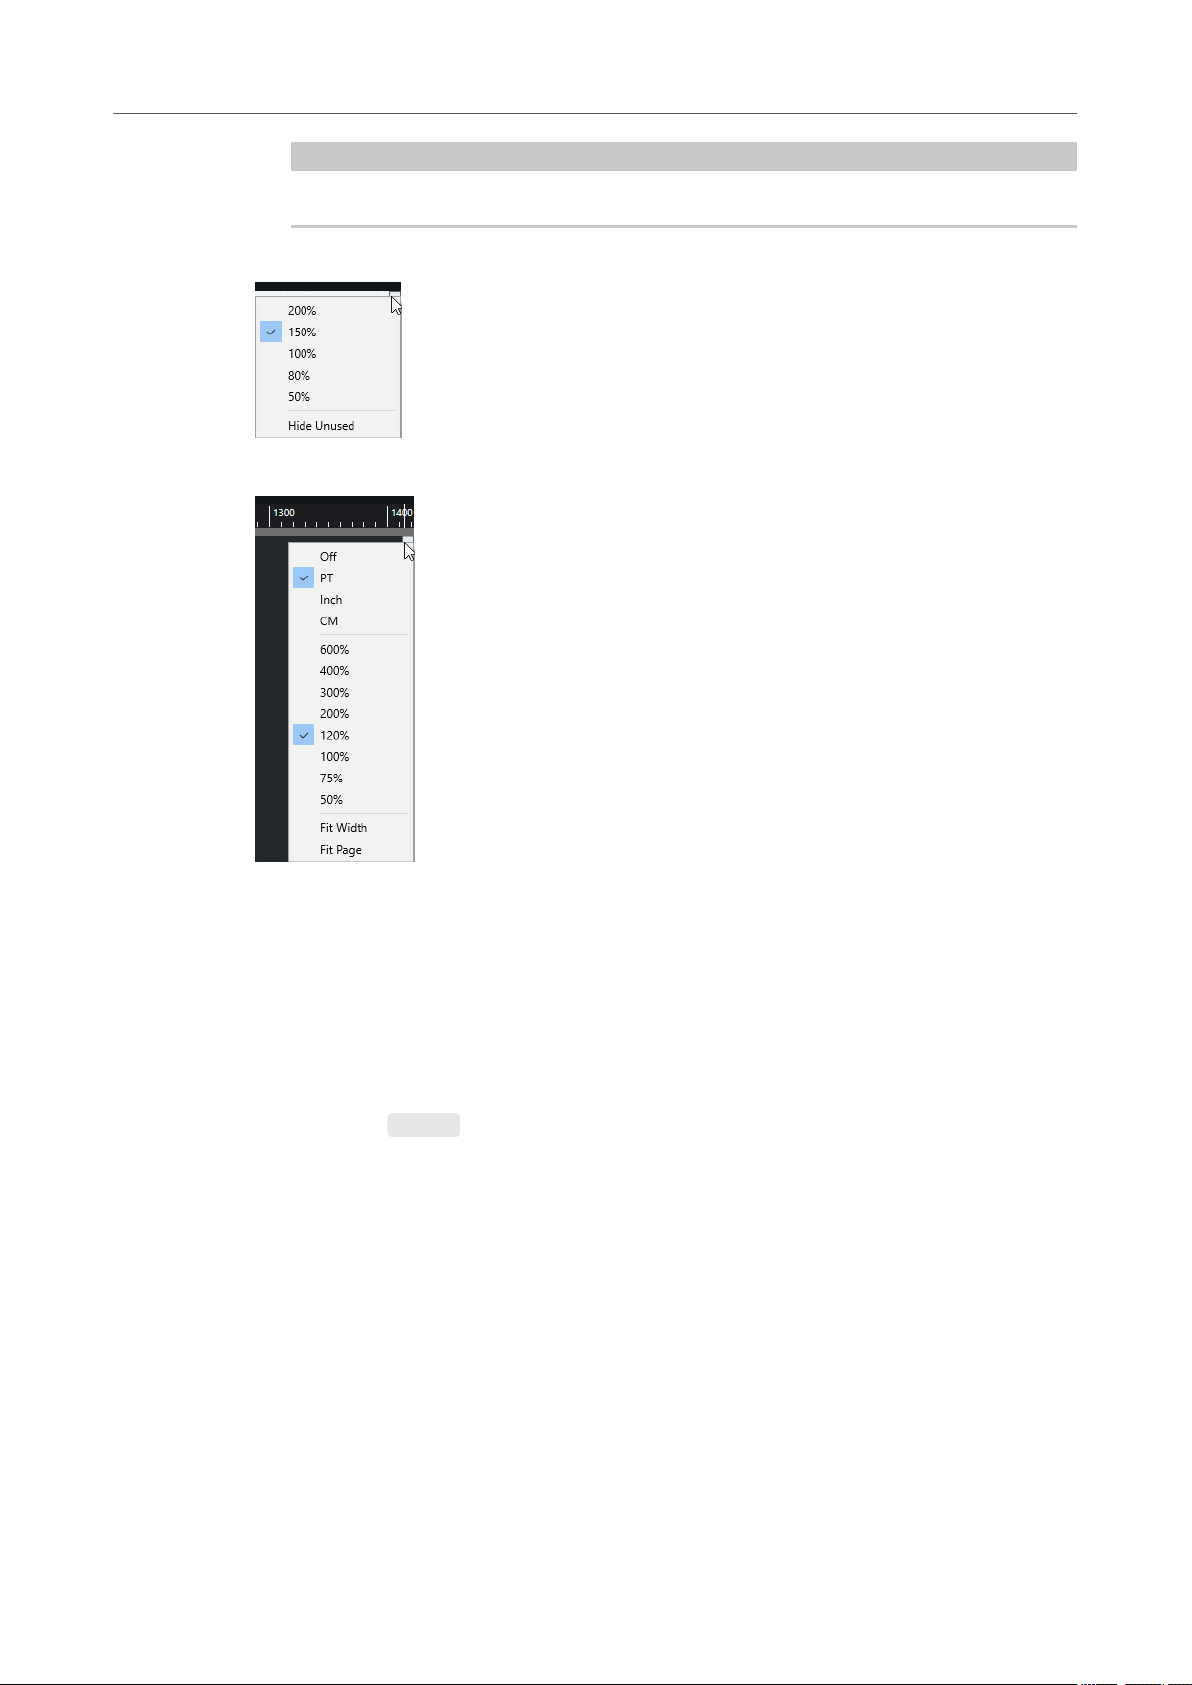
Ruler
The Score Editor rulers are only available in Page Mode. They are graphic rulers that are shown
at the upper and left border of the score and help you to position symbols and graphical objects
in the score.
●
The current pointer position is indicated by thin lines in the rulers.
●
To specify which unit to show on the rulers, click above the vertical scrollbar to the right
to open the Zoom pop-up menu, and select one of the options. You can choose between
points, inches, and centimeters.
●
To hide the rulers, select Off from the Zoom pop-up menu. To display the ruler again, open
the pop-up menu above the scrollbar at the far right and select one of the units.
NOTE
This setting also affects the units used in the Position Info window.
RELATED LINKS
Score Editor on page 5
Position Info Window on page 23
Zoom Pop-Up Menu on page 24
Position Info Window
The Position Info window helps you to determine and edit exact positions for symbols, objects,
and staves in your score.
To open the Position Info, click in the ruler.
●
The window contains the following settings and values:
Measure in
Allows to change the unit.
23
Cubase Pro 12.0.20
Page 24

Score Editor
Zooming in the Score Editor
NOTE
This setting also affects the units used in the ruler.
Abs.Pos/Rel.Pos
Allows to select whether X-Y position values are absolute and refer to the upper left
corner of the current page, or relative and refer to the upper left corner of the active
staff.
X, Y
● If a single object is selected, these values show the horizontal and vertical position
of this object. Click a value and enter in a new position for the object.
●
If no objects or several objects are selected, these values show the current
horizontal and vertical position of the mouse pointer.
dX, dY
These values indicate the horizontal and vertical distance by which you have moved an
object. Click and enter values to move the objects by the
Sel.Staff
specied distances.
● If Abs.Pos is active, this value shows the distance from the top of the score page
to the top of the active staff. Click and enter a value to move the active staff.
● If Rel.Pos is selected, this value is always 0, since vertical positions are related to
the top of the active staff.
To Prev Staff
The distance between the active staff and the staff above it. Click and enter a value to
move the active staff.
To Next Staff
The distance between the active staff and the staff below it. Click and enter a value to
move the staves below the active staff.
RELATED LINKS
Score Editor on page 5
Ruler on page 23
Zooming in the Score Editor
You can zoom in the Score Editor using the standard zoom techniques.
RELATED LINKS
Zoom Pop-Up Menu on page 24
Zoom Tool on page 25
Zooming with the Mouse Wheel on page 26
Zoom Pop-Up Menu
The Zoom pop-up menu contains options for zooming in the Score Editor.
To open the Zoom pop-up menu, click above the vertical scrollbar to the right.
●
24
Cubase Pro 12.0.20
Page 25
Score Editor
Zooming in the Score Editor
NOTE
In Page Mode, you can also open the Zoom pop-up menu by right-clicking in the ruler.
The following options are available if the Score Editor is in edit mode:
The following options are available if the Score Editor is in Page Mode:
Zoom Tool
● Fit Width adjusts the zoom factor so that the full width of the page becomes visible.
● Fit Page adjusts the zoom factor so that the whole page becomes visible.
The Zoom tool on the Score Editor toolbar allows you to zoom in to and out of specic sections
or score objects.
● Click with the Zoom tool to zoom in one step.
● Hold down Alt/Opt and click with the Zoom tool to zoom out one step.
● Drag a rectangle with the Zoom tool to set a custom zoom factor.
The section encompassed by the rectangle is zoomed to ll the score display.
Hold down a modier key and right-click with the Zoom tool to open the Zoom pop-up
●
menu, and select a zoom setting.
RELATED LINKS
Zoom Pop-Up Menu on page 24
Score Editor Toolbar on page 7
25
Cubase Pro 12.0.20
Page 26

Score Editor
Zooming in the Score Editor
Zooming with the Mouse Wheel
You can zoom in and out at specic positions of the score with the mouse wheel.
PROCEDURE
1. Move the mouse pointer to the position in the score where you want to change the zoom
factor.
2. Hold down Ctrl/Cmd and move the mouse wheel.
RESULT
The mouse position is kept when you zoom in or out.
26
Cubase Pro 12.0.20
Page 27
Score Editor Basics
The Score Editor allows you to display any possible piece of music as a score, complete with all
the necessary symbols and formatting. You can extract parts out of a full orchestra score, add
lyrics and comments, create lead sheets, drum scores, tablatures, etc.
The Score Editor interprets the MIDI notes in the MIDI parts and displays them according to the
settings you have made.
This is done in real time. Any change to the MIDI data or the settings is immediately reected in
the score.
You can enter and edit notes with the mouse or the computer keyboard, or you can record
them with a MIDI keyboard. You can also use a combination of both. However, even if you have
recorded the piece perfectly, your recording often requires some manual editing before printing.
RELATED LINKS
Preparing Scores on page 28
Activating a Staff on page 29
Setting up the Page on page 30
Clef, Key, and Time Signature Settings on page 30
Transposing Instruments on page 42
Printing from the Score Editor on page 43
Exporting Entire Scores as Image Files on page 44
Transcribing MIDI Recordings on page 45
Entering and Editing Notes on page 51
MIDI Notes vs. Score Notes
MIDI tracks in Cubase hold MIDI notes and other MIDI data. A MIDI note in Cubase is dened by
its position, length, pitch and velocity.
This is not nearly enough information to decide how the note is to be displayed in a score.
Information about the type of instrument, the key of the song, the basic rhythm, or the grouping
of the notes under beams is not provided. This is the kind of information that you can set up in
Score Editor.
the
EXAMPLE
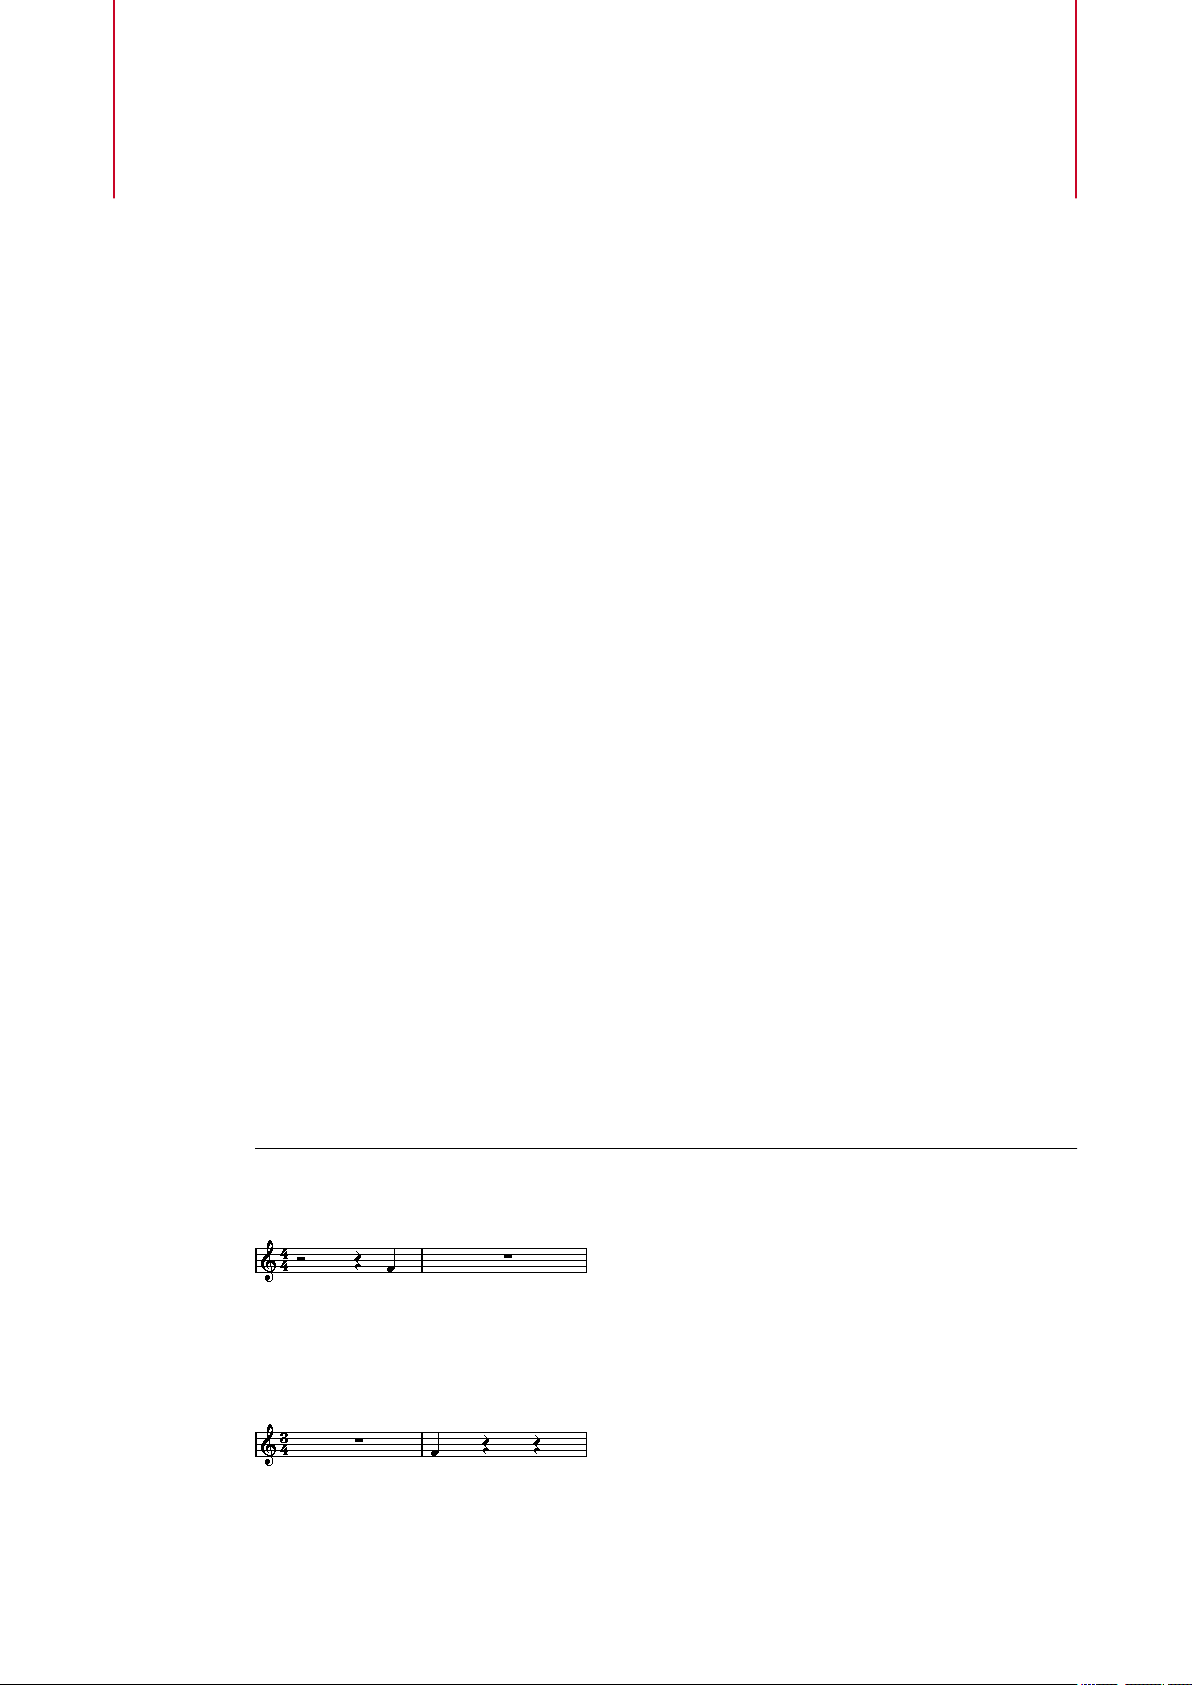
Cubase stores a MIDI note position in an absolute value, called ticks. A quarter note consists of
480 ticks.
A quarter note at the end of a 4/4 bar
The note is on the fourth beat of the bar.
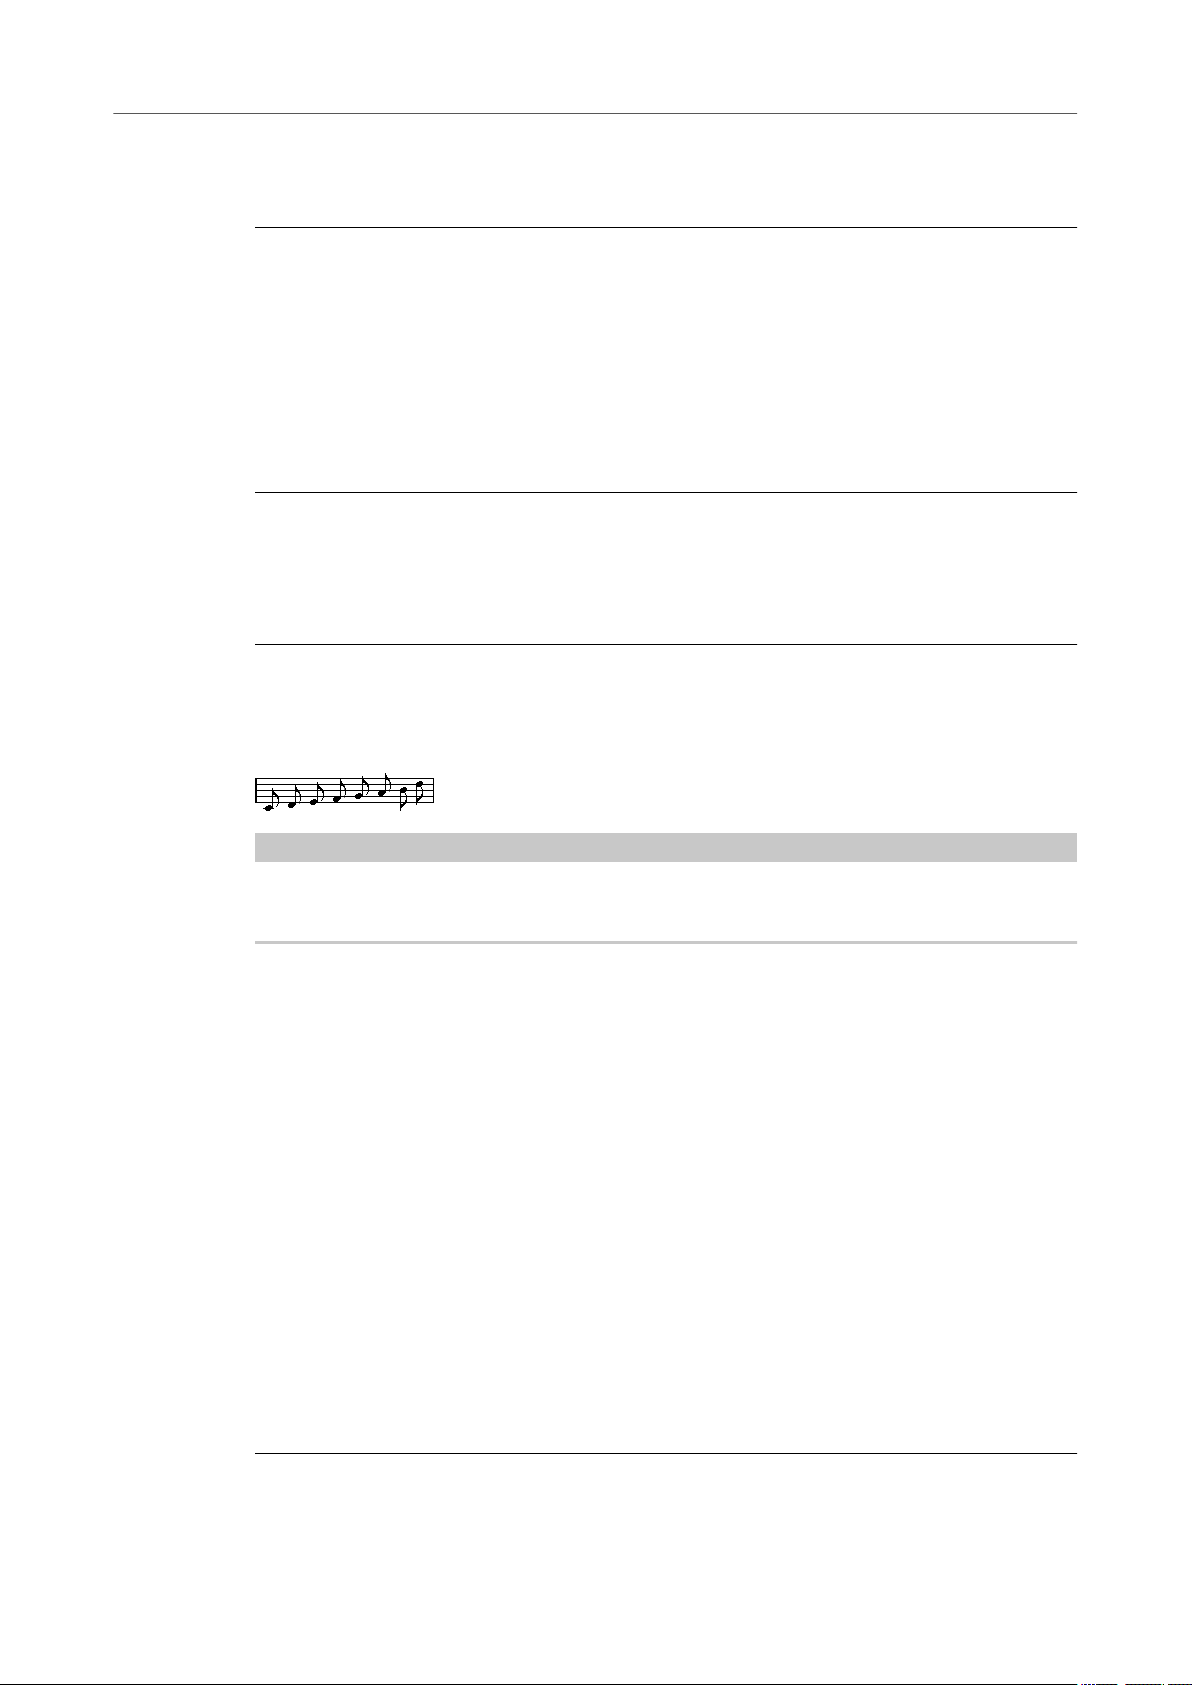
If you change the time signature to ¾, this shortens the length of a bar to three quarter notes
which corresponds to 1440 ticks. The quarter note is therefore moved to the next bar:
The same note in 3/4
27
Cubase Pro 12.0.20
Page 28
Score Editor Basics
Setting up a Display Quantize Note Value
The note is still at the same absolute position, but by changing the time signature, each bar
is shorter. This effectively moves the note in the score, because the Score Editor interprets it
differently.
Setting up a Display Quantize Note Value
You can dene the smallest note value that can be displayed by setting up a Display Quantize
note value.
PREREQUISITE
You have recorded a gure with some staccato eighth notes, and you have opened it in the Score
Editor.
PROCEDURE
1.
Select Scores> Settings.
2.
On the Staff tab, open the Main tab.
3.
In the Display Quantize section, set the Notes value to 8.
RESULT
The eighth notes are displayed as expected. The Display Quantize setting tells the program
to display all notes as if they were on exact eighth note positions, regardless of their actual
positions and that it should not display any notes smaller than eighth notes.
IMPORTANT
Setting a Display Quantize value does not alter the MIDI notes of your recording in any way. It
only affects how the notes are displayed in the Score Editor.
AFTER COMPLETING THIS TASK
Add a staccato symbol.
RELATED LINKS
Staff – Main Tab on page 93
Preparing Scores
When you prepare a score, we suggest you do things in the following order, since this minimizes
the time needed if you make a mistake somewhere and need to redo a step.
PREREQUISITE
You have made copies of the recorded tracks. You might have to change them permanently,
●
after which they do not play back as they originally did.
You have broken up the score into smaller segments.
●
In the Project window, you have arranged the tracks in the order you want them displayed
●
in the score. You cannot rearrange the order of systems in the
PROCEDURE
Open the Score Editor and select File> Page Setup to set up the page.
1.
28
Cubase Pro 12.0.20
Score Editor.
Page 29

Score Editor Basics
Activating a Staff
2. Do one of the following:
3. If needed, use polyphonic voicing to resolve overlapping notes, create piano systems, handle
4. Hide unwanted objects and add note-dependent and note-related symbols such as accents,
5.
6.
7.
8.
RELATED LINKS
Auto Layout Dialog on page 209
● If you have recorded music into tracks already, adjust the graphic display of the score as
much as possible without permanently editing the notes by using Display Quantize or
Grouping.
● If the tracks are empty, make basic staff settings, enter the notes, and then make
detailed adjustments.
crossing voices, etc.
dynamic symbols, crescendo, slurs, lyrics, or graphic rests.
Use the Auto Layout options.
Add layout symbols such as endings or page text.
Print or export the score.
Create alternative layouts to extract voices, for example.
Activating a Staff
Only one staff can be active at a time. The active staff is indicated by a rectangle to the left of the
clef symbol.
PROCEDURE
● Do one of the following to activate a staff:
● Click anywhere on the staff.
● Use the UpArrow and DownArrow keys to navigate between staves.
RESULT
The staff is activated.
RELATED LINKS
Score Display on page 13
29
Cubase Pro 12.0.20
Page 30

Score Editor Basics
Setting up the Page
Setting up the Page
Before preparing the score for printing, you must make some page settings for your project. This
also affects the on-screen display of the score.
PROCEDURE
1. Select File> Page Setup.
This opens the Page Setup dialog of your operation system. The only additional Cubase
options are the margin settings.
2. In the Page Setup dialog, select the preferred printer, paper size, orientation, etc.
3.
Optional: Change the margins by setting the left, right, top, and bottom margins.
4.
Click OK and save the project to make the settings permanent.
If you want new projects to always start with certain page setup settings, you can create
project templates.
RELATED LINKS
Printing from the Score Editor on page 43
Clef, Key, and Time Signature Settings
Before you enter notes into a score, we recommend that you rst set the clef, key, and time
signature for the staff.
The symbols for clef, key, and time signature are displayed at the beginning of the staff. If you
have multiple staves, you can set the clef, key, and time signature independently for each staff or
for all staves at once.
RELATED LINKS
Score Settings – Staff Tab on page 92
Hiding Objects on page 221
Setting the Initial Clef, Key, and Time Signature
You can set the initial clef, key, and time signature for your project.
PROCEDURE
1. Open the Symbols tab.
Open the Clefs section and click the clef symbol that you want to use.
2.
Click at the position of the staff to set the clef.
3.
Open the Keys section and click the key symbol that you want to use.
4.
Click at the position of the staff to set the key.
5.
Open the Time Signatures section and click the time signature symbol that you want to use.
6.
30
Cubase Pro 12.0.20
Page 31

Score Editor Basics
Clef, Key, and Time Signature Settings
RESULT
The settings are applied to the entire track.
RELATED LINKS
Clefs Section on page 144
Keys Section on page 143
Inserting Key Changes on page 40
Setting the Time Signature
You can set the time signature for your project.
PROCEDURE
●
Do one of the following:
● On the Transport panel, click the Time Signature eld and enter a value.
● Select Project> Tempo Track, and in the Tempo Track Editor, enter time signature
events.
● Select Project> Add Track> Signature, and enter time signature events on the
signature track.
● To enter composite time signatures, double-click the time signature symbol at the
beginning of the staff, and make your settings in the
Edit Time Signature dialog.
RESULT
The set time signature applies to all tracks in the project.
RELATED LINKS
Inserting Clefs, Keys, or Time Signatures on page 70
Edit Time Signature Dialog on page 31
Time Signatures Section on page 145
Edit Time Signature Dialog
The Edit Time Signature dialog allows you to specify and edit the time signature for your staff.
● To open the Edit Time Signature dialog, double-click the time signature symbol at the
beginning of the staff.
Numerator
For simple time signatures, enter a value in the rst value eld only.
For more complex time signatures, the numerator can be made up of up to 4 groups.
Divide the numerator into several numbers to get beaming and tied notes displayed
correctly automatically. This does not affect the metronome or anything else, only
beams and ties.
Denominator
Enter a note value for the denominator.
Cubase Pro 12.0.20
31
Page 32

Score Editor Basics
Clef, Key, and Time Signature Settings
Common time
Sets the time signature to common time 4/4.
Cut time
Sets the time signature to cut time 2/2.
For Grouping Only
Activate this to show the sum of the numbers entered.
NOTE
Cubase tries to preserve the denominator when you insert a composite signature and
activate
composite value such as 3+3+2 eighths, the time signature is still displayed as 4/4
instead of 8/8.
Deactivate this to show all the numbers entered.
Pick-up Bar
Activate this to dene a time signature and the number of beats for a pick-up bar.
For Grouping Only. If you have a time signature of 4/4 and change it to a
NOTE
You can change the font for time signatures in the Score Settings dialog (Project–Font Settings
page).
RELATED LINKS
Beams on page 126
Creating Pick-Up Bars on page 225
Setting the Time Signature on page 31
Time Signatures Section on page 145
Setting the Clef
Edit Clef Dialog
The Edit Clef dialog allows you to specify and edit the clef for your staff.
IMPORTANT
If Auto Clef is activated in the Score Settings dialog (Staff–Main tab), you cannot edit the clef.
To open the Edit Clef dialog, double-click the clef symbol at the beginning of the staff.
●
Use the scroll bar to select one of the following options:
Treble
Inserts a treble clef.
32
Cubase Pro 12.0.20
Page 33

Score Editor Basics
Clef, Key, and Time Signature Settings
Treble 8va
Inserts a treble clef that sounds an octave higher.
Treble 15va
Inserts a treble clef that sounds two octaves higher.
Treble 8vb
Inserts a treble clef that sounds an octave lower.
Bass
Inserts a bass clef.
Bass 8vb
Inserts a bass clef that sounds an octave lower.
Bass 15vb
Inserts a bass clef that sounds two octaves lower.
Bass 8va
Inserts a bass clef that sounds an octave higher.
Baritone
Inserts a baritone clef.
Sub-bass
Inserts a sub-bass clef.
Alto
Inserts an alto clef.
Sopran
Inserts a soprano clef.
Mezzosopran
Inserts a mezzo-soprano clef.
Tenor
Inserts a tenor clef.
Drum
Inserts a symbol that indicates that the staff is used for drum notation.
Tablature/1-5
Inserts numbers for tablature.
Tablature/TAB
Inserts a TAB sign for tablature.
RELATED LINKS
Clefs Section on page 34
Clef on page 80
Project – Notation Style Page on page 79
Clefs Section on page 144
Right Zone on page 20
33
Cubase Pro 12.0.20
Page 34

Score Editor Basics
Clef, Key, and Time Signature Settings
Clef Properties
The Properties tab for clefs in the right zone of the Score Editor allows you to change the
selected clef.
● To open the Properties tab for clefs in the right zone, select a clef in the score display.
Clefs Section
The following options affect the selected element:
Treble
Inserts a treble clef.
Treble 8va
Inserts a treble clef that sounds an octave higher.
Treble 15va
Inserts a treble clef that sounds two octaves higher.
Treble 8vb
Inserts a treble clef that sounds an octave lower.
Bass
Inserts a bass clef.
Bass 8vb
Inserts a bass clef that sounds an octave lower.
Bass 15vb
Inserts a bass clef that sounds two octaves lower.
Bass 8va
Inserts a bass clef that sounds an octave higher.
Baritone
Inserts a baritone clef.
Sub-bass
Inserts a sub-bass clef.
Alto
Inserts an alto clef.
Sopran
Inserts a soprano clef.
34
Cubase Pro 12.0.20
Page 35

Score Editor Basics
Clef, Key, and Time Signature Settings
Mezzosopran
Inserts a mezzo-soprano clef.
Tenor
Inserts a tenor clef.
Drum
Inserts a symbol that indicates that the staff is used for drum notation.
Tablature/1-5
Inserts numbers for tablature.
Tablature/TAB
Inserts a TAB sign for tablature.
Project Settings Section
The options in the Project Settings section in the right zone affect the entire project.
Show Warnings
Shows clef changes at line breaks at the end of a line and at the beginning of the next
line.
Small Clefs
Shows inserted clef changes as smaller symbols than at the beginning of the staff.
RELATED LINKS
Edit Clef Dialog on page 32
Clef on page 80
Project – Notation Style Page on page 79
Clefs Section on page 144
Right Zone on page 20
Clef Context Menu
The clef context menu allows you to specify and edit the clef for your staff.
● To open the clef context menu, right-click the clef symbol at the beginning of the staff.
The clef options are identical to the options in the Edit Clef dialog.
Furthermore, the following options are available:
Display Clef Changes as Small Symbols
Activate this to display clef changes in the score with a smaller symbol.
Warnings for New Clefs at Line Breaks
Determines what happens if you insert a new clef at a line break.
Activate this to display the clef in the last bar before the staff break. Deactivate this to
insert the clef in the rst bar of the next staff line only.
Hide/Show
Hides the clef from view.
35
Cubase Pro 12.0.20
Page 36

Score Editor Basics
Clef, Key, and Time Signature Settings
Properties
Opens the Edit Clef dialog.
RELATED LINKS
Edit Clef Dialog on page 32
Clefs Section on page 144
Clef/Key Section
The Clef/Key section in the Score Settings dialog allows you to specify and edit the clef for your
staff.
●
To open the Clef/Key section, select Scores> Settings, select the Staff tab, and open the
Main tab.
Use the left scroll bar to select one of the clef options. These are identical to the options in the
Edit Clef dialog. Use the right scroll bar to select one of the key options. These are identical to
the options in the Edit Key dialog.
Furthermore, the following options are available:
Local Keys
Allows you to insert a different key for the selected staff only. Activate this if you score
a French horn, for example, and you want to set a different key symbol.
Lower Staff
Allows you to insert a clef for the lower staff. This is only used in conjunction with split
(piano) staves and polyphonic voicing. If you have a split system, you can set different
clefs for the upper and lower staff.
Auto Clef
Activate this to let the program automatically select a treble clef or a bass clef for the
staff, depending on the range of the notes in the part.
RELATED LINKS
Staff – Main Tab on page 93
Setting up a Split Staff on page 68
Edit Clef Dialog on page 32
Edit Key Dialog on page 37
Setting the Key
You can set the key for the entire project or for specic staves only.
In the Score Settings dialog (Project–Notation Style page), you can nd options for keys in the
Keys category.
RELATED LINKS
Project – Notation Style Page on page 79
36
Cubase Pro 12.0.20
Page 37

Score Editor Basics
Clef, Key, and Time Signature Settings
Keys Section on page 143
Edit Key Dialog
The Edit Key dialog allows you to specify and edit the key for your staff.
● To open the Edit Key dialog, double-click the key symbol at the beginning of the staff.
NOTE
If Key Changes for the Entire Project is activated in the Keys category of the Score Settings
dialog (Project–Notation Style page), all changes made to the key always affect the entire
project, so that it is not possible to dene different keys for different staves.
Use the scroll bar to select one of the following options:
C# maj/A# min
Inserts 7 sharps for the sharp notes of the key F♯, C♯, G♯, D♯, A♯, E♯, B♯.
F# maj/D# min
Inserts 6 sharps for the sharp notes of the key F♯, C♯, G♯, D♯, A♯, E♯.
B maj/G# min
Inserts 5 sharps for the sharp notes of the key F♯, C♯, G♯, D♯, A♯.
E maj/C# min
Inserts 4 sharps for the sharp notes of the key F♯, C♯, G♯, D♯.
A maj/F# min
Inserts 3 sharps for the sharp notes of the key F♯, C♯, G♯.
D maj/B min
Inserts 2 sharps for the sharp notes of the key F♯, C♯.
G maj/E min
Inserts 1 sharp for the sharp notes of the key F♯.
C maj/A min
Does not insert any sharps or ats.
F maj/D min
Inserts 1 at for the at notes of the key B♭.
Bb maj/G min
Inserts 2 ats for the at notes of the key B♭, E♭.
Eb maj/C min
Inserts 3 ats for the at notes of the key B♭, E♭, A♭.
Ab maj/F min
Inserts 4 ats for the at notes of the key B♭, E♭, A♭, D♭.
Db maj/Bb min
Inserts 5 ats for the at notes of the key B♭, E♭, A♭, D♭, G♭.
37
Cubase Pro 12.0.20
Page 38

Score Editor Basics
Clef, Key, and Time Signature Settings
Gb maj/Eb min
Inserts 6 ats for the at notes of the key B♭, E♭, A♭, D♭, G♭, C♭.
Cb maj/Ab min
Inserts 7 ats for the at notes of the key B♭, E♭, A♭, D♭, G♭, C♭, F♭.
RELATED LINKS
Keys Section on page 38
Keys on page 80
Project – Notation Style Page on page 79
Keys Section on page 143
Clef/Key Section on page 36
Inserting Display Transpose Changes on page 43
Transposing Instruments on page 42
Right Zone on page 20
Key Properties
The Properties tab for keys in the right zone of the Score Editor allows you to change the
selected key.
● To open the Properties tab for keys in the right zone, select the key symbol in the score
display.
Keys Section
The following options affect the selected element:
C# maj/A# min
Inserts 7 sharps for the sharp notes of the key F♯, C♯, G♯, D♯, A♯, E♯, B♯.
F# maj/D# min
Inserts 6 sharps for the sharp notes of the key F♯, C♯, G♯, D♯, A♯, E♯.
B maj/G# min
Inserts 5 sharps for the sharp notes of the key F♯, C♯, G♯, D♯, A♯.
E maj/C# min
Inserts 4 sharps for the sharp notes of the key F♯, C♯, G♯, D♯.
A maj/F# min
Inserts 3 sharps for the sharp notes of the key F♯, C♯, G♯.
38
Cubase Pro 12.0.20
Page 39

Score Editor Basics
Clef, Key, and Time Signature Settings
D maj/B min
Inserts 2 sharps for the sharp notes of the key F♯, C♯.
G maj/E min
Inserts 1 sharp for the sharp notes of the key F♯.
C maj/A min
Does not insert any sharps or ats.
F maj/D min
Inserts 1 at for the at notes of the key B♭.
Bb maj/G min
Inserts 2 ats for the at notes of the key B♭, E♭.
Eb maj/C min
Inserts 3 ats for the at notes of the key B♭, E♭, A♭.
Ab maj/F min
Inserts 4 ats for the at notes of the key B♭, E♭, A♭, D♭.
Db maj/Bb min
Inserts 5 ats for the at notes of the key B♭, E♭, A♭, D♭, G♭.
Gb maj/Eb min
Inserts 6 ats for the at notes of the key B♭, E♭, A♭, D♭, G♭, C♭.
Cb maj/Ab min
Inserts 7 ats for the at notes of the key B♭, E♭, A♭, D♭, G♭, C♭, F♭.
Project Settings Section
The options in the Project Settings section in the right zone affect the entire project.
Global Keys
Applies all key changes to the entire project. If you activate this, you cannot dene
different keys for different staves of your project.
Show Warnings
Shows key changes at the end of a line and at the beginning of the next line.
Show Naturals
If a change to another key occurs, naturals are inserted to nullify any sharps and ats
that relate to the previous key.
RELATED LINKS
Edit Key Dialog on page 37
Keys on page 80
Project – Notation Style Page on page 79
Keys Section on page 143
Clef/Key Section on page 36
Inserting Display Transpose Changes on page 43
Transposing Instruments on page 42
39
Cubase Pro 12.0.20
Page 40
Score Editor Basics
Clef, Key, and Time Signature Settings
Right Zone on page 20
Key Context Menu
The key context menu allows you to specify and edit the key for your staff.
● To open the key context menu, right-click the key symbol at the beginning of the staff.
The key options are identical to the options in the Edit Key dialog.
The Transpose option is not available.
Furthermore, the following options are available:
Key Changes for the Entire Project
Activate this if you want all key changes to affect the entire project, so that it is not
possible to dene different keys for different staves.
Hide/Show
Hides the key.
Properties
Opens the Edit Key dialog.
RELATED LINKS
Keys Section on page 143
Clef/Key Section on page 36
Inserting Key Changes
You can insert key changes for your project.
PROCEDURE
1. Open the Symbols tab.
2. Open the Keys section and click the key symbol that you want to use.
3. Click at the position of the staff where you want to insert the key change.
RESULT
This introduces a key change that applies from this position on.
RELATED LINKS
Setting the Initial Clef, Key, and Time Signature on page 30
Keys Section on page 143
40
Cubase Pro 12.0.20
Page 41

Score Editor Basics
Setting up Note Names
Setting Different Keys in a Split System
You can set different keys for the upper and lower staff in a split system with two staves.
PROCEDURE
1. Select Scores> Settings.
2. Select the Staff tab, and open the Main tab.
3. In the Clef/Key section, set a key for the upper staff.
4. Activate Lower Staff, and set a key for the lower staff.
5.
Click Apply.
RESULT
The different keys are applied.
RELATED LINKS
Staff – Main Tab on page 93
Setting Local Keys
You can set a different key for the selected staff only. This is useful for instruments like oboe and
English horn that change display transpose and therefore also the key.
NOTE
Local Keys is only available if Key Changes for entire Project is activated in the Keys category
of the Score Settings dialog (Project–Notation Style page).
PROCEDURE
1. Activate the staff for which you want to set a local key.
2. Select the Staff tab, and open the Main tab.
3. Activate Local Keys, and set the key.
4. Click Apply.
RELATED LINKS
Staff – Main Tab on page 93
Project – Notation Style Page on page 79
Setting up Note Names
In the Score Editor, you can display note names in the following formats: English, German, or
Solfège.
PROCEDURE
Select Edit> Preferences.
1.
Select Chords & Pitches in the Event Display section.
2.
In the Pitch Notation section, open the Note Name pop-up menu and select an option.
3.
Click Apply.
4.
41
Cubase Pro 12.0.20
Page 42

Score Editor Basics
Transposing Instruments
RESULT
The note names and chord symbols throughout the Score Editor are changed according to
your settings. For further information about the settings on the Chords & Pitches page of the
Preferences dialog, see the separate document Operation Manual.
Transposing Instruments
Scores for some instruments, for example, a lot of brass instruments, are written transposed.
Therefore, the Score Editor provides the Display Transpose function that transposes notes in
the score without affecting the way they are played back.
Display Transpose allows you to record and play back a multi-staff arrangement and still score
each instrument according to its own transposition.
RELATED LINKS
Changing the Display for Transposing Instruments on page 42
Displaying the Concert Key on page 42
Inserting Display Transpose Changes on page 43
Changing the Display for Transposing Instruments
You can change the display for transposing instruments. The Display Transpose section in the
Score Settings dialog allows you to transpose notes in the score without affecting the way they
are played back.
PROCEDURE
1. Select Scores> Settings, select the Staff tab, and open the Main tab.
2. Do one of the following:
● Open the Transpose pop-up menu and select your transposing instrument.
● Use the Semitones value eld to set by how many semitones you want to transpose the
display.
3. Click Apply.
RESULT
The transposing instrument is displayed correctly.
IMPORTANT
Display Transpose does not affect MIDI playback.
RELATED LINKS
Display Transpose on page 97
Displaying the Concert Key
You can display the concert key instead of the scored key. This is useful if you changed the
display for transposing instruments.
PREREQUISITE
You have changed the display for a transposing instrument.
42
Cubase Pro 12.0.20
Page 43
Score Editor Basics
Printing from the Score Editor
PROCEDURE
● On the Score Editor toolbar, disable Display Transpose.
RESULT
The concert key is displayed.
RELATED LINKS
Display Transpose on page 9
Inserting Display Transpose Changes
You can change the Display Transpose setting at a specic point in your score to insert a key
change. This is useful if you are writing a saxophone part and want the player to switch from alto
to tenor saxophone, for example.
PROCEDURE
1.
Double-click the key symbol at the beginning of the staff.
2.
In the Transpose eld of the Edit Key dialog, enter a transposition value in semitones.
RESULT
NOTE
This setting is not relative to any Display Transpose settings in the Score Settings dialog (Staff–
Main tab). This means that you enter an absolute Display Transpose value that is used from this
point on.
RELATED LINKS
Edit Key Dialog on page 37
Keys Section on page 38
Inserting Key Changes on page 40
Printing from the Score Editor
When you have made all necessary changes to the score display and you are satised with the
result, you can print your score.
PREREQUISITE
You have set up the page in the Page Setup dialog.
PROCEDURE
In the Scores menu, activate Page Mode.
1.
Printing is only possible from within Page Mode.
Select File> Print.
2.
In the standard print dialog, change the settings as required.
3.
Click Print.
4.
RELATED LINKS
Setting up the Page on page 30
43
Cubase Pro 12.0.20
Page 44

Score Editor Basics
Exporting Entire Scores as Image Files
Exporting Entire Scores as Image Files
You can export a complete page in various image formats. This allows you to import your scores
into desktop publishing and drawing applications.
PROCEDURE
1. In the Scores menu, activate Page Mode.
2. Select the page that you want to export.
3. Select File> Export> Scores.
4.
In the Export Scores dialog, specify a location, name, and type for the exported le.
5.
Specify a resolution for the le.
6.
Click Save.
RESULT
The page of the score is exported and saved as the le type you specied.
RELATED LINKS
Exporting Images of Page Sections on page 44
Exporting Images of Page Sections
You can export a section of a page in various image formats. This allows you to import your
scores into desktop publishing and drawing applications.
PROCEDURE
1. In the Scores menu, activate Page Mode.
2. On the Score Editor toolbar, click Select Export Range.
3. Drag a selection rectangle for the section of the score that you want to export.
NOTE
You can adjust the size of the rectangle by clicking and dragging its handles or move it by
clicking and dragging.
4. Do one of the following:
● Double-click inside the rectangle.
● Select File> Export> Scores.
In the Export Scores dialog, specify a location, name, and type for the exported le.
5.
Specify a resolution for the le.
6.
Click Save.
7.
RESULT
The selected section of the score is exported and saved as a le.
RELATED LINKS
Exporting Entire Scores as Image Files on page 44
44
Cubase Pro 12.0.20
Page 45

Transcribing MIDI Recordings
You can create scores by transcribing your MIDI recordings.
If the parts are complicated, the notes probably require some manual editing.
RELATED LINKS
Preparing Recorded Parts on page 45
Inserting Display Quantize Exceptions on page 46
Resolving Parts That Contain Mixed Notes and Triplets on page 48
Converting MIDI Notes to Match the Score on page 49
Adjusting Rests on page 49
Adjusting Note Lengths on page 50
Entering and Editing Notes on page 51
Score Editor Basics on page 27
Preparing Recorded Parts
PROCEDURE
1. Make a MIDI recording.
2. Select all parts on all tracks that you want to work on.
3. Optional: Do one or all of the following:
● Select Project> Duplicate Tracks to create a version of the track for scoring, and mute
the original track while you are preparing the score.
● Quantize the recordings to reduce the amount of detailed adjustments needed in the
Score Editor.
4. Select Scores> Open Score Editor.
5. In the Scores menu, activate Page Mode.
6. Activate a staff, select Scores> Settings, and make initial staff settings.
NOTE
Always click Apply before making another staff active.
RELATED LINKS
Resolving Parts That Contain Mixed Notes and Triplets on page 48
Score Settings – Staff Tab on page 92
Display Quantize Exceptions
Display quantize exceptions are useful if your score looks as expected except for a few bars.
You can use the Display Quantize tool to insert a display quantize exception at the beginning of
the section and another one after it to restore to the current staff settings.
45
Cubase Pro 12.0.20
Page 46

Transcribing MIDI Recordings
Display Quantize Exceptions
You can make the display quantize exceptions visible by activating the Quantize option on the
lters bar. A ag is shown under the staff for each Display Quantize exception.
To edit a display quantize event, double-click its ag, adjust the settings in the Display
●
Quantize dialog, and click Apply.
● To remove a display quantize change, click its marker to select it and press Backspace or
Delete , or use the Erase tool.
RELATED LINKS
Inserting Display Quantize Exceptions on page 46
Display Quantize Dialog on page 47
Filters on page 16
Inserting Display Quantize Exceptions
Some situations may require different staff settings on different sections of the track. The staff
settings are valid for the entire track, but you can insert changes wherever you like.
PROCEDURE
1.
Select the Display Quantize tool on the toolbar.
The Display Quantize dialog opens.
2. Set the quantize values.
3. On the Filters bar, activate Quantize to show the quantize markers.
4. If you want to restore the settings to the ones used in the Score Settings dialog (Staff tab),
click Restore to Staff.
5. Move the mouse over the staff where you want to insert a new Display Quantize value.
NOTE
You can also apply Display Quantize changes to active voices. To do this, activate the voice
on the extended toolbar.
Use the Mouse Time Position display in the status line to nd the exact note position. The
vertical position is not relevant.
Click the mouse button to insert a Display Quantize event.
6.
46
Cubase Pro 12.0.20
Page 47

Transcribing MIDI Recordings
Display Quantize Exceptions
RESULT
The new quantize settings are now inserted into the staff at the position where you clicked. The
settings are valid until a new change is inserted. Display Quantize events are always inserted for
all voices.
If you are using polyphonic voices, you can insert a Display Quantize event for all voices by
pressing Alt/Opt and clicking with the tool.
If Display Quantize Tool Affects All Voices is activated in the Miscellaneous category of
the Score Settings dialog (Project–Notation Style page), Display Quantize events are always
inserted for all voices.
RELATED LINKS
Display Quantize Dialog on page 47
Activating Voices and Entering Notes on page 108
Score Editor Toolbar on page 7
Filters on page 16
Status Line on page 14
Project – Notation Style Page on page 79
Polyphonic Voicing on page 106
Display Quantize Dialog
The Display Quantize dialog allows you to edit Q symbols/ags.
● To open the Display Quantize dialog, select Display Quantize on the Score Editor toolbar.
Notes
Set this value according to the smallest note position that you want to be displayed in
the score. If the score contains only triplets, or mostly triplets, select one of the triplet
options.
Rests
Set this value according to the smallest rest value that you want to be displayed in
the score. If the score contains only triplets, or mostly triplets, select one of the triplet
options.
This also determines how the length of notes is displayed. Set this value according to
the smallest note length value you want to be displayed for a single note, positioned
on a beat.
Syncopation
If this is set to Off, the program adds ties to long notes extending over beats. If this is
Relax or Full, it does not.
set to
No Overlap
Cuts off one note where the next starts.
16th Subgroups
Creates beamed subgroups of sixteenth note pairs.
47
Cubase Pro 12.0.20
Page 48

Transcribing MIDI Recordings
Resolving Parts That Contain Mixed Notes and Triplets
Consolidate Rests
Joins groups of two consecutive rests into one.
Restore to Staff
Sets the dialog to the settings made in the Score Settings dialog.
RELATED LINKS
Staff – Main Tab on page 93
Resolving Parts That Contain Mixed Notes and Triplets
You can split the notes on a staff into separate tracks or convert a polyphonic staff into
polyphonic voices.
PREREQUISITE
You have created a copy of the original track. This is useful, because this operation changes the
original MIDI data.
PROCEDURE
1.
Select Scores> Functions> Explode.
2. In the Explode dialog, make your changes.
3. Click OK.
RESULT
A number of new tracks is now added to the score and the Project window.
RELATED LINKS
Explode Dialog on page 48
Moving Notes to Voices via the Explode Dialog on page 109
Explode Dialog
The Explode dialog allows you to move notes to different voices or tracks.
● To open the Explode dialog, select Scores> Functions> Explode.
To Polyphonic Voices
Allows you to move the notes to polyphonic voices.
To New Tracks
Allows you to move the notes to newly created tracks.
48
Cubase Pro 12.0.20
Page 49

Transcribing MIDI Recordings
Converting MIDI Notes to Match the Score
Number of New Tracks
Allows you to set up how many new tracks are created for the notes. If you have a
three-part polyphonic section and want to split this into three separate tracks, you
must specify two new tracks, since the original track holds one of the parts.
Split Note
Moves all notes below a certain pitch to another track or another voice.
Lines to Tracks
Moves each musical line to one track or to another voice. The notes with the highest
pitch remain on the original track or in the rst voice, the notes with the second
highest pitch are moved to the rst new track or the second voice, and so on.
Bass to Lowest Voice
If this option is activated, the lowest notes always end up on the lowest track or the
lowest voice.
RELATED LINKS
Explode Dialog on page 48
Converting MIDI Notes to Match the Score
You can change the lengths and positions of some or all the MIDI notes in the edited parts so
that they have exactly the values shown on screen.
PREREQUISITE
You have duplicated your track as a backup.
PROCEDURE
1. Open the part in the Score Editor.
2. Make sure that the notes you want to change are not hidden.
3. Select Scores> Functions> Score Notes to MIDI.
RESULT
The notes are converted so that their lengths and positions match the displayed values exactly.
AFTER COMPLETING THIS TASK
Open the Score Settings dialog on the Staff tab and verify if you can deactivate some of the
Display Quantize settings.
RELATED LINKS
Staff – Main Tab on page 93
Adjusting Rests
If there is no rest after a note although there should be one, you can try changing the settings in
the
Score Settings dialog.
PROCEDURE
Open the Score Settings dialog (Staff–Main tab).
1.
Do one of the following:
2.
49
Cubase Pro 12.0.20
Page 50

Transcribing MIDI Recordings
Adjusting Note Lengths
● Activate Clean Lengths.
● Change the Notes value.
● Lower the Rests value.
3. Click Apply.
RELATED LINKS
Staff – Main Tab on page 93
Adjusting Note Lengths
If the recorded note is displayed with the wrong length, you can try changing the settings in the
Score Settings dialog.
PROCEDURE
1.
Open the Score Settings dialog (Staff–Main tab).
2.
Set up the correct Display Quantize value for notes and rests.
3.
Deactivate Auto Quantize unless you have mixed triplets and regular notes.
4. Deactivate No Overlap in the Interpretation Options section.
5. Click Apply.
RELATED LINKS
Staff – Main Tab on page 93
50
Cubase Pro 12.0.20
Page 51

Entering and Editing Notes
You can create scores by entering and editing notes in the Score Editor.
NOTE
In the Score Settings dialog (Project–Font Settings page), you can specify the font and style
that is used for notes and other elements in the score.
RELATED LINKS
Project – Font Settings Page on page 75
Setting up the Font for Other Elements on page 189
Setting up the Staff on page 53
Note Values and Positions on page 54
Note Input on page 56
Note Selection on page 58
Note Editing Overlay on page 64
Editing Note Positions on page 60
Editing Note Pitches on page 61
Further Note Length Adjustment Methods on page 65
Moving Notes across Staves on page 62
Duplicating Notes on page 63
Cut, Copy, and Paste on page 63
Splitting Notes on page 68
Deleting Notes on page 68
Setting up a Split Staff on page 68
Multiple Staves on page 69
Snap
The notes that you enter or edit in the Score Editor snap to positions dened by the note length
and quantize values.
The Snap Type pop-up menu on the toolbar allows you to select how notes are moved or copied.
Grid
●
Snaps notes to exact grid positions.
Grid Relative
●
Maintains a note in its relative position to the grid.
RELATED LINKS
Score Editor Toolbar on page 7
Note Input on page 56
51
Cubase Pro 12.0.20
Page 52

Entering and Editing Notes
Acoustic Feedback
Acoustic Feedback
Acoustic Feedback allows you to hear the pitch of the note while moving to hear the pitch of the
note at the mouse position.
When entering or editing notes, consider activating Acoustic Feedback on the Score Editor
toolbar.
RELATED LINKS
Score Editor Toolbar on page 7
Editing Note Pitches on page 61
Note Input on page 56
Lock Layers
You can assign different types of objects to different lock layers and instruct Cubase to lock one
or two of these layers. This way, you cannot accidentally move other edit them.
To set up which type of object belongs to which lock layer, do one of the following:
●
In the Preferences dialog (Scores–Note Layer page) adjust the layer setting for each object
type.
● Open the Set Up Score Lock Layers menu on the extended toolbar to show which object
types are associated with that layer.
RELATED LINKS
Layers on page 139
Assigning Note Layer Symbols to Layers on page 140
Extended Toolbar on page 15
Activating Layers on page 141
52
Cubase Pro 12.0.20
Page 53

Entering and Editing Notes
Setting up the Staff
Setting up the Staff
Before you start entering notes, you must make some initial staff settings.
PROCEDURE
1. Do one of the following:
● Activate the staff, and select Scores> Settings.
● Double-click on the rectangle to the left of the staff.
● Activate the staff, and click Get Info on the extended toolbar.
2.
Make your changes and click Apply.
If you want to reuse settings made for one track in other tracks, you can save some time by
creating a staff preset.
NOTE
There are a number of staff presets available, set up to suit various instruments, for
example. Use them as they are, or as starting points for your own settings.
3.
Click anywhere in the staff or use the UpArrow /DownArrow keys to activate another staff.
4. Make your changes and click Apply.
RELATED LINKS
Staff – Main Tab on page 93
Score Settings – Staff Tab on page 92
Saving Staff Presets on page 93
Suggested Initial Settings
We suggest the following initial settings:
Option
Display Quantize: Notes 64
Display Quantize: Rests 64
Auto Quantize Activated
Syncopation Off
Suggested setting
Consolidate Rests Off
Clean Lengths Off
No Overlap Off
Shue Off
Key As required
53
Cubase Pro 12.0.20
Page 54

Entering and Editing Notes
Note Values and Positions
Option Suggested setting
Clef As required
Auto Clef Activate this if you want the program to select
Display Transpose value 0
Options tab settings As is
Polyphonic tab settings Staff Mode: Single
Tablature tab settings Tablature Mode deactivated
NOTE
If you set up Display Quantize values for notes and rests that are too large, the notes you try to
enter may not be displayed as intended.
a treble or bass clef automatically.
RELATED LINKS
Setting up a Split Staff on page 68
Score Editor Basics on page 27
Staff – Main Tab on page 93
Note Values and Positions
The most important settings for entering notes are the position of the note, the length of the
note, that is, the note value, and the minimum spacing between notes, that is, the value that is
selected in the
RELATED LINKS
Note Positions on page 54
Selecting a Note Value for Input on page 55
Selecting a Quantize Preset on page 56
Note Positions
You can use the graphical position in the score to determine the note position. However, you can
also verify the position numerically.
The relation between beats and bars depends on the time signature: In 4/4 there are 4 beats
to a bar. In 8/8 there are eight, in 6/8 there are six, etc. The third number is the sixteenth note
within the beat. The time signature determines the number of sixteenth notes to each beat. In a
quarter-note-based time signature (4/4, 2/4, etc.), there are four sixteenth notes to each beat, in
an eighth-note-based time signature (3/8, 4/8, etc.), there are two sixteenth notes, etc. The last
value is in ticks, with 480 ticks per quarter note (and thus 120 ticks per sixteenth note).
Quantize Presets pop-up menu.
Some note positions and their corresponding position values:
54
Cubase Pro 12.0.20
Page 55

Entering and Editing Notes
Note Values and Positions
Eighth note positions
●
●
●
Eighth note triplet positions
●
●
●
Sixteenth note positions
●
●
●
Selecting a Note Value for Input
You can select a note value for note input.
PROCEDURE
Do one of the following:
●
● On the extended toolbar, activate a note symbol.
You can activate any note value from 1/1 to 1/64 and the dotted and triplet options.
● On the toolbar, select an option from the Length Quantize pop-up menu.
RESULT
The selected note value is displayed in the Length Quantize eld on the toolbar and reected by
the cursor shape of the
Insert Note tool.
55
Cubase Pro 12.0.20
Page 56

Entering and Editing Notes
Note Input
RELATED LINKS
Length Quantize on page 11
Unusual Note Values on page 56
Unusual Note Values
Some unusual note values cannot be selected directly, for example, double dotted notes.
You can create those notes by changing the length of the note. You can glue notes together or
use the
RELATED LINKS
Further Note Length Adjustment Methods on page 65
Editing Note Lengths with the Glue Tool on page 67
Editing the Displayed Note Lengths on page 67
Display Length feature.
Selecting a Quantize Preset
You can select a quantize preset. This is useful to control the positioning of notes. Selecting a
Quantize Preset value of 1/8, for example, allows you to insert and move notes to eighth note
positions, at quarter notes, at half bars, or at bar positions.
PROCEDURE
1. On the toolbar, open the Quantize Presets pop-up menu.
2. Select a value that corresponds to the smallest note value in the project.
RELATED LINKS
Quantize Presets on page 11
Note Input
You can show bars and beats positions when you insert notes.
You can enter and edit notes with the computer keyboard or with the mouse.
If you activate Show Bars and Beats Positions When Inserting Notes in the Preferences dialog
Scores—Editing page), the bars and beats positions are shown when you enter or edit notes.
(
This allows you to nd the correct position.
NOTE
The position snaps to the grid that is dened by the quantize value.
RELATED LINKS
Entering Notes with the Computer Keyboard on page 57
Entering Notes with the Mouse on page 57
Snap on page 51
Acoustic Feedback on page 52
Selecting a Quantize Preset on page 56
56
Cubase Pro 12.0.20
Page 57

Entering and Editing Notes
Note Input
Entering Notes with the Computer Keyboard
You can enter notes with the computer keyboard.
PROCEDURE
1. On the extended toolbar, activate a note value button.
2. On the Score Editor toolbar, activate the Step/MIDI Input section.
3. Open the Set up Computer Keyboard Input pop-up menu, and make your settings.
4. Activate Computer Keyboard Input.
A note of the specied note value is shown at the cursor position.
NOTE
If Show Bars and Beats Positions When Inserting Notes is activated in the Preferences
dialog (Scores—Editing page), the bars and beats positions are shown when you click and
hold down the mouse button. This allows you to
5.
Adjust the pitch of the note by doing one of the following:
nd the correct position.
● Press the key that corresponds to the note on your computer keyboard.
● Use the UpArrow /DownArrow key to transpose the note in semitone steps.
● Use the PageUp /PageDown key to transpose the note in octave steps.
6. Adjust the insert position of the note by using the LeftArrow and RightArrow key.
The value that is selected in the Quantize Presets pop-up menu is taken into account.
7. Adjust the length of the note by holding down Shift and using the LeftArrow and
RightArrow key.
This changes the note value step by step.
8. Enter chords by pressing Shift -Return and entering the chord notes.
RESULT
The notes are inserted.
RELATED LINKS
Extended Toolbar on page 15
Score Editor Toolbar on page 7
Entering Notes with the Mouse
You can enter notes with the mouse.
PROCEDURE
Activate the staff.
1.
Do one of the following:
2.
● On the extended toolbar, click a note value symbol.
● On the toolbar, select the Insert Note tool.
On the toolbar, open the Quantize Presets pop-up menu and select a value.
3.
This determines the spacing between notes. If you select 1/1, you can only add notes at
downbeats. If you select 1/8, you can add notes at eighth note positions, etc.
57
Cubase Pro 12.0.20
Page 58

Entering and Editing Notes
Note Selection
4. Click in the staff and keep the mouse button pressed.
The Insert Note tool changes into a note symbol.
Adjust the pitch of the note by moving the mouse vertically.
5.
NOTE
● If Use Mouse Wheel to Transpose Notes is activated in the Preferences dialog (Scores
● If Show Note Info by the Mouse is activated in the Preferences dialog (Scores—
6.
Adjust the insert position by moving the mouse horizontally.
NOTE
If Show Bars and Beats Positions When Inserting Notes is activated in the Preferences
dialog (Scores—Editing page), the bars and beats positions are shown when you click and
hold down the mouse button. This allows you to nd the correct position.
7.
Input chords by entering the chord notes at the same insert position.
—Editing page), you can change the pitch of the note with the mouse wheel.
Editing page), the position and pitch of the note is also shown in a tooltip next to the
pointer while you are dragging.
8. Release the mouse button to insert the note.
RESULT
The note is inserted.
IMPORTANT
If you activate Show Pitch When Inserting Notes in the Preferences dialog (Scores—Editing
page), you do not need to keep the mouse button pressed to see the note as it would be inserted
in the score.
RELATED LINKS
Score Editor Toolbar on page 7
Extended Toolbar on page 15
Activating a Staff on page 29
Selecting a Note Value for Input on page 55
Note Editing Overlay on page 64
Note Selection
There are several options to select notes.
RELATED LINKS
Selecting Notes by Clicking on page 59
Selecting Notes with the Object Selection Tool on page 59
Selecting Notes with the Arrow Keys on page 59
Selecting Tied Notes on page 60
58
Cubase Pro 12.0.20
Page 59

Entering and Editing Notes
Note Selection
Selecting Notes by Clicking
You can select notes by clicking.
PROCEDURE
● Do one of the following:
● Select a note by clicking a notehead with the Object Selection tool.
● Select more notes by holding down Shift and clicking their noteheads.
● Select a note and all the following notes in the same staff by holding down Shift and
double-clicking a notehead.
RESULT
The notehead is highlighted to indicate that it is selected.
RELATED LINKS
Object Selection on page 7
Selecting Notes with the Object Selection Tool
You can select notes with the Object Selection tool.
PROCEDURE
1. Click in an empty area in the score with the Object Selection tool and keep the mouse
button pressed.
2. Drag a selection rectangle to select the notes.
3. Release the mouse button.
RESULT
All notes with noteheads inside the rectangle are selected.
RELATED LINKS
Object Selection on page 7
Selecting Notes with the Arrow Keys
You can select notes with the keyboard.
PROCEDURE
Do one of the following:
●
● Select the previous note in the staff by using the LeftArrow key.
● Select the next note in the staff by using the RightArrow key.
● Select a series of notes by holding down Shift and using the LeftArrow or the
RightArrow key.
59
Cubase Pro 12.0.20
Page 60

Entering and Editing Notes
Editing Note Positions
RESULT
If you are working with polyphonic voices, you step through the notes on the current track, that
is, in a split system, you step through the staves.
NOTE
If you want to use other keys for selecting notes, you can customize the settings in the Key
Commands dialog (Navigate category).
Selecting Tied Notes
You can select tied notes.
PROCEDURE
●
To select the entire note for editing, click the rst notehead of the tied note with the Object
Selection tool.
IMPORTANT
If you activate Tied Notes Selected as Single Units in the Preferences dialog (Scores—
Editing page), you can also select the entire note by clicking the notehead of the tied note.
RELATED LINKS
Tied Notes on page 132
Deselecting Notes
You can deselect notes.
PROCEDURE
● Click in an empty area of the score with the Object Selection tool.
Editing Note Positions
You can edit note time positions by dragging, by using the info line or by using key commands.
PROCEDURE
On the toolbar, open the Quantize Presets pop-up menu and select a quantize preset.
1.
This helps you when you move notes to specic time positions.
Select the notes that you want to move.
2.
Do one of the following:
3.
● Press Ctrl/Cmd and drag the notes horizontally to a new position.
NOTE
If you want to see the position and pitch of the note in a tooltip while you drag, activate
Show Note Info by the Mouse in the Preferences dialog (Scores—Editing page).
● On the info line, click the Start value eld and change the value to move the note to a
new time position.
60
Cubase Pro 12.0.20
Page 61

Entering and Editing Notes
Editing Note Pitches
● Press Ctrl/Cmd -LeftArrow or Ctrl/Cmd- RightArrow .
RELATED LINKS
Selecting a Quantize Preset on page 56
Editing Note Pitches
You can edit note pitches by dragging, by using the info line or by using key commands.
PREREQUISITE
NOTE
To restrict vertical movement to inside the current key only, open the Event Movement
Restrictions pop-up menu on the Score Editor toolbar, and activate Keep Notes within Key.
PROCEDURE
1.
Select the notes that you want to move.
2.
Do one of the following:
● Click one of the selected notes and drag it vertically to a new position.
On the status line, the Mouse Value displays the new pitch for the dragged note.
NOTE
If you want to see the position and pitch of the note in a tooltip while you drag, activate
Show Note Info by the Mouse in the Preferences dialog (Scores—Editing page).
● On the info line, click the Pitch value eld and change the value to move the note to a
new note pitch.
NOTE
If you change the Pitch value for several selected notes, all selected notes are moved by
an equal amount. To set all notes to the same pitch instead, hold down
changing the value.
● Assign key commands to the Up and Down functions in the Nudge category of the Key
Commands dialog and use them.
RELATED LINKS
Setting up Note Names on page 41
Event Movement Restrictions on page 10
Acoustic Feedback on page 52
Selecting a Quantize Preset on page 56
Note Editing Overlay on page 64
Ctrl/Cmd while
Editing Note Pitches via MIDI
You can edit note pitches by using your MIDI keyboard.
PROCEDURE
On the toolbar, activate the MIDI Input button and the Record Pitch button to the right.
1.
61
Cubase Pro 12.0.20
Page 62

Entering and Editing Notes
Moving Notes across Staves
2. Optional: Activate Record NoteOn Velocity and Record NoteOff Velocity if you also want to
change the note-on and/or note-off velocity.
3. Select the rst note that you want to edit.
4. Press a key on your MIDI keyboard to assign a new pitch to the selected note.
The note takes on the pitch of the key you pressed, and the next note is selected
automatically.
5. Optional: Press the LeftArrow and RightArrow key to select the previous or the next note.
RELATED LINKS
Setting up Note Names on page 41
Score Editor Toolbar on page 7
Event Movement Restrictions on page 10
Editing Note Pitches with the Transpose Palette
You can transpose selected notes by using the Transpose Palette.
PROCEDURE
1. Right-click the Score Editor toolbar, and activate Transpose Palette.
2. Select the notes that you want to transpose.
3. Do one of the following:
● To transpose the note up in steps of one semitone, click Move Up.
● To transpose the note down in steps of one semitone, click Move Down.
● To transpose the note up in steps of one octave, click Move Up More.
● To transpose the note down in steps of one octave, click Move Down More.
RELATED LINKS
Setting up Note Names on page 41
Event Movement Restrictions on page 10
Score Editor Toolbar on page 7
Moving Notes across Staves
You can move notes from one staff to another. This is useful if you edit several tracks.
PROCEDURE
On the toolbar, open the Quantize Presets pop-up menu and select a quantize preset.
1.
This helps you when you move notes to specic time positions.
On the extended toolbar, make sure L is deactivated.
2.
Select the notes on the same staff.
3.
Click one of the notes and drag them to the new system.
4.
The active staff rectangle indicates on which staff the dragged notes appear.
RESULT
The notes are moved to the other staff.
62
Cubase Pro 12.0.20
Page 63

Entering and Editing Notes
Duplicating Notes
RELATED LINKS
Extended Toolbar on page 15
Selecting a Quantize Preset on page 56
Duplicating Notes
You can duplicate notes, even on different systems at the same time.
PROCEDURE
1. On the toolbar, open the Quantize Presets pop-up menu, and select a quantize preset.
This helps you when you move notes to specic time positions.
2.
Select the notes that you want to duplicate.
3.
Press Alt/Opt and drag the notes to a new position.
NOTE
● To restrict movements to one direction, press Ctrl/Cmd while dragging.
● To restrict vertical movement to inside the current key only, open the Event Movement
Restrictions pop-up menu on the Score Editor toolbar, and activate Keep Notes within
Key.
4. Release the mouse button.
RESULT
The duplicated notes are inserted.
RELATED LINKS
Copying Notes and Symbols between Bars on page 167
Event Movement Restrictions on page 10
Selecting a Quantize Preset on page 56
Cut, Copy, and Paste
You can use the regular commands to cut, copy, or paste notes.
Pasting Notes from the Clipboard
You can paste notes from the clipboard into your score.
PROCEDURE
Activate the staff into which you want to paste notes.
1.
Hold down Alt/Opt -Shift , and click at the position in the score where you want the rst
2.
note to appear.
This moves the project cursor to that position.
Select Edit> Paste or use the default key command Ctrl/Cmd -V .
3.
RESULT
The notes are pasted into the score, beginning at the project cursor. If the cut or copied notes
come from different staves, they are also inserted on different staves. Otherwise, the notes are
63
Cubase Pro 12.0.20
Page 64
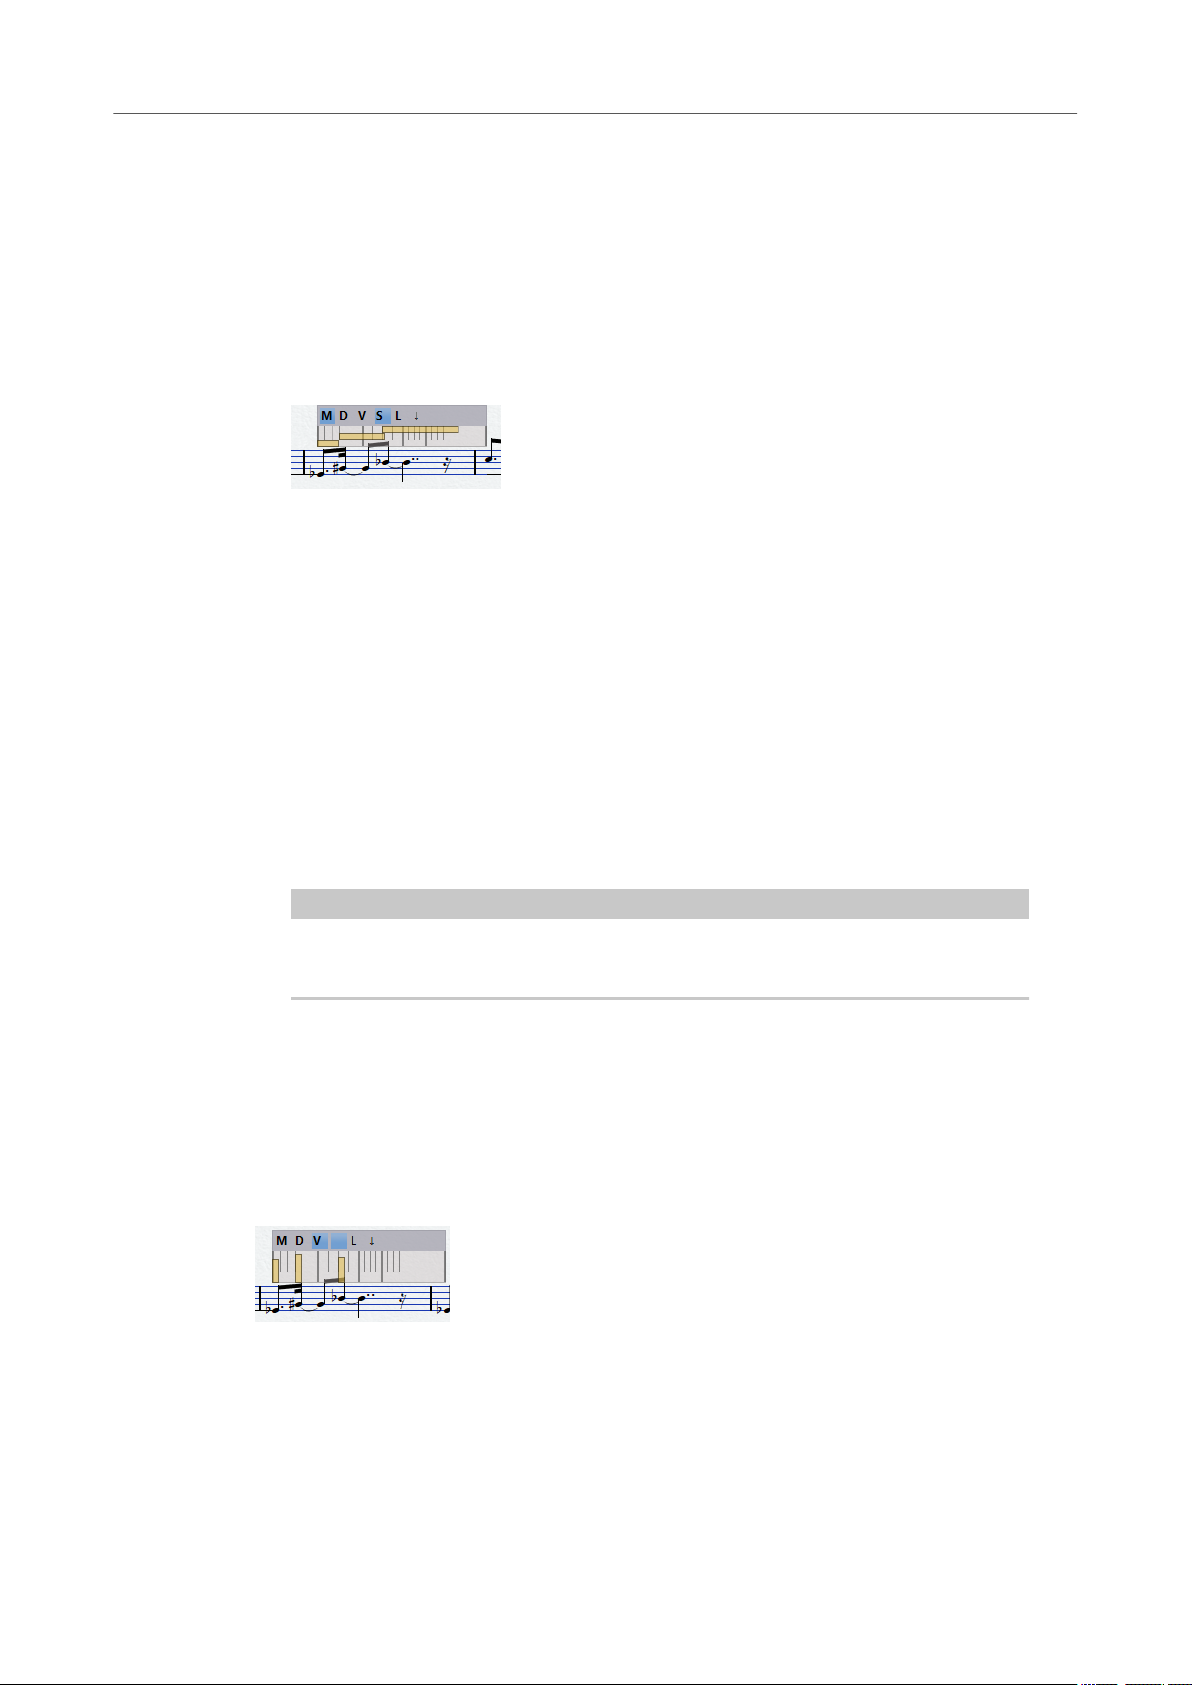
Entering and Editing Notes
Note Editing Overlay
inserted on the active staff. They keep the pitch and relative positions they had when you cut or
copied them.
Note Editing Overlay
The Note Editing Overlay allows you to edit note durations, note time positions, display
durations, and note velocities in a similar way as in the
● To display the Note Editing Overlay, activate the Note Editing Overlay section on the Score
Editor toolbar, and activate Note Editing Overlay On/Off.
Edit MIDI Note Duration
Allows you to edit the MIDI durations of the notes and the note positions.
Edit Display Duration
Allows you to edit the display durations of the notes.
Key Editor.
Edit Velocities
Allows you to edit the note velocities.
Snap
Snaps the durations and positions to the value that is set in the Quantize Presets
pop-menu on the Score Editor toolbar.
Lock Overlay
Locks the overlay to the position from where you opened it. If you deactivate this, the
overlay follows the mouse position.
NOTE
Moving the overlay to a different staff with the mouse automatically activates this staff
for editing.
Show above/below Staff
Allows you to move the overlay above or below the active staff.
MIDI note durations/Display durations/Velocities
The note durations, the display durations and the velocities in the overlay are shown
as rectangles, and the selected note duration or velocity is shown in the color that you
specied for Selected Events in the Preferences dialog (Scores–Colors for Additional
Meanings page).
RELATED LINKS
Score Editor Toolbar on page 7
Editing Notes and Velocities Using the Overlay on page 65
64
Cubase Pro 12.0.20
Page 65

Entering and Editing Notes
Further Note Length Adjustment Methods
Editing Notes and Velocities Using the Overlay
You can edit note durations, note time positions, display durations, and note velocities in the
Score Editor in a similar way as in the Key Editor.
PROCEDURE
1. On the toolbar, activate Note Editing Overlay On/Off.
2. Optional: Use the Zoom tool or the mouse wheel to zoom in on the bar that you want to edit.
3. Optional: Activate Lock Overlay to lock the overlay to a position.
4.
Do one of the following:
● To edit the actual note durations in the overlay, activate Edit MIDI Note Duration, and
drag the ends of the rectangles to the left or right.
● To edit the displayed note durations in the overlay, activate Edit Display Duration, and
drag the ends of the rectangles to the left or right.
● To edit note positions in the overlay, activate Edit MIDI Note Duration, and drag the
rectangles to the left or right.
● To edit note velocities in the overlay, activate Edit Velocities, and drag the upper ends of
the rectangles up or down.
The object that is selected for editing is shown in a different color. Depending on your edits,
the Start, End, Length, and Velocity value elds on the info line display the value changes
while you are editing.
NOTE
Use the Options pop-up menu to display notes and velocities in the overlay in specic colors
such as pitch colors, velocity colors, or channel colors.
You can change the color of the selected note in the Preferences dialog (Scores–Colors for
Additional Meanings page).
5. Optional: Move the mouse to a different bar and repeat the steps above. If Lock Overlay is
activated, you must deactivate this rst.
Moving the mouse to a different position moves the overlay. If you move the overlay to a
different staff, this automatically activates this staff for editing.
6. When you are done, deactivate Note Editing Overlay On/Off on the Score Editor toolbar.
RELATED LINKS
Note Editing Overlay on page 64
Options on page 10
Zoom Tool on page 25
Zooming with the Mouse Wheel on page 26
Further Note Length Adjustment Methods
You can edit the actual length of the notes, or you can edit the displayed length of the notes.
The Score Editor is special in that it does not necessarily display the notes with their actual
length. The appearance of notes and rests in the score is determined by the
settings in the Score Settings dialog (Staff tab). Depending on your settings, notes may be
displayed as if they were longer than they really are.
65
Cubase Pro 12.0.20
Display Quantize
Page 66

Entering and Editing Notes
Further Note Length Adjustment Methods
RELATED LINKS
Editing Note Lengths with the Note Value Buttons on page 66
Score Settings – Staff Tab on page 92
Editing Note Lengths Using the Info Line on page 66
Editing Note Lengths with the Glue Tool on page 67
Editing the Displayed Note Lengths on page 67
Editing Note Lengths with the Note Value Buttons
You can edit the note length of one or more selected notes with the note value buttons on the
extended toolbar.
PREREQUISITE
In the Score Settings dialog (Staff tab), the Display Quantize values for notes and rests are
set up in a way that they allow to display notes of the desired note value. Depending on your
settings, notes may be displayed as if they were longer than they really are.
PROCEDURE
1.
Select the notes that you want to change.
2.
Hold down Ctrl/Cmd , and on the extended toolbar, click one of the note value buttons.
NOTE
You must select a note value that is larger than the current note value.
RESULT
The note length of the selected notes changes according to the note value button that you
clicked.
RELATED LINKS
Score Settings – Staff Tab on page 92
Editing Note Lengths Using the Info Line
You can enter and edit note lengths by using the info line.
PREREQUISITE
In the Score Settings dialog (Staff tab), the Display Quantize values for notes and rests are set
up in a way that they allow you to display notes of the desired note value. Depending on your
settings, notes may be displayed as if they were longer than they really are.
PROCEDURE
Select the notes that you want to change.
1.
On the info line, click the Length value eld and change the value to change the note length.
2.
RESULT
The note length of the selected notes changes accordingly.
RELATED LINKS
Info Line on page 15
66
Cubase Pro 12.0.20
Page 67

Entering and Editing Notes
Further Note Length Adjustment Methods
Editing Note Lengths with the Glue Tool
You can edit note lengths by gluing notes of the same pitch together.
PREREQUISITE
In the Score Settings dialog (Staff tab), the Display Quantize values for notes and rests are set
up in a way that they allow you to display notes of the desired note value. Depending on your
settings, notes may be displayed as if they were longer than they really are.
PROCEDURE
1.
Select the notes that you want to glue together.
2.
On the toolbar, select the Glue tool.
3.
Click the rst note.
RESULT
This note is glued to the next note with the same pitch. The note length changes according. By
gluing together a quarter note, an eighth note, and a sixteenth note, you get a double dotted
quarter note, for example.
RELATED LINKS
Glue on page 8
Display Quantize on page 94
Editing the Displayed Note Lengths
You can change the displayed length of notes without affecting how they play back.
PROCEDURE
● Do one of the following:
● On the toolbar, select the Display Quantize tool, and click the note.
● Click a note event, in the right zone open the Extended Options section, and enter a
value in the Disp. Length eld.
● Double-click a note event, and in the Set Note Info dialog, enter a value in the Disp.
Length eld, and click Apply.
RESULT
The note is now displayed according to its display length setting.
RELATED LINKS
Score Settings – Staff Tab on page 92
Set Note Info Dialog on page 117
Extended Options Section on page 121
Display Quantize Dialog on page 47
Inserting Display Quantize Exceptions on page 46
67
Cubase Pro 12.0.20
Page 68

Entering and Editing Notes
Splitting Notes
Splitting Notes
You can split two notes that are strung together by a tie.
PROCEDURE
1. On the Score Editor toolbar, select the Split tool.
2. Click the second note, that is, the note that is tied.
RESULT
The note is divided into two. Both note lengths are kept.
Before and after splitting a tied note
RELATED LINKS
Score Editor Toolbar on page 7
Tied Notes on page 132
Deleting Notes
You can delete notes.
PROCEDURE
● Do one of the following:
● On the toolbar, select the Erase tool, and click the notes that you want to erase.
● On the toolbar, select the Erase tool, draw a selection rectangle around the notes that
you want to erase, and click any of the notes.
● Select the notes that you want to erase, and select Edit> Delete.
● Select the notes that you want to erase, and press Delete or Backspace on the
computer keyboard.
RELATED LINKS
Score Editor Toolbar on page 7
Setting up a Split Staff
You can set up a split staff.
PROCEDURE
Activate the staff.
1.
Select Scores> Settings.
2.
Select the Staff tab and open the Polyphonic page.
3.
Open the Staff Mode pop-up menu, and select Split.
4.
Set a value in the Split Point eld.
5.
Notes below the set split point are moved to the lower clef, notes above the split point are
moved to the upper clef.
68
Cubase Pro 12.0.20
Page 69

Entering and Editing Notes
Multiple Staves
6. Click Apply.
RESULT
The staff is split at C3.
Before and after setting a split at C3
AFTER COMPLETING THIS TASK
If the default piano clef settings for the upper and lower staff are not what you want, open the
Main tab in the Score Settings dialog, and in the Key/Clef section, adjust these settings.
RELATED LINKS
Activating a Staff on page 29
Setting the Initial Clef, Key, and Time Signature on page 30
Staff – Main Tab on page 93
Staff – Polyphonic Tab on page 100
Multiple Staves
When you have parts on several tracks selected in the Project window, these are put on one staff
each when you open the
The settings in the Score Settings dialog (Staff tab) are specic to each staff. You can keep the
Score Settings dialog open and select one staff after the other, make your settings, and click
Apply.
NOTE
If several staves share settings, consider saving a staff preset, and apply it to the other staves
one at a time.
You can select notes from one or several staves at the same time, using any of the selection
methods.
When you enter or edit notes, use the Mouse Value display on the status line to determine the
pitch. Whether a note ends up on the upper or lower staff is governed by the
in the Score Settings dialog (Staff–Polyphonic tab).
Score Editor. This allows you to work on several staves in parallel.
Split Point setting
If you want to put two notes with the same pitch on different staves in different parts of the
score, use polyphonic voicing.
RELATED LINKS
Saving Staff Presets on page 93
Score Settings – Staff Tab on page 92
69
Cubase Pro 12.0.20
Page 70

Entering and Editing Notes
Inserting Clefs, Keys, or Time Signatures
Staff – Polyphonic Tab on page 100
Entering and Editing Notes on page 51
Polyphonic Voicing on page 106
Inserting Clefs, Keys, or Time Signatures
You can insert clef, key, or time signature changes anywhere in the score.
PROCEDURE
1. On the Symbols tab, open the Clefs etc. section.
2.
Select the symbol that you want to insert.
3.
Do one of the following:
● To insert the symbol on one staff, click the position where you want to insert the symbol.
● To insert the symbol on all staves, hold down Alt/Opt , and click the position where you
want to insert the symbol.
NOTE
● You can use the Mouse Time Position display on the status line to nd the exact
location.
● You can only insert time signature changes at the beginning of a bar. Time signature
changes are inserted on the signature track, which affects all tracks.
RESULT
If you insert a key change, Display Transpose is taken into account. This means that if you set all
staves to a new key, the staves set to
change.
NOTE
If some of the staves are bracketed, straight brackets only, as set up in the Score Settings dialog
(Layout tab) inserting a symbol for one of these staves inserts it for all other staves within the
bracket. Staves outside the bracket are not affected.
RELATED LINKS
Clefs Section on page 144
Status Line on page 14
Display Transpose on page 97
Adding Brackets and Braces on page 218
Display Transpose still show the correct key after the key
Editing Clefs, Keys, and Time Signatures
If you double-click a symbol, a dialog opens where you can change the settings.
If you hold down Alt/Opt when double-clicking, all symbols at the same position are changed
accordingly. With keys, the
In the Score Settings dialog (Project–Notation Style page), you can nd several options for
●
how clef, key, and time signature changes are displayed.
You can also adjust the automatic spacing between these symbols in the Score Settings
dialog (Project–Spacings page).
Display Transpose value is taken into account.
70
Cubase Pro 12.0.20
Page 71

Entering and Editing Notes
Troubleshooting for Note Display
RELATED LINKS
Project – Notation Style Page on page 79
Project – Spacings Page on page 87
Moving Clefs Graphically
You can move the clef graphically, without disturbing the relation between the clef and the notes.
PREREQUISITE
Page Mode is active.
PROCEDURE
1.
On the toolbar, select the Layout tool.
2.
Click the clef and drag it to the desired position.
NOTE
When you insert a clef change in the score, you can decide whether this has the same size as
rst (default) clef symbol or whether it is displayed with a smaller symbol. Right-click the
the
symbol and activate/deactivate Display Clef Changes as Small Symbols.
NOTE
If Warnings for New Clef at Line Breaks is activated on the Clef context menu and you
inserted a clef change at a line break in the score, the clef change symbol is inserted in the
last bar before the staff break. If this option is deactivated, the symbol is inserted in the
bar of the next staff line.
RELATED LINKS
Page Mode on page 14
Troubleshooting for Note Display
When I enter a note with one value, it is shown as a note with another value.
● In the Score Settings dialog (Staff–Main tab), lower the Rests value.
● In the Score Settings dialog (Staff–Main tab), deactivate Auto Quantize,
especially if you do not have any triplets or triplets only.
When I change the length of a note, nothing happens.
In the Score Settings dialog (Staff–Main tab), set the Notes value to the smallest
●
value that you have in your project.
Notes are still shown with the wrong values although I have adjusted Display
Quantize and the other staff settings.
rst
Insert Display Quantize events.
●
Use polyphonic voicing.
●
Select Scores> Functions> Score Notes to MIDI.
●
There are a number of short rests after my notes.
In the Score Settings dialog (Staff –Main tab), raise the Rests value.
●
71
Cubase Pro 12.0.20
Page 72

Entering and Editing Notes
Troubleshooting for Note Display
● In the Score Settings dialog (Staff –Main tab), activate Clean Lengths.
In the Score Settings dialog, I change the Display Quantize settings on the Staff page
(Main subpage) and nothing happens.
● Click Apply.
● Did you already insert Display Quantize events in the score? These override the
staff settings.
There is a pause after a note that I don’t want.
● Lengthen the note physically or graphically or delete it and add a new one with the
correct note value.
NOTE
If this problem occurs a lot in your score, raise the Rests value in the Display
Quantize section of the Score Settings dialog (Staff–Main tab).
Notes are not displayed at the correct positions.
●
In the Score Settings dialog (Staff–Main tab), change the Notes value.
One long note is shown as many tied notes.
● Set up polyphonic voicing if other notes occur at the same positions but with
different lengths.
● In the Interpretation Options section of the Score Settings dialog (Staff–Main
tab), select a Syncopation option if the notes are syncopated.
Notes are not tied as I want them.
● Use the Cut Notes tool.
When I select a note, nothing is shown on the info line.
● The note is probably tied to another note. This means that the second note does
not really exist, it is just a graphic indication that the main note is long. Select the
main note instead.
The note has an accidental when it shouldn’t, or it doesn’t when it should.
● Move the note to the correct pitch or use enharmonic shifting.
RELATED LINKS
Display Quantize on page 94
Interpretation Options on page 95
Inserting Display Quantize Exceptions on page 46
Enharmonic Shift buttons on page 15
Cut Notes on page 8
72
Cubase Pro 12.0.20
Page 73

Score Settings Dialog
The Score Settings dialog is divided into several tabs that allow you to set up your score.
To open the Score Settings dialog, do one of the following:
● Open the Score Editor, and select Scores> Settings.
●
In the Score Editor, double-click to the left of a staff.
NOTE
You must click Apply to apply your settings.
The Score Settings is divided into several tabs:
Project
Allows you to set up the font, notation style, accidentals, chord symbols, guitar library,
and spacings for your project.
Layout
Allows you to set up a layout for your score.
Staff
Allows you to make settings for the staff and note appearance.
Text
Allows you to make settings for lyrics and other text.
RELATED LINKS
Score Settings – Project Tab on page 74
Score Settings – Layout Tab on page 89
Score Settings – Staff Tab on page 92
Score Settings – Text Tab on page 103
73
Cubase Pro 12.0.20
Page 74
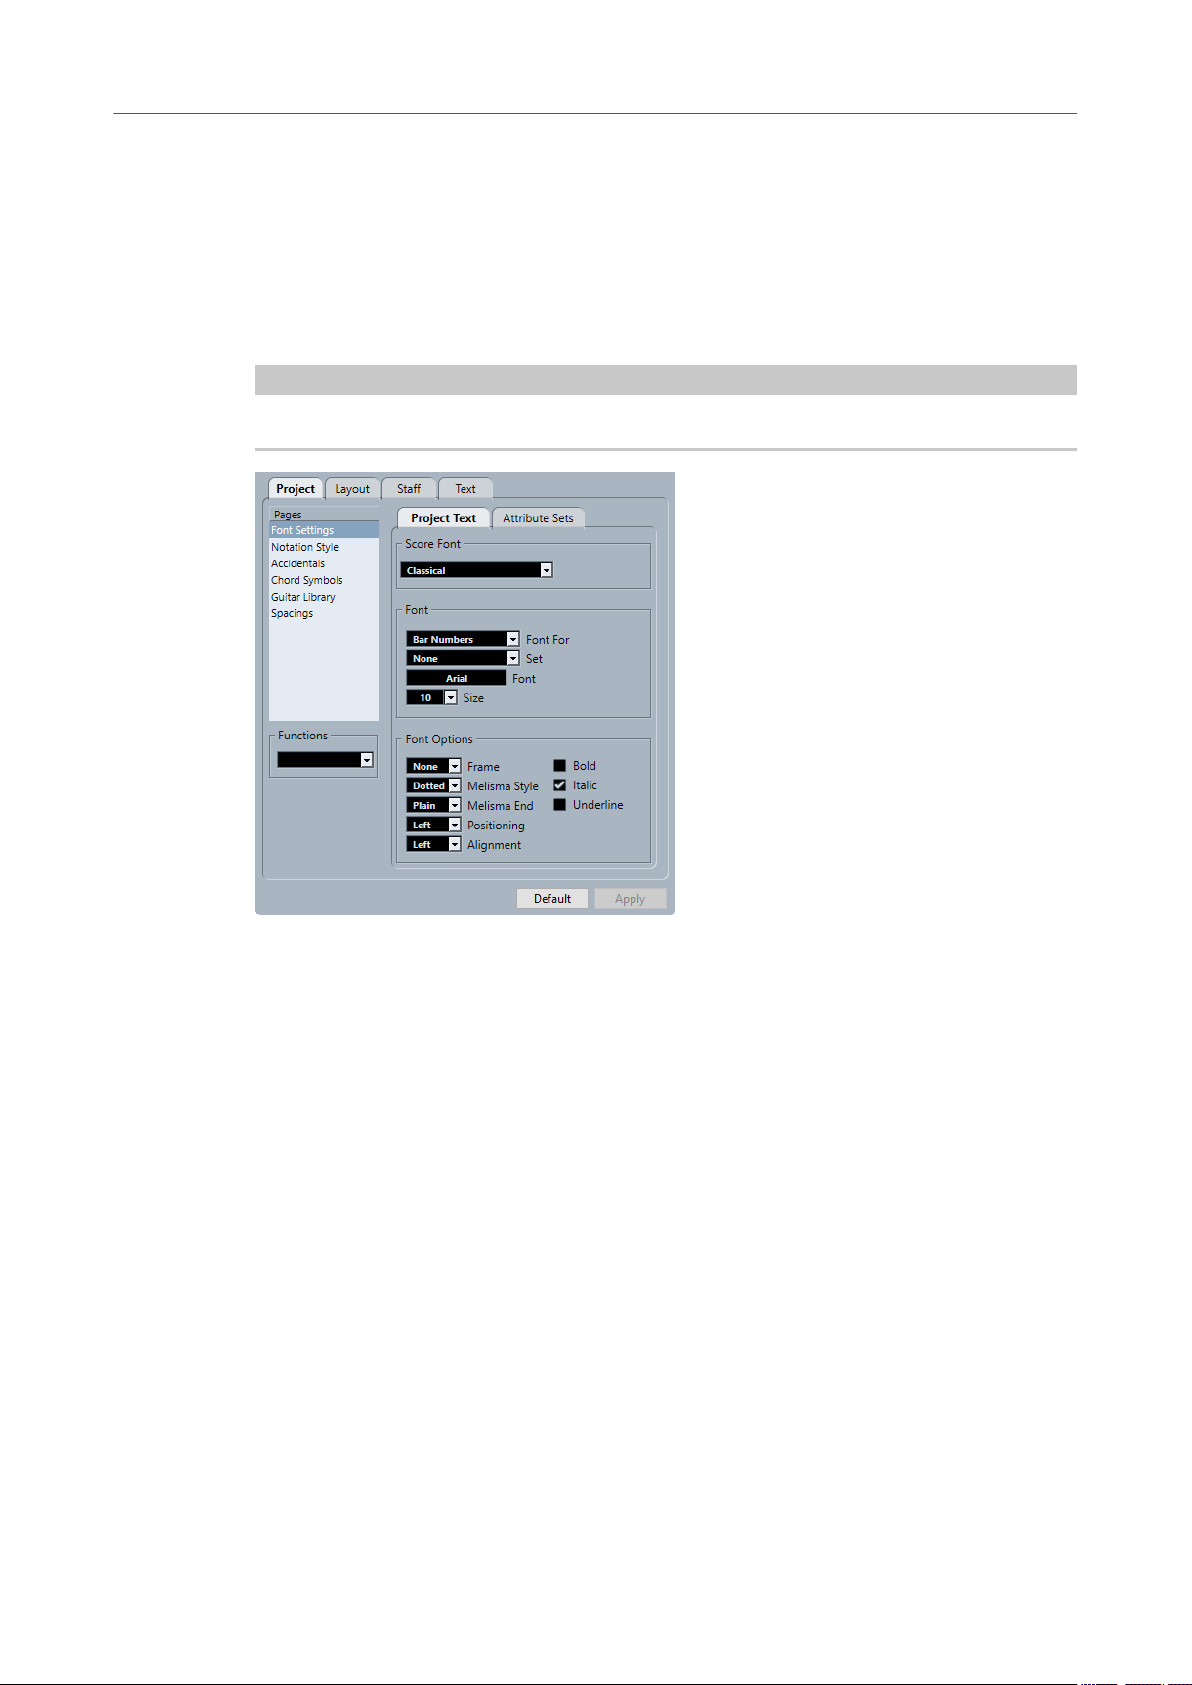
Score Settings Dialog
Score Settings – Project Tab
Score Settings – Project Tab
On the Project tab, you can specify which font and style are used for various elements in the
score.
To open the Project tab of the Score Settings dialog, do one of the following:
● Open the Score Editor, select Scores> Settings, and select the Project tab.
● In the Score Editor, double-click to the left of a staff, and select the Project tab.
NOTE
You must click Apply to apply your settings.
The Project tab is divided into several sections:
Pages
Select a page to show its settings in the right section of the dialog.
Functions
● Load Current Pane
Loads an XML le containing settings for this page.
● Load all
Loads an XML le containing settings for all the pages.
Save
●
Saves the settings for all the pages as an XML le.
Default
Loads the default settings.
Apply
Applies the current settings.
RELATED LINKS
Score Settings Dialog on page 73
Project – Font Settings Page on page 75
74
Cubase Pro 12.0.20
Page 75

Score Settings Dialog
Score Settings – Project Tab
Project – Notation Style Page on page 79
Project – Accidentals Page on page 84
Project – Chord Symbols Page on page 85
Project – Guitar Library Page on page 86
Project – Spacings Page on page 87
Project – Font Settings Page
On the Font Settings page, you can specify which font and style are used for various elements in
the score.
To open the Font Settings page of the Score Settings dialog, do one of the following:
●
Open the Score Editor, select Scores> Settings, select the Project tab, and in the Pages list,
Font Settings.
click
●
In the Score Editor, double-click to the left of a staff, select the Project tab, and in the Pages
list, click Font Settings.
NOTE
You must click Apply to apply your settings.
NOTE
If you select text in the score display, the font options are also shown in the right zone of the
Score Editor. These options only affect the selected element.
RELATED LINKS
Score Settings – Project Tab on page 74
Creating Text Attribute Sets on page 187
Melisma Lines on page 195
Right Zone on page 20
75
Cubase Pro 12.0.20
Page 76

Score Settings Dialog
Score Settings – Project Tab
Project Text
On the Font Settings page, you can specify which font and style are used for various elements in
the score.
To open the Font Settings page of the Score Settings dialog, do one of the following:
● Open the Score Editor, select Scores> Settings, select the Project tab, and in the Pages list,
click Font Settings.
● In the Score Editor, double-click to the left of a staff, select the Project tab, and in the Pages
list, click Font Settings.
NOTE
You must click Apply to apply your settings.
The following options are available:
Score Font
Score Font
This allows you to specify a font for the symbols and notes used in the score.
NOTE
Cubase features the SMuFL-compliant fonts Bravura and Petaluma. SMuFL, that is,
Standard Music Font Layout, is a font
required for music notation onto a standard layout. This allows for a new standard
glyph mapping for musical symbols that is optimized for modern font formats.
specication that maps all the different symbols
Font
Font For
Allows you to select to which element the font is applied.
Set
Allows you to select an attribute set. You can dene and save attribute sets on the
Attribute Sets tab. Select None to make manual settings.
76
Cubase Pro 12.0.20
Page 77

Score Settings Dialog
Score Settings – Project Tab
Font
Allows you to specify the font for the text.
NOTE
The Steinberg fonts are special fonts that Cubase uses. They are not suited for
common text.
Size
Sets the size of the text.
Font Options
Frame
Allows you to encase the text in a rectangular or oval frame.
Melisma Style
Allows you to specify whether the melisma line is dotted or solid.
Melisma lines are shown when you add a text symbol and you drag the handle at the
right edge of the text block to the right. This can be used for specifying duration or for
indicating lyrics sung over several syllables, for example.
Melisma End
Positioning
Alignment
Bold/Italic/Underline
NOTE
You must click Apply for the changes to take effect.
RELATED LINKS
Project – Font Settings Page on page 75
Attribute Sets
Allows you to specify how the melisma line ends.
Allows you to select which side of the text block is used for calculating its position.
This has an effect in situations where that text block is moved by the Auto Layout
function.
Allows you to specify the alignment of the text.
These options are only valid for texts with more than one line.
Allow you to show the text in bold, italic and/or underlined.
On the Font Settings page, you can specify which font and style are used for various elements in
the score.
To open the Font Settings page of the Score Settings dialog, do one of the following:
Open the Score Editor, select Scores> Settings, select the Project tab, and in the Pages list,
●
click Font Settings.
In the Score Editor, double-click to the left of a staff, select the Project tab, and in the Pages
●
list, click Font Settings.
77
Cubase Pro 12.0.20
Page 78

Score Settings Dialog
Score Settings – Project Tab
NOTE
You must click Apply to apply your settings.
The following options are available:
Font Set
Font Set
Allows you to create and edit text attribute sets for the appearance of text.
Attribute sets are available in the text sections of the Score Settings dialog.
Font
Font
Allows you to specify the font for the text.
NOTE
The Steinberg fonts are special fonts that Cubase uses. They are not suited for
common text.
Font Size
Sets the size of the text.
Font Options
Frame
Allows you to encase the text in a rectangular or oval frame.
Melisma Style
Allows you to specify whether the melisma line is dotted or solid.
Melisma lines are shown when you add a text symbol and you drag the handle at the
right edge of the text block to the right. This can be used for specifying duration or for
indicating lyrics sung over several syllables, for example.
78
Cubase Pro 12.0.20
Page 79

Score Settings Dialog
Score Settings – Project Tab
Melisma End
Allows you to specify how the melisma line ends.
Positioning
Allows you to select which side of the text block is used for calculating its position.
This has an effect in situations where that text block is moved by the Auto Layout
function.
Alignment
Allows you to specify the alignment of the text.
These options are only valid for texts with more than one line.
Bold
Allows you to show the text in bold.
Italic
Allows you to show the text in italics.
Underline
Allows you to show the text underlined.
NOTE
You must click Apply for the changes to take effect.
RELATED LINKS
Project – Font Settings Page on page 75
Creating Text Attribute Sets on page 187
Project – Notation Style Page
The Notation Style page allows you to specify how the score is displayed.
To open the Notation Style page of the Score Settings dialog, do one of the following:
● Open the Score Editor, select Scores> Settings, select the Project tab, and in the Pages list,
click Notation Style.
● In the Score Editor, double-click to the left of a staff, select the Project tab, and in the Pages
list, click Notation Style.
NOTE
You must click Apply to apply your settings.
79
Cubase Pro 12.0.20
Page 80

Score Settings Dialog
Score Settings – Project Tab
The Notation Style page is divided into several categories:
Groupings
Use Click Patterns for Groupings
Allows you to use the click pattern for grouping and beaming.
Page Numbers
Offset
Adds an offset to the page numbering if you have inserted page numbers.
Keys
Key Changes for the Entire Project
Applies all key changes to the entire project. If you activate this, you cannot dene
different keys for different staves of your project.
Warnings for new Keys at Line Breaks
Shows key changes at the end of a line and at the beginning of the next line.
Show Naturals
If a change to another key occurs, naturals are inserted to nullify any sharps and ats
that relate to the previous key.
Time Sign
Warnings for new Timesig at Line Breaks
Shows time signature changes at the end of a line and at the beginning of the next line.
Size of ‘Modern’ Time Signature
Allows you to adjust the size of modern time signatures.
Display Double Barlines on Timesig Change
Inserts double barlines at every time signature change in the score.
Clef
Warnings for New Clef at Line Breaks
Shows clef changes at line breaks at the end of a line and at the beginning of the next
line.
80
Cubase Pro 12.0.20
Page 81

Score Settings Dialog
Score Settings – Project Tab
Display Clef Changes as Small Symbols
Shows inserted clef changes as smaller symbols than at the beginning of the staff.
Staff Names
Show Staff Names to Left of Staff
Shows staff names to the left of the staff rather than above it.
Show Long Staff Names on new Pages
Displays the long staff name on the rst staff of every page.
Barlines
Grand Staff Barlines in old Choral Style
Shows barlines in grand staves in choral style so that they never cross the staves.
Break Barlines with Brackets
Breaks barlines above and below the bracketed staves to give a clearer indication of
which staves belong together.
Break Last Brackets
Determines whether the breaking of bracketed staves also applies to the barline at the
end of each row.
Hide First Barline in Parts
Hides the rst barline of parts that you open in the Score Editor.
Rhythmic Notation
Filled Notehead
Allows you to select a notehead for quarter notes, eighth notes, sixteenth notes, etc.
Outlined Notehead
Allows you to select a notehead for whole notes and half notes.
Display Ties Across Barlines
If you activate this option, notes that are tied across barlines in regular notation are
shown with a tie symbol in rhythmic notation.
Lyrics
Lyrics left-aligned to Note
Aligns lyrics with the left sides of notes.
Don’t Sync Lyrics
Keeps note positions when you insert lyrics.
Don’t Center Hyphens
Places hyphens adjacent to the preceding syllable when you separate your lyrics by
syllables.
Bar Numbers
Show Every
Allows you to set how often bar numbers are shown above the bars.
First Bar Number to Barline
Shows the bar number on the rst bar of each staff.
81
Cubase Pro 12.0.20
Page 82

Score Settings Dialog
Score Settings – Project Tab
Show Range with Multi-Bar Rests
Shows the bar number for a multi-bar rest as a range.
Below Barlines
Shows bar numbers below the staff rather than above the staff.
Auto Space
Automatically adjusts the vertical position of the bar numbers depending on the
contents of the bars.
Beams
Thick Beams
Shows beams as thick lines.
Show Small Slants as Flat Beams
Displays beams straight that would otherwise be slightly slanted.
Slanted Beams only Slightly Slanted
Displays beams only slightly slanted even if there is a signicant pitch difference
between the notes under the beam.
Multi-Bar Rests
Church Style
Shows multi-bar rests in church style, that is, with vertical bars, rather than with the
regular, horizontal symbols.
Numbers above Symbol
Shows multiple rest numbers above the symbol.
Snap Rests moved with the Layout Tool
Snaps rest symbols vertically to the closest position on a line or exactly between two
lines when you move a rest with the
Layout tool.
Tuplets
Tuplet Brackets
Allows you to determine whether brackets embracing tuplet groups are shown always,
never, or only when the tuplets are displayed on the head side.
Display Tuplet values by the Beams
Displays tuplets on the beam side of the notes instead of on the notehead side.
Suppress Recurring Tuplets
If you have several tuplets of the same type in the same bar, only the rst group gets a
number indication.
Show Tuplet Brackets as ‘Slurs’
Shows tuplet brackets with the same shape as slurs, as opposed to angled brackets.
Accents
Accents above Stems
Displays accent at the stem side of notes instead of by the notehead.
82
Cubase Pro 12.0.20
Page 83

Score Settings Dialog
Score Settings – Project Tab
Accents above Staves
Displays accent note symbols above the staff, regardless of the stem direction of the
notes. This setting overrides Accents above Stems.
Center Note-linked Symbols On Stems
Centers symbols that are linked to notes on the stems rather than on the noteheads.
Miscellaneous
Display Quantize Tool Affects All Voices
Applies changes that you perform with the Display Quantize tool to all voices on the
staff.
Hide Pedal Markers
Hides pedal markers for MIDI sustain pedal messages that you have recorded from the
score.
Hide Expression Map Symbols
Hides expression map symbols from the score.
Rehearsals: skip ‘J’
Skips the letter j when you use rehearsal letters in your score.
Draw Damper Pedals as
Allows you to specify if pedal up/down combinations are displayed as two symbols, as
symbol plus bracket, or as two brackets.
H. W. Henze Style
Centered Stems
Centers noteheads above stems.
Flat Ties
Displays ties as at lines, rather than as regular curved ties.
Beam-like Flags
Shows note ags as vertical lines.
Slanted Flags
Makes the ags slant downwards.
Accidentals for Each Note
Shows accidentals for both notes in a tied pair.
Special Braces
Uses simpler types of braces.
Beamed Rests
Shows beams for rests.
NOTE
You must click Apply for the changes to take effect.
RELATED LINKS
Score Settings – Project Tab on page 74
83
Cubase Pro 12.0.20
Page 84

Score Settings Dialog
Score Settings – Project Tab
Project – Accidentals Page
On the Accidentals page, you can specify how the program shows accidentals in the score.
To open the Accidentals page of the Score Settings dialog, do one of the following:
● Open the Score Editor, select Scores> Settings, select the Project tab, and in the Pages list,
Accidentals.
click
● In the Score Editor, double-click to the left of a staff, select the Project tab, and in the Pages
list, click Accidentals.
NOTE
You must click Apply to apply your settings.
The Accidentals page is divided into several sections:
Mode
Courtesy Acc Distance
Shows accidentals for notes outside the key.
Use the Bars value eld to specify after how many bars you want courtesy accidentals
to be displayed. 0 shows no courtesy accidentals.
Force
Shows accidentals for all notes outside the key, and repeats accidentals even within the
same bar.
Force all
Shows accidentals for every single note in the score.
Enharmonic shift for entire bar
Applies enharmonic shift to entire bars.
Use Chord Track for Accidentals
Uses the chord track to determine the accidentals in the score.
Outside the Scale
Interval buttons
Allow you to display the most common intervals as sharps or ats.
84
Cubase Pro 12.0.20
Page 85

Score Settings Dialog
Score Settings – Project Tab
RELATED LINKS
Score Settings – Project Tab on page 74
Project – Chord Symbols Page
The Chord Symbols page allows you to change how chord symbols are displayed in your score.
To open the Chord Symbols page of the Score Settings dialog, do one of the following:
● Open the Score Editor, select Scores> Settings, select the Project tab, and in the Pages list,
click Chord Symbols.
●
In the Score Editor, double-click to the left of a staff, select the Project tab, and in the Pages
list, click Chord Symbol.
NOTE
You must click Apply to apply your settings.
The Chord Symbols page is divided into several sections:
Chord Symbols Font
Root
Species the font size for the root note in the chord.
Type
Species the font size for the letters that indicate the type of chord.
Tensions
Species the font size for the tensions in chord symbols.
Bass
Species the font size for the letter that indicates the bass note in a chord.
Options
Align Bass Note
Shows bass notes on the same vertical position as the rest of the characters.
Tensions Bottom
Shows tensions on the same vertical position as the rest of the characters.
85
Cubase Pro 12.0.20
Page 86

Score Settings Dialog
Score Settings – Project Tab
Scale Chords
Scales the chord size with the system size.
Use Display Transpose
If Display Transpose is activated in the Score Settings dialog (Staff–Main tab), chord
symbols change accordingly.
RELATED LINKS
Score Settings – Project Tab on page 74
Setting up Note Names on page 41
Project – Guitar Library Page
The Guitar Library page allows you to dene guitar symbols for all common chords. These
symbols are used in the
function.
To open the Guitar Library page of the Score Settings dialog, do one of the following:
●
Open the Score Editor, select Scores> Settings, select the Project tab, and in the Pages list,
click Guitar Library.
● In the Score Editor, double-click to the left of a staff, select the Project tab, and in the Pages
list, click Guitar Library.
Guitar Symbol dialog or when you use the Make Chord Symbols
NOTE
You must click Apply to apply your settings.
The following options are available on the Guitar Library page:
Guitar
Shows all dened guitar symbols. Double-click a symbol to open the Guitar Symbol
dialog where you can edit the symbol.
Chord
Shows the chord symbol for the guitar symbol. Double-click a symbol to open the New
Chord Symbol dialog where you can edit the symbol.
New
Adds an empty guitar symbol below the selected symbol.
86
Cubase Pro 12.0.20
Page 87

Score Settings Dialog
Score Settings – Project Tab
Remove
Removes the selected guitar symbol.
Sort
Sorts the guitar symbols from top to bottom according to their scale, starting with C
chords and ending with B chords.
Use for Make Chord Symbols
If you use Make Chord Symbols, this inserts guitar symbols together with regular
chords if tting guitar symbols can be found. If several guitar symbols are available for
a specic chord, the rst one is used.
Small Display
Shows the chord symbols in the list in the size they will have in the score.
RELATED LINKS
Score Settings – Project Tab on page 74
Setting up Note Names on page 41
Project – Spacings Page
The Spacings page allows you to specify the spacing and other layout aspects of objects in the
score.
To open the Spacings page of the Score Settings dialog, do one of the following:
● Open the Score Editor, select Scores> Settings, select the Project tab, and in the Pages list,
click Spacings.
● In the Score Editor, double-click to the left of a staff, select the Project tab, and in the Pages
list, click Spacings.
NOTE
You must click Apply to apply your settings.
The following options are available on the Spacings page:
Before rst Chord
The distance between the barline and the rst note in each bar.
87
Cubase Pro 12.0.20
Page 88

Score Settings Dialog
Score Settings – Project Tab
Clef Change to following Bar
The distance between a clef inserted at the beginning of a bar and the barline that
comes after it.
Bar to Main Clef
The distance between the beginning of a staff and the rst clef on the line.
Clef to Key Signature
The distance between the clef and key signature symbols at the beginning of a staff.
Key Signature to Time Signature
The distance between the key signature and time signature symbols at the beginning
of a staff.
Time Signature Change to Bar
The distance between an inserted time signature symbol and the barline coming after
it.
Note to Dot
The distance between notes and their dots.
Note to Accidental
The distance between notes and their accidentals.
Behind Grace Notes
The spacing between grace notes belonging to the same note and the spacing to the
note they belong to.
Between Accidentals
The vertical distance between accidentals in a chord.
Accidentals within Key Signatures
The spacing between each accidental symbol in the group of accidentals displayed at
the beginning of each staff.
Height of Ties
The height of ties.
Height of Notehead Ties
The height of a bow up/bow down symbol.
Tie Thickness
The thickness of all ties.
Slur Thickness
The thickness of all slurs.
Bezier Thickness
The thickness of all Bezier slurs.
Slur’s Start and End Distance from Notehead
Allows you to adjust how far the end points of slurs are from the noteheads they
belong to.
Slur’s Middle Distance from Notehead
Allows you to adjust the vertical position of the middle of slurs.
First Bar Number - Horizontal Offset
Sets the horizontal distance between the bar number and the barline for the rst bar
on each staff.
88
Cubase Pro 12.0.20
Page 89

Score Settings Dialog
Score Settings – Layout Tab
First Bar Number - Vertical Offset
Sets the vertical distance between the bar number and the barline for the rst bar on
each staff.
Other Bar Numbers - Horizontal Offset
Sets the horizontal distance between the bar number and the barline for all other bars.
Other Bar Numbers - Vertical Offset
Sets the vertical distance between the bar number and the barline for all other bars.
Staff Separator - Horizontal Offset
Allows you to indent staff separators from the left margin.
Staff Separator - Vertical Offset
Allows you to move all staff separators vertically.
Track Name - Horizontal Offset
The horizontal distance between the track name and the beginning of the staff.
Track Name - Vertical Offset
The vertical distance between the track name and the staff.
Short Track Name - Horizontal Offset
Adjusts the horizontal distance between staves and their short track names.
Short Track Name - Vertical Offset
Adjusts the vertical distance between staves and their short track names.
Multi-Bar Rest Height
Adjusts the heights of multi-bar rest symbols.
Multi-Bar Rest Width
Adjusts the widths of multi-bar rest symbols.
Density of Note Placement
The minimum distance between chords/notes in a bar. Raising this value makes the
bars wider.
Density of Lyric Placement
The minimum distance between lyric syllables. Raising this value makes the lyrics
spacing wider.
Auto Space/Edit Mode
Raise this value to decrease the number of bars across the page in Edit Mode.
Default Line Width
The thickness of all lines that do not have a specic width adjustment.
Line Width [for option]
Allows you to trim the line widths for various elements in the score.
RELATED LINKS
Score Settings – Project Tab on page 74
Score Settings – Layout Tab
On the Layout tab, you can make settings for the different layouts.
To open the Score Settings dialog, do one of the following:
Cubase Pro 12.0.20
89
Page 90
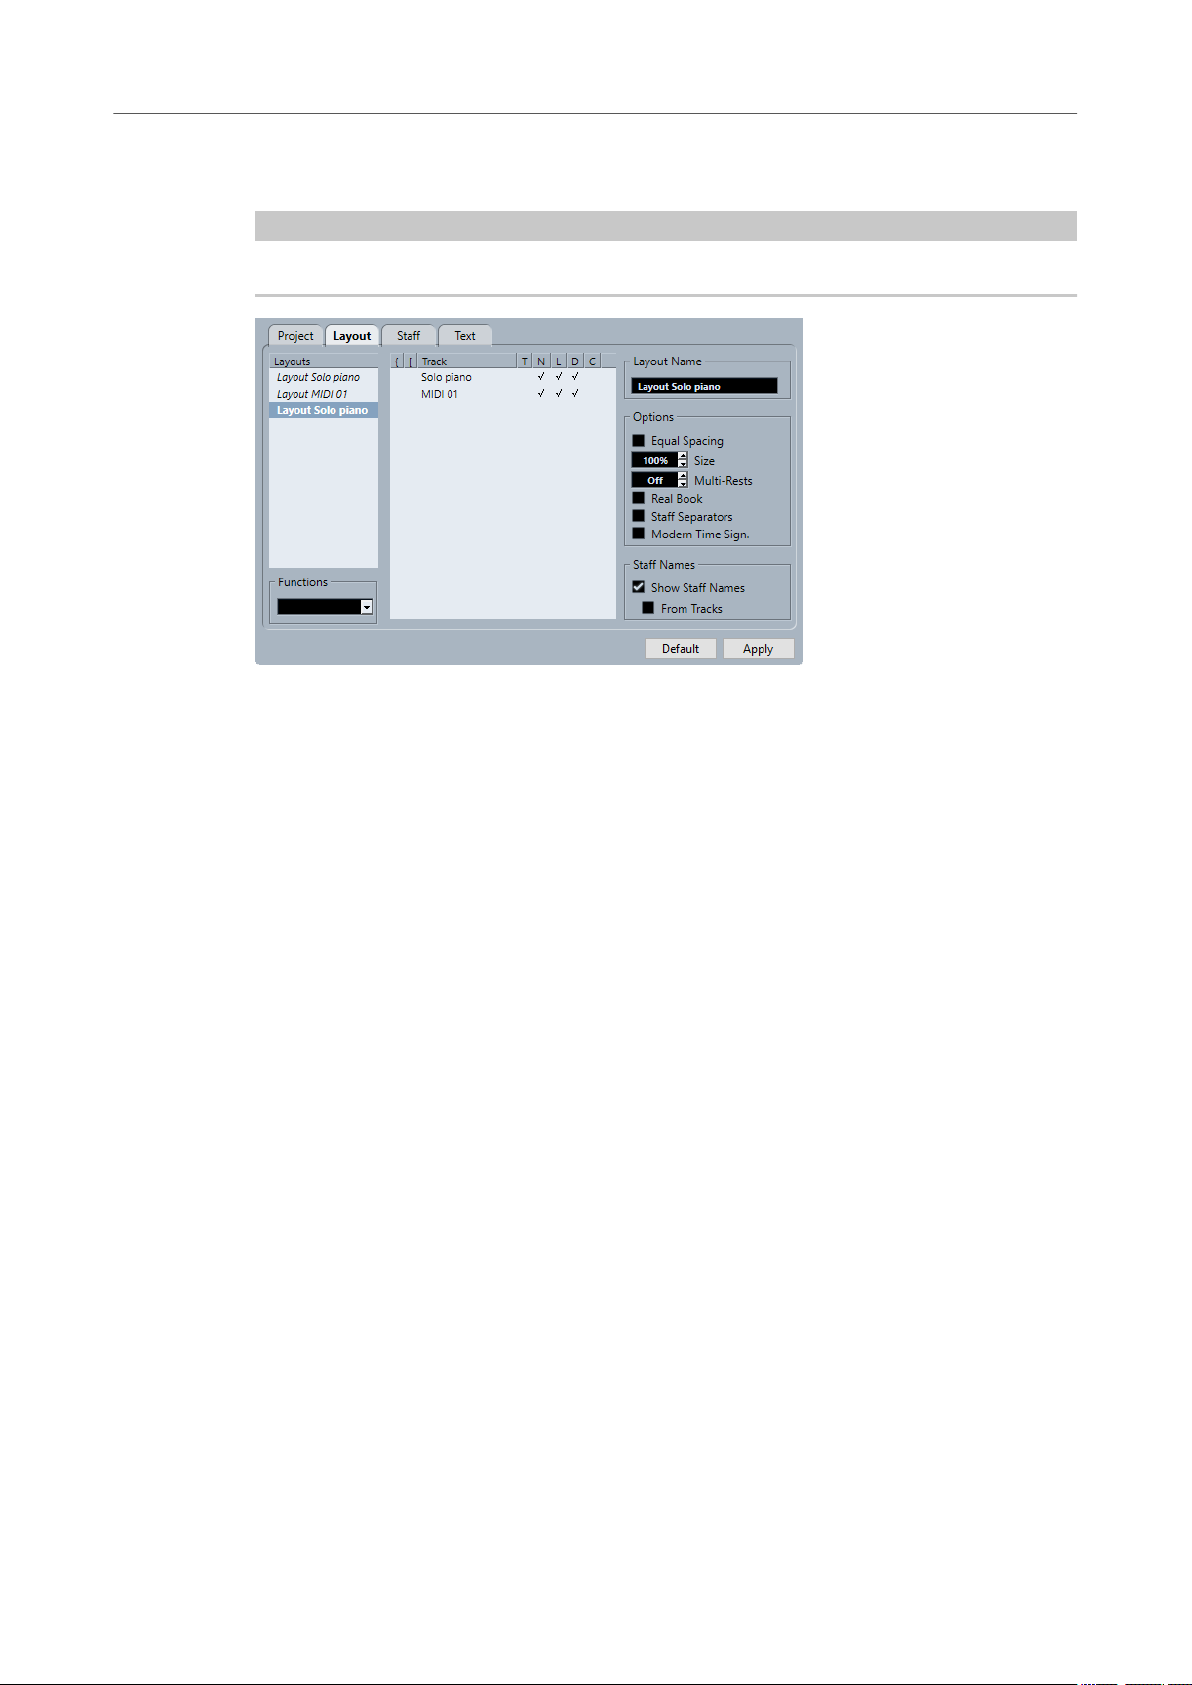
Score Settings Dialog
Score Settings – Layout Tab
● Open the Score Editor, and select Scores> Settings.
● In the Score Editor, double-click to the left of a staff.
NOTE
You must click Apply to apply your settings.
The following sections are available:
Layouts
Layouts list
Lists all layouts of the project. The current layout is highlighted.
Functions
Functions menu
Allows you to remove, clean up, copy, export, or import the current layout.
Track
Track list
Allows you to show/hide the following elements for the selected track:
● Braces
Braces that encompass the staves. Drag the ends of the indicator to edit the
braces, click the indicator to remove a brace.
Brackets
●
Brackets that encompass the staves. Drag the ends of the indicator to edit the
brackets, click the indicator to remove a bracket.
Track
●
The name of the MIDI track.
T
●
The time signature symbol. This is only shown if Modern Time Sign. is activated in
Options section to the right.
the
N
●
The staff name.
L
●
90
Cubase Pro 12.0.20
Page 91

Score Settings Dialog
Score Settings – Layout Tab
Layout symbols such as rehearsal marks.
● D
Display transpose.
● C
Chord track symbols. These can only be shown on one staff.
Layout Name
Layout Name
The name of the layout. By default, this corresponds to the name of the MIDI track.
Options
Options
●
Equal Spacing
Notes take up space according to their note value.
●
Size
Allows you to set the staff size as a percentage value of the normal size.
● Multi-Bar Rests
Allows you to set how many empty bars are allowed before rests that last longer
than a bar are replaced with a multi-bar rest symbol.
● Real Book
Shows clef symbols on the rst staff on each page only.
● Staff Separators
Inserts separator symbols at the beginning of each grand staff.
● Modern Time Sign.
Shows time signatures above the staves rather than in them. You can set the
size of the modern time signature in the
Style page). You can use the T column in the track list to specify for which tracks
time signatures are displayed.
Score Settings dialog (Project–Notation
Staff Names
Show Staff Names for this Staff
Determines whether staff names are shown.
NOTE
You can use the N column in the track list of the Score Settings dialog (Layout tab) to
hide or show staff names for individual tracks in the layout.
From Tracks
Uses the names of the tracks as staff names. If this is deactivated, the names specied
for each staff in the Score Settings dialog (Staff–Main tab) are used instead.
RELATED LINKS
Score Settings Dialog on page 73
91
Cubase Pro 12.0.20
Page 92

Score Settings Dialog
Score Settings – Staff Tab
Adding Brackets and Braces on page 218
Displaying Chord Symbols from the Chord Track on page 177
Multi-Bar Rests on page 223
Project – Notation Style Page on page 79
Score Settings – Staff Tab
The Staff tab shows the settings for the currently active staff.
To open the Score Settings dialog, do one of the following:
●
Open the Score Editor, and select Scores> Settings.
●
In the Score Editor, double-click to the left of a staff.
NOTE
You must click Apply to apply your settings.
The Staff tab is divided into several tabs:
Main
Shows settings for the active staff.
Options
Shows additional settings for the active staff.
Polyphonic
Shows settings for polyphonic voices or split staves.
Tablature
Shows settings for tablatures.
Common Settings for All Tabs
Tracks
Select a track to show its settings in the right section of the dialog.
Presets
Apply a staff preset by selecting it from the pop-up menu.
92
Cubase Pro 12.0.20
Page 93

Score Settings Dialog
Score Settings – Staff Tab
The program comes with a number of staff presets, set up to suit various instruments.
Store allows you to save the current settings as a preset.
Remove allows you to remove the selected preset.
RELATED LINKS
Score Settings Dialog on page 73
Saving Staff Presets on page 93
Staff – Main Tab on page 93
Staff – Options Tab on page 97
Staff – Polyphonic Tab on page 100
Saving Staff Presets
You can save staff presets and load them whenever you work with a staff similar to one you
have worked on before. This is useful because making staff settings for your scores can be
time-consuming.
PREREQUISITE
You have set up the staff to your liking.
NOTE
There are a number of staff presets available, set up to suit various instruments, for example. If
you select a preset, the corresponding settings are loaded. To apply these settings to a staff, you
must click
PROCEDURE
1. Open the Score Settings dialog (Staff tab).
2. In the Presets section, click Store.
3. Enter a name for the preset in the dialog, and click OK.
RESULT
The preset is now available on the Presets pop-up menu in all projects. It includes all settings
from
The staff presets are saved as individual les in the Staff Presets folder of the Presets folder
within the
RELATED LINKS
Score Settings – Staff Tab on page 92
Apply.
Staff tab.
Cubase program folder.
Staff – Main Tab
The Main tab shows the settings for the active staff.
To open the Score Settings dialog, do one of the following:
Open the Score Editor, and select Scores> Settings.
●
In the Score Editor, double-click to the left of a staff.
●
NOTE
You must click Apply to apply your settings.
93
Cubase Pro 12.0.20
Page 94

Score Settings Dialog
Score Settings – Staff Tab
The Main tab is divided into several sections:
Staff Names
Long
Allows you to specify a name for the staff that is shown for the very rst system in the
score.
NOTE
To show the long name at the beginning of each new page, activate Show Long Staff
Names on New Pages in the Score Settings dialog (Project–Notation Style page).
On the Layout tab of the Score Settings dialog, you can activate/deactivate that
names are shown at all. Here, you can also determine that the names of the edited
MIDI tracks are used instead.
Short
Allows you to specify a name for the staff that is shown for all systems in the score.
If you do not want a name shown for each system in the score, delete the short name.
Display Quantize
Display Quantize determines how MIDI notes are interpreted and helps you to make your music
appear as legible as possible.
NOTE
A common setting is having Notes set to 16 (sixteenth notes) and Rests to 4 (quarter notes).
Notes
Set this value according to the smallest note position that you want to be displayed in
the score. If the score contains only triplets, or mostly triplets, select one of the triplet
options.
This setting is partly overridden by Auto Quantize.
94
Cubase Pro 12.0.20
Page 95

Score Settings Dialog
Score Settings – Staff Tab
Rests
Set this value according to the smallest rest value that you want to be displayed in
the score. If the score contains only triplets, or mostly triplets, select one of the triplet
options.
This also determines how the length of notes is displayed. Set this value according to
the smallest note length value you want to be displayed for a single note, positioned
on a beat.
Auto Quantize
Activate this if your music contains mixed triplets and straight notes. Otherwise, make
sure it is deactivated.
NOTE
Auto Quantize uses the Display Quantize value. If it cannot nd an appropriate note
value for a certain note or group of notes, it will use the set Quantize value to display
it.
Deviation
Activate this if you want the program to detect triplets or straight notes even if they are
not exactly on the beat. Deactivate this if you know your triplets or straight notes are
perfectly recorded.
NOTE
This option is only available if Auto Quantize is activated.
Adapt
Activate this if you want the program to guess that when one triplet is found, there are
probably more triplets surrounding it.
NOTE
This option is only available if Auto Quantize is activated.
Interpretation Options
These settings determine how the notes are interpreted.
Syncopation
The following options are available:
● Relax
Adds ties to long notes. Exceptions such as a half note starting at 2 in 4/4 are
possible. These are always displayed as half notes, never as two tied quarter notes.
Full
●
Activates syncopation.
Off
●
Deactivates syncopation with no exceptions.
NOTE
You can insert exceptions to the Syncopation setting by using the Display Quantize
tool. You can also create tied notes in various combinations by using the Cut Notes
tool.
95
Cubase Pro 12.0.20
Page 96

Score Settings Dialog
Score Settings – Staff Tab
Consolidate Rests
Joins small consecutive rests into one, for example, an eighth note rest and a sixteenth
note rest joined to a dotted eighth note rest.
Consolidate Rests deactivated and activated
Clean Lengths
Shows notes that are considered to be chords with identical lengths. This is done by
showing the longer notes shorter than they are. Notes with very short overlaps are cut
off.
If a note is too short, this extends its display length to the beginning of the next note or
to the next rest’s display quantize position.
A slightly shorter eighth note without and with Clean Lengths
If using Clean Lengths does not help, you can manually resize the notes or use the
Display Quantize tool.
No Overlap
When this option is activated, one note will never be shown as overlapping another,
lengthwise. This allows long and short notes starting at the same point to be displayed
without ties; the long notes are cut off in the display. This will make the music more
legible.
You can insert exceptions to this by using the Display Quantize tool.
IMPORTANT
There may be situations when neither of these alternatives is ideal. If you run into such
a situation, it can probably be resolved by using polyphonic voicing.
Shue
Activate this function when you have played with a shue or swing feel (eighth note
or sixteenth note gures with every other note played late) and want it displayed as
straight notes (not triplets). This is common in jazz notation.
Without and with Shue
Clef/Key
These settings allow you to specify and edit the clef for your staff. Use the scroll bar to select one
of the clef options.
Local Keys
Allows you to insert a different key for the selected staff only. Activate this if you score
a French horn, for example, and you want to set a different key symbol.
Lower Staff
Allows you to insert a clef for the lower staff. This is only used in conjunction with split
(piano) staves and polyphonic voicing. If you have a split system, you can set different
clefs for the upper and lower staff.
96
Cubase Pro 12.0.20
Page 97

Score Settings Dialog
Score Settings – Staff Tab
Auto Clef
Activate this to let the program automatically select a treble clef or a bass clef for the
staff, depending on the range of the notes in the part.
Display Transpose
Display Transpose allows you to prepare parts for instruments that are not scored at the actual
concert key.
NOTE
Display Transpose does not affect playback or the actual pitch of the notes. It only changes how
they are displayed and printed.
NOTE
You can also insert Display Transpose changes anywhere in the score by inserting a key change
symbol and using the Transpose setting in the Edit Key dialog.
Semitones
Allows you to set by how many semitones you want to transpose the display. If the
Transpose pop-up menu does not list your instrument, use this value eld to set the
desired transposition.
Transpose pop-up menu
Allows you to select a transposing instrument from the pop-up menu. This
automatically adjusts the Semitones value.
RELATED LINKS
Score Settings – Staff Tab on page 92
Score Settings – Layout Tab on page 89
Project – Notation Style Page on page 79
Polyphonic Voicing on page 106
Inserting Display Quantize Exceptions on page 46
Display Quantize Exceptions on page 45
Setting up a Display Quantize Note Value on page 28
Edit Key Dialog on page 37
Project – Chord Symbols Page on page 85
Score Editor Toolbar on page 7
Transposing Instruments on page 42
Staff – Options Tab
The Options tab shows additional settings for the active staff.
To open the Score Settings dialog, do one of the following:
Open the Score Editor, and select Scores> Settings.
●
In the Score Editor, double-click to the left of a staff.
●
NOTE
You must click Apply to apply your settings.
97
Cubase Pro 12.0.20
Page 98

Score Settings Dialog
Score Settings – Staff Tab
The Options tab is divided into several sections:
Switches
Flat Beams
Shows the beams over notes at and not slanted.
No Beams
Shows no beams on the staff. This is useful for vocal scoring.
Beam Subgroups
Displays sixteenth notes that are under a beam divided into groups of four notes.
Without and with Beam Subgroups
16th Subgroups
Displays even smaller subgroups of sixteenth notes. This setting has no effect if Beam
Subgroups is deactivated.
As Beam Subgroups, but with 16th Subgroups activated
System Sizes
System Lines
Sets the number of system lines. Set this to 5 for regular scoring.
Setting the System Lines value to 0 can be useful for lead sheets.
Add Space
Sets the spacing between the system lines.
Size
Sets the size of the systems, as a percentage, with 100 % being the default value. In
effect, this setting scales the score vertically.
98
Cubase Pro 12.0.20
Page 99

Score Settings Dialog
Score Settings – Staff Tab
Score Drum Map
When scoring for drums, you can assign a unique notehead to each pitch. You can even set up
different noteheads for different note values.
Use Score Drum Map
Displays notes according to the drum map assigned to the track.
Single Line Drum Staff
Puts all notes are on a single note line.
Range
Allows you to set up a note range. Notes within this range are displayed on a single
line, while notes below or above the range are shown below or above the line.
No Accidentals
Shows drum notes without accidentals.
Fixed Stems
Active
Makes all note stems end at the same vertical position. This feature is useful when
scoring for drums.
A drum pattern with Fixed Stem length activated
Use the Up and Down value elds to specify which position relative to the top of the
staff is used for up and down stems, respectively.
Note Limits
The Note Limits section allows you to specify a note range. In the active staff, any notes outside
this range are displayed in a different color. If you write a score for a
makes it easy to nd notes that are outside of this instrument’s note range.
Low
Allows you to specify the low note limit.
You can specify the color in which the notes outside the range are displayed in the
active staff in the Preferences dialog (Scores–Colors for Additional Meanings).
You can hide notes outside the range by activating Hide Notes beyond Limits in the
Preferences dialog (Scores–Editing page).
High
Allows you to specify the high note limit.
RELATED LINKS
Score Settings – Staff Tab on page 92
Setting up a Staff for Drum Scoring on page 230
Deactivating Beams on page 126
Setting up Drum Maps on page 227
specic instrument, this
99
Cubase Pro 12.0.20
Page 100

Score Settings Dialog
Score Settings – Staff Tab
Staff – Polyphonic Tab
The Polyphonic tab shows the settings for polyphonic voices or split staves.
To open the Score Settings dialog, do one of the following:
● Open the Score Editor, and select Scores> Settings.
● In the Score Editor, double-click to the left of a staff.
NOTE
You must click Apply to apply your settings.
The following options are available:
Staff Mode
Staff Mode
● Single
Shows all notes on a single staff.
● Split
Shows a split staff with a xed split point set to the right. Notes below the split
point are moved to the lower staff.
● Polyphonic
Shows a staff with up to eight separate voices. Use the list below to set up the
voices.
Split Point
NOTE
This is only available if Split is selected as a staff mode.
Allows you to dene a split point. Notes below this point are moved to the lower staff.
100
Cubase Pro 12.0.20
 Loading...